Buttermilk Cheddar Not Quite Biscuits

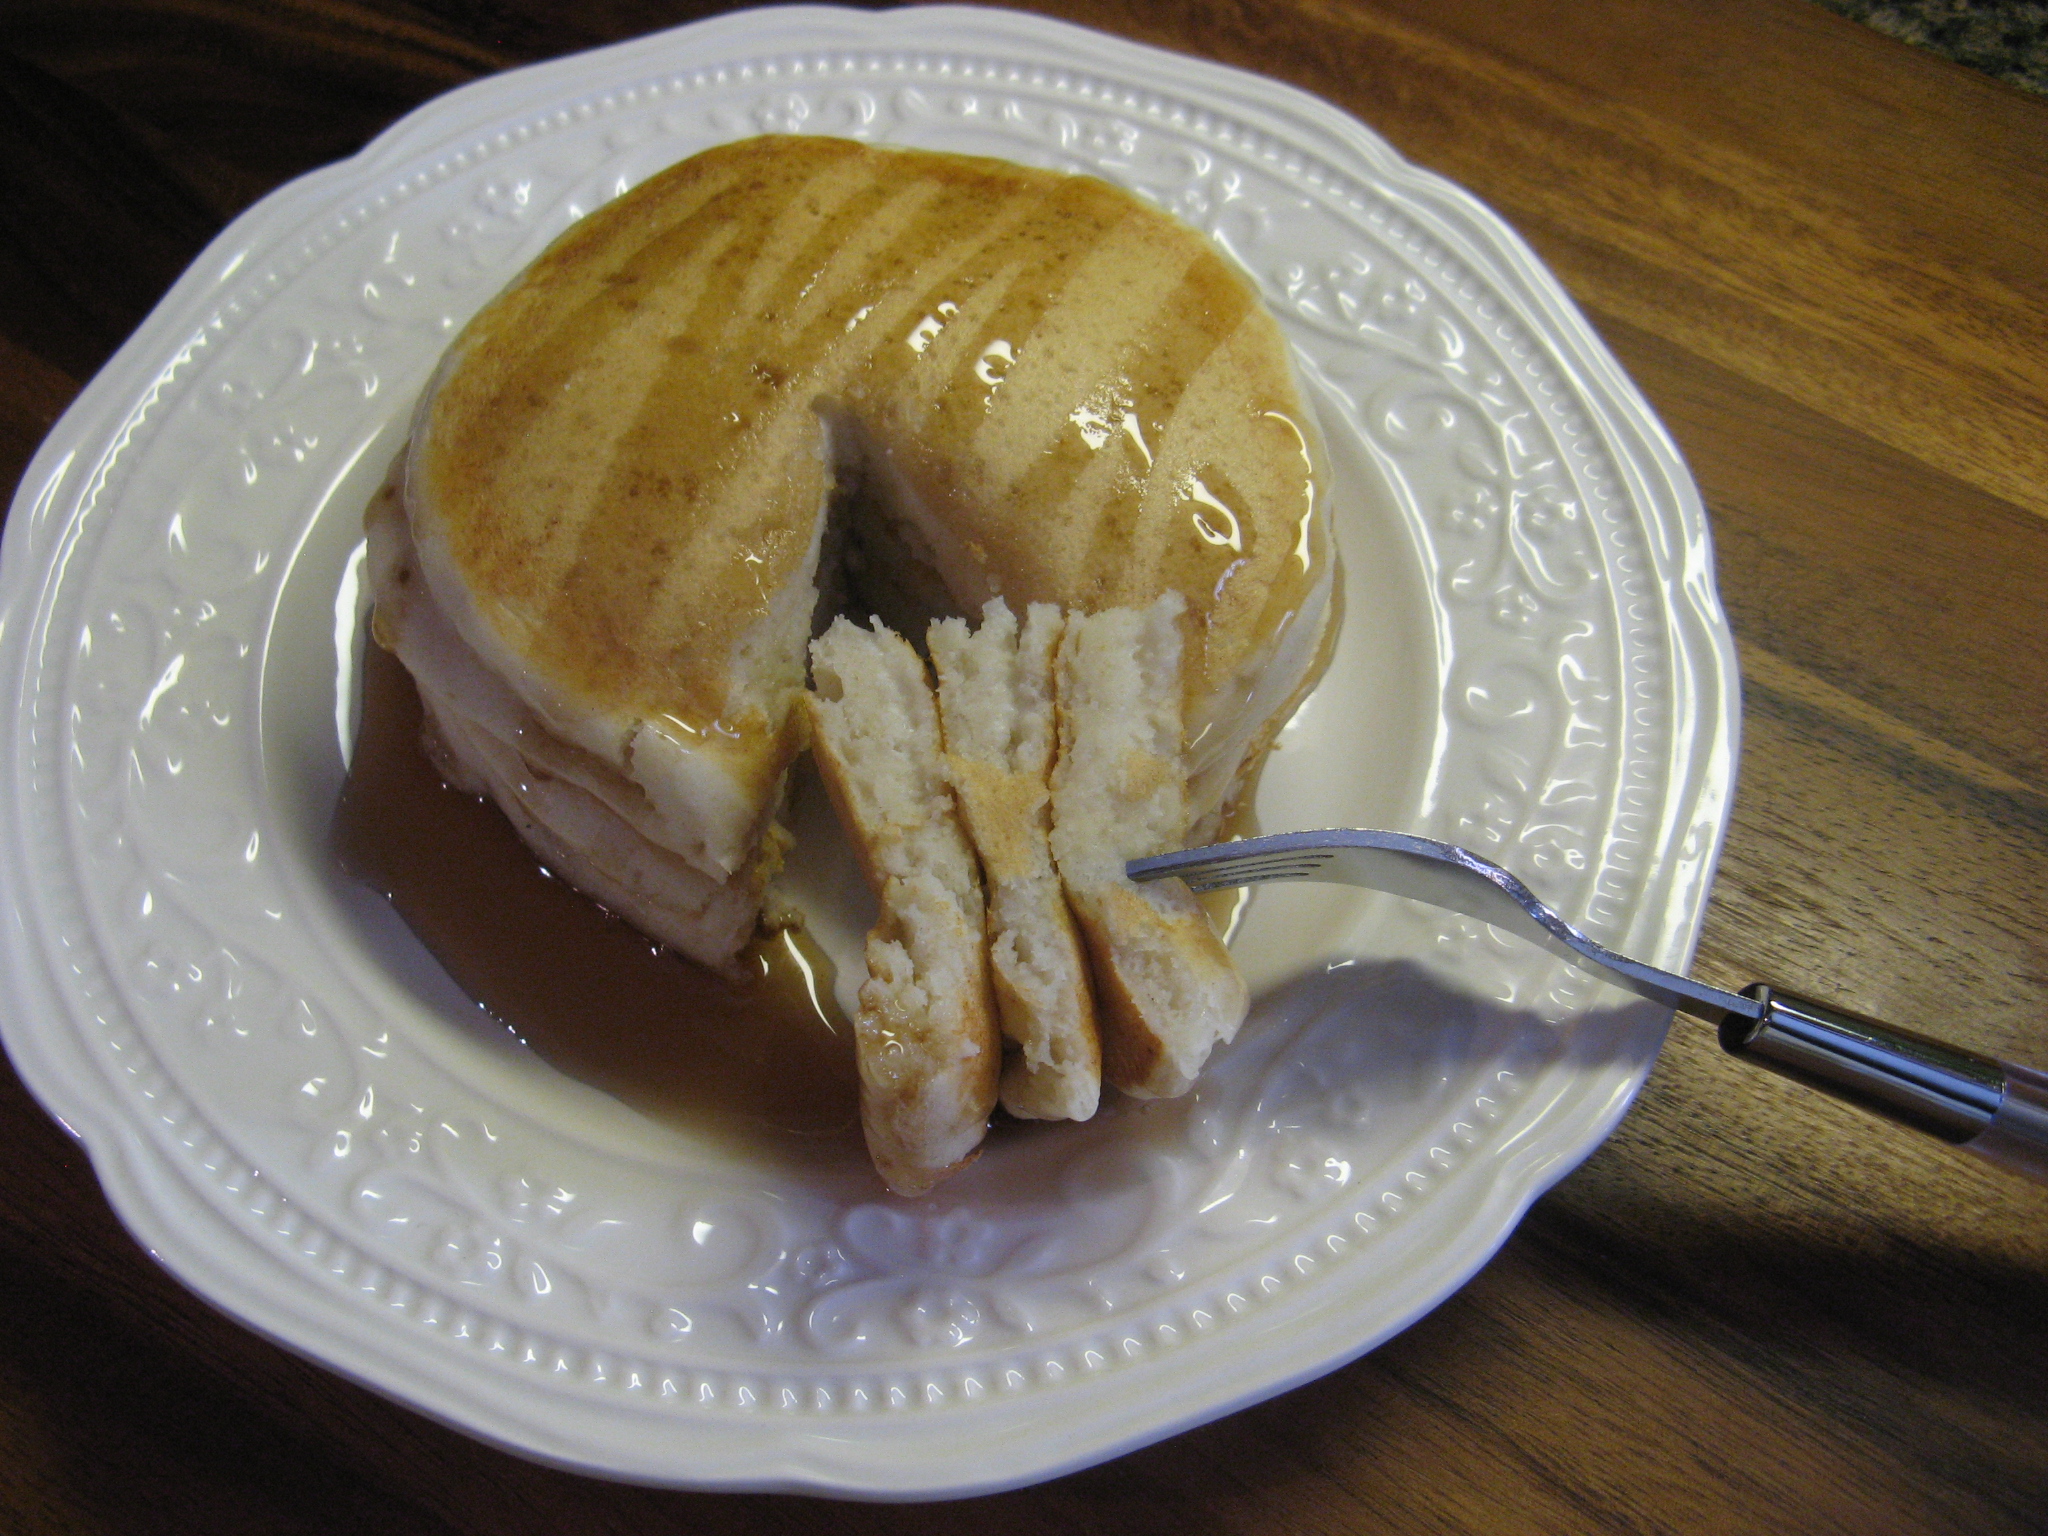
We’ve all been there, a mishap in the kitchen. Could it be the recipe, a missed ingredient, an incorrect measurement or maybe it was just an off day for your oven? I had one of those mishaps happen to me recently when I made Buttermilk Cheddar Biscuits. I had some leftover buttermilk in my fridge from a previous recipe and I didn’t want to go to waste and I wanted to make something different; I’ve never made biscuits before. Unfortunately my biscuits didn’t rise and I ended up with some pretty flat biscuits – I don’t even think I can call them biscuits. I’m still not sure what exactly went wrong.

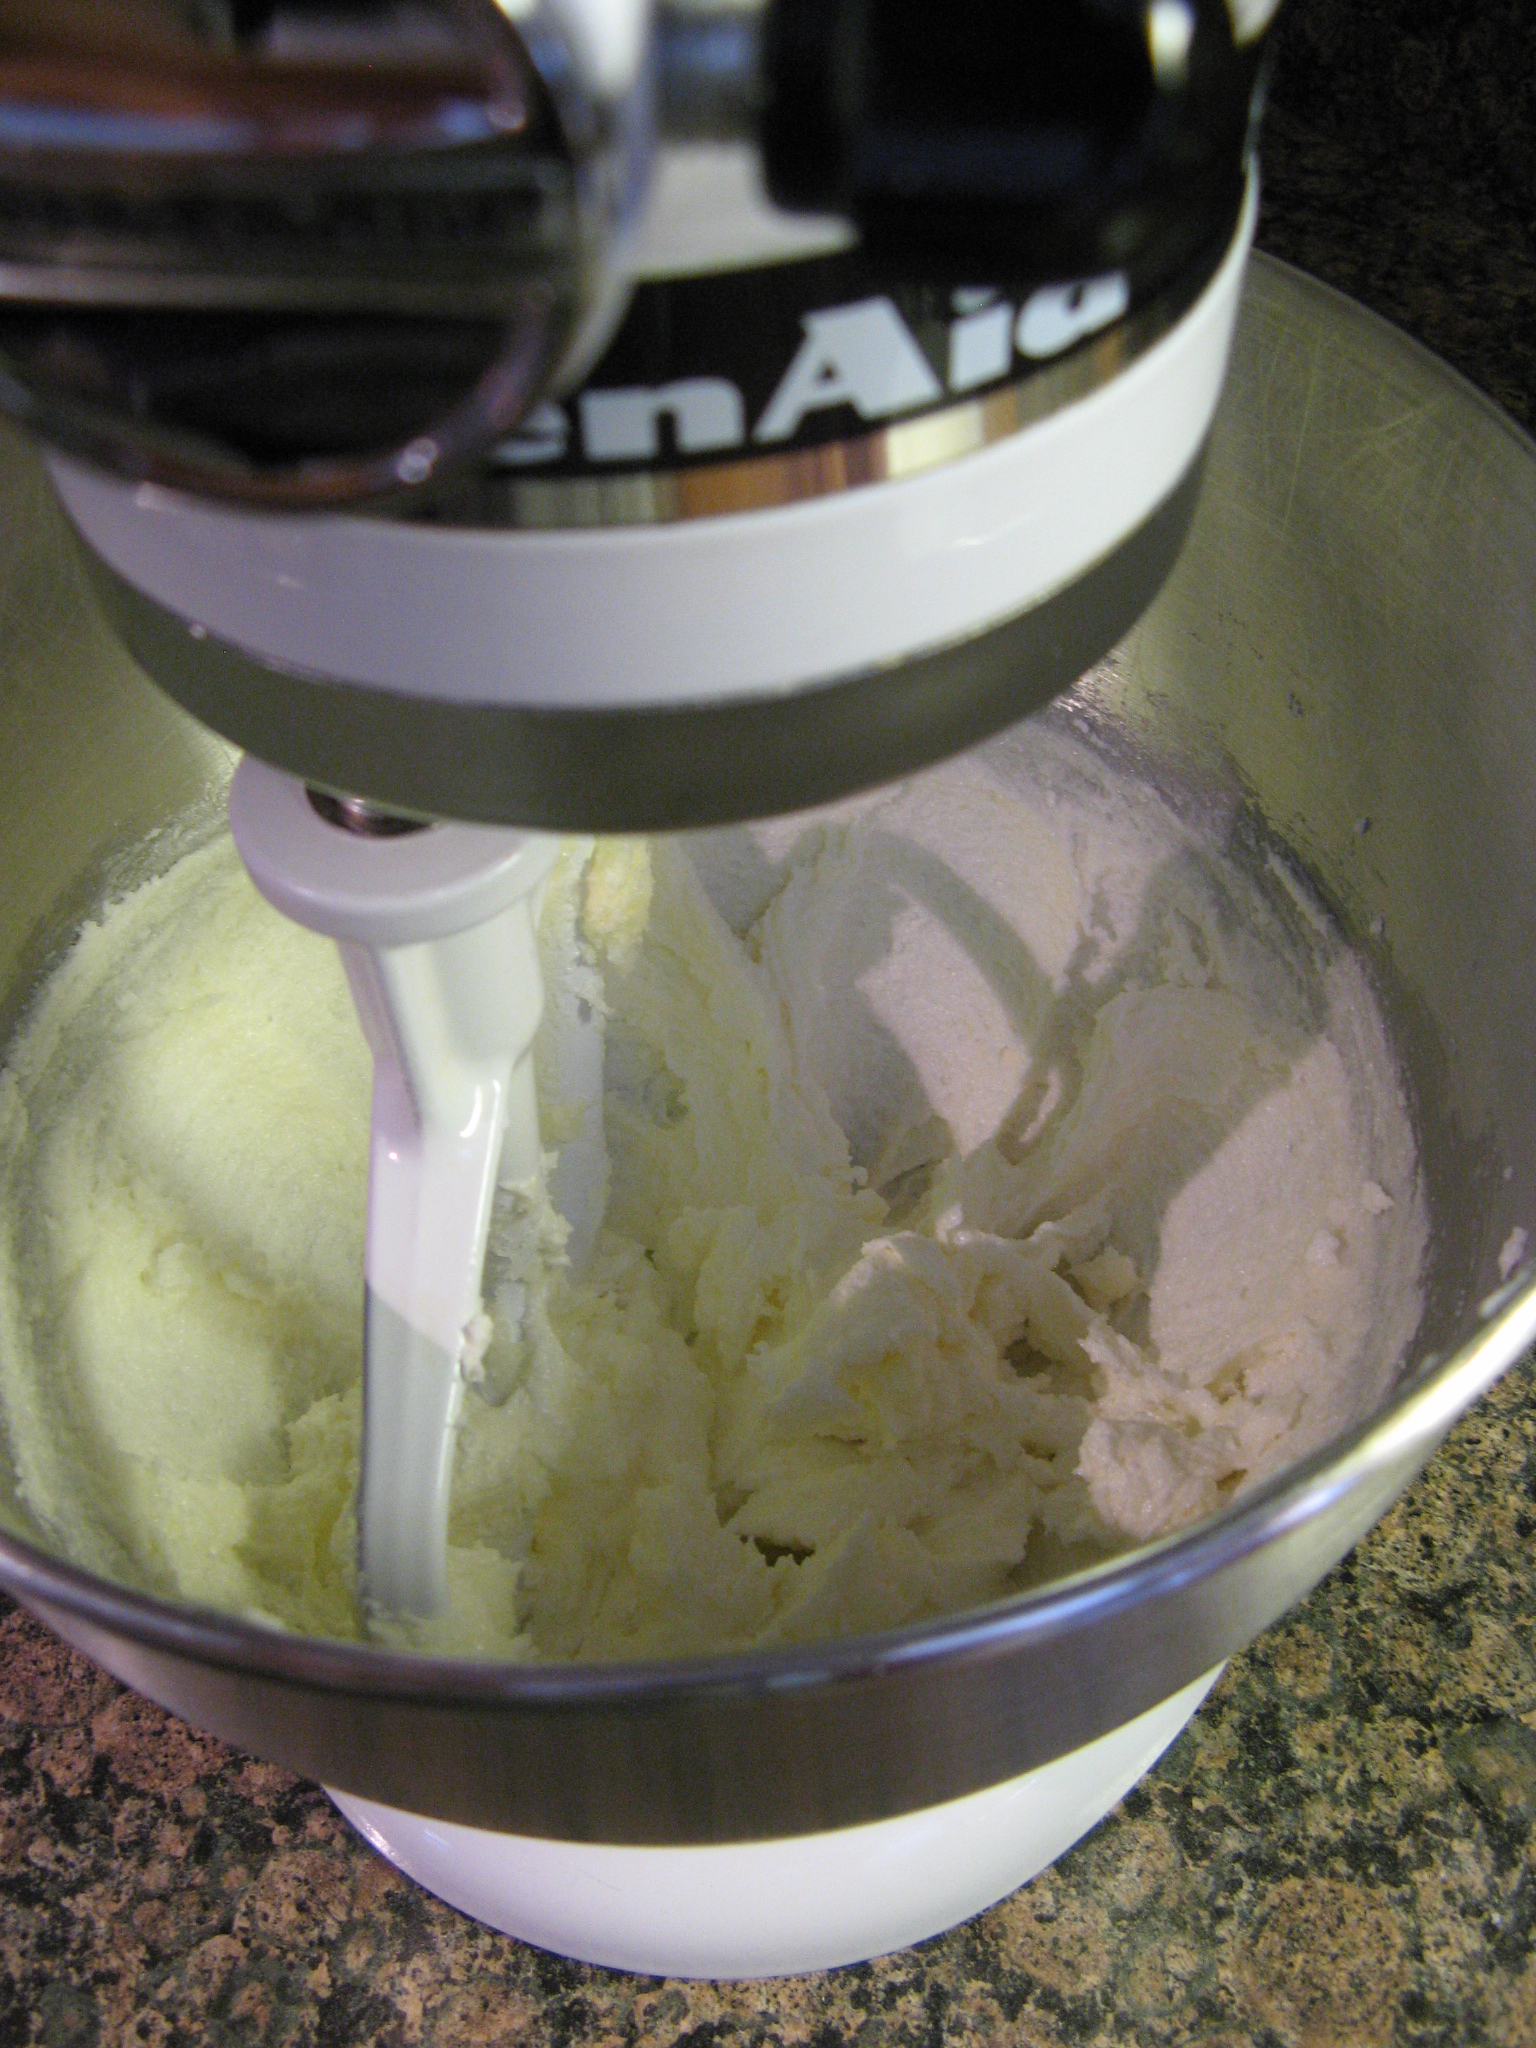
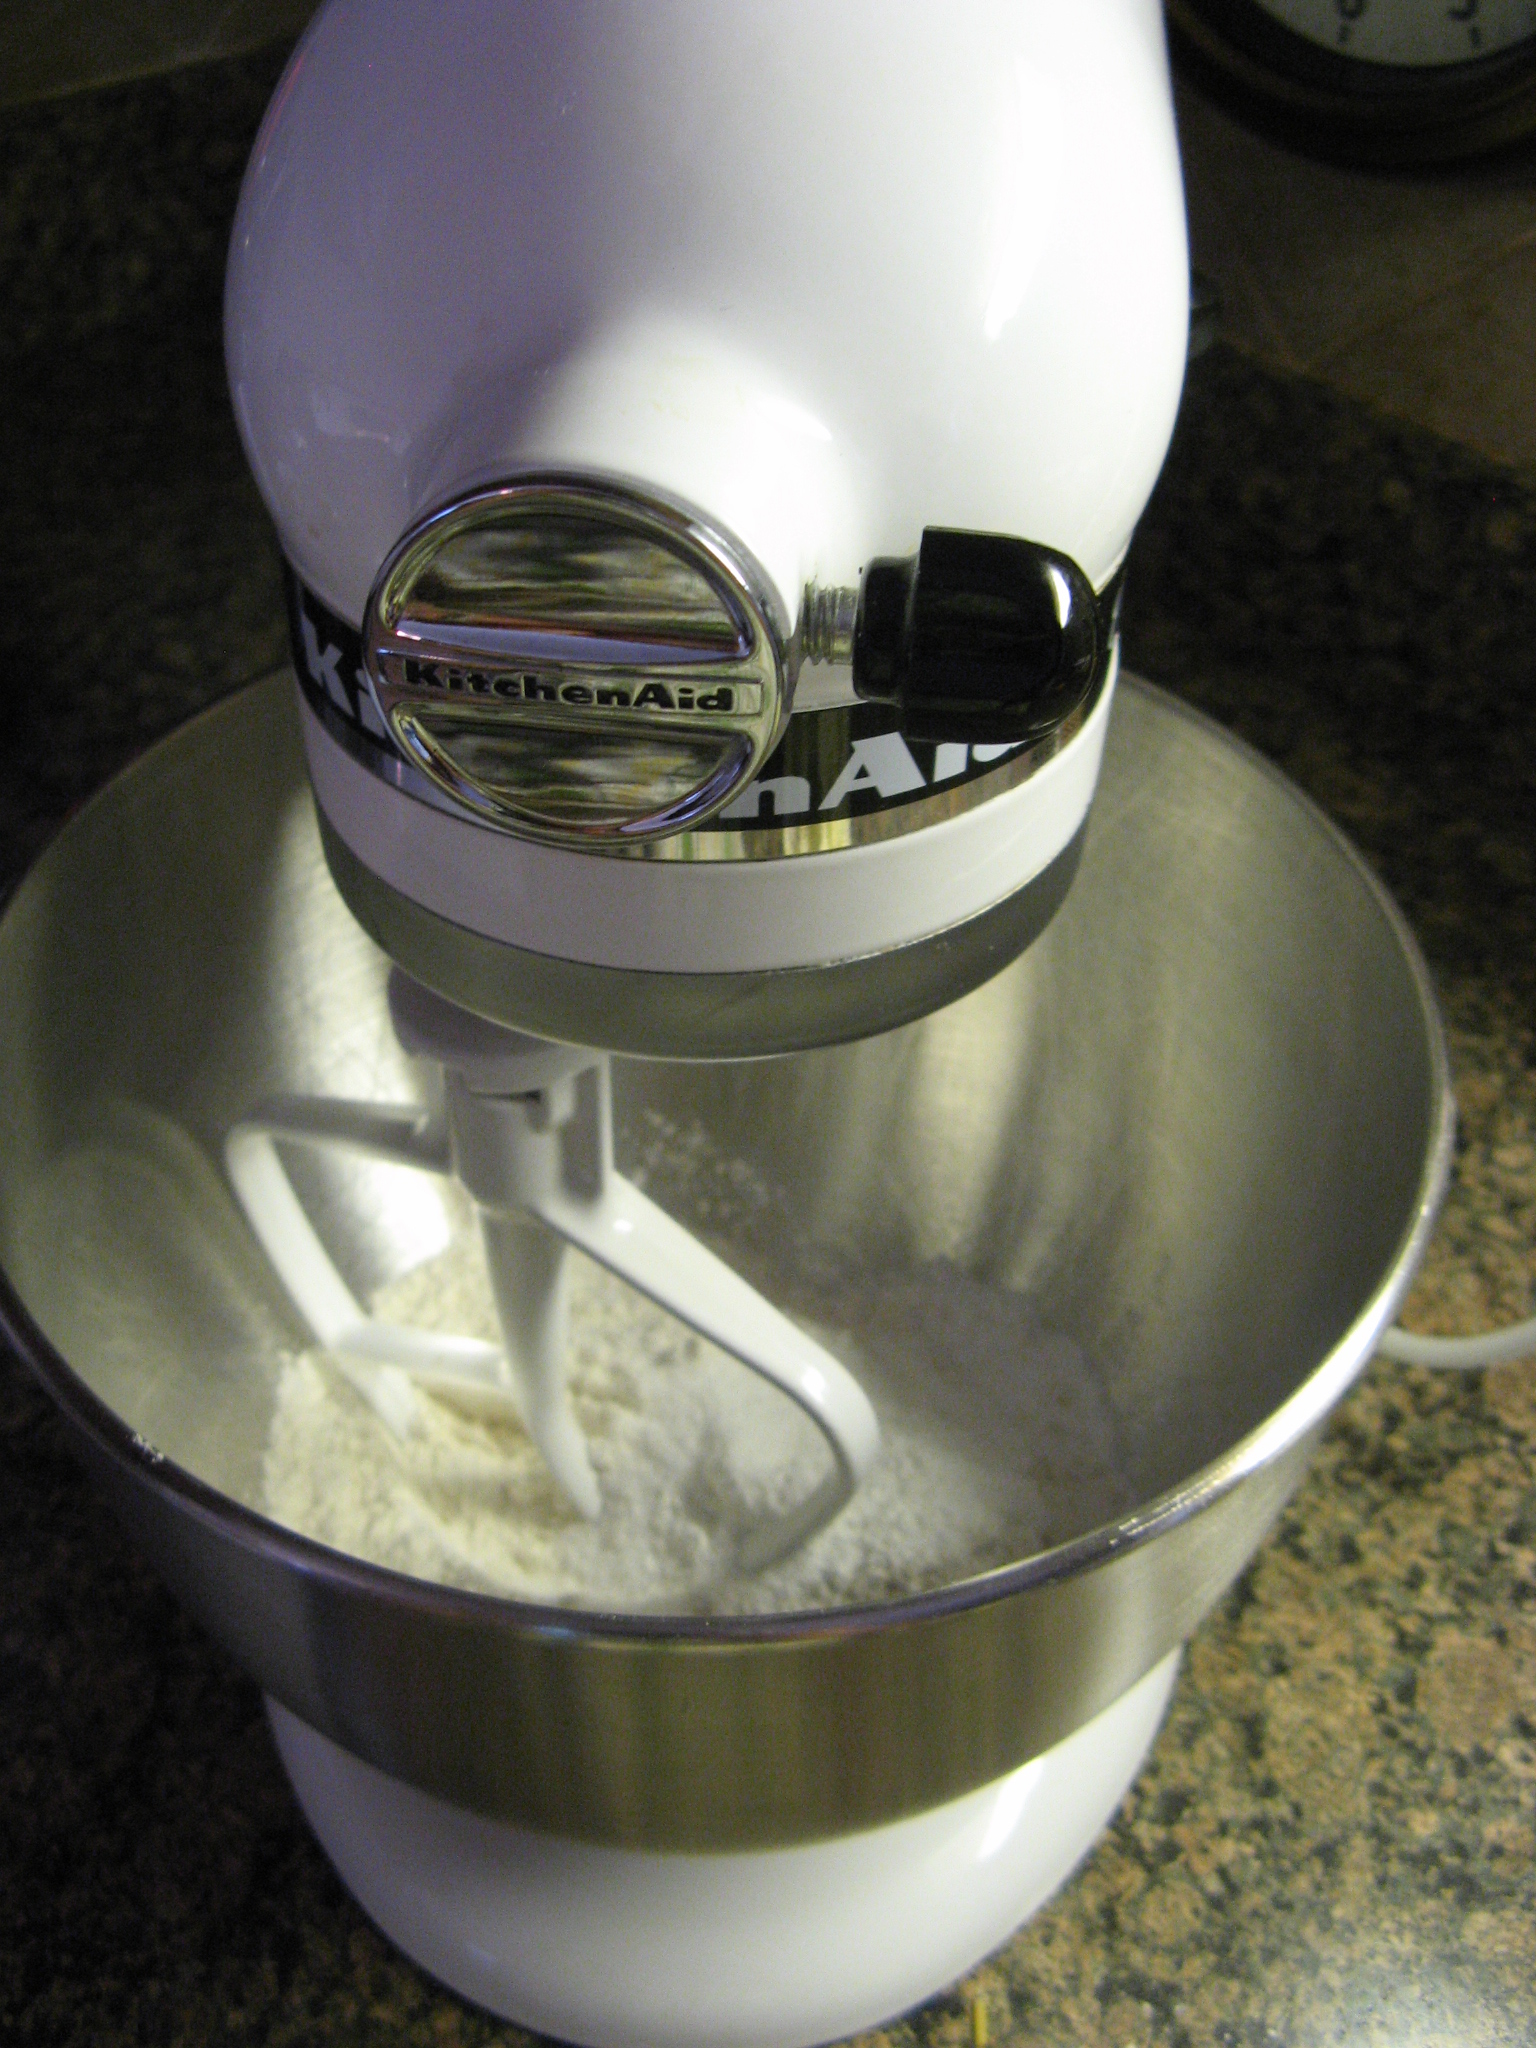
My prep work seemed to be just fine… I started by putting flour, baking powder and salt in the bowl of my stand mixer.

IMG_7596

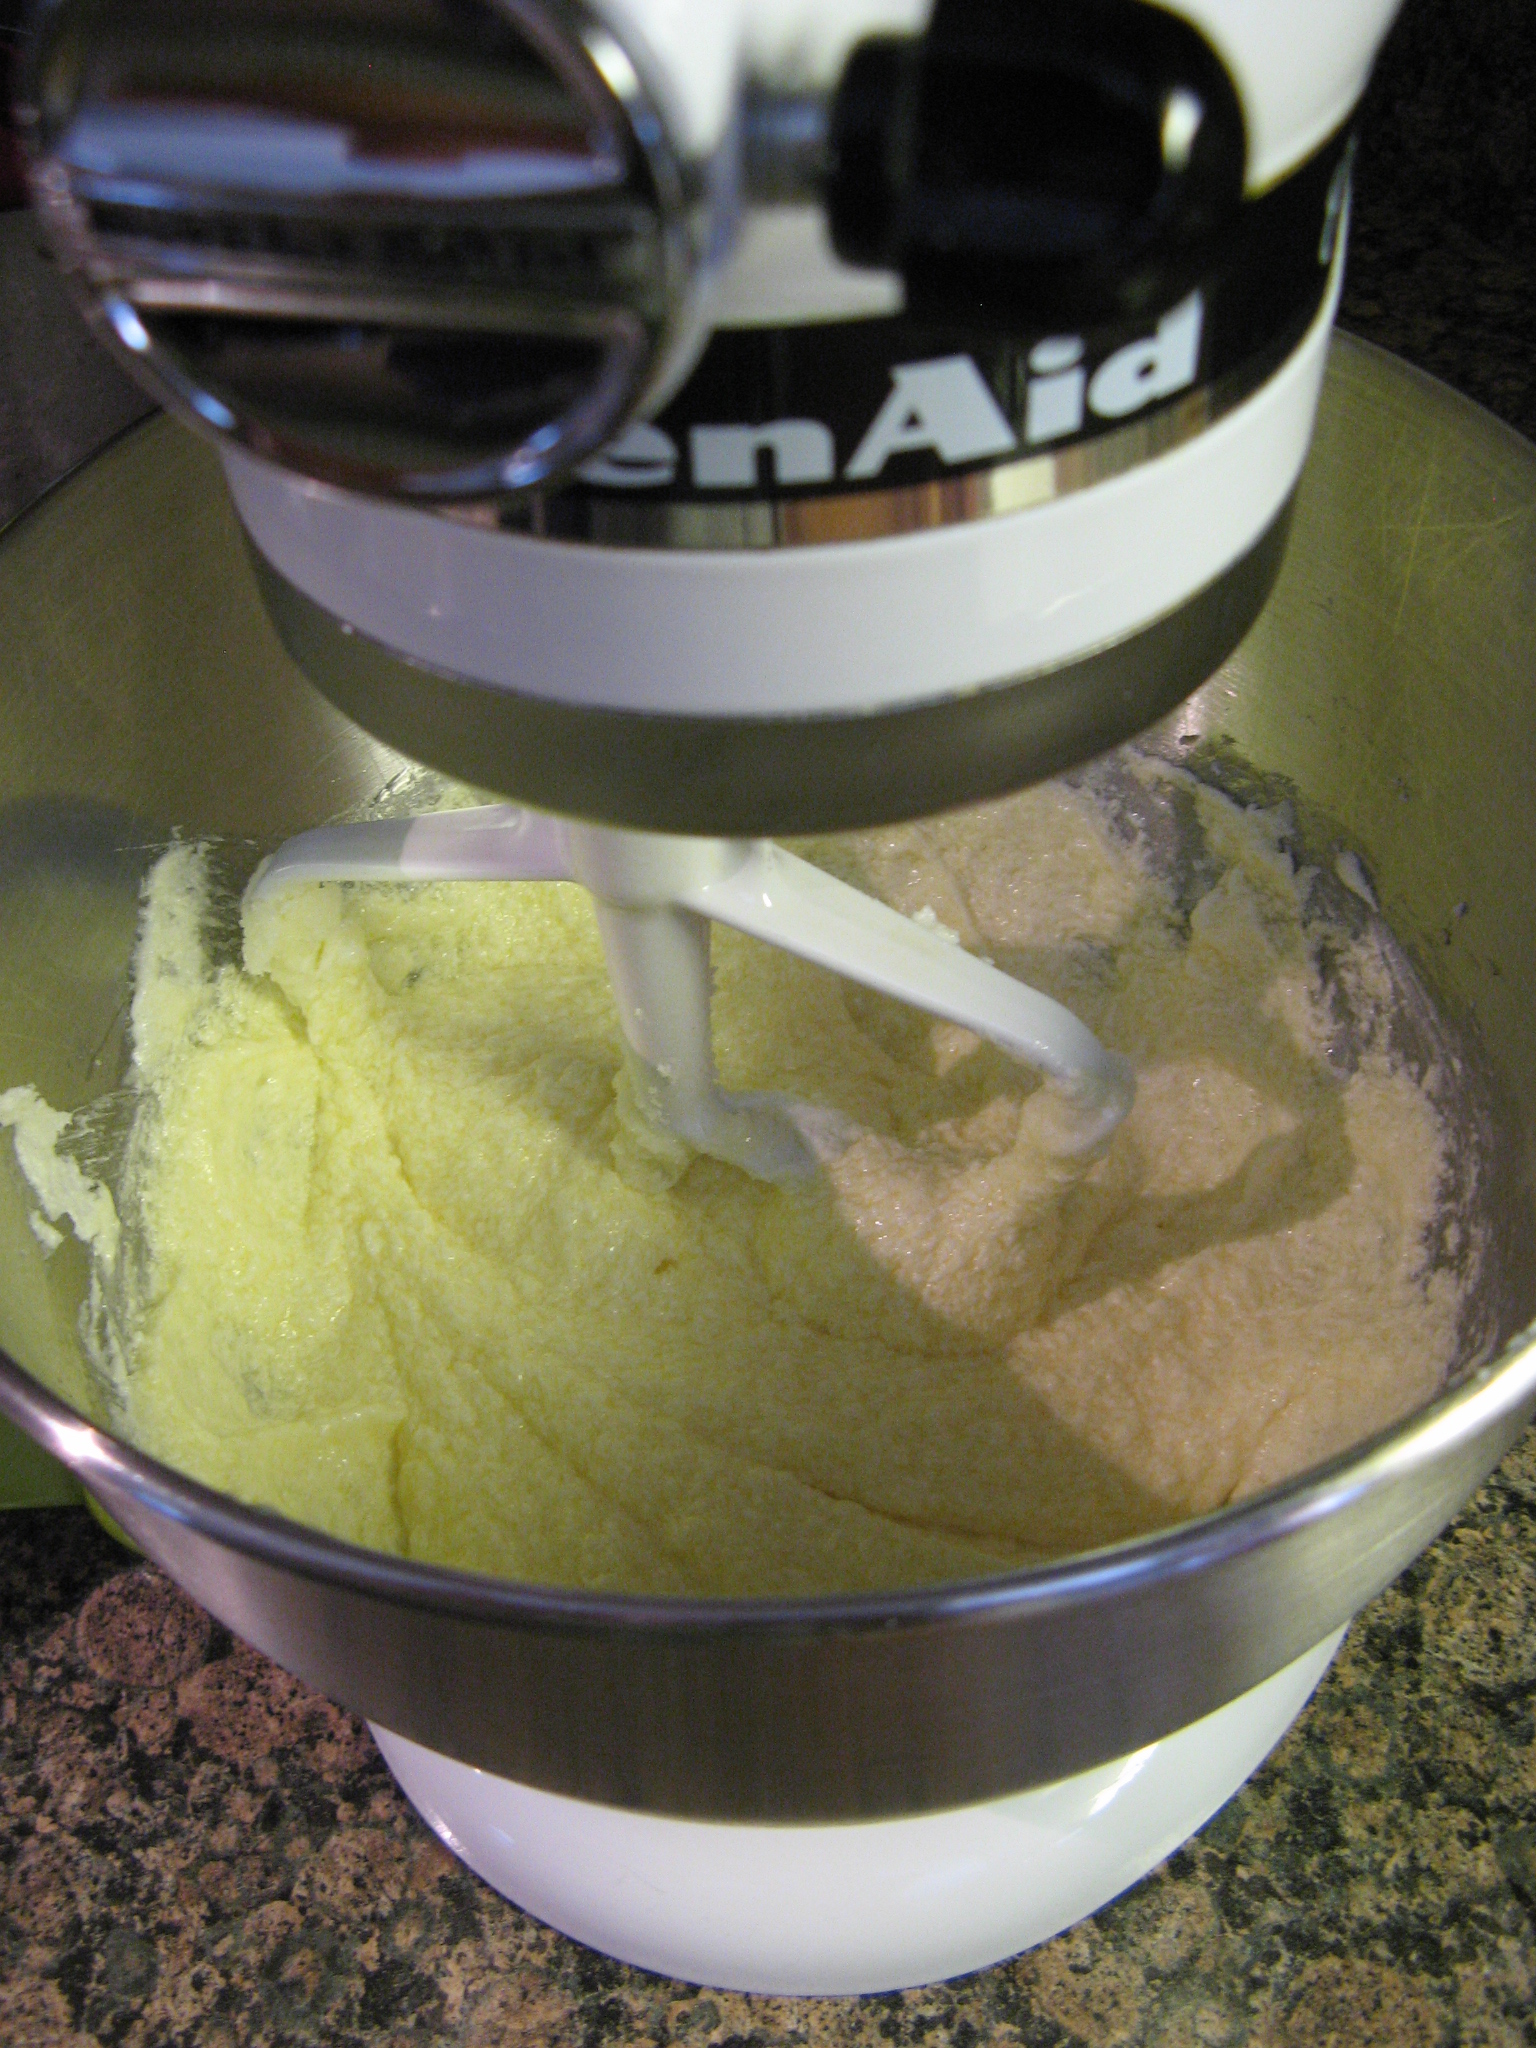
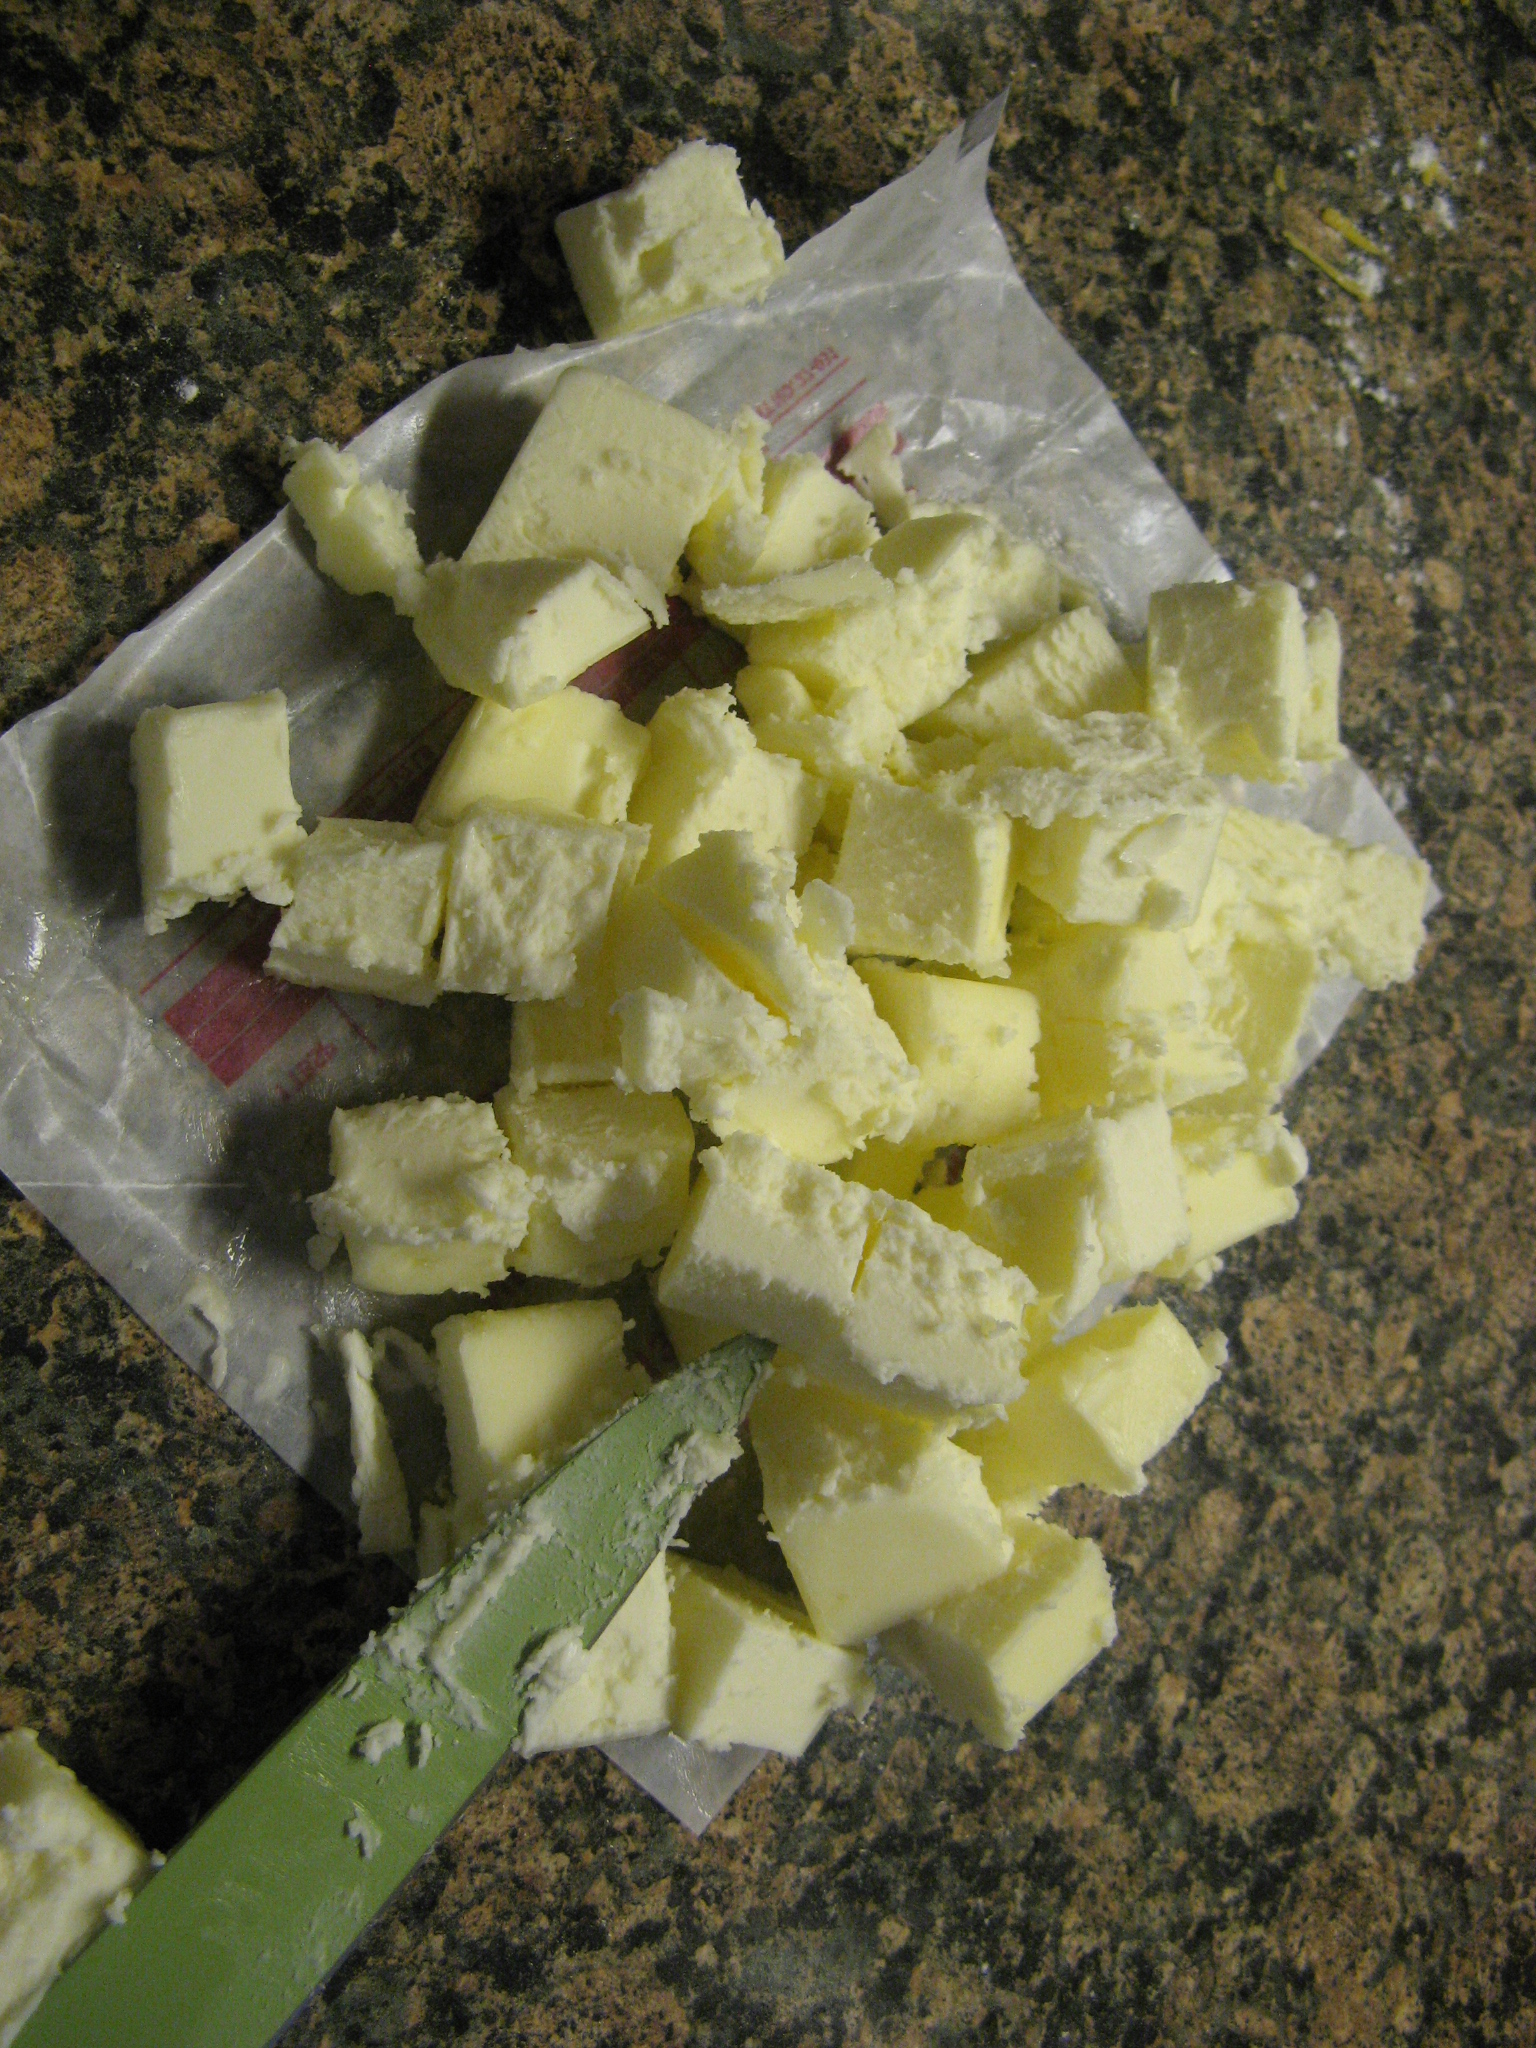
With the mixer on low I added in cold diced unsalted butter.

IMG_7597

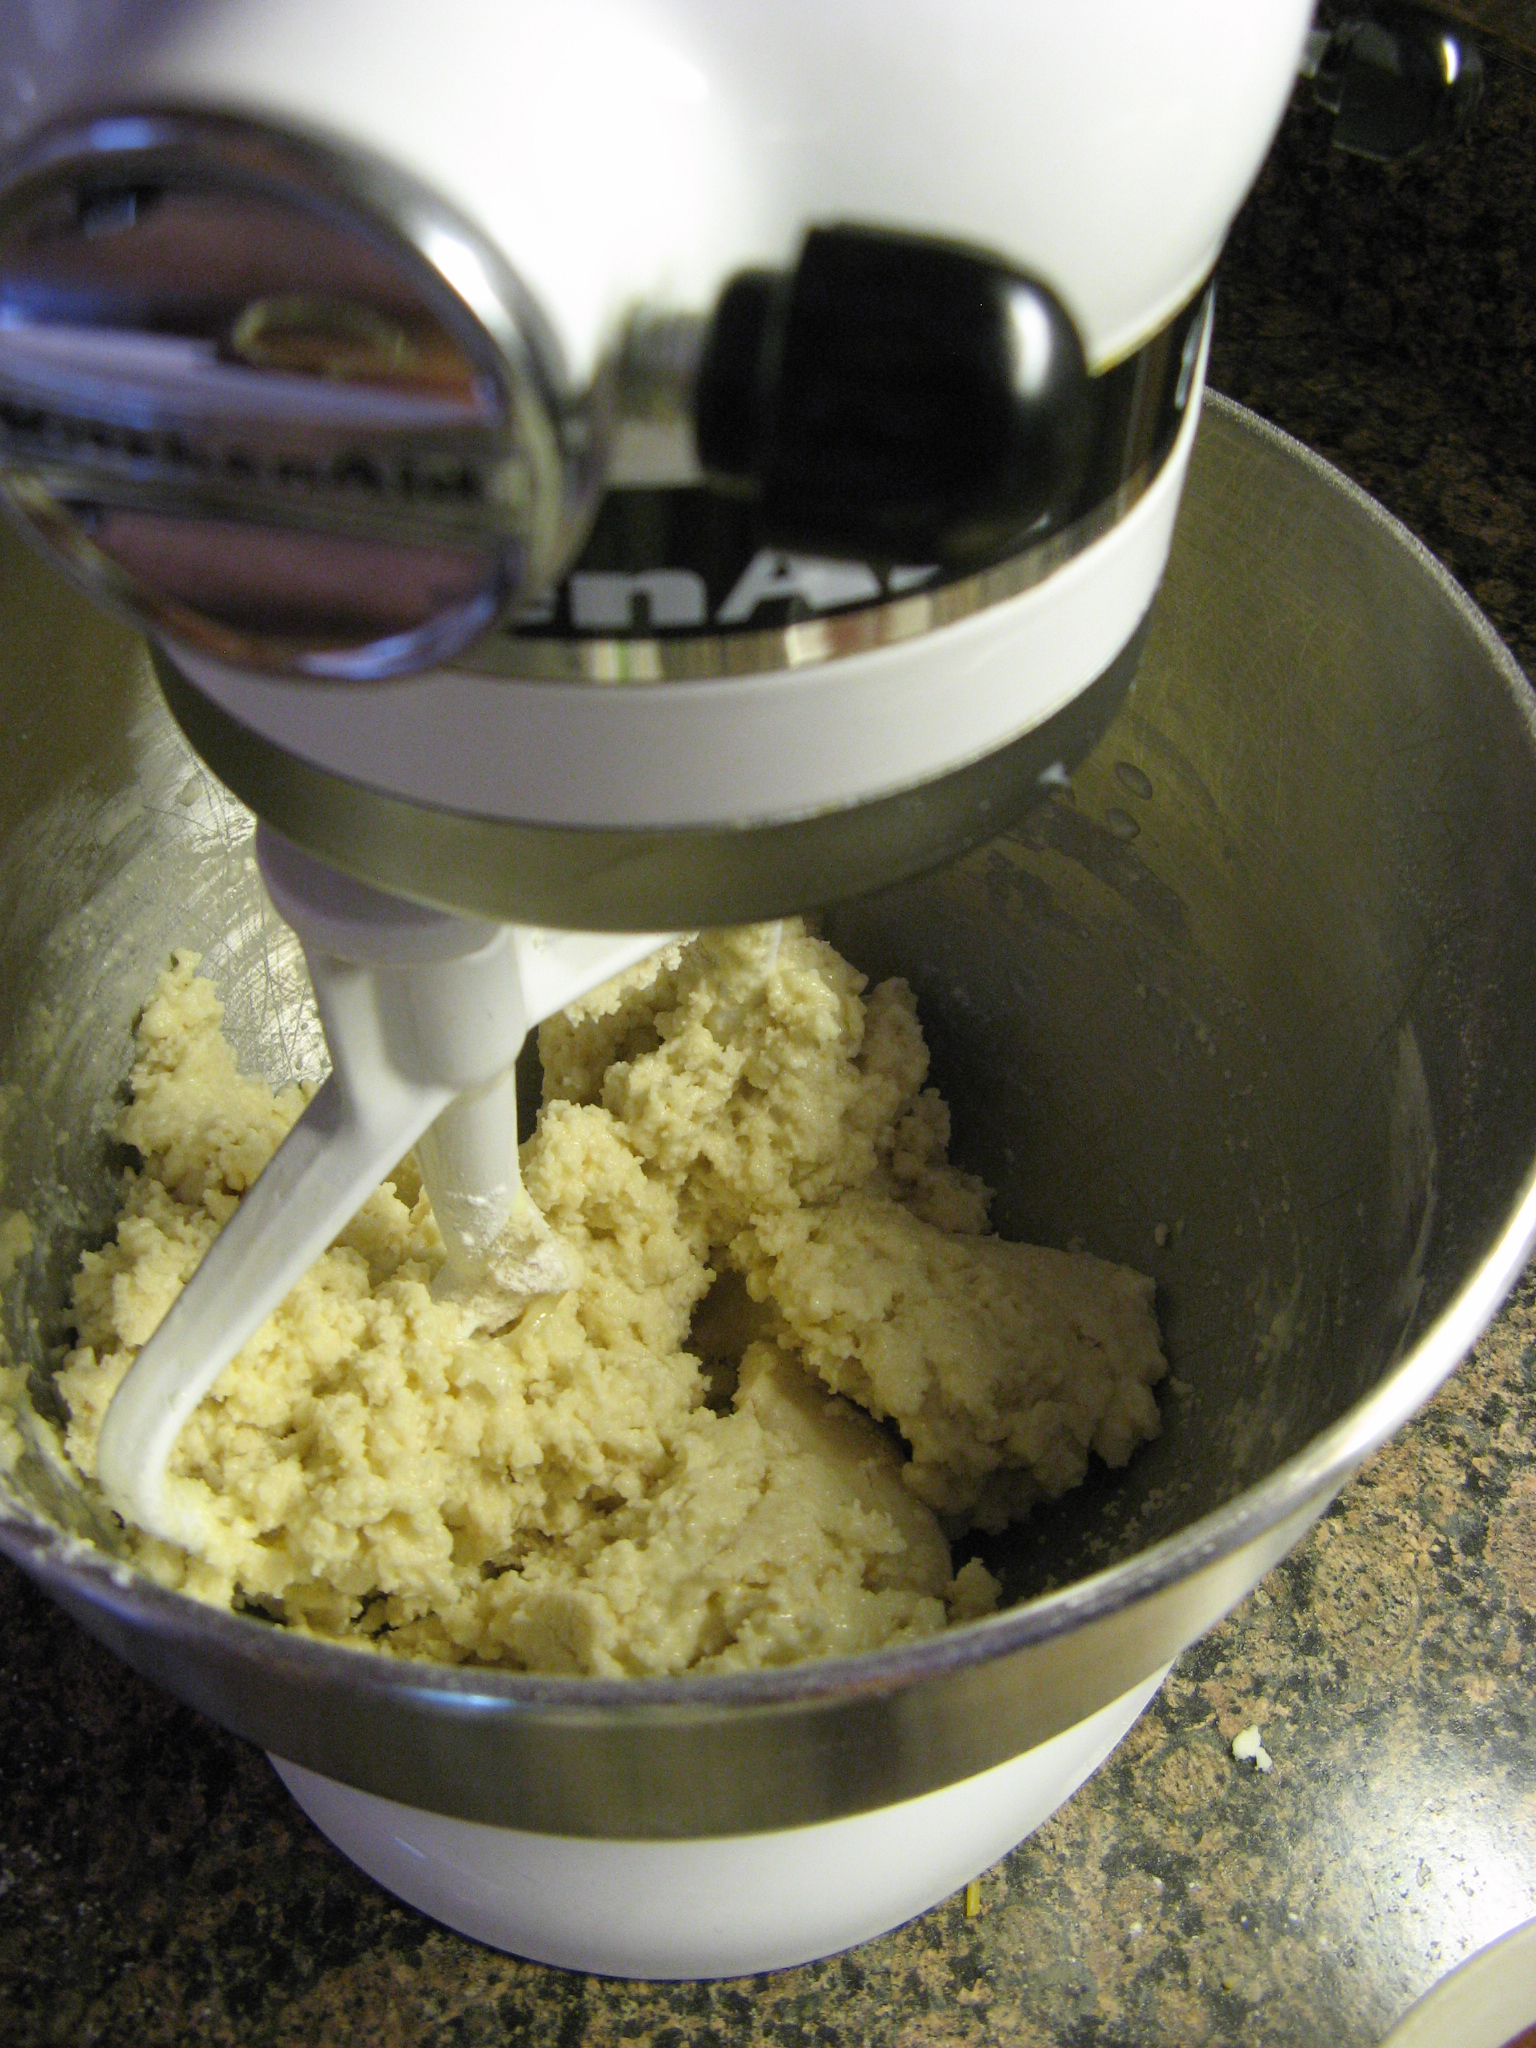
Once the butter looked like small peas I added in a buttermilk / egg mixture and continued mixing the ingredients until the mixture was moistened.

IMG_7600

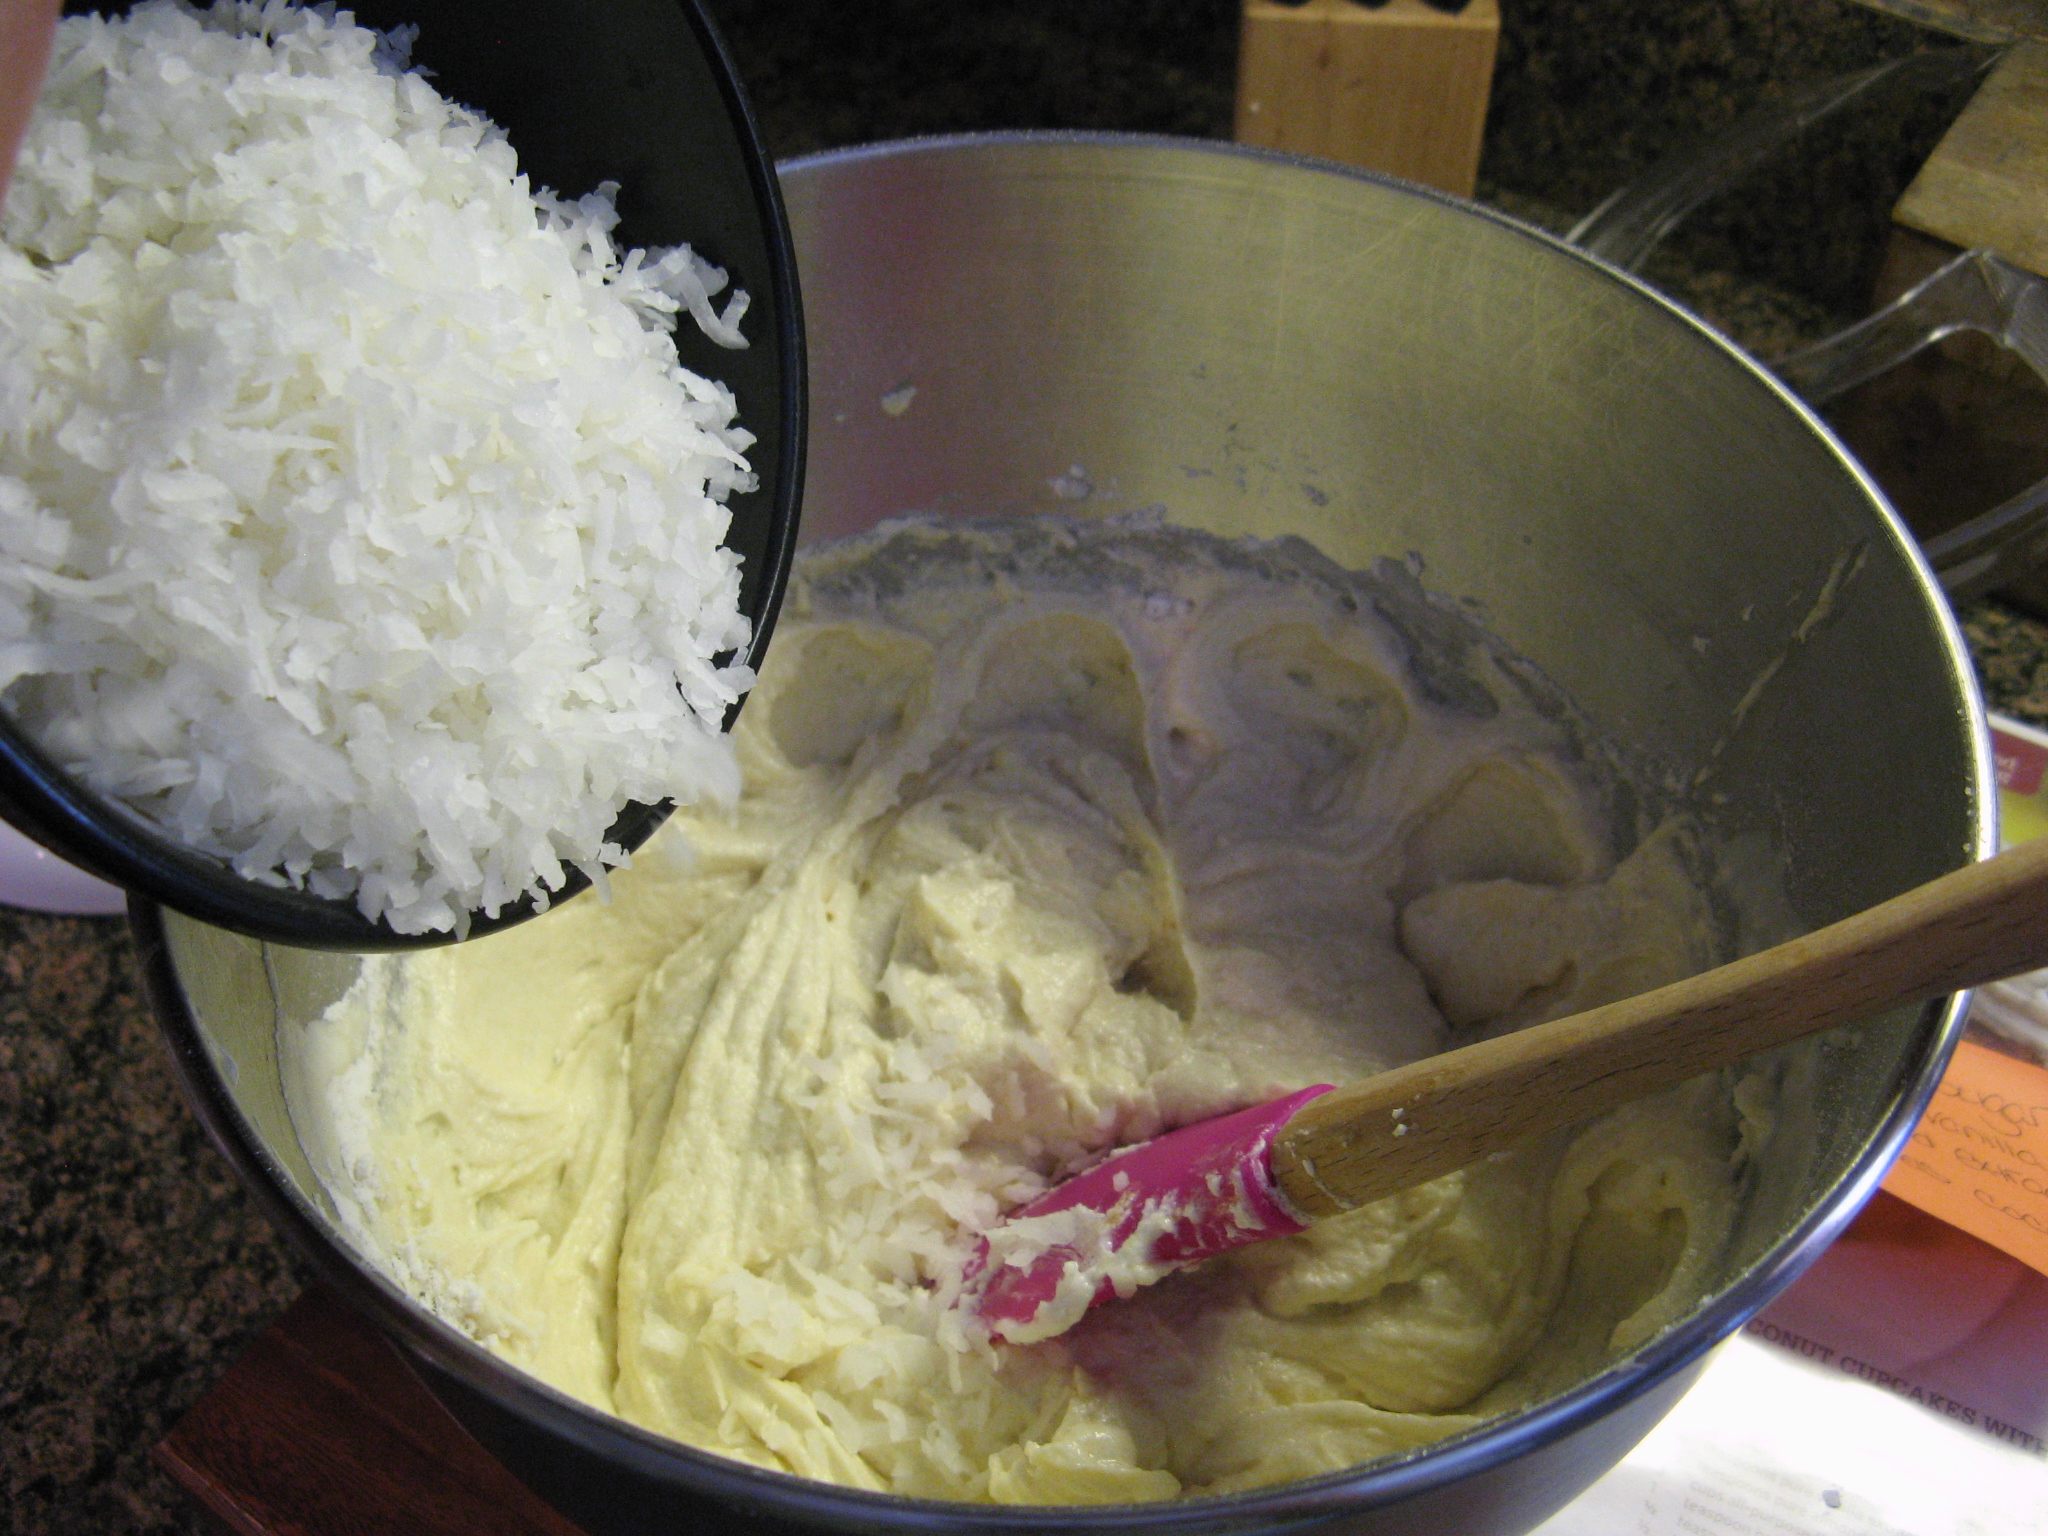
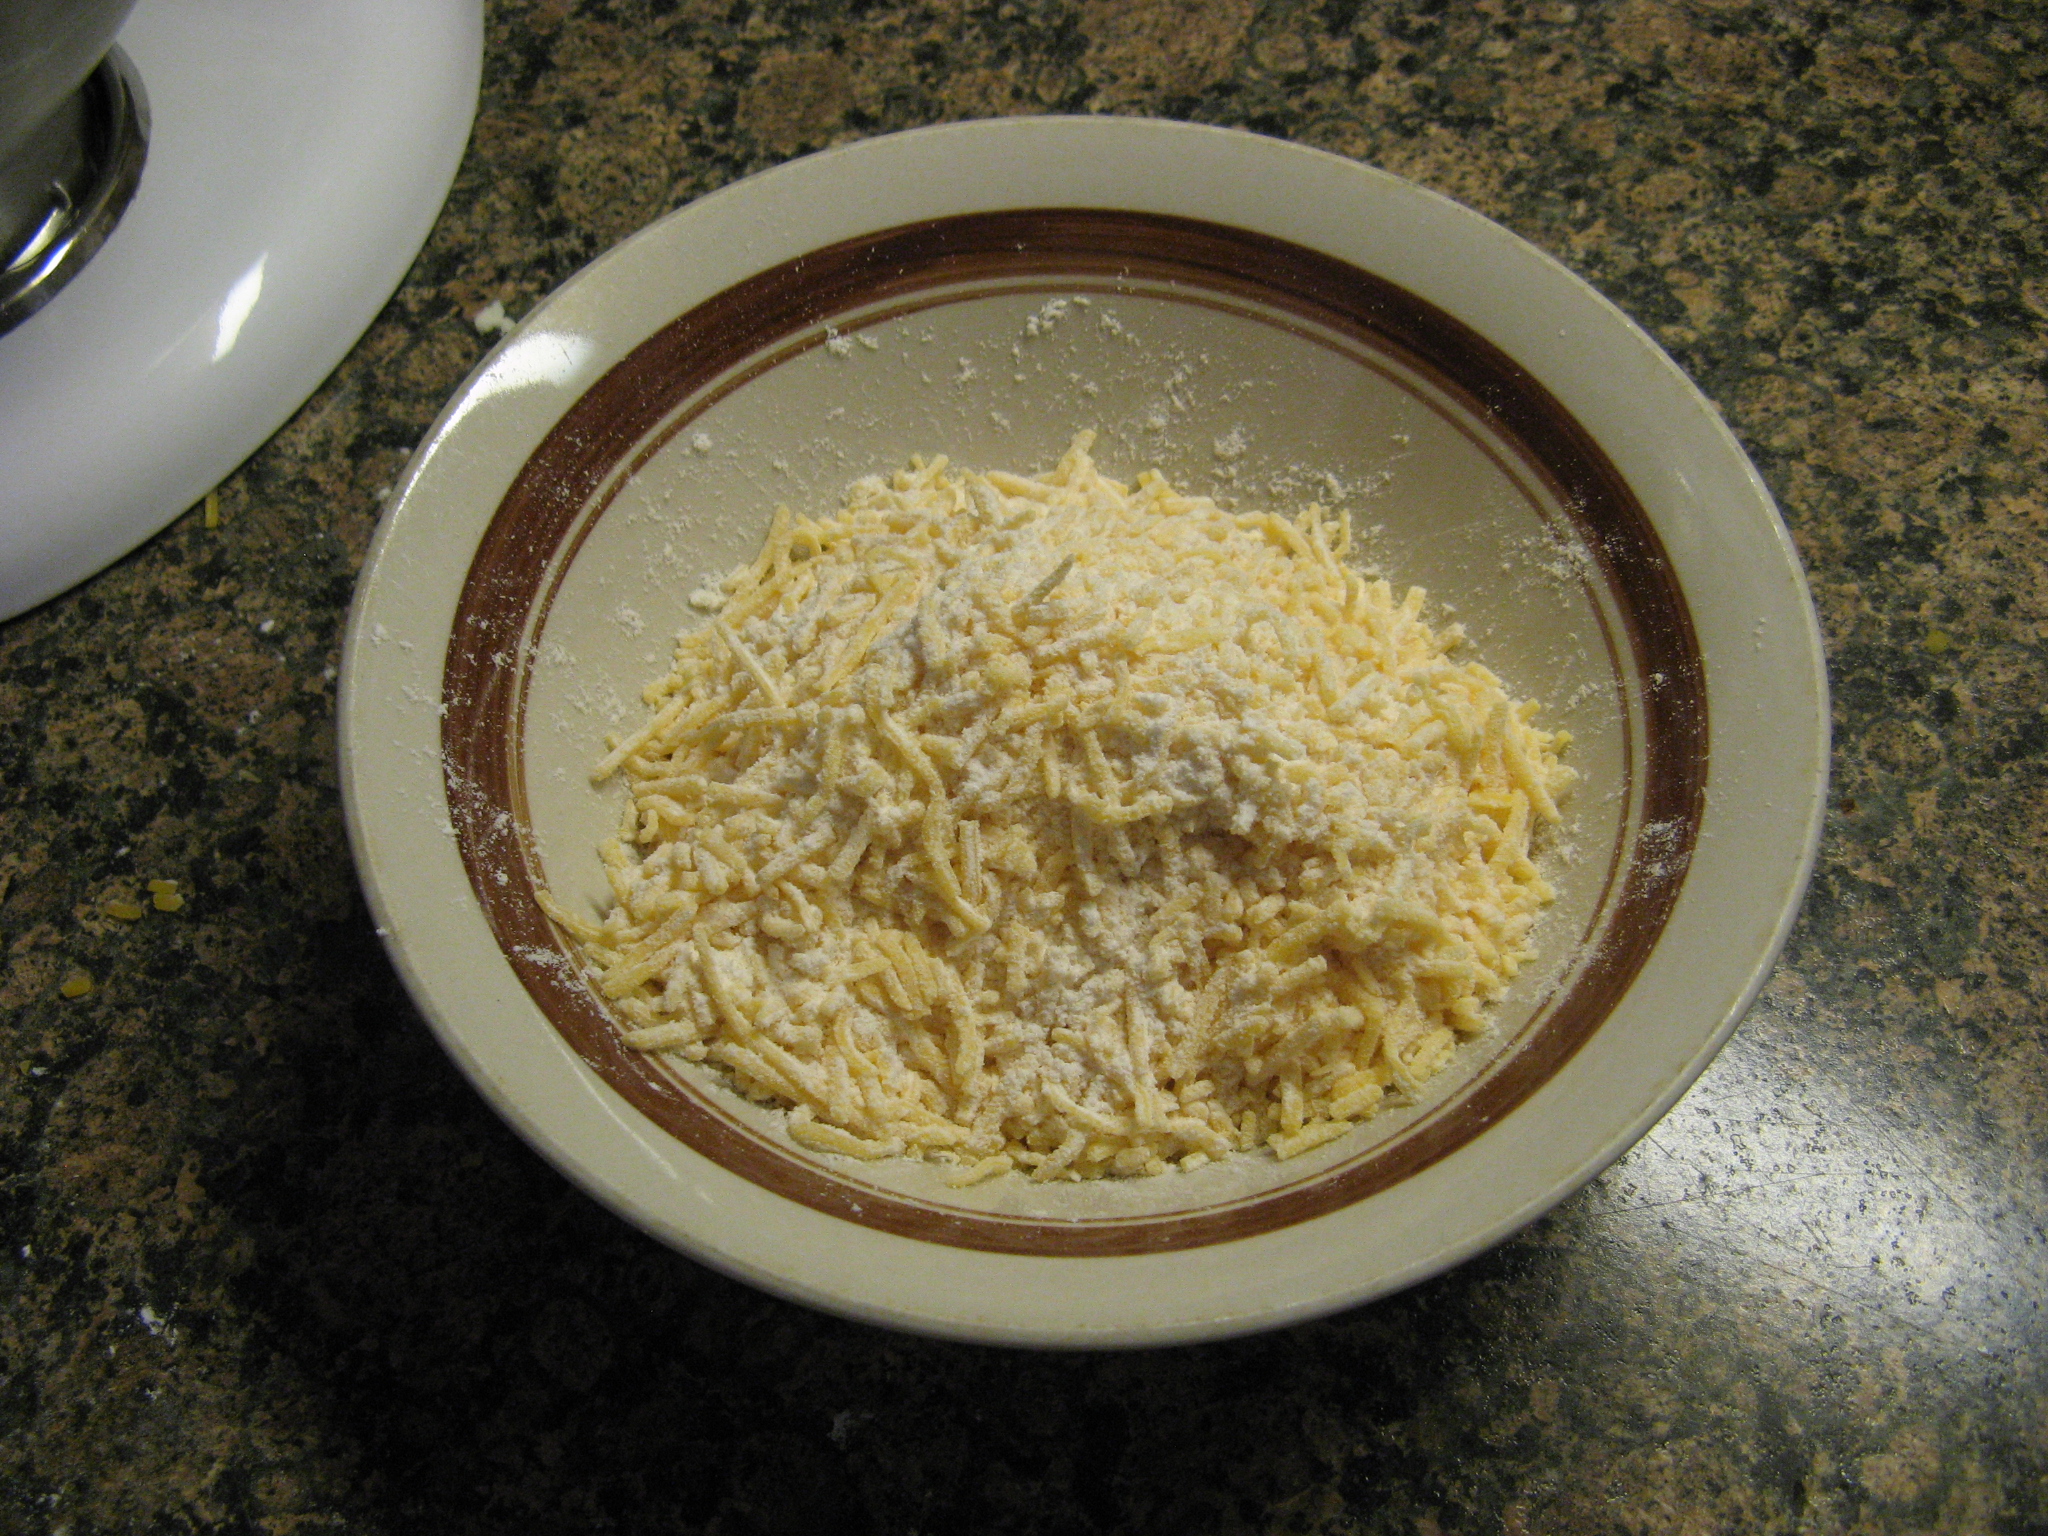
In a small bowl I combined shredded cheddar cheese with a small handful of butter.

IMG_7601

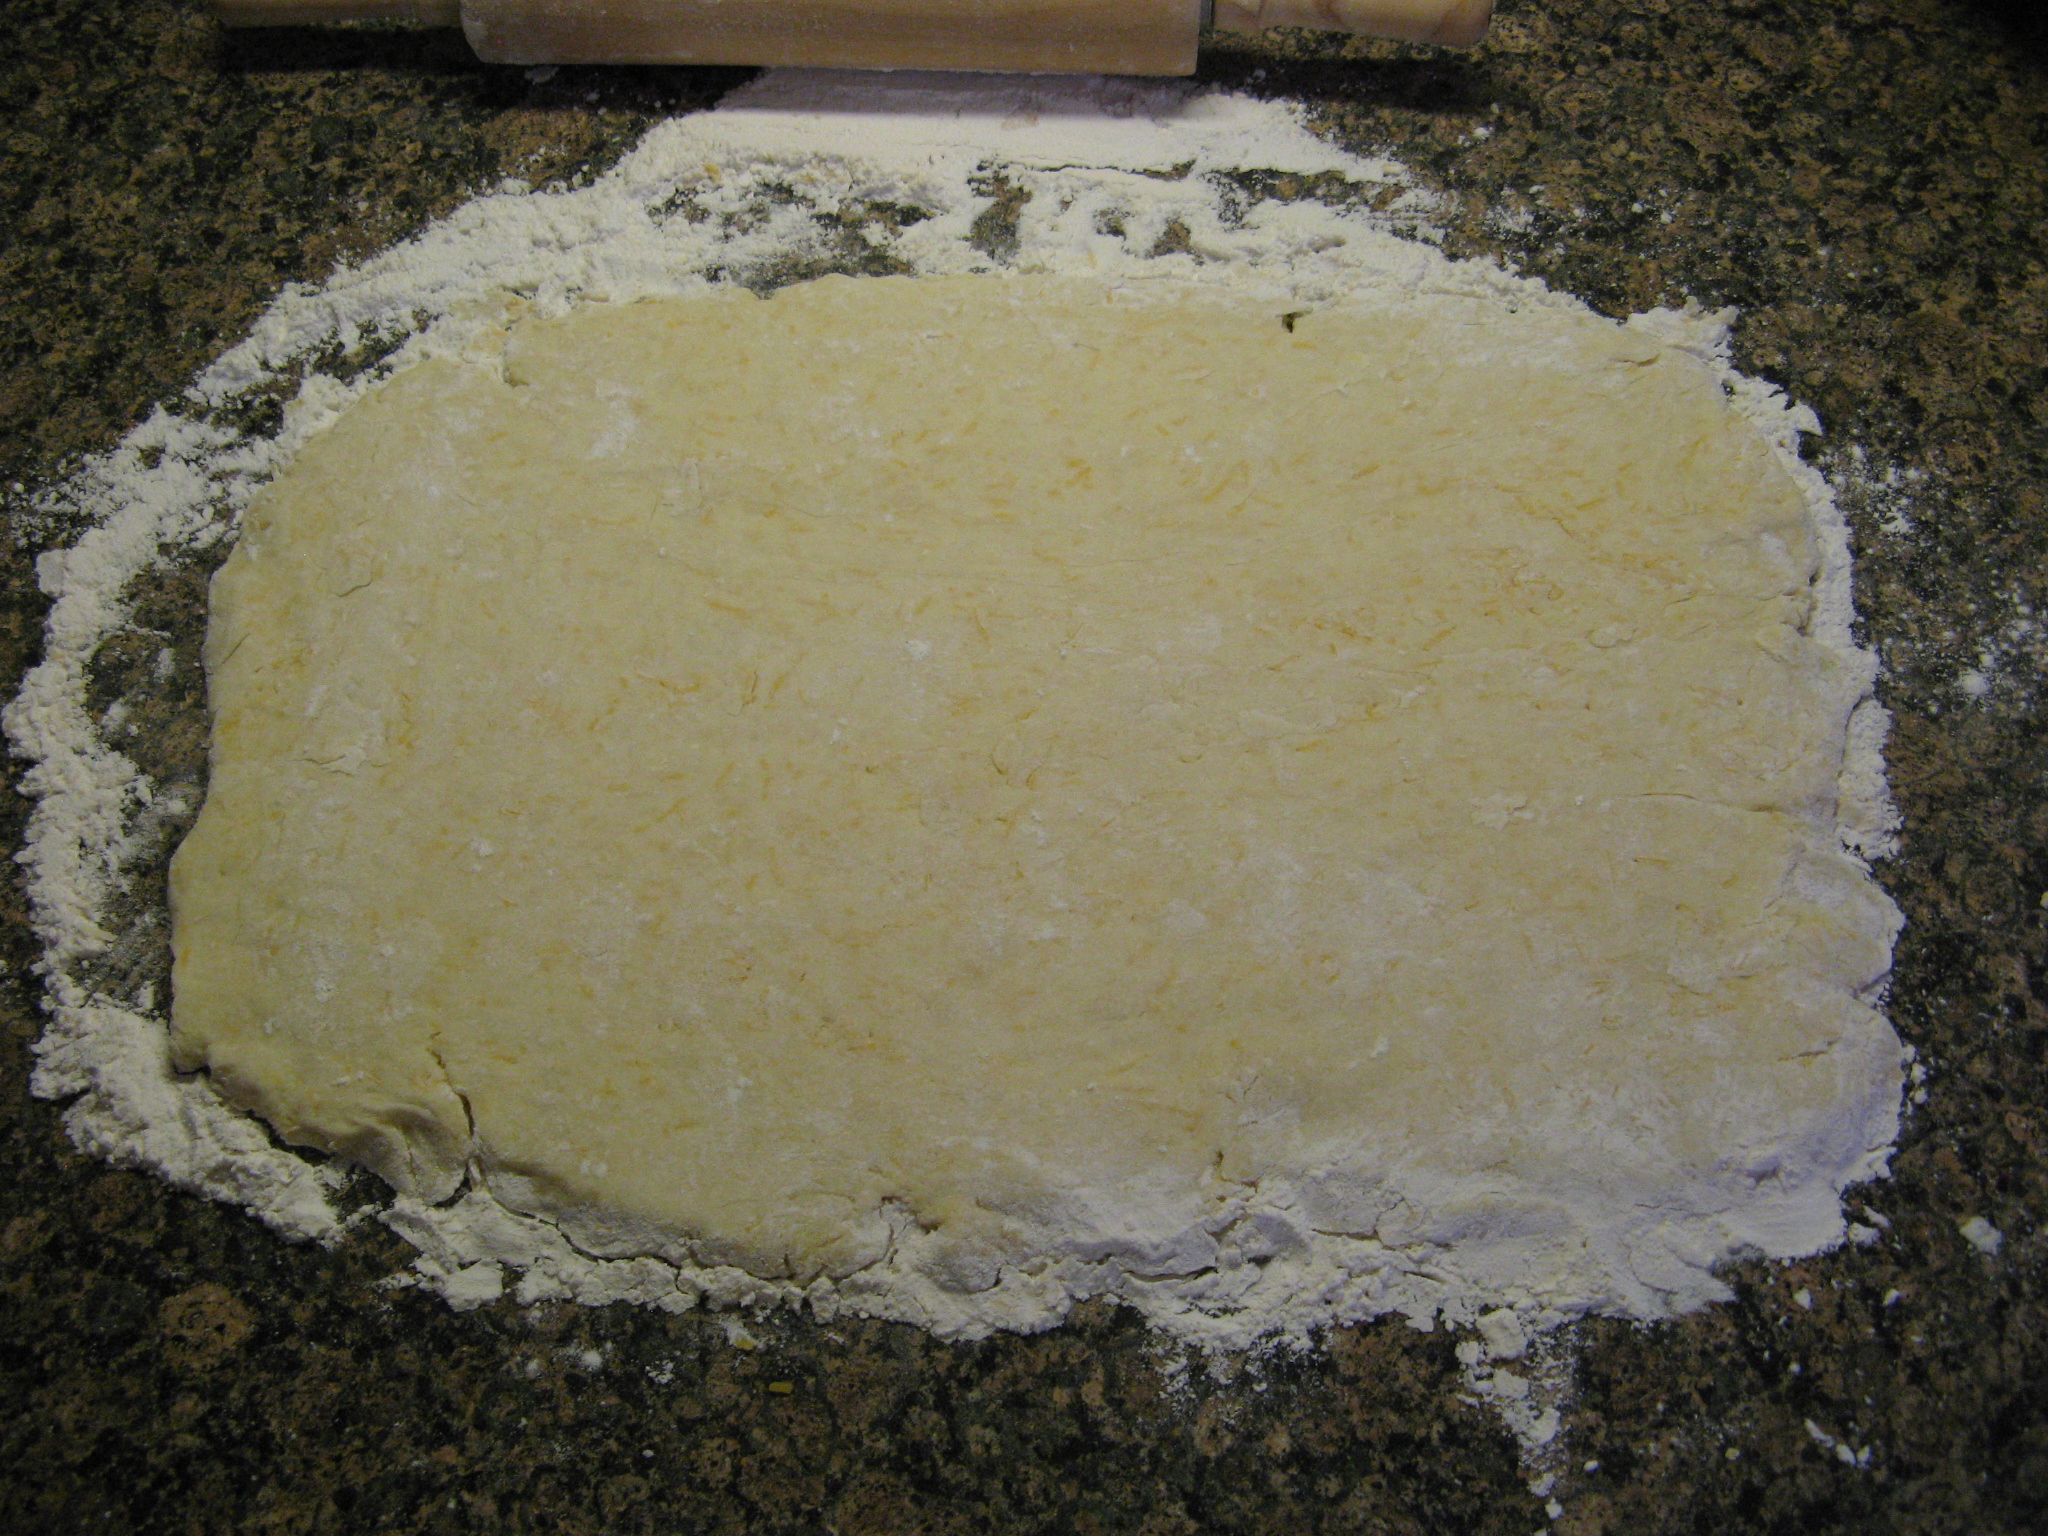
After adding in the cheddar to the dough I dumped the dough onto a well-floured surface and kneaded the dough a few times and then rolled it into a rectangle.

IMG_7602

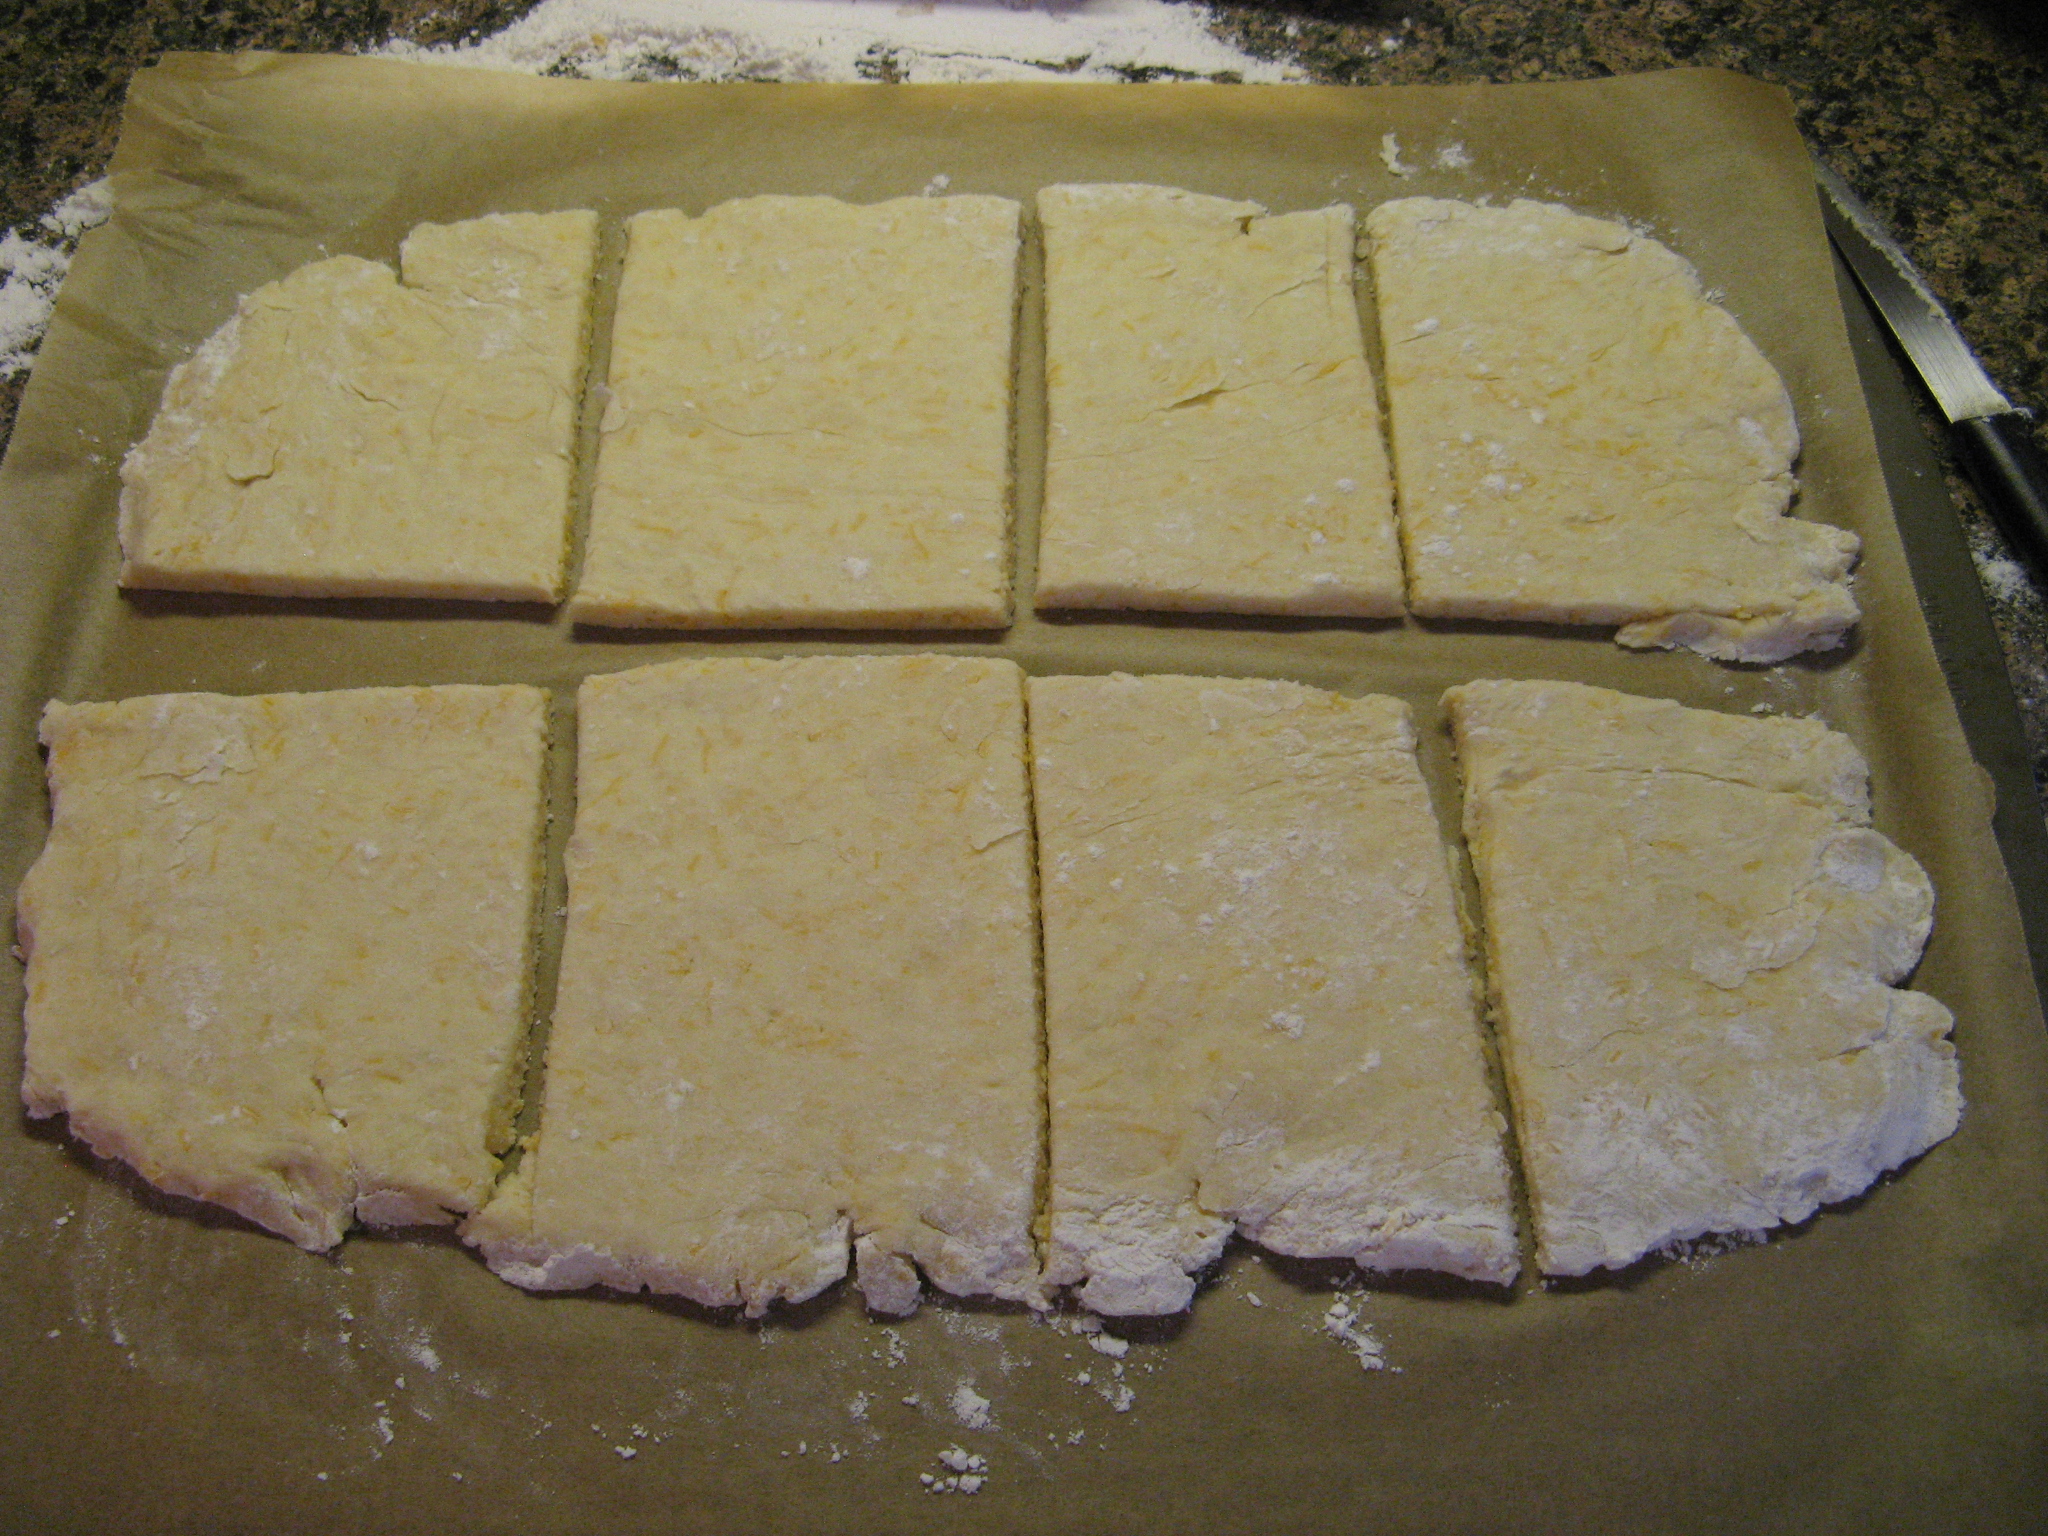
I then sliced the dough into 8 pieces and placed it onto a parchment lined cookie sheet and brushed them with an egg wash.

IMG_7606

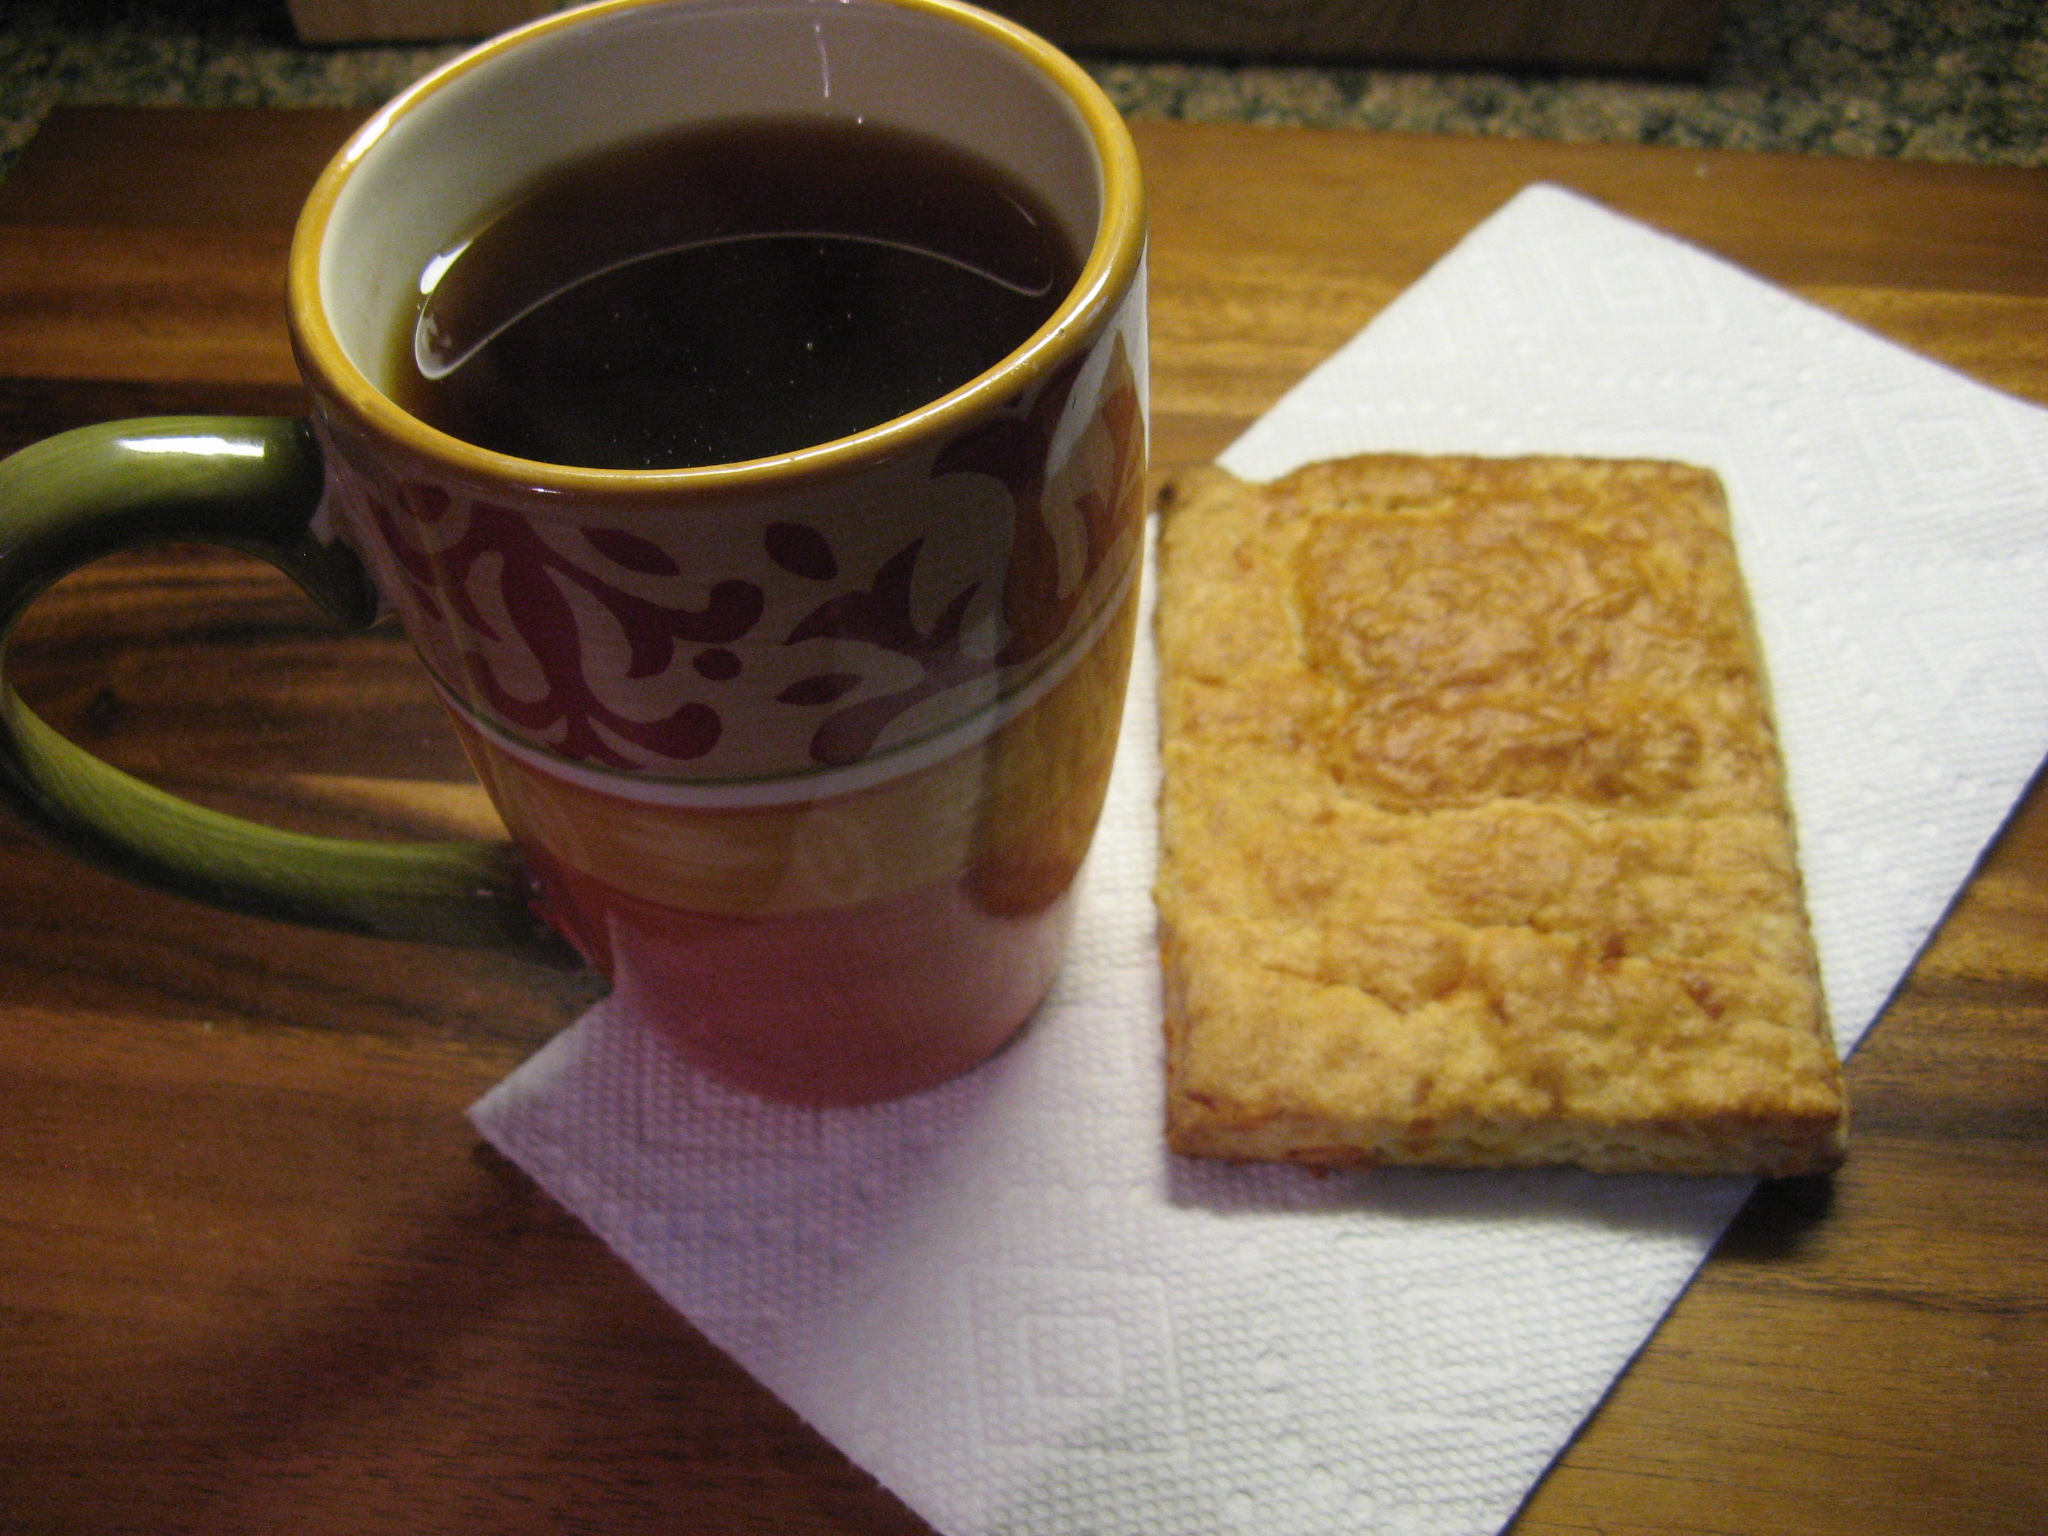
After baking in a 425 F preheated oven for about 25 minutes this is what I got… Flat biscuits.

IMG_7608

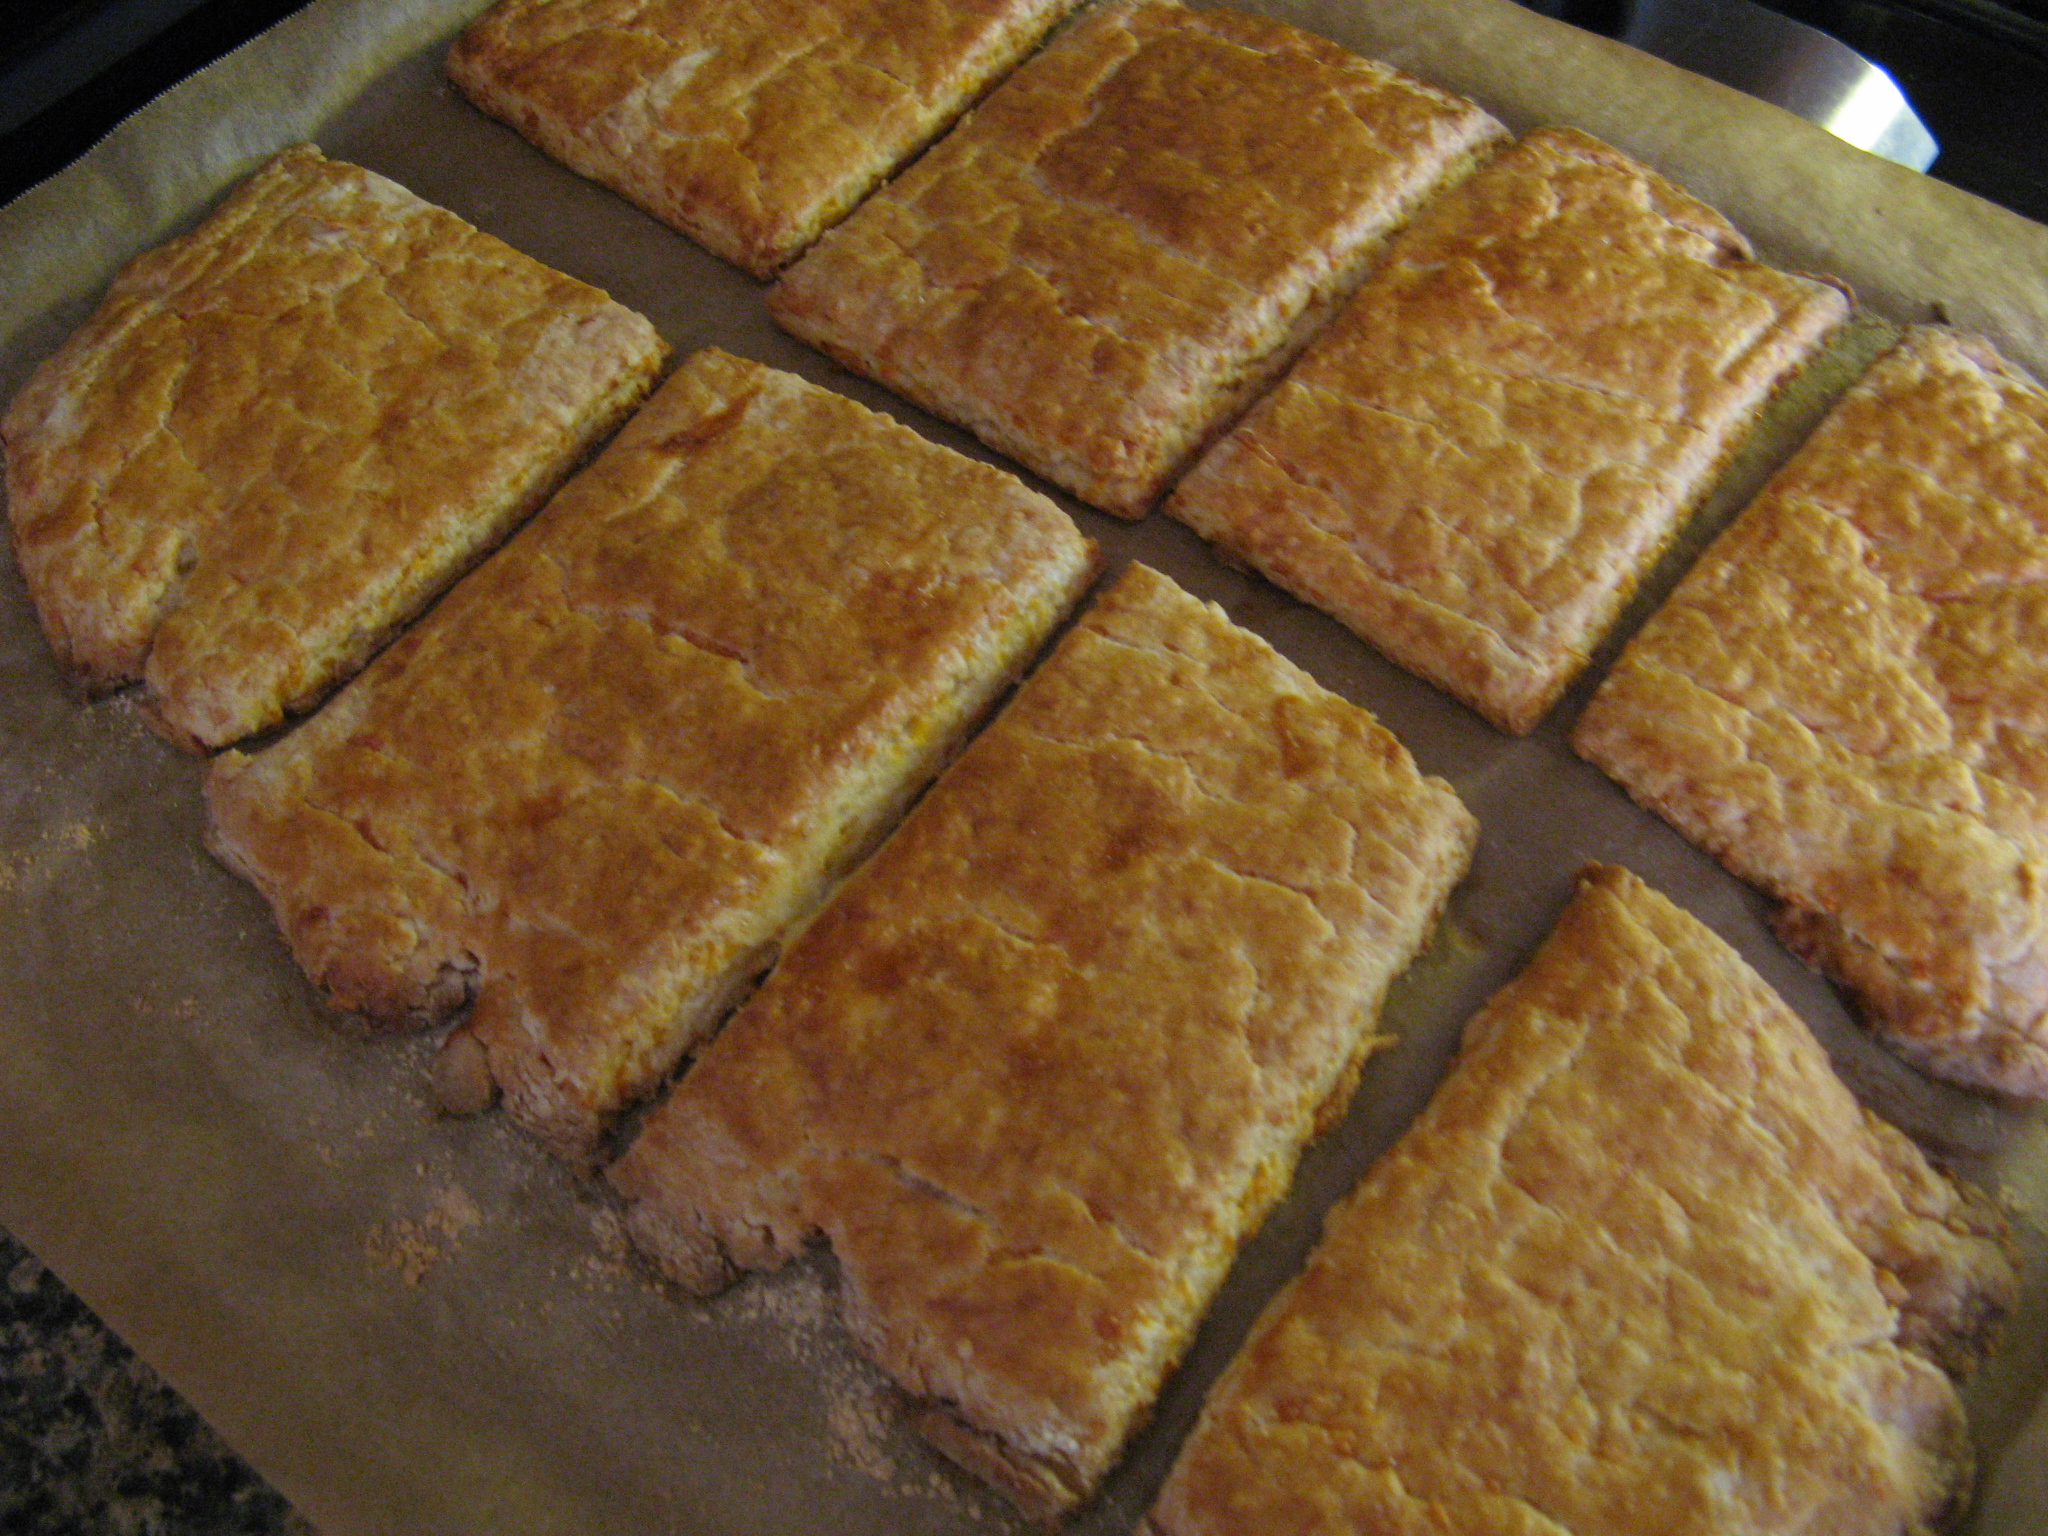
Luckily they tasted really good and were a nice breakfast treat the following morning with my cup of tea! Thankfully my mishap wasn’t a total loss.

IMG_7694

What kind of mishaps have you encountered in your cooking and baking adventures?

Buttermilk Cheddar Biscuits

Yield: 8 Biscuits

Ingredients:

2 cups all-purpose flour, plus more as needed

1 tablespoon baking powder

1 1/2 teaspoon kosher salt

12 tablespoons (1 1/2 sticks) cold unsalted butter, diced

1/2 cup cold buttermilk, shaken

1 cold extra-large egg

1 cup grated cheddar cheese

1 egg, beaten with 1 tablespoon milk

Directions:

1. Preheat oven to 425 F

2. Place 2 cups of flour, the baking powder, and salt in the bowl of an electric mixer and mix on low. Add the butter and mix until the butter is the size of peas.

3. Combine the buttermilk and egg in a small bowl or measuring cup and beat lightly with a fork. With the mixer still on low, quickly add the buttermilk mixture to flour mixture and mix only until it’s moistened. In a small bowl mix the cheddar cheese with a handful of flour. Add the cheese to the dough, still mixing it on low, and mix until roughly combined.

4. Dump the dough onto a well-floured surface and knead lightly about 6 times. Rolled the dough out to a rectangle (10 by 5 inches.) With a sharp floured knife cut the dough lengthwise in half and then across in quarters, making 8 rough rectangles. Transfer to sheet pan lined with parchment paper. Brush the tops with the egg wash and bake for 20 to 25 minutes, until the tops are browned and the biscuits are cooked through. Can serve hot or warm.

Lemon & Raspberry Bundt Cake

This cake was a few different things before it finally came to be a Lemon & Raspberry Bundt Cake. First I thought of making a raspberry crumb cake, then I thought of omitting the crumb part and making a raspberry cake with a cream cheese icing drizzle, this is where the lemon came in and I thought of a lemon raspberry cake, then it was a loaf cake and ultimately it became a Bundt cake. While initially I was thinking of sticking with the cream cheese icing drizzle I decided to pass on it so the cake wouldn’t end up being super-sweet. Did you get all that? Long story short… I ended up making a delicious lemon tinged cake that was filled with perfectly sweet raspberries.

IMG_7538

To make the batter I began by creaming together butter and sugar until it was light and fluffy. Following that I added six eggs, one at a time, beating the mixture well after each addition and finally I added in vanilla extract. I put that aside for a moment and in a medium sized bowl I whisked together flour, baking soda and salt. With my mixer set to a lower speed I then added in the flour mixture in three parts alternating with lemon Greek Yogurt.

IMG_7540

And finally I folded in the juice and zest of one lemon and fresh raspberries which I dredged in flour – dredging the berries in flour prevents them from falling to the bottom of the batter while baking.

IMG_7542

I then poured the batter into a Bundt pan which I sprayed with baking spray and baked it in a 325 F preheated oven.

IMG_7543

After about 50 minutes the cake was ready to come out of the oven.

IMG_7545

I let it rest in the pan for about 20 minutes and then inverted it onto a wire rack so it could cool completely.

IMG_7553

Once cooled, I couldn’t wait to slice into the cake and enjoy a slice, and I wasn’t disappointed, it was absolutely delish. Just the right amount of lemon flavor and the berries were definitely a nice complement to the citrus flavor. And just as important… It was perfectly moist!

IMG_7574

Lemon & Raspberry Bundt Cake

Ingredients:

2 sticks (1 cup) unsalted butter, at room temperature

2 cups sugar

3 cups flour

1 teaspoon baking soda

1 teaspoon kosher salt

6 large eggs, at room temperature

1 teaspoon vanilla extract

1 cup lemon Greek yogurt*

zest and juice from one lemon

2 cups raspberries, dredged in 2 tablespoons of flour

*I used 2 5.3-ounce containers of Chobani Greek Lemon Yogurt. You can also substitute with plain Greek yogurt or sour cream.

Directions:

1. Preheat the oven to 325 F. Prep the Bundt pan by spraying it with baking spray or coating it with butter and then dusting it with flour.

2. Using a mixer beat the butter and sugar on medium speed until light and fluffy – about 5 minutes. Add the eggs one at a time, beating well after each addition and scraping down the sides of the bowl as necessary. Add in the vanilla extract.

3. In a separate bowl whisk together the flour, baking soda and salt.

4. Reduce the speed of the mixer to low and add in the flour mixture in three parts alternating with the yogurt. Mix until just combined.

5. Fold in the raspberries, lemon zest and juice and then transfer the batter to the prepared pan and bake for approximately 50 – 60 minutes, until a cake tester comes out clean.

6. Place the cake on a wire rack and let it cool in the pan for 15-20 minutes before inverting and letting it cool completely.

Key Lime Cheesecake

After making Coconut & Lime Cupcakes last week to celebrate Cinco de Mayo I had quite a few key limes left over. While I normally would just whip up a delicious Key Lime Pie I opted to go a different route and used the key limes to create a Key Lime Cheesecake making a few adjustments – mainly adding in some key lime juice and zest – to the deliciously creamy and not overly sweet cheesecake I made in honor of Pi Day a few months ago.

IMG_7521

I wasn’t sure how much lime juice and zest to add to achieve the perfect balance in flavor. I figured a safe bet would be a 1/4 cup of juice and a teaspoon of the zest and luckily it was the perfect amount. Since I added both prior to mixing in the eggs I was able to do a quick taste test to ensure it would be the right amount.

And after letting the cheesecake cool and removing it from the springform pan, I decided to make some candied lime slices to decorate the top of it to give the cheesecake a little extra pizazz.

IMG_7518

Overall, this cheesecake was amazing! Those were the words a few of my friends used after trying it and I must admit it was quite delicious; the perfect balance of sweetness and tanginess and incredibly creamy. And you can never go wrong with a homemade graham cracker crust!

IMG_7528

Key Lime Cheese Cake – modified from here

Ingredients:

18 graham crackers (2 sleeves)

1/2 cup (1 stick) unsalted butter, melted

1/4 teaspoon kosher salt

1 cup plus 4 tablespoons sugar

3 8-oz. packages cream cheese, at room temperature

1/4 cup key lime juice

1 teaspoon key lime zest

2 cups sour cream, at room temperature

1 1/2 teaspoons vanilla extract

3 large eggs, at room temperature

Directions:

1. Preheat oven to 325 F. In a food processor pulse the graham crackers until fine crumbs form. Add the butter, salt and 2 tablespoons of the sugar and pulse to combine. Press the mixture on the bottom and 2-inches up the side of a 9-inch springform pan.

2. Use an electric mixer to beat the cream cheese and 1 cup of sugar until smooth. Add the key lime juice and zest and then add 1 cup of the sour cream and 1 teaspoon of the vanilla extract and continue beating until combined. Beat in the eggs, one at a time. Pour the mixture into the prepared crust and bake until just set (the center will be slightly wobbly), 50 to 60 minutes.

3. In a small bowl combine the remaining 1 cup of sour cream, 2 tablespoons of sugar and 1/2 teaspoon of vanilla extract. Spread over the hot cheesecake, then bake until set, 3 to 5 minutes more. Let cool to room temperature in pan, then refrigerate for at least 2 hours. Run a knife around the edge of cheesecake before unmolding.

Candied Limes

Ingredients: 

3 limes, sliced thin

1 cup water

1 cup sugar, plus a few tablespoons to coat the candied slices

Directions:

1. Blanch the lime slices. Fill a medium-sized saucepan with water and bring to a boil. Meanwhile prepare an ice water bath. Once the water is boiling add the lime slices and boil for 2-3 minutes. Drain the slices and place them in the ice water bath.

2. In the same pot bring the cup of water and sugar to a simmer and then add the lime slices and simmer them until the pith of the limes become translucent, then transfer the lime slices to a wire rack so they can cool and dry. Place a piece of parchment paper or wax paper below the wire rack just in case the limes begin to drip..

3. Once the limes are dry, at least an hour, pour a few tablespoons of sugar into a shallow bowl and press both sides of the lime slices into the sugar.

Coconut & Lime Cupcakes

Happy Cinco de Mayo! It’s the perfect day to enjoy some guacamole, a few tacos, a shot of tequila or a nice cold margarita. That brings me to today’s post. I’ve made some delicious treats in honor of this day in the past – churros, tres leches cupcakesMexican wedding cookies and sopapilla cheesecake – and this year I was thinking of making Margarita Cupcakes. But, since I didn’t have any tequila on hand (all the recipes I came across had this margarita staple in the ingredient list) I opted for something non-alcoholic and just as festive… Coconut & Lime Cupcakes – a coconut cupcake with a key lime cream cheese frosting.

IMG_7499

To begin I made the coconut cupcakes… In the bowl of my stand mixer I mixed together sugar and butter until it was light and fluffy – about 5 minutes on medium speed.

IMG_7452

I then reduced the speed to low and added in three eggs – one at a time.

IMG_7453

Next I added in buttermilk, and a sifted mixture of flour, baking powder, baking soda and salt. I alternated between adding the two beginning and ending with the dry ingredients. Oh, and can I just take a moment to say that I love this silicone bowl to add things into my running mixer. It’s completely flexible so I can form it into the perfect shape to pour the flour into the bowl and not have it fly all over the place. I used to use a pouring shield but I always had the flying flour issue with it. Check out this link if you have been searching for the perfect bowl to add dry ingredients to your batter while mixing.

IMG_7454

Once the batter came together I folded in sweetened shredded coconut.

IMG_7456

And finally, using an ice cream scoop I divided the mixture among a 12-cup paper lined muffin pan and baked it in a 325 F preheated oven for 25 minutes.

IMG_7457

Once they were out of the oven, I let the cupcakes cool in the pan for 15 minutes before removing them and letting them cool completely on a wire rack in preparation for frosting them.

IMG_7458

After letting the cupcakes cool I got to working on the frosting – a key lime cream cheese frosting that has the perfect combination of sweetness and citrus flavor. I began by creaming together cream cheese, butter, key lime juice and key lime zest until it was creamy. Next I added in 2 cups of sifted confectioners’ sugar one cup at a time – mixing well after each cup. Just to note, if want more of a lime flavor you can add more of the lime juice, but, you may have to balance that with more confectioners’ sugar since you don’t want your frosting to become too thinned down. Prior to frosting the cupcakes I popped the frosting in the fridge for about 10 – 15 minutes so the frosting would be firmer to pipe with.

IMG_7461

And after frosting each of the cupcakes I sprinkled them with a bit of lime zest.

IMG_7482

Coconut Cupcakes – Adapted from here

Makes 12 Cupcakes

Ingredients:

1 1/2 sticks unsalted butter, at room temperature

1 cup sugar

3 large eggs, at room temperature

3/4 teaspoon vanilla extract

3/4 teaspoon almond extract

1 1/2 cups all-purpose flour

1/2 teaspoon baking powder

1/4 teaspoon baking soda

1/4 teaspoon salt

1/2 cup buttermilk

1 1/2 cups sweetened shredded coconut

Directions:

1. Preheat the oven to 325 F and line a 12-cup muffin pan with paper liners.

2. In a medium bowl, sift together the flour, baking powder, baking soda and salt.

3. Using a stand mixer or electric hand mixer cream the butter and sugar until light and fluffy, about 5 minutes on medium speed. Reduce the speed to low and add the eggs one at a time, scraping the sides of the bowl down after each addition. Add in the vanilla and almonds extracts and mix well.

4. In three parts, alternately add the flour mixture and the buttermilk to the batter, beginning and ending with the flour mixture. Fold in the coconut.

5. Fill each cup of the muffin pan to the top – an ice cream scoop is the perfect size to fill the cups. Bake for 25 to 35 minutes, until the tops are slightly brown and a toothpick comes out clean. Allow the cupcakes to cool in the pan for 15 minutes before transferring them to a wire rack to cool completely.

Key Lime Cream Cheese Frosting

Ingredients:

12 ounces cream cheese, at room temperature

1 stick unsalted butter, at room temperature

2 1/2 tablespoons key lime juice

1 teaspoon key lime zest

2 cups confectioners’ sugar, sifted

Directions:

Cream together the cream cheese, butter, key lime juice and zest until creamy. Add in the sugar, one cup at a time, and continue mixing until all of the sugar is incorporated. If you find that the frosting is too soft, pop it into the refrigerator for a few minutes so it can firm up before using it.

Cheesecake Brownies

Brownies… They are probably the one thing I don’t bake too much of. I’m not really sure why that is since I do like them, especially when they have walnuts in them. Yum! I tend to like that crunchy texture in my deserts… walnuts in brownies or loaf cakes, sprinkles on cupcakes and ice cream and so forth. As I am thinking about it I think the major turn-off I have with brownies is having to slice them once they are cooled. They always tend to fall apart on me and I never end up with the amount the recipe says I’ll have; 12 somehow becomes 8 or 9. But, with this recipe not only did I end up with some delicious brownies, but, I also was able to cut them into 16 equal brownies as the recipe called for.

IMG_7300

In the bowl of my stand mixer I combined a box of Chocolate Fudge cake mix, oil, water and an egg and using the stir setting I mixed the ingredients until they were smooth. I then added in a 1/2 cup of chocolate chips and continued mixing until they were well incorporated.

IMG_7284

I then spread the mixture into a 13 x 9 inch pan that I sprayed with baking spray.

IMG_7285

Using a hand mixer – these are the times that I wish I had a second bowl for my stand mixer – I combined cream cheese, sugar, vanilla extract and an egg and beat the ingredients until they were smooth.

IMG_7287

After spreading the cream cheese mixture over the chocolate mixture I sprinkled chocolate chips over it.

IMG_7288

Once it was done baking – 35 minutes in a 350 F preheated oven – I let the brownies cool completely in the pan over a wire a rack.

IMG_7298

After some careful maneuvering – flipping and sliding – I placed the brownies on a large cutting board so I could cut them.

IMG_7311

And then it was time to enjoy them! Overall this recipe is a keeper. While the brownies are made using a cake mix they definitely tasted like they were made from scratch – i.e. flour, cocoa powder, etc. And the chocolate chips added to the brownie batter offer a nice texture and extra dose of chocolate in each bite. These brownies actually reminded me of the Mini Chocolate-Chip Cheesecakes I posted about a few years ago and continues to be a treat I make over and over again as it is a hit amongst many of my friends. And I am sure these brownies will become something I make quite a few more times.

IMG_7318

Cheesecake Brownies

Yield: 16 servings

Ingredients:

1 box Chocolate Fudge Cake Mix (Betty Crocker SuperMoist)

3/4 cup vegetable oil

2 tablespoons water

2 eggs

1 cup semisweet chocolate chips

1 8oz. package cream cheese, softened

1/4 cup sugar

1/2 teaspoon vanilla extract

Directions:

1. Preheat oven to 350 F. Prep a 13 x 9-inch pan by spraying the bottom with baking spray.

2. In a medium bowl, stir the cake mix, oil, water and 1 of the eggs until smooth. Stir in 1/2 cup of the chocolate chips. Spread batter into prepared pan.

3. In a medium bowl, beat the cream cheese, sugar, vanilla extract and remaining 1 egg with an electric mixer until smooth. Spread the mixture over the batter and sprinkle with the remaining 1/2 cup chocolate chips.

4. Bake 35 to 40 minutes or until a toothpick inserted in brownie 1 inch from the side of the pan comes out almost clean. Cool completely in pan on a wire rack, about 1 hour 30 minutes. Cut into 4 rows by 4 rows.

Chicken Pad Thai

Whenever I go to a Thai restaurant my go-to dish is always Chicken Pad Thai. It’s pretty much foolproof and always delicious. A few years ago I attempted to make it myself and was happy with the outcome – it was super simple and tasted awesome. I recently dug out the recipe I used and whipped it up for dinner.

To begin I prepped all of my ingredients; minced garlic and ginger, sliced three thinly sliced chicken breasts into strips and julienned 2 carrots and 1 zucchini.

IMG_7158

Two of my other ingredients were rice noodles and Asian chili paste.

IMG_7162

Next I whisked together soy sauce, water, peanut butter and the chili paste until it was smooth.

IMG_7163

To cook the vegetables and chicken I began by sautéing the garlic and ginger for about a minute and then adding the vegetables and chicken and cooking everything until the chicken was cooked through.

IMG_7166

While I was cooking the vegetables I prepped the rice noodles by soaking them in warm water (I brought a pot of water to boil and then removed it from the heat). Luckily the rice noodles now come in these individual packets (there are four in a box) so I knew exactly how many noodles I needed – 2 packets. The last time I cooked with rice noodles – granted it was some time ago – they didn’t come in these nifty packages so I had to use my best guess as to what was half of the package.

IMG_7164

The noodles soaking…

IMG_7165

Once the noodles were ready (I followed the directions on the package and soaked them for 5 minutes) I added them to the pan with the vegetables and then added in the peanut/soy sauce I made along with light brown sugar and cider vinegar. I tossed all of the ingredients together to distribute the sauce and let everything cook for a few more minutes and then it was time to enjoy my homemade Chicken Pad Thai and it was delicious!

IMG_7168

Chicken Pad Thai – Modified from here

Servings 4

Ingredients:

2 tablespoons soy sauce

2 tablespoons water

1 1/2 tablespoons creamy peanut butter

2 teaspoons Asian chili paste

3 tablespoons canola oil

2 teaspoons minced garlic

2 teaspoons minced ginger

1 zucchini, julienned

2 carrots, julienned

8 ounces chicken breast, sliced into strips

1/4 pound rice noodles, follow directions on package to prepare

1 tablespoons light brown sugar

1 tablespoons cider vinegar

Optional for garnish:

Lime Wedges

Chopped Peanuts

Bean Sprouts

Directions:

1. In a bowl whisk together the soy sauce, water, peanut butter and chili paste.

2. Heat a large sauté pan (or wok) over medium heat and add the canola oil. Once the oil is hot add the garlic and ginger and cook for about a minute. Add the vegetables and chicken and cook until the chicken is browned and cooked through. Add the noodles and toss to coat them.

3. Add the peanut/soy sauce, brown sugar and cider vinegar and toss to distribute. Cook until heated through.

Chocolate Bunny Topped Easter Cake

Happy Easter! A few weeks ago when I posted about the Springtime Chocolate Chip Cookies  I made I mentioned that I picked up some other things at my local Target store to create an Easter cake and I am happy to say that the cake turned out just as I pictured it in my head. So, what did I pick up? Edible Easter Grass, Cadbury Mini Easter Eggs and Chocolate Bunny.


IMG_7246

To begin, I baked my favorite Carrot Cake and frosted it with Cream Cheese Frosting.

IMG_7194 

The Edible Easter Grass, if you’re wondering, is made of wafer paper candy. It has a slight green apple flavor and surprisingly doesn’t have an after-taste. And from what I read about it online, most of the companies that sell it here in the United States import it from Germany.

 IMG_7193

I cut the grass into 1 to 2 inch pieces and spread it onto a cookie sheet. I then misted the grass with a littel water and mixed the grass so that it could clump together. I was careful not to use too much water because the grass would then disintegrate.

 IMG_7196

I first placed the chocolate bunny in the center of the cake and then started spreading the grass around the bunny lightly pressing it into the frosting.

 IMG_7197

I decided to only cover the top of the cake with the grass.

 IMG_7198

And after placing some Cadbury milk eggs in the grass my cake was decorated and ready for Easter!

IMG_7202


T-shirt Yarn Infinity Scarf

Thanks to large knitting needles and t-shirt yarn I was able to complete the infinity scarf I recently posted about in less than a week. Working with the t-shirt yarn was a lot easier than working with typical yarn. I didn’t have to worry about it fraying our accidentally splitting the yarn with the needles; it’s not the ideal yarn though for most projects, i.e. a blanket. While I did have two skeins of Loops & Threads T-shirt Yarn (which is unfortunately discontinued now) on hand to complete the scarf I only needed one skein.

I ended up knitting the scarf twenty-seven inches and then sewed the ends together so that it would be long enough to loop…

IMG_7176

Or an ideal length for wearing long.

IMG_7182

As for my next yarn project, I’m undecided. It’ll either be a scarf (surprise surprise as those are my favorite things to knit or crochet) or a shrug.


T-Shirt Yarn Infinity Scarf

Materials:

T-Shirt Yarn (one skein approximately 100 yards)

Knitting Needles: US 19 / 15 MM

Directions:

Cast on 10 stitches

Row 1: Knit 2, *Purl 2, Knit 2; repeat from * across. Repeat Row 1 until piece measures your desired length (either to loop around your neck or wear long.)

Bind off.

To finish, sew the ends together and weave in the ends of the yarn.


Chocolate Dipped Coconut Macaroons

Coconut is one of those things that people either love or hate. For me, I love coconut. Come the summer I can never pass up getting a Coconut Italian Ice and while I enjoy most flavors of Chobani Greek yogurt my favorite by far is the Almond Coco Loco Flip. So, it’s pretty surprising that I have never had a Coconut Macaroon. I’ve always wanted to make them, but, some other treat makes its way into my oven instead. I finally got around to making them and I must say I wish I had made them sooner!

These were by far one of the easiest cookies I have ever made… They didn’t require a hand or stand mixer and were easily prepared in one bowl. You can’t beat simplicity like that. I began my mixing together shredded sweetened coconut along with sugar, flour, and salt.

IMG_7133

I then added in egg whites and almond extract and mixed the ingredients until they were well blended. Then using a cookie scoop I scooped up the coconut mixture…

IMG_7134

And dropped them on a parchment lined cookie sheet and baked them in a 325 F preheated oven for about 20 minutes.

IMG_7135

Once out of the oven I immediately transferred the macaroons to a wire rack to cool completely.

IMG_7148

After they cooled it was time to dip them in melted chocolate. Conveniently I had half a bag of semi-sweet chocolate chips in my fridge. I melted the chocolate in the microwave and then dipped the bottom of each of the macaroons in the chocolate and then placed them on a wax paper lined cookie sheet and put them in the fridge so the chocolate could set.

IMG_7152

And since I had some chocolate left-over I decided to enjoy a mid-afternoon snack of chocolate dipped pretzels… You can’t go wrong with sweet & salty!

IMG_7156

Overall these macaroons were delish… With the combination of coconut, almond extract and chocolate they were reminiscent of an Almond Joy candy bar!


Coconut Macaroons

Makes 3 Dozen

Ingredients:

1 14oz. package sweetened coconut flakes (5 1/3 cups)

2/3 cup sugar

6 tablespoons flour

1/4 teaspoon salt

4 egg whites

1 teaspoon almond extract

Directions:

1. Preheat oven to 325 F. Line two cookies sheets with parchment paper.

2. Mix coconut, sugar, flour and salt in a large bowl. Stir in eggs whites and almond extract until well blended. Drop by rounded tablespoonful (I used a small cookie scoop which yielded 26 macaroons) onto prepared cookie sheets.

3. Bakes for 18-20 minutes, or until edges of cookies are golden brown. Remove from cookie sheets and transfer to a wire rack to cool completely.

Enjoy as is, or dip in melted chocolate for an extra sweet treat!

Lemon Ricotta Pancakes

When it comes to pancakes I’m a bit of a traditionalist. I’ll take plain old regular pancakes or buttermilk ones over any flavor (i.e. banana, pumpkin, corn, etc…) or additions (i.e. chocolate chips) – although blueberry pancakes are quite delish! A few years ago though I decided to try Lemon Ricotta Pancakes at a wonderful breakfast spot in Brooklyn – Tom’s Diner – and was instantly hooked. I don’t know what it is about this particular flavor that makes them so delicious – the hint of lemon, the swirl of ricotta cheese, or the combination of both – but they are definitely one pancake everyone should try. And while there are recipes for pancakes made from scratch I opted to make these pancakes using store-bought pancake mix… short-cuts aren’t always a bad thing. And with Easter just around the corner these would be perfect addition or main dish for your Easter breakfast or brunch.

To begin I whisked together pancake mix, milk and lemon oil (I didn’t have any lemons on hand to zest.) Some things to note, I used Aunt Jemima Complete Pancake Mix and while it calls for water to be used with the mix I always opt to use milk for richer tasting and fluffier pancakes. Also, the equivalent of lemon oil to lemon zest is 1/4 teaspoon vs. 1 tablespoon.

IMG_7136

I then folded in the ricotta cheese; folding in the ricotta helps to maintain the texture of the cheese and allows the ricotta to swirl into the batter.

IMG_7137

I’ll admit I’m not the best pancake maker. Usually the first one I pour into the pan is my “test” one that gets thrown out. I just haven’t mastered getting the pan to the right heat. This time around I almost nailed it.

IMG_7140

After topping my short-stack with syrup…

IMG_7142

It was time to enjoy them!

IMG_7143


Lemon Ricotta Pancakes*

Makes 5 4-inch pancakes

Ingredients:

1 cup pancake mix (I used Aunt Jemima complete)

3/4 cup milk (I used 2%)

1 tablespoon lemon zest (or 1/4 teaspoon lemon oil)

1/2 cup whole-milk ricotta cheese

Directions:

1. Whisk together the pancake mix, milk, and lemon oil (or zest) then gently fold in the ricotta cheese.

2. Spoon approximately 1/4 cup (I used an ice cream scoop) of the batter onto a lightly buttered pan or griddle heated over medium-heat.

3. Cook until bubbles form on the surface and then flip and cook for another minute or two until golden.

*This recipe can easily be doubled.