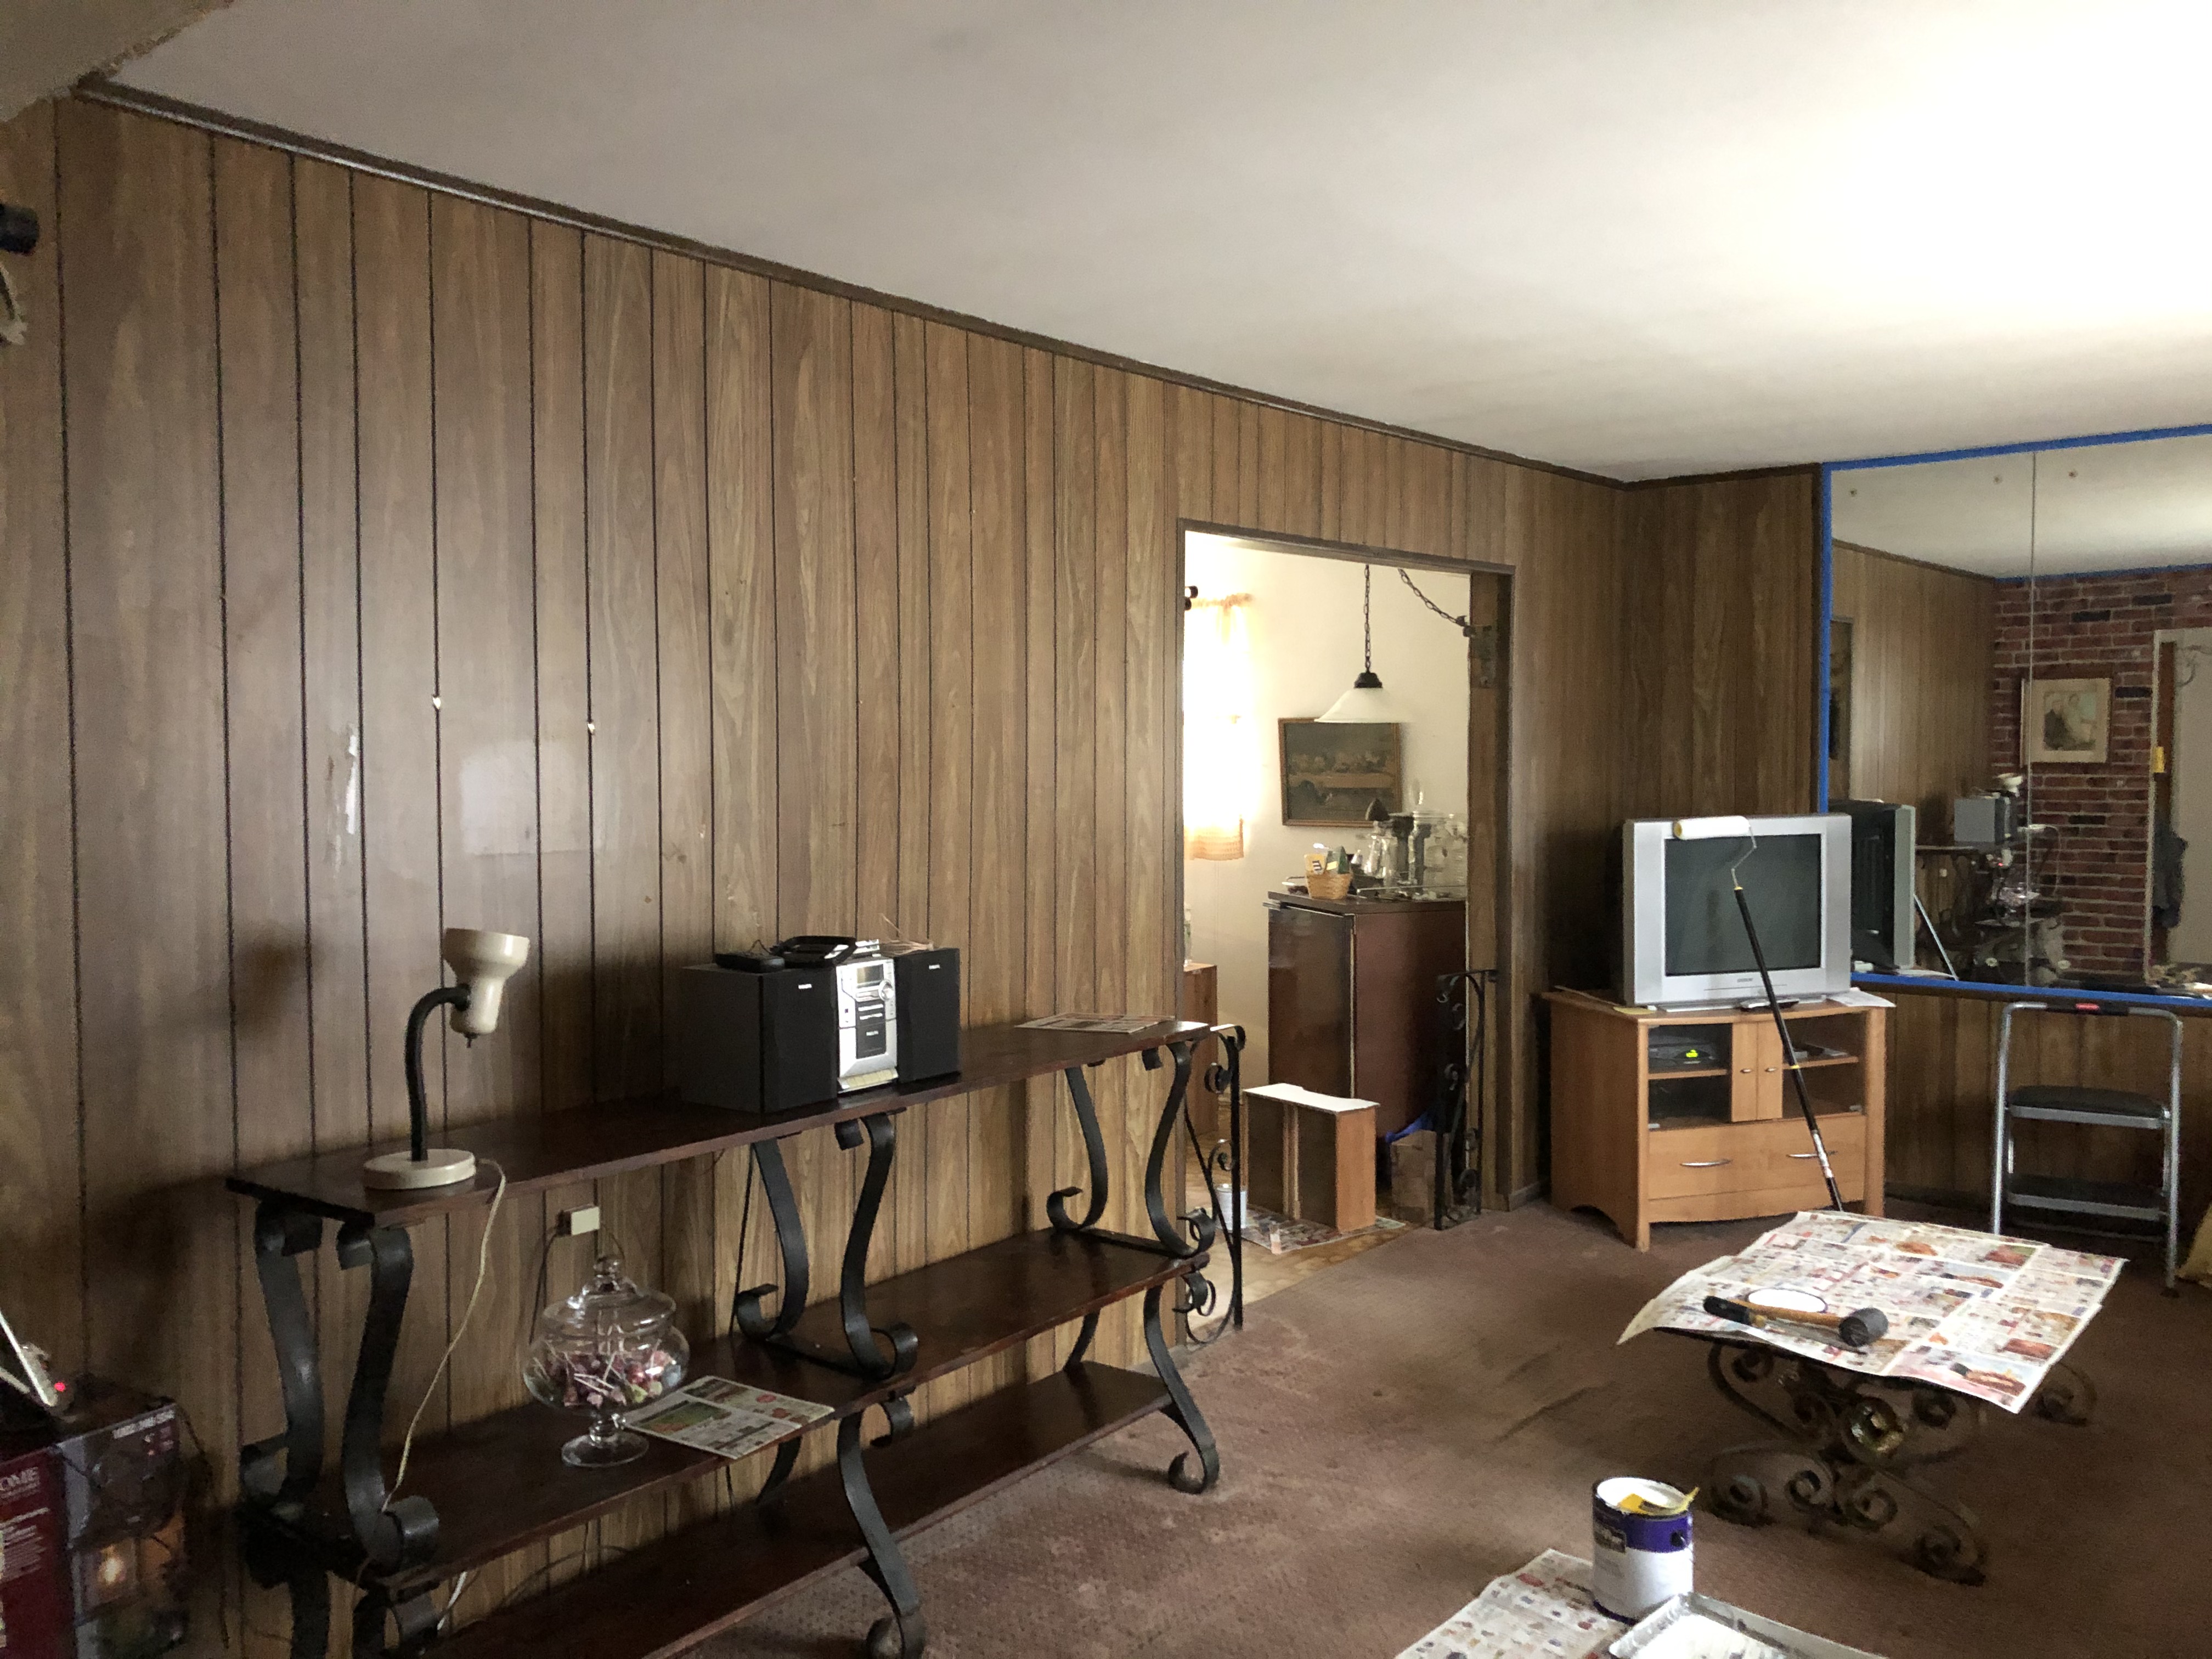
A few years ago I posted about the new sofa I purchased for my living room. In that post I talked about how I wanted to completely remodel the living room and change-up the paneling in the room. I don’t know if it was because I was spending so much time at home that I just got tired of the paneling or because I saw how nice paneling looked painted after watching a home improvement show on HGTV, but, I finally decided it was time to do something about it.
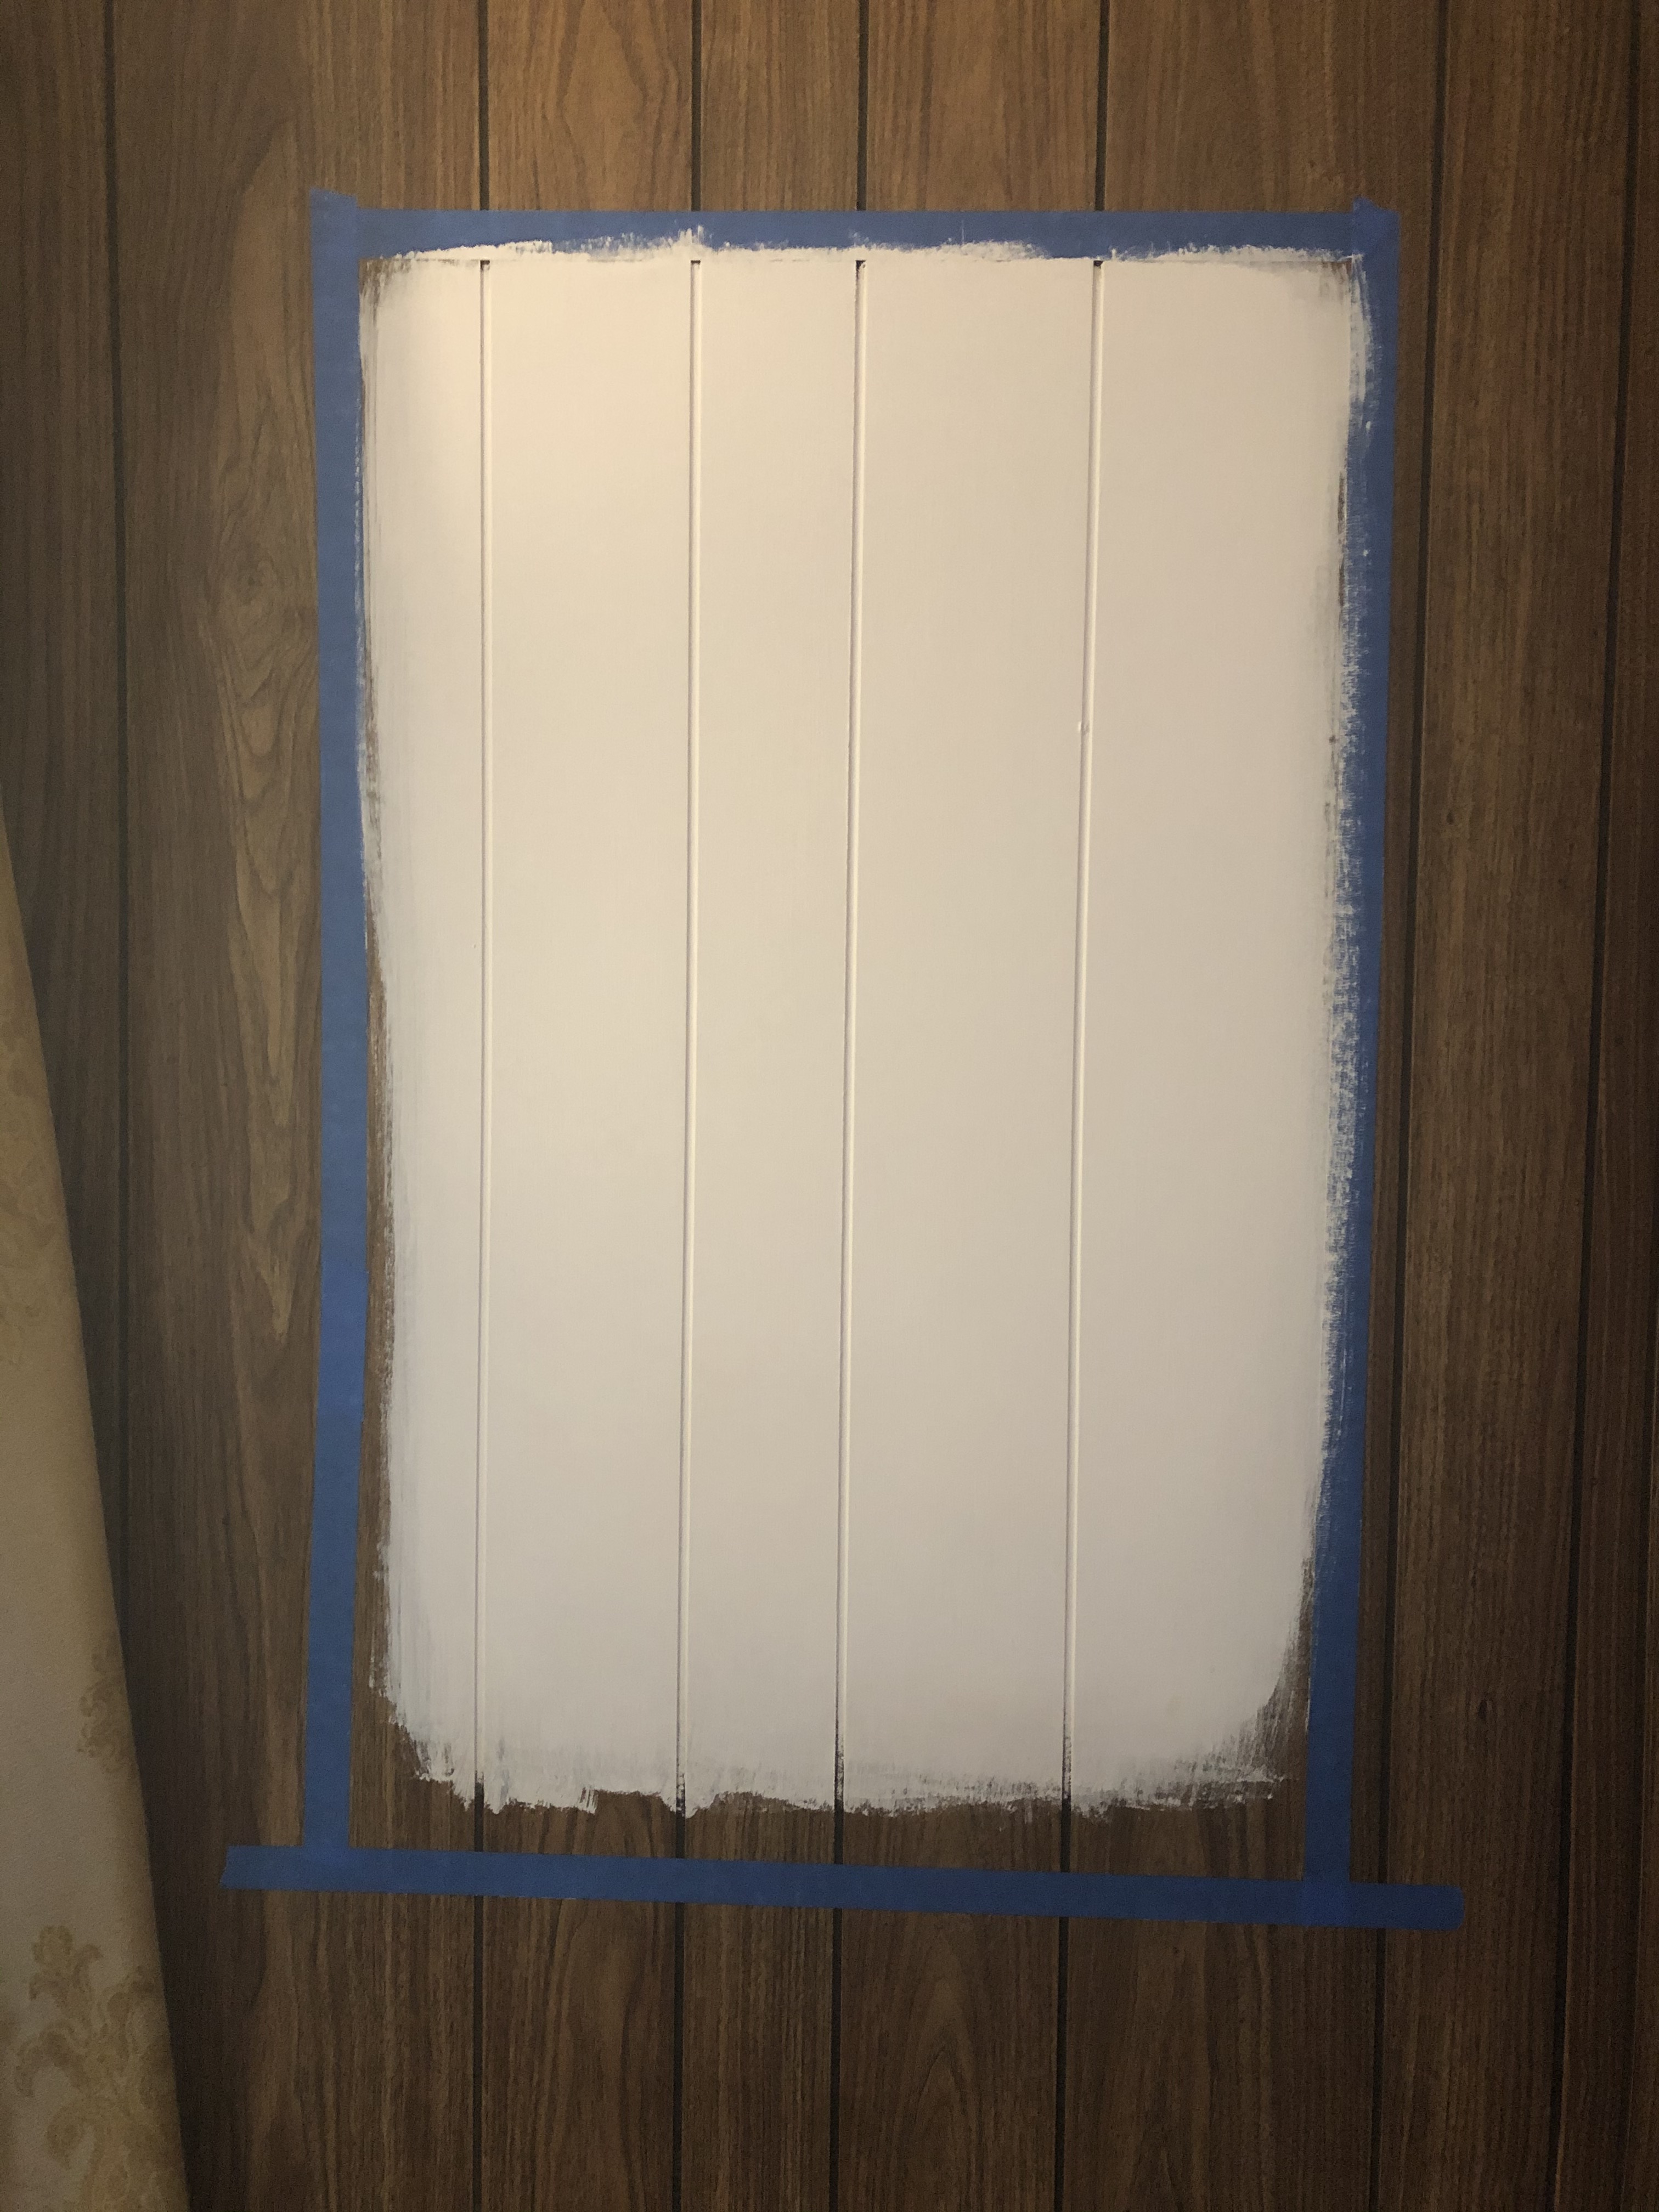
I did some research to find out what the best primer and roller was to use and then primed and painted a small section of the paneling behind the curtains. It came out nice and I quickly decided that I wanted to paint the entire living room.
First though I had to paint the ceiling. So, I taped up around the mirror, covered some furniture with old sheets, removed some items off a shelving unit and pictures off the wall and got to painting.
The following week I started in on the walls. Before priming and painting I washed the paneling with a mild soap (Dawn dish soap) to remove any dirt and dust build-up. Once the paneling was clean and dry, I applied the first coat of primer. I used a multi-surface primer and a thick roller (3/4-inch nap) meant for rough surfaces so I would be able to get into the grooves of the paneling. Applying the first coat of primer took me a lot longer than I anticipated… like 5 hours! But, taking my time was worth it as I was able to get the primer into all the grooves, although, the brown of the paneling was still peeking through considerably so I began to have some concerns that it wasn’t going to look nice, but, there was no turning back. It’s one thing when you paint a small sample section but another thing when you paint all the walls.

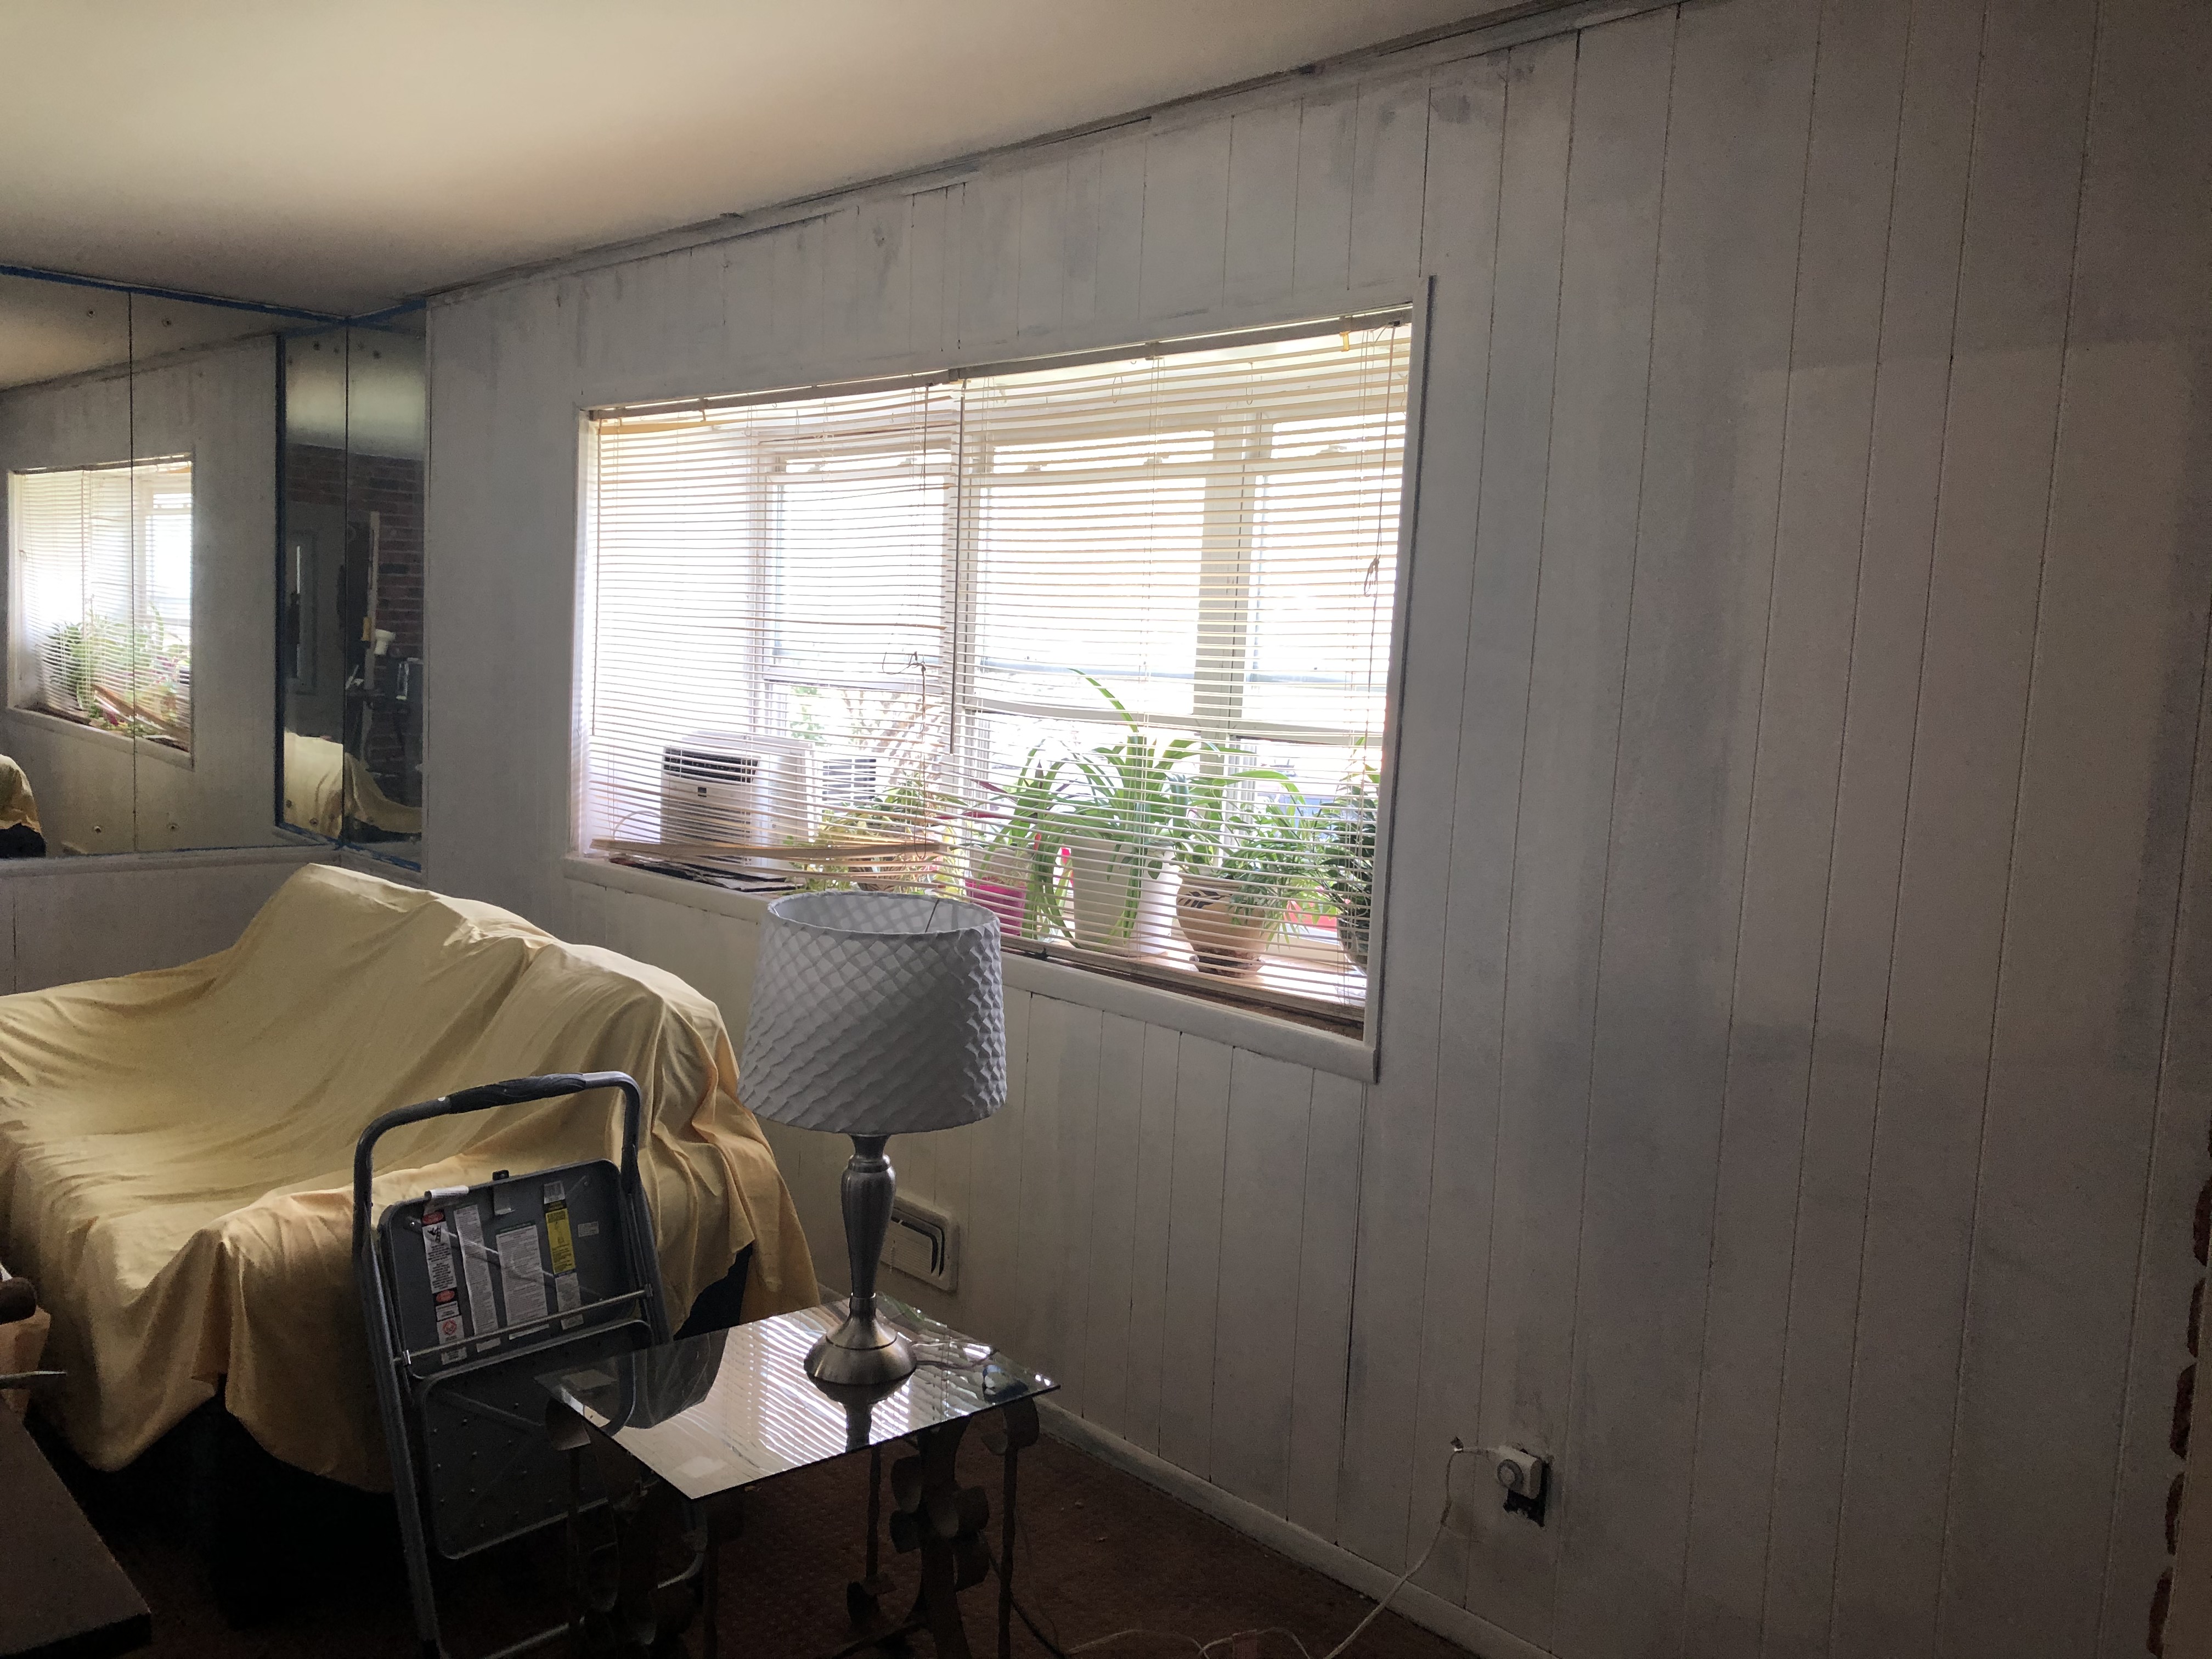
The following day I applied a second coat of primer and I felt better about what the final outcome would look like. I could hardly see the brown peeking through.

And a few days later I painted the walls with the first coat of color I had chosen… Whisper White.
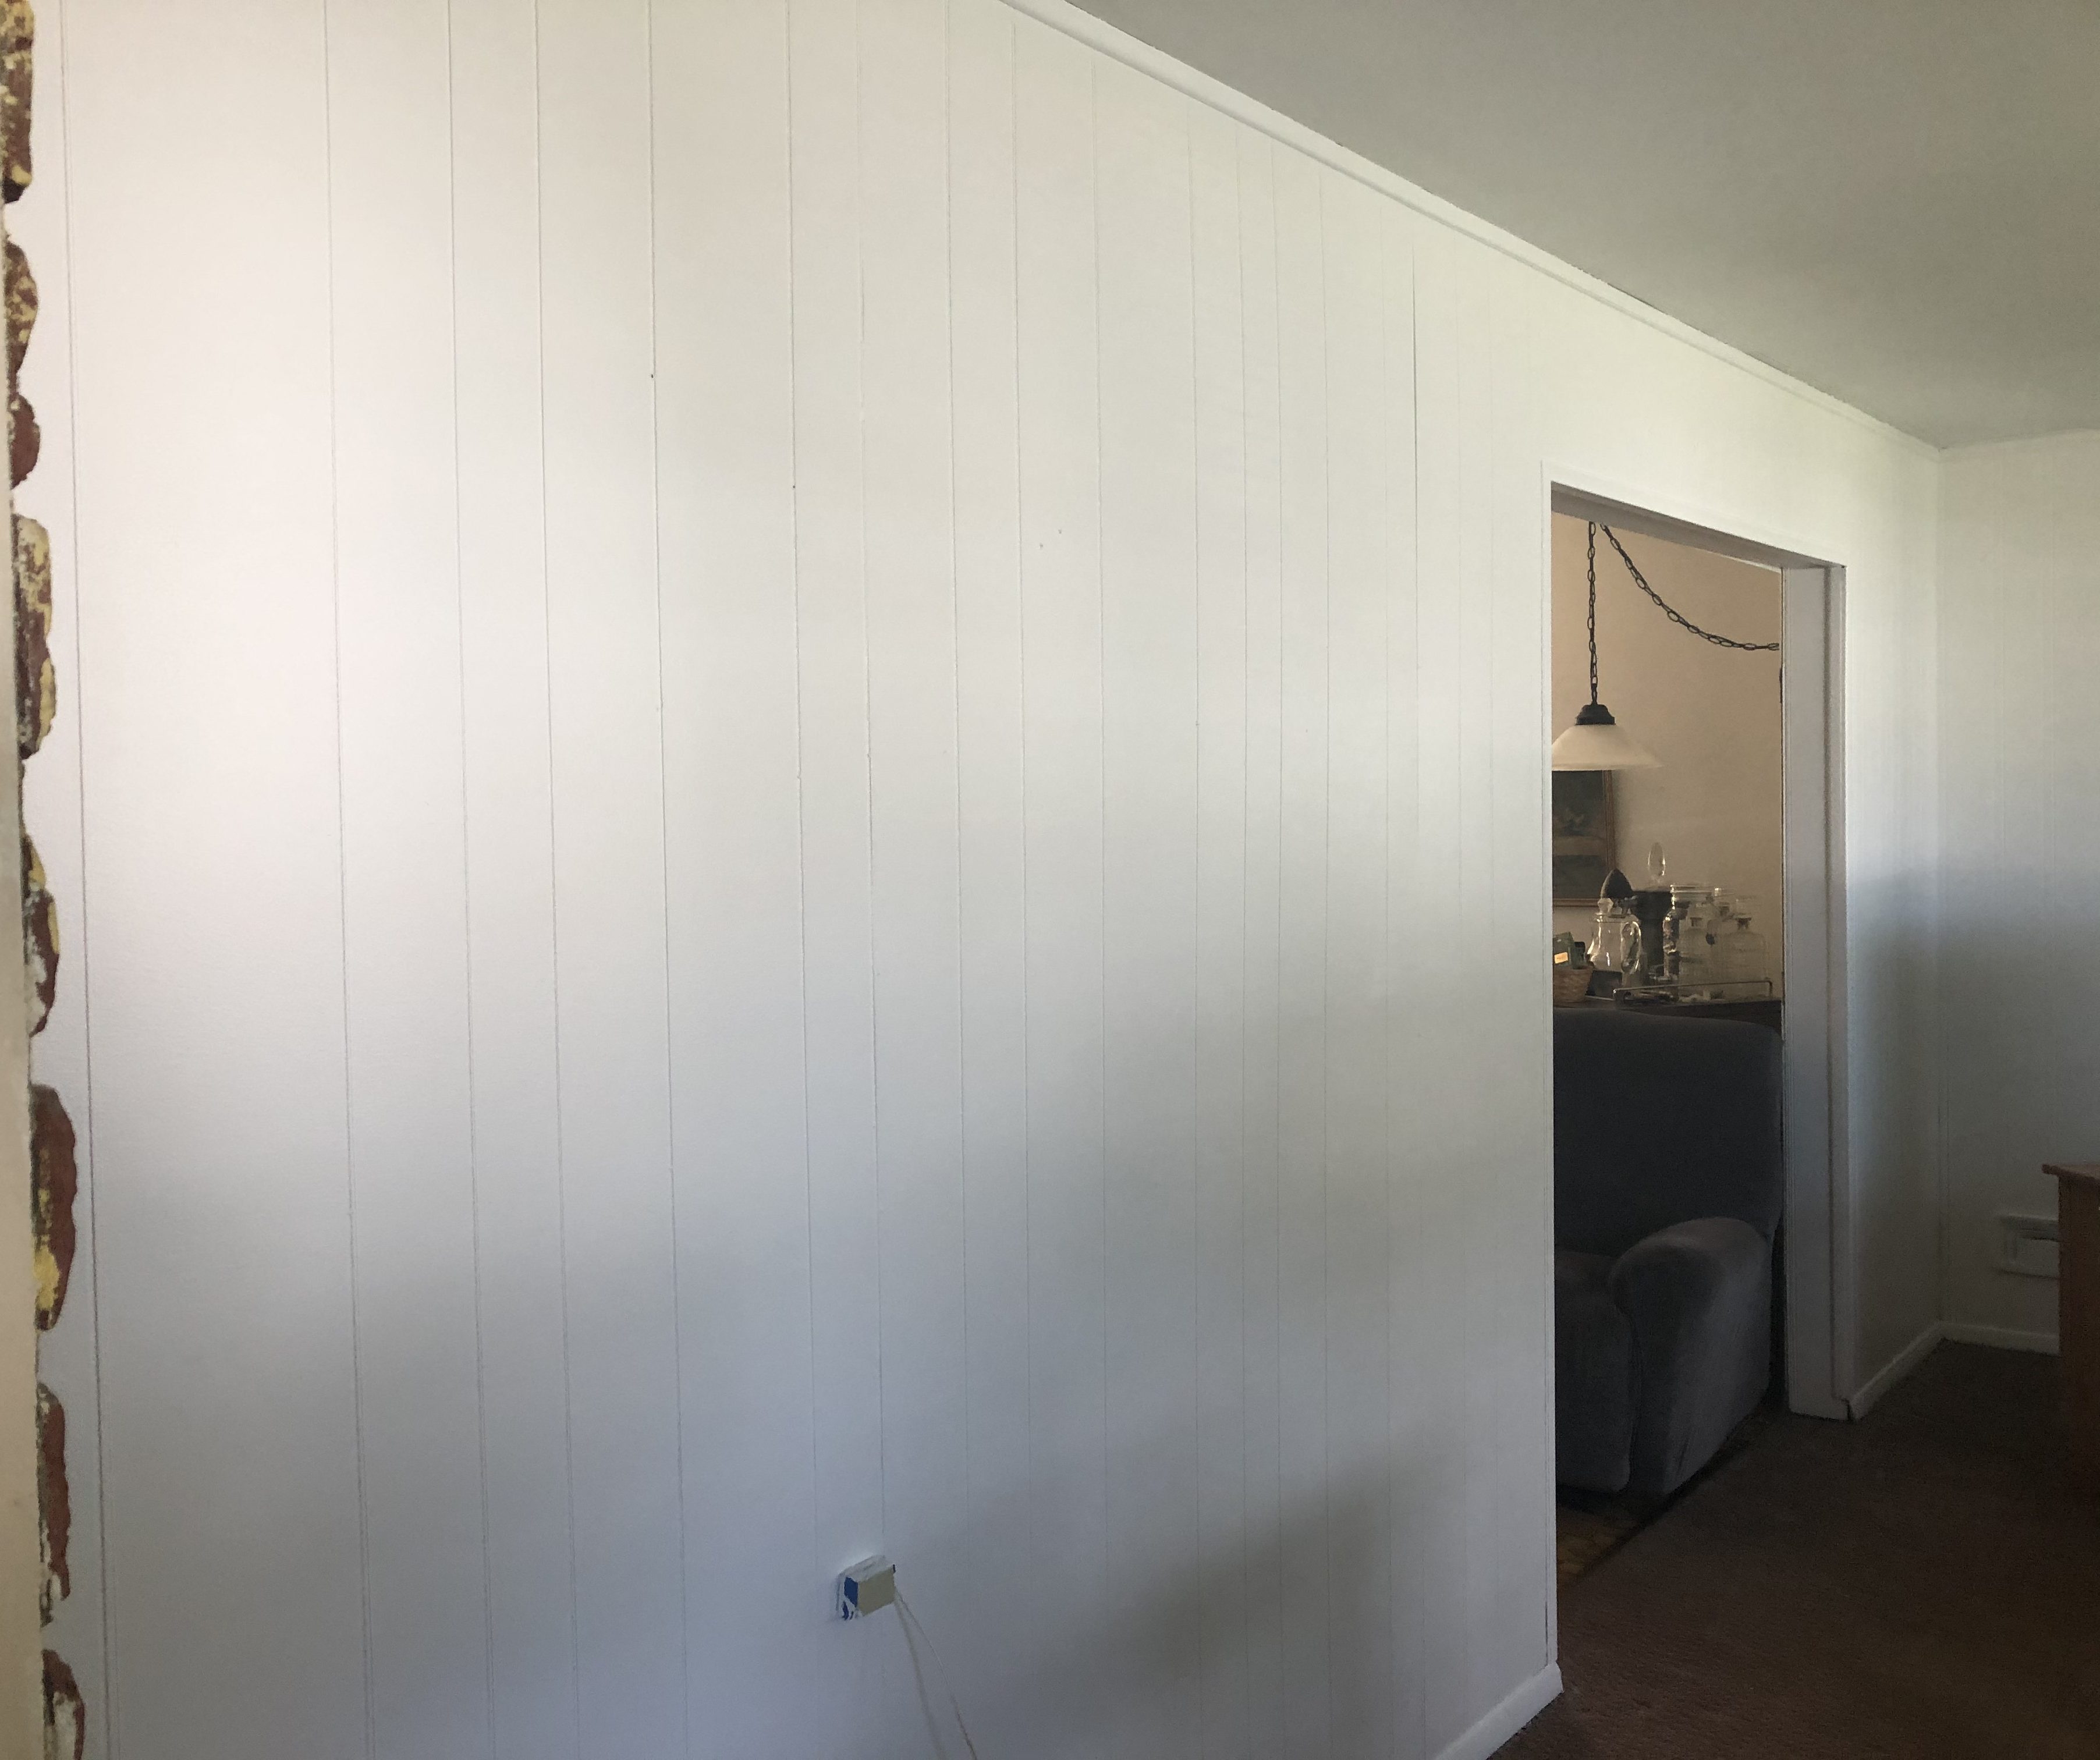
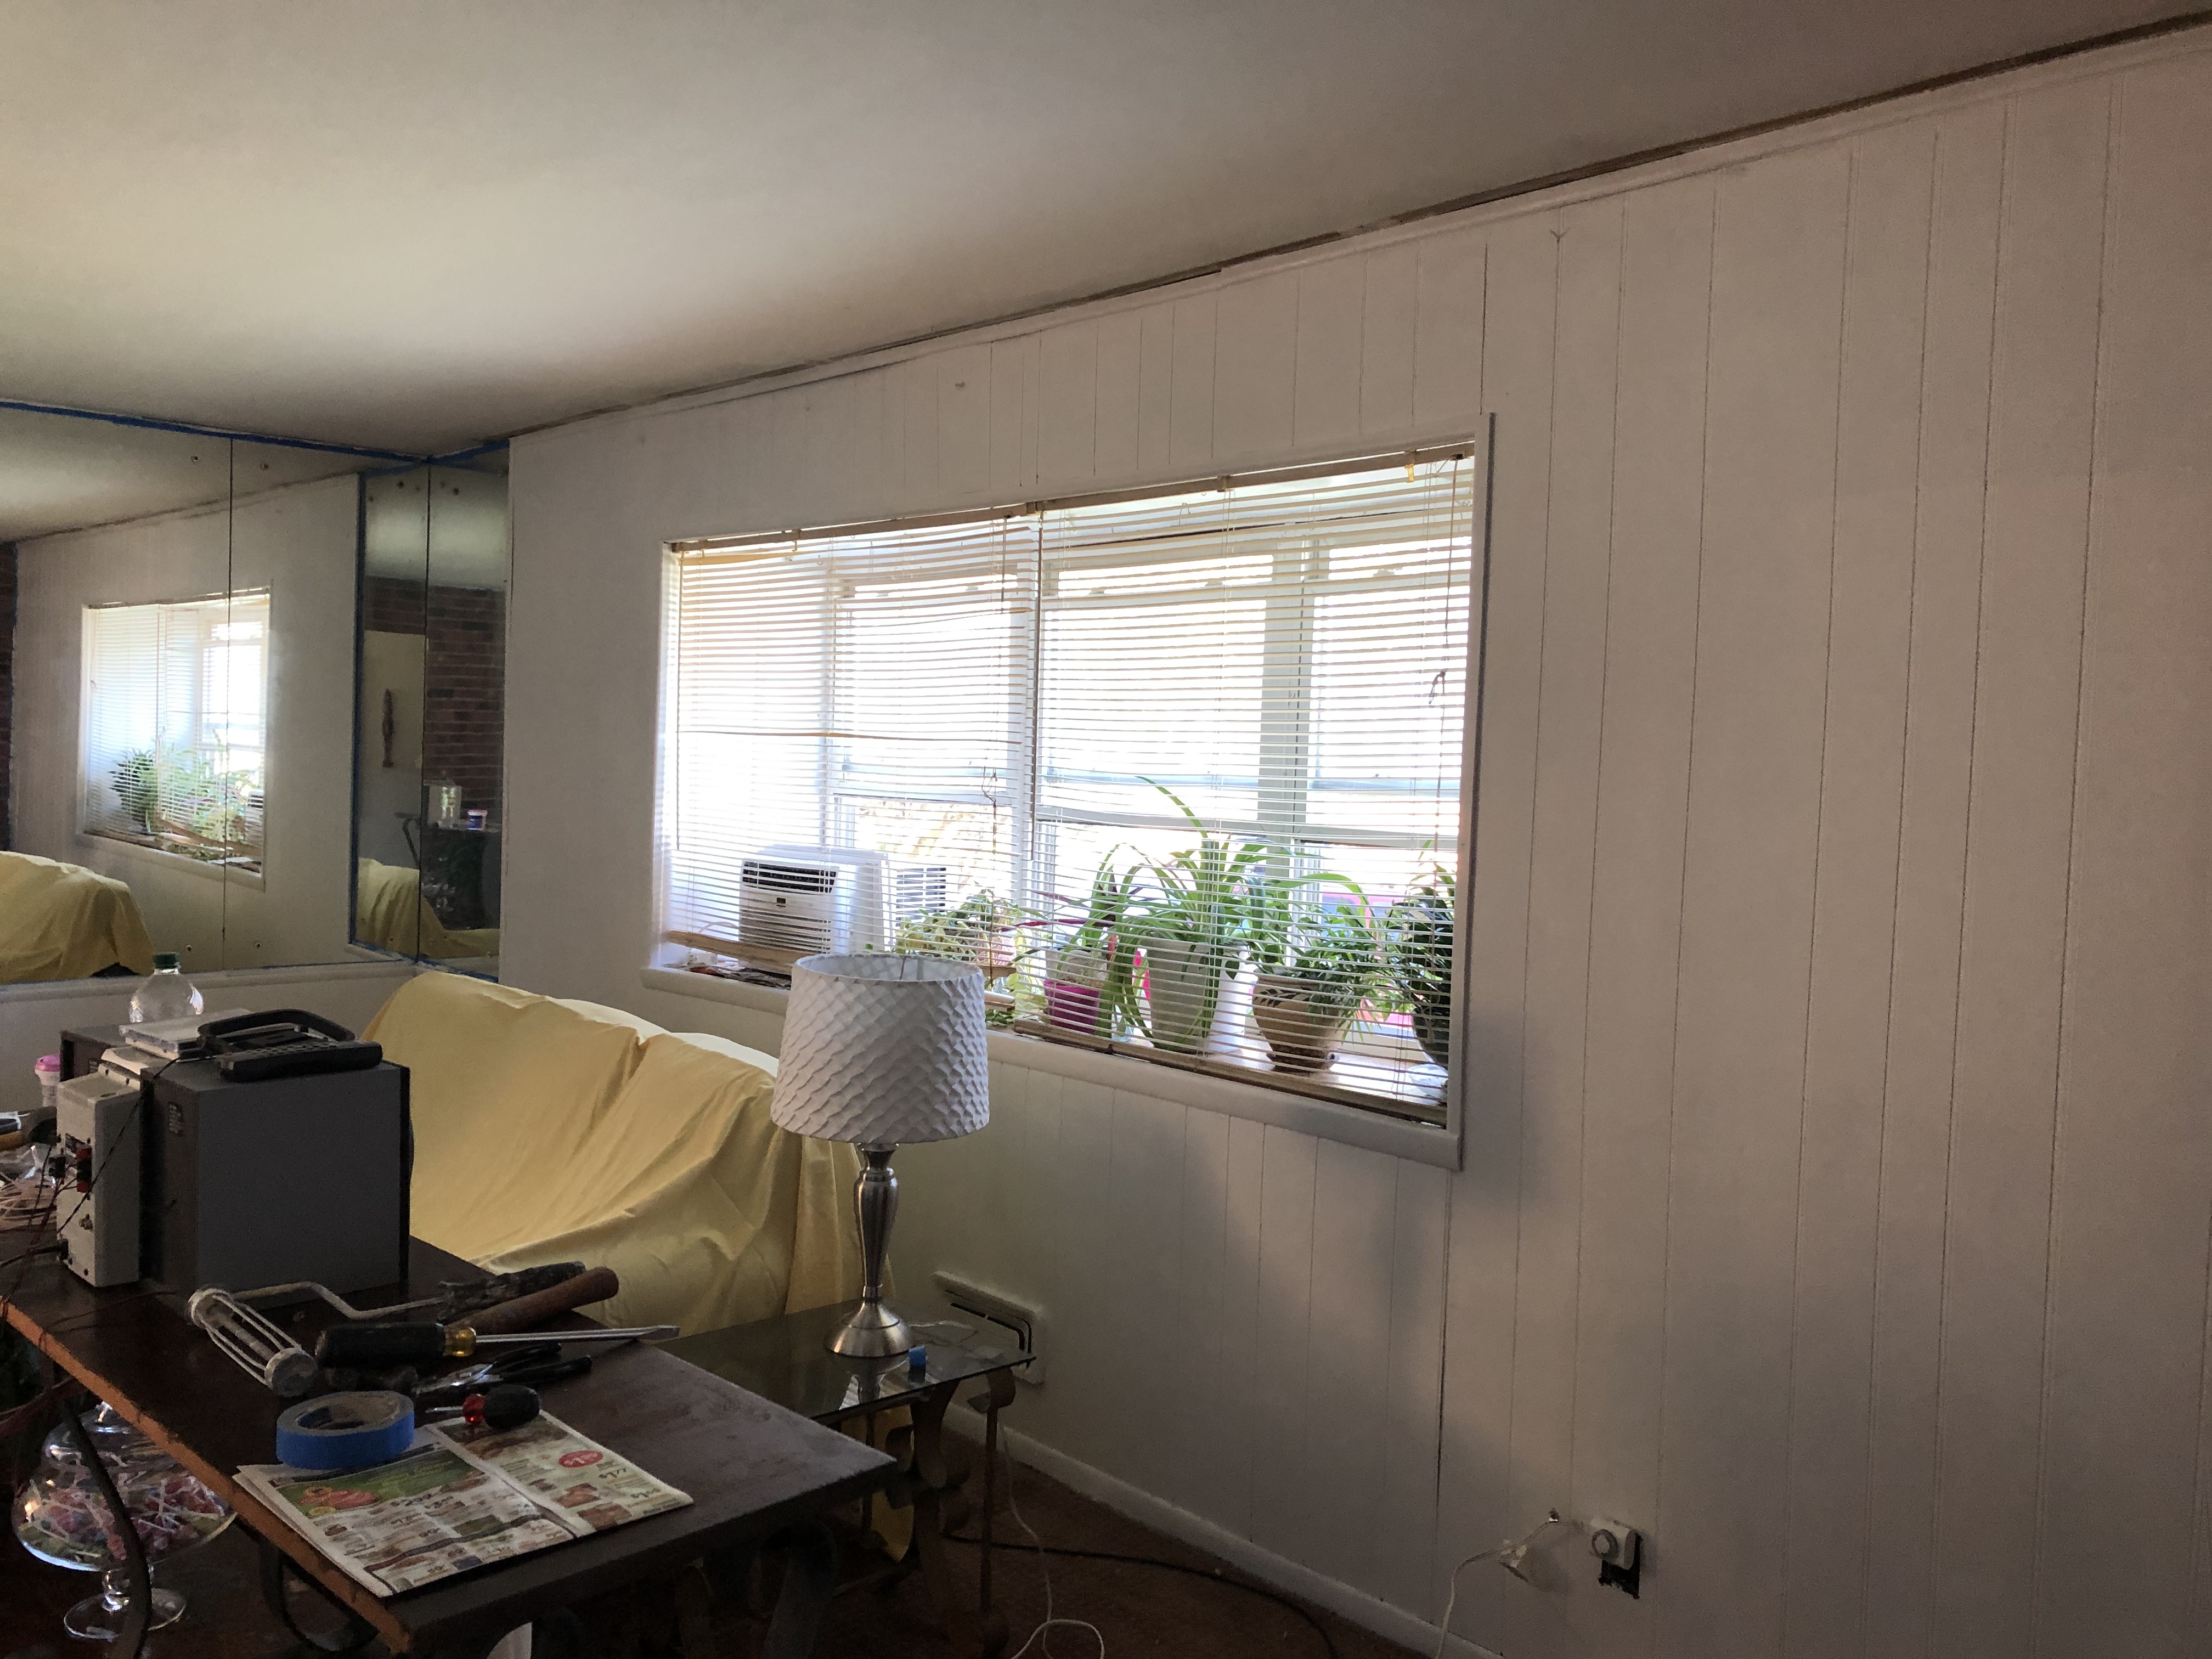
The following day I applied another coat of the color and since the paint was a paint and primer in one I basically applied 4 coats of primer and two coats of paint to the wall so I am happy to say that the brown paneling was a distant memory by the time I was done painting.
Once the walls were done it was time to refinish some of the furniture. Initially I was only planning on painting the base of the coffee and side table but then decided to spruce up the shelving unit as well. The three pieces were made by my Dad, who passed away about five years ago, so it was important to me to keep them.
I started with the shelves. I didn’t want to strip the wood completely so I bought a wood stain that was slightly darker than the original color and could be applied to wood that is already stained. All I needed to do was lightly sand the wood. After lightly sanding the shelves I used an oil-based black paint to repaint the metal portion of the unit and then re-stained the shelves.
Before…

After…

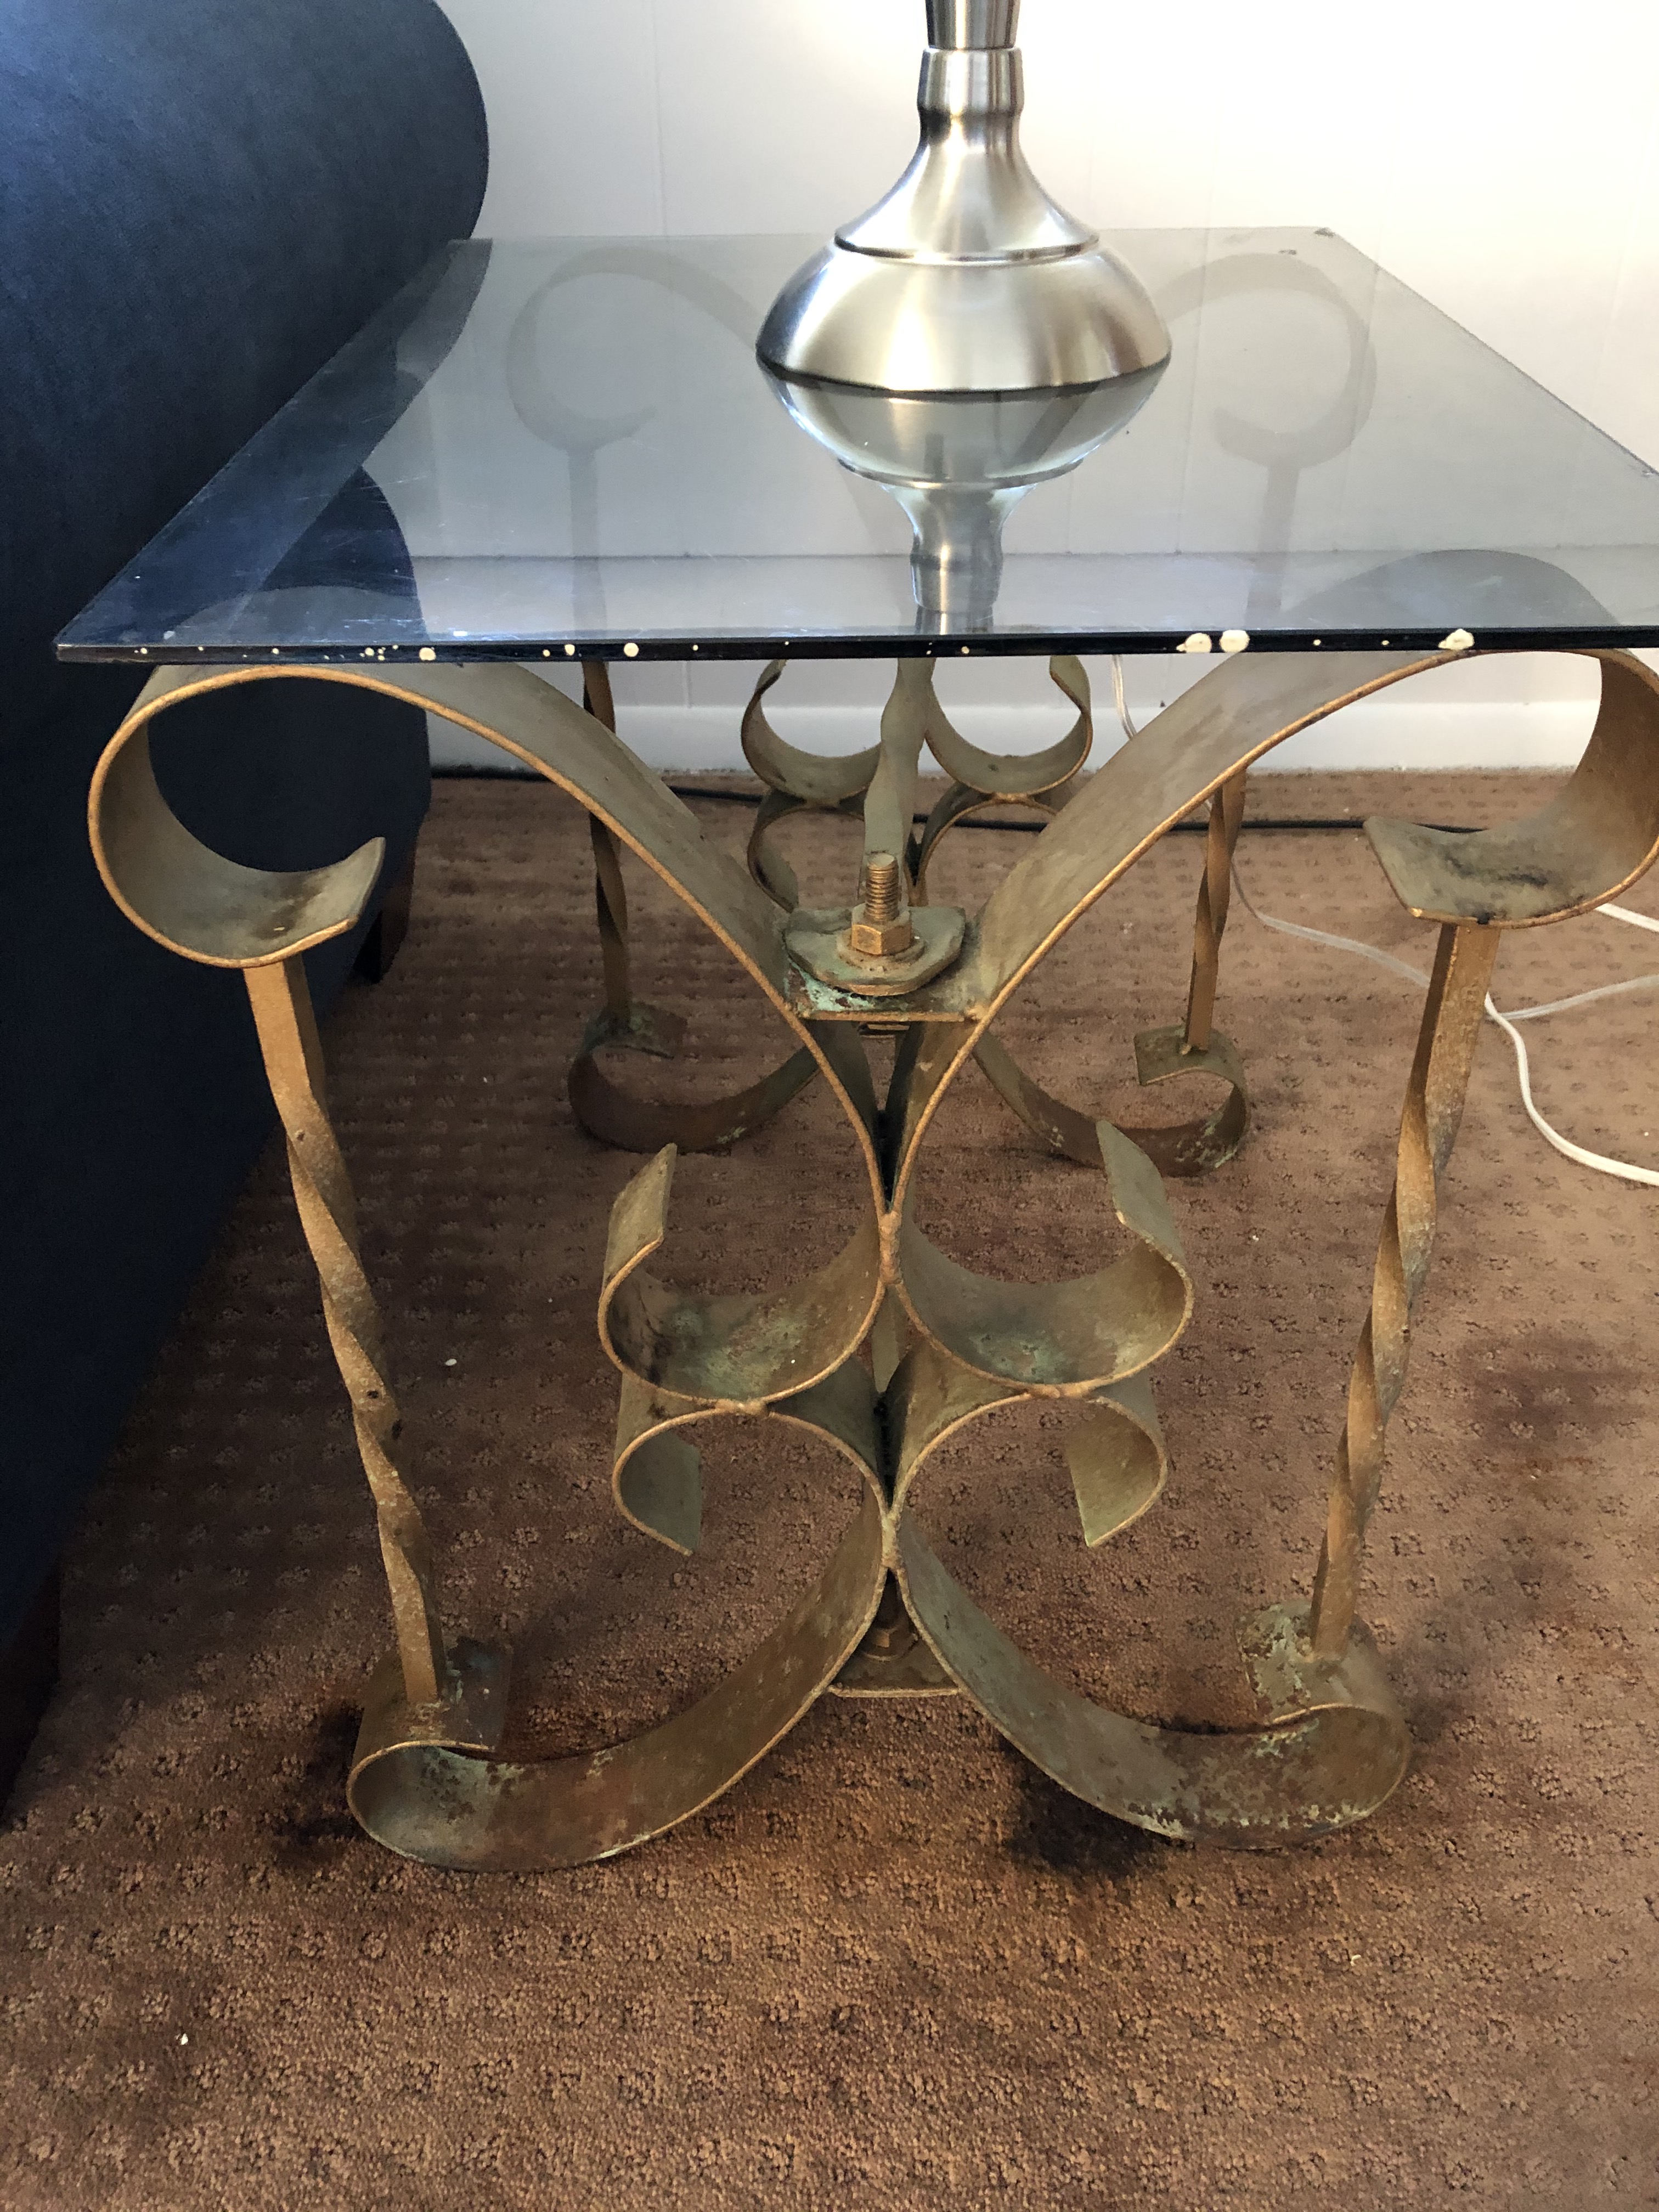
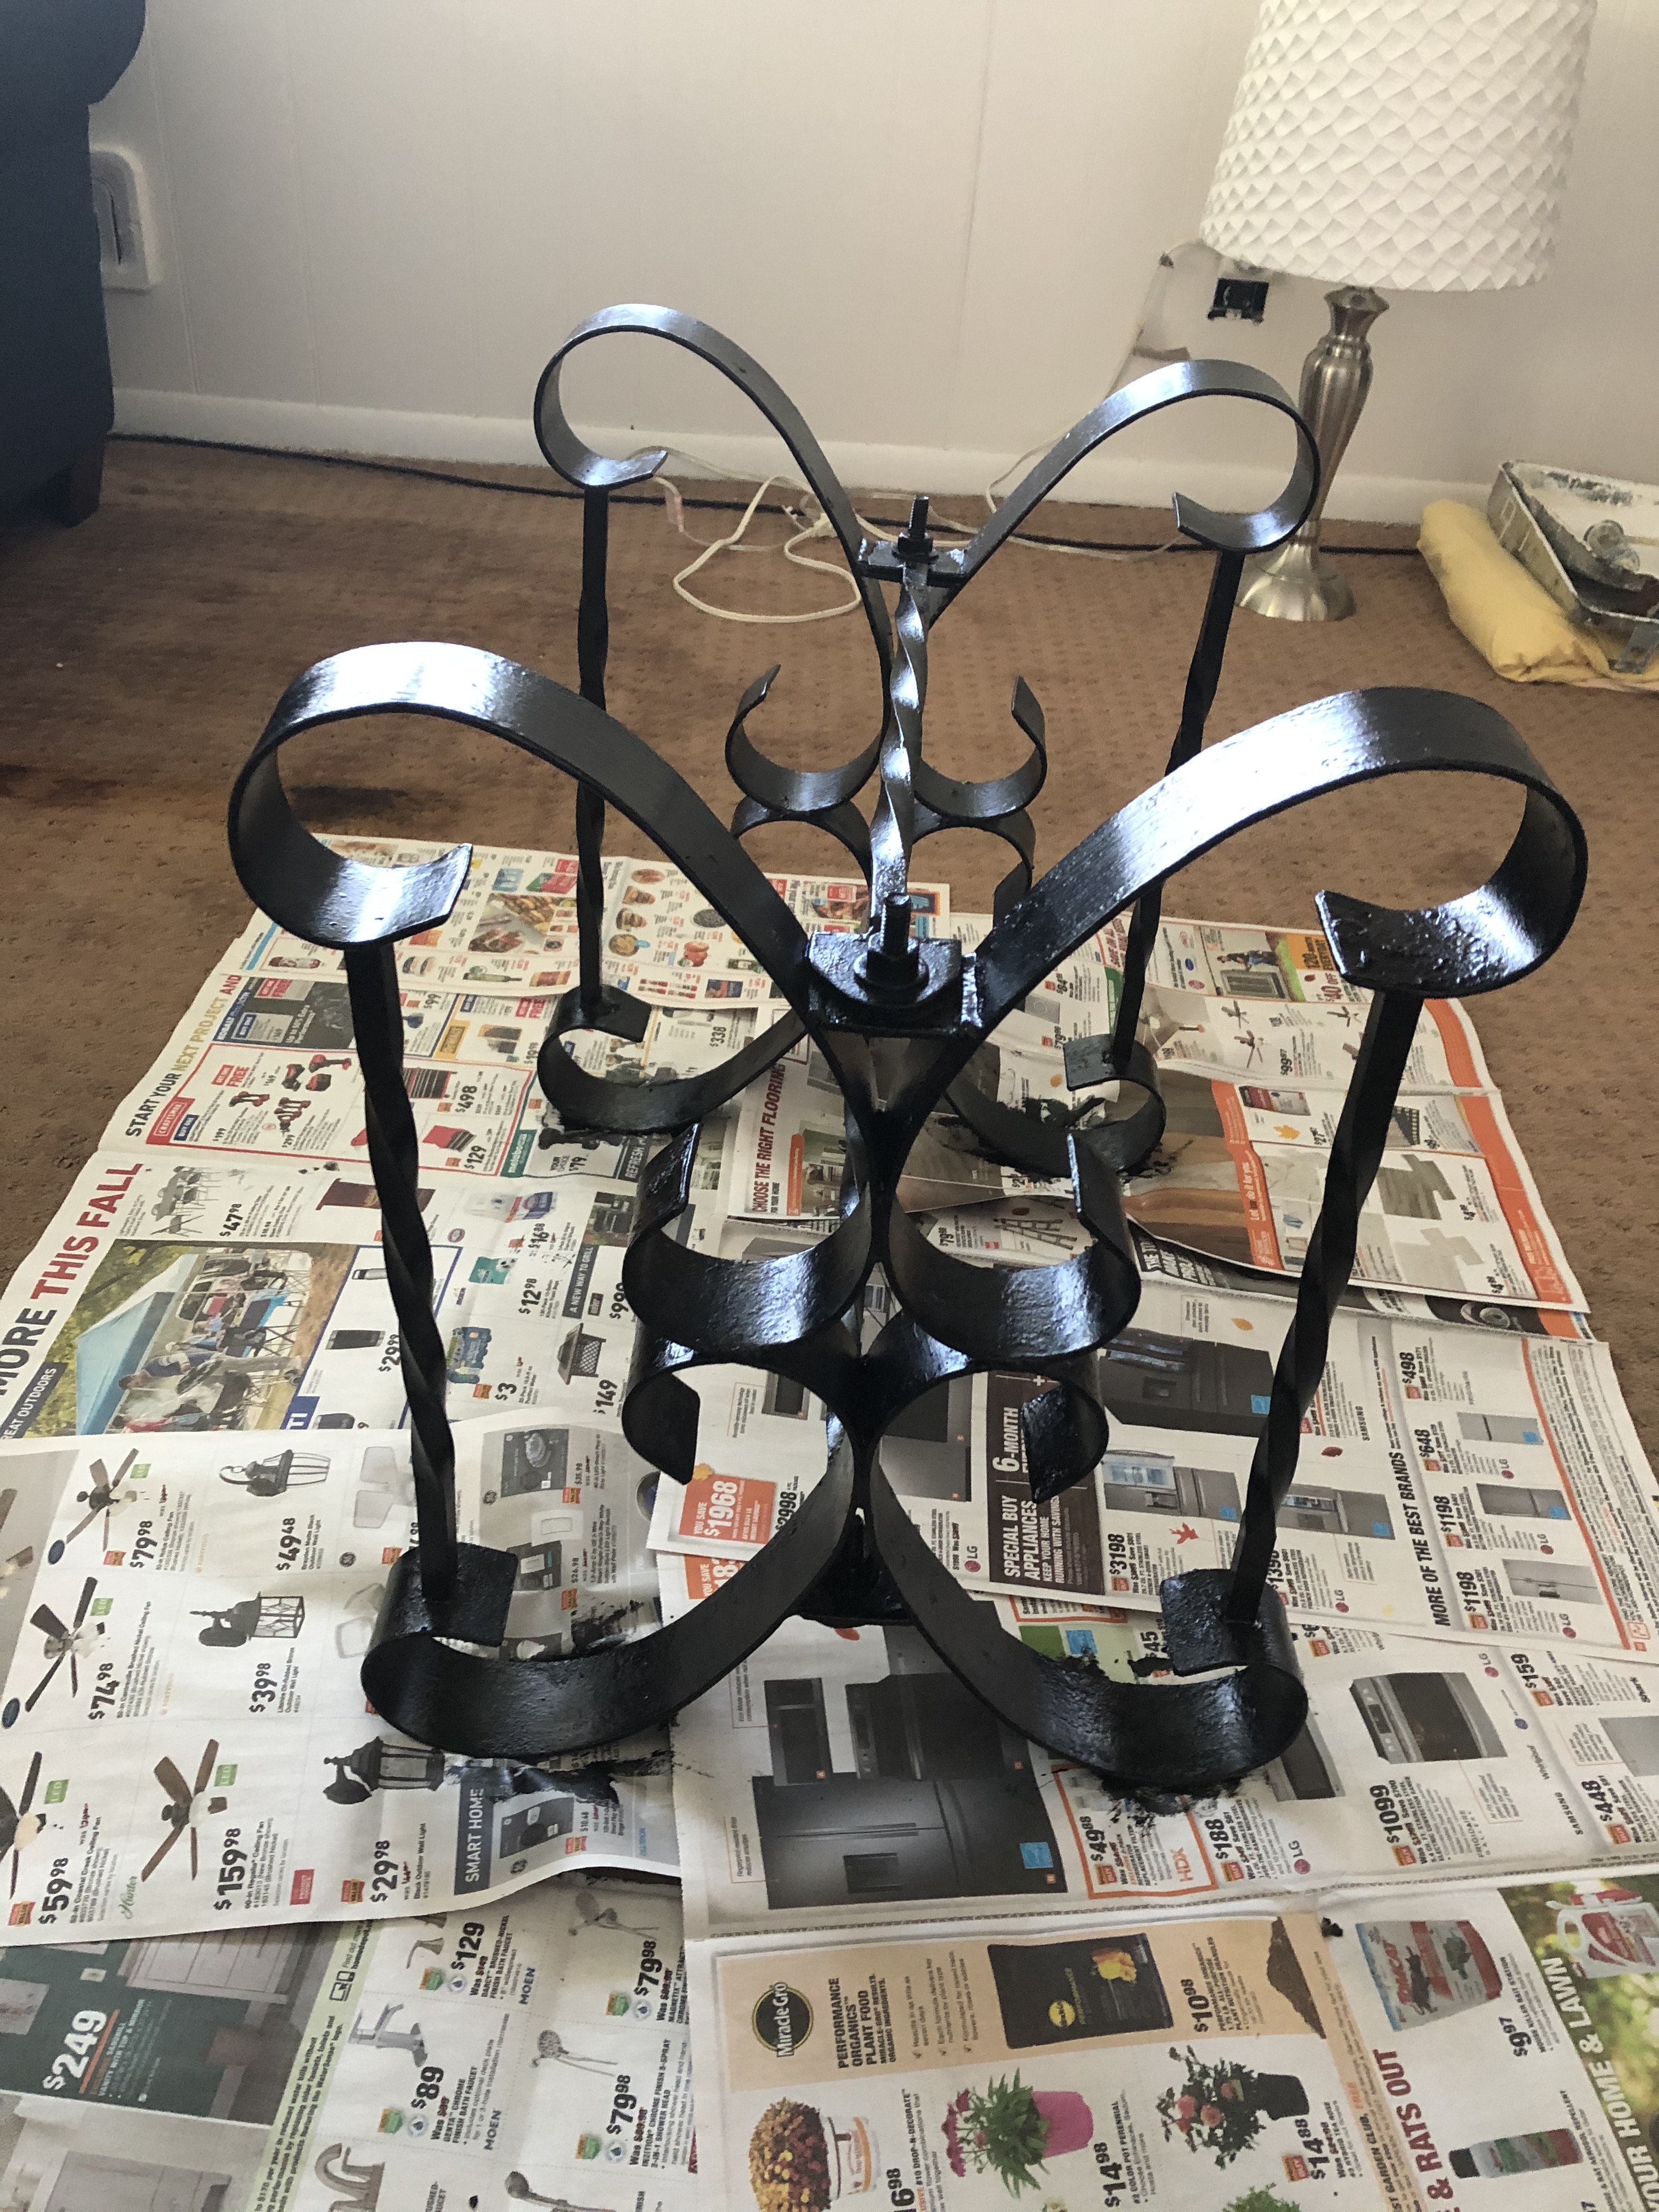
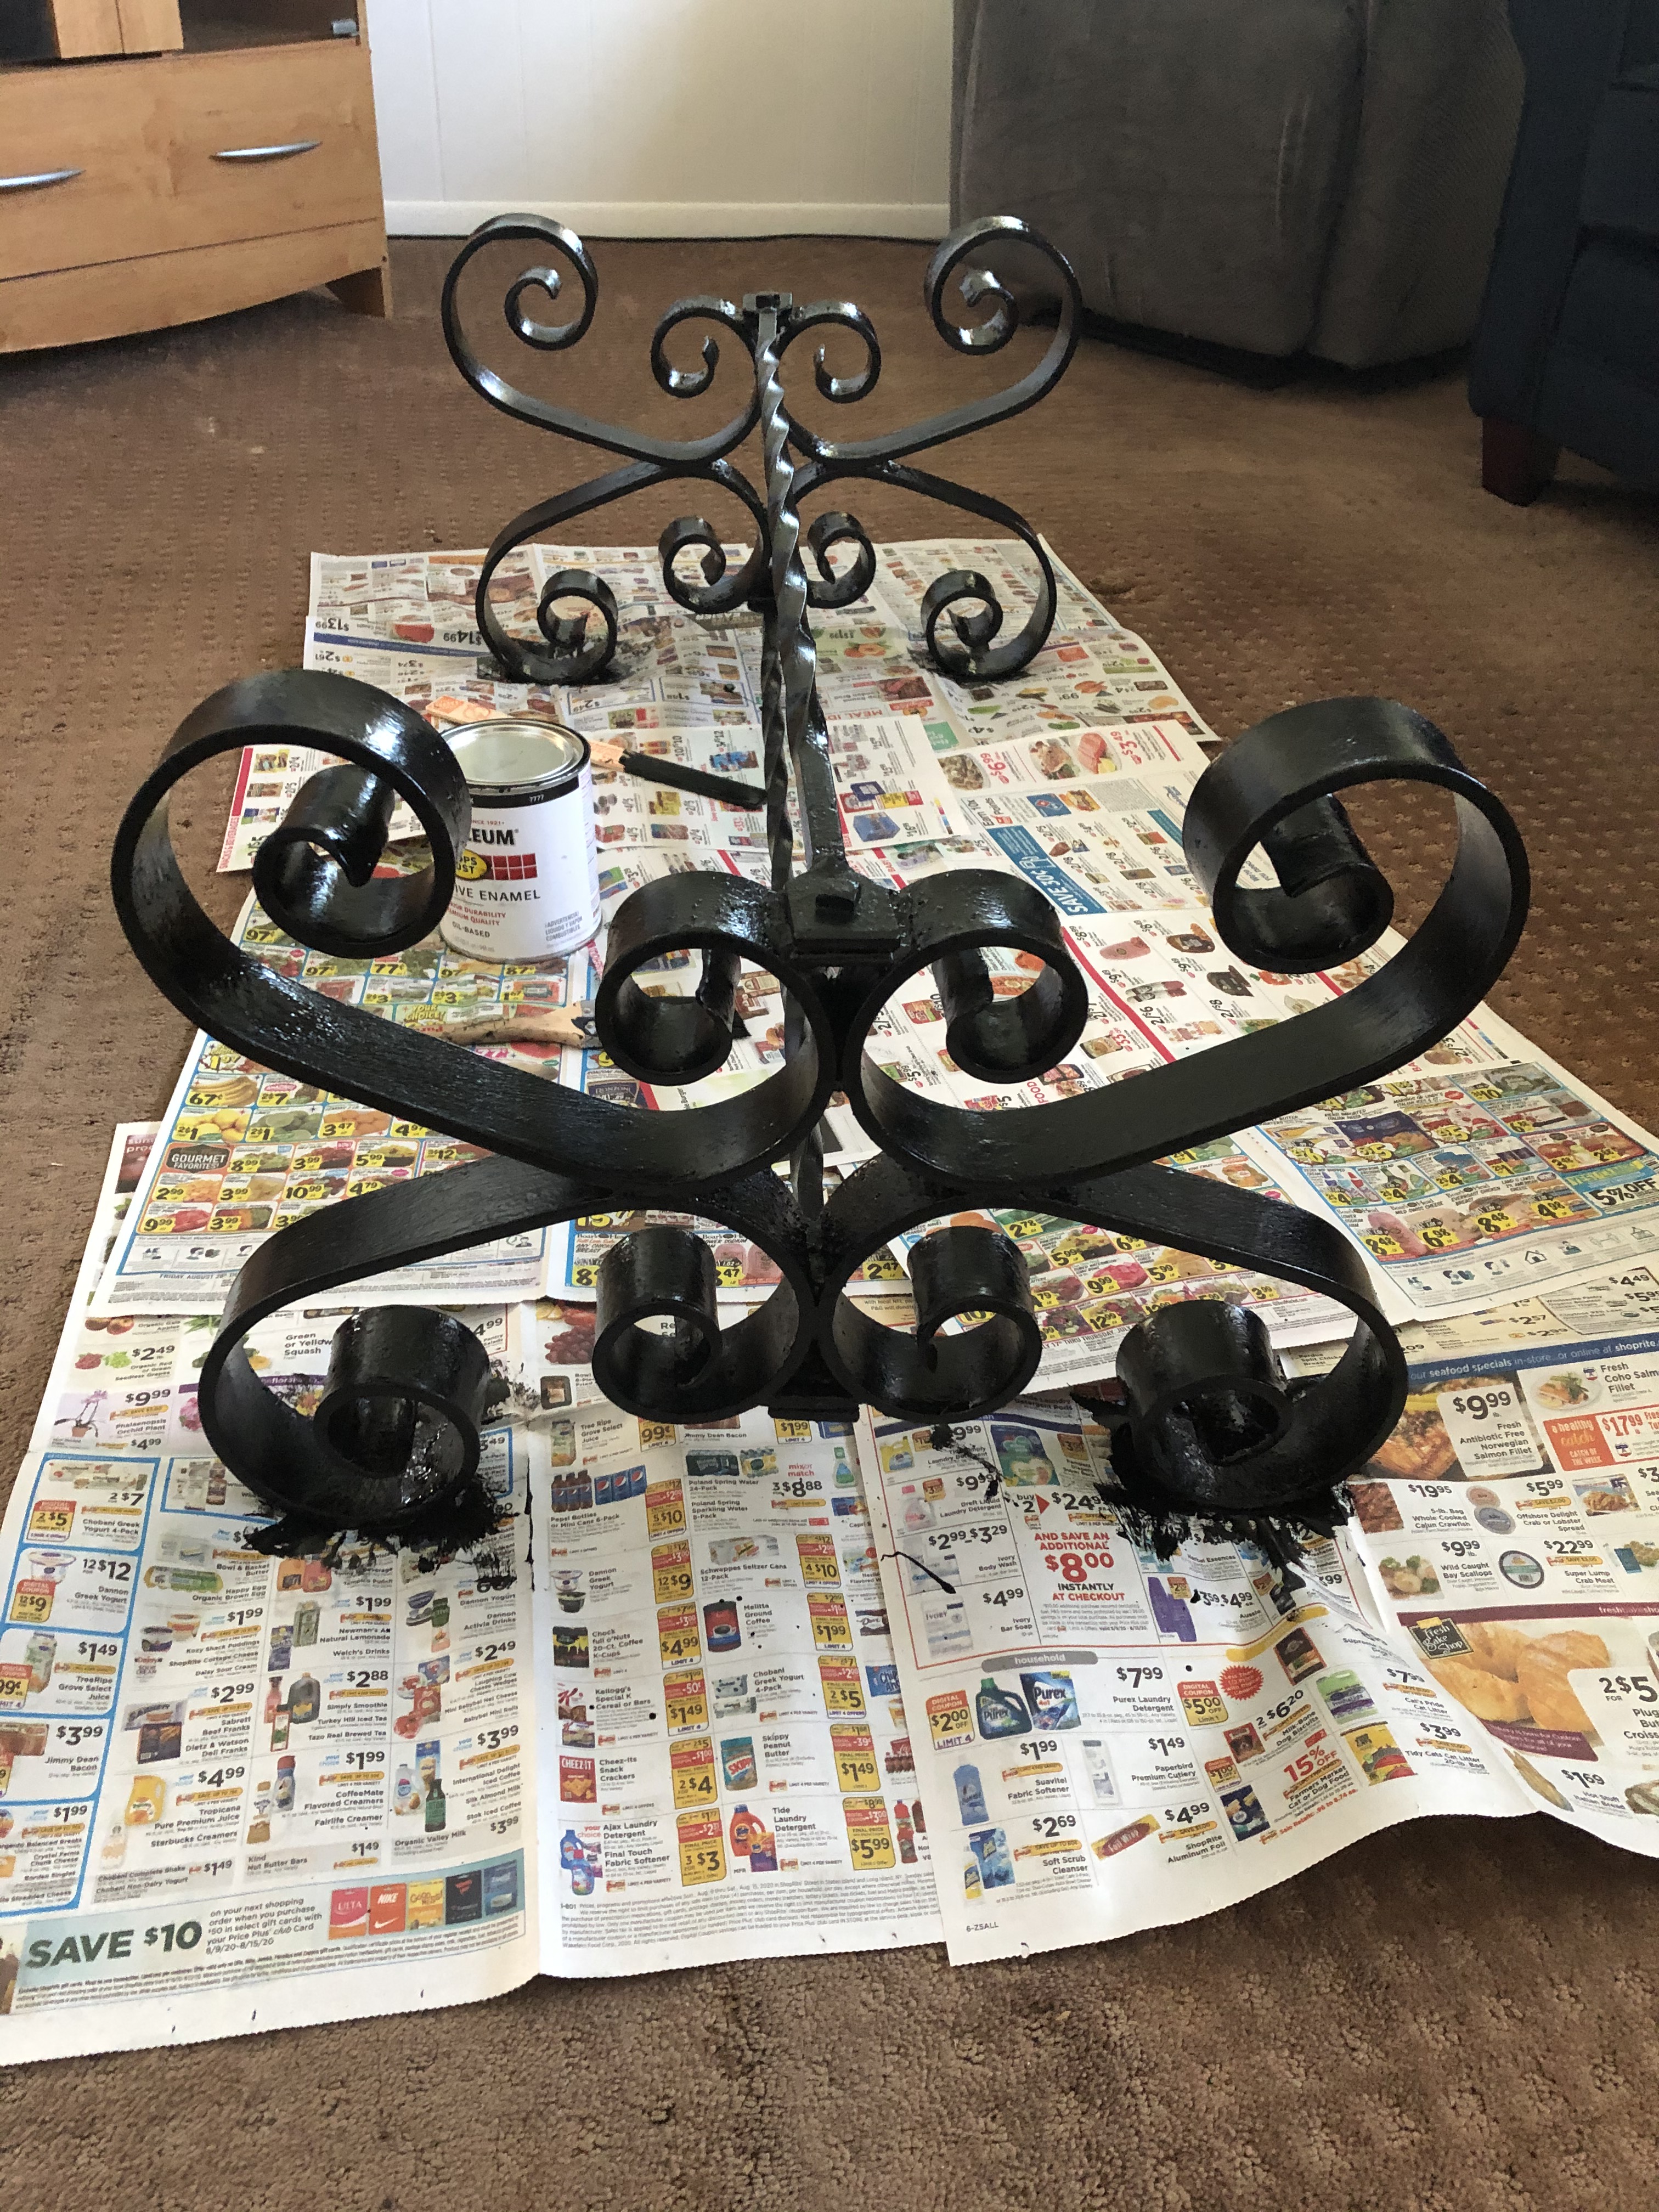
Then it was on to the side table and coffee table. Initially I was going to spray paint both of them black. I even bought the spray paint, but I had reservations about it. I was concerned that the color would be uneven or worse that it would be streaky. Since I had so much of the black paint left from painting the metal on the shelving unit, I decided to paint them instead. To prep them I lightly sanded them to get off any loose paint and rust.
Before…


After…
Once I was done with the walls and the furniture there was one thing left that was bugging me. The rug. I knew eventually I wanted to rip out the carpet and refinish the hardwood floors. But, seeing how good the walls looked and the newly painted furniture I knew I had to get rid of the rug ASAP.
I was able to get a reasonable quote for the floors, so I went for it. To save money I ripped out the carpet myself with the help of a friend’s husband. Ripping the carpet out was the easy part, the tedious part was removing all of the nails and staples. Ripping the carpet out led to another expense… the need for new baseboards. The original baseboards weren’t flush to the floor but instead were about an inch from the floor and the carpet filled that inch.
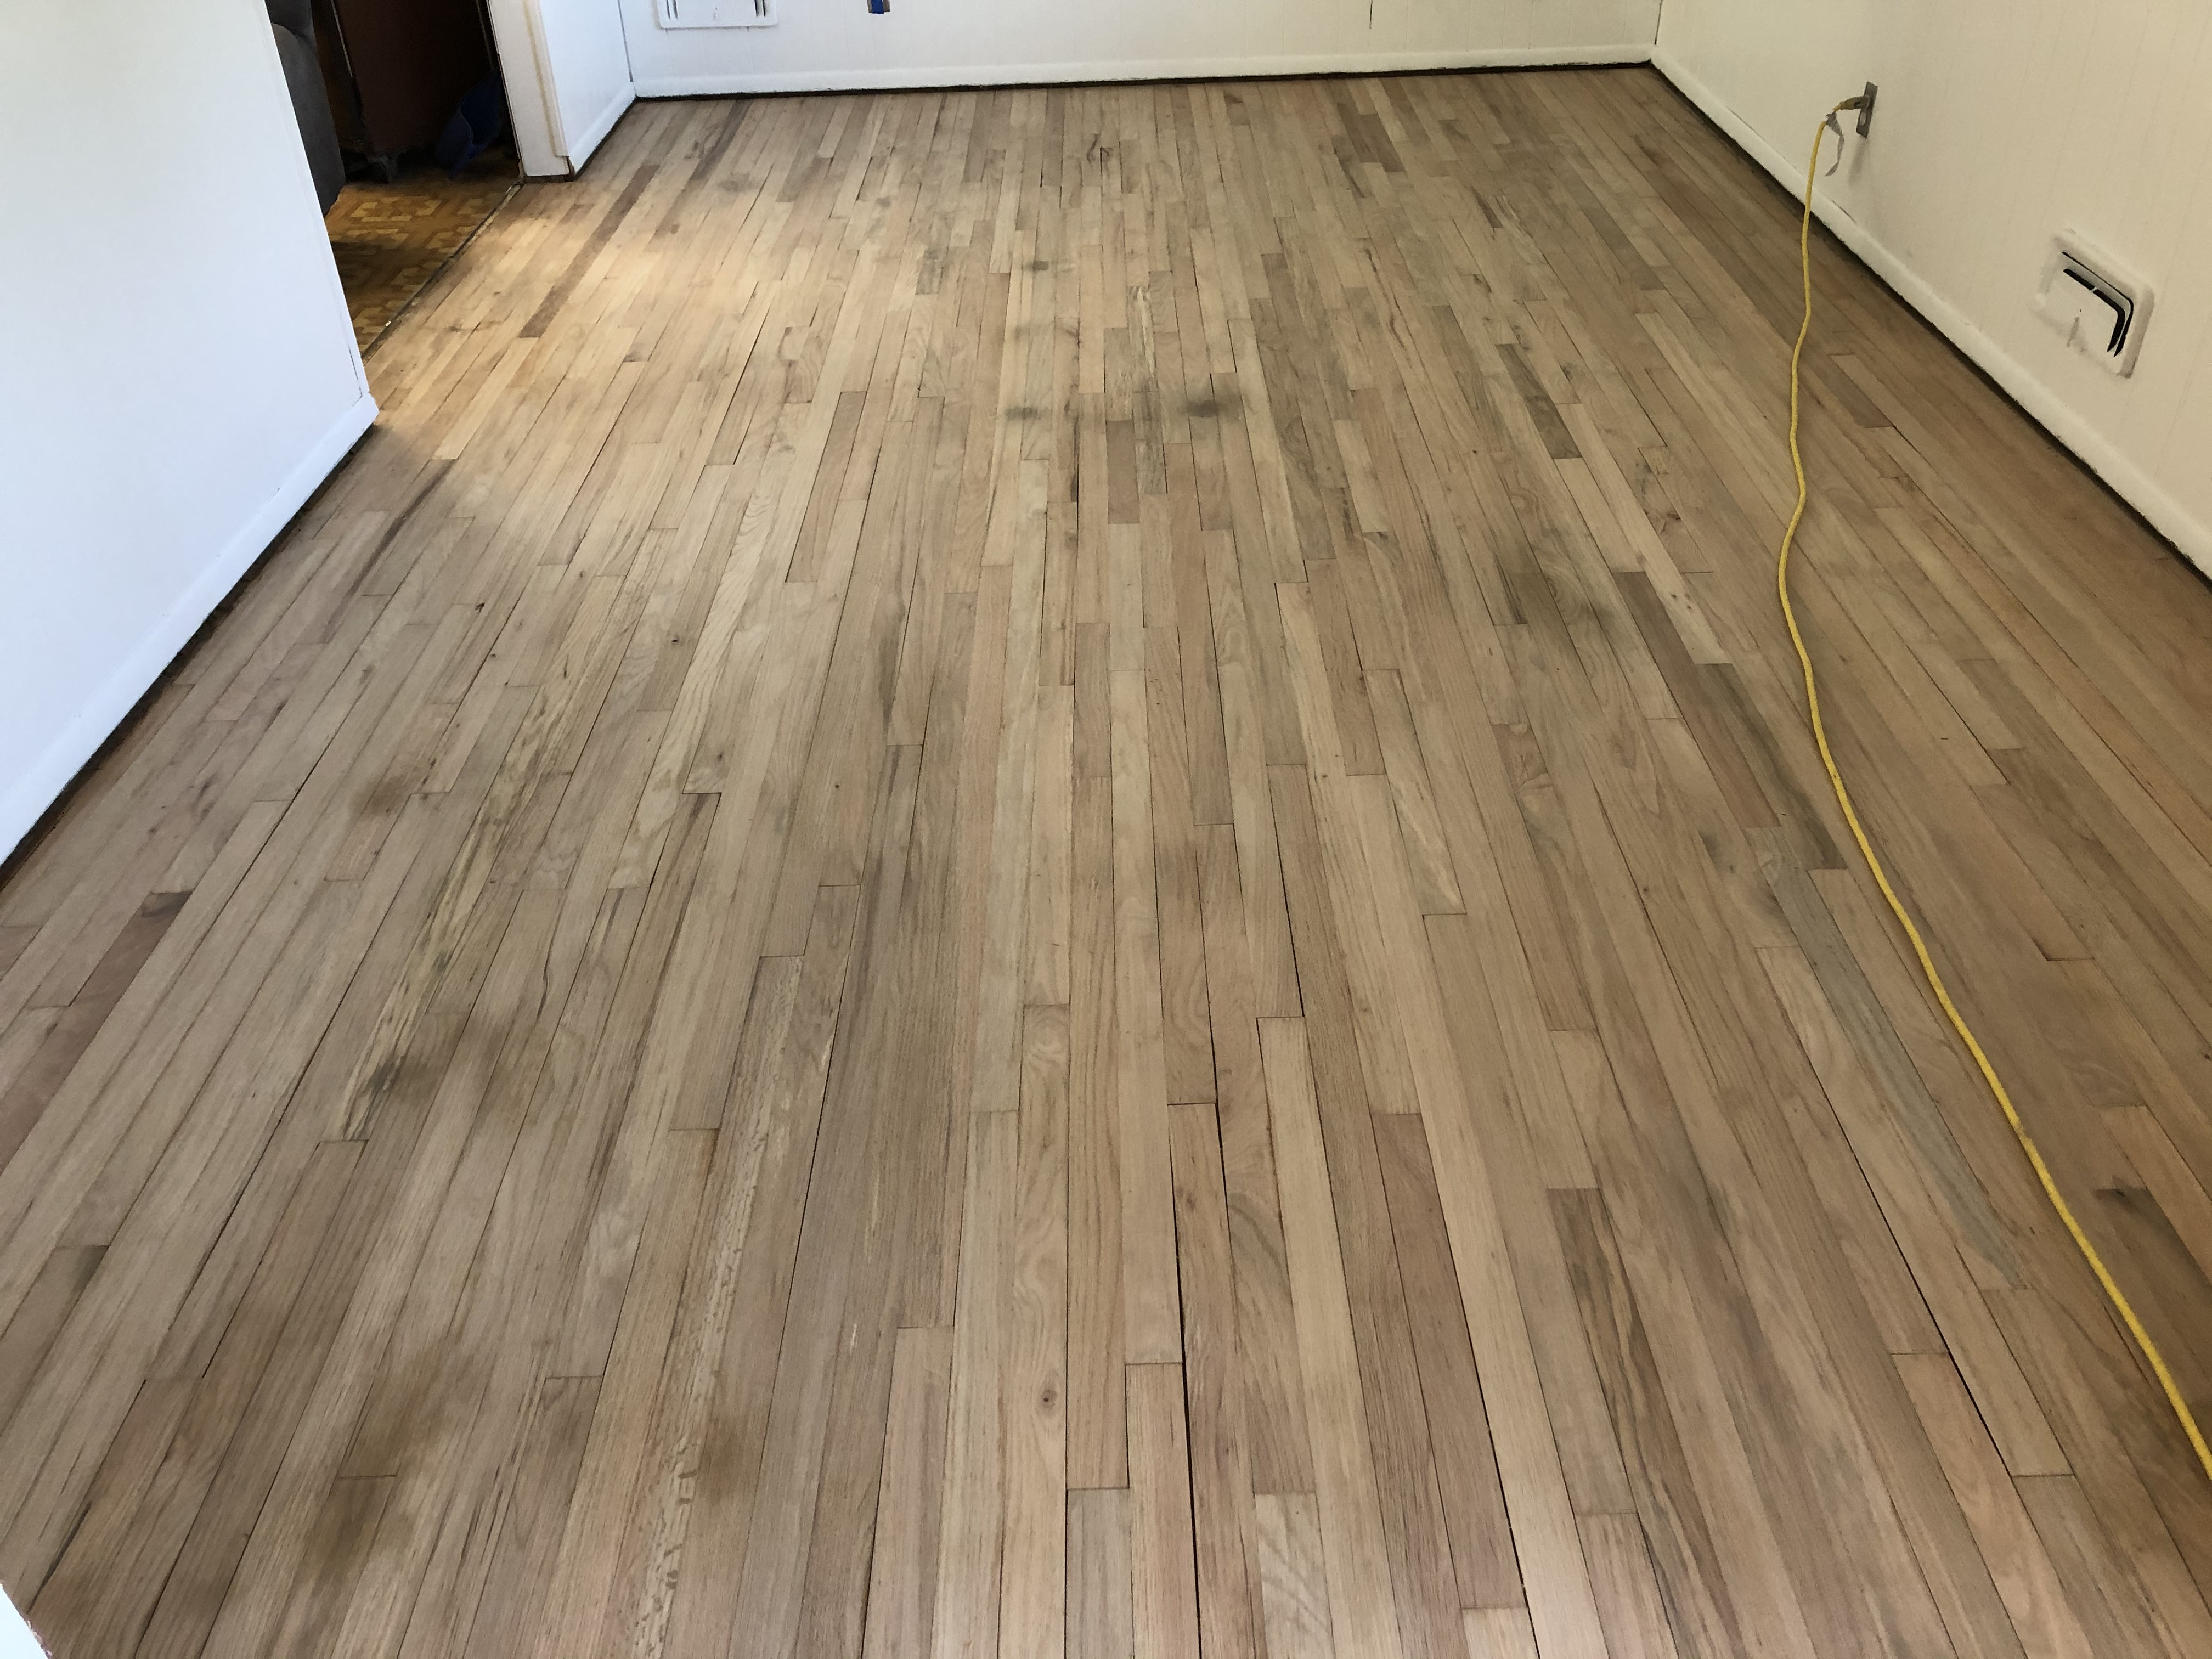
The floors before (they were in pretty bad shape) …


Right after the sanding…

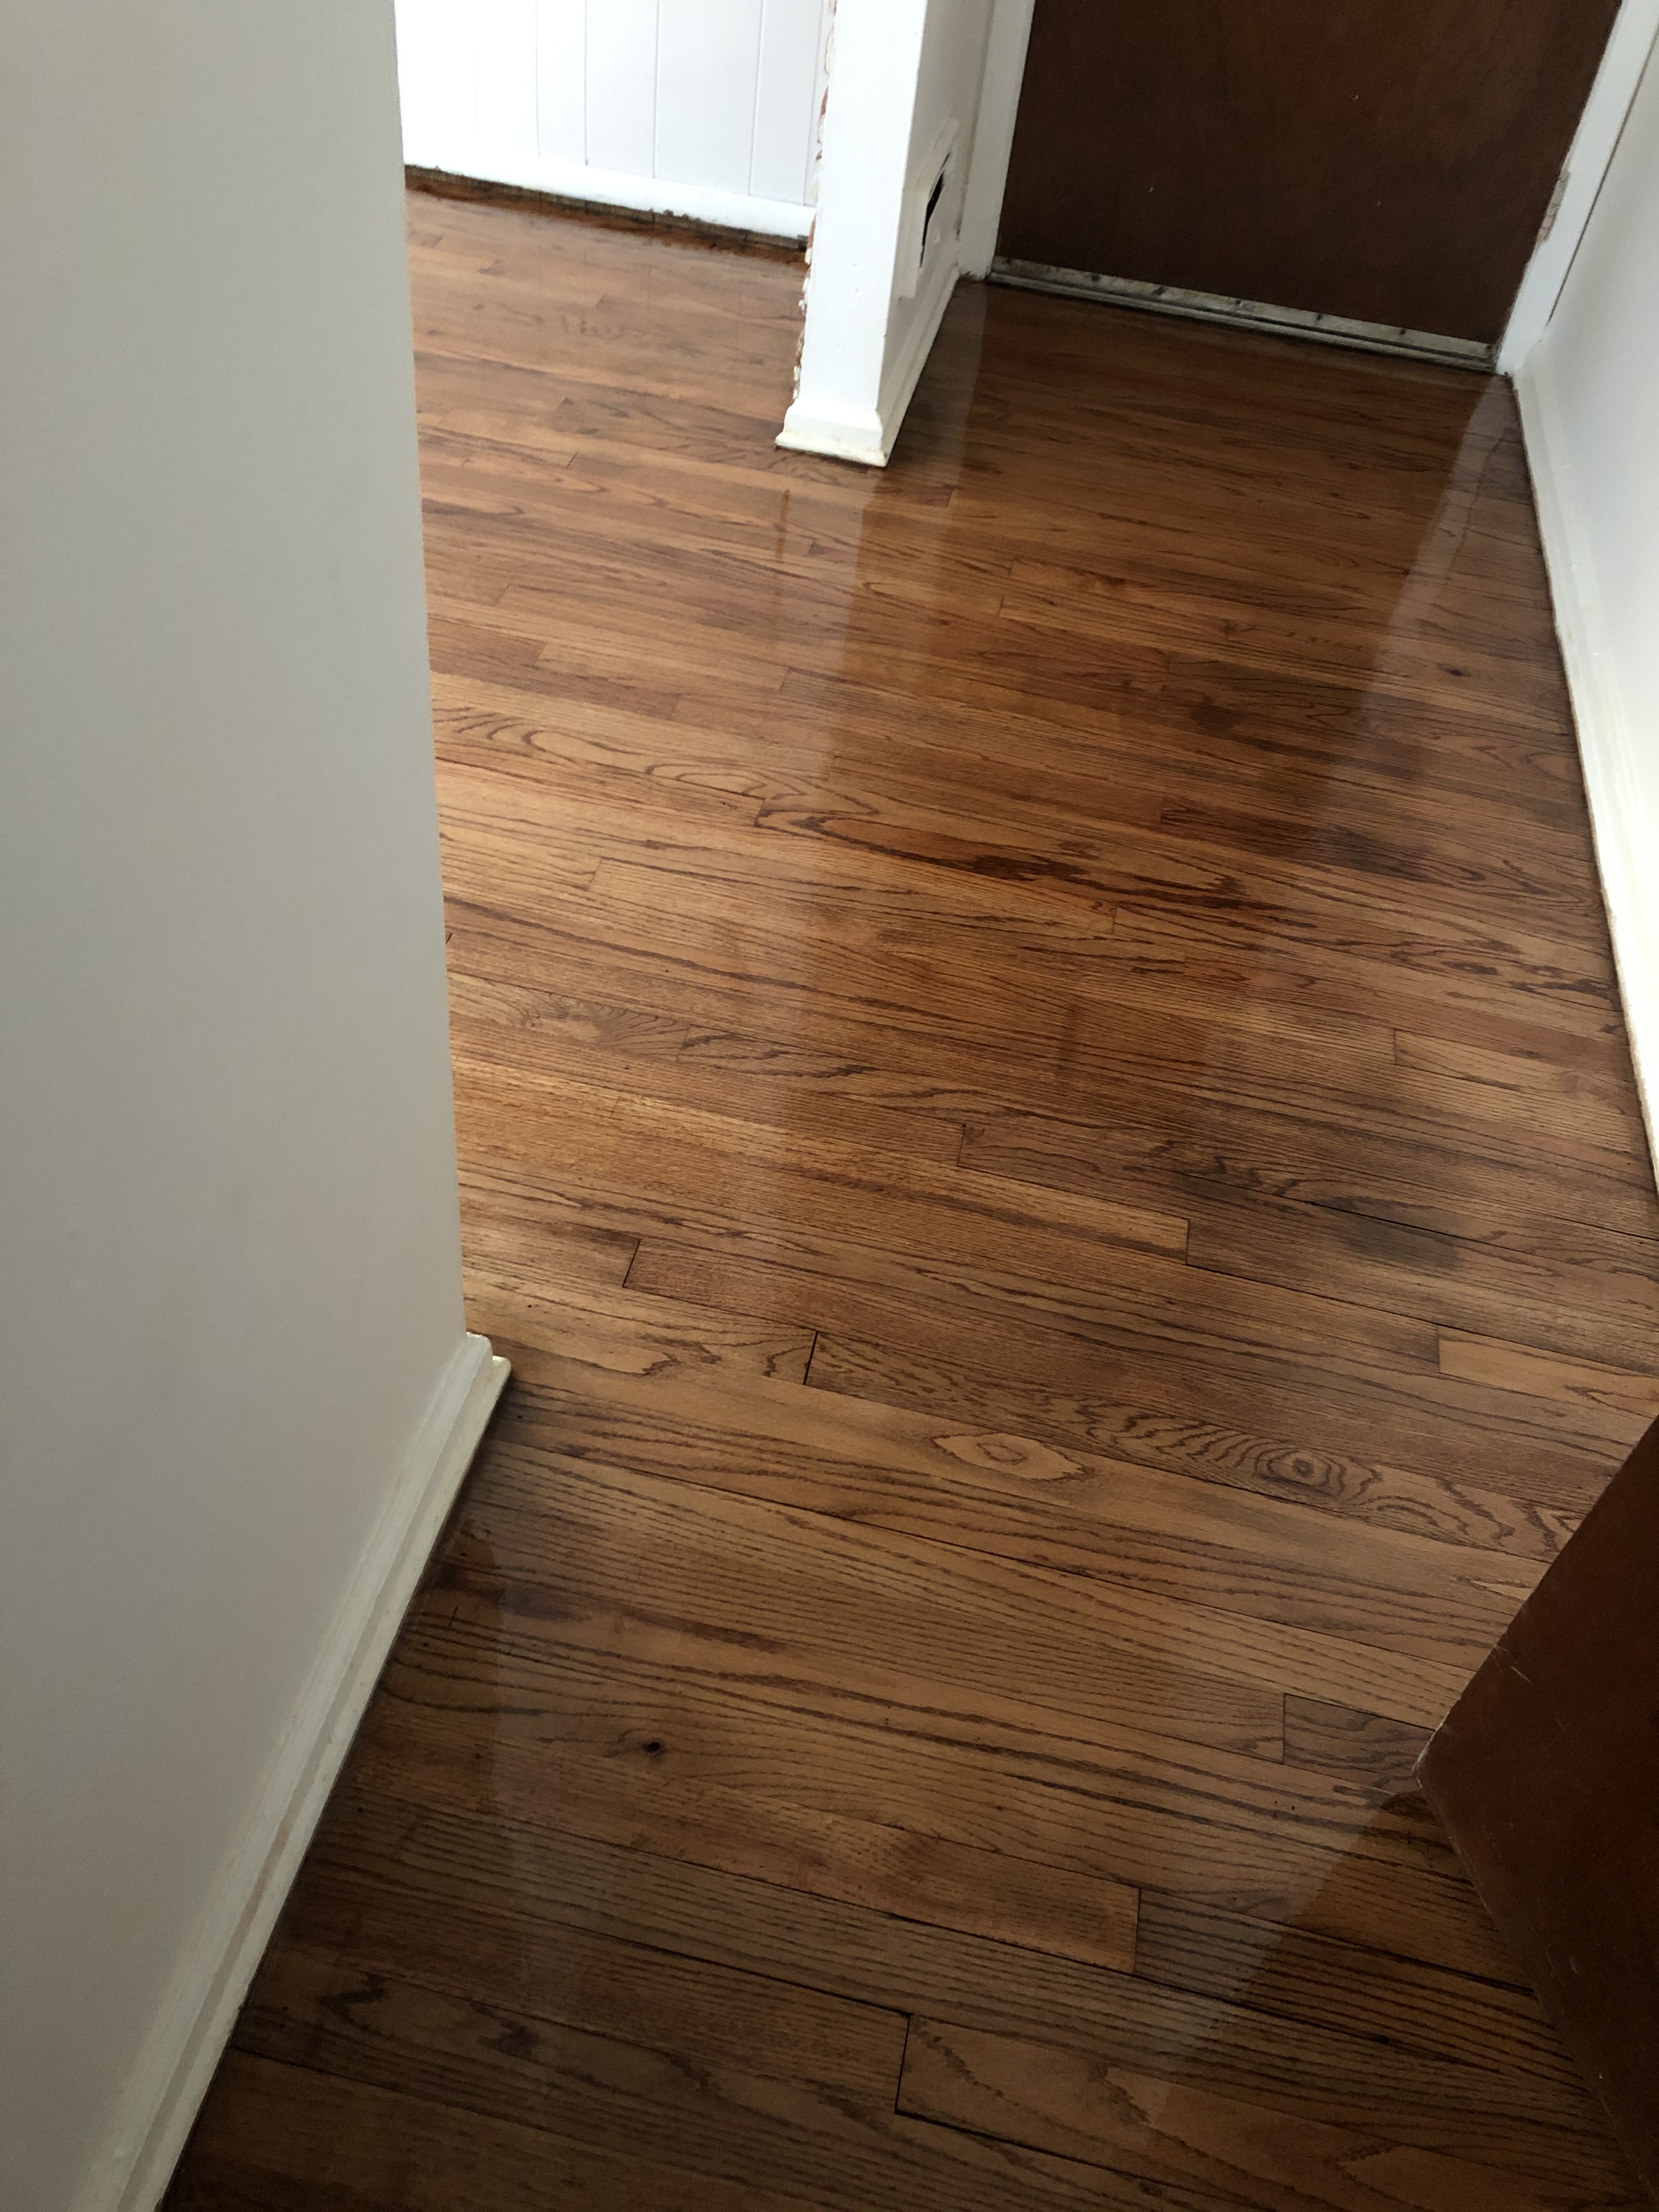
In the process of being stained…

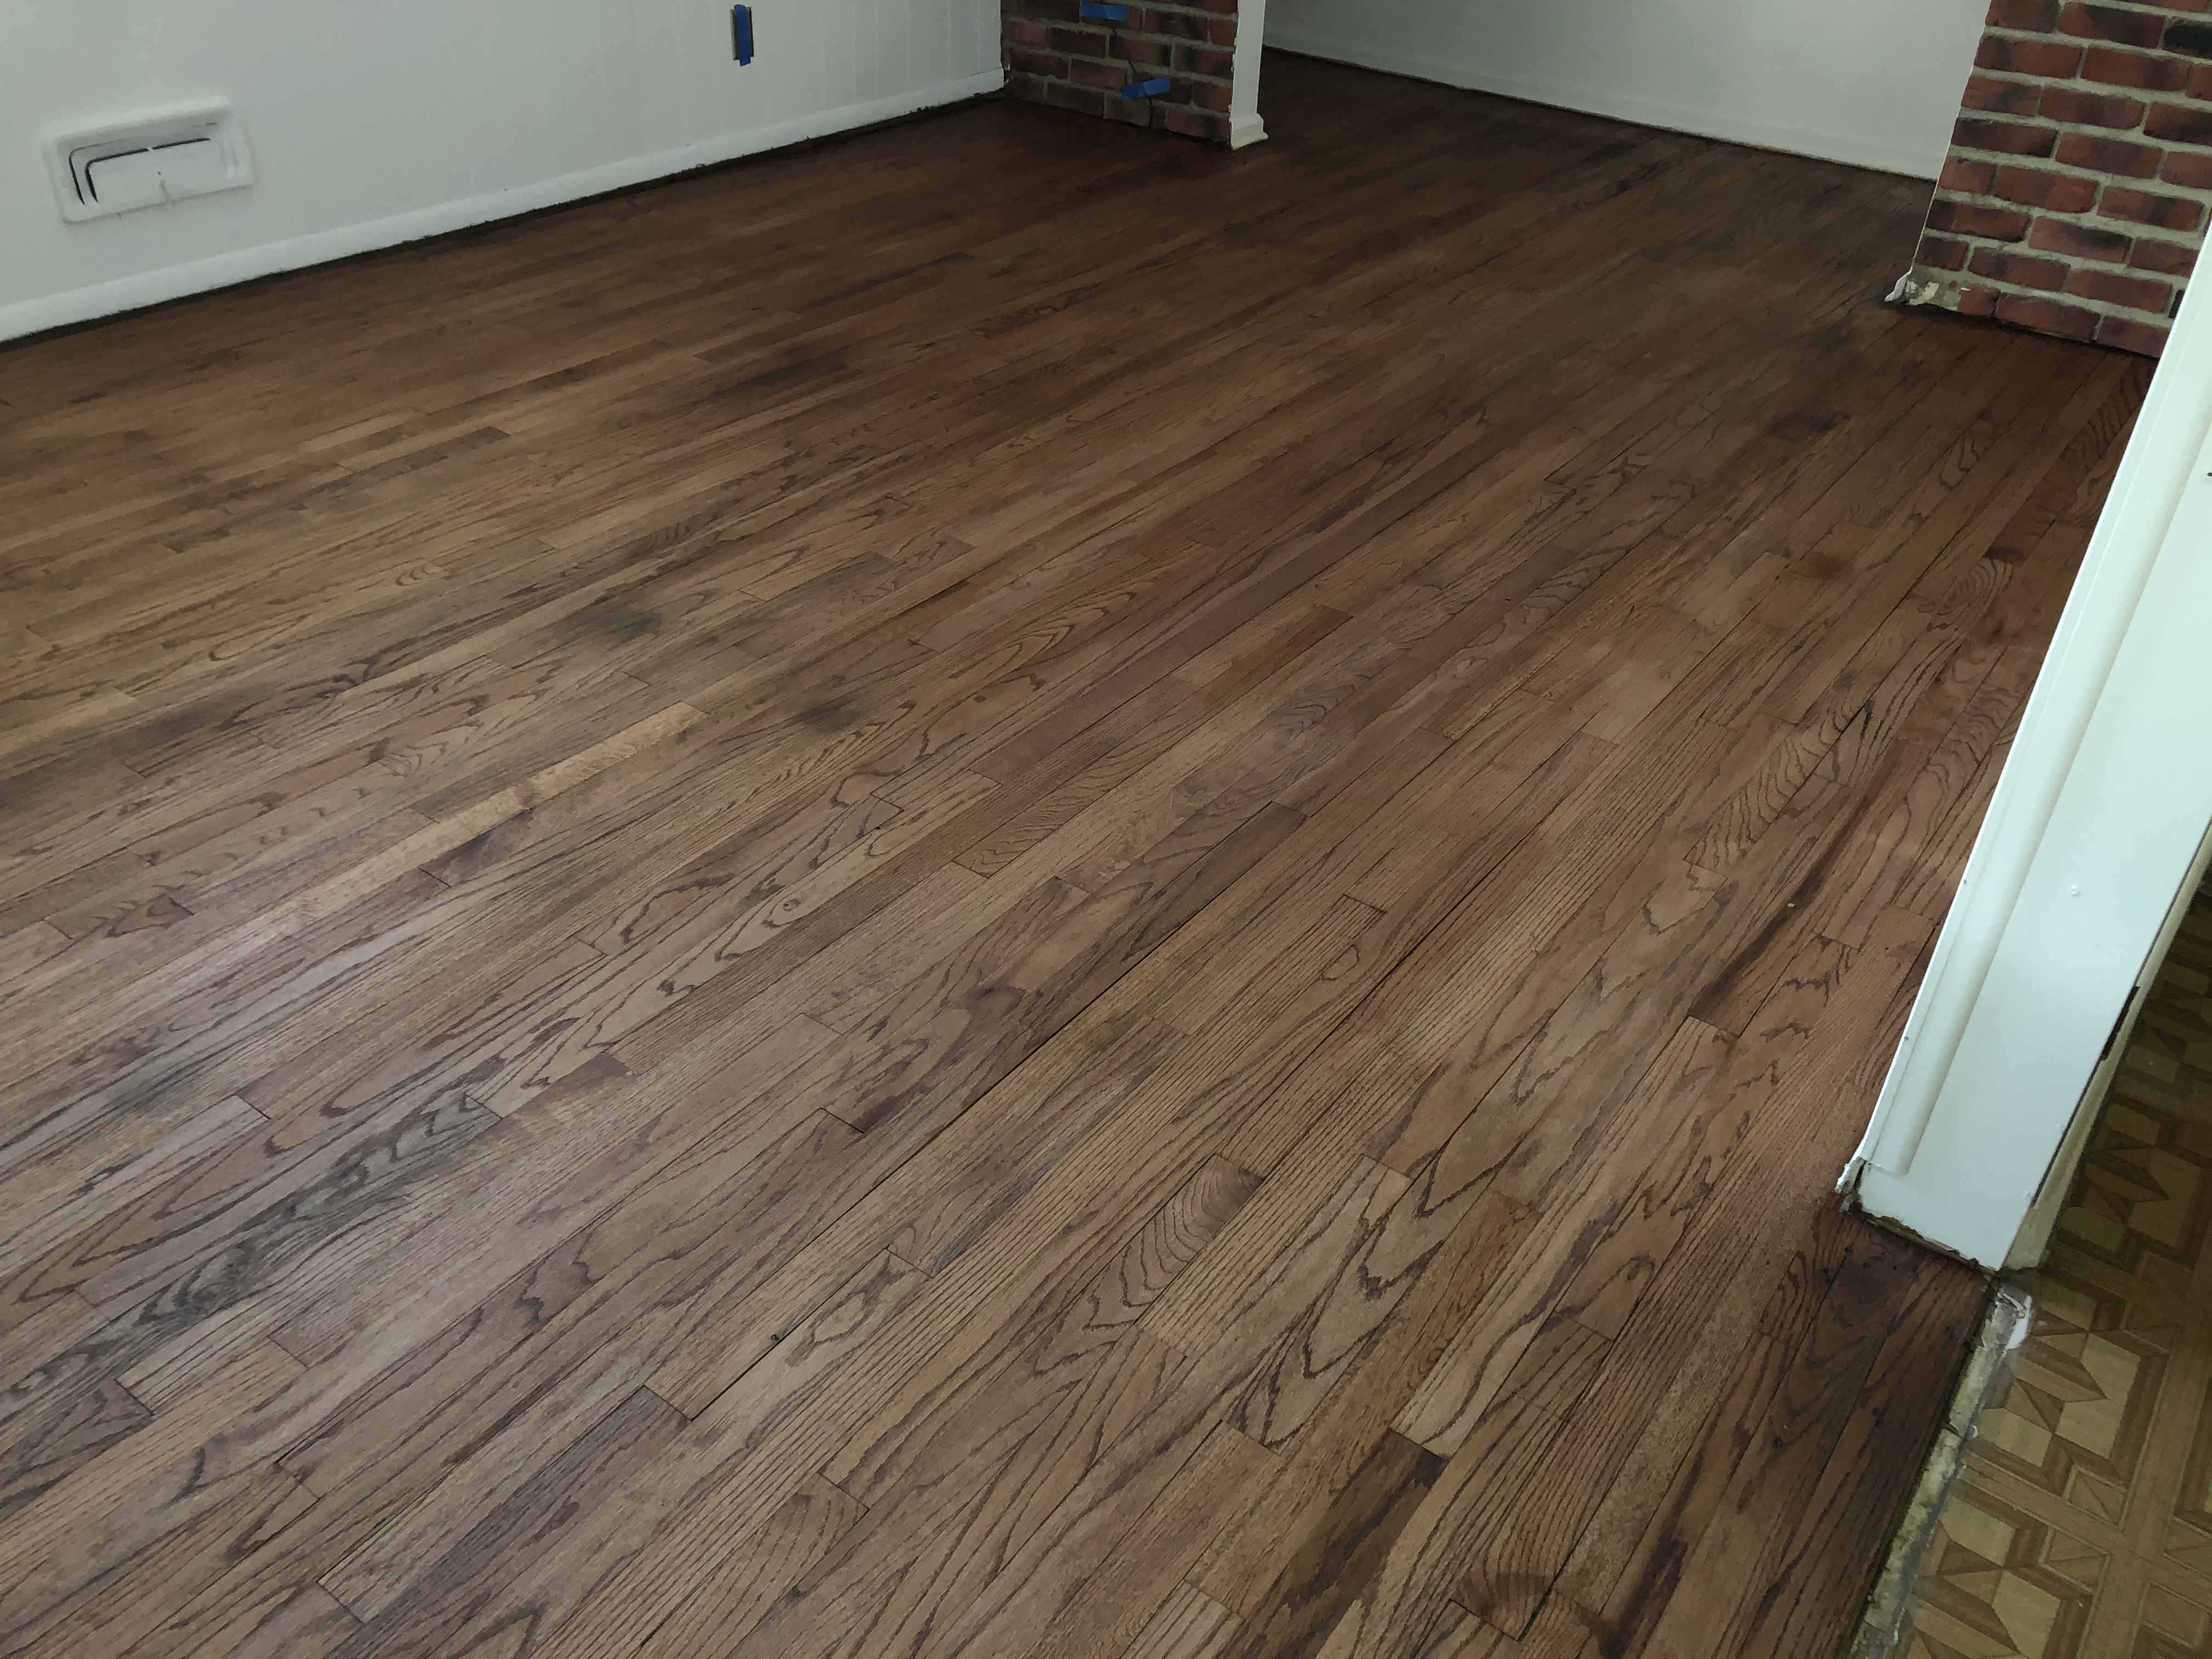
The finished floors…
Once all these big things were done it was time for the finishing touches.
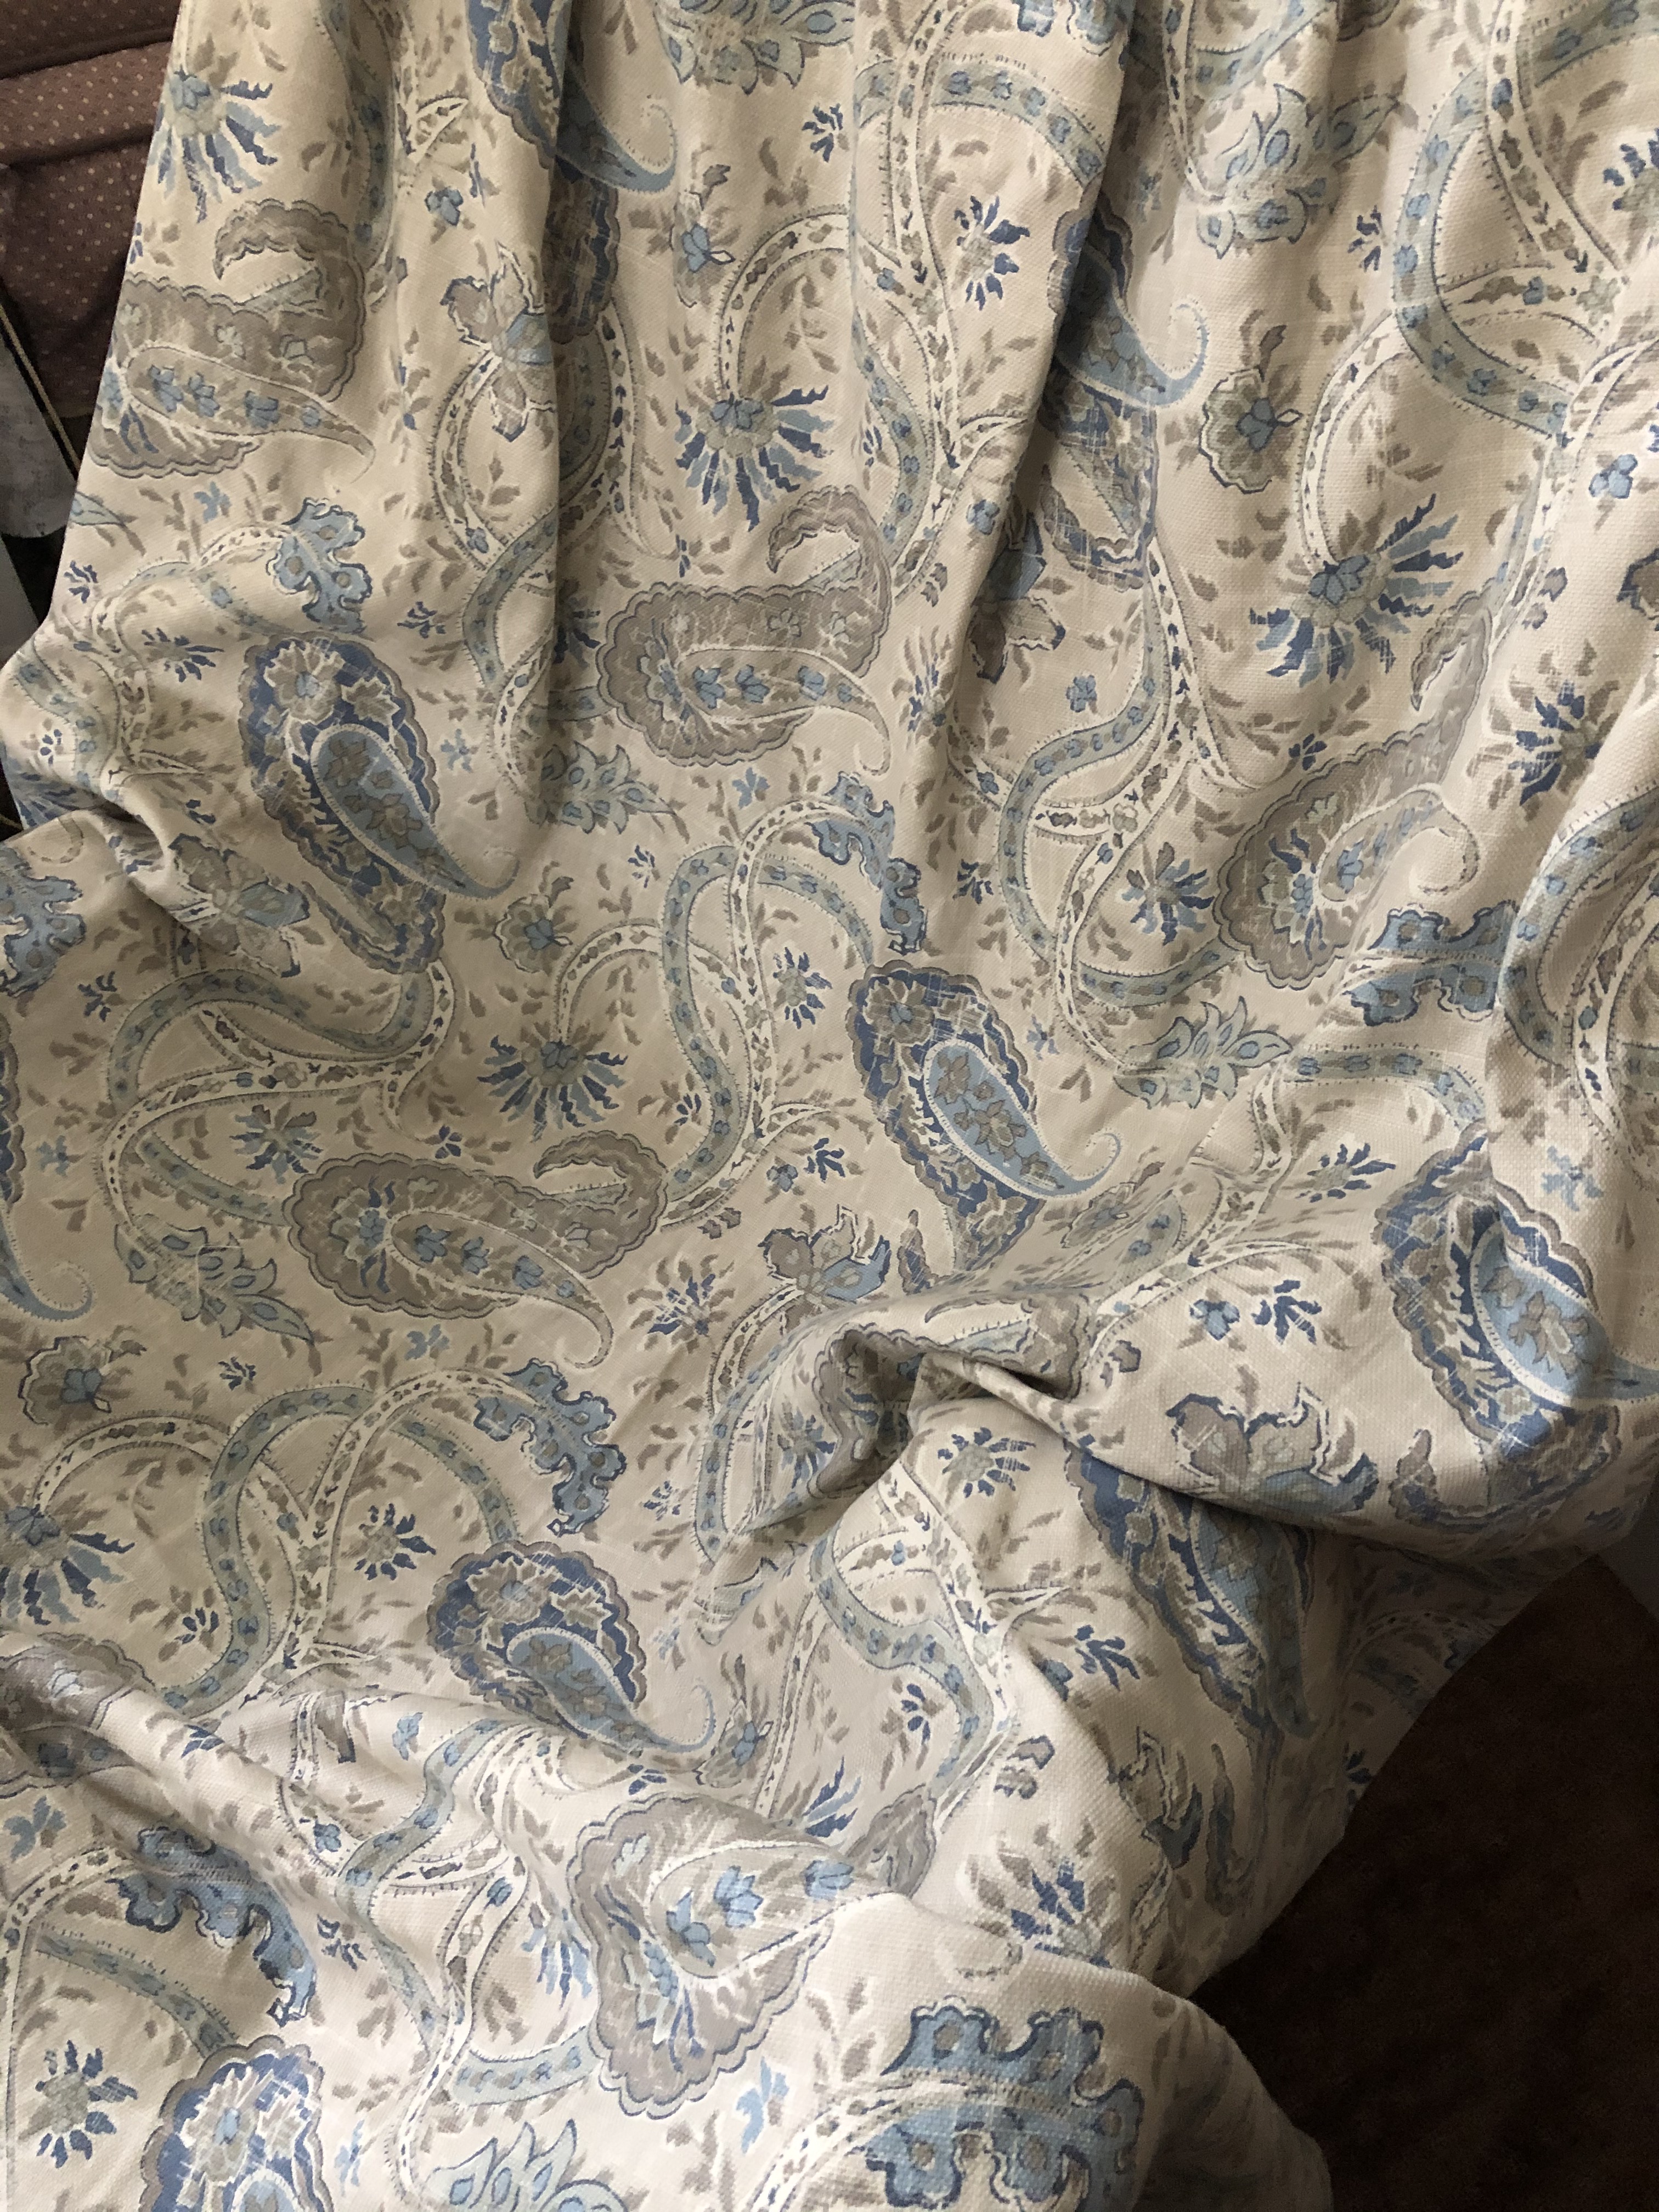
The curtains… I purchased paisley patterned pinch pleat curtains that I was initially planning on hanging on traverse rods. Finding curtains for traverse rods is not an easy feat and I fell in love with these but, they were only available in 108” and I needed 96″, so I ended up hemming all of the curtains with heat bond.
I installed the traverse rods I purchased and after hemming all of the curtains I hung them and then when I went to pull the cord to open and close the curtains it didn’t work. They worked fine without the curtains on them but not with. So, after trying to fix them I determined that the rods must be defective.

So, I painstakingly removed the curtains from the rods and all of the hooks that I had inserted to hang them. After going back and forth as to what to do I decided to forgo the traverse rod idea and purchased a curtain rod that hangs from the ceiling as opposed to attaching to the wall. Thankfully the curtains I purchased had loops behind them that enabled me to use a “regular” curtain rod to hang them. I must say I am much happier with this rod and I am able to open and close the curtains a lot easier than I am sure I would have ever been able to with the traverse rods.
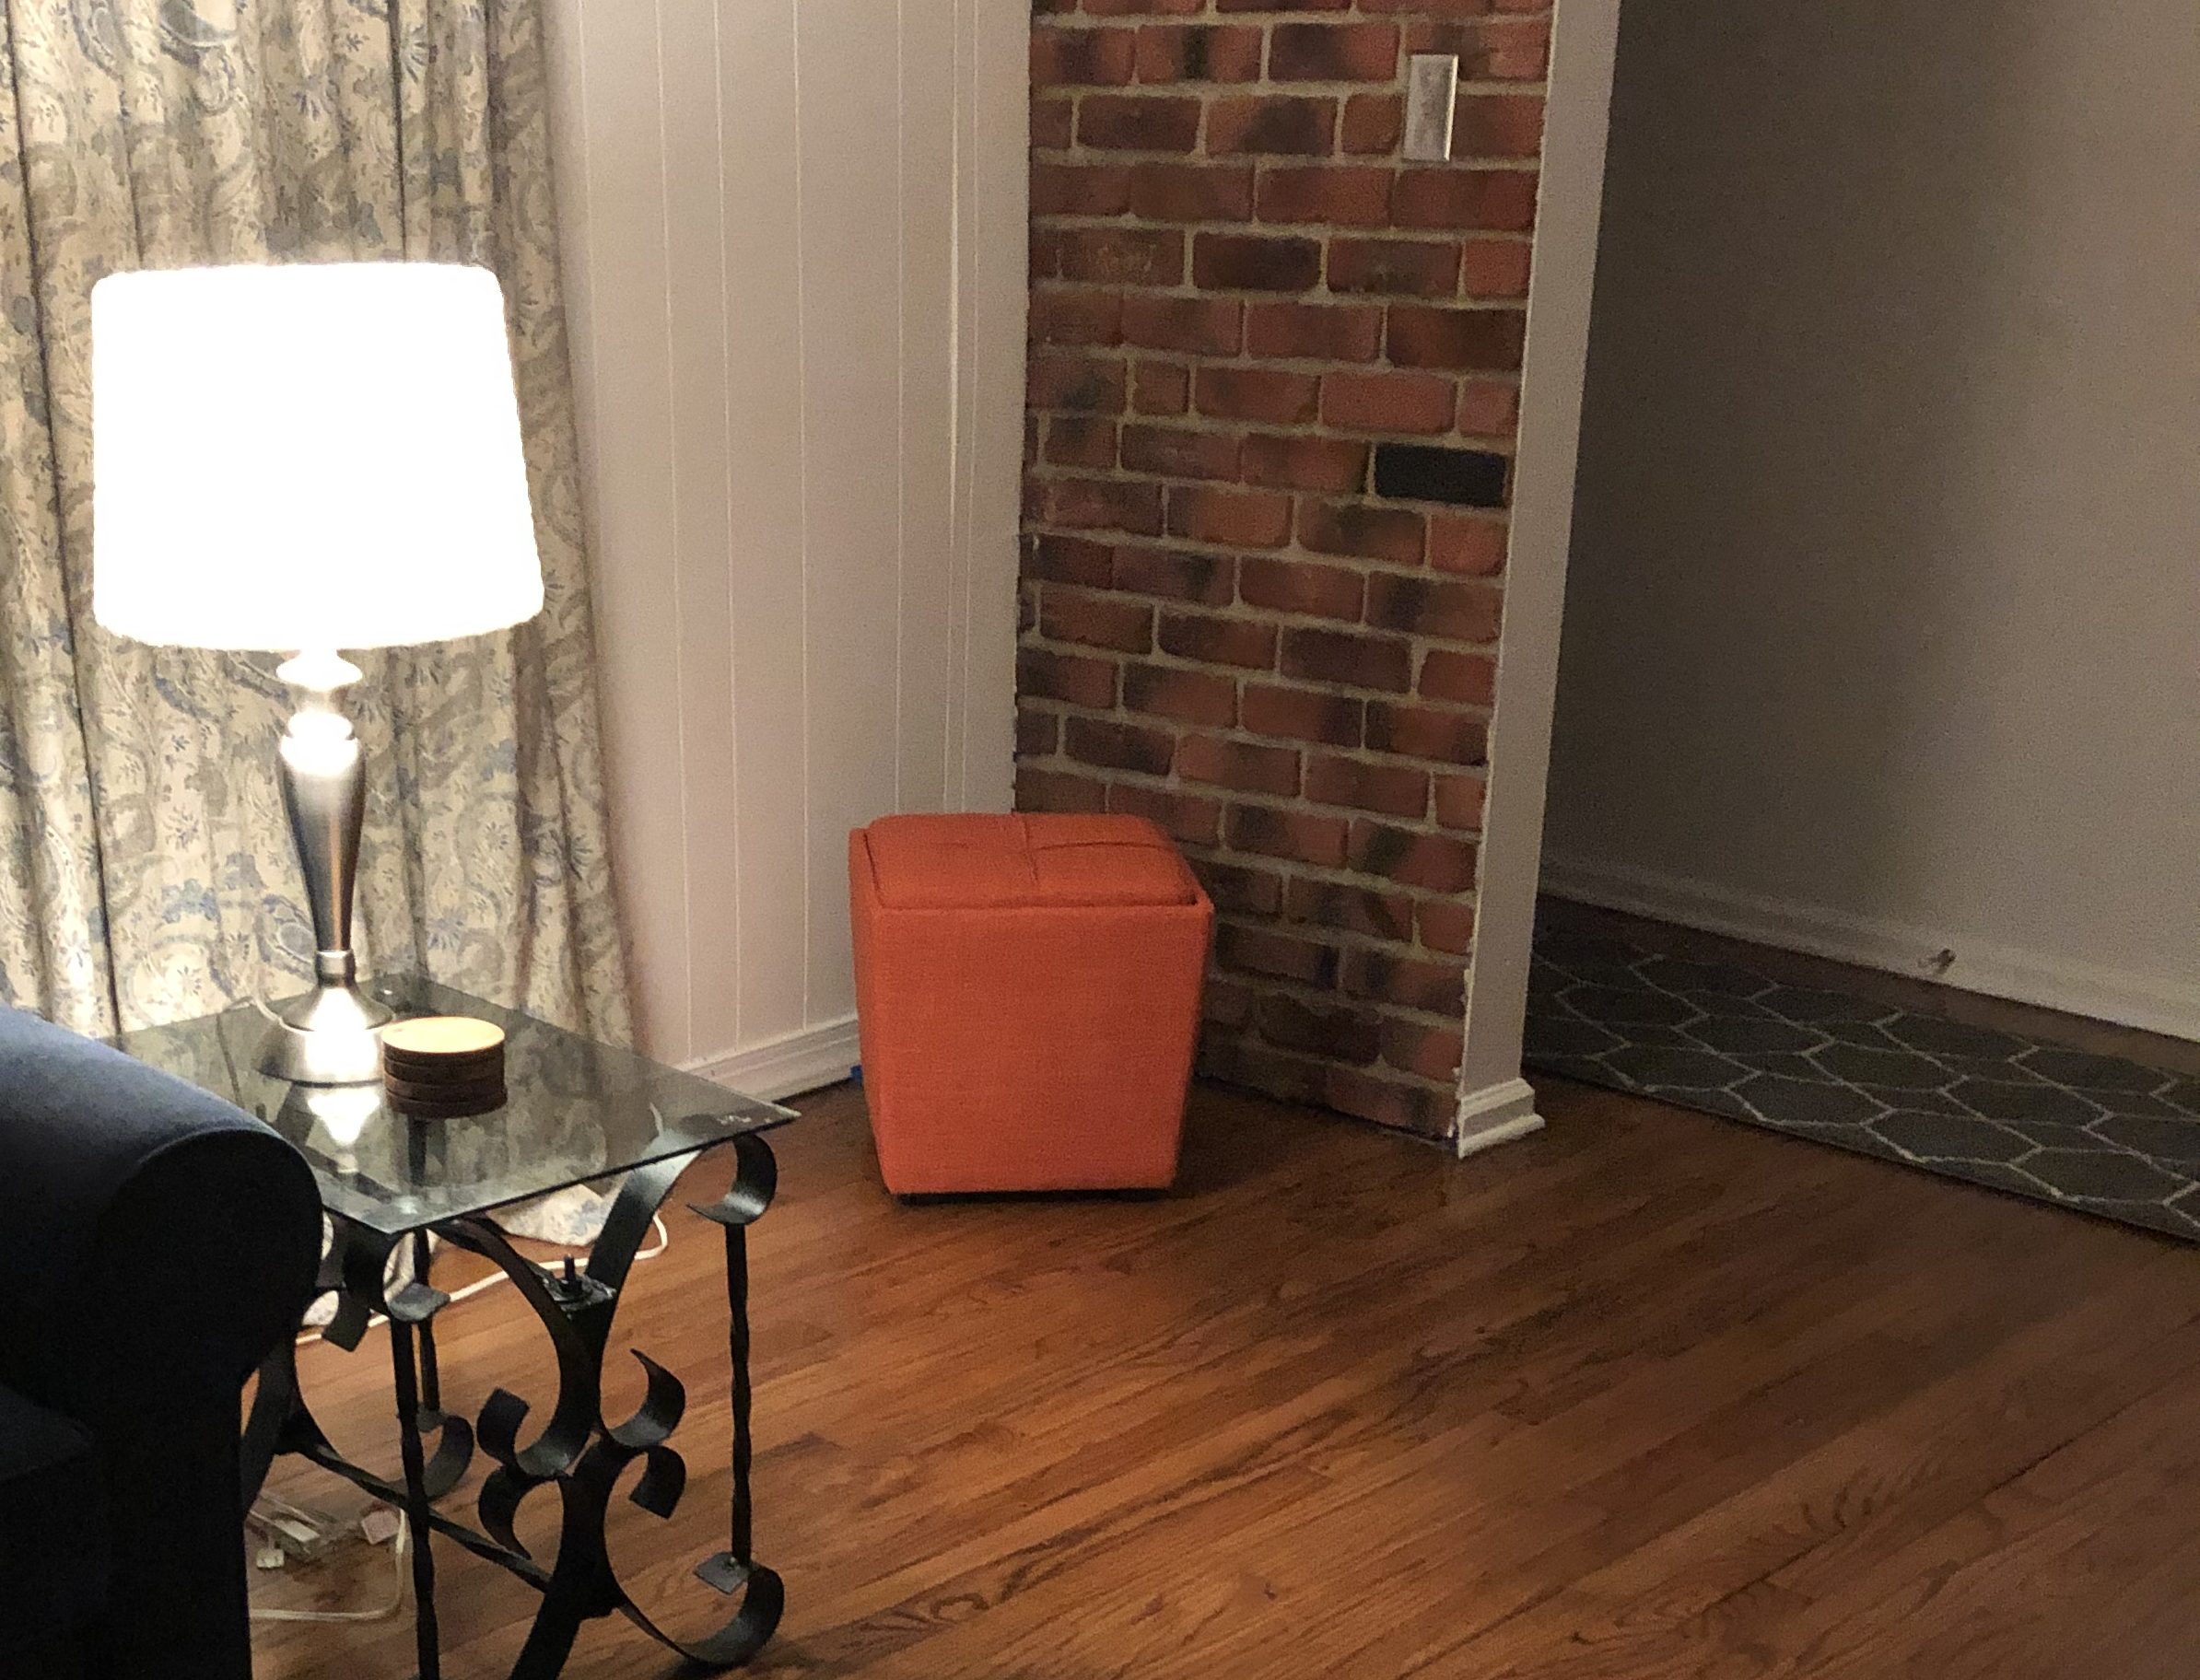
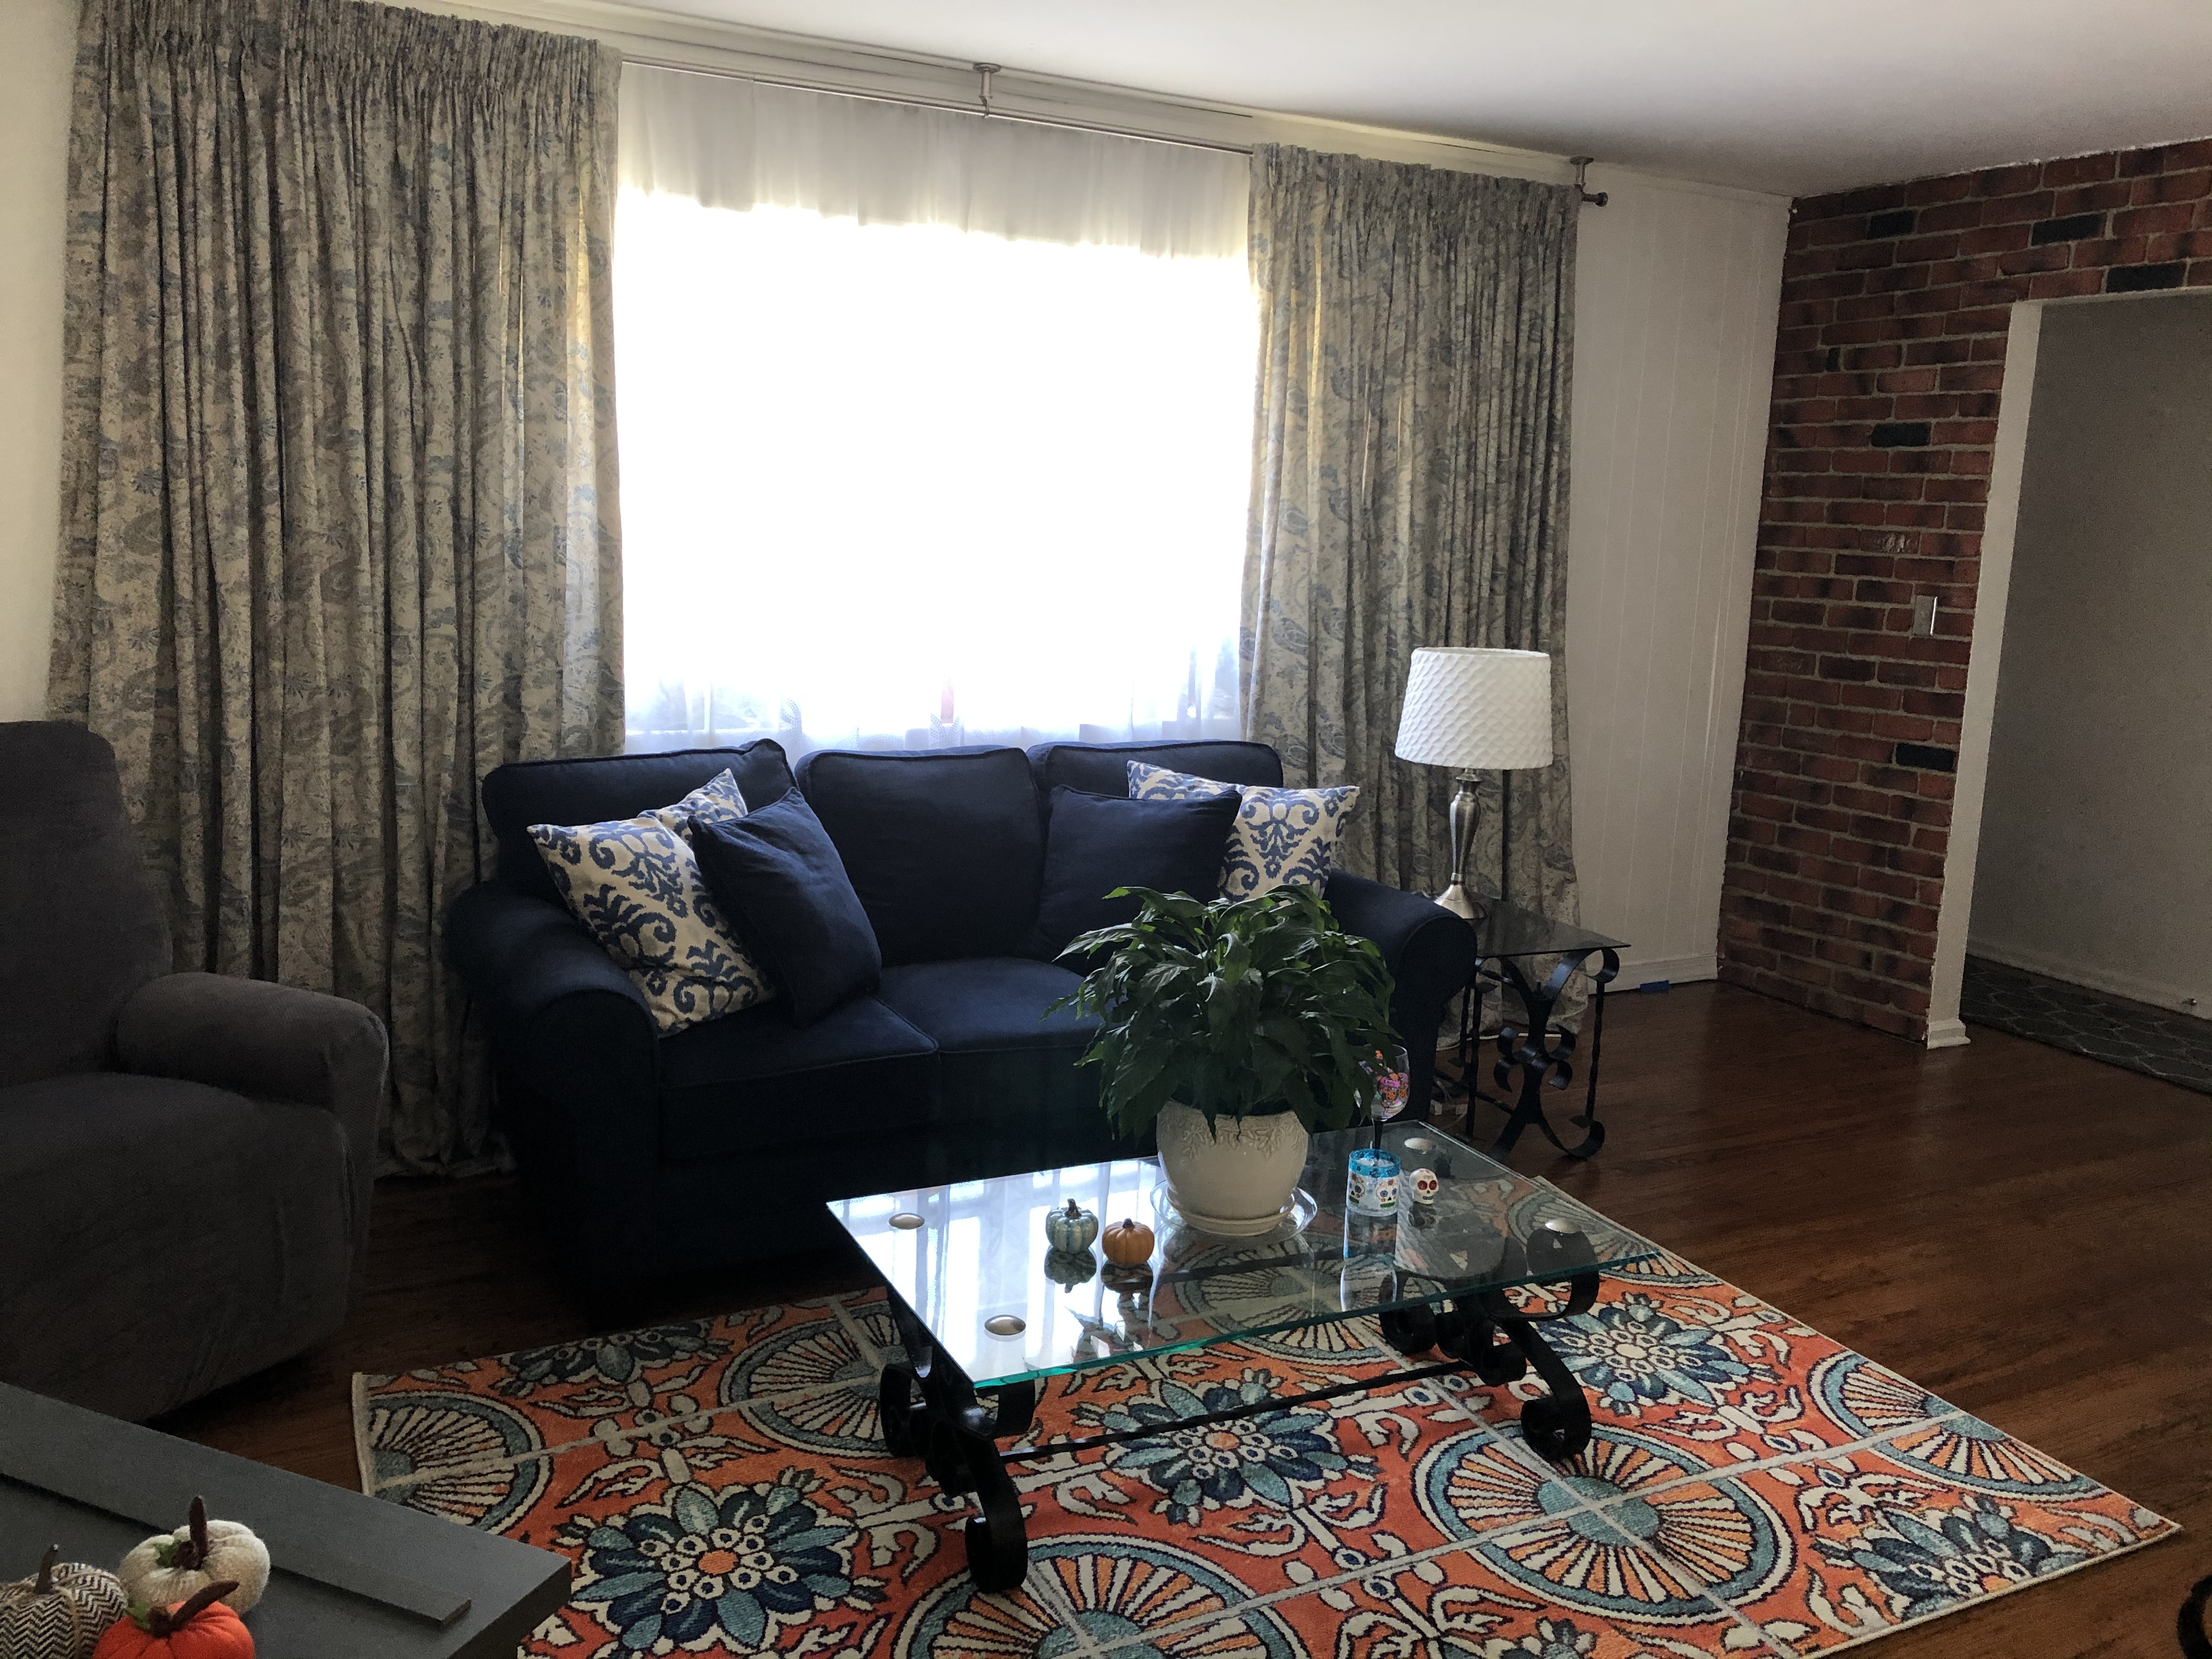
Since I had so much blue in the living room – sofa, curtains and my new tv stand – I decided to add a pop of color with this blue and orange rug.

I even found an ottoman in the same shade of orange.
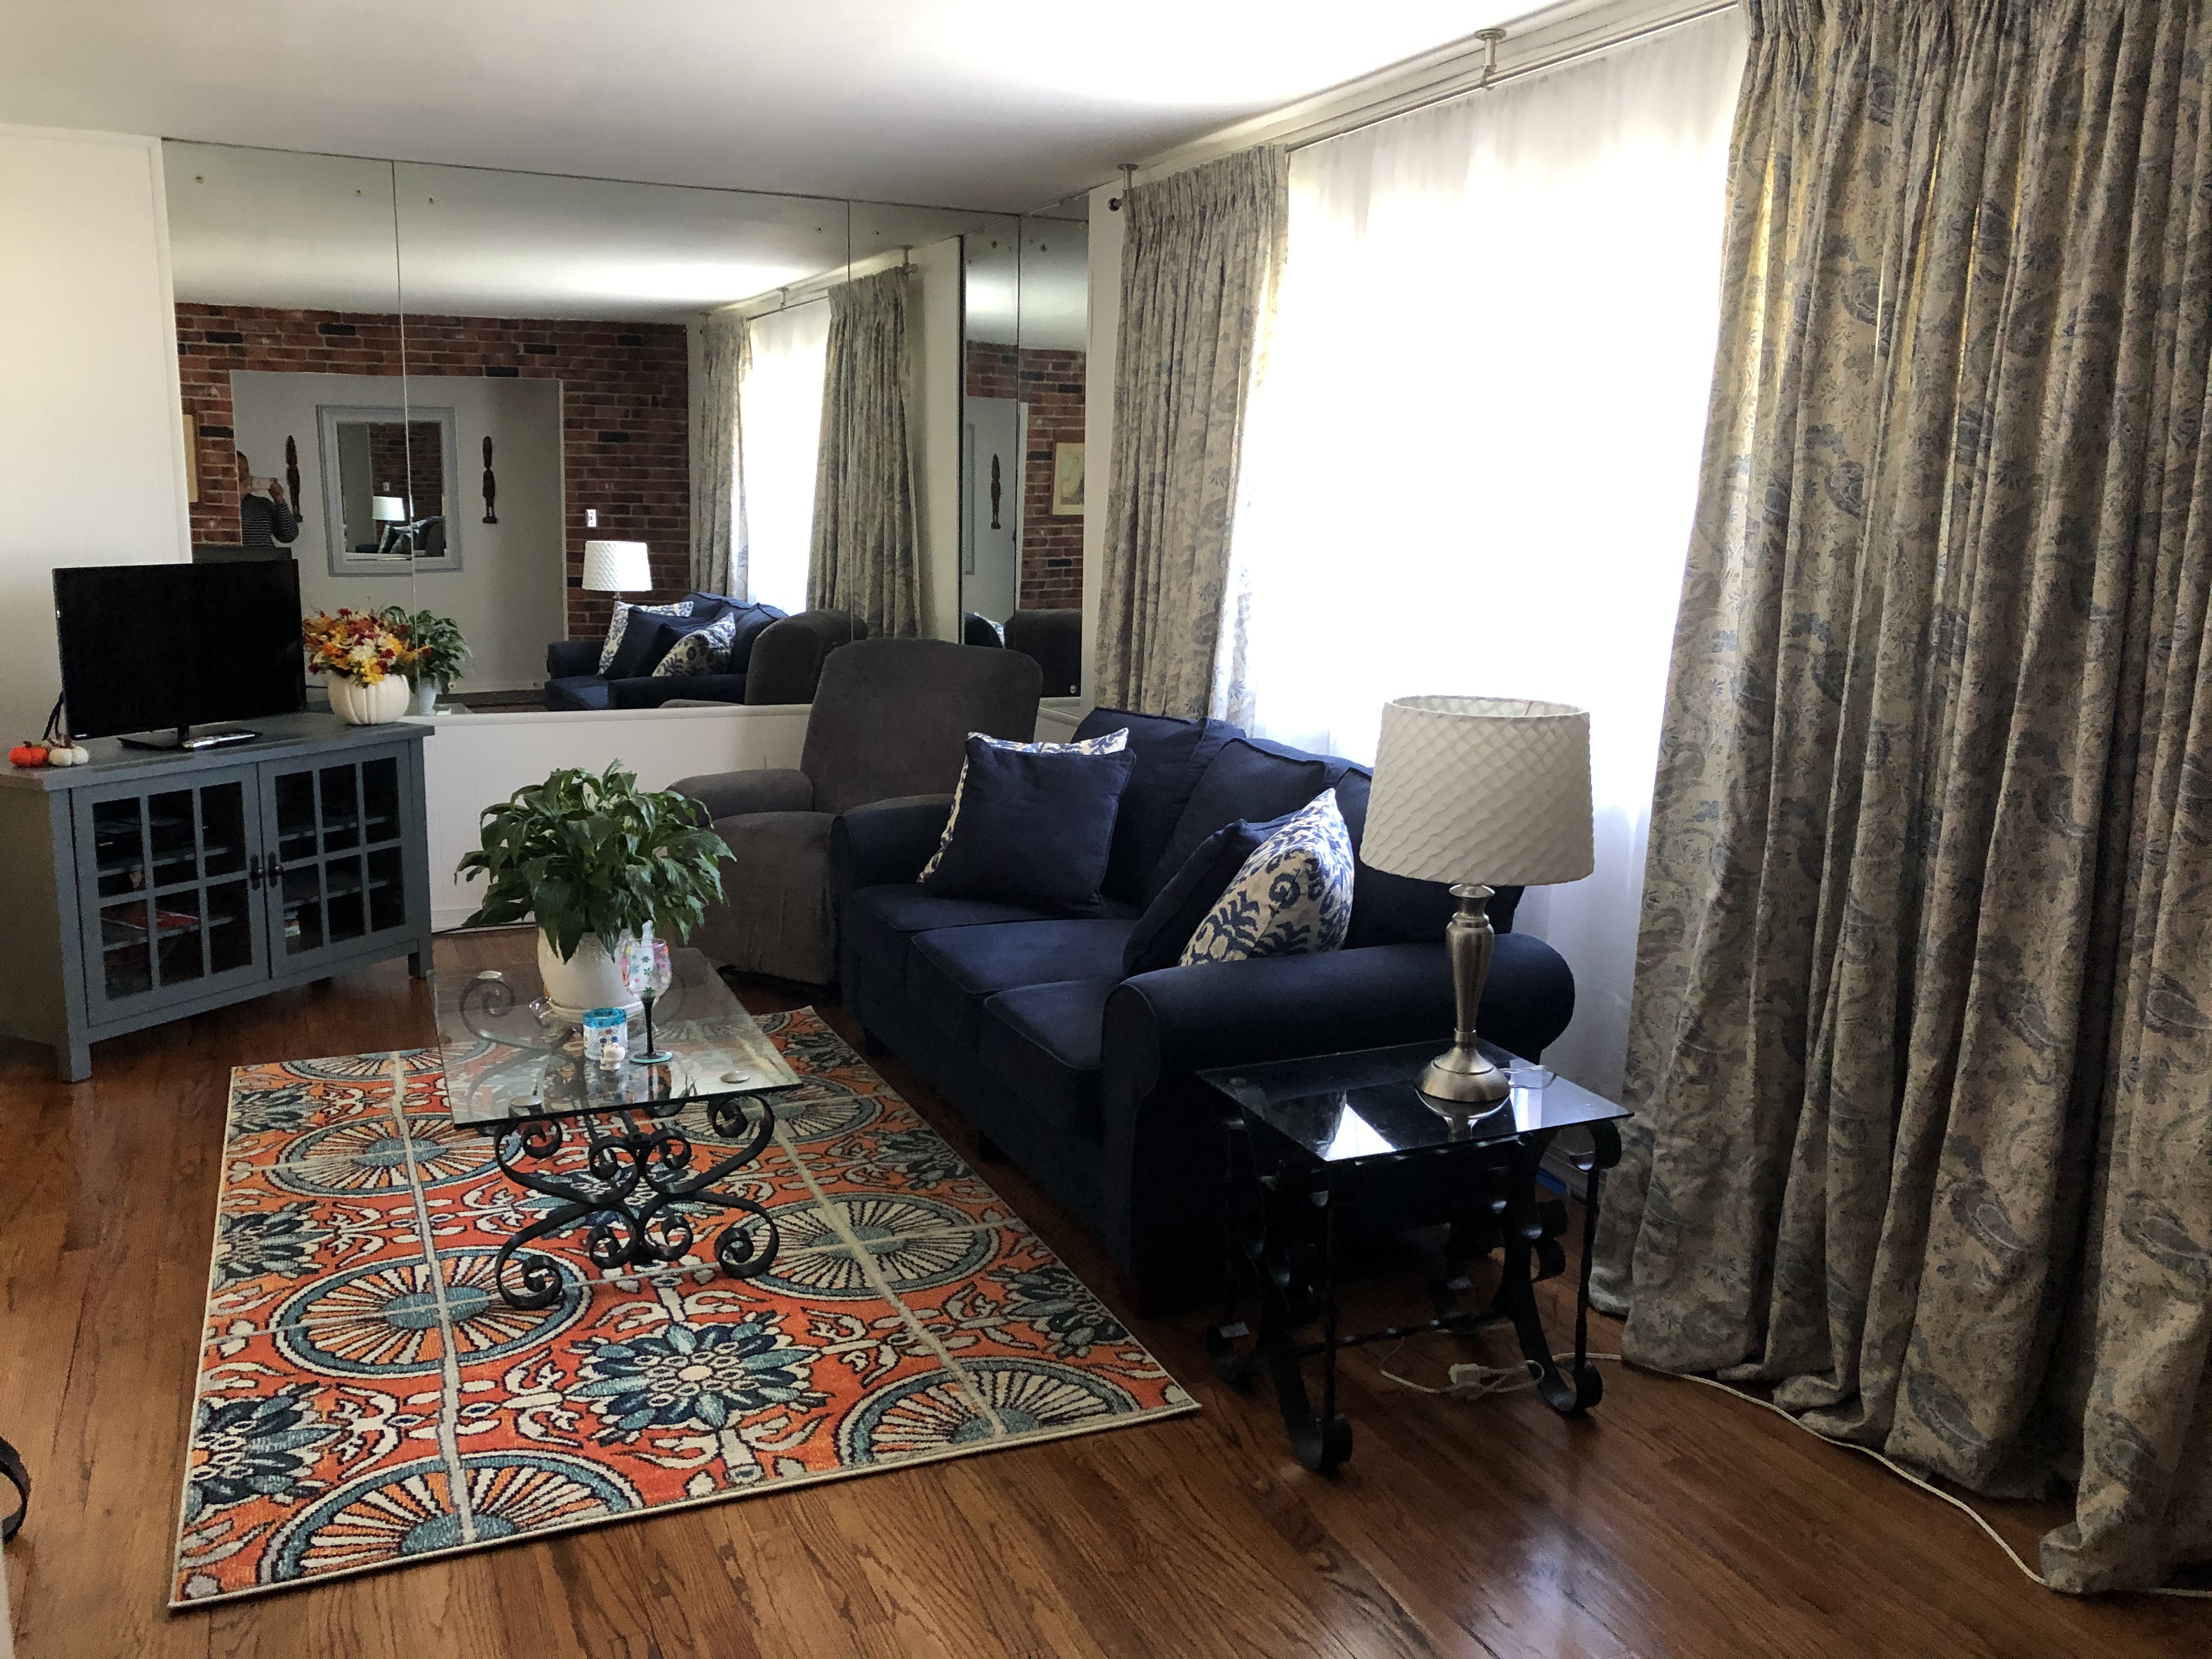
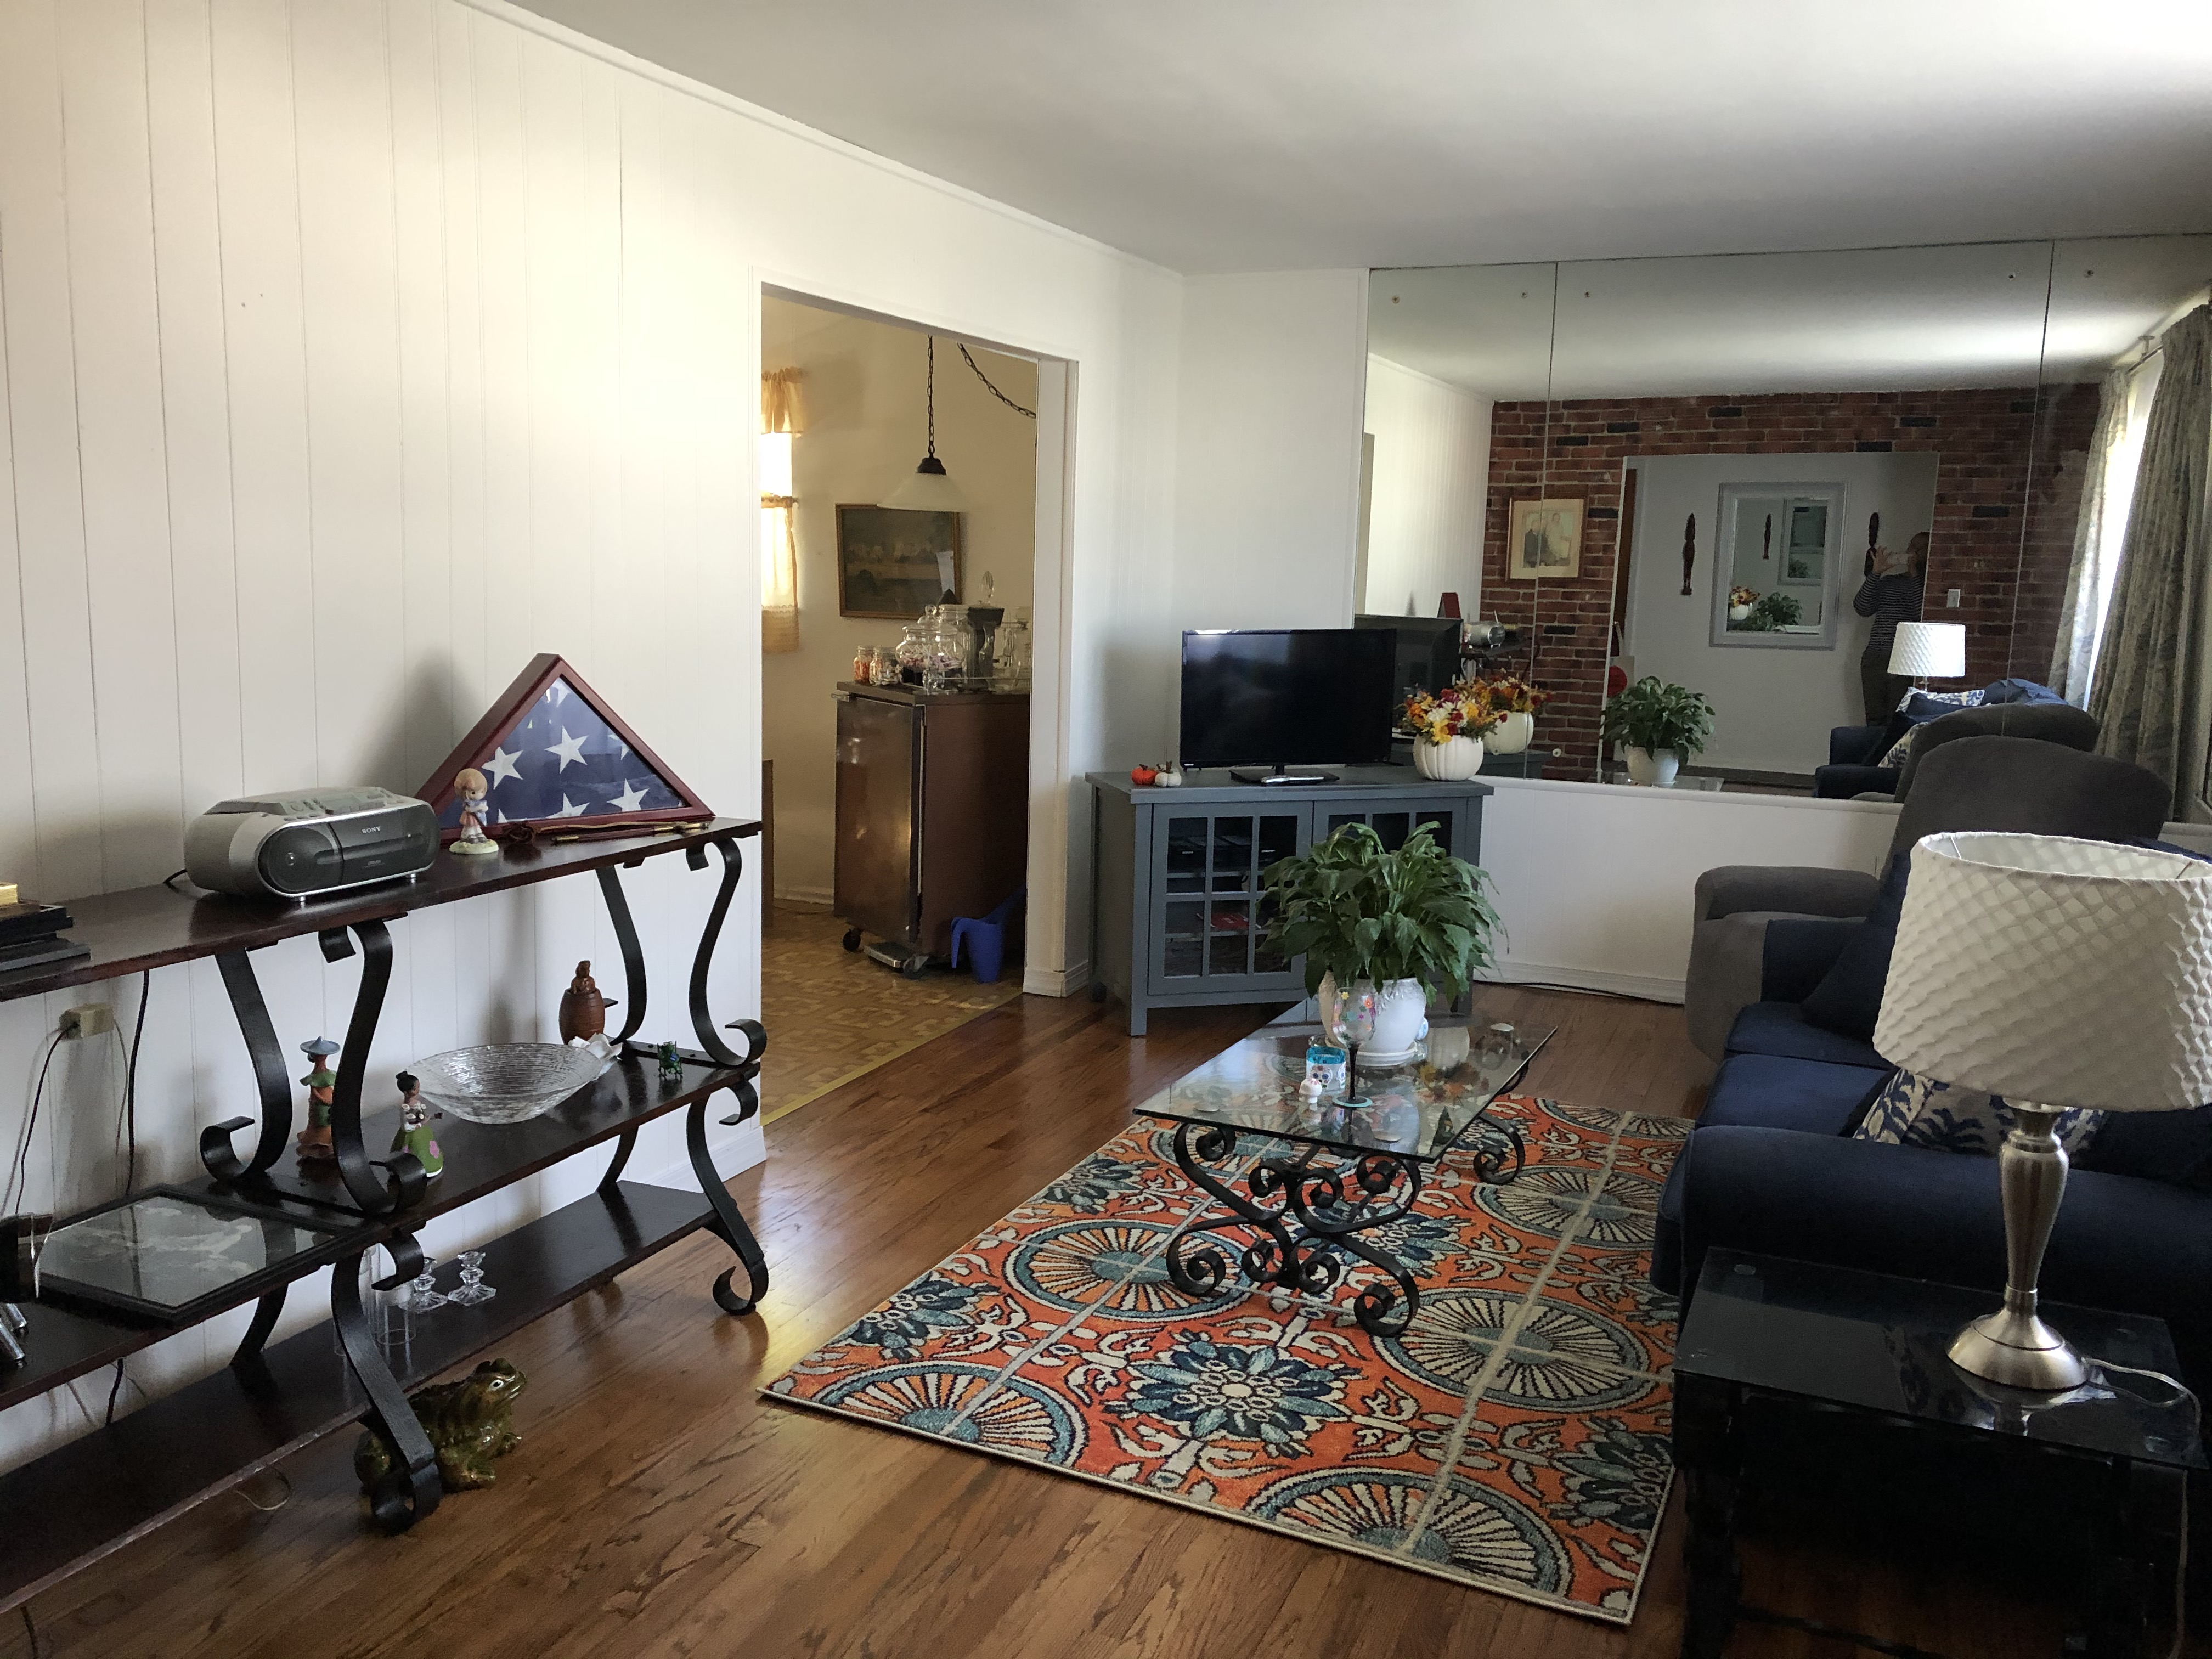
And here are some pics of the final look of my living room. I still have to hang pictures on the wall, but, so far so good. I am very happy with the outcome.

What to tackle next??? I am thinking of painting an old bedroom set to breathe new life into it.
