Malted Chocolate Brownies

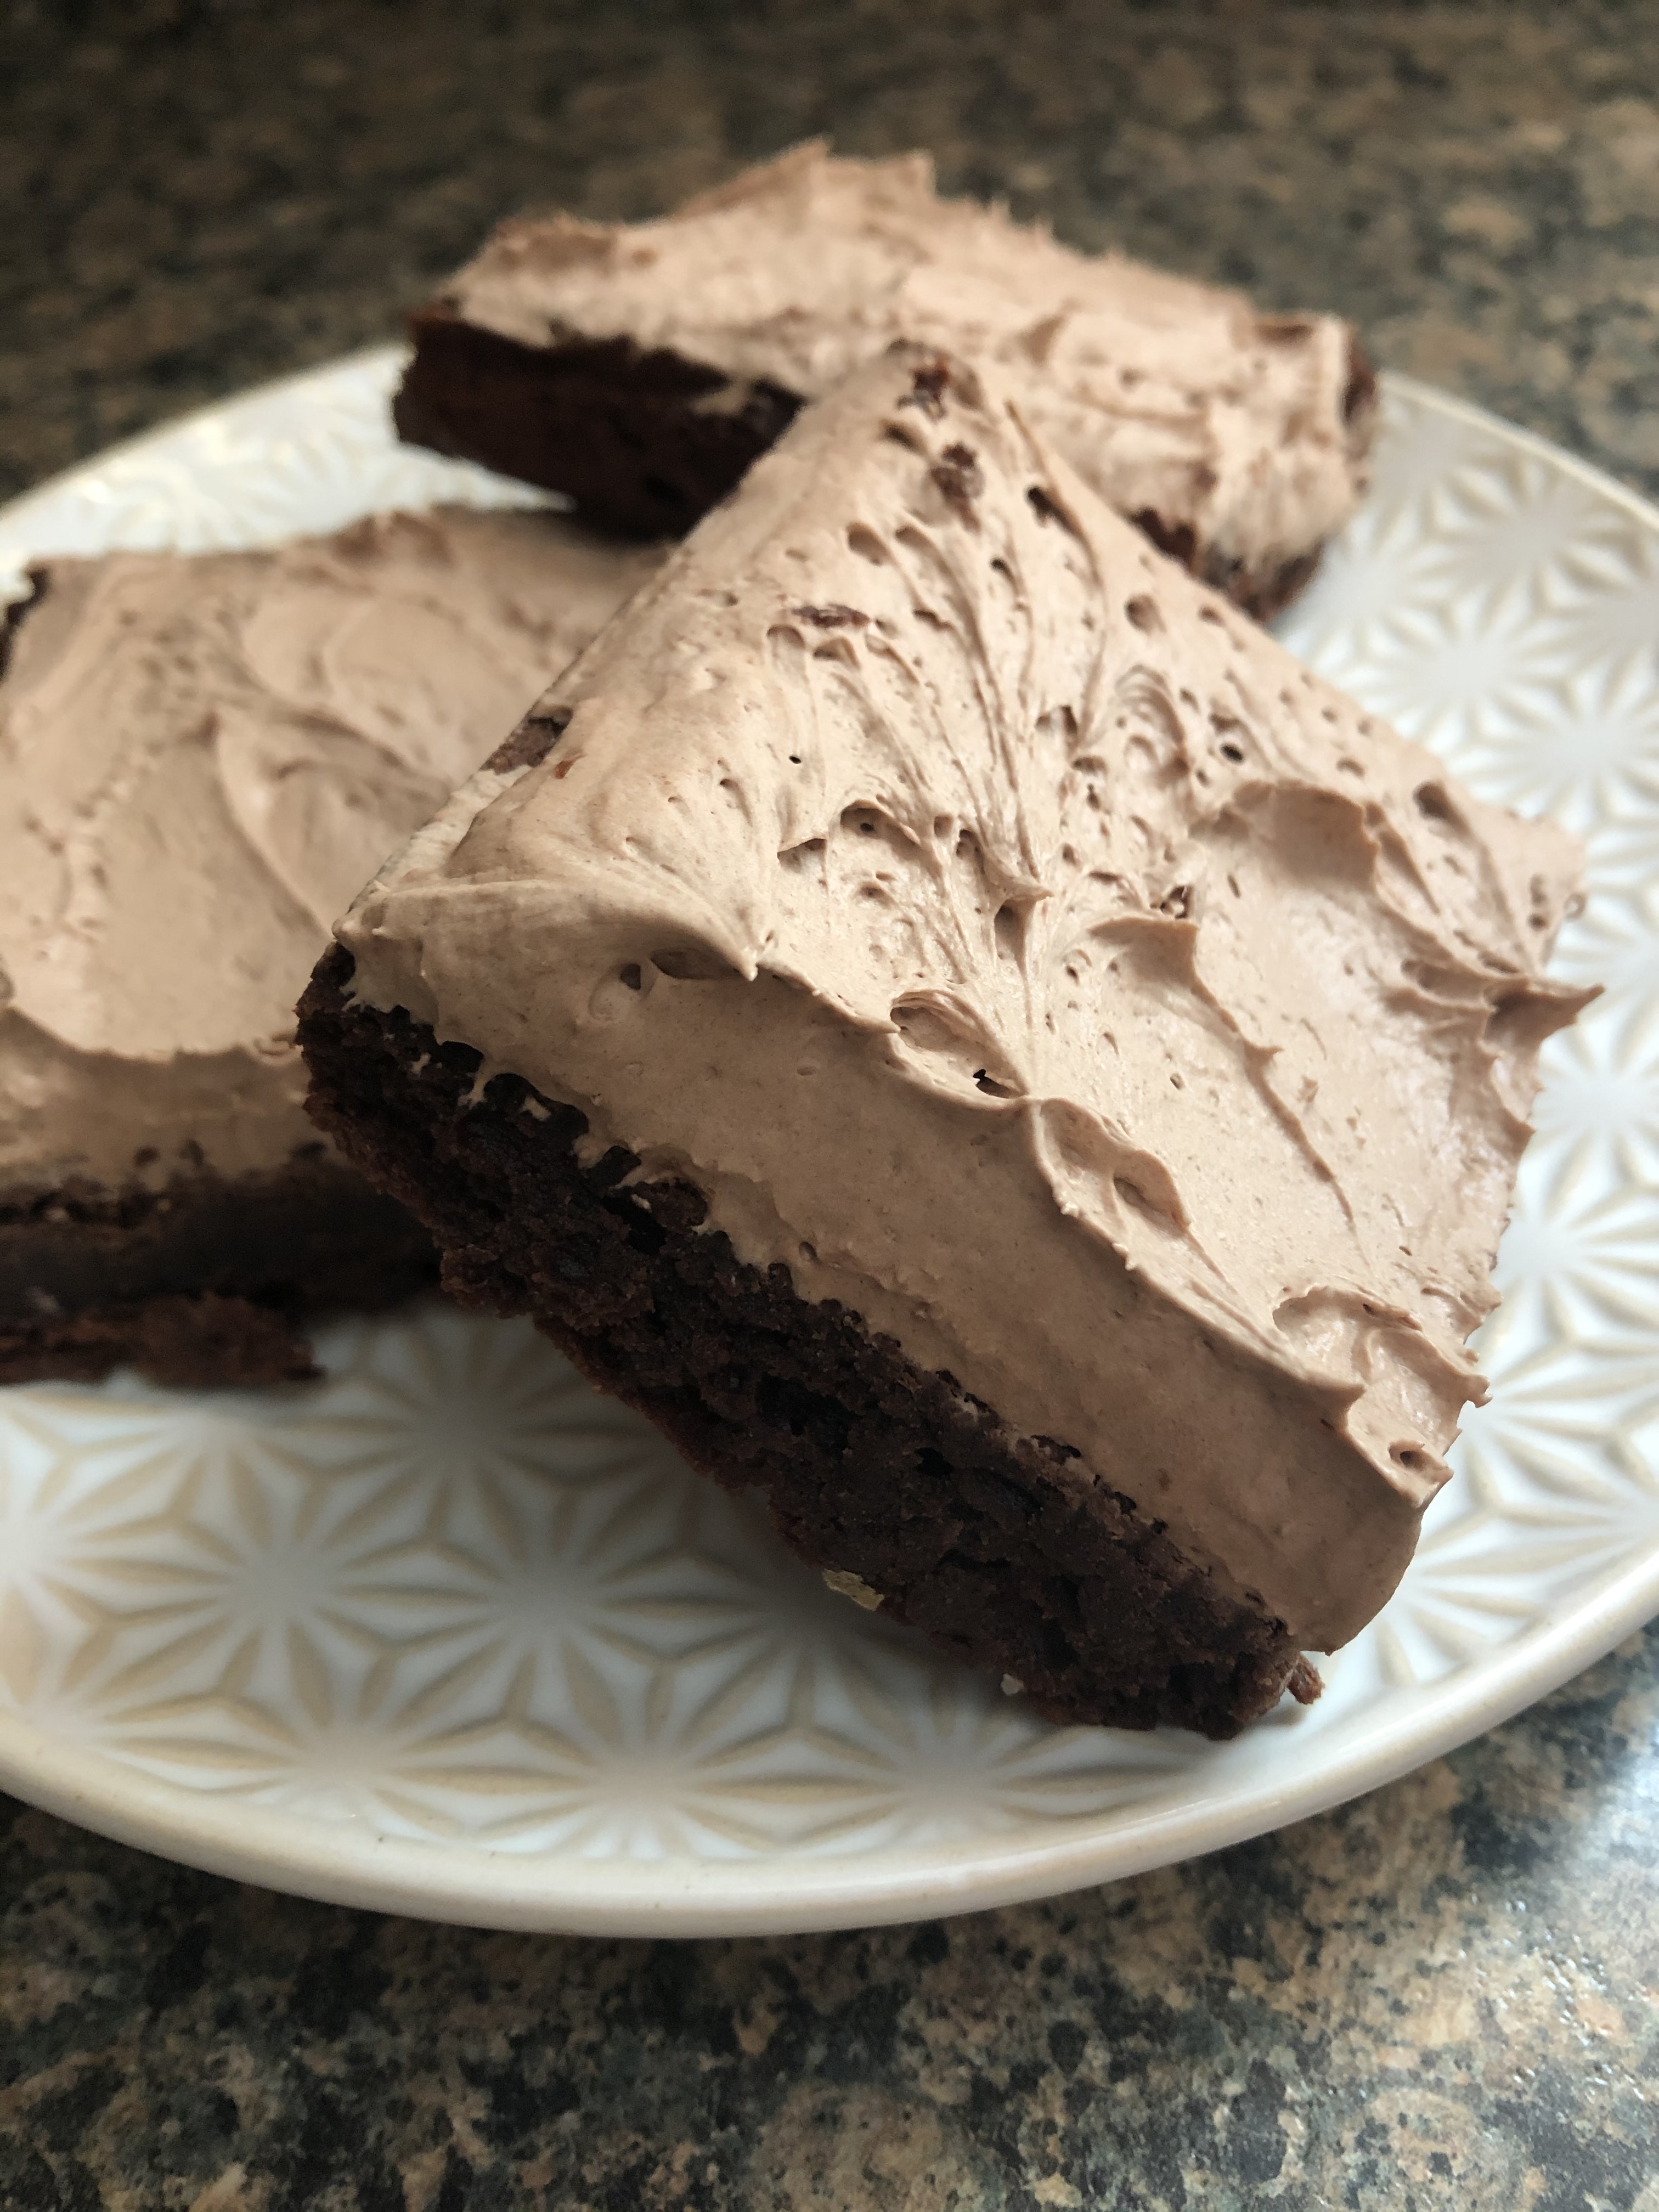
I’ve made quite a few desserts with malted milk powder as the star ingredient, and I must say none have ever disappointed. My favorite by far are the Malted Chocolate Chip Cookies I shared over 10 years ago and still make to this day – thankfully my pictures have improved since then! Today’s Malted Chocolate Brownies are a very close second though. These brownies are rich and decadent, but not overly sweet. The malted milk powder really enhances the chocolate flavor in them.

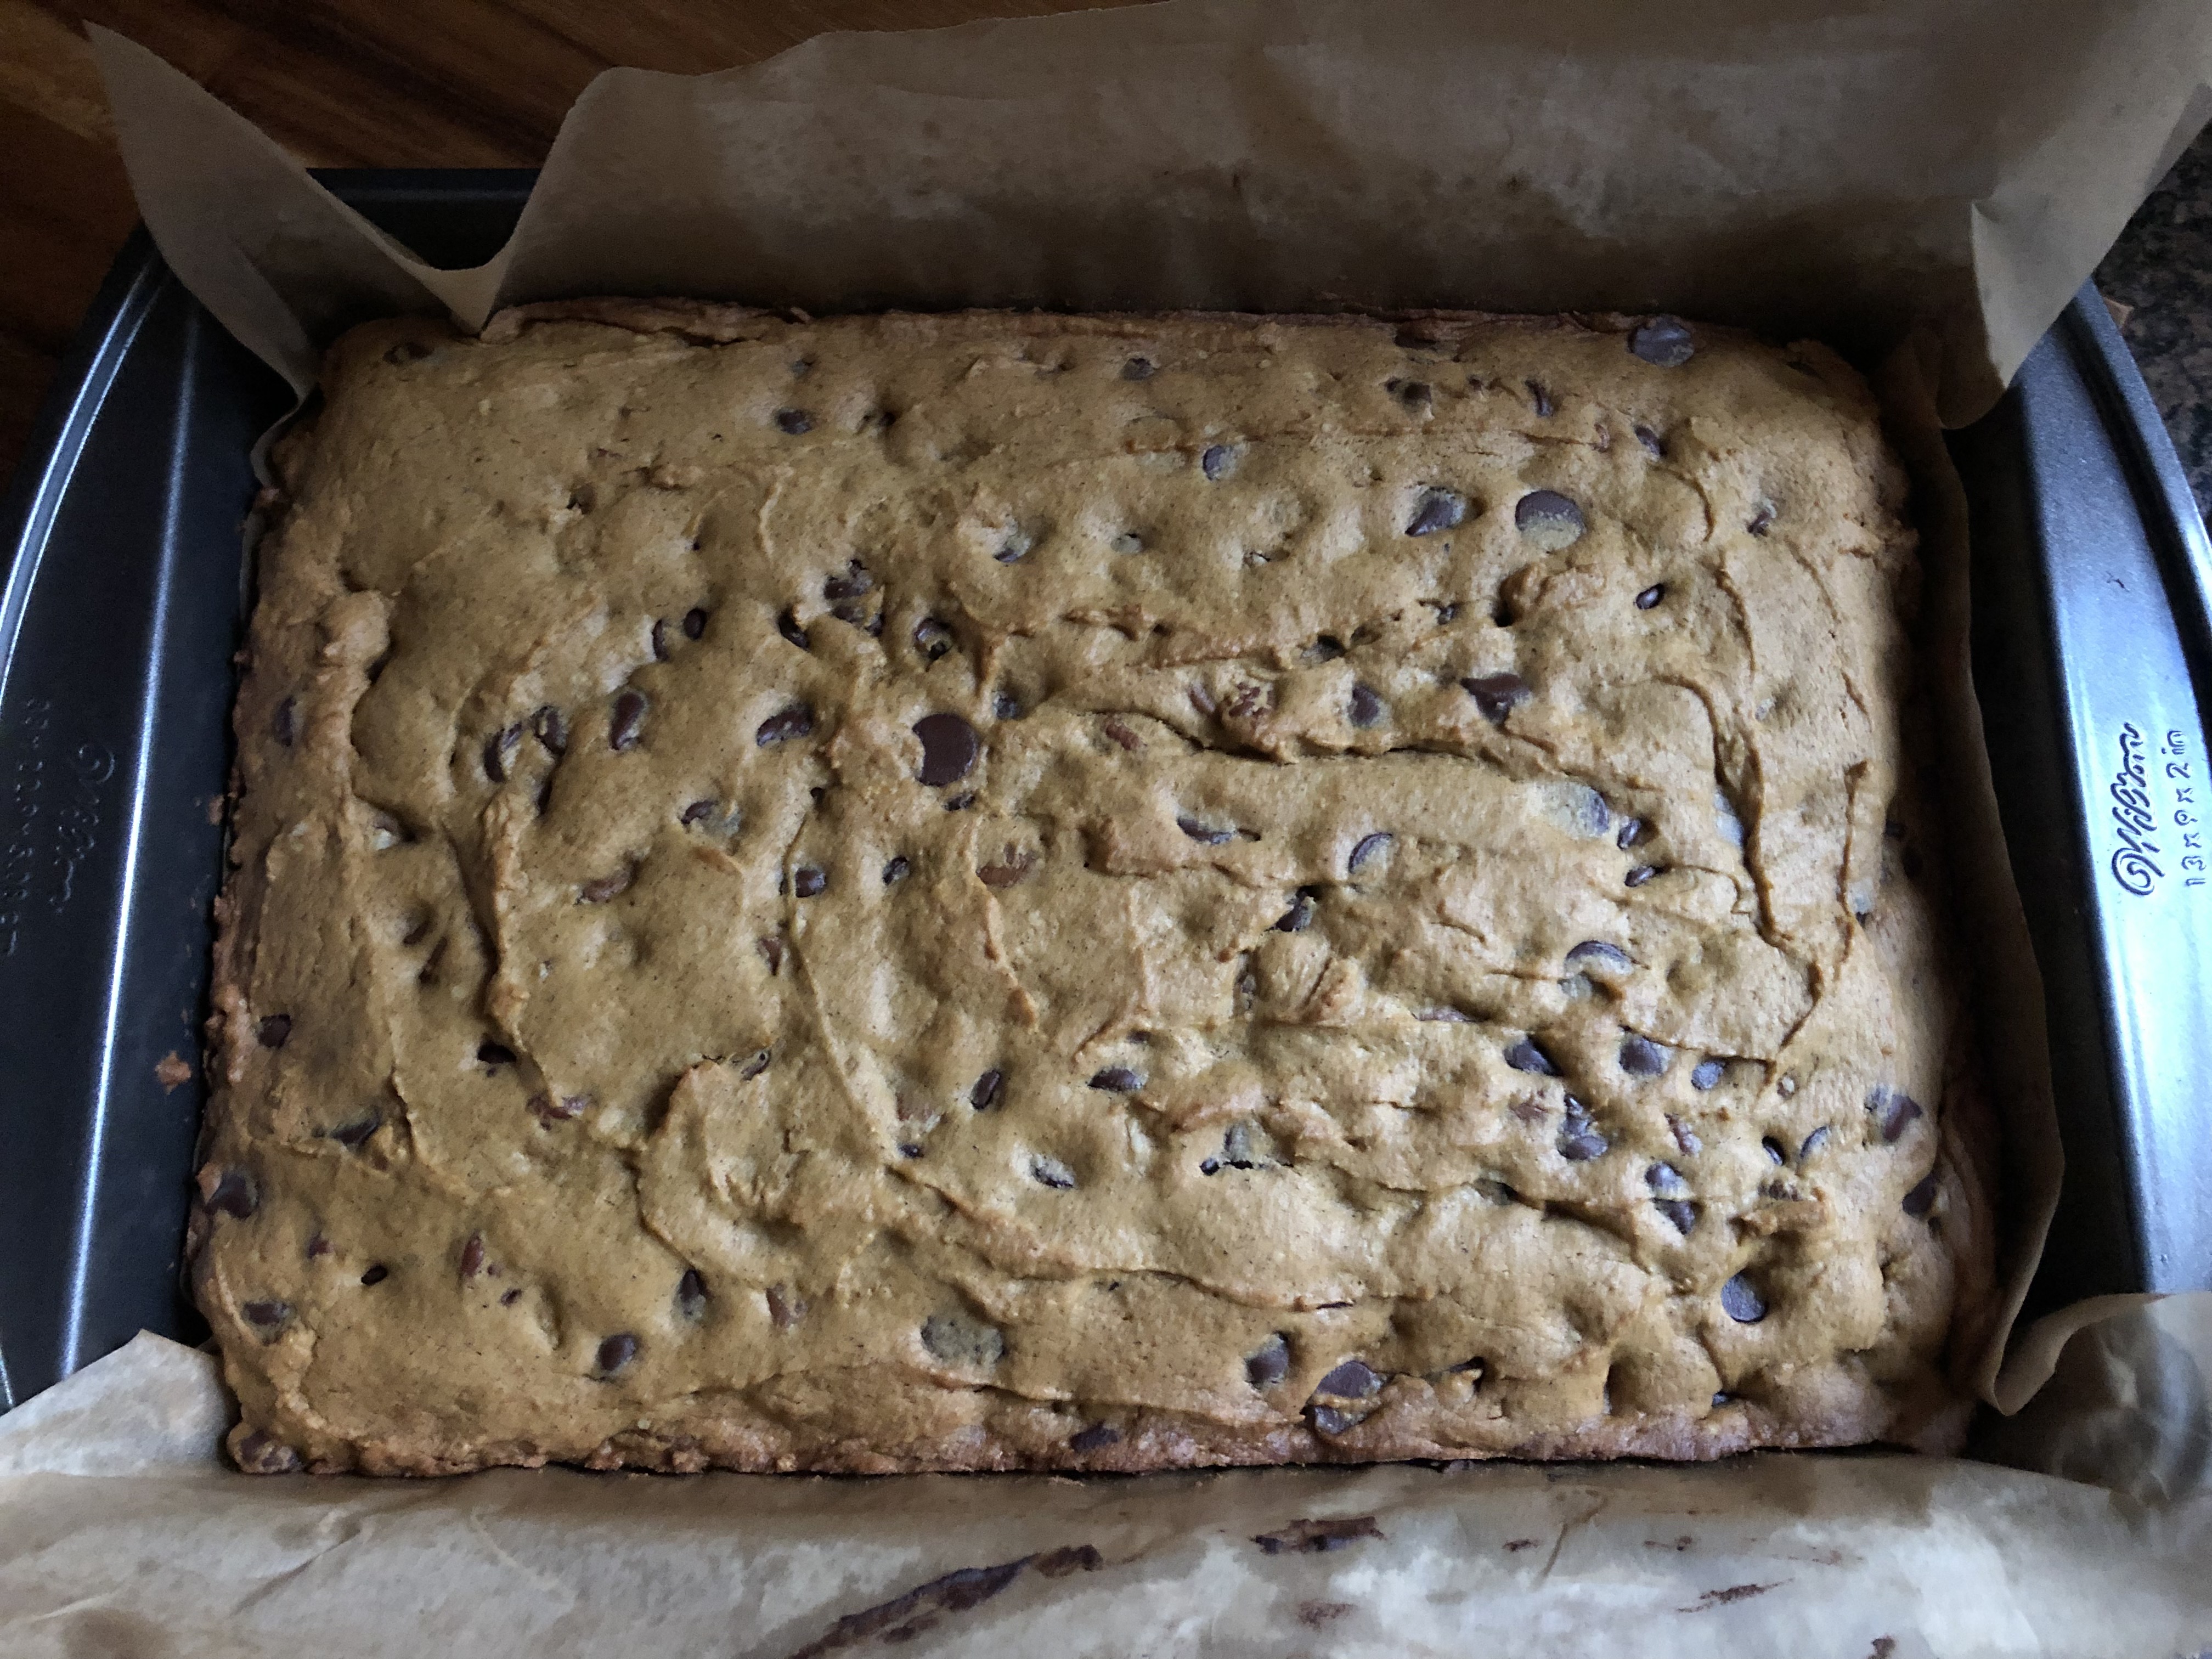
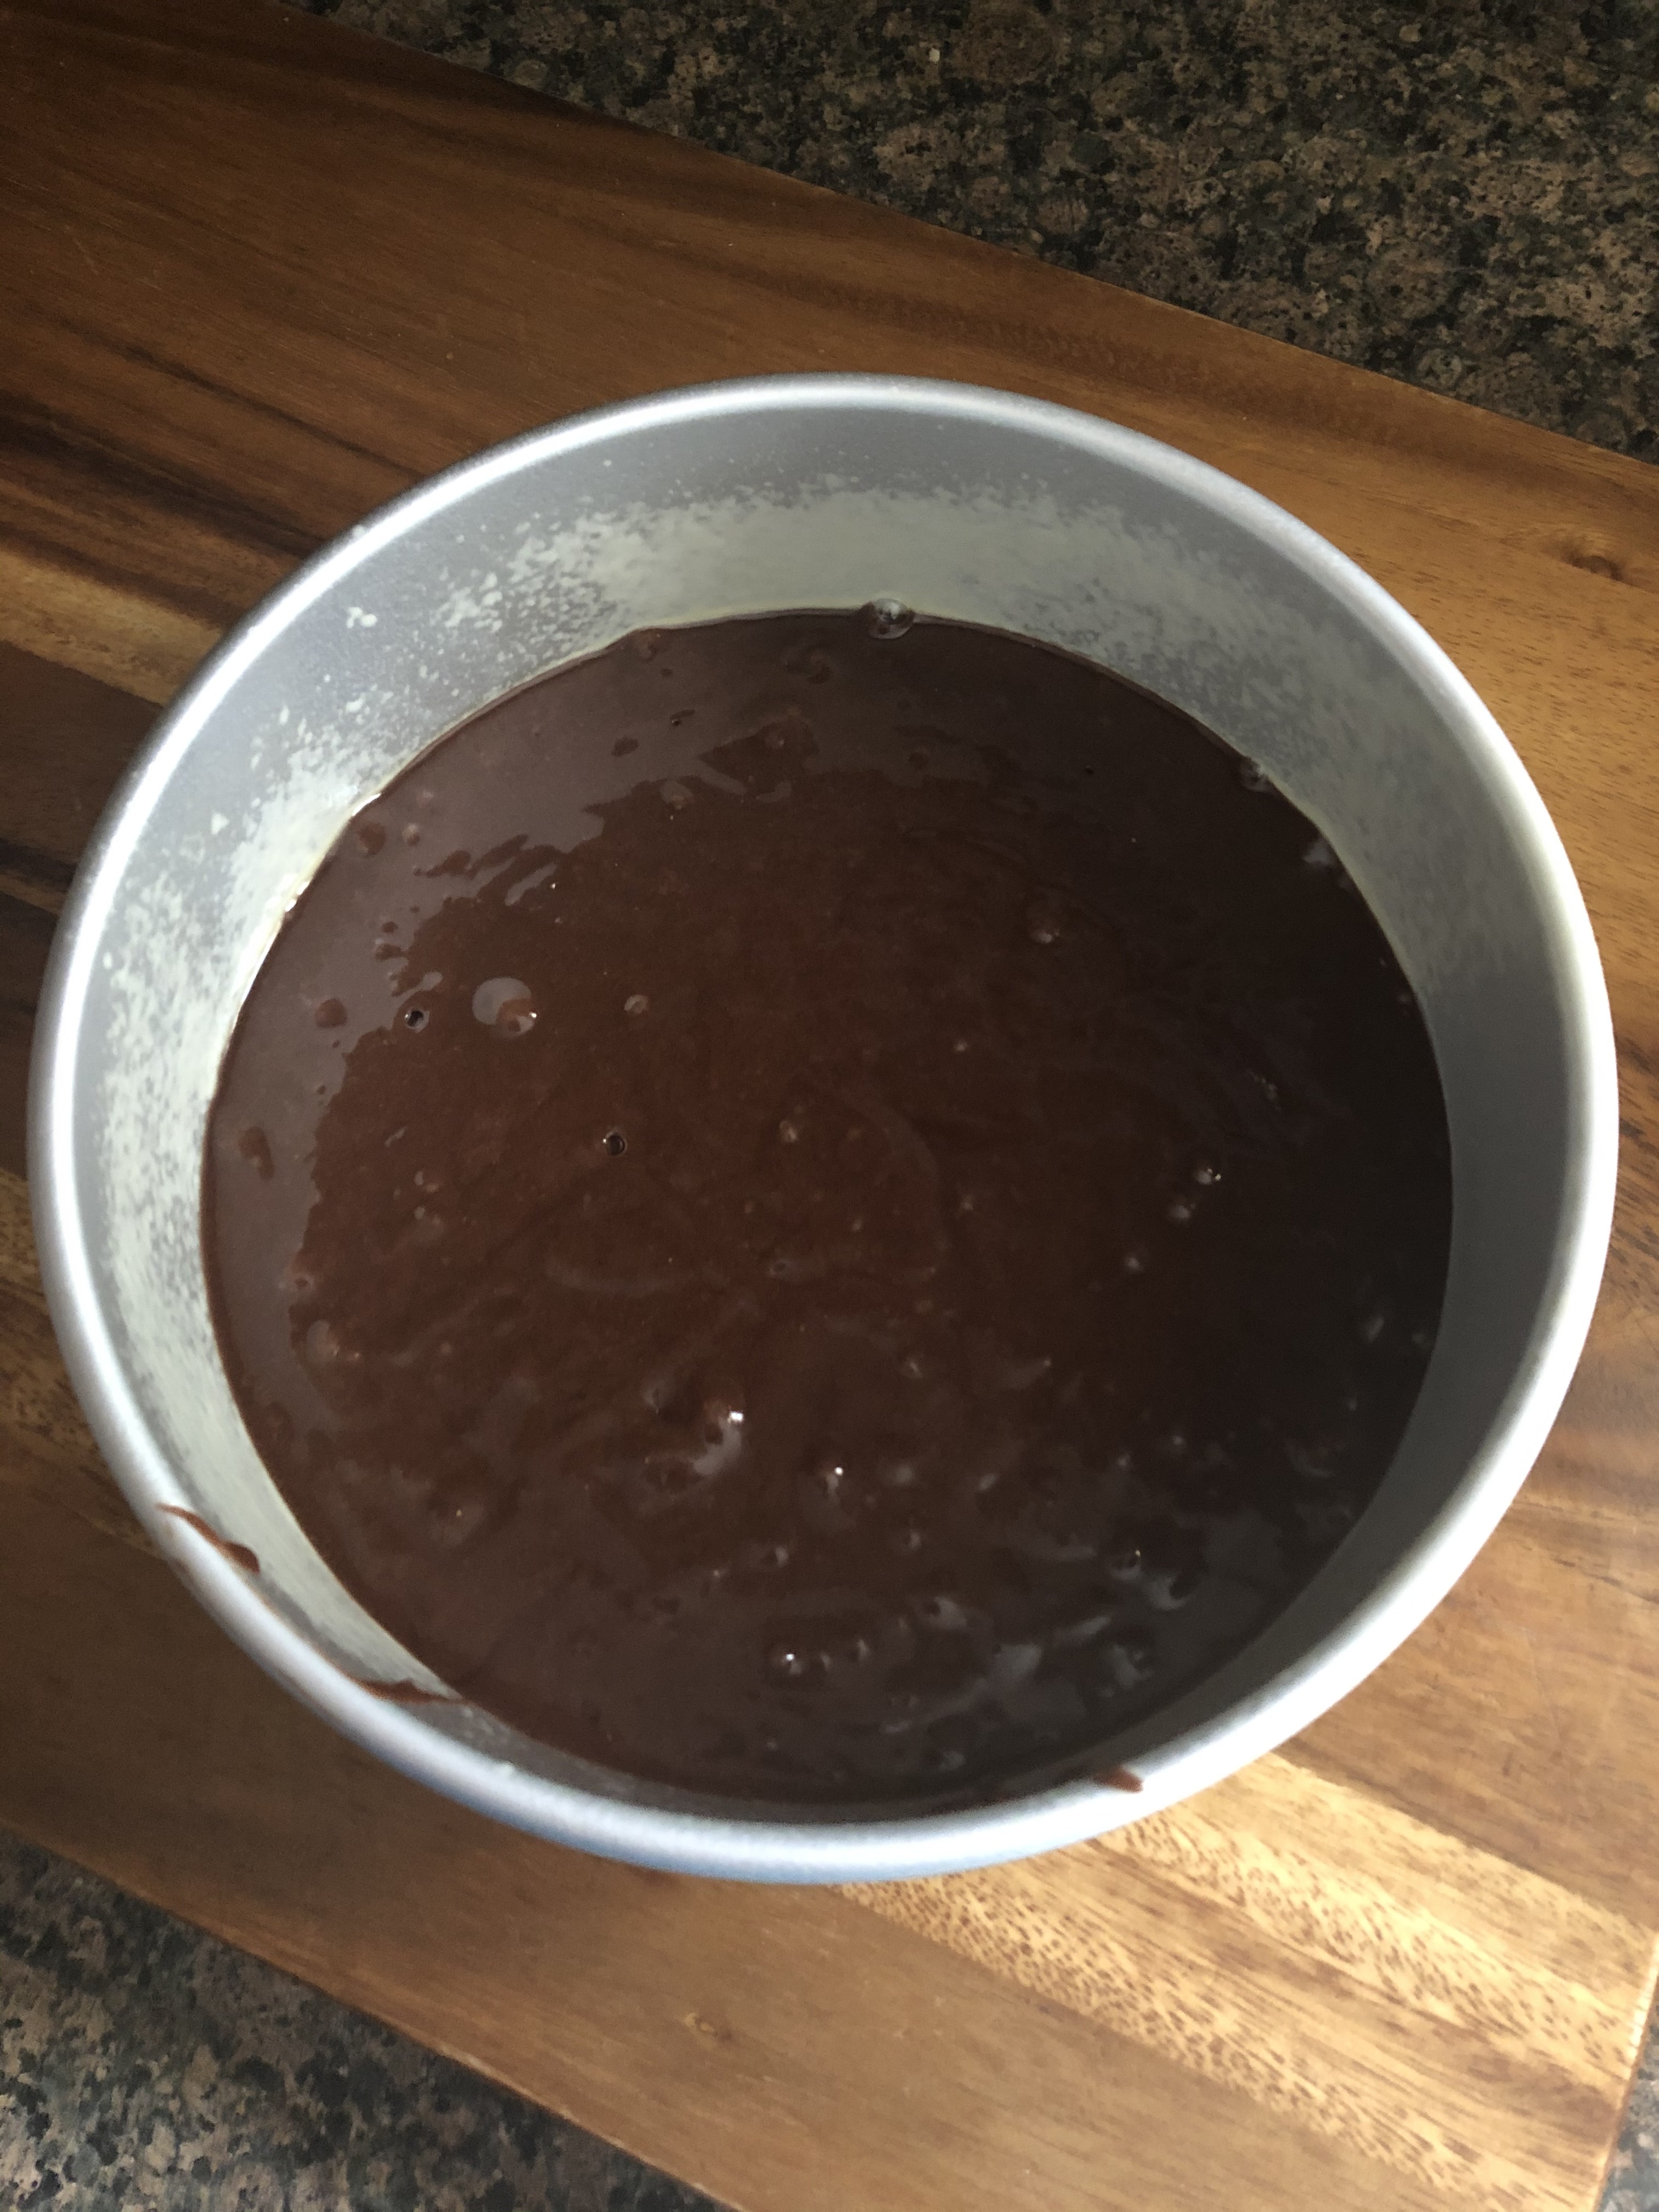
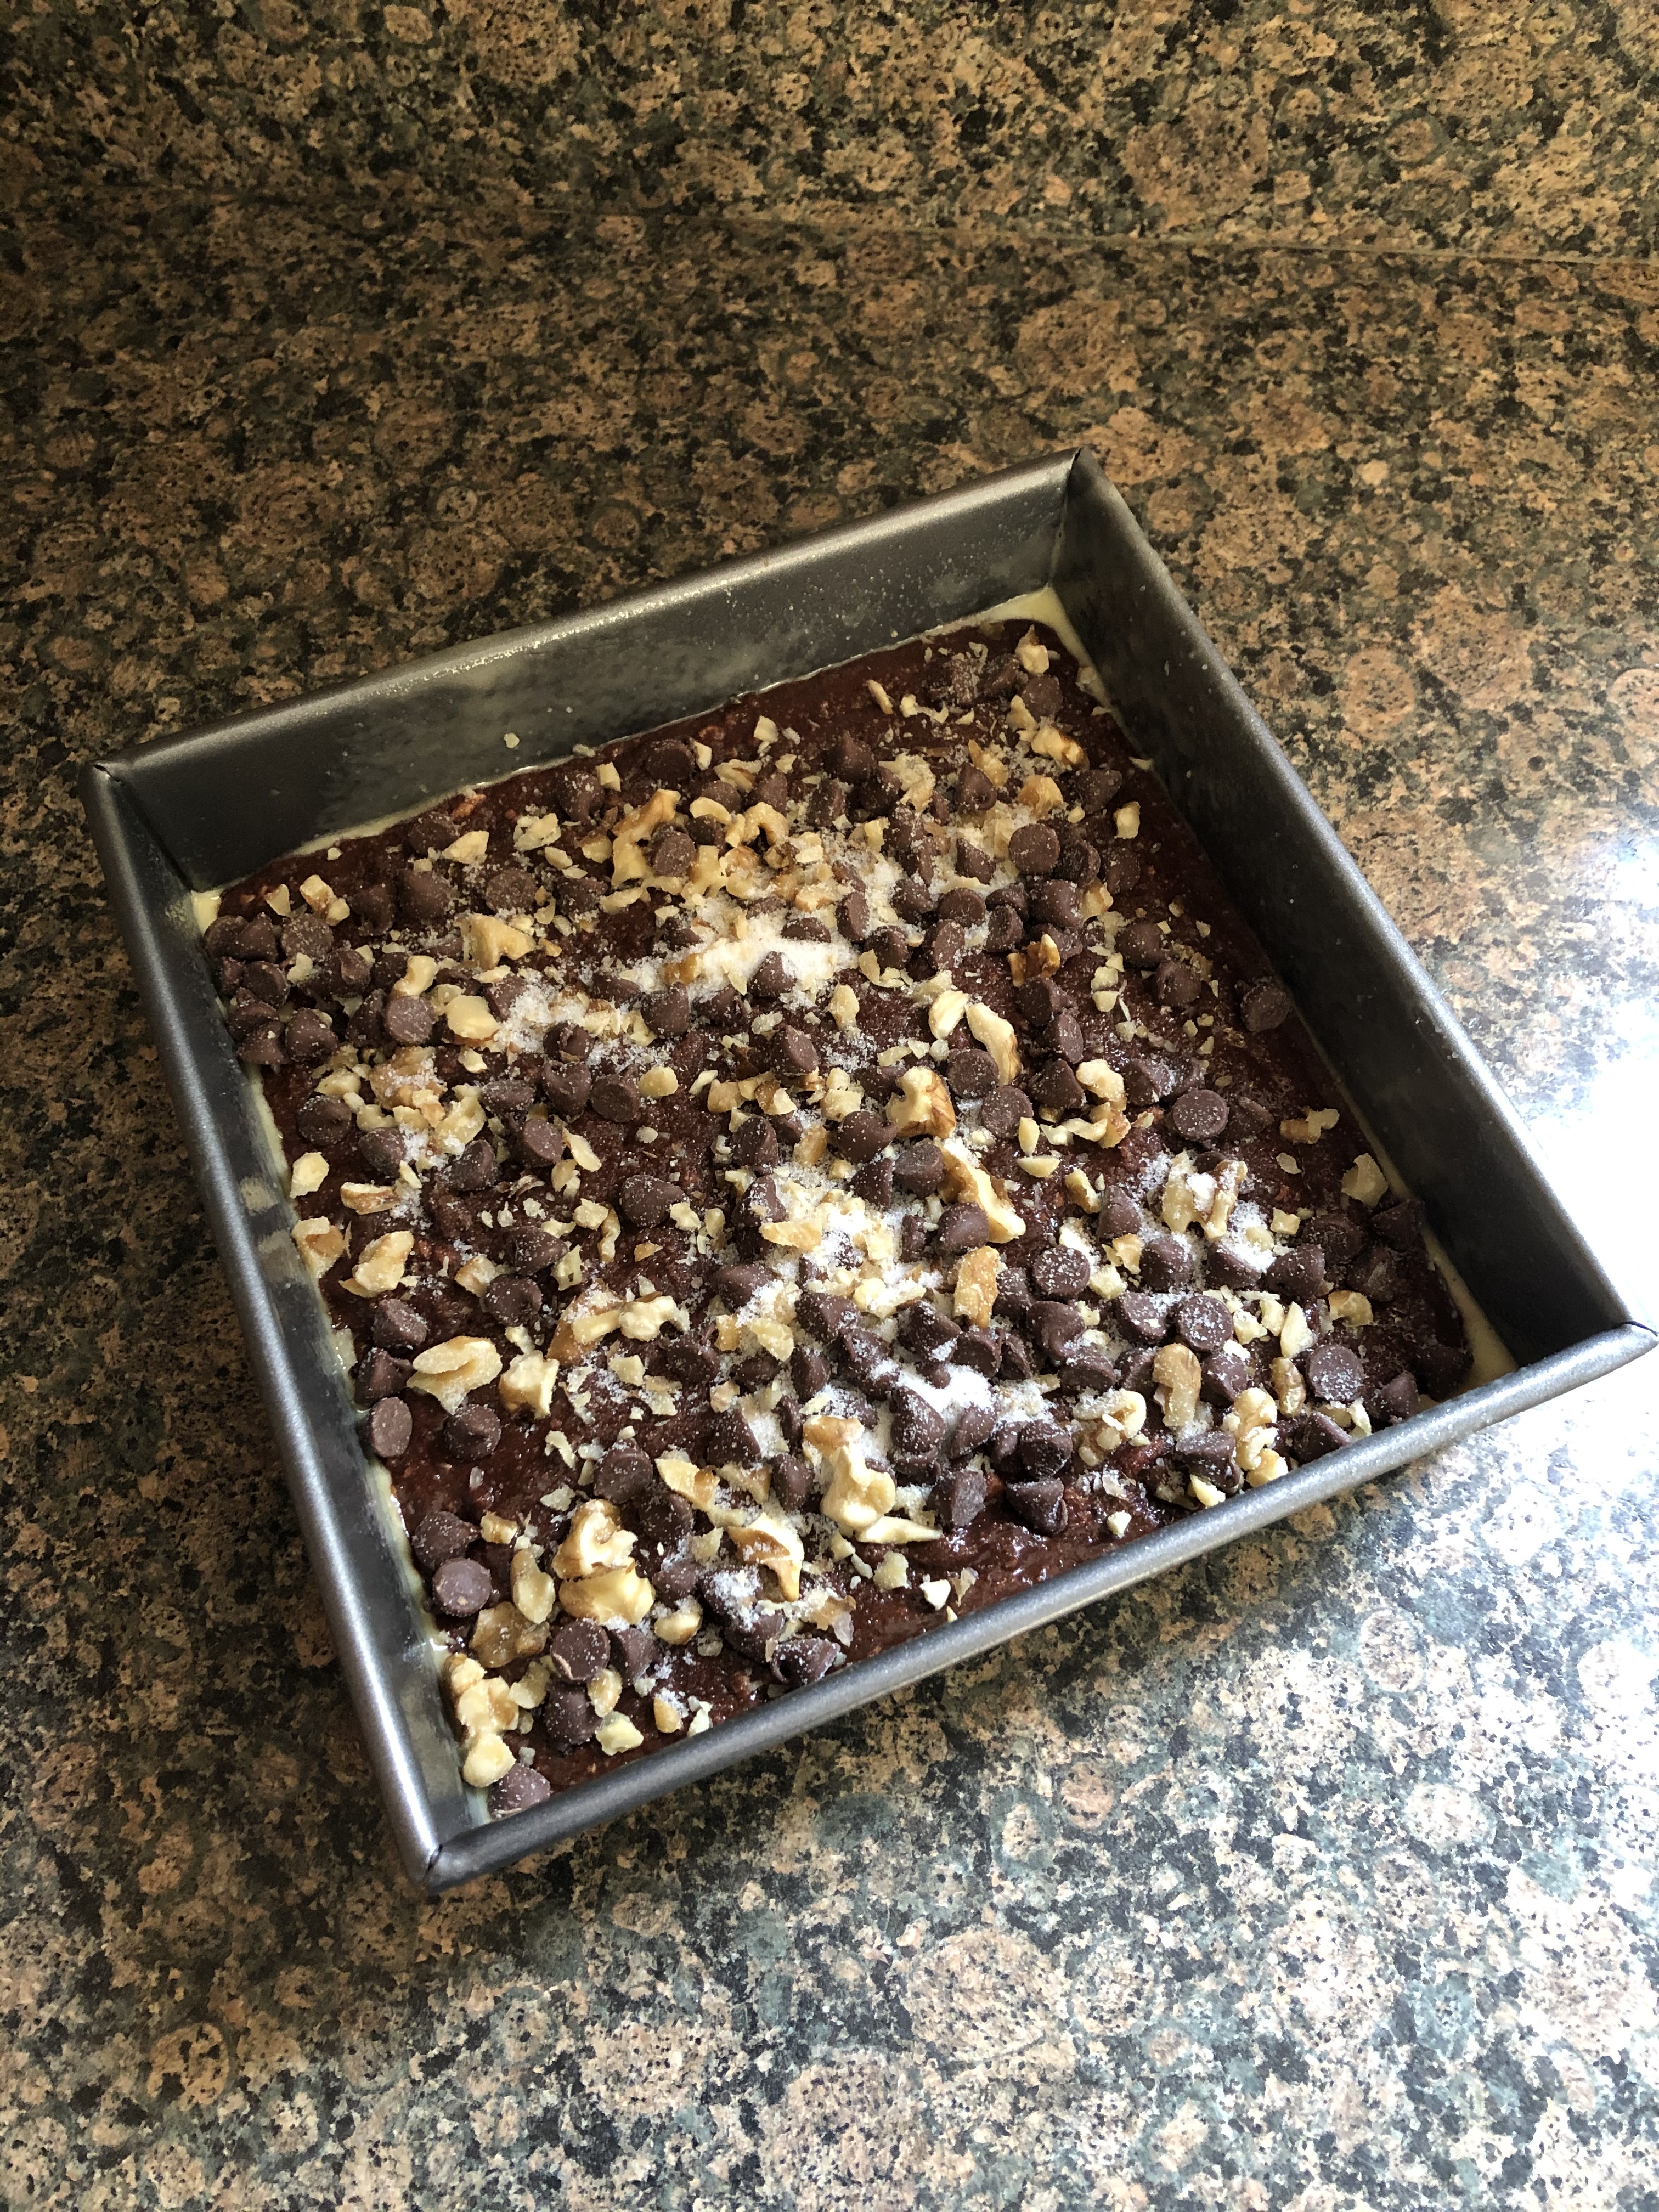
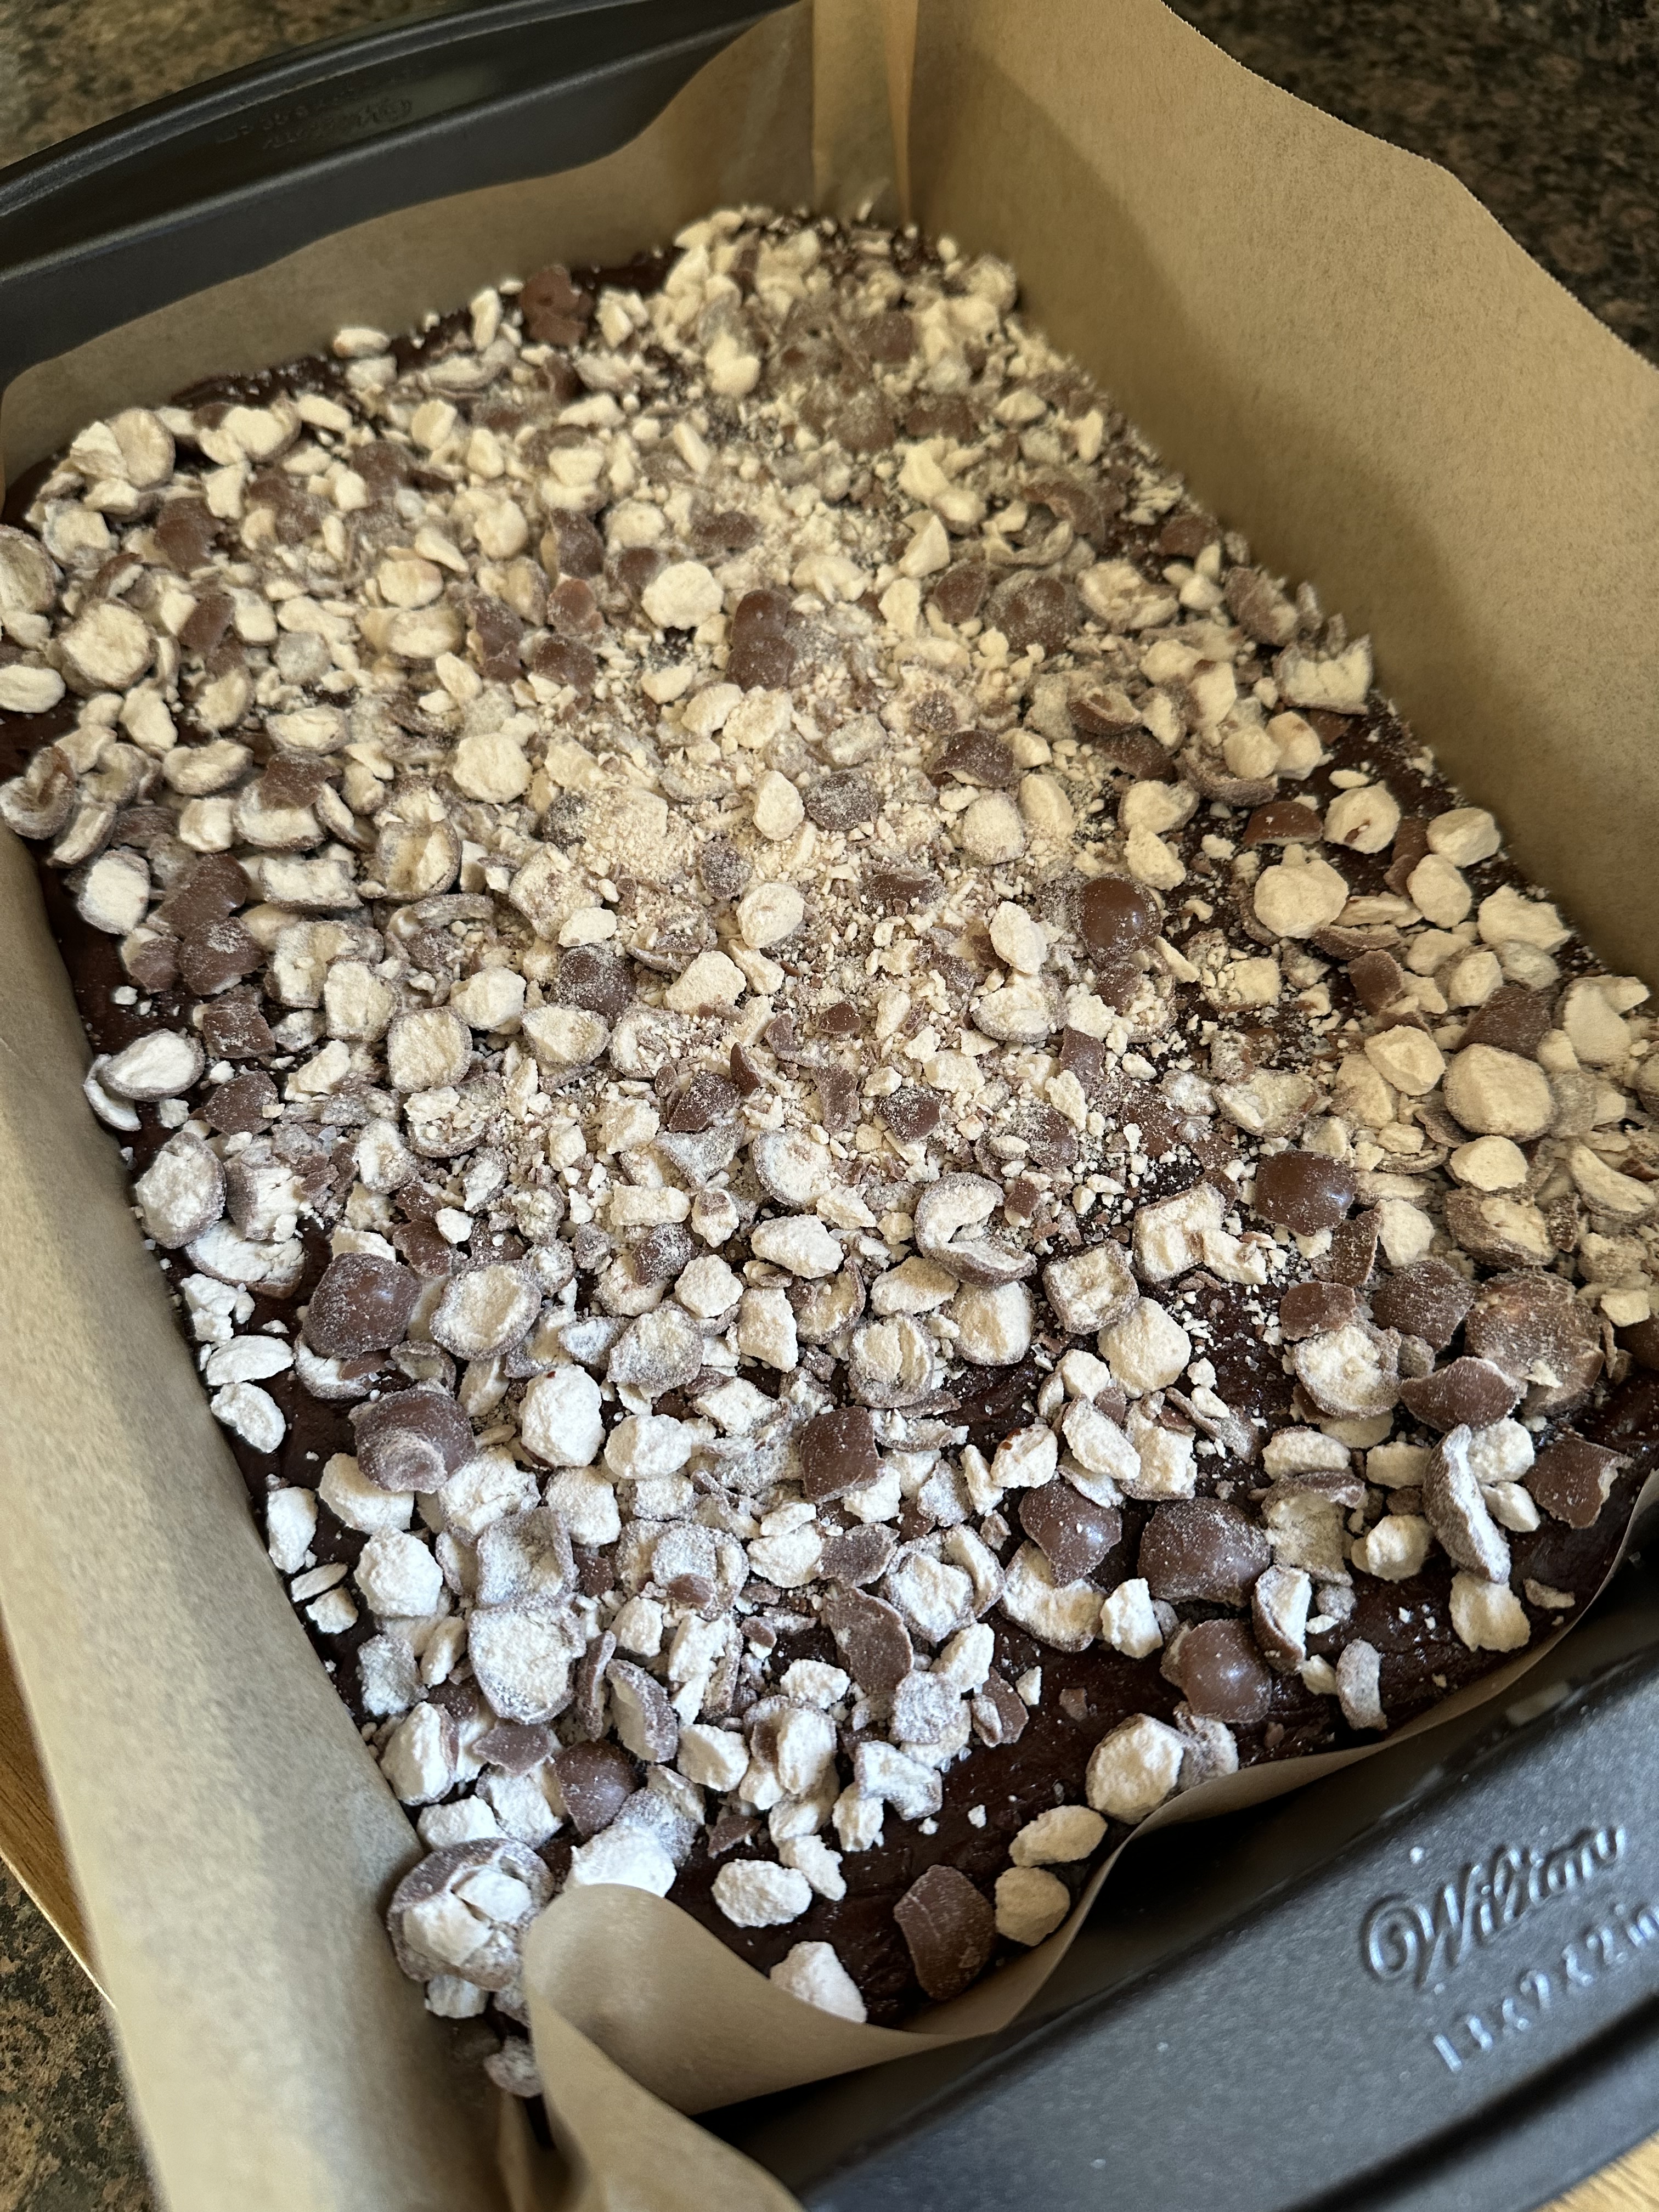
To start, I heated butter and sugar together in a saucepan over medium-low heat until the sugar mostly dissolved. I didn’t want to leave it on the heat too long and end up with the beginnings of caramel sauce. In a large bowl I whisked together eggs, vanilla extract, cocoa powder, malted milk powder, salt and baking powder. I slowly poured the butter mixture into the egg mixture and stirred everything together until it was smooth. I then stirred in the flour and finally folded in milk chocolate chips. I transferred the batter to a 9×13-inch baking pan I lined with parchment paper. And finally, I topped the batter with chopped malted milk balls (i.e. Whoppers).

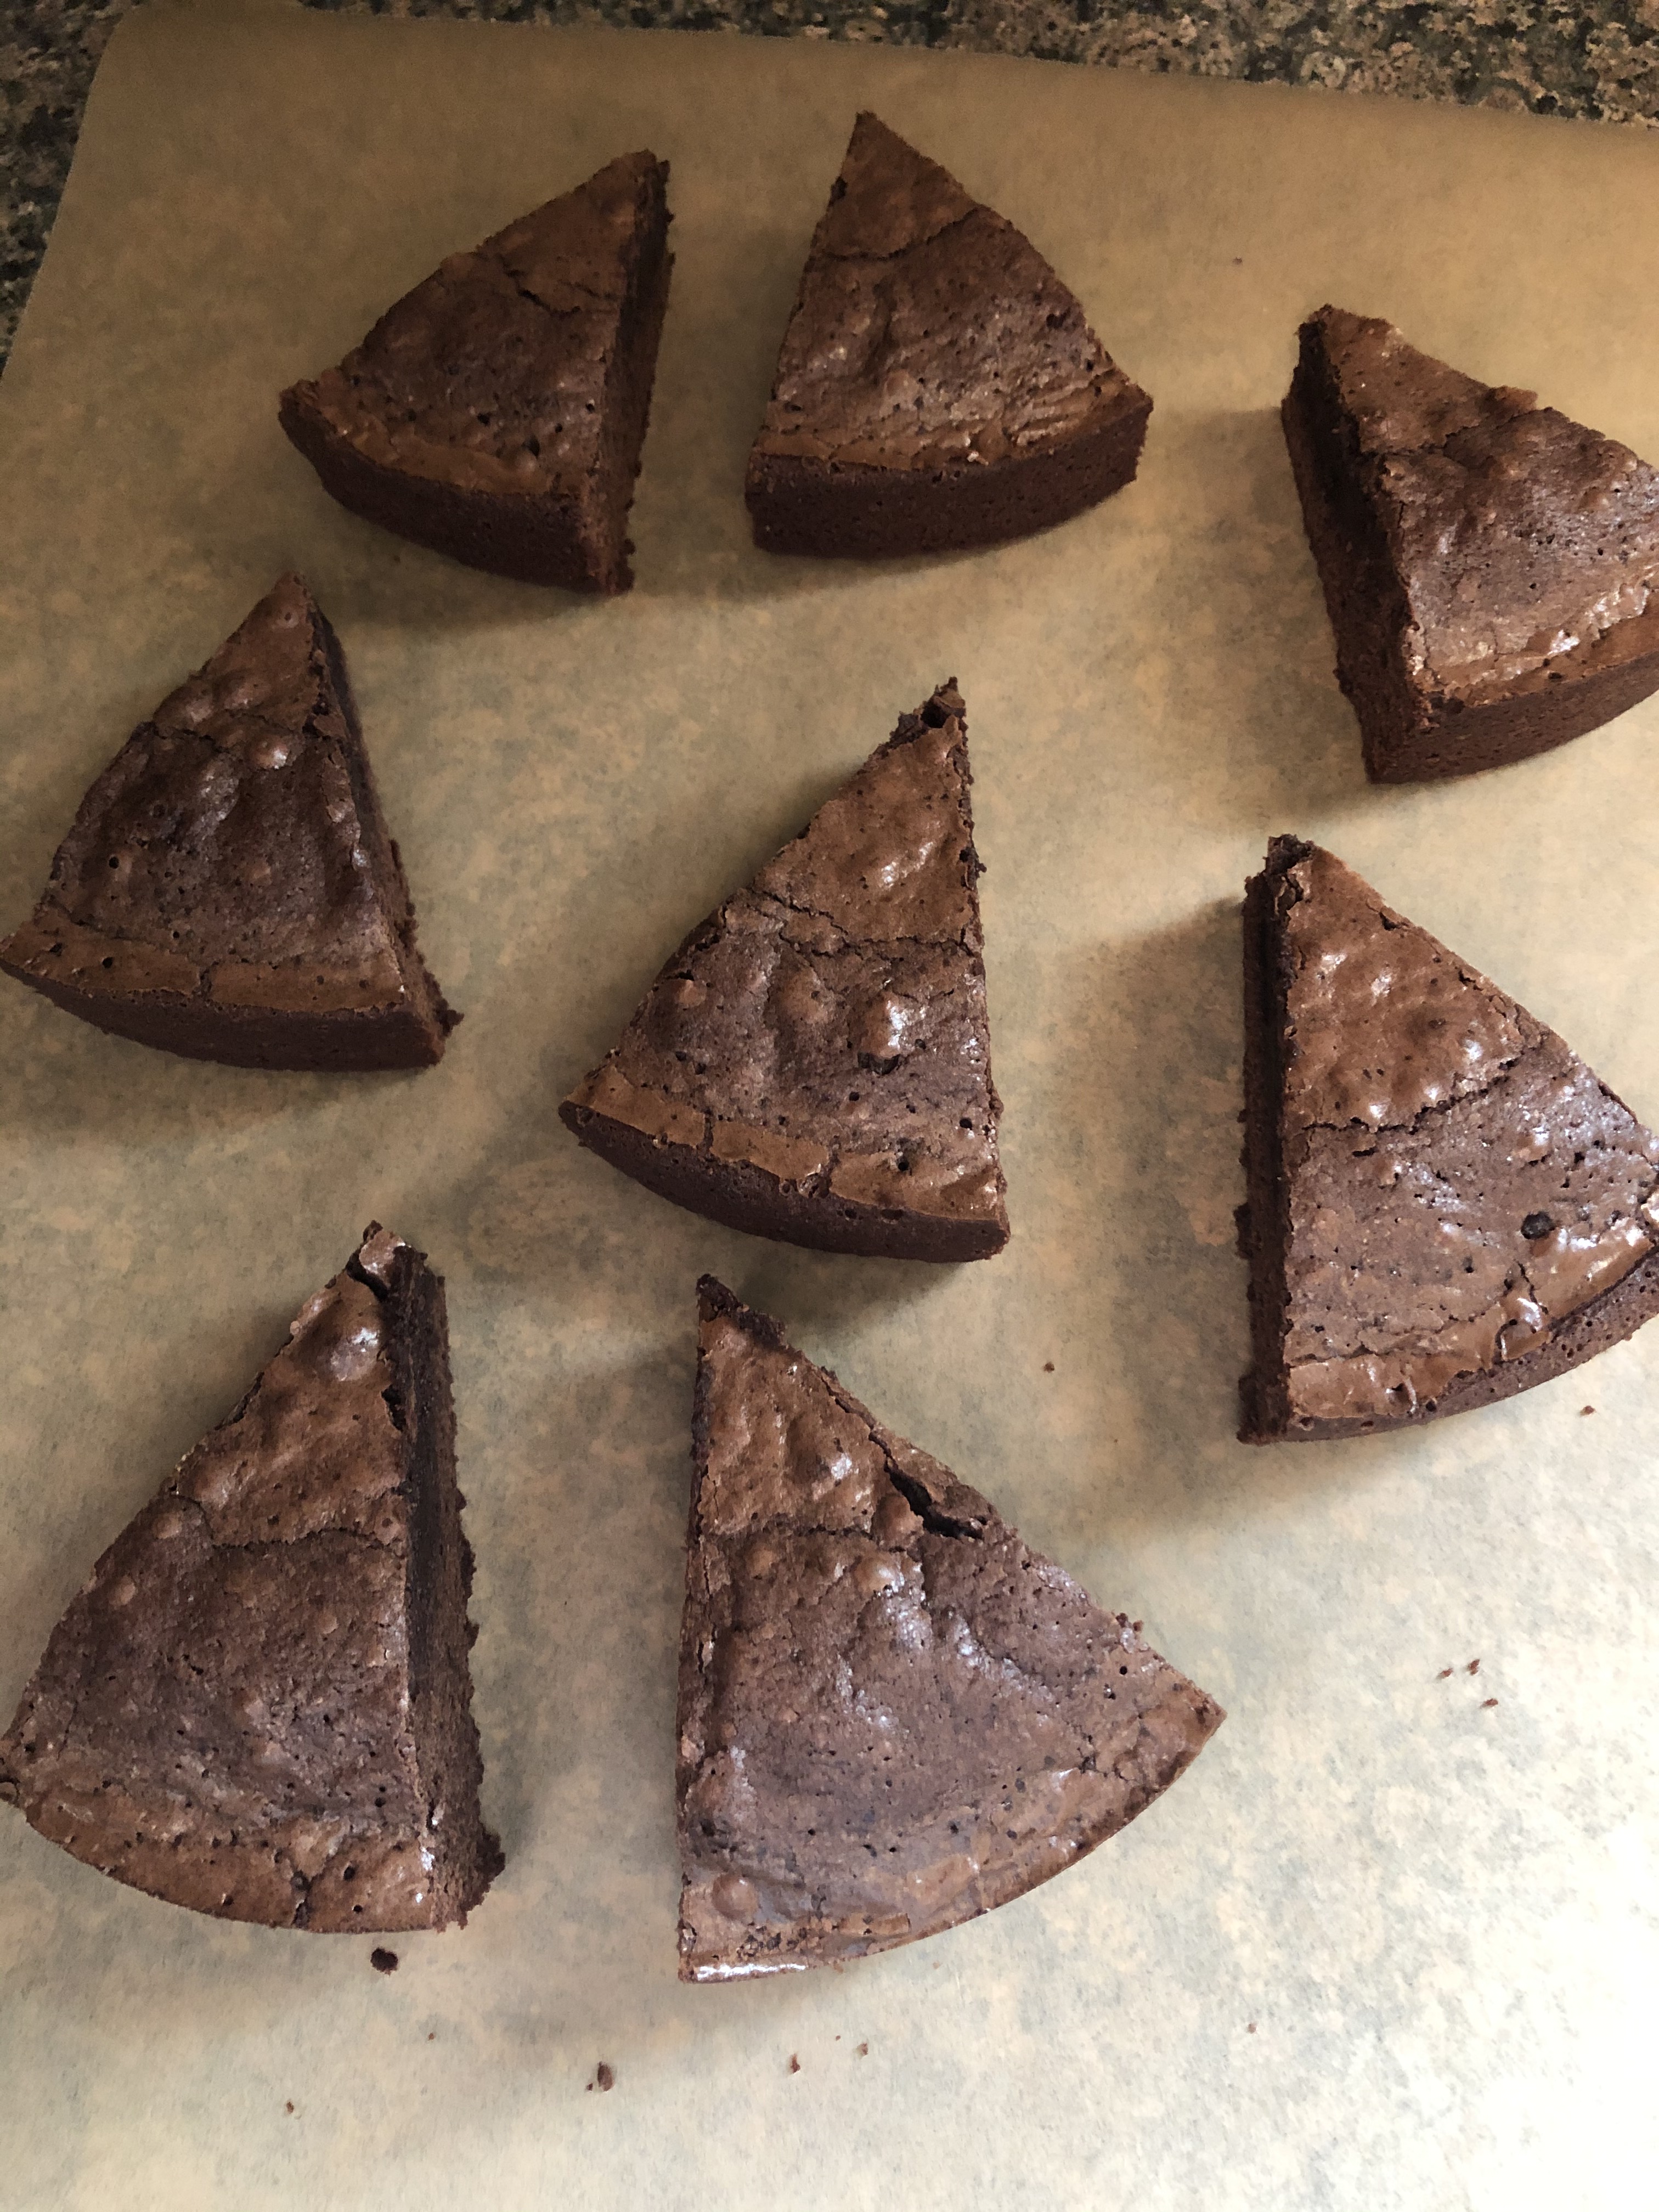
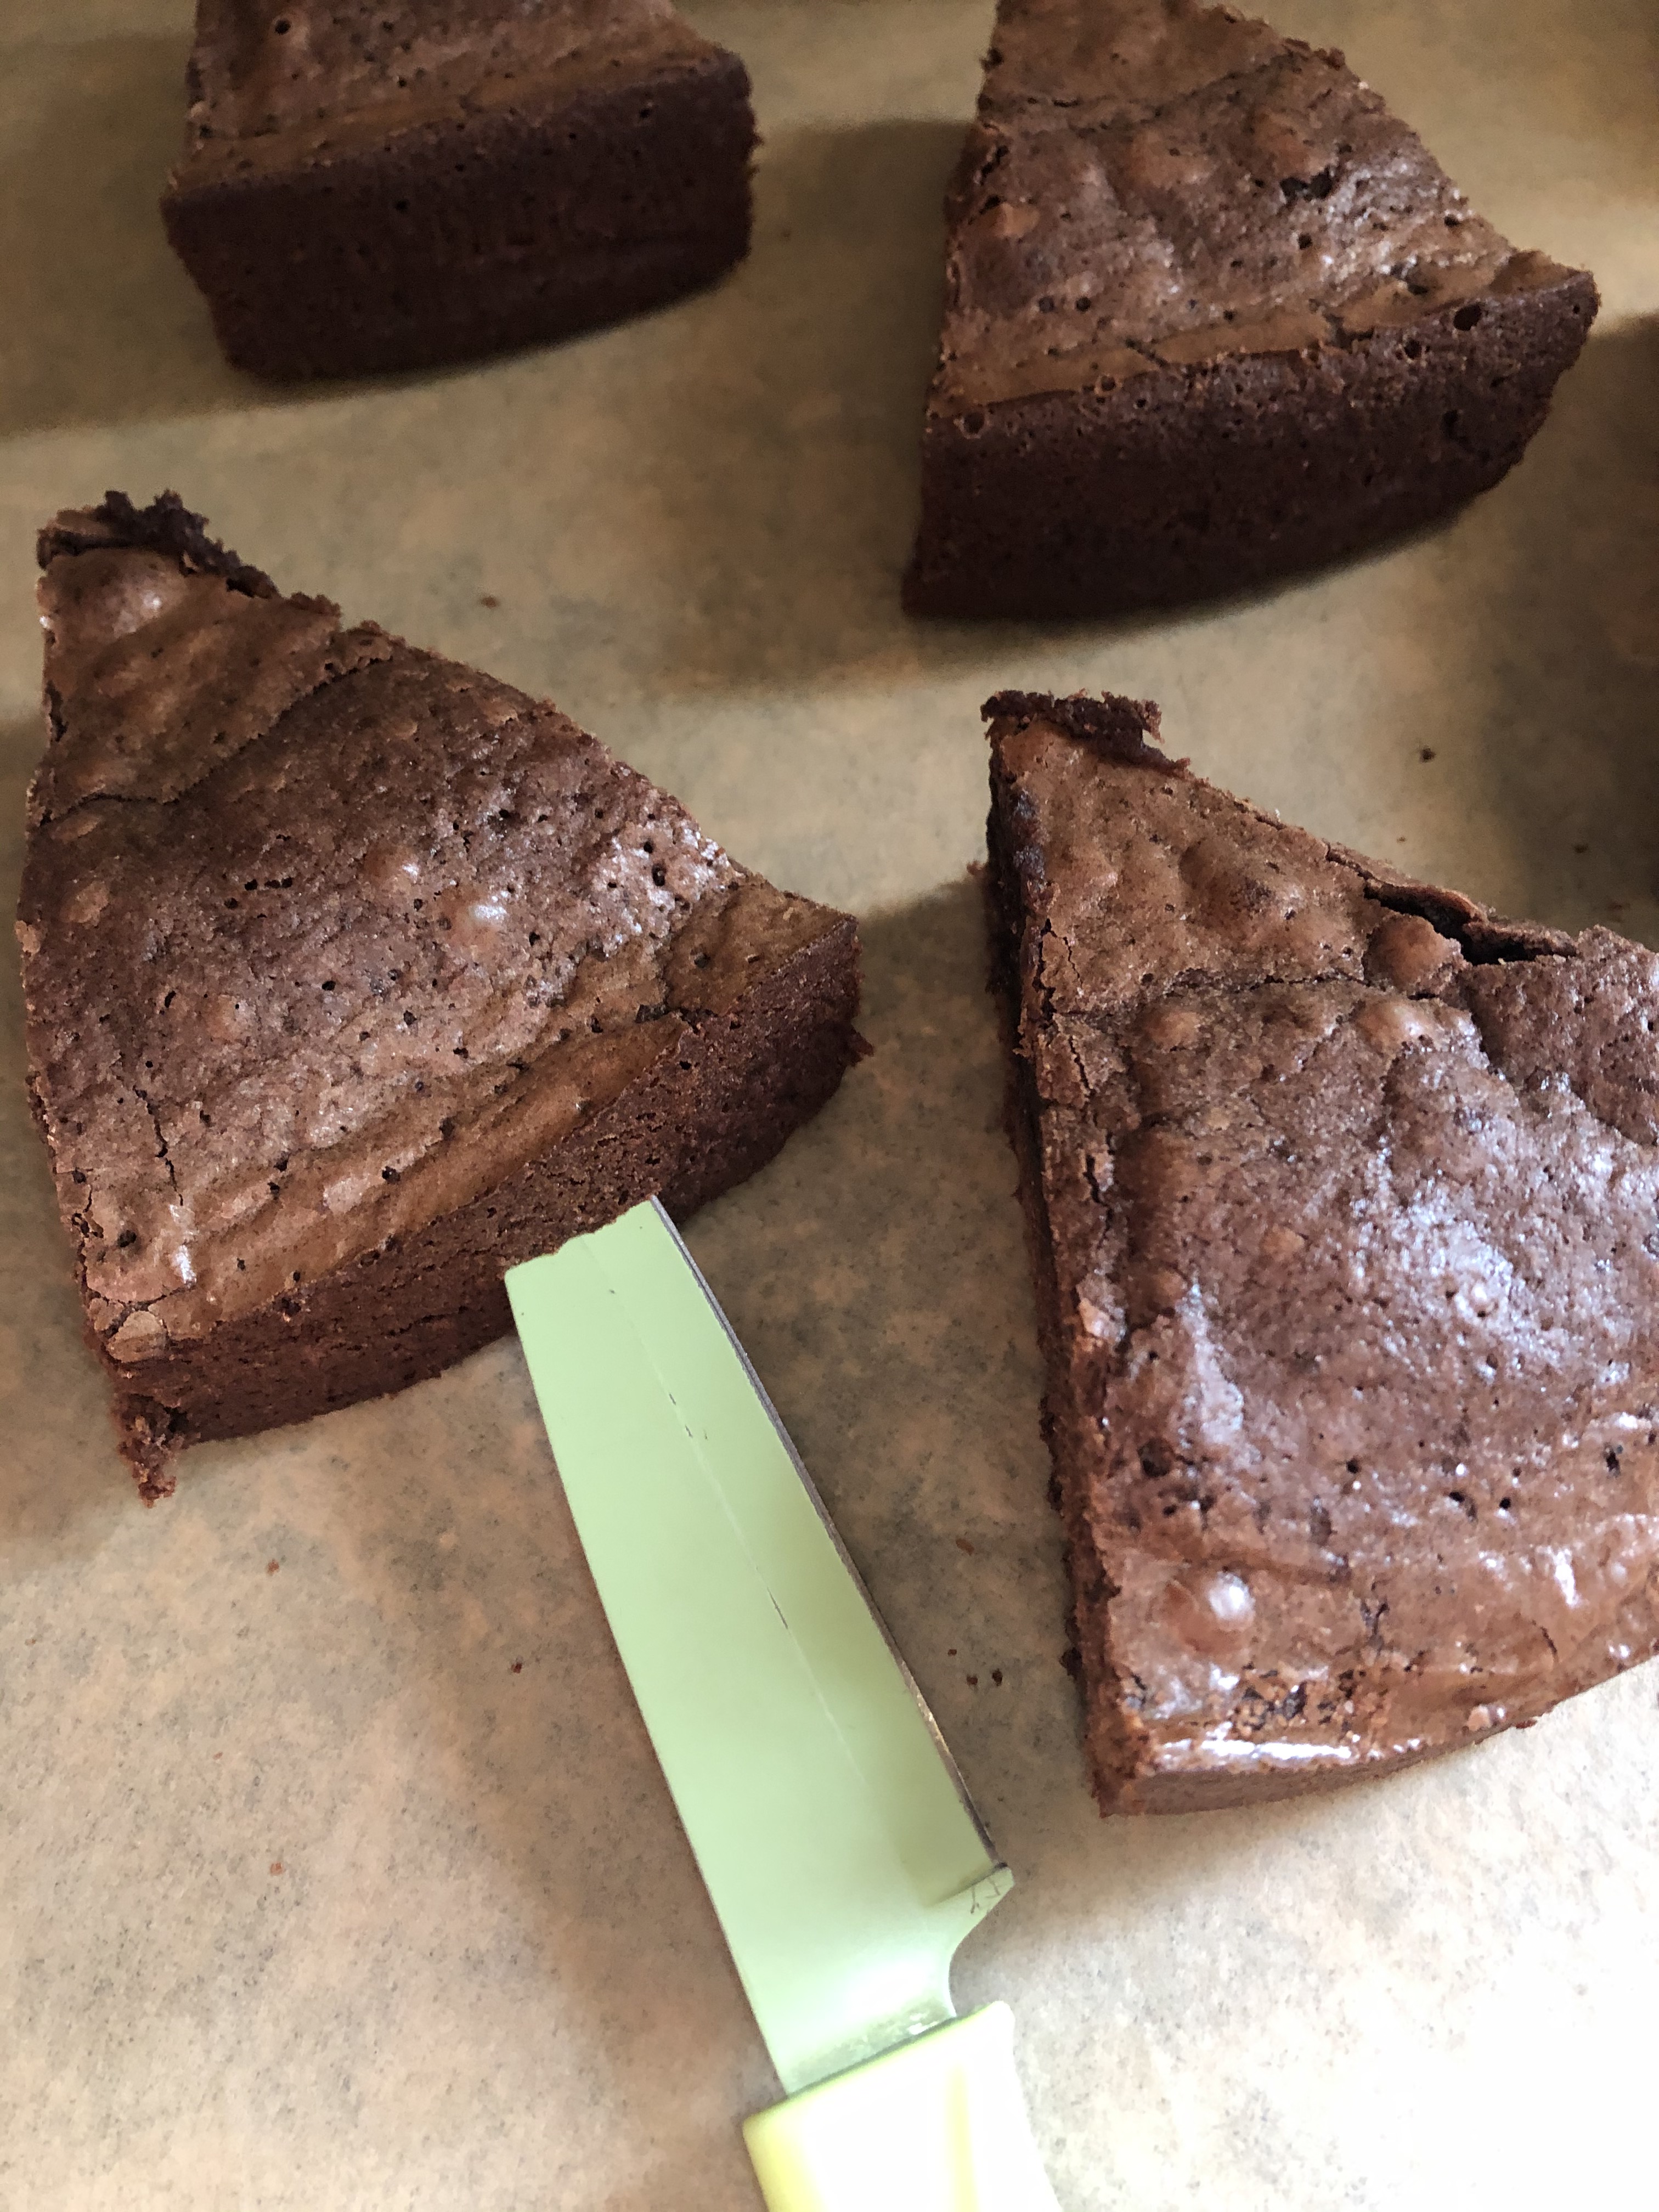
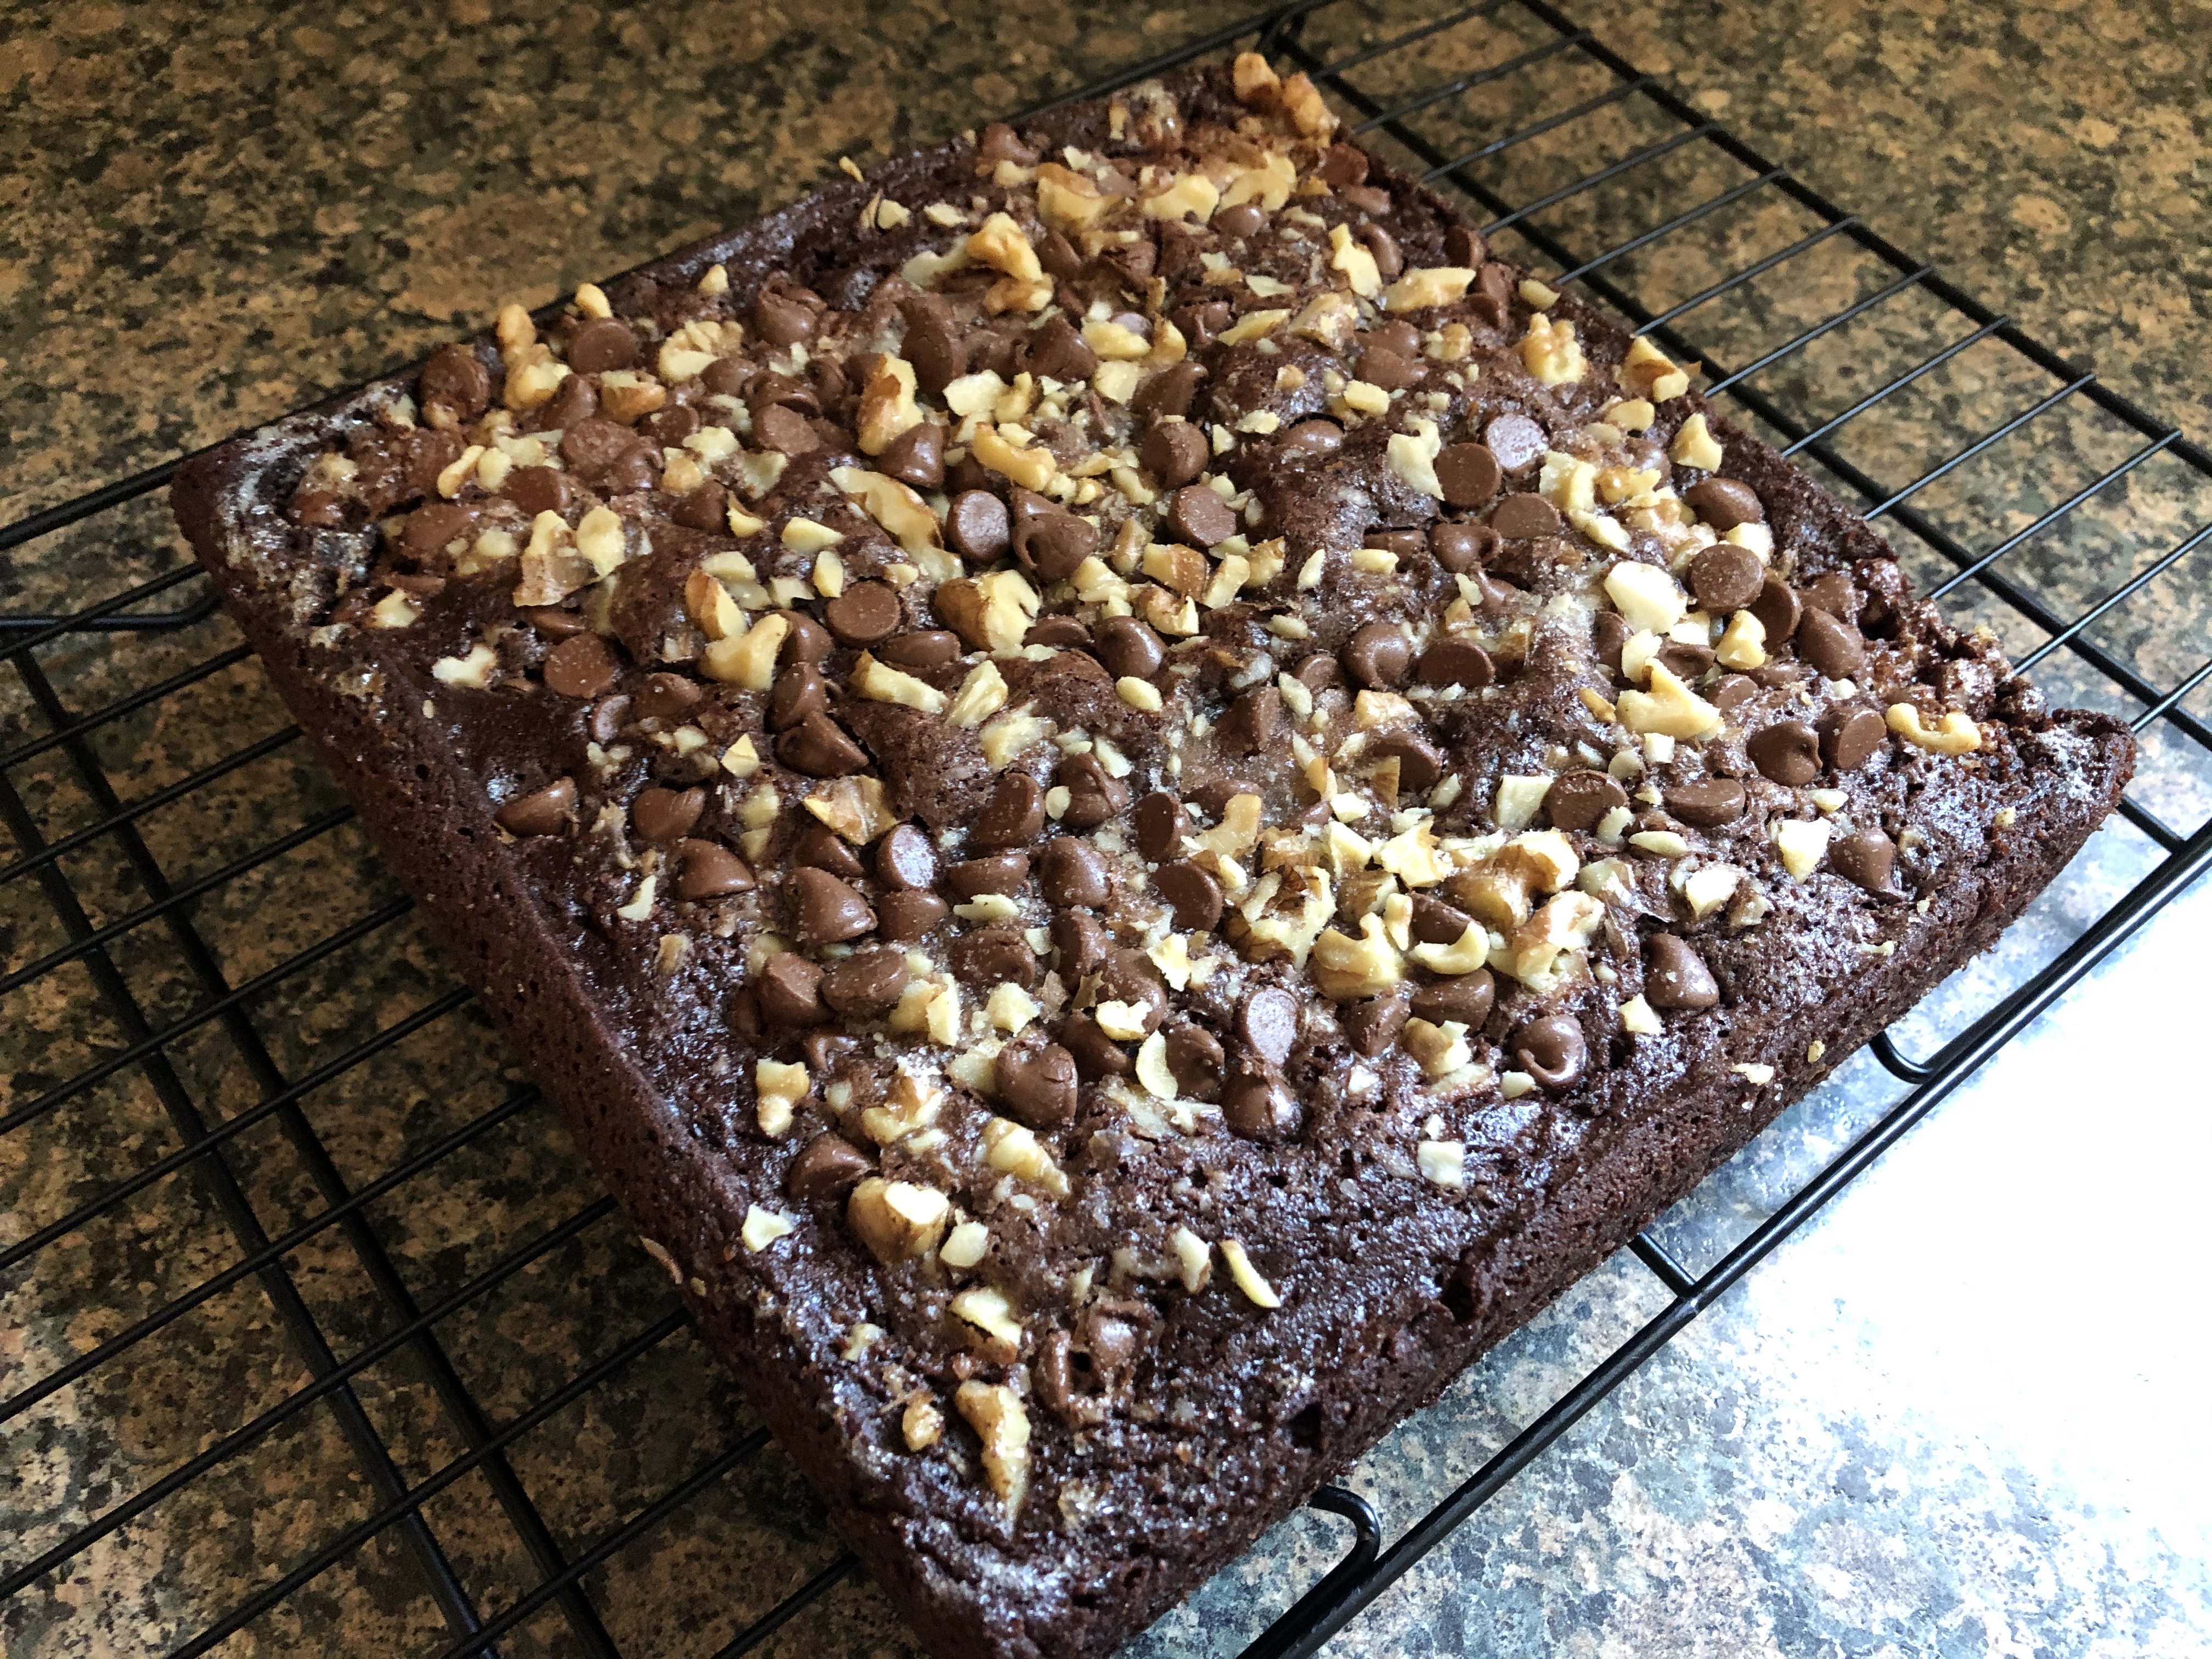
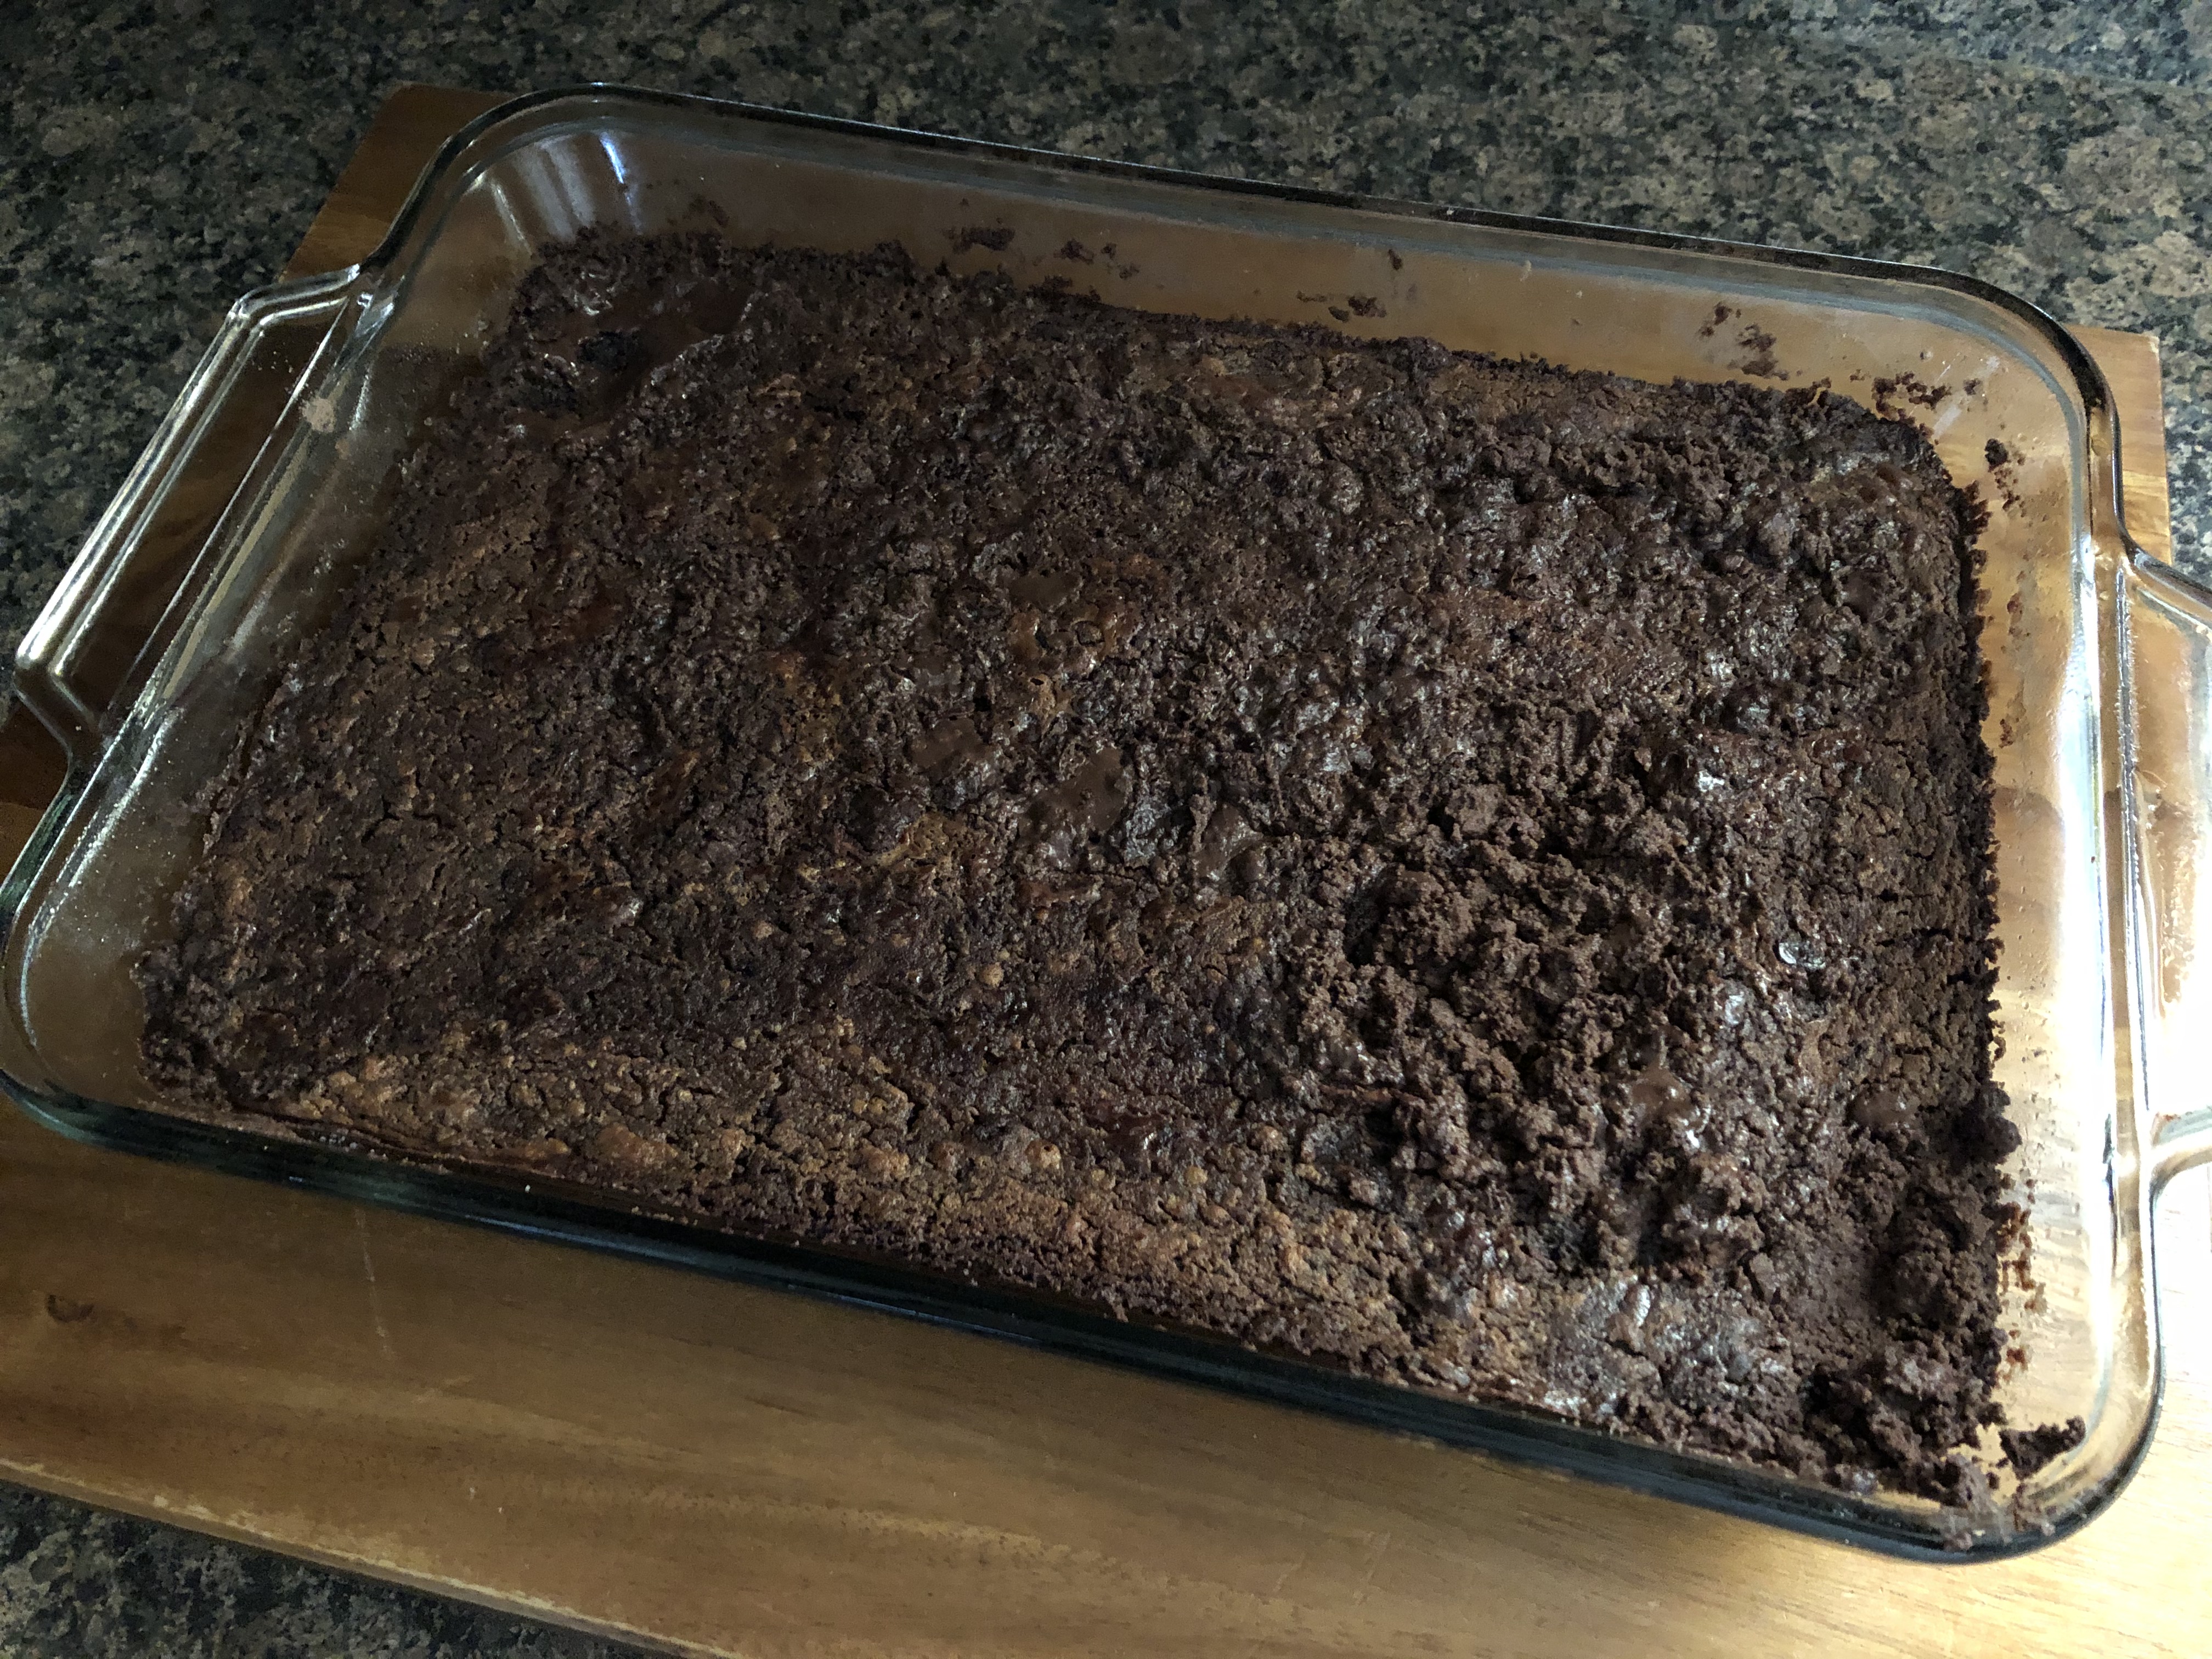
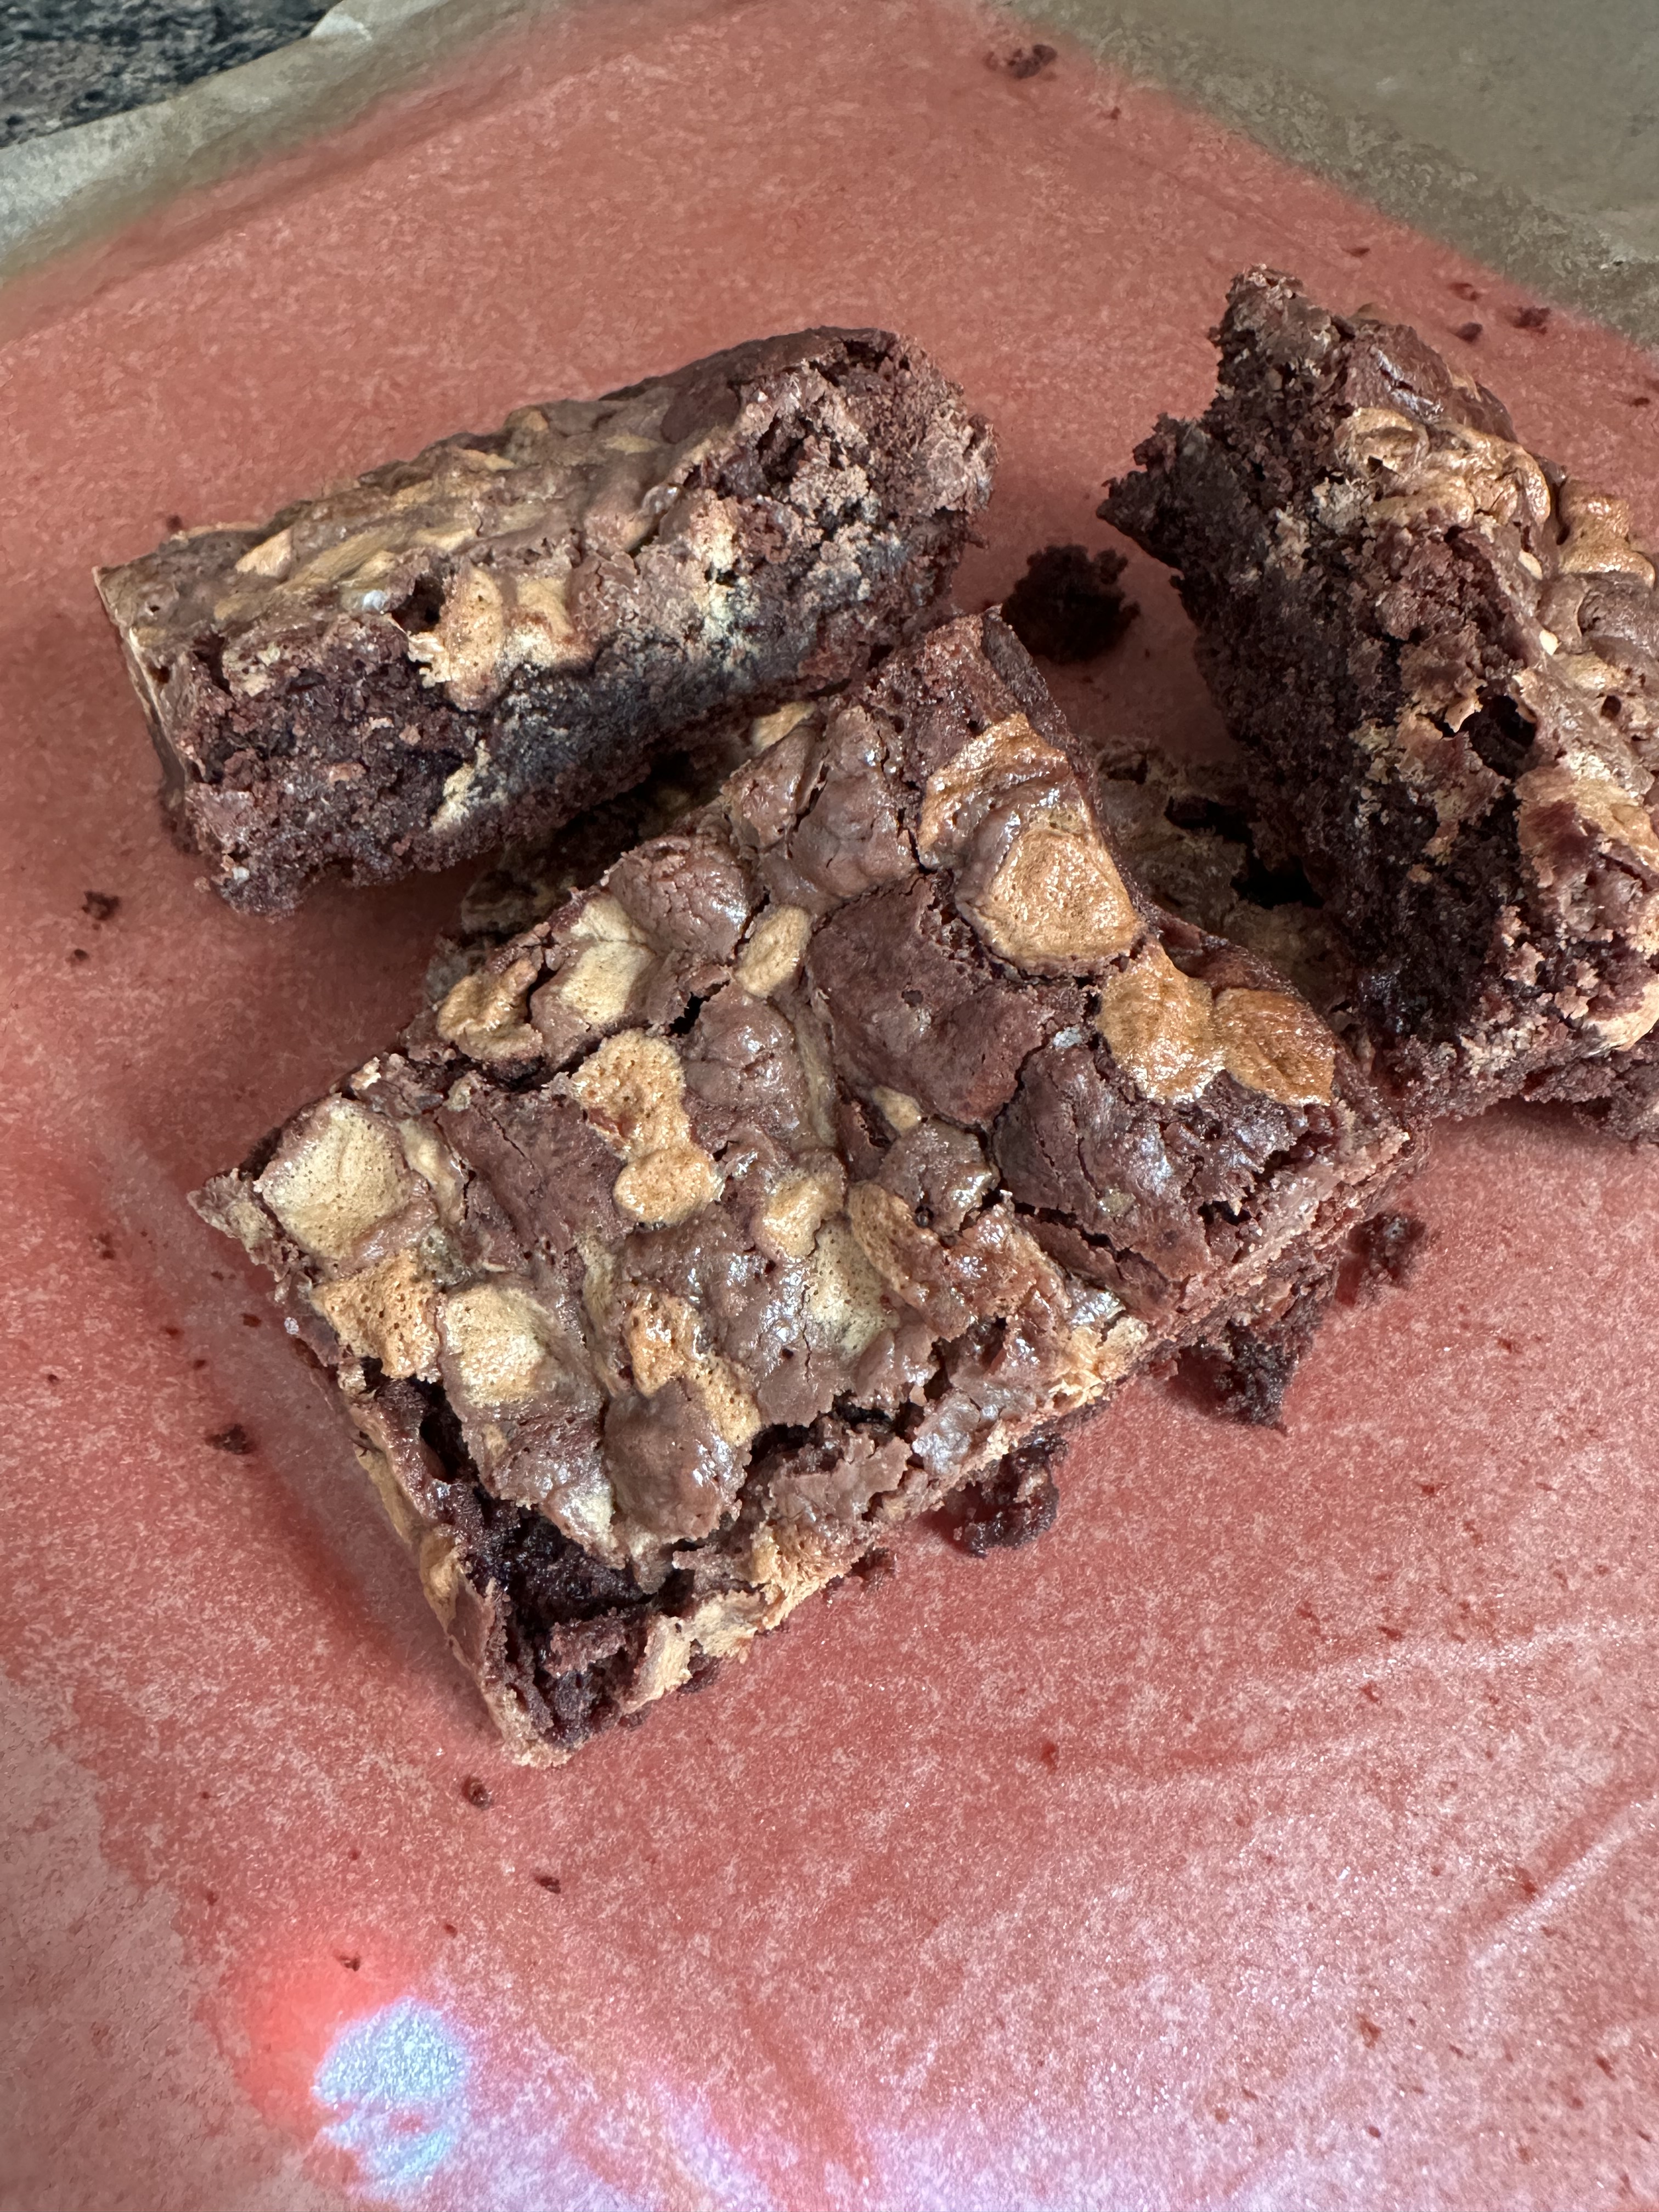
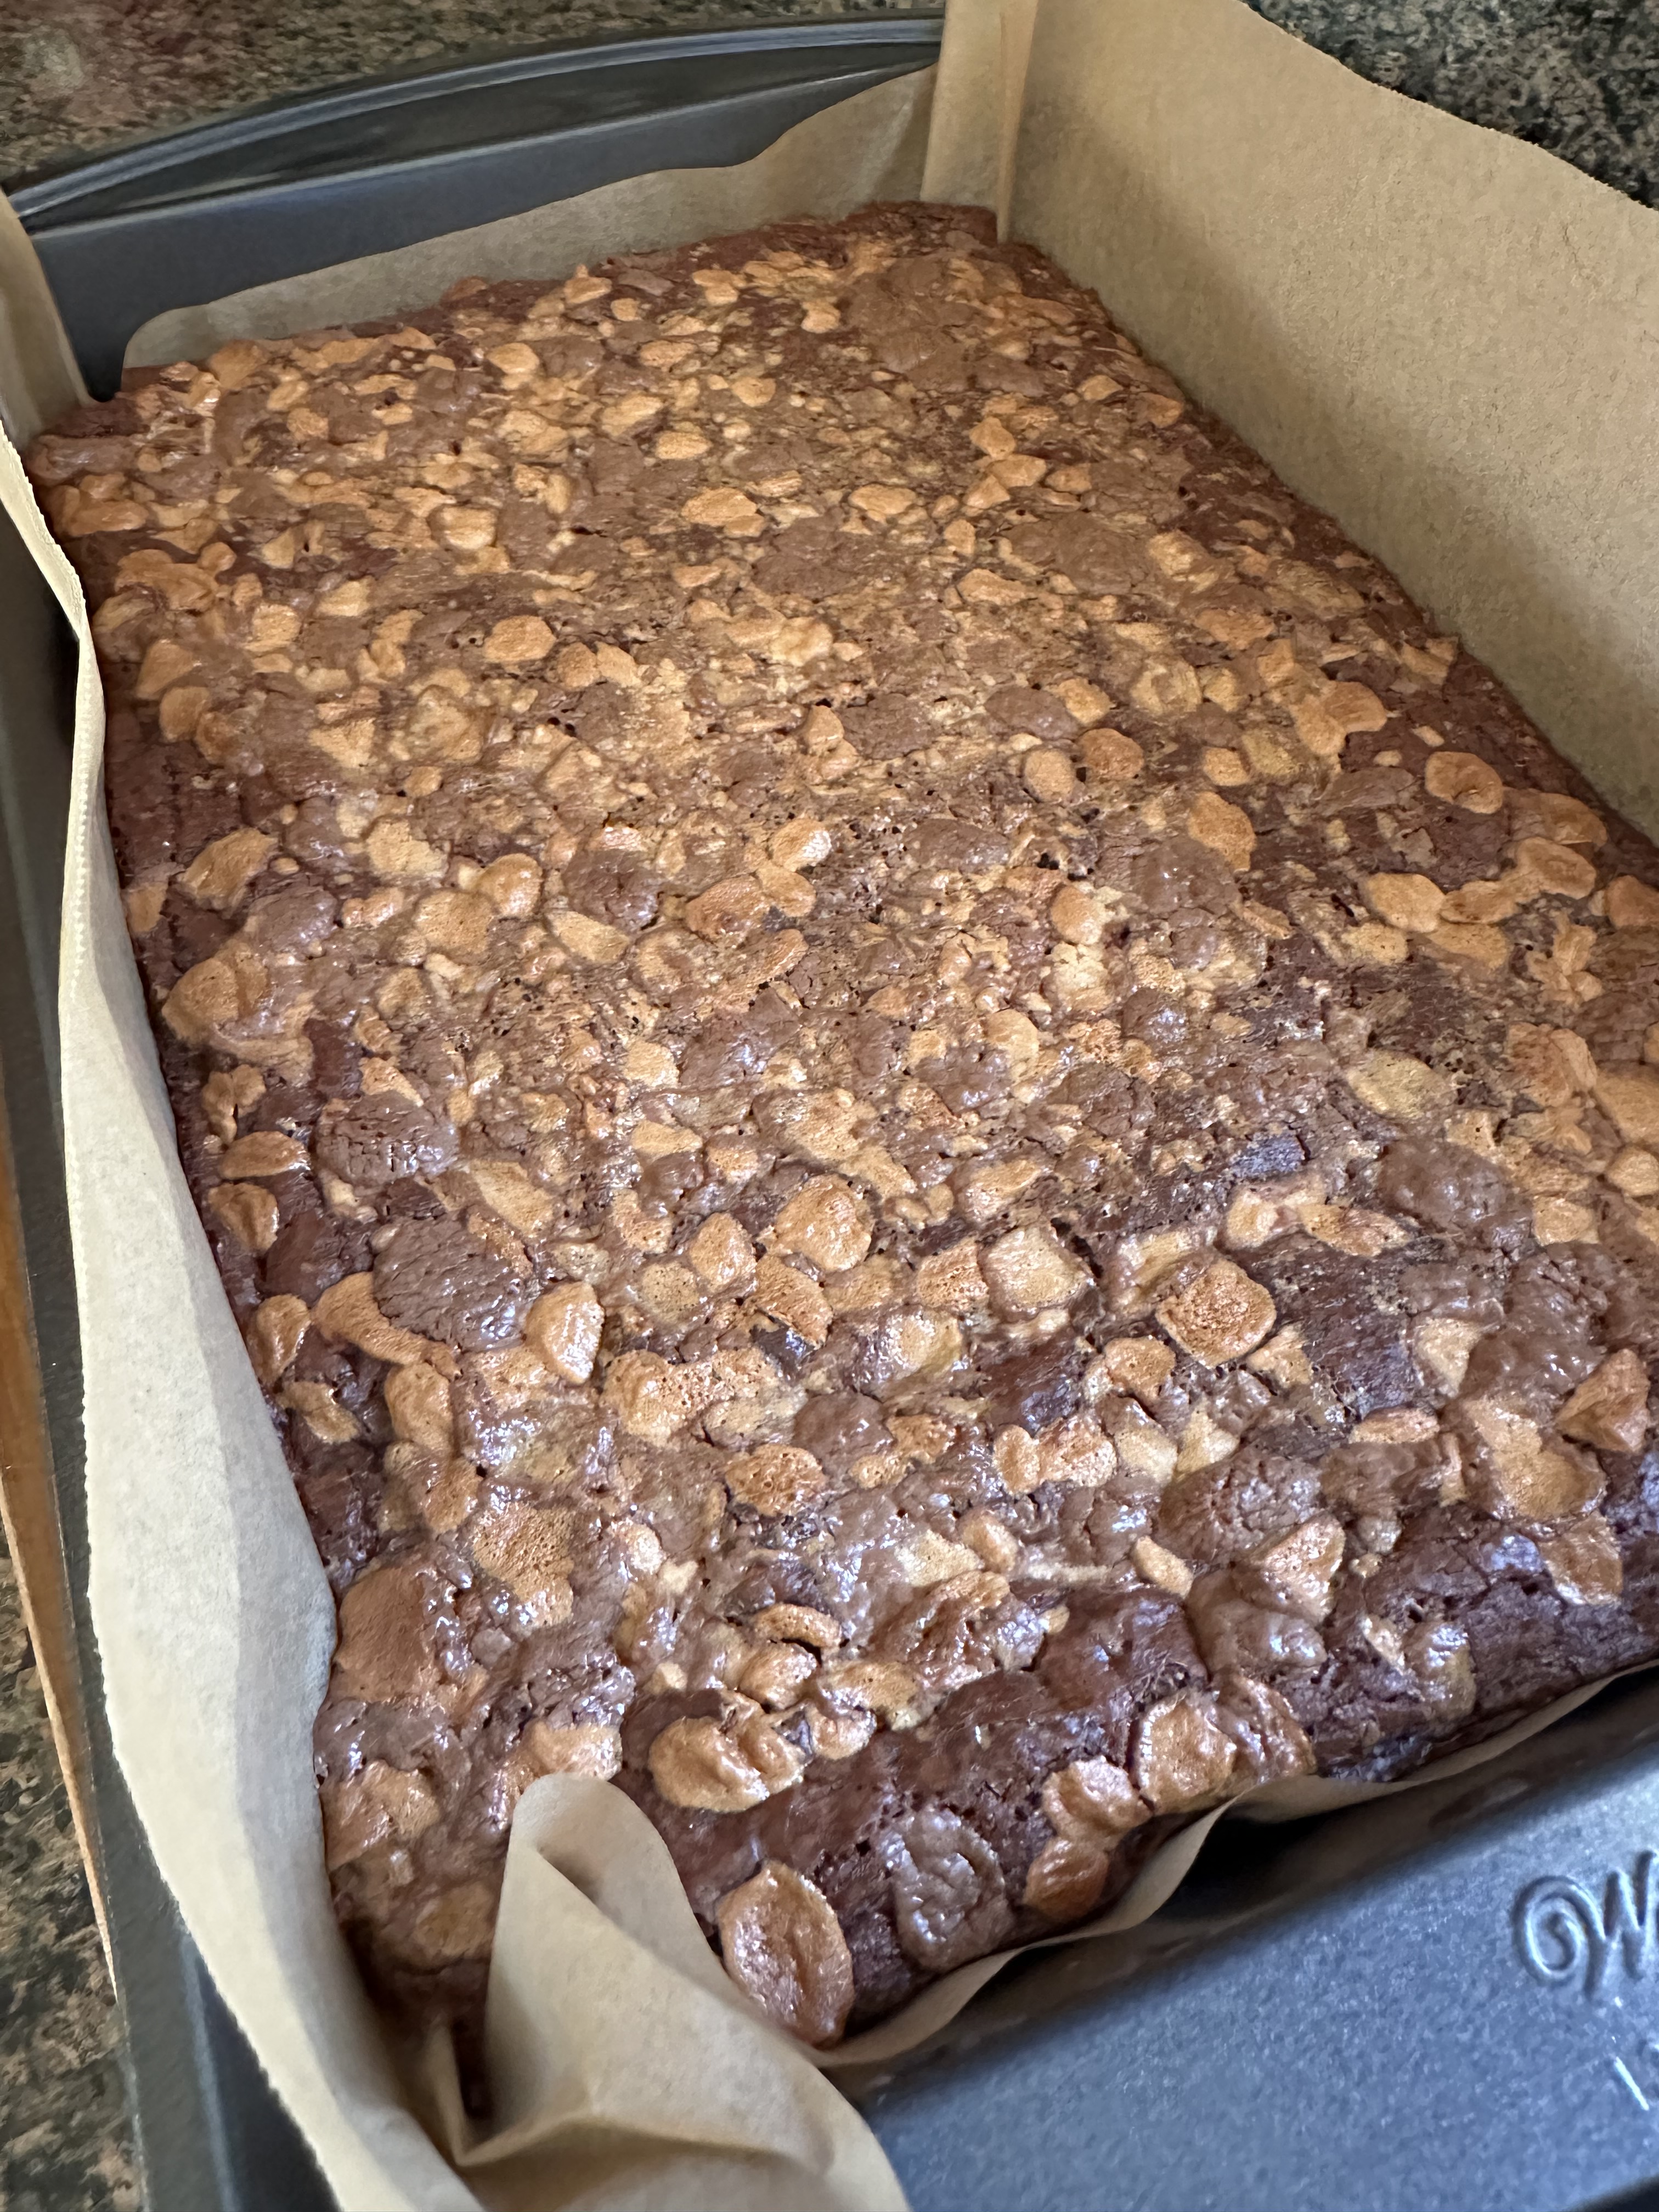
After baking for about 35 minutes they were done. The malted milk balls on top ended up with a nice caramel color and some of the pieces that were still decent size after chopping them gave a nice malted milk taste to the brownies. Just a quick note in case you are thinking of doing the same, I actually didn’t slice these brownies the same day I baked them. I wrapped them in plastic wrap and kept them at room temperature and then sliced them the following day to try to keep them fresh an extra day or two. And, I will point out, as with most brownies, you should warm your knife under hot tap water before slicing. You will get cleaner slices that way.

If you are looking for more recipes with malted milk powder, check these out:

Malted Brownies

Malted S’mores Ice Cream

Chocolate Malted Cupcakes with Fluffy Vanilla Frosting

Malted Chocolate Brownies

Ingredients:

2 sticks unsalted butter

2 cups sugar

4 large eggs

2 teaspoons vanilla extract

1 cup unsweetened cocoa powder

1/4 cup malted milk powder

1 teaspoon kosher salt

1 teaspoon baking powder

1 1/2 cups flour

1 11.5 oz. bag milk chocolate chips

1 5 oz. package malted milk balls (Whoppers), roughly chopped or gently crushed in a resealable bag

Directions:

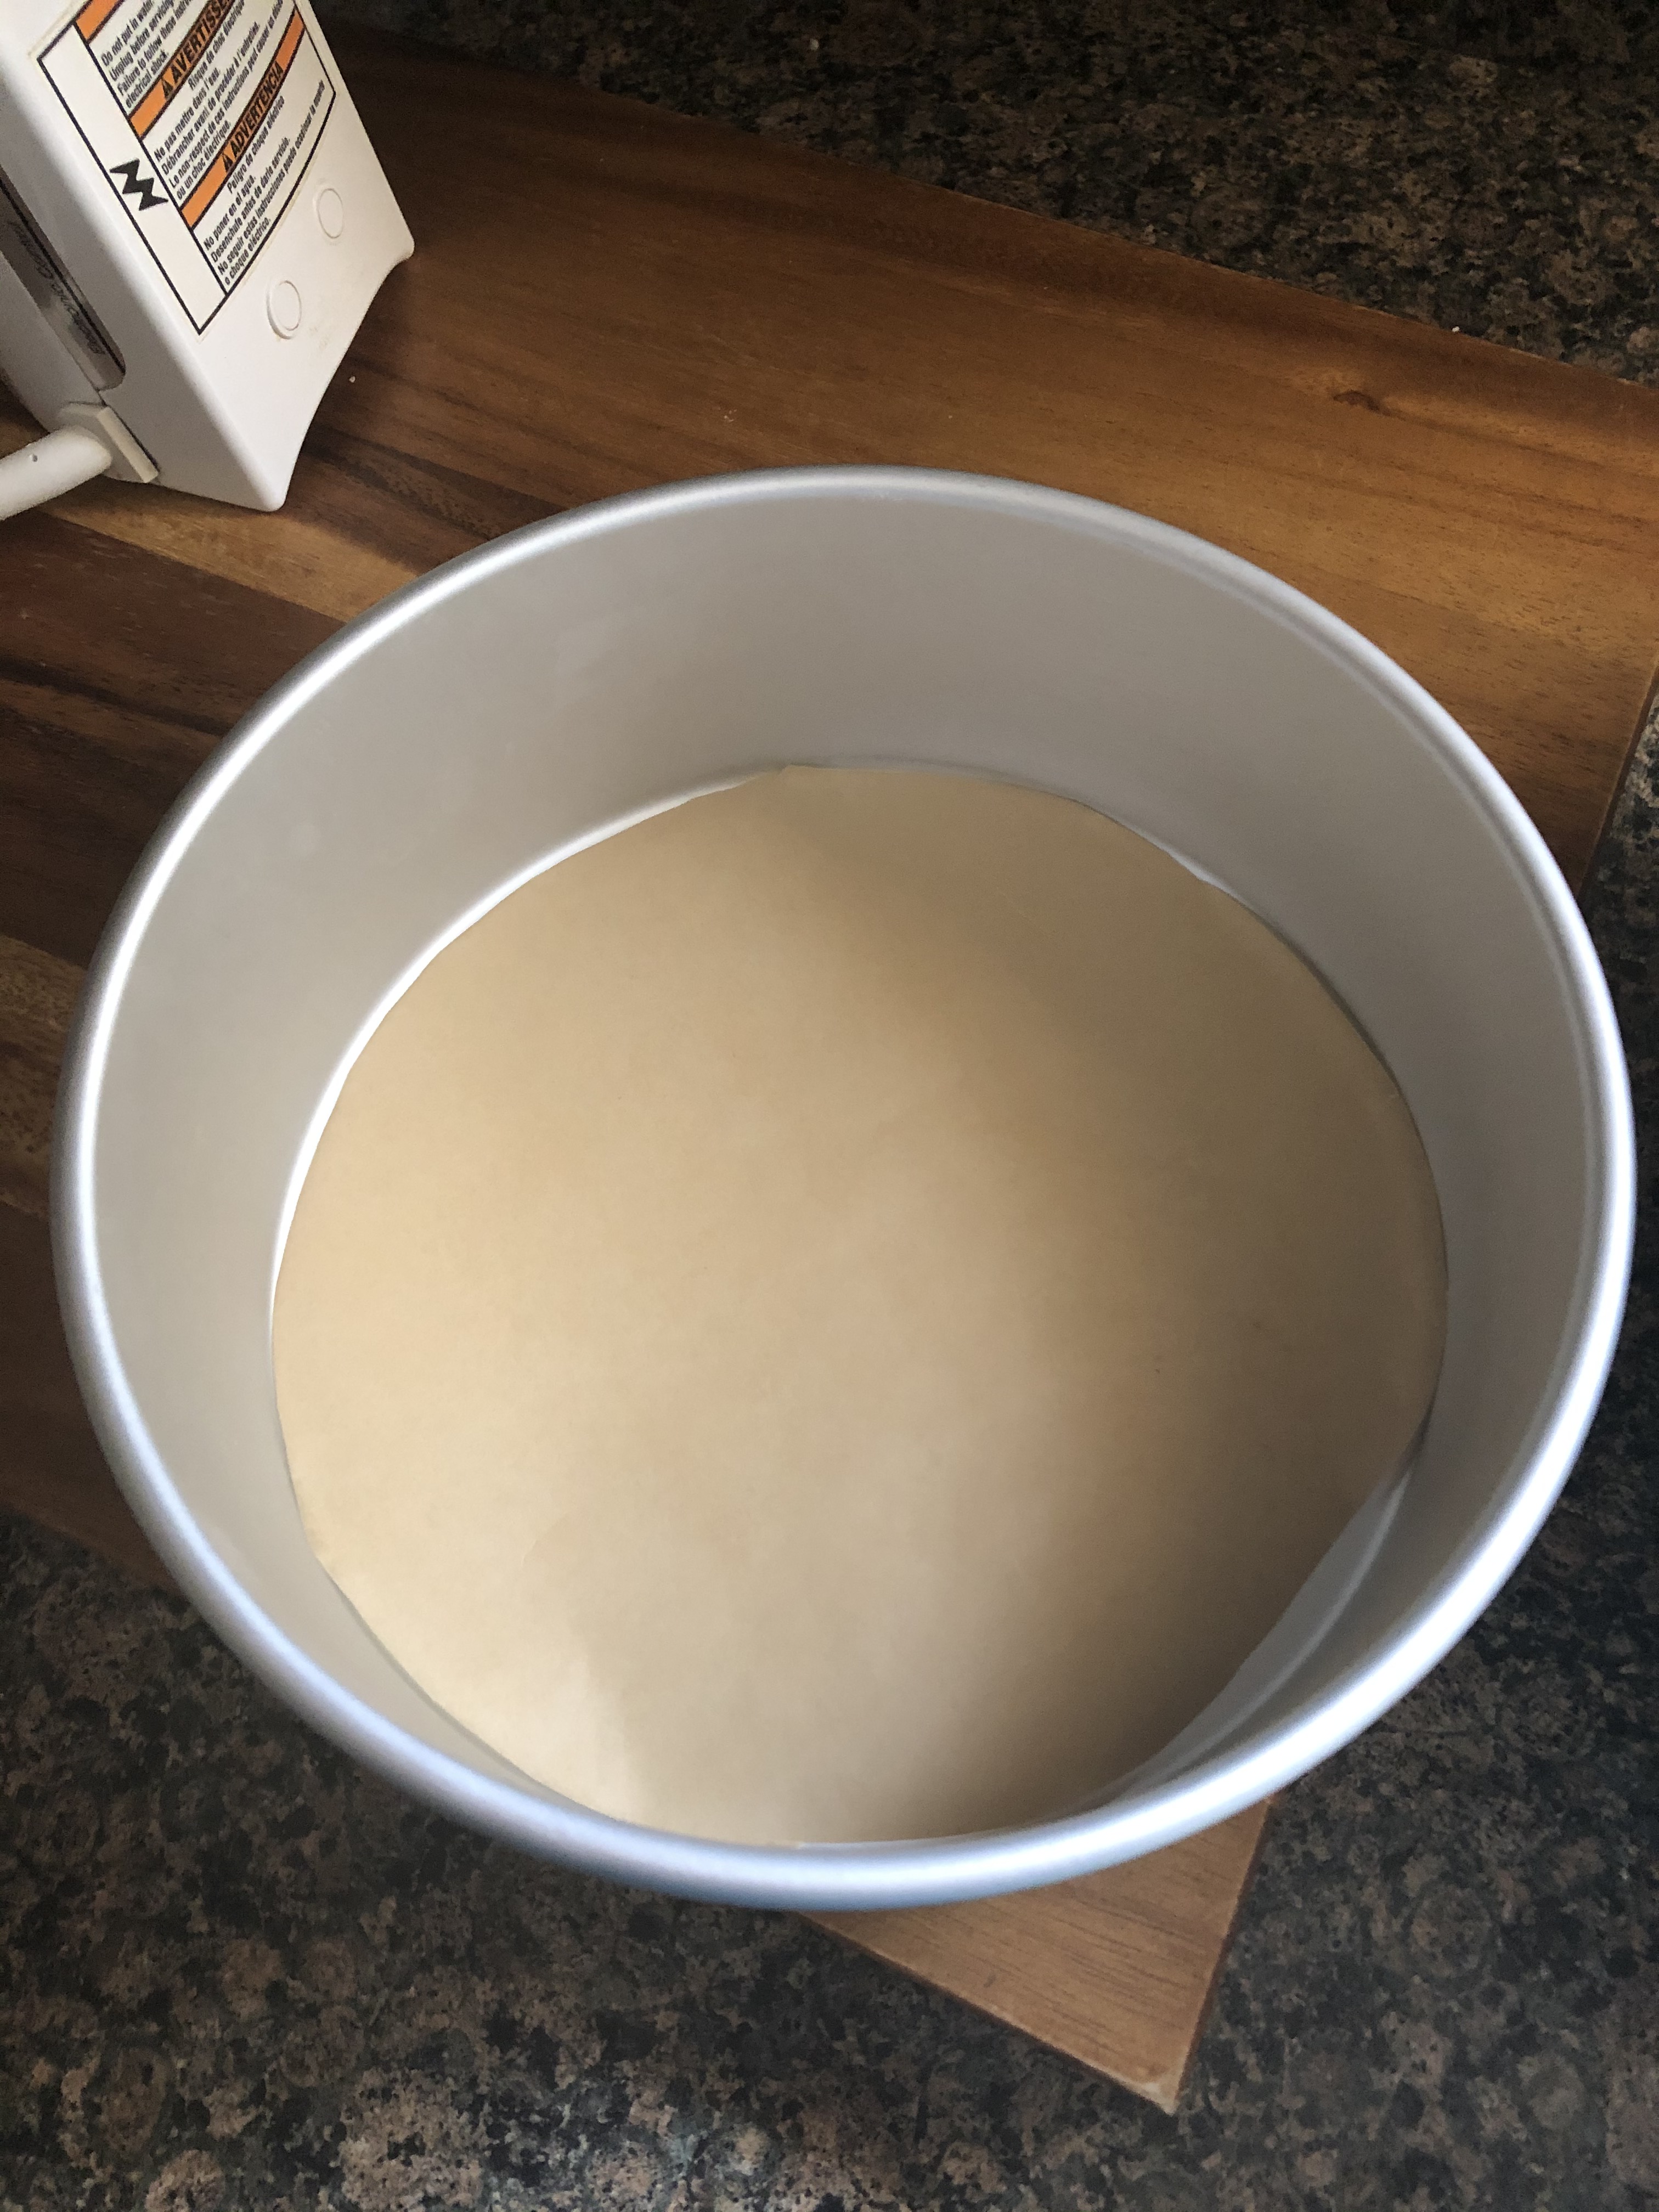
Preheat oven to 350 F. Line a 9×13-inch baking dish with parchment paper leaving an overhang on all sides.

In a medium saucepan heat the butter and sugar on medium-low heat until the butter melts and the sugar has mostly dissolved.

In a large bowl whisk the eggs and vanilla extract until combined. Whisk in the cocoa powder, malted milk powder, kosher salt and baking powder.

Gradually stir the butter mixture into the egg mixture and stir until smooth. Add the flour and stir until just combined. And finally, fold in the chocolate chips.

Spread the batter evenly into the prepared dish and top with the malted milk balls, pressing them lightly into the batter.

Baked in the preheated oven for 30 to 35 minutes, until the edges begin to pull away from the sides of the pan and a cake tester inserted in the center comes out mostly clean. Cool in the pan on a wire rack to room temperature then slice. Store in an airtight container.

Recipe from Real Simple

Brownie Ice Cream Sandwiches

The temperatures may not feel like it, but today, Labor Day, marks the end of the summer (albeit unofficially) for many. After the heat and humidity we’ve had this summer I say bring on Fall and the lower temperatures. The trees in my yard have been suffering from what I have coined “summer foliage.” The leaves are turning brown and falling due to a combination of a lack of rain and the heat. How can so many people really think that climate change doesn’t exist? Anyhoo… If you are looking to hold on to summer a bit longer and all the cold treats that come with it, then whip up a batch of these super simple Brownie Ice Cream Sandwiches to enjoy on those days that are still unbearably warm.

While you could use your favorite brownie recipe to make these, I opted to use a box mix. Ideally you would like two 9-inch square pans to make these so that after you prep your brownie batter you can divide it amongst the two pans to bake. But, if you only have 1, after you prepare your batter divide it in half and bake the first half and let it cool in the pan for 10-15 minutes before removing it to bake the other half. Either way, allow the brownie layers to cool completely before moving on to the next step.

Once the brownie layers had cooled, I lined one of the 9-inch square pans with plastic wrap leaving an overhang on all sides. I placed one of the brownie layers in the pan with the top side facing down and then spread ice cream over it in an even layer and then topped it with the other brownie layer, top side facing up. I covered it with plastic wrap and placed it in the freezer overnight. Truthfully, you only need to freeze it for a minimum of two hours.

The next day I inverted it onto a cutting board, removed the plastic wrap and sliced it into 9 brownie ice cream sandwiches with a serrated knife. To make slicing it easier, I ran the knife under hot water prior to slicing. Once they were sliced, I had to work fast as the ice cream was starting to melt a little. I decided to leave three of them as is, topped three of them with chocolate syrup and chopped walnuts and the last three I coated with sprinkles around the sides. I placed them on a baking sheet and put them back in the freezer for about 20 minutes so they could firm up.

And finally, I wrapped each in plastic wrap to store in my freezer to enjoy for the warmer days that I am sure will still come!

Brownie Ice Cream Sandwiches

Ingredients:

1 18 to 18.75 oz box brownie mix

1 qt. vanilla ice cream (or any flavor of ice cream, gelato or sorbet you like)

Chocolate Syrup, optional for decorating

Chopped Walnuts, optional for decorating

Rainbow Sprinkles, optional for decorating

Directions:

Preheat the oven to the temperature on your brownie mix.

Prepare the brownie batter per the directions on the box and divide in half. Bake in two 9-inch square pans or bake one half and then the other. If using only one pan, let the first brownie layer cool in the pan for 10-15 minutes before transferring to a wire rack to cool completely and then bake the other half.  If using two pans, allow the brownie layers to cool completely in the pans before removing. Bake for 16 to 18 minutes, or until the edges are set and a tester inserted in the center comes out with crumbs.

Line a 9-inch square pan with plastic wrap, leaving an overhang on all sides. Place one of the brownie layers in the pan with the top side facing down. Spread the ice cream over the brownie and then top with the other brownie layer with the top side facing up. Gently press down the top brownie layer. Cover with plastic wrap and freeze for at least 2 hours.

Invert onto a large cutting board and remove the plastic wrap. Use a serrated knife to cut into 9 ice cream sandwiches. To make slicing easier, run the knife under hot water.

If decorating…

To top the brownies with walnuts, spread a teaspoon or two of the chocolate syrup on the top of the brownies and then sprinkle with some of the chopped walnuts, pressing them down lightly to adhere.

To add sprinkles to the sides, pour some sprinkles onto a plate and then press each side of the ice cream sandwich into the sprinkles.

Once the brownie ice cream sandwiches have been decorated (or just sliced if you are not decorating) place them on a baking sheet and back in the freezer for 15-20 minutes so they can set. Remove from the freezer and wrap each in plastic wrap and store in the freezer until ready to enjoy!

Brookies – Chocolate Chip Cookie Brownies

Chocolate Chip Cookies and Brownies are probably among the top desserts that people eat. Both can have a slew of variations and add-ins but when it comes down to it they are comforting and familiar. So, what happens when you combine the two? Well you get the best of both worlds in what is perfectly termed a “Brookie.” A brownie layer with a chocolate chip cookie topping.

I came across this recipe in Martha Stewart’s Cookie Perfection cookbook. I made a few slight changes though. I opted to use dark chocolate chips instead of bittersweet chocolate and since unbleached and all-purpose flour are interchangeable I went with all-purpose flour. I bought a bag of unbleached flour for a few recipes last year and ended up never finishing it so I didn’t want to buy another one.  And, I opted to make my brownie batter a bit differently. The original recipe called for melting the chocolate and butter together in a double boiler, but, I decided to melt the two together in the microwave in :30 intervals, stirring between each. I figured I had done before with success so why wouldn’t it be okay this time as well.

I started by making the chocolate chip cookie dough and then set it aside while I made the brownie batter. As I mentioned, I melted the chocolate and butter together in the microwave. I then whisked in the remaining ingredients and then spread the batter in a 9×13-inch pan I lined with parchment paper. I then crumbled the cookie dough over the batter making sure it was evenly spread out. After baking it, I let the Brookies cool completely in the pan on a wire rack. I ended up baking this in the evening so I let them cool overnight on my counter. In case you are wondering, when I leave things to cool on my counter overnight I normally lightly cover them with a paper towel or piece of aluminum foil.

I waited until the following afternoon to slice them. Thanks to the parchment paper they easily came out of my pan and I then sliced them into 16 squares. I ended up with a lot of crumbs and some of the brownie layer didn’t really stick to the cookie dough. I think I should have pressed the cookie dough into the batter as well. And, I also forgot to heat my knife in hot water between each slice.

But, it was all the good. The main thing, they were delicious! Next time though I might slice them into smaller pieces, maybe 24 or 32. They are a bit decadent.

Now, if you want to make your own Brookies but don’t want to go through all the work of making the separate dough and batter, you could always use a brownie box mix and pre-made cookie dough found in most refrigerated sections of the supermarket.  With the holidays coming up these would be a nice addition to your dessert table.

Chocolate Chip Cookie Brownies

Ingredients:

For the Cookie Dough:

1 stick unsalted butter, at room temperature

1 3/4 cups flour

1/2 teaspoon baking soda

1/2 teaspoon baking powder

3/4 teaspoon Kosher salt

1/2 cup light brown sugar

1/2 cup sugar

1 large egg, at room temperature

1 teaspoon vanilla extract

1 cup dark chocolate chips

For the Brownie Batter:  

1 stick unsalted butter, cut into cubes

1 cup dark chocolate chips

1 1/2 cups sugar

3 large eggs, at room temperature

1/4 cup unsweetened Dutch-process cocoa powder

1/2 teaspoon Kosher salt

1/2 cup plus 2 tablespoons flour

Directions:

Preheat the oven to 350 F. Spray a 9×13-inch baking pan with non-stick spray. Line with parchment paper, leaving an overhang on the long sides of the pan, and spray with additional non-stick spray.

For the Cookie Dough: In a medium bowl whisk together the flour, baking soda, baking powder and salt and set aside.

In a larger bow, using a hand mixer on medium speed, cream together the butter and both sugars until pale and fluffy. With the mixer on low, beat in the egg and vanilla extract. Then beat in the flour mixture until just incorporate. Finally, stir in the chocolate chips. Set aside.

For the Brownie Batter: In a microwave-safe bowl add the butter and chocolate chips and microwave on :30 second intervals, stirring between each. Continue to do this until the mixture is smooth. Whisk in the sugar. Then whisk in the eggs, one at a time, until combined. Whisk in the cocoa powder and salt. Finally, fold in the flour until combined.

Spread the brownie batter evenly in the prepared pan and then crumble the cookie dough on top. Lightly press the cookie dough into the batter.

Cover the pan with a parchment paper and then aluminum foil and then bake in the pre-heated oven for 20 minutes. After the 20 minutes remove the parchment paper and foil and continue baking for an additional 25-30 minutes, or until a cake tester inserted in the center comes out moist with a few crumbs.

Transfer the pan to a wire rack to cool completely. Lift the Brookies from the pan using the parchment paper and slice into 16 squares. Store in an airtight container.

Recipe from Martha Stewart Cookie Perfection

Pumpkin Blondies

I wasn’t planning on making so many pumpkin recipes this year, but, inevitably I come across a recipe here and there and it sounds too good not to make it. Besides its Fall Y’all… it’s all about the apples and the pumpkins! Now, I haven’t attempted to make a pumpkin brownie since the Pumpkin Chocolate Brownies from 5 years ago. Those brownies required 9 eggs, more than 1 can of pumpkin puree, turned into a debacle when I went to slice them and I was on the fence as to whether or not I liked them. Considering that I never thought to make them again, that should be my answer. But this year when I was thinking of something to bake for a friend’s birthday (she’s a pumpkin fan like me) I thought about attempting a pumpkin brownie again, definitely not that recipe though. But that idea quickly turned into a Pumpkin Blondie instead. In case you are wondering, the biggest difference between a blondie and a brownie is that a blondie does not have cocoa powder.

I knew right off the bat that these blondies would be much better than those brownies. The batter wasn’t as dense so I knew that when they were done baking there wouldn’t be any undercooked sections. I baked them until the edges were beginning to brown and pulled away from the sides of the pan. And when I inserted a cake tester in the center it came out clean.

And when I sliced them, I was right. They were completely baked through. And more importantly they were delish. I’ll go out on a limb and say that these blondies may be good for you. Along with the pumpkin, they also have dark chocolate and pecans, all three of which have health benefits.

Pumpkin Blondies

  • Servings: 24 Blondies
  • Print

Ingredients:

2 1/3 cup flour

1 tablespoon pumpkin pie spice

1 teaspoon cinnamon

1 teaspoon baking soda

3/4 teaspoon kosher salt

2 stick unsalted butter, at room temperature

3/4 cup sugar

3/4 cup dark brown sugar

1 large egg

2 teaspoons vanilla extract

1 15oz. can pure pumpkin puree

2 cups dark chocolate chips*

3/4 cup chopped pecans

*I used a 10oz. bag of dark chocolate chips

Directions:

Preheat the oven to 350 F. Line a 9×13 baking pan with parchment paper, leaving an overhang on all sides, and spray with baking spray.

In a medium bowl whisk together the flour, pumpkin pie spice, cinnamon, baking soda and salt. Set aside.

In the bowl of a stand mixer using the paddle attachment, or a large bowl using a hand mixer, cream the butter and both sugars together on medium-high speed until smooth. Beat in the egg and vanilla extract until everything is combined. Add in the pumpkin puree and beat until combined.

With the mixer on low, add in the dry ingredients. Mixing until everything is just combined. Fold in the chocolate chips and chopped pecans with a rubber spatula.

Transfer the batter to the prepared pan and using an offset spatula spread the batter out evenly. Bake in the preheated oven for 35 to 40 minutes, or until the edges begin to pull away from the sides of the pan and when a cake tester inserted in the center comes out clean.

Place pan on a wire rack and let blondies cool completely in the pan before removing and slicing.

Recipe from My Baking Addiction

Malted Brownies

My favorite chocolate chip cookie is a Malted Chocolate Chip cookie. The malted milk powder produces a cookie that is both chewy (in the center) and crispy (along the edges) and gives it a flavor that is just extra yummy. So, when I came across a recipe for Malted Brownies, I knew I had to try it.

One thing that was slightly different about these brownies is that they are frosted. Which might make you think that they are going to be like a snack cake, but I can assure you they are not. The consistency is all brownie! And the frosting also has malted milk powder in it, so you are getting double dose of it. It’s made with marshmallow crème (or fluff) and while it was delicious on these brownies, it would make a great filling for a chocolate cake.

Surprisingly these brownies weren’t overtly sweet considering the frosting. I think that was due to the fact that bittersweet chocolate is used to make the brownies. They are rich though, so I would suggest cutting them into 24 pieces as opposed to 12 like I did.

Malted Brownies

Ingredients:

For the Brownies:

1/2 cup unsalted butter

1 1/4 cups bittersweet chocolate chips*

4 eggs

1 1/2 cups sugar

1 teaspoon vanilla extract

1 cup flour

1/2 cup vanilla malted milk powder

2 tablespoon unsweetened cocoa powder

1 teaspoon Kosher salt

For the Frosting:

3/4 cup unsalted butter, at room temperature

7oz. jar marshmallow crème

1/2 teaspoon vanilla extract

3 tablespoons vanilla malted milk powder

2 tablespoons unsweetened cocoa powder

1/2 cup confectioners’ sugar

*The original recipe called for 8oz. bittersweet chocolate, chopped

Directions:

Preheat the oven to 350 F. Grease a 13 x 9 – inch baking pan and line with parchment paper leaving an overhang on the long sides. Set aside.

In a microwave safe bowl melt the butter and chocolate together in 35 second intervals, stirring between each, until smooth. Let cool for a few minutes.

In a large bowl whisk together the eggs, sugar and vanilla extract until smooth. Add in the melted chocolate mixture and continue whisking until combined. Add the flour, milk powder, cocoa powder and salt and continue whisking until the mixture is smooth.

Pour the brownie mixture in the prepared pan and smooth the top. Bake in the preheated oven for 30 minutes. Let cool in the pan on a wire rack before spreading frosting on top.

While the brownies are cooling make the frosting. In a large bowl beat the butter using a handheld mixer until creamy. Add in the marshmallow crème and vanilla extract and continue beating until combined. Add in the malted milk powder and cocoa powder and continue beating. Gradually add in the confectioners’ sugar and beat until thoroughly combined.

Spread frosting over cooled brownies. To make slicing the brownies easier refrigerate for about 10 minutes so the frosting can set.

Slice into 12 large brownies or 24 small brownies.

Recipe from Better Homes & Gardens

Coconut Macaroon Brownies

If you love chocolate dipped coconut macaroons, Almond Joy candy bars or anything chocolate and coconut, today’s recipe is for you. It’s Coconut Macaroon Brownies!

Up first I made the brownie layer. While the recipe directions called for melting the dark chocolate and unsalted butter in a double boiler, I opted to do in the microwave. I placed the chocolate and butter in a microwave safe bowl and microwaved it in 30 second intervals, stirring between each, until it was completely melted and smooth. I set that aside and in a large bowl whisked together, by hand, eggs, sugar, light brown sugar, cocoa powder, espresso granules, vanilla extract and salt until it was smooth. Next, I folded in coconut flour. The coconut flour helped to make the brownies extra fudgy and dense and also keeps this recipe gluten-free. And finally, I folded in milk chocolate chips. I spread this into a 9 x 13-inch baking pan that I lined with parchment paper, making sure to leave an overhang on all sides to make clean up easy and more importantly removing from the brownies hassle-free. I then place the pan in the refrigerator for an hour.

Next up, the macaroon layer. Using my stand mixer with the whisk attachment, I beat egg whites until they were frothy and then slowly added in sugar, vanilla extract and salt until stiff peaks formed. Finally, I added in shredded coconut and my macaroon layer was ready.

Using a small offset spatula, I spread the coconut mixture over the brownie base.

I baked it in a 375 F preheated oven for about 30 minutes, until the brownies were set and the macaroon layer had a golden-brown color. I let the brownies cool in the pan on a wire rack for about 2 hours.

I then removed them easily thanks to parchment paper and let them cool for about another 30 minutes before slicing.

And even though I did clean my knife between each slice my brownies didn’t slice perfectly clean. Nevertheless, it didn’t take away from how delicious these brownies are. The chocolate layer is the perfect amount of chocolate without being overly sweet. That’s primarily due to using a dark chocolate as the base and also adding those espresso granules. Coffee really enhances the flavor of chocolate. As for the coconut layer, by using unsweetened shredded coconut as opposed to the traditional sweetened version in typical macaroons, the coconut layer isn’t crazy sweet either. You really do get to taste the coconut flavor.

Coconut Macaroon Brownies

Ingredients:

Brownie Layer:

8 oz. dark chocolate (70% cacao), coarsely chopped*

2 sticks unsalted butter, cut into chunks

4 large eggs

1 cup sugar

1/4 cup light brown sugar

2 tablespoons unsweetened cocoa powder

1 tablespoon vanilla extract

1 teaspoon Kosher salt

1 teaspoon instant espresso granules

1 cup coconut flour

1 cup milk chocolate chips

Macaroon Layer:

4 large eggs whites

3/4 cup sugar

2 teaspoons vanilla extract

1/2 teaspoon Kosher salt

4 cups unsweetened finely shredded coconut

*I used Lindt Excellence 70% Cocoa Dark Chocolate Bars found in the candy aisle

Directions:

Make the brownie layer: Line a 9 x 13 – inch baking dish with parchment paper, leaving an overhand on all sides. In a microwave safe bowl add the chopped chocolate and butter. Microwave in 30 second intervals, stirring between each interval until the chocolate and butter are smooth. Set aside.

In a large bowl whisk together the eggs, both sugars, cocoa powder, vanilla extract, salt and espresso granules until smooth. Add in the chocolate/butter mixture and continue whisking until smooth. Fold in the coconut flour and then then the milk chocolate chips. Spread the batter in the prepared pan and refrigerate for 1 hour.

Make the macaroon layer: Preheat the oven to 375 F. Using a stand mixer with the whisk attachment beat the egg whites on medium speed until frothy. Slowly add in the sugar, vanilla extract and salt and gradually increase the speed to high. Beat until stiff peaks form. Reduce the speed to low and add in the shredded coconut and beat until just combined. Spread the coconut mixture over the brownie layer.

Bake in the preheated oven for 25-30 minutes, or until the top is golden. Allow to cool completely in the pan on a wire rack. Remove from pan and cut into 24 brownies.

Recipe from Food & Wine

Christmas Tree Brownies

Are you still looking for an easy and quick Christmas themed dessert to make? These Christmas Tree Brownies may just be the thing. You can make these completely homemade, semi-homemade, or just by using store bought items only. I went with semi-homemade. Using a boxed brownie mix and homemade frosting. And since they only make 8 brownies, they may be the perfect amount for your smaller get togethers this year.


I prepped the brownie batter per the instructions on the box and then poured it into an 8-inch round cake pan that I lined with parchment paper and sprayed with baking spray. Using a round cake pan is the key behind cutting even triangles without any waste. And while I don’t normally line my pan with parchment paper when making brownies, I did so this time to ensure the brownies wouldn’t stick to the pan.

After baking, I let the brownies cool completely in the pan on a wire rack. Once cooled I easily removed them from the pan…

And sliced them into 8 even triangles.

I had leftover frosting from decorating a cake a few days prior, so I let it sit out at room temperature, since it had been refrigerated, for a few hours before tinting it green. If you don’t want to make your own frosting you can use store bought. At this time of the year you may even be able to find green frosting.

Next I made small slits with a paring knife into the base of the brownie triangles…

I did this so it would be easier to insert paper straws into the brownies to resemble a tree trunk.

While I used paper straws that I picked up at my local party store cut in half, you could also use peppermint candy canes. You’ll just need to trim off the curved part and depending on the length of your candy canes cut them in half. Regardless of whether you are using straws or candy canes, you will want to insert them first into the brownies before decorating them. If you don’t, you may end up smudging the decorated brownie.

Once the straws were inserted it was time to decorate. I filled a piping bag fitted with a small star tip (I used a Wilton 16) with the green frosting and piped it onto the brownies to resemble a Christmas tree.

Finally, I sprinkled Christmas themed nonpareils onto the frosting and topped each with a gold star sprinkle.

And just as easy as that I had made Christmas Tree Brownies!


Supply List:

8 Triangle Shaped Brownies (Use a box mix or your favorite recipe baked in an 8-inch round cake pan)

Green Frosting (Use your favorite vanilla frosting recipe tinted green or buy vanilla frosting and tint it green or even easier, if you can find it, buy green frosting) – About 1/2 cup

Paper straws or candy canes

Christmas Themed Nonpareils

Gold Star Sprinkles

Applesauce Brownies

Earlier this week I posted a recipe that used applesauce and whole wheat flour as two of its ingredients and today I am sharing another recipe with those two ingredients… A brownie recipe. Granted these brownies were more like snack cakes, but, were delicious nonetheless. And truth be told, that’s all that really matters.

After making the batter I poured it into an 8×8-inch pan I sprayed with baking spray. I’ve come to realize that greasing your pan isn’t enough when it comes to making brownies. The addition of flour in the baking spray ensure that the brownies will not stick the pan when removing them. I then sprinkled the top of the batter with a walnut, chocolate chip and sugar mixture.

Next, I baked them in a 350 F preheated oven for about 30 minutes and after letting the brownies cool in the pan for a few minutes…

I removed them from the pan so they could cool completely on a wire rack…

Before slicing and enjoying them. As I mentioned, the texture is definitely more cake-like than brownie, and yes, I know that cake-like brownies are a thing, but, having had and made cake-like brownies, these definitely were not reminiscent of that. The brownies themselves aren’t overly sweet so the chocolate chips in the topping is a welcomed sweetness as is the crunch from the walnuts.

Applesauce Brownies

  • Servings: 12 Brownies
  • Print

Ingredients:

1 stick unsalted butter, at room temperature

6 tablespoons cocoa powder*

2 tablespoons vegetable oil

3/4 cup sugar

2 large eggs, at room temperature

3/4 unsweetened applesauce

1 1/4 teaspoons vanilla extract

1 cup whole wheat flour

1/2 teaspoon baking powder

1/4 teaspoon baking soda

1/4 teaspoon salt

Topping:

2 tablespoons sugar

1/4 chopped walnuts

1/4 chocolate chips (any type)


*I used a 50/50 combination of Hershey’s 100% Cacao / Hershey’s Special Dark cocoa powder. The original recipe called for King Arthur’s Triple Cocoa Powder


Directions:

Preheat the oven to 350 F. Grease an 8×8 inch pan and set aside.

In a medium bowl whisk together the flour, baking powder, baking soda and salt and set aside.

In a large bowl combine the butter, cocoa powder, oil, sugar, eggs, applesauce and vanilla and using a hand mixer on medium speed beat the ingredients until well combined.

Add the dry ingredients to the wet ingredients and mix on low until just combined.

Spread the batter in the prepared ban.

In a small bowl combined the ingredients for the topping and then sprinkle over the batter.

Bake in the preheated oven for 30 – 35 minutes, or until the brownies begin to pull away from the sides of the pan and a cake tester inserted about 1-inch from the sides comes out clean.

Allow to cool in pan before slicing them.

Recipe from King Arthur Flour

Hershey’s Deep Dish Brownies

I love brownies, but, truth be told, they are not one of my favorite things to bake. Not because they are difficult to prepare, but, because I always have an issue with either removing them from the pan and/or slicing them. They always seem to stick the pan, even though I prep the pan, and/or crumble when I slice them, even though I wait until they are completely cooled before doing so. And I will point out that I have used parchment paper sometimes to make brownies, but, I still run into some issue with them, usually it’s them falling apart when I slice them.

Recently I tried a very simple recipe that resulted in perfect brownies… They didn’t stick to the pan when I flipped it over and I was able to slice them without any crumbly pieces. Who knew it was actually possible!?!? This great recipe is from Hershey’s, it’s their Deep Dish Brownie Recipe. I will tell you though that these brownies are more cake-like than fudgy, but, if you want a fudgier brownie you can reduce the egg count in the recipe from 3 to 2. I will admit I haven’t tried it with this recipe, but, I do know that eggs are one of the ingredients that changes the texture of brownies from cake-like to fudgy. One other thing I liked about these brownies was that they had some height to them as well. Great for topping them with ice cream after warming them up for a few seconds in the microwave.

Hershey’s Deep Dish Brownies

  • Servings: 12-16 Brownies (depending on how you slice them)
  • Print

Ingredients:

3/4 cup (12 tablespoons) unsalted butter, melted

1 1/2 cups sugar

1 1/2 teaspoons vanilla extract

3 eggs

3/4 cup flour

1/2 cup cocoa powder

1/2 teaspoon baking powder

1/2 teaspoon salt


Directions:

Preheat the oven to 350 F. Grease an 8×8 pan.

In a medium bowl whisk together the dry ingredients – flour, cocoa powder, baking powder and salt – and set aside.

In another bowl whisk together the melted butter, sugar and vanilla extract until combined. Add in the eggs and whisk everything together until well incorporated. Gradually whisk in the flour mixture.

Pour the batter into the prepared pan and bake for 40 – 45 minutes, until the brownies begin to pull away from the sides of the pan and when a cake tester inserted about one inch from the edge comes out clean.

Let the brownies cool completely in the pan on a wire rack before inverting and slicing.

Recipe from Hershey’s

Peanut Butter Brownie Dump Cake

Dump cakes… One of the simplest ways to make a quick and delicious dessert. I’ve made them using canned fruit with a box cake mix and fresh fruit with a homemade cake mix. So, when I came across a recipe for a Peanut Butter Brownie Dump Cake I knew I had to try it.

When I read the reviews for these brownies I had some reservations about making them, but, I realized that the issue most people were having was that they weren’t reading the directions properly. They kept saying that they added eggs to the mixture, but, nowhere in the ingredient list were eggs mentioned. After a few more seconds of thought I realized what most people were doing wrong. They were preparing the batter for the brownies as the directions on the box instructed them as opposed to just using the flour mixture itself. That’s the key to dump cakes. You are not preparing the batter for the box mix, but, just using the flour mixture from it.

I began by melting together semi-sweet chocolate, peanut butter and milk in the microwave. I heated it for about 2 minutes and then whisked the mixture until it was smooth.

I then poured the mixture into a 13×9-inch baking dish that I sprayed with cooking spray. Next, I sprinkled the brownie mix over the melted chocolate.

Finally, I drizzled melted butter and milk over the brownie mix. I also used a fork to smooth down the top of the brownie mix to level it off.

I then baked it in a 350 F preheated oven for about an hour.

Unfortunately I didn’t take any pics of the brownies once I had sliced up. I’ll admit that the picture above doesn’t make them look too appetizing, but, trust me, they were delicious. Everyone who tried them said the same thing as well. One thing though, I decided to use a chewy fudge brownie mix, next time I make these I will use a milk chocolate mix. I think using the chewy fudge mix increased my baking time and I ended up brownies that were too soft. When I sliced these I honestly thought that were going to fall apart, even though I waited for them to cool before doing so. After slicing them though they did firm up a little more. They tasted great warmed-up with a scoop of vanilla ice cream on top.


Peanut Butter Brownie Dump Cake

Ingredients:

8 oz. semi-sweet chocolate baking bar*

1 cup creamy peanut butter

2 1/4 cups milk, divided**

1 pkg. brownie mix (18 to 20 oz. size / 13×9-inch pan size)

3/4 cup butter, melted

Whipped cream or ice cream for topping


*I used 1 1/2 cups semi-sweet chocolate chips in lieu of the 8oz. chocolate

**I used whole milk


Directions:

Preheat oven to 350 F. Spray a 13×9-inch with cooking spray and set aside.

In a microwave safe bowl combine the chocolate, peanut butter and 1 1/2 cups of milk. Microwave on high for 2 1/2 minutes or until chocolate is almost melted. Stir the contents together until they are melted and smooth.

Pour the mixture into the prepared dish. Sprinkle the dry brownie mix over the chocolate mixture. Drizzle the top of the brownie mix with the melted butter and then the remaining milk.

Bake for 45 to 50 minutes in the preheated oven, or until a cake tester inserted in the middle comes out with fudgy crumbs.

Let cool completely and then slice into pieces.

Recipe from Betty Crocker