Fig & Brie Croissants

I love a good croissant, especially a good almond croissant. Now, I don’t think I would ever attempt to make croissants from scratch since they do seem a bit labor intensive and it’s possible (and easier) to buy them. I did make these Almond Croissants that were easy and delish, but I used plain croissants as the base and doctored them up a bit. I did attempt to make almond croissants using puff pastry once and it was a fail. They never even made it into the oven! Something was off with the puff pastry, and it never thawed properly.  Recently on Instagram I saw a video of someone making Ham & Cheese Croissants using puff pastry. Which gave me the idea to make Fig & Brie Croissants. Thankfully this time the puff pastry thawed properly, and the croissants actually made it into the oven. 

To thaw the puff pastry I removed it from the packaging and let it sit at room temperature for about 40 minutes. When it was ready, I was able to easily unfold it, but it was still a bit cold/frozen. I lined a baking sheet with parchment paper and unfolded one of the sheets on top of it and brushed it with an egg wash, reserving the rest of it. Each column of the puff pastry makes three croissants, so next I dropped a teaspoon of fig jam in the center of each croissant and then topped it with brie cheese.

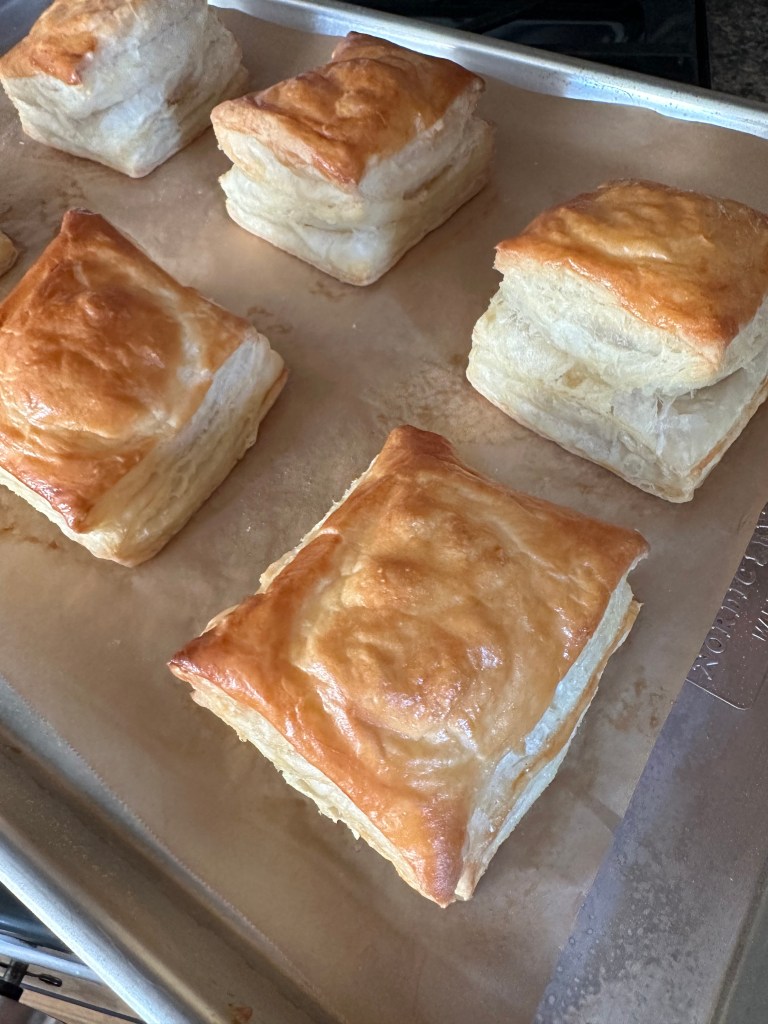
The day I made these I was trying to do too many things at once, so I completely forgot to snap a picture of what they looked like before going in the oven. Basically, I topped it with the second pastry sheet and gently pressed the two sheets together removing any air from each square. I then sliced the croissants and separated them on the parchment paper about 2 inches apart. While the oven heated to 400 F I placed them in the refrigerator to ensure that the pastry would be flaky. Since I did handle the puff pastry a bit it could have warmed, and this would definitely affect texture of it. Puff Pastry is made with butter and the cold butter in the pastry is what gives you the flaky layers.  After baking for about 25 minutes, I had golden flaky fig & brie croissants to eat.

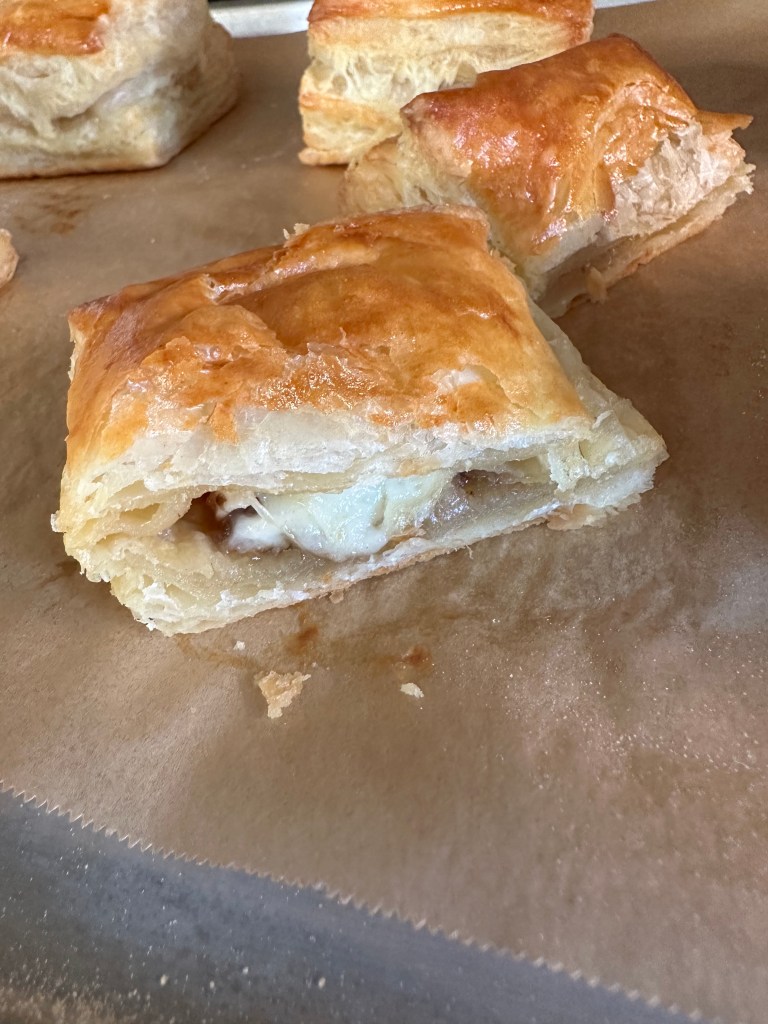
I let them cool for about 10 minutes before slicing into one to enjoy and it was delish!

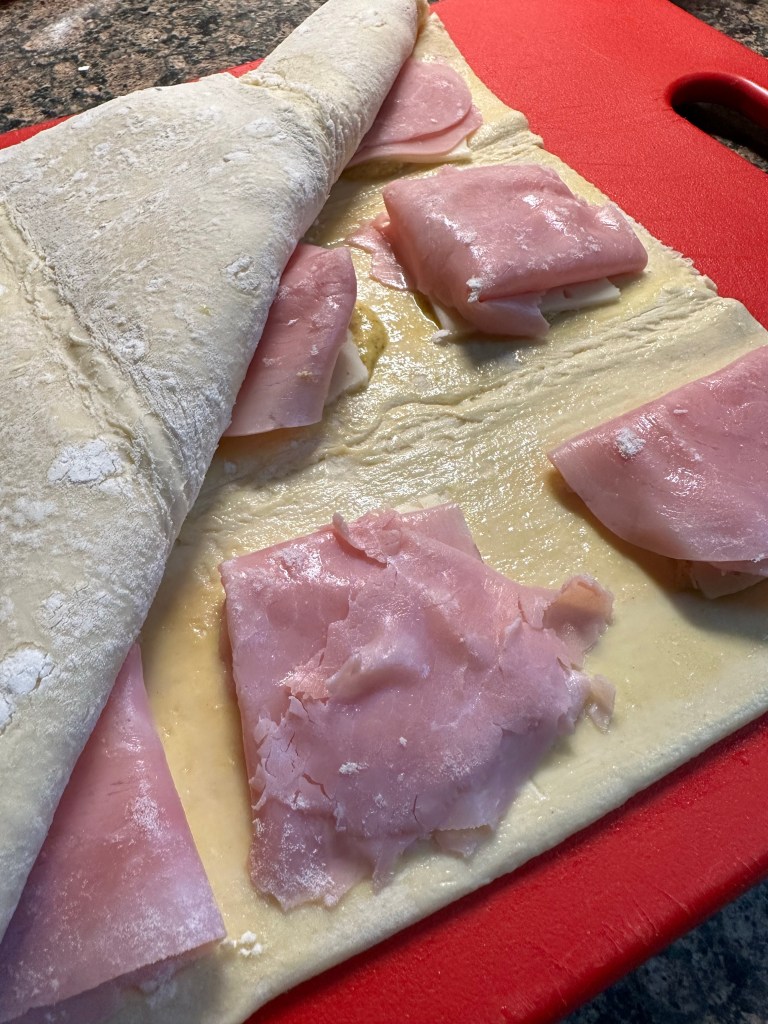
And yes, I did try making the Ham & Cheese one’s I saw as well with a few tweaks. I opted to use spicy mustard and Swiss cheese in lieu of whole grain mustard and gruyere cheese and they were just as good as the Fig & Brie ones.

Fig & Brie Croissants

Ingredients:

1 package (2 sheets) puff pastry, thawed per directions*

1 large egg, beaten

3 tablespoons fig jam

9 pieces of Brie cheese, cut from an 8oz. wheel of Brie about 1/4-inch thick

*I used Pepperidge Farm Frozen Puff Pastry

Directions:

Line a baking sheet with parchment paper and gently unfold one of the puff pastry sheets on the parchment paper. Brush with the egg wash, reserving the remaining egg wash for the top of the croissants.

You will have a total of 9 croissants, 3 from each column of the puff pastry. Visualize each column of the puff pastry sheet divided in three and drop a teaspoon of fig jam in the center of each. Repeat for the other two columns. Then place a piece of brie cheese on top of each teaspoon of fig jam.

Gently unfold the other puff pastry sheet and place on top. Use your fingers to press the two sheets together, removing any trapped air from each square. Using a sharp knife, pastry wheel or pizza cutter to slice into 9 squares. Separate them leaving about two inches between each and cover with a kitchen towel and refrigerate while the oven preheats to 400 F.

Once the oven is ready, bake the croissants for 20-25 minutes. Allow to cool for 10-15 minutes before enjoying.

To make the Ham & Cheese Croissants swap out the fig jam & brie cheese for spicy mustard, 5 slices of deli ham cut in half and folded, and 3 slices of Swiss cheese cut into quarters. Drop a teaspoon of mustard onto each croissant and then top with a folded half slice of ham and a quarter piece of the Swiss cheese. All other directions are the same.

No-Knead Roasted Garlic & Rosemary Bread and Roasted Tomato Soup

Today’s blog post is a two-for-one special. A bread & soup pairing. And with the rainy days of April just around the corner this may be exactly what you will want to eat.    

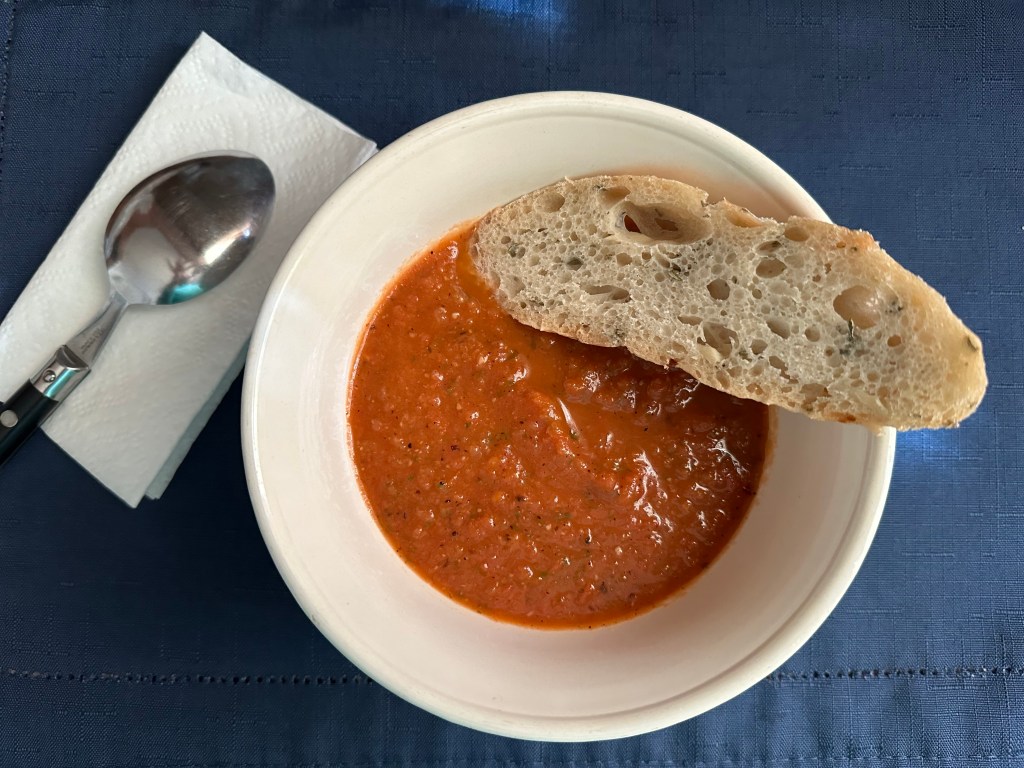
I’ve made quite a few No-Knead breads that have turned out to be delicious. When you can take the guesswork and work out of how much to knead your dough it’s hard to end up with something inedible. For today’s version, I am sharing with you a No-Knead Roasted Garlic and Rosemary Bread (YUM!) and for something warm and tasty to dunk it into a Roasted Tomato Soup (Double YUM!).

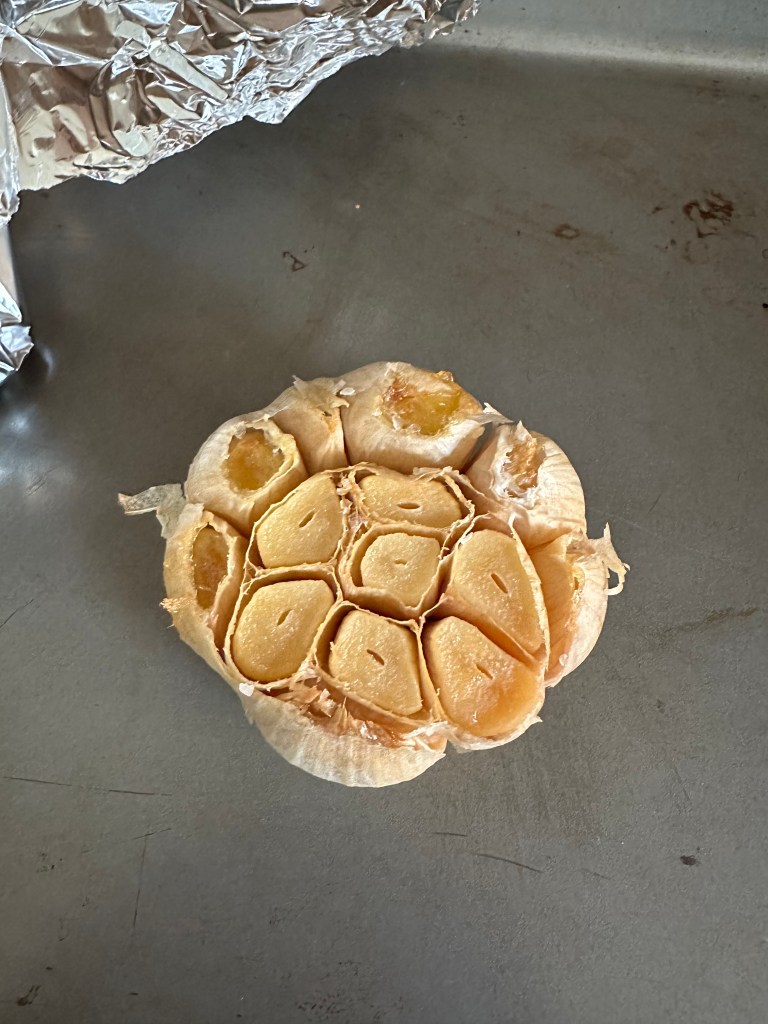
I started by making the bread. First up I roasted a head of garlic in the oven. I trimmed about a 1/2-inch of the head off and removed some of the papery outer layers. I placed the garlic in an aluminum foil packet and drizzled it with olive oil and sprinkled it with salt. I then sealed the aluminum foil and placed on a baking sheet and roasted it in the oven for about an hour. After letting it cool completely, I squeezed the cloves out and mashed them.

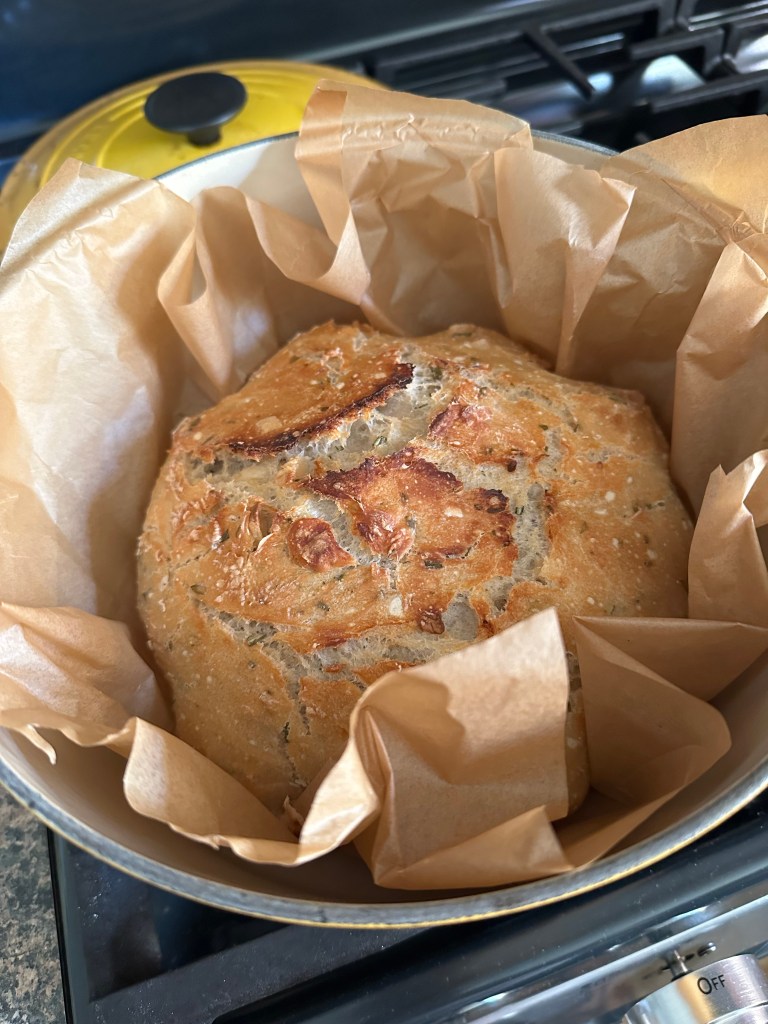
I then added the garlic with chopped rosemary into my dough. After letting the dough rest for about 12 hours – which is the key to No-Knead Bread – it was time to bake it. I ended up with a perfectly golden crust on the outside and soft bread on the inside.

While the bread cooled, I made the soup. I roasted the tomatoes in the oven along with garlic cloves. I opted to remove the seeds from the tomatoes prior to roasting this way I wouldn’t have to worry about straining the soup afterwards to remove them.

I added the tomatoes to the pot where I caramelized the onions along with basil and some vegetable broth and used an immersion blender to blend everything together. I immediately regretted not using my food processor instead. No matter how careful I was there was splatter!

But the mess was worth it. The soup was delicious, and it paired perfectly with the bread.

No-Knead Roasted Garlic and Rosemary Bread

Ingredients:

3 cups flour

1 1/2 teaspoons Kosher salt

1/2 teaspoon instant dry yeast

1 head of garlic, roasted & mashed

2 tablespoons fresh rosemary, chopped

1 1/2 cups warm water, 95F-100F

Olive oil and additional salt to roast garlic

Directions:

To roast garlic: Preheat oven to 400 F. Trim the head of the garlic about 1/4 to 1/2 inch and remove the papery outer layers of the bulb. Place on a piece of aluminum foil and drizzle with olive oil and sprinkle with Kosher salt. Seal the aluminum foil to create a packet and then place on a baking sheet. Roast in the oven for 45 minutes – 1 hour. Let the garlic cool and then squeeze the cloves out of the bulb. Mash the cloves prior to adding to the dough.

In a large bowl stir together the flour, salt, yeast, garlic and rosemary. Add in the water and continue to stir together until the dough forms. It will be sticky. Shape the dough into a ball and then tightly cover the bowl with a piece (or two) of plastic wrap and let the dough rest at room temperature for 12-18 hours. The dough will double in size and be covered with air bubbles.

Once the dough is ready, preheat the oven to 450 F and turn your dough out onto a workspace lightly dusted with flour and with floured hands shape the dough into a ball. Transfer the dough to a piece of parchment paper – large enough to fit inside of the Dutch oven – and then place in a bowl – one that won’t allow the dough to spread much – and cover with plastic wrap and let rest for 30 minutes.

While the dough is resting place your Dutch oven in the oven for the 30 minutes. After the 30 minutes, carefully remove the Dutch oven from the oven and place the dough along with the parchment paper inside and cover. Bake for 25-30 minutes and then remove the lid and bake for additional 10-15 minutes, until the bread is golden brown.

Remove the bread and parchment paper from the pot and place on a wire rack to cool for 30 minutes prior to slicing.

Store leftovers in an airtight container at room temperature.

Notes:

Make sure to check the highest temperature your parchment paper can safely be used in the oven.

If you don’t have a Dutch oven, you can use a heavy-duty pot instead.

Recipe first appeared on Bead Yarn & Spatula.

Roasted Tomato Soup

Ingredients:

For the Roasted Tomatoes:

3 lbs. plum tomatoes, sliced in half and seeds removed

8 garlic cloves

3 tablespoons olive oil

salt & pepper

For the Caramelized Onions:

2 yellows onions, thinly sliced

1/2 tablespoon olive oil

Remaining Ingredients:

1/4 cup basil leaves

1/2 teaspoon dried oregano

2 cups vegetable broth

Additional salt & pepper

Directions:

For the Roasted Tomatoes:

Preheat the oven to 400 F. Line a baking sheet with parchment paper. Place the tomatoes & garlic cloves on the parchment paper cut side up, drizzle with olive oil and sprinkle with salt & pepper. Roast in the oven for 40-45 minutes. Allow to cool for 10 minutes.

For the Caramelized Onions:

In a large pot heat the oil over medium heat. Lower the heat to medium-low and add the onions. Cook for 20 minutes, stirring occasionally. Allow to cool for 10 minutes.  

To Make the Soup:

Transfer the tomatoes, onions and basil to the bowl of a food processor (or a large pot if using an immersion blender) and process until everything is smooth and combined.

Transfer the mixture to a large pot or use the same pot if blended with an immersion blender, add in the vegetable broth, oregano and salt & pepper to taste and simmer on medium low heat for 10 minutes to heat through.

Spaghetti with Turkey Marsala Meatballs

I haven’t been posting many savory recipes… In other words, something I cooked instead of baked. That doesn’t mean I haven’t cooked. I cook every week, but lately I haven’t been trying new recipes. Just sticking with things that I know are good and are easy to make. Two important criteria when it comes cooking if you ask me. Last month though I finally tried a new recipe, and it was so good that I just made it again. So, what was so good that I had to make it again so quickly… Spaghetti with Turkey Marsala Meatballs.

Two quick things to note… While I do eat pasta, I normally don’t make spaghetti (not a fan of twirling to get it on the fork) and I never made meatballs before trying this recipe (I have eaten them though!). I was always concerned about getting the meat fully cooked. Silly, I know! Both of those things didn’t matter with this recipe though. The meatballs were super easy to make, and for peace of mind I left them in the oven a minute or two longer than the recipe suggested to ensure they were cooked. They didn’t dry out since the chopped mushrooms added to the meat helped to keep them moist. And twirling spaghetti isn’t that bad!

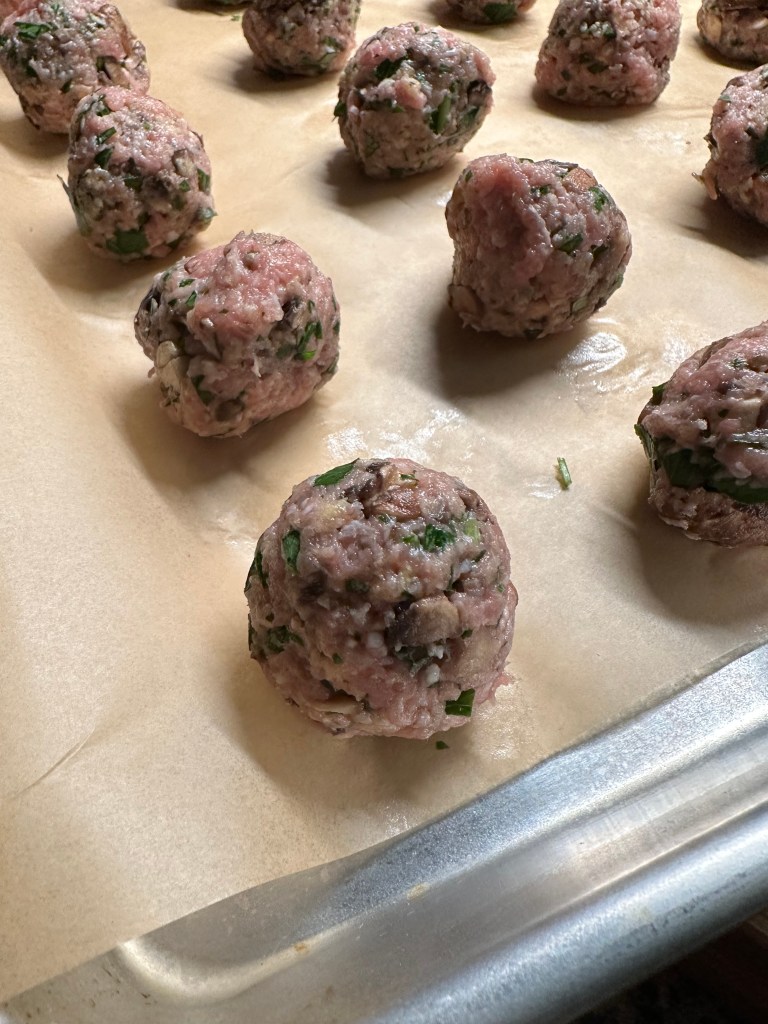
I started off by prepping the meatballs. Once they were formed, I baked them in the oven for about 15 minutes.

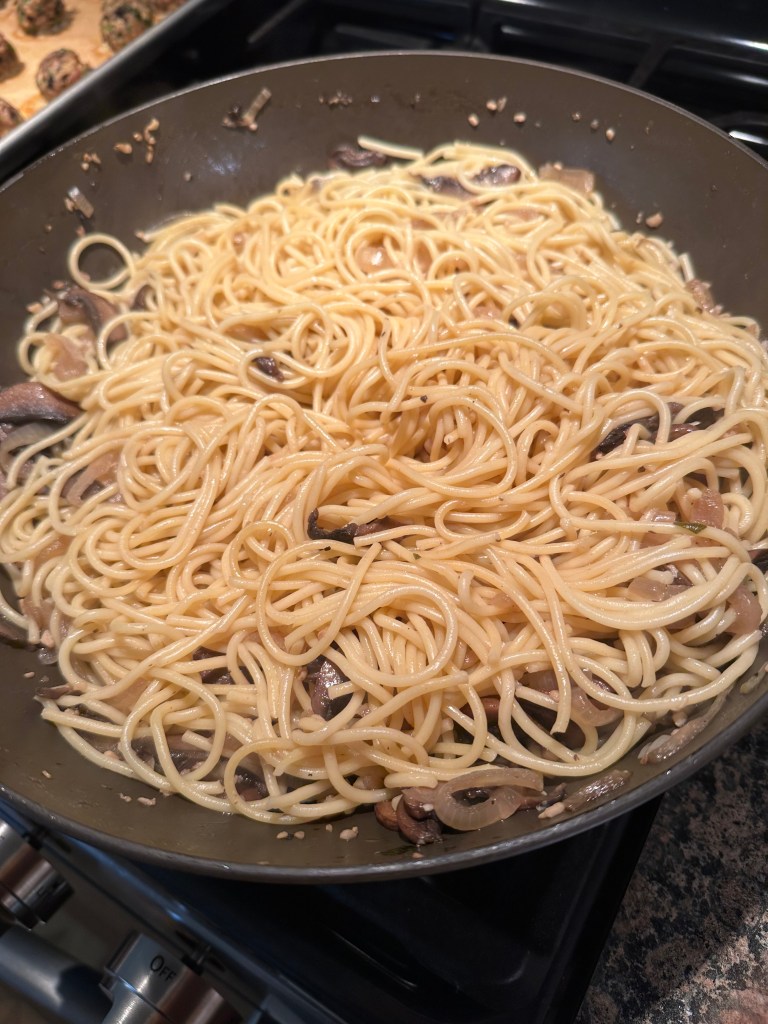
While the meatballs were in the oven (and for a little while after they came out) I worked on making the sauce for the pasta, boiled the pasta and tossed the pasta into the sauce.

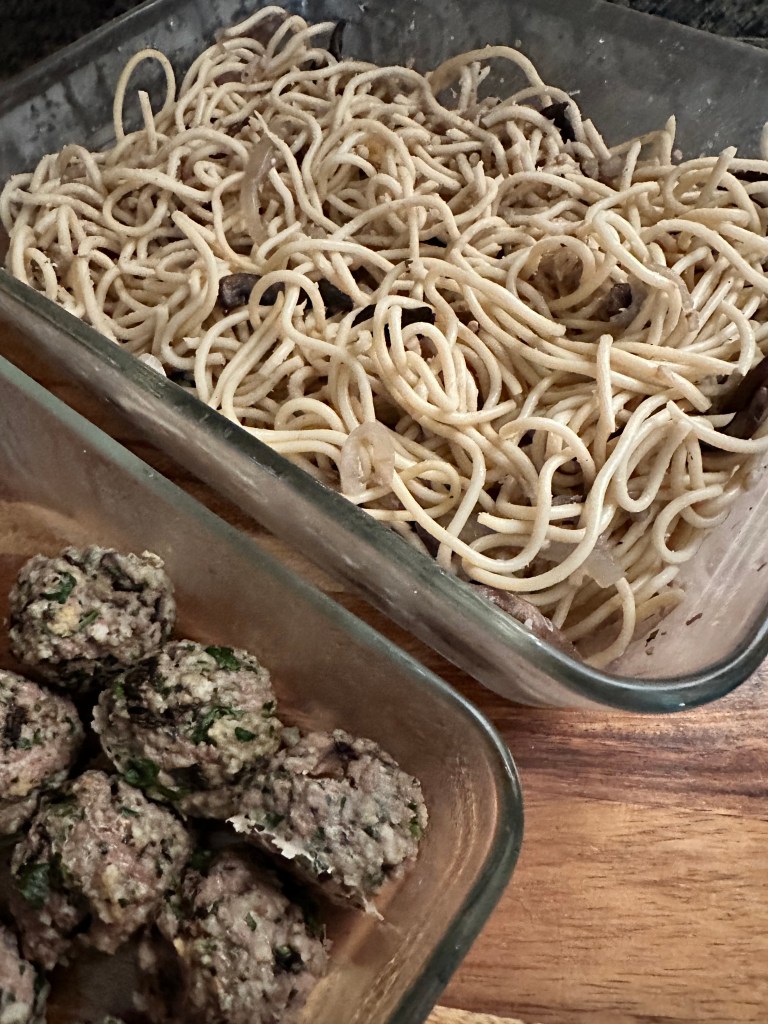
I wasn’t planning on enjoying this the day I made it, so I packed it in containers and refrigerated it. I will say that it heats up very well and tastes better each day!

Spaghetti with Turkey Marsala Meatballs

Ingredients:

12 ounces cremini mushrooms*

1 pound ground turkey

1 large egg

1/2 cup panko breadcrumbs

1/2 cup parsley, chopped

4 tablespoons unsalted butter

1 small onion, thinly sliced

3 garlic cloves, minced

1/2 cup Marsala wine

12 ounces spaghetti

2 1/2 cups low-sodium chicken broth

Kosher salt and freshly ground pepper

*I used 10 ounces of baby bella mushrooms

Directions:

Preheat the oven to 450 F. Line a baking sheet with parchment paper and set aside.

Finely chop a third of the mushrooms and thinly slice the rest.

In a medium bowl combine the chopped mushrooms, ground turkey, egg, panko breadcrumbs, parsley, 1/2 teaspoon salt and a few grinds of black pepper. Use your hands to mix everything together. Roll into 18 to 22 meatballs and place on the prepared baking sheet. Use a cookie scoop (1 1/2 tablespoons) to make rolling the meatballs easier. Bake in the preheated oven 12 to 14 minutes, until the meatballs are browned and cooked through.

Bring a large pot of salted water to boil.

In a large skillet, melt 2 tablespoons of butter over medium-high heat. Add the sliced mushrooms and onion and a pinch of salt and pepper. Cook, undisturbed for 4 to 5 minutes so the mushrooms and onions can crisp. Stir and cook until browned, an additional 3 to 5 minutes. Add the minced garlic and cook for 30 seconds. Add the Marsala wine and cook until thickened, about 1 to 2 minutes.

Add the spaghetti to the boiling water and cook for 6 minutes.

Add the chicken broth to the mushroom and onion mixture and bring to a boil, reduce the heat and let simmer until thickened, 5 minutes.

Drain the spaghetti and add to the skillet. Cook, tossing until al dente, about 3 to 4 minutes. Remove the skillet from the heat and add in the remaining 2 tablespoons of butter. Toss the spaghetti until the butter has melted.

To serve, divide the pasta among bowls and top with the meatballs.

Recipe from Food Network

Broccoli Cheddar Soup

One of my favorite soups is Broccoli Cheddar. I got hooked on it years ago when I tried it at Panera’s. I didn’t attempt to make it myself though until I came across a recipe from The Pioneer Woman. And while it is delicious it makes 12 servings. Now, I have no problem eating leftovers or cooking something to eat over the course of a few days, but 12 servings is a bit much. That’s A LOT of soup for one person! Recently, by chance, I came across a recipe for broccoli cheddar soup that was the perfect amount – 2 servings!

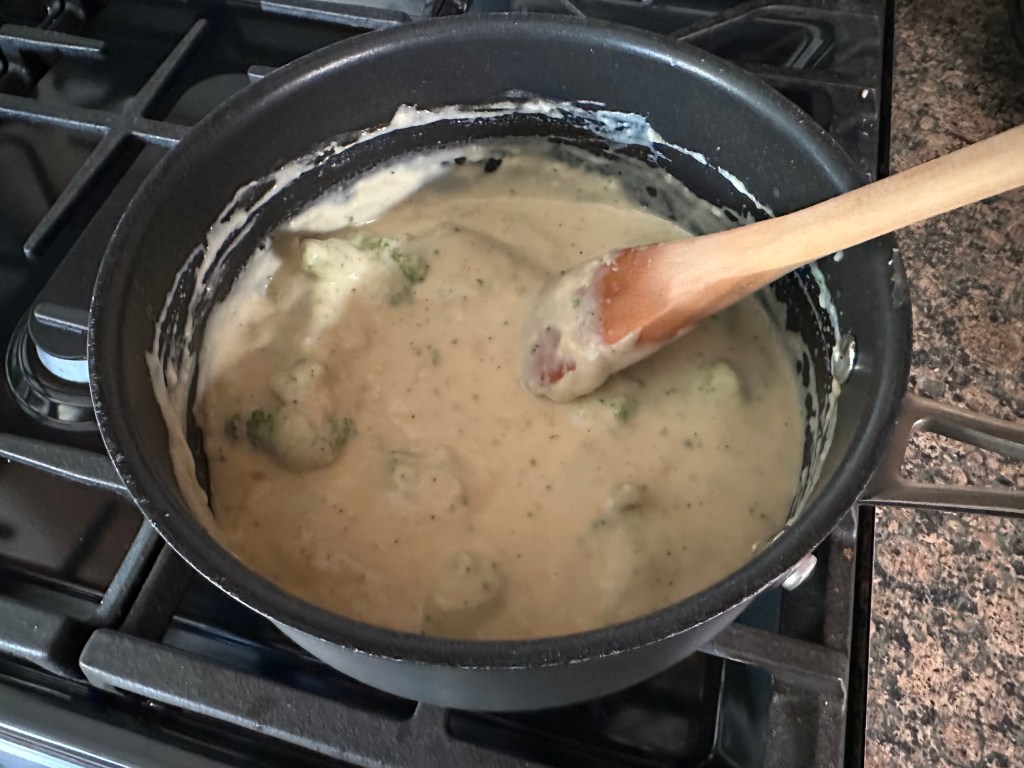
Now, the recipe seemed so simple that I had my doubts that it could be delicious, but it was. Truthfully, sometimes the simplicity of ingredients makes a recipe all that better. You can enjoy the flavor of what you are making without it being masked by other ingredients. If you are making broccoli cheddar soup what you really want to taste is the broccoli and cheddar, and that’s what you get with this soup and in less than 30 minutes. You can’t beat that.

Broccoli Cheddar Soup

Ingredients:

1/4 cup chopped yellow onion

1/4 cup unsalted butter, cubed

1/4 cup flour

1/4 teaspoon salt

1/4 teaspoon pepper

1 1/2 cup 2% milk

3/4 cup low-sodium chicken broth

1 cup cooked or frozen broccoli florets

1/2 cup shredded cheddar cheese

Directions:

In a medium saucepan melt the butter on medium heat. Add in the onions and sauté until the onions are tender. Stir in the flour, salt and pepper until well combined. Gradually add in the milk and then the chicken broth. Bring to a boil, cook and stir until the soup has thickened, about 2-3 minutes.

Add the broccoli and cook until heated through. If using frozen broccoli cook until the broccoli is tender and no longer frozen. Remove the pan from the heat and stir in the cheese until melted.

Recipe from Taste of Home

A New Year Tradition Revamped

Happy New Year! I hope you all had a wonderful Holiday season. Can you believe 2023 has rolled in already? I am convinced that after July 4th the year basically just flies by. At that point the summer is sort of winding down. Yes, I know that sounds crazy considering that July is just starting and there’s still August to get through. But, after that it seems like the anticipation of summer fun fades away. And then September rolls in and it’s all about back-to-school and the Fall. And before you know it it’s Halloween and then Thanksgiving and lo and behold the Holidays are upon us again. Not trying to be negative or anything but it’s definitely true that as you get older time somehow goes by faster. It’s probably because we are more aware of days, dates and holidays and everything that must – and needs to – get done. All the traditions and things we just do because we have been doing them forever. The holidays are the perfect time to get caught up in that. As they say, it’s hard to break with tradition. Not that there is anything wrong with it, I’m guilty of it myself.

For as long as I can remember I’ve eaten ham on New Year’s Day. It was something that my parents always cooked on New Year’s Day. I am not a 100% sure why, I vaguely recall my mom saying it was for good luck. I did a Google search once and as it turns out there’s a belief that you should eat pork on New Year’s Day as pigs move their snouts forward when eating – or something to that effect. This forward motion brings you luck in the new year. Here’s the thing though, I am not a fan of ham! There may have been a few times when I did enjoy it and look forward to eating it but definitely not often. The tradition is so engrained in me though that even though my dad passed away 7 years ago, and my mom has been in a nursing home longer than that I still make ham for myself on New Year’s Day! Subconsciously it’s probably a way for me to feel comforted and connected to memories.

For a few years I would begrudgingly eat the ham for a few days. And let me tell you even the smallest ham is too big so there would always be a ridiculous amount of leftovers even after me eating it for those days. One year, I even chopped up some of the ham and froze it convinced that I would do something with it, I didn’t, and it ended up getting tossed. Two years ago, I decided to make soup with it. And it was the best decision ever. So now, I look forward to the ham only because of the soup I know I will be making with it. For tradition’s sake though I still eat a slice or two on New Year’s Day. Come January 2nd though it’s time for Ham & Potato Soup.

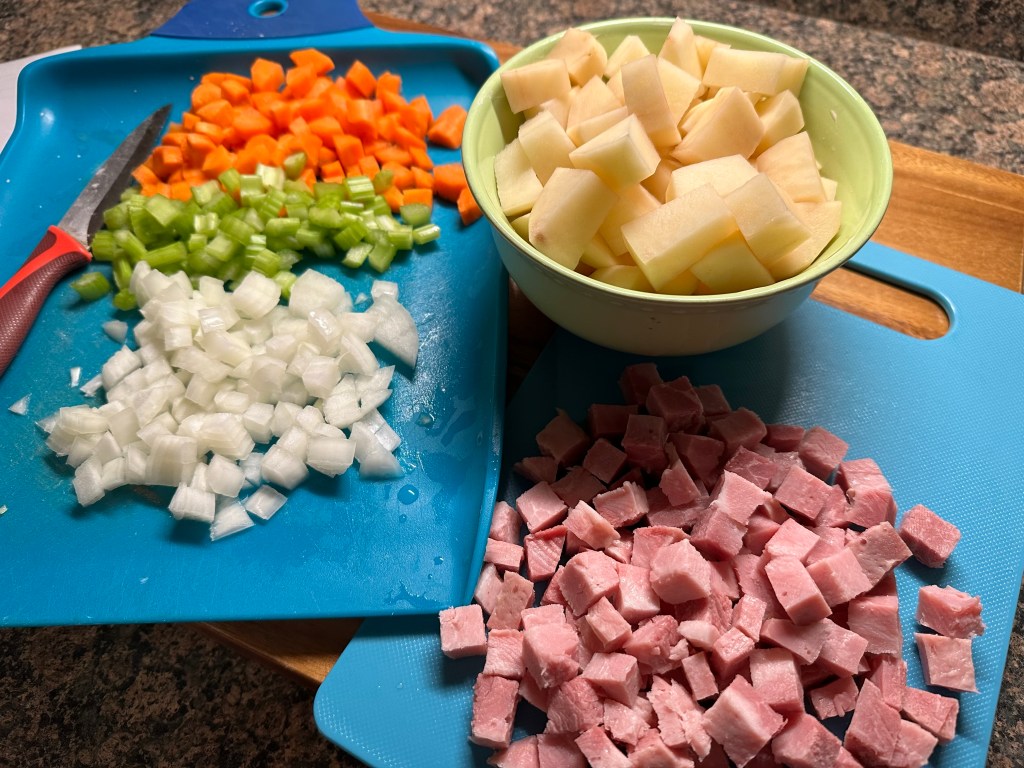
I like to think it’s somewhat healthy since it is homemade and loaded with vegetables.

Just ignore the stick of butter and whole milk that’s also needed to make it. Truth be told, those are the ingredients that help to make it creamy and delicious so they can’t be omitted.

Unfortunately, even after making my delicious soup I still have more than half of the ham left in my fridge. I was hoping to buy a small canned one this year but by the time I got to the supermarket they only had 2 large ones left and I wasn’t in the mood to start driving around looking for a small one. So, once again I will chop up some of it and freeze it and really make a conscious effort to use it for other things. Maybe I will make something controversial like a Ham & Pineapple Pizza. LOL!

Ham & Potato Soup

Ingredients:

1 stick unsalted butter

1 medium yellow onion, chopped

2 carrots, peeled and diced

1/2 cup celery, diced

3 cups potatoes, peeled and chopped*

2 1/2 cups cooked ham, diced

5 garlic cloves, minced

1/3 cup flour

4 cups (32 oz. carton) low-sodium chicken broth

3 cups whole milk

Salt and pepper, to taste

*Use 1 very large or 2 medium potatoes. Chop the potatoes into decent sized chunks as they will break down as the soup cooks.

Directions:

In a large pot melt the butter over medium heat. Add the onion, carrots and celery and sauté until the carrots begin to soften and the onions are translucent. About 4-5 minutes.

Add the ham and potatoes, stir everything together and cook for 2 minutes. Stir in the garlic and cook until fragrant, about 2 minutes.

Stir in the flour and cook for an additional 2 minutes.

Stir in the stock, mixing everything together. Bring to a boil, cover the pot and boil for 10-12 minutes, or until the potatoes are fork tender. Stir occasionally.

Reduce the heat to medium-low and add in the milk. Stir until the mixture begins to thicken and the soup is heated through.

Season with salt and pepper.

Recipe first appeared on Bead Yarn & Spatula. 

Sheet Pan Greek Pita

I’m constantly printing out recipes or ripping them out of magazines. Sometimes I take a second (or third) look at them and decide that I just don’t want to make it for various reasons. Usually it’s because it requires too many ingredients or more than I feel like buying. And while the ingredient list for this Sheet Pan Greek Pita is a bit long, it was thankfully ingredients that I normally have on hand or are part of a typical trip to the supermarket.

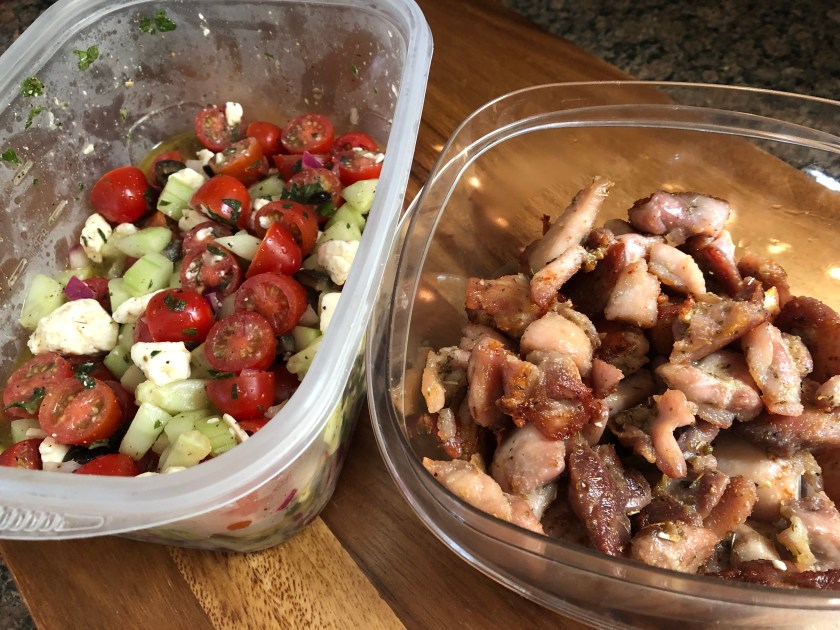
Another plus to this recipe… It came together in less than 45 minutes. Since the salad requires a little time to sit and marinate I decided to make it earlier in the day so it would be ready by the time my chicken was done.

And when it was time to eat, it was super easy to put together. I cut a pita in half, added in some of the salad, some of the chicken and topped it off with more of the salad.  This is one recipe that I won’t be tossing. This pita was delicious and I may have discovered a new way to make my chicken for salads!

Sheet Pan Greek Pita

For the Chicken:

4 boneless & skinless chicken thighs cut into 1-inch pieces

3 tablespoons olive oil

1 1/2 teaspoons garlic powder

1 1/2 teaspoons oregano

1 teaspoon salt

For the Cucumber Tomato Salad:

1/4 cup olive oil

1/4 teaspoon garlic powder

1/4 teaspoon oregano

1 teaspoon salt

1 teaspoon black pepper

1 cucumber, diced

1 pint cherry tomatoes, sliced in half

2 tablespoons chopped mint

1/4 cup diced red onion

1/2 cup black olives chopped (or Kalamata olives)

1 cup crumbled feta cheese

Juice of half a lemon

1/4 cup red wine vinegar

2 Pitas for serving

Directions:

Preheat the oven to 400 degrees.

In a medium bowl combine all the ingredients for the salad and mix well. Refrigerate for at least 30 minutes or overnight.

Combine all the ingredients for the chicken in a medium bowl. Mix well and then spread on a large baking pan. Make sure to leave ample space between the chicken so it roasts as opposed to steam. Cook in the preheated oven for 18-20 minutes, until chicken is cooked through.

To serve, slice a pita in half, spoon some of the cucumber tomato salad into the pita, followed by the chicken and top it off with more of the salad.

Recipe from Chef Jason Goldstein

Roasted Butternut Squash Pasta in a Browned Butter Sage Sauce

As I mentioned in my focaccia post earlier this week I decided to plant quite a few herbs. Today I am sharing with you what I opted to make with the fresh sage I picked… A Roasted Butternut Squash Pasta in a Browned Butter Sage Sauce. This was the first time I had planted sage and while I have purchased it a few times in the supermarket, there is really nothing like growing your own herbs and vegetables. Although, the tomatoes, cucumber and eggplant I planted are in fact fruits thanks to the seeds inside of them and because they all come from the flower of the plant. Back to the sage though, the leaves were enormous and so fragrant.

I started by peeling and chopping up a small butternut squash. I usually take the easy route and buy butternut squash already chopped, but since it’s not Fall yet it wasn’t available at my local supermarket. I did learn though that peeling and chopping up a small butternut squash is much easier than a large one. Next, I tossed it with olive oil, salt and pepper and roasted it in the oven for about 35 minutes.

Next, I boiled some pasta. Now, I would stick with penne or farfalle for this dish. I just find that it mixes better with the sauce and the size of that pasta is a good ratio for the small chunks of butternut squash. And finally, I made the browned butter sage sauce. In a large skillet, I combined half a stick of butter along with my fresh sage leaves over medium-low heat. I let the butter cook until it was beginning to brown and then added in minced garlic and cooked it for a minute more. Now, you need the sage leaves to crisp up so you can crumble them into the dish. That won’t happen though until you add the garlic to the melted butter and everything begins to sizzle. Make sure you don’t overcook the butter or the garlic or your sauce will be bitter. After the minute, I removed the pan from the heat, removed the sage leaves and added in the cooked pasta and roasted butternut squash. I crumbled the sage and then added it back to the skillet. I gave everything a good toss to make sure it was evenly coated with the browned butter and then tossed in some parmesan cheese and dinner was ready!

Roasted Butternut Squash Pasta in a Browned Butter Sage Sauce

Ingredients:

1 small to medium butternut squash, 2 pounds

1 teaspoon kosher salt

1/4 teaspoon freshly ground black pepper

3 tablespoons olive oil

8 ounces pasta*

1/4 cup unsalted butter

18-24 fresh sage leaves

2 garlic cloves, minced

1/2 cup shredded parmesan cheese

*Ideal pasta would be a penne or farfalle

Directions:

Preheat the oven to 375 F. Peel the butternut squash, scoop out the seeds and then cut into 1/2-inch to 1-inch cubes. Transfer the cubes to a large baking sheet and drizzle with the oil and sprinkle the salt and pepper on top. Toss the cubes to evenly coat them with the olive oil and salt and pepper. Roast in the oven for 30-35 minutes, tossing them halfway through the cooking time. Set aside.

Cook the pasta per the directions on the box. Set aside.

In a large skillet over medium-low heat add the butter and sage leaves and cook until the butter begins to brown. Add the garlic and continue cooking for an additional minute. Make sure not to let the butter or garlic burn as the flavor will become bitter then. Remove from the heat and use a fork or slotted spoon to remove the sage leaves. They should be crispy.

Add the roasted butternut squash and cooked pasta to the skillet. Crumble the sage on top. Return the skillet to low-heat and toss everything a few times to evenly coat the pasta and squash with the browned butter. Add salt and pepper to taste.

Toss the parmesan cheese in and serve.

Recipe modified from The Spruce Eats

Homemade Pickles

Pickles, you either love them or hate them. It’s one of those food items that there doesn’t seem to be an in between about. I am on the “love them” side of the fence so when my cucumber plant started producing more cucumbers that I could possibly eat or give away I decided to turn them into one of my favorite snacks.

To begin, I sliced two cucumbers into spears. I first sliced each of the cucumbers in half and then sliced those halves into halves or thirds depending on the size of the cucumbers. Next, I placed the cucumbers into a 32oz. wide mouth jar. I topped the cucumbers with chopped dill and smashed garlic cloves and tucked a bay leaf on the inside of the jar.

In a liquid measuring cup I combined water, rice wine vinegar, sugar, salt, red pepper flakes and black pepper and stirred everything together until the salt dissolved. I sampled the mixture to ensure that it had the right about of sweetness and spiciness.

I then poured the mixture into the jar with the cucumbers.

And then sealed it and refrigerated it for at least 24 hours before trying one of the pickles.

Now, my pickles were more on the spicy side than sweet side, but delicious nonetheless. If you would prefer a sweeter pickle, like a bread & butter one, increase your sugar amount, if you just want a delicious pickle without the sweet or spicy aspect I would omit the red pepper flakes. One more thing to note, make sure you are starting with cucumbers that have a nice crunch to them. They will hold up much better, and still have that crunch, after sitting in the water/vinegar mixture. You could also try this recipe with other goodies from your garden… Carrots, sting beans, or even asparagus.

Happy pickling!

Homemade Pickles

Ingredients:

2 medium-to-large cucumbers

1 cup water, at room temperature or cooler

1 cup rice wine vinegar

3 tablespoons sugar

3 teaspoons fine sea salt

1/2 teaspoon red pepper flakes (optional)

2 teaspoons freshly ground black pepper

1/4 cup fresh dill, chopped

4 garlic cloves, peeled and smashed

1 bay leaf

Directions:

Slice the cucumbers into spears. Slice the cucumber in half. Then slice each half into quarters. If your cucumbers are on the thinner side then only slice the halves into halves as well. Use your best judgment. Alternatively, you could also slice the cucumbers into rounds

Place the cucumbers inside of the jar you will be using. Make sure the jar is tall enough to leave about 1 inch of space between the cucumbers and the top of the jar. This recipe is ideal for a 32oz. jar.

In a liquid measuring cup, combine the water, rice wine vinegar, sugar, sea salt, red pepper flakes, and black pepper. Give everything a few good stirs until the salt has fully dissolved.

Top the cucumbers with the dill and garlic and place the bay leaf on the inside of the jar. Pour the water mixture into the jar until the cucumbers are fully submerged. Seal the jar and refrigerate at least 24 hours before enjoying.

Recipe modified from Cookie and Kate

Savory Focaccia Bread Pudding

As promised a second bread pudding recipe this week. This time a savory bread pudding made with focaccia bread. Once again, I had this focaccia left over after ordering Italian food. It was too much and I didn’t want it to go to waste and bread pudding is always a great way to use up left-over bread, but a typical bread pudding that is normally sweet wouldn’t work for this focaccia so I thought I could possibly make a savory version and I was right.

Here’s a look at the leftover focaccia. I let it sit for a day, so it became quite hard but that was perfect. It meant I wouldn’t have to toast it before using it.

I cut it up into cubes and added it to a large bowl.

In a large skillet I cooked mushrooms, onions, green pepper and celery that I seasoned with minced garlic, chopped thyme, salt and pepper until the vegetables were soft and most of the juices in the pan had evaporated.

While the vegetables were cooking, I made the custard by whisking together heavy whipping cream and eggs that I seasoned with salt and pepper.

Once the vegetable where ready I added them to the bowl with the focaccia cubes along with fresh parsley and gave everything a few good stirs.

I let the vegetables cool for about 10 minutes before adding in the custard mixture to the focaccia cube mixture. I then transferred it to a 9×13-inch baking dish that I sprayed with cooking spray and then topped it with shredded parmesan cheese. I let it sit for about 15 minutes so the focaccia cubes could soak in the custard.

I then baked it in a 350 F preheated oven for about an hour. After letting it sit for a few minutes it was time to slice. This was delicious. Definitely something I will make again. An added bonus, it tasted even better the next day as the flavors really had time to marry. And if you are trying to adopt a Meatless Monday diet this is ideal with a side salad and you will have leftovers for a few days. If you don’t have focaccia or want to use another type of bread, like an Italian or French loaf, I would suggest toasting the cubes before using them or letting the bread sit for a day or two so it can become stale and withstand the custard without becoming too soggy.

Savory Focaccia Bread Pudding

Ingredients:

10 cups cubed focaccia*

4 tablespoons unsalted butter

4 teaspoons fresh thyme, chopped

2 garlic cloves, minced

2 8oz. packages sliced baby portabella mushrooms

1 large onion, chopped

1 green bell pepper, chopped

4 celery stalks, thinly sliced

1/3 cup fresh parsley, chopped

3 1/2 cups heavy whipping cream

8 large eggs

1/3 cup shredded parmesan cheese

Salt

Pepper


*Can use a different type of bread. Just make sure it’s stale or if using fresh bread, cube and then toast in the oven for 15-20 minutes at 350 F.


Directions:

Preheat oven to 350 F. Spray a 9×13–inch baking dish with cooking spray and set aside.

Place cubed focaccia in a large bowl.

In a large skillet melt the butter over medium heat-high heat. Add the mushrooms, chopped onions, chopped green pepper and sliced celery along with the chopped thyme and minced garlic to the skillet. Season with salt and pepper and sauté until the vegetables are soft and most of the juices have evaporated, about 15 minutes.

Add the cooked vegetables and chopped parsley to the cubed focaccia. Give it a few good stirs and then let the vegetables cool for about 10 minutes.

While the vegetables cool make the custard. In a large bowl whisk together the heavy cream and the eggs. Season with salt and pepper.

Once the vegetables have cooled, add the custard to the bowl with the cubed focaccia and vegetables. Give it a few good stirs and then transfer to the prepared baking dish. Top with the shredded parmesan cheese.

Let the bread pudding sit for 15 minutes and then bake in the preheated oven uncovered for 50-60 minutes, until set and the top is golden. Let sit for 20 minutes before slicing.

Store leftovers in an airtight container in the refrigerator for 5 days.

Modified from Epicurious

Baked Feta Pasta

Thanks to TikTok there are so many viral food trends / hacks / challenges that have gone viral. While I may not have the app myself that doesn’t mean I am immune to them. There are some I am willing to try and others that are a quick no.  I did try Dalgona Chocolate and while it was good, I have not made in since. As I mentioned in that blog post, I don’t see it worth the extra time. And while I may like pickles, I will pass on Pickle Juice Salad Dressing. I did recently make my own Hot Cocoa Bombs and those were a delicious success that I will definitely be making again. A post will be coming soon. Another success, one of the latest trends, Baked Feta Pasta.

This is probably one of the simplest things I have ever made. After preheating my oven to 400 F. I combined two pints of grape tomatoes, a quartered shallot and olive oil in a 9×13-inch baking dish. I seasoned everything with salt and red pepper flakes and then tossed it all together. I placed an 8oz block of feta cheese in the center and then drizzled the top of the feta with olive oil and placed a few sprigs of thyme over the tomatoes. I baked this in the oven for about 40 minutes. While the feta was in the oven, I cooked a box of pasta per the box directions, reserving a 1/2 cup of the water. I would avoid using spaghetti or angel hair pasta. I opted to use Rotini.

Once the feta began to melt and the tomatoes were bursting, I knew it was ready.

I removed it from the oven and added my cooked pasta along with the reserved pasta water and used tongs to toss everything together. And that was it! Dinner was ready in less than an hour and didn’t require much effort on my part. And yes, in case you are wondering, this did reheat well.

While I kept mine simple, you can add in spinach, garlic, basil and so forth to add in some extra flavor. One thing I will do different next time, add in more shallots. They have a nice sweetness when baked in the oven.


Baked Feta Pasta

Ingredients:

2 pints grape tomatoes

1 shallot, quartered

1/2 cup extra virgin olive oil, divided

Kosher salt

Crushed red pepper flakes

1 8oz. block feta cheese

3 sprigs thyme

10z. pasta

Directions:

Preheat the oven to 400 F. In 9×13-inch baking dish combine the grape tomatoes, shallot and most of the olive oil (reserve 3 tablespoons to drizzle over the feta). Season with salt and red pepper flakes and toss to combine.

Place the feta in the center of the tomato mixture and drizzle with the remaining olive oil. Place the thyme sprigs over the tomatoes and bake in the preheated oven for 40 to 45 minutes, or until the tomatoes are bursting and the feta cheese is golden on top.

While the feta is in the oven, bring a large pot of water to boil, season with salt and cook pasta per the box directions. Reserve 1/2 cup of the pasta water before draining.

Add the cooked pasta and reserved pasta water to the dish with the tomatoes and feta and toss to combine.

Recipe from Delish

%d bloggers like this: