As Lent season comes to an end you may be seeing Hot Cross Buns available in the bakery section of your local supermarket or at your favorite bakery. They are synonymous with this time of the year due to their symbolism for the holiday.
I attempted to make them last year and while they smelled great while they were baking, the end result were buns that were hard and dry. And I instantly knew what the problem was, my yeast mixture was off. The recipe stated that when you added the yeast mixture to the flour mixture the dough should be shaggy. That never happened, but, I forged on hoping for a soft and tasty bun in the end. This time around though I got it all right. In my mind there’s an emoji of me jumping up and down with excitement. See, I am not a fan of working with yeast. If you follow me on Instagram, you’ll know I recently made bread three weekends in a row – Irish Soda Bread, Cranberry Walnut Bread and Jalapeno Cheddar Bread. Irish Soda Bread doesn’t require yeast so I am very comfortable baking it and the latter two while they do require yeast, both are no-knead breads. You combine all of the ingredients, form it into a dough and then place in a bowl covered with plastic wrap and let it rest for about 18 hours so it can rise – 100% foolproof. And while these buns aren’t all that difficult to make, sans the yeast part, they do require two things from you, time and patience. Give yourself at least 3 to 3.5 hours to prep and bake them.
I started by making the yeast mixture. In a medium saucepan I combined water and milk and heated it on low heat until it reached a temperature of 100 F, making sure it didn’t go above 110 F. I used my candy thermometer to keep track of the temperature. Once it reached the right temperature I removed the saucepan from the heat and sprinkled yeast and a pinch each of sugar and flour over the surface. I left it undisturbed for about 30 minutes. I was waiting for the mixture to become foamy and begin to rise up the sides of the pan.
Meanwhile, in a large bowl I whisked together flour, sugar, salt, nutmeg, cinnamon and ginger. Once the ingredients were well combined I made a well in the middle.
Once the yeast mixture was ready I whisked in an egg yolk, melted butter and vanilla extract into it. Once all of these ingredients were well combined I poured them into the well I created in the flour mixture. Using a wooden spoon I mixed all of the ingredients together and a thick, shaggy and sticky dough formed. I stirred in raisins and then turned the dough onto a floured surface and kneaded it until it was soft and elastic and formed it into a ball.
I quickly washed the large bowl I had used to make the dough and then rubbed the inside with softened butter. I returned the dough to the bowl and began turning it to coat it with the butter from the bowl. I covered the bowl with plastic wrap and let it rest for about 90 minutes until it was doubled in size.
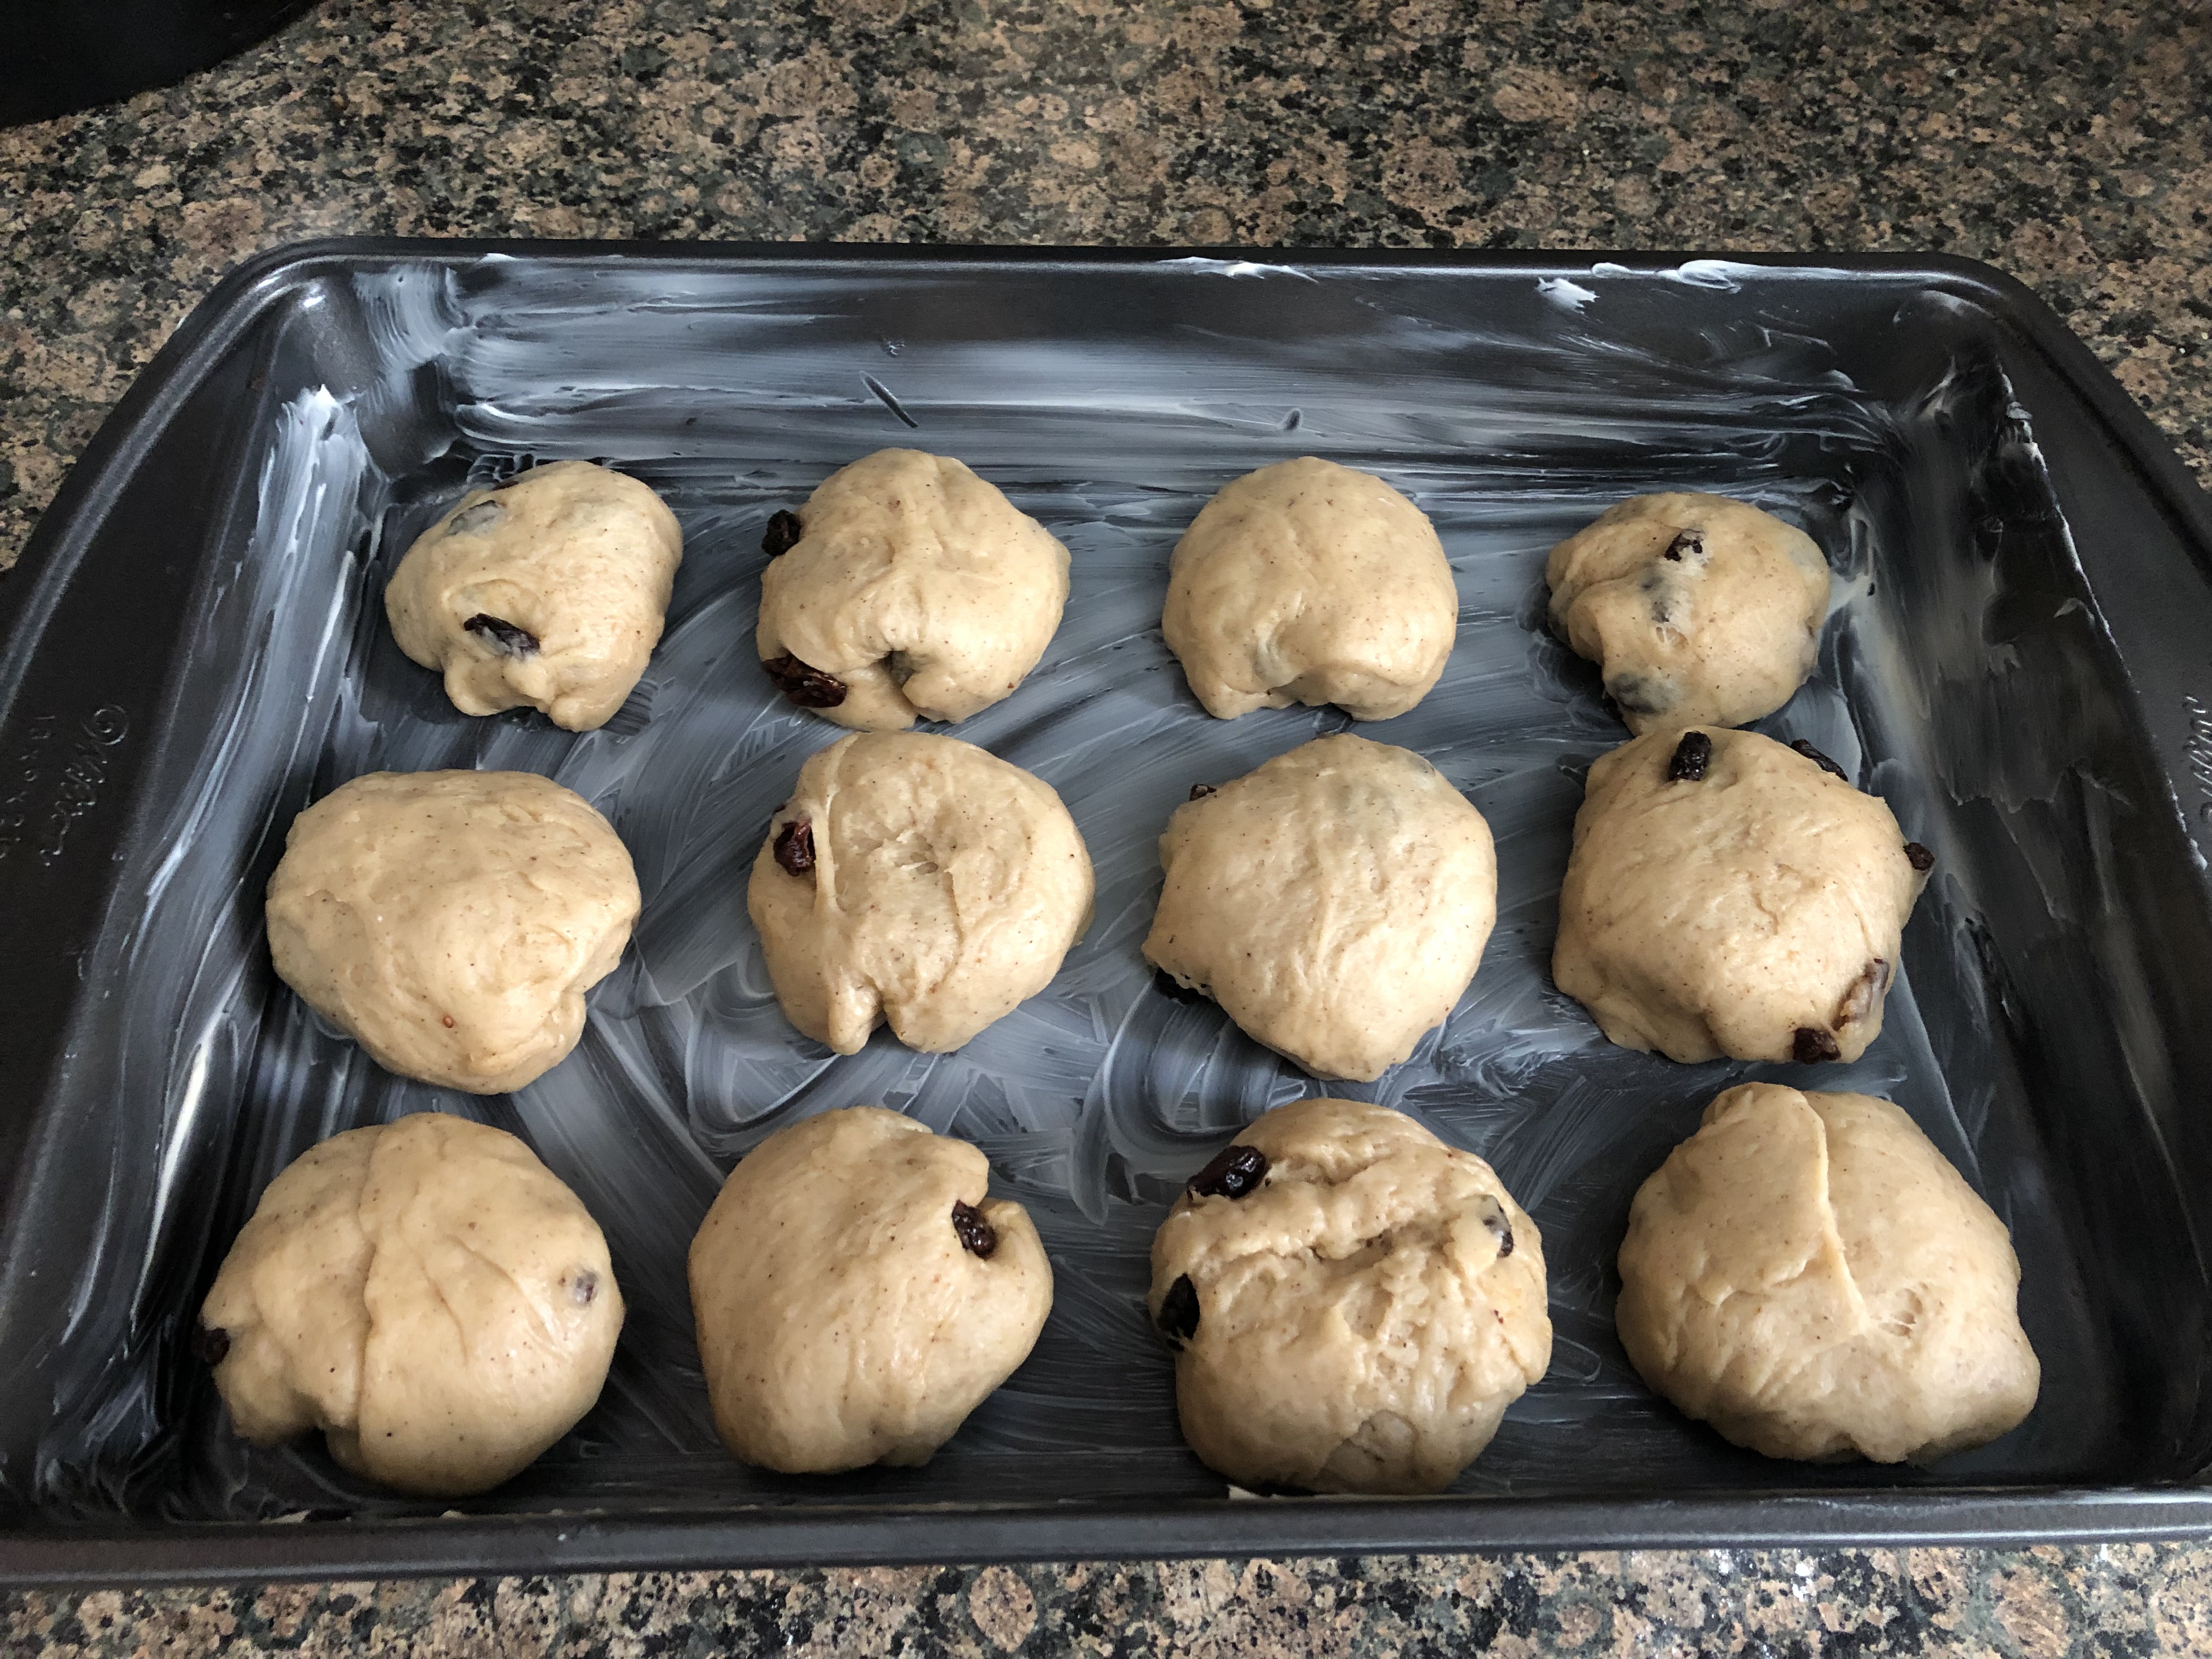
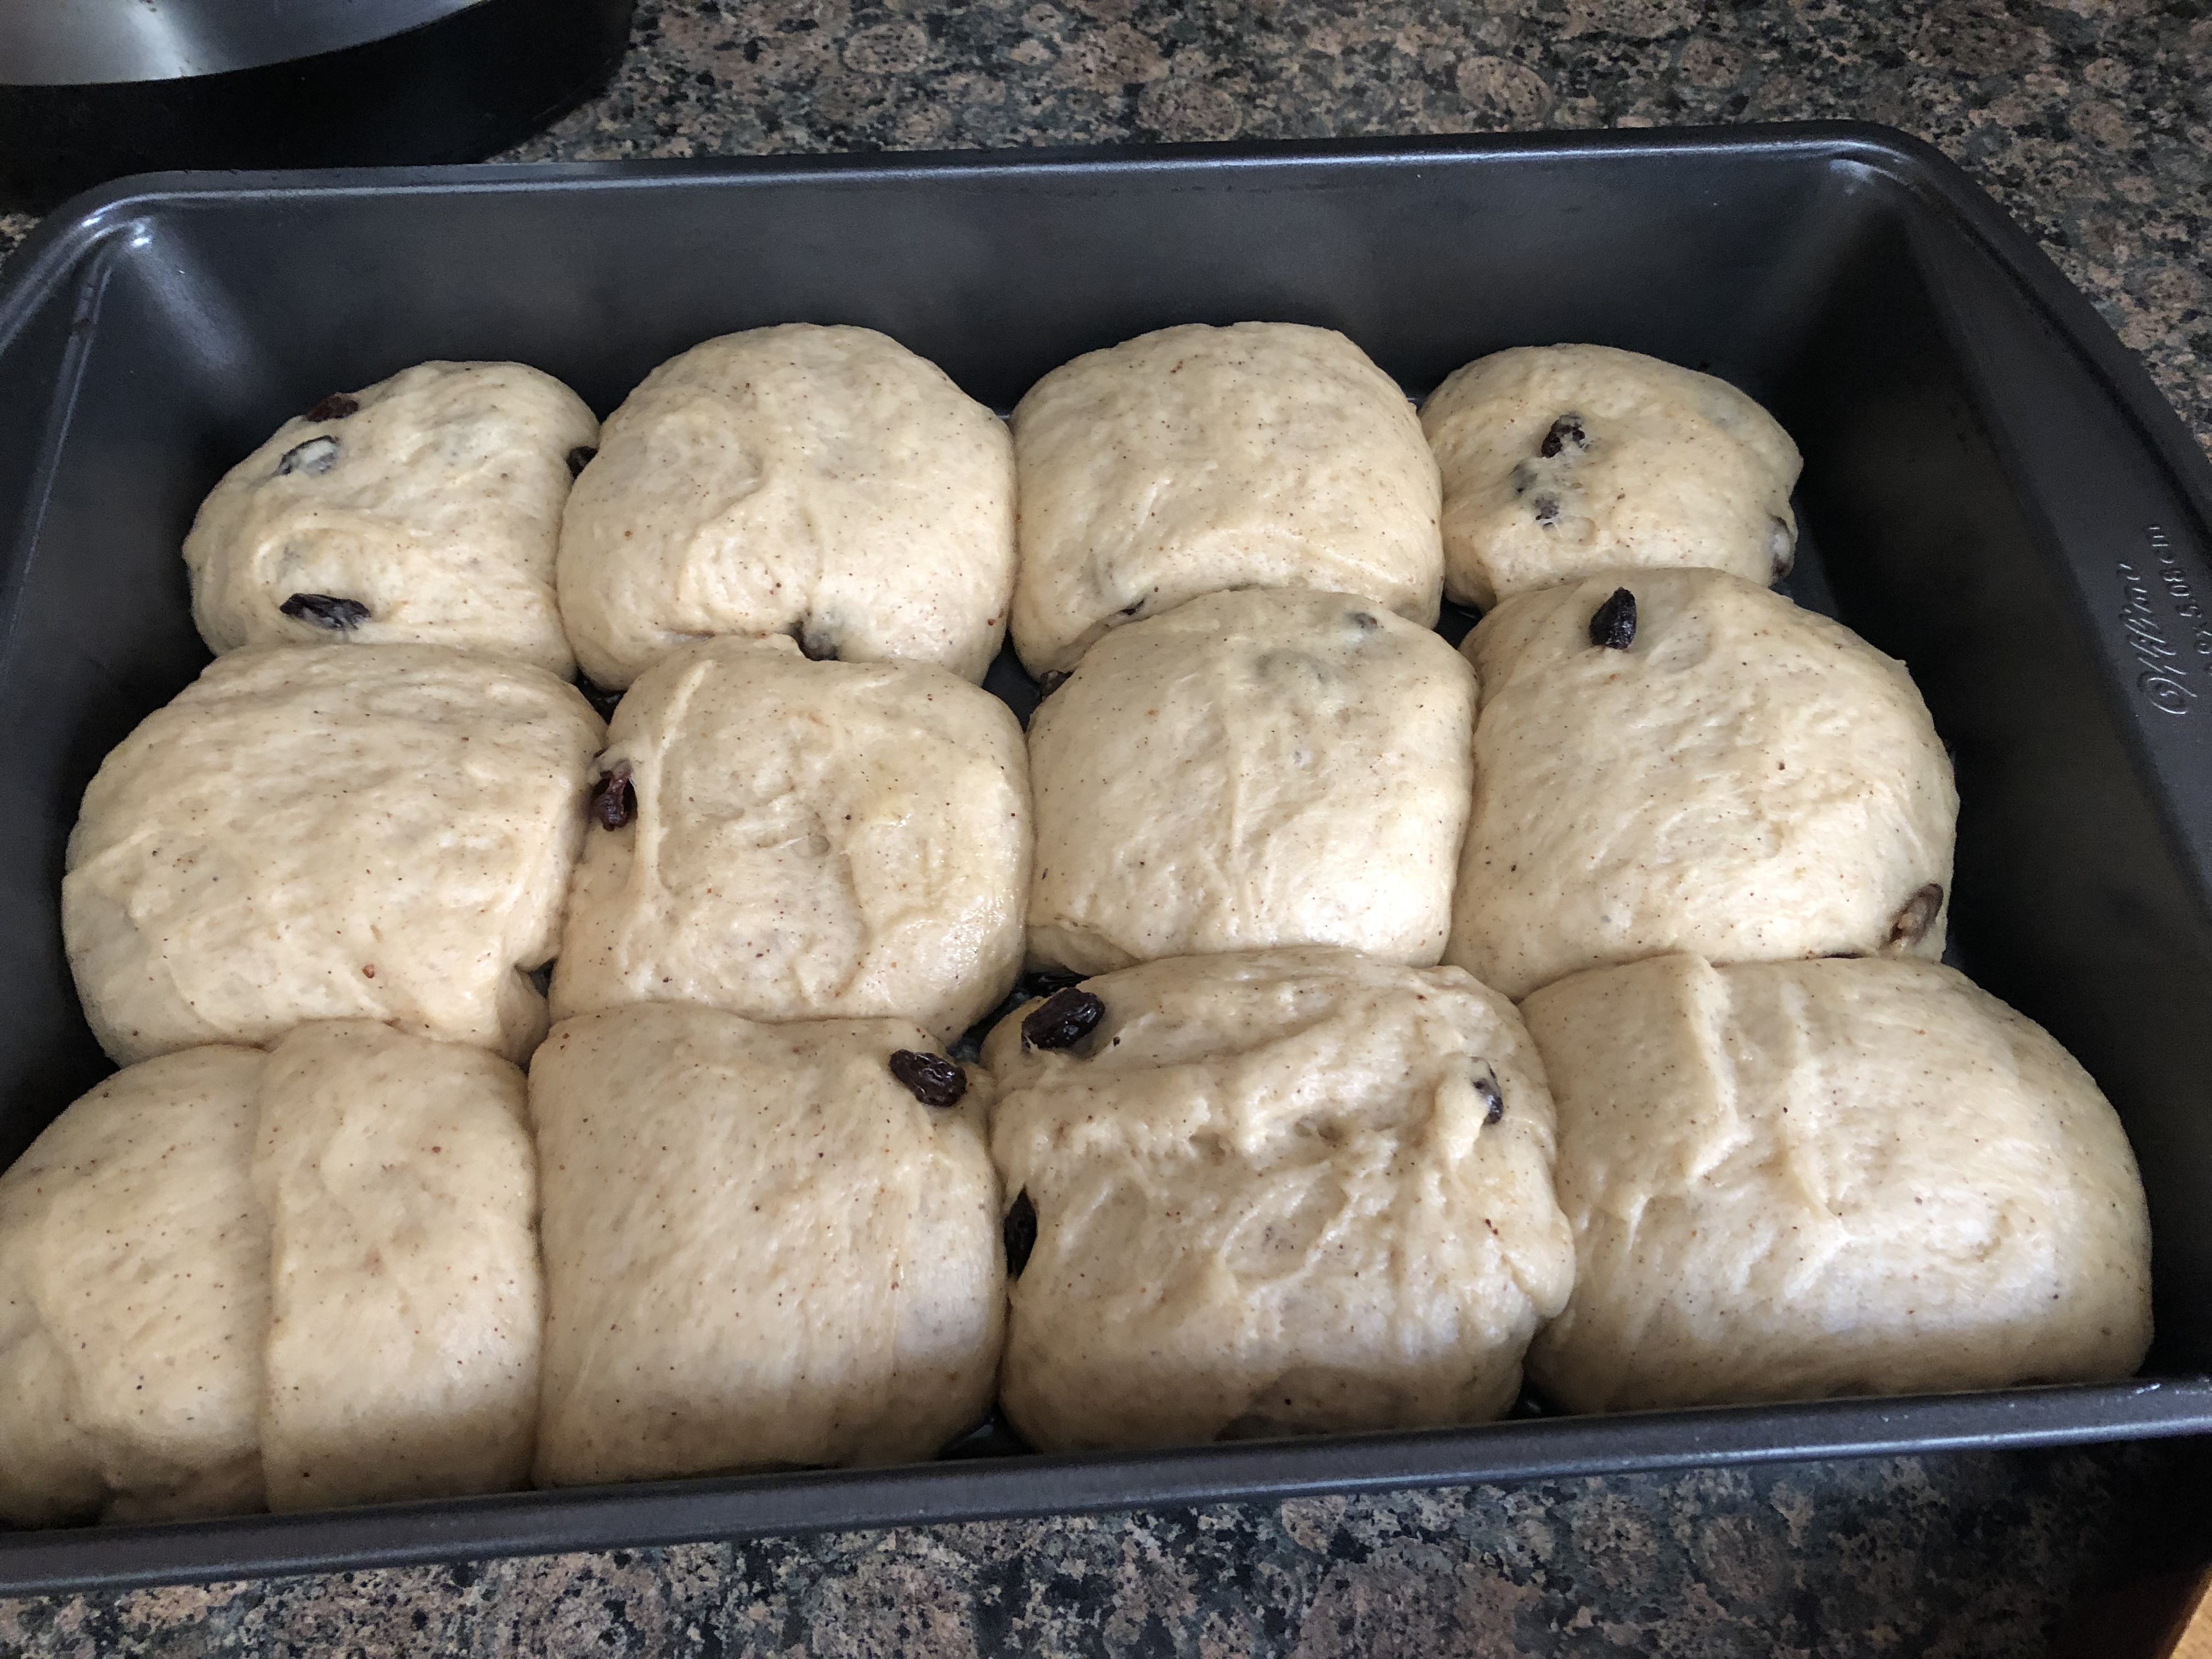
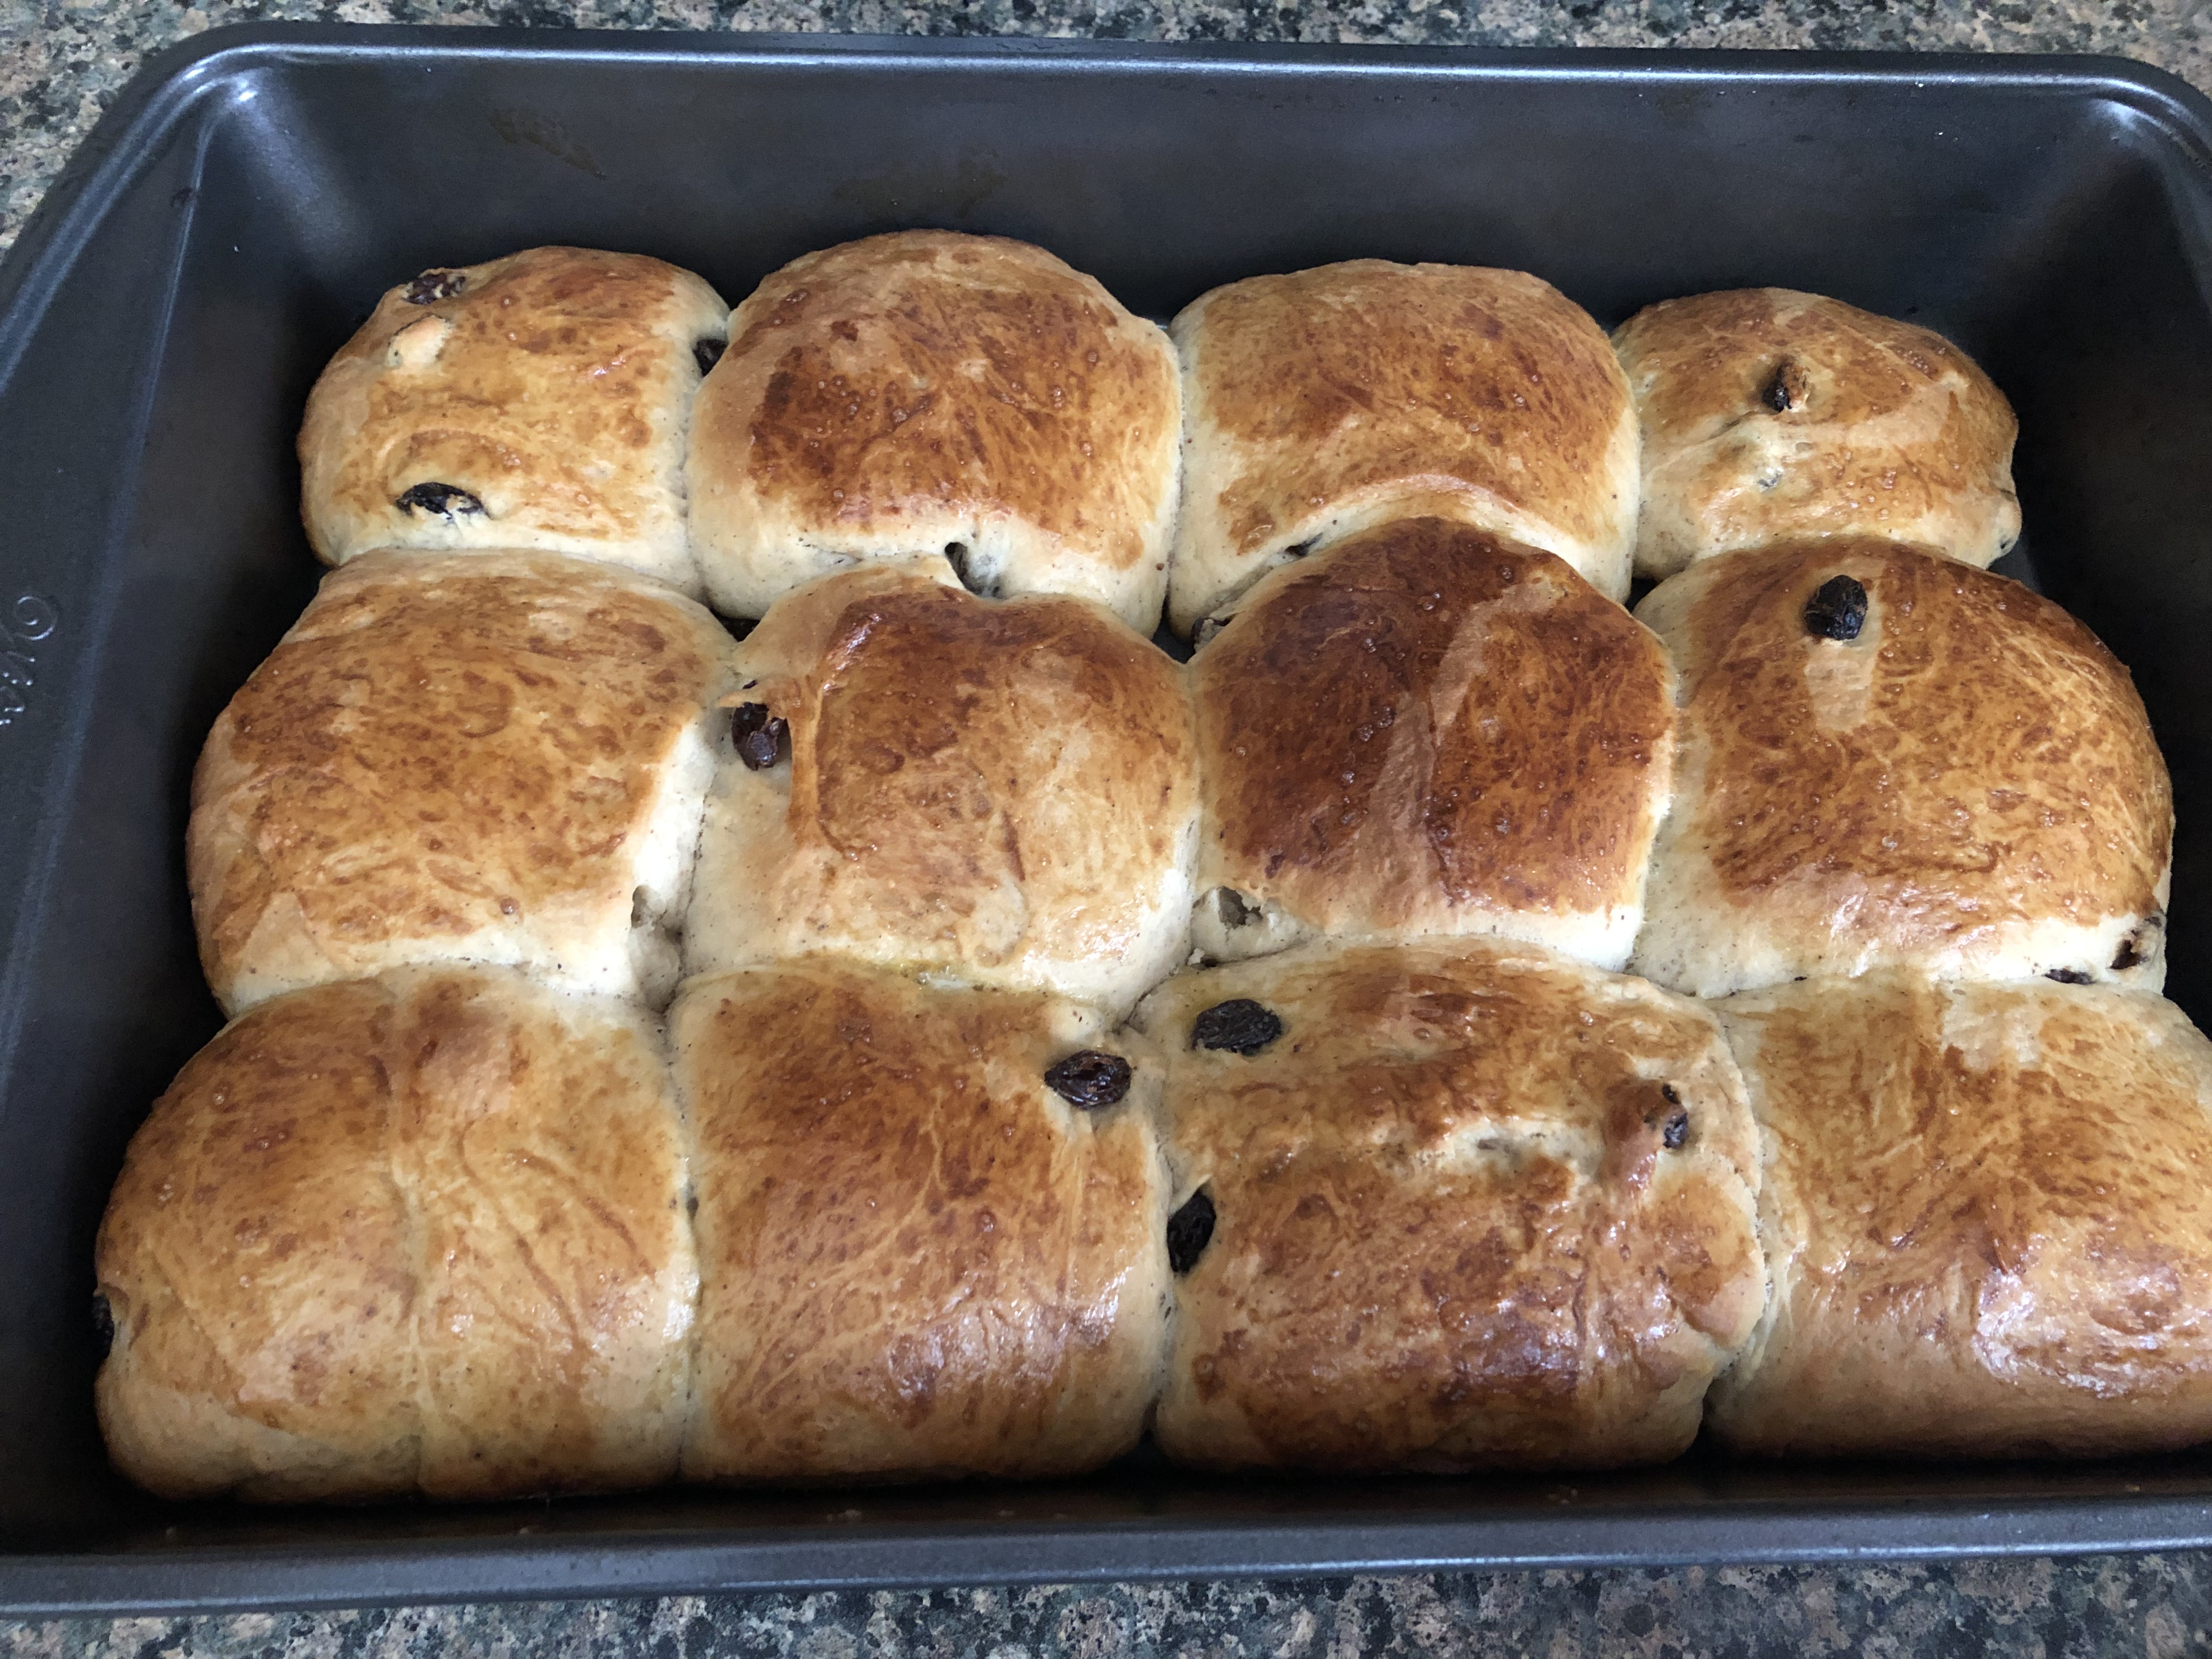
Just before I began forming the buns, I greased a baking pan with softened butter and preheated my oven to 200F. Once the dough was ready I removed it from the bowl and formed it into a 16 x 8 rectangle. I then divided the dough in half lengthwise, then in half crosswise and then divided each of the sections into three equal parts. To make the buns round, I tucked the edges in and then placed them into the prepared pan leaving a little space in between each. Next time I make these I will form the dough into balls by rolling it between my hands to get a better round shape. The tucking method resulted in buns that looked a little more square / rectangle. I then covered the pan with a piece of plastic wrap that I coated with softened butter. At this point, I turned off my oven and placed the covered pan in the oven so the buns could rise. Here’s a tip, when yeast recipe calls for something to be placed in a warm spot to rise, preheat your oven to 200 F, turn it off and then place the item in the oven. It’s the perfect environment for it to rise. I left the buns in the oven for about 40 minutes, they more than doubled their size. Once I removed them I preheated the oven to 375F and brushed the tops with a beaten egg before returning them to the oven for 25 minutes, until they were golden brown on top and puffy.
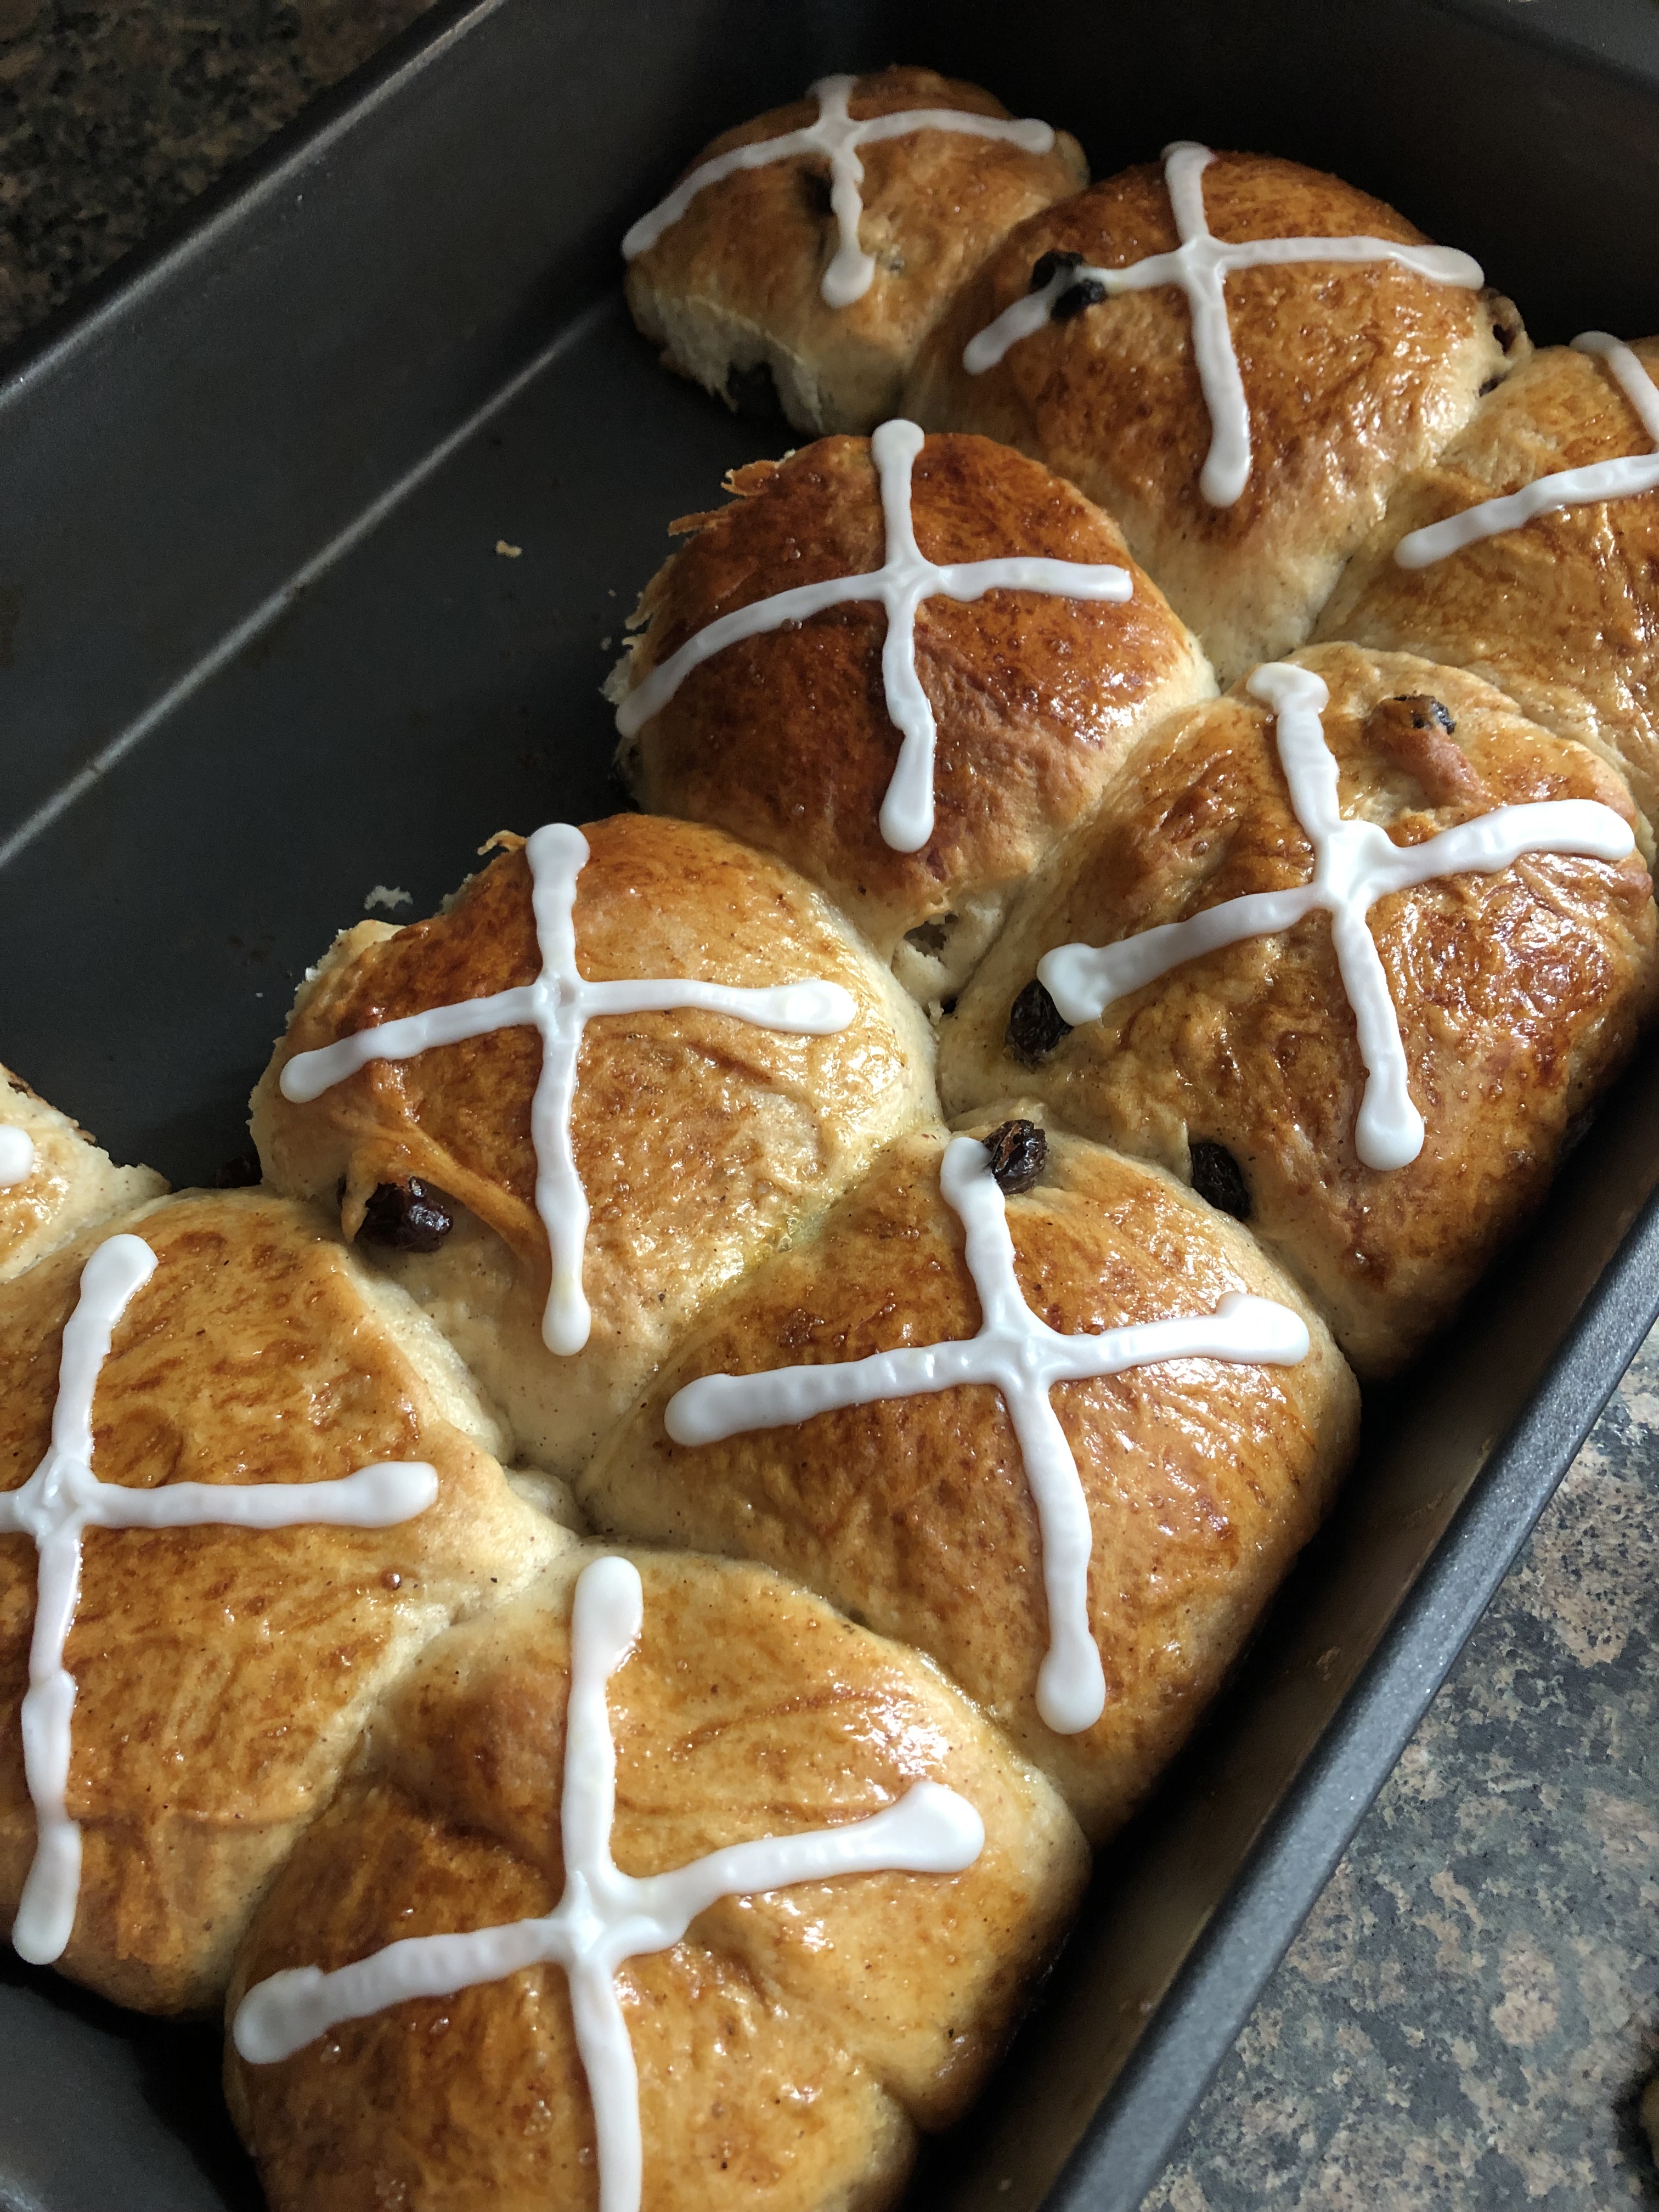
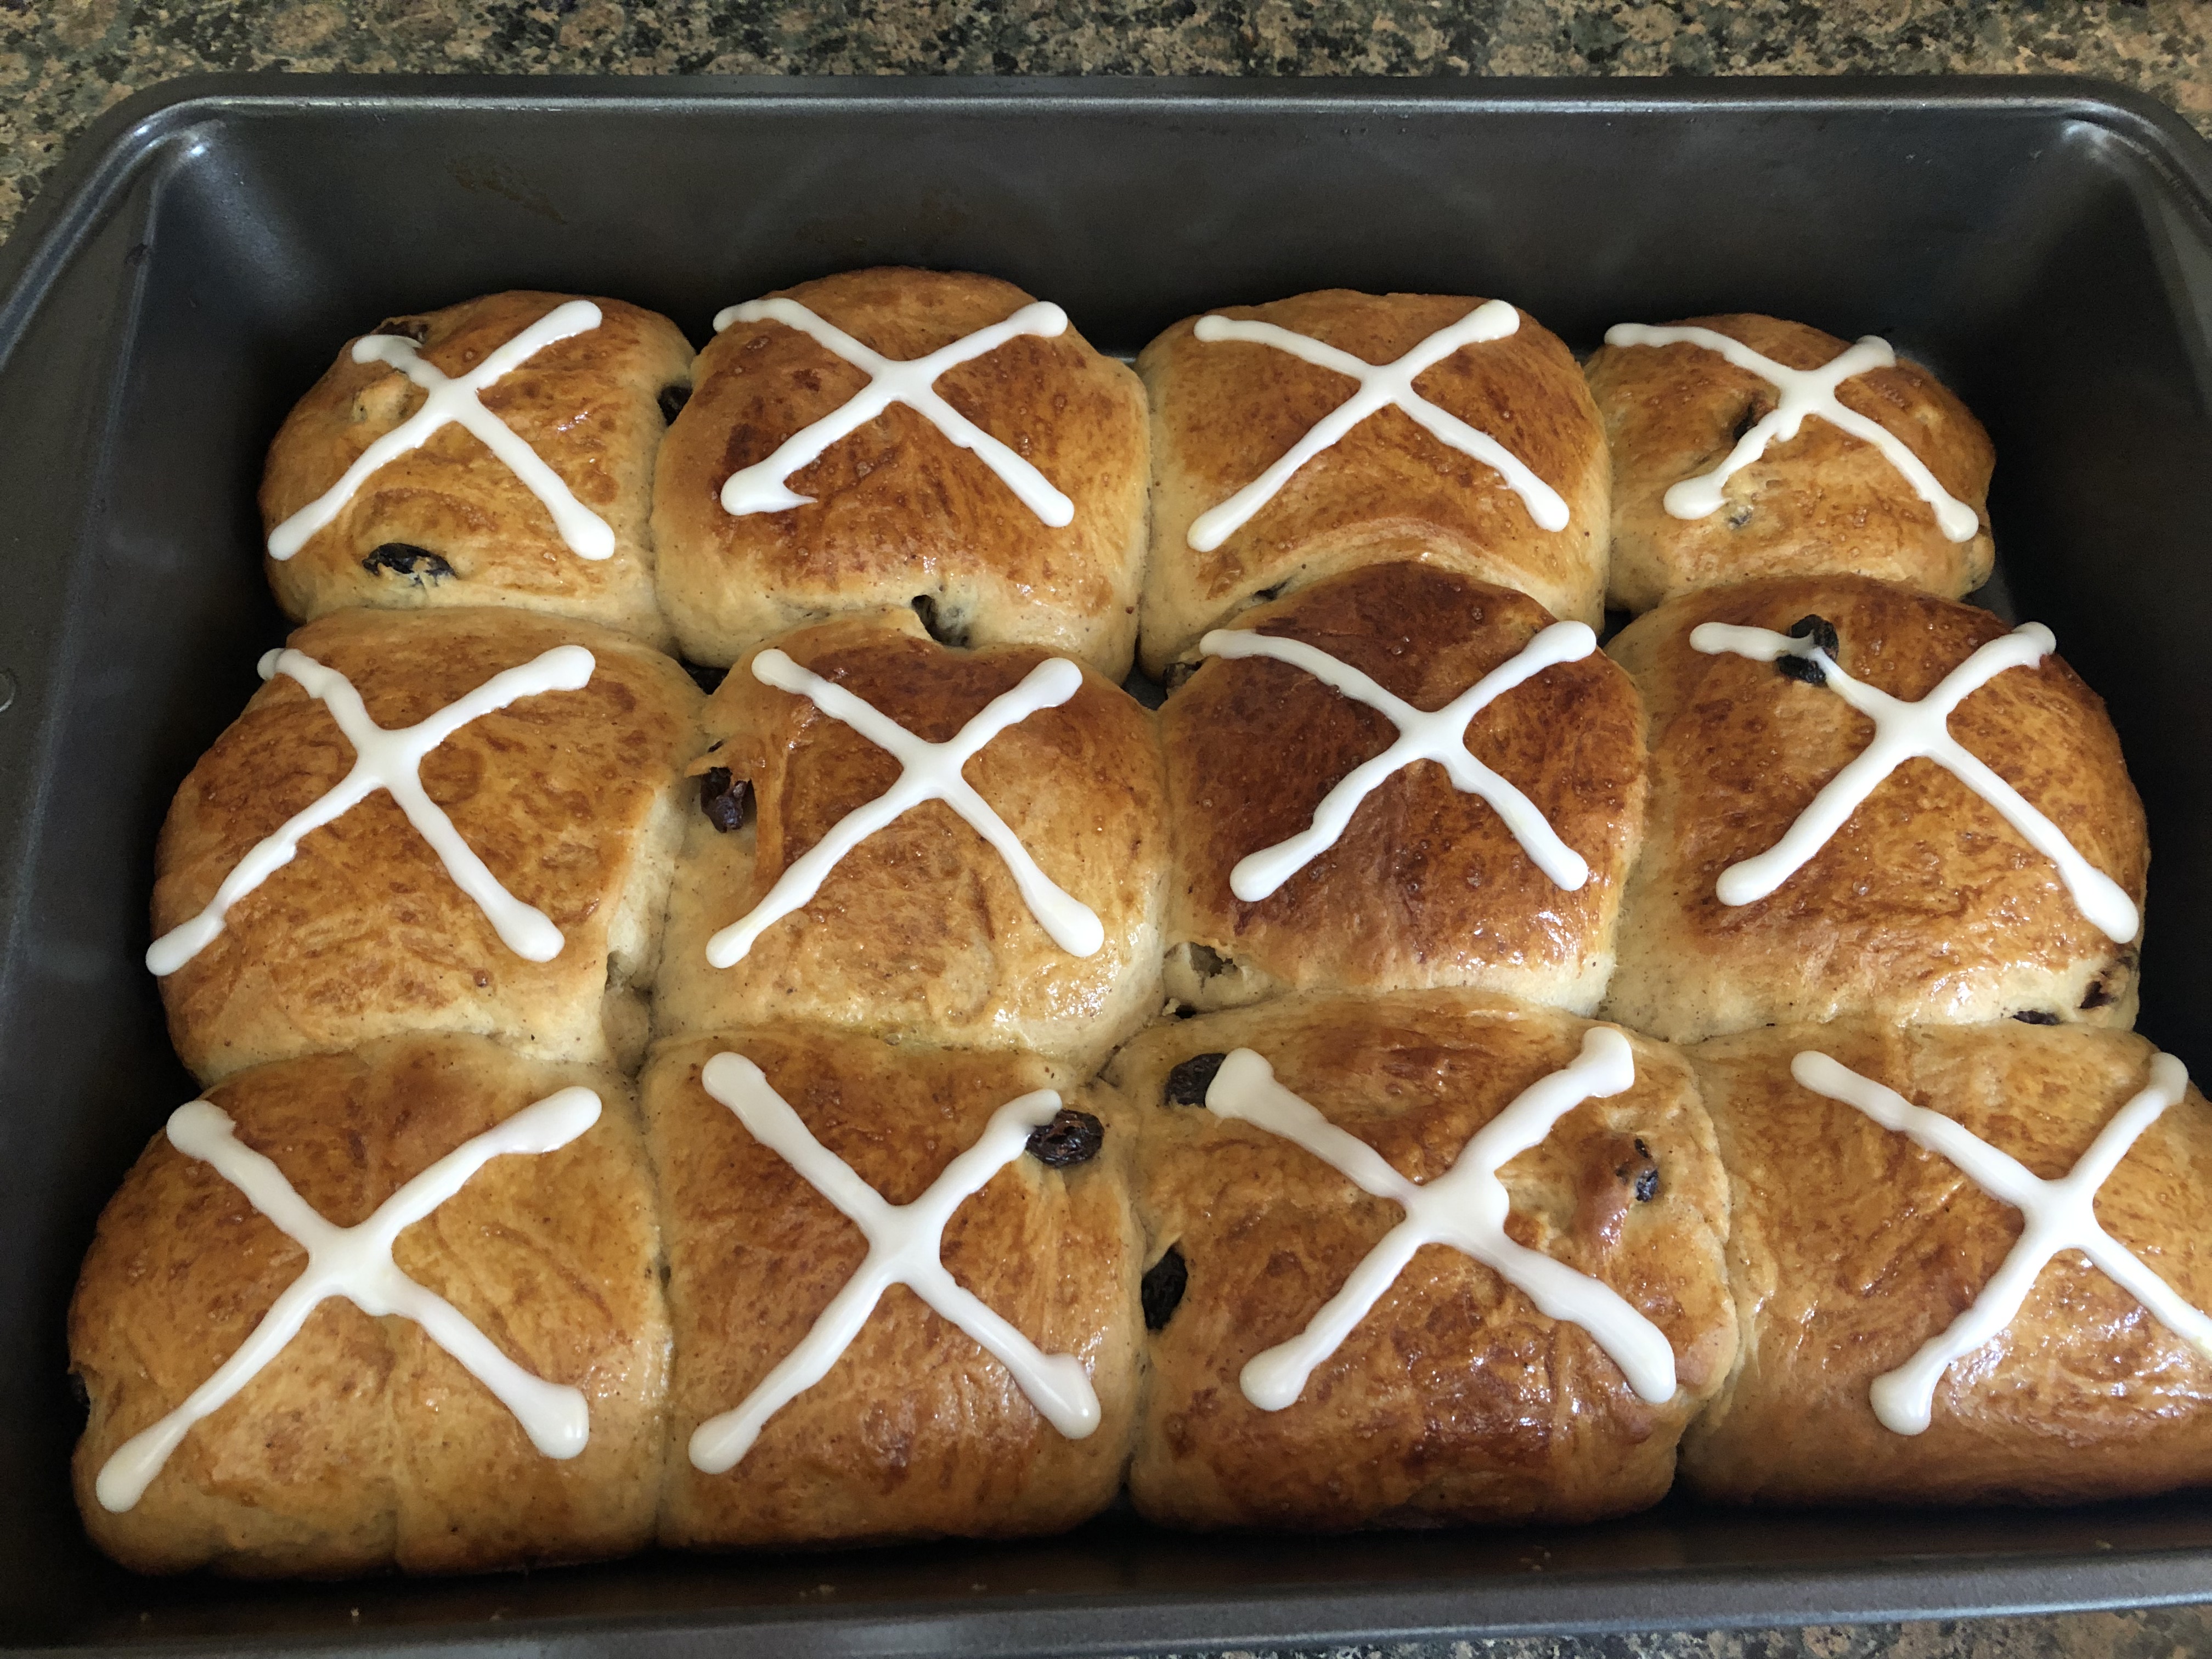
I let the buns cool completely in the pan. Once cooled, I made the traditional cross pattern on each bun with a confectioners’ sugar glaze.
Hot Cross Buns
Ingredients:
For the Buns:
1/2 cup water
1/2 cup whole milk
1/2 cup sugar
2 1/4 oz. packages active dry yeast
1/3 cup unsalted butter, melted (plus more at room temperature as needed per directions)
1 large egg yolk
1 1/2 teaspoons vanilla extract
3 cups flour
3/4 teaspoon salt
1/2 teaspoon ground nutmeg
1/2 teaspoon ground cinnamon
1/4 teaspoon ground ginger
1/2 cup raisins
1 egg beaten, for brushing buns
For the Glaze:
2 cups confectioners’ sugar, sifted
2 tablespoons milk
1/4 teaspoon lemon zest
1 teaspoon vanilla extract
Directions:
In a medium saucepan combine the water and milk. Heat on low heat until it reaches a temperature or 100 F, not exceeding 110 F. Remove from the heat and sprinkle the yeast and a pinch of sugar and flour over the surface. Set aside without stirring until the mixture becomes foamy and begins to rise up the sides of the pan, about 30 minutes.
In a large bowl whisk together the flour, sugar, salt, nutmeg, cinnamon and ginger. Make a well in the middle of the mixture and set aside.
When the yeast mixture is ready, whisk in the melted butter, egg yolk and vanilla extract.
Pour the yeast mixture into flour mixture and using a wooden spoon mix it to form a thick, shaggy and sticky dough. Stir in the raisins. Turn the dough out onto a lightly floured surface and knead the dough until it is soft and elastic, about 8 minutes. Shape the dough into a ball.
Brush the inside of a large bowl with softened butter. Put the dough into the bowl and turn it to coat it with the butter. Cover the bowl with plastic wrap and let the dough rise at room temperature until it has doubled in size, about 90 minutes.
Butter a 9 x 14 inch baking pan. Turn the dough out of the bowl and pat into a 16 x 8 inch rectangle. Divide the dough in half lengthwise and then again crosswise. Divide of each of these pieces into thirds and form the dough into rounds. Place in the prepared pan, leaving a little space between each. Cover the pan with a buttered plastic wrap and set the rolls to rise, they will double in size, in a warm place. About 45 minutes.
Preheat the oven to 375 F.
Remove the plastic wrap from the pan and brush the top of the buns with a beaten egg. Bake until golden brown on top and puffy, about 25 minutes. The internal temperature of the buns should be 190 F. Let the buns cool in the pan.
In a medium bowl combine the ingredients for the glaze and stir until smooth. Transfer the glaze to a piping bag or zip bag and make a small cut on the end or corner. Ice each of the buns with a cross.
Recipe from Food Network