Mixed Berry Galette

The unofficial end of summer is upon us… Labor Day. While the day temps feel like summer the drop in the evening temps definitely signal the arrival of Fall is imminent, kids are heading back to school and everywhere you look there is something flavored pumpkin. I am not complaining though… Fall is by far my favorite of the four seasons. I love the crispness in the air, apple picking, the leaves changing colors and the return of scarf season. If you didn’t know, I love scarves!!! But before all that fun begins I have one last summer themed dessert… A Mixed Berry Galette. While you can get berries – blueberries, blackberries, strawberries, etc. – anytime of the year, summer is when they are at their peak.

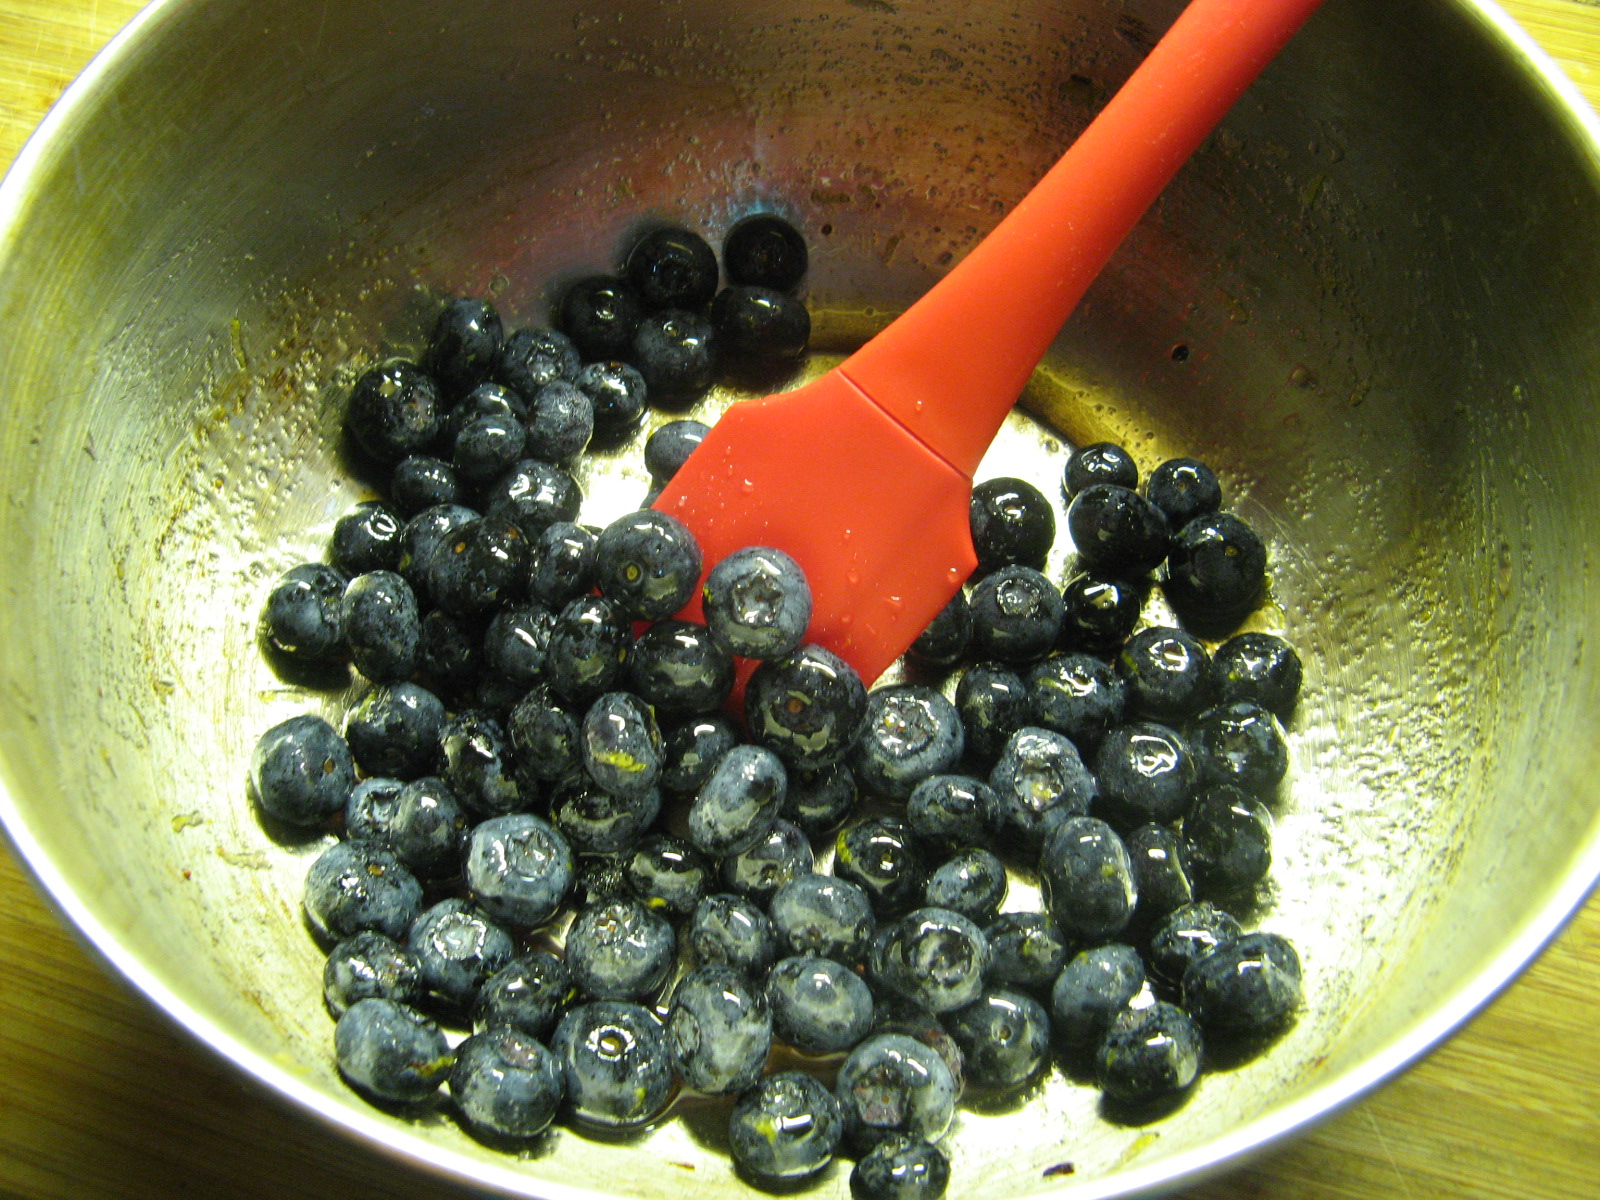
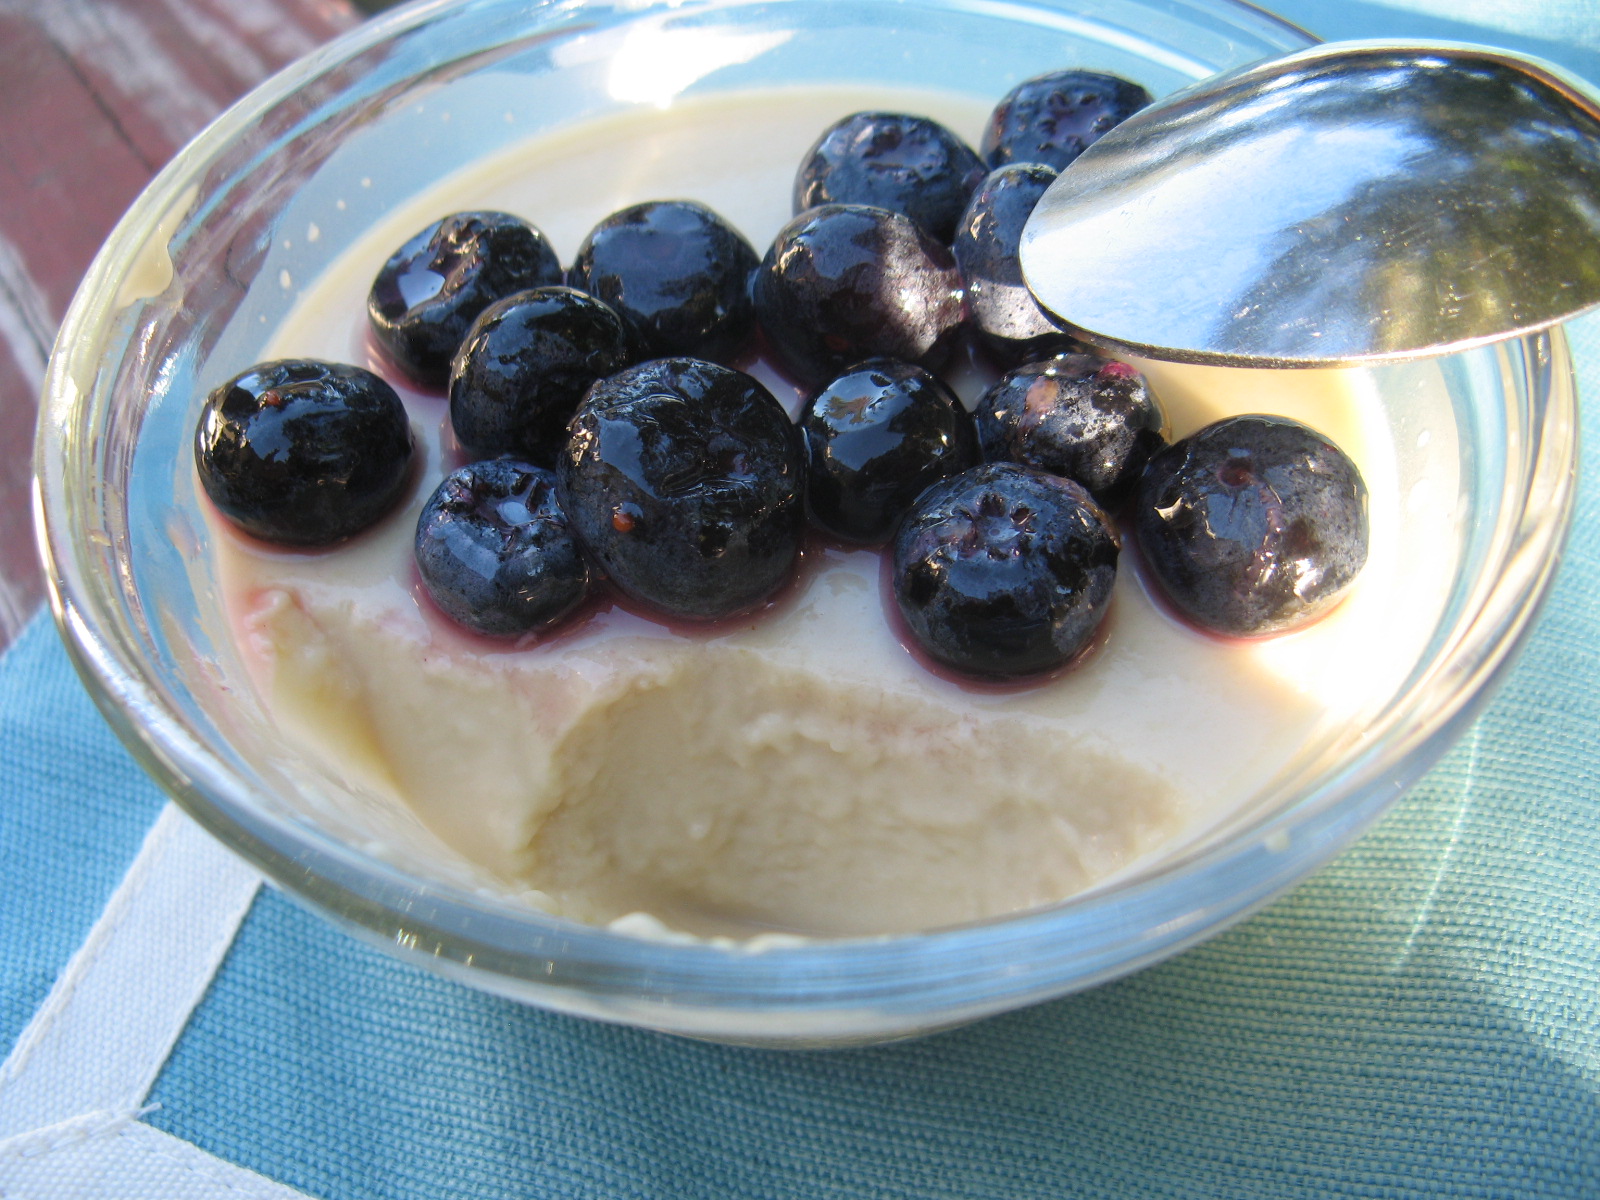
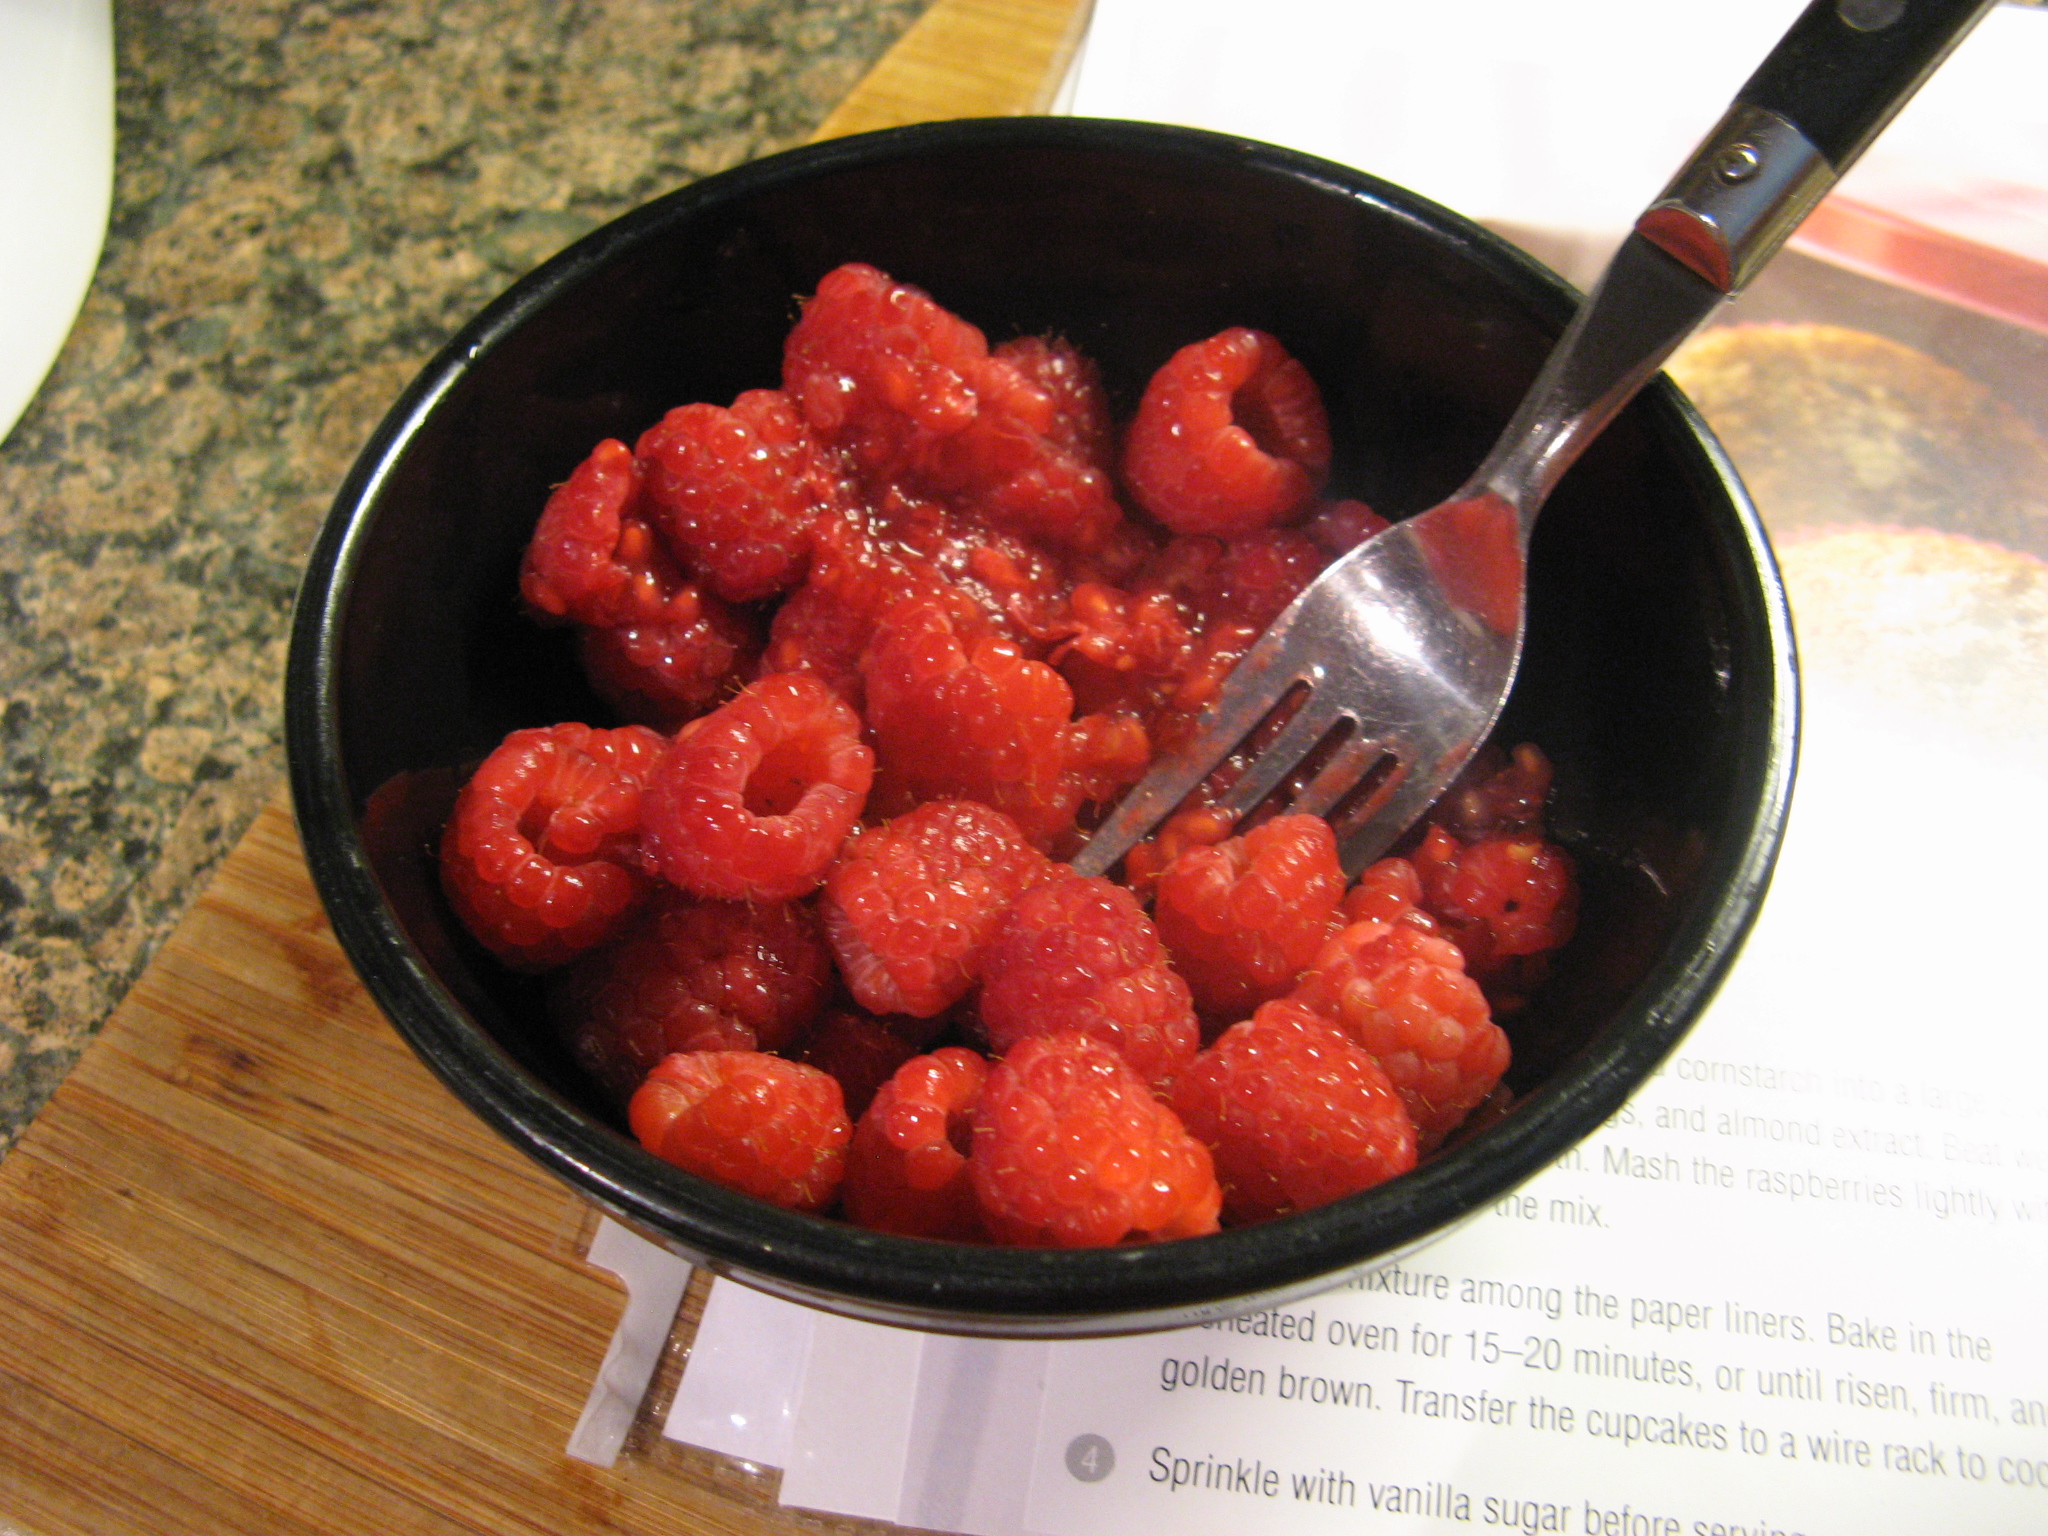
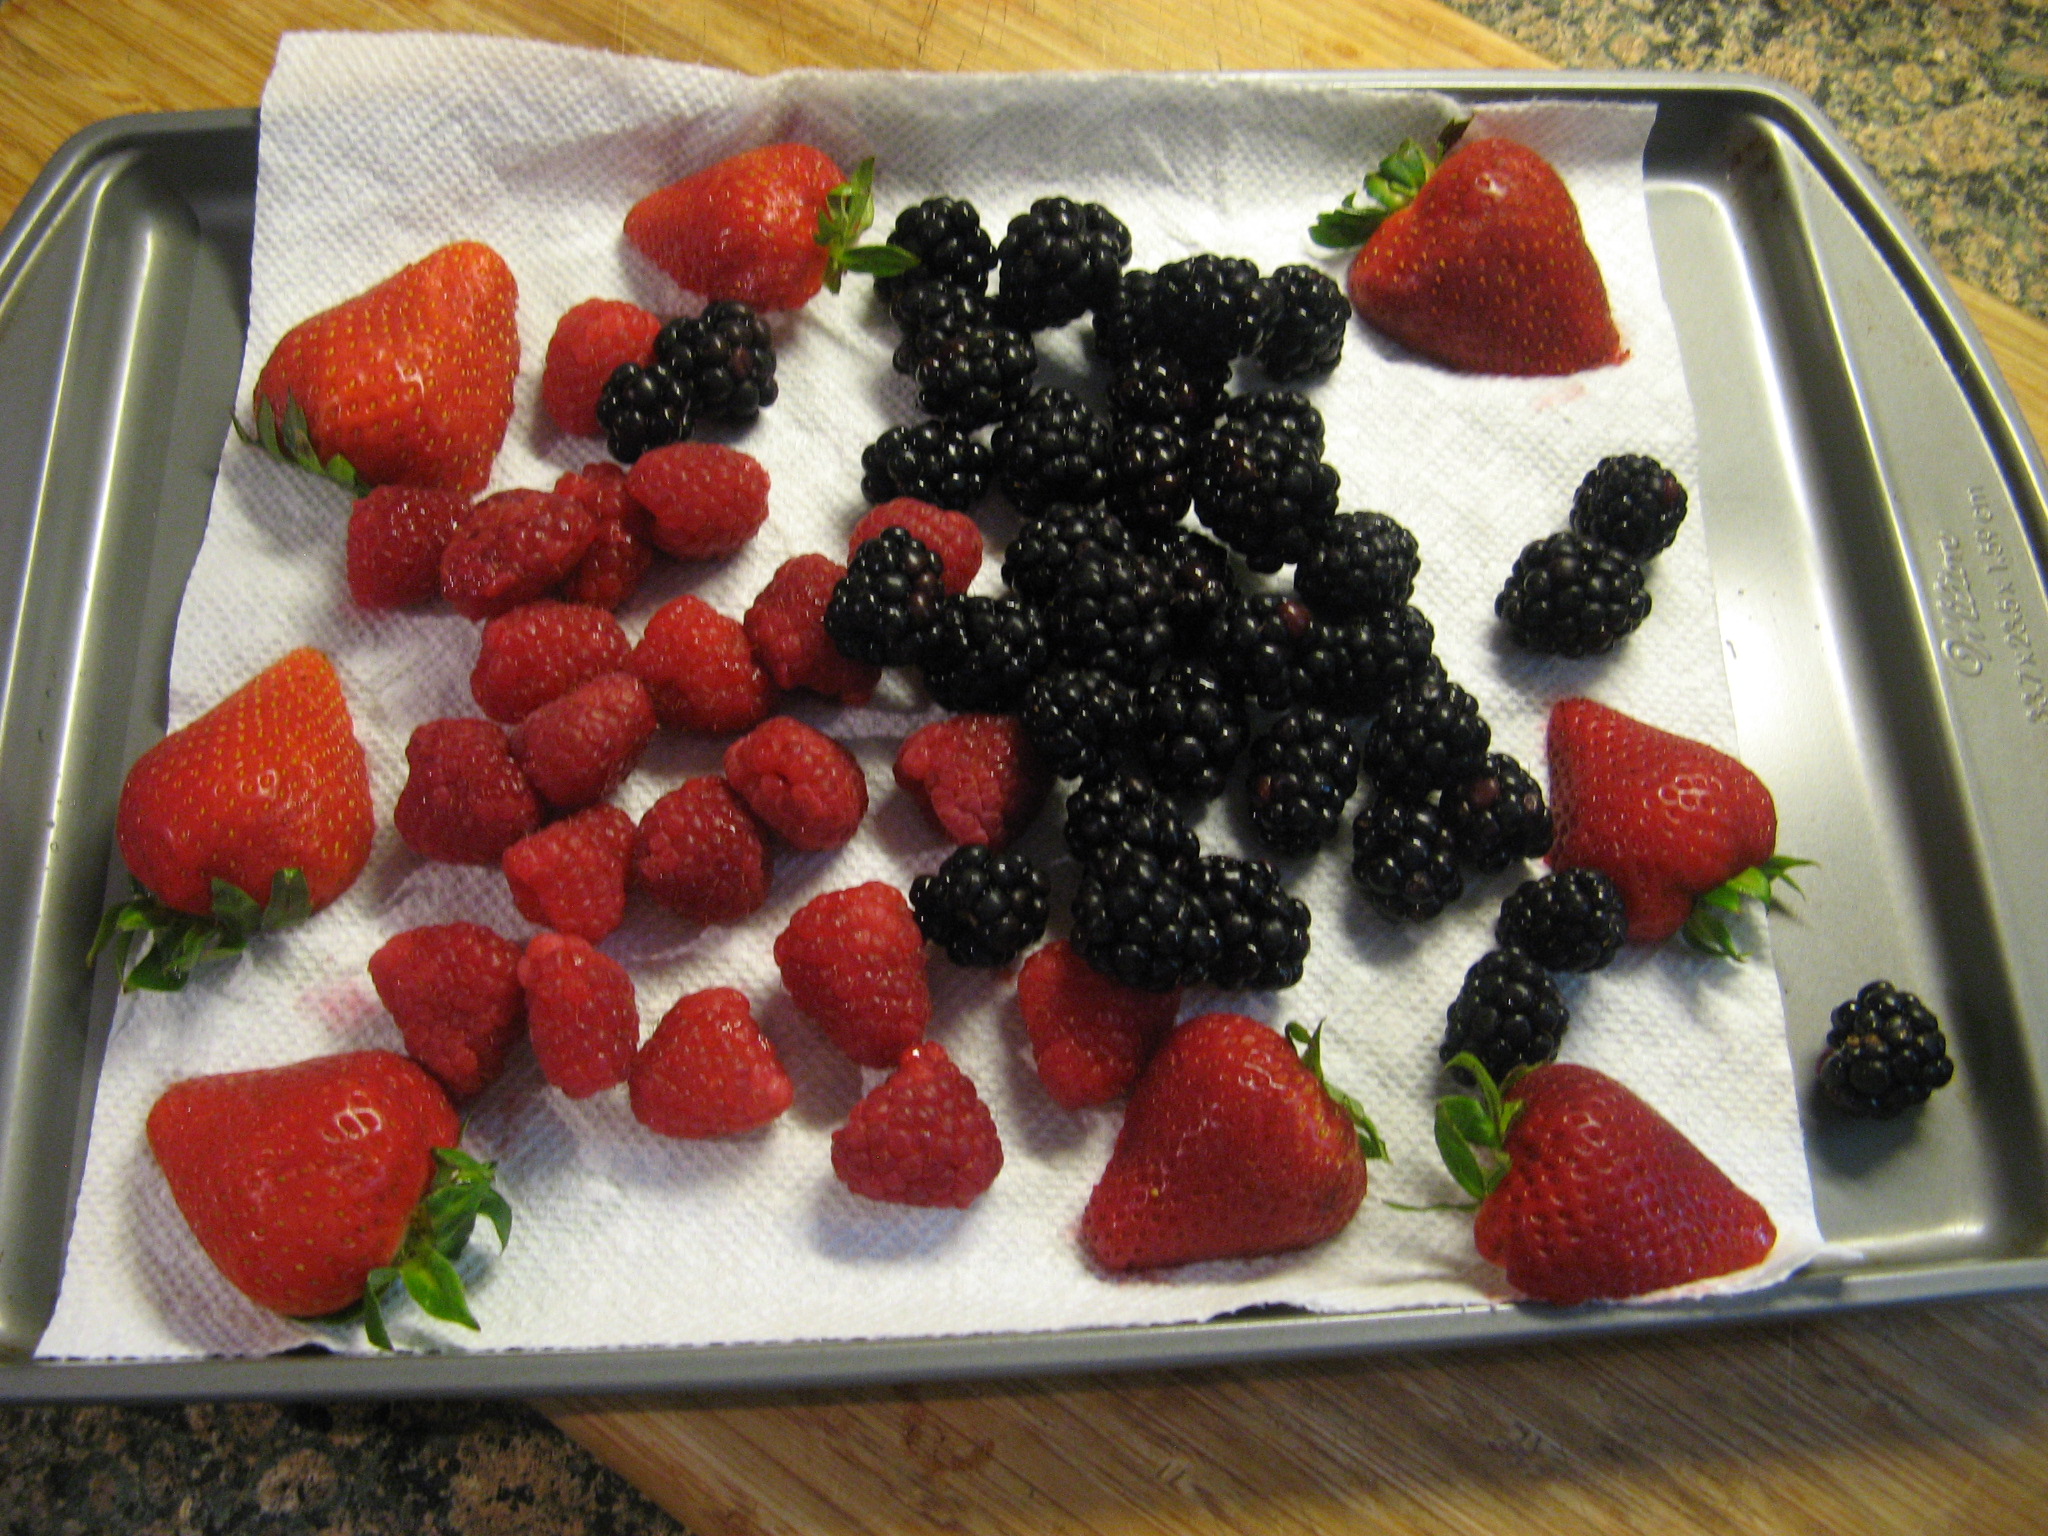
Just look at how vibrant and delicious these berries look…

IMG_9105

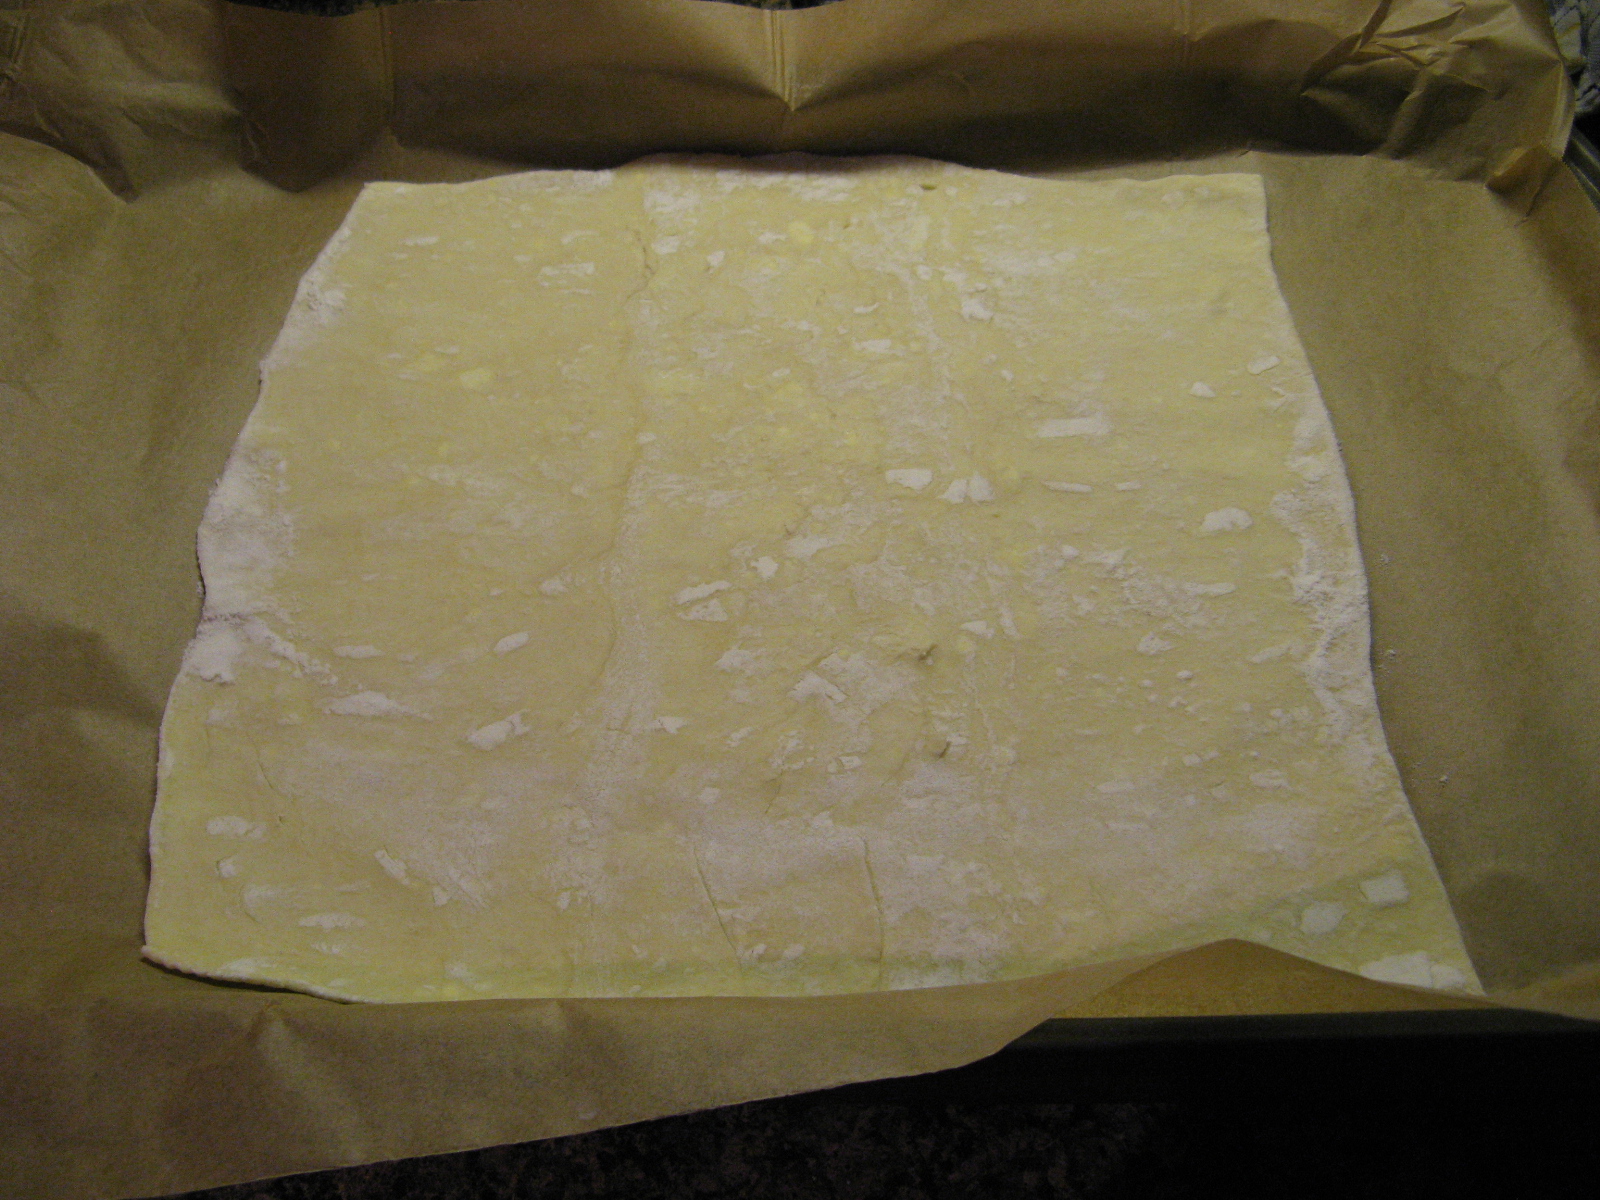
While you could make your dough from scratch, I opted to go the easier and quicker route by using a puff pastry sheet. After thawing the sheet out I rolled it on a lightly floured surface into a 12-inch square. I then transferred it to a parchment lined cookie sheet and placed it the refrigerator for about 20 minutes.

IMG_9107

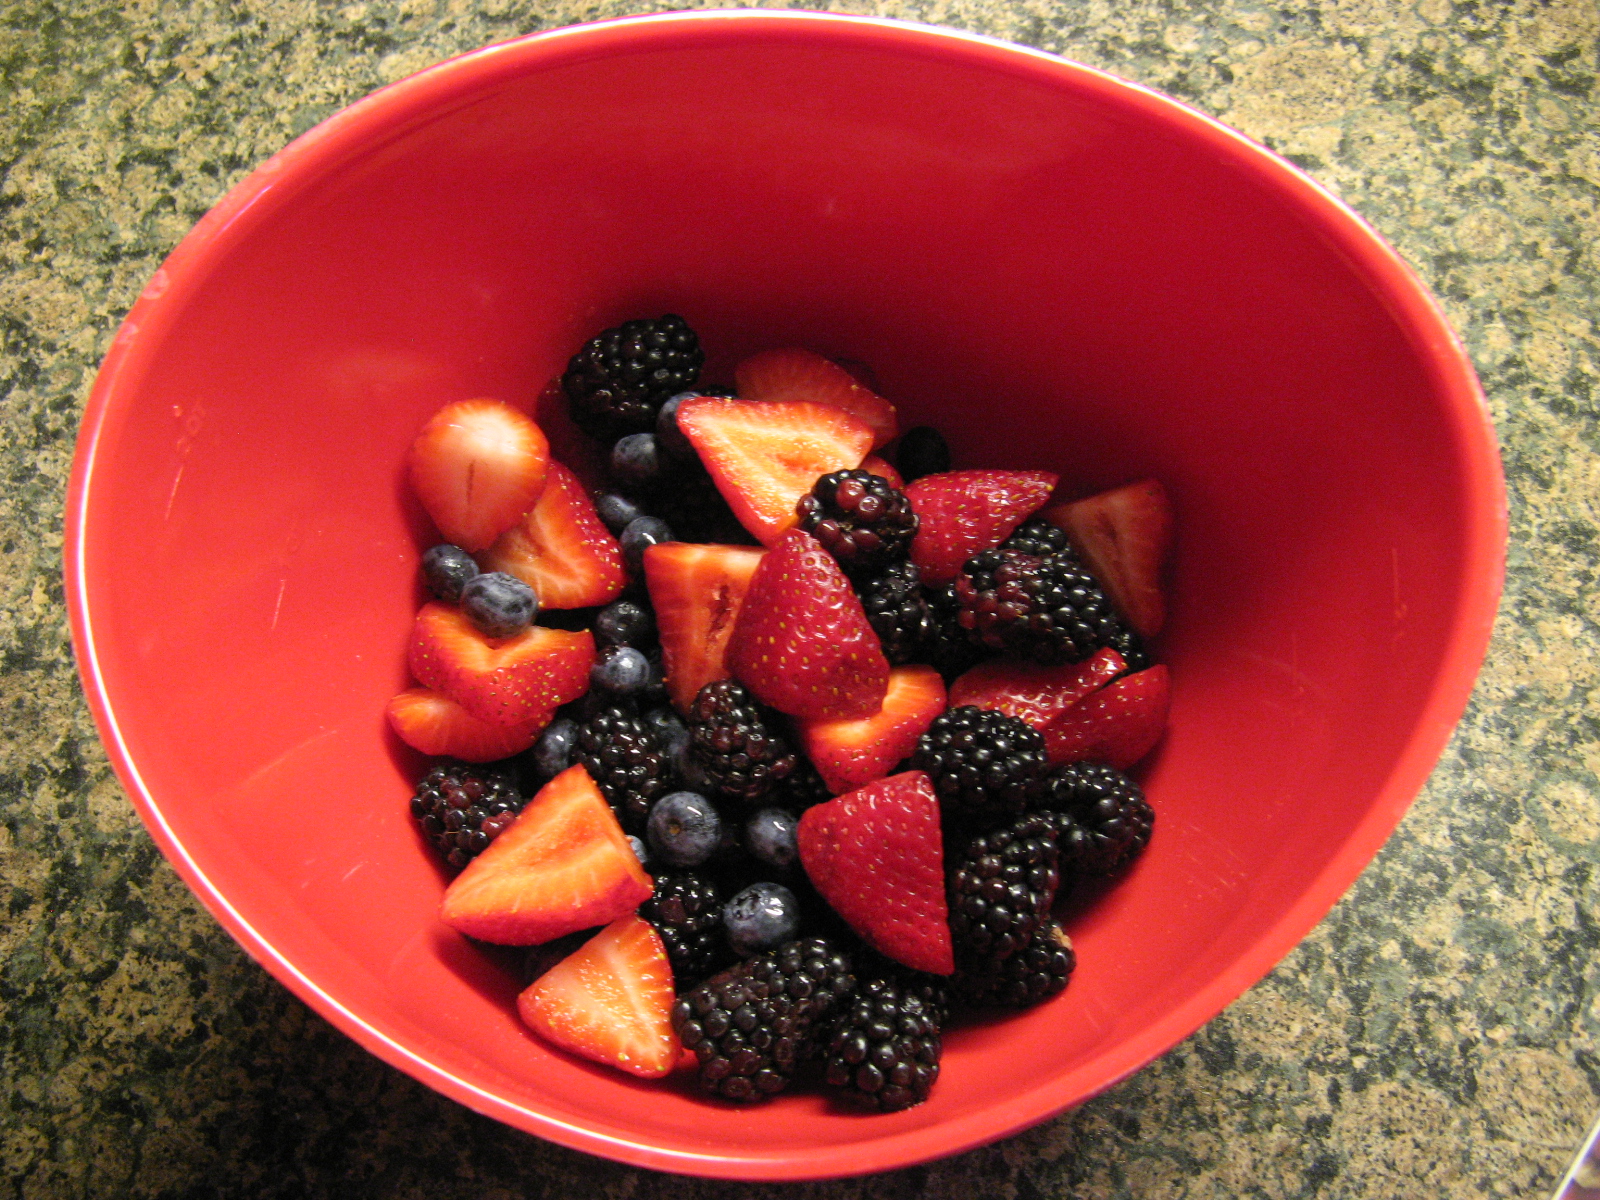
Following that I put my berries – which I tossed with corn starch, sugar and salt – in a small mound in the center of the sheet and folded the edges around it. I brushed the edges with an egg wash – an egg beaten with a teaspoon of water – and sprinkled granulated sugar on it.

IMG_9110

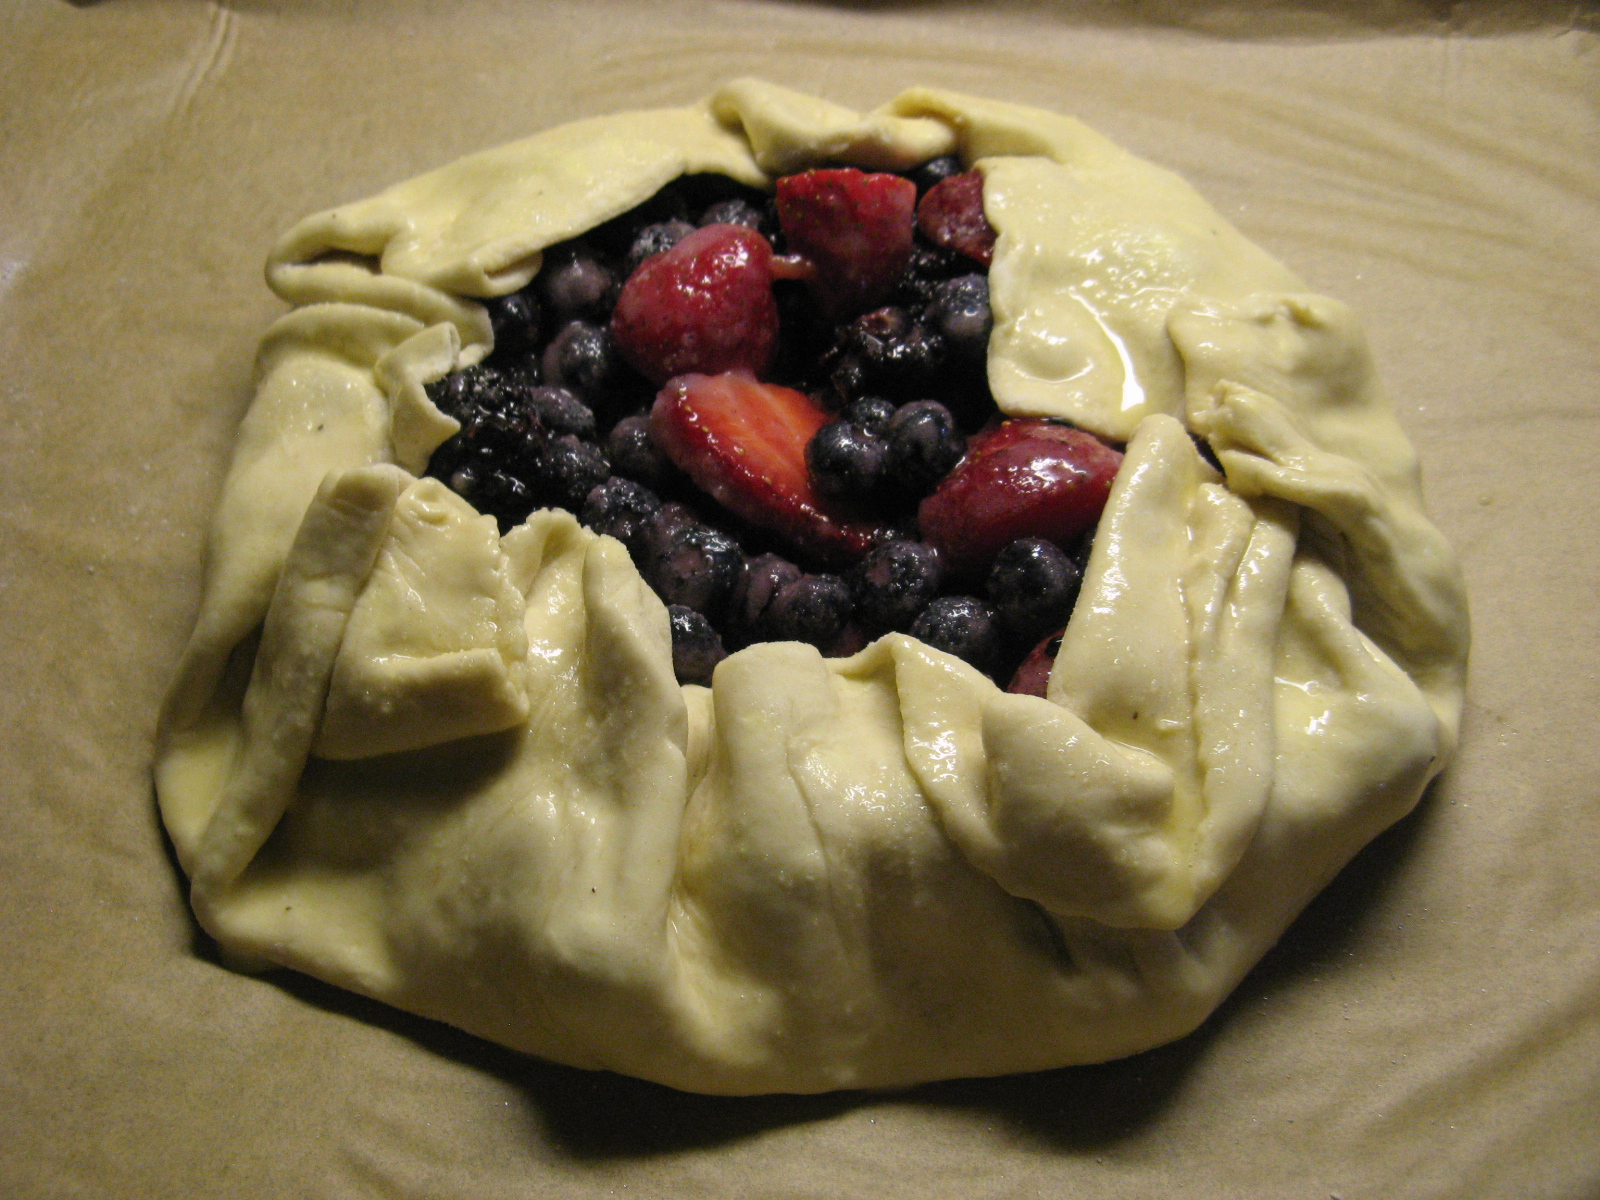
After refrigerating it for 15 minutes I the baked it in a 400 F preheated oven for 30 minutes – until the puff pastry was golden brown and the berries were bubbling. Unfortunately my galette opened up a bit while baking.

IMG_9115

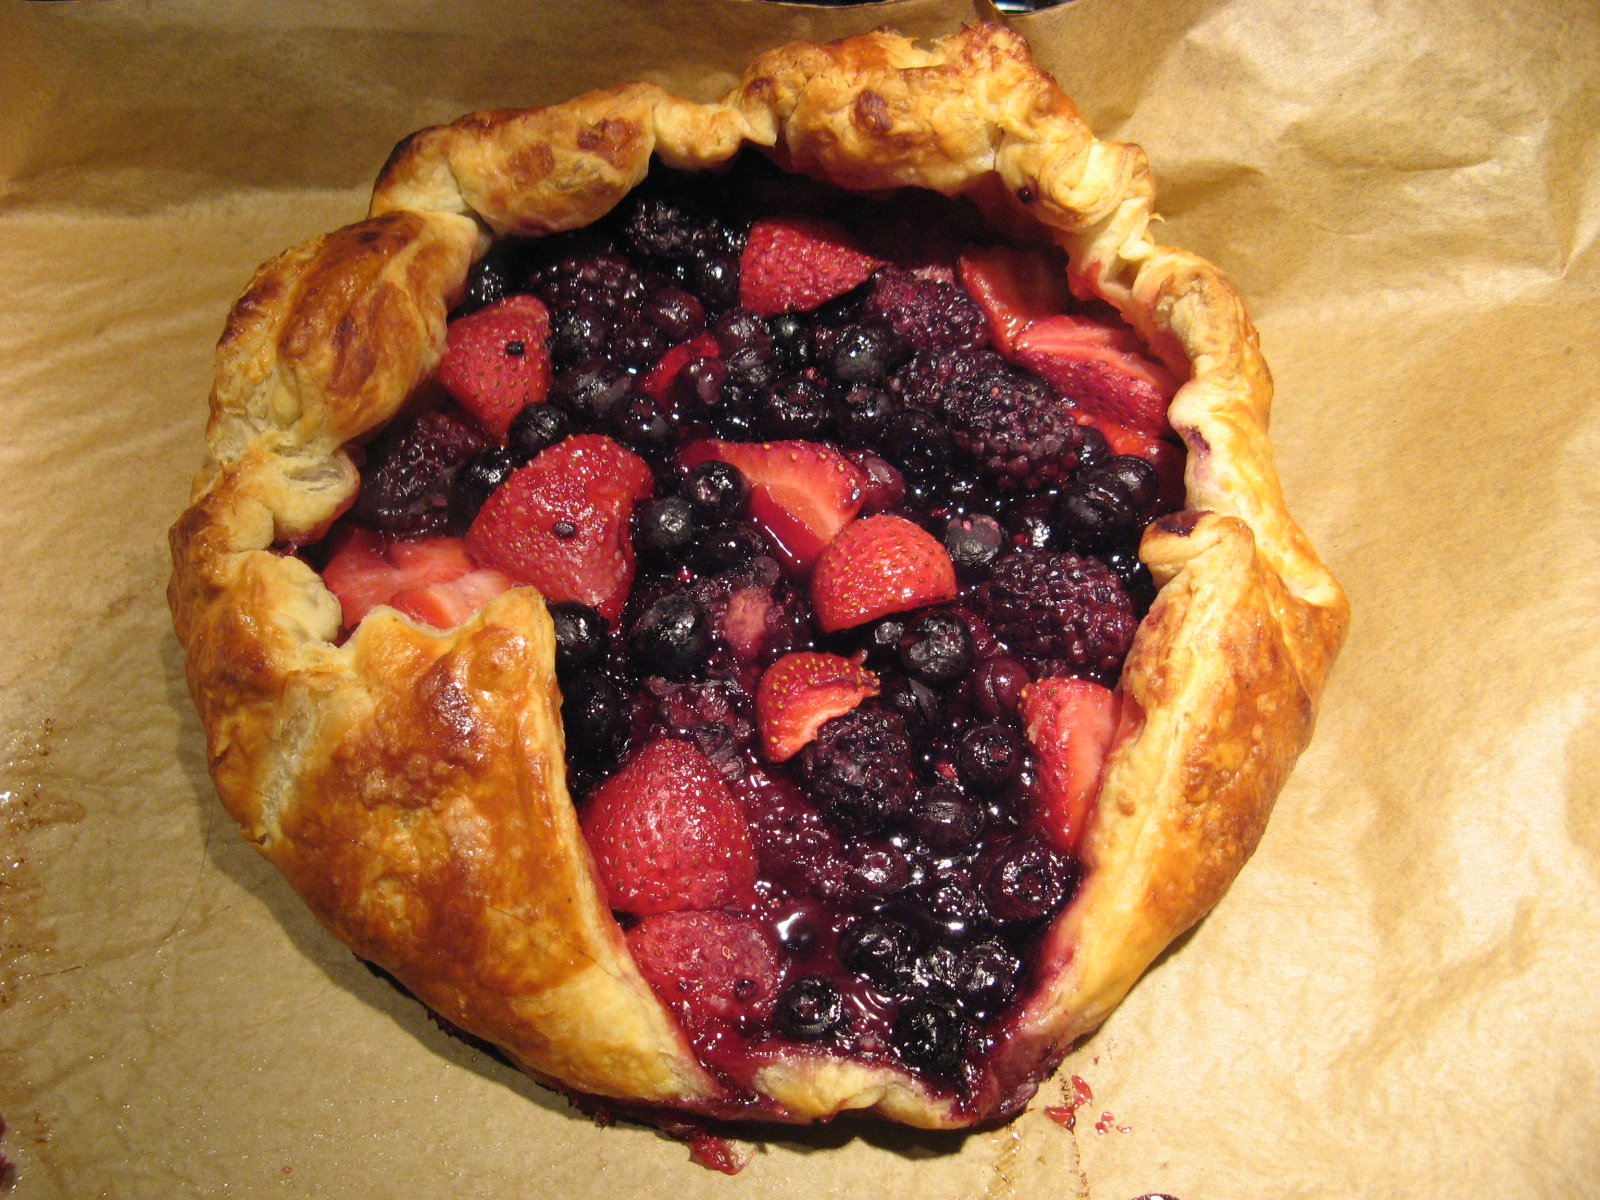
That didn’t affect the taste though; once it cooled I cut myself a piece and was quite pleased with how something so quick and simple could turn into something so delicious!

Mixed Berry Galette

Ingredients:

1 frozen puff pastry sheet, thawed

All-purpose flour, for dusting

1 large egg, for brushing the pastry

3 cups mixed berries – strawberries, blueberries, blackberries

1/4 cup cornstarch

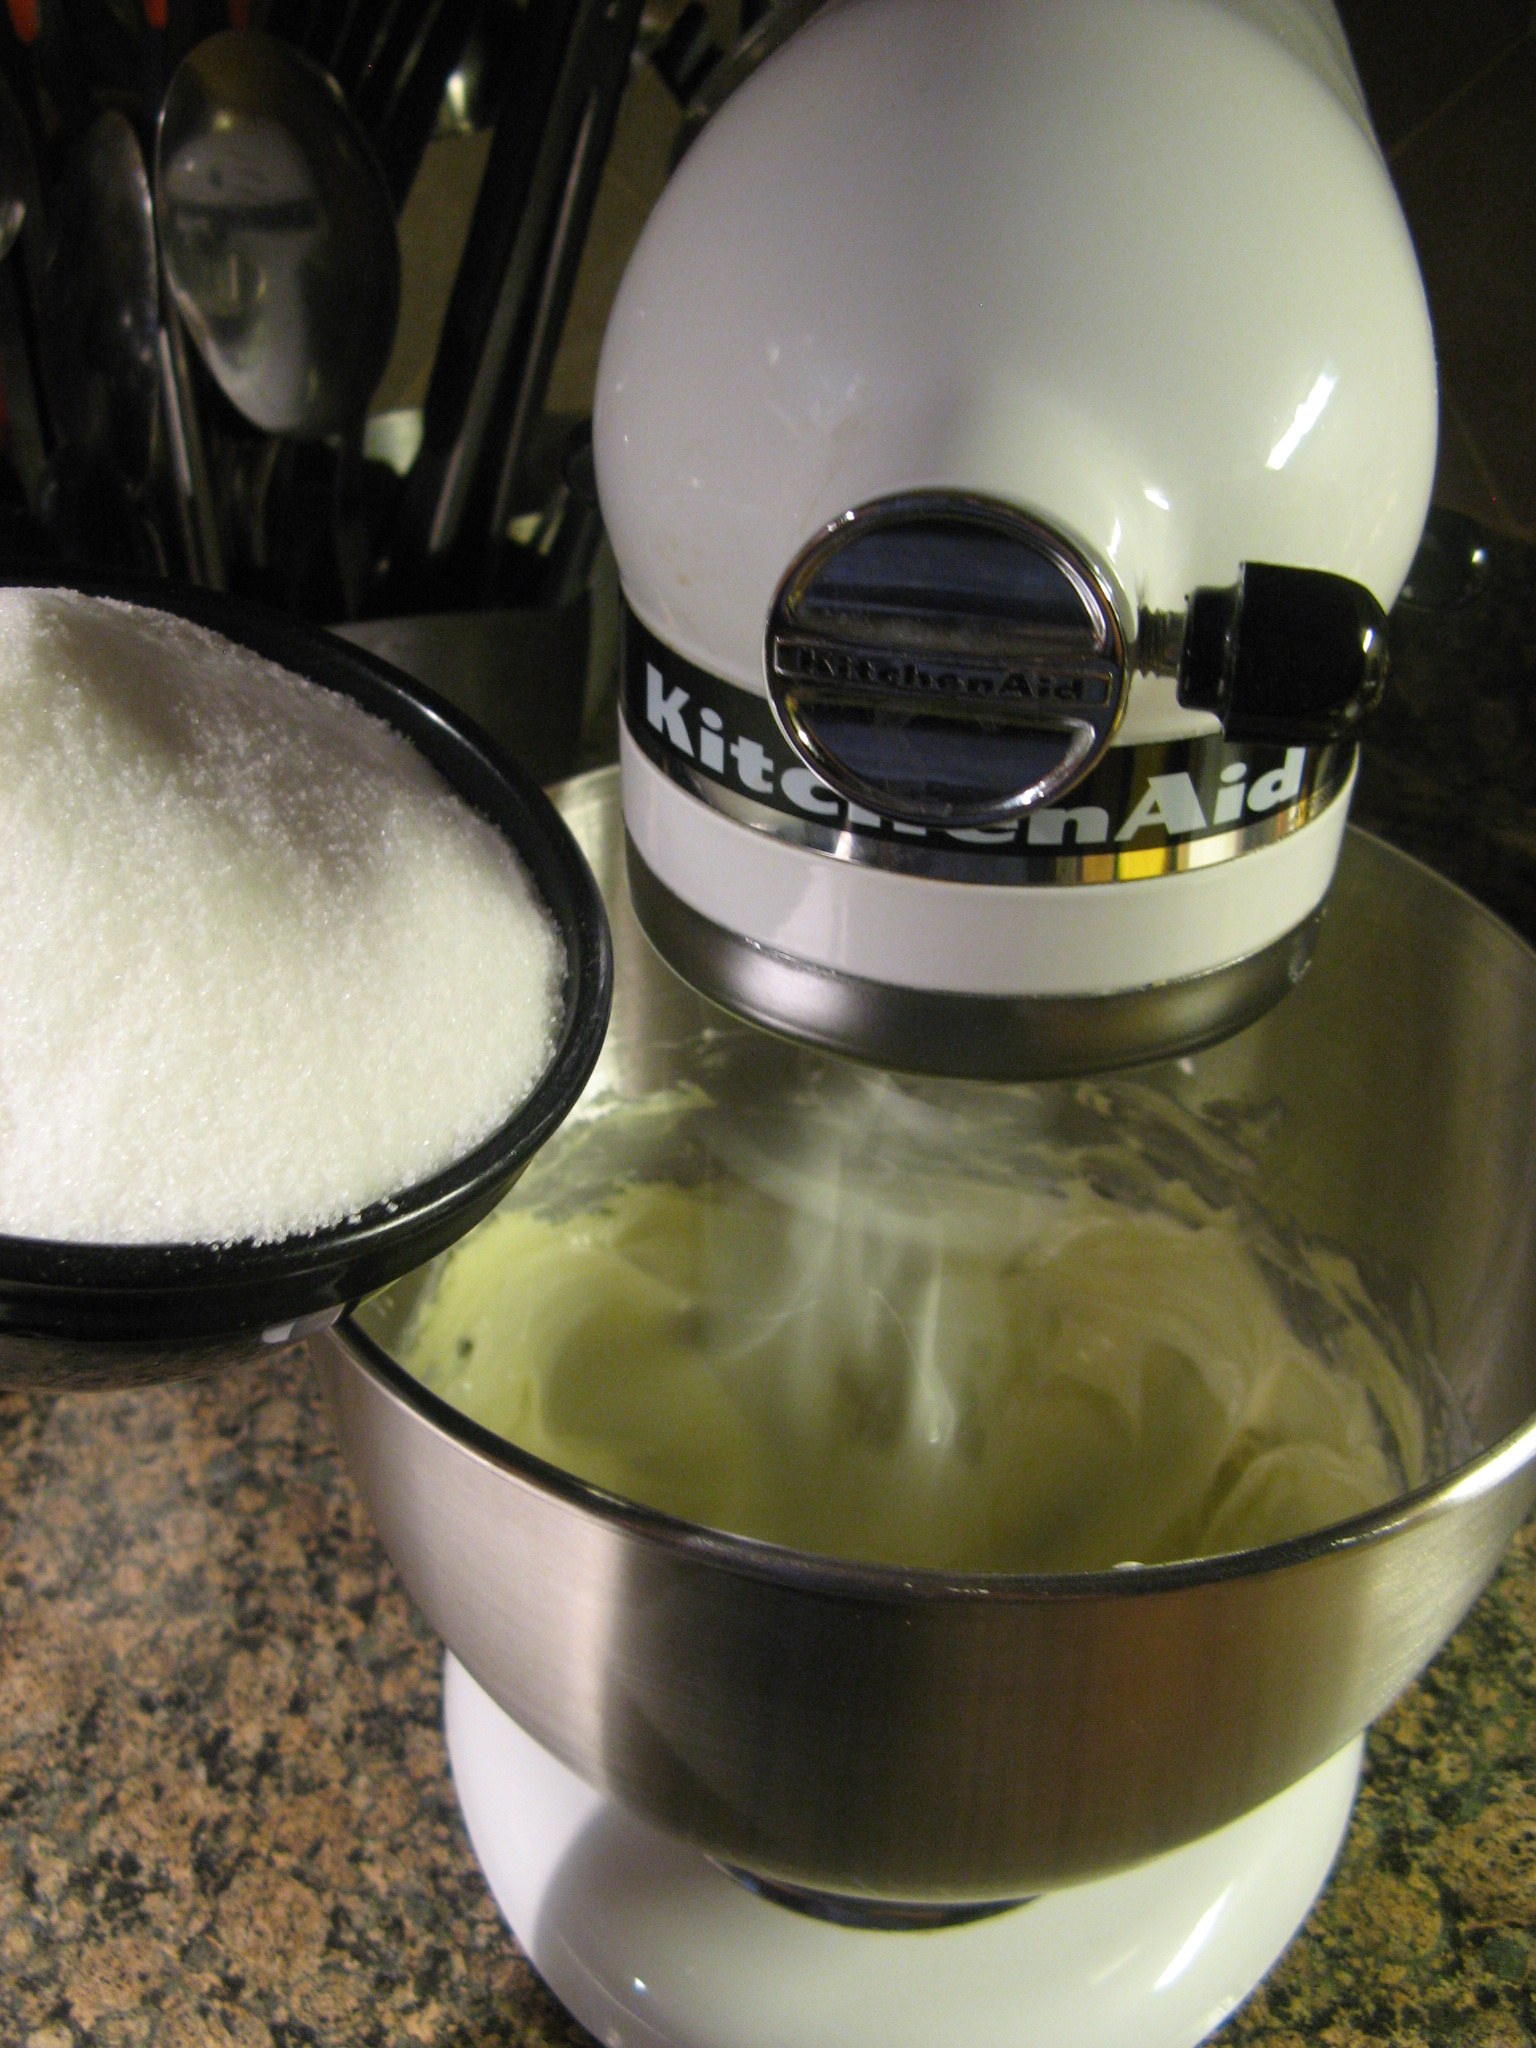
1/2 cup granulated sugar*, plus more for sprinkling the puff pastry

1/4 teaspoon salt

*If you would like your galette on the sweeter side add a tablespoon or two more sugar.

Directions:

Preheat the oven to 400 F. Line a rimmed baking sheet with parchment paper. Roll out the puff pastry into a 12-inch square on a lightly floured surface. Transfer the sheet to the prepared baking sheet and refrigerate for 15 minutes.

Make the filling by tossing the berries with the cornstarch, sugar and salt.

Place the fruit in the center of the puff pastry in a small mound and fold the edges of the sheet over the fruit, overlapping the sheet as you fold.

Brush the pastry with an egg wash – the egg lightly beaten with a teaspoon of water – and then sprinkle with granulated sugar. Refrigerate for about 20 minutes, until firm.

Bake until the edges are golden brown and the fruit is bubbling, about 30 – 35 minutes.

Lemon & Raspberry Bundt Cake

This cake was a few different things before it finally came to be a Lemon & Raspberry Bundt Cake. First I thought of making a raspberry crumb cake, then I thought of omitting the crumb part and making a raspberry cake with a cream cheese icing drizzle, this is where the lemon came in and I thought of a lemon raspberry cake, then it was a loaf cake and ultimately it became a Bundt cake. While initially I was thinking of sticking with the cream cheese icing drizzle I decided to pass on it so the cake wouldn’t end up being super-sweet. Did you get all that? Long story short… I ended up making a delicious lemon tinged cake that was filled with perfectly sweet raspberries.

IMG_7538

To make the batter I began by creaming together butter and sugar until it was light and fluffy. Following that I added six eggs, one at a time, beating the mixture well after each addition and finally I added in vanilla extract. I put that aside for a moment and in a medium sized bowl I whisked together flour, baking soda and salt. With my mixer set to a lower speed I then added in the flour mixture in three parts alternating with lemon Greek Yogurt.

IMG_7540

And finally I folded in the juice and zest of one lemon and fresh raspberries which I dredged in flour – dredging the berries in flour prevents them from falling to the bottom of the batter while baking.

IMG_7542

I then poured the batter into a Bundt pan which I sprayed with baking spray and baked it in a 325 F preheated oven.

IMG_7543

After about 50 minutes the cake was ready to come out of the oven.

IMG_7545

I let it rest in the pan for about 20 minutes and then inverted it onto a wire rack so it could cool completely.

IMG_7553

Once cooled, I couldn’t wait to slice into the cake and enjoy a slice, and I wasn’t disappointed, it was absolutely delish. Just the right amount of lemon flavor and the berries were definitely a nice complement to the citrus flavor. And just as important… It was perfectly moist!

IMG_7574

Lemon & Raspberry Bundt Cake

Ingredients:

2 sticks (1 cup) unsalted butter, at room temperature

2 cups sugar

3 cups flour

1 teaspoon baking soda

1 teaspoon kosher salt

6 large eggs, at room temperature

1 teaspoon vanilla extract

1 cup lemon Greek yogurt*

zest and juice from one lemon

2 cups raspberries, dredged in 2 tablespoons of flour

*I used 2 5.3-ounce containers of Chobani Greek Lemon Yogurt. You can also substitute with plain Greek yogurt or sour cream.

Directions:

1. Preheat the oven to 325 F. Prep the Bundt pan by spraying it with baking spray or coating it with butter and then dusting it with flour.

2. Using a mixer beat the butter and sugar on medium speed until light and fluffy – about 5 minutes. Add the eggs one at a time, beating well after each addition and scraping down the sides of the bowl as necessary. Add in the vanilla extract.

3. In a separate bowl whisk together the flour, baking soda and salt.

4. Reduce the speed of the mixer to low and add in the flour mixture in three parts alternating with the yogurt. Mix until just combined.

5. Fold in the raspberries, lemon zest and juice and then transfer the batter to the prepared pan and bake for approximately 50 – 60 minutes, until a cake tester comes out clean.

6. Place the cake on a wire rack and let it cool in the pan for 15-20 minutes before inverting and letting it cool completely.

Sweet Corn Panna Cotta with Blueberry Compote

I recently signed up for Food & Wine Magazine’s Daily email where I get one sensational (their words not mine) recipe emailed to me every day. I usually glance at the recipe and then delete the email, not because the dish sounds bad, but because I know I will never make it. A week or two ago I got one recipe that I knew I wanted to try… A Sweet Corn Panna Cotta with Fresh Blueberry Compote. I had panna cotta for dessert at a restaurant a few years ago and instantly loved it; granted that one was a Mango Panna Cotta with a Passion Fruit Sauce. I never attempted to make it myself because I thought that it would be difficult – the one recipe I came across was a bit intimidating but once I saw this one I knew I could handle it.

IMG_4879

I began my shucking two ears of corn and then used a corn zipper to remove the kernels and boiled them for about 15 minutes until they were tender.

IMG_4830

Following that I rinsed the kernels in cold water and then transferred them into the bowl of my food processor.

IMG_4834

Meanwhile I sprinkled 1 1/2 teaspoons of unflavored gelatin powder over 1/4 cup of whole milk, which I let stand for 5 minutes.

IMG_4831

In a small saucepan I combined whole milk, heavy cream, salt, granulated sugar, and dark brown sugar and brought it to a simmer over medium heat whisking it to dissolve the sugars.

IMG_4833

I then poured the hot milk mixture into the bowl with the gelatin mixture and stirred it until the gelatin dissolved.

IMG_4835

I then poured the mixture over the corn in the food processor.

IMG_4837

I pureed the corn and milk mixture until it was smooth and then strained it through a sieve pressing on the solids to get all of the liquid out and then discarded the solids.

IMG_4839

I strained the mixture once again through the sieve and then placed the bowl in an ice bath until it was cool, stirring it occasionally.

IMG_4841

And finally I divided the mixture into four 8-ounce ramekins, covered them and placed them in the refrigerator overnight so they could set. In all honesty, I had my doubts that I made the panna cotta correctly because it was so watery when I poured it into the ramekins. I checked one of them an hour or so after refrigerating it to make sure it was solidifying and I am happy to say I had made them correctly!

IMG_4843

While the panna cotta was “baking” in the fridge I made the Blueberry Compote which couldn’t have been simpler. I combined blueberries with sugar, lemon zest, lemon juice and kosher salt and mixed it until the sugar was dissolved and then let it stand for a bit (at least 30 minutes), stirring it occasionally.

IMG_4846

The set panna cotta…

IMG_4875

And topped with the Blueberry Compote.

IMG_4876

This was absolutely delicious! The panna cotta was the perfect texture, silky and smooth, and the corn flavor was just perfect without being too sweet or having too much of a “vegetable” taste, for those of you who aren’t keen on eating your veggies.

IMG_4882

Sweet Corn Panna Cotta with Fresh Blueberry Compote

Servings: 4

Ingredients:

Panna Cotta

2 ears of corn, husked

1 1/2 teaspoons unflavored powdered gelatin

3/4 cup plus 1 tablespoon whole milk

1 cup plus 2 1/2 tablespoons heavy cream

1/4 teaspoon plus 1/8 teaspoon kosher salt

1/4 cup plus 2 tablespoons granulated sugar

3 tablespoons dark brown sugar

Blueberry Compote

1 tablespoon sugar

1/2 teaspoon finely grated lemon zest

1 1/2 teaspoons fresh lemon juice

Pinch of kosher salt

1 1/2 cups blueberries

Directions: 

1. Make the Panna Cotta: In a medium pot fitted with a steamer basket, steam the corn until tender, 15 minutes. Let cool, then cut the kernels from the cobs (you should have 1 1/2 cups); discard the cobs. Transfer the kernels to a blender.*

2. Meanwhile, in a heatproof medium bowl, sprinkle the gelatin over 1/4 cup of the milk. Let stand for 5 minutes.

3. In a small skillet, combine the remaining 1/2 cup plus 1 tablespoon of milk with the cream, salt and both sugars and bring to a bare simmer, whisking to dissolve the sugars. Scrape the hot milk into the gelatin and stir until the gelatin dissolves. Pour the mixture into the blender over the corn and puree until smooth.

4. Strain the puree through a sieve into a large bowl, pressing on the solids; discard the solids. Strain again without pressing; discard any solids in the sieve. Set the panna cotta in an ice bath until cool, stirring occasionally. Scrape the panna cotta into four 8-ounce ramekins. Cover and refrigerate overnight until firm.

5. Make the Blueberry Compote: In a large bowl, combine all of the ingredients and mix until the sugar is dissolved. Let stand for at least 30 minutes, stirring occasionally. Serve the panna cotta in the ramekins with the compote.

*I opted to remove the kernels from the cobs beforehand and boiled the corn for about 15 minutes and then drained it while running them under cold water to cool them. And instead of using a blender, I used a food processor.

Raspberry Ripple Cupcakes

Last week I took a mini road trip which of course meant I had to bake some yummy treats for the drive. I didn’t want to make anything that could possibly spoil so I settled on trying a cupcake recipe that didn’t call for the cupcakes to be frosted – mini Raspberry Ripple Cupcakes. I’ve wondered whether an unfrosted cupcake would qualify as being a muffin and after a few Google searches I haven’t been able to get a concrete answer on that one. Do you guys have any ideas on that?

IMG_4269

To begin, I lightly mashed a cup of fresh raspberries with a fork.

IMG_4233

I then sifted flour, baking powder, and cornstarch into the bowl of my stand mixer.

IMG_4235

Following that I added in softened butter, sugar, eggs and almond extract (I knew these cupcakes would be delicious once I saw this final ingredient.)

IMG_4237

I then beat all of the ingredients together until the mixture was smooth.

IMG_4241

And finally I folded in the mashed raspberries. And that was it… Sometimes you have to relish those recipes that are super quick to put together!

IMG_4243

After dividing the batter among paper lined mini muffin tins I baked them in a 375 F preheated oven for about 20 minutes.

IMG_4244

Once I removed them from the oven I transferred the cupcakes to a wire rack to cool completely.

IMG_4272

And of course I had to try a few before heading out on said road trip and they were super delicious… Moist and fluffy bursting with the flavors of almond and raspberries. Yum!

IMG_4263

To go along with these cupcakes I also made a batch of rugelach. Both of which were a hit with my fellow road trippers… We came back with empty tins!

IMG_4281


Raspberry Ripple Cupcakes*

Makes 32 mini cupcakes

1 1/2 cups all-purpose flour

1 tablespoon baking powder

1 tablespoon cornstarch

3/4 cup unsalted butter, softened

3/4 cup superfine sugar

3 eggs, beaten

1 teaspoon almond extract

1 cup fresh raspberries

1. Preheat the oven to 375F. Put 32 paper liners into shallow muffin tins.

2. Sift the flour, baking powder, and cornstarch into a large bowl and add the butter, sugar, eggs and almond extract. Beat well until the mixture is smooth. Mash the raspberries lightly with a fork, then fold into the mix.

3. Divide the mixture among the paper liners. Bake in the preheated oven for 15-20 minutes, or until risen, firm and golden brown. Transfer the cupcakes to a wire rack to cool.

*Unfortunately I cannot tell you the origin of the recipe as I ripped it out of a book (I know not so nice, but, my bookshelf was getting a little overloaded) and didn’t make note of which one.

Lemon Buttermilk Cupcakes with Cream Cheese Frosting

Hope you all had a wonderful 4th on Friday and that the rest of your holiday weekend was good. As for me, the 4th was a bit of a washout due to rain but the rest of the weekend was beautiful which meant I was able to do some yard work. The rain wasn’t all that bad though, it gave me the perfect excuse to stay in and bake some patriotic themed cupcakes. I settled on making Lemon Buttermilk Cupcakes with Cream Cheese Frosting. I should note that the recipe for the Lemon Buttermilk was originally for a loaf cake, but, I decided to turn it into cupcakes and add some frosting.  
IMG_4319
I began by whisking together the dry ingredients -flour, baking powder and salt – in one bowl and the wet ingredients – oil, sugar, buttermilk, eggs, lemon zest and juice – in another.
IMG_4290 IMG_4291
After whisking those ingredients together by hand I opted to use my hand mixer to whisk all of the ingredients together.
IMG_4292
I then used an ice cream scoop – I find it’s always the perfect size for scooping cupcake batter – to fill patriotic themed cupcake liners.
IMG_4297 IMG_4298
I then baked them in a 350 F preheated oven for 20 minutes – rotating the tins halfway through. After letting the cupcakes cool for a few minutes in the pan I removed them and let them cool completely on a wire rack.
IMG_4307 IMG_4310
I then whipped up a batch of Cream Cheese Frosting and used a large open star tip to pipe the frosting onto the cupcakes.
IMG_4311
And since these were patriotic themed cupcakes I added some red and blue with stars and stripes sprinkles, blueberries and strawberries and blueberries and raspberries.
IMG_4353
Final verdict… Lemon & Cream Cheese are a winning combination!
IMG_4330

Lemon Buttermilk Cupcakes – adapted from here

Makes 14 Cupcakes

Ingredients:

1/2 cup canola oil

2 cups all-purpose flour, spooned and leveled

2 teaspoons baking powder

1/2 teaspoon kosher salt

1 1/2 cups sugar

3/4 cup buttermilk

2 large eggs

1 tablespoon finely grated lemon

1/4 cup lemon juice

1/2 teaspoon vanilla extract

Directions:

1. Heat oven to 350 F. Line a cupcake tin with paper liners.

2. In a large bowl, whisk together the flour, baking powder and salt; set aside

3. In a medium bowl, whisk together the oil, sugar, buttermilk, eggs, lemon zest and juice. Add to the dry ingredients.

4. Divide the batter evenly among the lined cups and bake until a cake tester comes out clean, about 20 minutes, rotating the tins halfway through.

5. Cool the cupcakes in the tins on a wire rack for a few minutes and then remove them and let them cool completely on the wire rack.

6. Frost and enjoy!


Cream Cheese Frosting

Ingredients:

8oz. cream cheese, room temperature

1/2 cup (1 stick) unsalted butter, room temperature

2 cups Confectioners’ sugar, sifted

1 teaspoon vanilla extract

Directions:

1. Cream together the cream cheese and butter with an electric mixer

2. With the mixer on low speed add the confectioners’ sugar 1 cup at a time until smooth and creamy

3. Beat in the vanilla extract

Lemon, Berries & Cream… Oh My!

Back in the fall I made a cake that I coined the Quintessential Fall Birthday Cake– an Apple Walnut Cake with Cinnamon Cream Cheese Frosting (YUM!) – and recently I made a cake that could quite possibly be the Quintessential Summer Birthday Cake. A 4-tier lemon cake layered with pastry cream and topped with fresh berries (Delish!)
IMG_3825
Since the pastry cream needed to be refrigerated for at least 2 hours before using it I began this cake by cooking up 2 batches of it. I gathered up my ingredients (egg yolks, sugar, cornstarch, salt, milk and vanilla extract) and whisked together the eggs yolks in one bowl and in another cooked the sugar, cornstarch, salt and milk until the mixture thickened and was bubbling. I then poured about a third of the milk mixture in with the eggs to temper them. Once the eggs were tempered I pour them back into the remaining milk mixture on the stove and whisked the mixture constantly until the cream came together. I removed the cream from the heat and added in the vanilla extract.
photo_2
Following that I strained the cream through a sieve and then placed a piece of parchment paper right on top of it prior to refrigerating it. I had never made pastry cream before and was concerned this wouldn’t come out well, especially with tempering the eggs, but, it came out perfectly and I probably could have easily eaten the whole bowl it was so good.
photo_1
While the pastry cream was chilling I began to work on the Lemon Cake – a 1-2-3-4 Lemon Cake. A 1-2-3-4 Cake is an old-fashioned cake that gets its name from the list of ingredients – one cup butter, two cups sugar, three cups flour and four eggs. First up I sifted together flour, baking powder, baking soda and salt in a bowl. I actually sifted the flour twice as I first sifted it to get the 3 cups I needed and then sifted it again along with the other ingredients.
IMG_3792
In the bowl of my stand mixer I beat butter until it was softened and then gradually added in sugar until it was pale and fluffy.
IMG_3793
And then the eggs.
IMG_3795
Next up I added in the flour mixture in 3 batches alternating with 2 batches of buttermilk.
IMG_3797
And finally I beat in vanilla extract and lemon zest.
IMG_3798
I divided the batter evenly between two 8-inch pans – which I prepped with baking spray and parchment paper – and baked it for about 45 minutes in a 350 F preheated oven, rotating halfway through.
IMG_3803
After letting the cakes cool 15 minutes in the pans I then removed them and let them cool completely on wire racks.
IMG_3807
In preparation to assemble the cake I split the two cooled cakes into four with a cake leveler and then whisked together the chilled pastry cream.
IMG_3808
After assembling the cake – I spread about a cup of pastry cream between each layer – I chilled it in the refrigerator for about an hour so the pastry cream could set and so I wouldn’t end up with a cake that had layers sliding all over the place.
IMG_3814
While it chilled I rinsed and dried the berries I would be using – strawberries, raspberries and blackberries.
IMG_3816
To make sure the berries would stay put on top of the cake I spread a layer of pastry cream on the top tier and then placed the berries on top of it.
 IMG_3830
This cake was delicious… The three flavors worked so well together and I can definitely see myself making it again before the cold weather begins to creep in in a few months.
 
Makes about 3 cups
Ingredients:
4 large egg yolks
1/2 cup sugar
1/4 cup cornstarch
Pinch of salt
2 cups milk
1 1/4 teaspoon pure vanilla extract
Directions:
1. Whisk egg yolks until smooth in a large bowl. Combine sugar, cornstarch, and salt in a medium saucepan, and heat over medium. Stirring constantly, gradually ass milk in a slow, steady stream, and cook until mixture thickens and begins to bubble, about 5 minutes.
2. Whisking constantly, slowly pour one third of the milk mixture into egg yolks. Pour mixture into remaining milk mixture in saucepan. Cook over medium heat, whisking constantly, until mixture comes to a full boil and is thick enough to hold its shape when lifted with a spoon, 2 to 4 minutes. Remove from heat; stir in vanilla.
3. Strain mixture through a fine sieve into a heatproof bowl. Cover with parchment paper or plastic wrap, pressing it directly on surface to prevent a skin from forming. Refrigerate until chilled and firm, at least 2 hours (or up to 2 days.)
 
Ingredients:
1 cup (2 sticks) unsalted butter, room temperature
3 cups sifted all-purpose flour
1 tablespoon baking powder
1 teaspoon baking soda
1/2 teaspoon salt
2 cups granulated sugar
4 large egg yolks, lightly beaten
1 1/4 cups buttermilk
1 1/2 teaspoon vanilla extract
Zest of 2 lemons (I used one lemon so the cake wouldn’t be too “lemony”)
Directions:
1. Preheat oven to 350 F. Butter two 8-by-2 inch round cake pans; line with parchment rounds, and butter parchment. Dust with flour, tapping out excess. (I used two 8-by-3 inch pans and used baking spray instead of butter and flour.) Sift together flour, baking powder, baking soda, and salt into a medium bowl.
2. With an electric mixer on medium speed, beat butter until softened, 1 to 2 minutes. Gradually add granulated sugar, and beat until pale and fluffy, 3 to 4 minutes, scraping down the sides of bowl once or twice. Gradually add eggs; beat until incorporated after each addition, scraping down sides of bowl once or twice.
3. Slowly add the flour mixture in 3 batches, alternating with 2 batches of buttermilk; beat until just combined. Beat in vanilla and lemon zest.
4. Divide batter evenly between prepared pans. Bake, rotating halfway though, until a cake tester comes out clean, 35 to 45 minutes. Transfer pans to wire racks to cool 15 minutes. Turn out cakes onto racks to cool completely.
%d bloggers like this: