Meyer Lemon Shaker Pie

A pie for Pi Day! To celebrate Pi Day this year I am bringing you a Meyer Lemon Shaker Pie. Meyer lemons are a tad sweeter than your traditional lemons. They are a cross between regular lemons and mandarins and tend to be smaller, rounder and smoother than traditional lemons. They also have a deep yellow / orange hue to them.

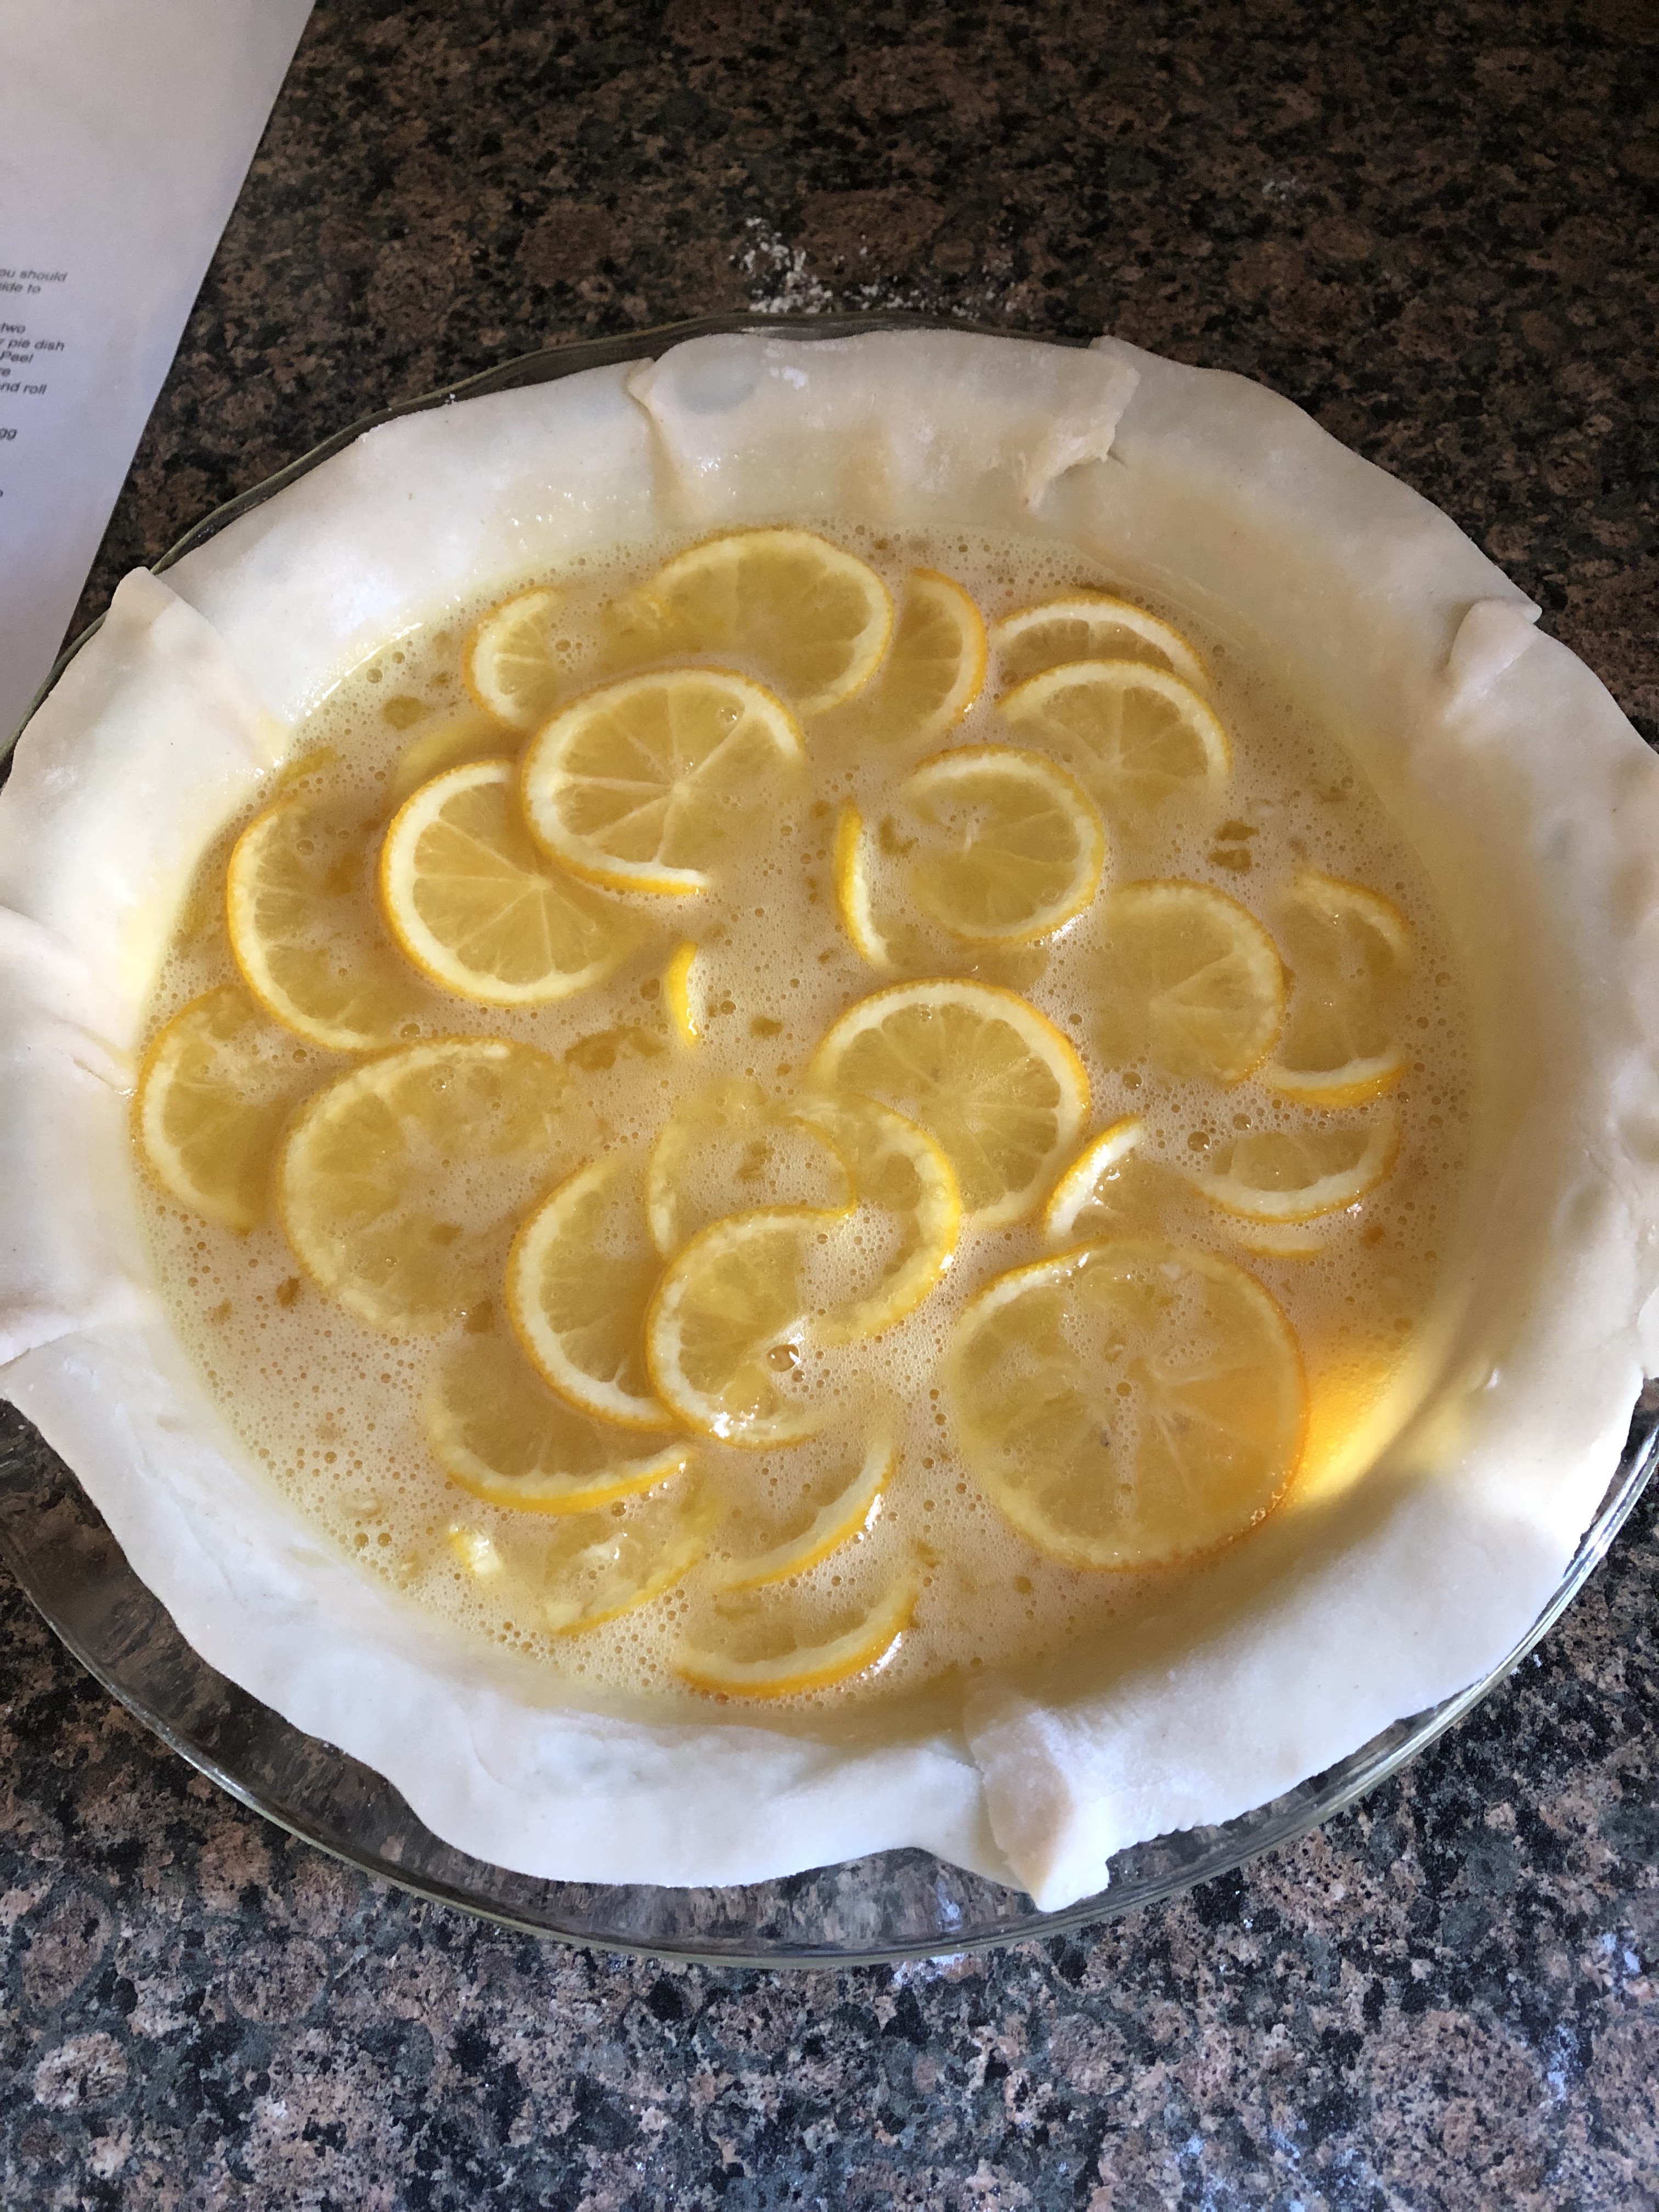
I began by thinly slicing the lemons, removing the pits.

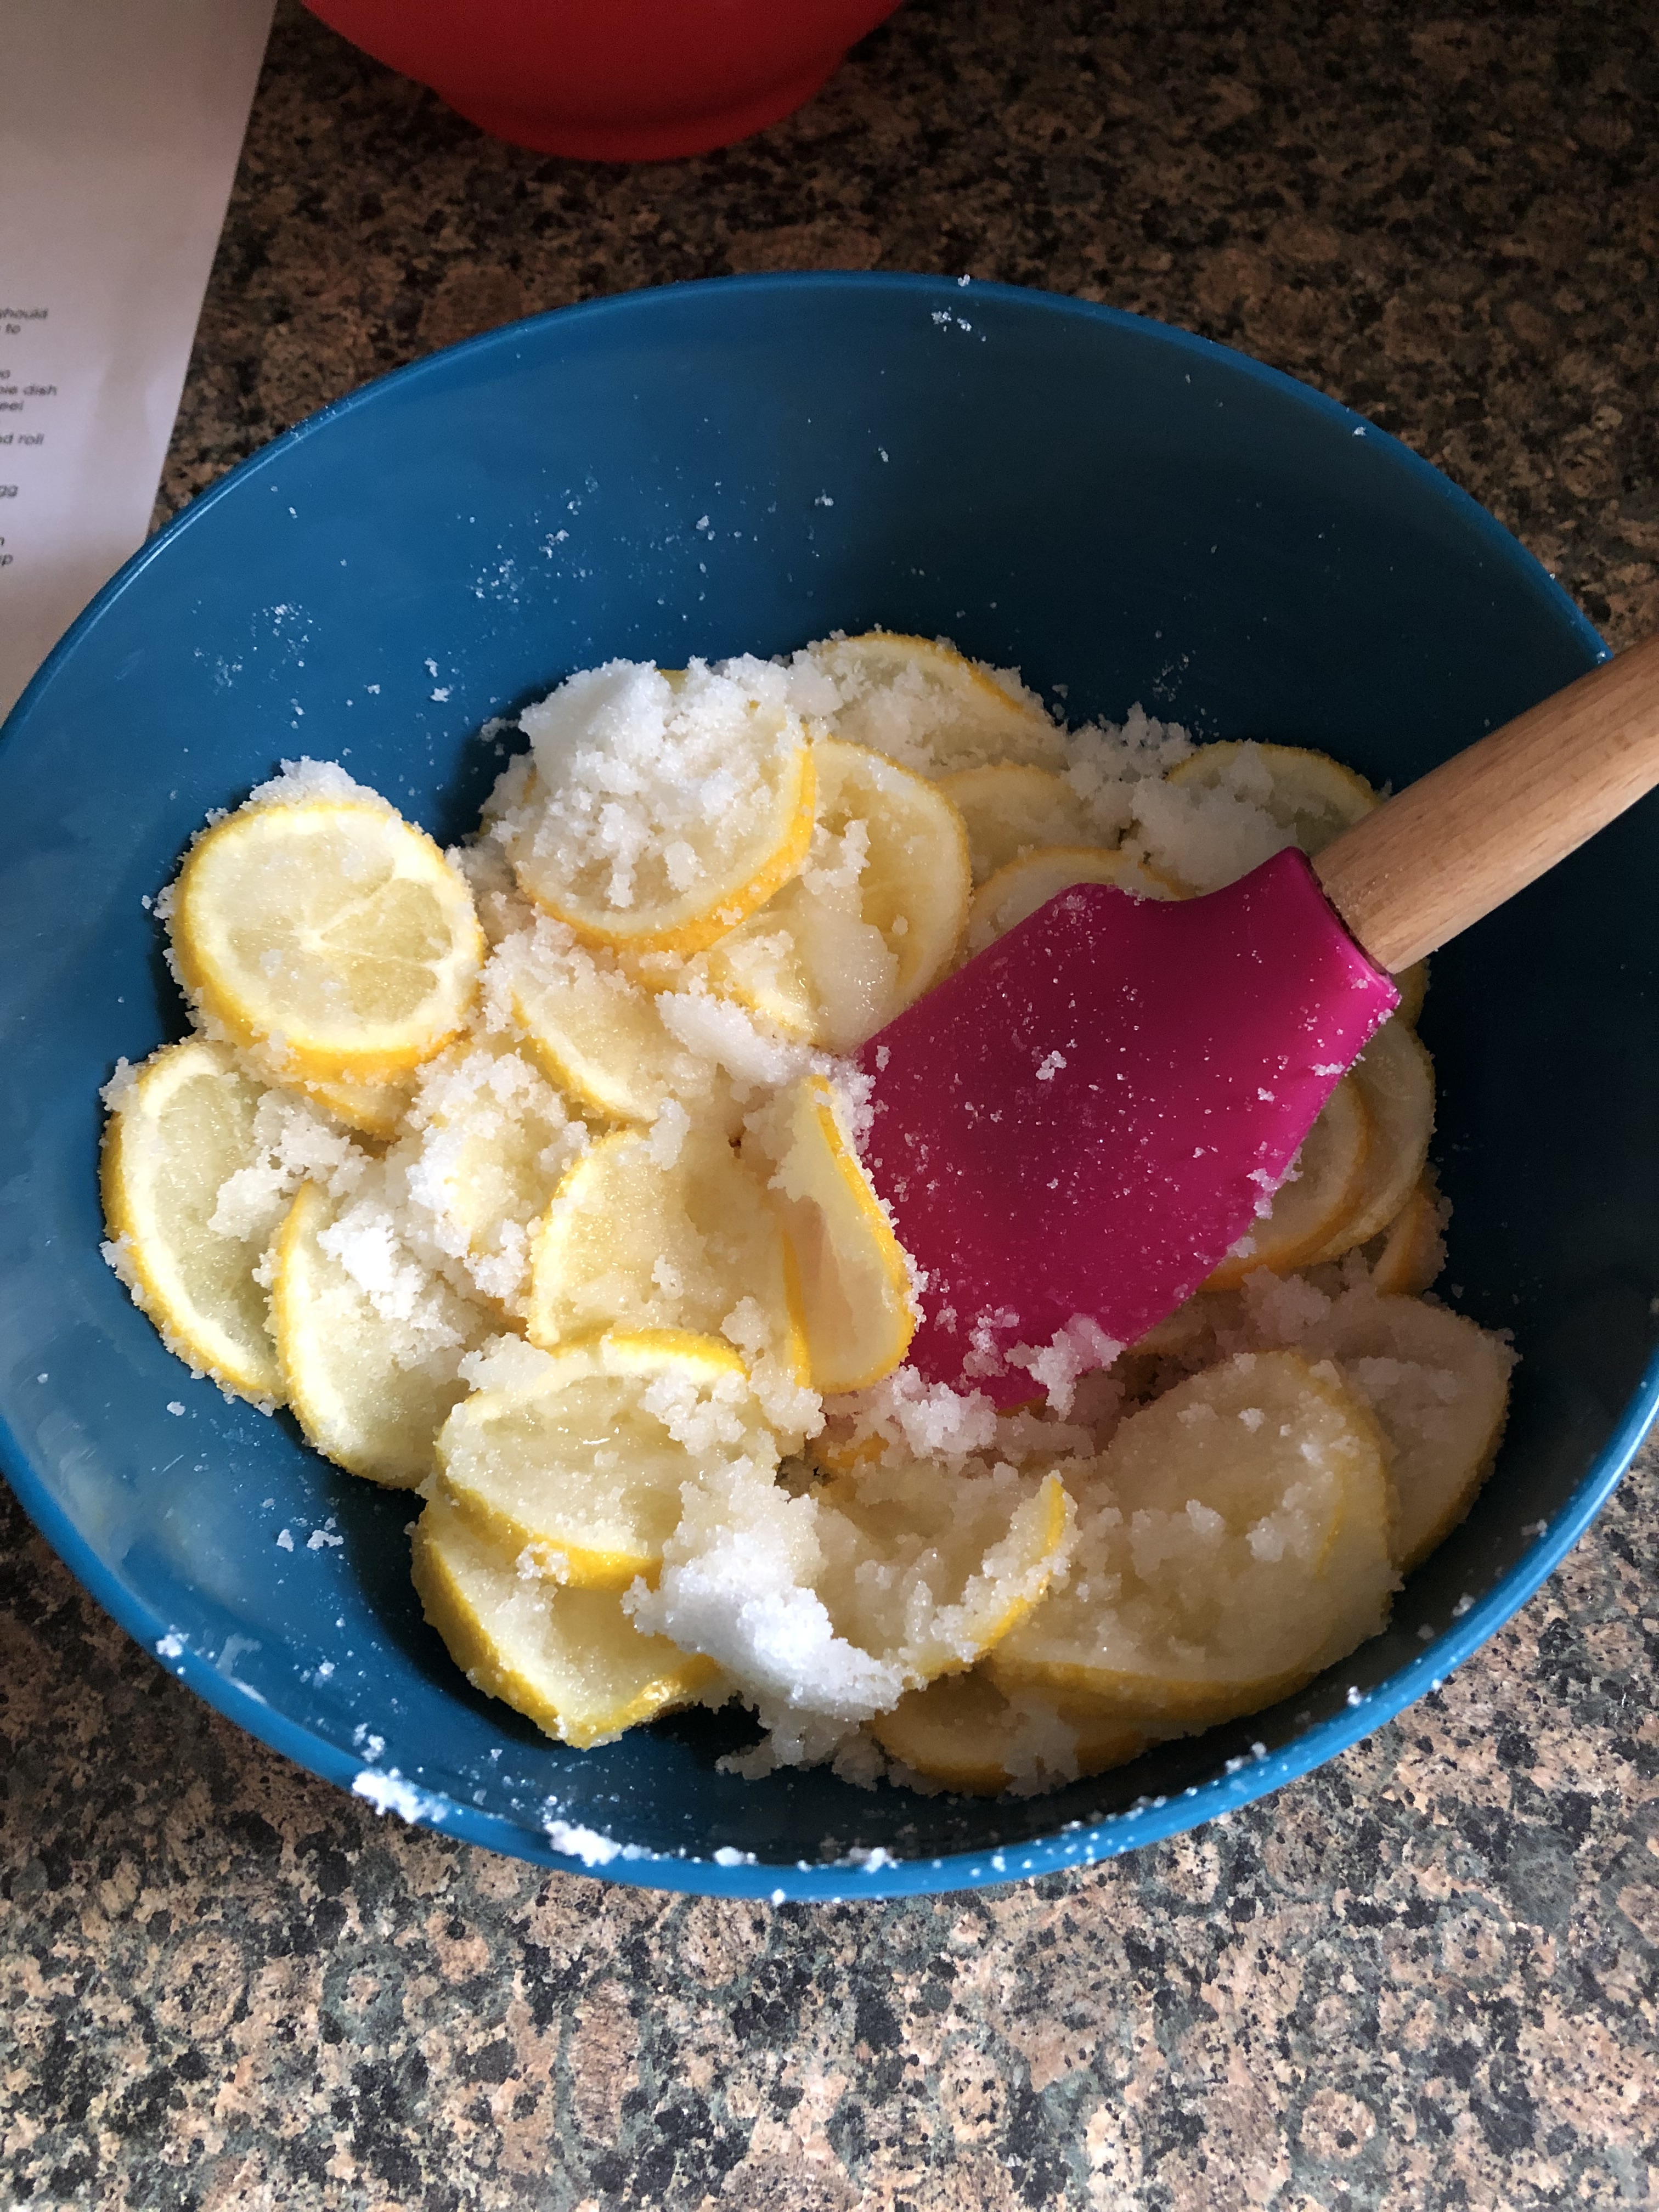
I then combined the sliced lemons with sugar and salt and set it aside.

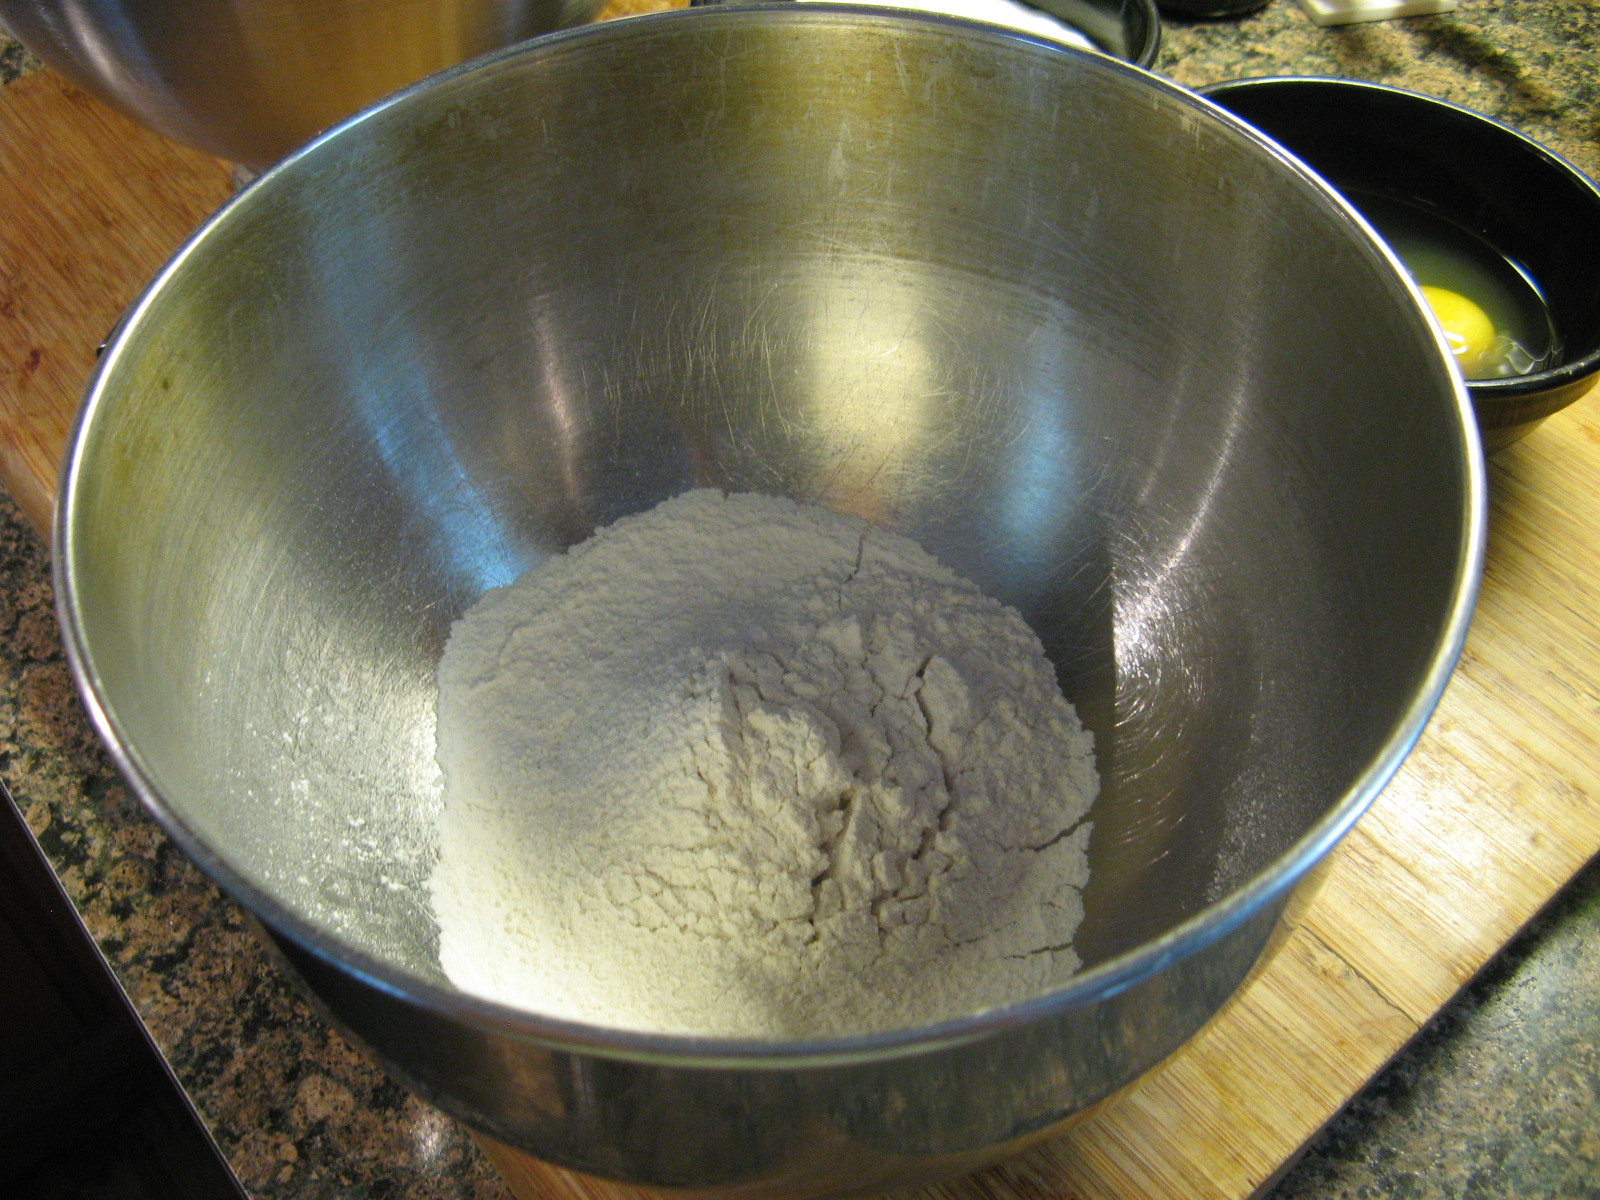
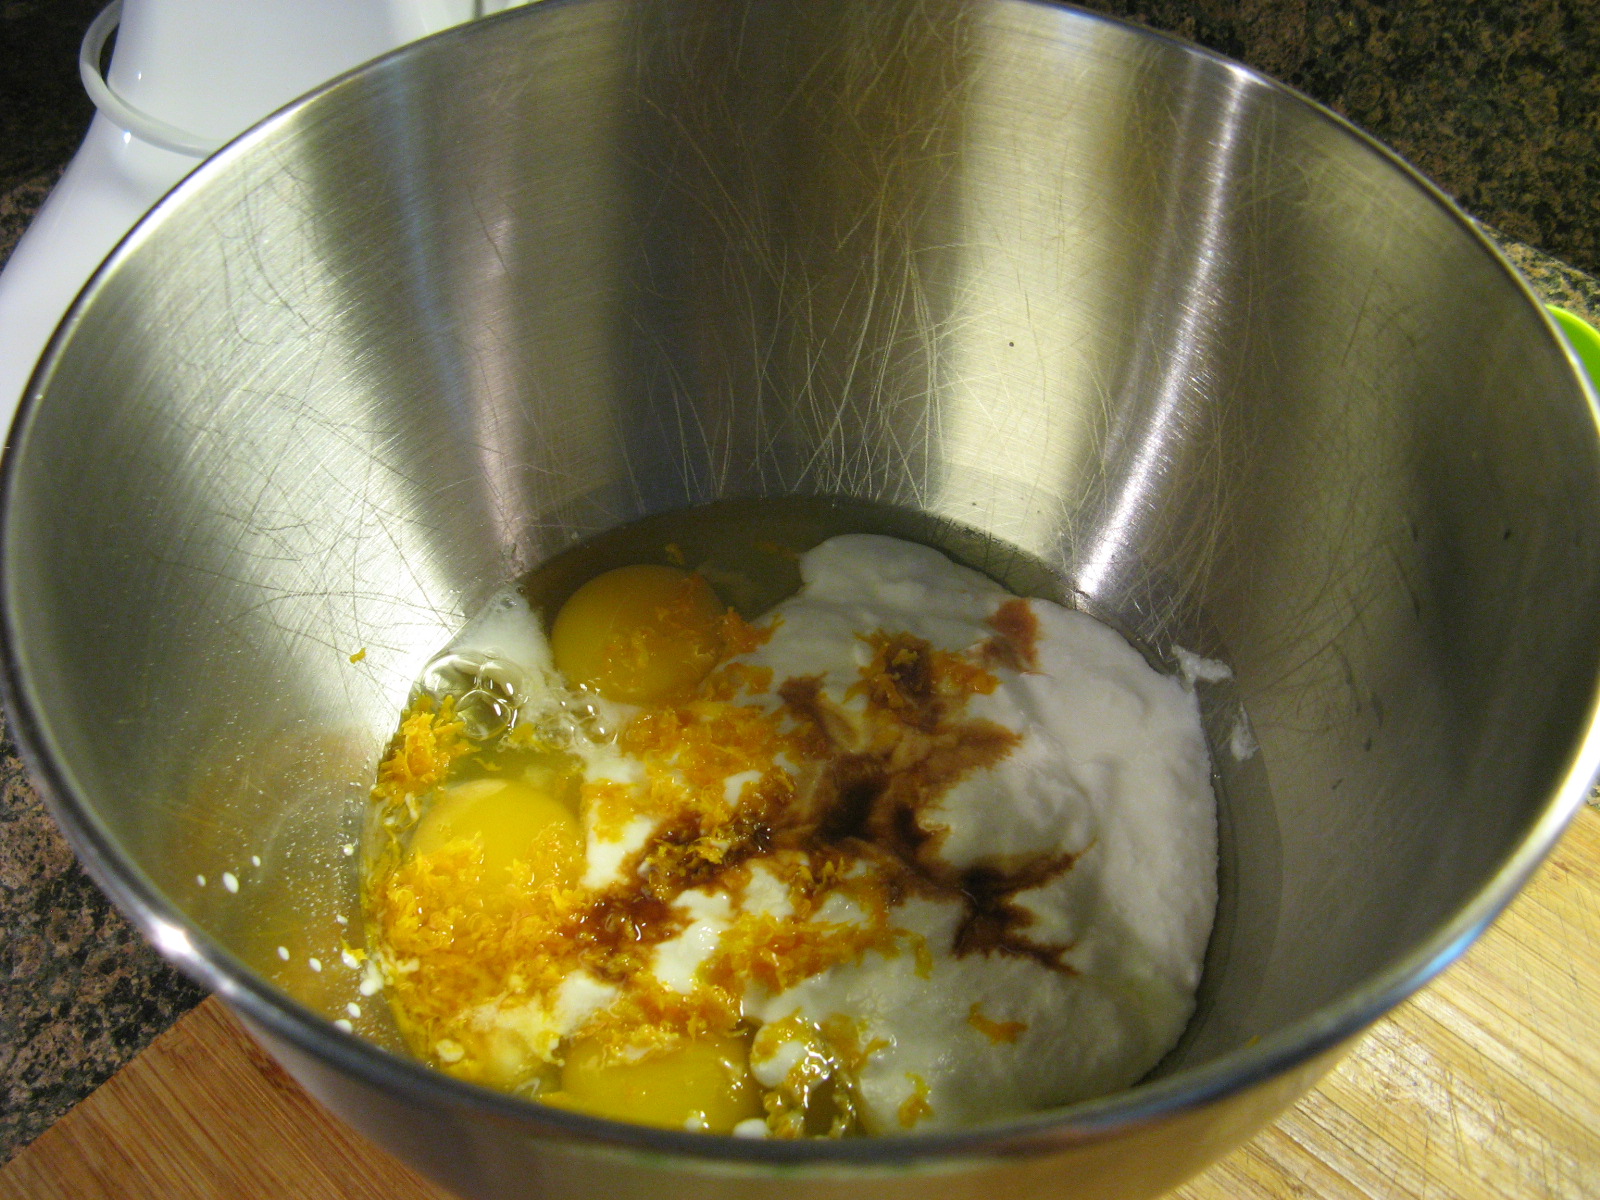
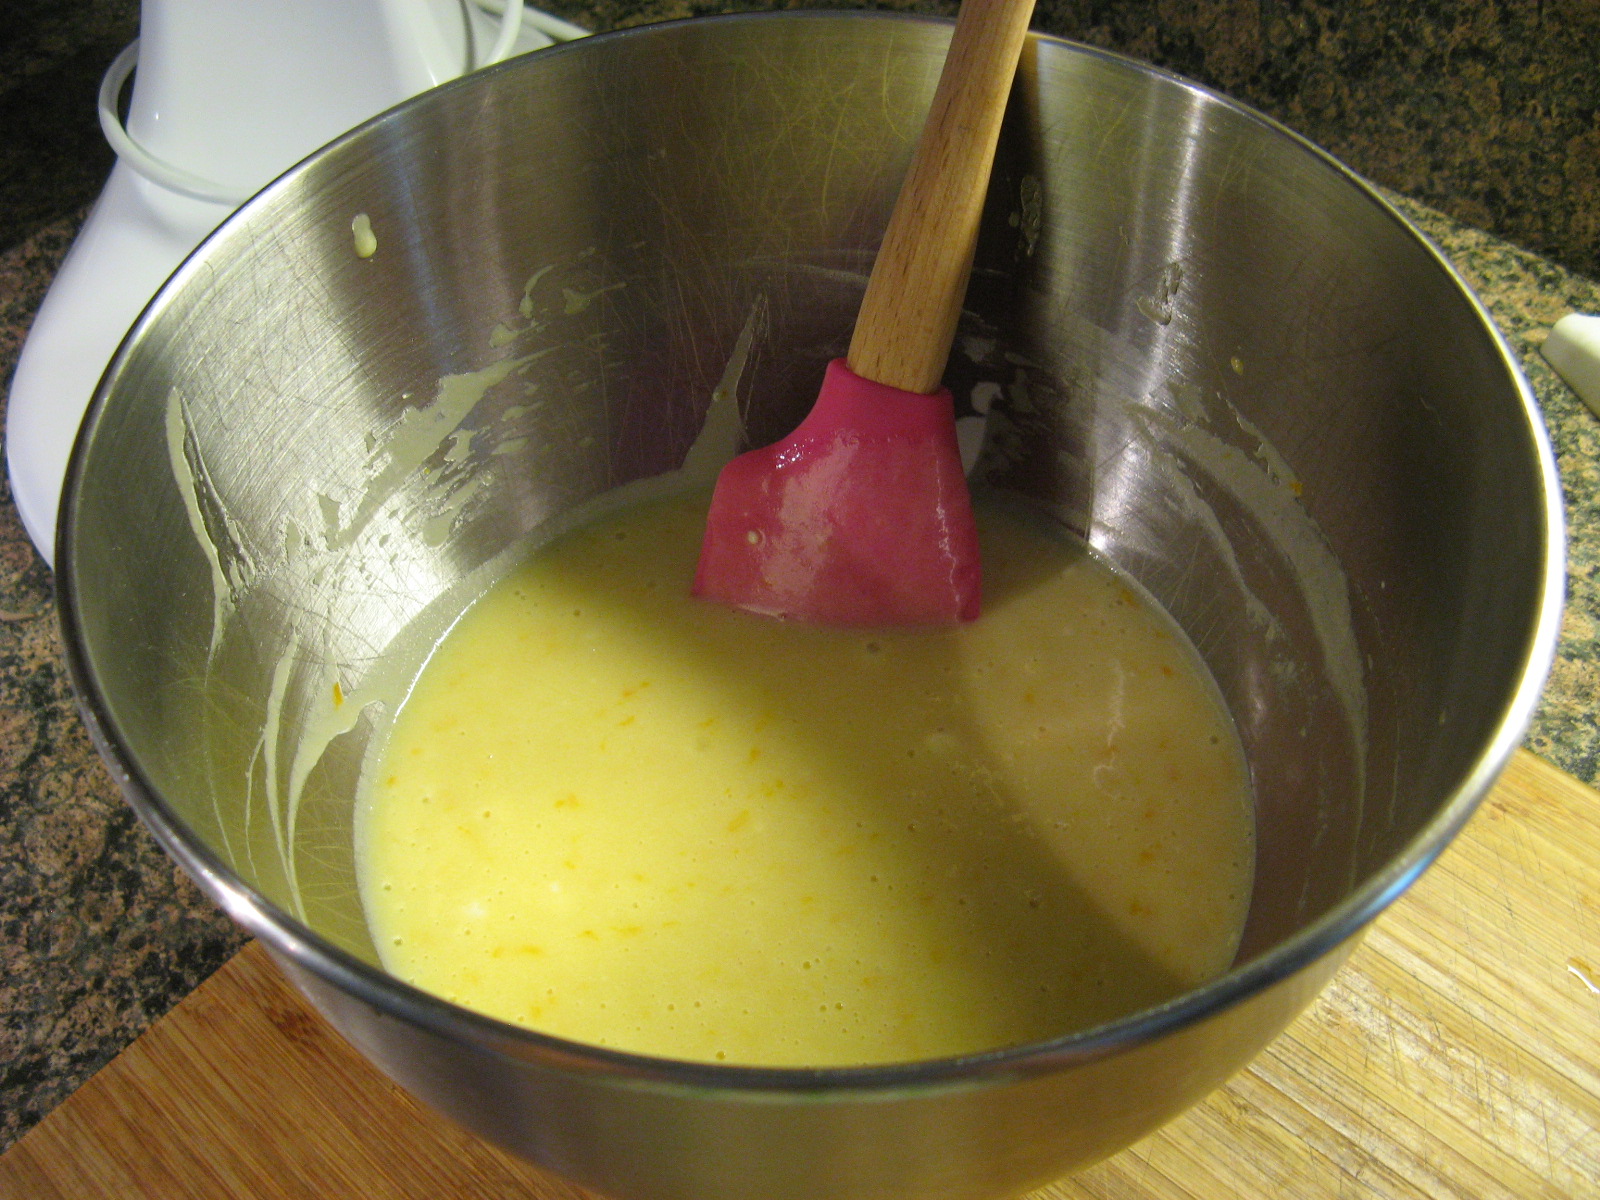
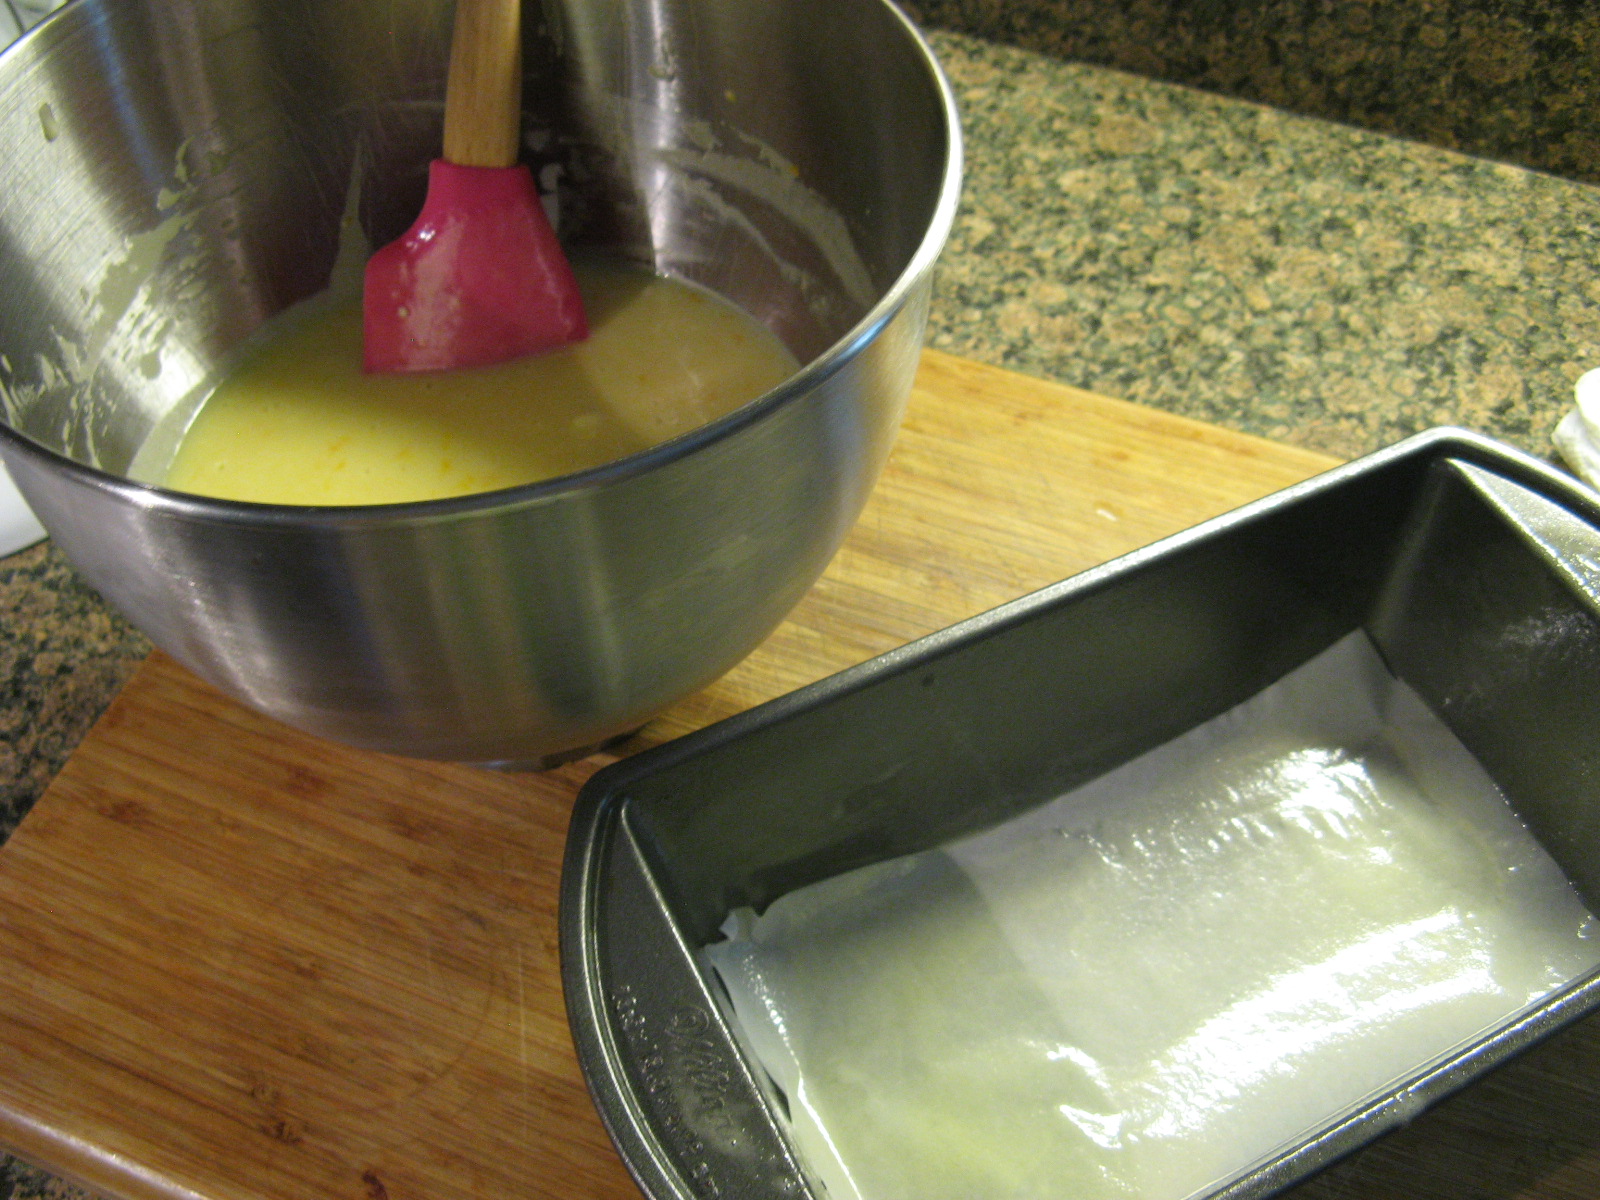
In a medium bowl I whisked together 4 large eggs with vanilla extract and then combined that with the lemons. I opted to use refrigerated store-bought pie dough. After letting it come to room temperature I rolled it out about and extra 1/2-inch and then pressed it into a pie dish that I greased with butter. I brushed the crust with a beaten egg yolk and then poured the lemon mixture into the crust.

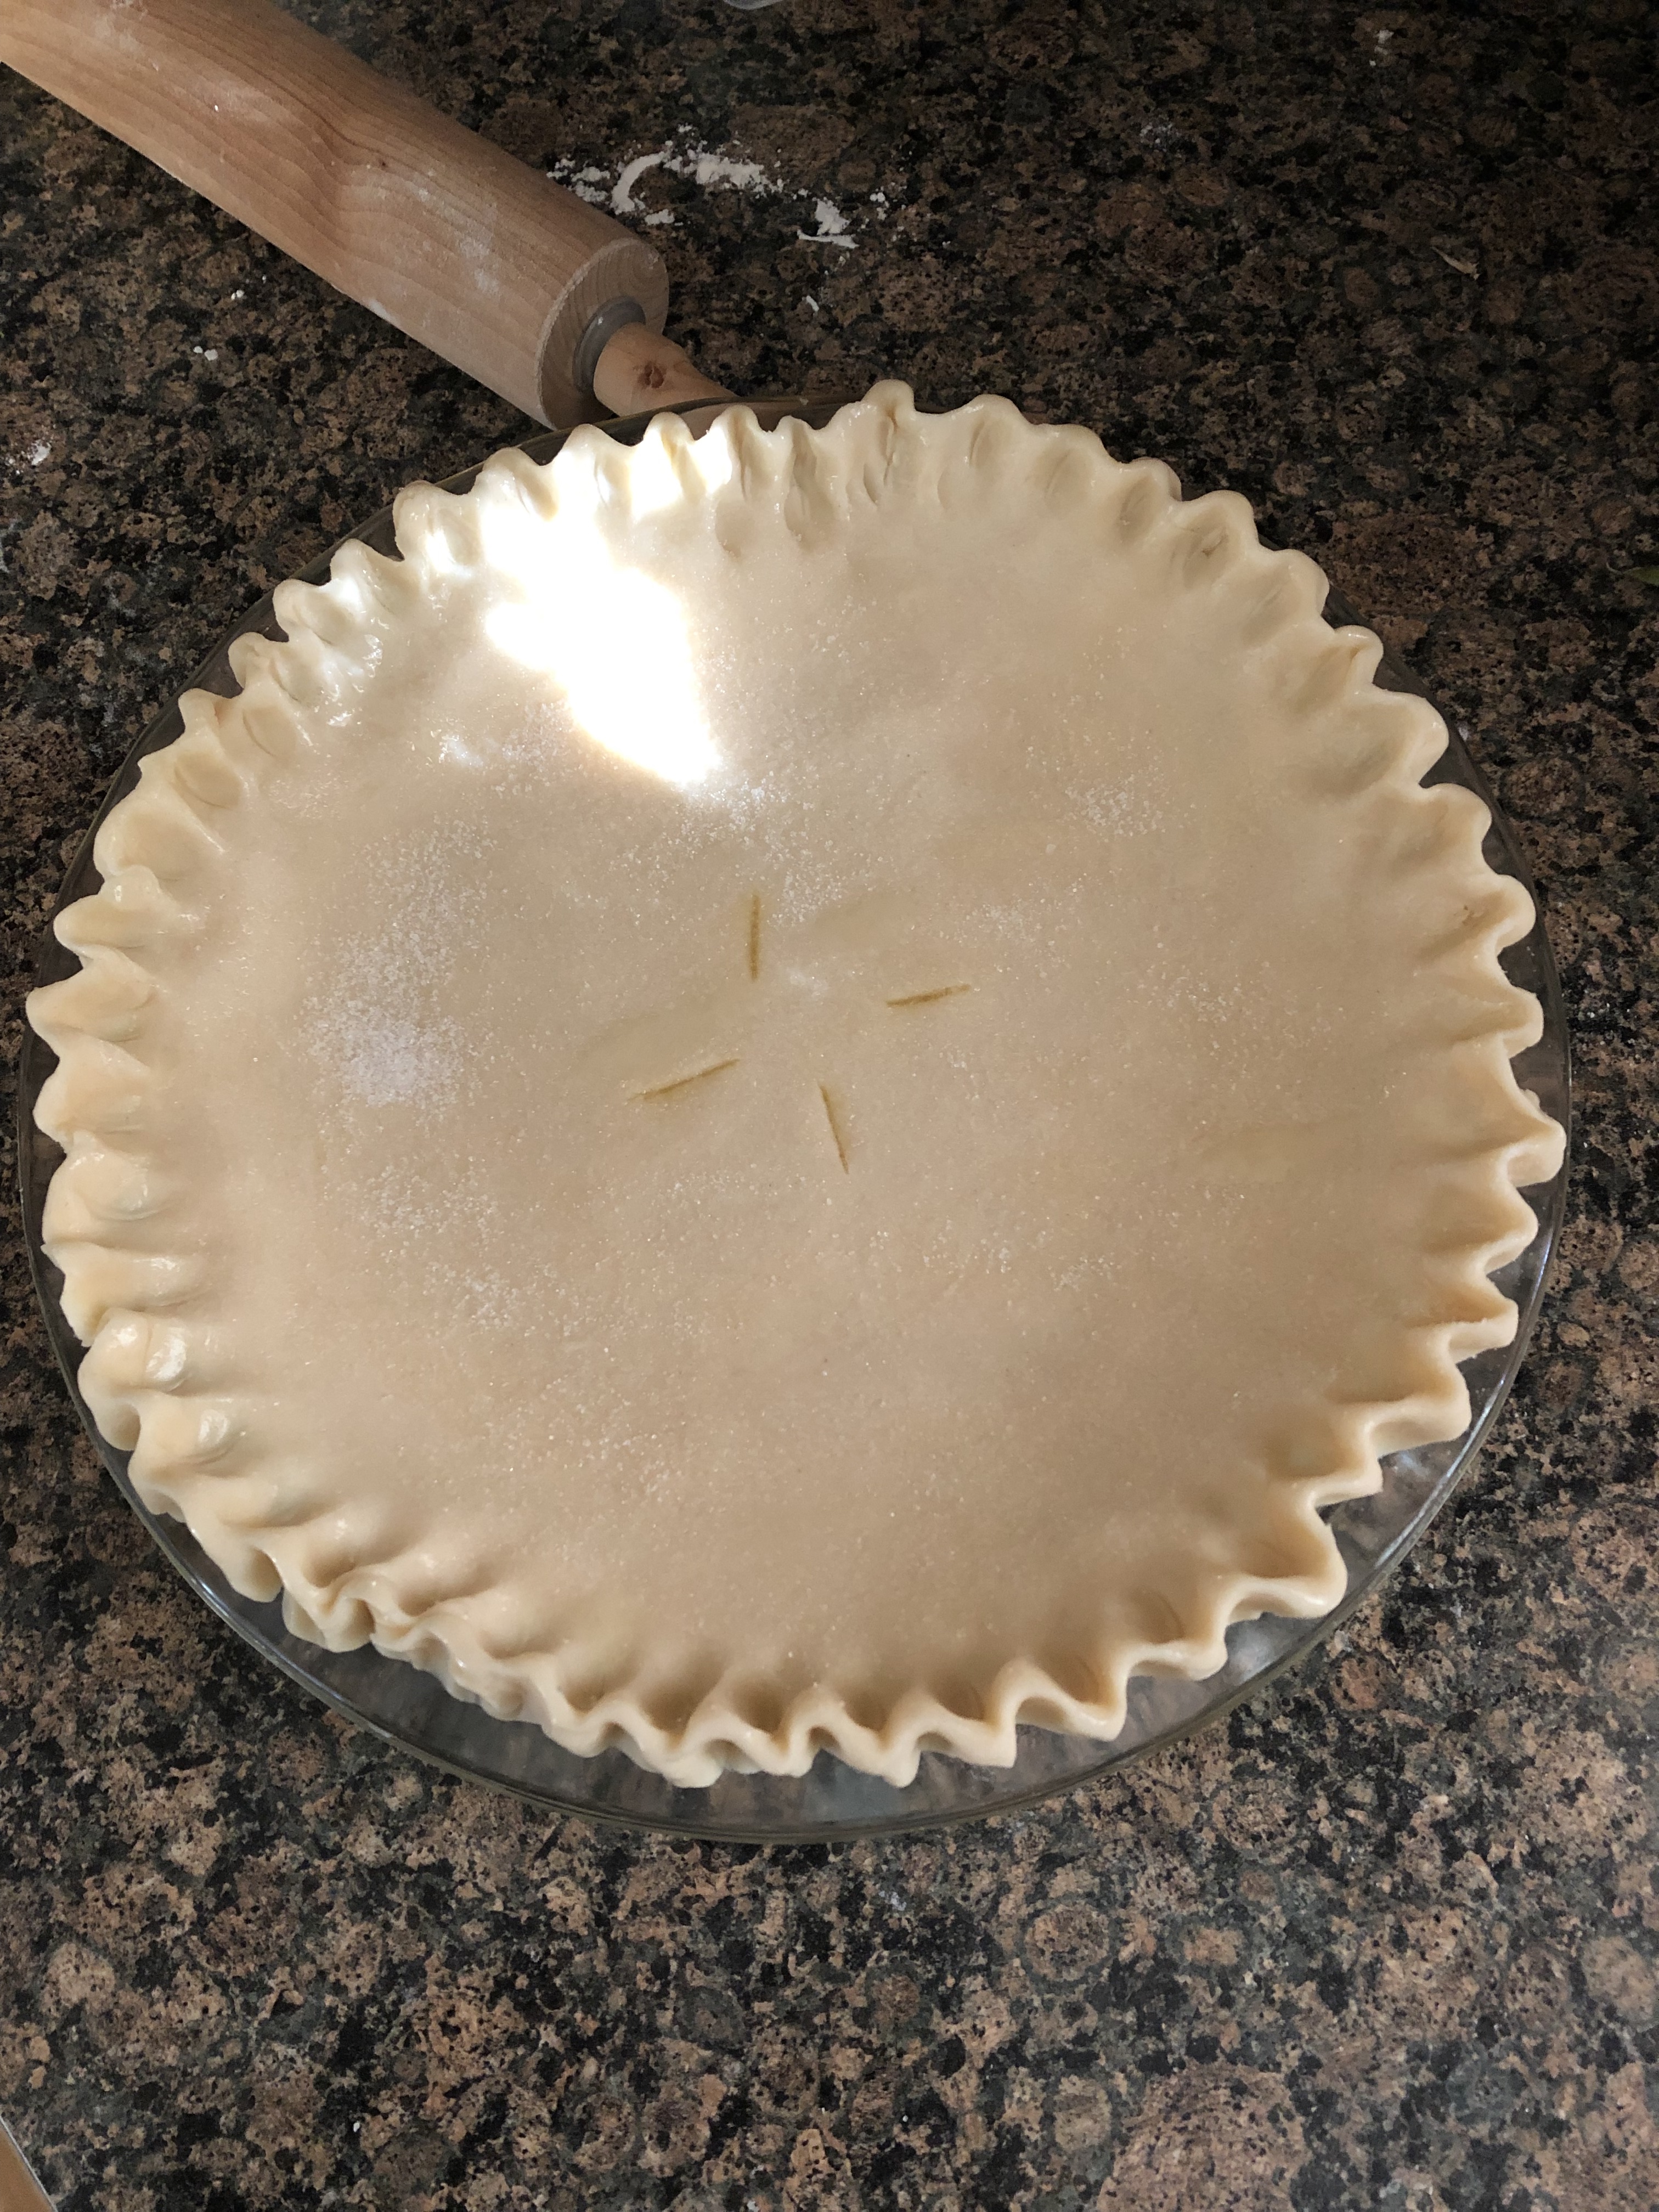
Next, I rolled out the other half of my pie crust approximately an extra 1/2 inch and then placed it on top of my pie. I attempted to do a decorate crust my crimping the ends. I am not a great pie maker so I was happy with the way this crust looked when I was done. I did my best not to rush through it and I was very happy that I was able to cut slits in the pie that were four individual slits as opposed to four slits that I over sliced and turned into 2. It’s happened. I am telling you, baking pies knocks me off-kilter and I end up doing something wrong. Practice makes perfect though. My plan at this point was to freeze the pie for an hour prior to baking. But, I found out the hard way (when I went to go put the pie in the freezer) that my freezer wasn’t wide enough for me to get the dish in. UGH! So, I ended up refrigerating the pie overnight instead. On a side note, when it comes time for me to purchase a new refrigerator I will be going to the store with a bag of pie dishes and cookie sheets to make sure I get a freezer part that I will be able to fit things in. Not being able to get certain dishes and pans in my freezer can be maddening at times. I didn’t find it to be such an annoyance until I decided to freeze my cookie dough back in December and I was only able to fit one cookie sheet in there from the 10+ that I own. It definitely slowed down my flow of getting things done! Anyhoo…

After refrigerating the pie overnight I baked it the following morning… I was pleased with the golden brown color of the crust and that my decorative edge didn’t fall apart completely while the pie was baking.

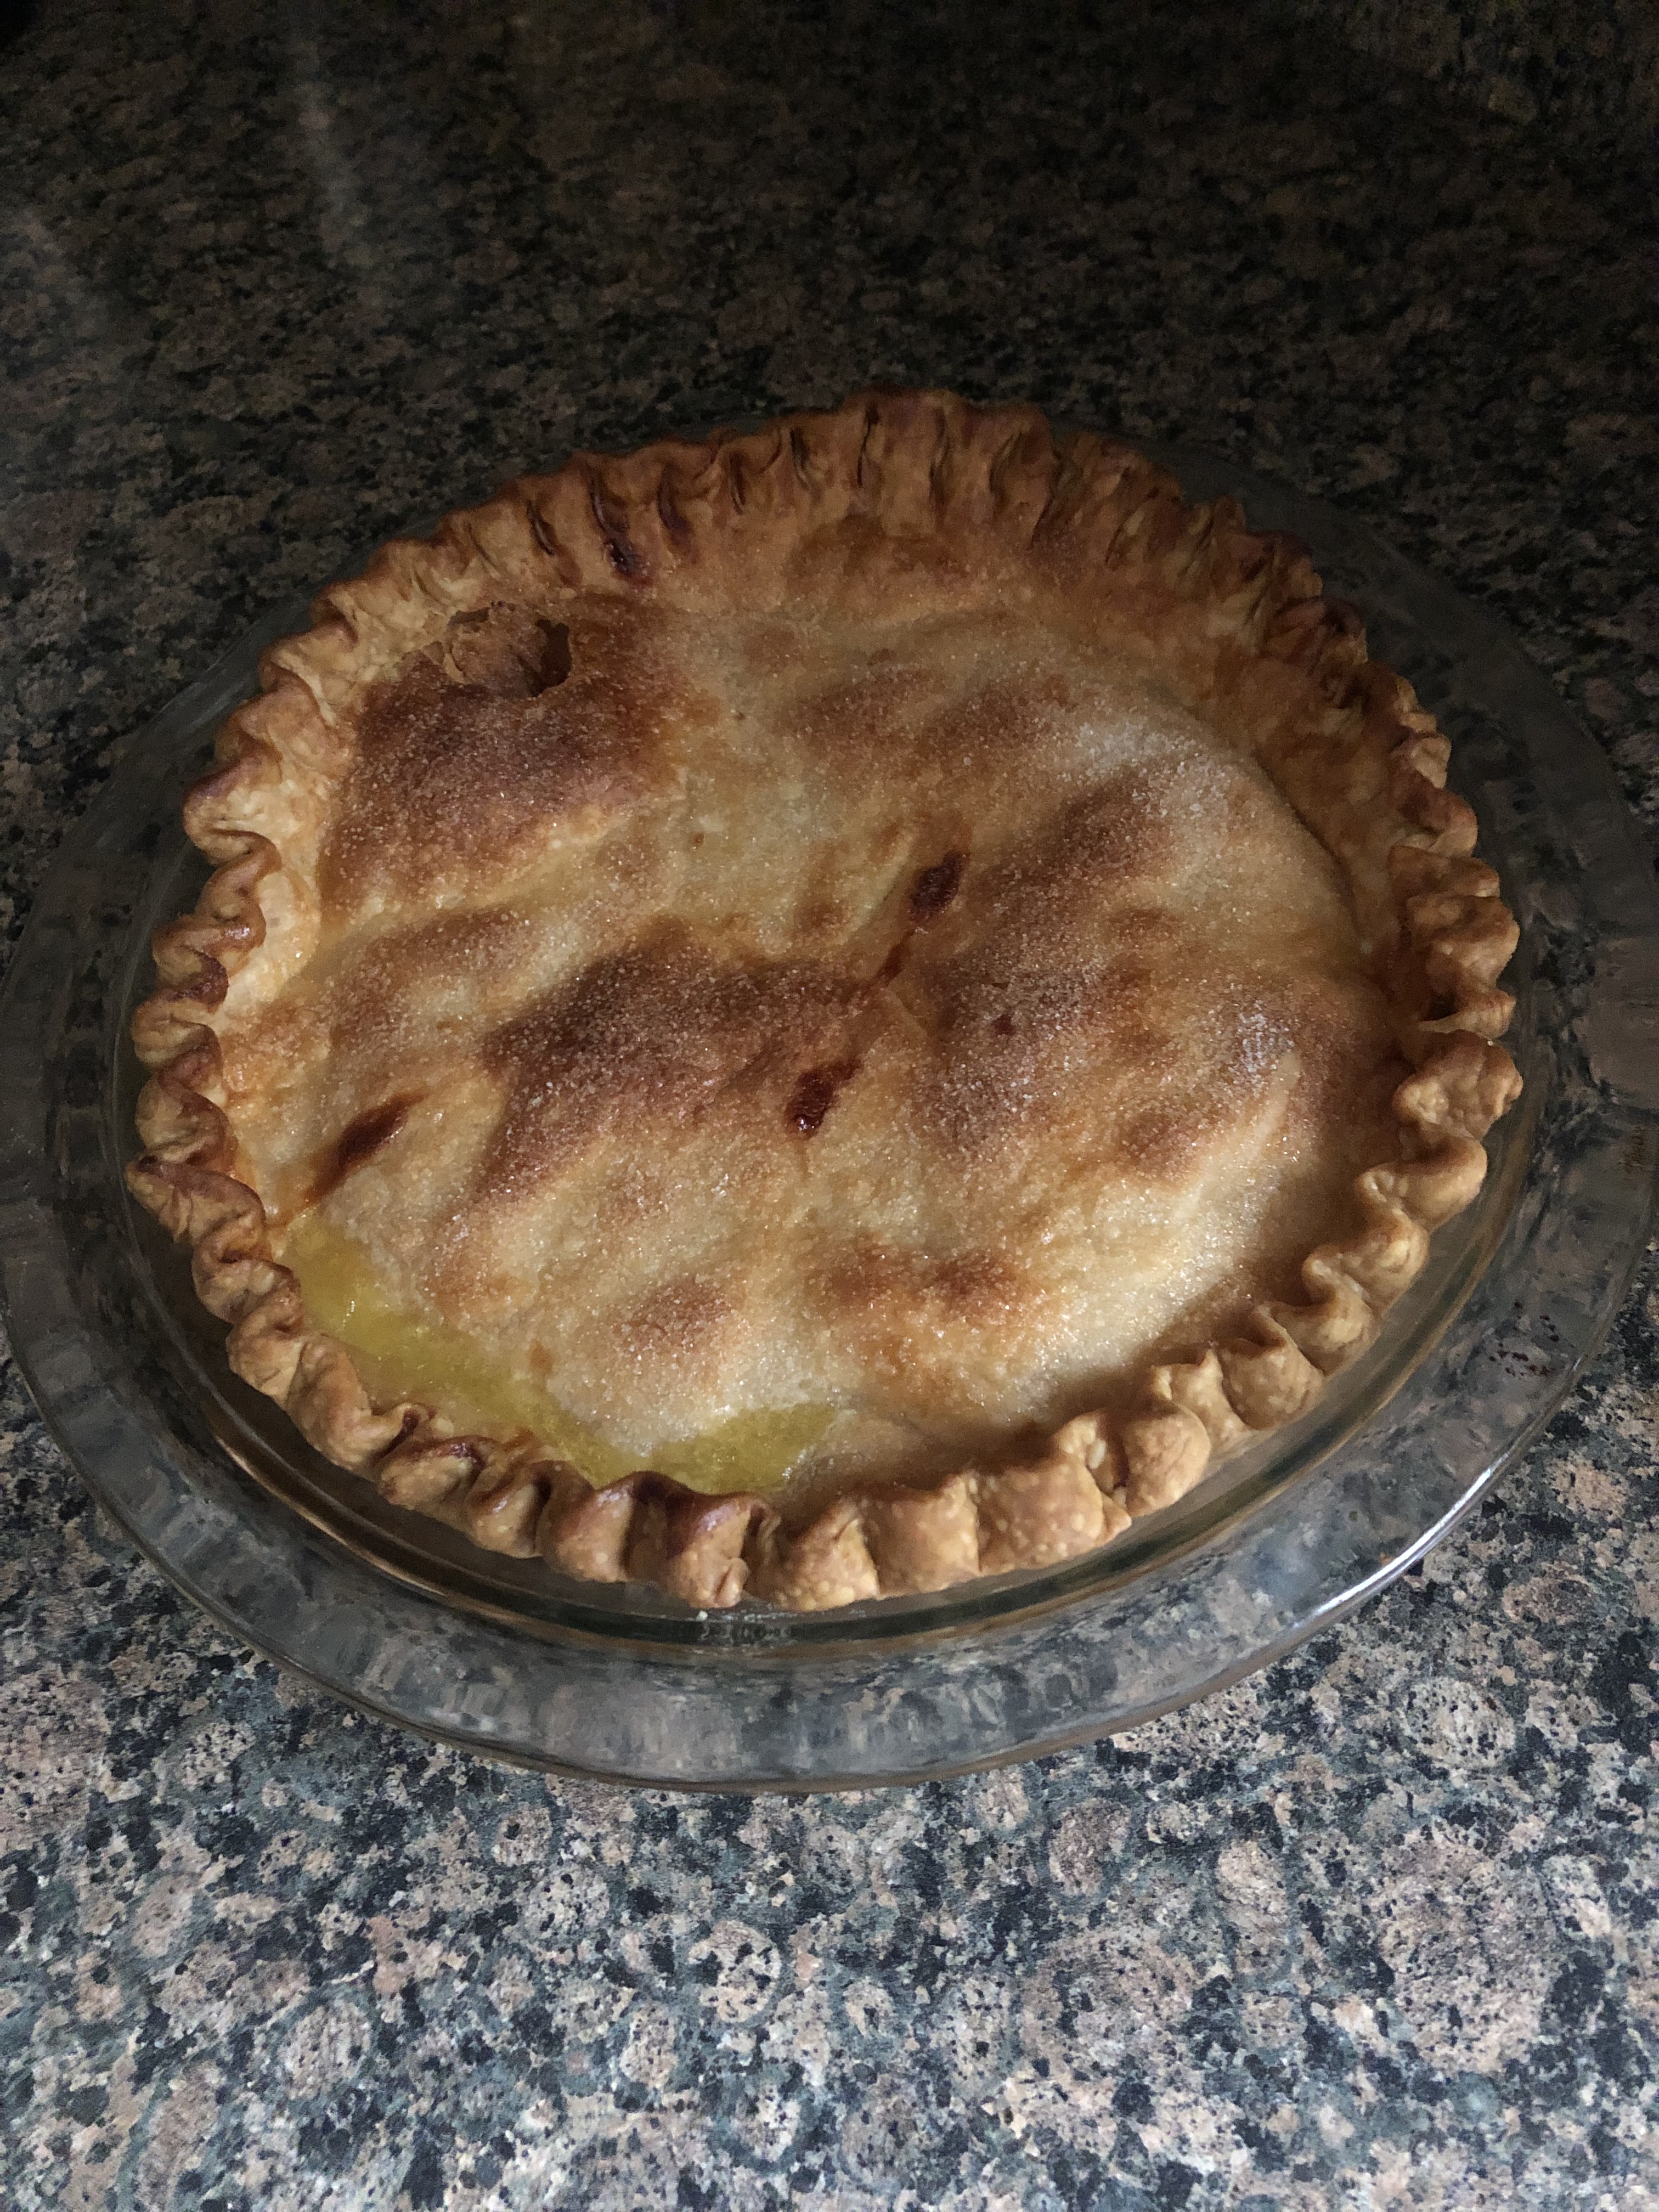
I let the pie cool for a bit and then sliced into it… The filling was jammy as it’s supposed to be, but, I found it incredibly sweet. I tried taking a few bites, but, it was just too much for me. If I make this again I will definitely cut back on the amount of sugar I used per the directions (2 cups). While I was scooping the sugar out to combine with the lemons in the back of my mind I was already thinking “this is way too much sugar,” but since other recipes I saw called for that much I followed along.

While the recipe I followed didn’t call for the lemons and sugar to macerate for 24 hours, I found that many recipes called for this step in order to break down the rind and pith of the lemons to eliminate any bitterness.  If I were to make this recipe again I would definitely do that as well as cut back on some of the sugar. While the pie did have a nice taste to it and the bitterness from the rind and pith wasn’t strong, as I mentioned, the sweetness was just too much for me. So, here is what I would do. I would slice the lemons and combine them with the sugar (probably only a cup and a quarter to a cup and a half) and salt in a large bowl. Cover and refrigerate for 24 hours, stirring occasionally. The following day I would then continue with the recipe, whisking together the eggs and vanilla and then combining that with the lemons. And instead of freezing / refrigerating the pie before baking, I would omit this step and go ahead and bake the pie

Meyer Lemon Shaker Pie

Ingredients:

4 to 7 small to medium Meyer lemons

2 cups sugar

1 teaspoon salt

4 large eggs

1 teaspoon vanilla extract

1 store-bought pie crust or homemade


To finish the pie:

1 large egg separated, white and yolk whisked separately

2 teaspoons sugar


Directions:

Thinly slice the lemons, removing any seeds. You will need 2 cups of sliced lemons. Combine the lemon slices with the sugar and salt and set aside to allow the lemon to macerate. Whisk the 4 eggs and vanilla extract together in a separate bowl.

Lightly grease a 9-inch pie dish. Roll out half of the dough to fit in the dish with a 1-inch overhang. Brush the dough with the beaten egg yolk.

Combine the sliced lemons and egg mixture and then spread into the prepared pie crust.

Roll out the other half of the dough. If using store bought dough, roll it out approximately a 1/2 inch more and then place on top of the dough in the pie dish. Trim off any excess dough and pinch the bottom and top crust together and crimp or seal the edges with your finger or fork.

Cut 4 slits on the top and brush with the beaten egg white and sprinkle the sugar on top. Chill in the freezer for 1 hour or in the refrigerator overnight.

Preheat the oven to 450 F. Bake the pie on the lowest rack of the oven for 15 minutes. Lower the temperature of the oven to 375 F and move the pie to the center rack and bake for another 30 minutes. If the edges of the pie begin to brown too quickly, cover with a pie cover or strips of aluminum foil.

Let the pie cool for at least 30 minutes before slicing and enjoying.

Recipe from The Kitchn

Meyer Lemon Poppy Seed Muffins

With 2 bags of Meyer Lemons I have made my fair share of desserts. I made the scones I posted last week, a pie which I will be sharing with you on Pi Day (3/14) and these Lemon Poppy Seed Muffins I am sharing with you today. I was planning on making these muffins prior to the scones but I didn’t have any poppy seeds, well, guess what. I have way more than enough now. I honestly thought I would be able to purchase a small bag of them like I did for sesame seeds, but, at my usual supermarket poppy seeds are only available in containers like spices. So, because it was a better value I purchased the larger container. I guess I will be making a lemon poppy seed cake one of these days.

What was nice about these muffins is that they require only one large bowl to make the batter. I began by creaming together butter, eggs and sugar, then added in lemon juice and zest and finally the dry ingredients – baking powder, salt and poppy seeds. I opted to bake them in a 6 – cup muffin tin, but, you could bake them in a 12-cup cupcake tin instead. You will just need to keep an eye on them because the baking time will differ. These tasted good and were a nice treat for breakfast, but, next time I think I will bake them at 350 F instead. I found that baking them at 375 F allowed for the outside of the muffin to overbake a little while the inside finished baking.

Meyer Lemon Poppy Seed Muffins

Ingredients:

1/2 cup unsalted butter, at room temperature

2 eggs

3/4 cup sugar

3 tablespoons meyer lemon juice

1 teaspoon meyer lemon zest

1 1/2 cups flour

1 1/2 teaspoons baking powder

3/4 teaspoon salt

1 tablespoon poppy seed

*If you cannot find Meyer Lemons, you can use regular lemons

Directions:

Preheat the oven to 350 F. Line a 6-cup muffin tin with liners.

In a large bowl cream together the butter, eggs and sugar using a hand mixer or stand mixer on medium speed. Add in the lemon zest and juice and continue mixing until well combined. Add in the flour, baking powder, salt and poppy seeds and stir together until just combined, being careful not to over-mix.

Divide the batter among the prepared muffin tin.

Bake for 20-25 minutes, or until a cake tester inserted in the middle comes out clean.

Enjoy warm or at room temperature. Store left-over muffins in an air-tight container for 2 to 3 days.

Recipe from Miss in the Kitchen

Meyer Lemon Scones

I recently purchased 2 bags of Meyer Lemons to make a pie which I will be sharing with you in a couple of weeks in honor of Pi Day. I was pretty sure I only needed 1 bag of the lemons since each bag had about 6 each, but, I wanted to be sure I had enough in case of any mishaps and I figured I could always make something else with the extra ones. Initially I was thinking of making muffins, which I may still do, but quickly realized that most lemon muffins include poppy seeds, which I didn’t have. Then I came across a recipe for scones and for some reason I always thought that scones were difficult and time-consuming to make but the recipe I opted to try was the complete opposite.

Unfortunately I did not take any pictures of the prep work that went into making these scones. I was cooking/baking about three or four other things so my counter was a mess and I was trying to make sure I didn’t overcook or burn anything. What was nice about this recipe was that it only required two bowls to mix all of the ingredients and it came together quickly. After stirring together my dry ingredients (flour, sugar, salt, baking soda and baking powder) I added in diced cold butter. Here’s a tip, if you want to ensure your butter is cold enough and incorporates into the flour well, freeze it for a few minutes and instead of dicing it grate it in to the flour mixture. I then used a combination of a pastry cutter and my hands (actually just one hand, I ended up with a pretty bad cut on one of my fingers when I was cleaning lemon zest off my Microplane Grater) to work the butter in and get the mixture into the consistency of small peas. In a measuring cup I whisked together the heavy cream, an egg yolk and lemon zest and then added this to the flour mixture and stirred it until the dough formed. I then transferred the dough to a baking sheet, formed it into a circle and then cut it using a pizza cutter into four equal pieces. I separated the pieces so they weren’t touching and then brushed them with heavy cream. While the scones were baking, I whisked together a glaze of confectioners’ sugar, heavy cream and lemon juice to pour on them right out of the oven. I was never one to add glazes to my baked goods, I always thought doing so would make them super sweet. But, I have come around and realized that all glazes are not super sweet and sometimes can add another level of flavor to things. Like the cardamom glaze on the Rum-Raisin Apple Bundt Cake I posted a few months ago… YUM!

These scones were delicious and made for a nice breakfast treat. Maybe next time I will add some blueberries. Blueberries and lemon go together like peanut butter and chocolate!

Meyer Lemon Scones

Ingredients:

For the Scones:

1 1/4 cups flour

1/4 cup sugar

1/4 teaspoon salt

1/4 teaspoon baking soda

4 tablespoon unsalted butter, cold and diced

1/3 cup + 2 tablespoons heavy cream, plus more for brushing

1 large egg yolk

Zest of 2 Meyer lemons


For the Glaze:

1/3 cup Confectioners’ sugar

1 teaspoon heavy cream

2 teaspoons freshly squeezed Meyer lemon juice

Directions:

Preheat the oven to 400 F.

In a large bowl whisk together the flour, sugar, salt, baking soda and baking powder. Add the butter and using your preferred method (knives, pastry cutter or hands) work the butter into the flour mixture until the consistency is smaller than peas.

In a measuring cup whisk together the heavy cream, egg yolk and lemon zest and then pour over the flour mixture. Stir the mixture until a shaggy dough forms and everything is incorporated, being careful not to overmix the dough.

Transfer the dough to a small cookie sheet and form it into a circle.

Using a knife (or pizza cutter) cut the circle into 4 equal pieces. Separate the pieces a bit so they are not touching and brush the pieces with heavy cream.

Whisk together the ingredients for the glaze in a small bowl and set aside.

Bake the scones for 13-15 minutes in the preheated oven, or until a cake tester inserted in the middle comes out clean and the edges of the scones are beginning to brown.

Drizzle the glaze on the scones immediately after removing them from the oven. Enjoy warm.

To store, place the scones in an airtight container at room temperature for 1-2 days.

Recipe from Dessert for Two

Meyer Lemon Yogurt Cake

Key limes weren’t the only citrus fruits I picked up on a recent grocery trip; I also came across some Meyer lemons. I’m always on the lookout for fruits or vegetables that are not your typical everyday kind. So, what exactly is a Meyer Lemon? Well, it’s a cross between your basic lemon and either a mandarin or a common orange. They also have a sweeter and less acidic taste than your typical lemon. One other characteristic that sets them apart is their thin skin. I wasn’t all that sure what I was going to make with them. I began by searching for specific Meyer lemon recipes but I wasn’t all that thrilled with what I came up. I also searched through some of my cookbooks but to no avail of something that really stood out. So, I made my search simpler and just went with a basic lemon search and came across Ina Garten’s (aka The Barefoot Contessa) Lemon Yogurt Cake. The reviews for the cake were good so I just went ahead and swapped out the regular lemons for the Meyer lemons.

IMG_4783

As you can see from the picture below the Meyer lemons are also a bit rounder and the yellow-orange coloring of their skin lets you know they are perfectly ripe

IMG_4733

I began by zesting two of the lemons…

IMG_4737

And then squeezing the juice of three of the lemons to get a little more than a 1/3 of cup of juice. Their skins are so thin that a few of the halves ripped a bit while I was squeezing.

IMG_4739

In one bowl I sifted together flour, baking powder and salt.

IMG_4741

In the bowl of my stand mixer I whisked together whole milk yogurt, sugar, eggs, the lemon zest, and vanilla extract.

IMG_4742

I then slowly whisked in the dry ingredients.

IMG_4743

And finally I used a rubber spatula to fold in vegetable oil.

IMG_4744

Then it was time to pour the batter into my prepared loaf pan. I sprayed it with baking spray and then lined the bottom with parchment paper which I then sprayed with some more baking spray.

IMG_4745

I then placed the cake in a 350 F preheated oven for about 50 minutes. While the cake was in the oven I cooked an equal part of lemon juice and sugar (1/3 cup each) until the sugar dissolved and the mixture was clear and set it aside.

IMG_4756

After the letting the cake cool in the pan for 10 minutes I inverted it onto a wire rack which I had placed over a baking sheet. After poking the cake a few times I poured the lemon-sugar mixture over the cake and allowed it to soak in while the cake cooled.

IMG_4757

Once the cake was completely cooled I moved it to a platter in preparation to drizzle it with a lemon glaze, which I made by mixing confectioners’ sugar and a few tablespoons of lemon juice.

IMG_4774

The final product. I should note that the recipe called for an 8.5 x 4.25 x 2.5 inch pan, which I don’t have, so I used my 9.25 x 5.25 x 2.75 inch pan which resulted in a cake that was a bit wider and shorter but not lacking in deliciousness.

IMG_4786

This cake was absolutely divine. I thought it was going to be on the sweeter side because of the glaze and lemon and sugar juice poured over it but it only enhanced the flavor. I was extremely happy with it and can’t wait to make it again.

IMG_4785


Meyer Lemon Yogurt Cake – adapted from here

Ingredients:

1 1/2 cups all-purpose flour

2 teaspoons baking powder

1/2 teaspoon kosher salt

1 cup plain whole-milk yogurt

1 1/3 cups sugar, divided

3 large eggs

2 teaspoons grated Meyer lemon zest (2 lemons)

1/2 teaspoon pure vanilla extract

1/2 cup vegetable oil

1/3 cup freshly squeezed Meyer lemon juice

1 cup confectioners’ sugar

2 tablespoons freshly squeezed Meyer lemon juice

Directions:

1. Preheat the oven to 350 degrees F. Grease a loaf pan. Line the bottom with parchment paper and then grease the pan again.

2. Sift together the flour, baking powder, and salt in one bowl. In another bowl, whisk together the yogurt, 1 cup of sugar, the eggs, lemon zest and vanilla extract. Slowly whisk in the flour mixture. With a rubber spatula, fold the vegetable oil in the batter, making sure it’s all incorporated. Pour the batter into the prepared loaf pan and bake for about 50 minutes, or until a cake tester in the center of the loaf comes out clean.

3. Meanwhile, cook the 1/3 cup lemon juice and remaining 1/3 cup sugar in a small pan until the sugar dissolved and the mixture is clean. Set aside.

4. When the cake is done, allow it cool in the pain for 10 minutes. Carefully place on a baking rack over a sheet pan. While the cake is still warm, pour the lemon-sugar mixture over the cake and allow it to soak in. Cool.

5. For the glaze, combine the confectioners’ sugar and lemon juice and drizzle over the cake.


Lemon Buttermilk Cupcakes with Cream Cheese Frosting

Hope you all had a wonderful 4th on Friday and that the rest of your holiday weekend was good. As for me, the 4th was a bit of a washout due to rain but the rest of the weekend was beautiful which meant I was able to do some yard work. The rain wasn’t all that bad though, it gave me the perfect excuse to stay in and bake some patriotic themed cupcakes. I settled on making Lemon Buttermilk Cupcakes with Cream Cheese Frosting. I should note that the recipe for the Lemon Buttermilk was originally for a loaf cake, but, I decided to turn it into cupcakes and add some frosting.  
IMG_4319
I began by whisking together the dry ingredients -flour, baking powder and salt – in one bowl and the wet ingredients – oil, sugar, buttermilk, eggs, lemon zest and juice – in another.
IMG_4290 IMG_4291
After whisking those ingredients together by hand I opted to use my hand mixer to whisk all of the ingredients together.
IMG_4292
I then used an ice cream scoop – I find it’s always the perfect size for scooping cupcake batter – to fill patriotic themed cupcake liners.
IMG_4297 IMG_4298
I then baked them in a 350 F preheated oven for 20 minutes – rotating the tins halfway through. After letting the cupcakes cool for a few minutes in the pan I removed them and let them cool completely on a wire rack.
IMG_4307 IMG_4310
I then whipped up a batch of Cream Cheese Frosting and used a large open star tip to pipe the frosting onto the cupcakes.
IMG_4311
And since these were patriotic themed cupcakes I added some red and blue with stars and stripes sprinkles, blueberries and strawberries and blueberries and raspberries.
IMG_4353
Final verdict… Lemon & Cream Cheese are a winning combination!
IMG_4330

Lemon Buttermilk Cupcakes – adapted from here

Makes 14 Cupcakes

Ingredients:

1/2 cup canola oil

2 cups all-purpose flour, spooned and leveled

2 teaspoons baking powder

1/2 teaspoon kosher salt

1 1/2 cups sugar

3/4 cup buttermilk

2 large eggs

1 tablespoon finely grated lemon

1/4 cup lemon juice

1/2 teaspoon vanilla extract

Directions:

1. Heat oven to 350 F. Line a cupcake tin with paper liners.

2. In a large bowl, whisk together the flour, baking powder and salt; set aside

3. In a medium bowl, whisk together the oil, sugar, buttermilk, eggs, lemon zest and juice. Add to the dry ingredients.

4. Divide the batter evenly among the lined cups and bake until a cake tester comes out clean, about 20 minutes, rotating the tins halfway through.

5. Cool the cupcakes in the tins on a wire rack for a few minutes and then remove them and let them cool completely on the wire rack.

6. Frost and enjoy!


Cream Cheese Frosting

Ingredients:

8oz. cream cheese, room temperature

1/2 cup (1 stick) unsalted butter, room temperature

2 cups Confectioners’ sugar, sifted

1 teaspoon vanilla extract

Directions:

1. Cream together the cream cheese and butter with an electric mixer

2. With the mixer on low speed add the confectioners’ sugar 1 cup at a time until smooth and creamy

3. Beat in the vanilla extract

%d bloggers like this: