Thanksgiving Desserts

Hope you all had a wonderful Thanksgiving filled with delicious food and joyous times with loved ones. This year I spent the day at a friend’s house enjoying said delicious food and joyous times – although I did cook a turkey the following day. At this point though I am kind of turkeyed out! I didn’t go empty handed to the Thanksgiving celebration though; I brought the dessert… three pies, a cheesecake and a chocolate cake. What can I say, I love to bake!

Among the pies was a Pumpkin Pie that I decorated using Fall themed pie cutters. Then there was a Sweet Potato Pie 

that I decorated with a leaf border. I made this pie because I had never tried Sweet Potatoe Pie and was curious as to what all the fuss was about. It was good, but, I am partial to pumpking. And finally an Apple Pie that I gave a nice twisted pie crust design to.

IMG_9940

For the Cheesecake I stuck to a recipe that was a hit and topped it with sugared cranberred. The cranberries were so good that I ended up eating the leftovers like they were candy.

IMG_9938

And finally, the Chocolate Cake. The cake had a pumpkin spice mousse filling – it was super simple to make and delish thanks to a box of Jell-O Pumpkin Spice Pudding mix – and frosted it with chocolate frosting. And to give it a Fall theme I topped it with white chocolate leaves in seasonal colors.

IMG_9928

Coconut & Lime Cupcakes

Happy Cinco de Mayo! It’s the perfect day to enjoy some guacamole, a few tacos, a shot of tequila or a nice cold margarita. That brings me to today’s post. I’ve made some delicious treats in honor of this day in the past – churros, tres leches cupcakesMexican wedding cookies and sopapilla cheesecake – and this year I was thinking of making Margarita Cupcakes. But, since I didn’t have any tequila on hand (all the recipes I came across had this margarita staple in the ingredient list) I opted for something non-alcoholic and just as festive… Coconut & Lime Cupcakes – a coconut cupcake with a key lime cream cheese frosting.

IMG_7499

To begin I made the coconut cupcakes… In the bowl of my stand mixer I mixed together sugar and butter until it was light and fluffy – about 5 minutes on medium speed.

IMG_7452

I then reduced the speed to low and added in three eggs – one at a time.

IMG_7453

Next I added in buttermilk, and a sifted mixture of flour, baking powder, baking soda and salt. I alternated between adding the two beginning and ending with the dry ingredients. Oh, and can I just take a moment to say that I love this silicone bowl to add things into my running mixer. It’s completely flexible so I can form it into the perfect shape to pour the flour into the bowl and not have it fly all over the place. I used to use a pouring shield but I always had the flying flour issue with it. Check out this link if you have been searching for the perfect bowl to add dry ingredients to your batter while mixing.

IMG_7454

Once the batter came together I folded in sweetened shredded coconut.

IMG_7456

And finally, using an ice cream scoop I divided the mixture among a 12-cup paper lined muffin pan and baked it in a 325 F preheated oven for 25 minutes.

IMG_7457

Once they were out of the oven, I let the cupcakes cool in the pan for 15 minutes before removing them and letting them cool completely on a wire rack in preparation for frosting them.

IMG_7458

After letting the cupcakes cool I got to working on the frosting – a key lime cream cheese frosting that has the perfect combination of sweetness and citrus flavor. I began by creaming together cream cheese, butter, key lime juice and key lime zest until it was creamy. Next I added in 2 cups of sifted confectioners’ sugar one cup at a time – mixing well after each cup. Just to note, if want more of a lime flavor you can add more of the lime juice, but, you may have to balance that with more confectioners’ sugar since you don’t want your frosting to become too thinned down. Prior to frosting the cupcakes I popped the frosting in the fridge for about 10 – 15 minutes so the frosting would be firmer to pipe with.

IMG_7461

And after frosting each of the cupcakes I sprinkled them with a bit of lime zest.

IMG_7482

Coconut Cupcakes – Adapted from here

Makes 12 Cupcakes

Ingredients:

1 1/2 sticks unsalted butter, at room temperature

1 cup sugar

3 large eggs, at room temperature

3/4 teaspoon vanilla extract

3/4 teaspoon almond extract

1 1/2 cups all-purpose flour

1/2 teaspoon baking powder

1/4 teaspoon baking soda

1/4 teaspoon salt

1/2 cup buttermilk

1 1/2 cups sweetened shredded coconut

Directions:

1. Preheat the oven to 325 F and line a 12-cup muffin pan with paper liners.

2. In a medium bowl, sift together the flour, baking powder, baking soda and salt.

3. Using a stand mixer or electric hand mixer cream the butter and sugar until light and fluffy, about 5 minutes on medium speed. Reduce the speed to low and add the eggs one at a time, scraping the sides of the bowl down after each addition. Add in the vanilla and almonds extracts and mix well.

4. In three parts, alternately add the flour mixture and the buttermilk to the batter, beginning and ending with the flour mixture. Fold in the coconut.

5. Fill each cup of the muffin pan to the top – an ice cream scoop is the perfect size to fill the cups. Bake for 25 to 35 minutes, until the tops are slightly brown and a toothpick comes out clean. Allow the cupcakes to cool in the pan for 15 minutes before transferring them to a wire rack to cool completely.

Key Lime Cream Cheese Frosting

Ingredients:

12 ounces cream cheese, at room temperature

1 stick unsalted butter, at room temperature

2 1/2 tablespoons key lime juice

1 teaspoon key lime zest

2 cups confectioners’ sugar, sifted

Directions:

Cream together the cream cheese, butter, key lime juice and zest until creamy. Add in the sugar, one cup at a time, and continue mixing until all of the sugar is incorporated. If you find that the frosting is too soft, pop it into the refrigerator for a few minutes so it can firm up before using it.

Sweet Corn Panna Cotta with Blueberry Compote

I recently signed up for Food & Wine Magazine’s Daily email where I get one sensational (their words not mine) recipe emailed to me every day. I usually glance at the recipe and then delete the email, not because the dish sounds bad, but because I know I will never make it. A week or two ago I got one recipe that I knew I wanted to try… A Sweet Corn Panna Cotta with Fresh Blueberry Compote. I had panna cotta for dessert at a restaurant a few years ago and instantly loved it; granted that one was a Mango Panna Cotta with a Passion Fruit Sauce. I never attempted to make it myself because I thought that it would be difficult – the one recipe I came across was a bit intimidating but once I saw this one I knew I could handle it.

IMG_4879

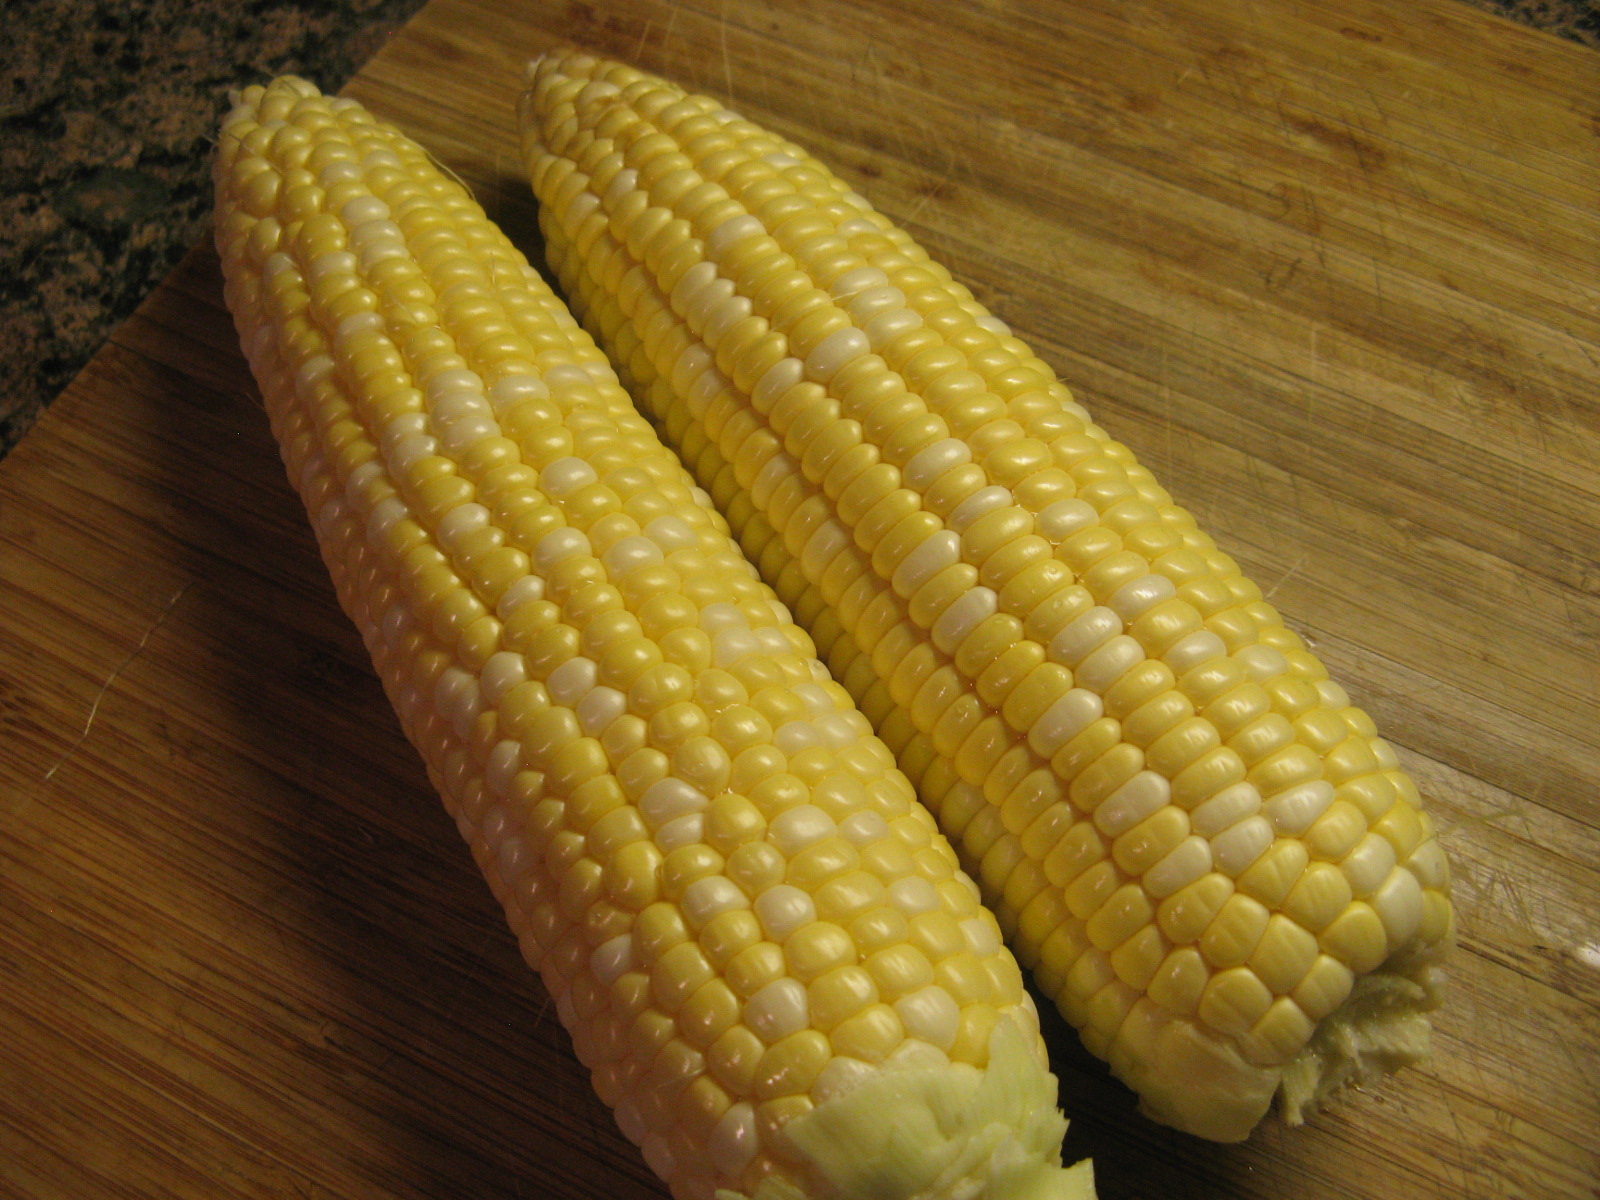
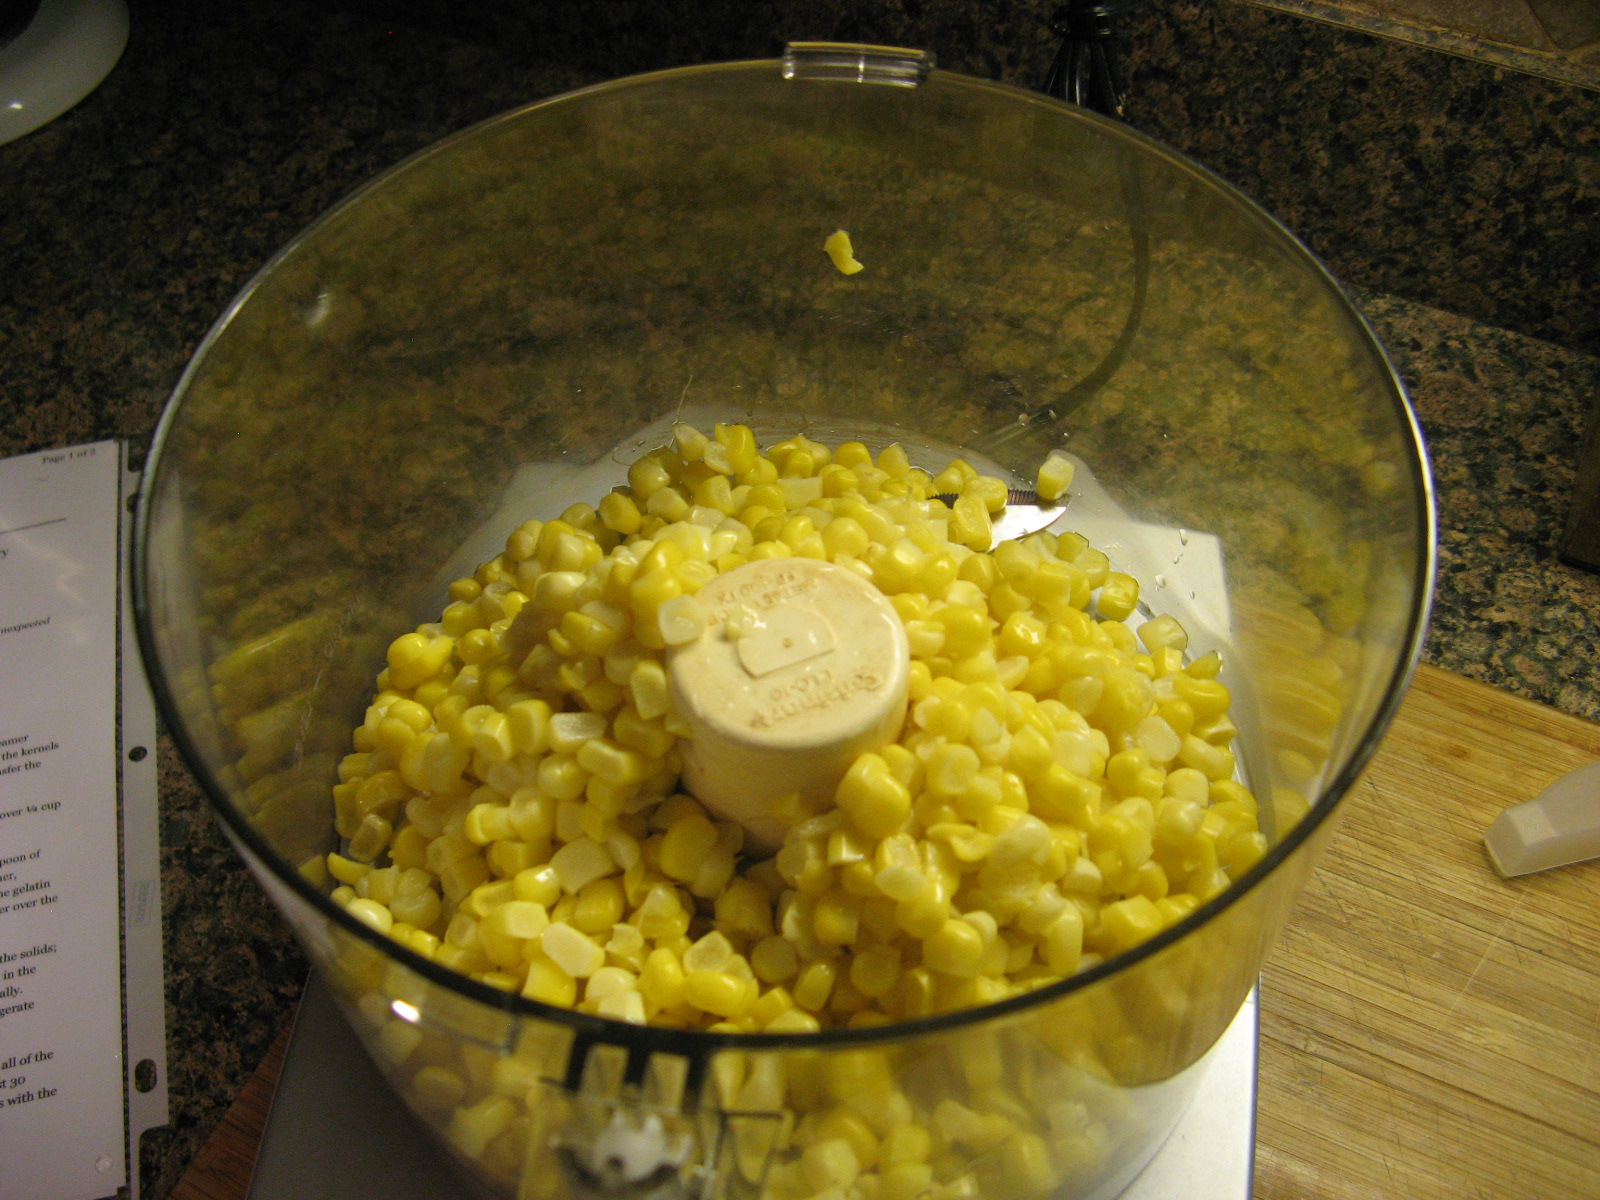
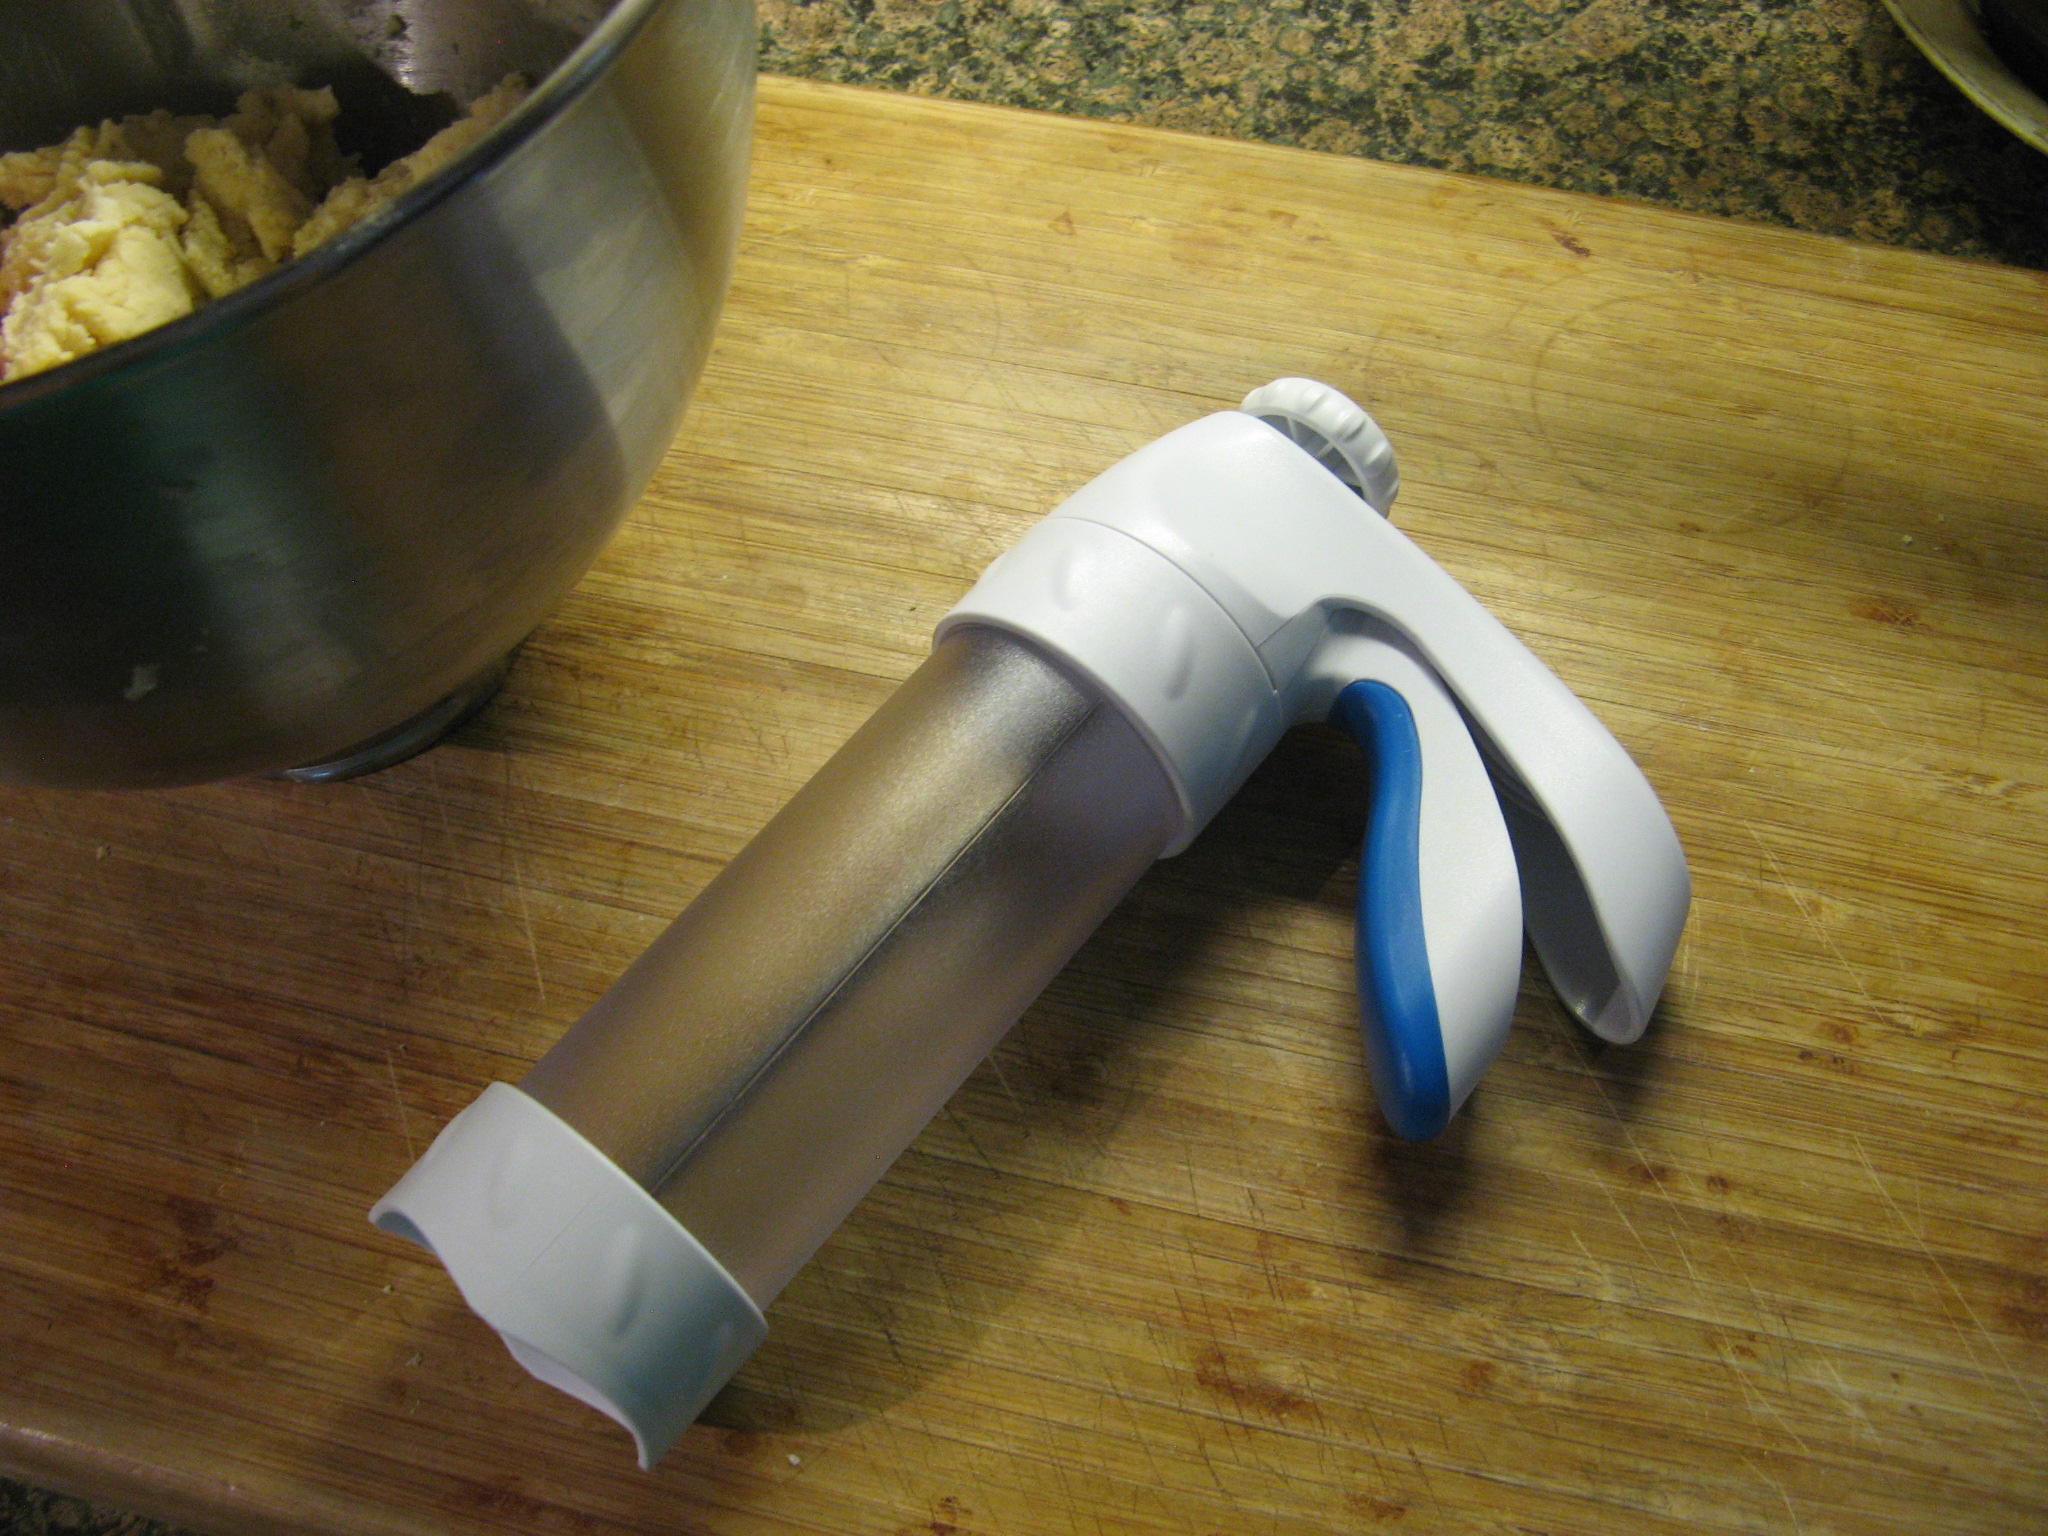
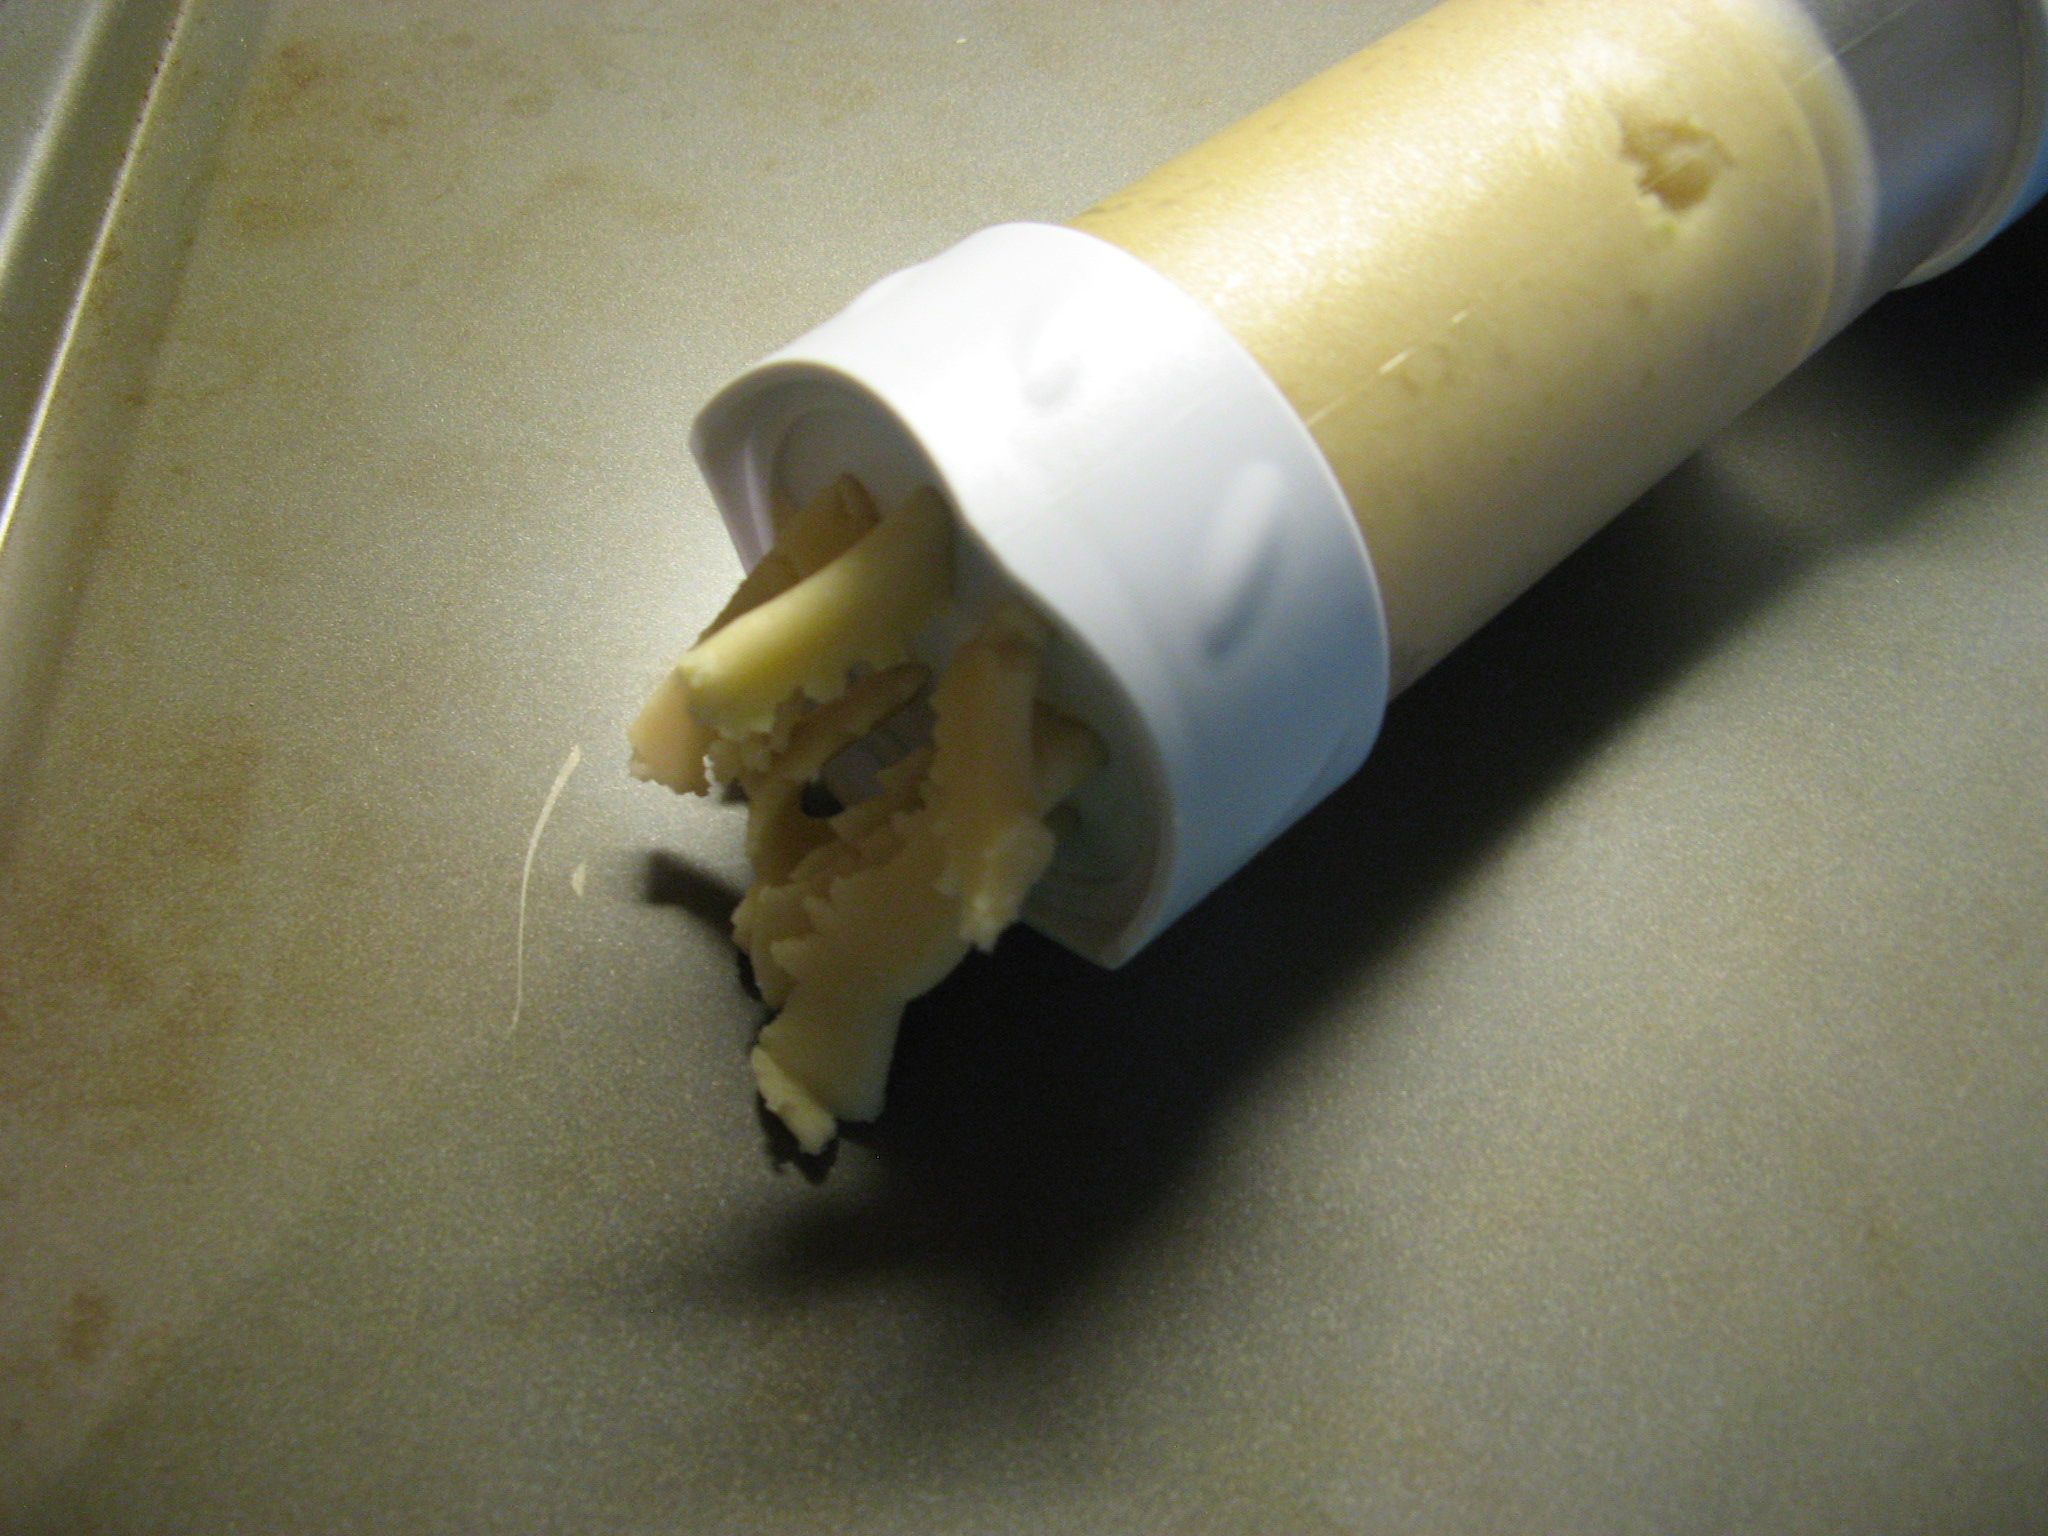
I began my shucking two ears of corn and then used a corn zipper to remove the kernels and boiled them for about 15 minutes until they were tender.

IMG_4830

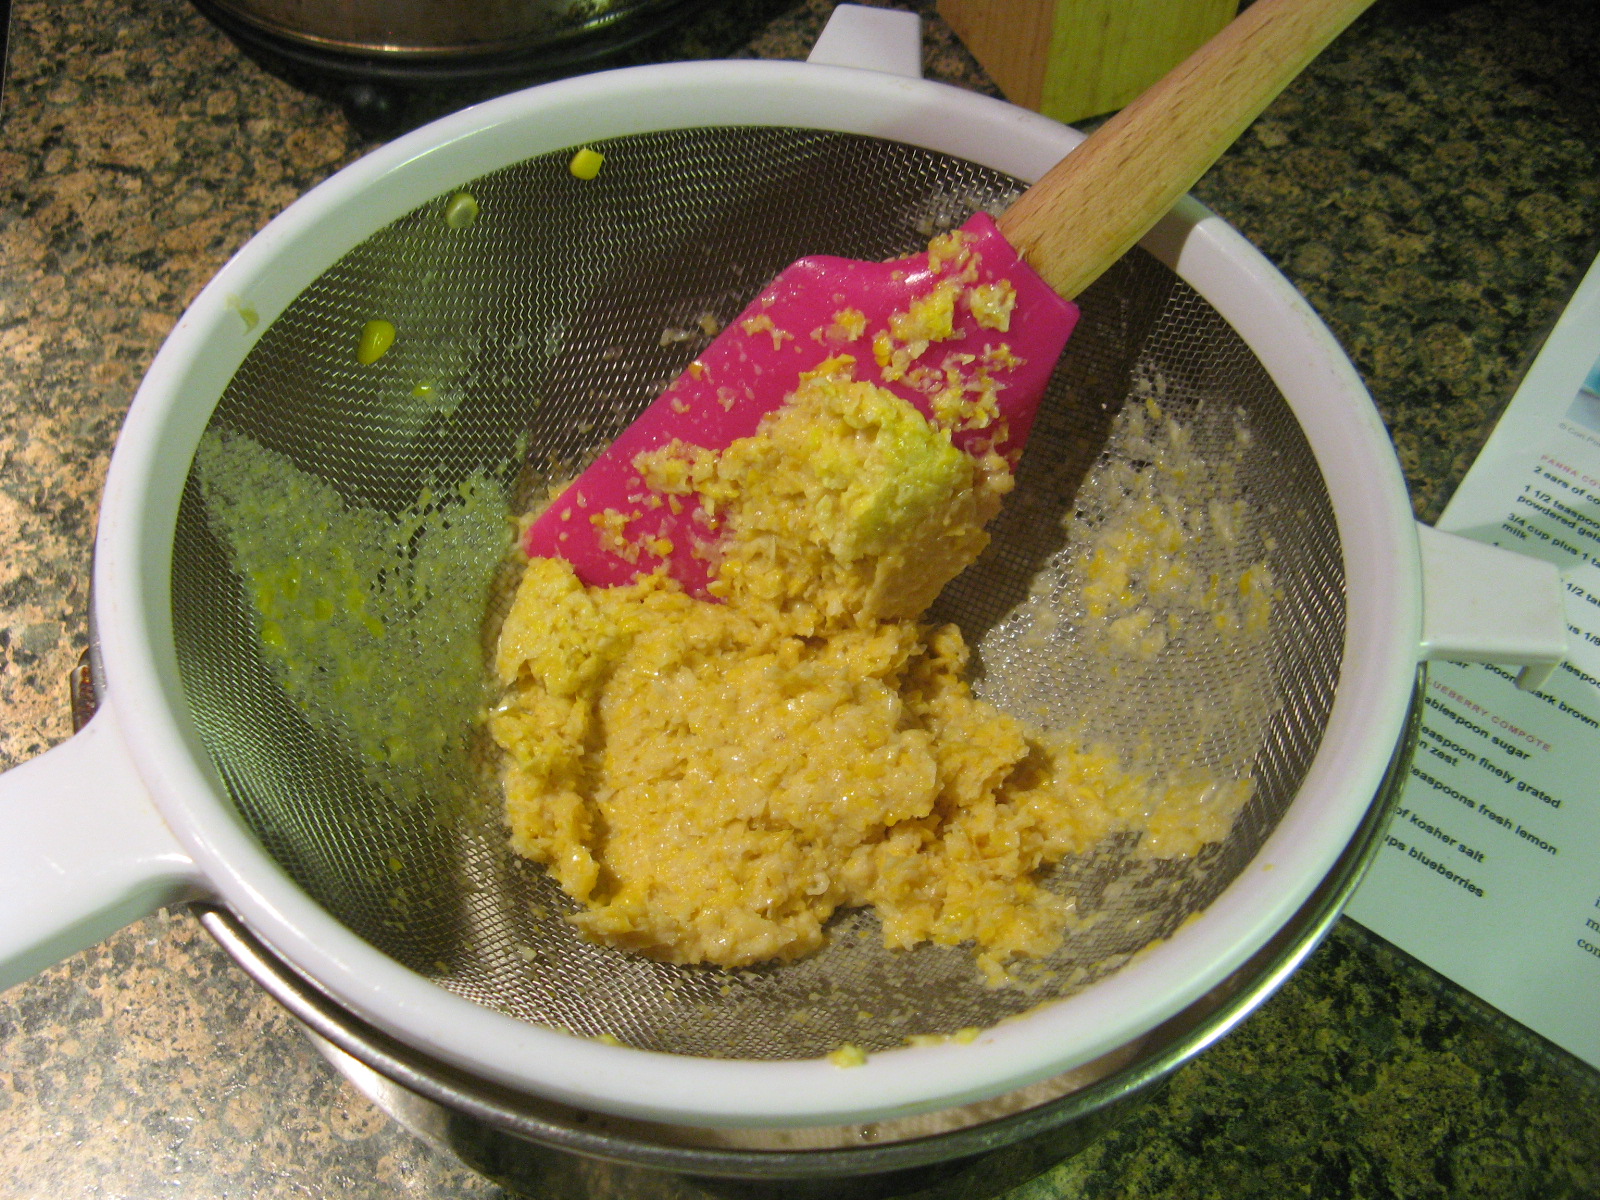
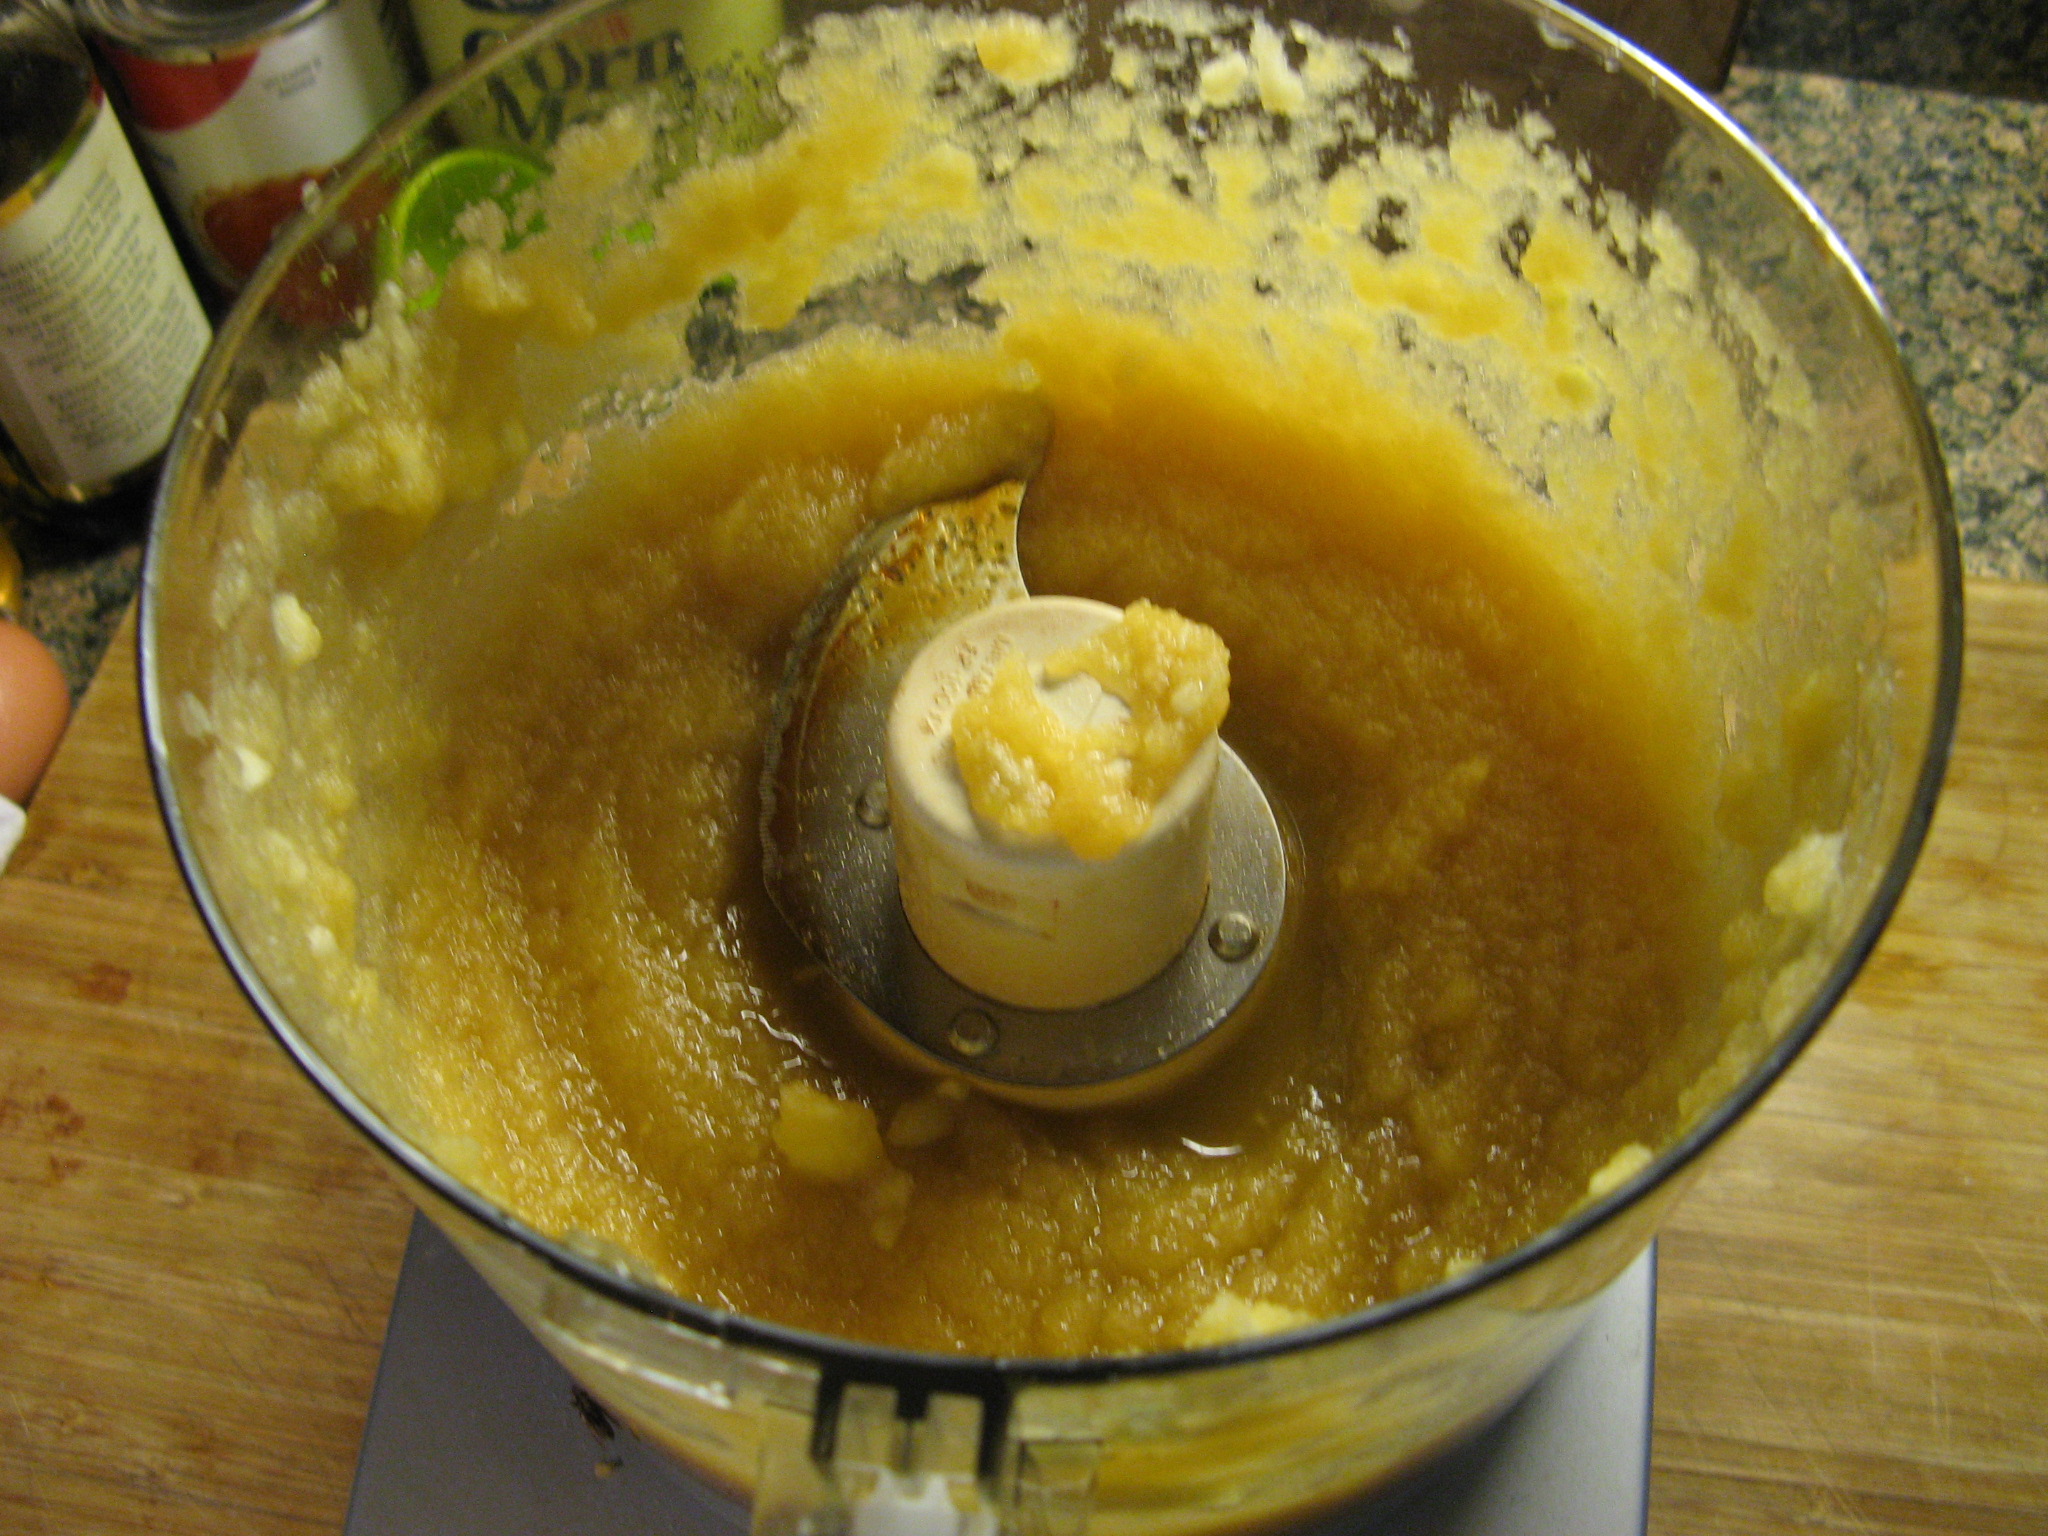
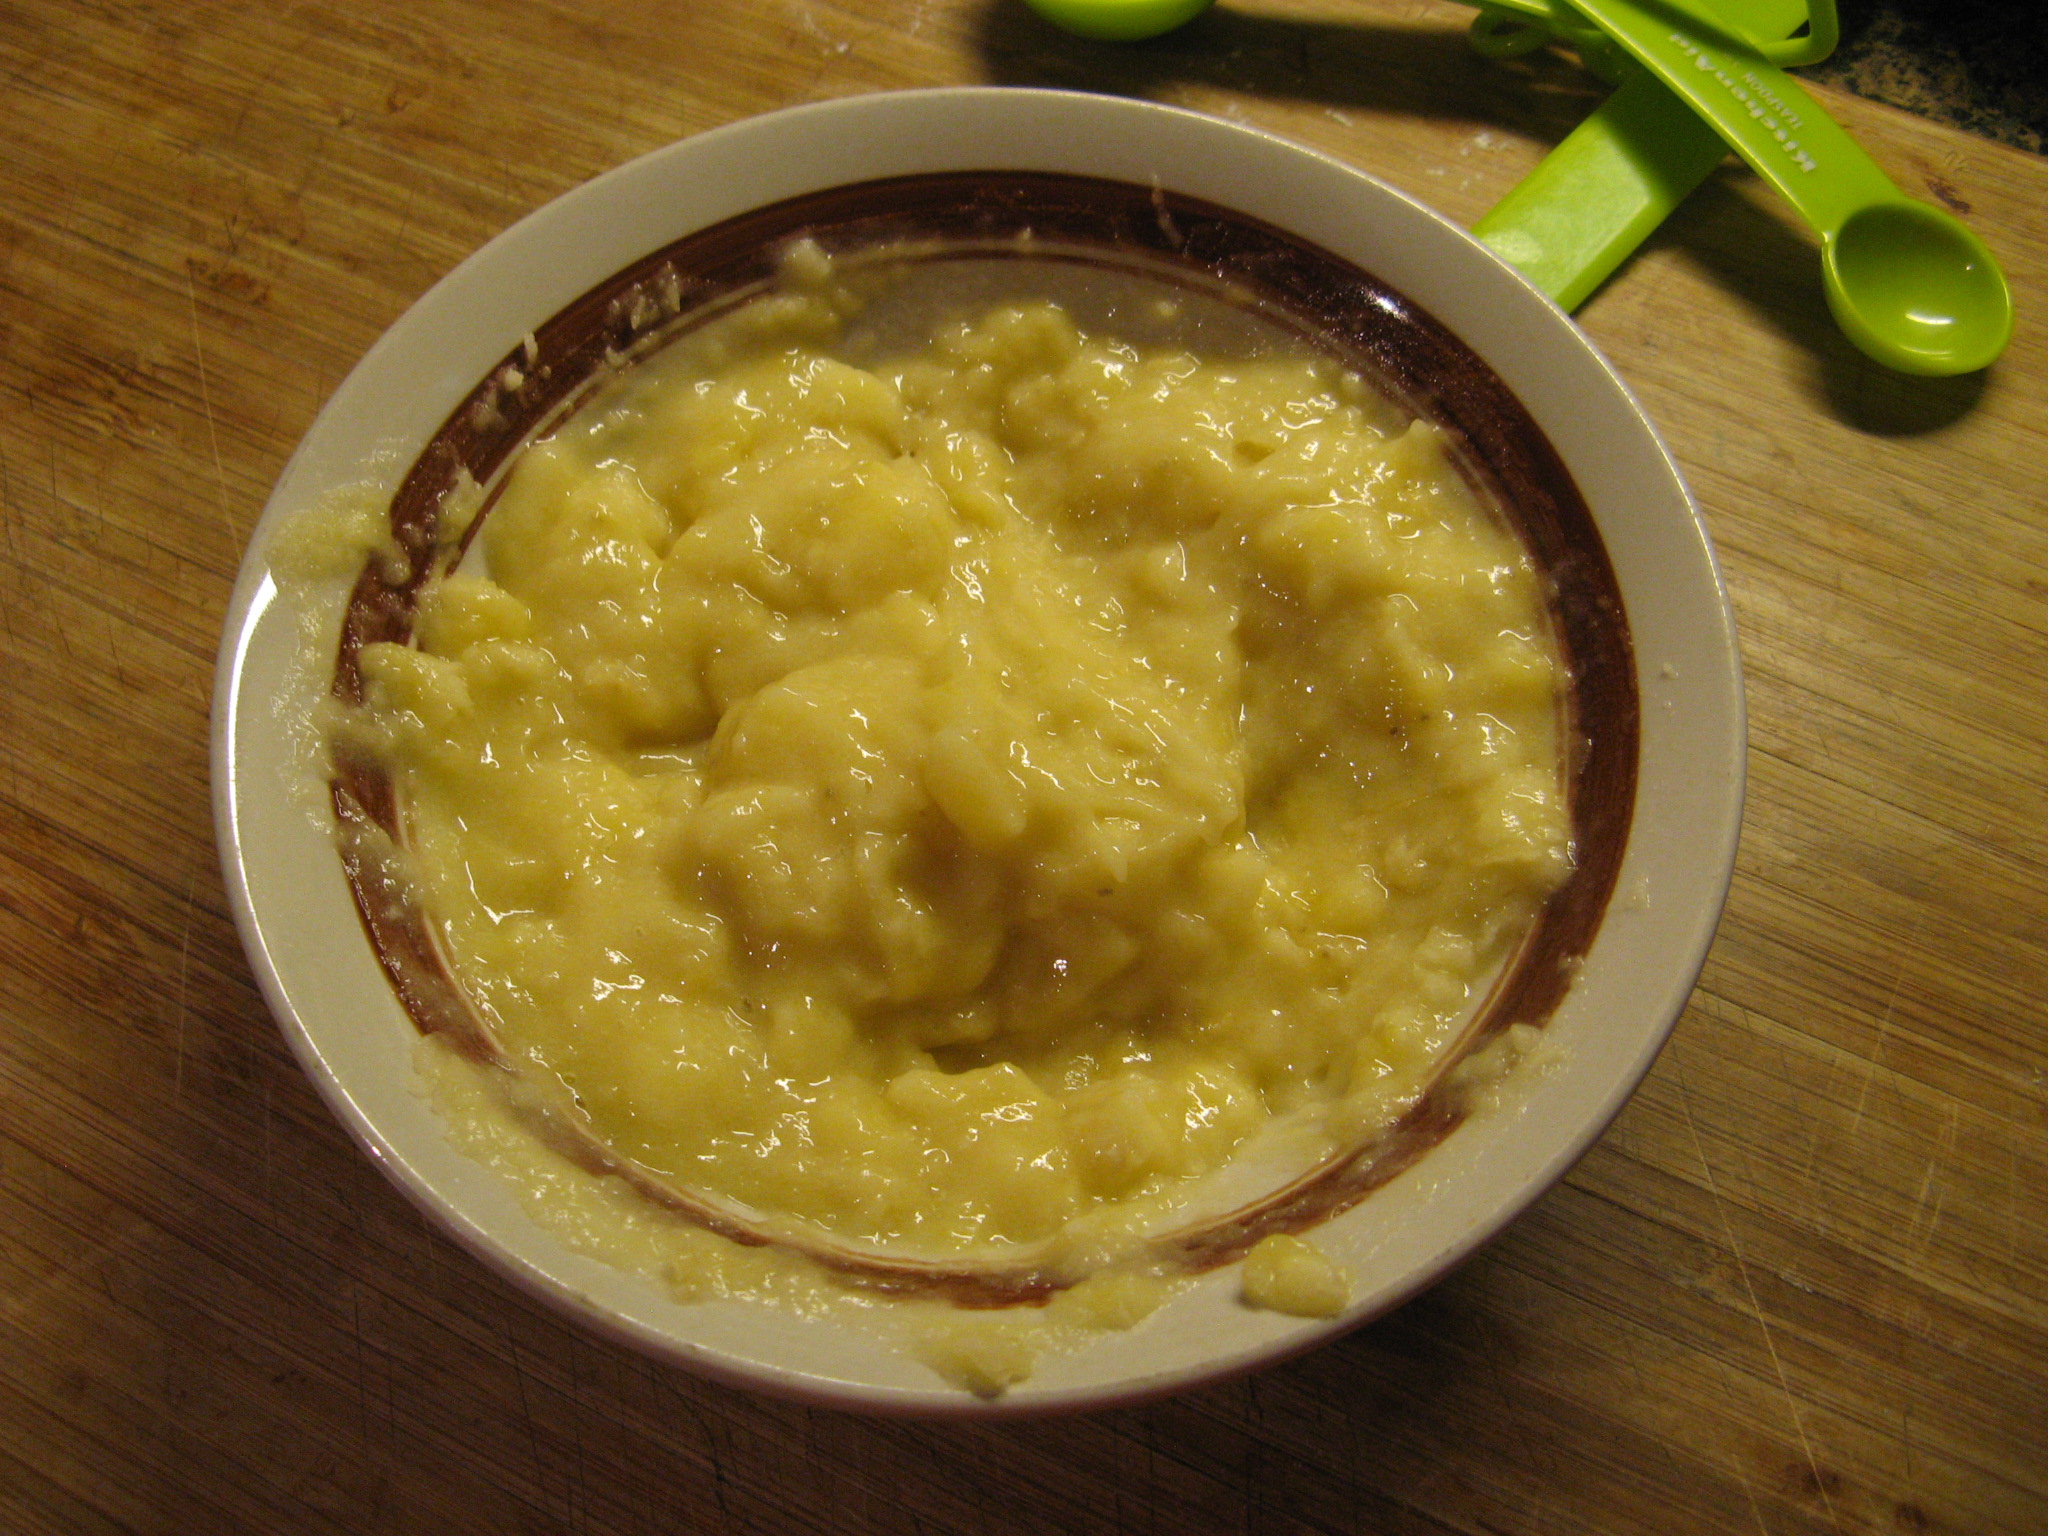
Following that I rinsed the kernels in cold water and then transferred them into the bowl of my food processor.

IMG_4834

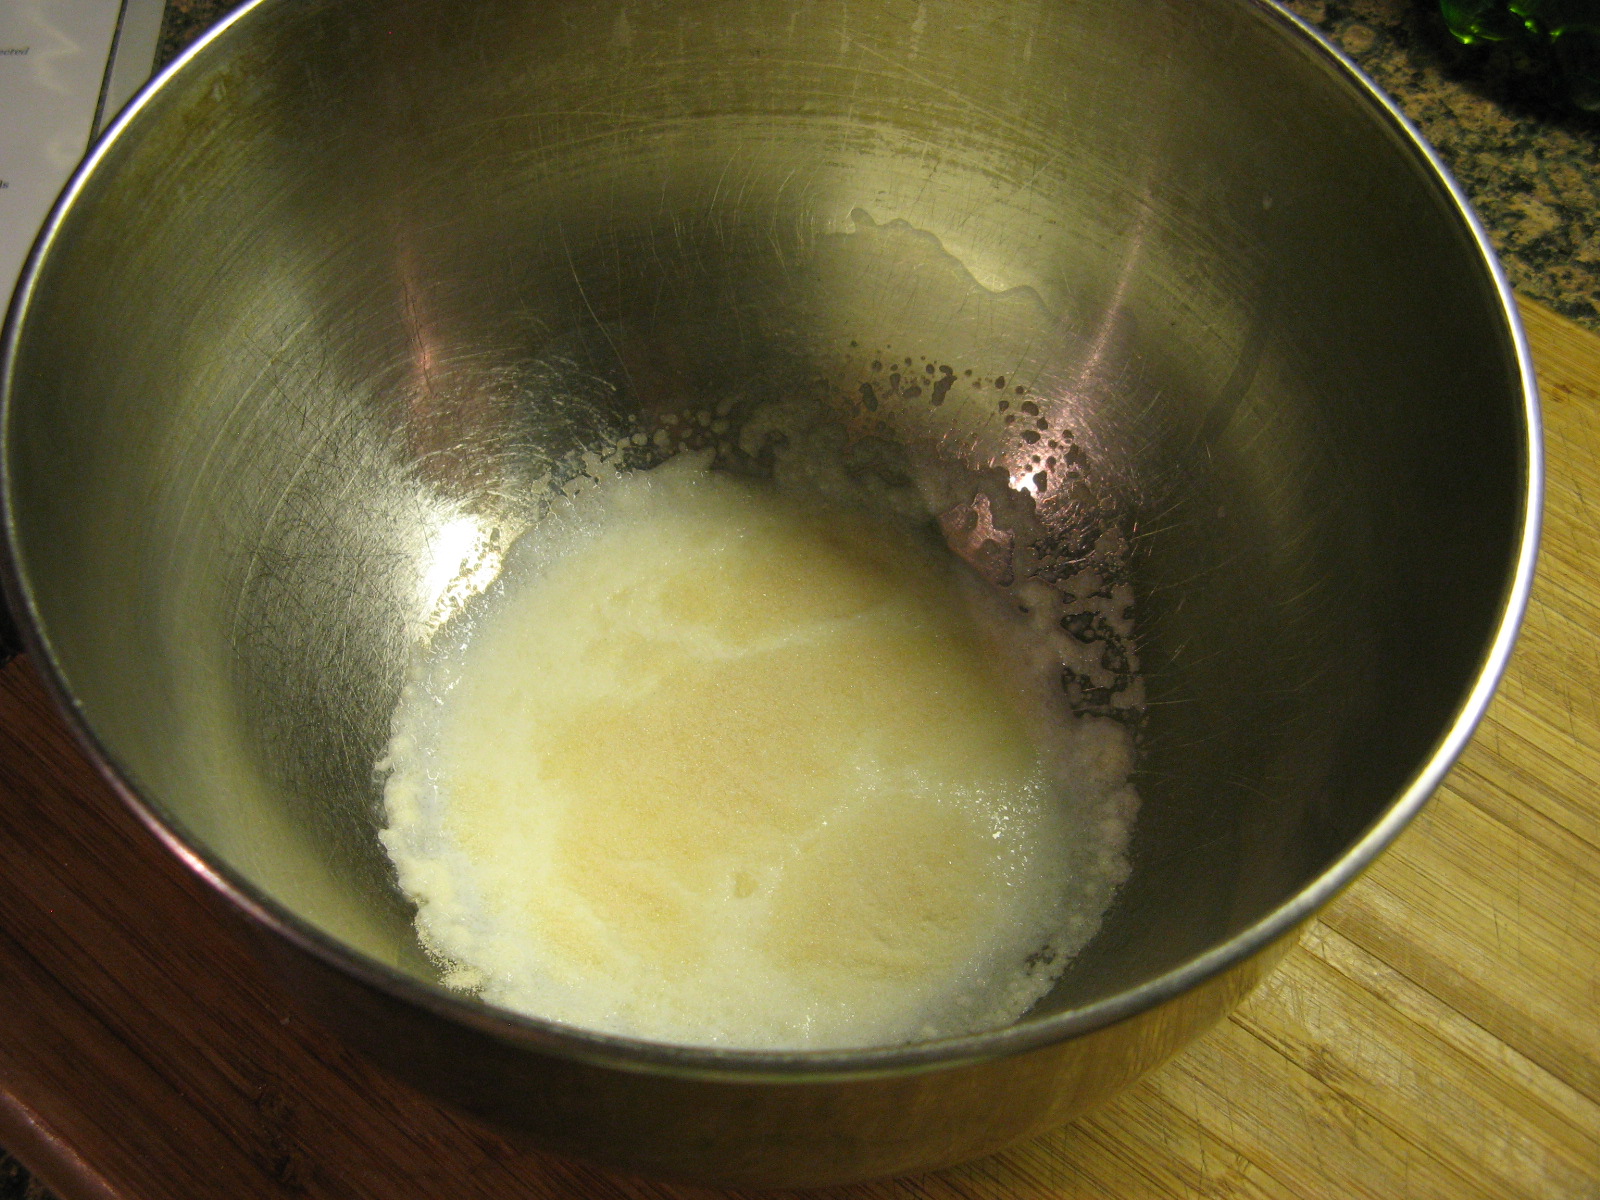
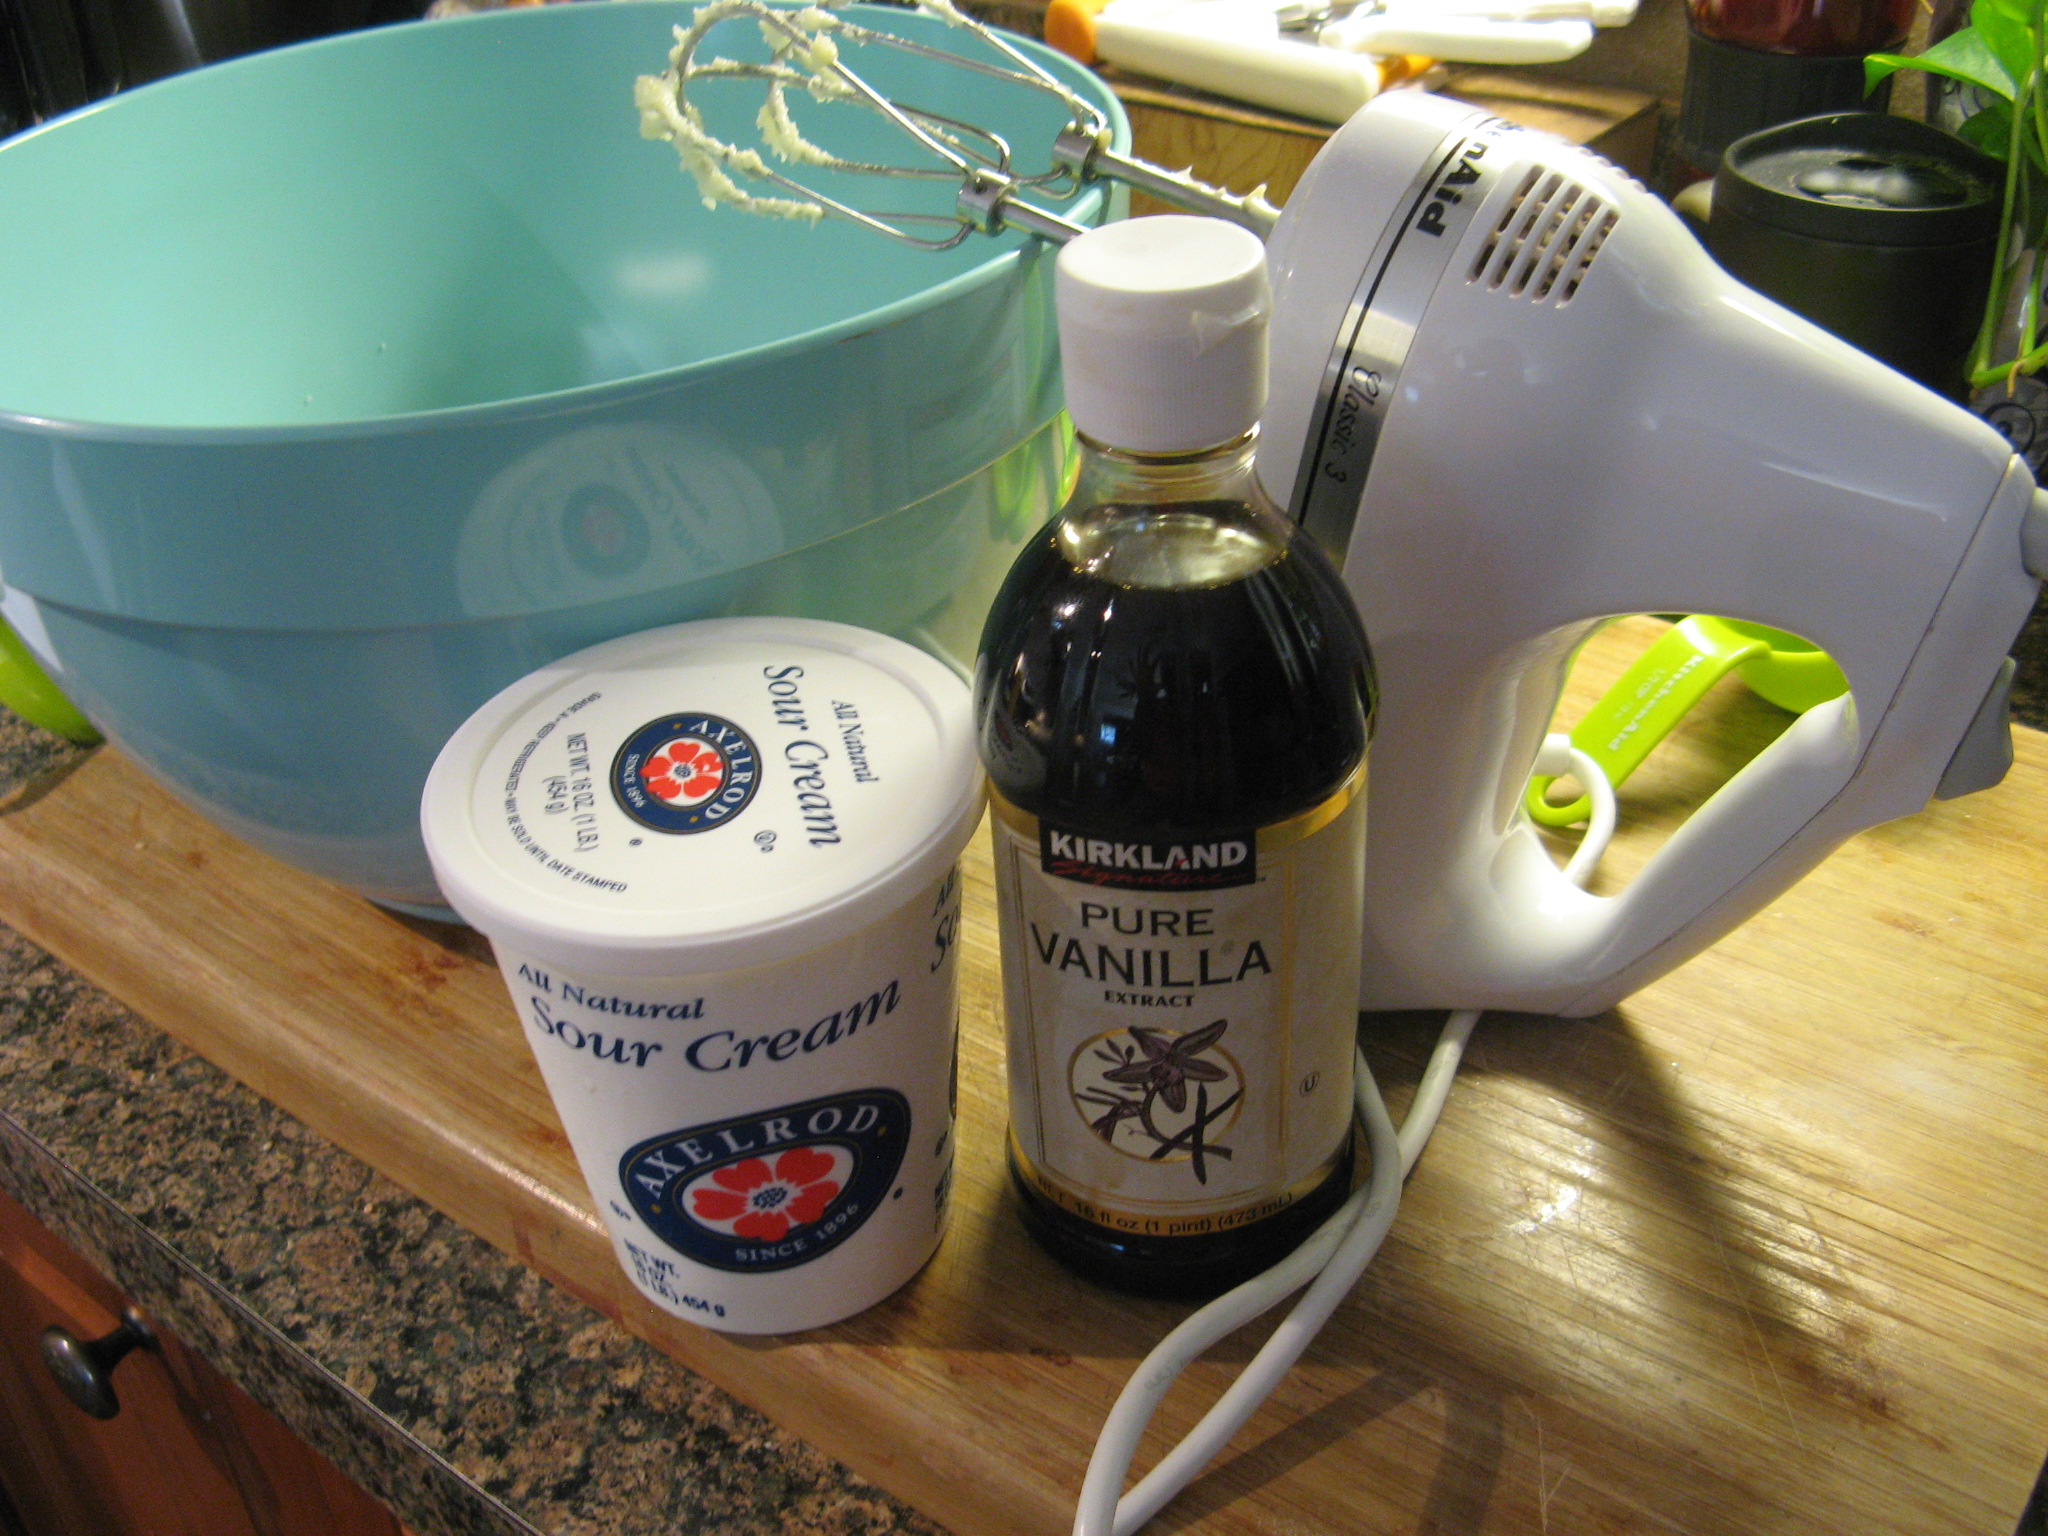
Meanwhile I sprinkled 1 1/2 teaspoons of unflavored gelatin powder over 1/4 cup of whole milk, which I let stand for 5 minutes.

IMG_4831

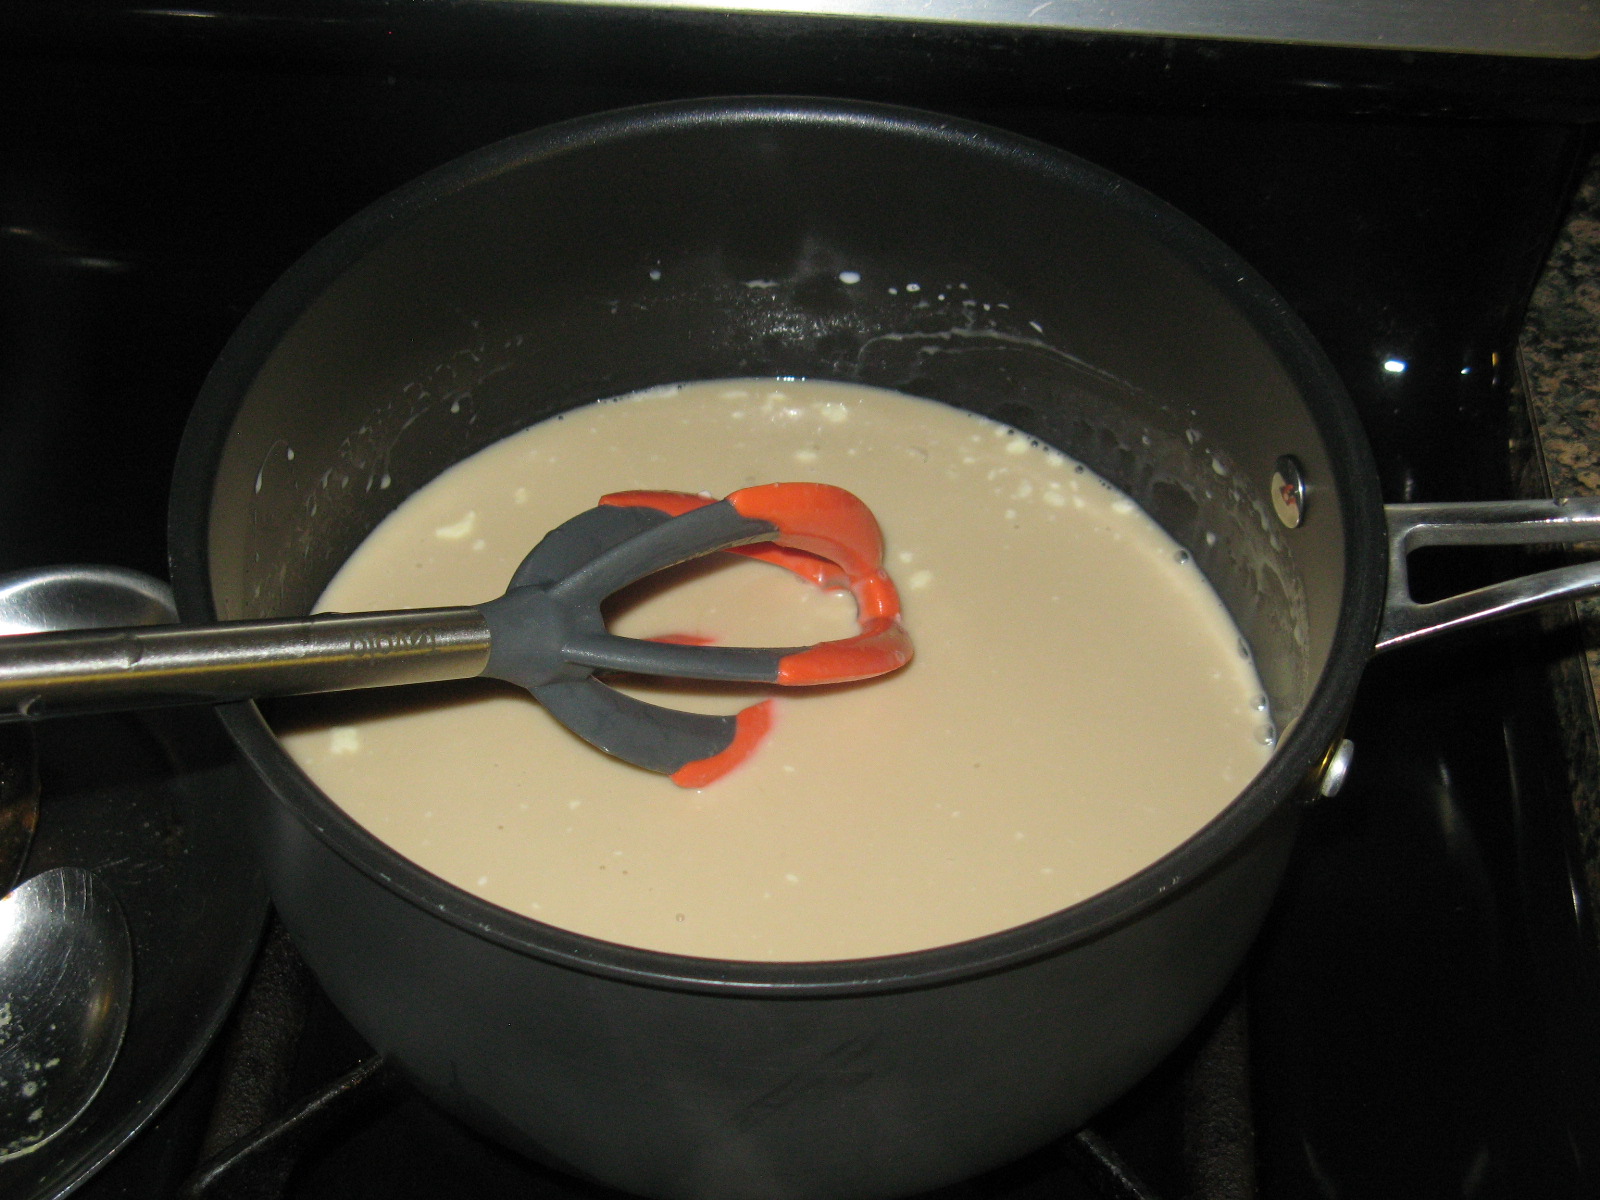
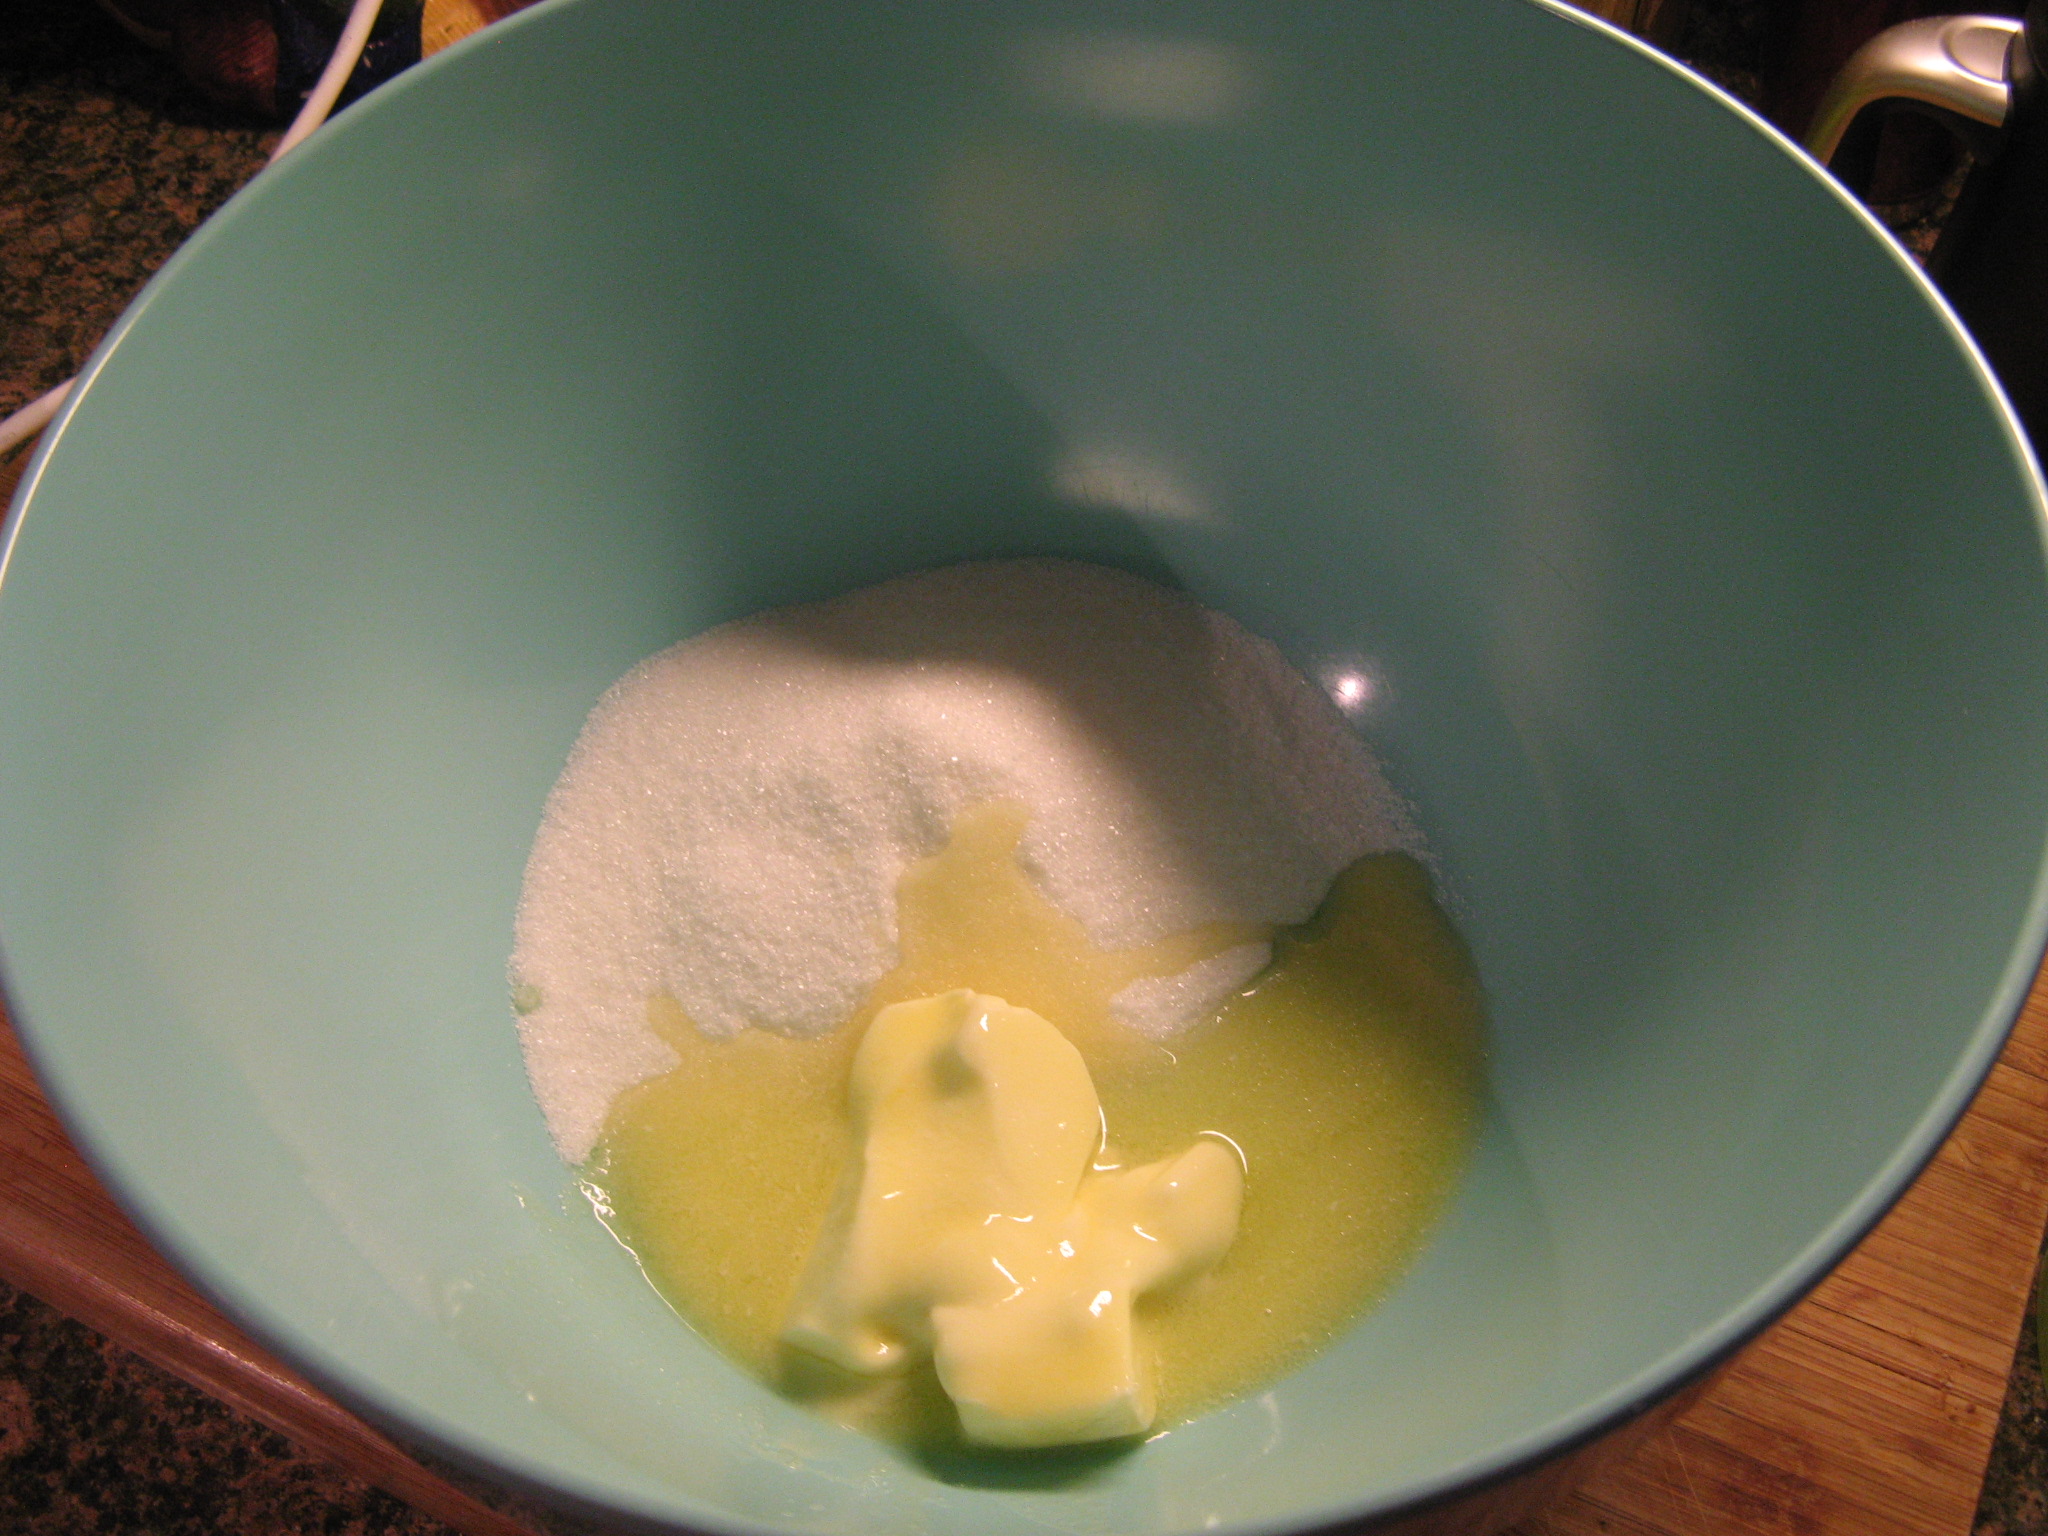
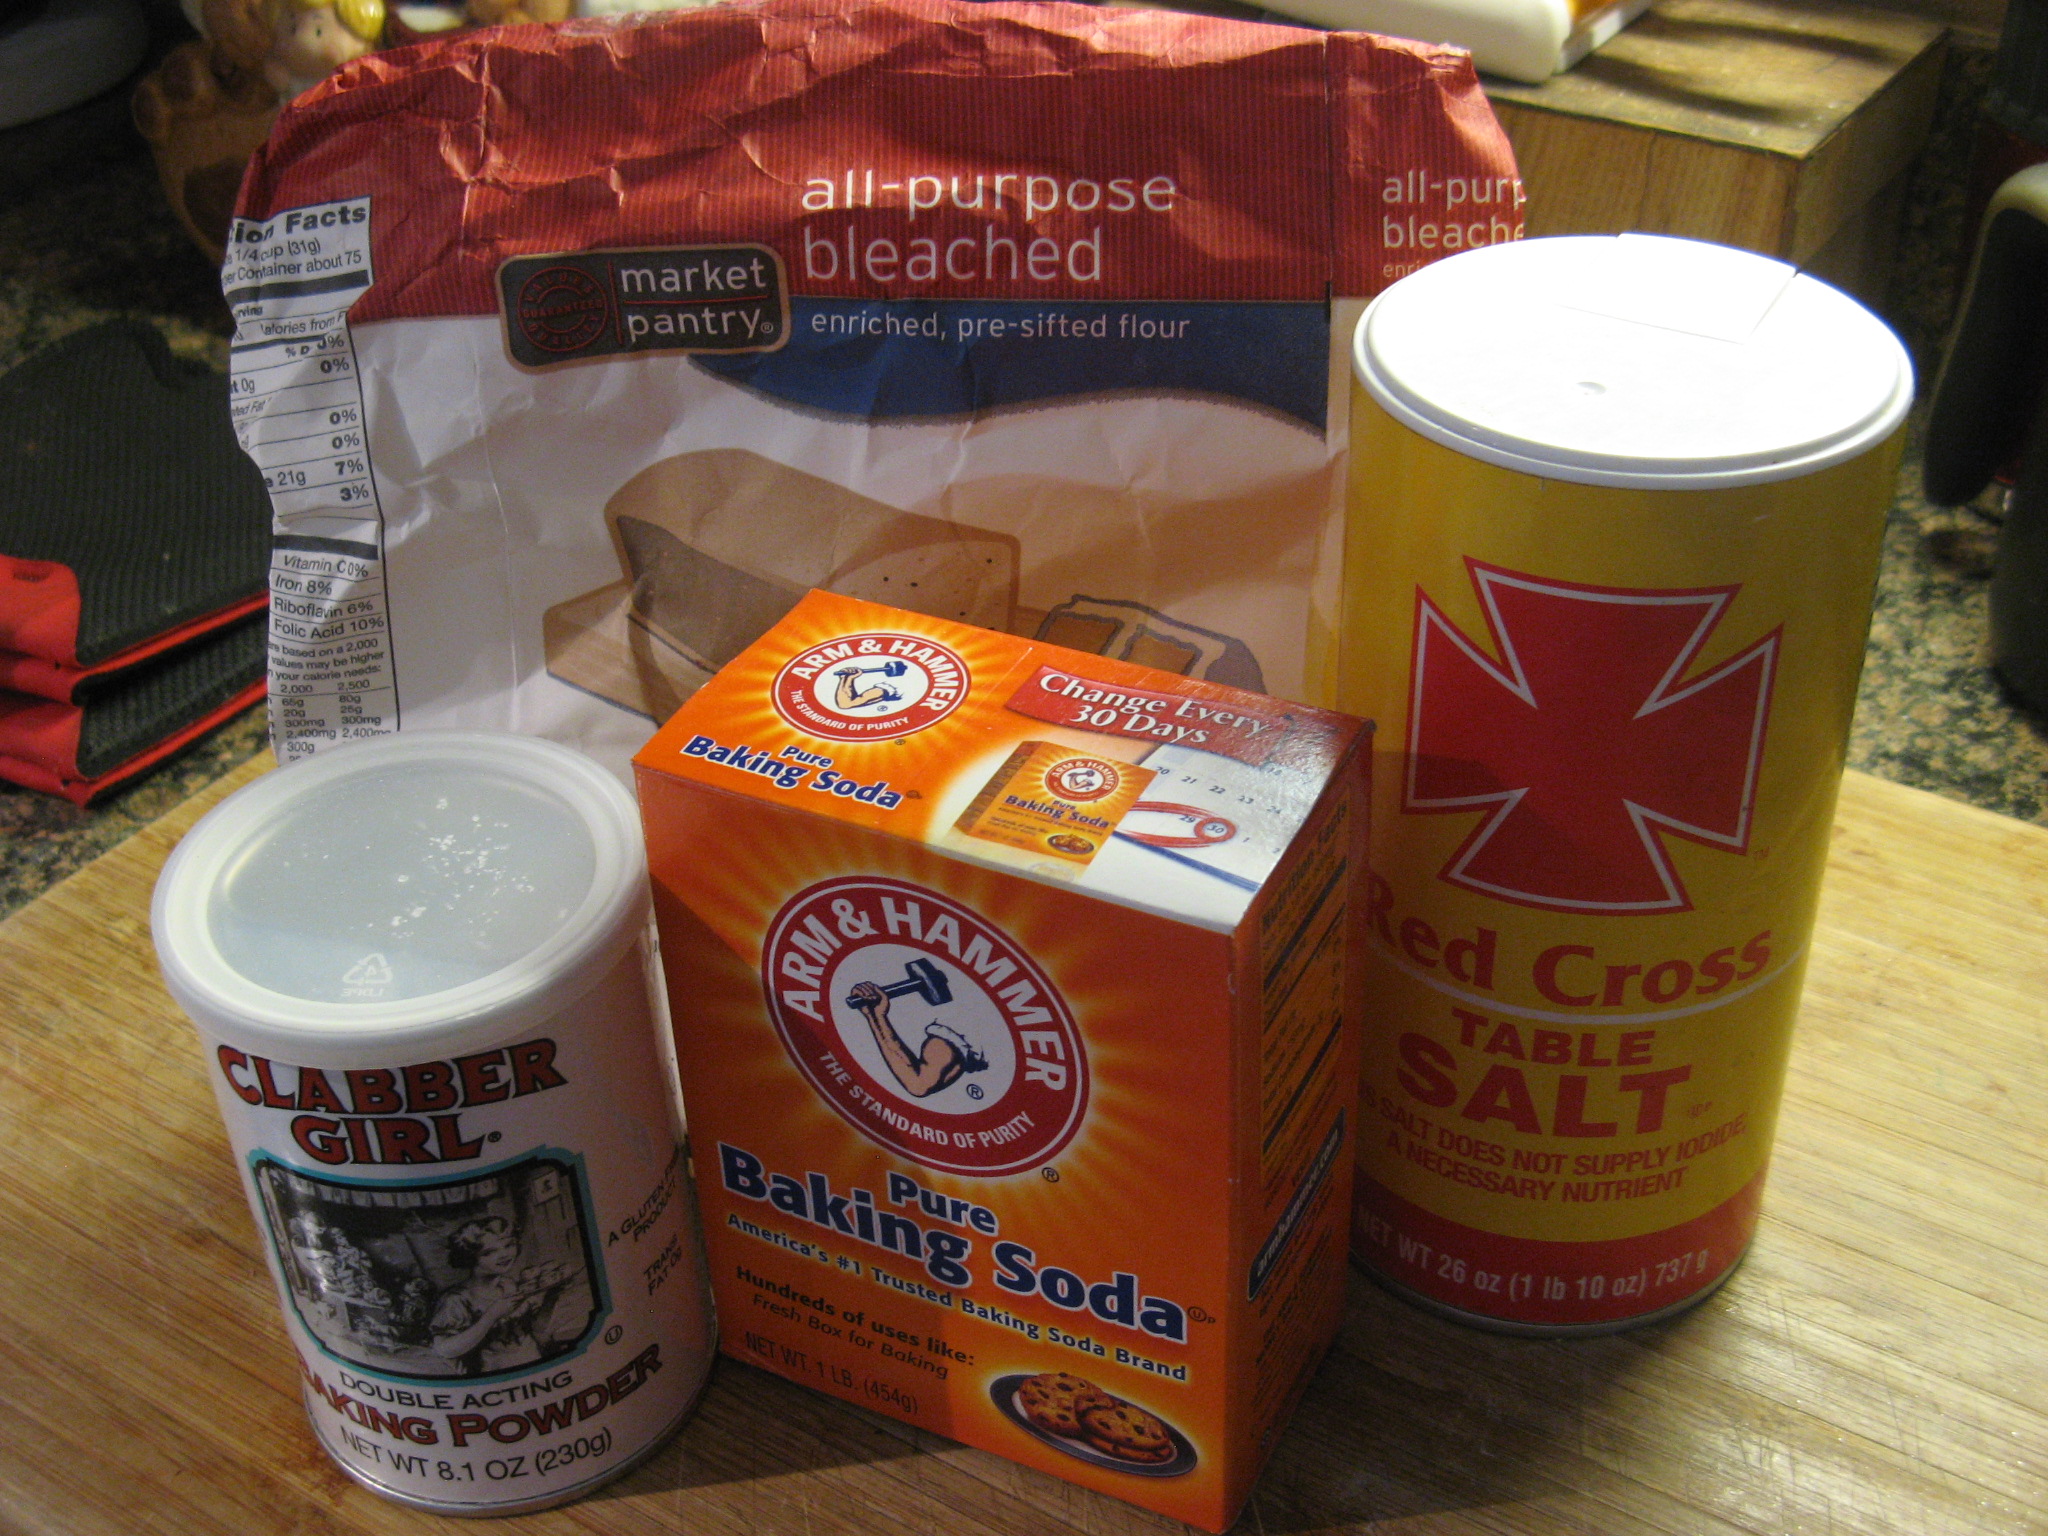
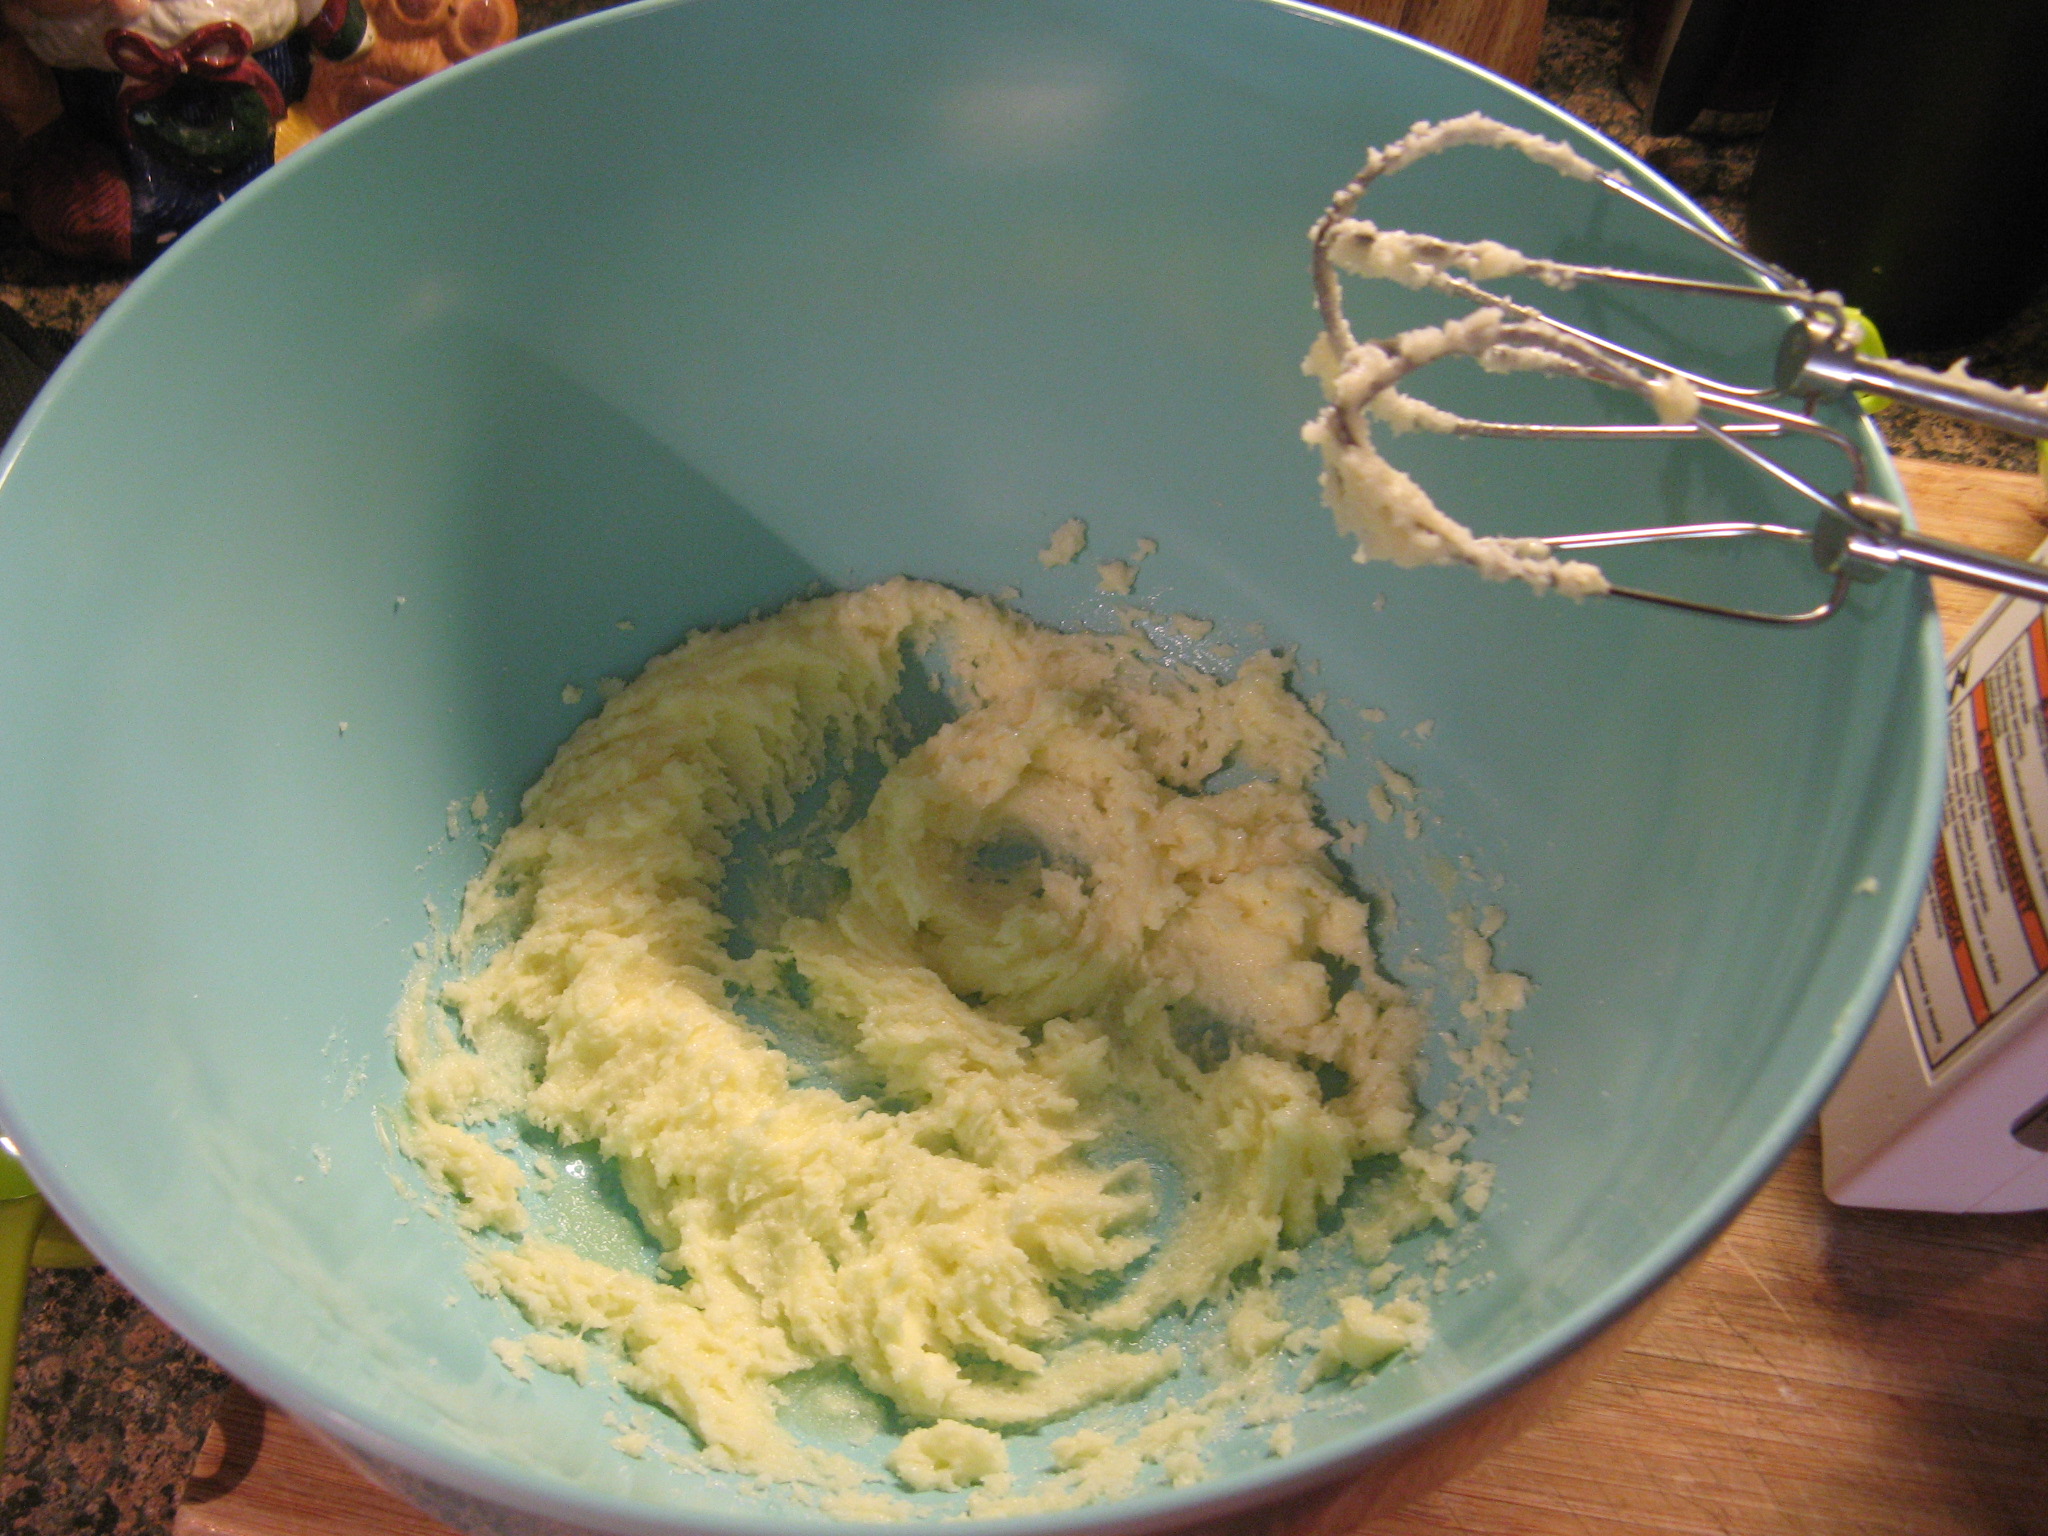
In a small saucepan I combined whole milk, heavy cream, salt, granulated sugar, and dark brown sugar and brought it to a simmer over medium heat whisking it to dissolve the sugars.

IMG_4833

I then poured the hot milk mixture into the bowl with the gelatin mixture and stirred it until the gelatin dissolved.

IMG_4835

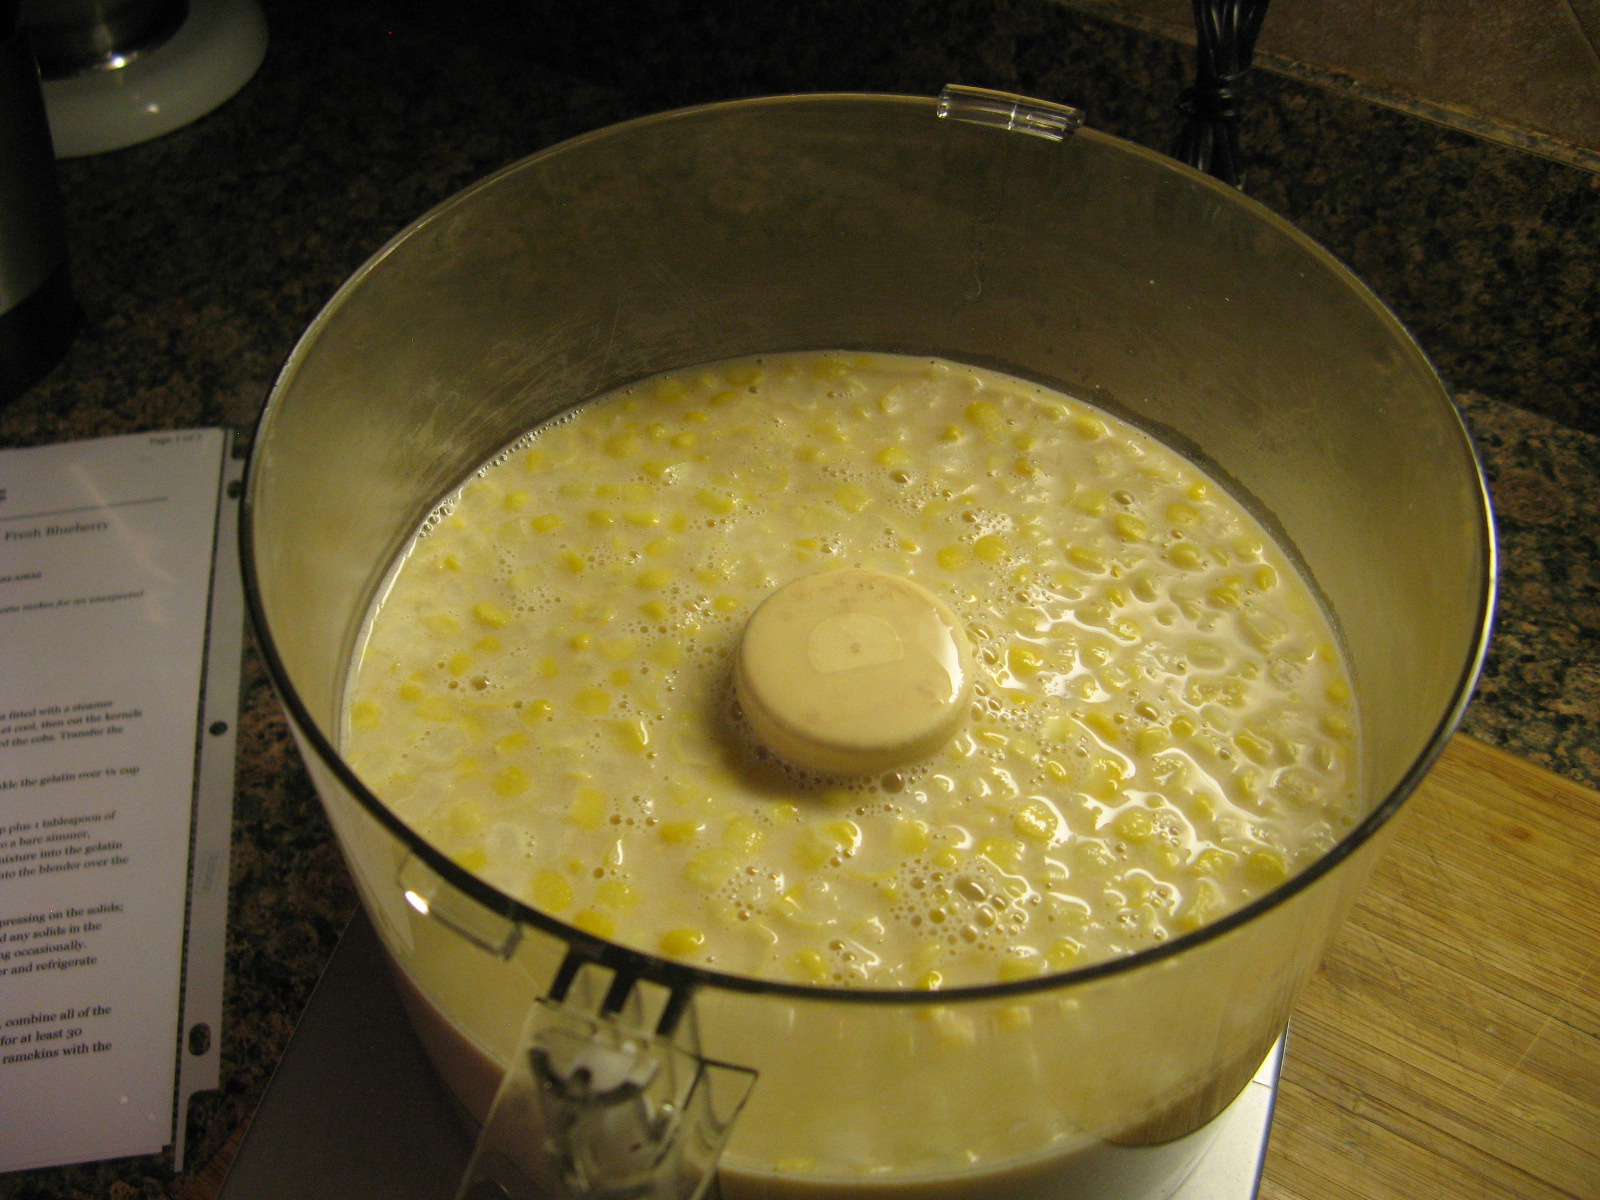
I then poured the mixture over the corn in the food processor.

IMG_4837

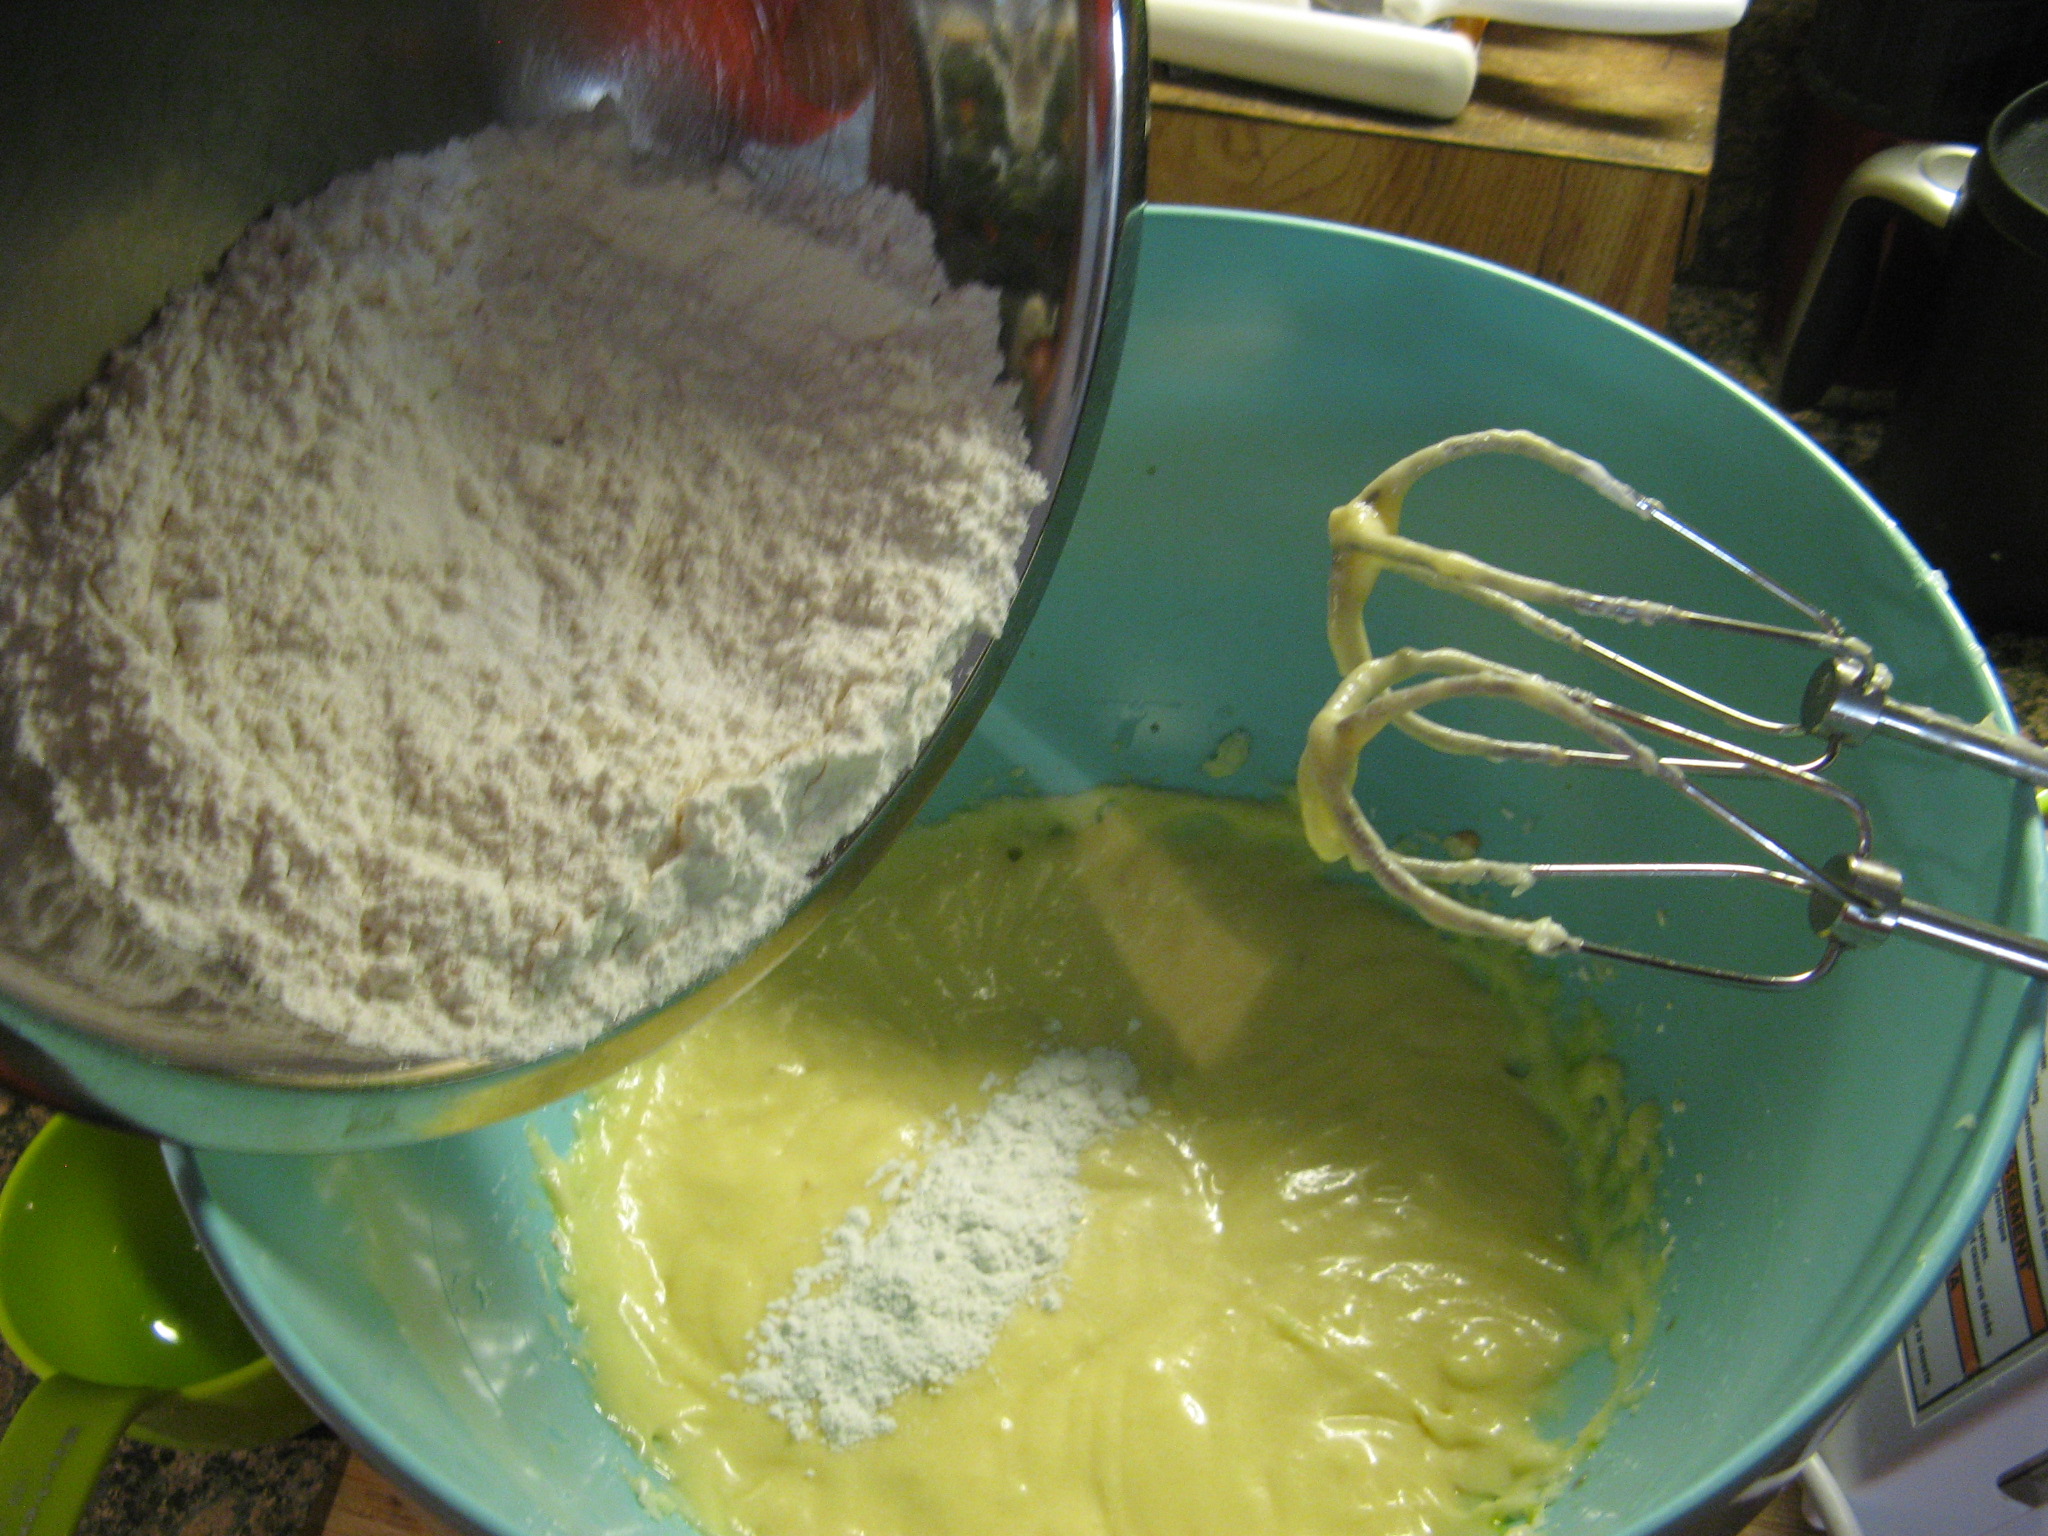
I pureed the corn and milk mixture until it was smooth and then strained it through a sieve pressing on the solids to get all of the liquid out and then discarded the solids.

IMG_4839

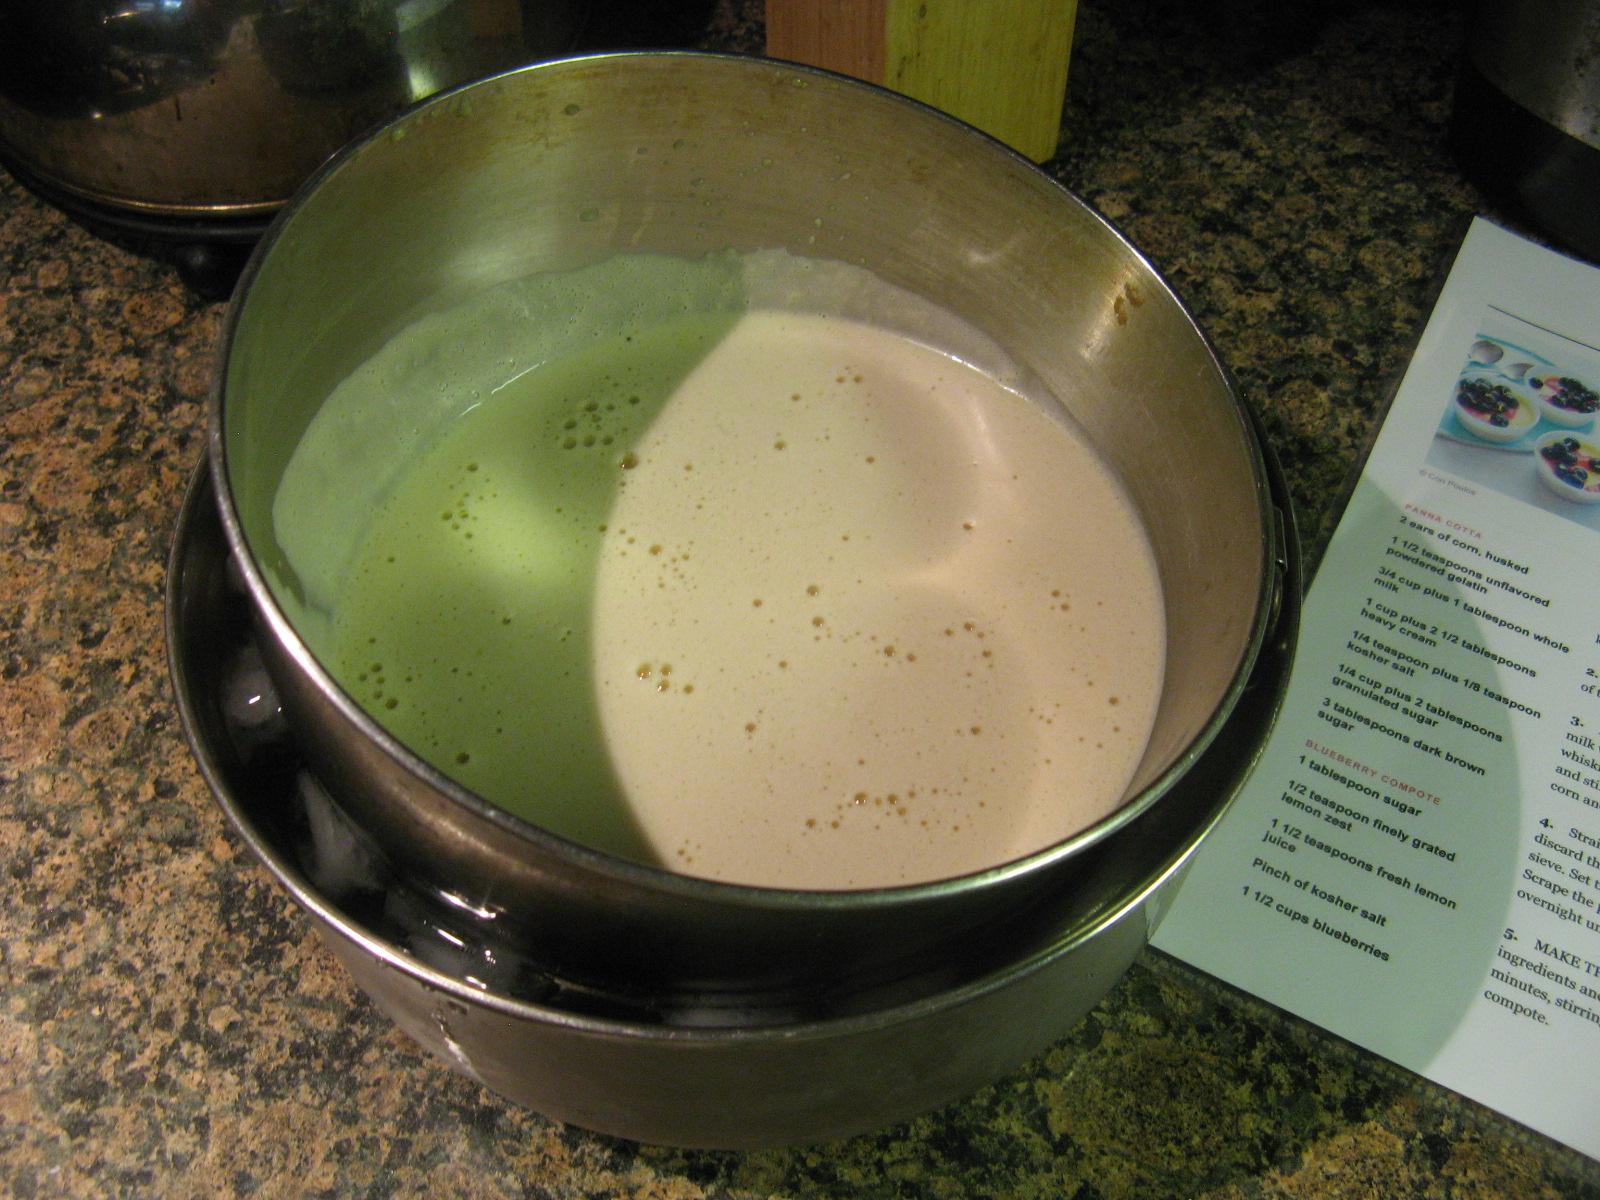
I strained the mixture once again through the sieve and then placed the bowl in an ice bath until it was cool, stirring it occasionally.

IMG_4841

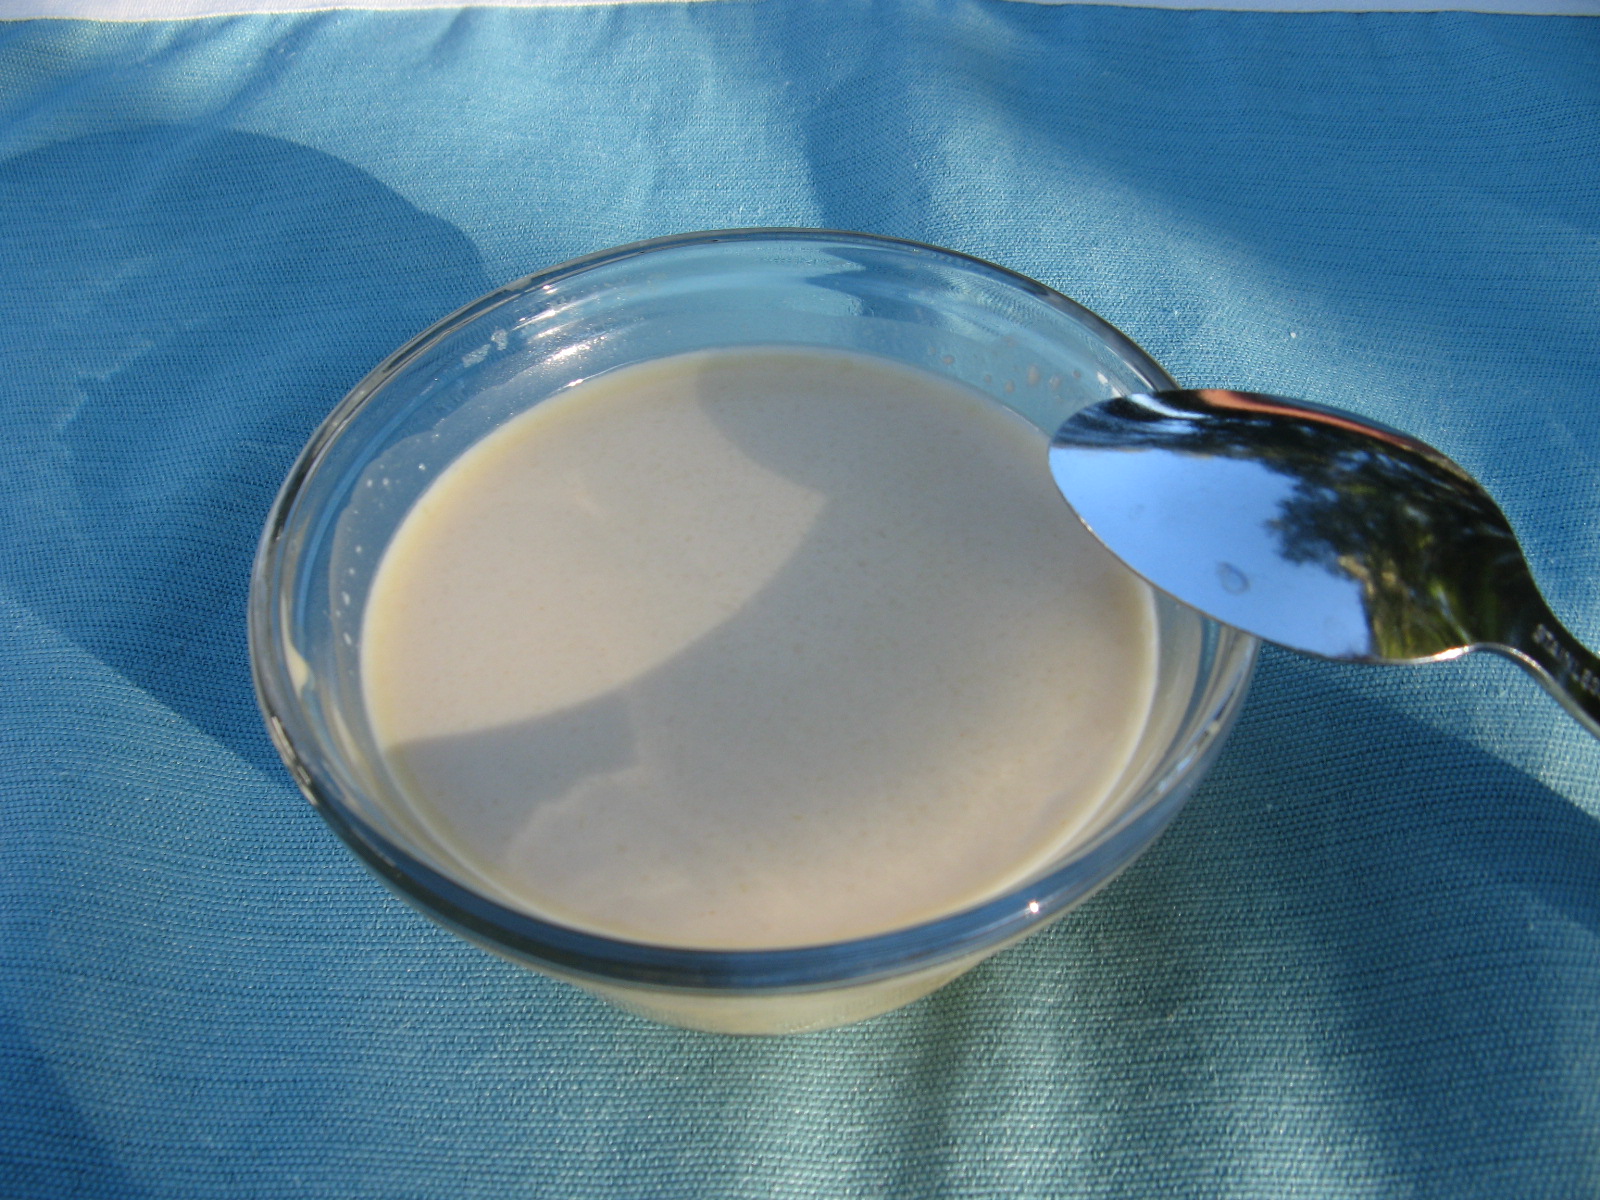
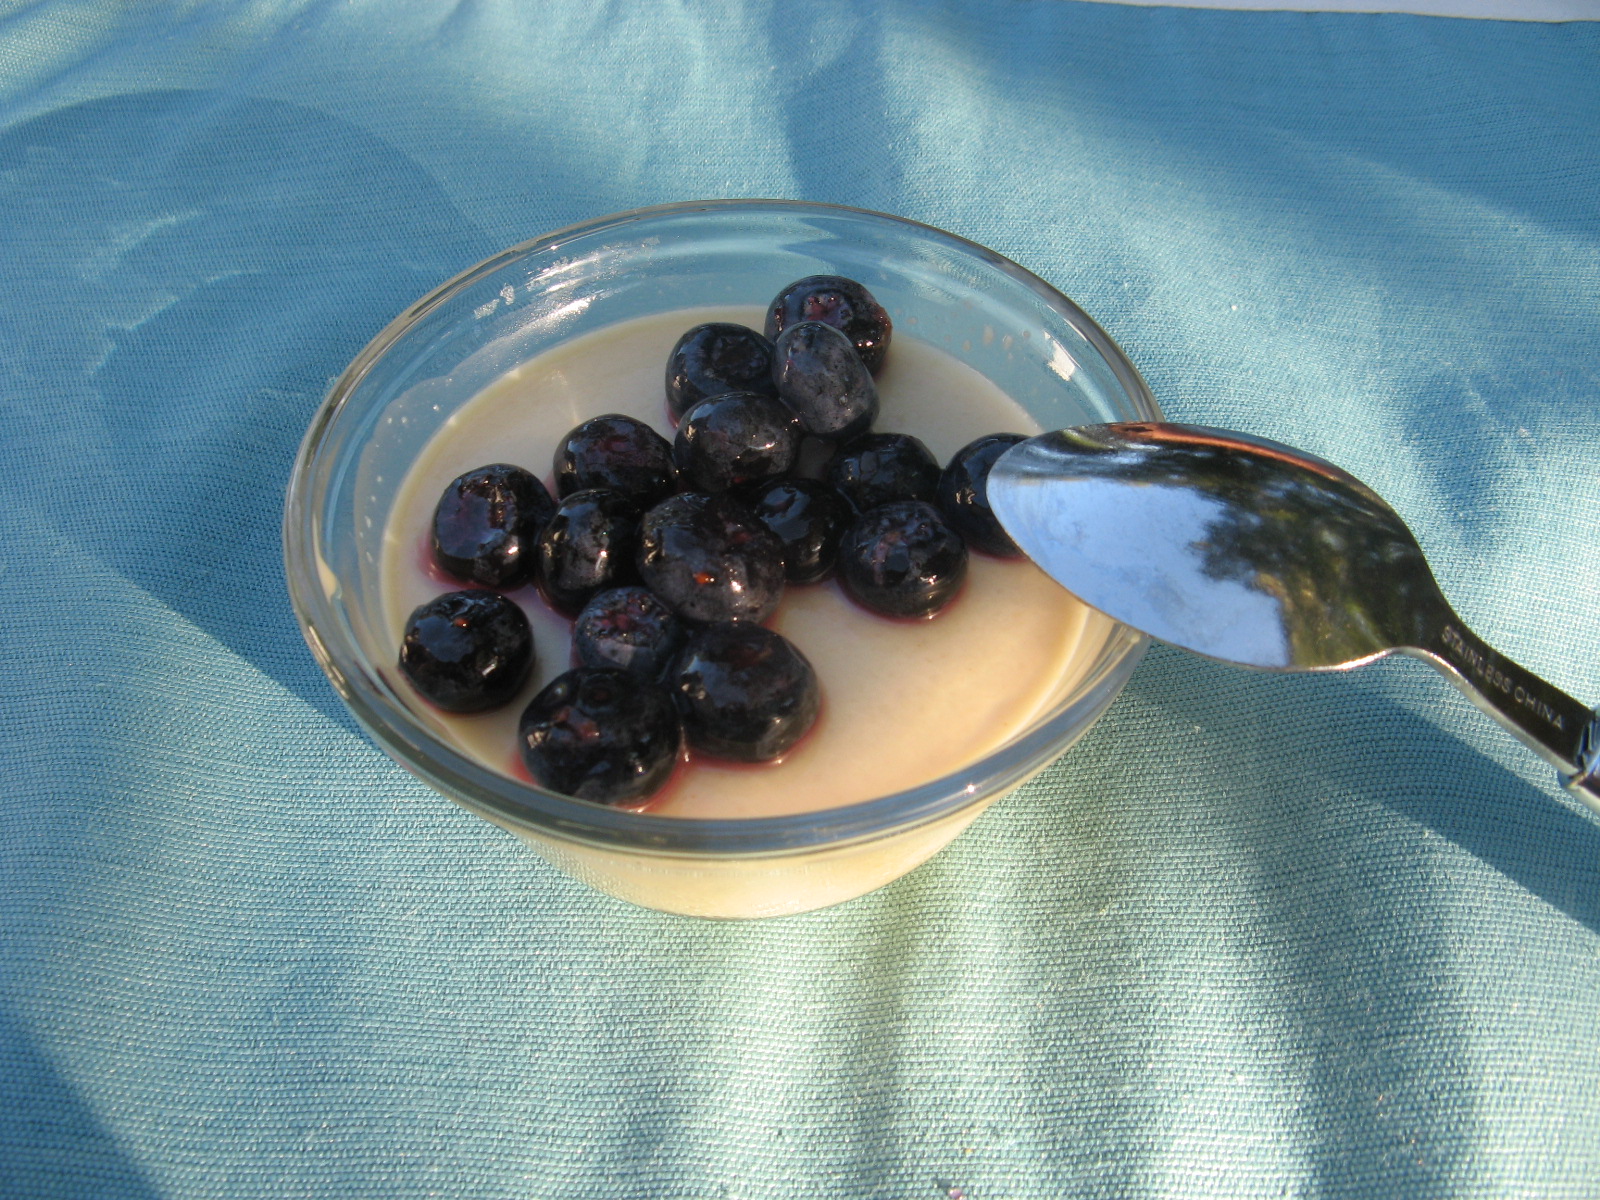
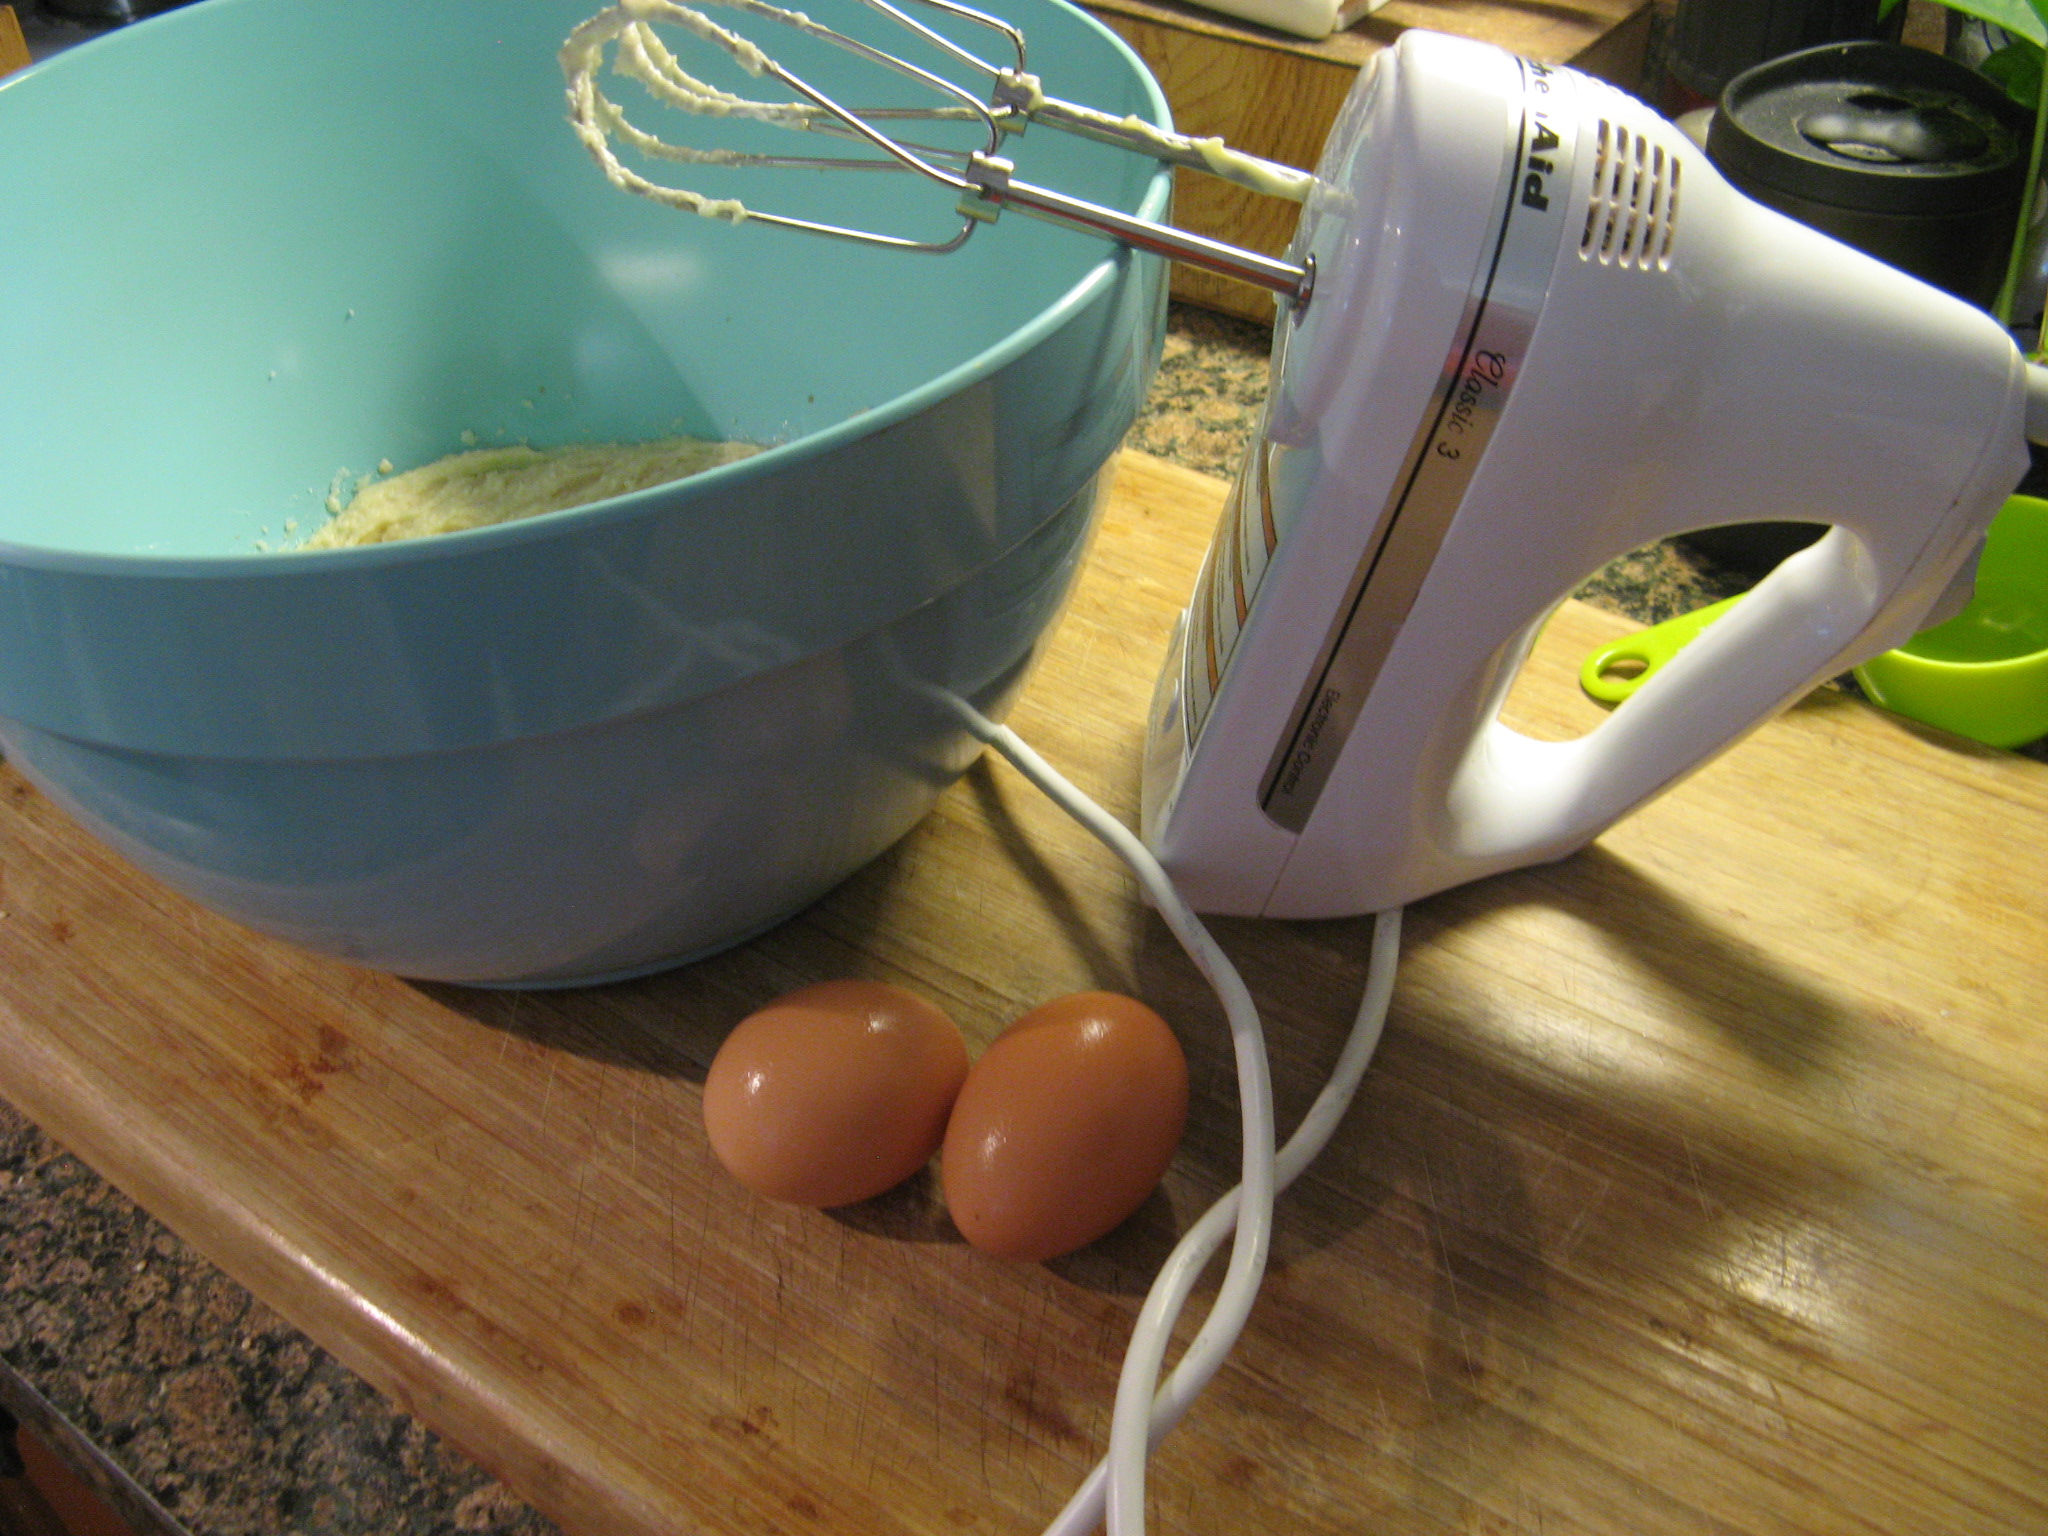
And finally I divided the mixture into four 8-ounce ramekins, covered them and placed them in the refrigerator overnight so they could set. In all honesty, I had my doubts that I made the panna cotta correctly because it was so watery when I poured it into the ramekins. I checked one of them an hour or so after refrigerating it to make sure it was solidifying and I am happy to say I had made them correctly!

IMG_4843

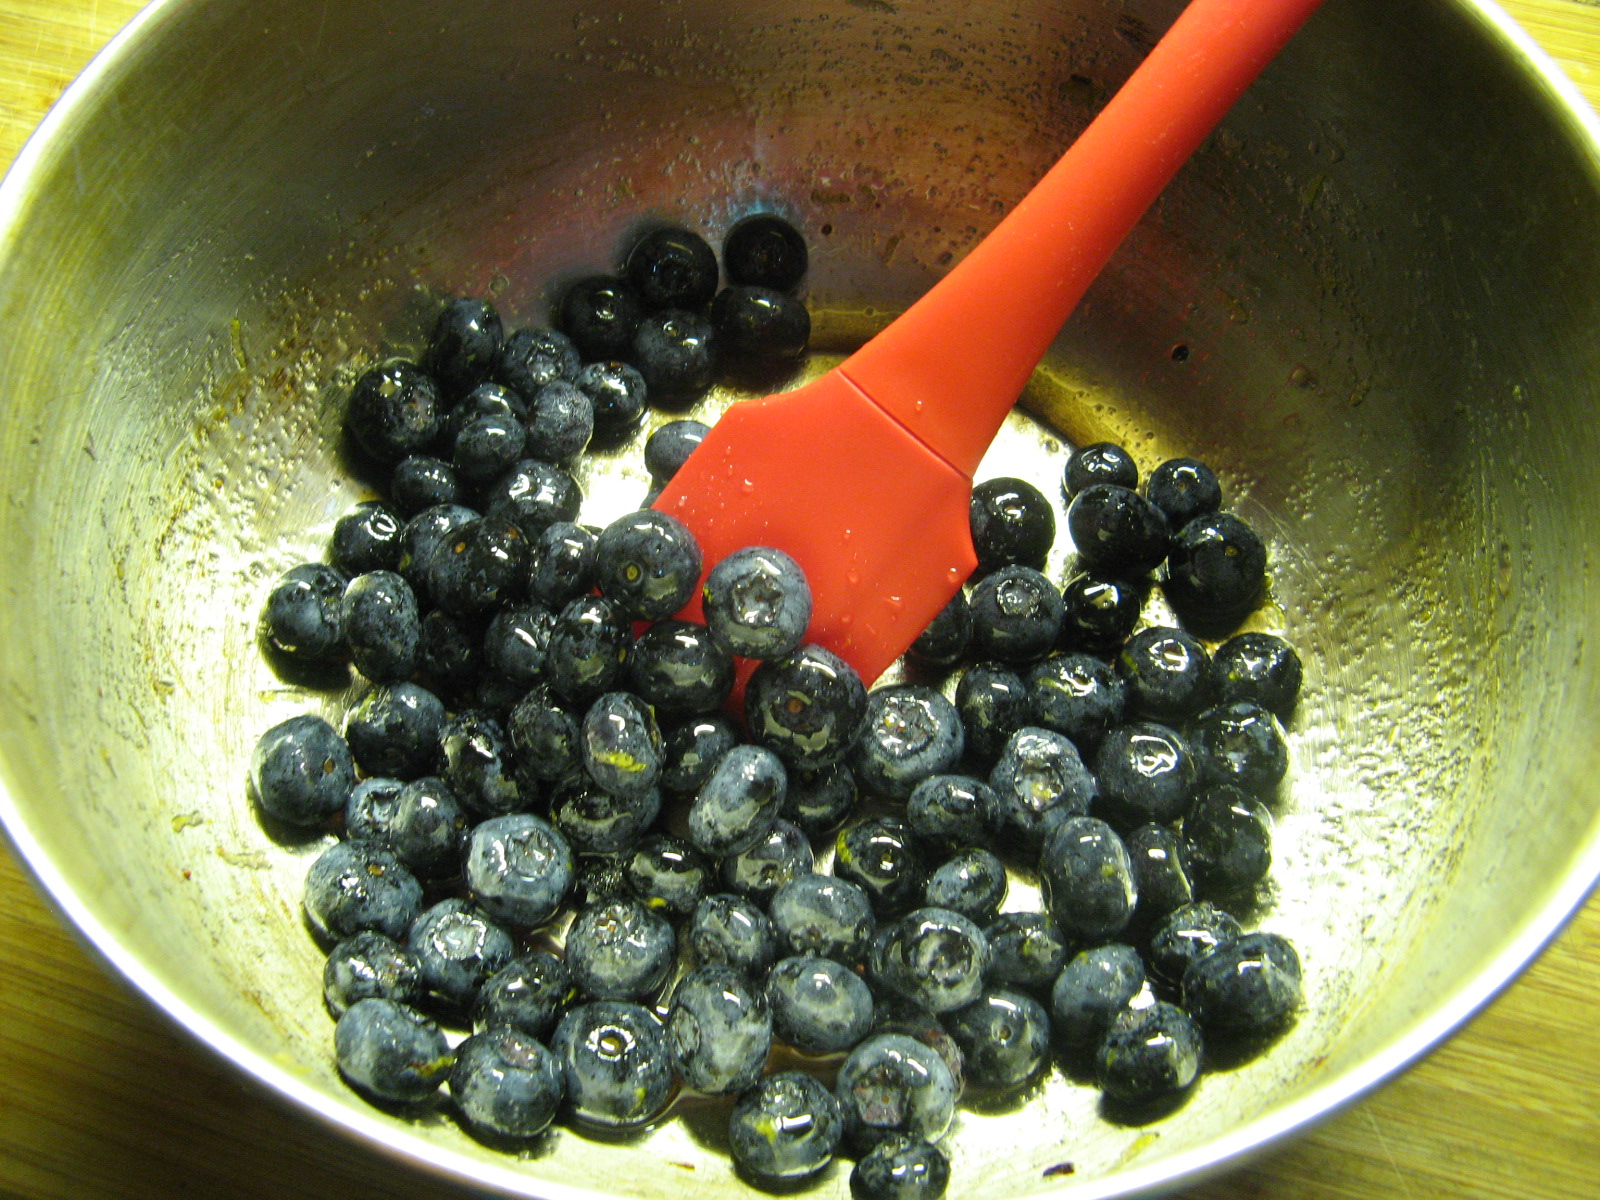
While the panna cotta was “baking” in the fridge I made the Blueberry Compote which couldn’t have been simpler. I combined blueberries with sugar, lemon zest, lemon juice and kosher salt and mixed it until the sugar was dissolved and then let it stand for a bit (at least 30 minutes), stirring it occasionally.

IMG_4846

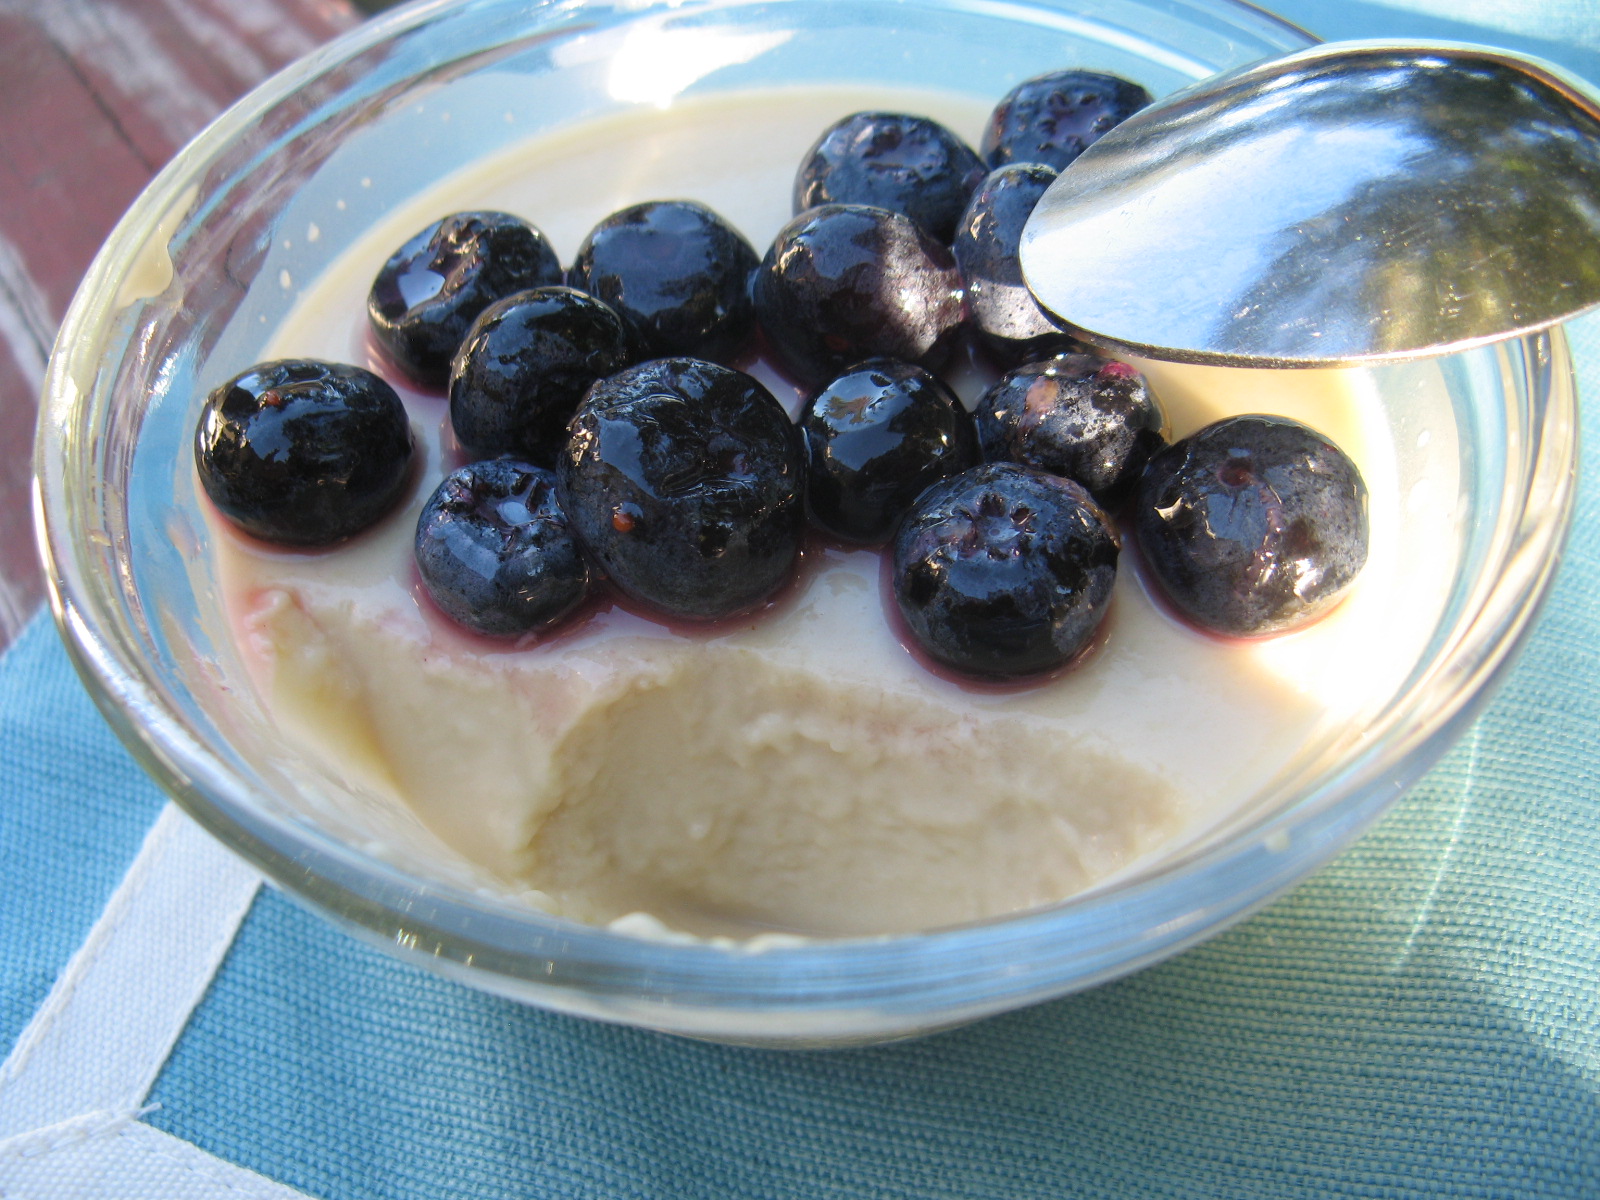
The set panna cotta…

IMG_4875

And topped with the Blueberry Compote.

IMG_4876

This was absolutely delicious! The panna cotta was the perfect texture, silky and smooth, and the corn flavor was just perfect without being too sweet or having too much of a “vegetable” taste, for those of you who aren’t keen on eating your veggies.

IMG_4882

Sweet Corn Panna Cotta with Fresh Blueberry Compote

Servings: 4

Ingredients:

Panna Cotta

2 ears of corn, husked

1 1/2 teaspoons unflavored powdered gelatin

3/4 cup plus 1 tablespoon whole milk

1 cup plus 2 1/2 tablespoons heavy cream

1/4 teaspoon plus 1/8 teaspoon kosher salt

1/4 cup plus 2 tablespoons granulated sugar

3 tablespoons dark brown sugar

Blueberry Compote

1 tablespoon sugar

1/2 teaspoon finely grated lemon zest

1 1/2 teaspoons fresh lemon juice

Pinch of kosher salt

1 1/2 cups blueberries

Directions: 

1. Make the Panna Cotta: In a medium pot fitted with a steamer basket, steam the corn until tender, 15 minutes. Let cool, then cut the kernels from the cobs (you should have 1 1/2 cups); discard the cobs. Transfer the kernels to a blender.*

2. Meanwhile, in a heatproof medium bowl, sprinkle the gelatin over 1/4 cup of the milk. Let stand for 5 minutes.

3. In a small skillet, combine the remaining 1/2 cup plus 1 tablespoon of milk with the cream, salt and both sugars and bring to a bare simmer, whisking to dissolve the sugars. Scrape the hot milk into the gelatin and stir until the gelatin dissolves. Pour the mixture into the blender over the corn and puree until smooth.

4. Strain the puree through a sieve into a large bowl, pressing on the solids; discard the solids. Strain again without pressing; discard any solids in the sieve. Set the panna cotta in an ice bath until cool, stirring occasionally. Scrape the panna cotta into four 8-ounce ramekins. Cover and refrigerate overnight until firm.

5. Make the Blueberry Compote: In a large bowl, combine all of the ingredients and mix until the sugar is dissolved. Let stand for at least 30 minutes, stirring occasionally. Serve the panna cotta in the ramekins with the compote.

*I opted to remove the kernels from the cobs beforehand and boiled the corn for about 15 minutes and then drained it while running them under cold water to cool them. And instead of using a blender, I used a food processor.

Nilla Wafer Cupcakes with Banana Cream Cheese Frosting

I have a confession to make; I have never had a s’more. It sounds like a good combination, a roasted marshmallow sandwiched between two graham crackers and a piece of chocolate; then again, I am not a big fan of marshmallows. I used to love them as a child but somewhere along the way I just wasn’t as keen on them as I got older. And then recently, in the July issue of Real Simple magazine, I came across a recipe for S’mores Cupcakes that I thought of trying but then I had the idea of swapping out the graham cracker crumbs in the cupcake for Nilla Wafer crumbs and because I didn’t think that the marshmallow and chocolate ganache would be the right topping for it I decided to create a banana cream cheese frosting to top it off.

IMG_4483

To begin I used a food processor to turn approximately twenty-five Nilla Wafer cookies into crumbs.

IMG_4458

I then whisked the crumbs in with flour, baking powder and salt.

IMG_4459

In another bowl I creamed together butter and sugar until it was light and fluffy and then added in two eggs – one at a time – and finally vanilla extract. It was then time to add the crumb mixture along with whole milk to this mixture.

IMG_4461

I alternated between the crumb mixture and milk, beginning and ending with the crumb mixture, until the batter came together.

IMG_4462

Using my trusted ice cream scoop I filled a 12-cup muffin tin lined with paper liners.

IMG_4466

After baking for a little over 20 minutes (I rotated the tin halfway through) the cupcakes were done. I let them cool in the tin for 10 minutes before removing them and letting them cool completely on a wire rack.

IMG_4471

And then it was time for the frosting… To begin I used an electric mixer to beat an overripe banana to “liquefy” it.

IMG_4475

Following that I added in one stick of butter and an 8 oz. bar of cream cheese – both at room temperature – and creamed them together until they were incorporated. To sweeten the frosting a bit I added in 1/2 cup of confectioners’ sugar 1/4 cup at a time. I ended up with a frosting that was quite fluffy.

IMG_4476

While it wouldn’t have been a bad idea to let the frosting sit in the refrigerator for a few minutes so it could stiffen up a bit, I opted to frost with it immediately.

IMG_4480

Final verdict… A winning flavor combination!

IMG_4489


Nilla Wafer Cupcakes – Adapted from here

Makes 12

1 cup Nilla Wafer crumbs (from 25-30 crackers – If you have any extra crumbs you can use them as a topping for the cupcakes)

1 cup all-purpose flour, spooned and leveled

1 1/2 teaspoons baking powder

1/2 teaspoon fine salt

1/2 cup (1 stick) unsalted butter, at room temperature

3/4 cup sugar

2 large eggs

1 teaspoon pure vanilla extract

3/4 cup whole milk

1. Heat the oven to 350 F and line a standard 12-cup muffin tin with paper liners. Whisk together the Nilla Wafer crumbs, flour, baking powder and salt in a medium bowl.

2. Beat the butter and sugar in a separate bowl with an electric mixer until light and fluffy, 2 to 3 minutes. Beat in the eggs, one at a time, then the vanilla extract, scraping down the sides of the bowl as necessary. Reduce the mixer to low and add the dry ingredients and milk, alternately, beginning and ending with the dry ingredients and mixing well between additions. Mix until just combined.

3. Divide the batter among the muffin cups. Bake, rotating once, until a toothpick inserted in the center of a cupcake comes out clean, 20 to 24 minutes. Cool in the tin for 10 minutes; transfer to a wire rack to cool completely.


Banana Cream Cheese Frosting

1 overripe banana

1/2 cup (1 stick) unsalted butter, at room temperature

8 oz. (1 bar) cream cheese, at room temperature

1/2 cup confectioners’ sugar

1. Beat the banana with an electric mixer on medium speed to “liquefy” it. Add the butter and cream cheese and continues mixing until all of the ingredients are well combined.

2. Beat in the confectioners’ sugar in 2 additions – 1/4 cup at a time. Continue mixing until the sugar has been completely incorporated.

Banana Chocolate Chip & Nut Muffins

So once again I had a few bananas that were a tad over-ripe and while I had a few ideas as to what I wanted to make I settled on some muffins. I figured I had to have a recipe somewhere for something so basic and then I came across a 50 Muffin booklet I ripped out of an issue of Food Network magazine last year. The recipe was simple and I had all of the ingredients on hand so I got to baking.

Up first I mixed together my dry ingredients: flour, walnuts, baking powder, salt and baking soda. I also added some chocolate chips which weren’t part of the original recipe.

IMG_1638

Secondly I mixed together brown sugar, melted butter, mashed banana, sour cream and eggs.

IMG_1639

I then folded the wet mixture into the flour mixture.

IMG_1640

Since it was fall I decided to use up the last of my pumpkin decorated cupcake liners. I was concerned since they seemed as though they had lost their shape….

IMG_1641

But once I filled them with the muffing batter they were just fine. While the recipe said it only yielded twelve muffins I had some extra batter to squeeze out two extra muffins. I filled the empty compartments of the muffin tin with water so the two muffins would bake evenly but recently read that it’s not necessary.

IMG_1645

I baked them for about twenty minutes in a 350 degree pre-heated oven. After letting them sit in the pan for a few minutes I then transferred them to a wire rack so they could cool completely.

IMG_1651

While these muffins did taste good I wasn’t too thrilled about them so I doubt I will be baking up another batch of them anytime soon. I am thinking the next time I have some bananas past their prime I might make a Banana Cream Pie.

IMG_1671

Banana Chocolate Chip & Nut Muffins

Ingredients

2 cups flour

1/2 cup chopped nuts (I used walnuts)

1/2 cup semi-sweet chocolate chips*

1 tsp. baking powder

1/2 tsp. salt

1/4 tsp. baking soda

3/4 cup brown sugar

1 stick unsalted butter, melted

1/2 cup mashed banana

1/2 cup sour cream

2 eggs

*The original recipe didn’t include chocolate chips

Directions

Preheat the oven to 350 degrees.

Mix the flour, chopped nuts, chocolate chips, baking powder, salt and baking soda in a bowl and set aside. In another bowl whisk together the brown sugar, butter, banana, sour cream and 2 eggs and then fold it into the flour mixture. Divide among 12 prepared muffin cups and bake 20 to 25 minutes.

Baked Cinnamon Sugar Apple Doughnuts

There are a few great things about going apple picking… The scenery, the apples (of course) and the freshly made apple cider doughnuts. The doughnuts are amazing but unfortunately they don’t stay fresh very long. By the following day they are quite hard. Hoping to get that yummy goodness at home I decided to bake my own Apple Doughnuts by tweaking the recipe for the Pumpkin Doughnuts that I made last month that.

The scenery…

IMG_1529

To begin I whisked together flour, baking powder, cinnamon, salt and baking soda and set it aside.

IMG_1647

I then peeled and cored three apples – I used the Golden Delicious apples I got while picking – and pureed them in a food processor. While the original pumpkin recipe called for 1 cup of pumpkin puree I decided to use only 1/2 cup of the fresh apple puree (it was essentially applesauce) since it wasn’t as thick as the pumpkin puree and I didn’t want my batter to be too watery.

IMG_1653 IMG_1655

To continue with the batter I mixed the apples with sugar, brown sugar, oil, an egg and vanilla extract and then added in the dry ingredients.

IMG_1656

It was then time to fill up my doughnut pans. I filled in each doughnut crevice with a 1/4 cup of the batter.

IMG_1659

I baked them for about thirteen minutes in a 350 degree preheated oven and they were done to perfection. I recently bought a second doughnut pan so I wouldn’t have to wait for my first batch of doughnuts to cool in the pan before using it again.

IMG_1663

And finally I melted 3 tbsp. of butter in one bowl and combined 1/2 cup of sugar and 1 tsp. of cinnamon in another bowl so I could coat the doughnuts in cinnamon sugar. I dipped each doughnut in the butter and then in the cinnamon sugar.

IMG_1665

Final verdict… They were delicious! Doughnuts have quickly become one of my favorite things to bake!

IMG_1667

Baked Cinnamon Sugar Apple Doughnuts

Ingredients

1/2 cup canola oil

1 3/4 cups all-purpose flour

1 tsp. baking powder

1/2 tsp. cinnamon

1/2 tsp. fine salt

1/4 tsp. baking soda

1/2 cup fresh applesauce

3/4 cup granulated sugar

1/4 cup light brown sugar

1 large egg

1 tsp. pure vanilla extract

Cinnamon Sugar Topping

3 tbsp. melted butter

1/2 cup granulated sugar

1 tsp. cinnamon

Directions

1. Heat oven to 350° F. Spray two 6-compartment doughnut pans with baking spray. Whisk together the flour, baking powder, cinnamon, salt, and baking soda in a medium bowl; set aside.

2. Peel, core & puree three apples. Whisk the pureed apples with the granulated sugar, brown sugar, oil, egg, and vanilla. Add the dry ingredients and mix until just combined (do not over mix).

3. Spoon 1/4 cup batter into each compartment of the prepared pans. Bake until the doughnuts are golden brown and spring back lightly when touched, 12 to 14 minutes. Let cool in the pans for 15 minutes.

4. Combine the sugar and cinnamon for the topping in a shallow bowl. Dip each doughnut into the melted butter and then into the cinnamon sugar mixture. Place each doughnut on a wire rack to cool completely.

A Quintessential Fall Birthday Cake

A good friend recently celebrated a birthday and a few days prior to it I asked her what kind of cake she would like me to bake for her and she responded with an apple cake. The only apple cake I could recall making was an Apple Walnut Cake that really wasn’t what I would consider to be a birthday cake. So, after a few texts back and forth we settled on an apple cake with walnuts with a cinnamon cream cheese frosting. While her birthday technically falls in the summer according to the calendar it’s unofficially in the fall since it is after Labor Day, hence this cake being the quintessential fall birthday cake. Since I haven’t mastered creating my own recipes I did a few internet searches to find a recipe for the cake and frosting. After coming up empty handed I decided to follow the recipe for my favorite carrot cake and substitute grated apples in lieu of the carrots and for the frosting, I made my favorite cream cheese frosting and added in ground cinnamon in small increments until I reached my desired flavor.

To begin I prepped my Granny Smith Apples…

IMG_1301

First I peeled them…

IMG_1303

Then cored and sliced them using an apple divider…

IMG_1305

And finally grated them using a food processor.

IMG_1308

I started the batter by combining the dry ingredients and setting it aside.

IMG_1313

I then creamed butter and sugar together.

IMG_1316

Once the butter and sugar were mixed together well I added in the eggs and dry ingredients by alternating between the two.

IMG_1318

And them some vanilla extract.

IMG_1322

It was then time to add in the grated apples.

IMG_1323

And finally I folded in some chopped walnuts.

IMG_1325

Once the walnuts were incorporated well into the batter it was time to divvy it up among my prepared pans.

IMG_1326 IMG_1327

Once divided I popped them into a 350 degrees oven.

IMG_1328

After baking for 25 minutes the cakes were done.

IMG_1331

I let them cool for a bit in the pans and then inverted them onto cooling racks to let them cool completely.

IMG_1332

After the cakes cooled completely I made the Cinnamon Cream Cheese Frosting by combing cream cheese, butter, confectioners’ sugar, vanilla extract and of course cinnamon.

IMG_1333

I spread frosting between each of the layers…

IMG_1336

And then crumb coated the cake and refrigerated it for a bit while I made another batch of frosting to finish covering the cake and for decorating.

IMG_1337

After about twenty minutes in the fridge I finished frosting it…

IMG_1339

And then I added some decorations and scattered some walnuts along the sides of the cake prior to writing a birthday message on it.

IMG_1343

Final verdict: It was a hit… Definitely something I’ll make again!

Apple Walnut Cake
(Adapted from Gigi’s Carrot Cake)
Ingredients
3 sticks unsalted butter
2 cups granulated sugar
2 cups all-purpose flour
2 teaspoons baking soda
2 teaspoons ground cinnamon
1 teaspoon salt
4 large eggs
1 teaspoon pure vanilla extract
3 cups grated apples (I used Granny Smith apples)
1 cup chopped walnuts
Directions
Preheat the oven to 350 degrees F.
Spray 3 (9-inch) cake pans with baking spray and set aside. In a large bowl, cream the butter with an electric mixer. Add the sugar, and beat. In a medium bowl combine the flour, baking soda, cinnamon, and salt and mix well.
Add the dry ingredients, alternating with the eggs, beating well after each addition. Add the vanilla extract and mix. Add the apples and beat on medium speed until well incorporated, about 2 minutes. Fold in the walnuts. Divide the batter between the 3 cake pans and bake until set and a cake tester inserted into the middle comes out clean, 25 to 30 minutes. Remove from the oven and let rest in the cake pans for 10 minutes. Invert onto wire racks, remove from the pans, and let cool.
Cinnamon Cream Cheese Frosting
Ingredients
2 8-oz packages cream cheese, softened
1 stick butter, softened
2 cups sifted confectioners’ sugar
1 teaspoon vanilla extract
1 teaspoon ground cinnamon
Directions
In a medium bowl cream together the cream cheese and butter until creamy. Add in the vanilla extract and then gradually add in the confectioners sugar. And finally mix in the ground cinnamon.

Peach Streusel Cake

I tend to rip recipes out of magazines and file them away for quite some time before actually trying them. I recently made a turkey meatloaf following a recipe from a 2008 issue of a magazine. I wish I had made it sooner… It was quite good. So, when I was looking to make a cake to give as an anniversary treat for a friends’ parents I turned to a Peach Streusel Cake recipe that I had ripped out from a 2011 issue of Food & Wine magazine.

I started the cake by making the streusel. I combined flour, light brown sugar, salt, butter and pecans in a bowl…

IMG_1256

And mixed it together with my fingers to form small clumps with the mixture and then set it aside.

IMG_1258

Next up I whisked together flour, baking powder, baking soda and salt in a bowl and set this aside as well.

IMG_1255

In a separate bowl I began making the batter for the cake by beating together butter and sugar.

IMG_1259

I then added in two eggs one at a time.

IMG_1264

And then sour cream and vanilla extract.

IMG_1266

Once all of the wet ingredients were combined well I added in the dry ingredients.

IMG_1268

Once the wet and dry ingredients were mixed together it was time to pour it into my prepared pan.

IMG_1269 IMG_1270

I started by spreading two-thirds of the batter into the pan.

IMG_1272

I then folded in chopped frozen peaches into the remaining batter. I had to go to about 4 different places to find frozen peaches. Each supermarket I went to had strawberries, blueberries and other frozen berries but no peaches. I ended up finding them at my local Target. It’s always the last place you check that has what you want.

IMG_1273

I then spread this batter on top of the non-peach batter already in the pan.

IMG_1275

And finally I spread the streusel topping on top.

IMG_1276

I baked the cake in a preheated 325F oven for 90 minutes, covering the cake with foil for the last 15 minutes so the streusel topping wouldn’t brown too much. It looked amazing when I took it out of the oven.

IMG_1277

I let it cool for a bit before placing it inside of a tin.

IMG_1290

And although it was meant for someone else, I did end up trying a piece and overall it was quite good, but, I think next time I’ll use fresh peaches instead.

IMG_1298

Peach Streusel Cake

Ingredients

Streusel

1/2 cup all-purpose flour

1/4 cup packed light brown sugar

1/4 teaspoon salt

3 tablespoons unsalted butter, softened

1 cup chopped toasted pecans

Batter

2 cups all-purpose flour

1 teaspoon baking powder

1 teaspoon baking soda

1/2 teaspoon salt

1 stick unsalted butter, softened

1 cup sugar

2 large eggs

1 cup sour cream

2 teaspoons vanilla extract

One 10-ounce bag frozen peaches, coarsely chopped

Directions

1. Preheat the oven to 325F and butter flour a 9-inch springform pan.

2. Make the Streusel: In a bowl using your fingers, combine the flour, brown sugar, and salt. Add the butter and mix until smooth. Add the pecans; press the mixture into clumps.

3. Make the Batter: In a bowl, whisk together the flour, baking powder, baking soda and salt. In a large bowl, beat the butter and sugar at medium-high speed until light, 3 minutes. Beat in the eggs one at a time; beat in the sour cream and vanilla. Add the dry ingredients and beat at a low speed until incorporated.

4. Spread two-thirds of the batter in the pan. Fold the peaches into the remaining batter and spoon into the pan. Scatter the streusel crumbs on top. Bake the cake for 1 hour and 30 minutes, or until a toothpick inserted in the center comes out clean; loosely cover the cake foil for the last 15 minutes of baking. Transfer to a rack and cool for 30 minutes them remove the ring and let the cake cool completely before serving.

Banana & Chocolate Cupcakes

Normally when I have a few over-ripe bananas I tend to make Banana Nut Bread, but, recently when I had a few bananas that were past their prime for eating in my opinion I decided to make some cupcakes with them instead. Following the recipe Gina’s Banana Cupcakes from the Food Network’s website I made some really moist and delicious cupcakes that weren’t overpowering with the flavor of banana.

I started off by mashing two very ripe bananas.

IMG_1122 IMG_1128

I then combined my dry ingredients (flour, baking powder, baking soda and salt) and set it aside.

IMG_1144 IMG_1127

To begin making the batter I creamed together butter and sugar.

IMG_1129 IMG_1130

I then added in sour cream and vanilla.

IMG_1132

And then two eggs, which I added in one at a time.

IMG_1134

At this point I added in the dry ingredients to the wet mixture.

IMG_1136

After mixing it well it was time to finally add in the bananas.

IMG_1138

Once the entire banana was incorporated into the mixture I used an ice cream scoop to fill my prepared cupcake pan.

IMG_1140 IMG_1141

The batter was the perfect amount for twelve cupcakes!

IMG_1142

After baking for 18 minutes in a 350 degrees preheated oven they were done and smelled incredible.

IMG_1146

I let them cool for a bit before frosting and since I was running a bit short on time I decided to take a short cut and use store bought chocolate frosting.

IMG_1145 IMG_1151

Once they were cooled I frosted them using a piping bag attached with Wilton’s 1M tip to create the 1M Swirl.

IMG_1156

Overall… the cupcakes were absolutely delish!

IMG_1157

Gina’s Banana Cupcakes*

Ingredients

1 cup all-purpose flour

1/2 teaspoon baking powder

1/2 teaspoon baking soda

1/4 teaspoon salt

1 stick (4 ounces) butter, softened

1/2 cup granulated sugar

1/4 cup sour cream

1 1/2 teaspoons vanilla extract

2 large eggs

Directions

Preheat the oven to 350F. Line a 12-cup standard muffin tin with paper cupcake liners.

In a medium bowl, combine the flour, baking powder, baking soda and salt. Set aside.

In a large bowl, add the butter and granulated sugar. Beat with a handheld mixer until combined. Add the sour cream and vanilla. Slowly beat in the eggs, one a time. Incorporate the dry mixture and wet mixture together until thoroughly combined. Add the bananas, being careful not to over mix.

Using an ice cream scoop, fill each cupcake liner three-quarters of the way full. Bake in the oven until the tops turn golden brown and a toothpick inserted in the middle of the cupcake comes out clean, 18 to 20 minutes. Remove the cupcakes from the oven to a wire rack and let cool before frosting.

*The original recipe included 3/4 cup walnuts from the batter which I omitted and was paired with a molasses frosting which I opted to replace with a chocolate frosting.

A Key Lime Cookie Miss

So after baking my Key Lime Pie I had quite a few key limes left over and wanted to put them to good use so I decided to bake some Key Lime Spritz cookies. Unfortunately this was one recipe that didn’t work for me for numerous reasons.

The ingredients were basic enough: butter, sugar, salt, baking powder, an egg, key lime zest and juice, and flour.
IMG_1093
Two things attracted me to the recipe I followed, it sounded simple enough and it gave me an opportunity to use my Wilton Cookie Press.
IMG_1098
I followed the direction to make the dough…
IMG_1110
And then it was time to bring out the cookie press – this is where things went downhill.
IMG_1111
I filled my cookie press with the dough and was ready to start pressing out cookies in my selected shape.
IMG_1113
Instead of dropping cookies onto my cookie sheet this is what happened instead.
IMG_1114
Frustrated after numerous tries I turned to my trusted cookie scoop instead.
IMG_1115
I scooped the dough and pressed it down to make round cookies.
IMG_1117
I baked them for about 7 minutes until the cookies looked firm but weren’t browning.
IMG_1118
I didn’t even bother using the rest of the cookie dough… I tried one of the cookies from the first batch and was extremely disappointed. The cookies had no lime flavor whatsoever and the overall taste of it was nothing to rave about. Not sure if it had to do with the recipe itself or just my technique.

Besides the recipe not being all that I was hoping for I was disappointed that my cookie press didn’t work as it should again – yes, this was the second time I had a failed experience using it. At this point I am not sure if I will try for a third time with it. So, has anyone ever had success using a cookie press? And if so, how did you get it to work? Any and all advice is welcome. Thanks!