Baked Apples

I recently got a good amount of apples from my yearly apple picking trip and this year the apples I picked were the right amount of sweetness and crispness. To make sure they don’t go to waste, one can only eat so many apples before they start to go bad, I invariably make a few baked goodies with them. Usually an apple crisp of some sort, this year I decided to make Baked Apples. A simple dessert with a lot of flavor.

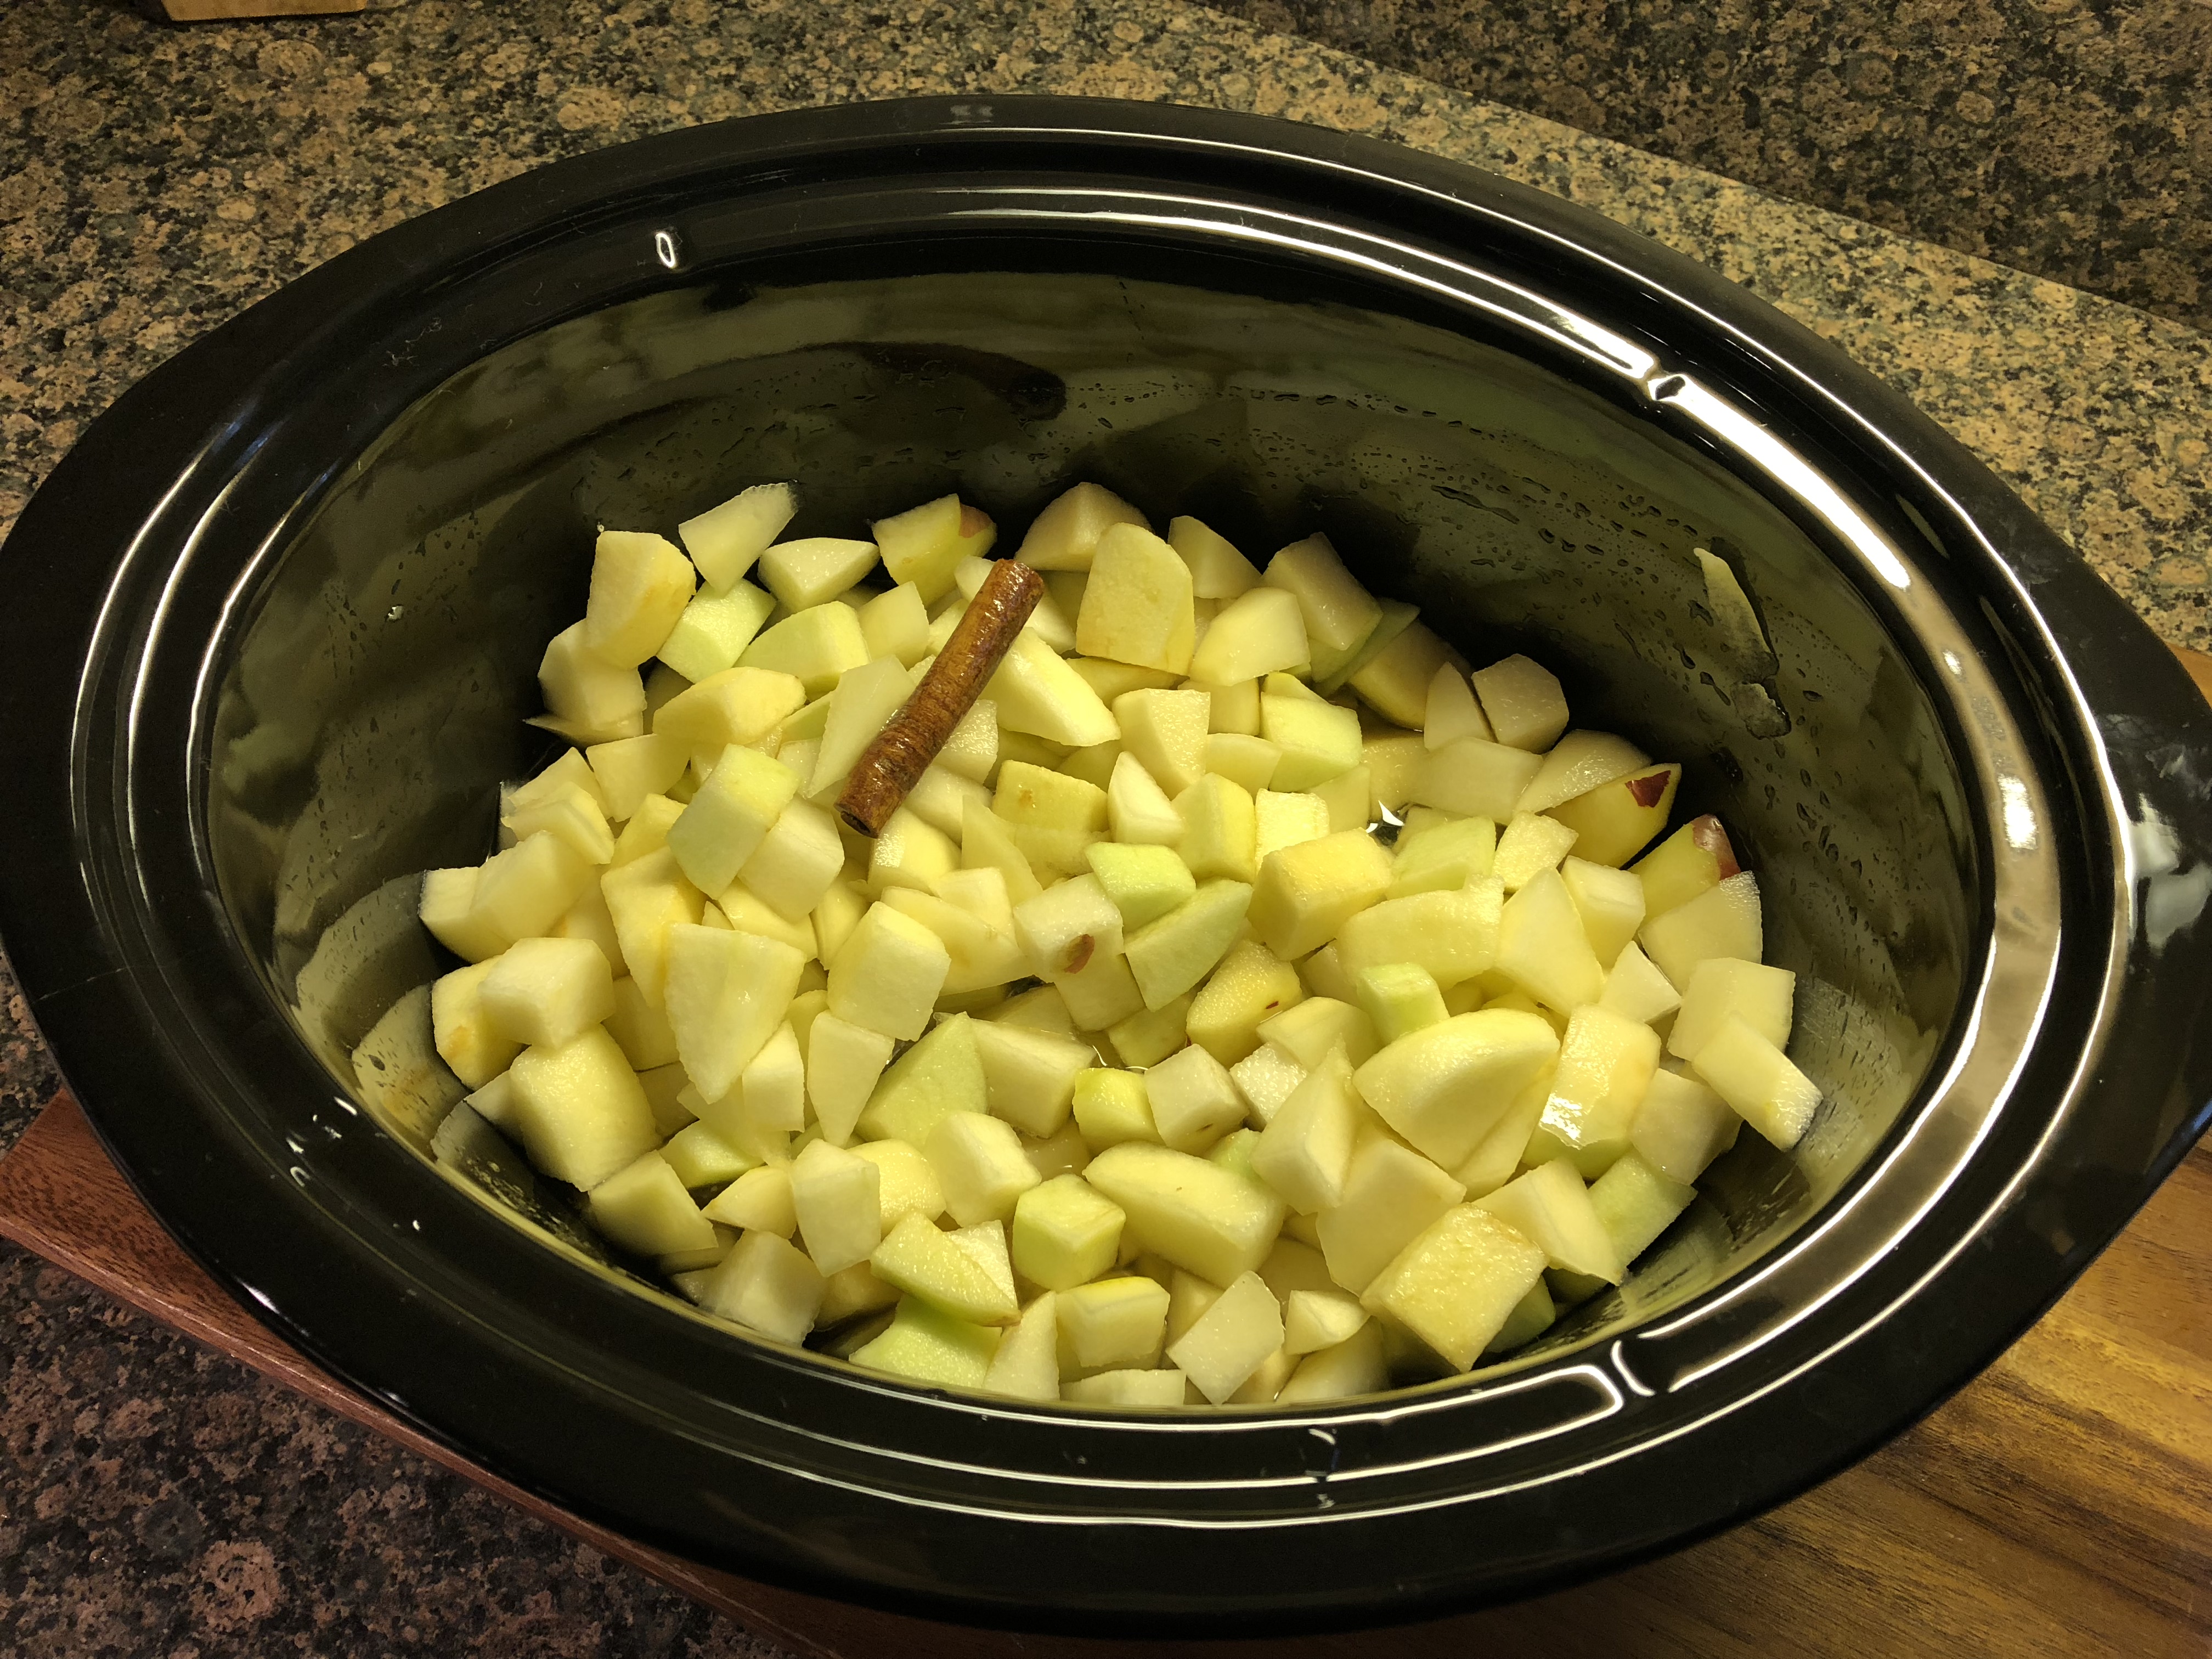
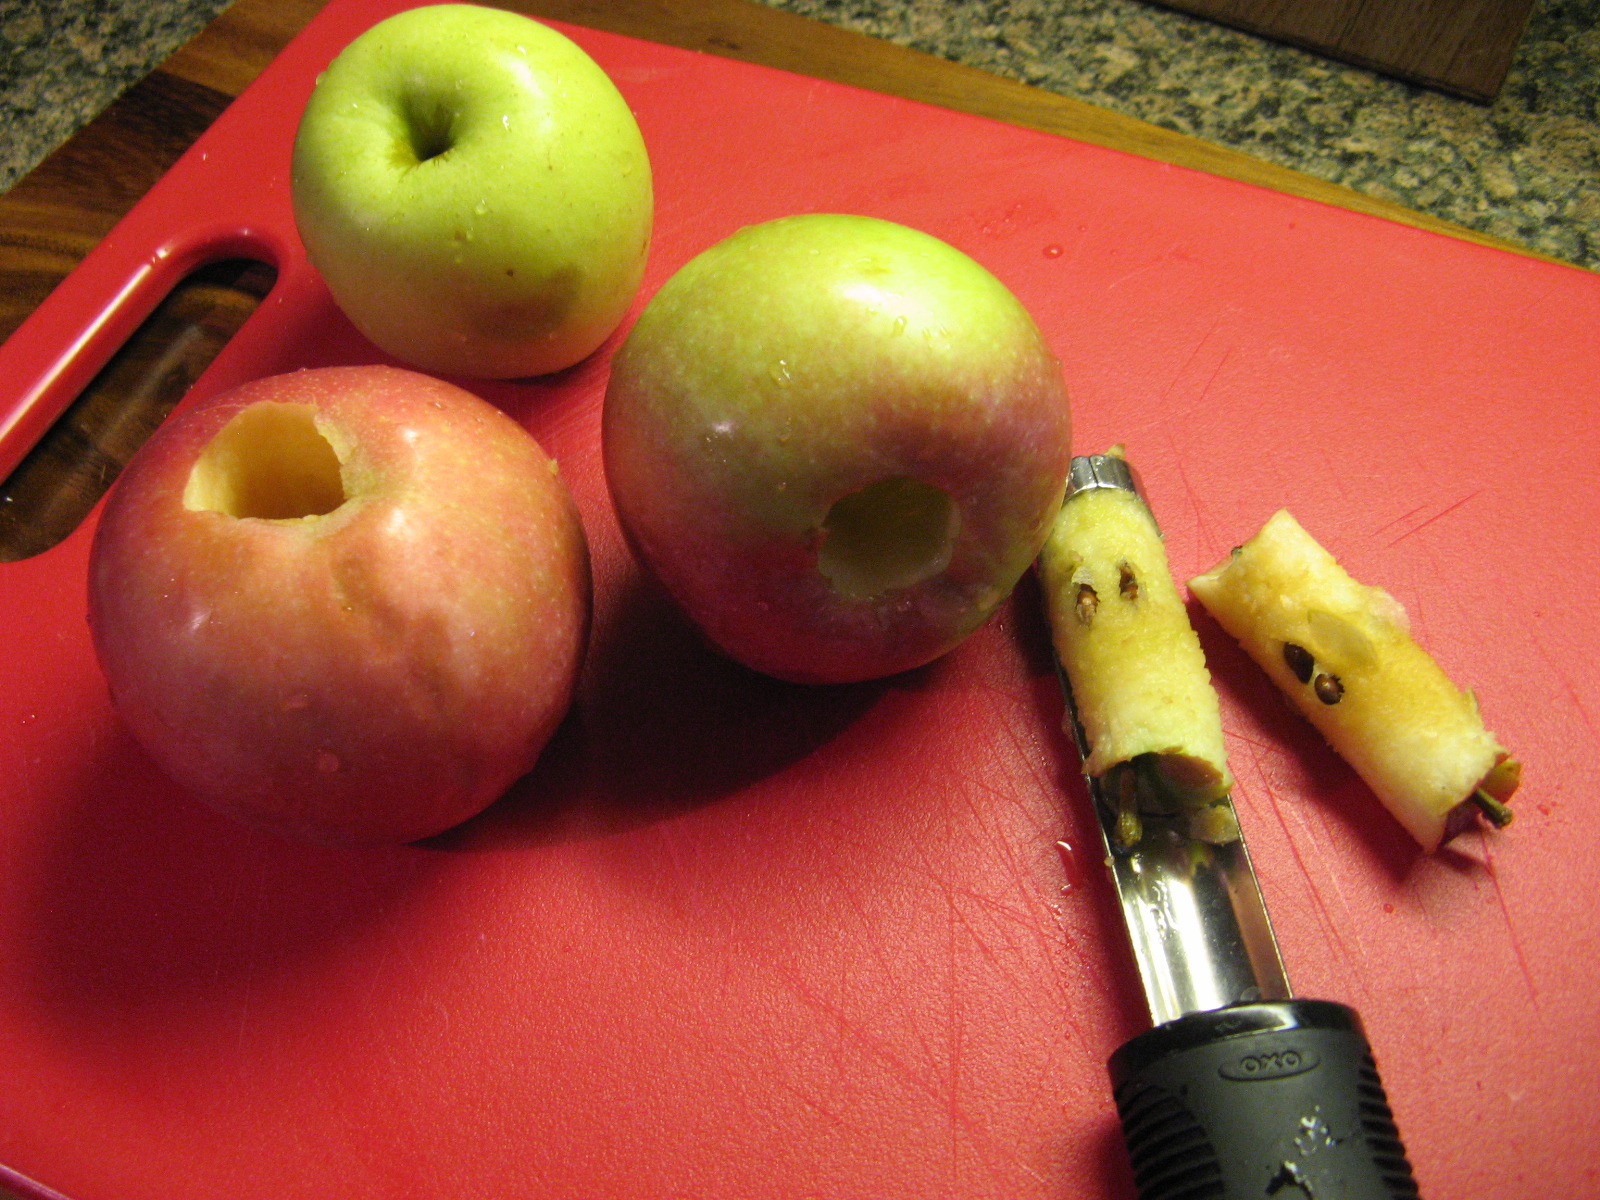
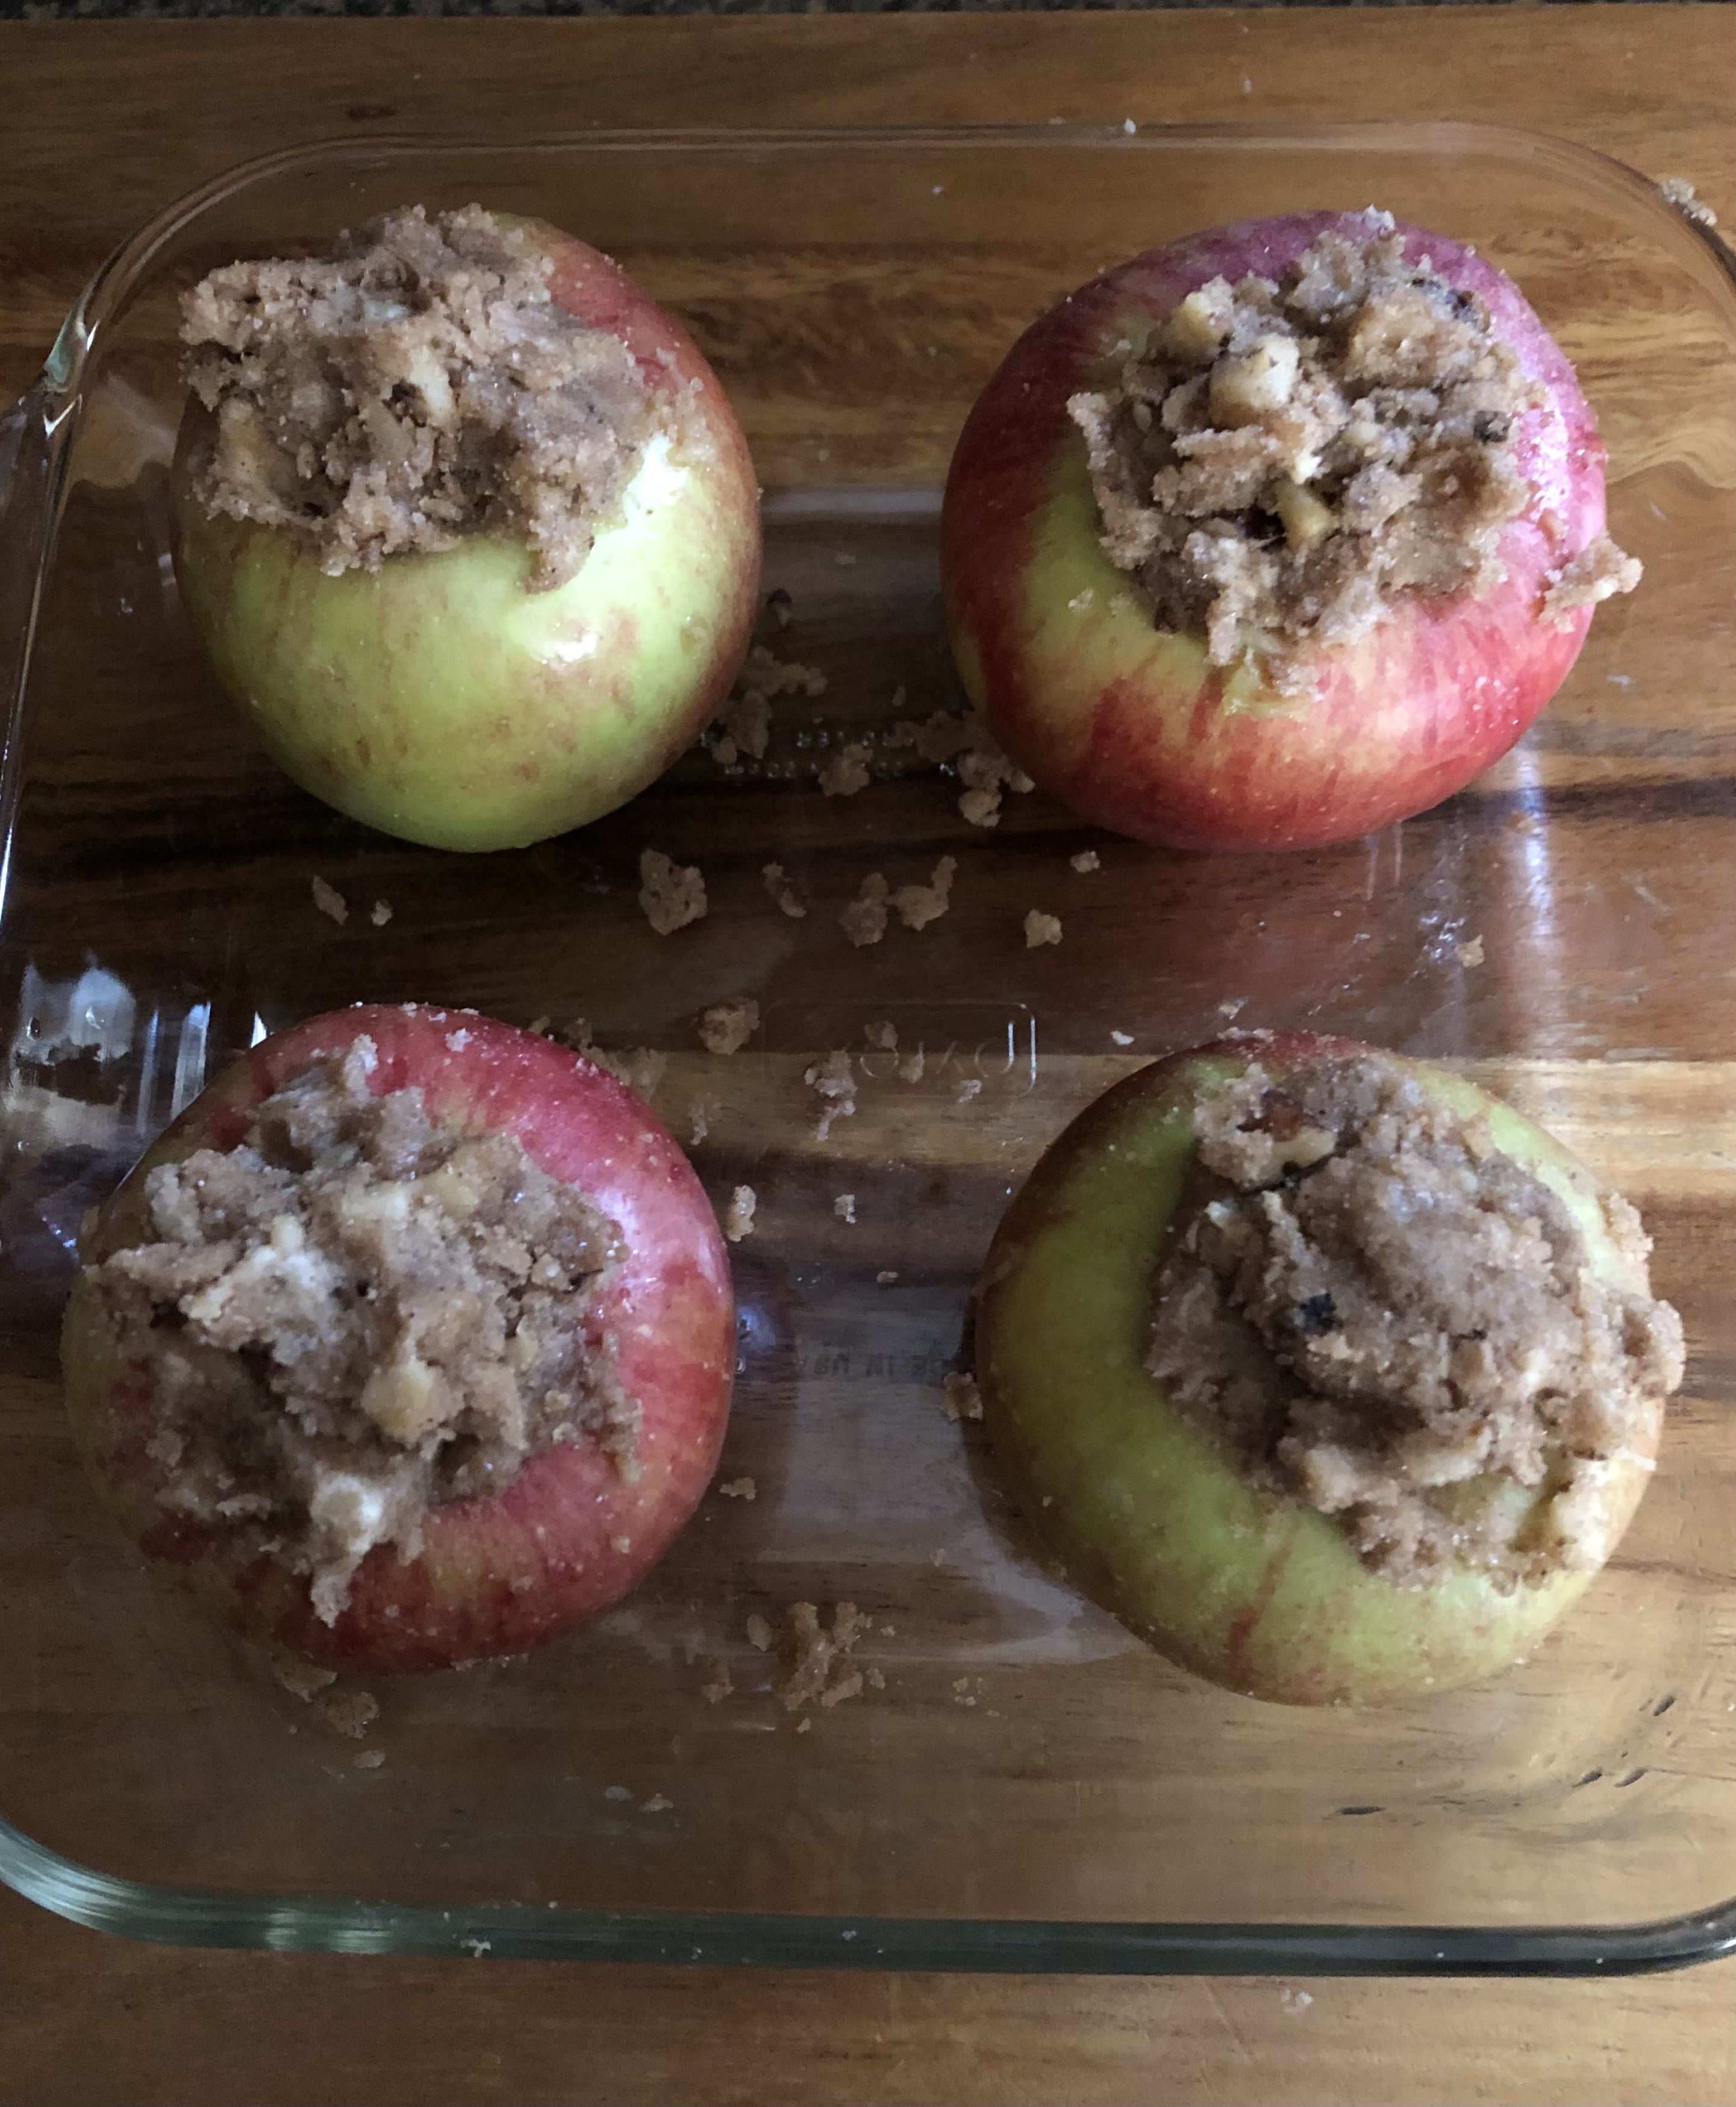
The most difficult part of making these baked apples is coring the apples. To do so I used an apple corer to go partway down the apple, turned it a few times and then removed it without the core. Next, I used a paring knife and a small spoon to remove the core and to widen the holes of the apples. You want to leave about a 1/2-inch of the bottom of the apple intact.

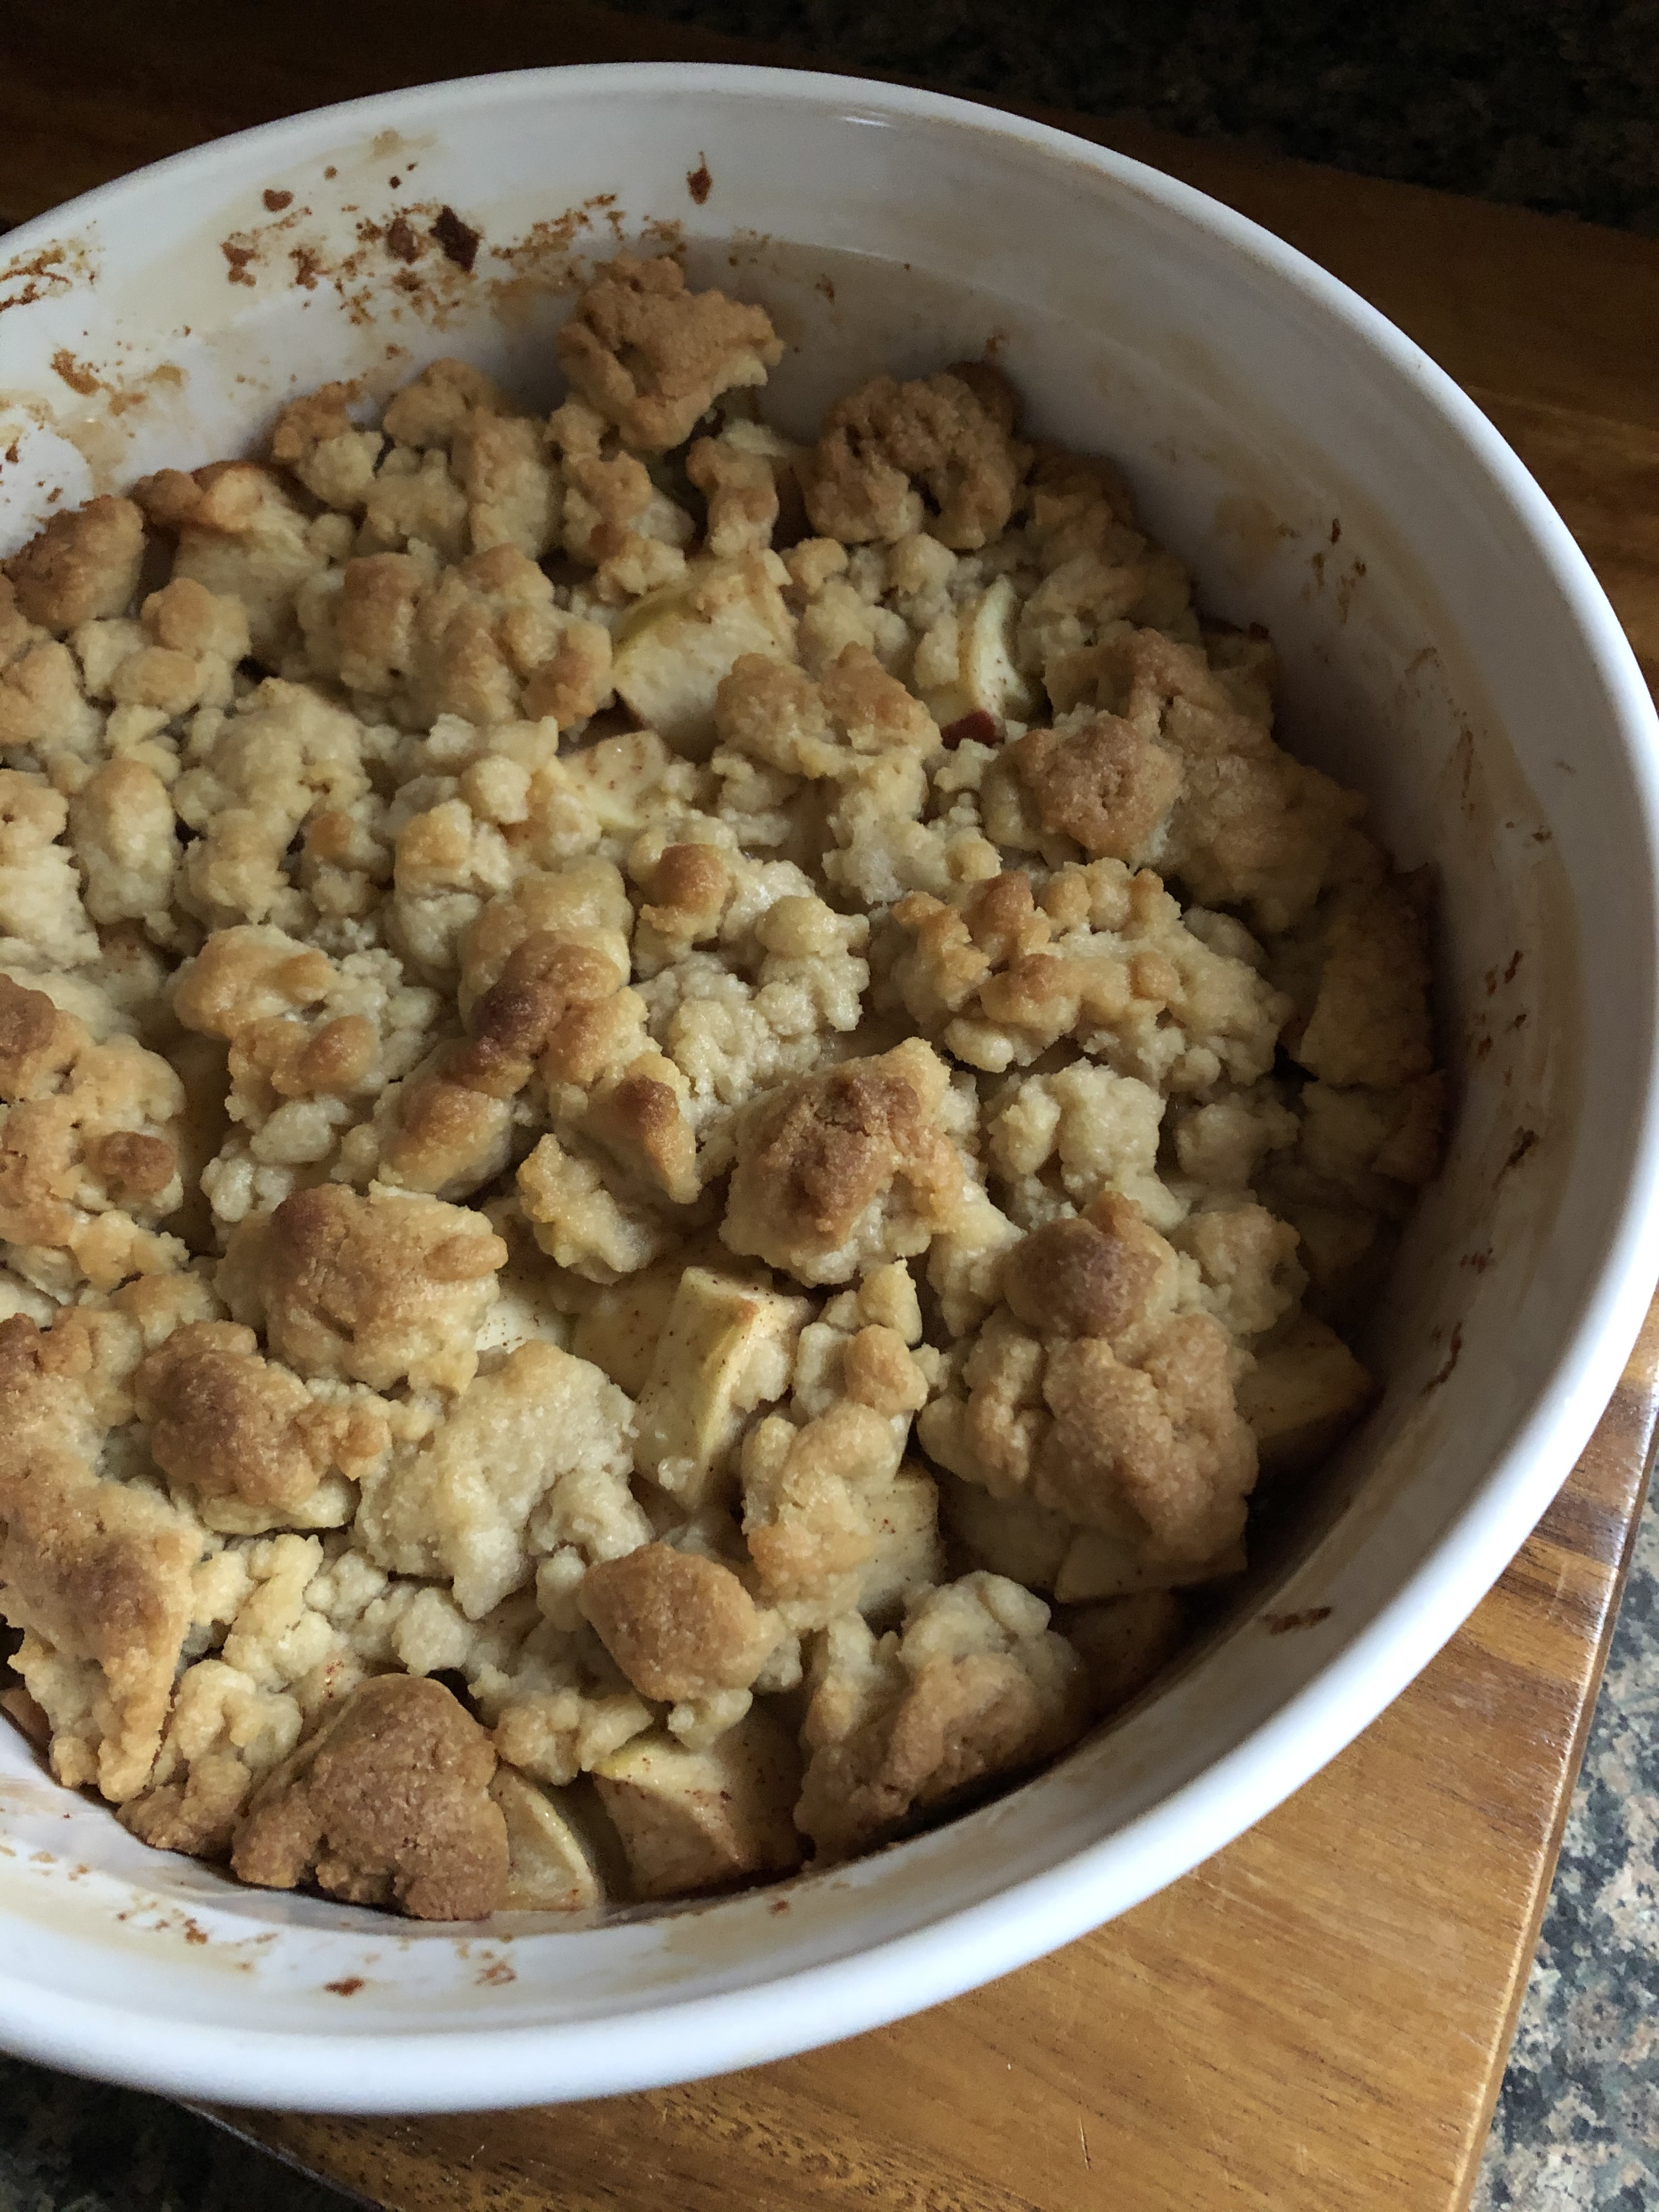
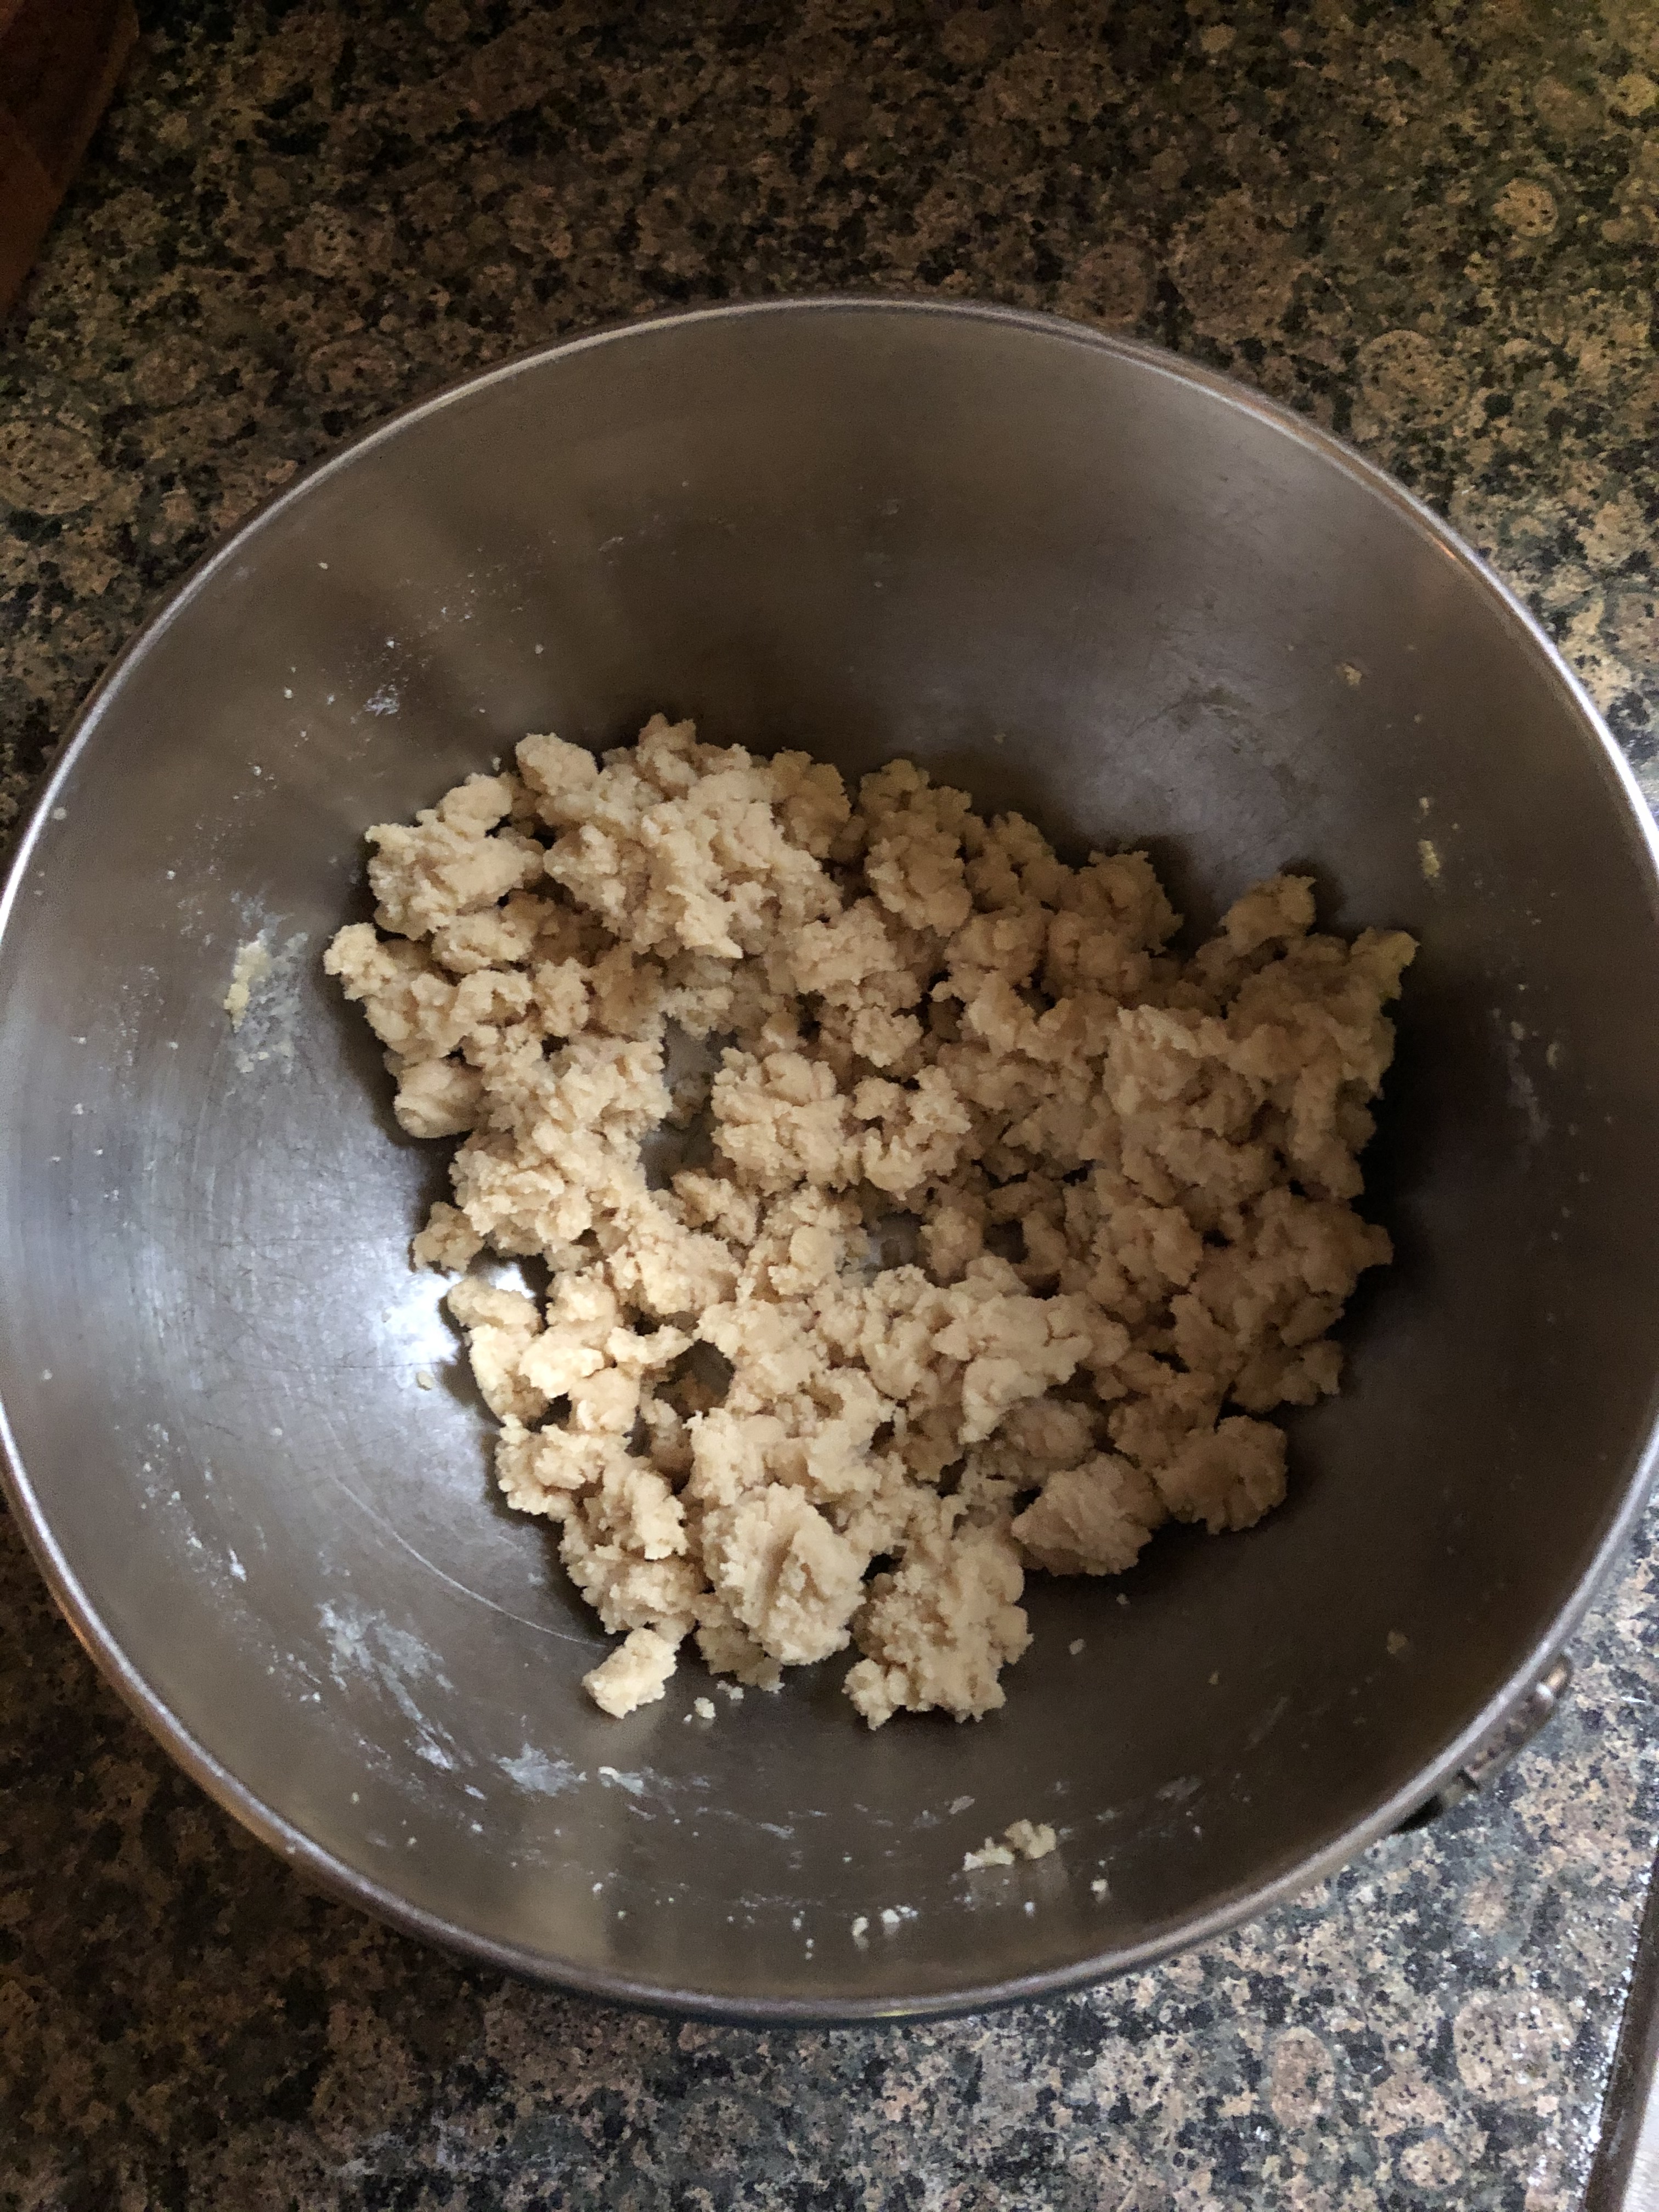
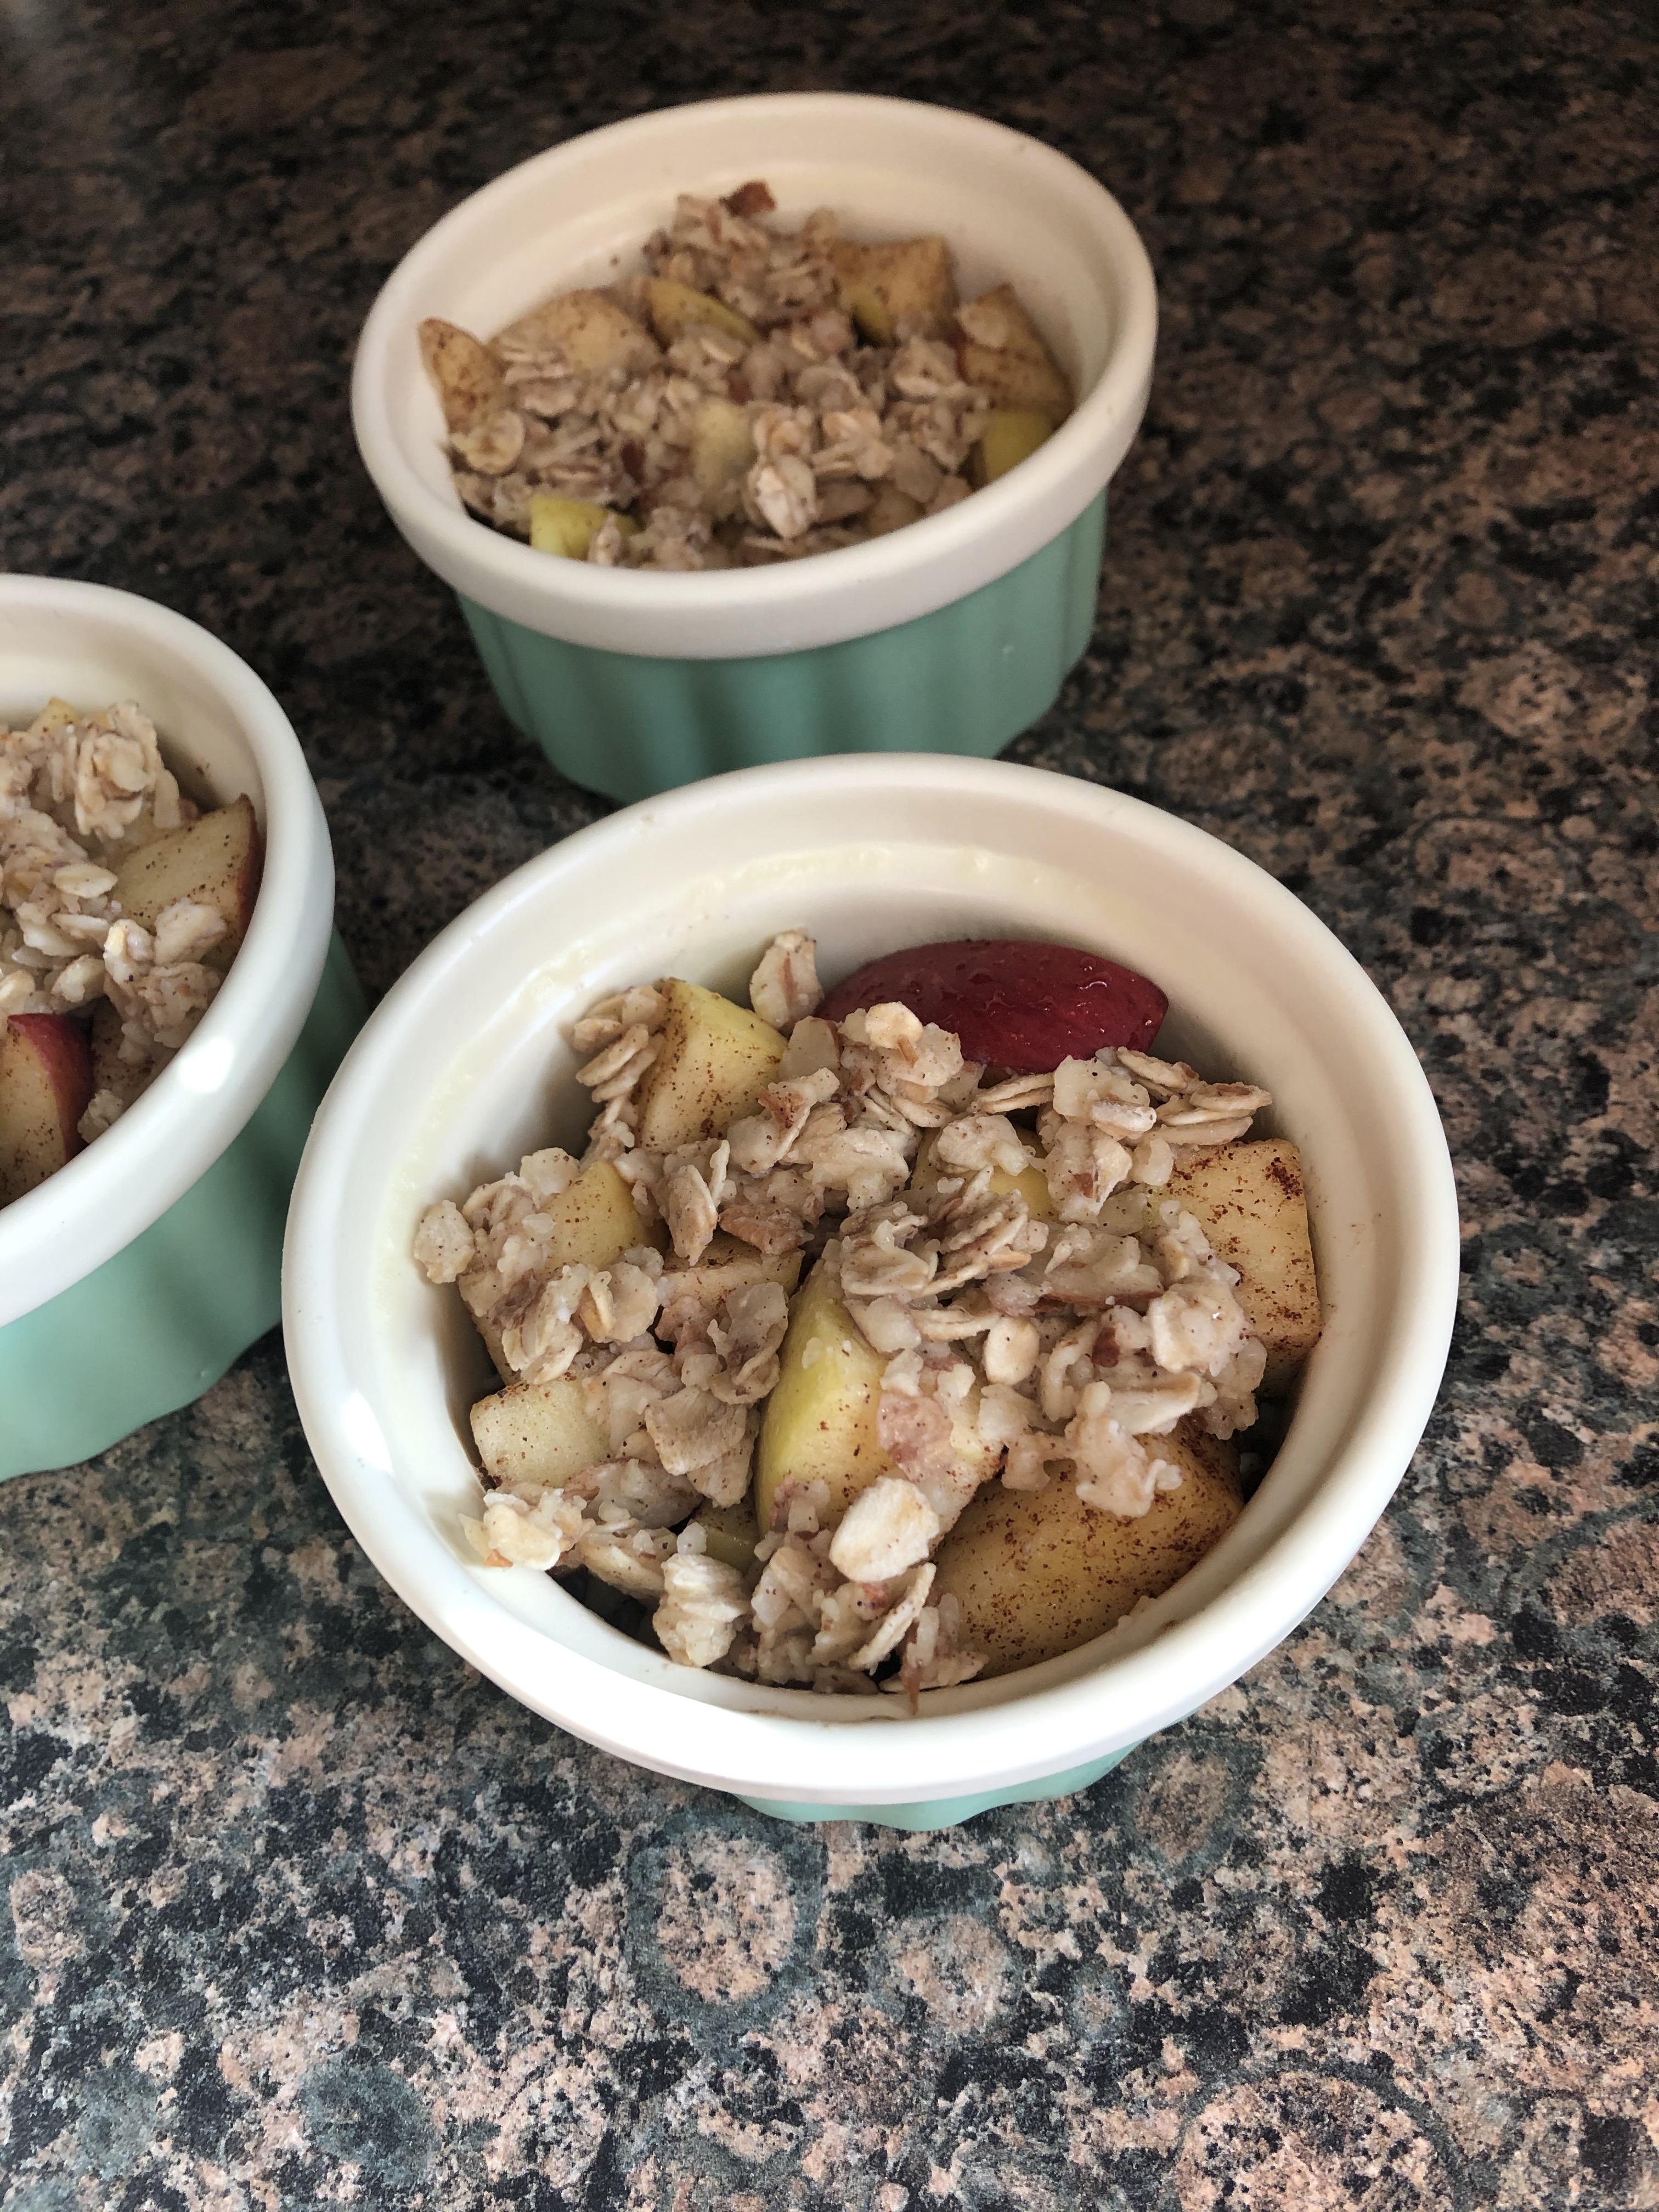
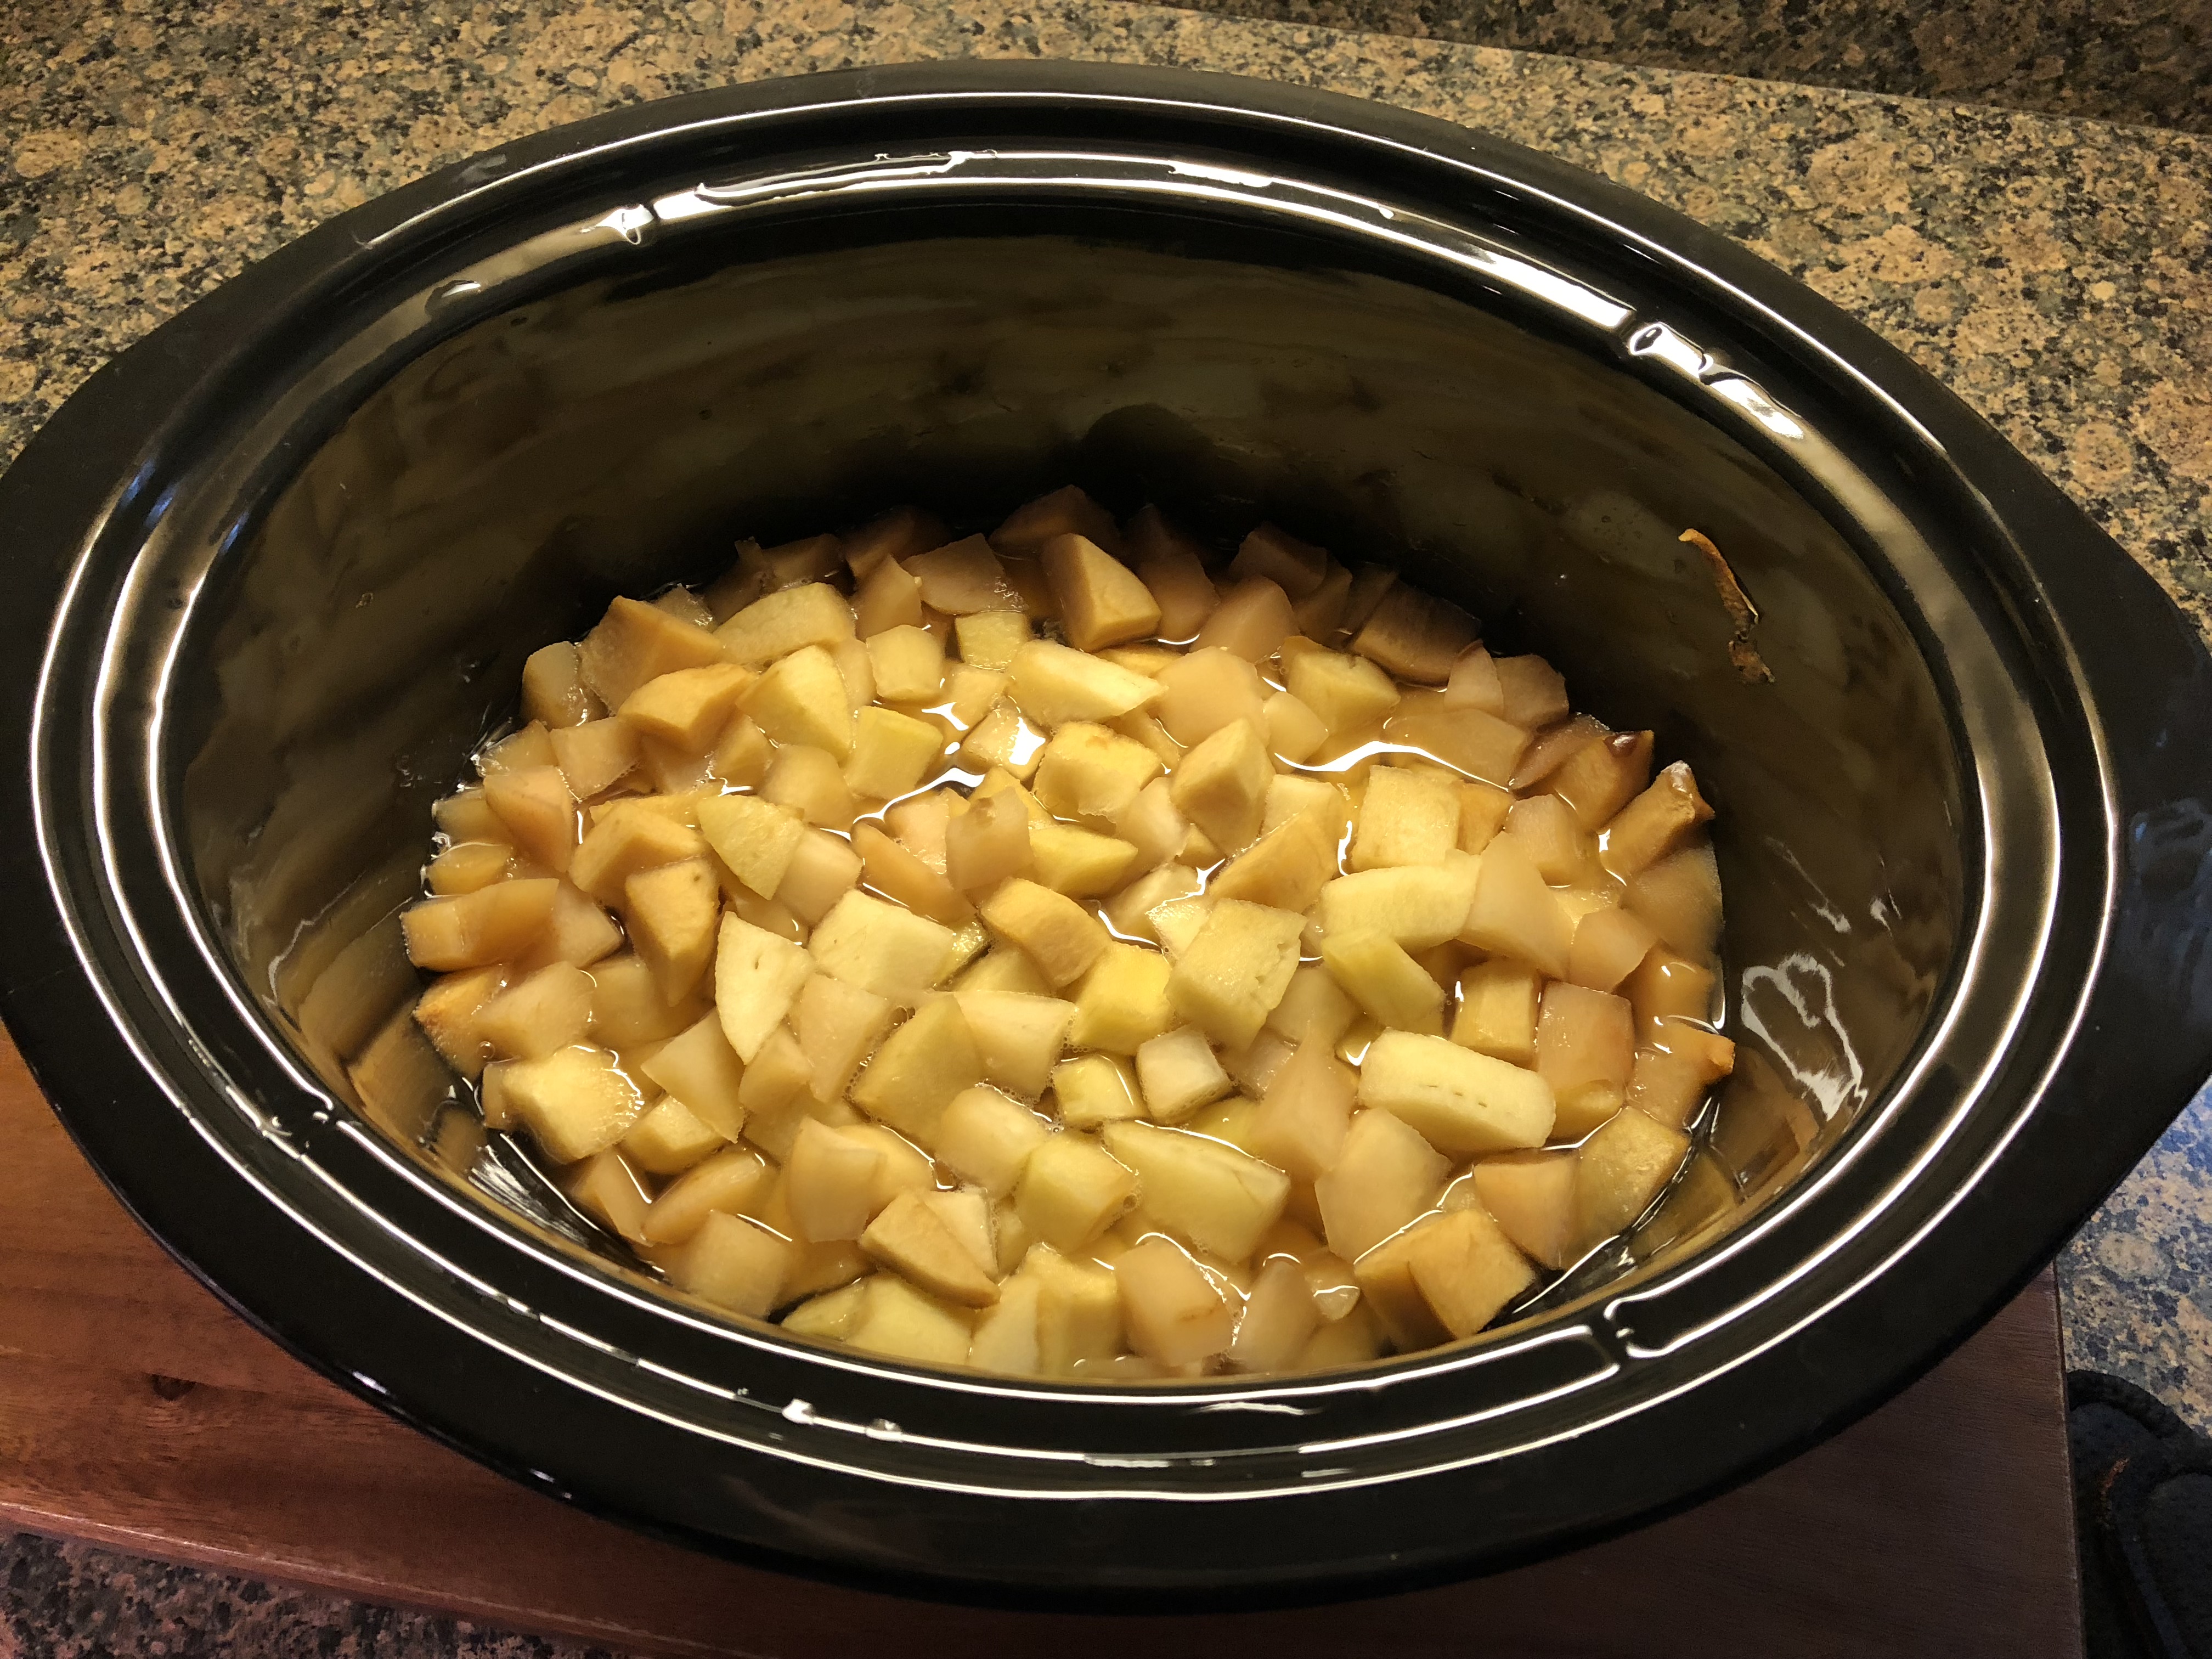
Next, I combined brown sugar, spices and chopped walnuts with softened butter and divided the mixture among the apples which I placed in a glass baking dish. And finally, before placing the apples in the oven I filled the bottom of the dish with a cup of boiling water. This helps to keep the apples moist while baking.

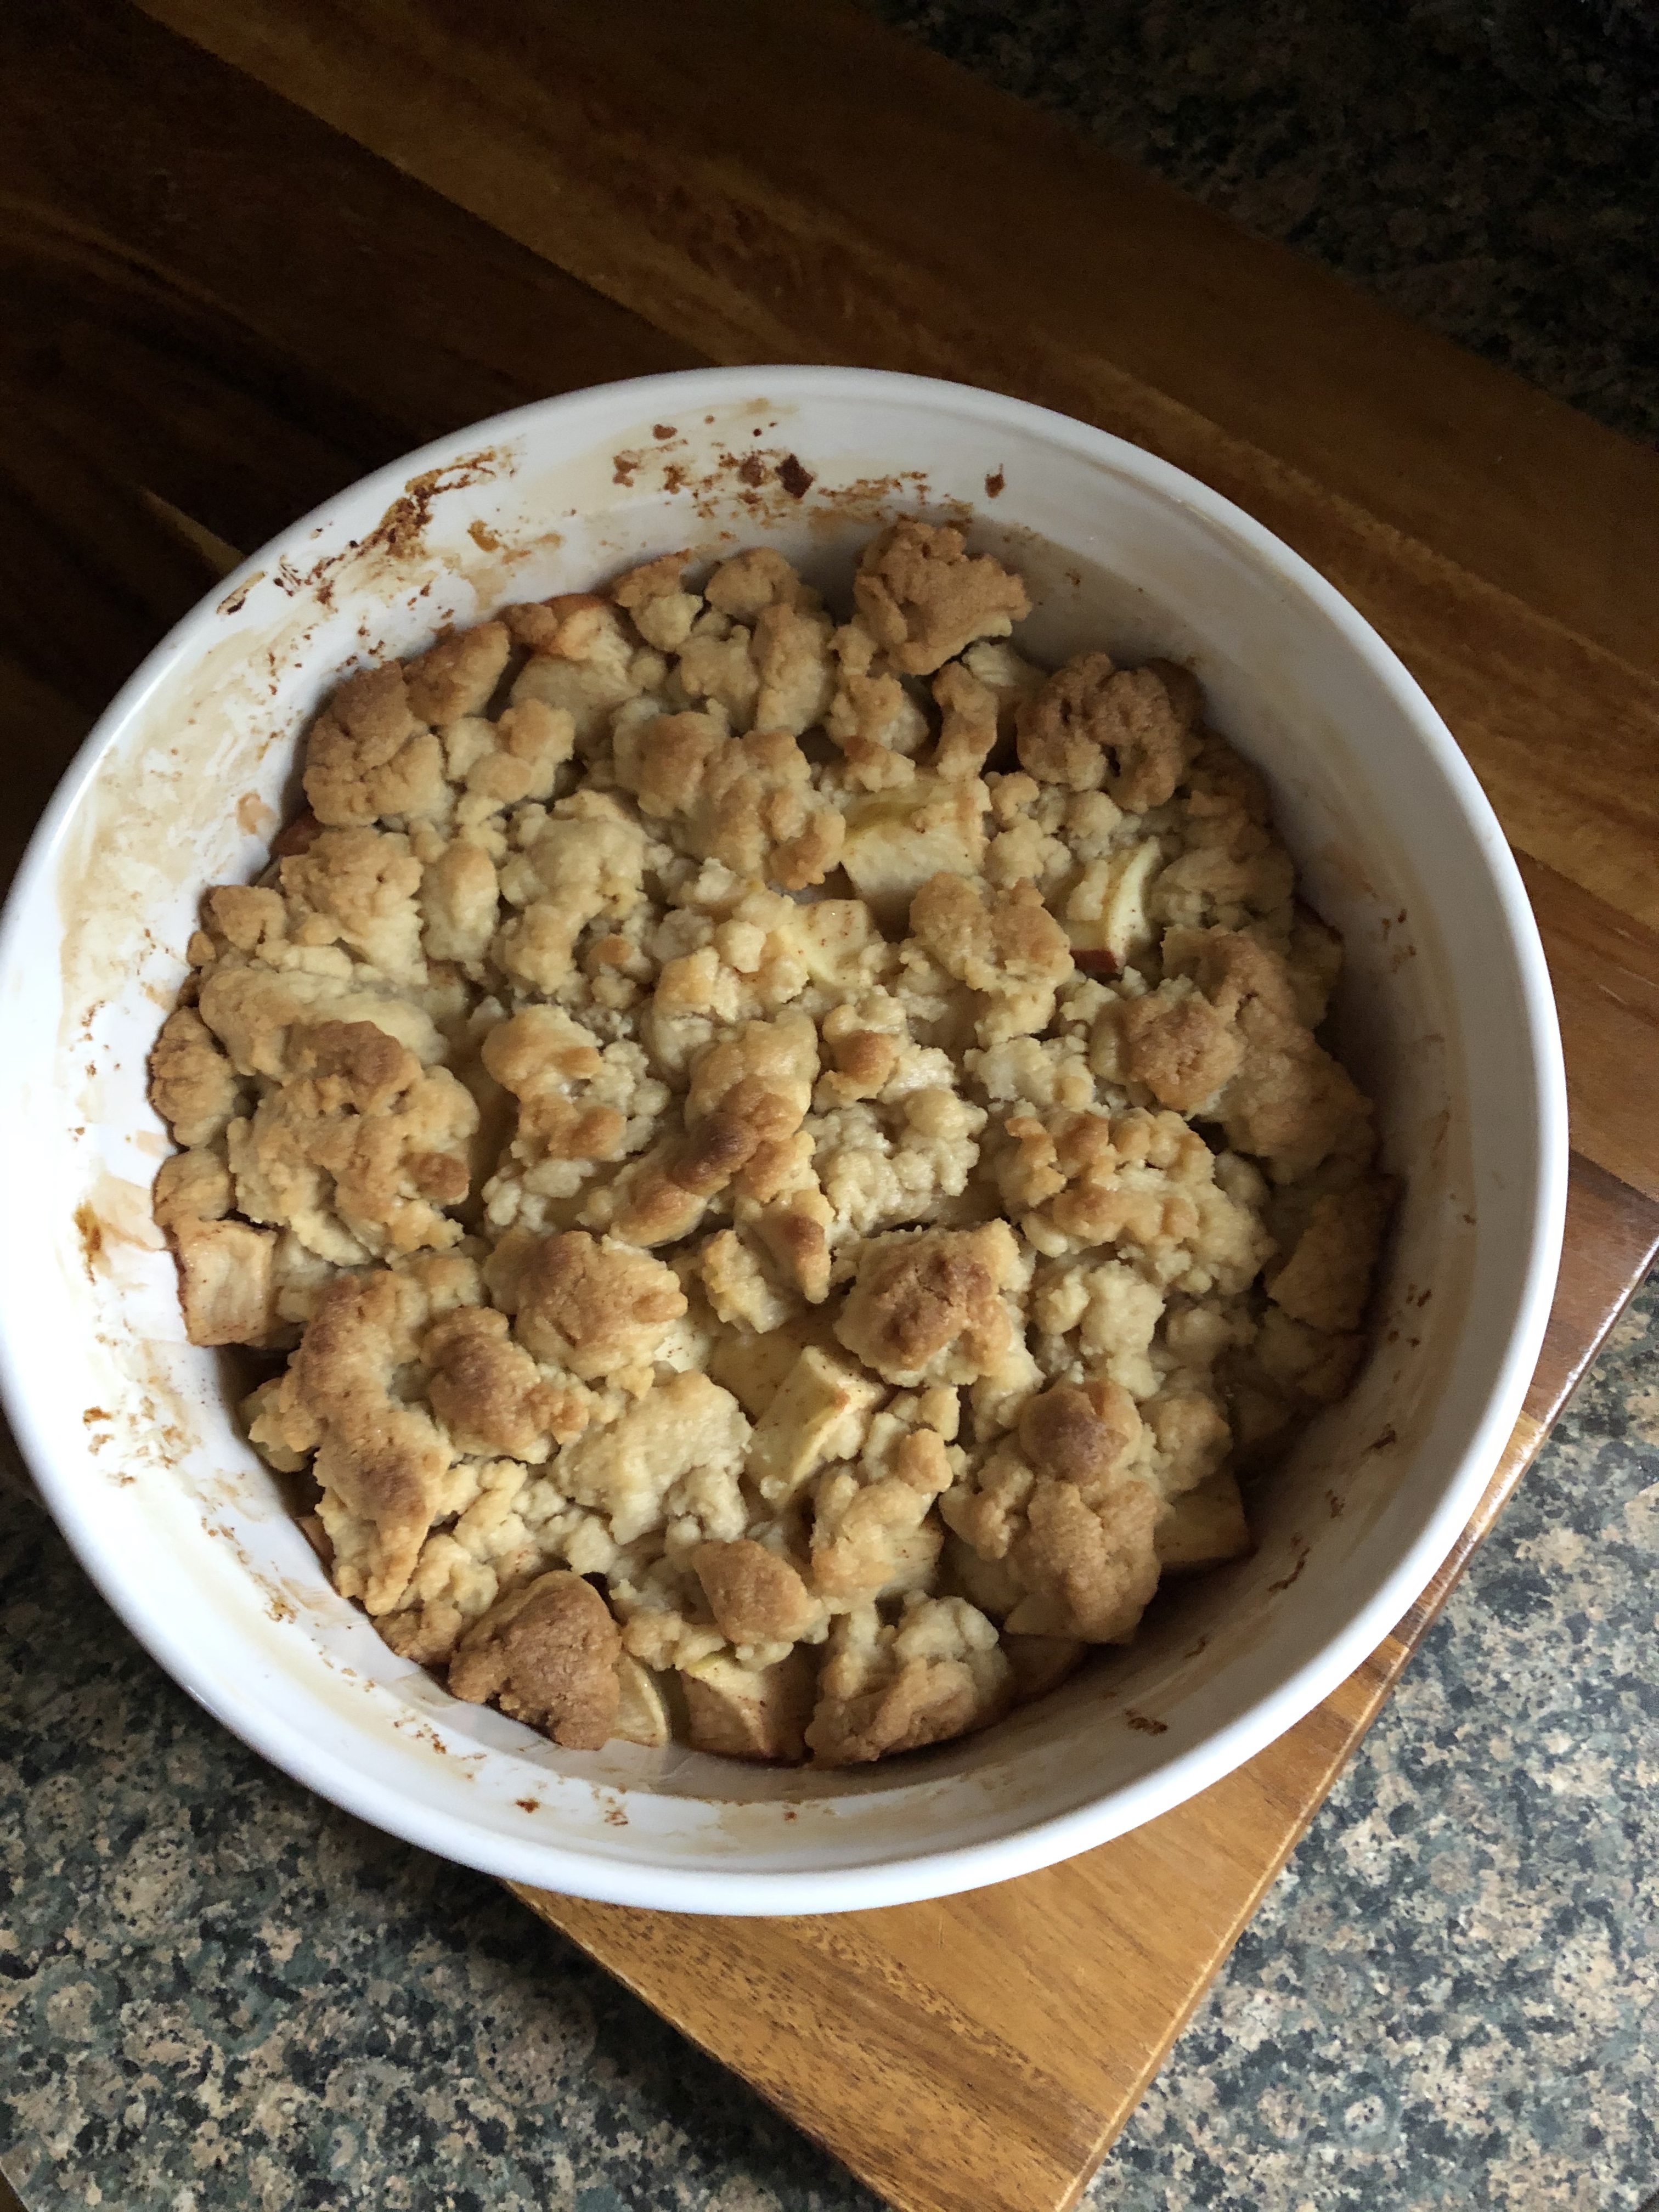
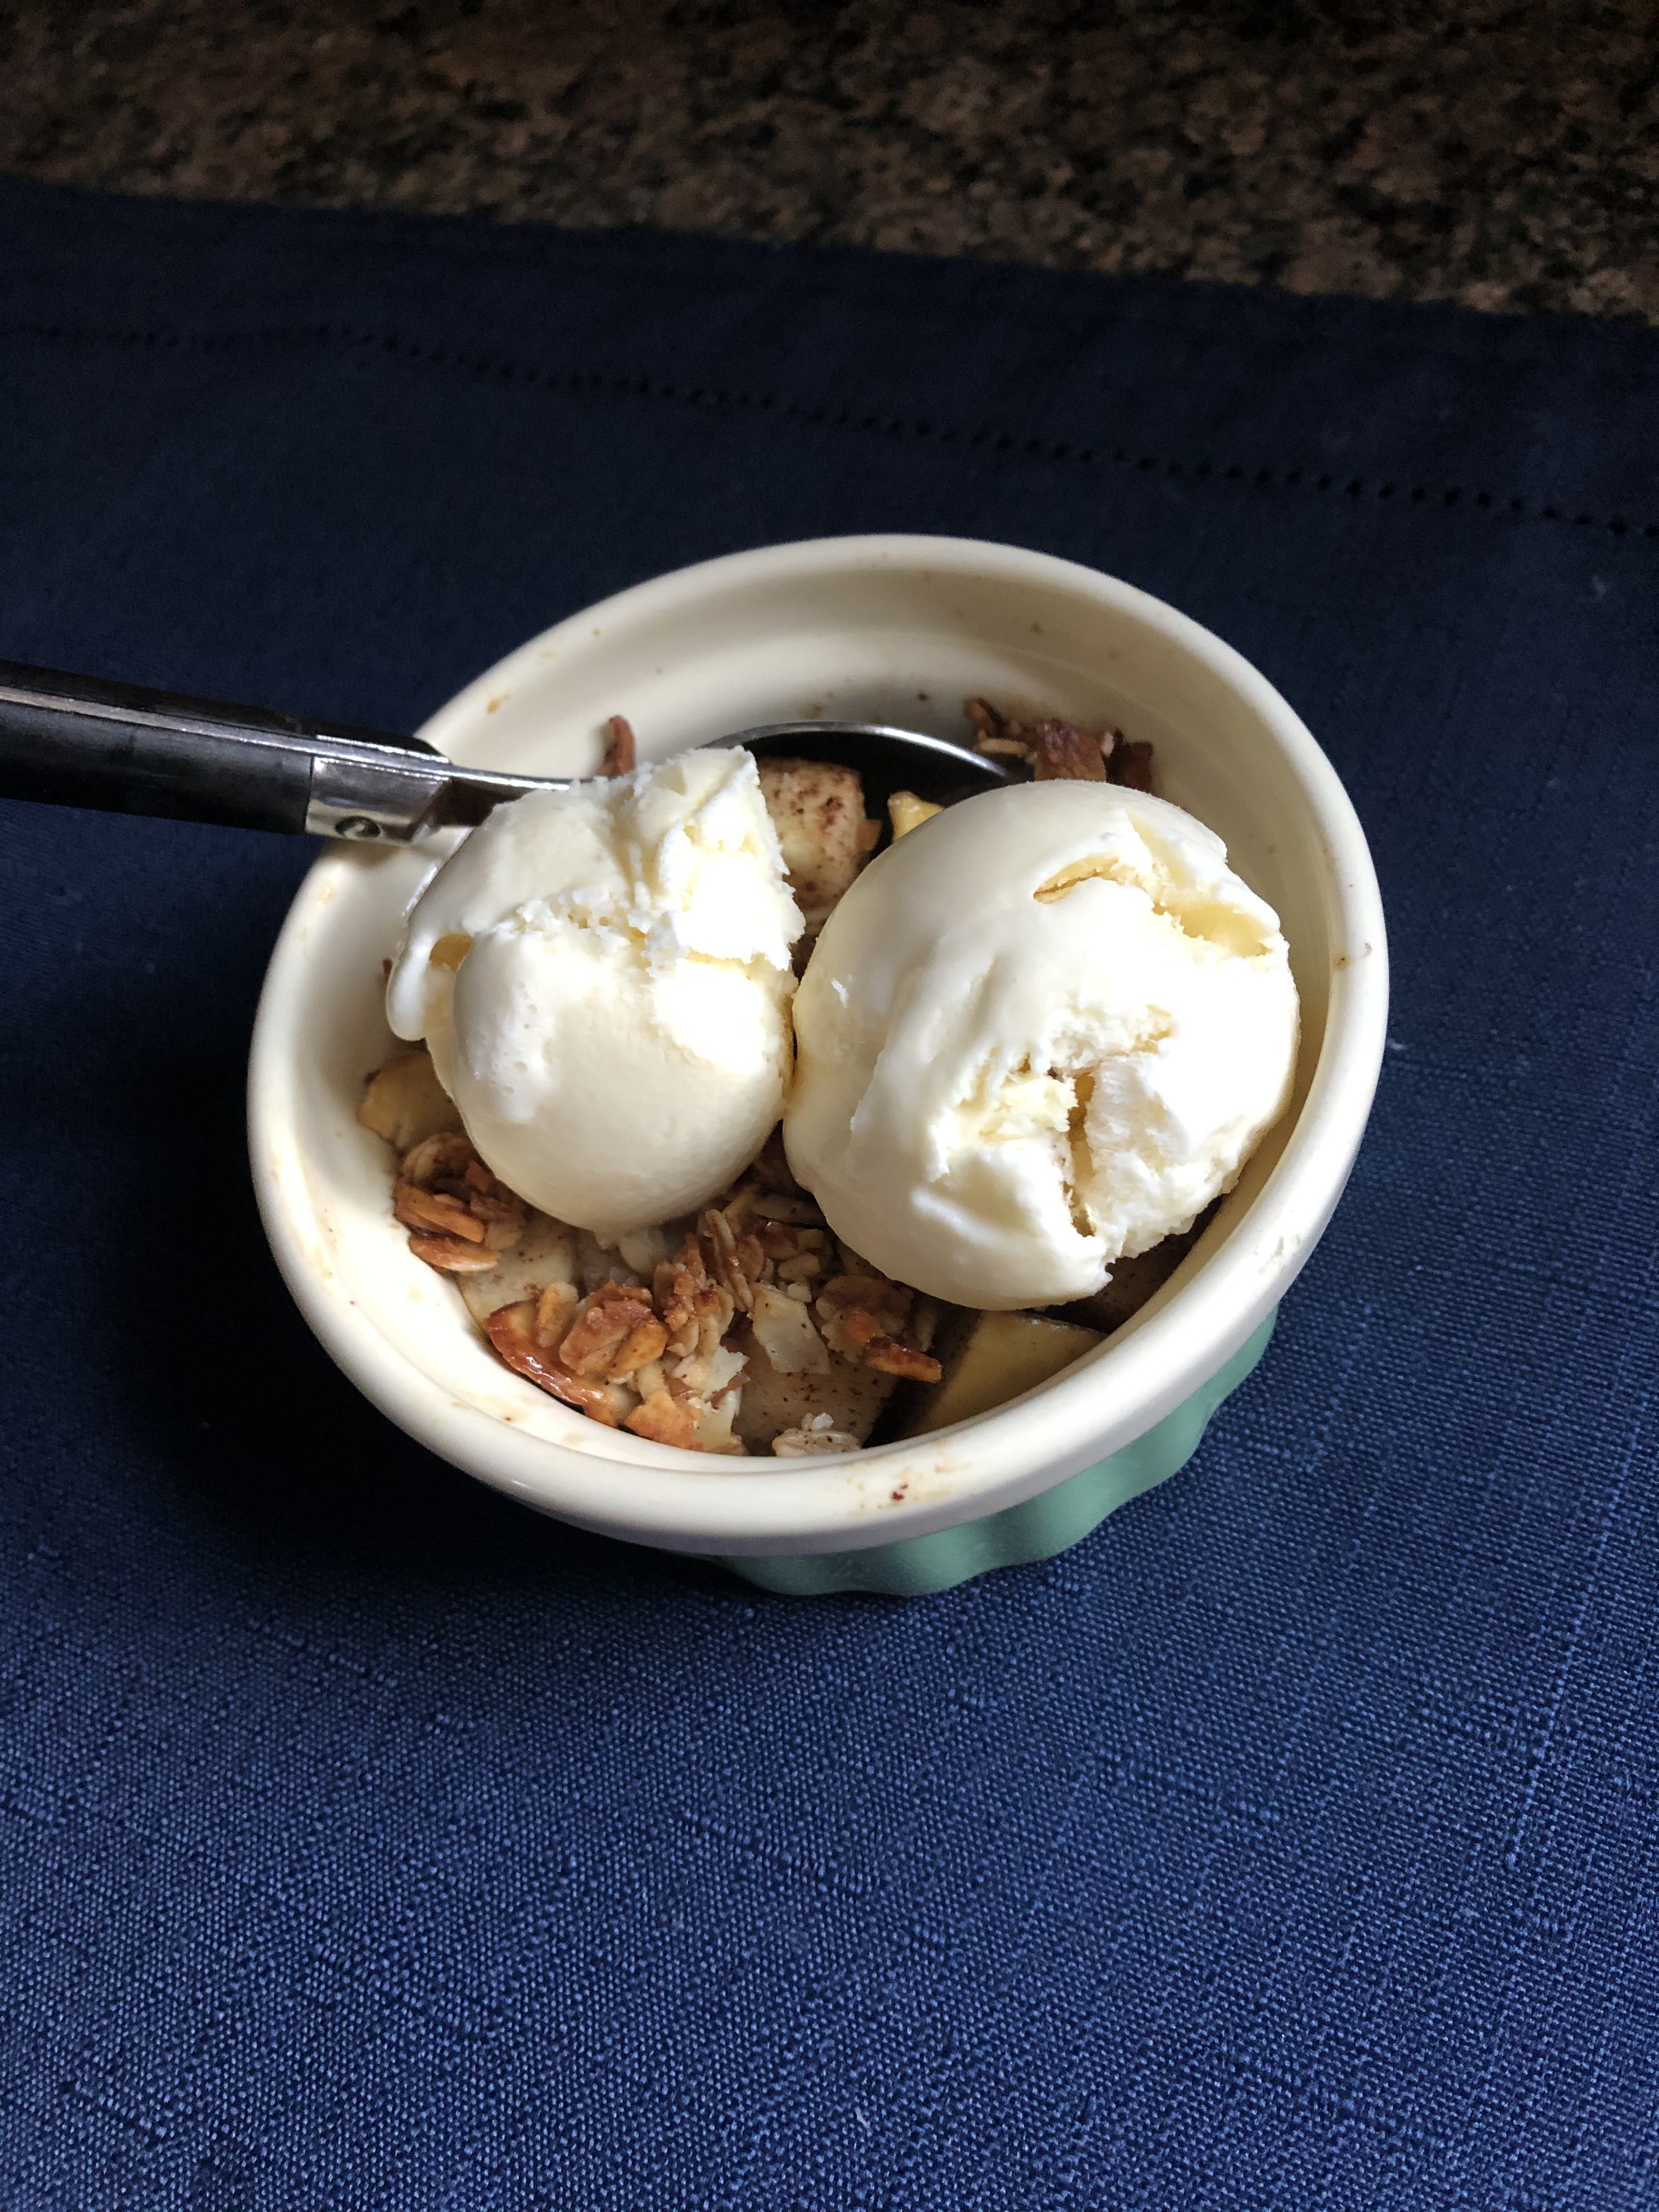
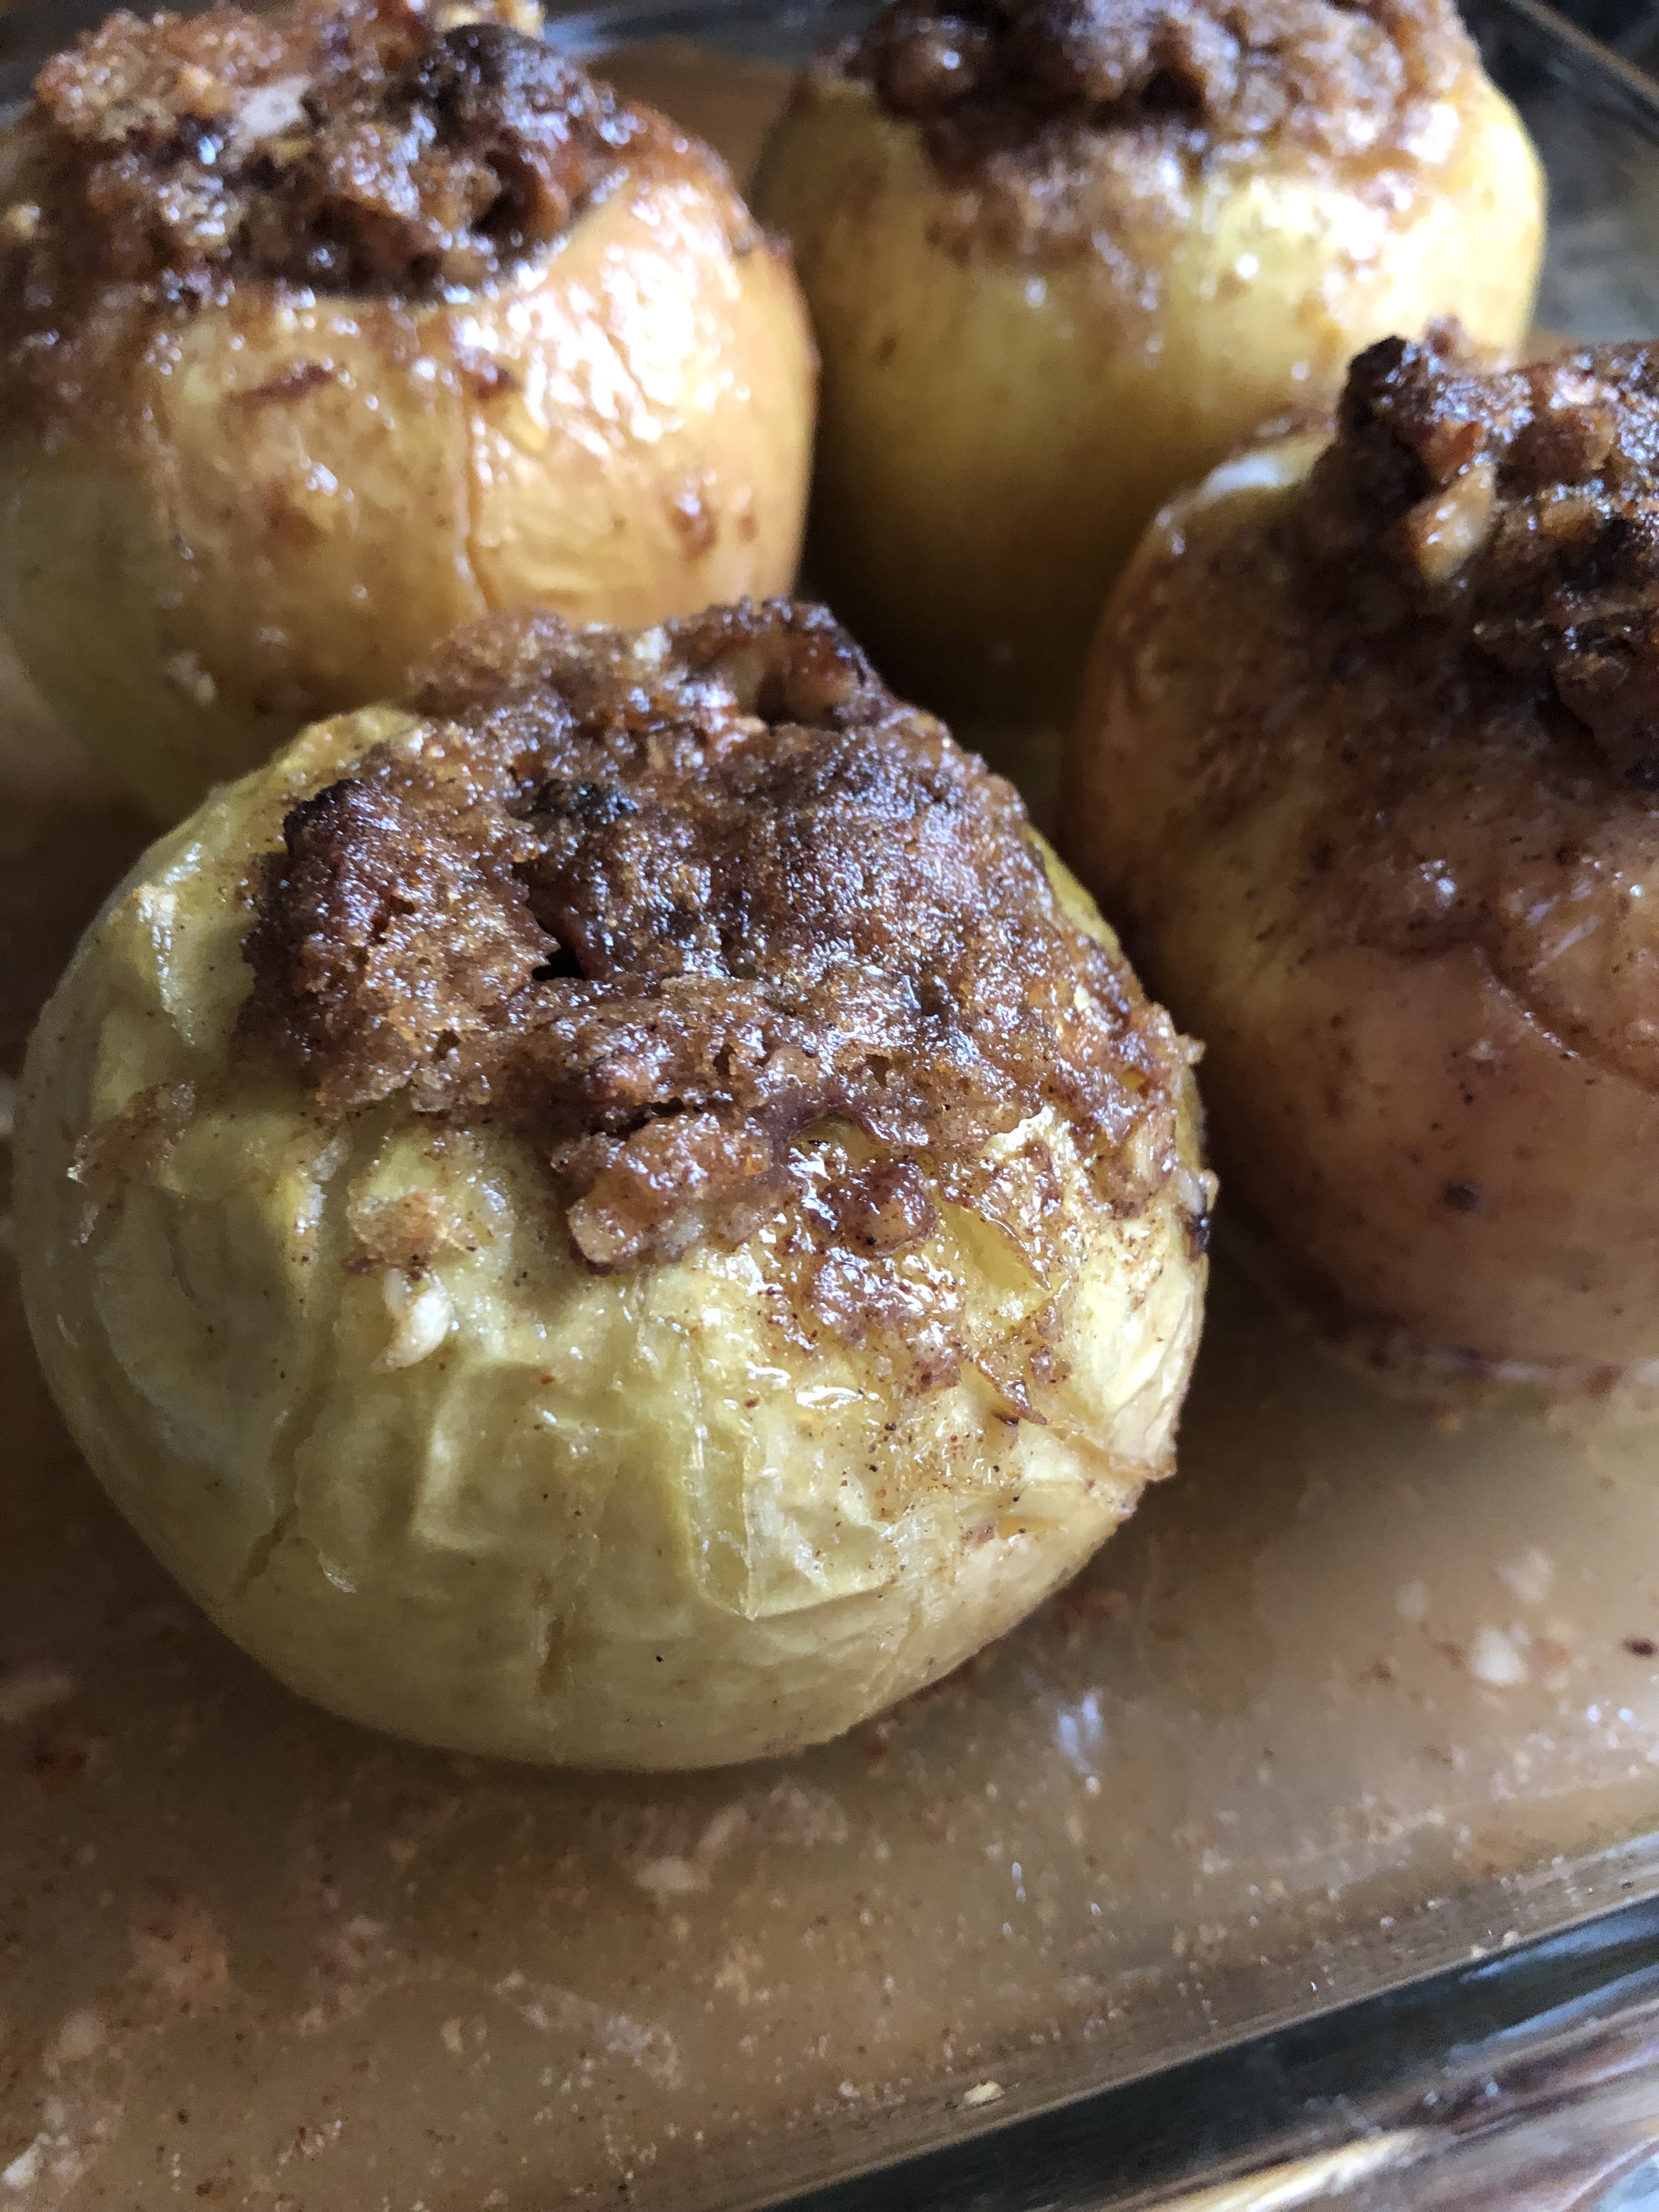
And after baking for about 40 minutes in the oven I had delicious baked apples and wonderful aroma swirling around my house. These are delish on their own but even better with a scoop or two of vanilla ice cream.

One more thing to note, the best apples to use for baking are those that are firm; Granny Smith, Cortland, Fuji, Gala, etc. Since I picked quite a few different types of apples I can’t be all that sure which I used to make these baked apples. If you are concerned that the apples you are using may be too soft just keep an eye on them while they are in the oven. They may be ready in less time.

Baked Apples

Ingredients:

4 medium to large apples

4 tablespoons unsalted butter, at room temperature

1/2 cup light brown sugar

1 teaspoon cinnamon

1/4 teaspoon nutmeg

1/4 teaspoon ginger

1/4 cup chopped walnuts, optional

1 cup boiling water

Directions:

Preheat oven to 375 F.

Use a sharp knife or apple corer to cut out the core of the apples leaving about a 1/2-inch of the bottom of the apple intact. Scoop out the insides of the apples to make the holes wide enough to place the butter mixture inside.

In a medium bowl whisk together the brown sugar, cinnamon, nutmeg, ginger and chopped walnuts (is using). Add in the softened butter and mash everything together with a fork or use your hands to mix it together until it’s well combined.

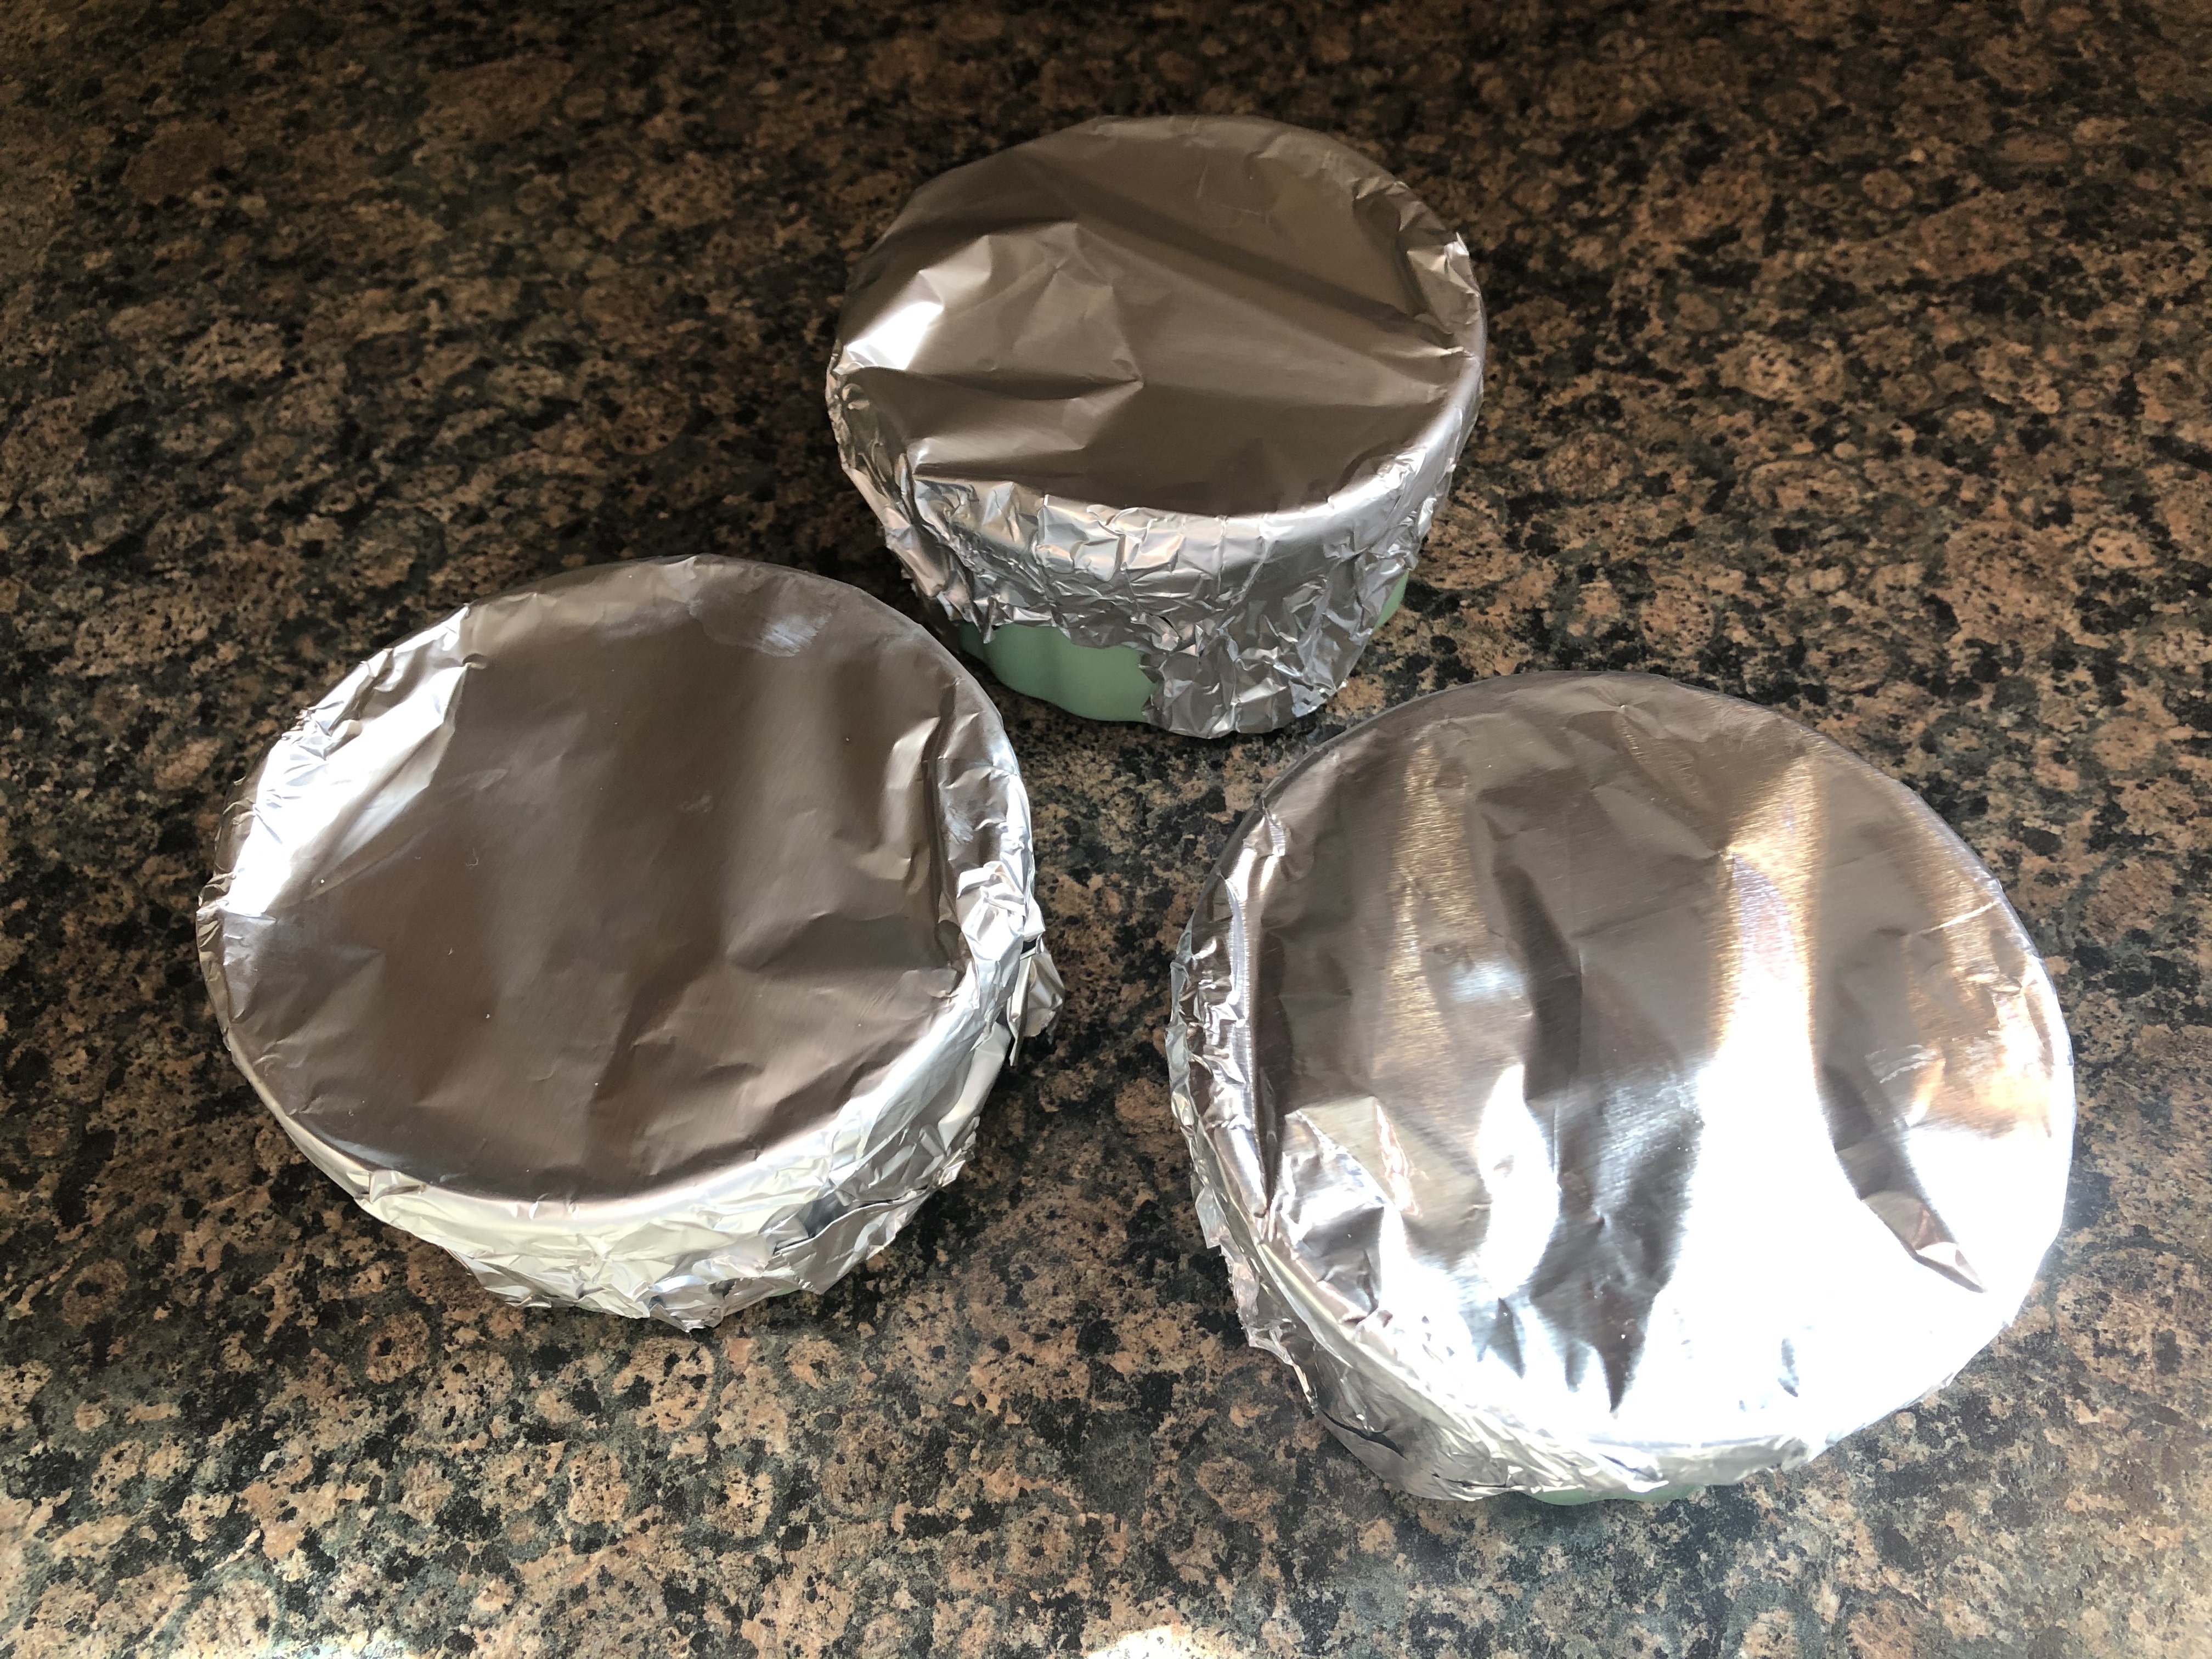
Place the apples in an 8×8-inch baking dish. Divide the butter mixture among the apples and then carefully pour the hot water into the bottom of the pan.

Bake in the preheated oven for 35-40 minutes, or until the apples are cooked through and soft but not mushy.

Remove from the oven and let cool for a few minutes before enjoying.

Any leftover apples can be stored in the refrigerator and reheated in the microwave.

Recipe first appeared on Bead Yarn & Spatula.

Apple Butterscotch Cookies

So, I’m on a bit of an apple kick. I welcomed Fall on here with an Apple Pie Spice Cake, I recently made an Apple Fritter Bread that I will be sharing very soon and today I am bringing you a recipe for Apple Butterscotch Cookies. They do say an apple a day keeps the doctor away, but, I am just not sure if that also applies to apples baked into desserts.

These cookies are perfect for Fall. Not just because of the apples, but because the cinnamon and butterscotch in these cookies would pair perfectly with a hot cup of tea or cider. Both of which are a welcome relief to combat the slight chill in the air of a perfectly crisp Fall day. As for the texture, they are firm around the edges and perfectly soft in the middle. The ideal combination of any cookie.

Apple Butterscotch Cookies

  • Servings: 36 cookies
  • Print

Ingredients:

2 ½ cups flour

2 teaspoons cinnamon

1 teaspoon baking soda

2 sticks unsalted butter, at room temperature

3/4 cup sugar

3/4 cup light brown sugar

2 eggs

1 teaspoon vanilla extract

1 Granny Smith apple peeled and diced

1 cup chopped walnuts

1 cup butterscotch chips

Directions:

Preheat oven to 350 F. Line two baking sheets with parchment paper.

In a medium bowl whisk together the flour, cinnamon and baking soda and set aside.

In a large bowl, using a hand mixer on medium speed, cream together the butter and both sugars until creamy. Add the eggs 1 at a time, beating well after each addition. Beat in the vanilla extract.

Add the flour mixture to butter mixture and beat on low until just incorporated.

Add in the diced apple, chopped walnuts and butterscotch chips and mix until everything is well combined.

Use a cookie scoop to drop the dough on the prepared baking sheets. Bake in the preheated oven for 13-15 minutes, until the cookies are set on top and starting to brown around the edges.

Transfer to a wire rack to cool completely. Store in an airtight container at room temperature.

Recipe first appeared on Bead Yarn & Spatula.

Apple Crumble

While pumpkin and pumpkin spice does dominate as the flavor of the Fall, there’s another fruit that is just as delicious… Apples. One of my favorite things to do in the Fall is to go apple picking. And while I have had to forgo many activities due to the pandemic, thankfully apple picking wasn’t one of them. I’ll admit though that this year I haven’t been snacking on my apples as much as I have in the past. I think that’s partly due to the fact that I am working from home. I have been snacking on other things instead, whereas an apple was my snack for my drive home. It’s all good though, it just means I can bake with them instead. Last year I made an Apple Crumb Pie that was a hit! I actually ended up making two of them for Thanksgiving. And this year I am bringing you a recipe for an Apple Crumble that’s just as good. You get all the flavors of apple pie without the fuss of making a crust and with the added deliciousness of a crumble topping.

After peeling, coring and chopping the apples I tossed them with sugar, flour, lemon juice, cinnamon and salt. I then transferred them to a baking dish that I greased with unsalted butter.

To make the crumble topping, using a handheld mixer, I beat together a stick of softened unsalted butter with brown sugar until fluffy and then added in flour and salt and continued beating the mixture until large pieces began to form.

I then sprinkled the crumble topping over the apples.

And then baked it in a 375 F preheated oven for about an hour, until the mixture was bubbling.  After the first 20 minutes, I tented the dish with aluminum foil to prevent the topping from burning.

After letting it cool, I enjoyed some with vanilla ice cream.


Apple Crumble

Ingredients:

For the Apples:

1 tablespoon butter to grease dish

3 lbs. apples, peeled, cored & chopped

6 tablespoons sugar

2 tablespoons flour

2 tablespoons fresh lemon juice

1/2 teaspoon cinnamon

1/4 teaspoon kosher salt


For the Crumble Topping:

1 stick unsalted butter, at room temperature

1/2 cup light brown sugar

1 cup flour

1/2 teaspoon salt


Vanilla Ice Cream, for serving


Directions:

Preheat the oven to 375 F. Grease a 2-quart baking dish the tablespoon of butter.

Toss the apples, sugar, flour, lemon juice, cinnamon and salt in a large bowl. Transfer to the prepared baking dish and set aside.

Make the crumble topping: In a medium bowl beat the butter and light brown sugar together until light and fluffy. Add in the flour and salt and continue beating until large pieces form.

Sprinkle the crumble topping over the apples and bake in the oven. After the first 20 minutes tent the dish with aluminum foil and continue baking until the mixture begins to bubble, about an hour.

Let cool for 20 minutes and then serve.

Recipe from Martha Stewart

Apple Crumb Pie

I’m wrapping up my mini apple week today with a pie that would be a perfect addition to your Thanksgiving dessert table… An Apple Crumb Pie. I make my fair share of desserts for Thanksgiving and this year I decided to make things a little easier on myself and forgo making any pies with a decorative pie crust. My baking list for Thanksgiving usually includes about 6 or 7 different desserts so taking that small thing off of my list is definitely going to help me get everything done in a timely fashion. And since I normally head to the city to see the Macy’s Thanksgiving Day Parade balloons get inflated the night before Thanksgiving I have limited time on that day to bake so I normally end up baking one last thing on Thanksgiving morning and I am trying to avoid that this year. Coupled with no decorative pie crusts I am also thinking of baking one or two things ahead of time which should definitely free up some time for me.

To begin this pie I started by making the crumb topping. Once I mixed all of the ingredients together I placed it in the freezer so it could firm up. Next, I covered a large baking sheet with aluminum foil and placed it on the bottom rack of my oven and preheated it to 400 F. And finally I made the filling. I added all of the ingredients for the filling to a large bowl and using a rubber spatula gently folded them together.

Now, I’ve never had much success in making pie crust from scratch so I always opt to either use refrigerated pie crust or my real favorite frozen pie crust. I apologize to those of you who are cringing right now. I just find it fool-proof, especially the frozen one, and since I am usually more concerned with how the filling is going to come out and perfecting a decorative crust it’s just easier for me. To be honest, when I do make a decorative pie crust I use a frozen crust for the filling and a refrigerated pie crust to decorate it. It’s so much easier to make cut outs or cut long strips with pie crust that is already the perfect thickness. If you’re thinking of following my trick here’s another one. If you want to decorate your pie with cut-outs make sure you refrigerate them after cutting them out before placing them on your pie. Same thing goes for the strips you would use for braiding or a lattice design. Handling the pie crust softens it quickly and then when you go to place it on your pie it won’t place as well or may start to break (especially if you are making a lattice design), firming it up again makes it easier to work with and it will bake better. Okay, so back to the pie at hand. I used a frozen 9-inch deep dish pie crust. I kept the pie crust in the freezer until I was ready to fill it. I spooned the filling into the pie crust and then gently topped it with the crumb topping, breaking any pieces of crumb that were too large. I carefully removed the hot pan from the oven and placed the pie on it and then returned it to the oven.

Look at those nice pieces of crumb topping… YUM!!!

I baked it at 400 F for about 25 minutes and then reduced the oven temperature to 350 F and baked it for about another 50 minutes. My apples were a tad soft to begin with (I got them a few weeks ago from apple picking) so my pie was ready rather quickly. About 25 minutes after reducing the heat I covered the top of the pie with a piece of aluminum foil so the crumb topping wouldn’t burn. Once I removed it from the oven the crumb topping was a perfect golden color and the filling had bubbled out just a bit.

After letting it cool completely I placed it in the refrigerator covered with aluminum foil for a few days before cutting into it -I baked it on a Thursday night and sliced it on Sunday. Final verdict… It was the best apple pie I’ve ever made. I would say pie in general, but that distinction belongs to Key Lime Pie. Per requests, I am planning on making two of these for Thanksgiving!


Apple Crumb Pie

Ingredients:

1 Frozen 9-inch deep dish pie crust*

Crumb Topping:

1 cup all-purpose flour

1/3 cup light brown sugar

1/4 teaspoon ground cinnamon

1/4 teaspoon salt

1 stick unsalted butter, cut into 1/2-inch pieces at room temperature

Filling:

3 pounds mixed apples, peeled and sliced 1/4-inch thick

4 tablespoons unsalted butter, melted

1/3 cup granulated sugar

1/4 cup light brown sugar

2 tablespoons all-purpose flour

1 tablespoon fresh lemon juice

1 teaspoon ground cinnamon

1/8 teaspoon salt

*You could also use a homemade pie crust or a refrigerated pie crust. If using either, once you have prepped your pie plate with the crust place the dish in the refrigerator until the crust is firm, at least 1 hour or overnight. If using a frozen pie crust, you can fill the crust right out of the freezer.


Directions:

Make the crumb topping: Mix the flour, brown sugar, cinnamon and salt in a medium bowl. Add the butter to the mixture and use your hands to mix it until crumbs form. Place in the freezer until ready to use.

Line a large baking sheet with aluminum foil and place it in the bottom rack of your oven and then preheat the oven to 400 F.

Make the filling: Mix the apples, melted butter, both sugars, flour, lemon juice, cinnamon and salt in a large bowl. Spoon the filling into the pie crust. Sprinkle the filling with the frozen crumbs. Breaking any large crumbs into smaller pieces and making sure to spread them evenly over the pie and patting them down while doing so.

Place the pie on the baking sheet in the oven and bake until the crumbs lightly brown, about 25-30 minutes. Reduce the oven temperature to 350 F and continue baking until the apples are completely soft when pierced with a knife, about an additional 60 to 80 minutes. If you find the crumb topping is getting too dark cover it loosely with a piece of aluminum foil. Transfer the pie to a wire rack to cool completely.

Recipe from Food Network

Apple Cider Doughnut Cake

I’ve mentioned it quite a few times before that one of my favorite things about going apple picking is getting freshly made apple cider doughnuts. I posted about a baked version last year. And while those were good, there is something about a fried doughnut that just can’t be topped. If you are not sure about frying doughnuts (I tried once and it was a fail) check out my post for Apple Cider Fritters. They’re bite size and so good you may end up guilty of eating one too many. So, when I came across a recipe for a twist on my favorite doughnuts in a cake form (including a cinnamon sugar topping) I knew I had to try it. Well, at first I was going to pass on it. I try to stick with recipes that require ingredients that I have on hand or that I know I will use again. So, when I saw that this recipe included wheat flour as one of the ingredients I was a tad bit skeptical. I know, wheat flour isn’t something that is all that odd, but, there aren’t many recipes I come across that require it so I was a bit concerned that it would end up just sitting in my cabinet or refrigerator indefinitely. I also wondered why both? Which of course required a Google search. And what I learned is that using a combination of all-purpose and whole wheat flour produces a cake that is lighter in texture and rises better. And by mixing the two you also get the added benefits of more fiber and nutrients thanks to the whole wheat.

So, a slightly funny story while making this cake. One of the ingredients is unsweetened applesauce. I had a jar of it in my refrigerator from another recipe but I never actually checked it until it was time to add it to the batter. So, I had all of my wet ingredients in a bowl and was about to add in the applesauce when I saw there was mold on top of it. Okay, not so funny. I didn’t bother to check it since it wasn’t set to expire until next year. But, this will definitely be a lesson to me to check those odd ball ingredients just in case. This is a good example of what I was saying before, buying ingredients that will sit without being used for a while. I ended up covering the ingredients with a piece of plastic wrap and ran out to the store to buy a new jar of applesauce. Hopefully the same thing won’t happen to this one. I guess I better come up with recipes for whole wheat flour and applesauce ASAP.

Letting the ingredients sit for a bit of time didn’t have any affect on the final cake. It did somehow separate while baking, but, I doubt it was because of the time my ingredients were left sitting. If you are having trouble seeing it in the picture below it’s on the right-hand side.

After adding a cinnamon sugar coating to the cake and letting it cool completely it was time to slice in to the cake and enjoy a piece. It didn’t taste exactly like my favorite apple cider doughnuts, but, it was just as good.

Apple Cider Doughnut Cake

Ingredients:

2 cups all-purpose flour

1 cup whole-wheat flour

1 1/2 teaspoons baking powder

1 1/2 teaspoons ground cinnamon

1/2 teaspoon baking soda

3/4 teaspoons kosher salt

1 3/4 cups sugar

1 cup apple cider

3/4 cup extra-virgin olive oil

3/4 cup unsweetened applesauce

2 teaspoons vanilla extract

3 large eggs, at room temperature

4 tablespoons unsalted butter, melted


Directions:

Preheat the oven to 350 F degrees. Spray a Bundt pan with baking spray or coat with butter and flour.

In a large bowl whisk together both flours along with the baking powder, 1 teaspoon of the cinnamon, baking soda and salt.

In another bowl whisk together 1 1/2 cups of the sugar, apple cider, olive oil, applesauce, vanilla and eggs. Once well blended add to the flour mixture and whisk both mixtures together until well combined. Transfer the batter to the prepared pan.

Bake in the preheated oven for 45 to 50 minutes, or until a cake tester inserted in the middle comes out clean. Transfer the pan to a wire rack set over a large bowl or rimmed baking sheet to cool for 15 minutes. While the cake is cooling mix together the remaining sugar and cinnamon and melt the butter.

Invert the cake onto the wire rack. Brush sections of the cake with melted butter and the sprinkle with the cinnamon sugar mixture. Continue doing this until the entire cake is coated with the butter and cinnamon sugar. Let the cake cool completely before serving.

Recipe from Martha Stewart

Individual Mini Apple Crisps

While pumpkin recipes have been the focus of most of my recent blog posts, there is another fruit that deserves some love this time of the year… Apples. I went apple picking in early October and while I didn’t get to pick my favorite apple, Honeycrisp, I did end up with a good amount of delicious apples that I have been enjoying. As my bag of apples begins to dwindle down some of them aren’t as crisp for eating so I have finally started baking with them. So this week I will be bringing you three recipes apples related. Today’s Individual Mini Apple Crisps, an Apple Cider Doughnut Cake (which didn’t require apples, but, fresh apple cider which I picked up while apple picking) and finally an Apple Crumb Pie. This pie is perfect if you love apple pie but are a little intimidated with making and/or decorating pie crusts.

While these apple crisps are perfect to serve as a dessert if you are having people over for dinner or part of your Thanksgiving desserts (the recipe can easily be doubled or halved as I did) they are a great make ahead dessert as well. I prepped them, covered them with aluminum foil and then refrigerated them until I was ready to bake it. I didn’t change much from the recipe, well, I did make my own apple pie spice since I had the spices on hand and it was cheaper than buying it.

I began by combining the ingredients for the crust and topping (the crisp part) in one bowl. And in another bowl I combined the ingredients for the apple filling. I began assembling the crisps by pressing two tablespoons of crisp mixture into the bottom of ramekins I sprayed with cooking spray. I then evenly divided the apple filling into each of the ramekins. And finally, I sprinkled the remaining crisp mixture over the apple filling. At this point you could bake the crisps in the oven on a baking sheet or, do what I did.

I covered each of the ramekins with aluminum foil and placed them in the refrigerator until I was ready to enjoy them.

When I was, I placed the ramekin on a baking sheet and baked it in a 350 F preheated oven for 30 minutes. As a note, I prepped these on a Sunday and enjoyed my last one on a Wednesday so these will definitely keep in the refrigerator for a few days.

I then topped it with a few scoops of ice cream before digging in. If you omit the ice cream, these are pretty healthy. The crisp is made with old-fashioned oats, raw almonds and honey. While the apple filling just requires a few tablespoons of sugar. This is definitely something I will be making again. Probably next time though I won’t halve the recipe. Since I know for sure that the crisps will keep in the refrigerator for a few days I wouldn’t mind having a few more on hand for a dessert fix.

Mini Apple Crisps

Ingredients:

Crust & Topping:

1/4 cup unsalted butter, at room temperature

3 tablespoons honey

1/2 teaspoon vanilla extract

1/2 teaspoons apple pie spice*

1 cup crush raw almonds**

1 cup old-fashioned oats

Apple Filling:

3 unpeeled medium apples, chopping into 1/2 inch pieces

3 tablespoons sugar

1 tablespoon fresh lemon juice

1 tablespoons apple pie spice

Vanilla ice cream, optional


Directions:

Preheat the oven to 350 F. Spray 6 ramekins with cooking spray.

In a large bowl mix together the butter, honey, vanilla extract and apple pie spice. Add in the almonds and oats and toss together until well coated. Press two tablespoons onto the bottoms of each of the prepared ramekins.

In a medium bowl combine the apples, sugar, lemon juice and apple pie spice. Toss the ingredients together well and then divide it evenly among the ramekins. Sprinkle the top of the filling with the remaining oats and almond mixture.

Place the ramekins on a baking sheet and bake in the oven for 30 minutes, or until the apples are soft and topping is golden brown. ***

Serve warm, topped with ice cream.

*To make your own Apple Pie Spice combine 1 1/2 tablespoons cinnamon, 1 1/2 teaspoons of nutmeg and 1 teaspoon allspice.

**I used raw sliced almonds. I put them in a resealable bag and then rolled them with a roll pin to crush them.

***Alternatively you can cover each of the ramekins with aluminum foil and place in the refrigerator to heat at a later time.

Recipe from Taste of Home

Baked Apple Cider Donuts

I remember that the only time I was able to get Apple Cider Donuts was when I would go apple picking in upstate NY. I used to look forward to that 2-hour car trip, not only for the apples, but because I knew on the 2+ – hour (thanks to the inevitable traffic) car ride home I would be enjoying some freshly made warm donuts. Nowadays, it seems like you can get Apple Cider Donuts just about anywhere. Practically every apple orchard and farm I have visited sells them. Thankfully there are two places not terribly far from me that sell them year-round and both are quite delicious. There are some other places that sell them and they are, well, to be kind, I will say not so delicious.

While the Apple Cider Donuts I have had are deep-fried, I have attempted to make my own baked Apple Cider Donuts at home and until recently haven’t been that successful. The recipes I tried usually involved reducing the apple cider and I am not sure if I wasn’t reducing it enough or what, but, they were always a fail. Recently though I came across a recipe that didn’t involve reducing the apple cider and included olive oil that produced a delicious donut that actually stayed fresh & moist for a few days – thanks to said olive oil. I wouldn’t say that these are a perfect substitution to the delicious ones I get upstate, but, they are pretty close.

If you are looking for something bite-sized so you don’t feel as guilty (granted, they are fried though!), check out these Apple Cider Fritters I posted last year.

Baked Apple Cider Donuts

  • Servings: 18-21 Donuts
  • Print

Ingredients:

3 cups flour

1 1/2 teaspoons ground cinnamon*

1/8 teaspoon ground nutmeg*

1/8 teaspoon ground allspice*

1 1/2 teaspoons baking powder

1/2 teaspoon baking soda

1 teaspoon kosher salt

1 1/2 cups sugar

1 cup apple cider

3/4 cup unsweetened applesauce

3/4 cup extra-virgin olive oil

3 large eggs

2 teaspoons vanilla extract


Topping:

4 tablespoons unsalted butter, melted

1/2 cup sugar**

2 tablespoons cinnamon**


*If you have apple spice, use 1 teaspoon of ground cinnamon & 1 teaspoon of apple pie spice and omit the nutmeg & allspice.

**If you have cinnamon sugar you can use that in place of mixing together cinnamon & sugar


Directions:

Preheat oven to 350 F. Spray donut pans with baking spray and set aside.

In a large bowl whisk together the dry ingredients: flour, spices, baking powder, baking soda and salt.

In a second large bowl whisk together the sugar, apple cider, olive oil, applesauce, vanilla and eggs. Once well combined, add in the flour mixture and stir to combine.

Transfer the batter to the prepared donut pan, filling each cavity three-quarters full.

Bake for 18-20 minutes, until a cake tester inserted comes out clean.

Let the donuts cool for a few minutes in the pan and then invert onto a wire rack.

In a small bowl whisk together the sugar & cinnamon. Brush each donut with the melted butter and the sprinkle the cinnamon sugar on to the donut.

Store the donuts in an air tight container.

Recipe from Inspired By Charm

Slow Cooker Sunday: Maple Cinnamon Pear-Applesauce

I have an abundance of apples from my recent apple picking outing and while I have been enjoying eating them, I decided to use some of them to make a homemade pear-applesauce. Making homemade applesauce is quicker and easier than you may think. And healthier since you can control the level of sweetness. You could also customize the flavors by adding in different fruits (i.e. peaches, mangoes, cranberries) or different spices.

I began by peeling, coring and chopping 2 lbs. each apples (I used red delicious and granny smith) and pears (I used Bartlett). I added the apples along with pure maple syrup, vanilla extract, a cinnamon stick, lemon juice and water to the inset of a slow cooker.

I set it took on low for 4 hours and was left with apples and pears that were perfectly tender for the next step.

I removed the cinnamon stick and using a slotted spoon transferred the apples and pears to the bowl of a food processor. To prevent the sauce from becoming too watery I didn’t add too much of the juices. I then pulsed the mixture to my desired consistency, making sure no large apple or pear chunks remained.

I transferred the pear-applesauce to a container to let it cool and then covered and refrigerated it.


Slow Cooker Maple Cinnamon Pear-Applesauce

Ingredients:

2 pounds apples, peeled, cored and chopped

2 pounds pears, peeled, cored and chopped

3/4 cup pure maple syrup

3/4 cup water

Juice from 1 lemon

1/2 teaspoon pure vanilla extract

Directions:

Combine all of the ingredients in a slow cooker (at least 6 quarts) and stir to combine. Cover and cook on low until the apples and pears are tender, about 4 hours.

Remove the cinnamon stick and transfer the mixture to a food processor or blender and pulse until desired consistency. You could also transfer to a large bowl and mash with a potato masher for a chunkier sauce.

Let cool and then transfer to an airtight container and refrigerate.

Recipe from Real Simple

If you would prefer to make this on the stove, increase the water amount to a cup and combine all of the ingredients in large pot and cook over medium heat, stirring occasionally, until the apples are tender, about 25 minutes.

For both versions (slow cooker or stove top) you could substitute apple juice for the water.


Apple Cider Fritters

I love Apple Cider Donuts! I first had them years ago when I went apple picking in upstate NY and now you can find them anywhere and everywhere. The best one’s I’ve had are from Wilklow Orchards in upstate NY and from Wooside Orchards out on the North Fork- their hard cider is good as well. I’ve also had some bad ones, but, we won’t get into that.  I did try to recreate them at home last year, but, it was a fail. I tried again this year, but, instead of donuts I made fritters and they were DELISH! The only problem… It’s easier to mindlessly eat a ridiculous amount of fritters than it is donuts.

Apple Cider Fritters

  • Servings: 24 Fritters
  • Print

Ingredients:

Fritters:

2 cups all-purpose flour

2/3 cup granulated sugar

2 teaspoons baking powder

1 1/2 teaspoons ground cinnamon*

1/4 teaspoon nutmeg*

1/8 teaspoon cardamom*

1/8 teaspoon all spice*

3/4 cup apple cider

2 large eggs, lightly beaten

2 tablespoons butter, melted and cooled**

1 teaspoon vanilla extract

Cinnamon Sugar Coating:

1 cup sugar

4 tablespoons ground cinnamon

*Instead of all 4 spices, you could sub 1 teaspoon ground cinnamon and 1 teaspoon apple pie spice for them

**Can use salted or unsalted, I used unsalted

Directions:

Whisk together the flour, sugar, baking powder, salt, cinnamon, nutmeg, cardamom and all spice in a large bowl. In another bowl stir together the apple cider, eggs, butter and vanilla. Add the apple cider mixture to the flour mixture and stir until combined.

Combine the sugar and cinnamon for the coating in a shallow bowl.

Pour the oil in a Dutch oven or another heavy bottom deep pot and heat over medium heat to 360 to 370 F. Using a cookie scoop, drop the batter in the hot oil. Fry until golden brown, 1 to 2 minutes per side. Transfer to a plate lined with paper towels to drain.

While still warm roll the fritters in the cinnamon sugar and enjoy!

Recipe adapted from My Recipes

Quick & Easy Apple Tarts

Do you sometimes want an apple pie, but, you don’t really want to go through all the trouble to make one? Even if you are using a store-bought crust – I have no qualms in saying that’s usually my go-to way of “making” pie crust – it can still be a bit time and labor consuming. So, if you are ever feeling like that or you are feeling like that right now I have the remedy for you. A pair of Apple Tarts that take just about an hour to make – that includes prep and bake time – and only requires six ingredients!

To begin thaw out a puff pastry sheet for about 20-30 minutes. You don’t want it to become warm and mushy, but, you also don’t want it to be partially frozen. Once you are able to unfold it, it’s ready to be used. Slice it in half – a pizza cutter works best – and place both pieces on a baking sheet that has been sprayed with nonstick spray.

IMG_9390

While the puff pastry is defrosting make your apple filling. Core three apples…

IMG_9386

Then thinly slice them. It’s important to slice the apples as thin as possible this way they will cook (i.e. soften) during the short baking time.

IMG_9388

Next add in lemon juice, brown sugar, salt and cinnamon. Let the apples sit until the puff pastry is ready to be filled.

IMG_9389

Once the puff pastry is ready and you have sliced it in half arrange the apples in a single line.

IMG_9392 IMG_9391

Bake in a 415 F preheated oven for 15 to 18 minutes, until the pastry has puffed and is lightly golden.

IMG_9393

Remove the tarts from the pan and transfer them to a cutting board to cool.

IMG_9401

Or, immediately cut off a piece and enjoy with a scoop of vanilla ice cream. There’s nothing like a warm apple treat with a scoop of ice cream on top of it.

IMG_9454

Overall these were incredibly easy to make and wonderfully delicious, but, there’s one thing I think I would change when I make these again… I’ll peel the apples this way it’ll be easier to take a bit out of them. The peel holds you back a little from taking clean bites… At least it does for me.

Baked Apple Tarts

Ingredients:

1 puff pastry sheet, thawed and cut in half

3 apples, cored and thinly sliced

2 tablespoons of lemon juice (approximately juice from half a lemon)

1 cup light brown sugar

1/4 teaspoon salt

1/4 teaspoon cinnamon

Directions:

Preheat the oven to 415 F.

While the puff pastry is thawing prepare the apple filling by coring and slicing the apples then tossing them with the lemon juice, sugar, salt and cinnamon.

Once the puff pastry has thawed slice it half and place it on a baking sheet that has been sprayed with nonstick spray.

Arrange the apples on the puff pastry in a thin overlapping line.

Bake in the preheated oven for 15 to 18 minutes, until the pastry is lightly golden and puffed. Transfer the tarts to a cutting board or serving platter immediately.

Recipe slightly modified from The Pioneer Woman

%d bloggers like this: