Apple Crumb Pie

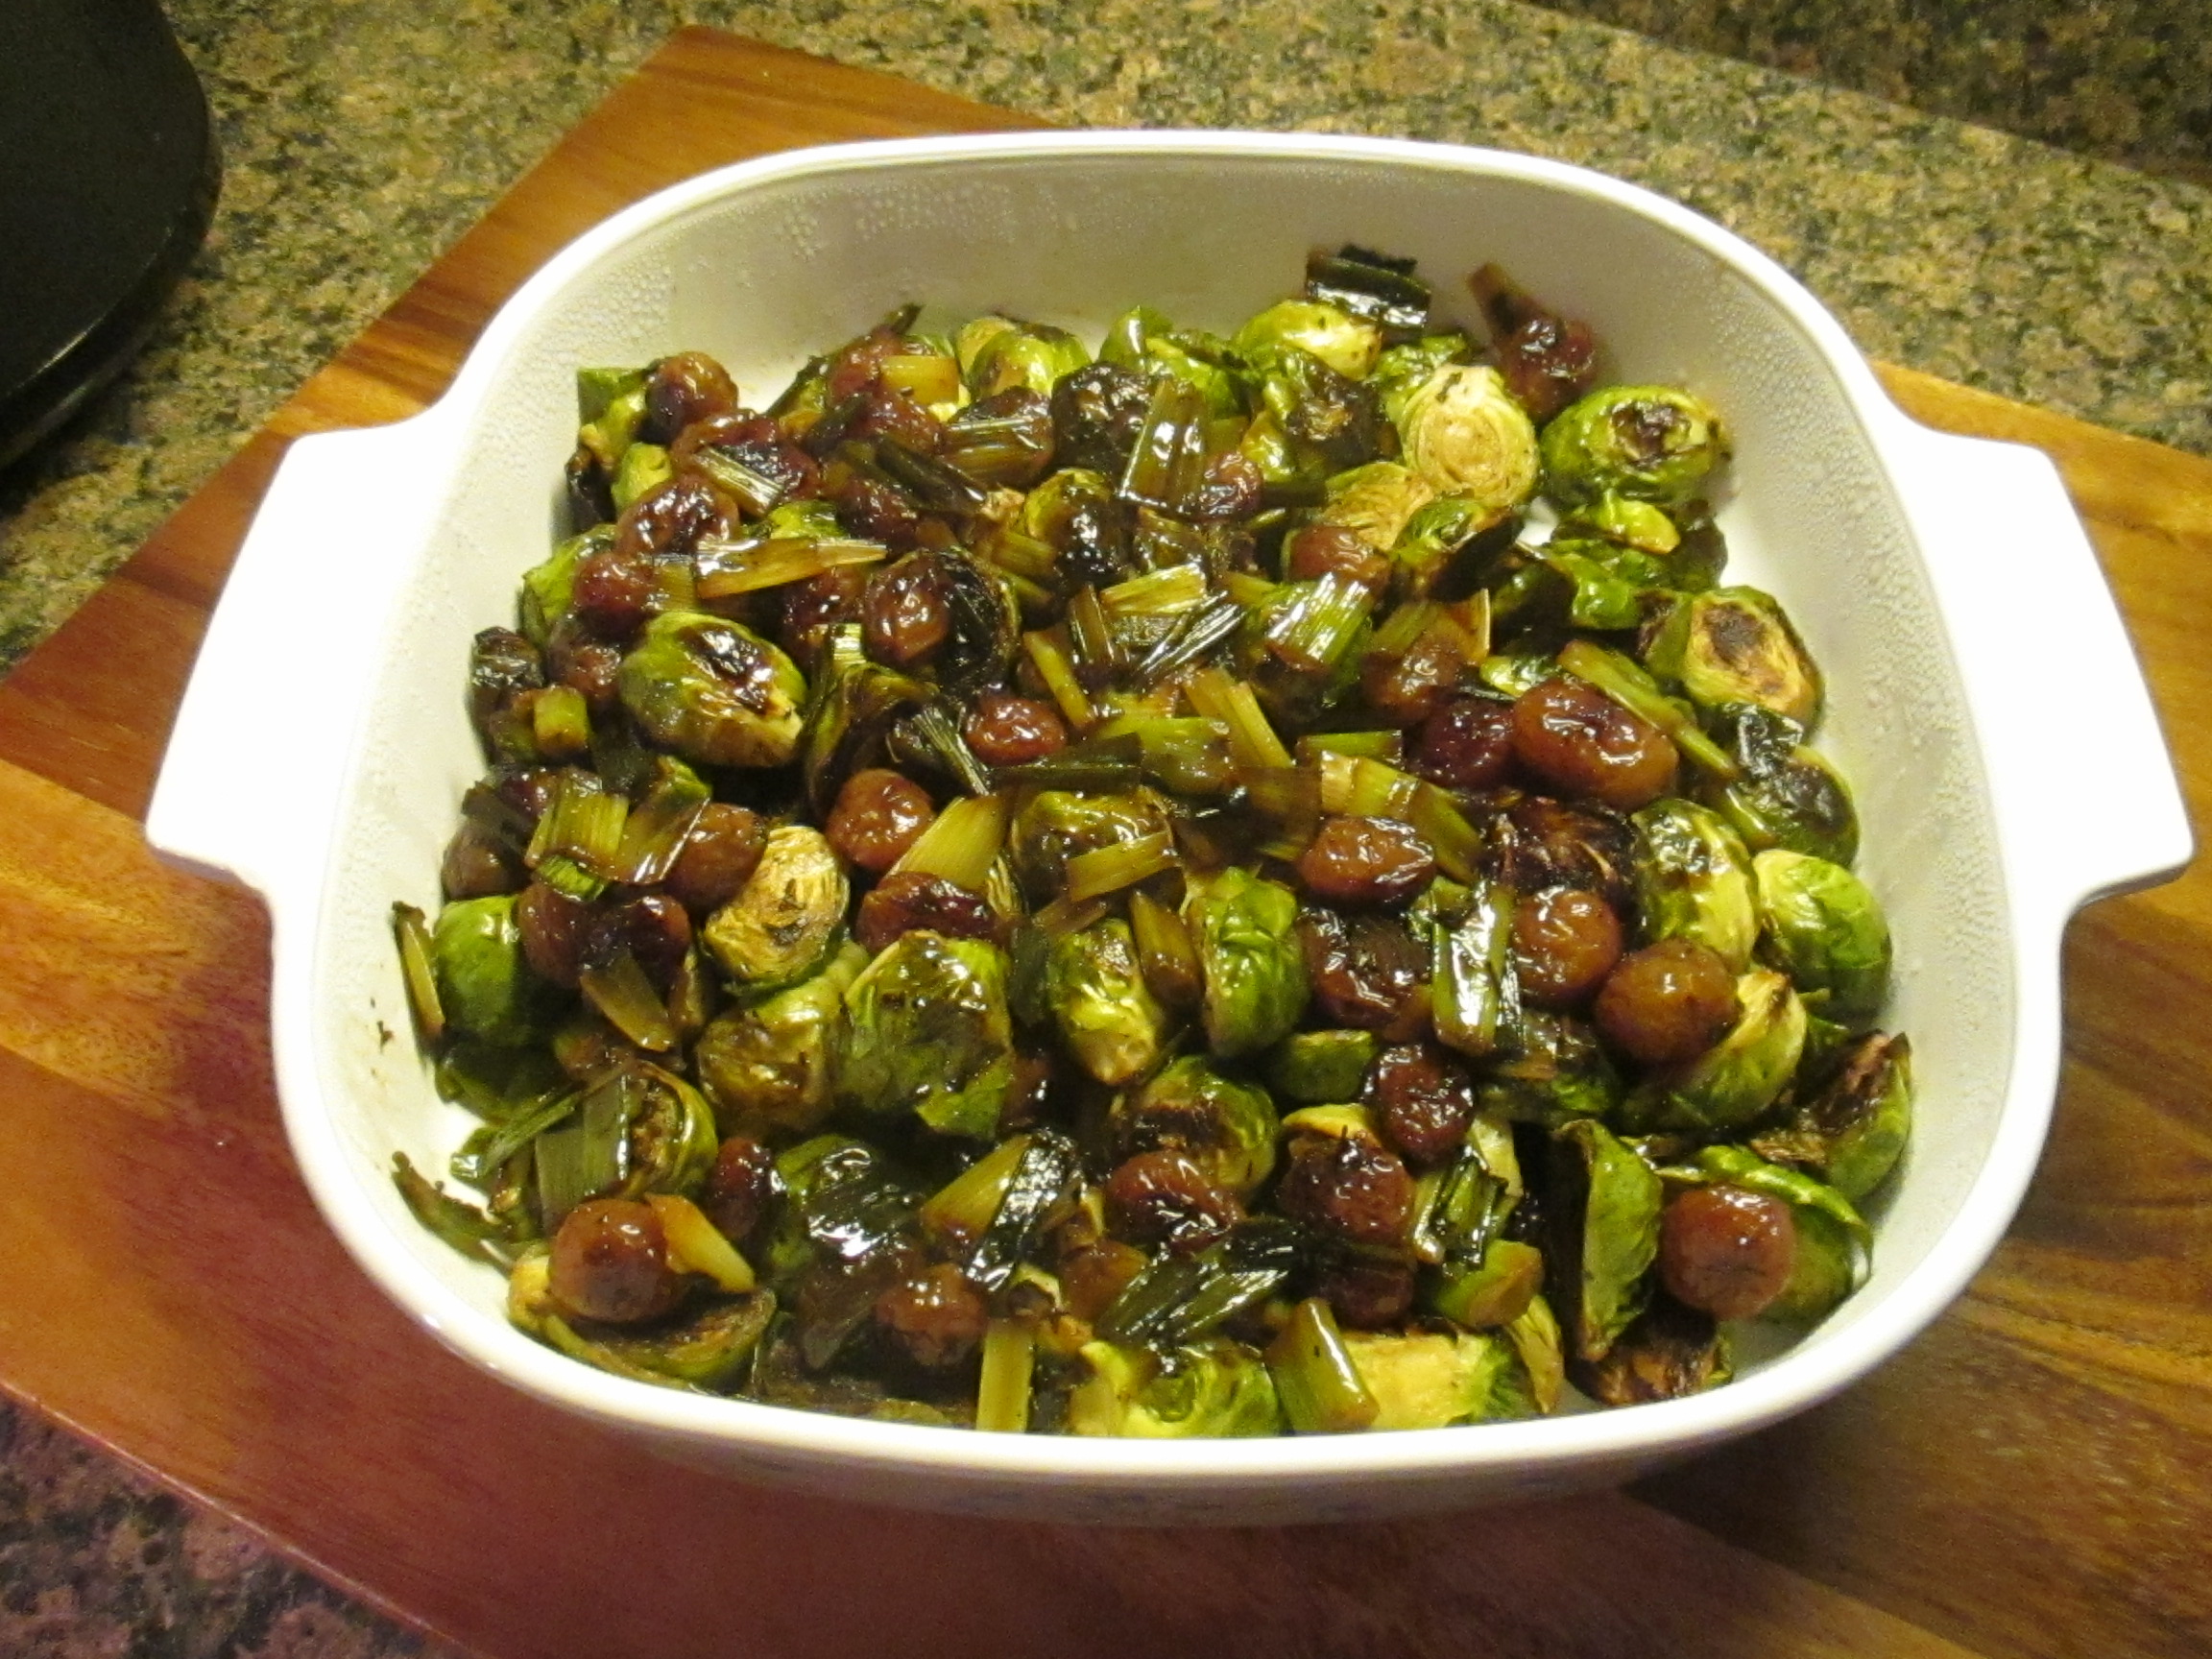
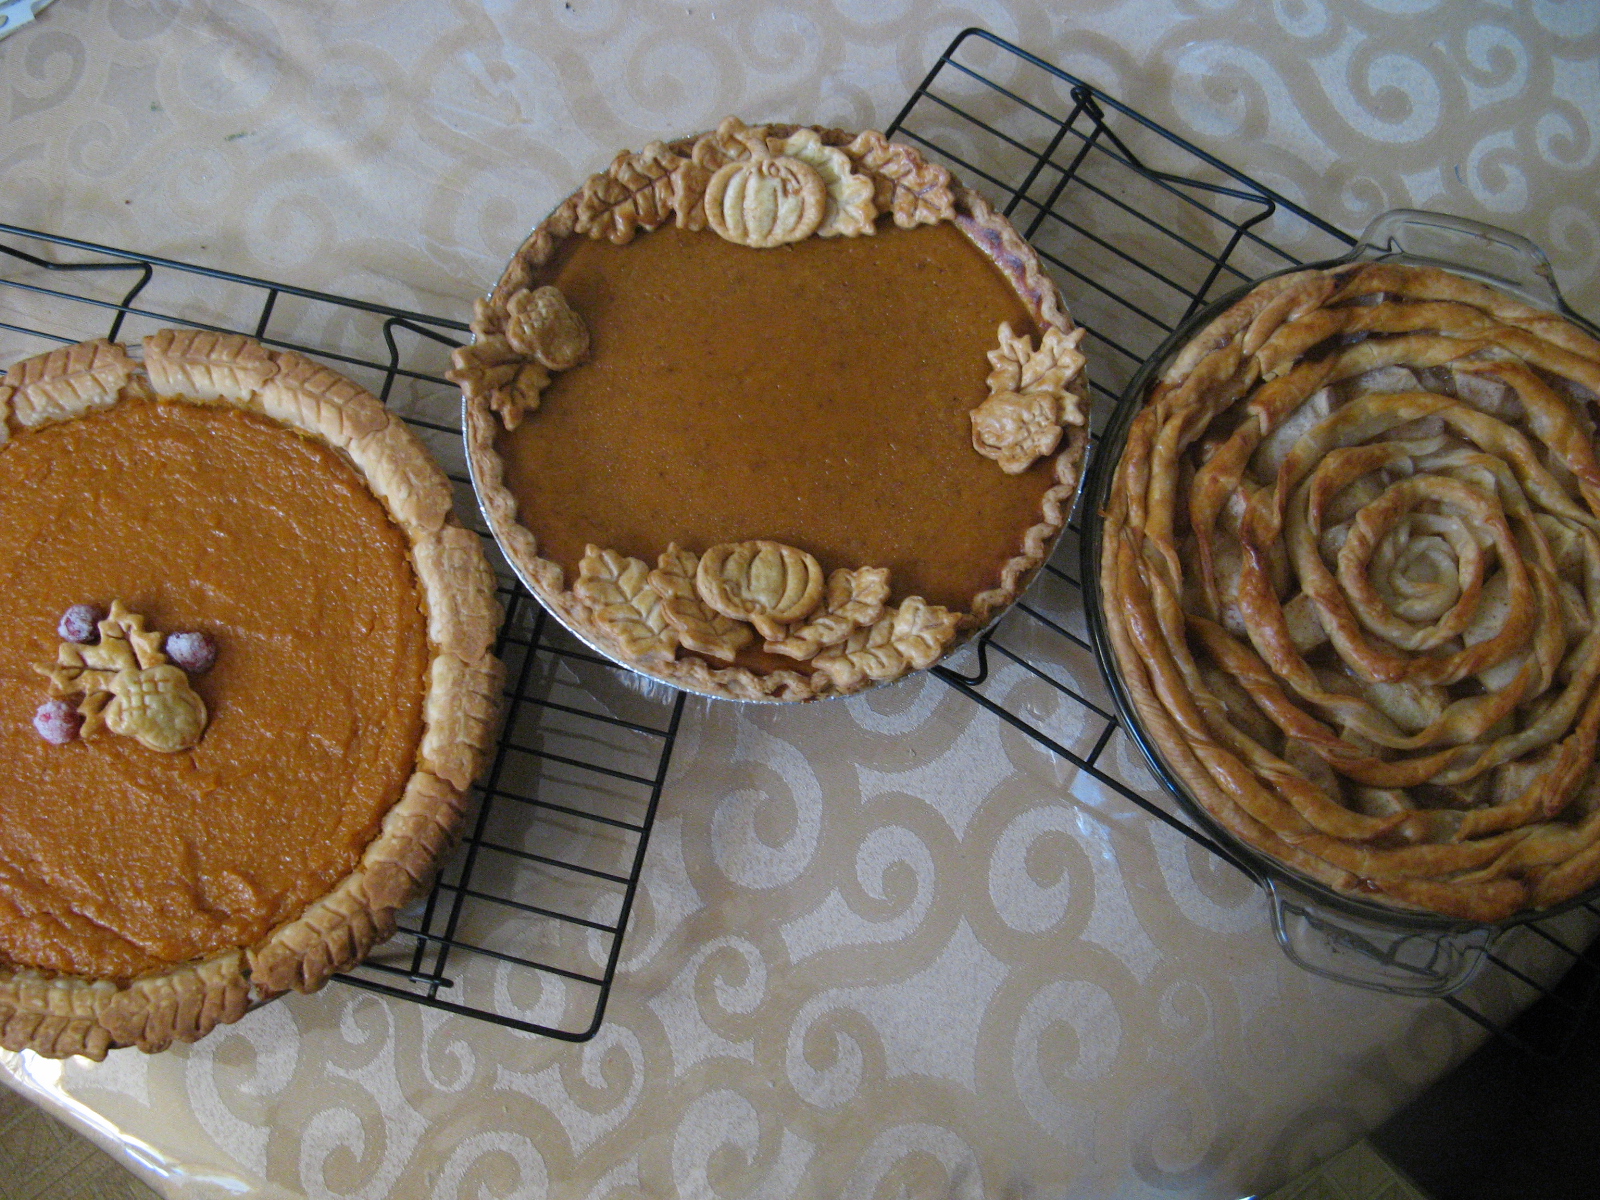
I’m wrapping up my mini apple week today with a pie that would be a perfect addition to your Thanksgiving dessert table… An Apple Crumb Pie. I make my fair share of desserts for Thanksgiving and this year I decided to make things a little easier on myself and forgo making any pies with a decorative pie crust. My baking list for Thanksgiving usually includes about 6 or 7 different desserts so taking that small thing off of my list is definitely going to help me get everything done in a timely fashion. And since I normally head to the city to see the Macy’s Thanksgiving Day Parade balloons get inflated the night before Thanksgiving I have limited time on that day to bake so I normally end up baking one last thing on Thanksgiving morning and I am trying to avoid that this year. Coupled with no decorative pie crusts I am also thinking of baking one or two things ahead of time which should definitely free up some time for me.

To begin this pie I started by making the crumb topping. Once I mixed all of the ingredients together I placed it in the freezer so it could firm up. Next, I covered a large baking sheet with aluminum foil and placed it on the bottom rack of my oven and preheated it to 400 F. And finally I made the filling. I added all of the ingredients for the filling to a large bowl and using a rubber spatula gently folded them together.

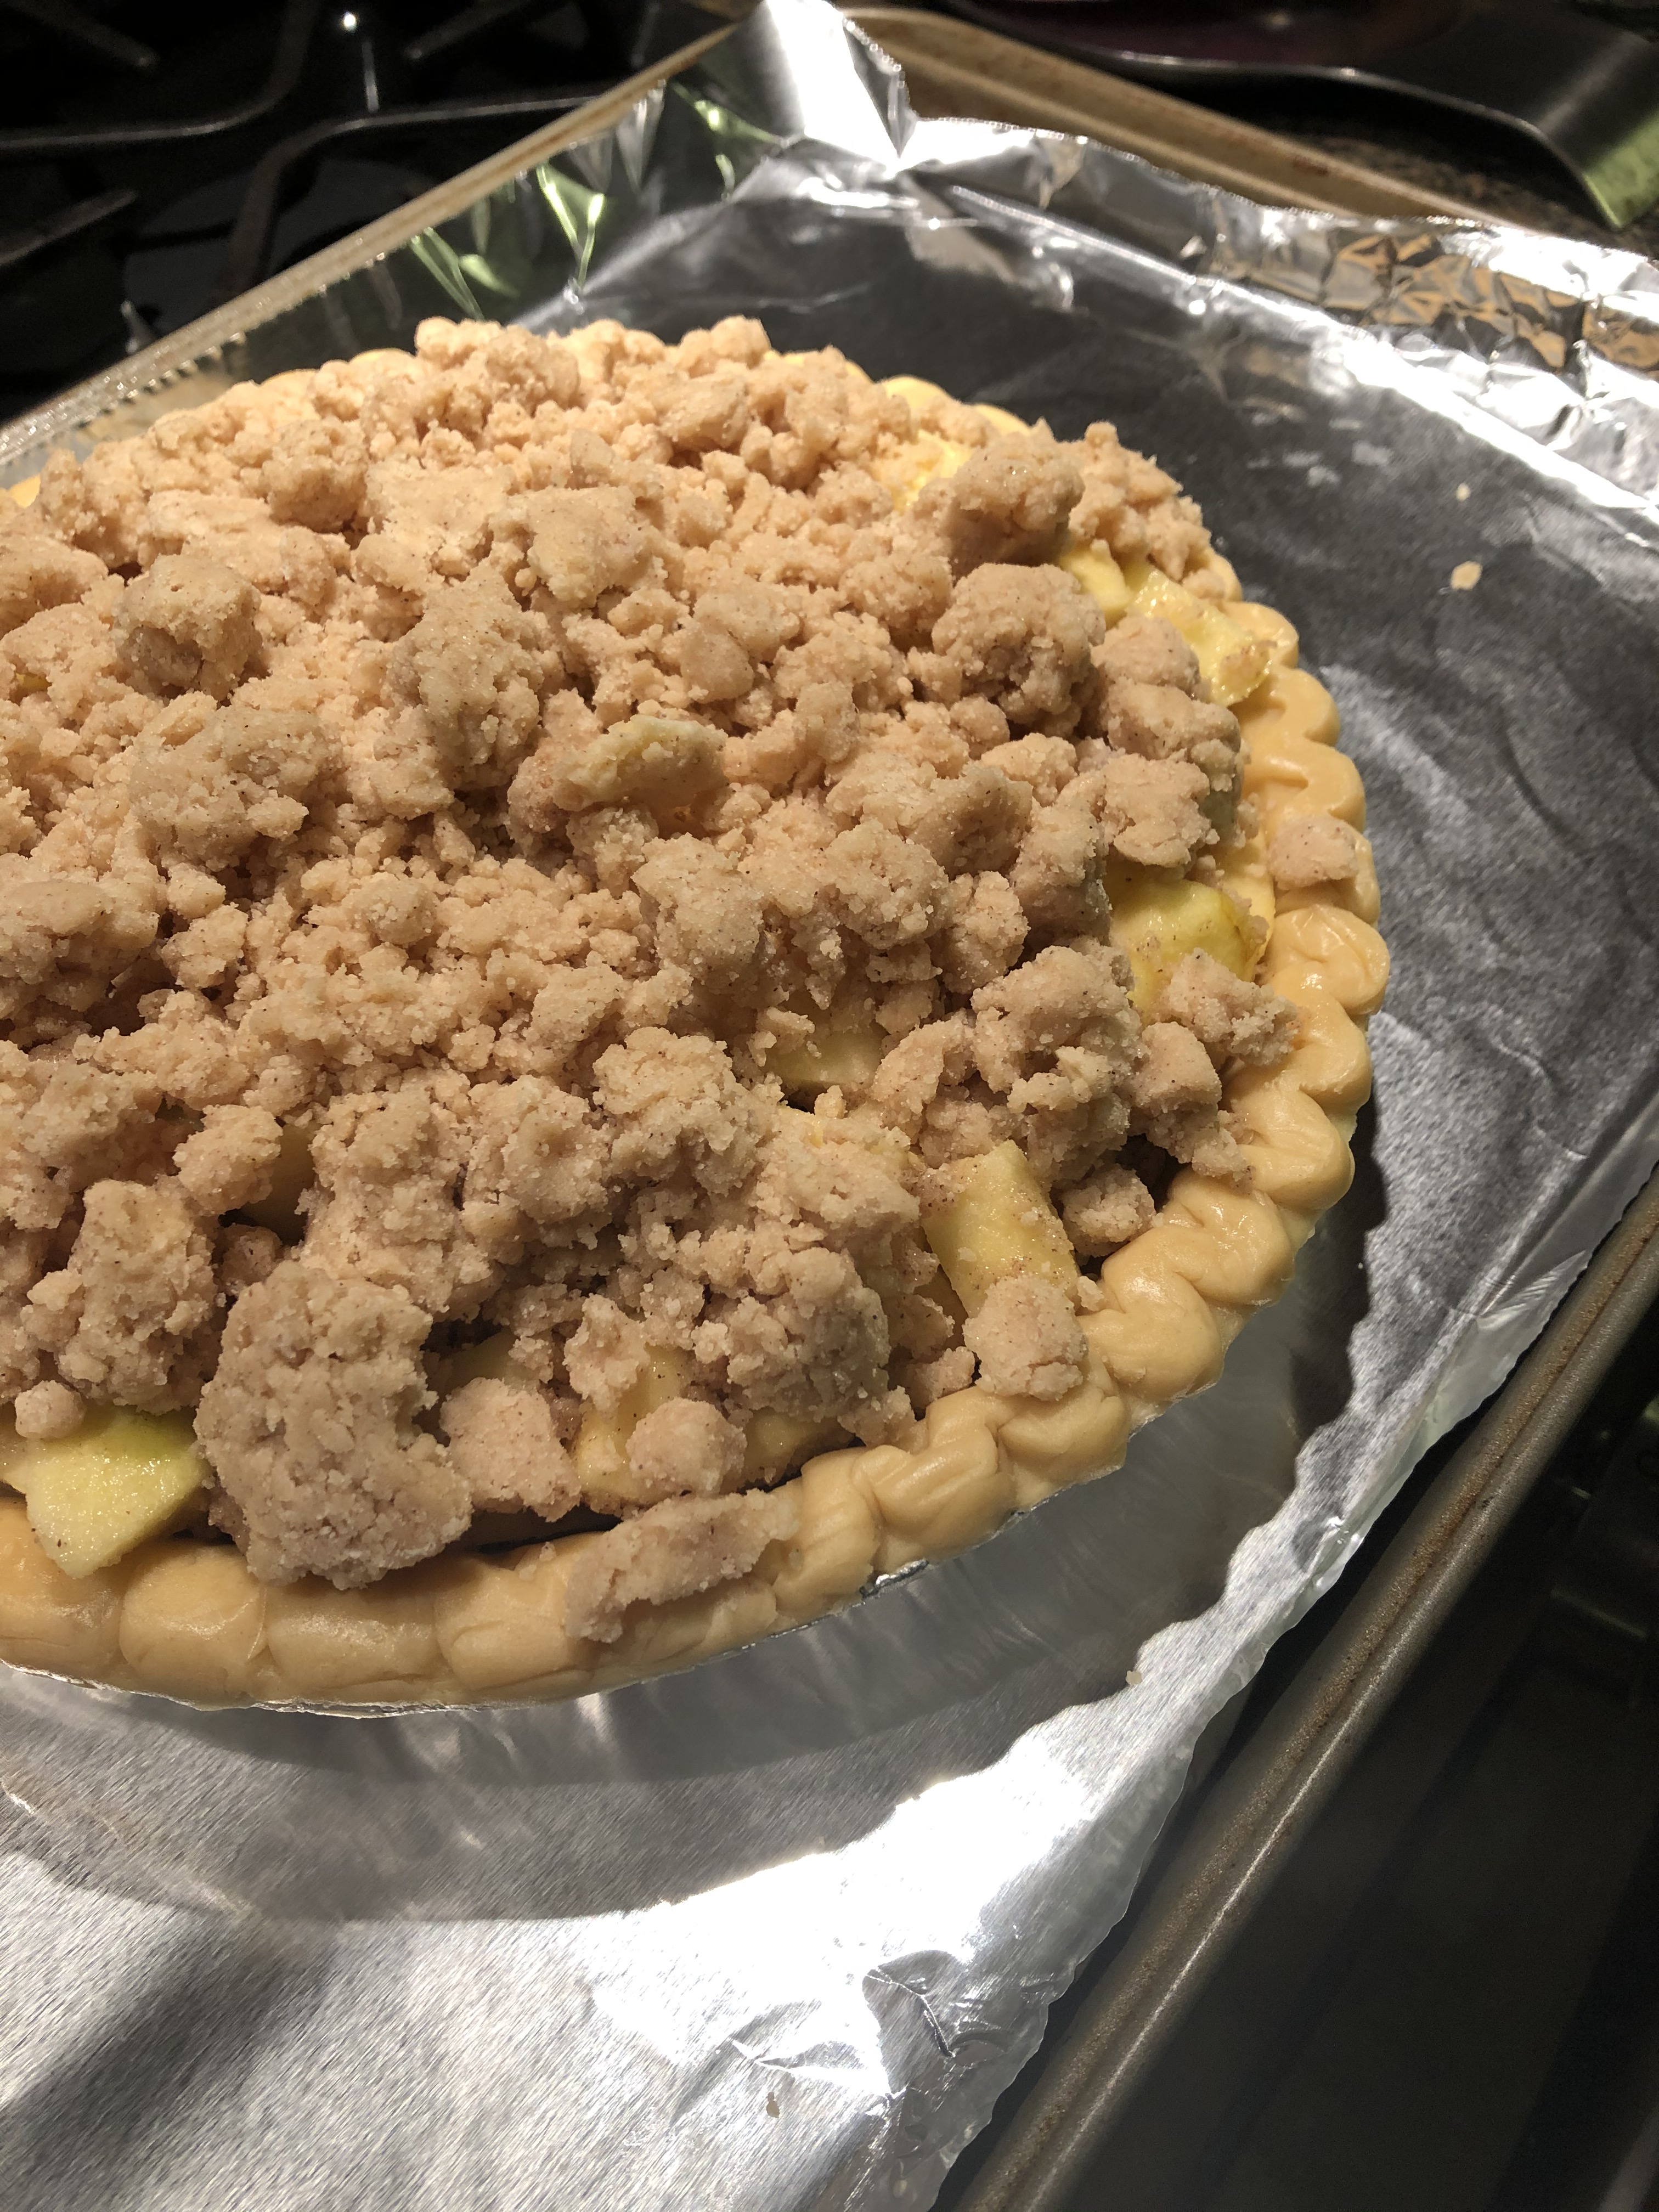
Now, I’ve never had much success in making pie crust from scratch so I always opt to either use refrigerated pie crust or my real favorite frozen pie crust. I apologize to those of you who are cringing right now. I just find it fool-proof, especially the frozen one, and since I am usually more concerned with how the filling is going to come out and perfecting a decorative crust it’s just easier for me. To be honest, when I do make a decorative pie crust I use a frozen crust for the filling and a refrigerated pie crust to decorate it. It’s so much easier to make cut outs or cut long strips with pie crust that is already the perfect thickness. If you’re thinking of following my trick here’s another one. If you want to decorate your pie with cut-outs make sure you refrigerate them after cutting them out before placing them on your pie. Same thing goes for the strips you would use for braiding or a lattice design. Handling the pie crust softens it quickly and then when you go to place it on your pie it won’t place as well or may start to break (especially if you are making a lattice design), firming it up again makes it easier to work with and it will bake better. Okay, so back to the pie at hand. I used a frozen 9-inch deep dish pie crust. I kept the pie crust in the freezer until I was ready to fill it. I spooned the filling into the pie crust and then gently topped it with the crumb topping, breaking any pieces of crumb that were too large. I carefully removed the hot pan from the oven and placed the pie on it and then returned it to the oven.

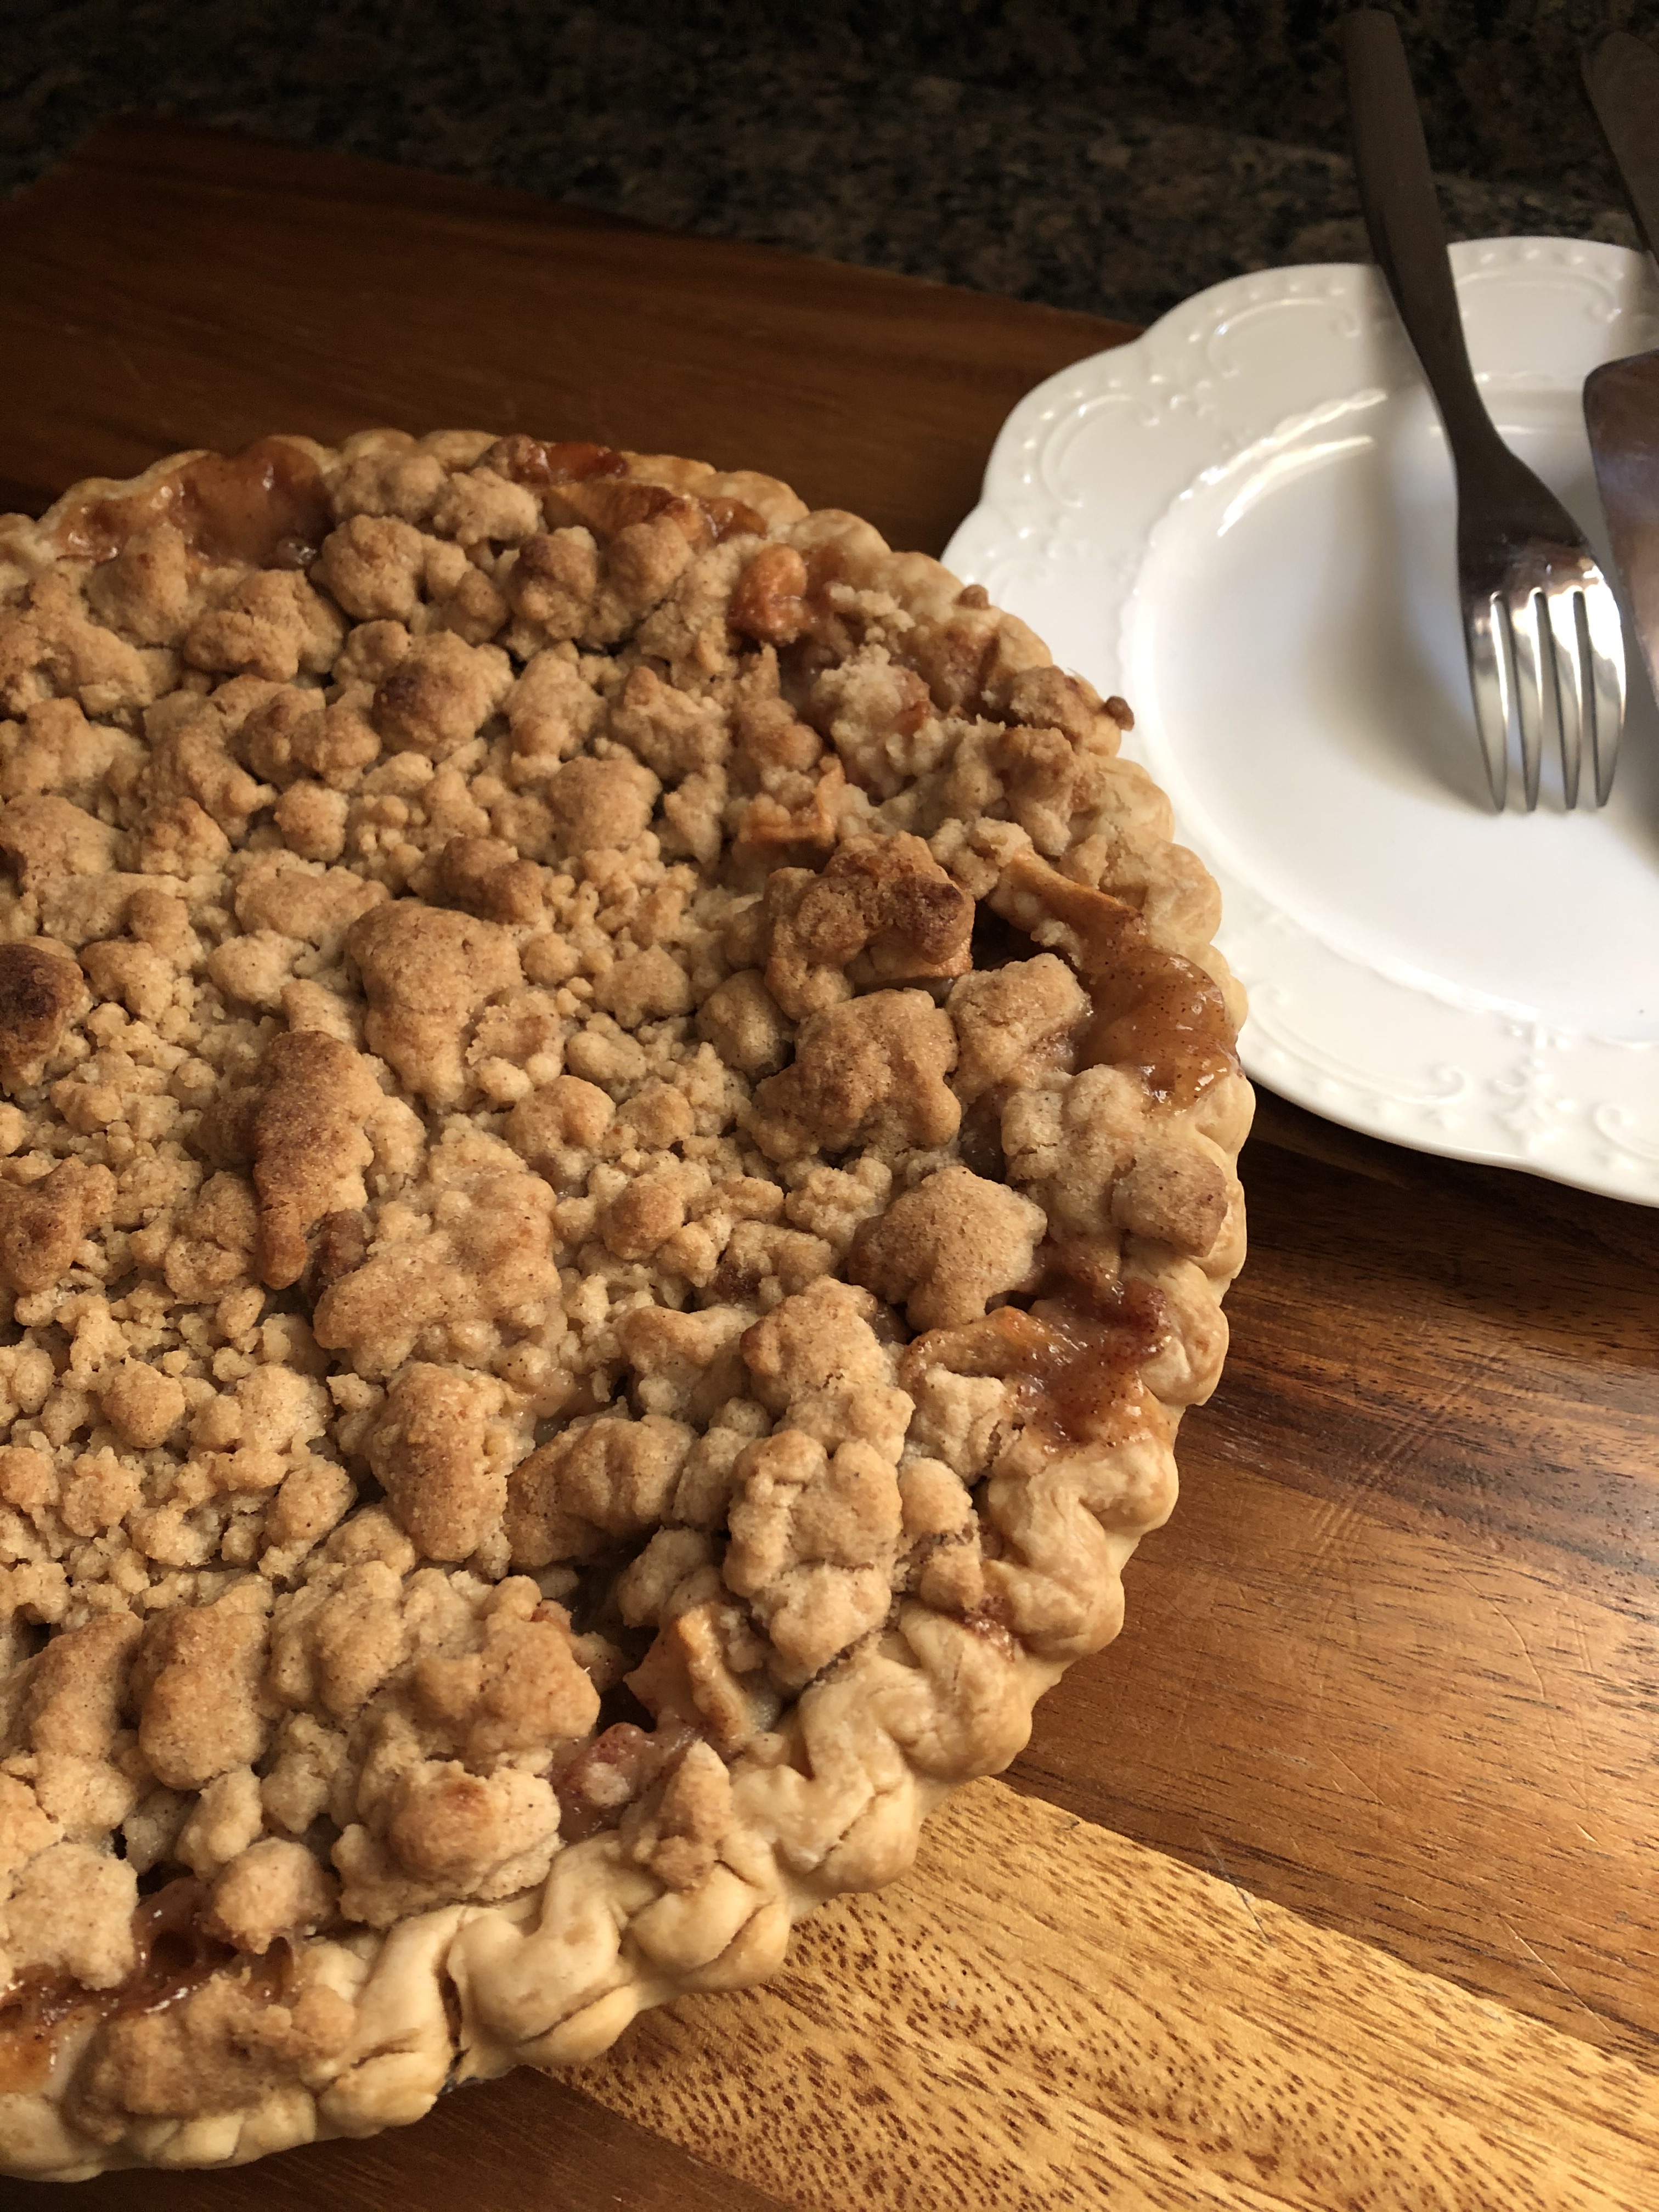
Look at those nice pieces of crumb topping… YUM!!!

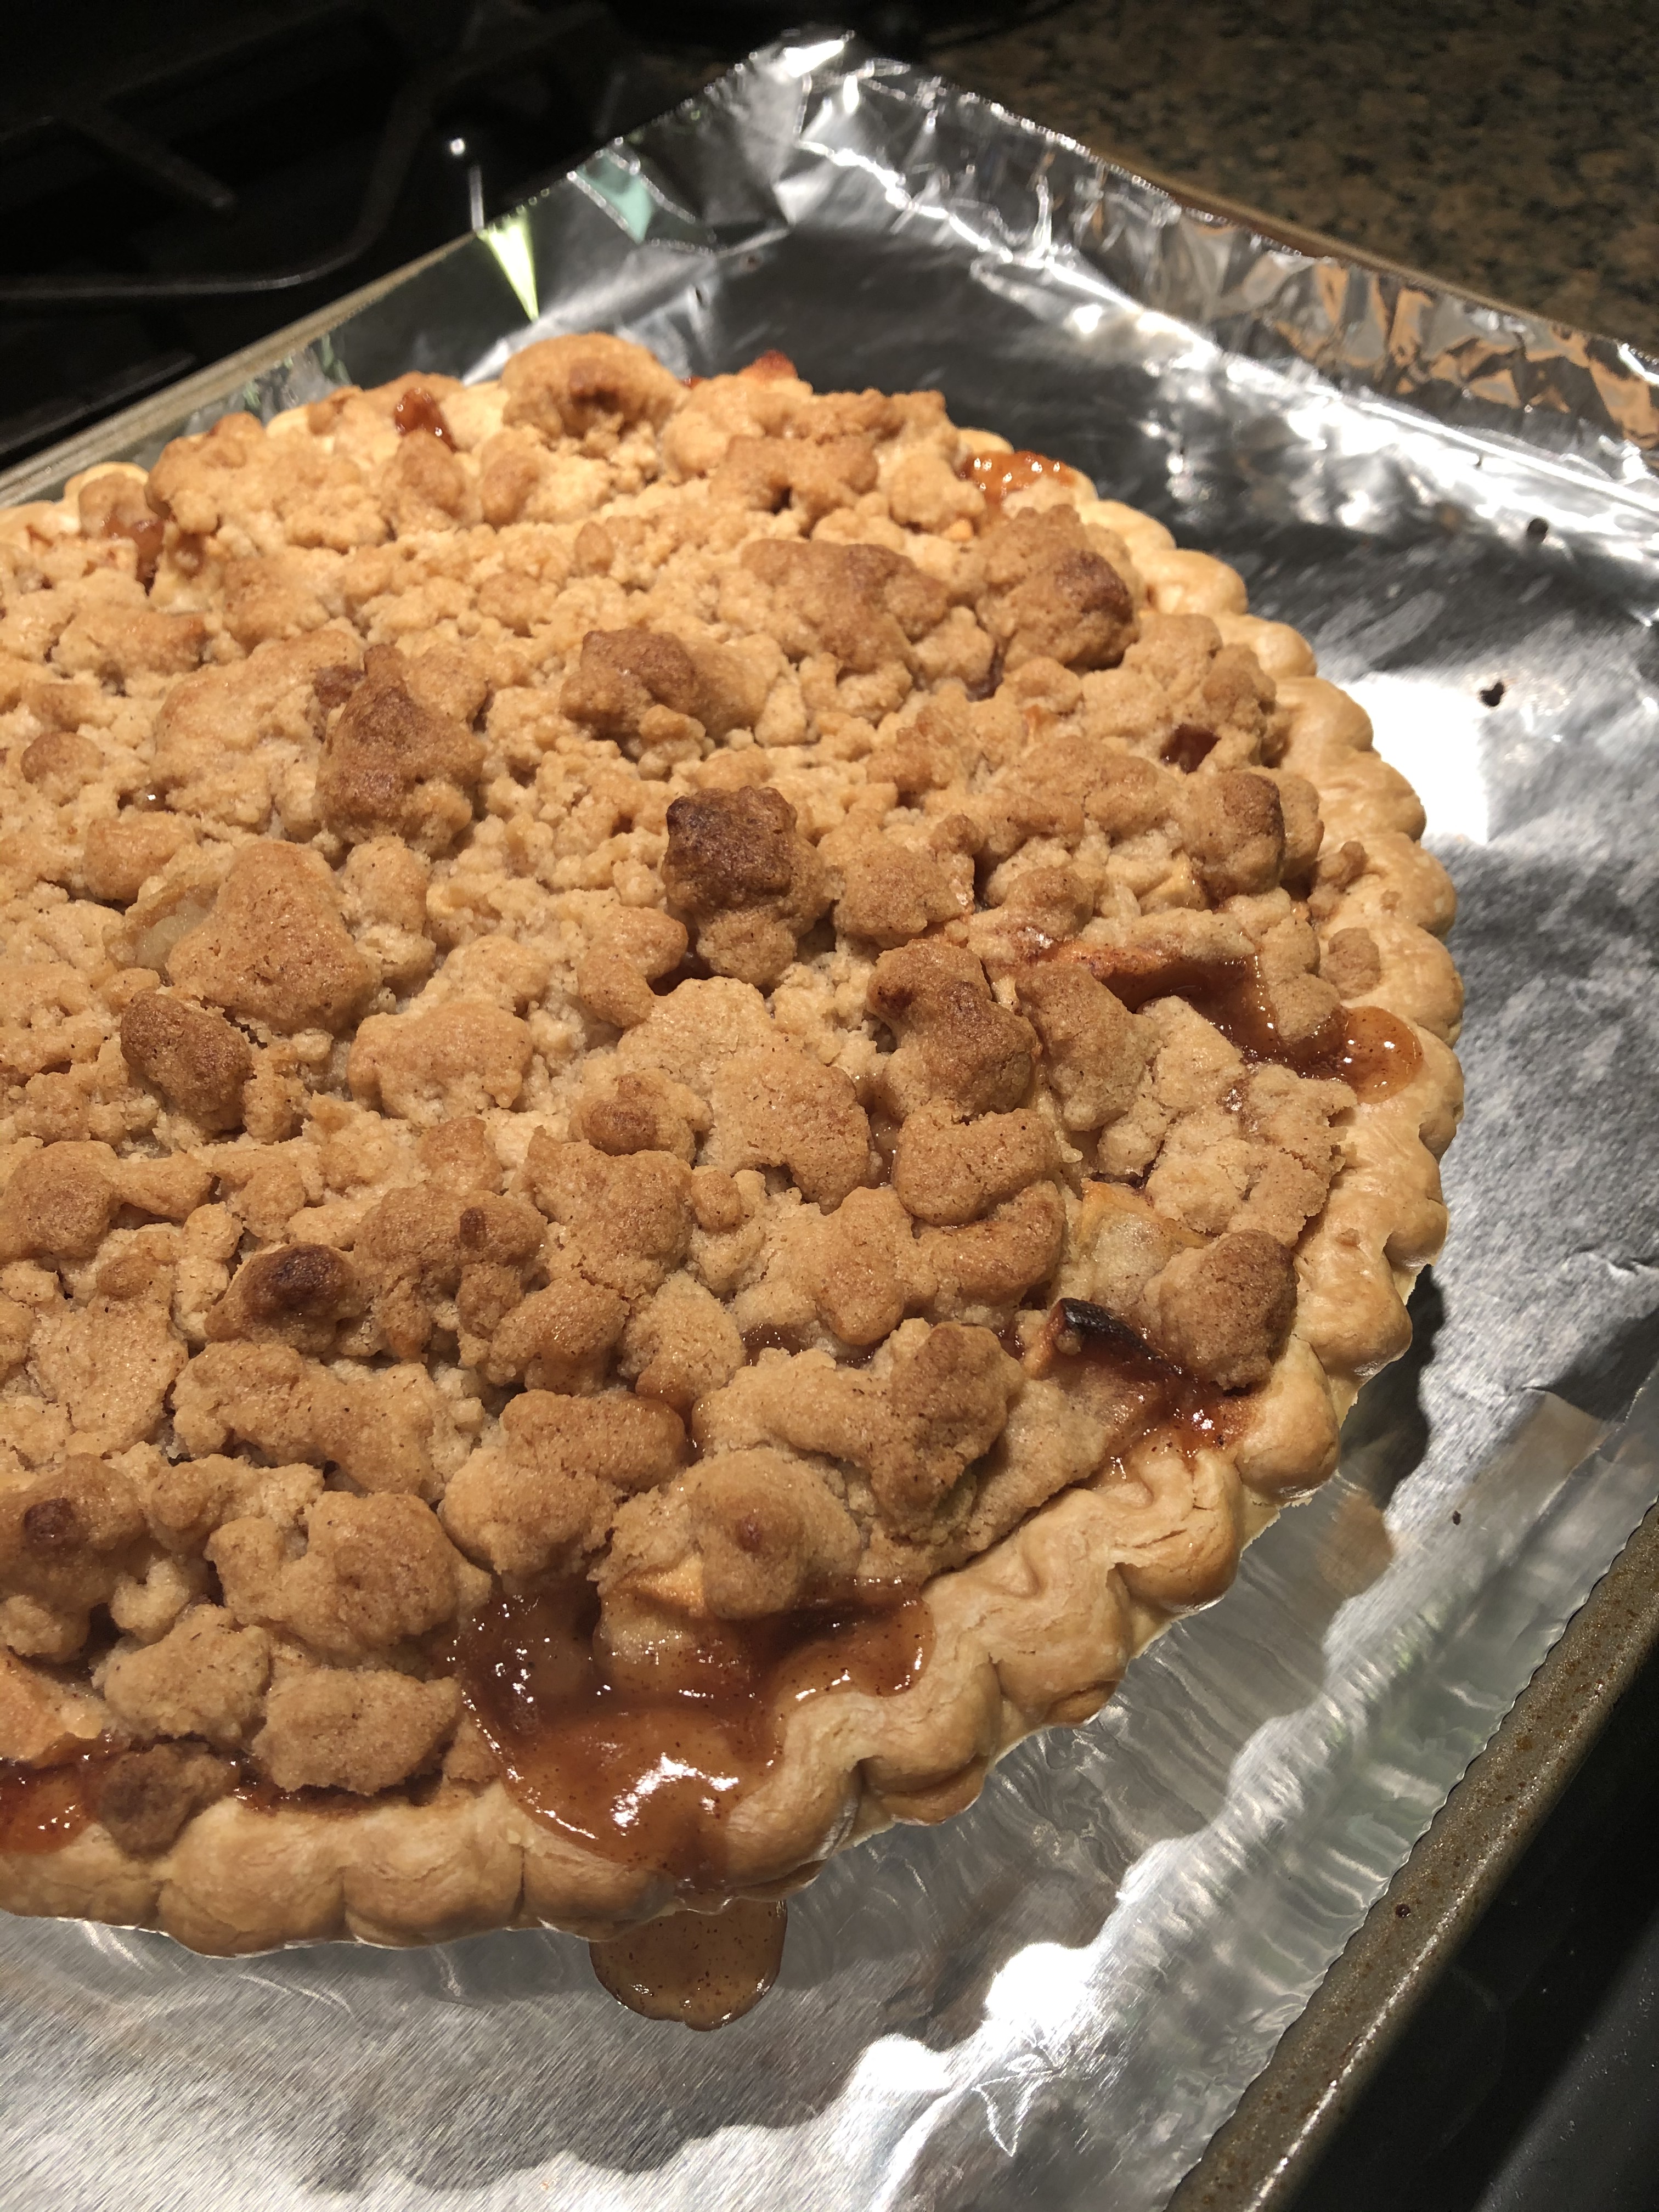
I baked it at 400 F for about 25 minutes and then reduced the oven temperature to 350 F and baked it for about another 50 minutes. My apples were a tad soft to begin with (I got them a few weeks ago from apple picking) so my pie was ready rather quickly. About 25 minutes after reducing the heat I covered the top of the pie with a piece of aluminum foil so the crumb topping wouldn’t burn. Once I removed it from the oven the crumb topping was a perfect golden color and the filling had bubbled out just a bit.

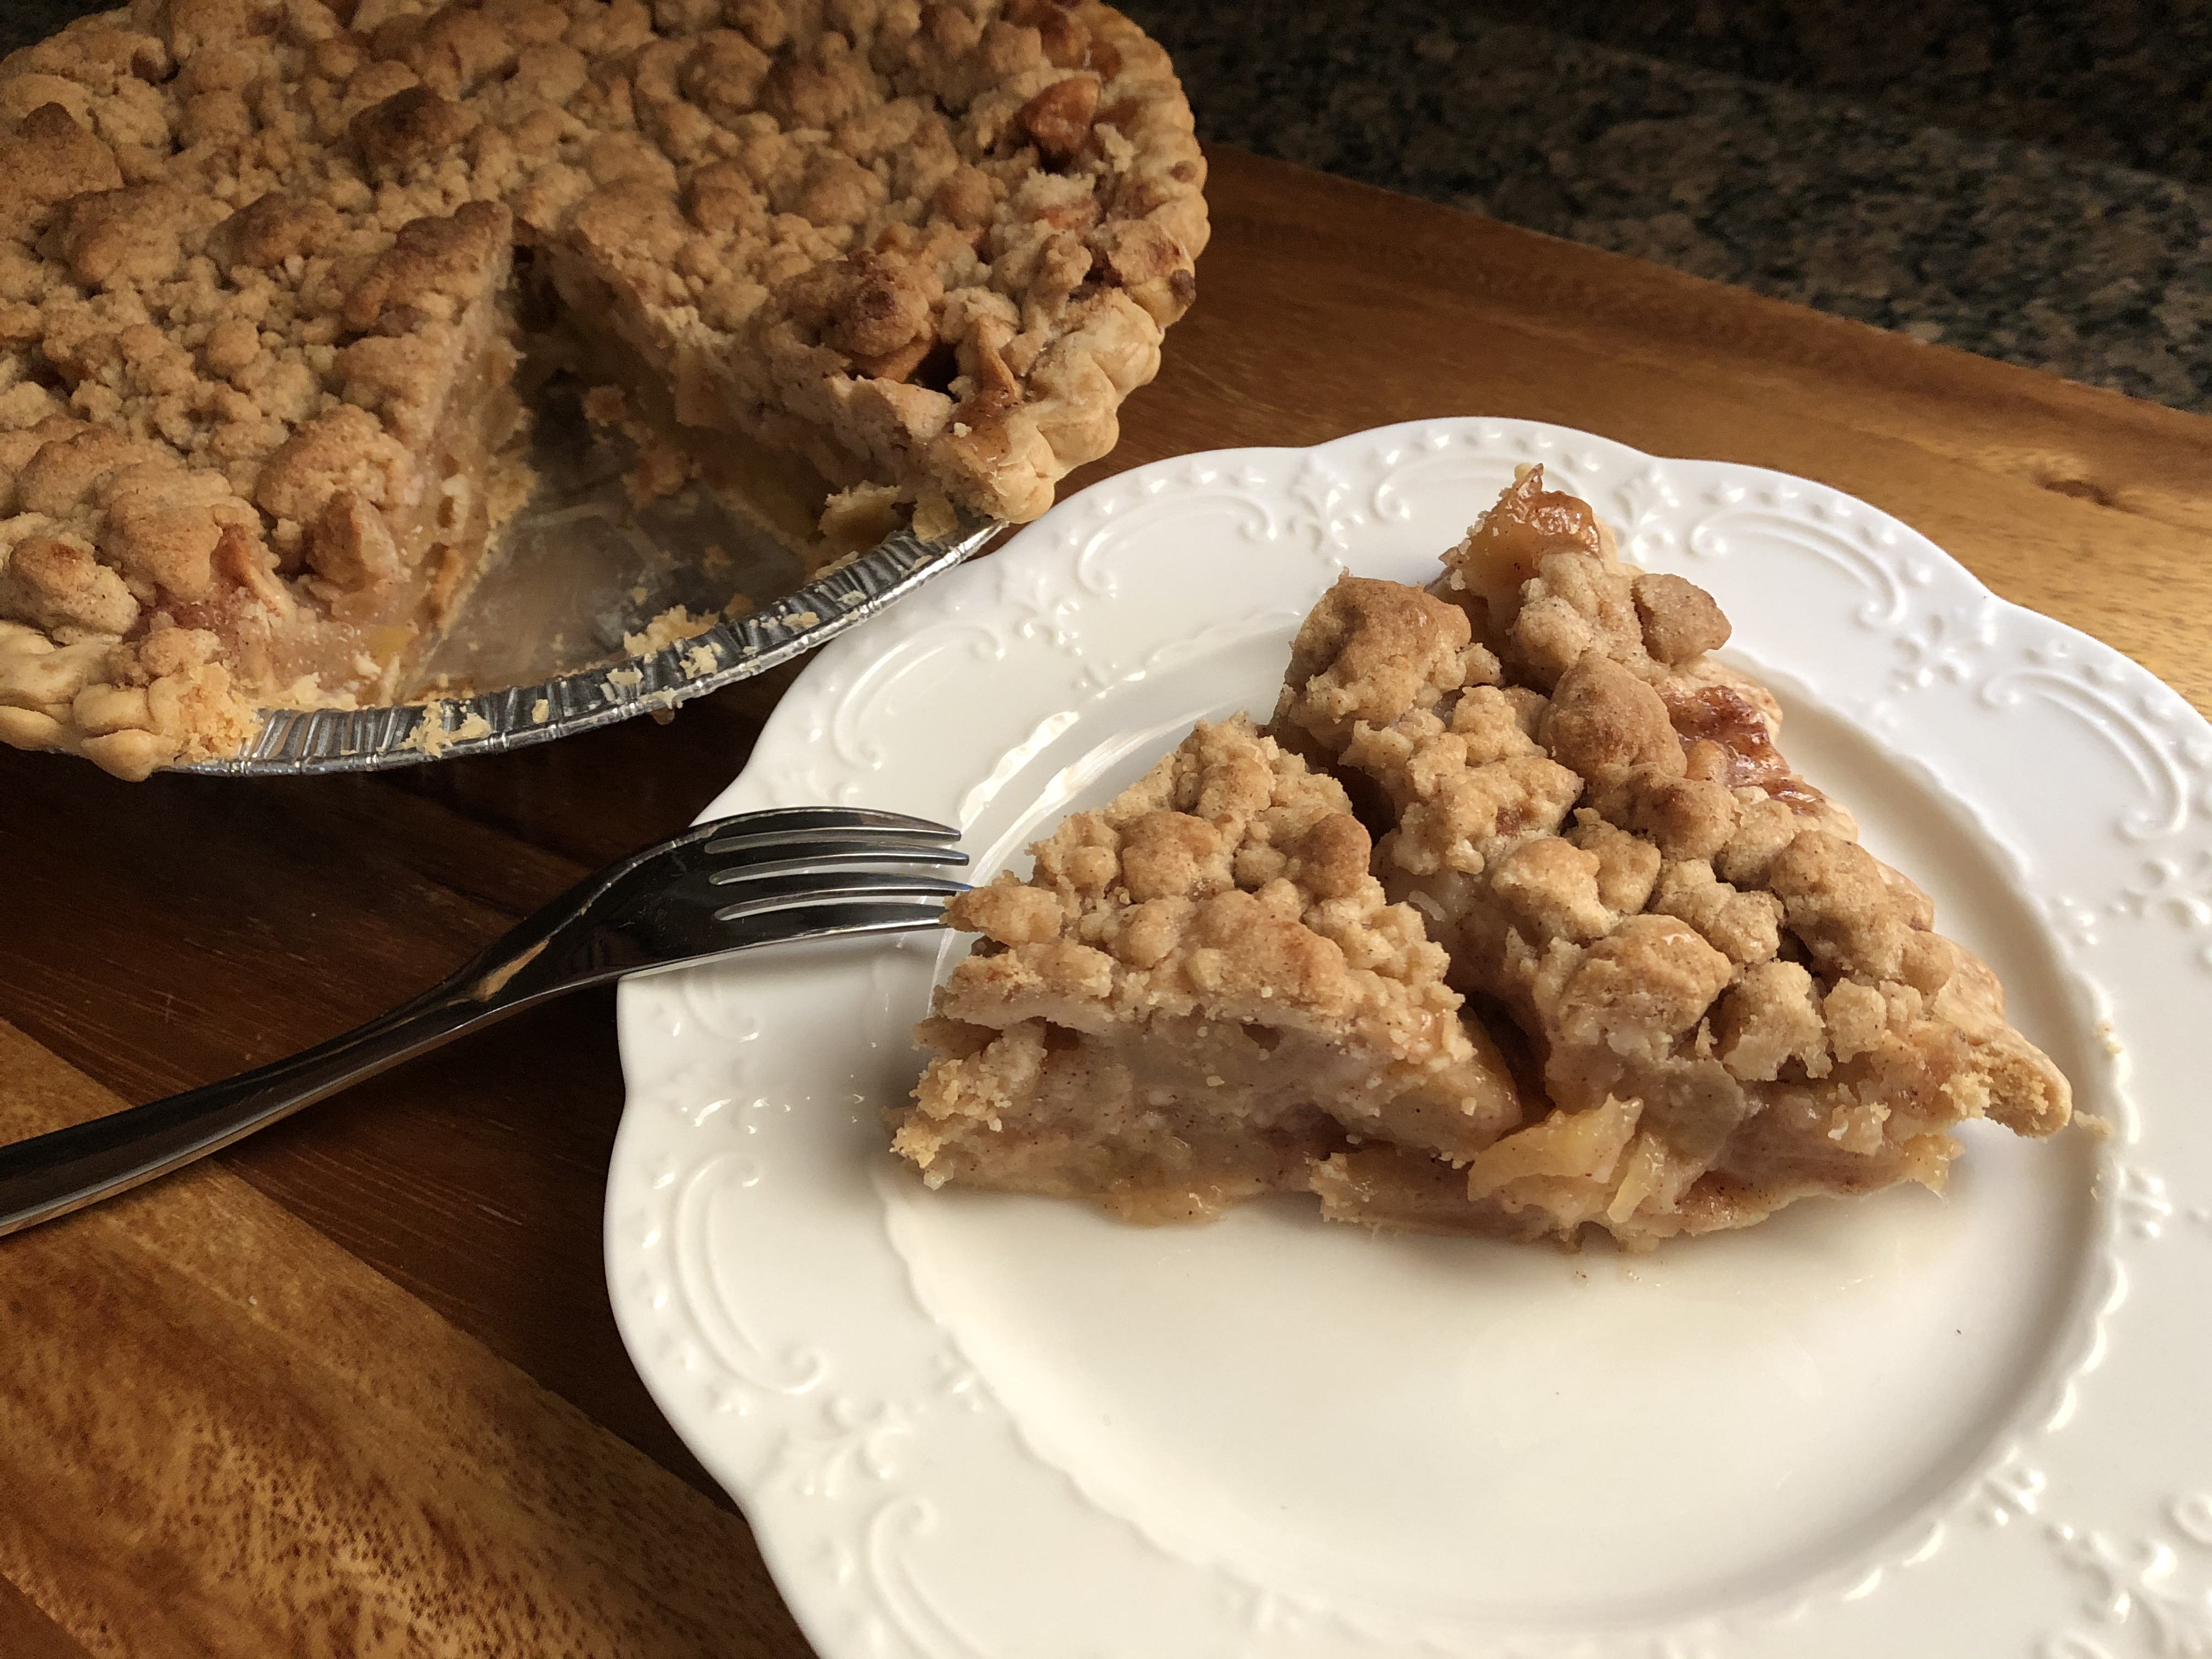
After letting it cool completely I placed it in the refrigerator covered with aluminum foil for a few days before cutting into it -I baked it on a Thursday night and sliced it on Sunday. Final verdict… It was the best apple pie I’ve ever made. I would say pie in general, but that distinction belongs to Key Lime Pie. Per requests, I am planning on making two of these for Thanksgiving!


Apple Crumb Pie

Ingredients:

1 Frozen 9-inch deep dish pie crust*

Crumb Topping:

1 cup all-purpose flour

1/3 cup light brown sugar

1/4 teaspoon ground cinnamon

1/4 teaspoon salt

1 stick unsalted butter, cut into 1/2-inch pieces at room temperature

Filling:

3 pounds mixed apples, peeled and sliced 1/4-inch thick

4 tablespoons unsalted butter, melted

1/3 cup granulated sugar

1/4 cup light brown sugar

2 tablespoons all-purpose flour

1 tablespoon fresh lemon juice

1 teaspoon ground cinnamon

1/8 teaspoon salt

*You could also use a homemade pie crust or a refrigerated pie crust. If using either, once you have prepped your pie plate with the crust place the dish in the refrigerator until the crust is firm, at least 1 hour or overnight. If using a frozen pie crust, you can fill the crust right out of the freezer.


Directions:

Make the crumb topping: Mix the flour, brown sugar, cinnamon and salt in a medium bowl. Add the butter to the mixture and use your hands to mix it until crumbs form. Place in the freezer until ready to use.

Line a large baking sheet with aluminum foil and place it in the bottom rack of your oven and then preheat the oven to 400 F.

Make the filling: Mix the apples, melted butter, both sugars, flour, lemon juice, cinnamon and salt in a large bowl. Spoon the filling into the pie crust. Sprinkle the filling with the frozen crumbs. Breaking any large crumbs into smaller pieces and making sure to spread them evenly over the pie and patting them down while doing so.

Place the pie on the baking sheet in the oven and bake until the crumbs lightly brown, about 25-30 minutes. Reduce the oven temperature to 350 F and continue baking until the apples are completely soft when pierced with a knife, about an additional 60 to 80 minutes. If you find the crumb topping is getting too dark cover it loosely with a piece of aluminum foil. Transfer the pie to a wire rack to cool completely.

Recipe from Food Network

Slow Cooker Sunday: Turkey Meatballs in a Cranberry Chili Sauce

The book I got this recipe from touts them as satisfying your craving for Thanksgiving, while that may be true, I think they are a great appetizer if you are having a small get together, a game night, or a nice accompaniment to stuffing – if you are really hankering for that Thanksgiving flavor.

Begin by combining ground turkey along with panko breadcrumbs, an egg, chopped onion, sage and salt. Gently mix to combine. I used a cookie scoop to scoop the mixture and then rolled it into golf ball-sized meatballs. I baked them in a 425 F preheated oven on a parchment lined baking sheet for about 15 minutes.

While the meatballs were in the oven I combined a can of jellied cranberry sauce and chili sauce in the insert of my slow cooker and stirred it until the cranberry sauce had completed broken down and the two ingredients were well combined. Once the meatballs were cooked I added them to the sauce and gently mixed them in. I covered the slow cooker and cooked it on low for 90 minutes, until the sauce was heated.

Slow Cooker Turkey Meatballs in a Cranberry Chili Sauce

  • Servings: Makes about 20
  • Print

Ingredients:

1 lb. ground turkey

3/4 cup panko breadcrumbs

12 cup finely chopped yellow onion

1 teaspoon ground sage

1 teaspoon salt

1 14 oz. can jellied cranberry sauce

3/4 cup chili sauce

Directions:

Preheat the oven to 425 F. Line a baking sheet with parchment paper.

In a large bowl combine all of the ingredients except the cranberry sauce & chili sauce. Gently mix the turkey mixture until just combined and roll into golf ball-sized meatballs.

Place the meatballs on the baking sheet and bake for 12-15 minutes, until browned and cooked through.

In a slow cooker mix the cranberry sauce and chili sauce together. Add the meatballs gently toss with the sauce. Cover and cook on low for 90 minutes.

Recipe adapted from Slow Cooker Family Favorites

Slow Cooker Sunday: Herbed Turket Breast

Have you ever thought about cooking your Thanksgiving turkey in a slow cooker? Well, unfortunately you can’t put a whole turkey in there, but, you can cook a turkey breast. Believe it or not, they actually say slow cooker friendly on the wrapper, well, at least the one I picked up did. My friends and I had our 2nd Annual Friendsgiving Celebration last weekend, and when I offered to bring the turkey in my mind I was already thinking of a slow cooker turkey breast since there wasn’t going to be that many of us. I decided on a turkey breast that was 7.5 lbs. Now, when I brought him home and tested him out in my slow cooker I freaked out a little bit because he didn’t fit. Well, he fit I just couldn’t put the cover on the slow cooker. But, I thought to myself that once he thawed out he should just fine.

On the day of the get together I got up early just in case it took longer than directed and in case of any other mishaps. I began by placing a chopped carrot, onion and celery in the bottom of my slow cooker. I then placed the turkey breast on top of the vegetables and sprinkled him – oh, and yes, I always refer to my turkey as him or he, it’s because of Tom The Turkey – with an herb and spice mix and then drizzled melted butter over him. If you don’t have the specific spices that I used below feel free to create your own spice mix.

After a little coercion I was able to get the cover snug on top and I set him to cook on low. I was planning on him being done between 6-7 hours.

While the pop-up time did pop out at 6 hours I decided to leave him in there a little longer just to be sure. I figured he wouldn’t dry out in a slow cooker. And unfortunately the one downfall of cooking a turkey in a slow cooker is not getting that nice browned skin.

But, that was nothing that a few minutes under the broiler couldn’t resolve.

So, would I make a turkey breast like this again? Yes! It’s stress-free and pretty much guarantees that you will have a juicy turkey. I am tempted to go my usual route of brining the turkey beforehand next time though. Oh, one thing I was able to make with this turkey that I had never been able to do before was gravy. There was a decent amount of drippings left in the slow cooker and I must say, homemade gravy from the drippings beats anything you buy in the store hands down.


Slow Cooker Herbed Turkey Breast

Ingredients:

1 carrot, peeled and chopped into 1-inch pieces

1 onion, chopped into 1-inch pieces

1 celery stalk, chopped into 1-inch pieces

3 tablespoons onion powder

1/2 teaspoons sage

1/2 teaspoon celery seed

1 teaspoon dried parsley

1 teaspoon salt

1/2 teaspoon freshly ground black pepper

1 6 to 7 lb. bone-in turkey breast

2 tablespoons unsalted butter, melted

2 tablespoons cornstarch


Directions:

In the slow cooker toss together the carrot, onion and celery.

In a small bowl mix the herbs and spices.

Place the turkey on top of the vegetables and sprinkle with the spice mixture. Try to get some of the mixture under the skin of the turkey as well. Drizzle with the melted butter. Cover and cook on low for 6 to 7 hours, or until fully cooked – 165 F

When the turkey is done, preheat the oven to broil and place the turkey in a roasting pan and broil for a few minutes to brown the skin. Don’t leave it in the oven too long or the turkey could dry out.

Combine the cornstarch with 2 tablespoons of water.

Strain the remaining liquid in the slow cooker into a medium saucepan. Bring to a bowl over medium-high heat. Whish in the cornstarch mixture and cook until the gravy thickens.

Slice the turkey and serve with the gravy.


Recipe from Slow Cooker Family Favorites


Brussels Sprouts & Cranberry Sauce

So, I’m working a little backwards here. Yesterday I brought you a delicious pie you can serve for Thanksgiving dessert and today I am bringing you two sides. A roasted Brussels sprouts dish and homemade cranberry sauce. Come back on Sunday for Slow Cooker Sunday where I will tell you how I slow cooked a turkey breast – see, definitely working backwards!

I know Brussels sprouts is not a favorite vegetable for many, but, I think the reason is because they are not preparing them the best way. Yes, they have a bitter flavor, just like broccoli rabe, but, when you season and roast them in the oven they take on a whole new flavor. Even the little charred sections taste good. And, they get perfectly tender. The recipe I recently tried called for them to be roasted in the oven and then topped with a glaze made with grapes, honey & scallions… YUM! I can’t wait to make it again and I am pretty sure it will make any Brussels sprout skeptic think twice about that vegetable that looks like a baby cabbage.

I grew up eating cranberry sauce from a can, not the whole berry sauce one, but, the jellied version. It’s weird, I won’t eat the whole berry one from a can because I feel like it’s too fake but I will eat the jellied version. Yes, I will still eat it with my turkey and stuffing. I don’t really know what prompted me to try making cranberry sauce myself since I was content with the can stuff, but, I’ve used the same recipe now for quite a few years and it’s one of my favorite things about Thanksgiving. I look forward to a sandwich with leftover turkey warmed up with melted cheese (preferably provolone) and topped with cranberry sauce every year after Thanksgiving. I am dreaming of it now as I type… LOL! So, what is so special about this sauce? I think it’s the simplicity of it. There are no out of the box ingredients. It’s simply a bag of fresh cranberries, sugar, water, fresh ginger, orange zest, a cinnamon stick, ground cloves and salt. I tried getting a little fancy one year, but, it just didn’t top the simple yet delicious taste of this cranberry sauce. Make a few days before you intend to use to really get the best flavor.

So, I hope these two dishes will make their way to your table, or, they have given you ideas of something else to try.


Roasted Brussels Sprouts With Grapes

Ingredients:

2 pounds Brussels sprouts, trimmed and halved

3 tablespoons olive oil

3 tablespoons unsalted butter

2 cups red seedless grapes

2 teaspoons chopped fresh thyme

1 bunch scallions, cut into 1-inch pieces

2 tablespoons honey

Kosher salt & freshly ground black pepper


Directions:

Place a baking sheet on the middle rack of the oven and preheat to 450 F.

Toss the Brussels sprouts with the olive oil, 1/2 teaspoon salt and a few grinds of pepper in a large bowl. Spread them on the hot baking sheet and roast, tossing halfway through until tender and charred in spots, 20 to 30 minutes.

While the Brussels sprouts are in the oven…. Melt the butter in a large skillet over medium-high heat. Add the grapes and thyme and cook until the grapes starting to burst, stirring occasionally. Add the scallions and honey. Increase the heat to high and bring to boil, then reduce the heat to medium-low and let simmer until the juices thicken and the grapes are glazed. Season with salt and pepper.

Once ready, transfer the Brussels sprouts to a dish and drizzled the grape mixture over them

Recipe from Food Network


Cranberry Sauce

  • Servings: 2 1/2 Cups
  • Print

Ingredients:

1 12 ounce bag fresh cranberries

1 cup sugar

1 cinnamon stick

2 teaspoons finely chopped ginger

2 teaspoons orange zest

1/4 teaspoon salt

1/8 teaspoon ground cloves


Directions:

In a medium saucepan combine 1 cup of water with the sugar, cinnamon stick, ginger, orange zest, salt and cloves. Cook over medium heat, stirring, until the sugar dissolves. Stir in the cranberries and bring to a boil, then lower the heat to medium-low and allow to simmer, stirring until slightly thickened.

Remove from the heat and transfer to a bowl. Allow to cool before refrigerating

Recipe from Rachael Ray

Pumpkin Cake with Goat Cheese Frosting

So, what happens when you bake a cake late at night and then frost it early the next morning? You don’t take pictures! But, that’s okay. I don’t need pictures to tell you how delicious this cake is. I do have this lovely final picture though…

img_0144

With Thanksgiving this week this Pumpkin Cake with Goat Cheese Frosting is my final pumpkin dessert of the season. I can’t say it’s the best as that title goes to the Pumpkin Tiramisu I posted about last month, but, it’s definitely a close second, and I am sure would be a welcome addition to your Thanksgiving dessert table. I actually made it for a Friendsgiving celebration I had with some wonderful friends last weekend. If you’ve never had your own Friendsgiving celebration I strongly advise you to have one next year. There’s absolutely no drama and you get to spend some time with people who are just as important or in some cases more important to you than your own family!

Here are some quick notes about this cake though… Definitely go with the freshly grated nutmeg and don’t try to substitute ground ginger for the freshly grated ginger, trust me, these two things make a huge difference in the flavor. I speak from experience. Make your own buttermilk by combining vinegar (or lemon juice) and milk (for this cake, I used 1/2 tablespoon of vinegar and 1/2 cup 2% milk to make the buttermilk.) And finally, if you’re not a fan of goat cheese go with a simple cream cheese frosting. You can never go wrong with cream cheese frosting.

So, however you’re spending your Thanksgiving I hope it’s one with delicious food, sweet desserts and great company. And remember, no matter what has happened in life there is ALWAYS something to be grateful for!


Pumpkin Cake

Ingredients:

2 sticks unsalted butter, at room temperature

2 3/4 cups all-purpose flour

1 1/2 teaspoons baking powder

1 teaspoon baking soda

1 1/2 teaspoons ground cinnamon

3/4 teaspoon freshly grated nutmeg

1/2 teaspoon salt

2 cups light-brown sugar

3 large eggs

1 1/2 cups solid-pack pumpkin

1 teaspoon pure vanilla extract

3/4 teaspoon grated peeled fresh ginger

1/2 cup buttermilk*

*To make your own combine 1/2 tablespoon vinegar (or lemon juice) with 1/2 cup milk – I used 2%. Let stand for 5-10 minutes at room temperature. When the milk is ready it will have thickened and you will see small curdled bits.

Directions:

Preheat oven to 350 F. Prep two 8-inch round pans, either by spraying them with baking spray (what I did) or brush the pans with butter, line the bottoms with parchment paper, butter the parchment paper then dust the pans with flour, tapping out the excess.

In a medium bowl whisk together the flour, baking powder, baking soda, cinnamon, nutmeg and salt.

With an electric mixer (or stand mixer) beat the butter and brown sugar on medium speed until pale and fluffy, 3 to 4 minutes. Beat in the eggs, 1 at a time. Then beat in the pumpkin and finally the vanilla and ginger. Reduce the speed to medium and add the flour in the batches alternating with 2 batches of the buttermilk, beating until just combined, scraping down the sides of the bowl as necessary.

Divide the batter evenly between the prepared pans. Bake until the cakes are golden brown, the edges pull away from the sides of the pan and a cake tested comes out clean, about 30 -35 minutes. Transfer the pans to a wire rack to cool for 15 minutes. Turn out the cakes onto the racks to cool completely.

Place the bottom layer of the cake on a cake stand (or board) and spread half of your desired frosting evenly over the cake. Top with the second layer and evenly spread the remaining frosting over the cake.

Recipe from Martha Stewart


Goat Cheese Frosting

Ingredients:

1 pound (2 – 8oz bars) cream cheese, at room temperature

8 ounces soft goat cheese, at room temperature

1/2 cup confectioners’ sugar

Directions:

Beat cheese until combined, then gradually add sugar and continue beating until smooth and creamy.

Recipe from Martha Stewart

Thanksgiving Desserts

Hope you all had a wonderful Thanksgiving filled with delicious food and joyous times with loved ones. This year I spent the day at a friend’s house enjoying said delicious food and joyous times – although I did cook a turkey the following day. At this point though I am kind of turkeyed out! I didn’t go empty handed to the Thanksgiving celebration though; I brought the dessert… three pies, a cheesecake and a chocolate cake. What can I say, I love to bake!

Among the pies was a Pumpkin Pie that I decorated using Fall themed pie cutters. Then there was a Sweet Potato Pie 

that I decorated with a leaf border. I made this pie because I had never tried Sweet Potatoe Pie and was curious as to what all the fuss was about. It was good, but, I am partial to pumpking. And finally an Apple Pie that I gave a nice twisted pie crust design to.

IMG_9940

For the Cheesecake I stuck to a recipe that was a hit and topped it with sugared cranberred. The cranberries were so good that I ended up eating the leftovers like they were candy.

IMG_9938

And finally, the Chocolate Cake. The cake had a pumpkin spice mousse filling – it was super simple to make and delish thanks to a box of Jell-O Pumpkin Spice Pudding mix – and frosted it with chocolate frosting. And to give it a Fall theme I topped it with white chocolate leaves in seasonal colors.

IMG_9928

Thanksgiving Wrap-Up

So I ate the last of my Thanksgiving leftovers yesterday and they were definitely good while they lasted. Ironically cooking a turkey on Thanksgiving has never intimidated me like cooking on an everyday basis used to. Go figure! I would like to say that I turned those turkey leftovers into something creative, but, that just never happened (although I did have a thought or two about it.)

Along with my turkey (which I must say came out really juicy and tasty thanks to brining and an herbed butter rub)…

IMG_2038

I also made a Sweet Potato Casserole (it was the first time I ever made one and it will definitely become a staple of mine), Williams-Sonoma’s Focaccia Stuffing and Brussels Sprouts with Caramelized Onions…

IMG_2043

And in my opinion Thanksgiving is just not complete without some Cranberry Sauce.

IMG_2018

For dessert I decided to make a Pumpkin Pecan Pie. I usually just make a plain old Pumpkin Pie but after seeing a recipe that included pecans I was intrigued to try it. In all honesty I didn’t particularly care for that recipe so originally I decided to add pecans to the usual recipe I follow for Pumpkin Pie, but, I decided this year to try out Libby’s Famous Pumpkin Pie recipe. They are known for their packed pumpkin in cans so I figured they should know a thing or two about turning that into a delicious pie.

To start I toasted about 1/2 cup of chopped pecans on a lightly greased baking sheet in a 350 degrees preheated oven for five minutes. After they cooled I scattered them on the bottom of a deep-dish pie shell. I took a major short-cut and opted to buy a frozen pie crust.

IMG_2003

Next, I made the pumpkin filling by beating 2 large eggs in a bowl and then adding in the pumpkin and a mixture of sugar, cinnamon, salt, ginger and cloves. And then I gradually stirred in a can of evaporated milk.

IMG_2002

And finally I poured that into the pecan covered pie crust and baked it for fifteen minutes in a 425 degrees preheated oven and then dropped the temperature to 350 degrees and baked it for another forty-five minutes.

IMG_2006

I loved the texture the pecans added to the pie as well as the nutty flavor.

IMG_2010

And while many were out scoring Black Friday deals I opted to stay in and work on some Christmas crafts… Stay tuned!

%d bloggers like this: