Ingredients:
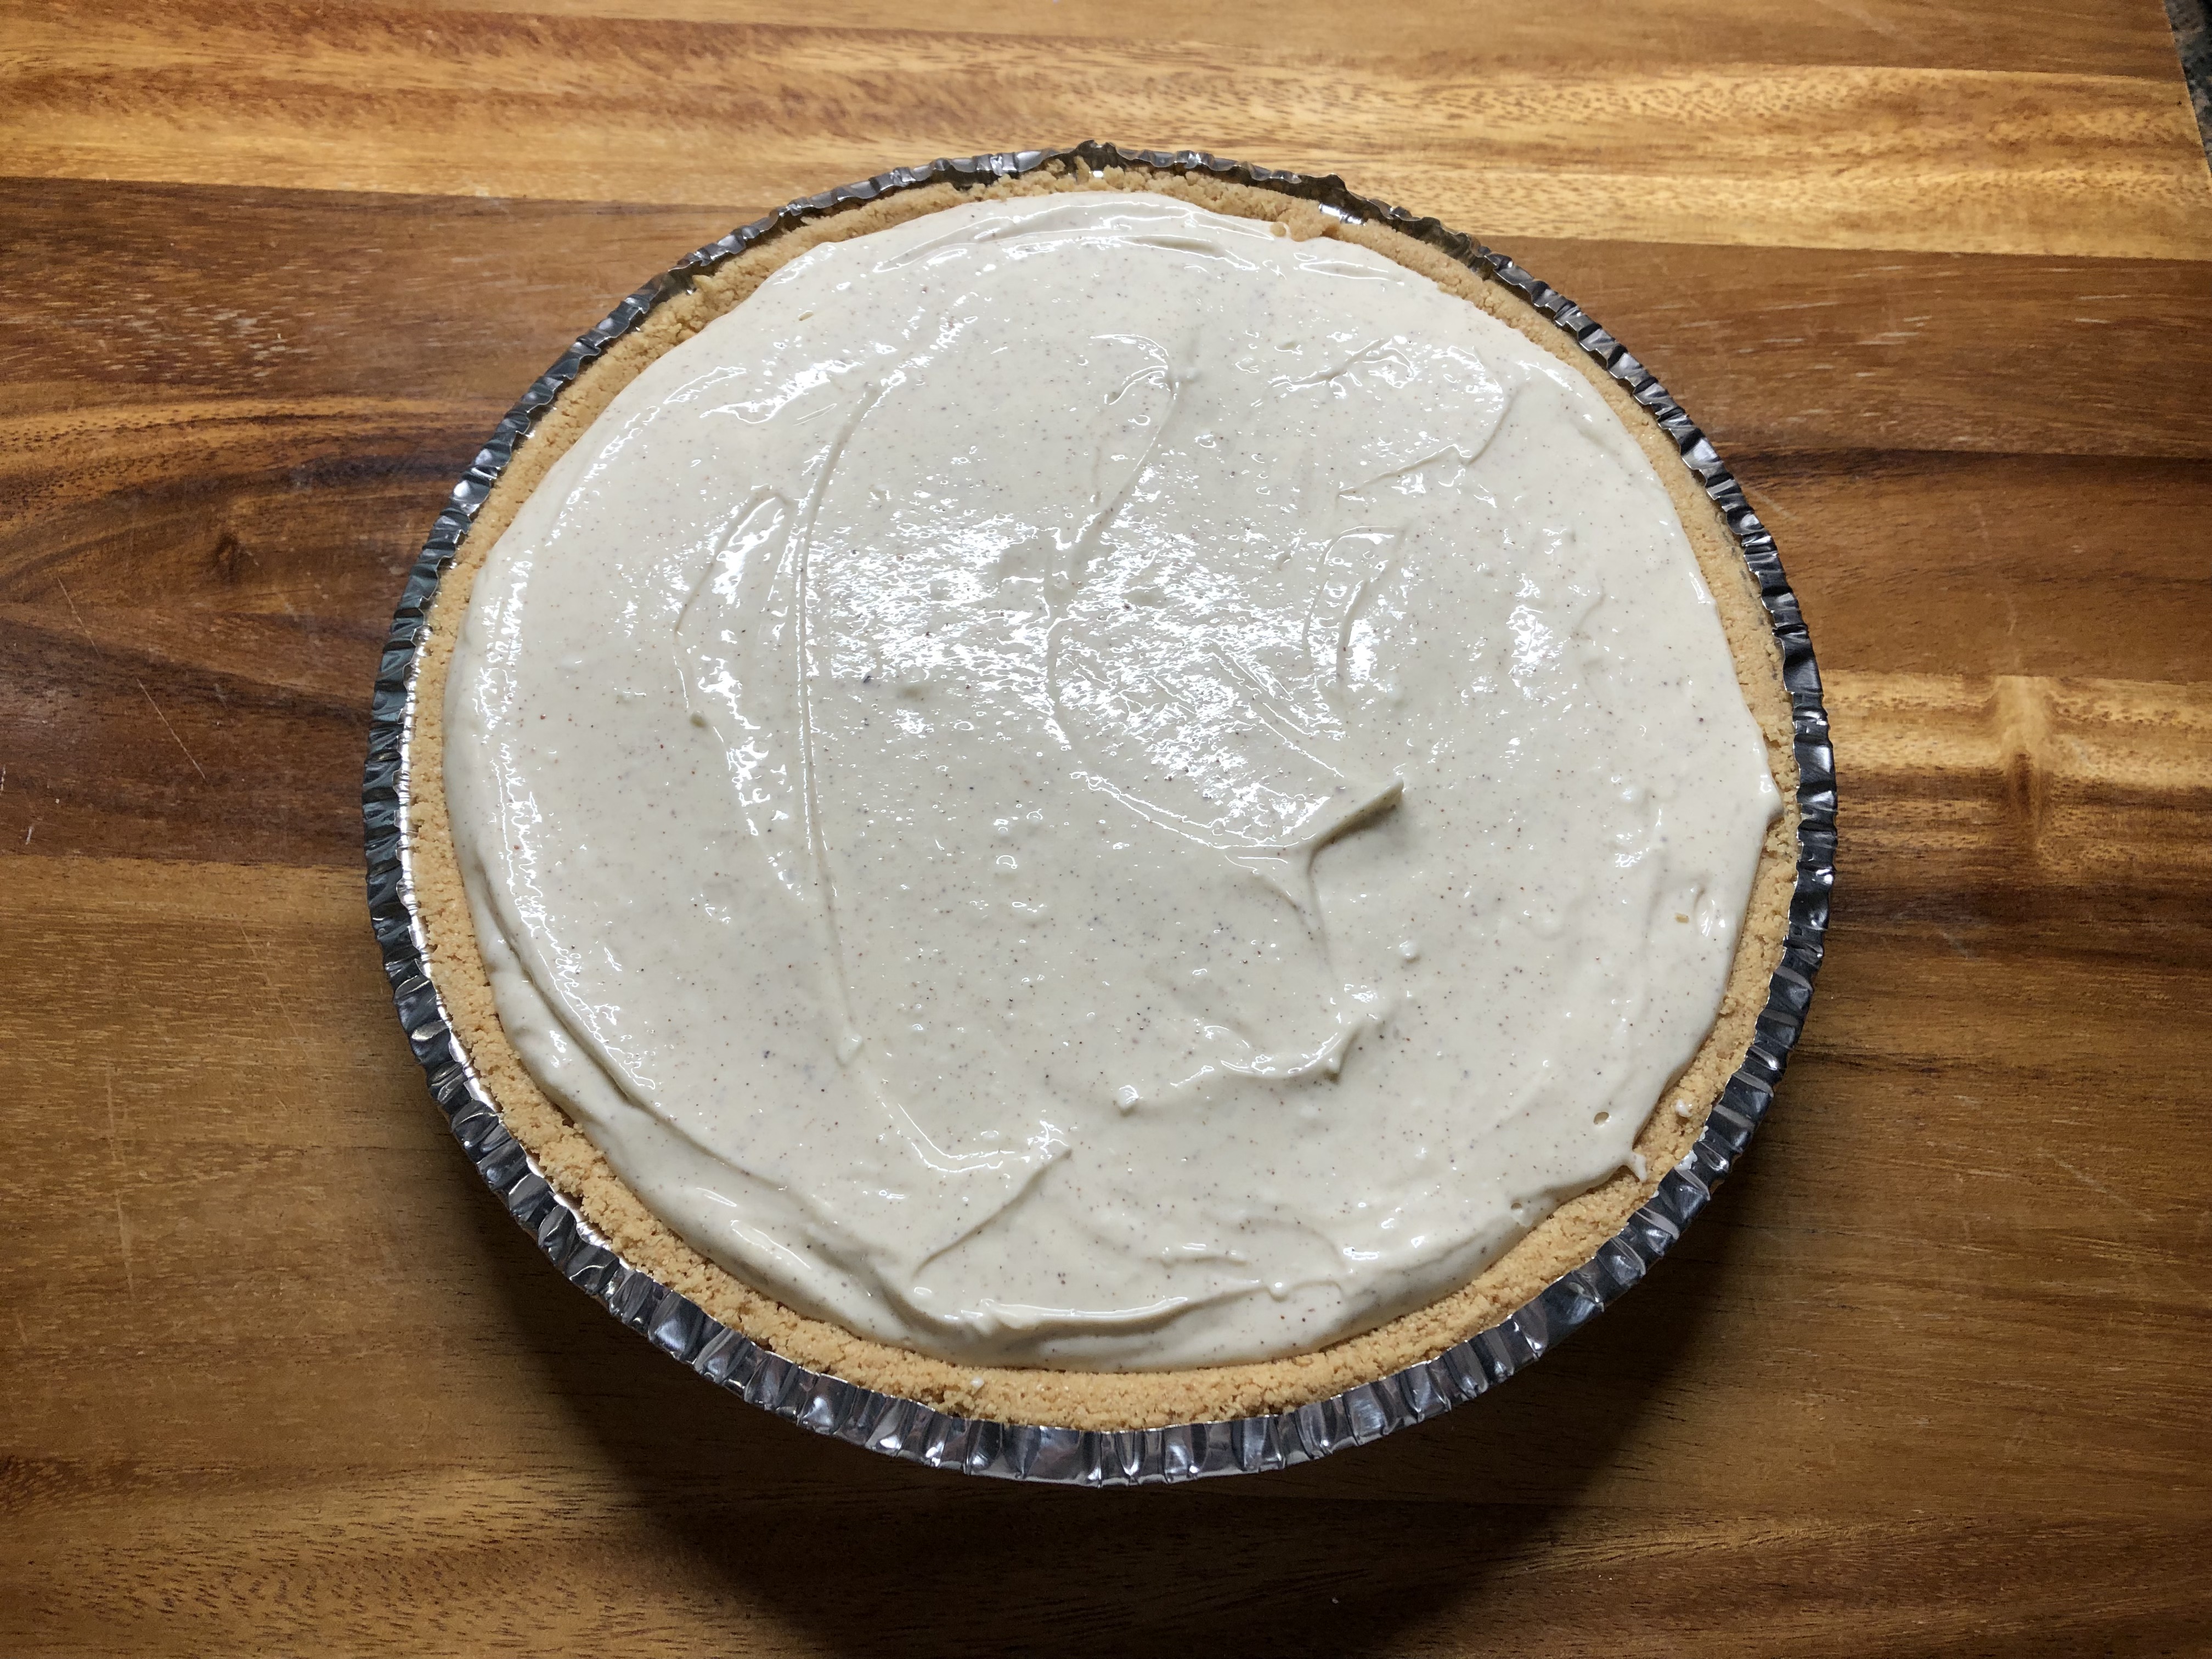
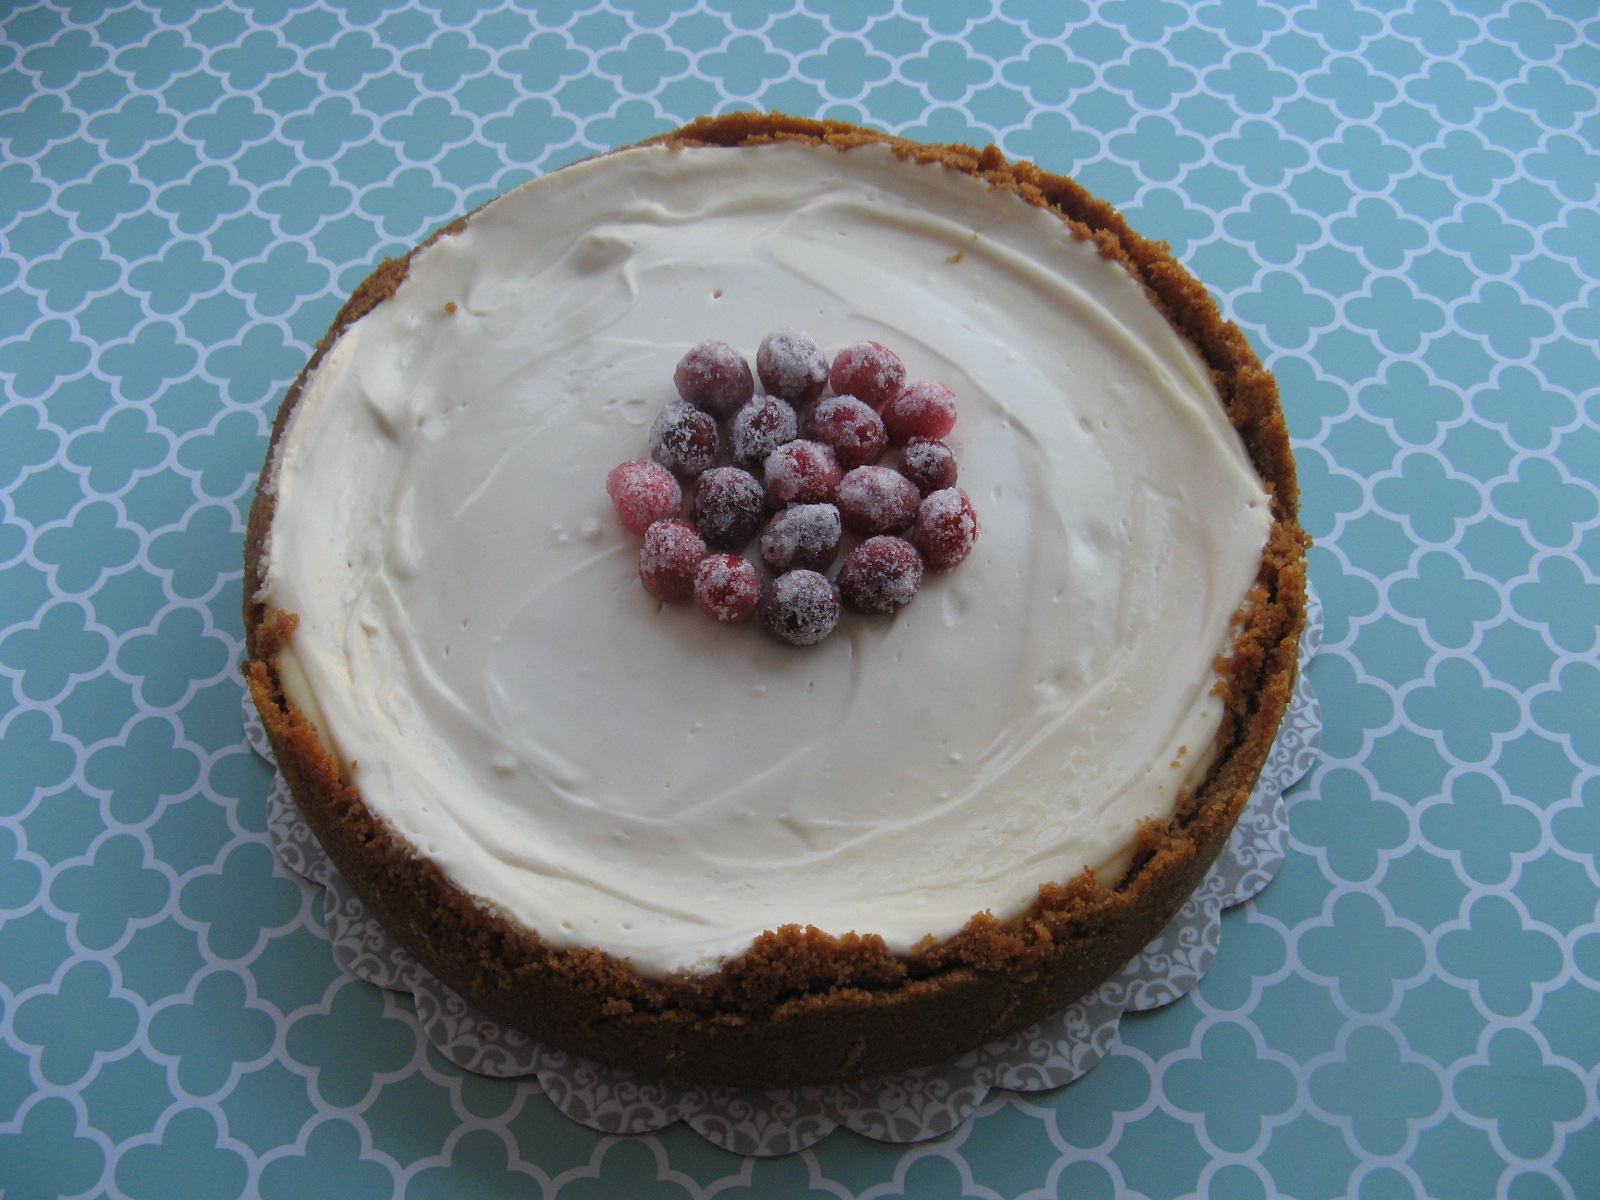
9-inch graham cracker crust
For the Cheesecake:
2 8oz packages cream cheese, at room temperature
1/2 cup sour cream
1/2 cup sugar
1 teaspoon vanilla extract
1/2 teaspoon cinnamon
1/4 teaspoon nutmeg
1/4 teaspoon allspice
1/8 teaspoon ginger
2 large eggs, at room temperature
For the Apple Topping:
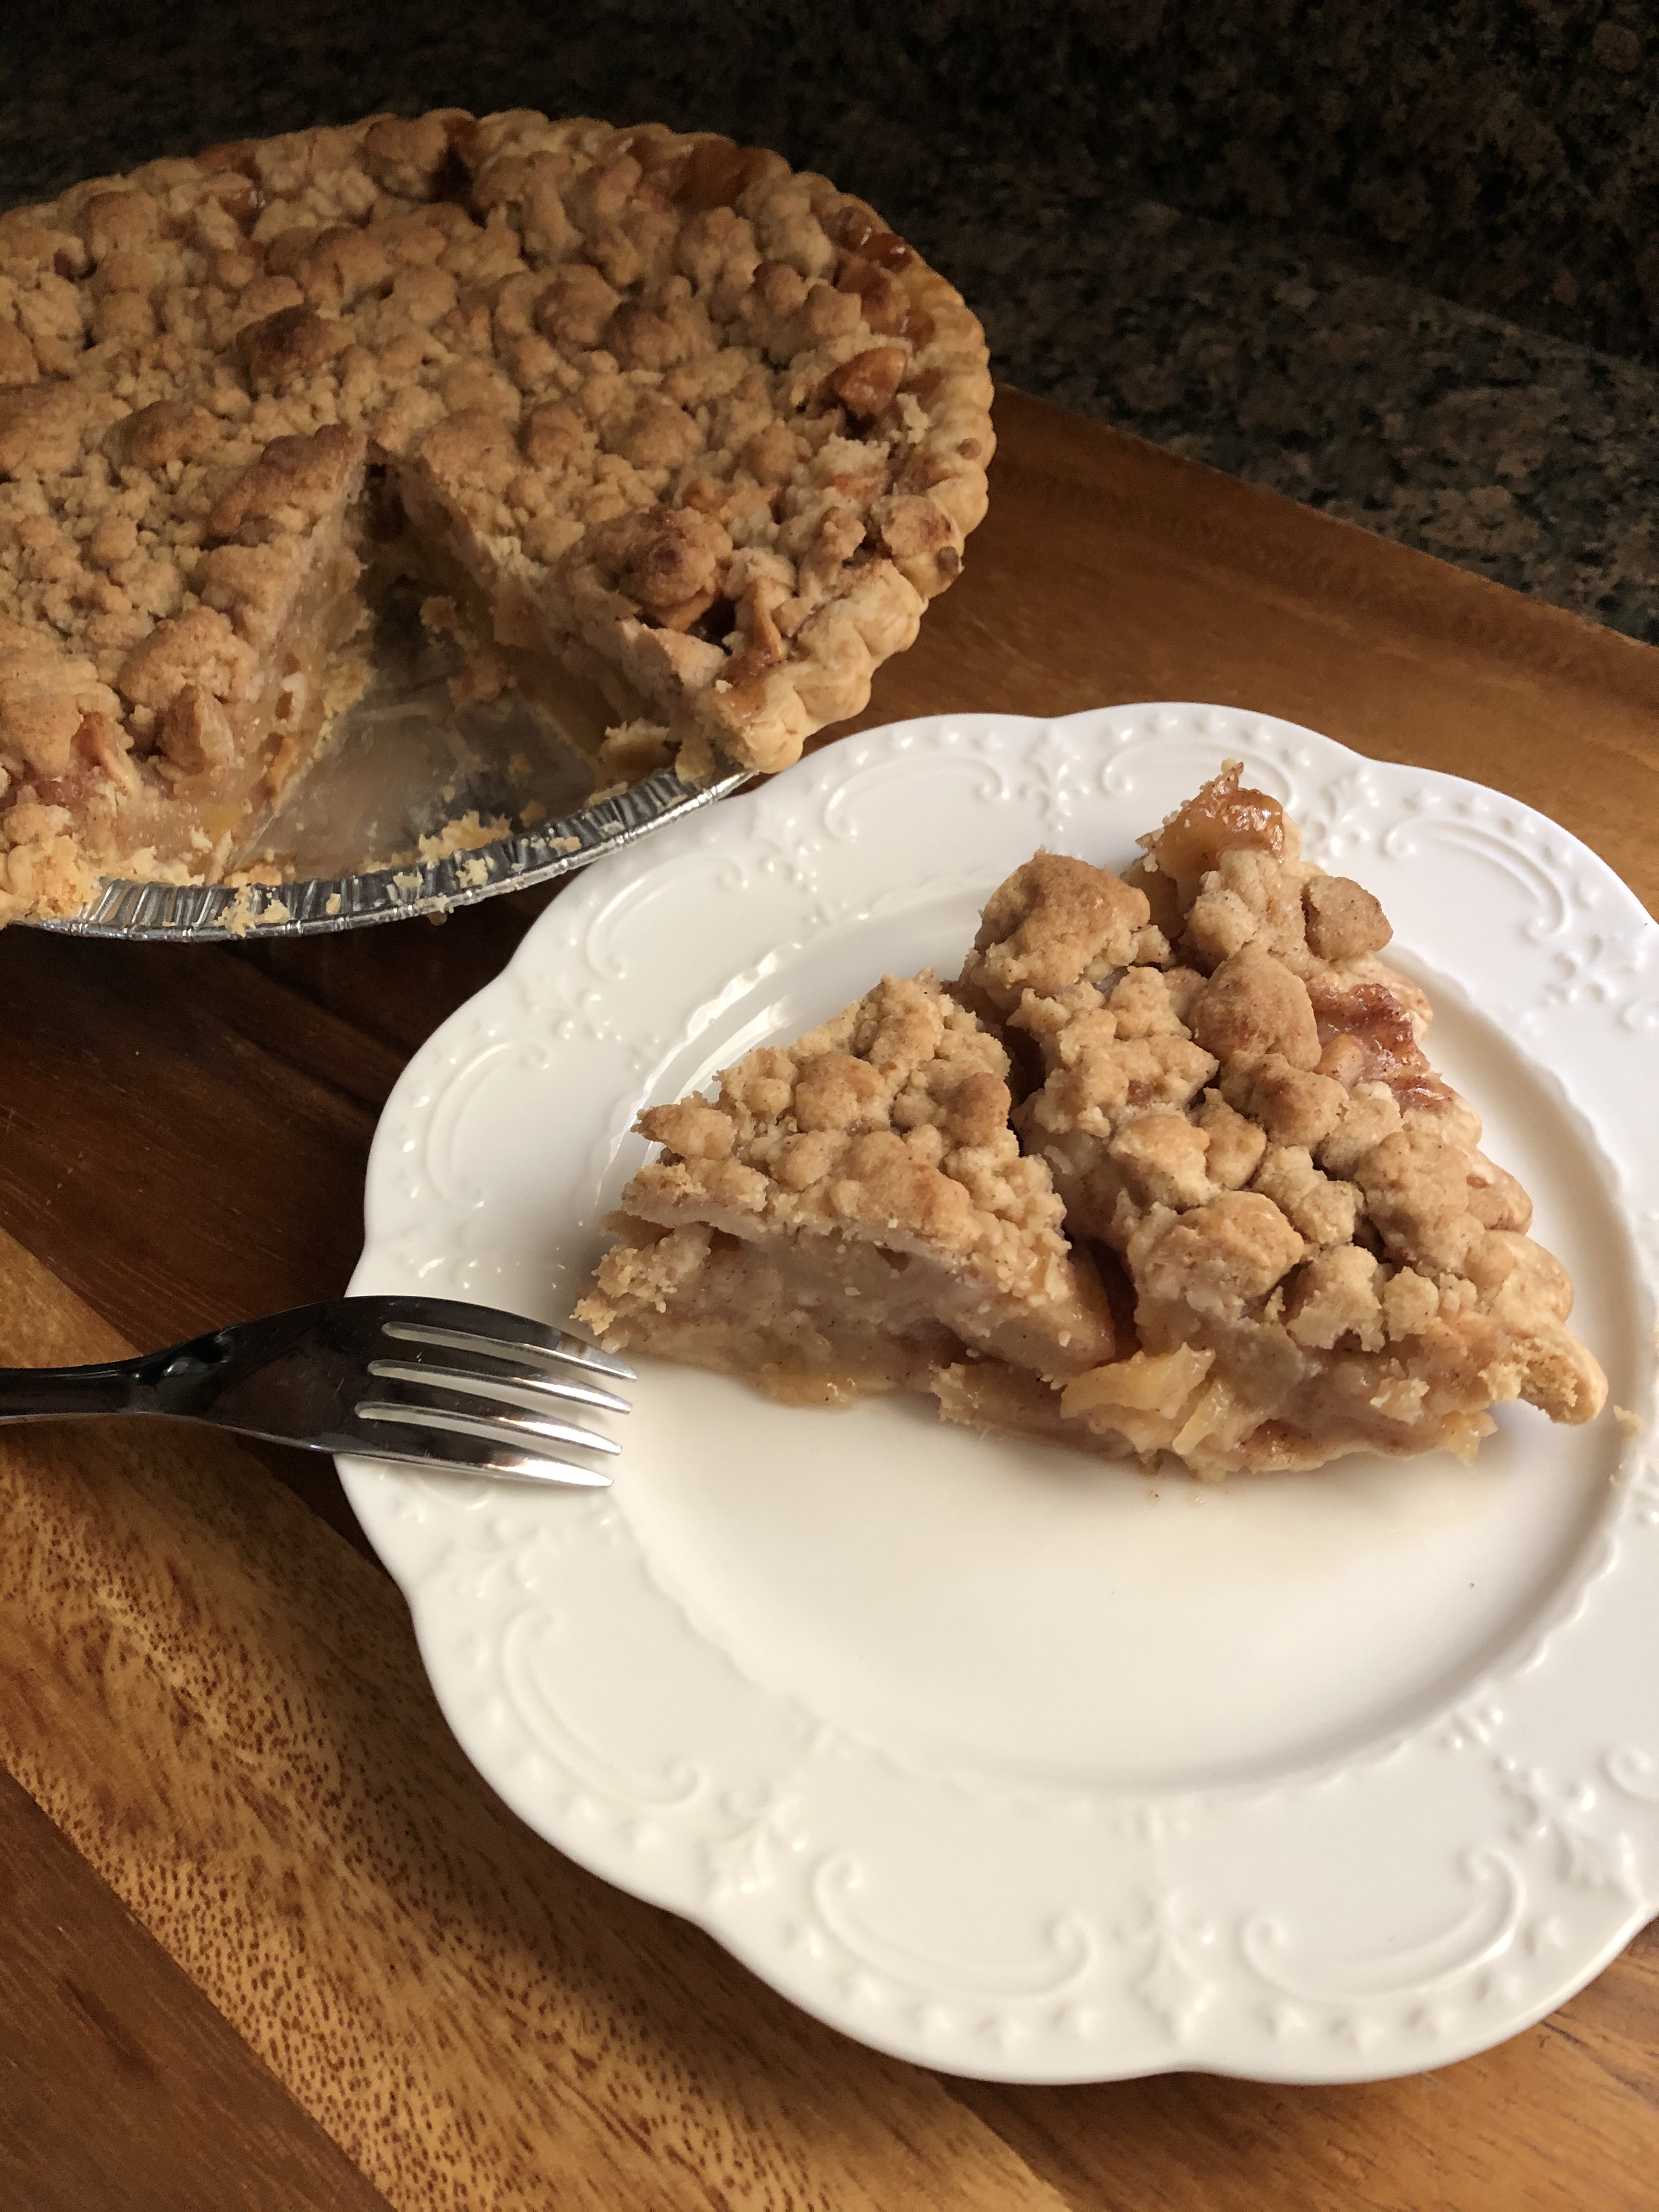
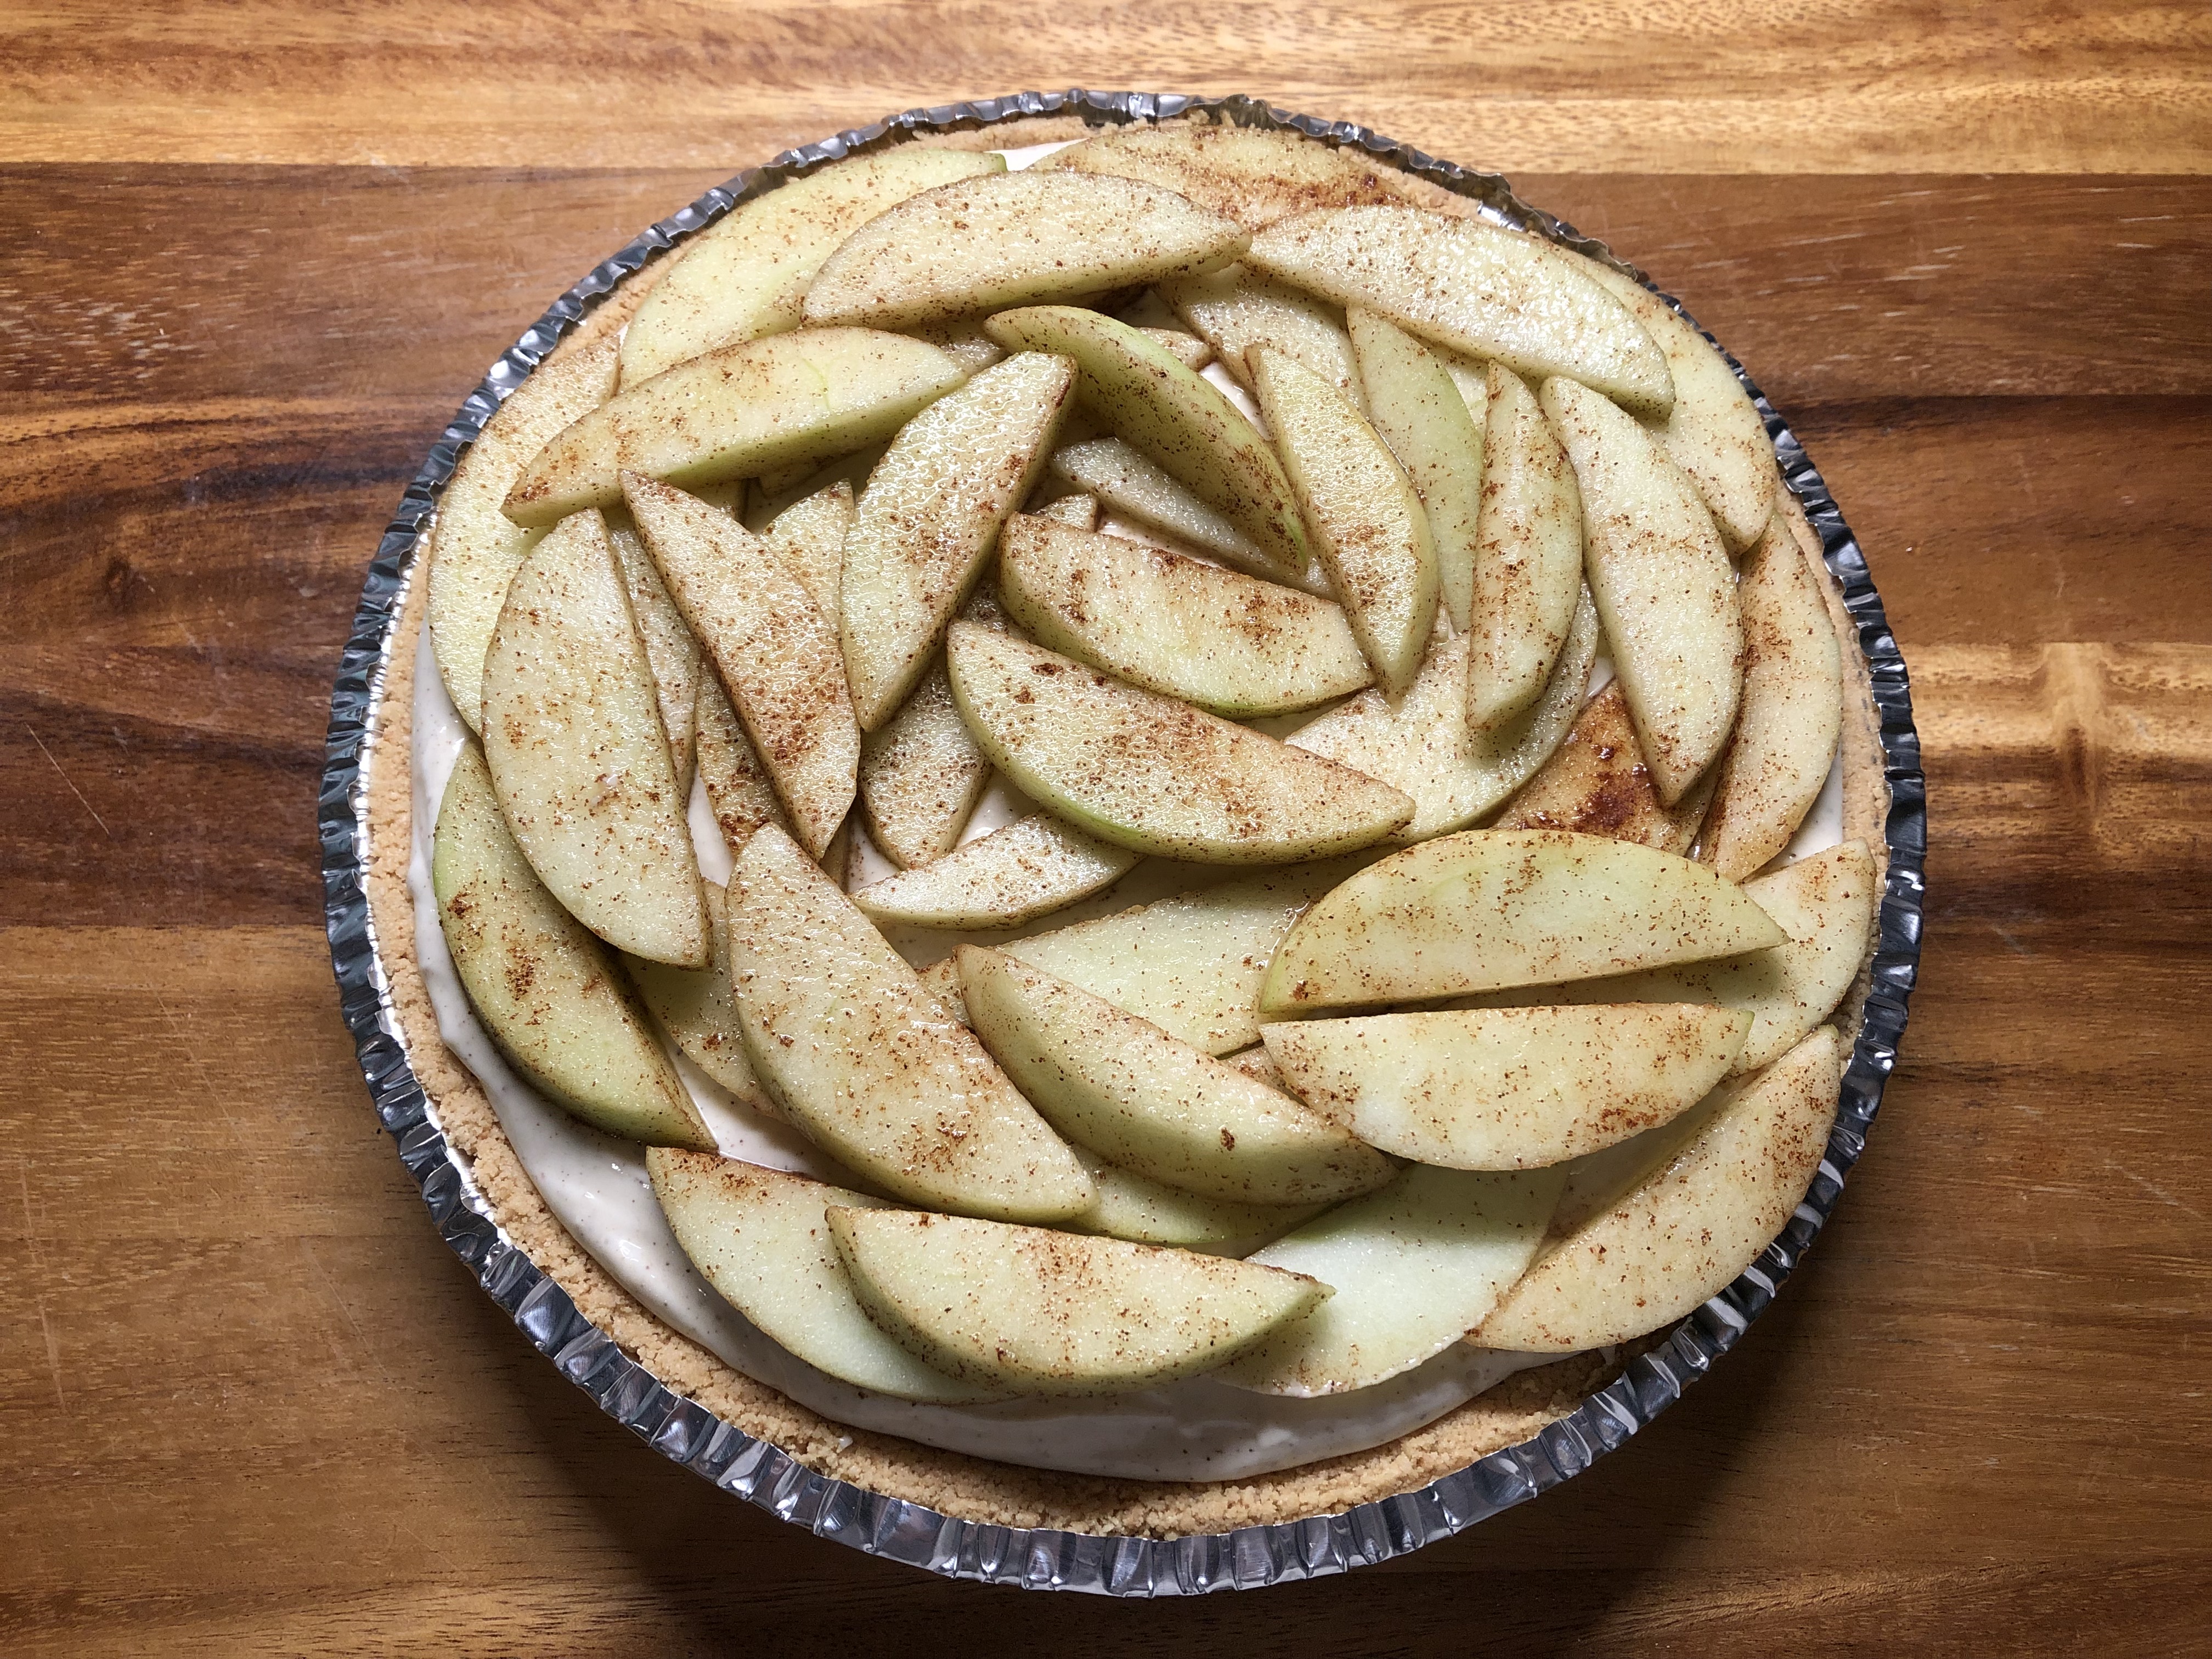
2 Granny Smith Apples, peeled, cored & sliced thin
1 tablespoon lemon juice
1/2 teaspoon cinnamon
1 tablespoon light brown sugar
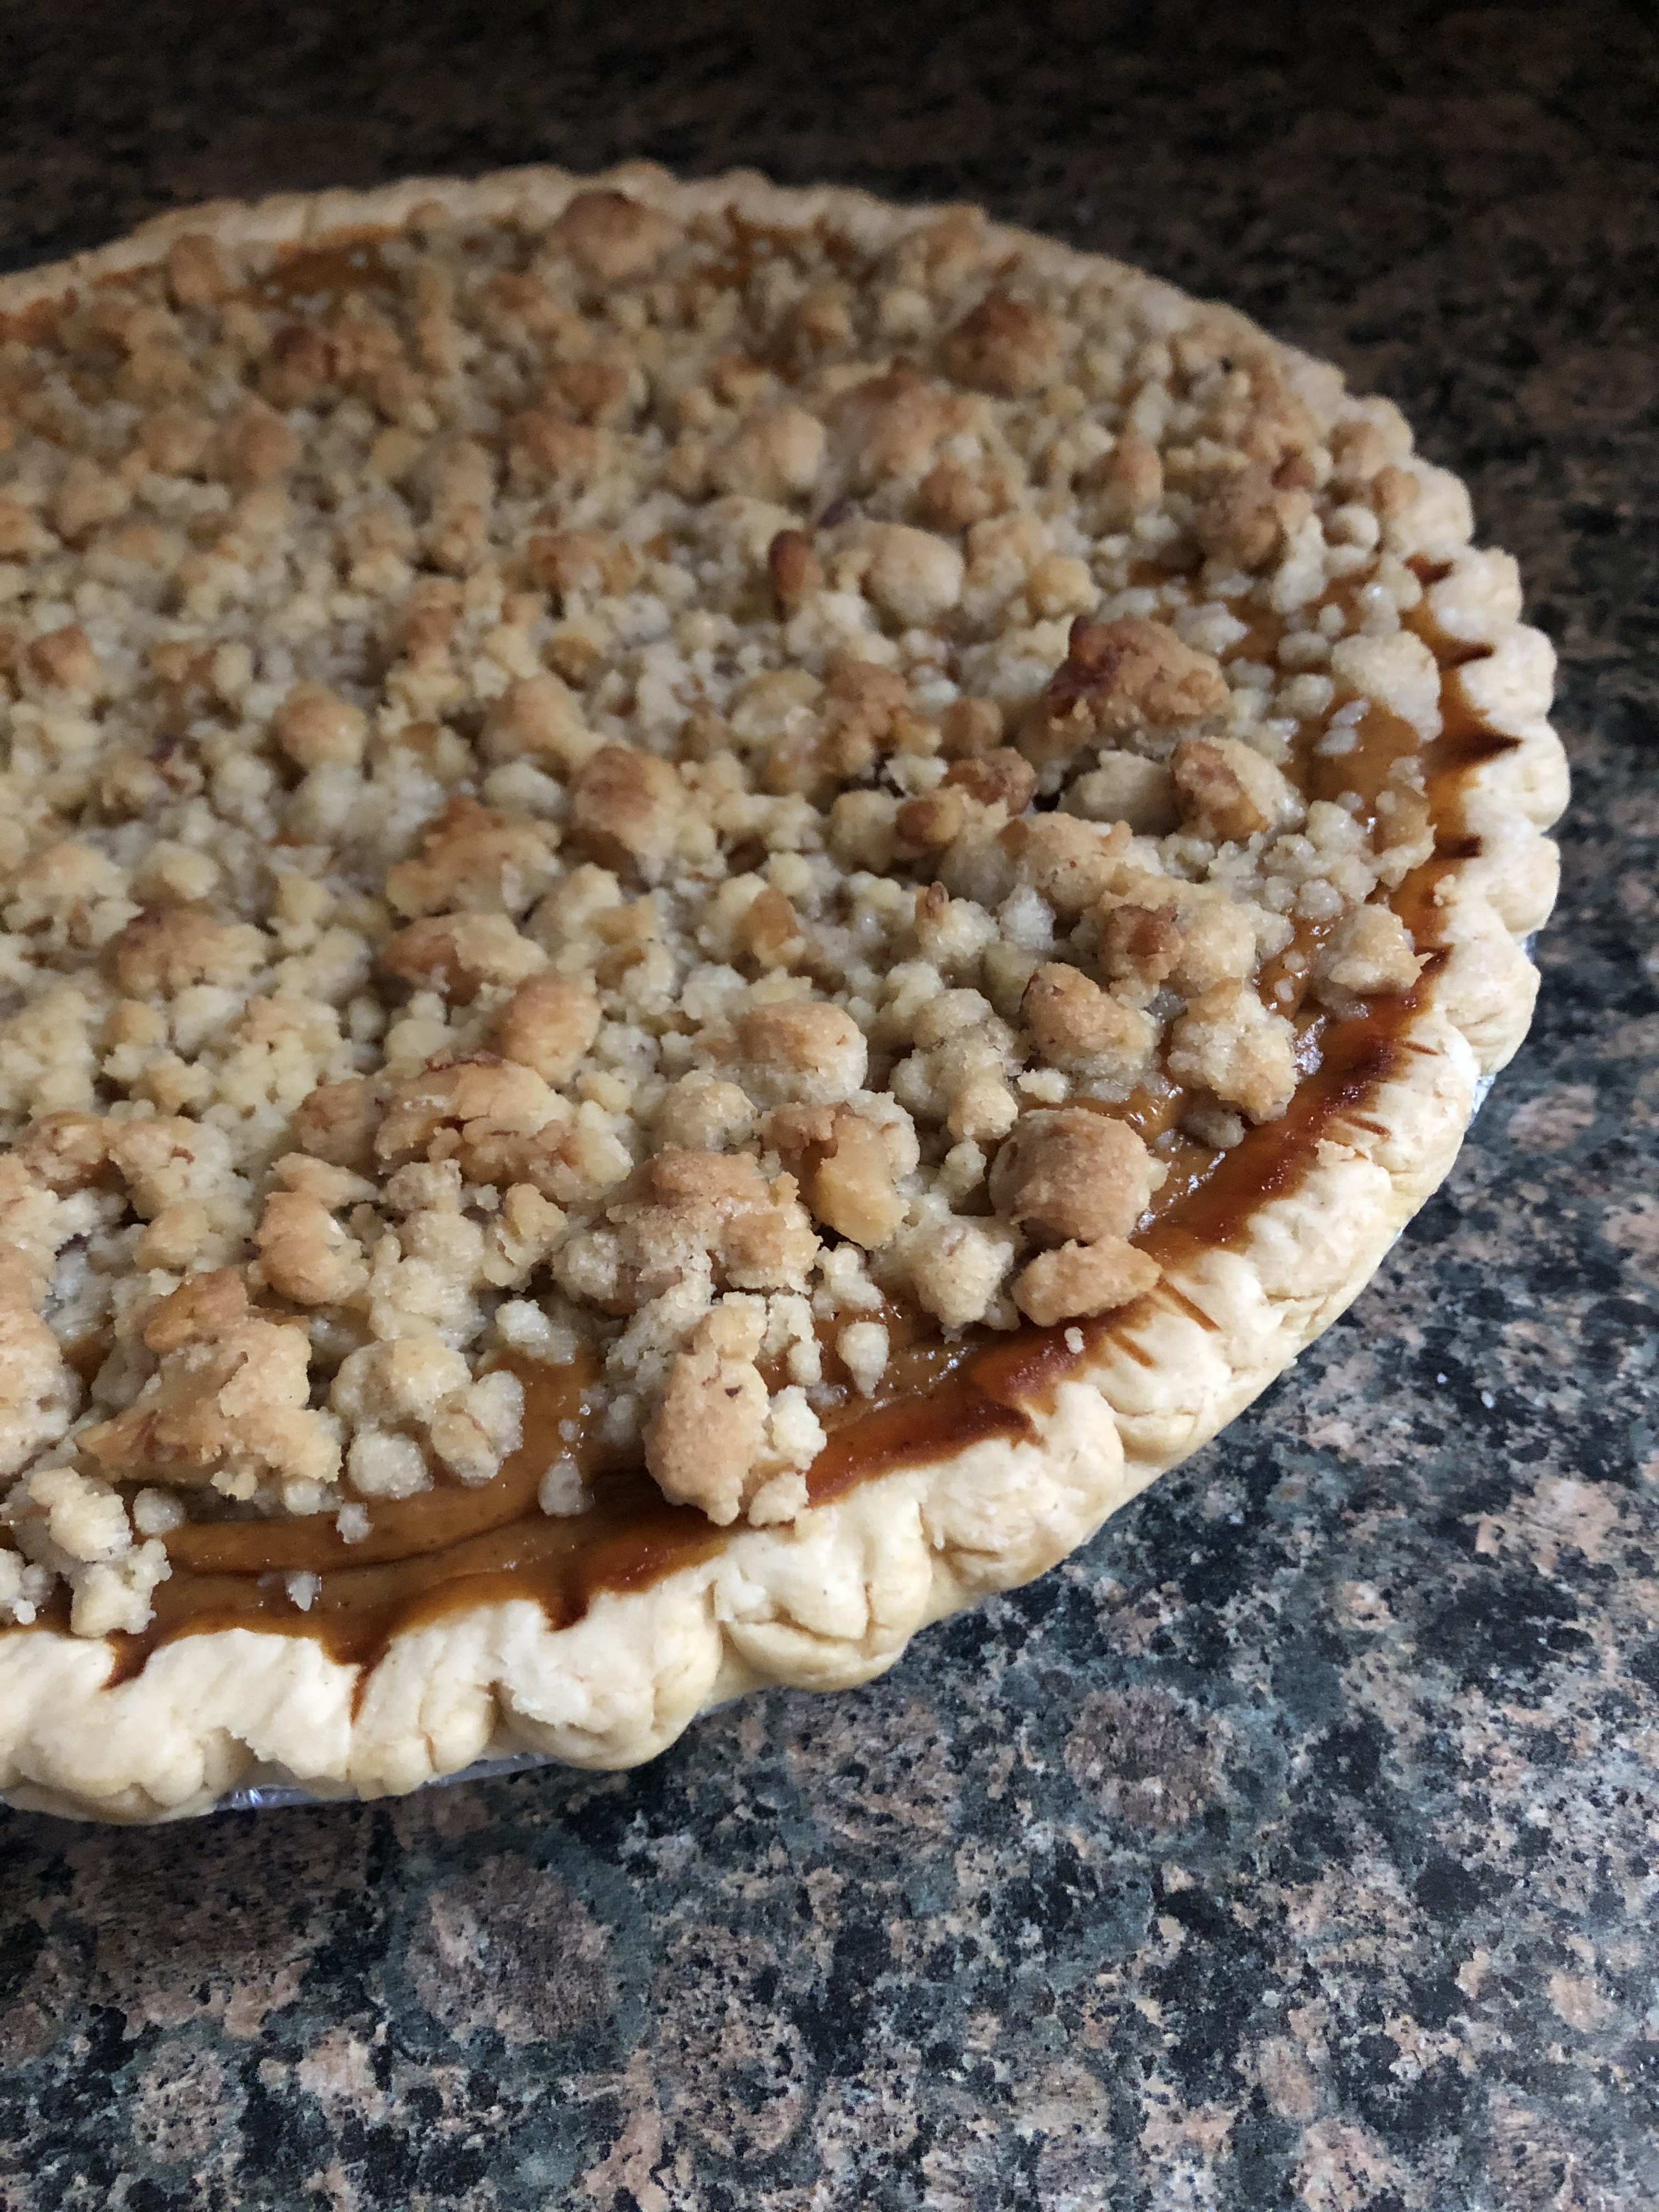
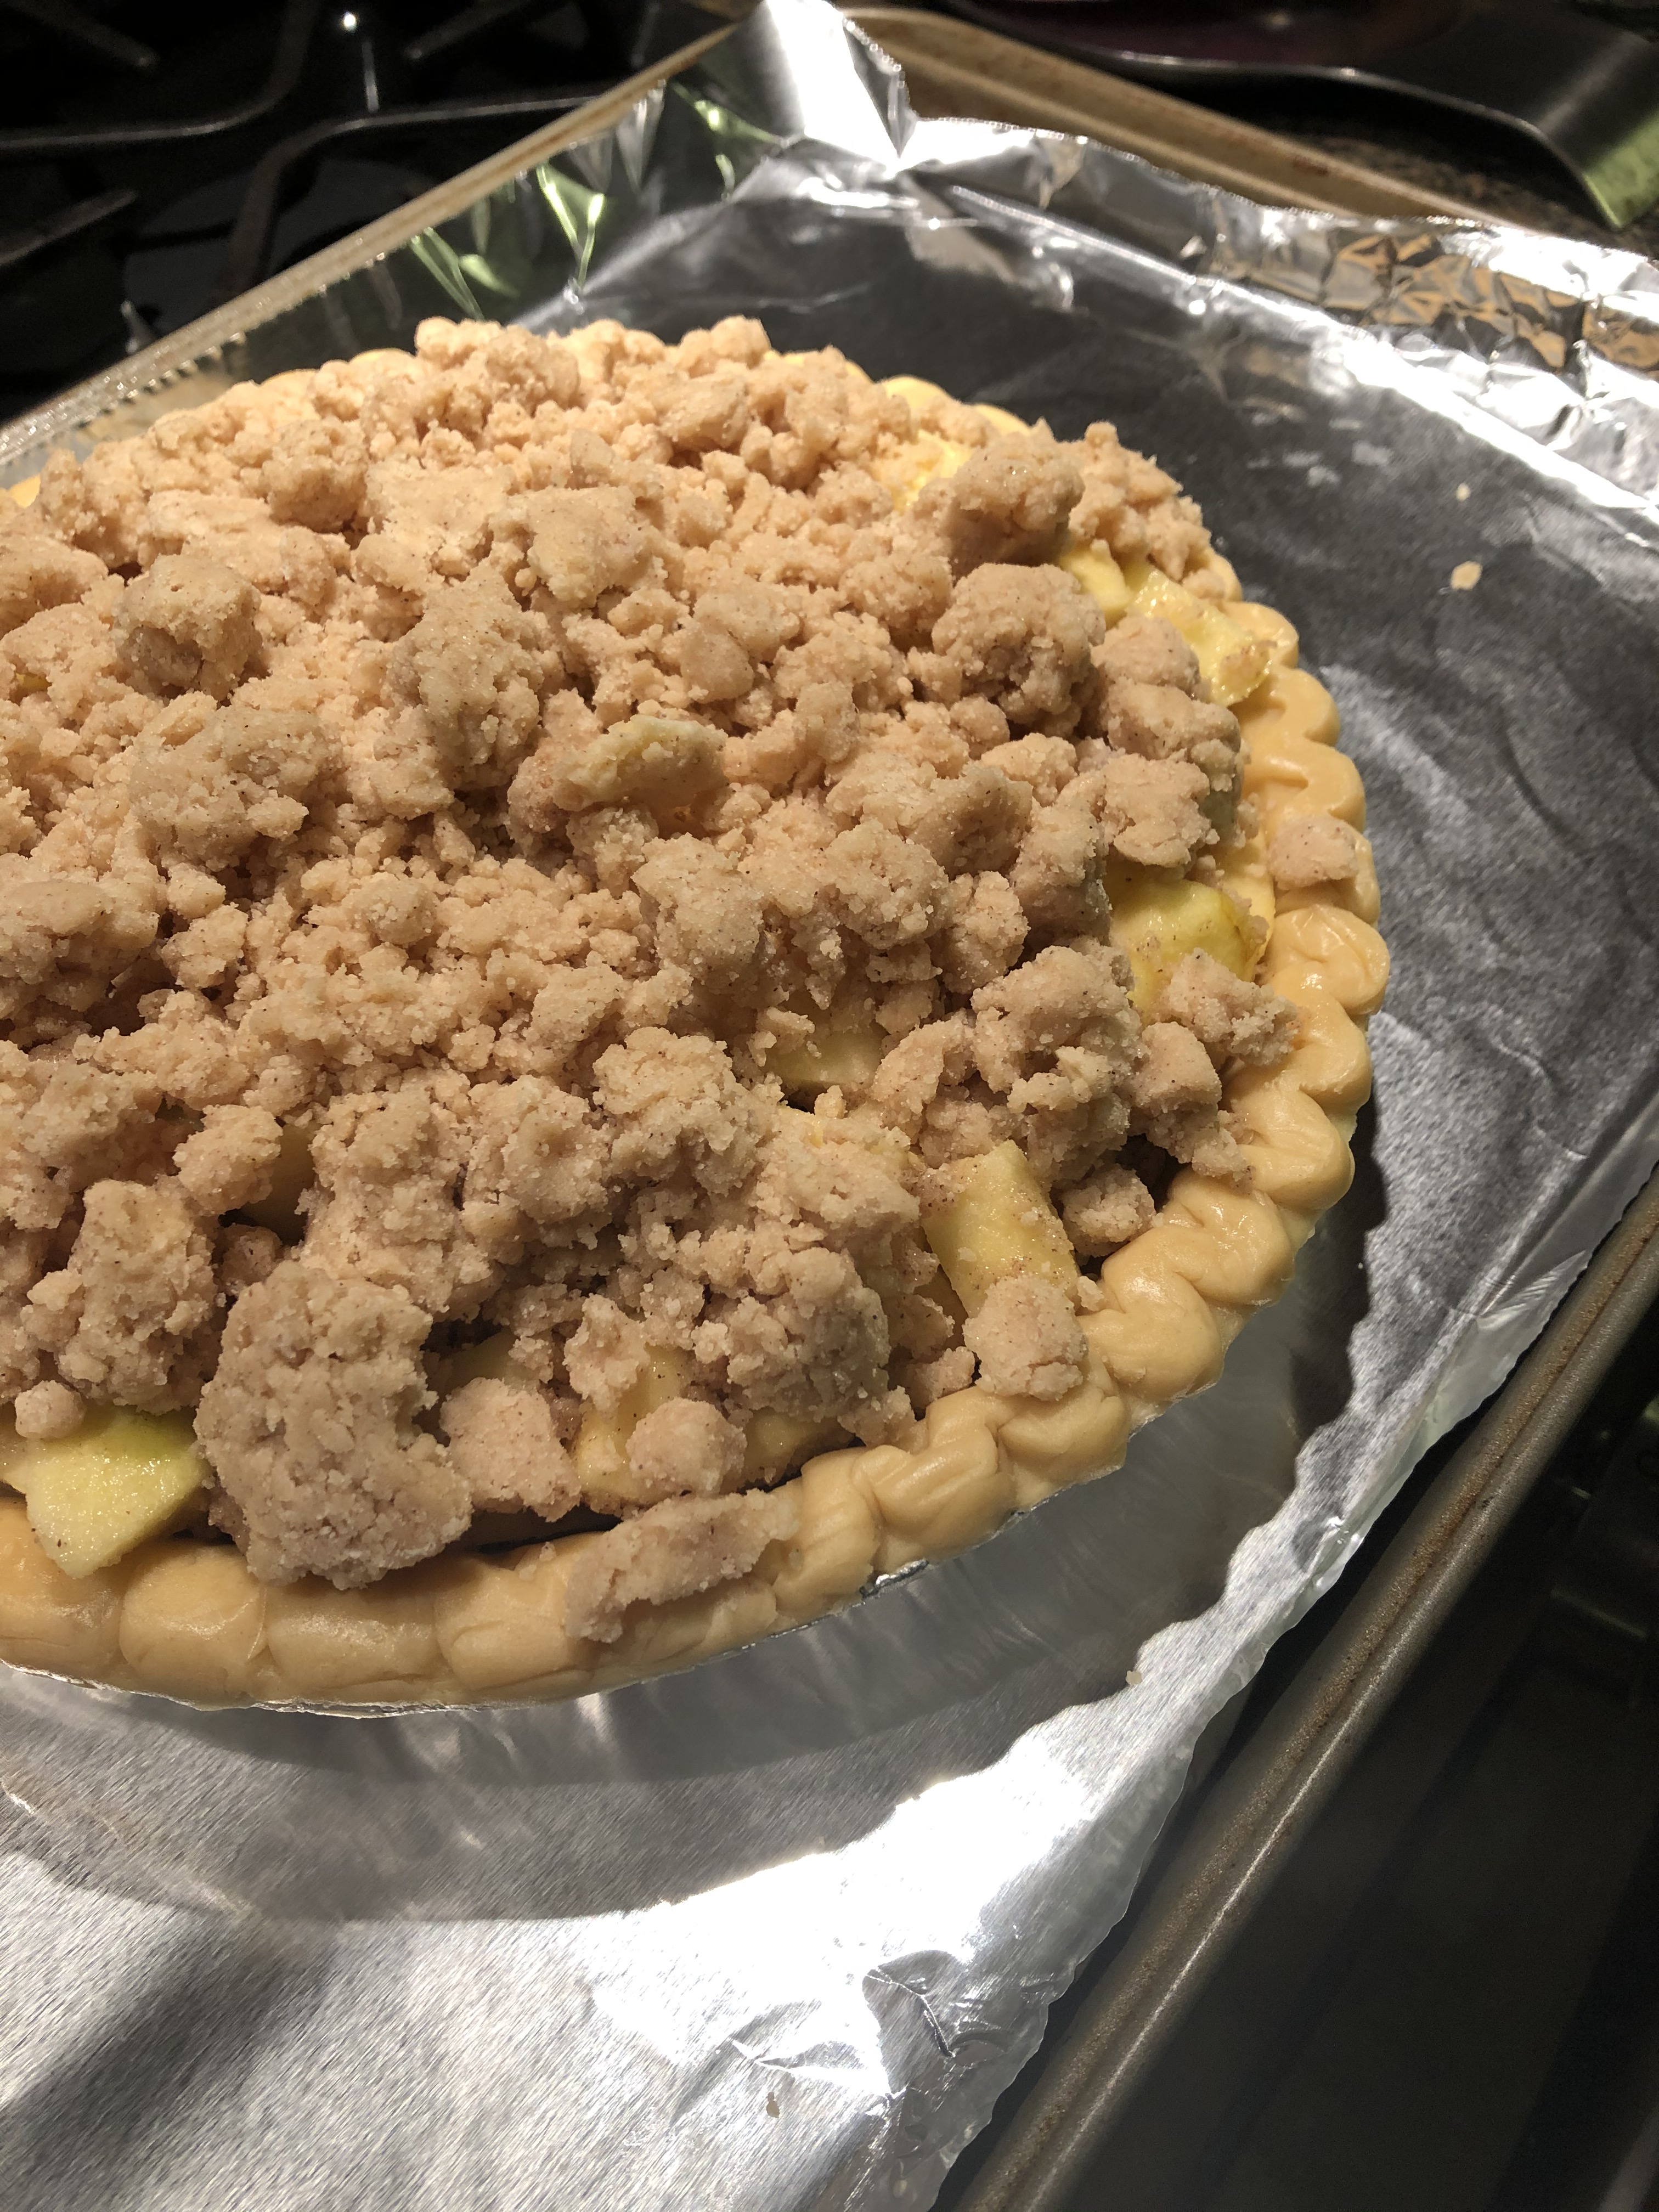
For the Crisp Topping:
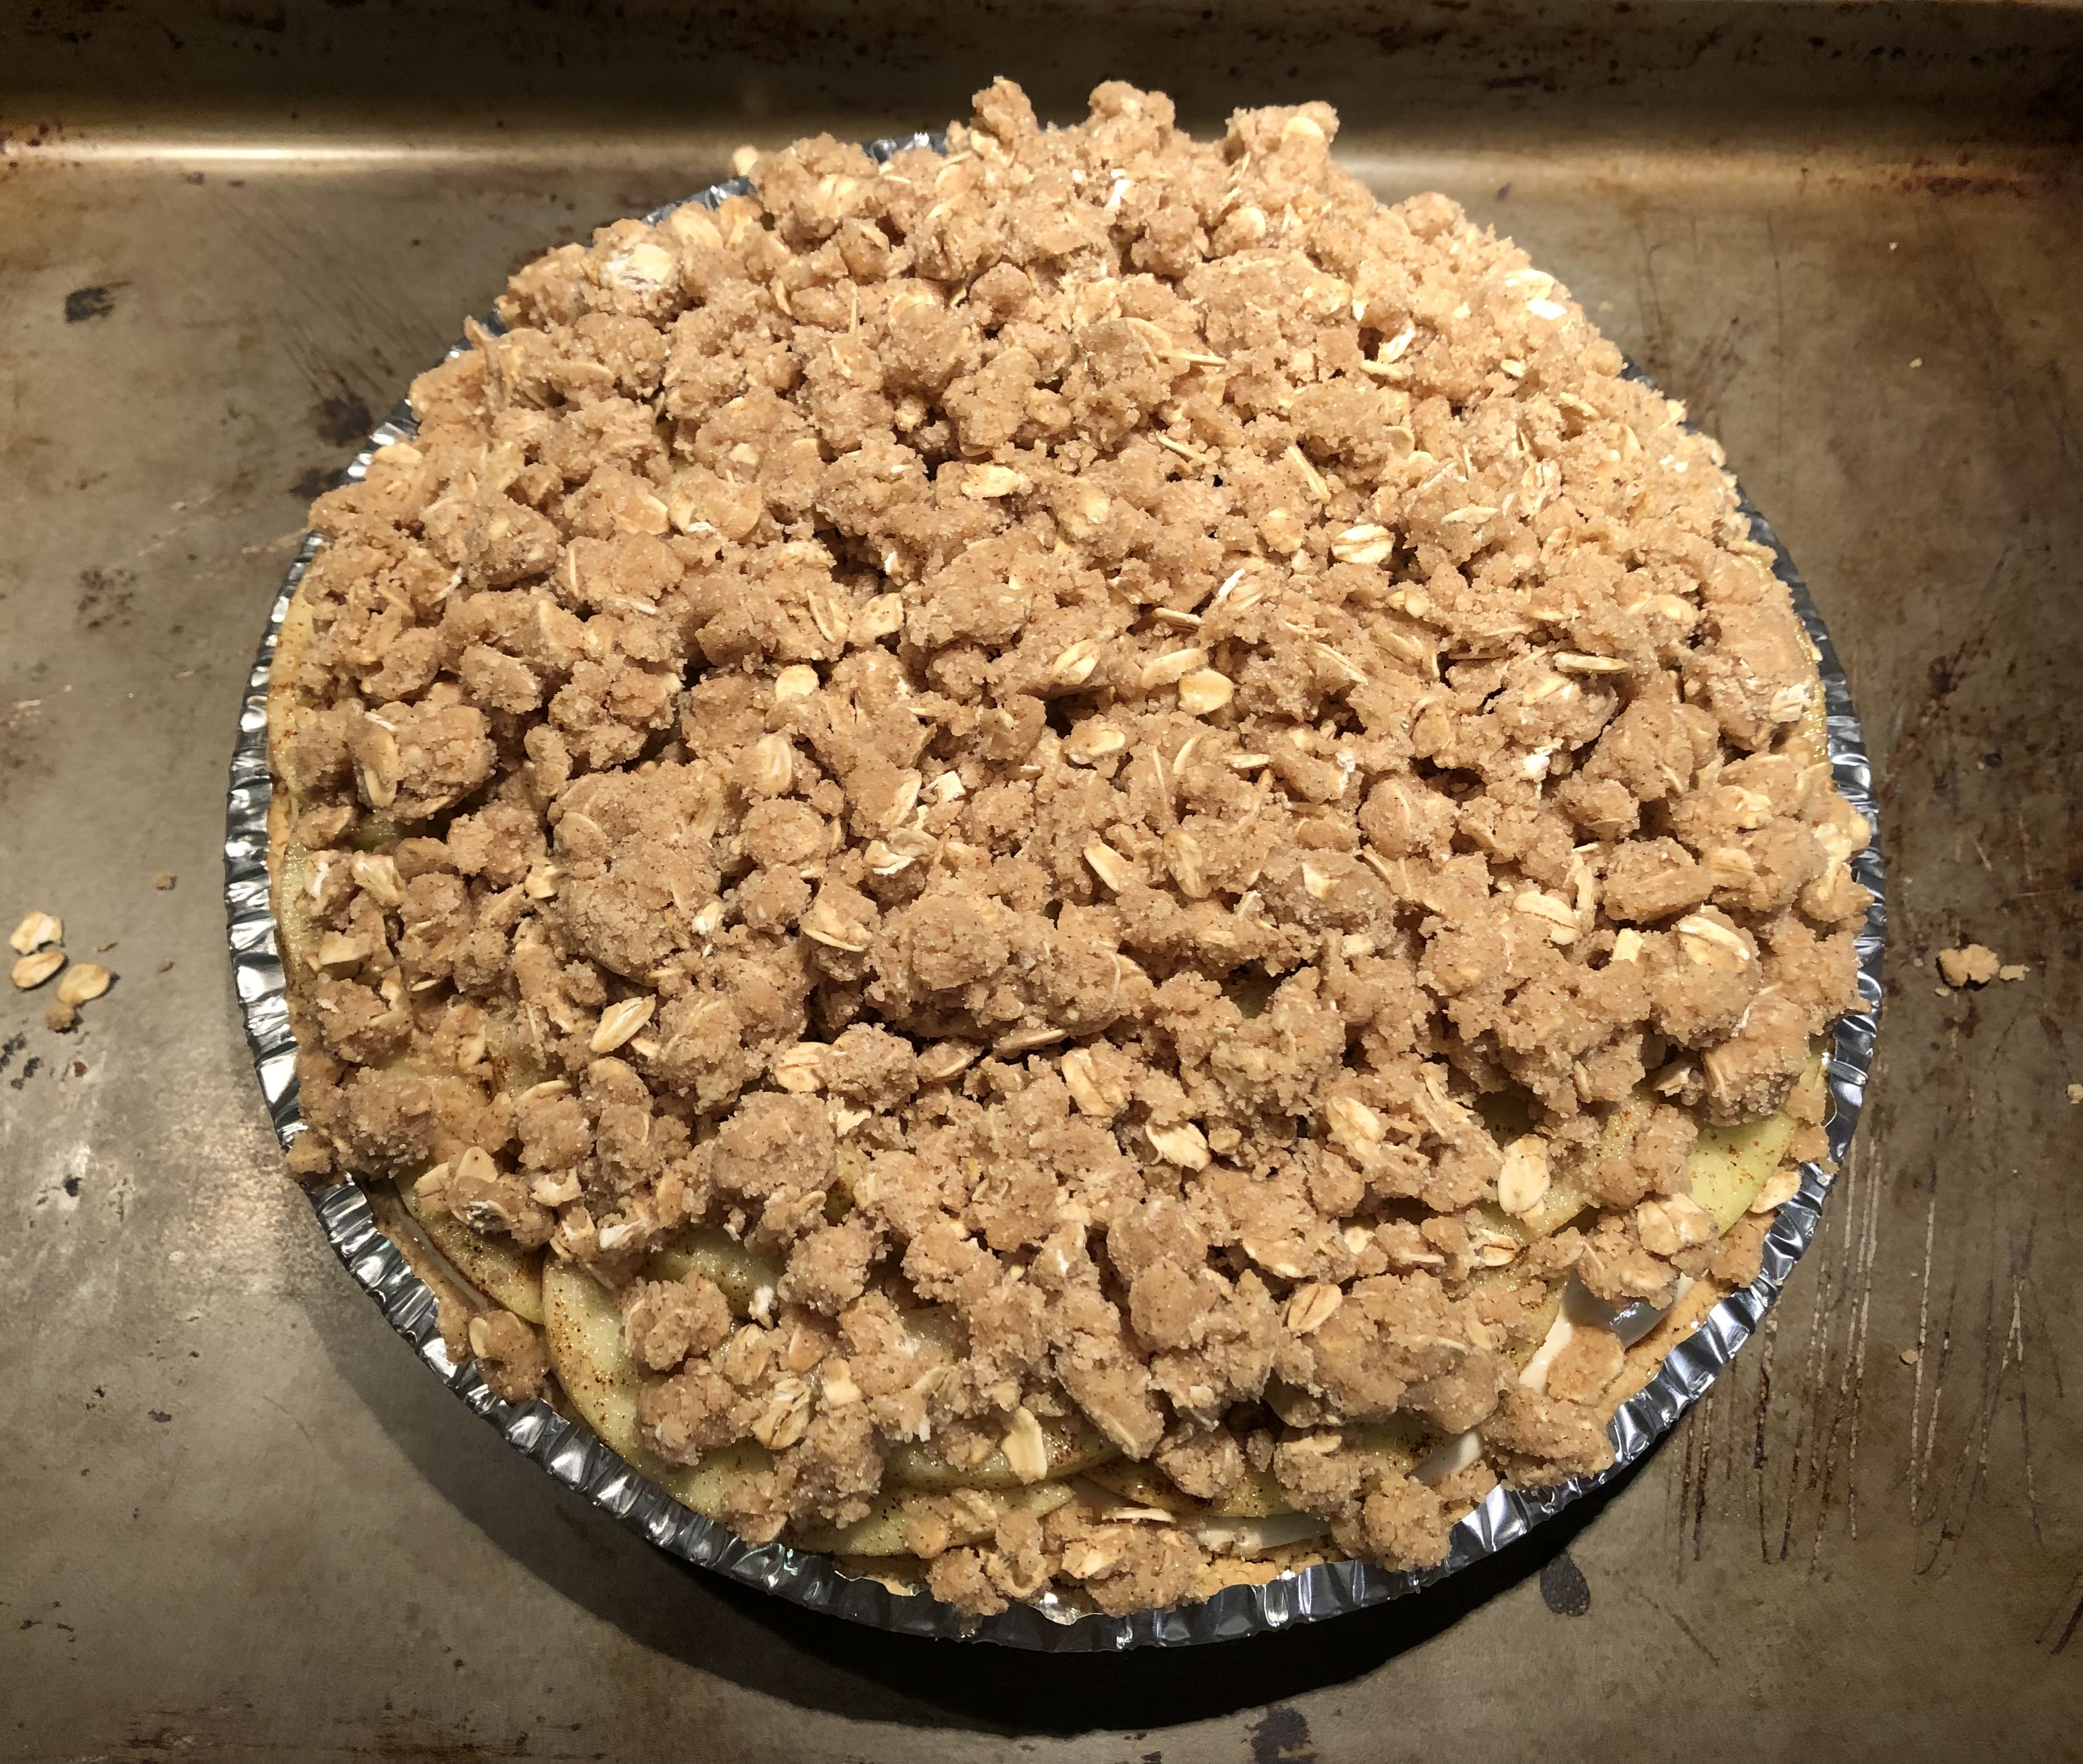
1/2 cup old-fashioned oats
1/2 cup flour
1/2 cup light brown sugar
1/2 teaspoon cinnamon
4 tablespoons butter, softened
Directions:
Preheat oven to 325 F.
For the Crisp Topping: In a medium bowl mix together the oats, flour, sugar and cinnamon until well combined. Add in the butter and mix until the mixture is crumbly. It might be best to use your hands. Refrigerate or freeze until ready to use.
For the Apple Topping: In a medium bowl toss together the apples, lemon juice, cinnamon and sugar until the apples are well coated. Set aside.
For the Cheesecake: In a large bowl beat together the cream cheese, sour cream, sugar, vanilla extract, cinnamon, nutmeg, allspice and ginger with a hand mixer on medium speed until well blended. Add the eggs and continue beating until the eggs are incorporated into the batter.
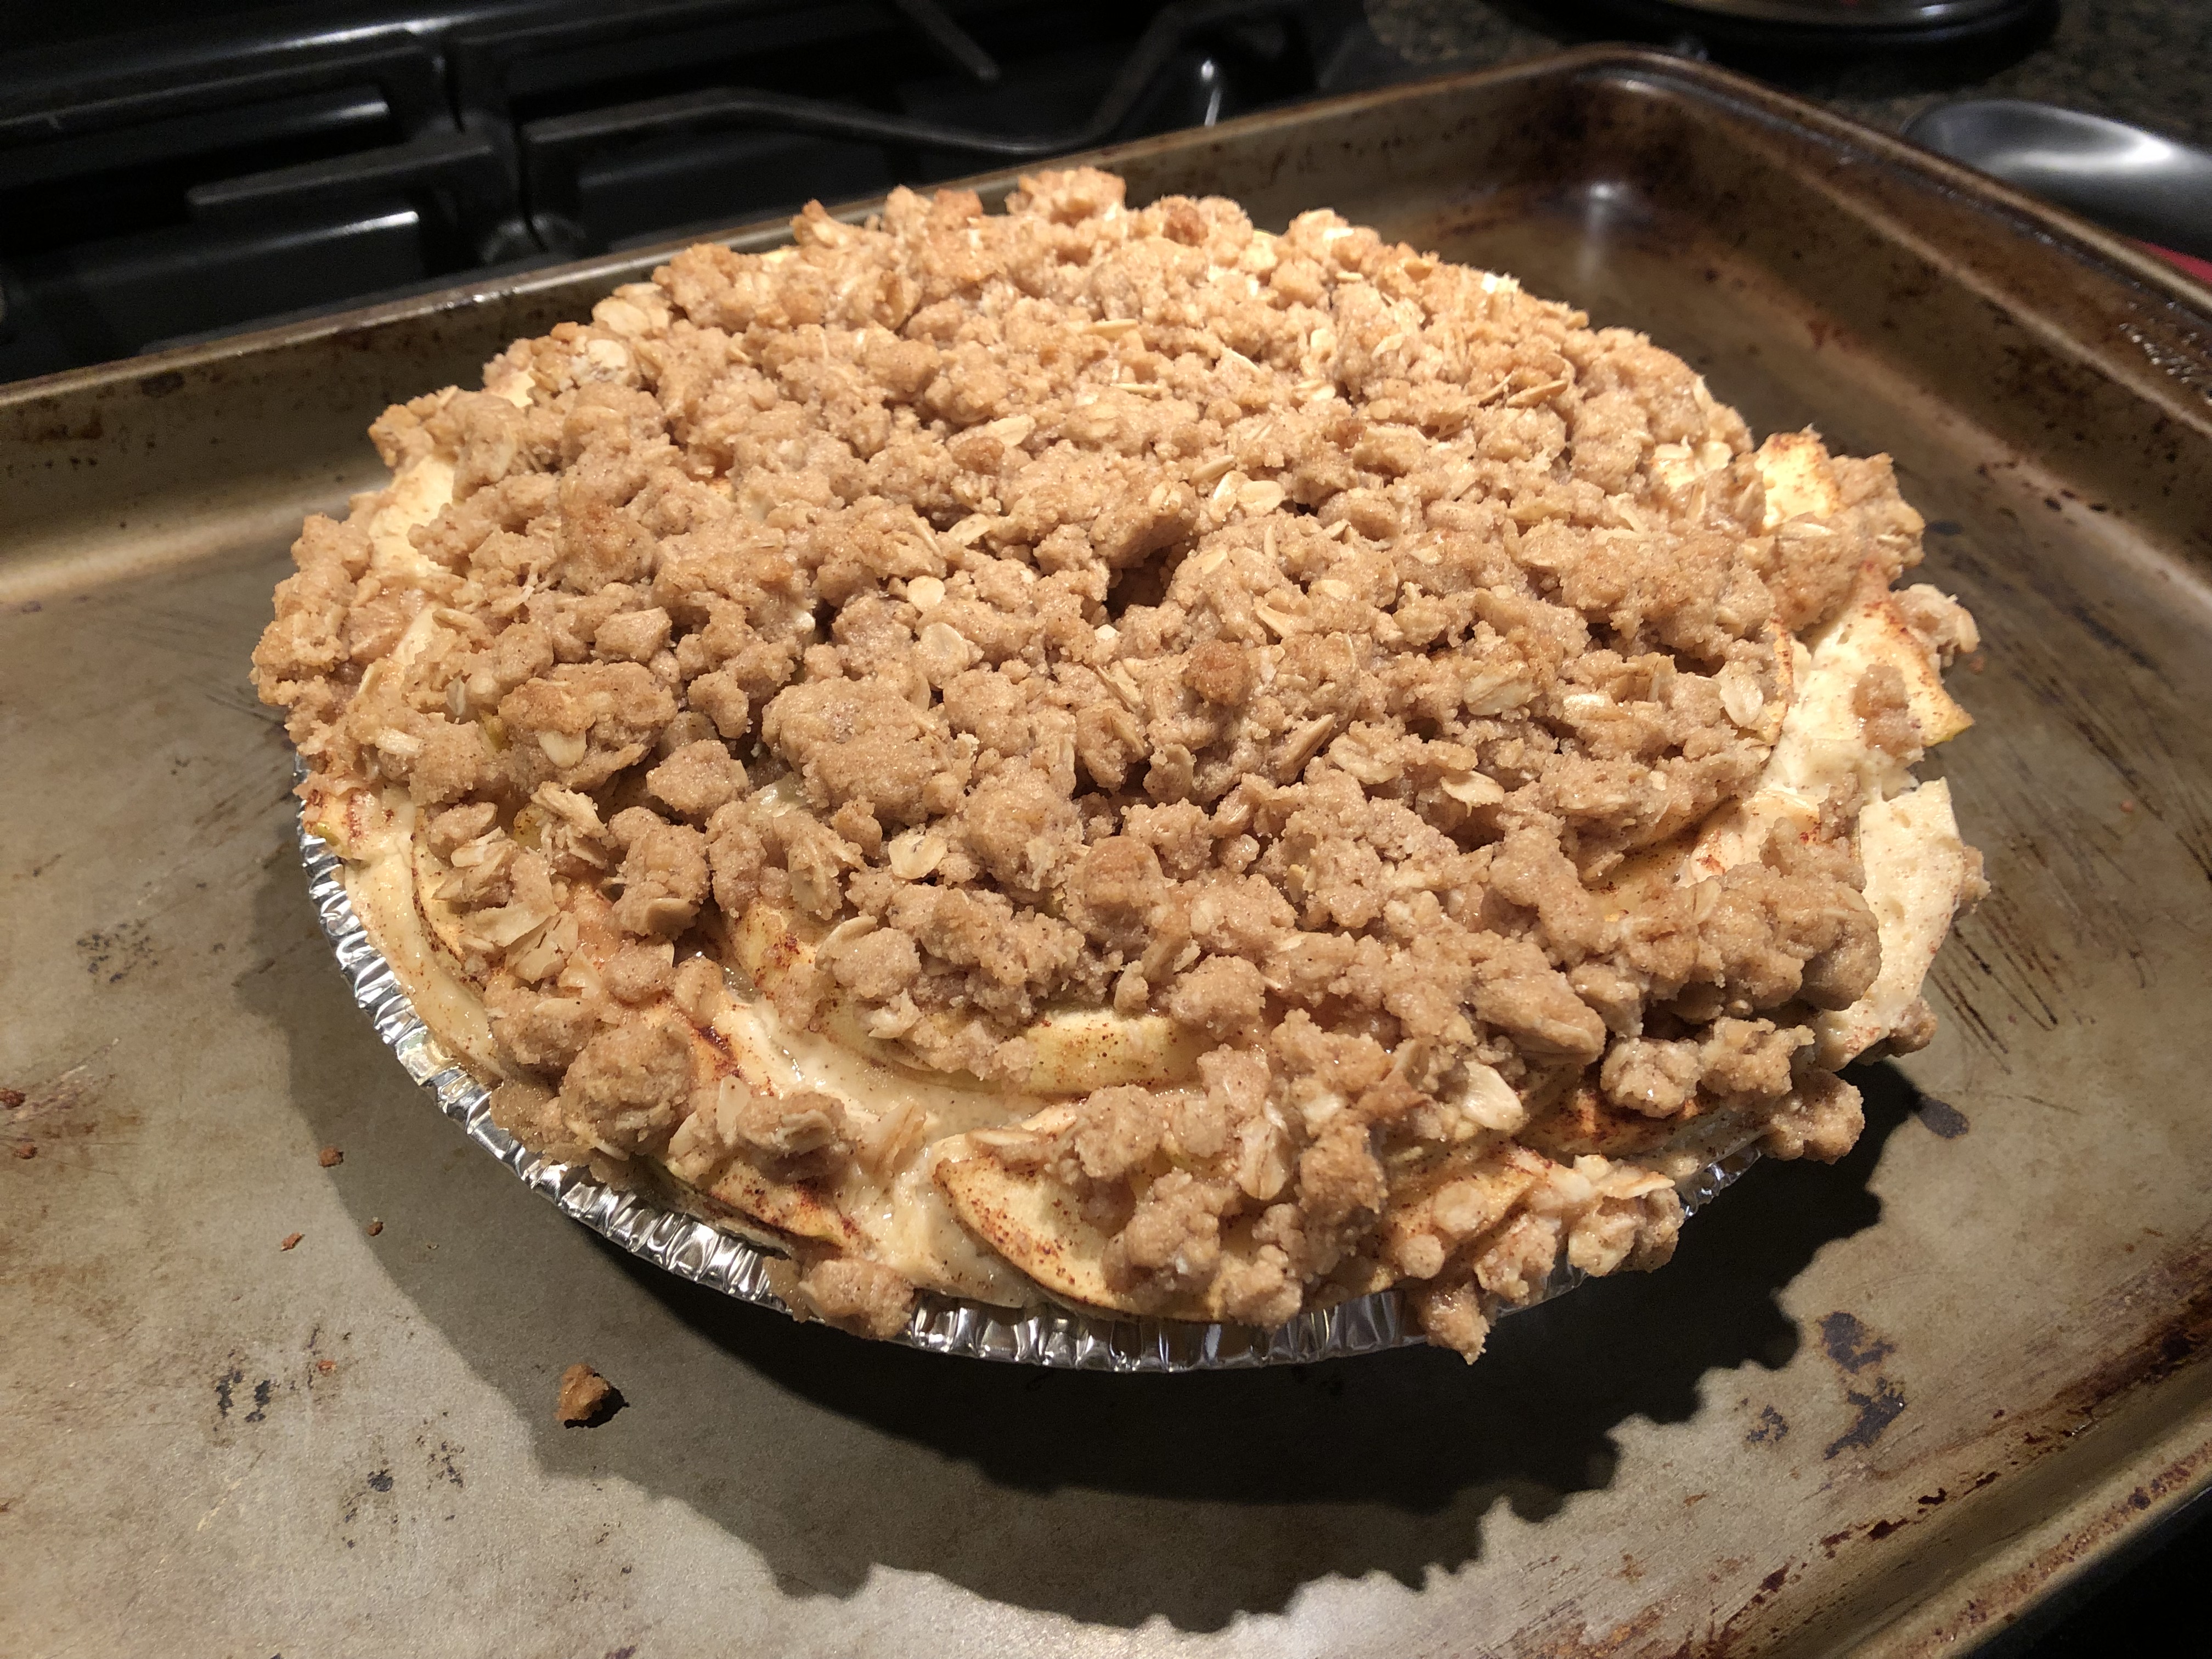
Assemble: Place the graham cracker crust on a baking sheet then pour the cheesecake batter into the crust. Arrange the apples evenly over the batter and then sprinkle the crisp topping over the apples.
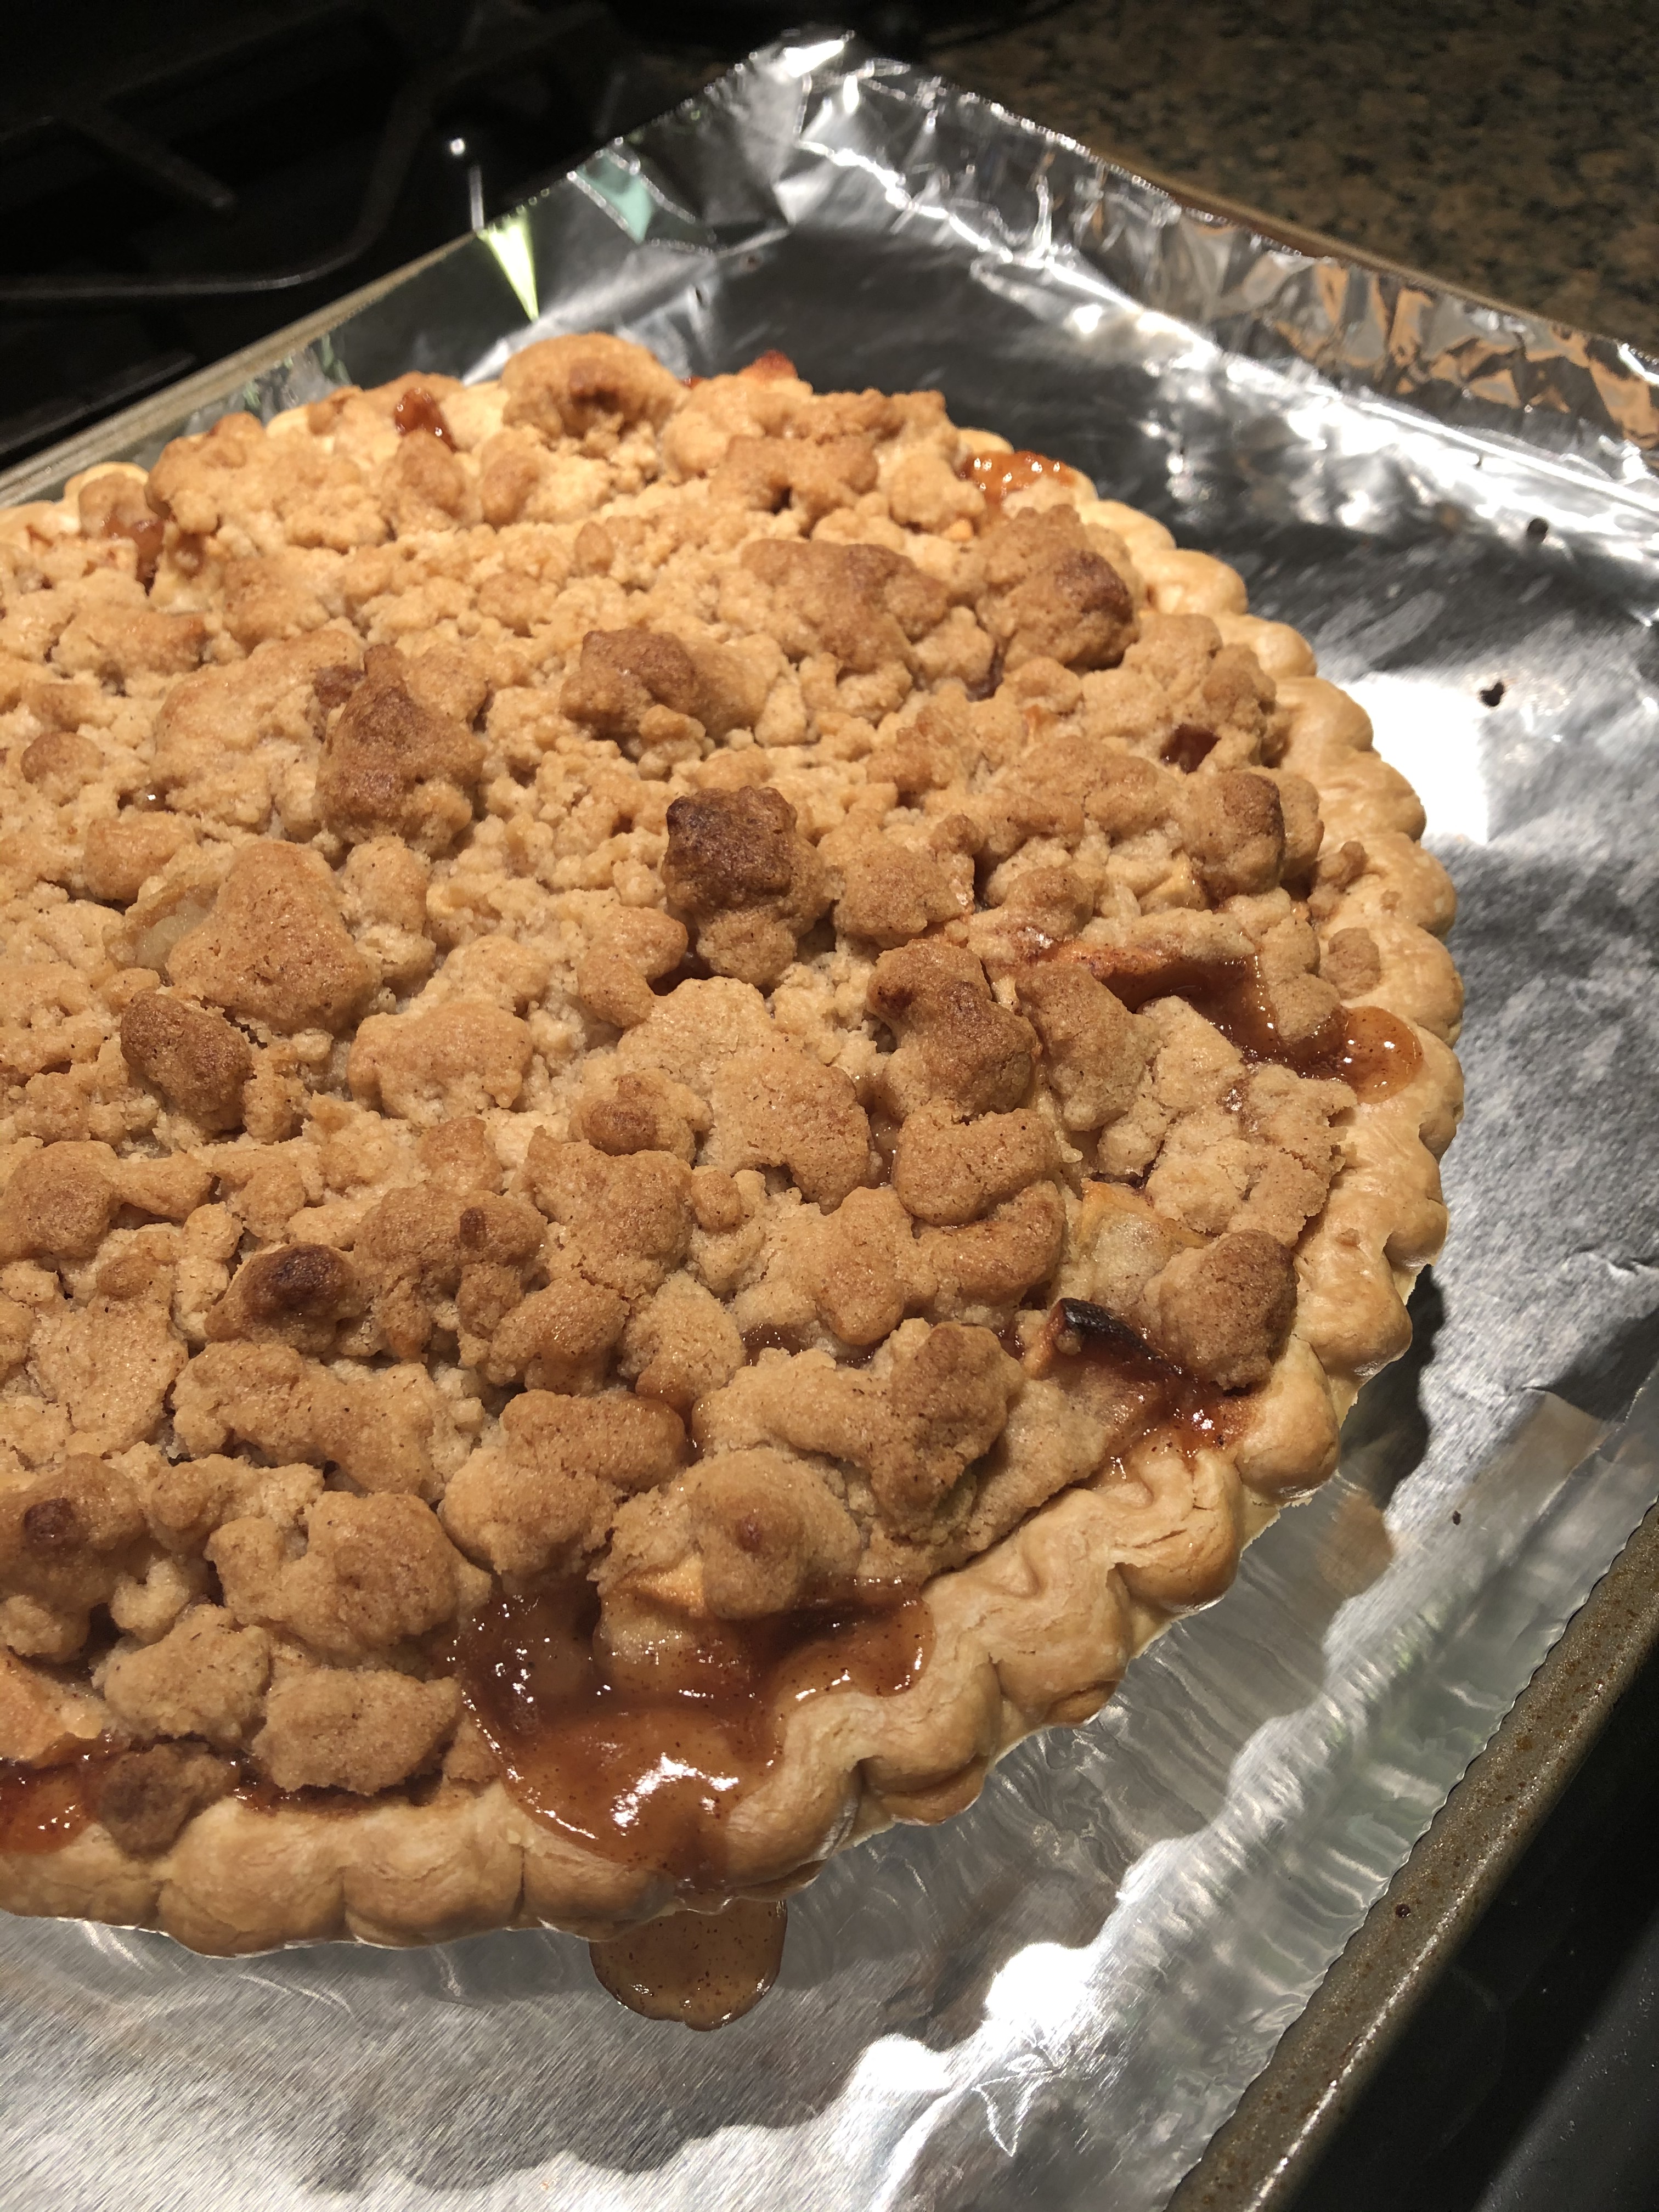
Bake in the preheated oven for 50-55 minutes, until the center is set. To prevent the crisp topping from over-browning or burning, tent the cheesecake with aluminum foil for the last 15-20 minutes.
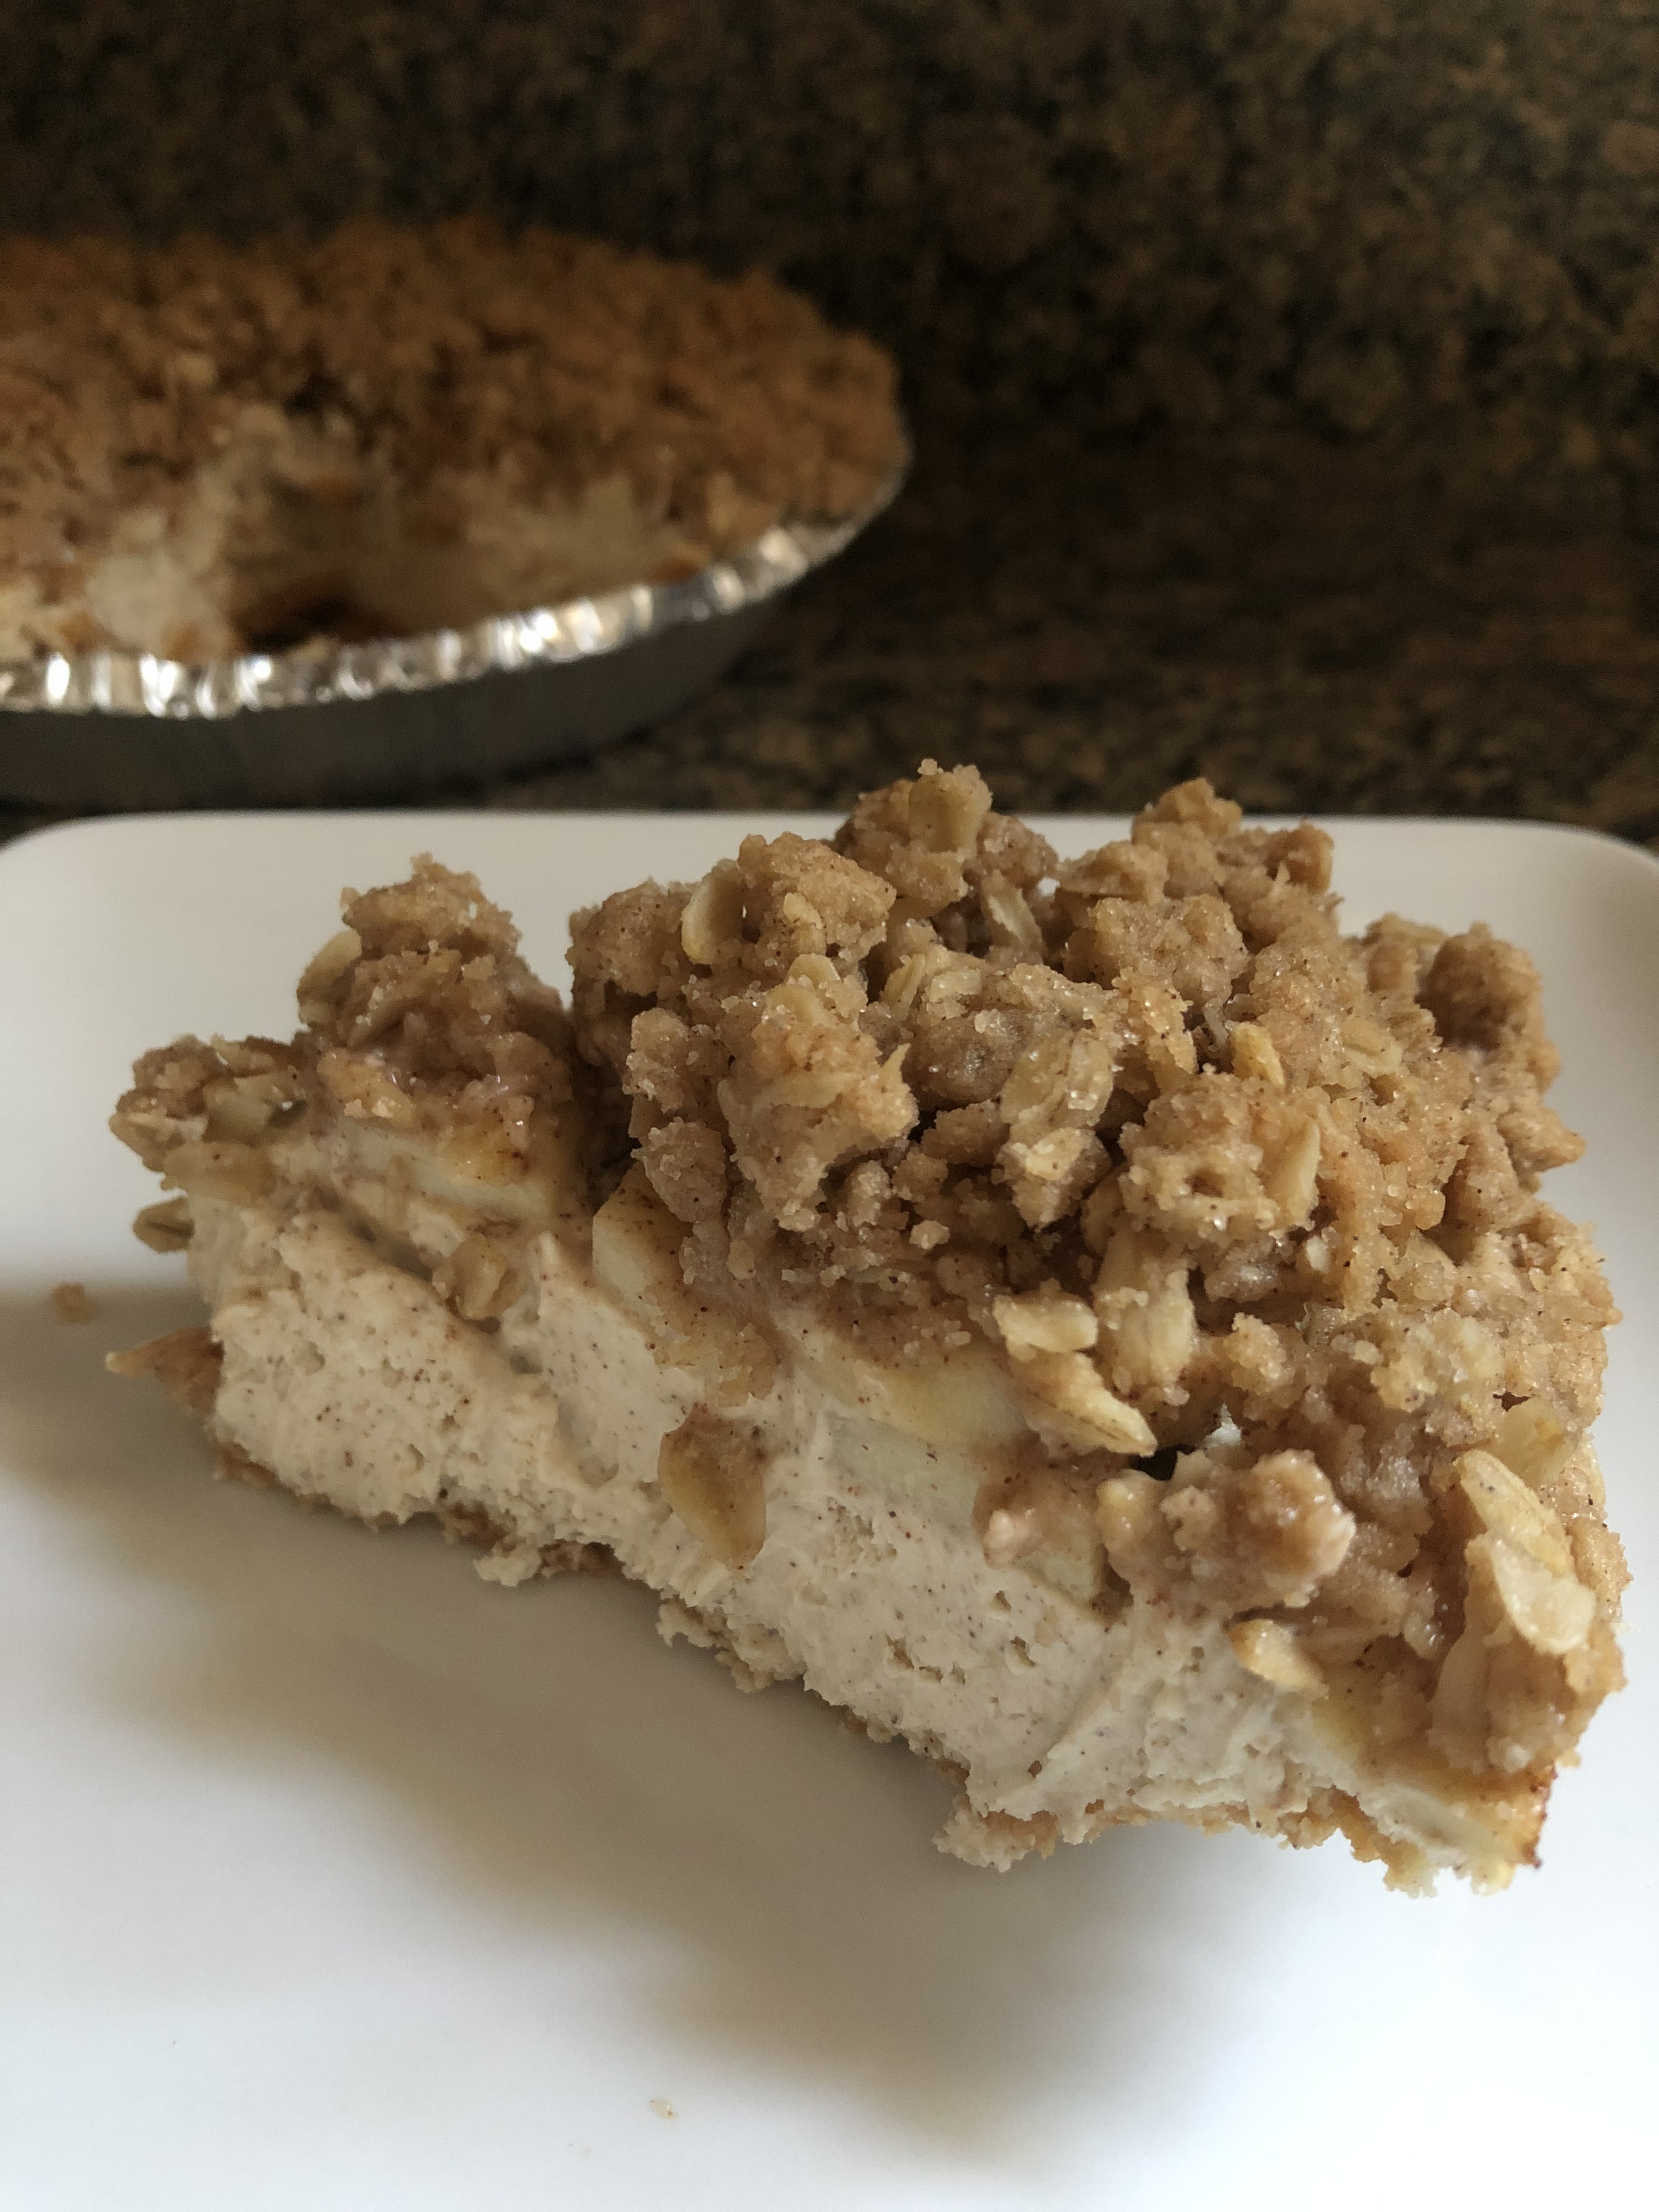
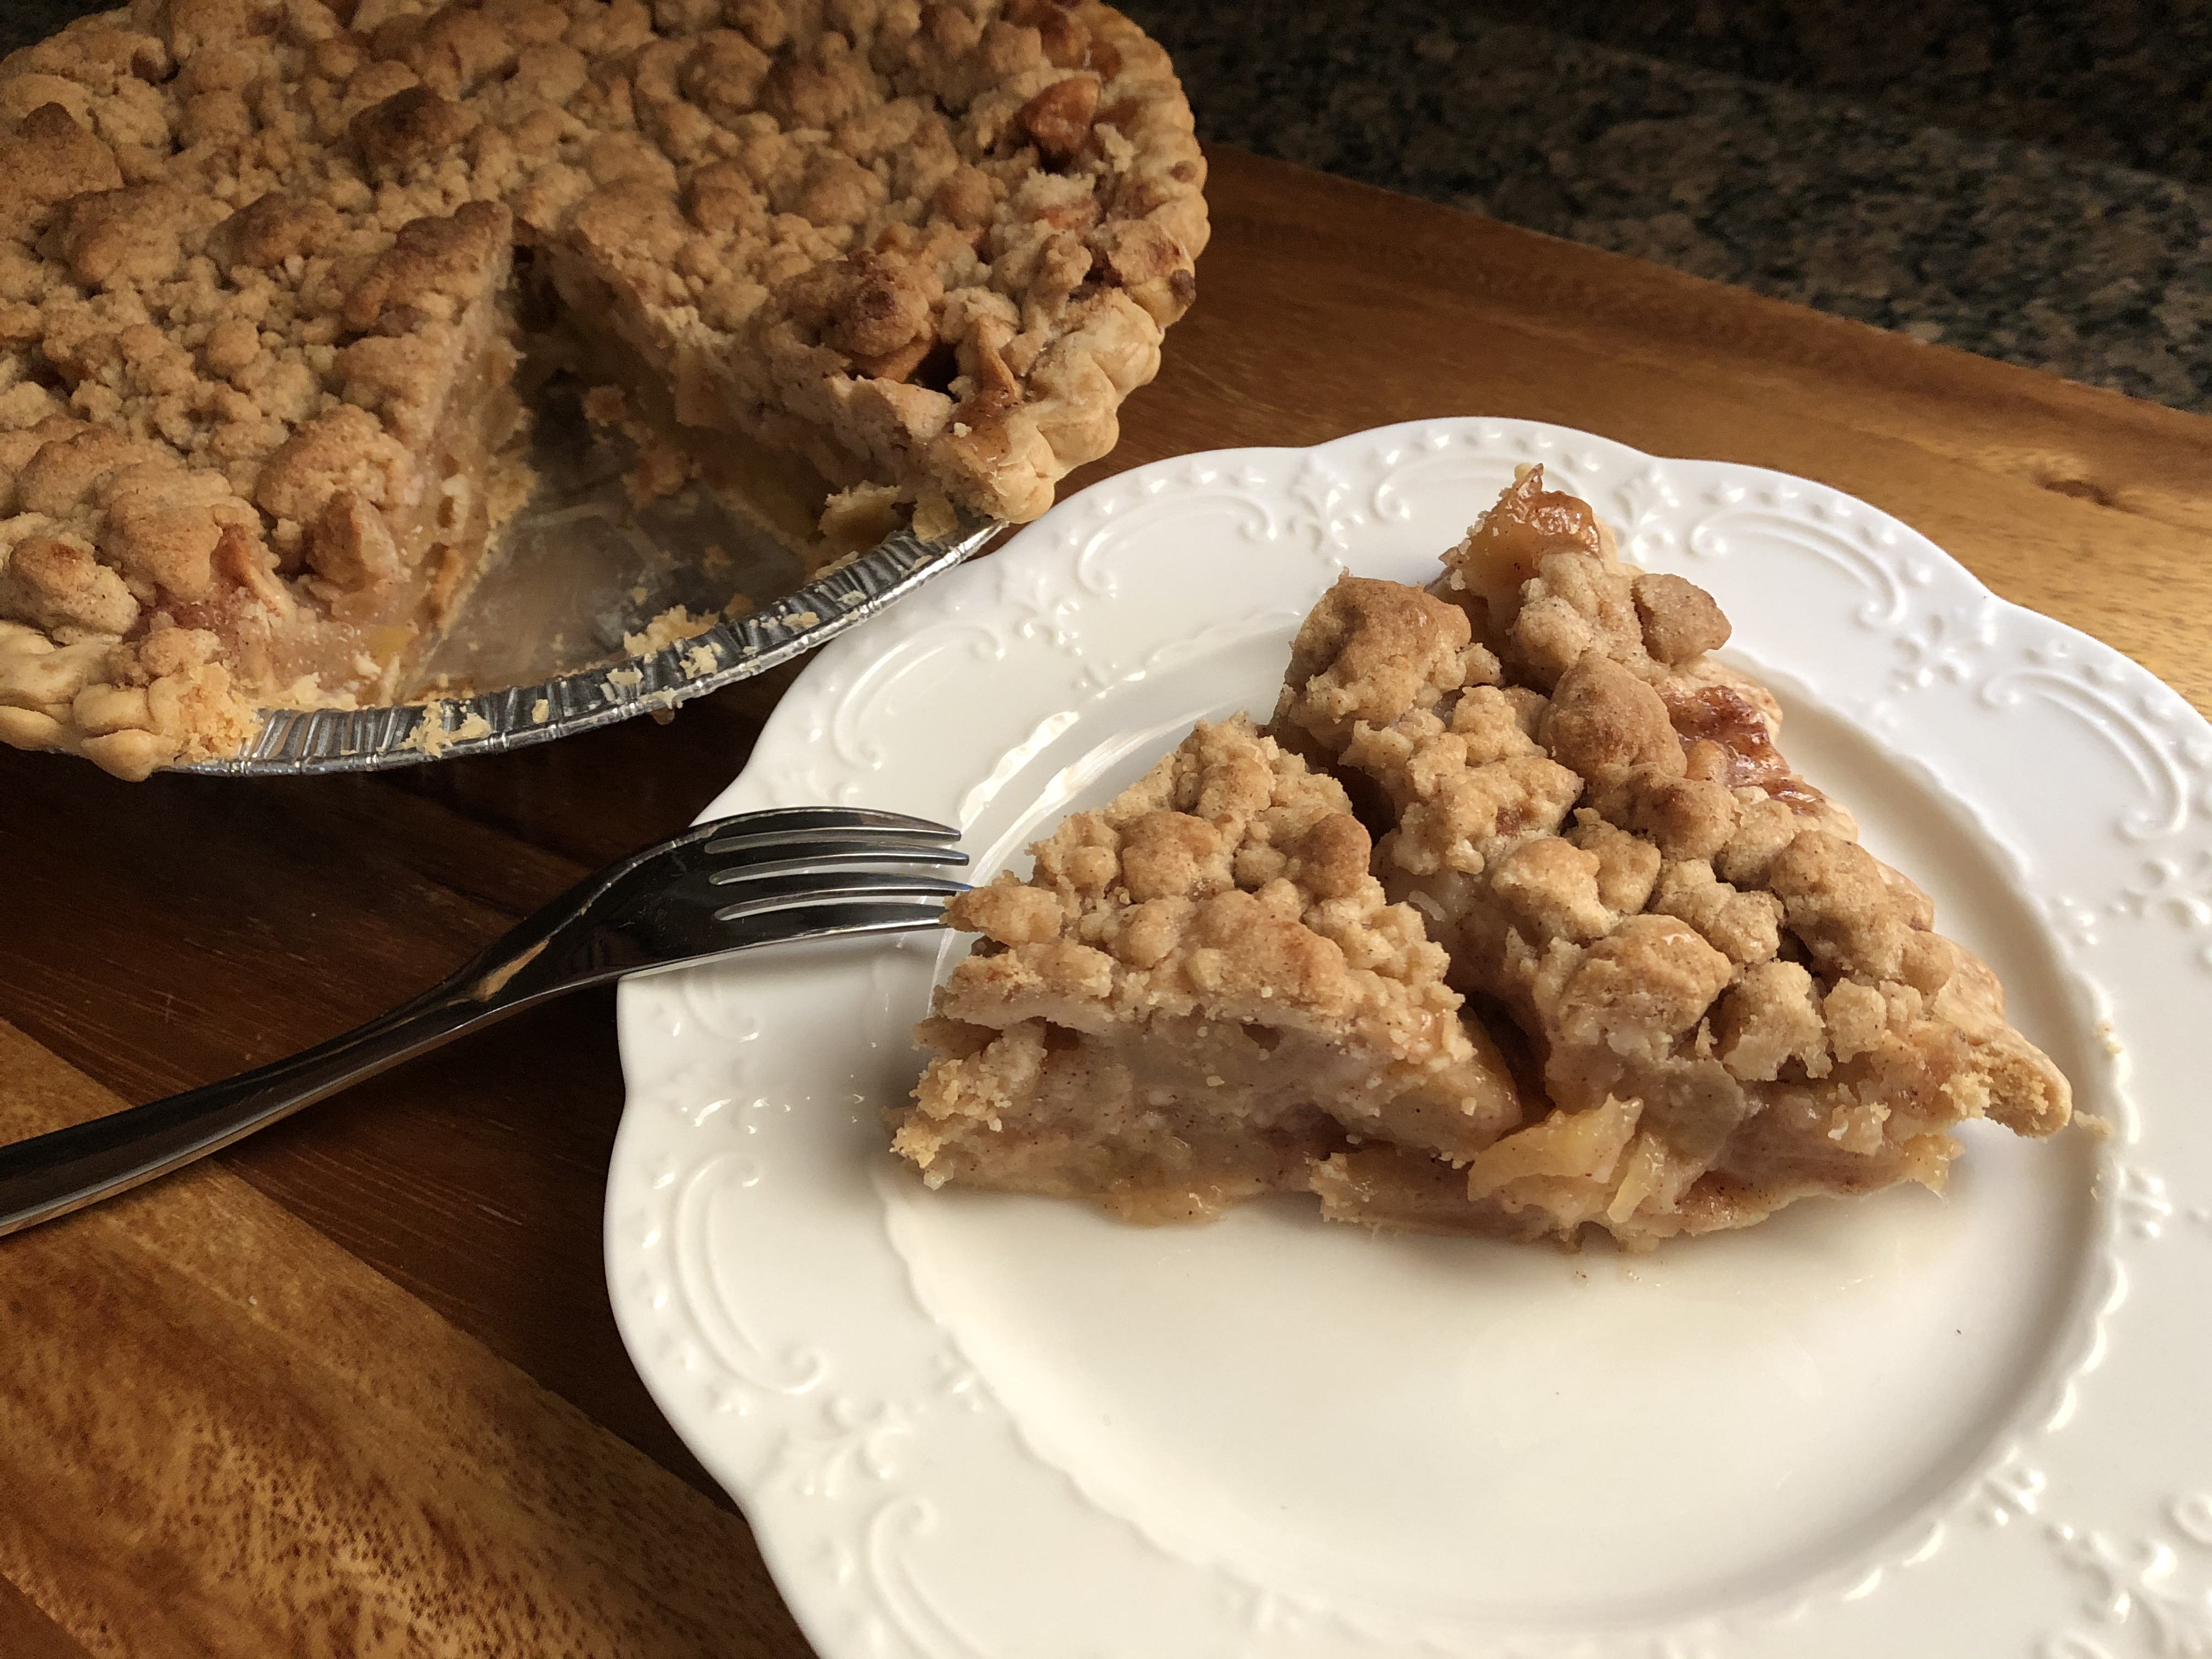
Cool on the pan for a few minutes before transferring to a wire rack to cool completely. Cover with a piece of plastic wrap or aluminum foil and refrigerate for at least 8 hours (or overnight) before serving.
Recipe first appeared on Bead Yarn & Spatula.