Apple Crisp Cheesecake

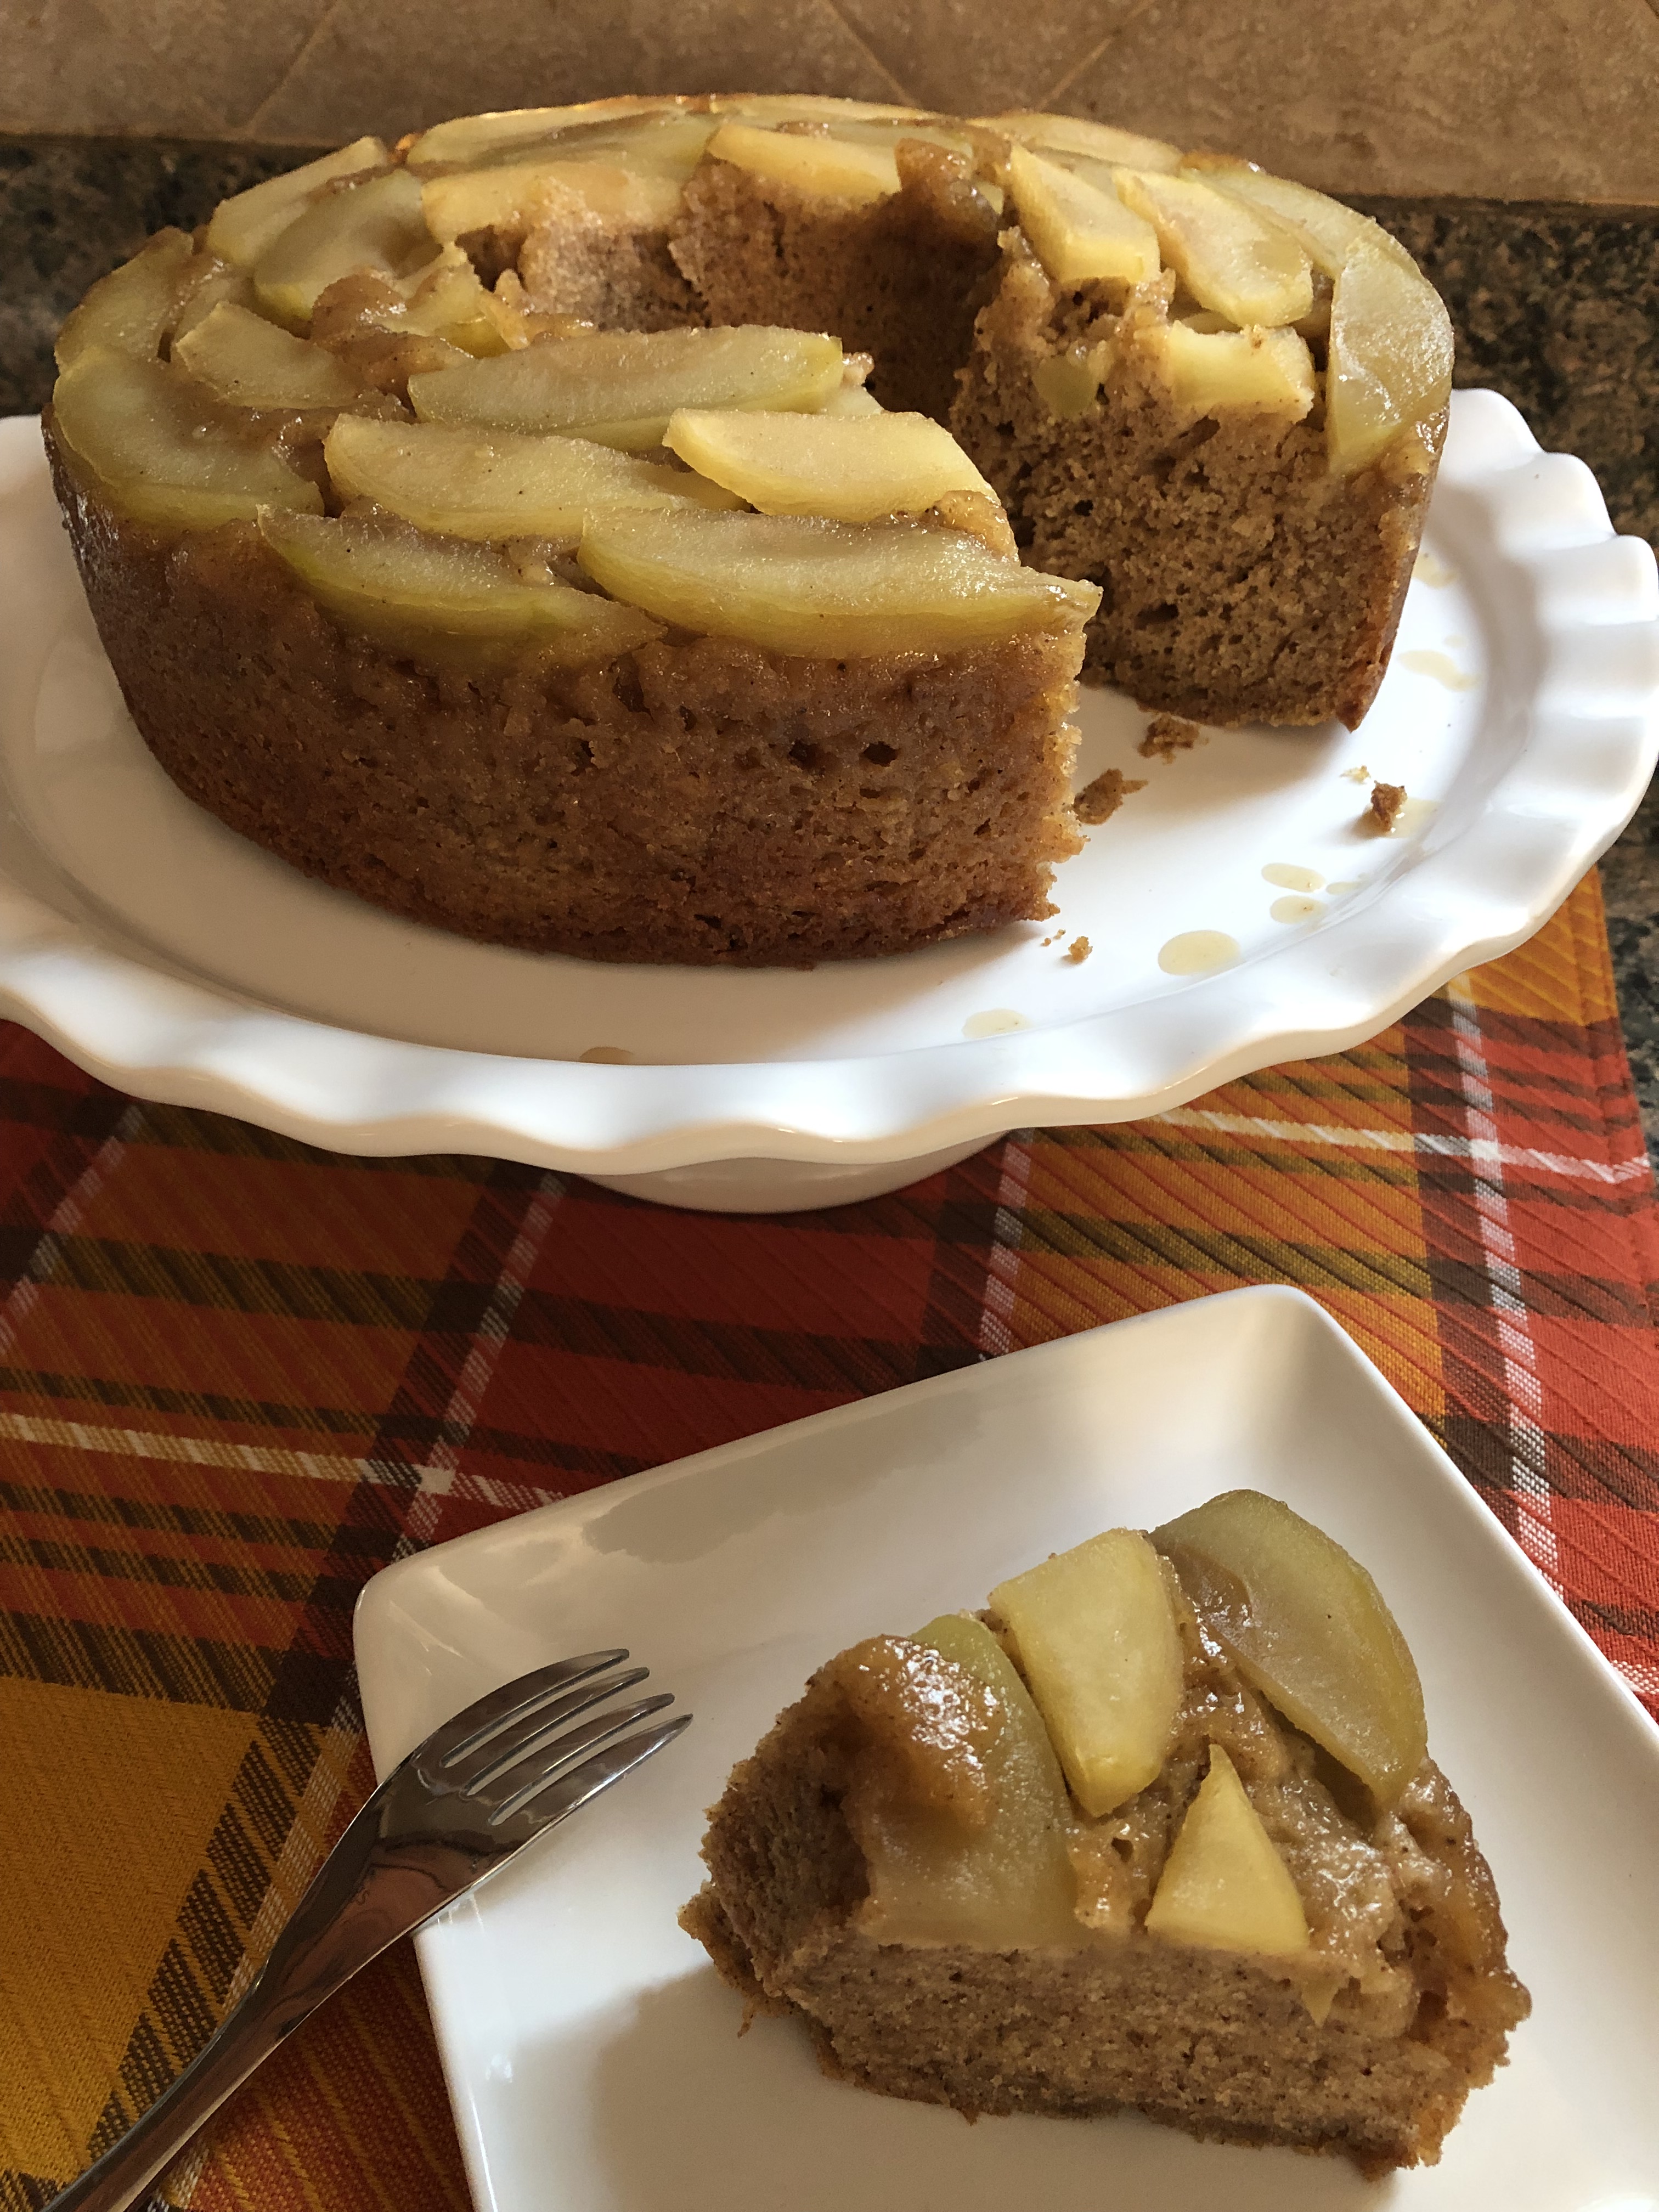
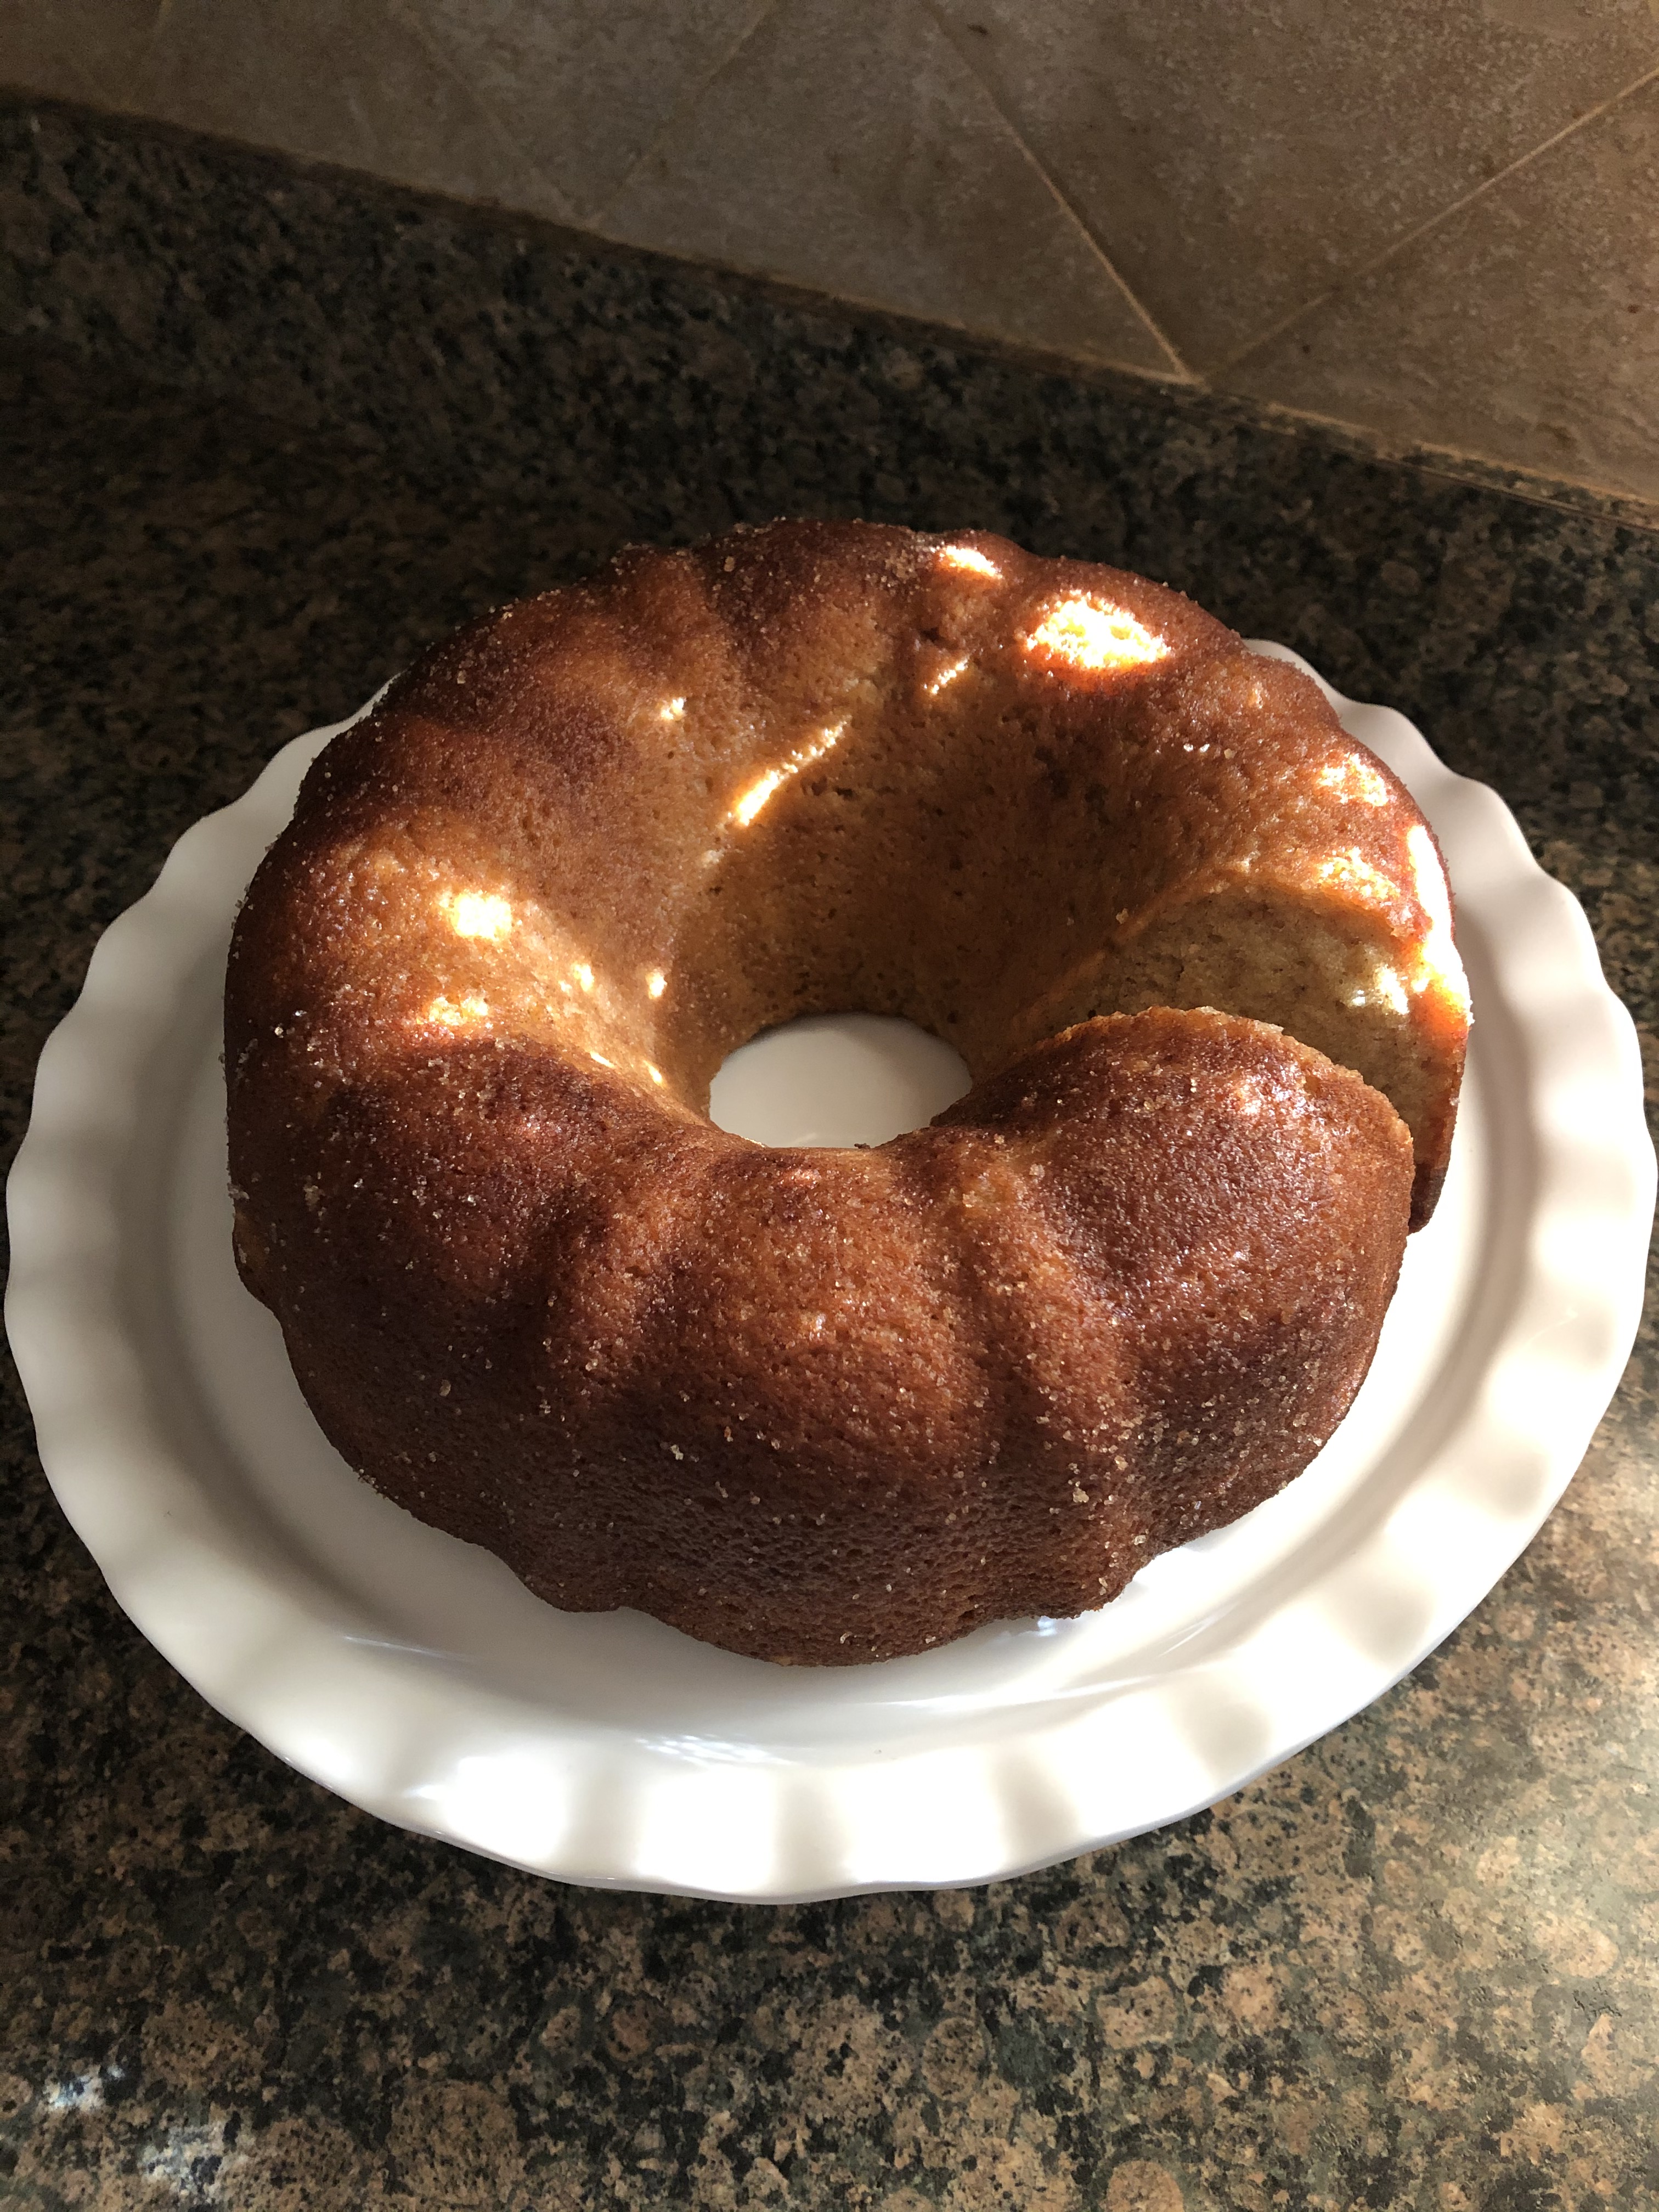
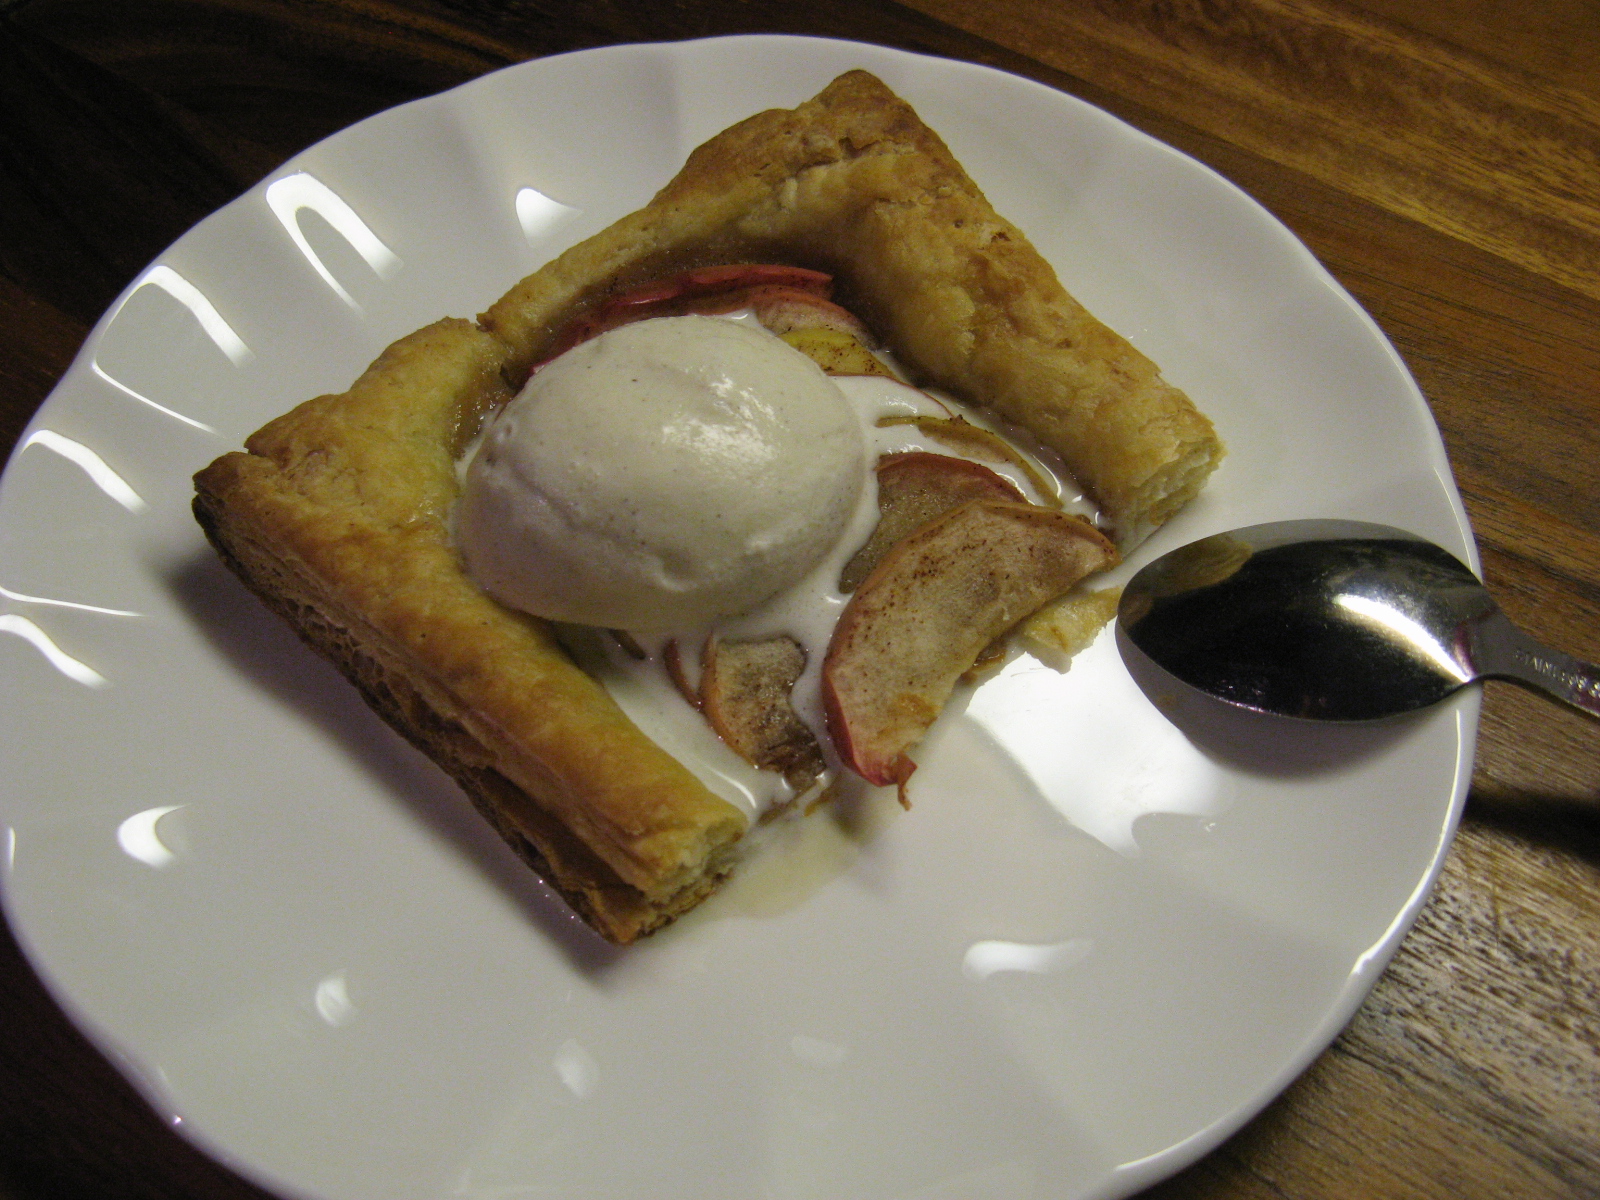
So, are you savoring these last days of Fall while getting ready for Thanksgiving still embracing the pumpkins, leaves and colors of the season? Or have you just gone full blown into Christmas and all around you is red and green and your Thanksgiving meal will be celebrated with Christmas décor?  People have very strong feelings about this and prefer each holiday to have its own time. Me personally I put up my Christmas Tree on November 1st. I used to wait until after Thanksgiving, but I would always feel rushed then to get all my decorating done in one day. The tree up, décor around the house and the lights outside. It was just too much. So, a few years ago I decided that I would set up my tree right after Halloween. I will wait until Thanksgiving week though to turn it on and enjoy it all lit up. I must say though that this year I found that people really had some strong feelings about people jumping into Christmas right after Halloween. Is it really that big of a deal? Just do you own thing and don’t fault others for wanting to spread some holiday cheer a little early. Regardless, today’s dessert might just be the perfect addition to your Thanksgiving dessert table. It combines quite a few desserts into one, an Apple Crisp Cheesecake. You get your apples, a crisp topping and a cheesecake all tied together into one yummy dessert.

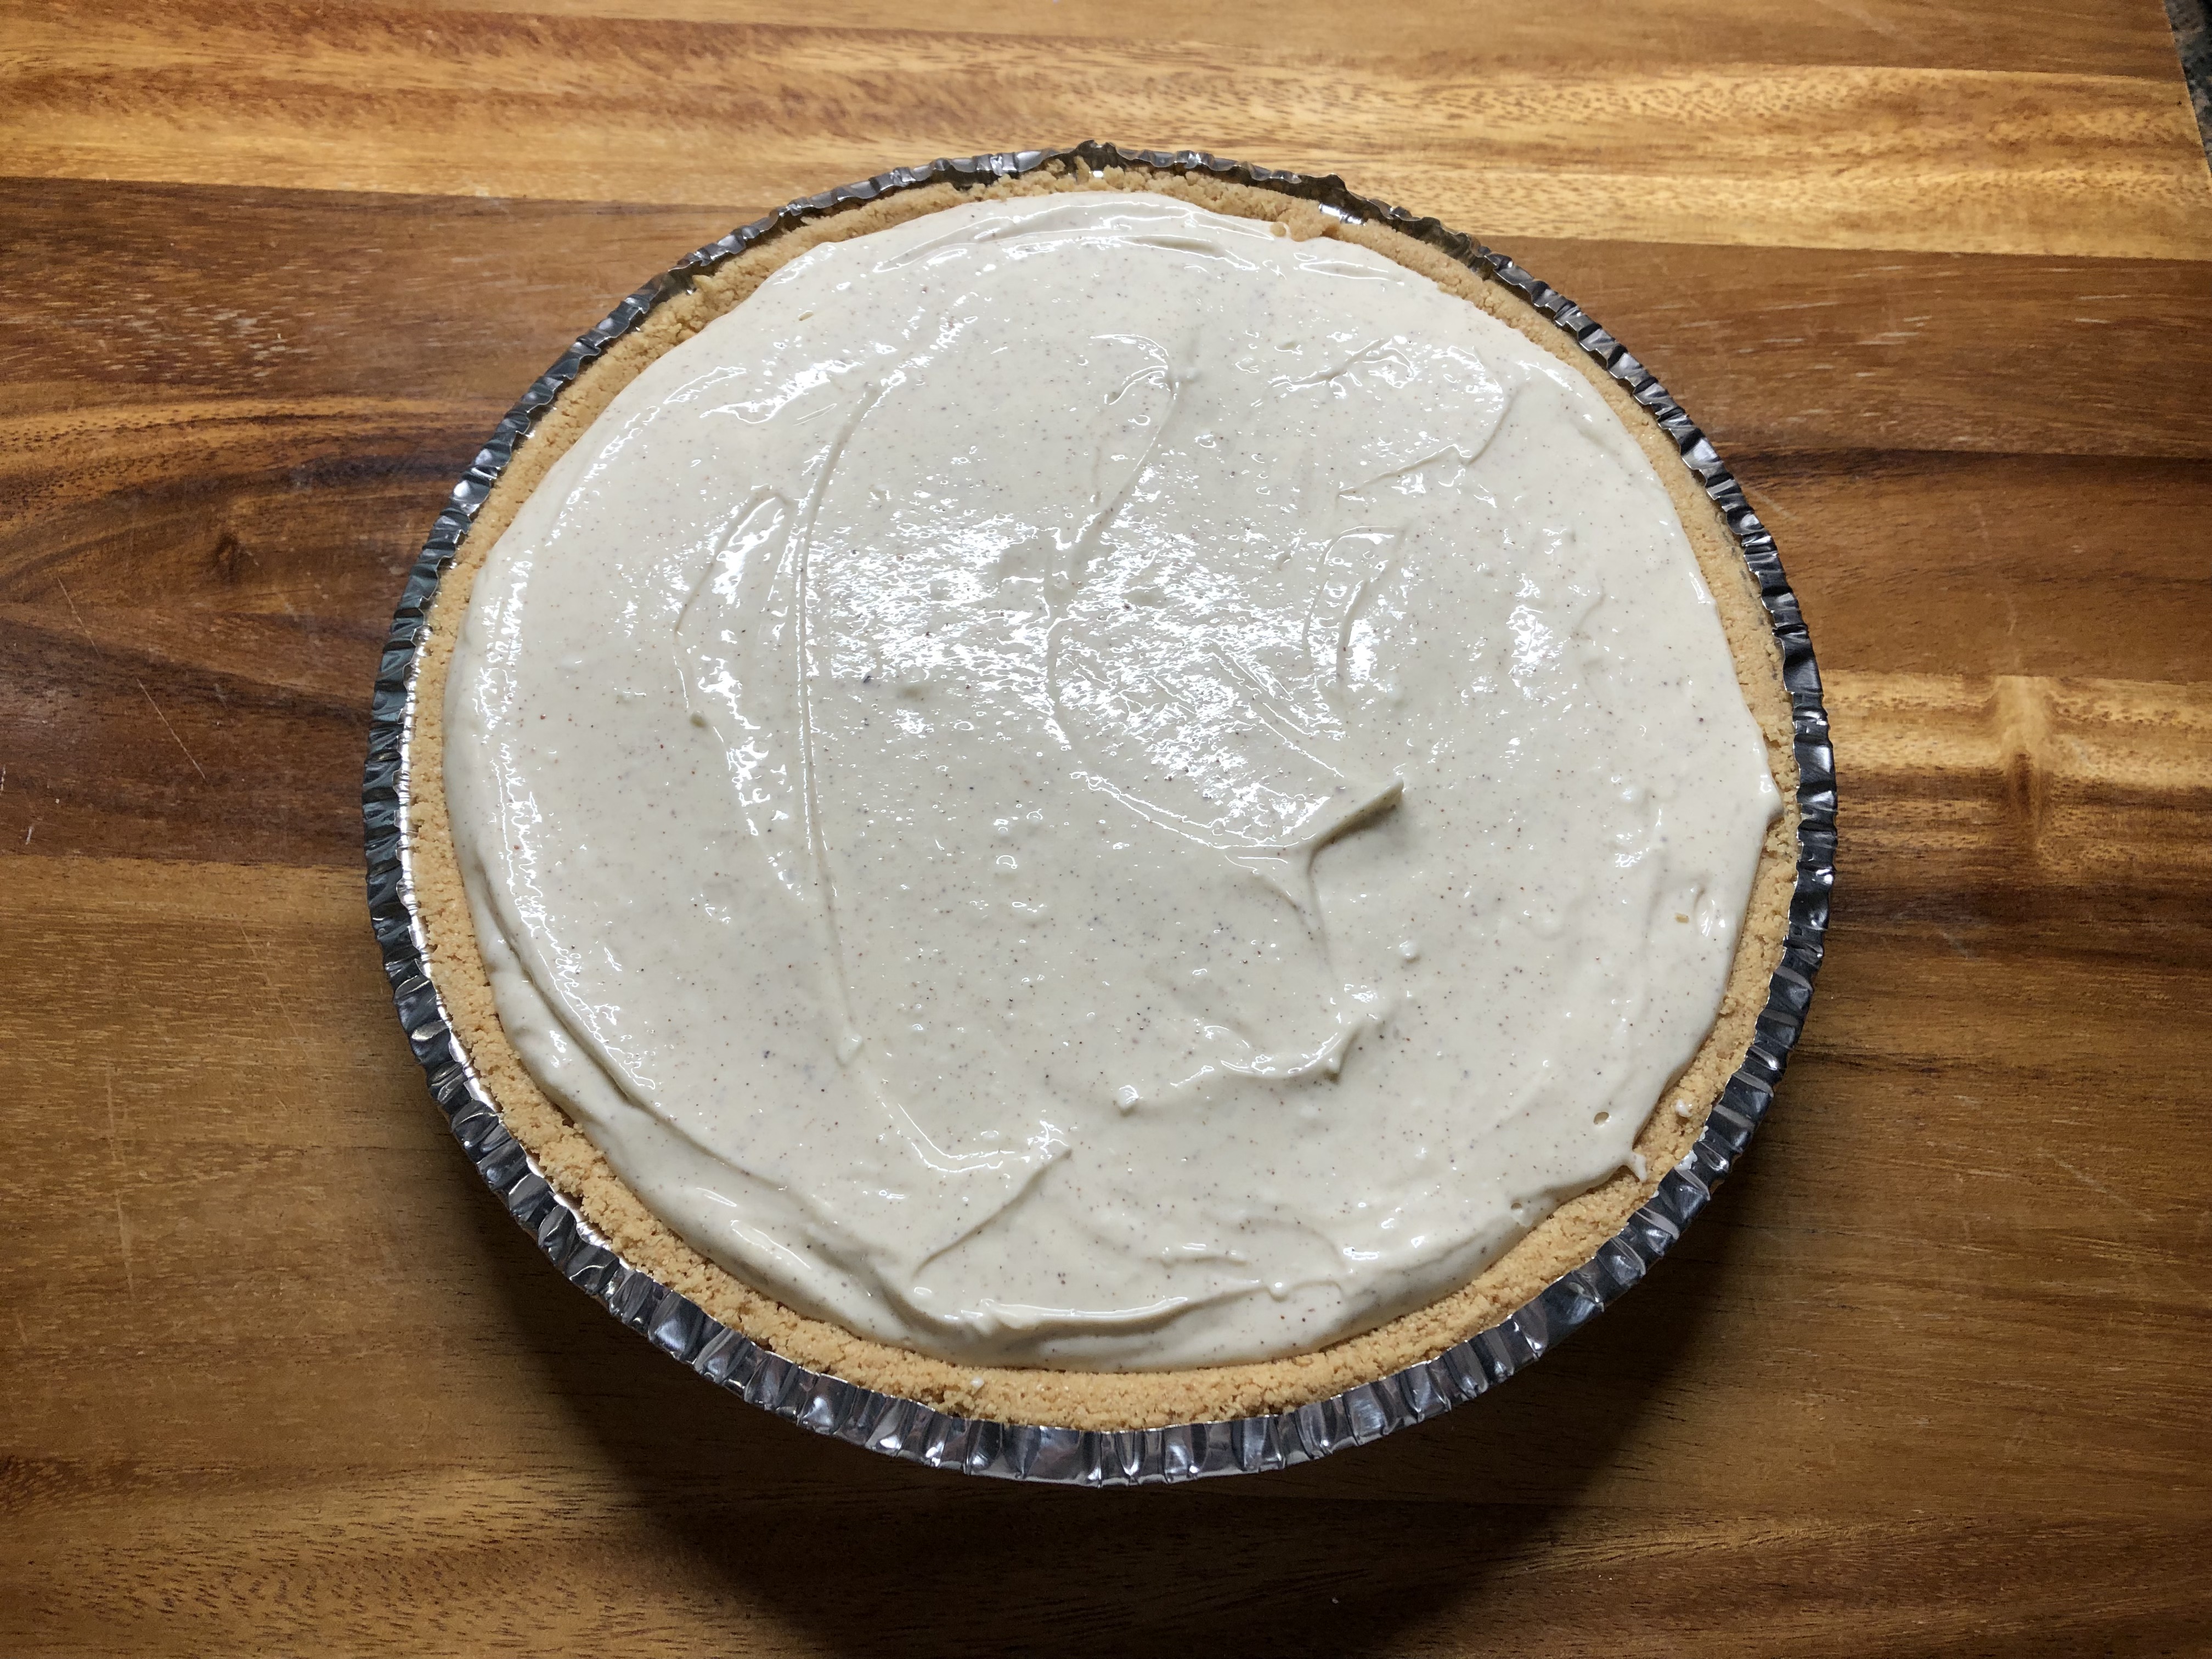
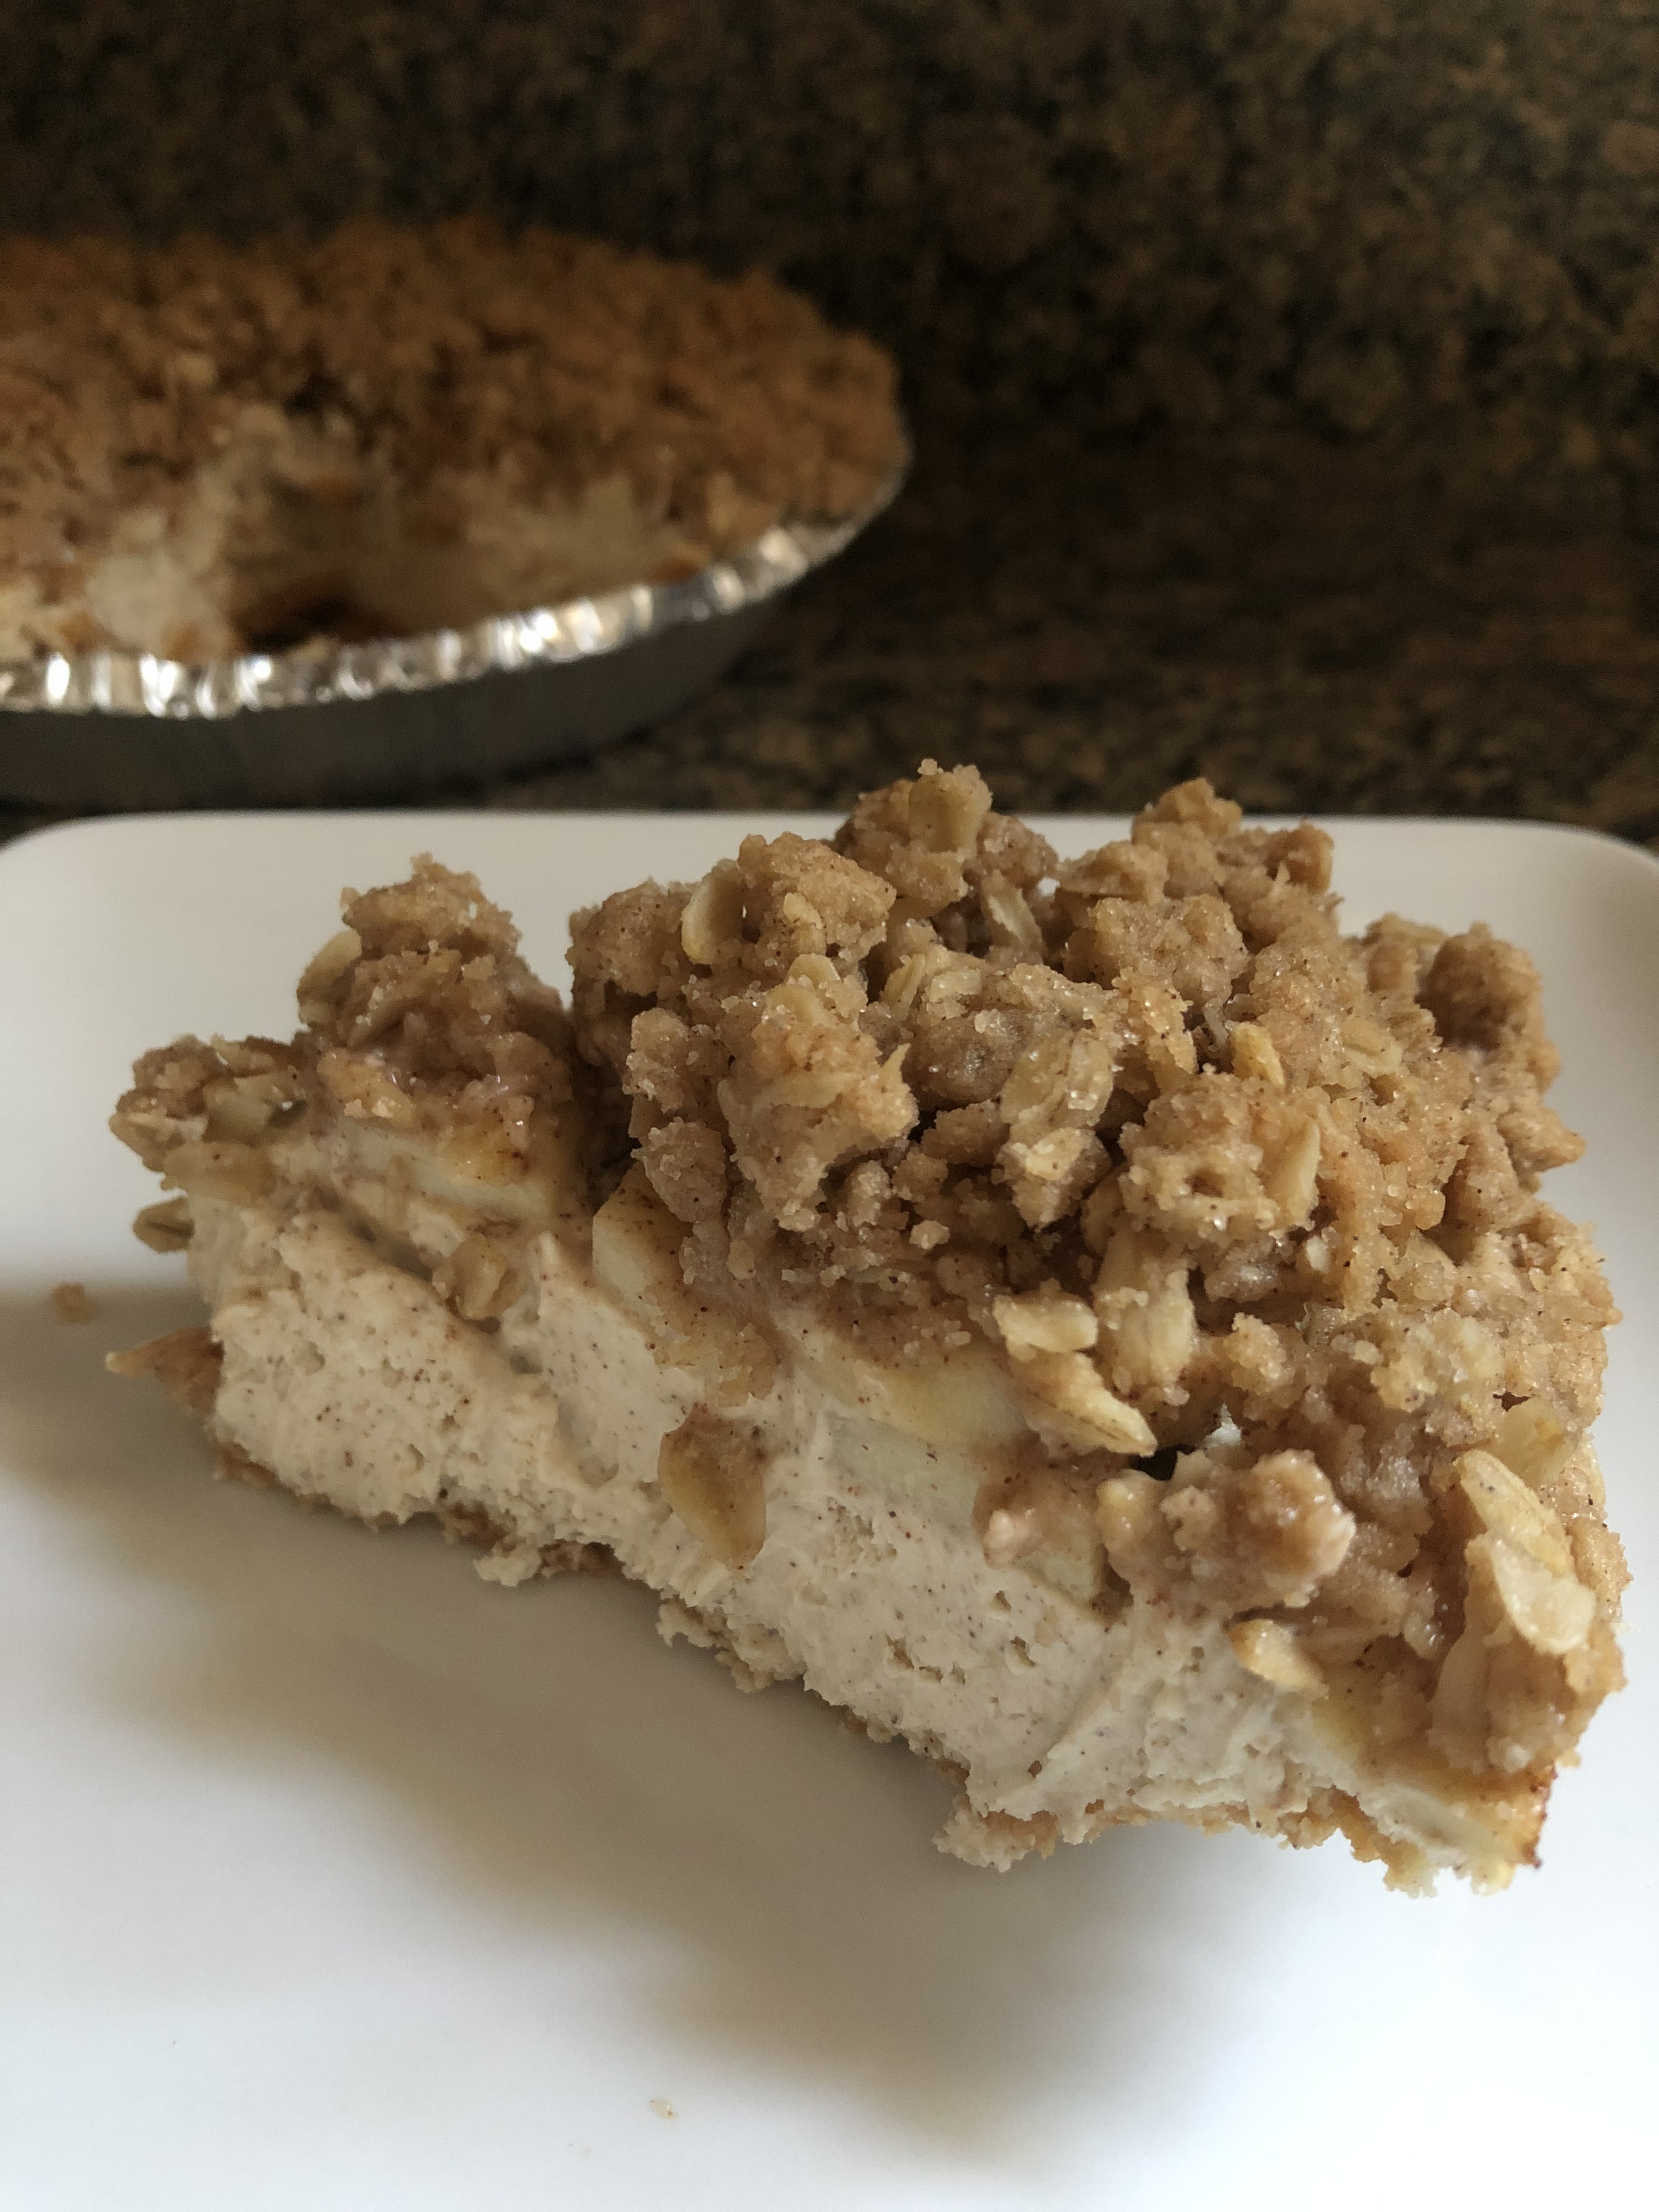
I started off by making the crisp topping since it needed to be chilled, then the apples and finally the cheesecake part. To assemble, I started off by filling a 9-inch graham cracker crust with the cheesecake filling. I added in some apple pie spices – cinnamon, nutmeg, allspice and ginger – to the cheesecake to help tie all the flavors together since I did add cinnamon to both the apples and crisp topping.

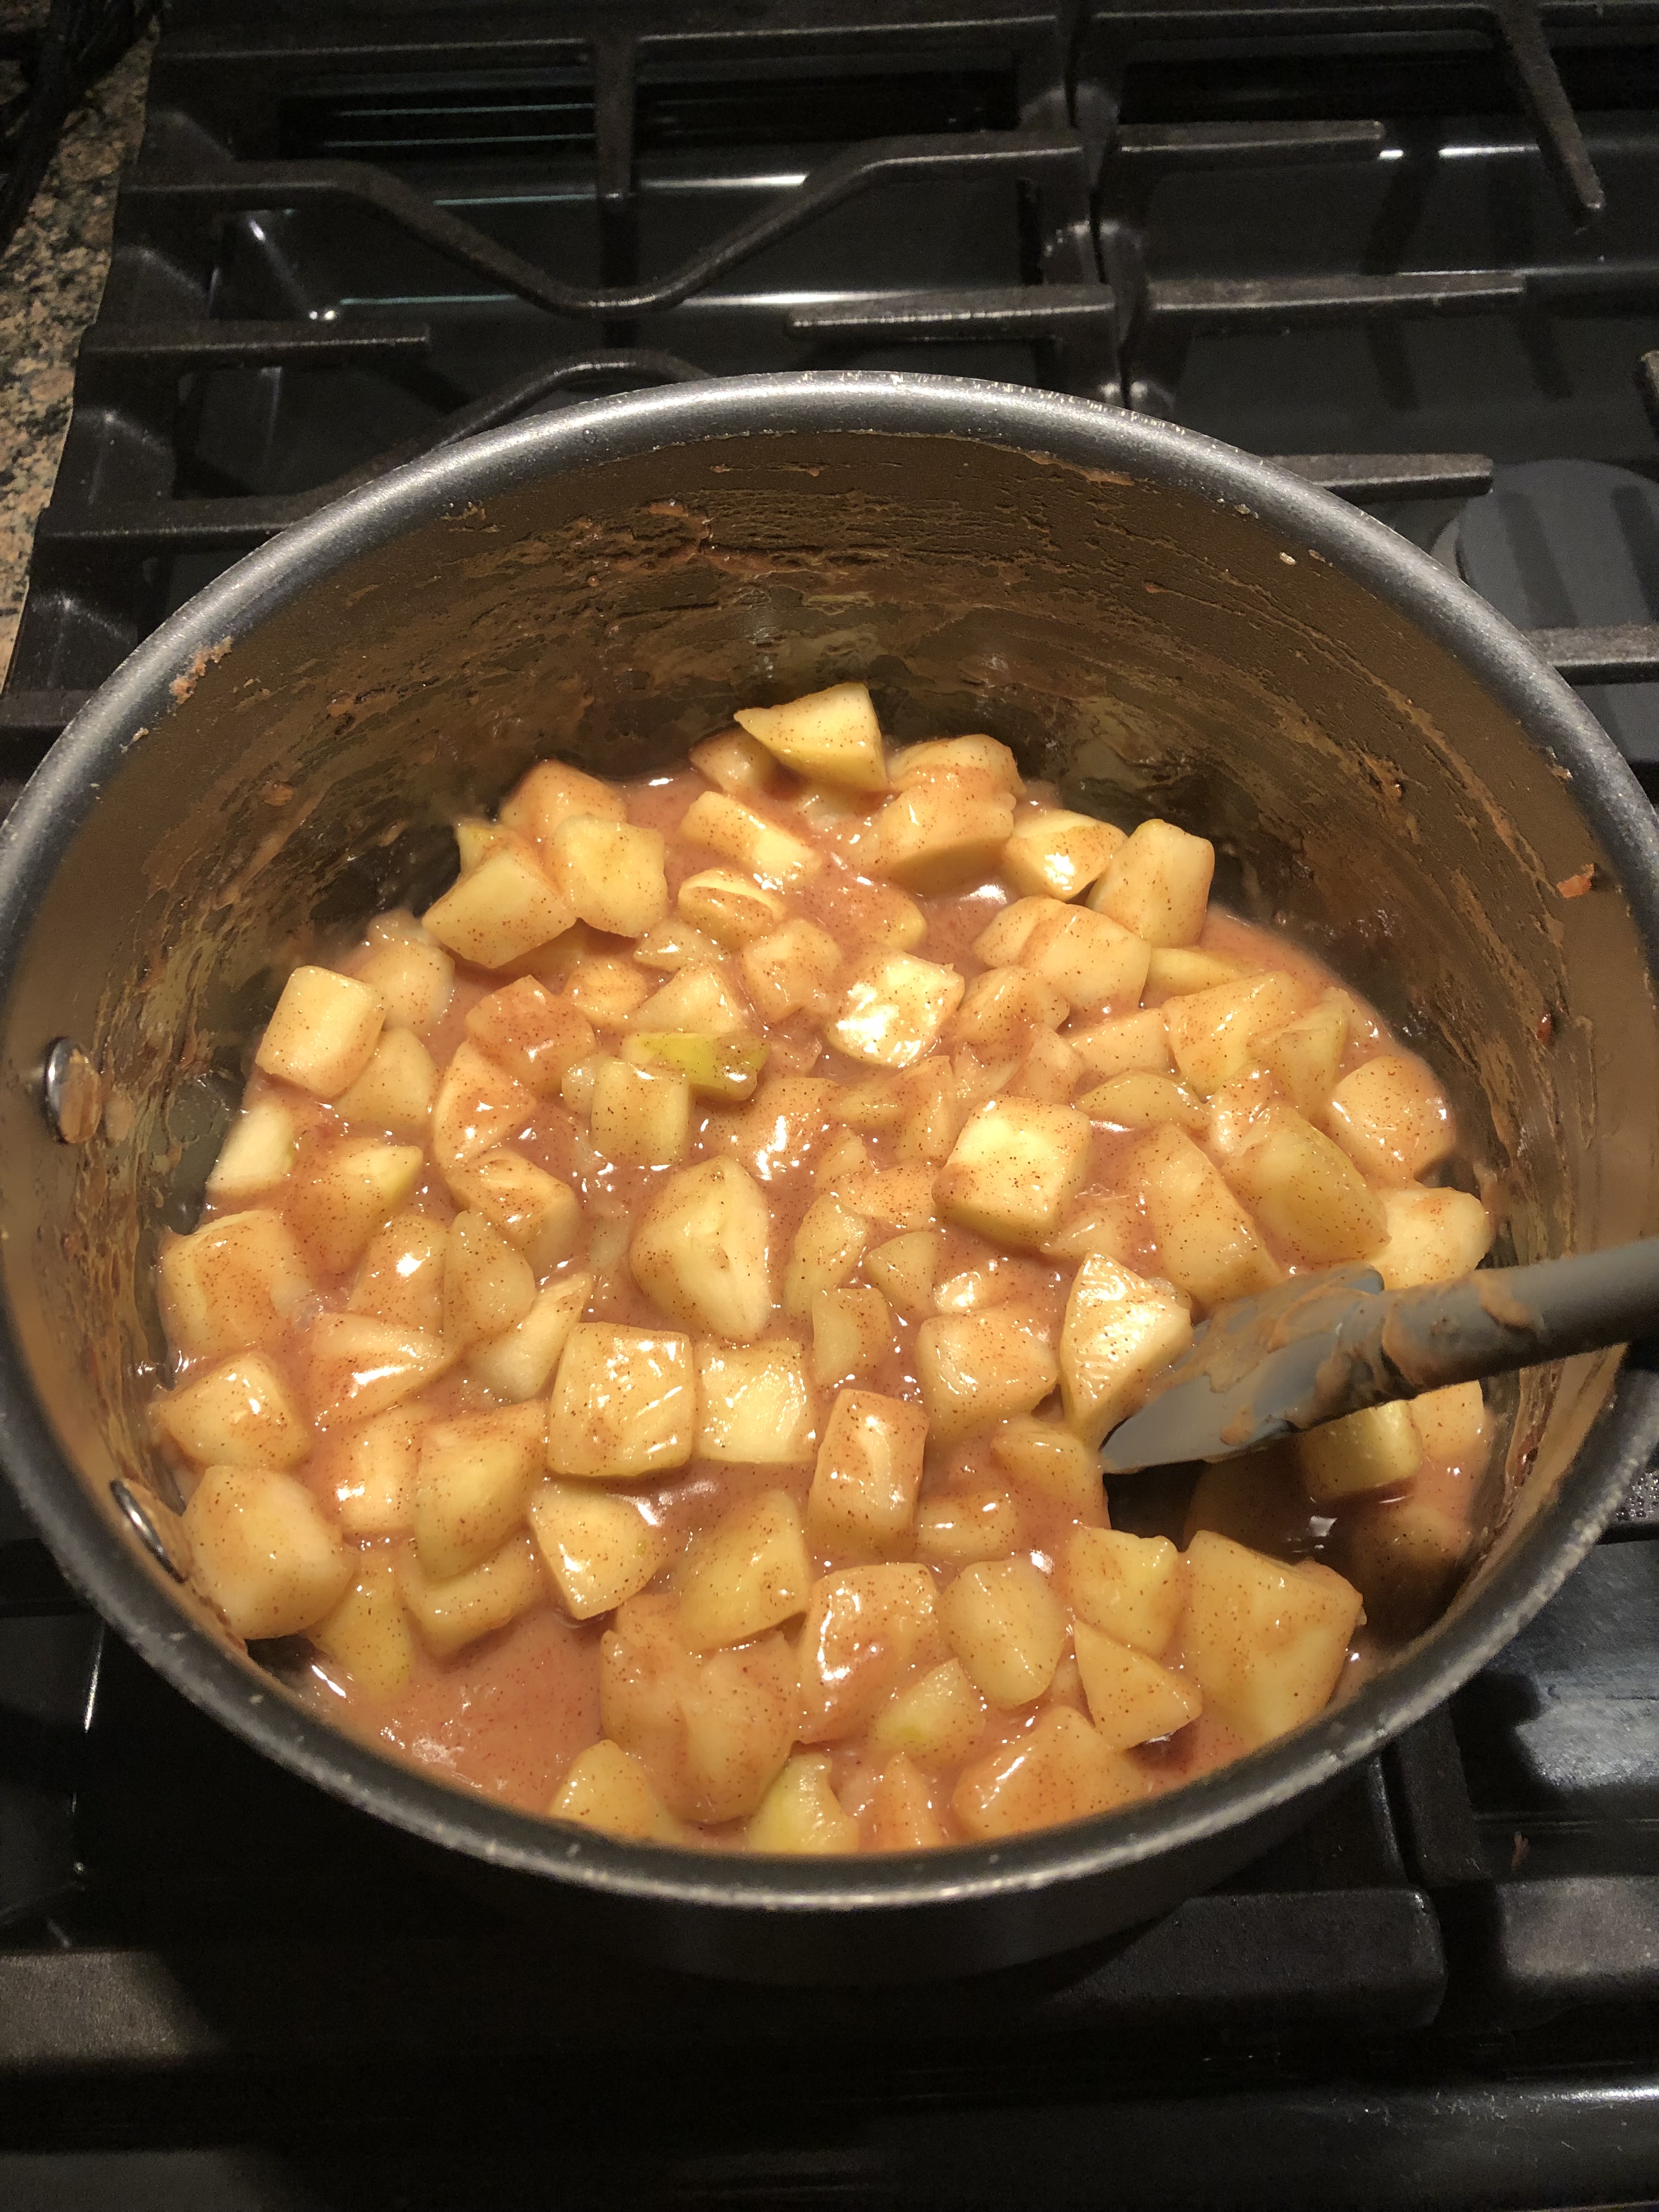
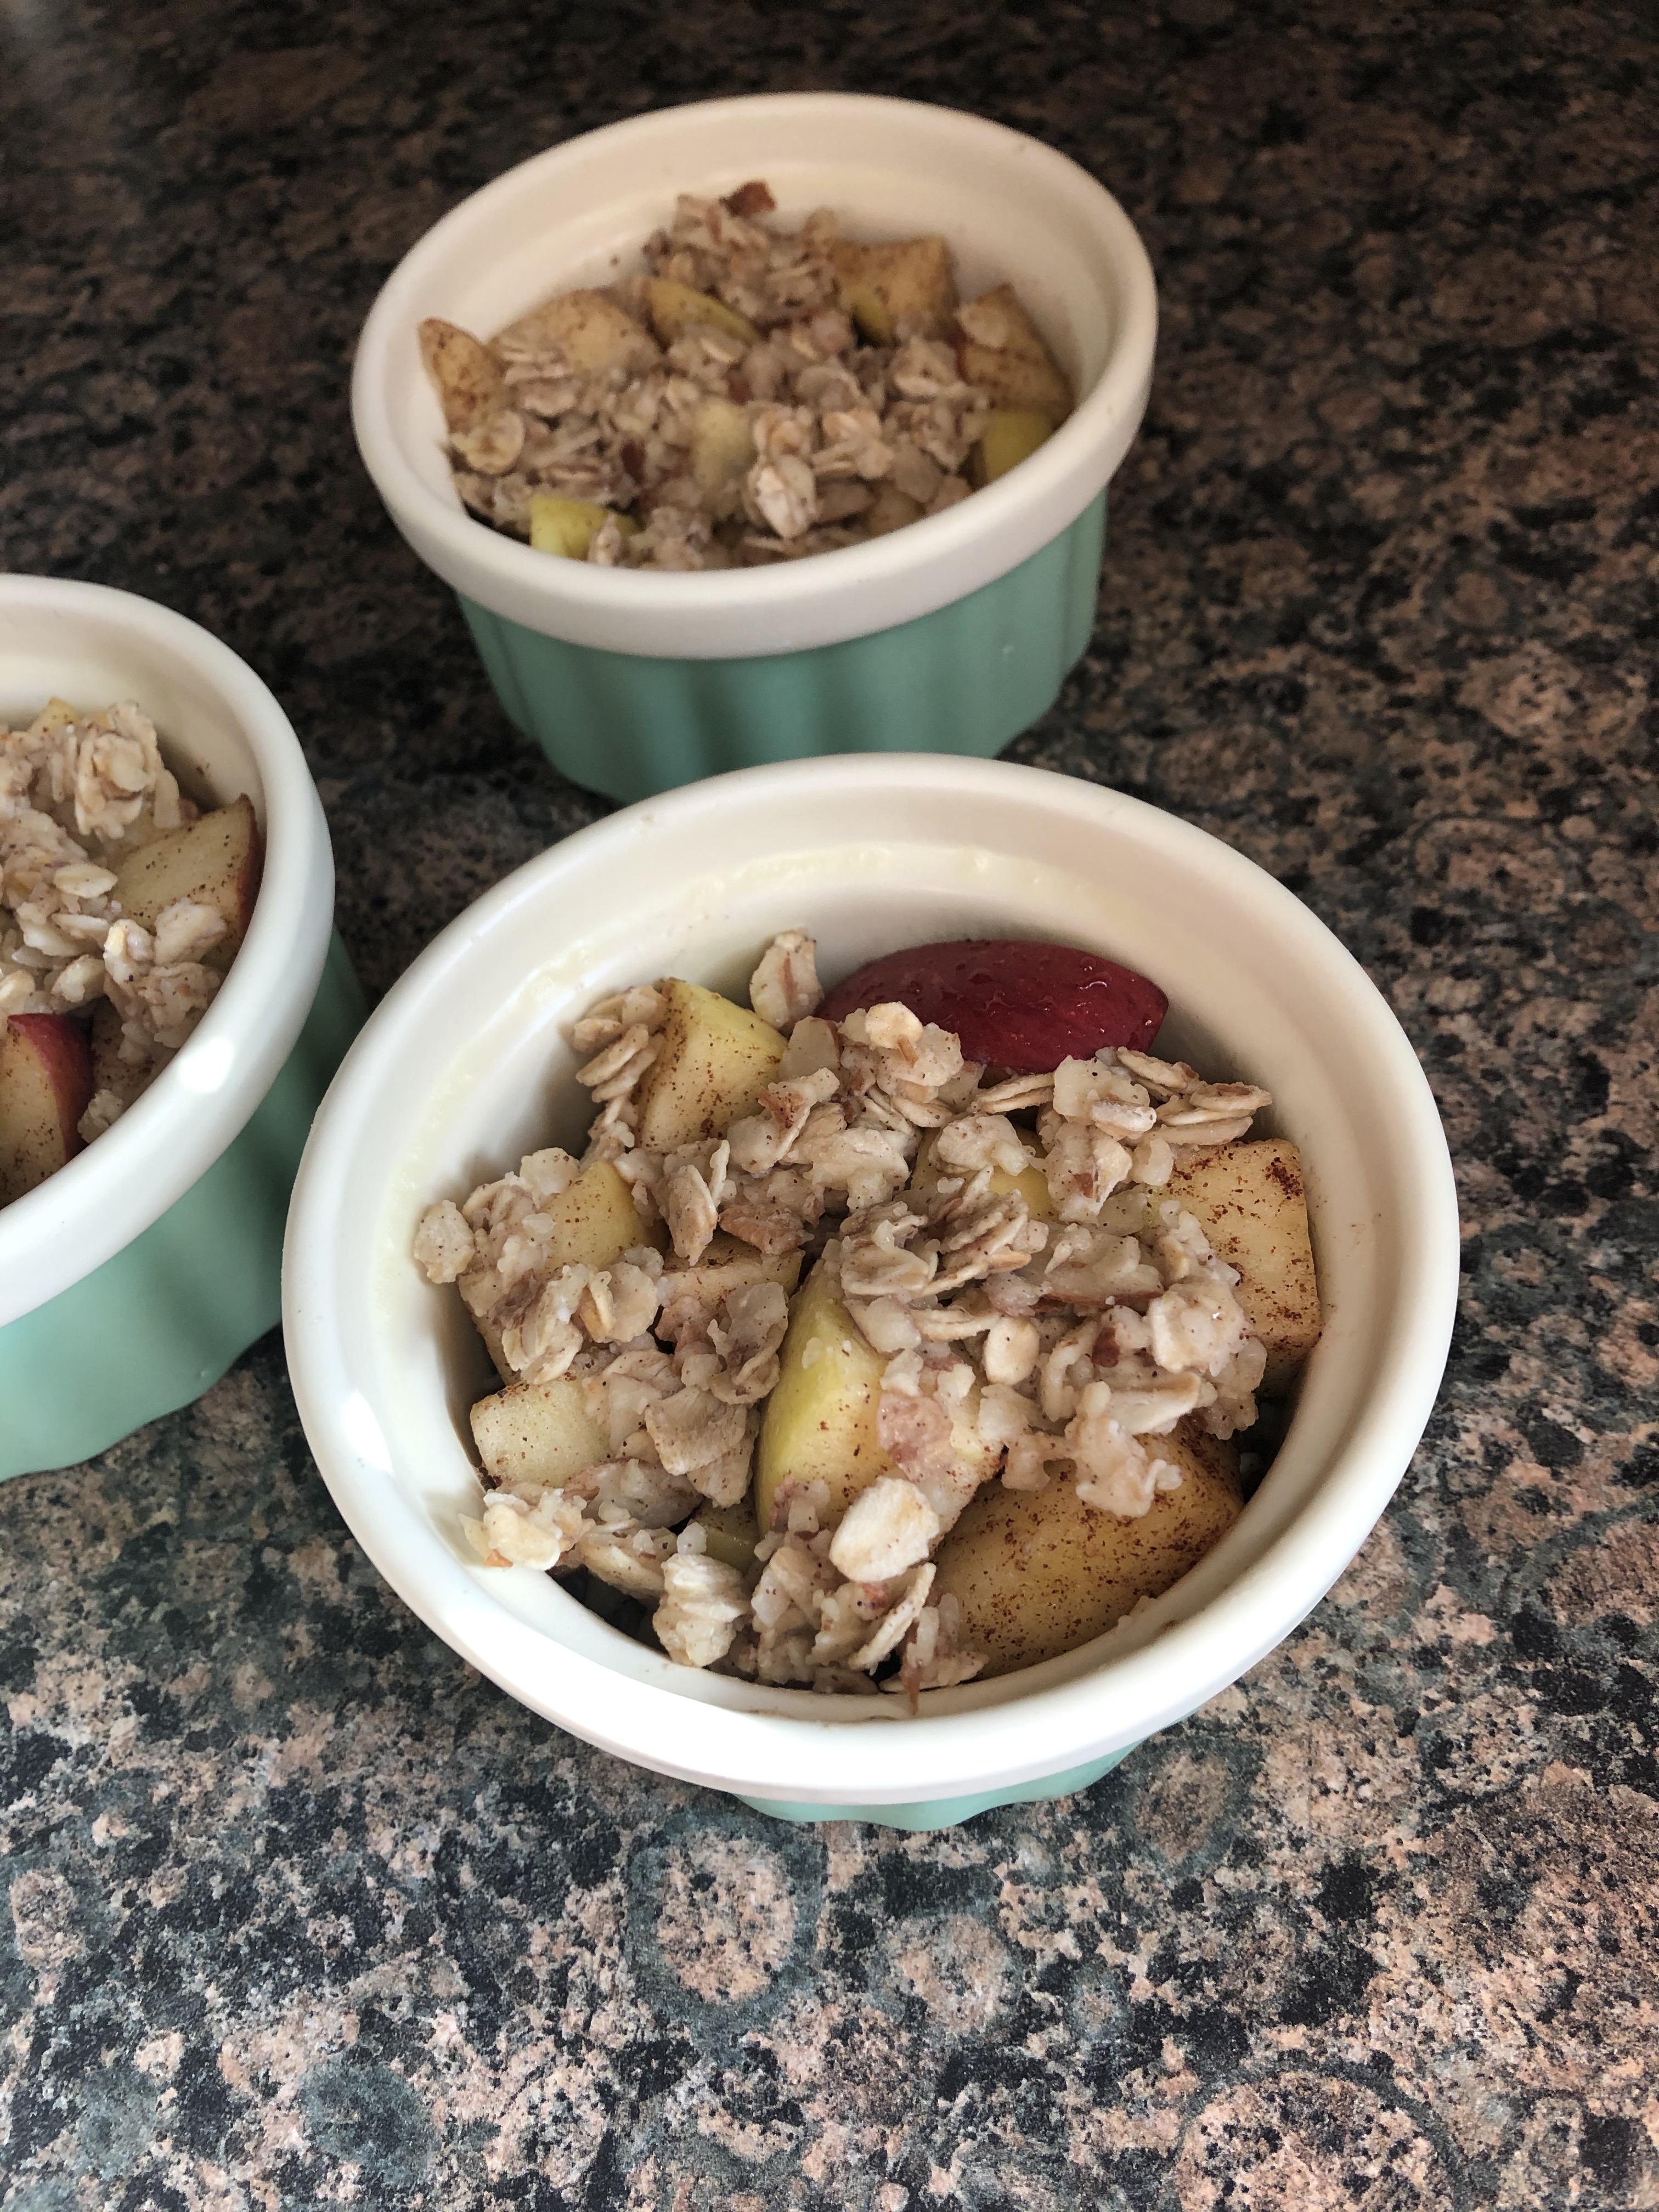
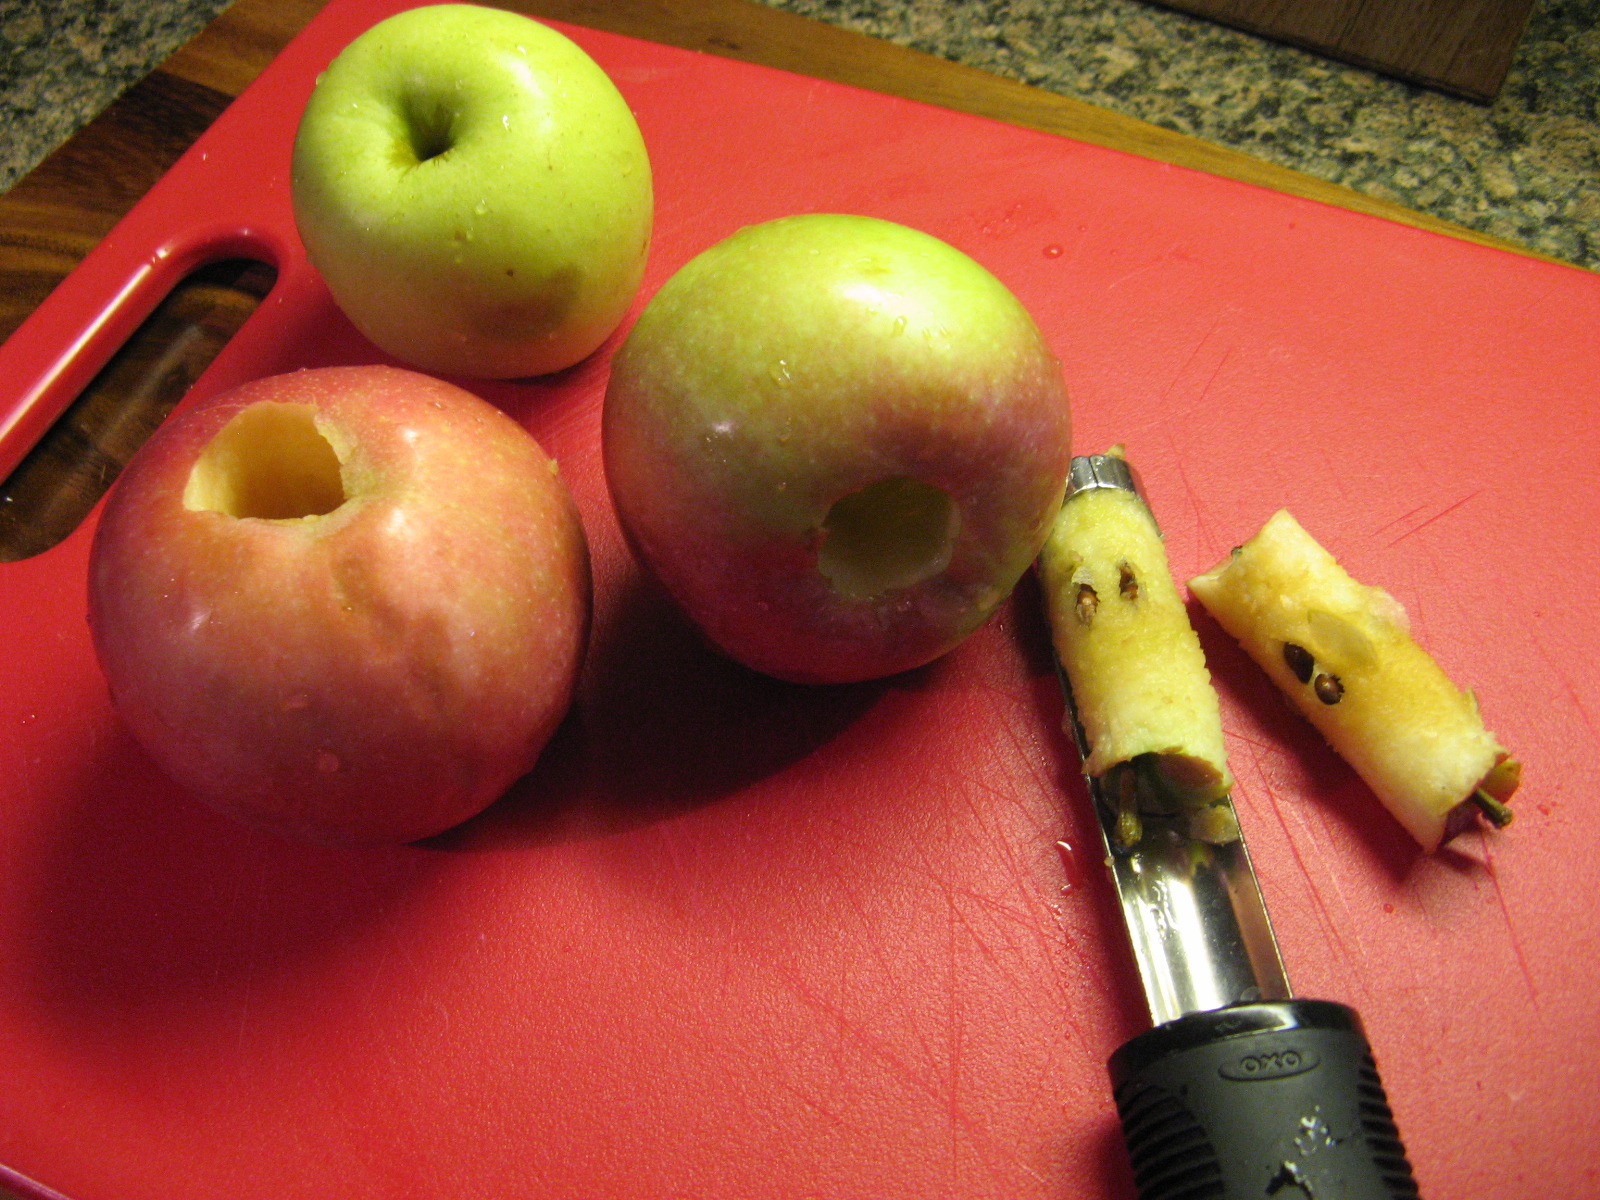
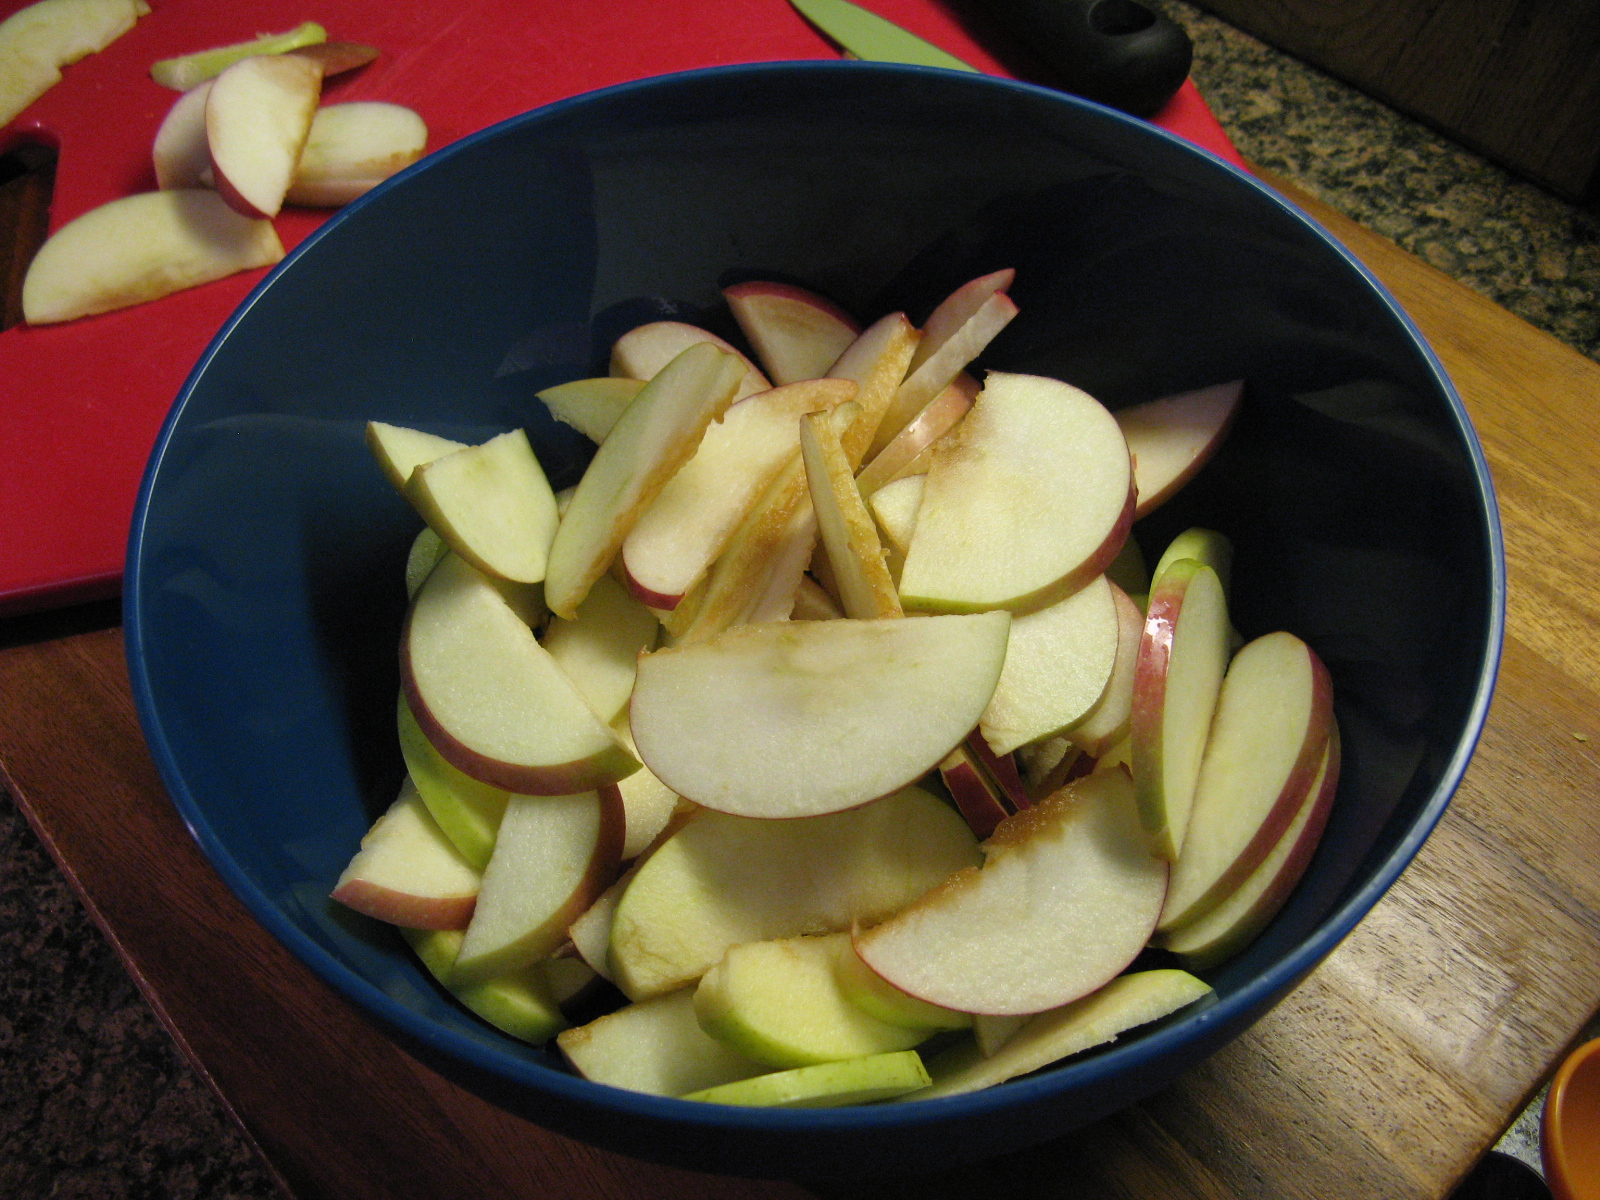
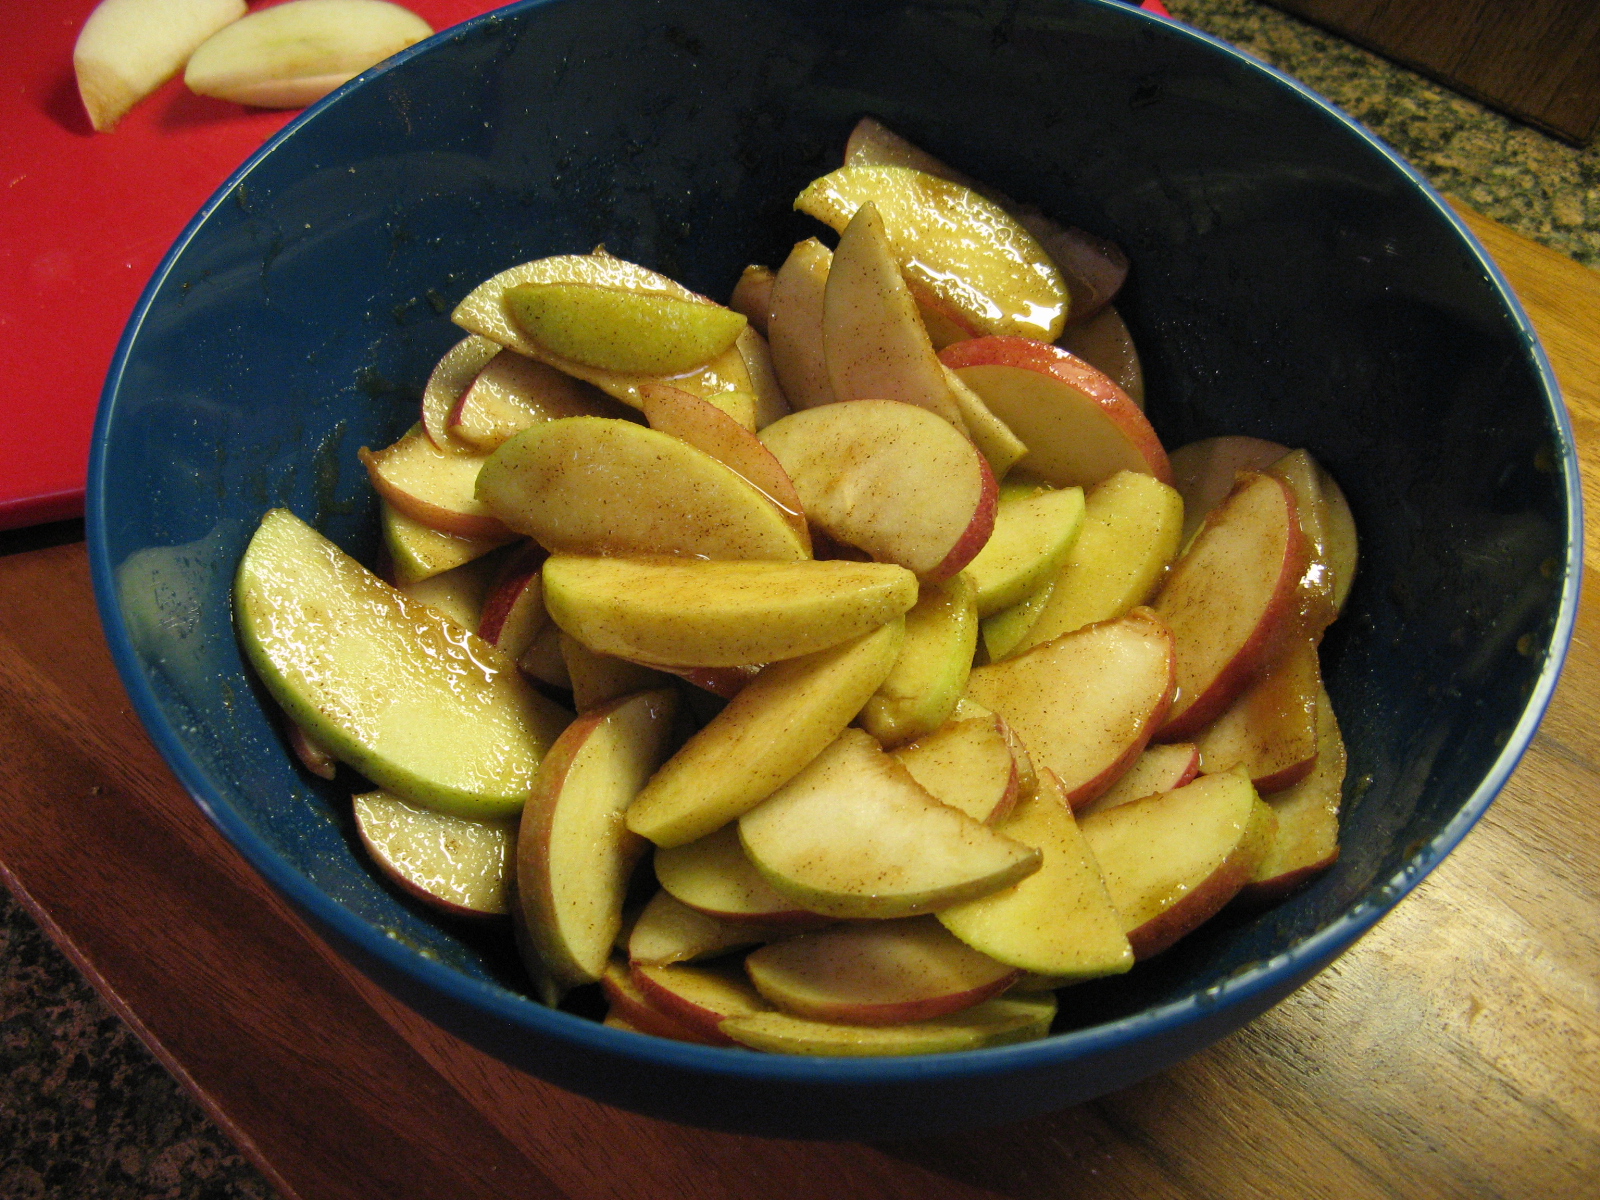
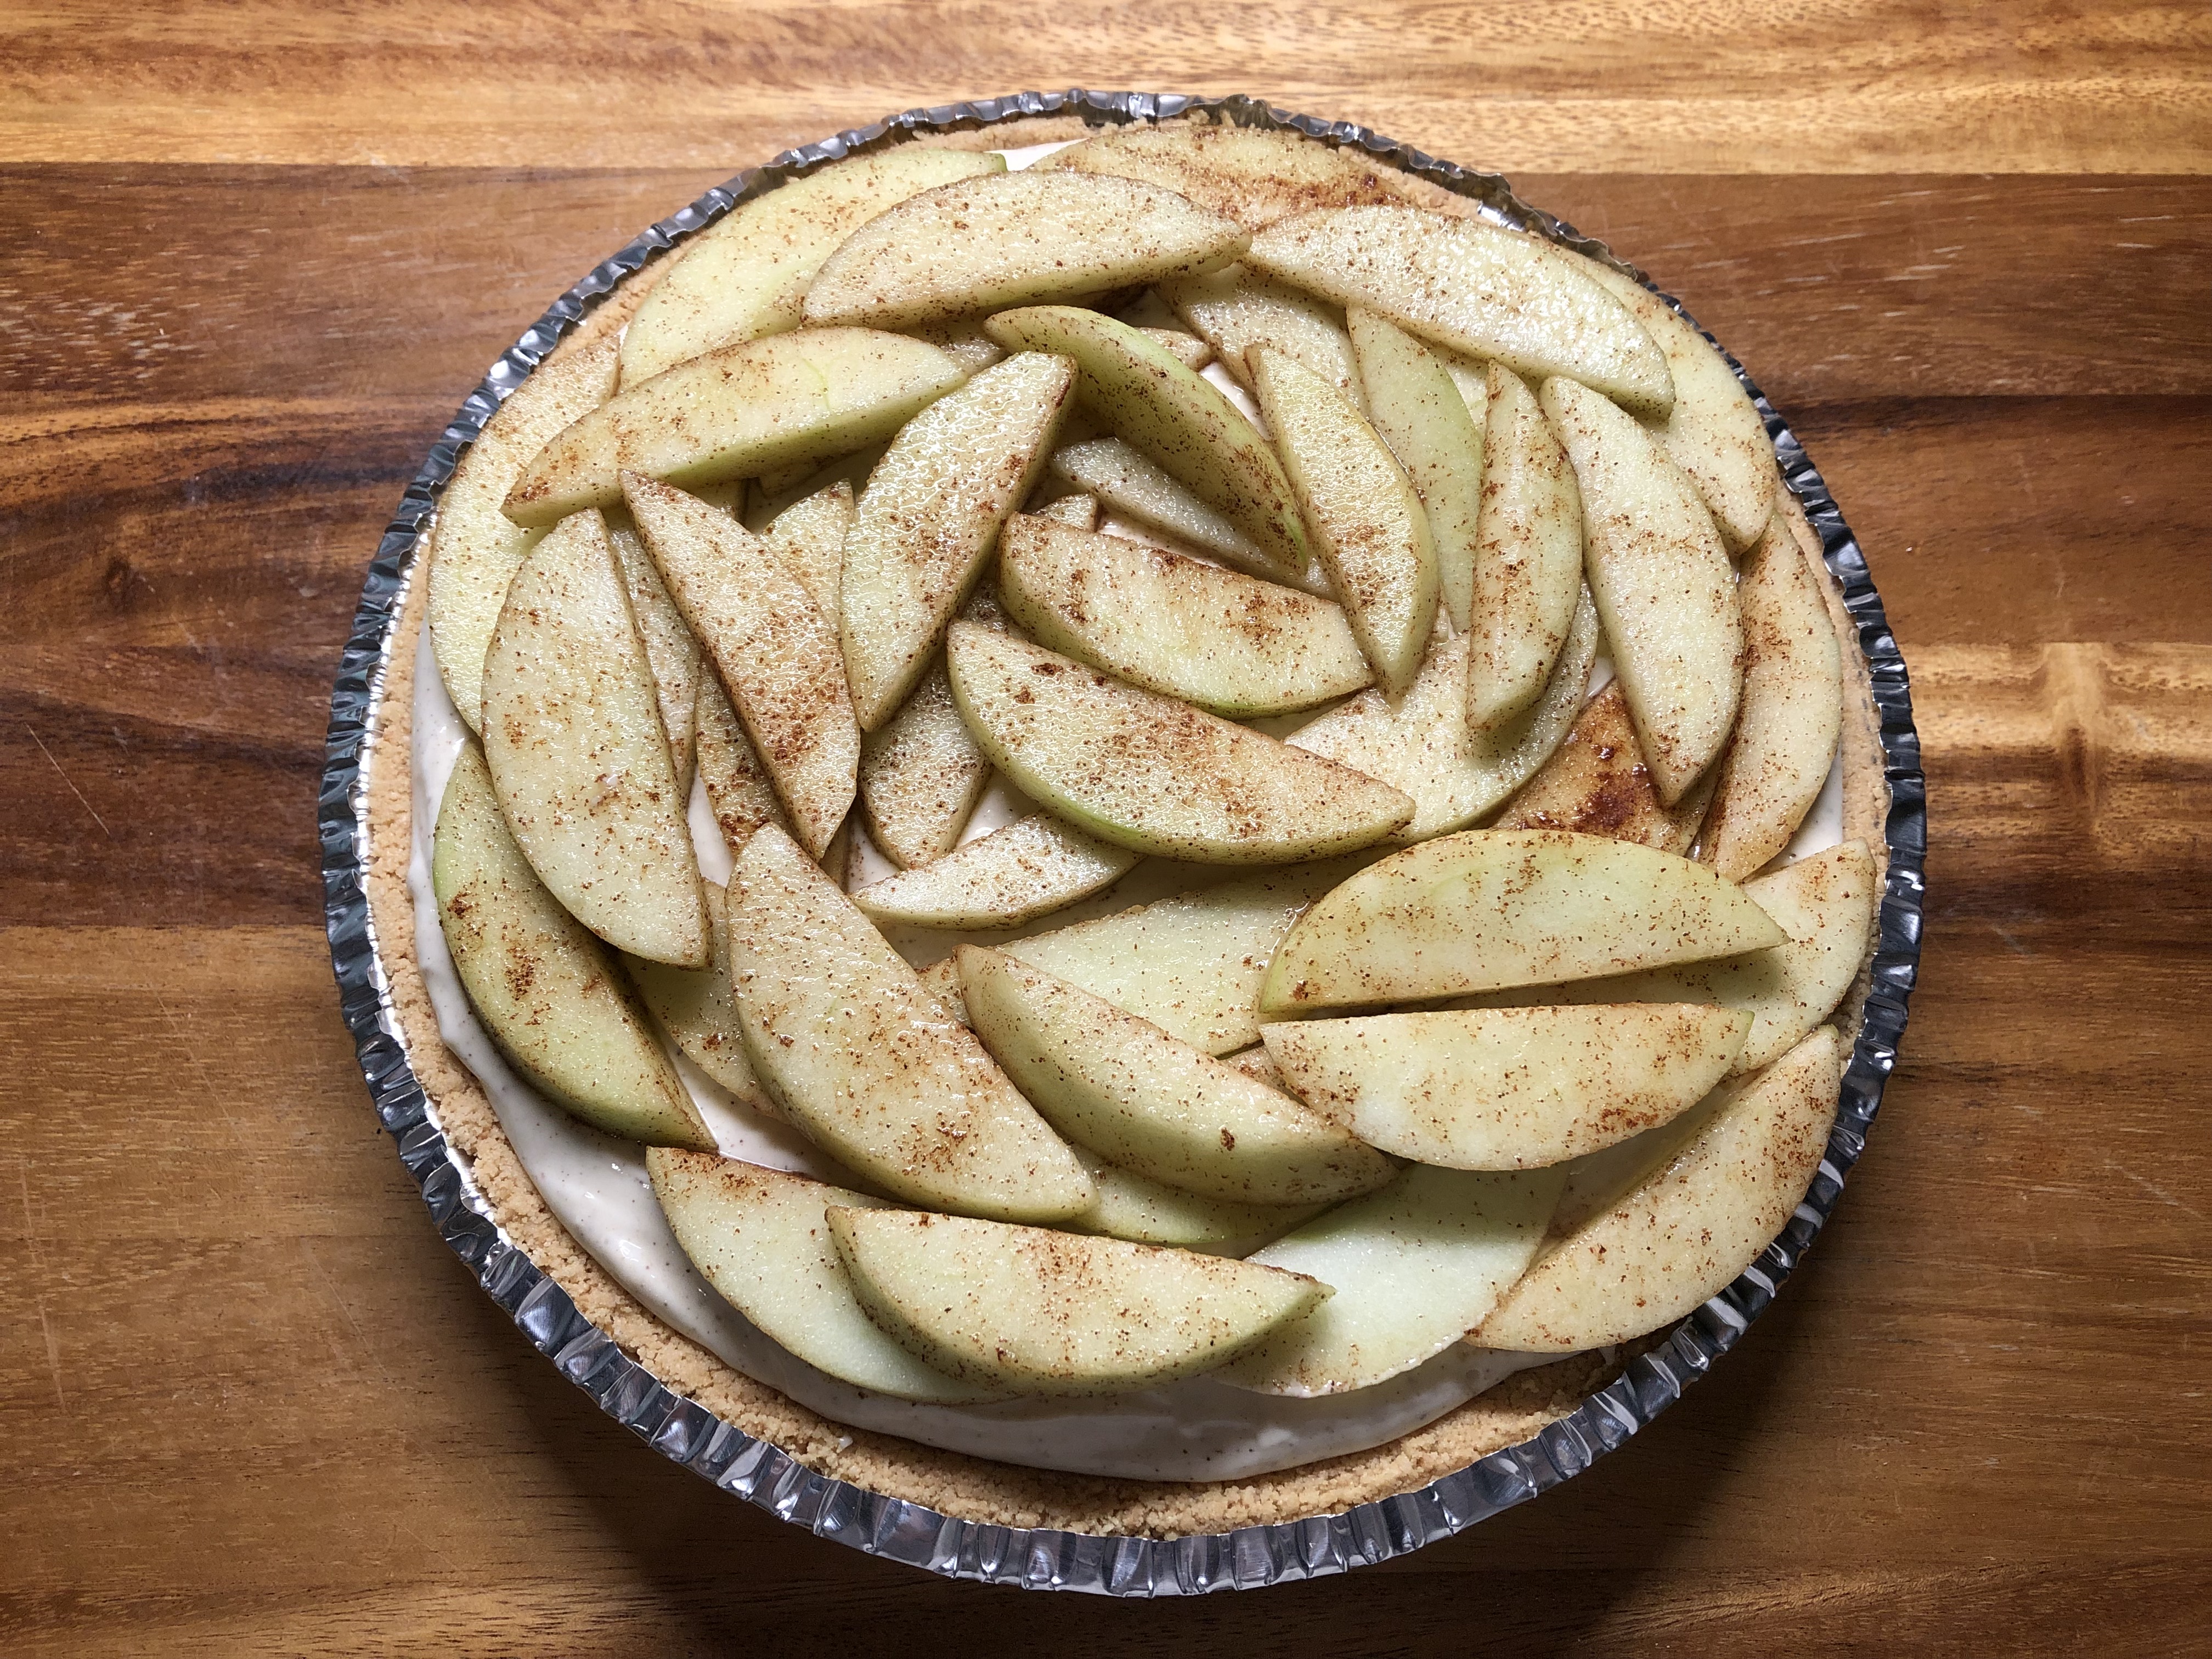
I then arranged the apples over the filling. First in an even layer and then placed the remaining apples over them. I tossed the apples with lemon juice, cinnamon and brown sugar. I used Granny Smith apples, so they weren’t very sweet or mushy after baking.

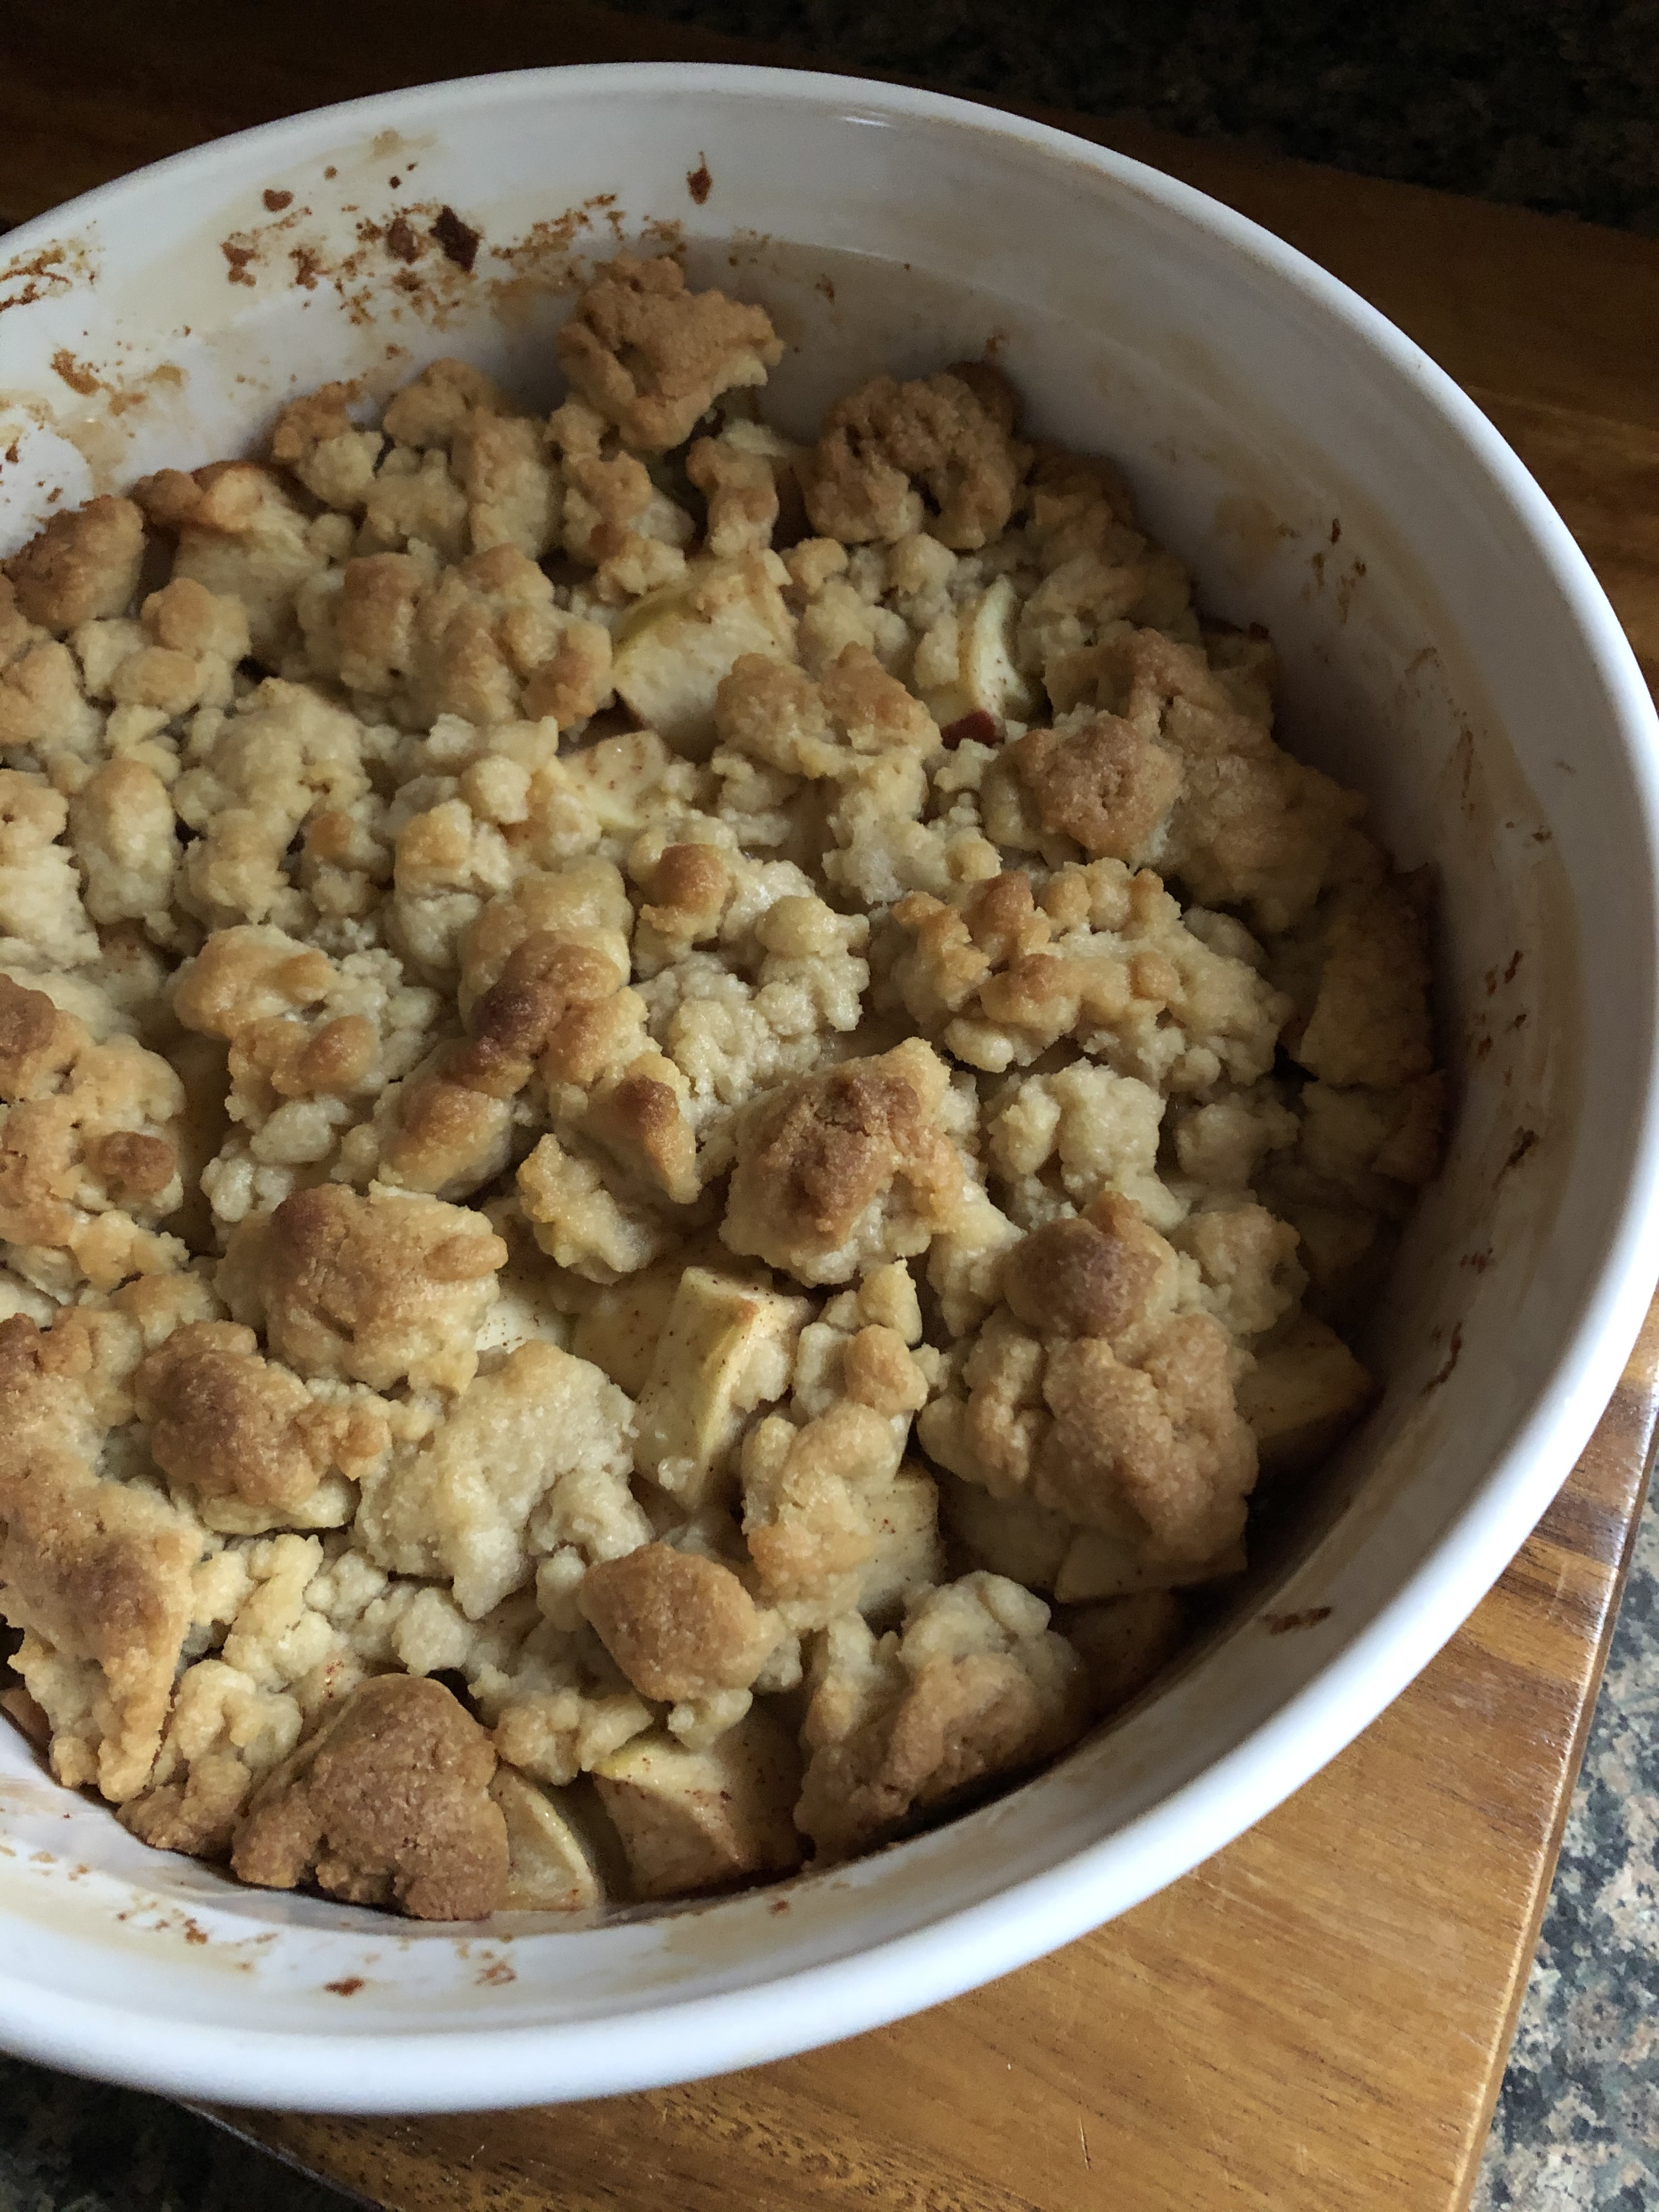
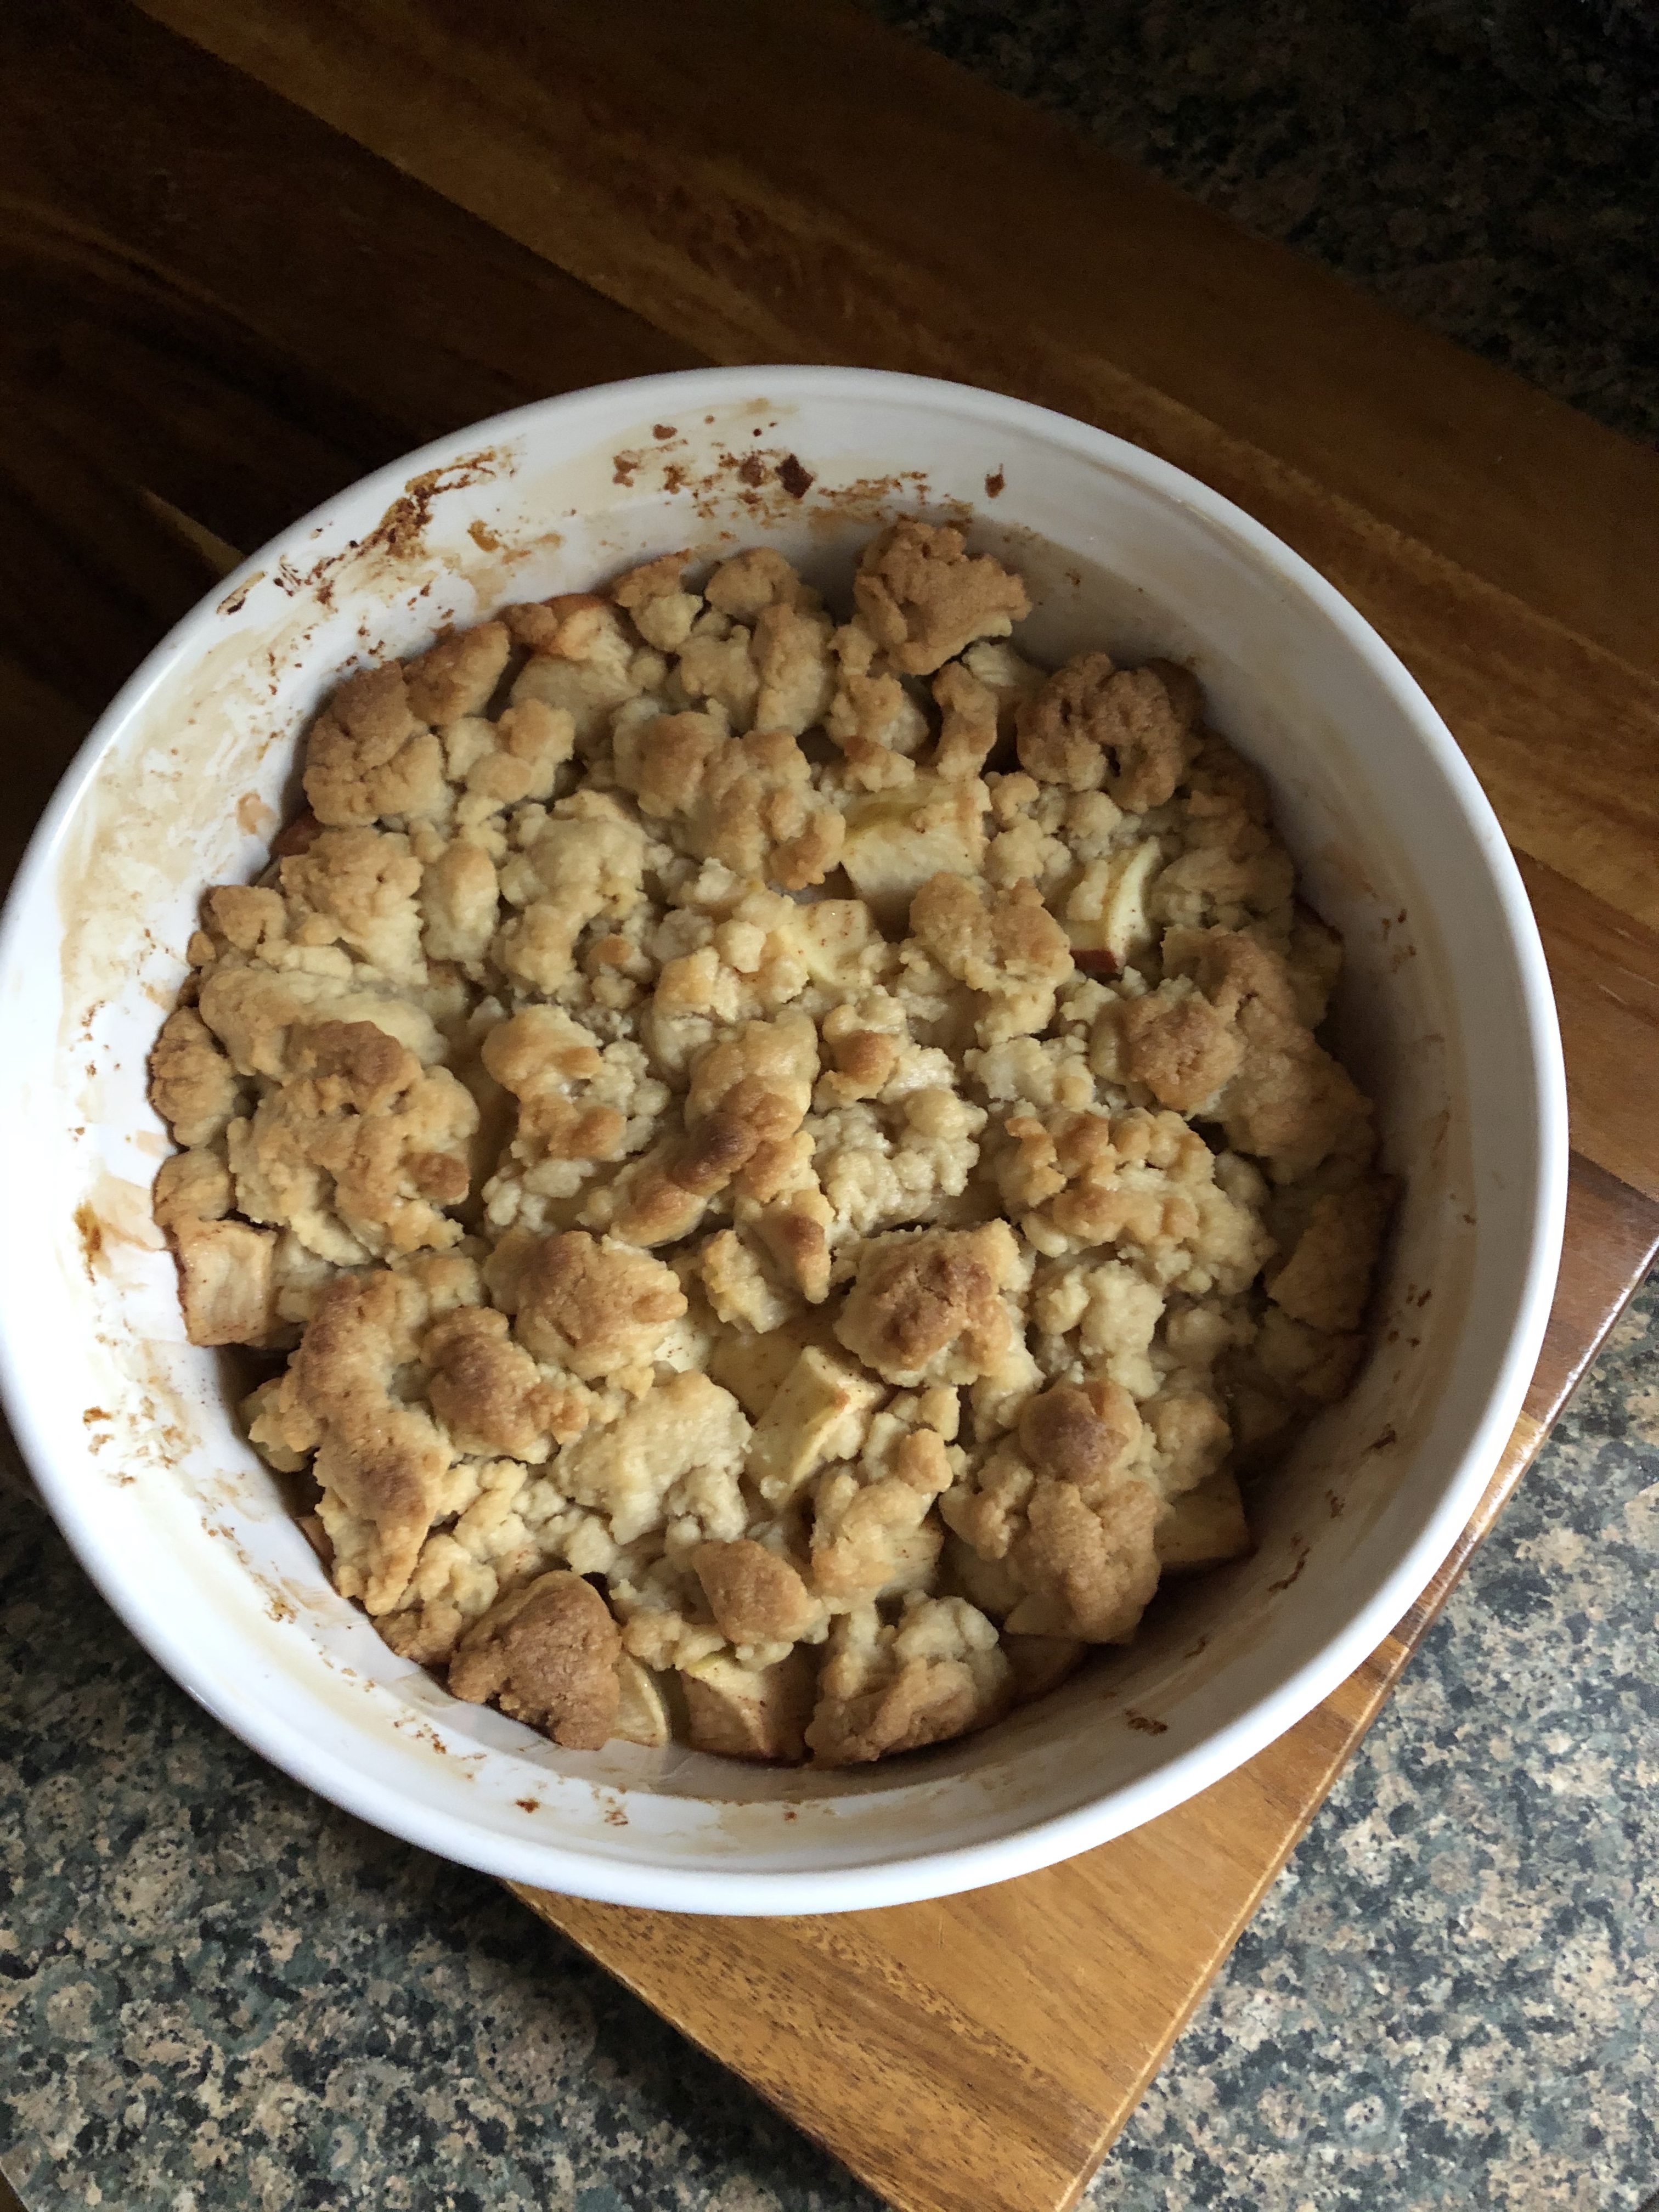
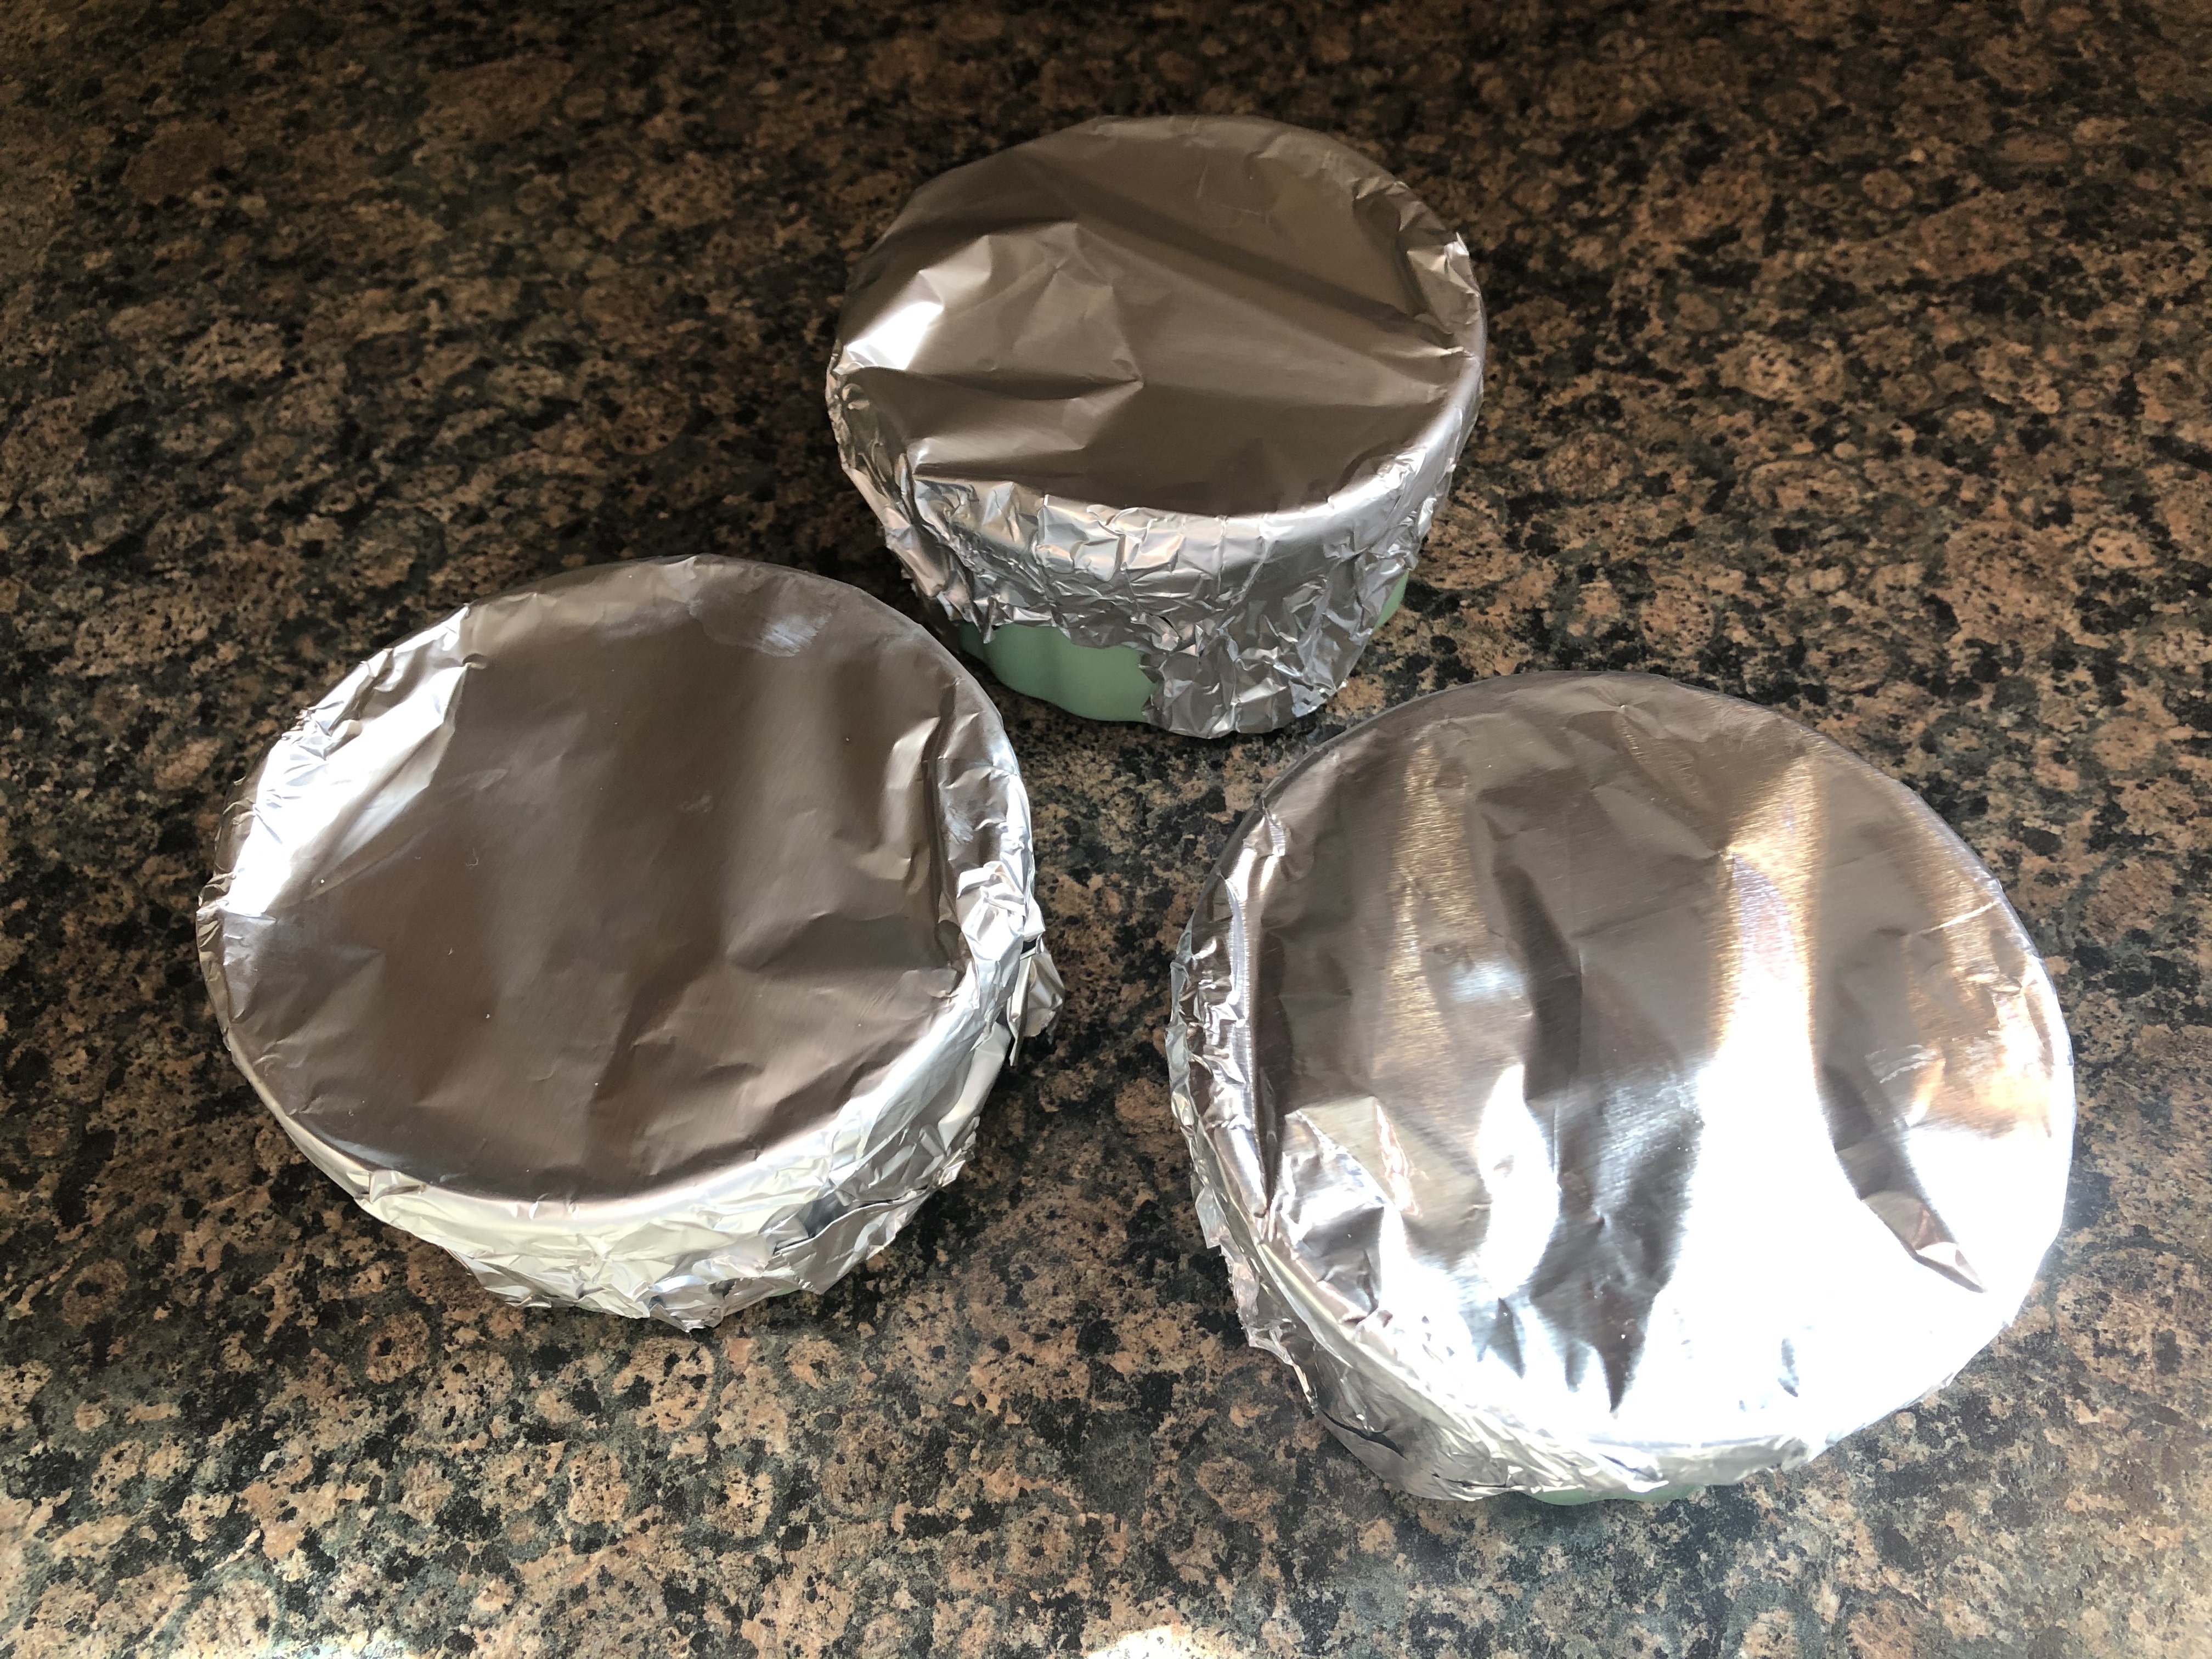
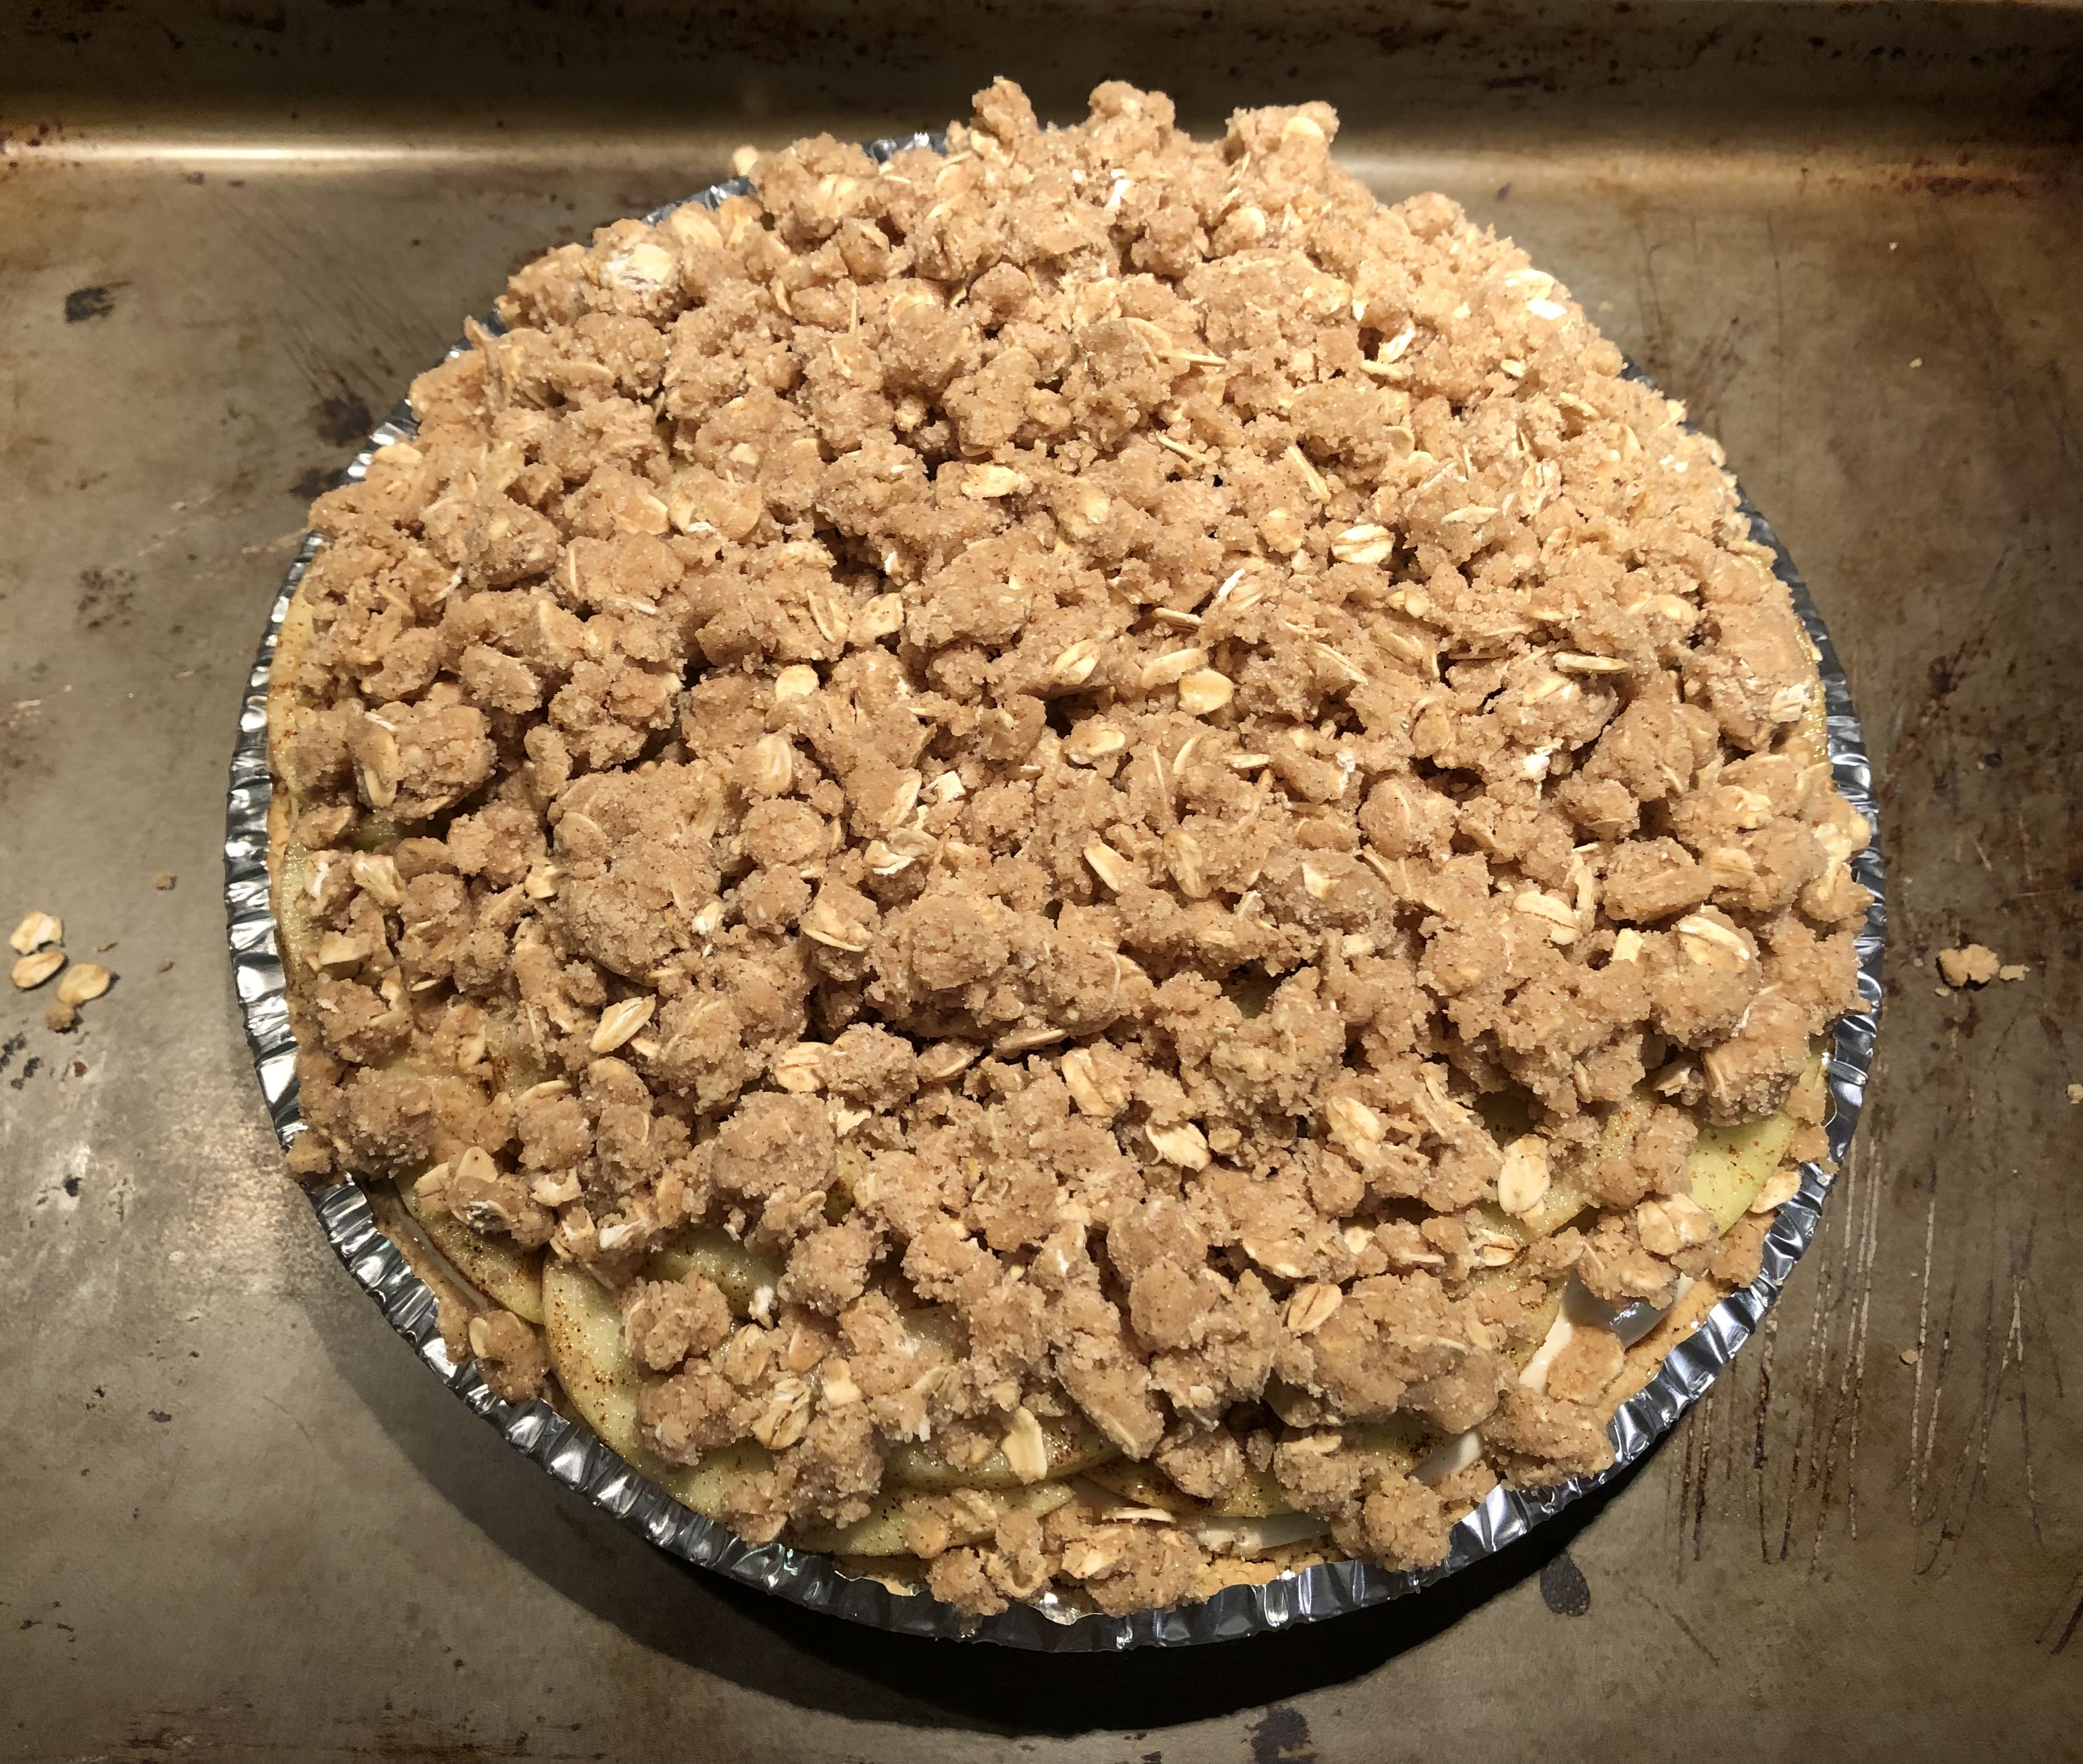
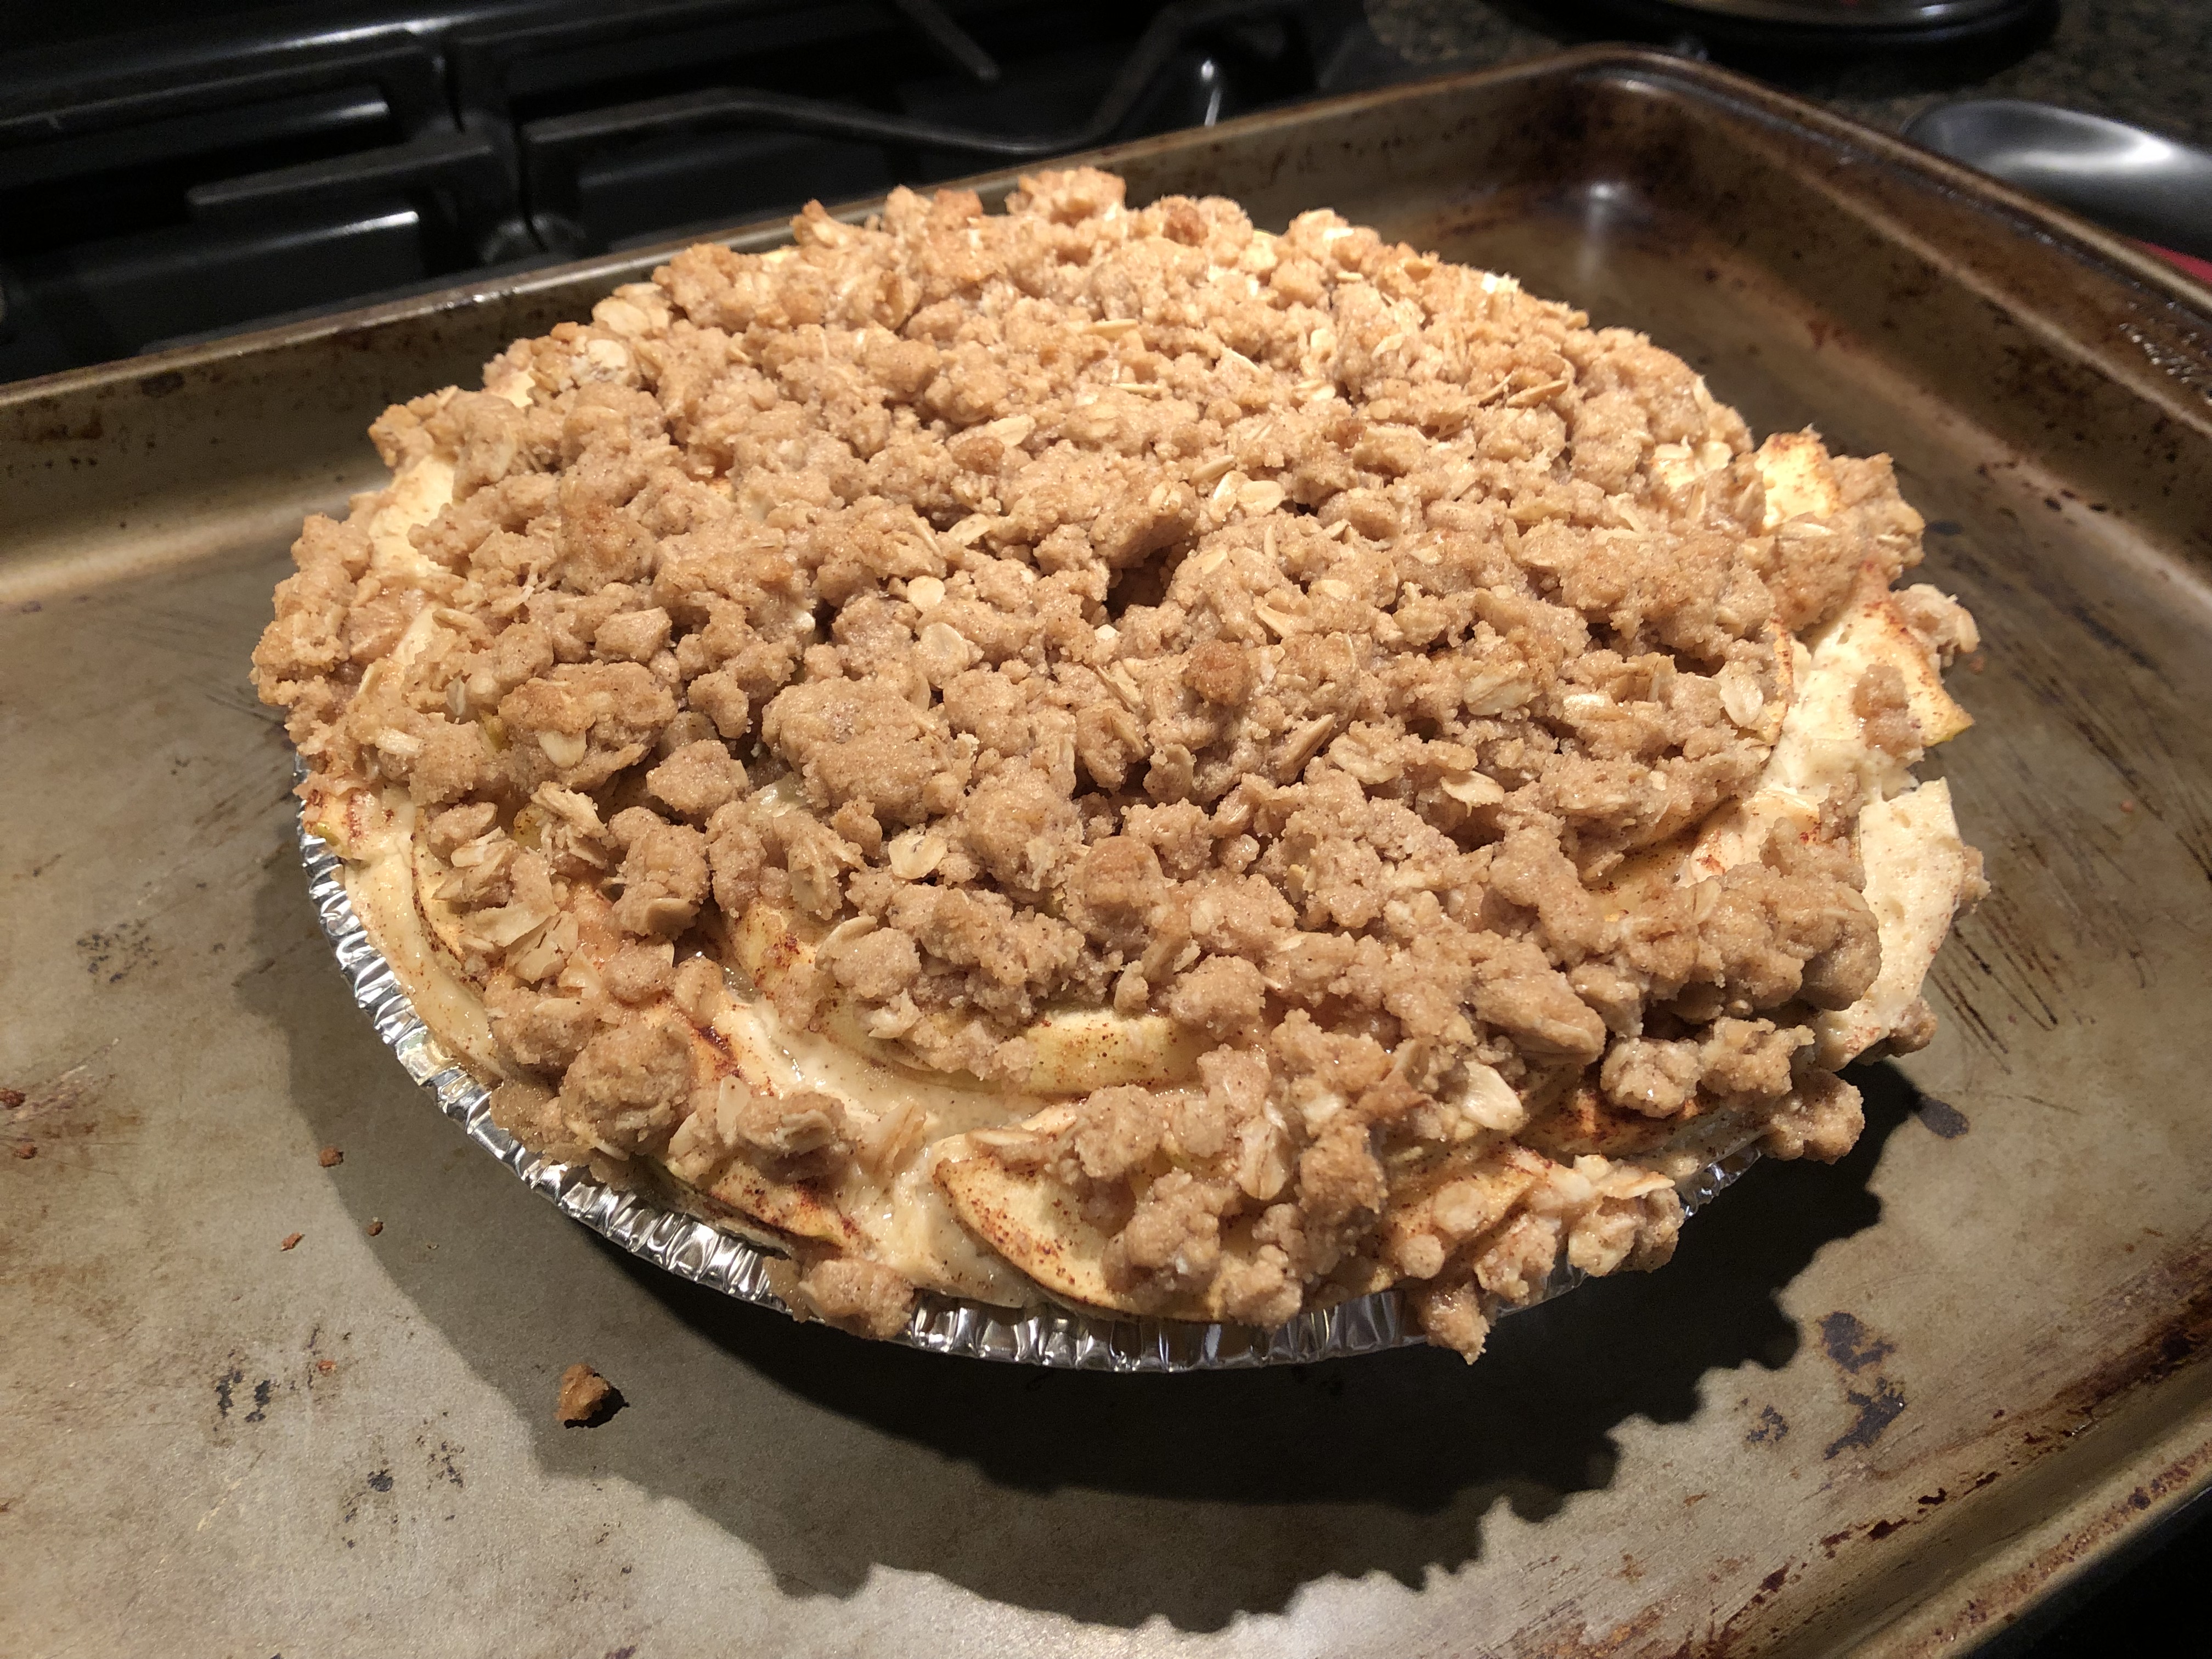
And finally, I sprinkled the chilled crisp topping over the apples. Initially I wasn’t planning on baking the cheesecake on a baking sheet, but, as I started to sprinkle the topping on it, I thought it best to bake it on the sheet just in case any of the topping fell off. The reason I chilled the crisp topping was to minimize the chances of it over-browning or burning too quickly while in the oven.

I baked the cheesecake for just shy of an hour and then let it cool on the baking sheet for a few minutes before placing it on a wire rack to cool completely. It’s best to let cool it for a few minutes on the pan before transferring it so the cheesecake can firm up a bit. The apples will release some juices while baking and while the cheesecake will be done it will feel soft due to these extra juices.

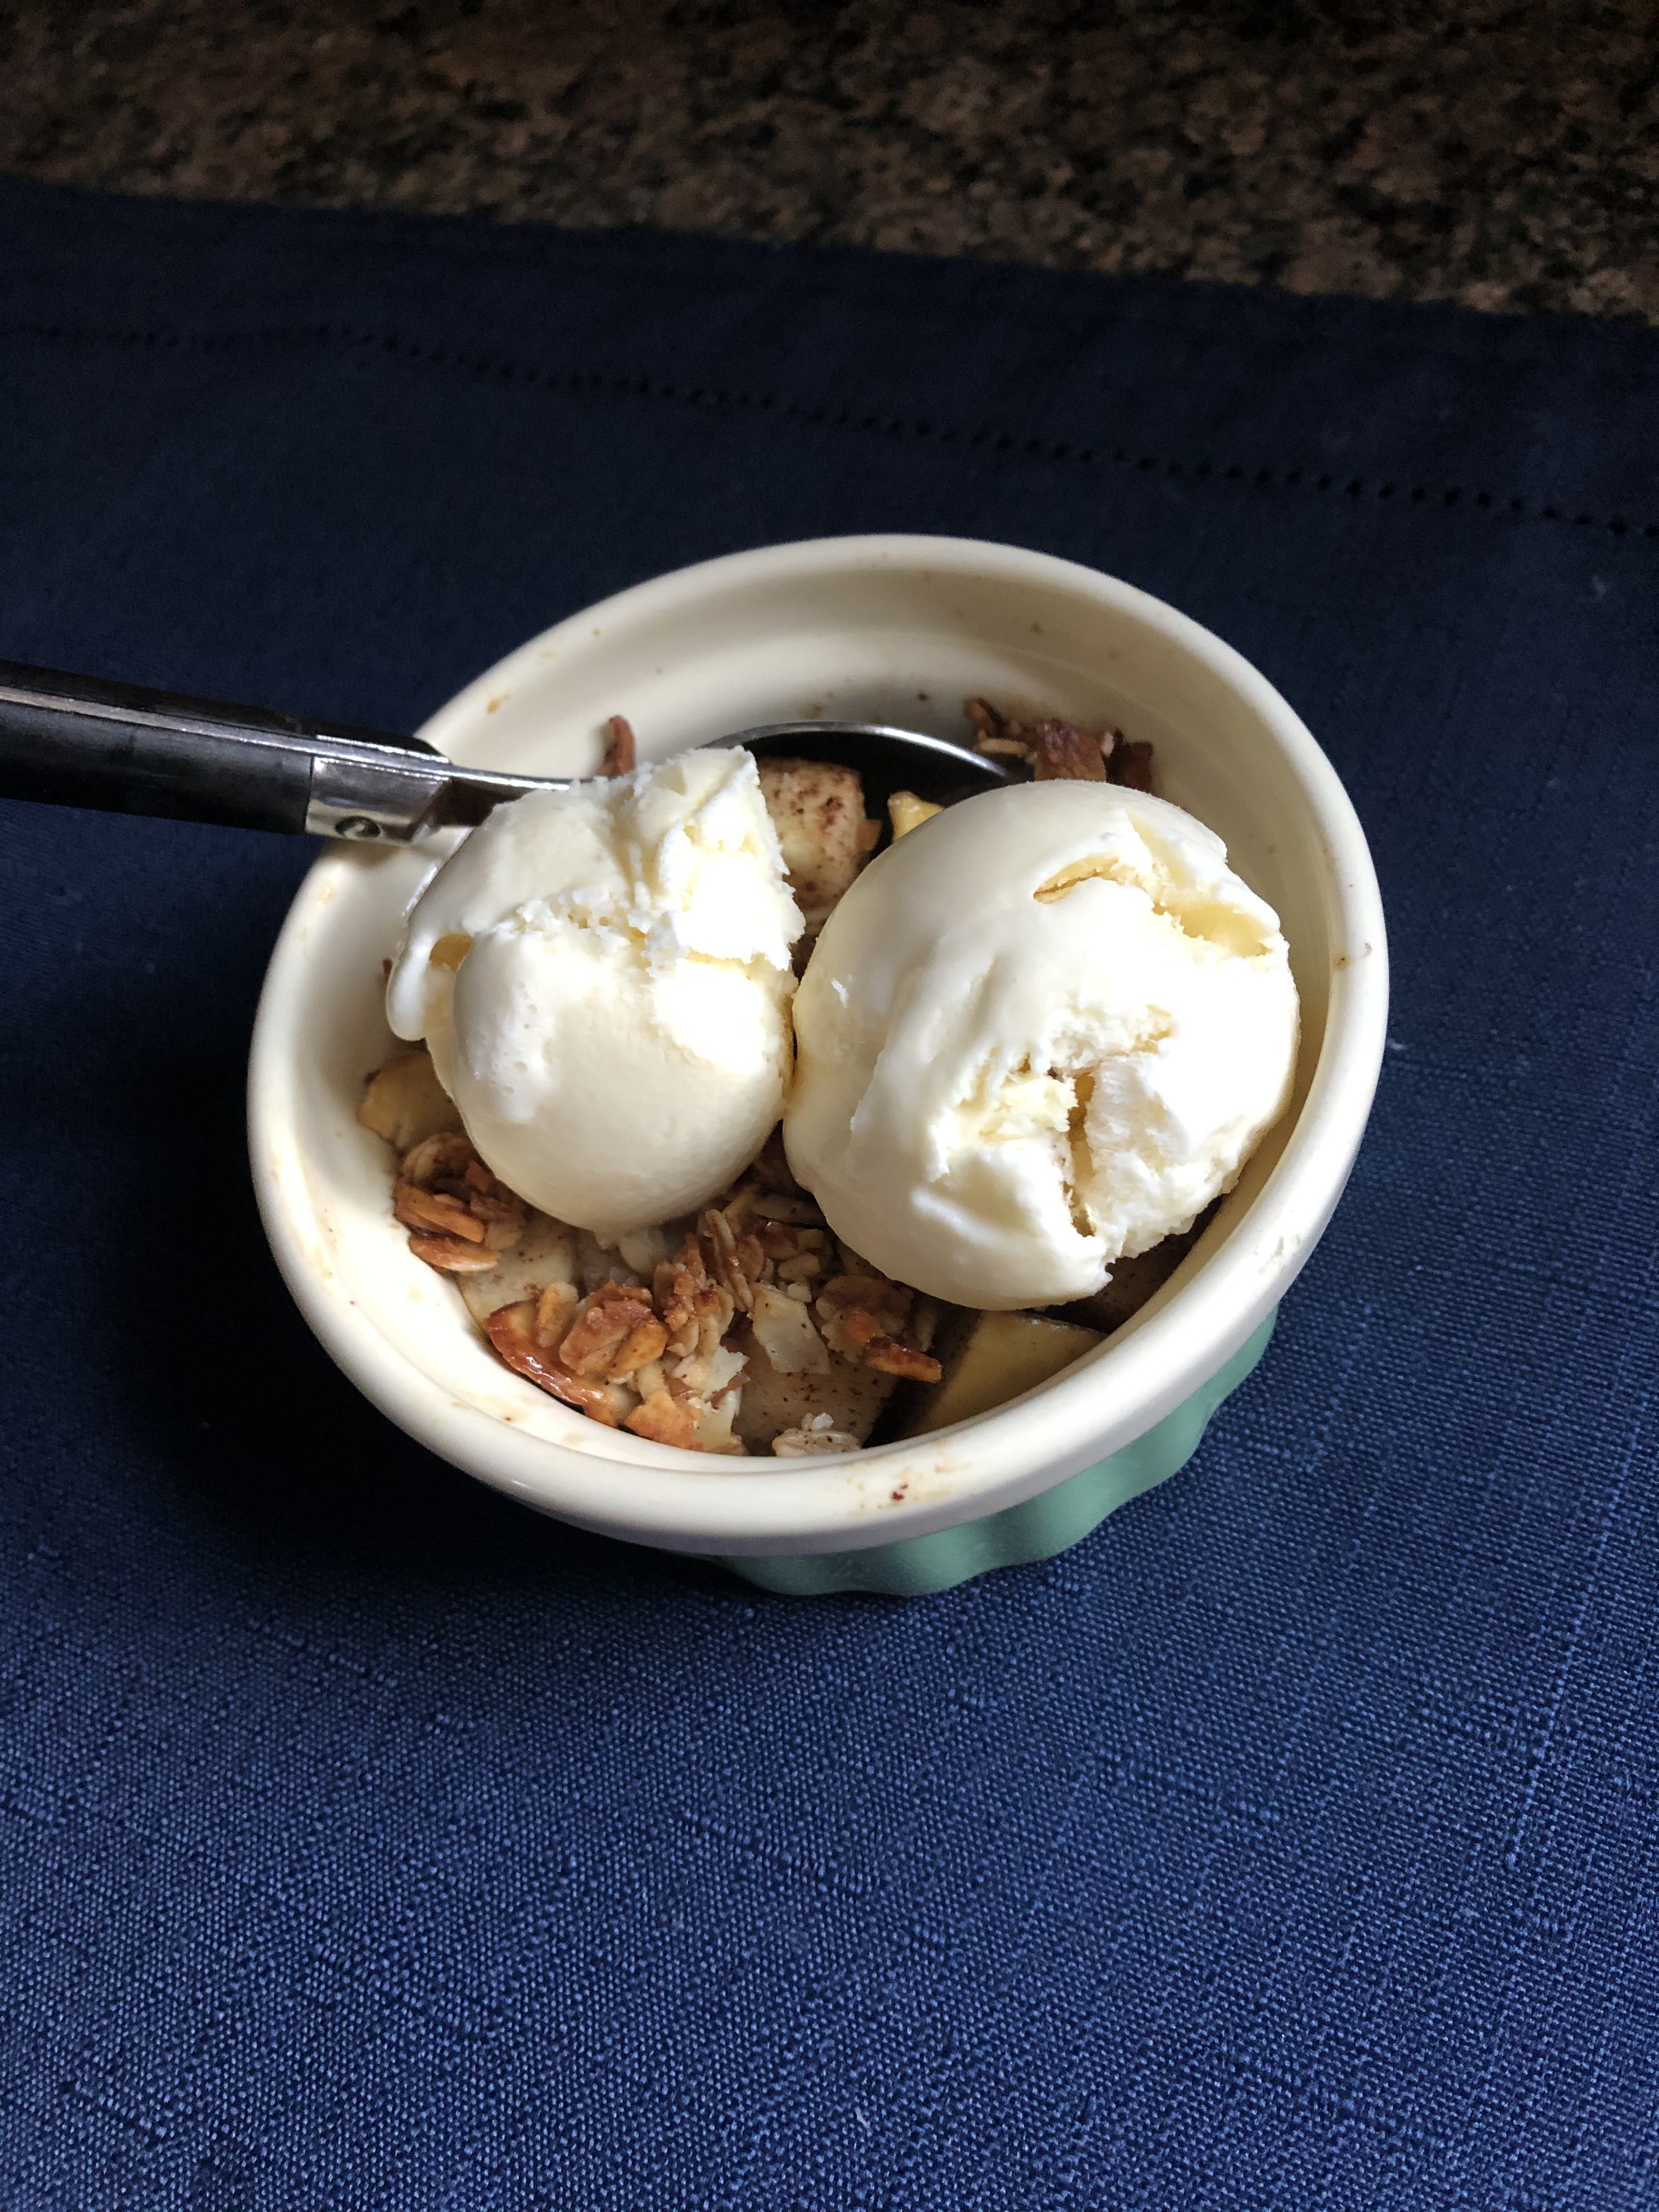
Once the cheesecake had cooled completely, I refrigerated it overnight. And the next day it was time to slice it and enjoy a piece. And I must say, this came out just as I had hoped and envisioned in my head. As with the Apple Tiramisu from the other day it wasn’t overly sweet and all the components worked well together.  

Apple Crisp Cheesecake

Ingredients:

9-inch graham cracker crust

For the Cheesecake:

2 8oz packages cream cheese, at room temperature

1/2 cup sour cream

1/2 cup sugar

1 teaspoon vanilla extract

1/2 teaspoon cinnamon

1/4 teaspoon nutmeg

1/4 teaspoon allspice

1/8 teaspoon ginger

2 large eggs, at room temperature

For the Apple Topping:

2 Granny Smith Apples, peeled, cored & sliced thin

1 tablespoon lemon juice

1/2 teaspoon cinnamon

1 tablespoon light brown sugar

For the Crisp Topping:

1/2 cup old-fashioned oats

1/2 cup flour

1/2 cup light brown sugar

1/2 teaspoon cinnamon

4 tablespoons butter, softened

Directions:

Preheat oven to 325 F.

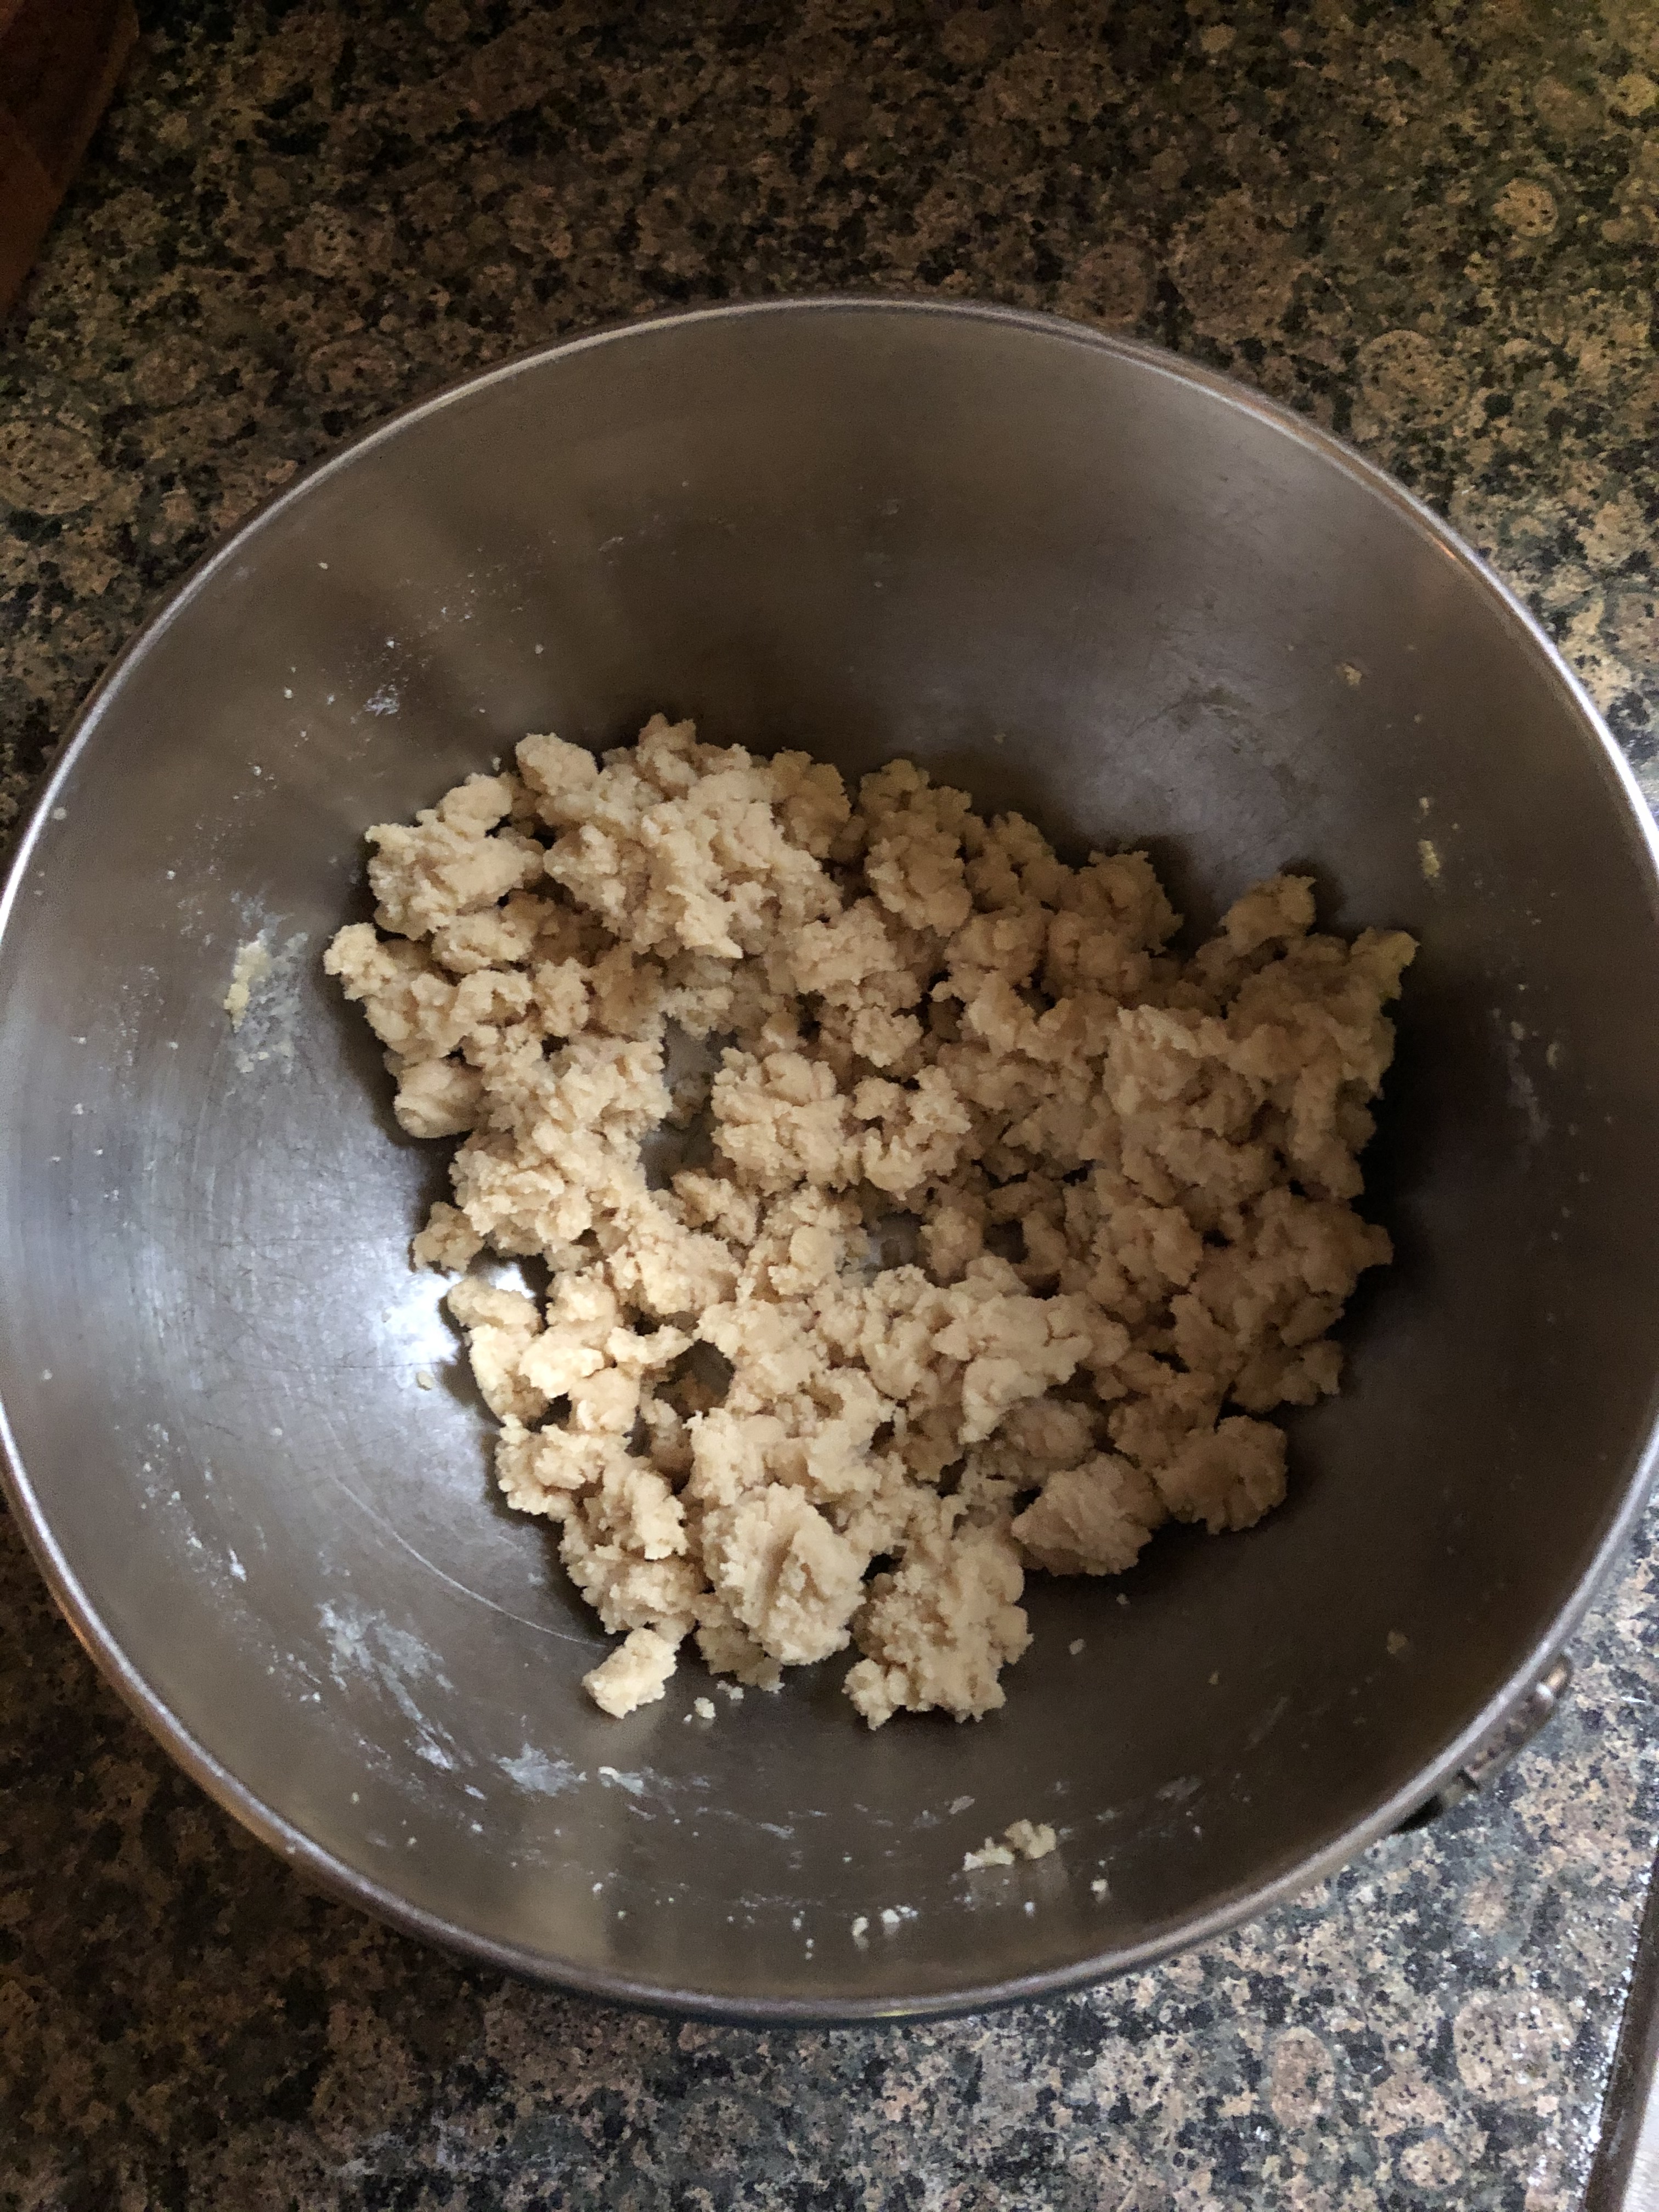
For the Crisp Topping: In a medium bowl mix together the oats, flour, sugar and cinnamon until well combined. Add in the butter and mix until the mixture is crumbly. It might be best to use your hands. Refrigerate or freeze until ready to use.

For the Apple Topping: In a medium bowl toss together the apples, lemon juice, cinnamon and sugar until the apples are well coated. Set aside.

For the Cheesecake: In a large bowl beat together the cream cheese, sour cream, sugar, vanilla extract, cinnamon, nutmeg, allspice and ginger with a hand mixer on medium speed until well blended. Add the eggs and continue beating until the eggs are incorporated into the batter.

Assemble: Place the graham cracker crust on a baking sheet then pour the cheesecake batter into the crust. Arrange the apples evenly over the batter and then sprinkle the crisp topping over the apples.

Bake in the preheated oven for 50-55 minutes, until the center is set. To prevent the crisp topping from over-browning or burning, tent the cheesecake with aluminum foil for the last 15-20 minutes.

Cool on the pan for a few minutes before transferring to a wire rack to cool completely. Cover with a piece of plastic wrap or aluminum foil and refrigerate for at least 8 hours (or overnight) before serving.

Recipe first appeared on Bead Yarn & Spatula.

Apple Tiramisu

This week I’m bringing you a twist on some traditional desserts, a Fall twist that is with the addition of apples to both. Up first an Apple Tiramisu, and later this week an Apple Crisp Cheesecake.

So, where did the idea for an Apple Tiramisu come from? Well, I had a pack of ladyfingers that were quickly approaching their expiration date and while I was planning on making a traditional tiramisu with them, I started to think that maybe something a little more seasonal would work. And thankfully I was right. Truth be told I had some reservations that the apple filling, similar to what you would make for apple pie, would work in the tiramisu.

To start, I made the apple filling since it needed to be completely cooled before assembling the tiramisu. After peeling, coring and chopping my apples I tossed them with lemon juice, light brown sugar, cinnamon and flour. I then cooked them in melted butter along with a few tablespoons of water in a medium saucepan. The apples were soft, but still had a slight crunch to them.

While the apples cooled, I made a bourbon whipped cream and the mascarpone filling. I folded some of the bourbon whipped cream into mascarpone cheese and reserved the rest for the topping of the tiramisu. I also made the dipping mixture for the ladyfingers by whisking together milk, sugar, vanilla extract and bourbon.

Once all the components were done it was time to start assembling the tiramisu. I began by dipping half of the ladyfingers in the milk mixture and arranging them in an even layer in the bottom of an 8×8-inch baking dish. I spread half of the mascarpone filling over the ladyfingers and then topped it with half of the apple mixture. I repeated the layer one more time and then spread the reserved bourbon whipped cream over the top. I covered the tiramisu with a piece of wax paper and aluminum foil and refrigerated it overnight.

The following day I made a small and quick batch of caramel sauce. After sprinkling chopped walnuts on top of the tiramisu I then drizzled the caramel sauce over it.

This was a nice Fall twist on the traditional Tiramisu. It was light with just the right amount of sweetness from the apples.

Apple Tiramisu

Ingredients:

7oz. package of Ladyfingers

1/2 cup chopped walnuts, for topping

For the Apple Filling:

3 large Granny Smith Apples, peeled, cored & chopped

2 tablespoons lemon juice

2 tablespoons light brown sugar

1 teaspoon cinnamon

1 tablespoon flour

3 tablespoons unsalted butter

4 tablespoons water

For the Mascarpone Cream:

8 oz. mascarpone cheese, at room temperature

3 teaspoons vanilla extract, divided

2 cups heavy cream

1/3 cup sugar

2 tablespoons bourbon

For the Ladyfingers Dipping Mixture:

1 1/2 cups milk*

1 tablespoon sugar

1/2 teaspoon vanilla extract

2 tablespoons bourbon

For the Caramel Drizzle:

1/4 cup light brown sugar

2 tablespoons unsalted butter

1 tablespoon milk

1/2 teaspoon vanilla extract

*I used whole milk

Directions:

Apple Filling: In a medium bowl toss the apples with the lemon juice. Add in the sugar, cinnamon and flour and toss together until the apples are well coated.

In a medium saucepan melt the butter over medium heat, add the apples and water and toss everything together. Lower the heat to medium-low and cook the apples until they are soft but still have a slight crunch to them, 10-15 minutes, stirring occasionally so the apples don’t stick to the pan. Remove from the heat and cool completely.

Mascarpone Cream: In a medium bowl stir together the mascarpone cheese and 1 teaspoon of the vanilla extract until well combined.

In another medium bowl, beat together the heavy cream, sugar, bourbon and the remaining 2 teaspoons of vanilla extract with a hand mixer on medium speed until stiff peaks form. Reserve about 1 1/4 cups of the whipped cream mixture.

Gradually fold the remaining whipped cream mixture into the mascarpone cheese mixture. Start with a quarter of the of the whipped cream mixture and then the remaining amount. Continue folding the two mixtures together until no streaks of either remain and they are well incorporated.

Dipping Mixture: In a shallow bowl whisk together all the ingredients – milk, sugar, vanilla extract and bourbon – until combined.

Assemble: Dip the rounded side of half of the ladyfingers in the dipping mixture and arrange them in an even layer in the bottom of an 8×8-inch baking dish. Top with half of the mascarpone cream and then spread half of the cooled apple mixture over the cream. Repeat the layers once more. Top with the reserved whipped cream mixture. Cover with a piece of wax paper and them aluminum foil and refrigerate for at least 4 hours, or overnight.

For the caramel drizzle: An hour before serving, make the caramel sauce. In a small saucepan combine the sugar, butter and milk. Heat over medium heat until sugar melts and the mixture boils. Boil for a minute or two stirring occasionally, until the sauce thickens. Remove from the heat and stir in the vanilla extract. Allow to cool. The sauce will continue to thicken as it cools. If it looks like it’s separating while it’s cooling, whisk it for a minute or so.

Right before serving, sprinkle the chopped walnuts over the tiramisu and then drizzle with caramel sauce.

Store leftovers in the refrigerator.

Recipe first appeared on Bead Yarn & Spatula.

Baked Apples

I recently got a good amount of apples from my yearly apple picking trip and this year the apples I picked were the right amount of sweetness and crispness. To make sure they don’t go to waste, one can only eat so many apples before they start to go bad, I invariably make a few baked goodies with them. Usually an apple crisp of some sort, this year I decided to make Baked Apples. A simple dessert with a lot of flavor.

The most difficult part of making these baked apples is coring the apples. To do so I used an apple corer to go partway down the apple, turned it a few times and then removed it without the core. Next, I used a paring knife and a small spoon to remove the core and to widen the holes of the apples. You want to leave about a 1/2-inch of the bottom of the apple intact.

Next, I combined brown sugar, spices and chopped walnuts with softened butter and divided the mixture among the apples which I placed in a glass baking dish. And finally, before placing the apples in the oven I filled the bottom of the dish with a cup of boiling water. This helps to keep the apples moist while baking.

And after baking for about 40 minutes in the oven I had delicious baked apples and wonderful aroma swirling around my house. These are delish on their own but even better with a scoop or two of vanilla ice cream.

One more thing to note, the best apples to use for baking are those that are firm; Granny Smith, Cortland, Fuji, Gala, etc. Since I picked quite a few different types of apples I can’t be all that sure which I used to make these baked apples. If you are concerned that the apples you are using may be too soft just keep an eye on them while they are in the oven. They may be ready in less time.

Baked Apples

Ingredients:

4 medium to large apples

4 tablespoons unsalted butter, at room temperature

1/2 cup light brown sugar

1 teaspoon cinnamon

1/4 teaspoon nutmeg

1/4 teaspoon ginger

1/4 cup chopped walnuts, optional

1 cup boiling water

Directions:

Preheat oven to 375 F.

Use a sharp knife or apple corer to cut out the core of the apples leaving about a 1/2-inch of the bottom of the apple intact. Scoop out the insides of the apples to make the holes wide enough to place the butter mixture inside.

In a medium bowl whisk together the brown sugar, cinnamon, nutmeg, ginger and chopped walnuts (is using). Add in the softened butter and mash everything together with a fork or use your hands to mix it together until it’s well combined.

Place the apples in an 8×8-inch baking dish. Divide the butter mixture among the apples and then carefully pour the hot water into the bottom of the pan.

Bake in the preheated oven for 35-40 minutes, or until the apples are cooked through and soft but not mushy.

Remove from the oven and let cool for a few minutes before enjoying.

Any leftover apples can be stored in the refrigerator and reheated in the microwave.

Recipe first appeared on Bead Yarn & Spatula.

Bourbon Caramel Apple Upside Down Spice Cake

I’ve been willing Fall to get here for the past few weeks. I am sure I have mentioned it before, it’s my favorite season. Cooler weather, the leaves changing, baking without overheating my house, the list goes on and on. There are a few flavors synonymous with this time of year, mainly pumpkin and apples. And while I normally like to welcome Fall with a new pumpkin recipe, I decided to go with the apples this year for a Caramel Apple Bourbon Upside Down Spice Cake. A bit of a mouthful!

A little backstory on this cake. I got the idea from watching a Fall themed movie on Hallmark Channel back in the Spring. I wrote the idea on a post-it and finally revisited it a few weeks ago. And of course, there were a few fails before I finally ended up with a cake that looked and tasted delicious. My first cake collapsed in the middle. My cake tester led me astray! The cake was slightly undercooked in the middle and there was no saving it. The fail though led me to change the flavor of the cake so it was kind of a good thing. Initially I doctored a French vanilla cake mix and decided the flavor just wasn’t right, so I switched to a spice cake instead. That definitely screams Fall more so than French Vanilla. So, I bought a spice cake Mix and made a few tweaks to it. I also decided to bake the cake in a tube pan to ensure it would bake completely without drying out. Well, it still wasn’t quite right. I used heavy cream when I made my bourbon caramel sauce and I just didn’t like the way it looked after flipping the cake. And while the cake tasted good, I just wasn’t getting enough spice from it.

Thankfully my third attempt was a success! First, I decided to omit the heavy cream from my caramel sauce. Second, I went with a yellow cake mix and added in cinnamon, nutmeg, ginger, allspice and cloves (those yummy warm spices of the season) to really get a strong spice flavor. And third, after I poured the caramel and arranged the apples in the pan, I placed the pan in the refrigerator while I made the batter for the cake. This allowed the apples to set in the caramel so that they wouldn’t move when I poured the batter into the pan. This actually happened with my second attempt at this cake. I had arranged my apples in a nice design and they moved all around once I poured the batter in. I didn’t take any chances with my third attempt though. I spooned the batter into the pan just to be safe.

Just look at how the apples looked before I added the batter. I definitely wanted that look on top of my cake once it was done.

And thankfully since I made those tweaks my cake looked amazing once I flipped it out of the pan. YAY!!!

And even better, the taste and texture of the cake was spot on.

Happy Fall Y’all!

Bourbon Caramel Apple Upside Down Spice Cake

Ingredients:

For the Bourbon Caramel Apple:

1/2 cup light brown sugar

4 tablespoons unsalted butter

1/4 cup bourbon

2 Granny Smith Apples, peeled, cored and thinly sliced (about 1/4 inch)

For the Spice Cake:

1 15.25 box of yellow cake mix (I used Duncan Hines)

2 teaspoons cinnamon

1 teaspoon nutmeg

1/2 teaspoon ginger

1/2 teaspoon allspice

1/2 teaspoon ground cloves

3 large eggs

1/2 cup vegetable oil

3/4 cup buttermilk*, at room temperature

1/3 cup sour cream, at room temperature

1 teaspoon vanilla extract

*Make your own buttermilk by adding 4 teaspoons of vinegar to a measuring cup and then adding enough whole milk to make 3/4 cup. Let stand for 15 minutes at room temperature, or until the milk becomes thick and appears curdled.

Directions:

Preheat the oven to 350 F. Spray a tube pan with baking spray and set aside. You could also use a Bundt pan.

For the Bourbon Caramel Sauce:

In a small saucepan combine the brown sugar and butter and melt over medium heat, stirring occasionally. Once the mixture is melted and combined remove from the heat and add the bourbon. Return to the heat for about a minute and stir to combine. Let cool slightly.

Pour the caramel sauce into the prepared pan and arrange the apple slices in the sauce making sure to overlap them.

While you make the cake batter refrigerate the pan with the apples and caramel sauce so the sauce can set. This will help the apples stay in place when you add the batter.

For the Spice Cake:

In a medium bowl whisk together the yellow cake mix with the cinnamon, nutmeg, ginger, allspice and cloves. Set aside.

In a large bowl, using a handheld mixer on low speed, beat the eggs, vegetable oil, buttermilk, sour cream and vanilla extract until combined. Using a fine mesh sieve (or a sifter) sift the cake mix with the spices over the buttermilk mixture and then beat with the hand mixer on medium speed until just combined.

Remove the pan from the refrigerator and spoon the batter over the apples. Give the pan a few gentle taps on the counter to remove any air bubbles and then bake in the preheated oven for 30-35 minutes, or until a cake tester inserted in the cake comes out clean.

Cool on a wire rack for 20 minutes and then invert onto a cake platter or other rimmed dish. Let the cake to cool to room temperature before slicing and enjoying. It’s important to let the cake cool before slicing so the apples can set on the cake. If you slice it too soon the apples will slide off.

Recipe first appeared on Bead Yarn & Spatula

Apple Crumble

While pumpkin and pumpkin spice does dominate as the flavor of the Fall, there’s another fruit that is just as delicious… Apples. One of my favorite things to do in the Fall is to go apple picking. And while I have had to forgo many activities due to the pandemic, thankfully apple picking wasn’t one of them. I’ll admit though that this year I haven’t been snacking on my apples as much as I have in the past. I think that’s partly due to the fact that I am working from home. I have been snacking on other things instead, whereas an apple was my snack for my drive home. It’s all good though, it just means I can bake with them instead. Last year I made an Apple Crumb Pie that was a hit! I actually ended up making two of them for Thanksgiving. And this year I am bringing you a recipe for an Apple Crumble that’s just as good. You get all the flavors of apple pie without the fuss of making a crust and with the added deliciousness of a crumble topping.

After peeling, coring and chopping the apples I tossed them with sugar, flour, lemon juice, cinnamon and salt. I then transferred them to a baking dish that I greased with unsalted butter.

To make the crumble topping, using a handheld mixer, I beat together a stick of softened unsalted butter with brown sugar until fluffy and then added in flour and salt and continued beating the mixture until large pieces began to form.

I then sprinkled the crumble topping over the apples.

And then baked it in a 375 F preheated oven for about an hour, until the mixture was bubbling.  After the first 20 minutes, I tented the dish with aluminum foil to prevent the topping from burning.

After letting it cool, I enjoyed some with vanilla ice cream.


Apple Crumble

Ingredients:

For the Apples:

1 tablespoon butter to grease dish

3 lbs. apples, peeled, cored & chopped

6 tablespoons sugar

2 tablespoons flour

2 tablespoons fresh lemon juice

1/2 teaspoon cinnamon

1/4 teaspoon kosher salt


For the Crumble Topping:

1 stick unsalted butter, at room temperature

1/2 cup light brown sugar

1 cup flour

1/2 teaspoon salt


Vanilla Ice Cream, for serving


Directions:

Preheat the oven to 375 F. Grease a 2-quart baking dish the tablespoon of butter.

Toss the apples, sugar, flour, lemon juice, cinnamon and salt in a large bowl. Transfer to the prepared baking dish and set aside.

Make the crumble topping: In a medium bowl beat the butter and light brown sugar together until light and fluffy. Add in the flour and salt and continue beating until large pieces form.

Sprinkle the crumble topping over the apples and bake in the oven. After the first 20 minutes tent the dish with aluminum foil and continue baking until the mixture begins to bubble, about an hour.

Let cool for 20 minutes and then serve.

Recipe from Martha Stewart

Apple Cider Doughnut Cake

I’ve mentioned it quite a few times before that one of my favorite things about going apple picking is getting freshly made apple cider doughnuts. I posted about a baked version last year. And while those were good, there is something about a fried doughnut that just can’t be topped. If you are not sure about frying doughnuts (I tried once and it was a fail) check out my post for Apple Cider Fritters. They’re bite size and so good you may end up guilty of eating one too many. So, when I came across a recipe for a twist on my favorite doughnuts in a cake form (including a cinnamon sugar topping) I knew I had to try it. Well, at first I was going to pass on it. I try to stick with recipes that require ingredients that I have on hand or that I know I will use again. So, when I saw that this recipe included wheat flour as one of the ingredients I was a tad bit skeptical. I know, wheat flour isn’t something that is all that odd, but, there aren’t many recipes I come across that require it so I was a bit concerned that it would end up just sitting in my cabinet or refrigerator indefinitely. I also wondered why both? Which of course required a Google search. And what I learned is that using a combination of all-purpose and whole wheat flour produces a cake that is lighter in texture and rises better. And by mixing the two you also get the added benefits of more fiber and nutrients thanks to the whole wheat.

So, a slightly funny story while making this cake. One of the ingredients is unsweetened applesauce. I had a jar of it in my refrigerator from another recipe but I never actually checked it until it was time to add it to the batter. So, I had all of my wet ingredients in a bowl and was about to add in the applesauce when I saw there was mold on top of it. Okay, not so funny. I didn’t bother to check it since it wasn’t set to expire until next year. But, this will definitely be a lesson to me to check those odd ball ingredients just in case. This is a good example of what I was saying before, buying ingredients that will sit without being used for a while. I ended up covering the ingredients with a piece of plastic wrap and ran out to the store to buy a new jar of applesauce. Hopefully the same thing won’t happen to this one. I guess I better come up with recipes for whole wheat flour and applesauce ASAP.

Letting the ingredients sit for a bit of time didn’t have any affect on the final cake. It did somehow separate while baking, but, I doubt it was because of the time my ingredients were left sitting. If you are having trouble seeing it in the picture below it’s on the right-hand side.

After adding a cinnamon sugar coating to the cake and letting it cool completely it was time to slice in to the cake and enjoy a piece. It didn’t taste exactly like my favorite apple cider doughnuts, but, it was just as good.

Apple Cider Doughnut Cake

Ingredients:

2 cups all-purpose flour

1 cup whole-wheat flour

1 1/2 teaspoons baking powder

1 1/2 teaspoons ground cinnamon

1/2 teaspoon baking soda

3/4 teaspoons kosher salt

1 3/4 cups sugar

1 cup apple cider

3/4 cup extra-virgin olive oil

3/4 cup unsweetened applesauce

2 teaspoons vanilla extract

3 large eggs, at room temperature

4 tablespoons unsalted butter, melted


Directions:

Preheat the oven to 350 F degrees. Spray a Bundt pan with baking spray or coat with butter and flour.

In a large bowl whisk together both flours along with the baking powder, 1 teaspoon of the cinnamon, baking soda and salt.

In another bowl whisk together 1 1/2 cups of the sugar, apple cider, olive oil, applesauce, vanilla and eggs. Once well blended add to the flour mixture and whisk both mixtures together until well combined. Transfer the batter to the prepared pan.

Bake in the preheated oven for 45 to 50 minutes, or until a cake tester inserted in the middle comes out clean. Transfer the pan to a wire rack set over a large bowl or rimmed baking sheet to cool for 15 minutes. While the cake is cooling mix together the remaining sugar and cinnamon and melt the butter.

Invert the cake onto the wire rack. Brush sections of the cake with melted butter and the sprinkle with the cinnamon sugar mixture. Continue doing this until the entire cake is coated with the butter and cinnamon sugar. Let the cake cool completely before serving.

Recipe from Martha Stewart

Individual Mini Apple Crisps

While pumpkin recipes have been the focus of most of my recent blog posts, there is another fruit that deserves some love this time of the year… Apples. I went apple picking in early October and while I didn’t get to pick my favorite apple, Honeycrisp, I did end up with a good amount of delicious apples that I have been enjoying. As my bag of apples begins to dwindle down some of them aren’t as crisp for eating so I have finally started baking with them. So this week I will be bringing you three recipes apples related. Today’s Individual Mini Apple Crisps, an Apple Cider Doughnut Cake (which didn’t require apples, but, fresh apple cider which I picked up while apple picking) and finally an Apple Crumb Pie. This pie is perfect if you love apple pie but are a little intimidated with making and/or decorating pie crusts.

While these apple crisps are perfect to serve as a dessert if you are having people over for dinner or part of your Thanksgiving desserts (the recipe can easily be doubled or halved as I did) they are a great make ahead dessert as well. I prepped them, covered them with aluminum foil and then refrigerated them until I was ready to bake it. I didn’t change much from the recipe, well, I did make my own apple pie spice since I had the spices on hand and it was cheaper than buying it.

I began by combining the ingredients for the crust and topping (the crisp part) in one bowl. And in another bowl I combined the ingredients for the apple filling. I began assembling the crisps by pressing two tablespoons of crisp mixture into the bottom of ramekins I sprayed with cooking spray. I then evenly divided the apple filling into each of the ramekins. And finally, I sprinkled the remaining crisp mixture over the apple filling. At this point you could bake the crisps in the oven on a baking sheet or, do what I did.

I covered each of the ramekins with aluminum foil and placed them in the refrigerator until I was ready to enjoy them.

When I was, I placed the ramekin on a baking sheet and baked it in a 350 F preheated oven for 30 minutes. As a note, I prepped these on a Sunday and enjoyed my last one on a Wednesday so these will definitely keep in the refrigerator for a few days.

I then topped it with a few scoops of ice cream before digging in. If you omit the ice cream, these are pretty healthy. The crisp is made with old-fashioned oats, raw almonds and honey. While the apple filling just requires a few tablespoons of sugar. This is definitely something I will be making again. Probably next time though I won’t halve the recipe. Since I know for sure that the crisps will keep in the refrigerator for a few days I wouldn’t mind having a few more on hand for a dessert fix.

Mini Apple Crisps

Ingredients:

Crust & Topping:

1/4 cup unsalted butter, at room temperature

3 tablespoons honey

1/2 teaspoon vanilla extract

1/2 teaspoons apple pie spice*

1 cup crush raw almonds**

1 cup old-fashioned oats

Apple Filling:

3 unpeeled medium apples, chopping into 1/2 inch pieces

3 tablespoons sugar

1 tablespoon fresh lemon juice

1 tablespoons apple pie spice

Vanilla ice cream, optional


Directions:

Preheat the oven to 350 F. Spray 6 ramekins with cooking spray.

In a large bowl mix together the butter, honey, vanilla extract and apple pie spice. Add in the almonds and oats and toss together until well coated. Press two tablespoons onto the bottoms of each of the prepared ramekins.

In a medium bowl combine the apples, sugar, lemon juice and apple pie spice. Toss the ingredients together well and then divide it evenly among the ramekins. Sprinkle the top of the filling with the remaining oats and almond mixture.

Place the ramekins on a baking sheet and bake in the oven for 30 minutes, or until the apples are soft and topping is golden brown. ***

Serve warm, topped with ice cream.

*To make your own Apple Pie Spice combine 1 1/2 tablespoons cinnamon, 1 1/2 teaspoons of nutmeg and 1 teaspoon allspice.

**I used raw sliced almonds. I put them in a resealable bag and then rolled them with a roll pin to crush them.

***Alternatively you can cover each of the ramekins with aluminum foil and place in the refrigerator to heat at a later time.

Recipe from Taste of Home

Quick & Easy Apple Tarts

Do you sometimes want an apple pie, but, you don’t really want to go through all the trouble to make one? Even if you are using a store-bought crust – I have no qualms in saying that’s usually my go-to way of “making” pie crust – it can still be a bit time and labor consuming. So, if you are ever feeling like that or you are feeling like that right now I have the remedy for you. A pair of Apple Tarts that take just about an hour to make – that includes prep and bake time – and only requires six ingredients!

To begin thaw out a puff pastry sheet for about 20-30 minutes. You don’t want it to become warm and mushy, but, you also don’t want it to be partially frozen. Once you are able to unfold it, it’s ready to be used. Slice it in half – a pizza cutter works best – and place both pieces on a baking sheet that has been sprayed with nonstick spray.

IMG_9390

While the puff pastry is defrosting make your apple filling. Core three apples…

IMG_9386

Then thinly slice them. It’s important to slice the apples as thin as possible this way they will cook (i.e. soften) during the short baking time.

IMG_9388

Next add in lemon juice, brown sugar, salt and cinnamon. Let the apples sit until the puff pastry is ready to be filled.

IMG_9389

Once the puff pastry is ready and you have sliced it in half arrange the apples in a single line.

IMG_9392 IMG_9391

Bake in a 415 F preheated oven for 15 to 18 minutes, until the pastry has puffed and is lightly golden.

IMG_9393

Remove the tarts from the pan and transfer them to a cutting board to cool.

IMG_9401

Or, immediately cut off a piece and enjoy with a scoop of vanilla ice cream. There’s nothing like a warm apple treat with a scoop of ice cream on top of it.

IMG_9454

Overall these were incredibly easy to make and wonderfully delicious, but, there’s one thing I think I would change when I make these again… I’ll peel the apples this way it’ll be easier to take a bit out of them. The peel holds you back a little from taking clean bites… At least it does for me.

Baked Apple Tarts

Ingredients:

1 puff pastry sheet, thawed and cut in half

3 apples, cored and thinly sliced

2 tablespoons of lemon juice (approximately juice from half a lemon)

1 cup light brown sugar

1/4 teaspoon salt

1/4 teaspoon cinnamon

Directions:

Preheat the oven to 415 F.

While the puff pastry is thawing prepare the apple filling by coring and slicing the apples then tossing them with the lemon juice, sugar, salt and cinnamon.

Once the puff pastry has thawed slice it half and place it on a baking sheet that has been sprayed with nonstick spray.

Arrange the apples on the puff pastry in a thin overlapping line.

Bake in the preheated oven for 15 to 18 minutes, until the pastry is lightly golden and puffed. Transfer the tarts to a cutting board or serving platter immediately.

Recipe slightly modified from The Pioneer Woman

%d bloggers like this: