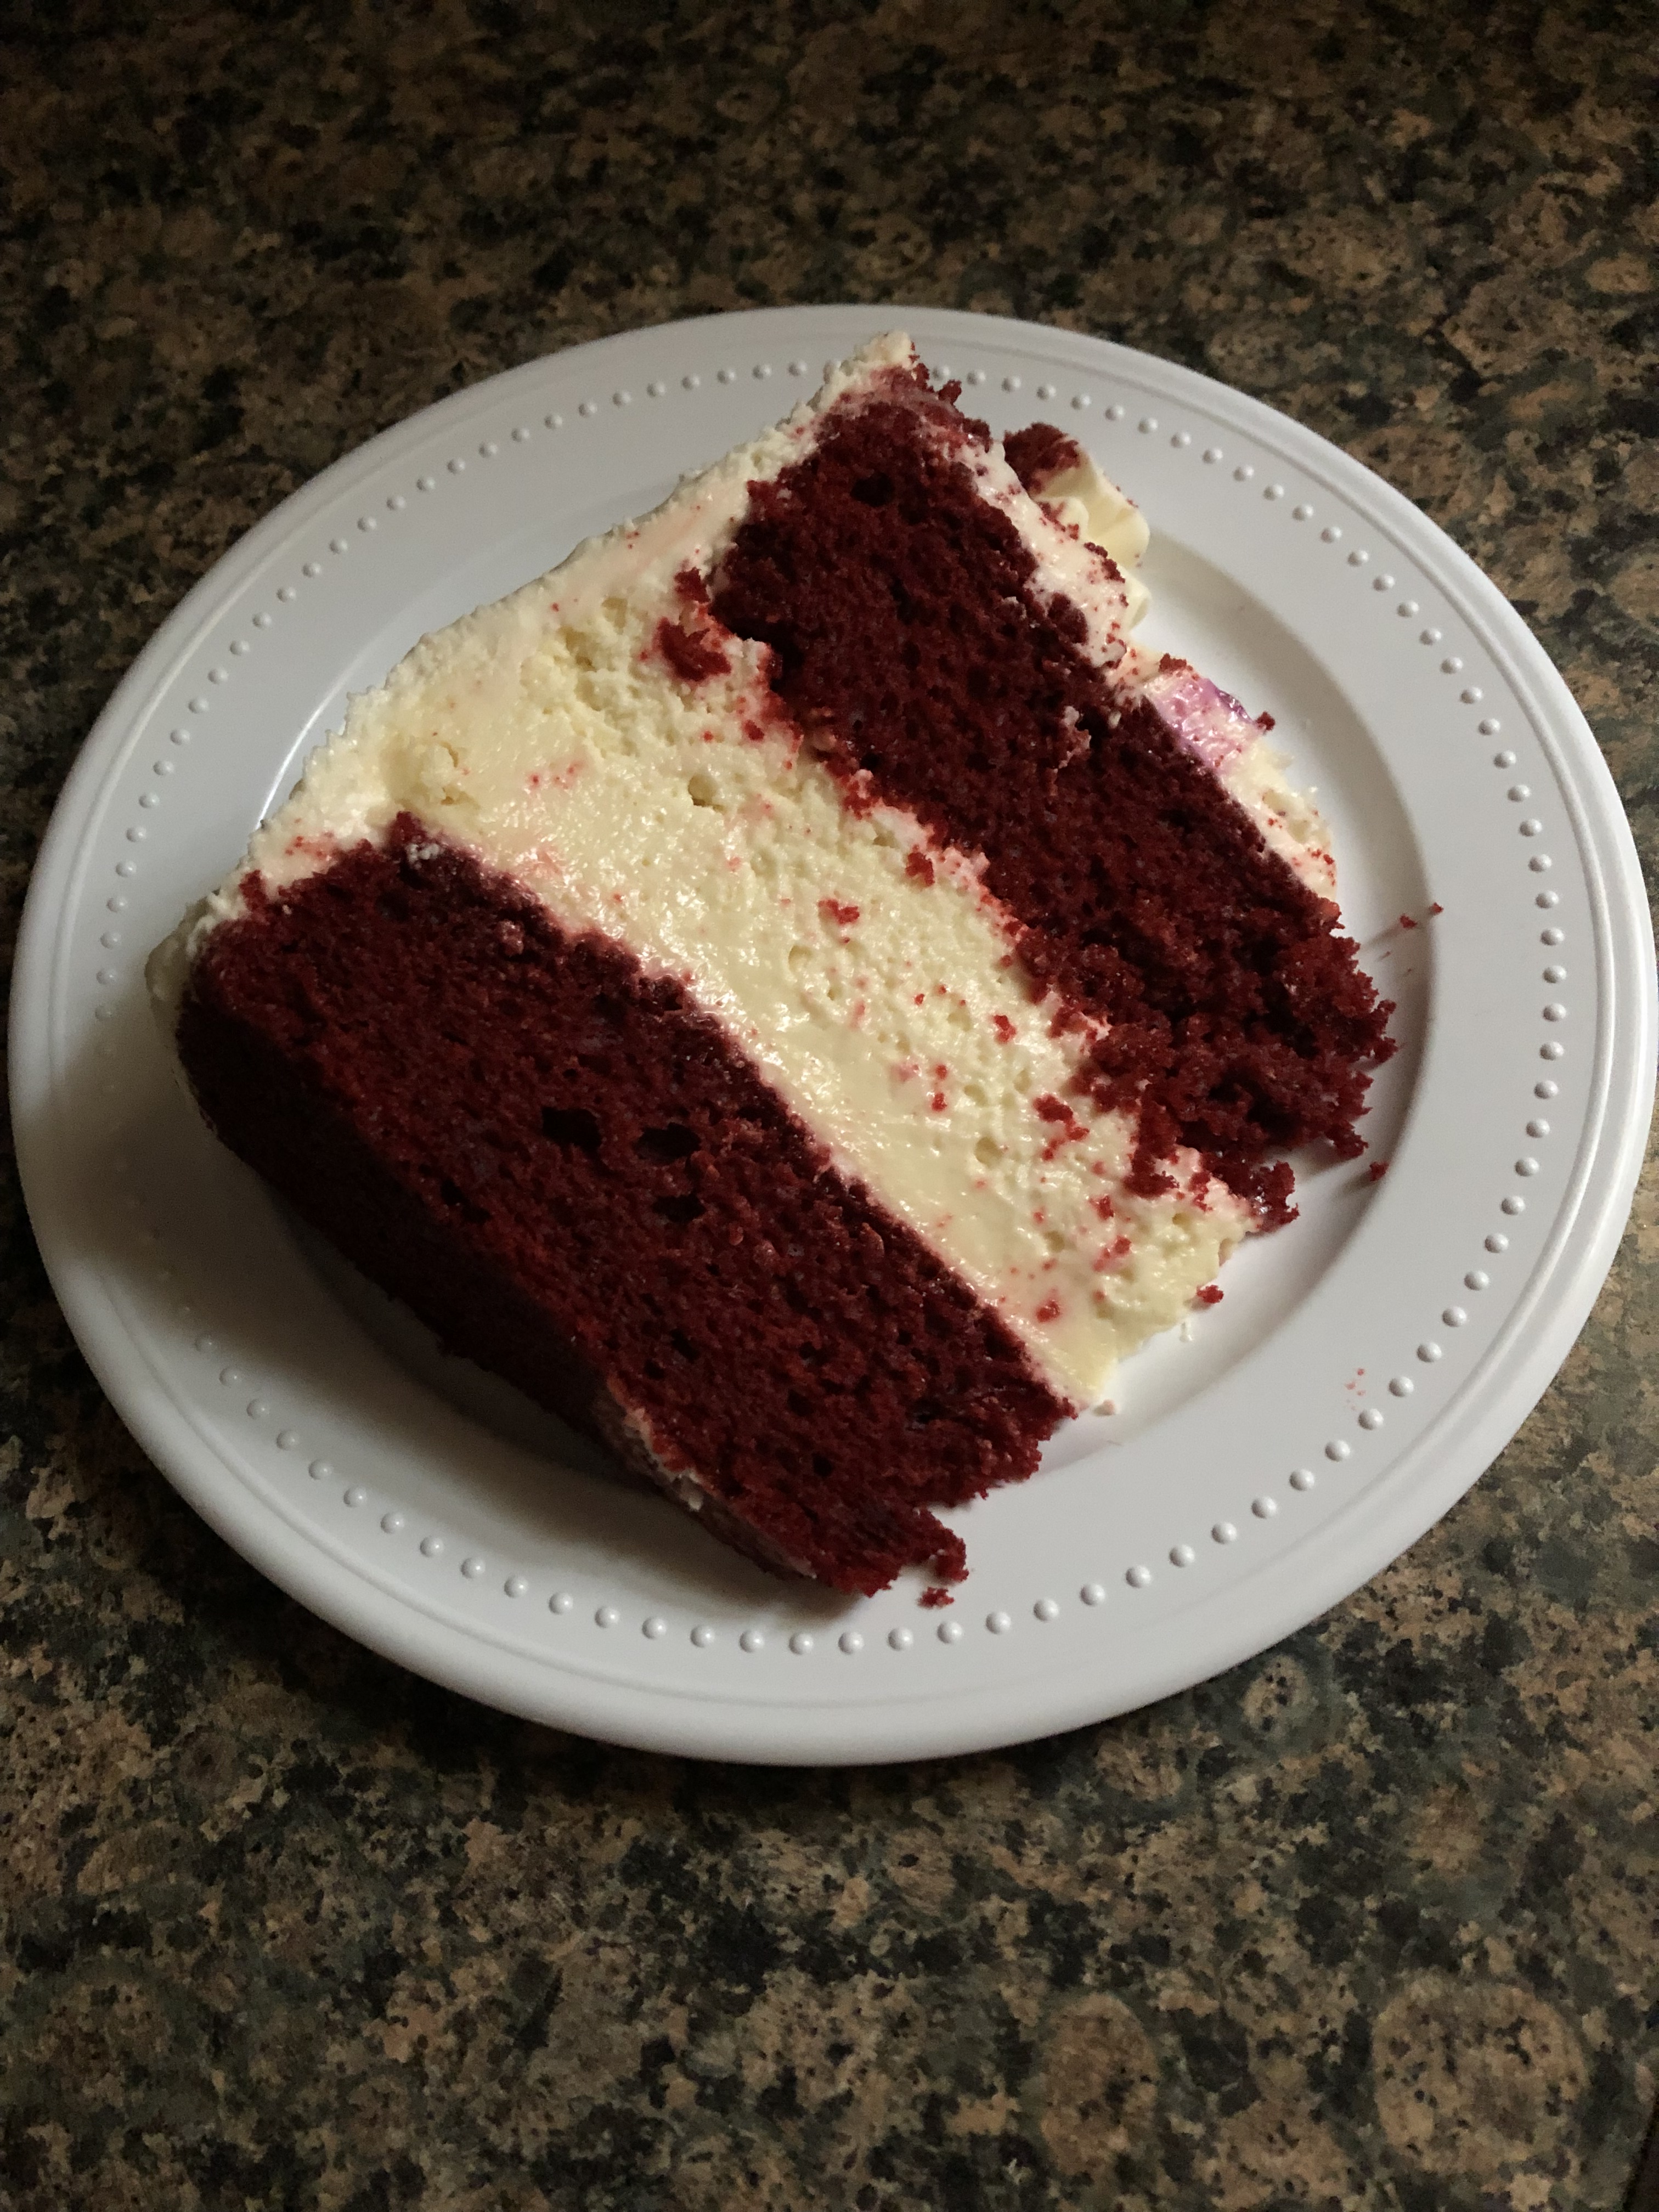
Happy Holidays! A time of get-togethers, good food and even better desserts! If you are looking for a delicious cake to make for any of your get-togethers that has a festive touch to it this Red Velvet Cheesecake Cake just might be the one. A delicious creamy cheesecake is sandwiched between two red velvet cake layers and then frosted with a tangy and slightly sweet cream cheese frosting!
To ensure that your cake layers and cheesecake are the same size, use the same pans to bake them. While two pans may be the same size, one may have straighter edges than the other. I baked my cake layers and cheesecake in 8-inch round cake pans. You could also use 9-inch ones but keep in mind that your cake layers and cheesecake won’t be as high.
And while I did have to smooth the sides of the cheesecake a bit to get it flushed with the cake layers once the cake was assembled, I am sure it would have been a lot worse if I hadn’t used the same pans for all the layers.
And after a crumb coat…
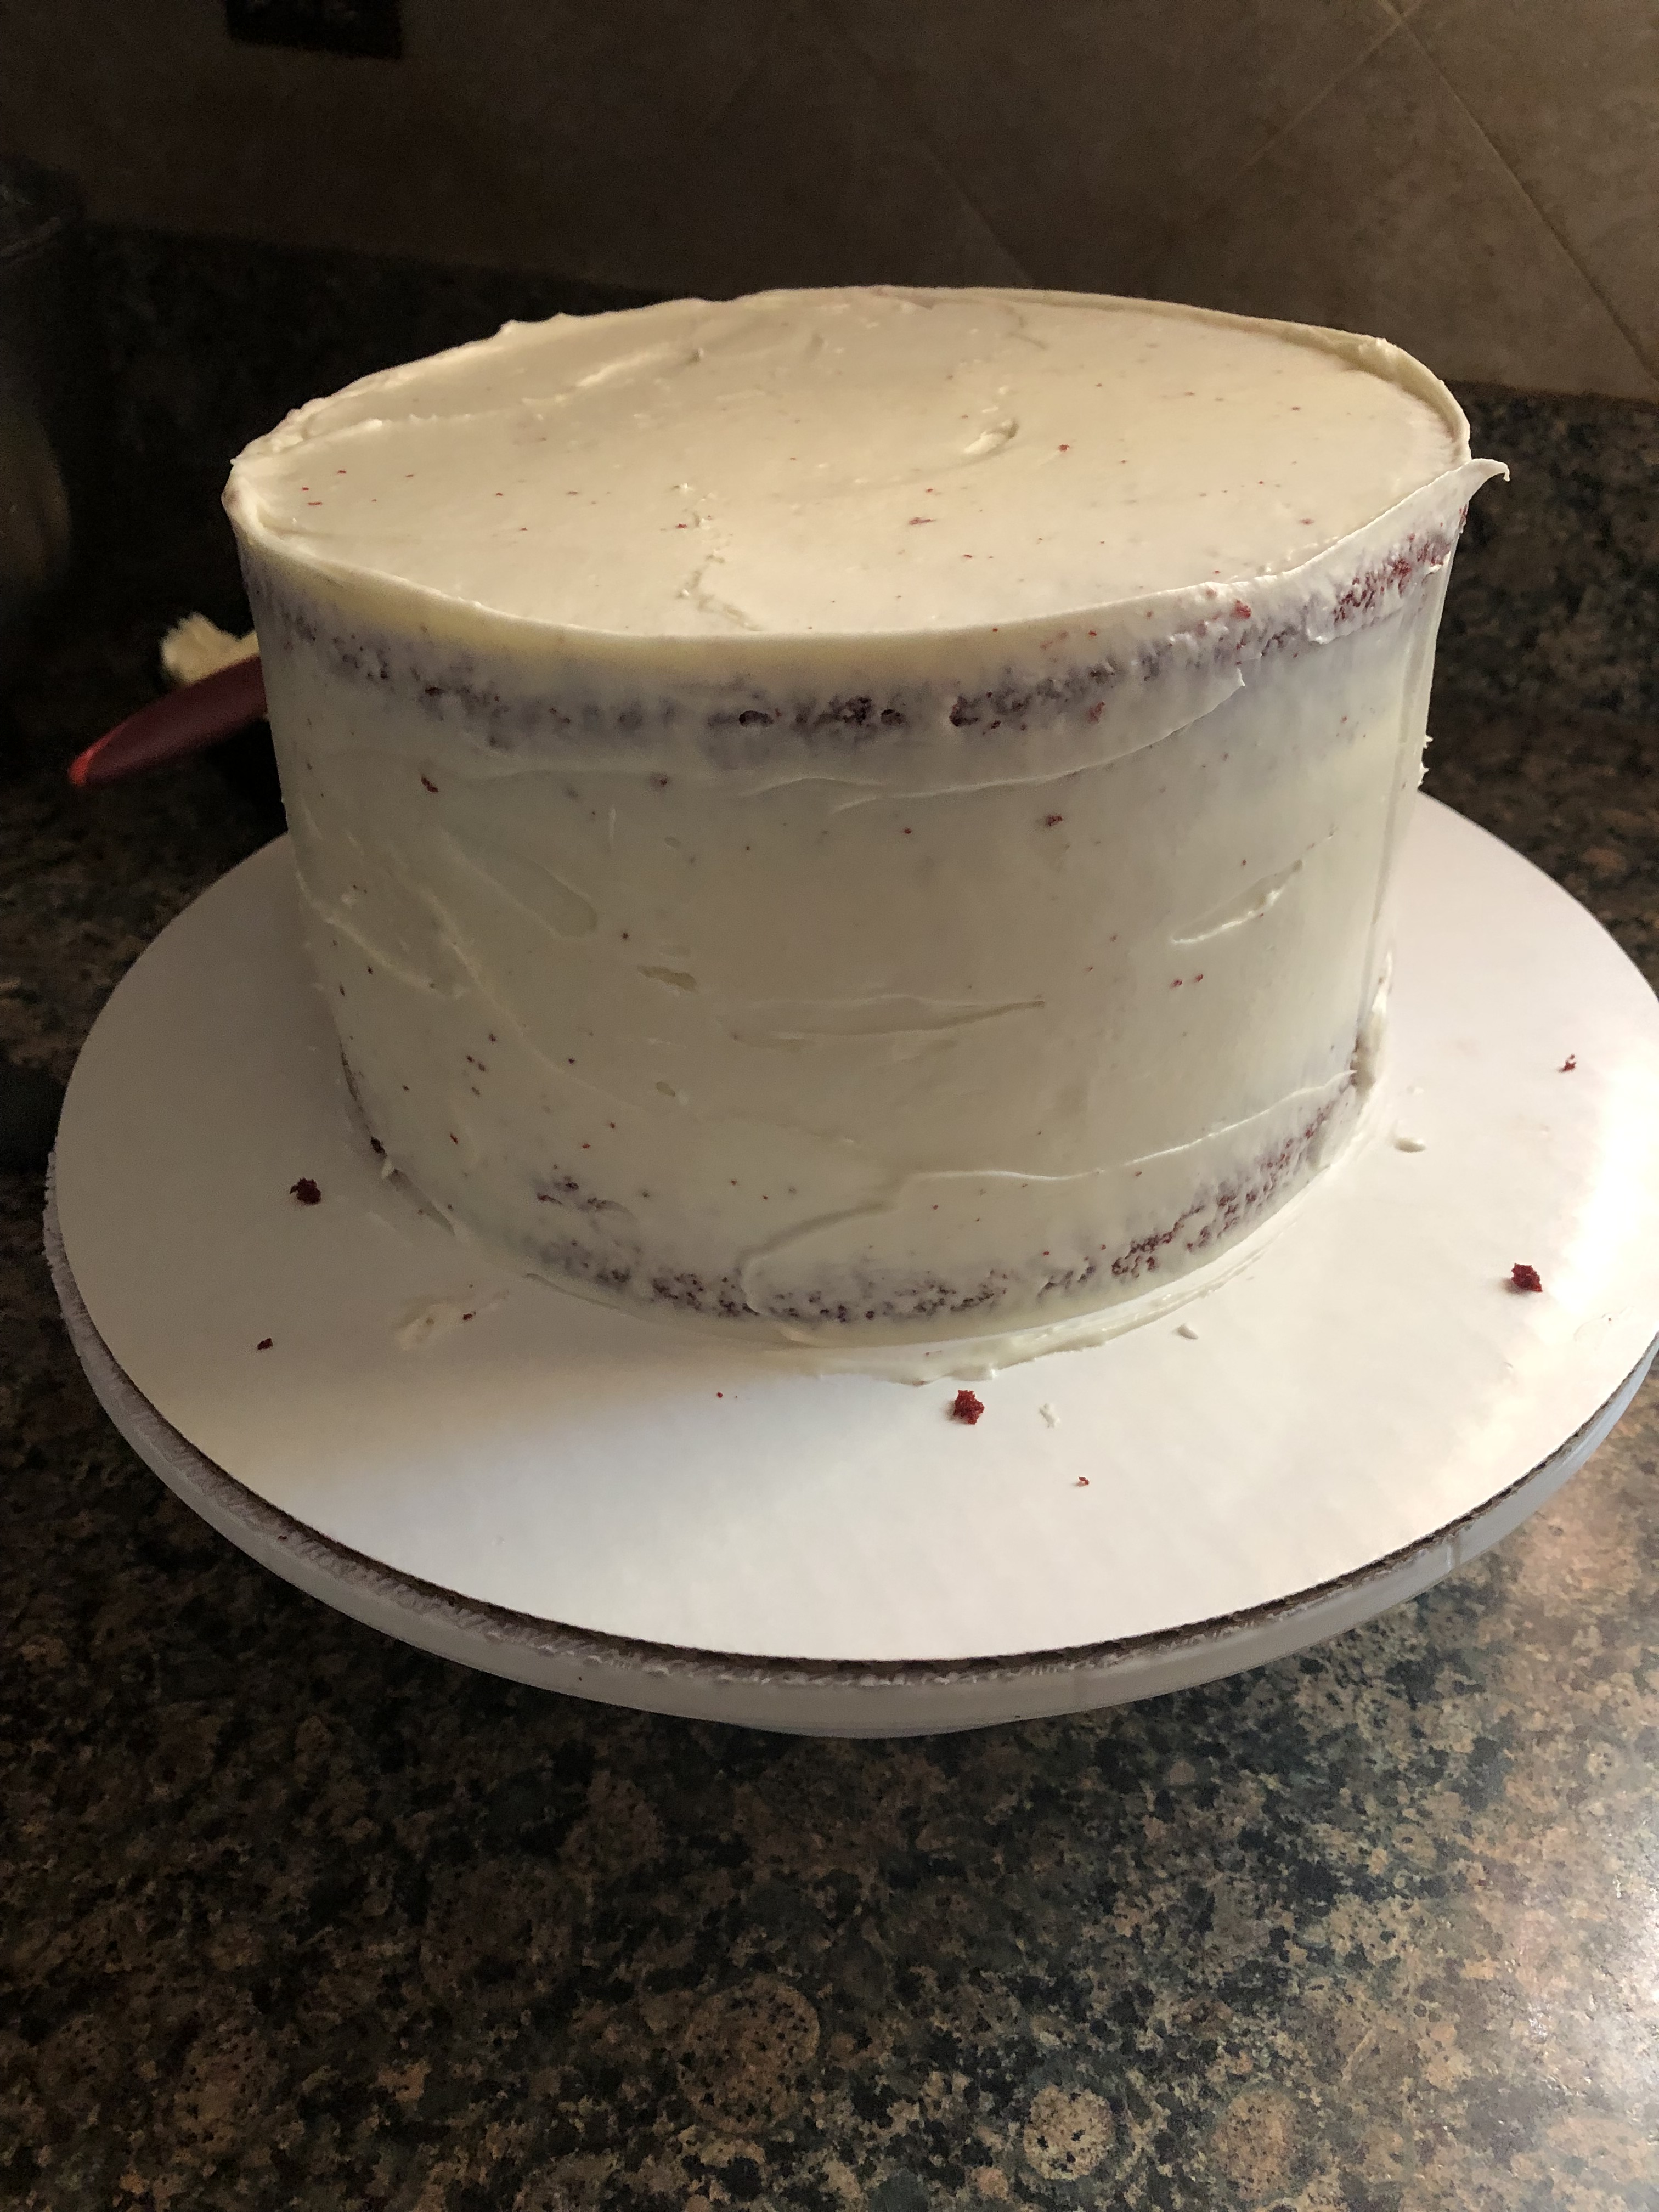
I finished frosting and decorating the cake.
This cake will take you 2-3 days to bake and assemble depending on when you bake and/or refrigerate your layers. I opted to bake my cake layers on day 1, wrapped them in plastic wrap once they cooled and then refrigerated them. The following day I made my cheesecake layer and refrigerated that overnight. And finally, on the third day I made the cream cheese frosting and assembled the cake. You could also opt to bake everything on the same day and then refrigerate overnight, or the cheesecake one day and then the cake layers the following day and then assemble the cake once the cake layers have cooled. Whatever you decide, keep in mind that the cheesecake layer will need to be refrigerated at least 6 hours before assembling. Regardless of the baking schedule you choose you will end up with a delicious cake that will be perfect for your holidays, any other festive occasion or just because!
Red Velvet Cheesecake Cake
Ingredients:
Cheesecake:
3 8oz blocks cream cheese, at room temperature
1 cup sugar
3 tablespoons flour
1 cup sour cream
1 tablespoon vanilla extract
4 large eggs, at room temperature
Red Velvet Cake:
1 15.25 of package of Red Velvet Cake Mix (I used Duncan Hines)
3 large eggs
1 cup buttermilk*
1/3 cup vegetable oil
Cream Cheese Frosting:
2 8oz block cream cheese, at room temperature
2 sticks (1 cup) unsalted butter, at room temperature
4 cups Confectioners’ sugar, sifted
2 teaspoons vanilla extract
*Make your own buttermilk by adding 5 teaspoons of vinegar to a measuring cup and then adding enough whole milk to make 1 cup. Let stand for 15 minutes at room temperature, or until the milk becomes thick and appears curdled.
Directions:
For the Cheesecake:
Preheat the oven to 300 F. Line an 8-inch round cake pan with aluminum foil, leaving an overhang, and set aside.
In a large bowl beat the cream cheese, sugar and flour with hand mixer on low speed until just combined. Add the sour cream and vanilla extract and continue beating on low until incorporated. Add the eggs 1 at a time and continue beating until everything is combined.
Pour the cheesecake batter into the prepared pan. Place the pan inside of a larger pan (larger cake pan or a roasting pan) and fill with water halfway up the sides of the pan. Bake in the preheated oven for 1 hour. Turn the oven off and leave the cheesecake in the oven for an additional 30 minutes. Afterwards, crack the oven door open and let the cheesecake cool in the oven for an additional 30 minutes. Transfer to a wire rack to cool and then refrigerate overnight.
For the Cake:
Preheat the oven to 350 F. Spray two 8-inch round cake pans with baking spray and set aside.
In a large bowl beat together the buttermilk, eggs and oil with a hand mixer on medium speed until well combined. Using a fine mesh sieve (or a sifter) sift the cake mix over the buttermilk mixture. Beat on medium speed until just combined and then use a rubber spatula to gently stir the batter together a few times. Divide the batter among the prepared pans and bake in the preheated oven for 26-30 minutes, or until a cake tester inserted in the center comes out clean. Let the cakes cool in the pans for 15 minutes and then transfer to a wire rack to cool completely.
If you are baking the cake layers ahead of time wrap them in plastic wrap and refrigerate until ready to use.
For the Cream Cheese Frosting:
Add the cream cheese, butter and Confectioners’ sugar to the bowl of a stand mixer with the paddle attachment and beat on low until combined. Raise the speed to medium high and continue beating the frosting until light and fluffy, about 5 minutes. Add the vanilla extract and continue beating on medium speed until incorporated.
If the frosting is too soft to use refrigerate for 10-15 minutes, or until desired consistency.
To Assemble:
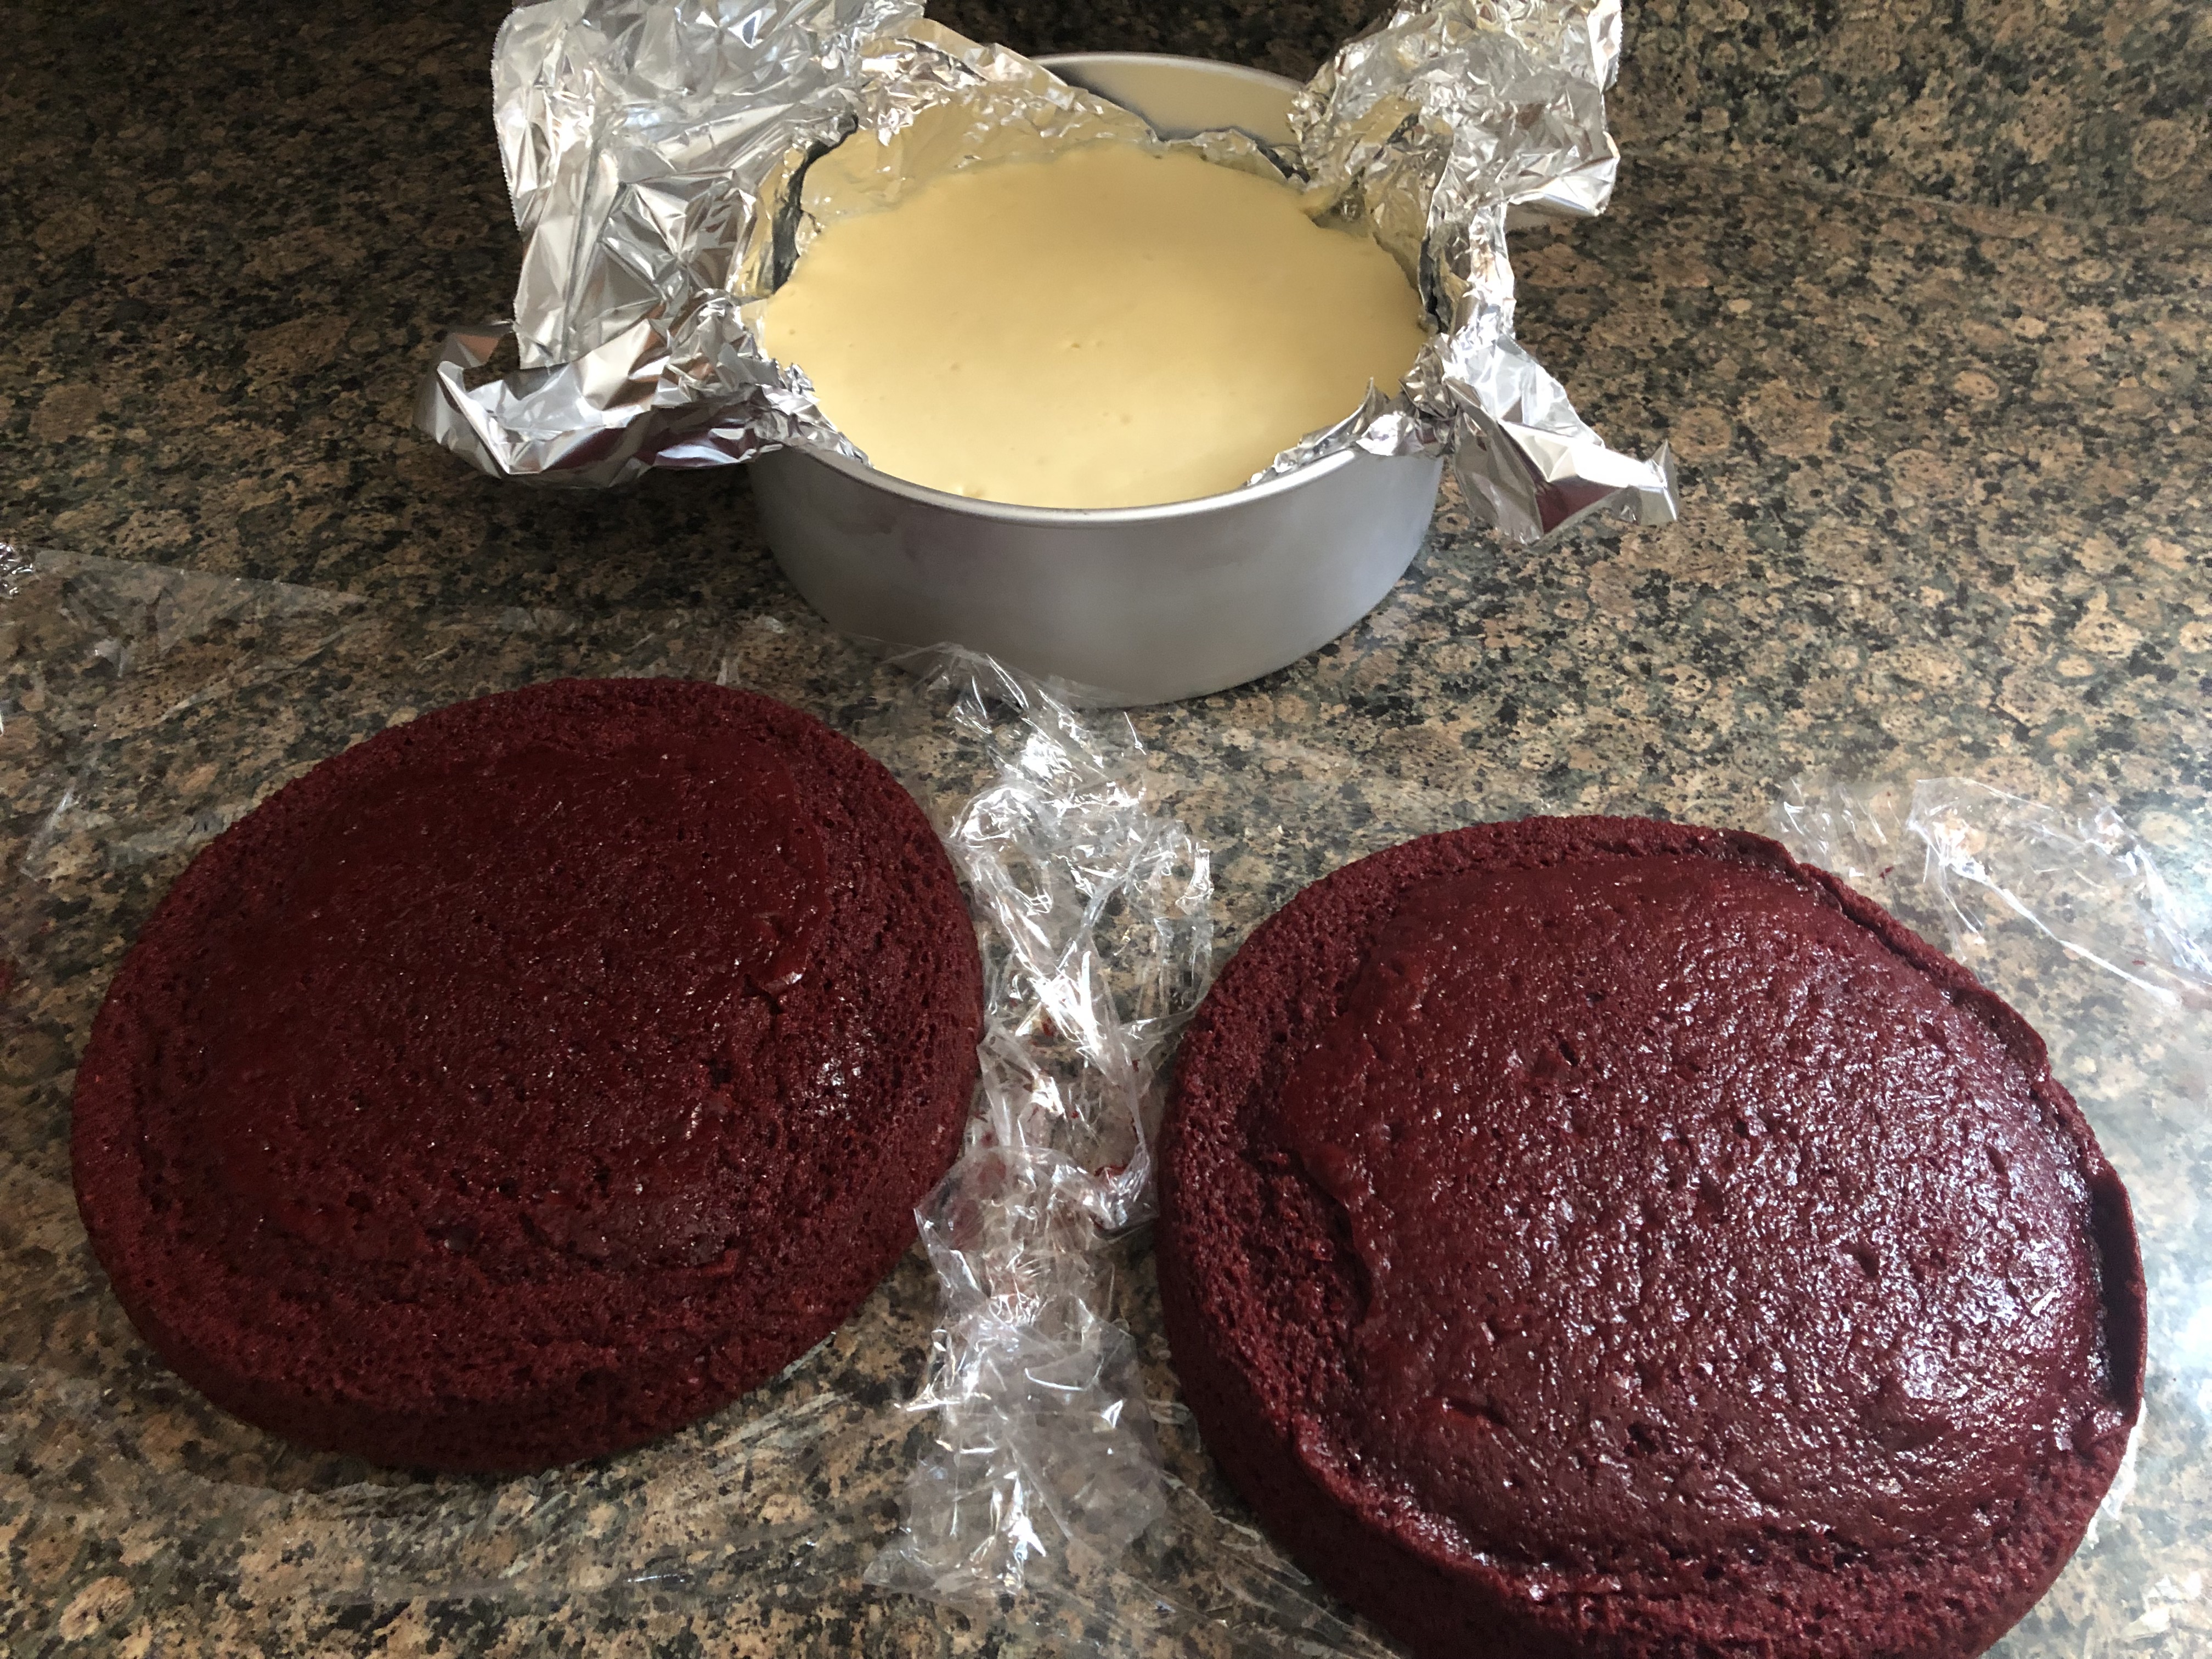
Level the red velvet cake layers and crumble the cut pieces and set aside.
Spread a dollop of the frosting in the center of a cake board and place one of the cake layers on it. Spread a thin layer of the frosting on the cake.
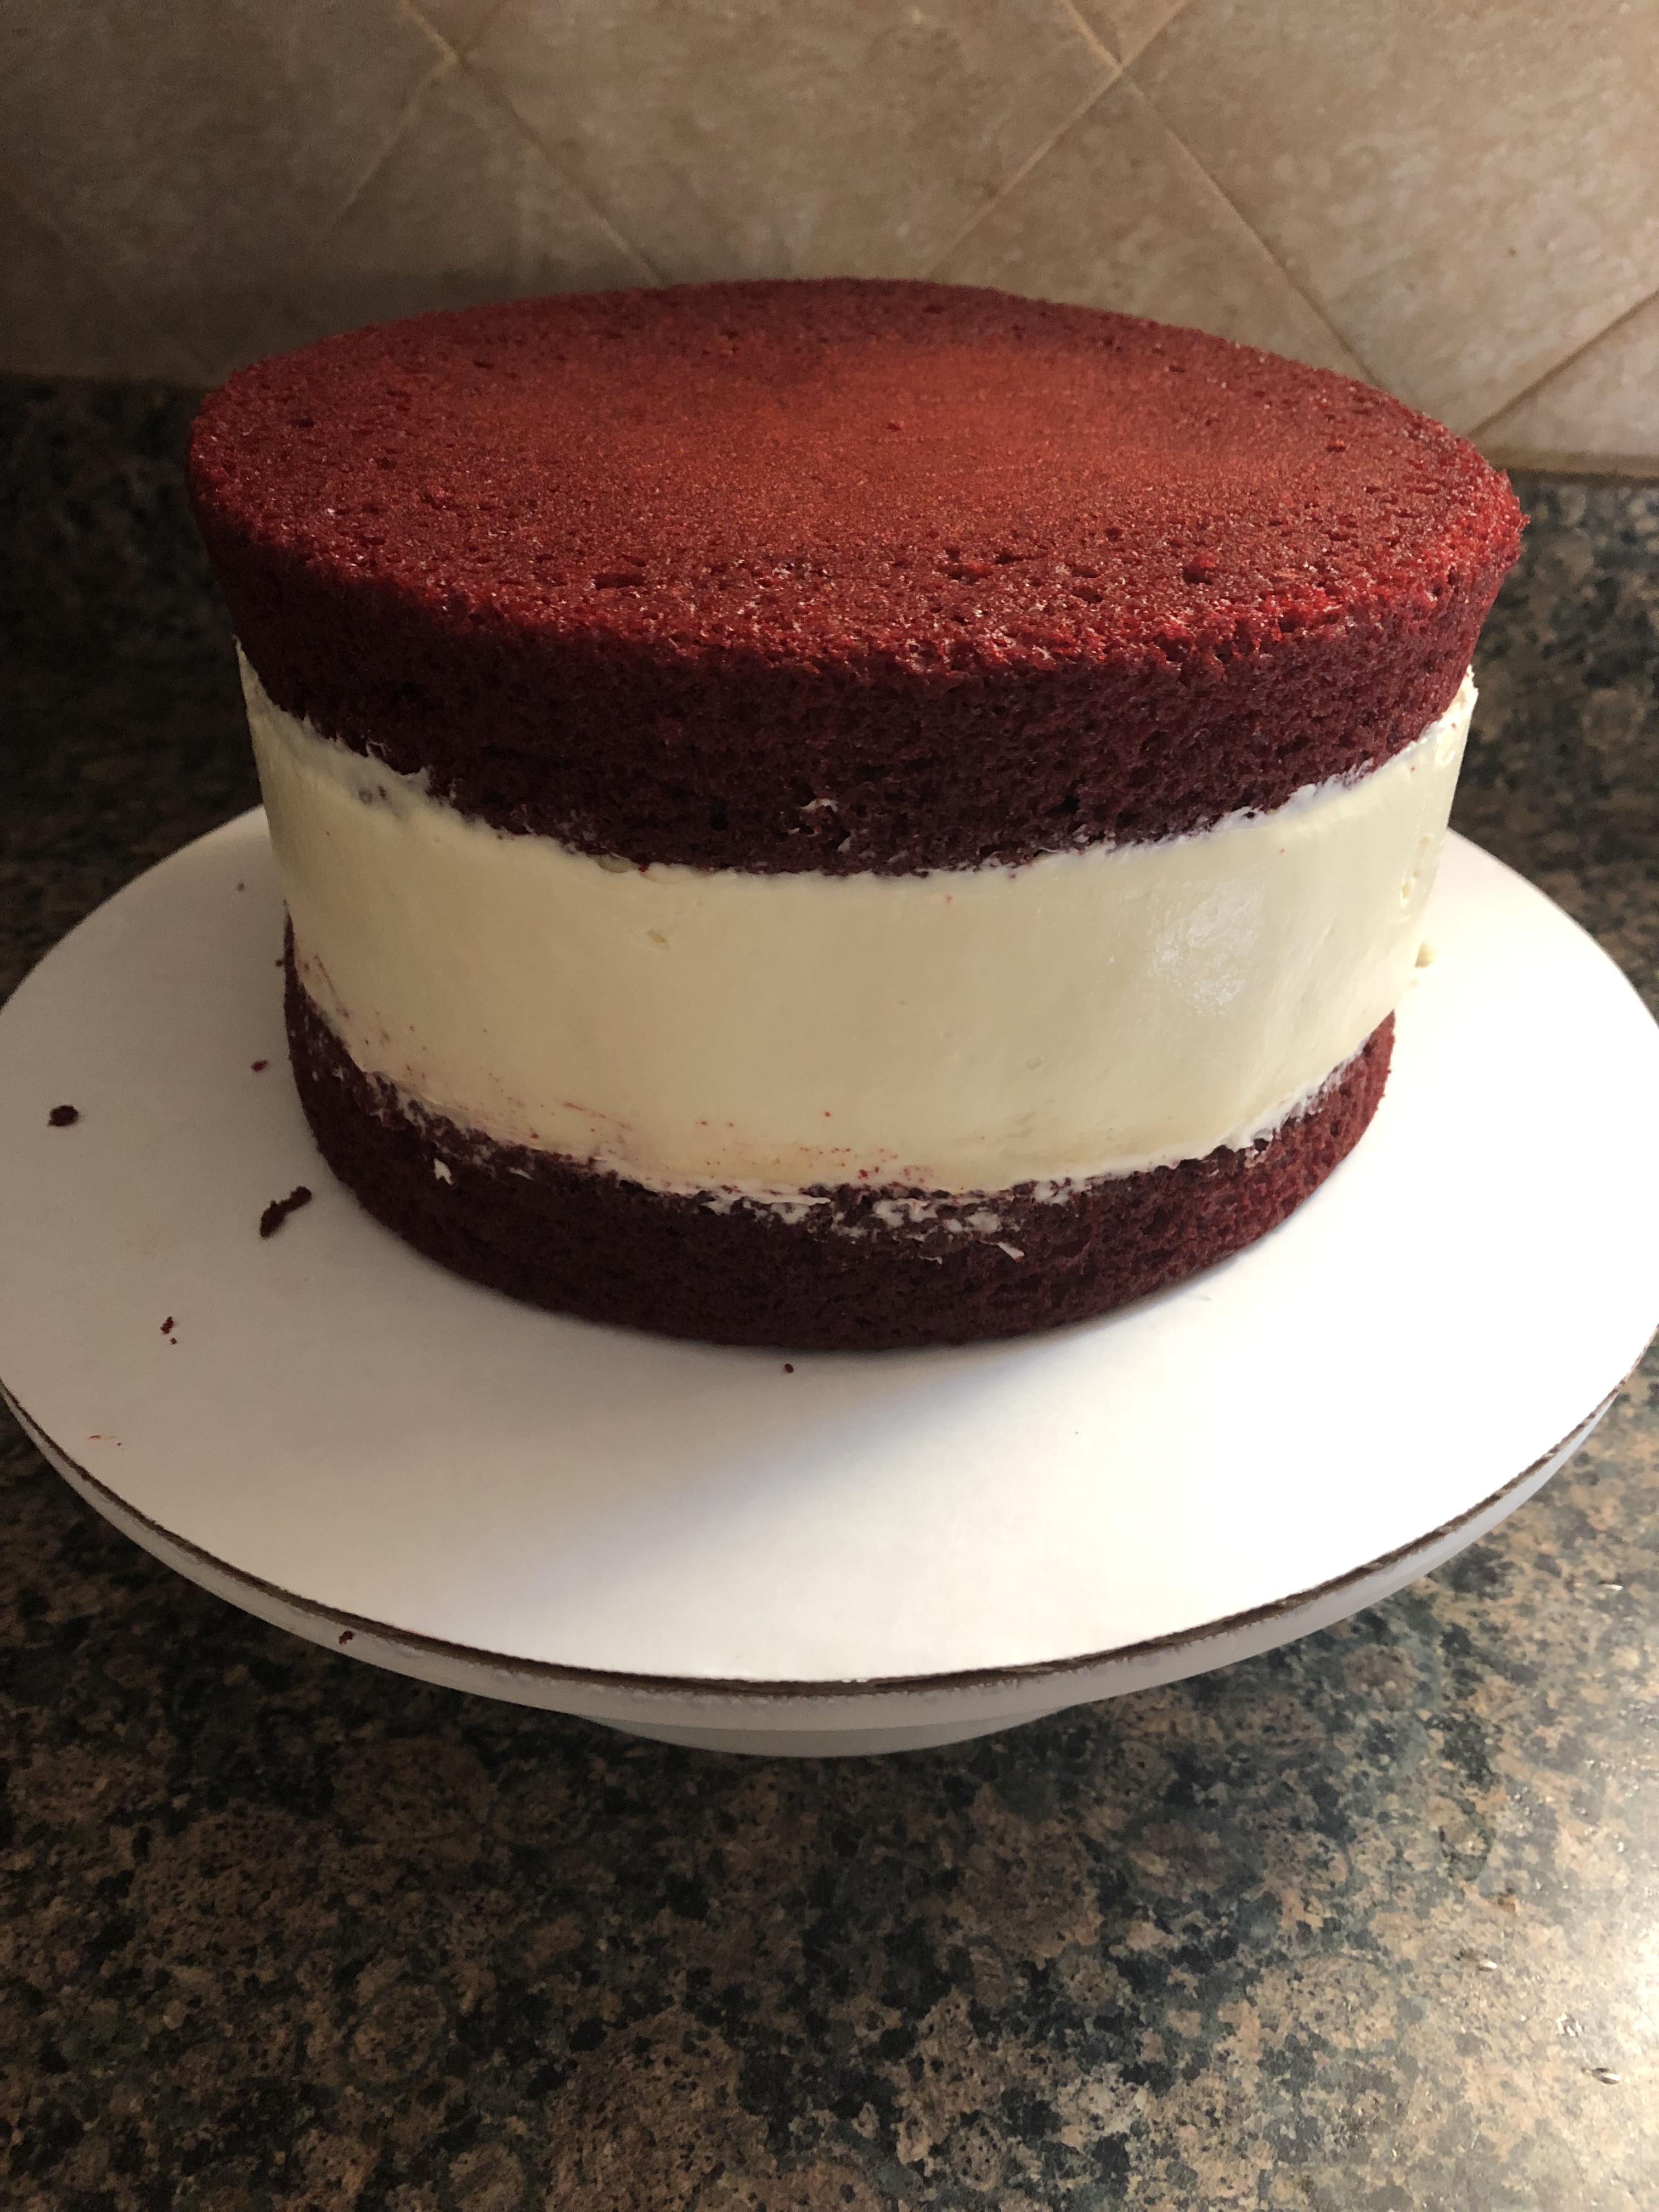
Carefully remove the cheesecake layer from the aluminum foil and place it on top of the cake layer. Gently spread a thin layer of the frosting on the cheesecake and then top with the remaining cake layer, cut side down.
If need be, use a paring knife or long spatula to smooth the sides of the cheesecake to be flush with the red velvet cake layers.
Crumb coat the cake – cover the cake with a thin layer of frosting and refrigerate for 30 minutes. If the remaining frosting begins to get too soft place it in the refrigerator for the last 5-10 minutes.
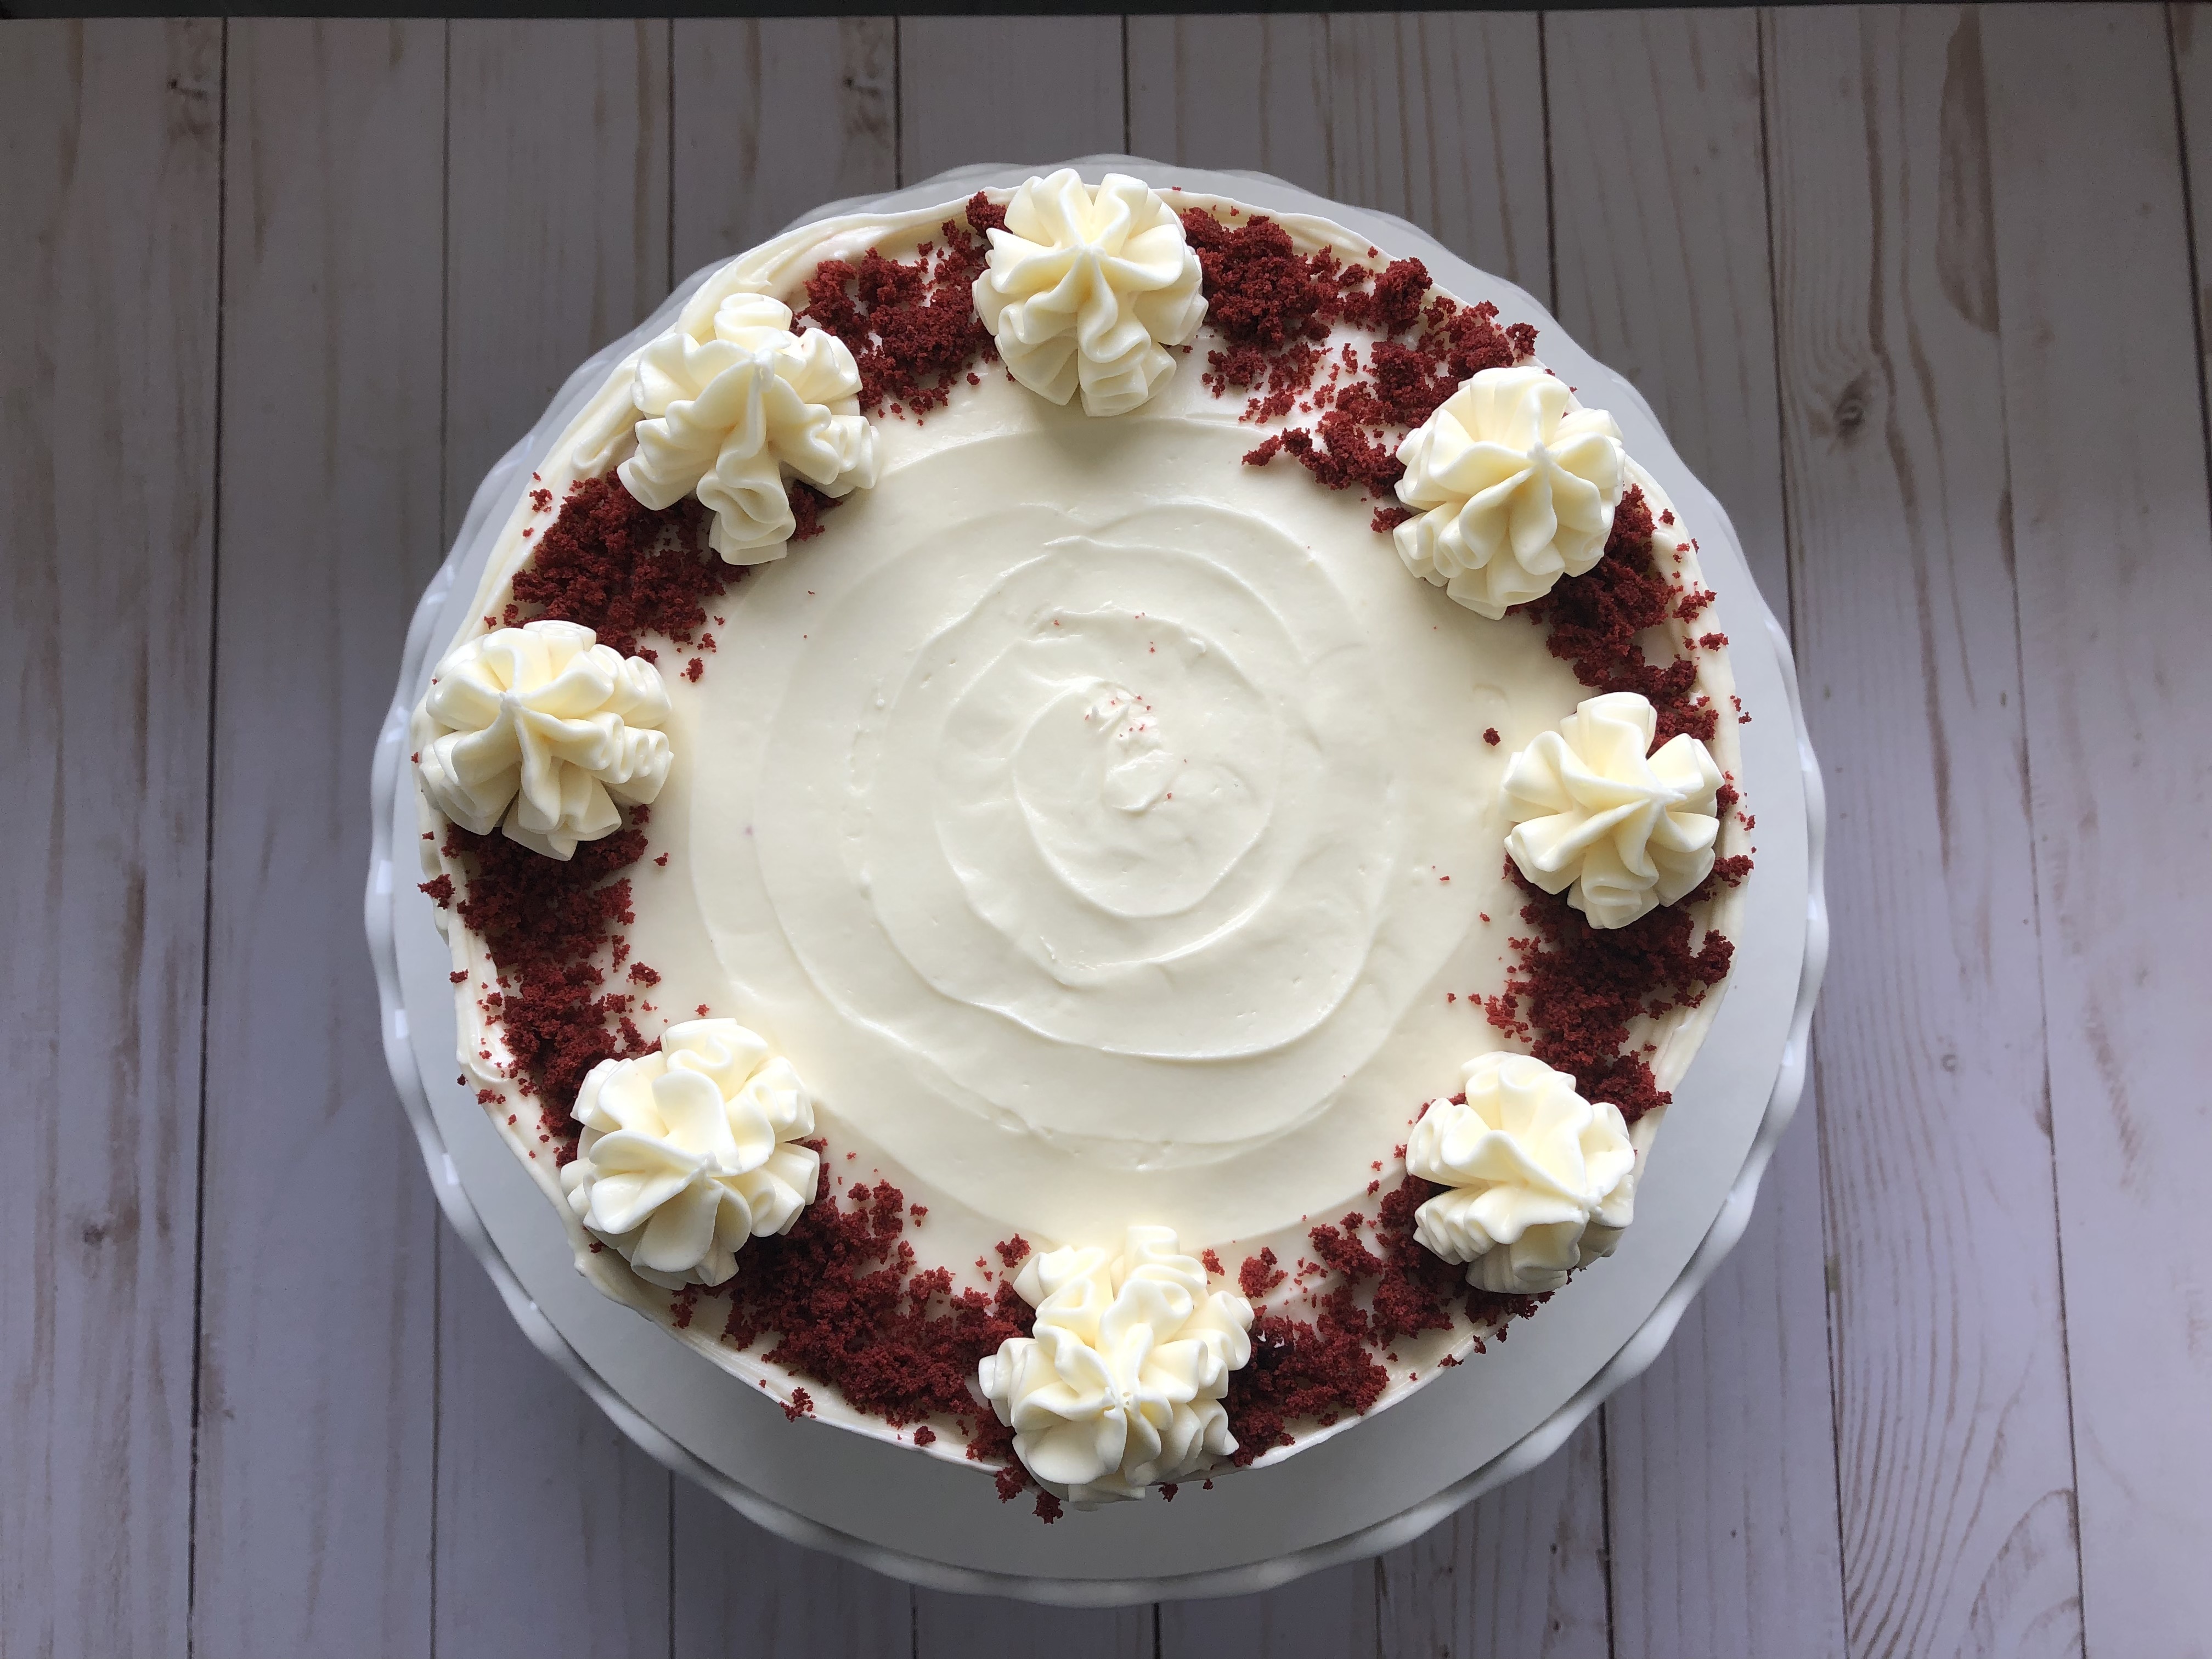
Reserve about a cup of the frosting and then use the remaining frosting to cover the entire cake.
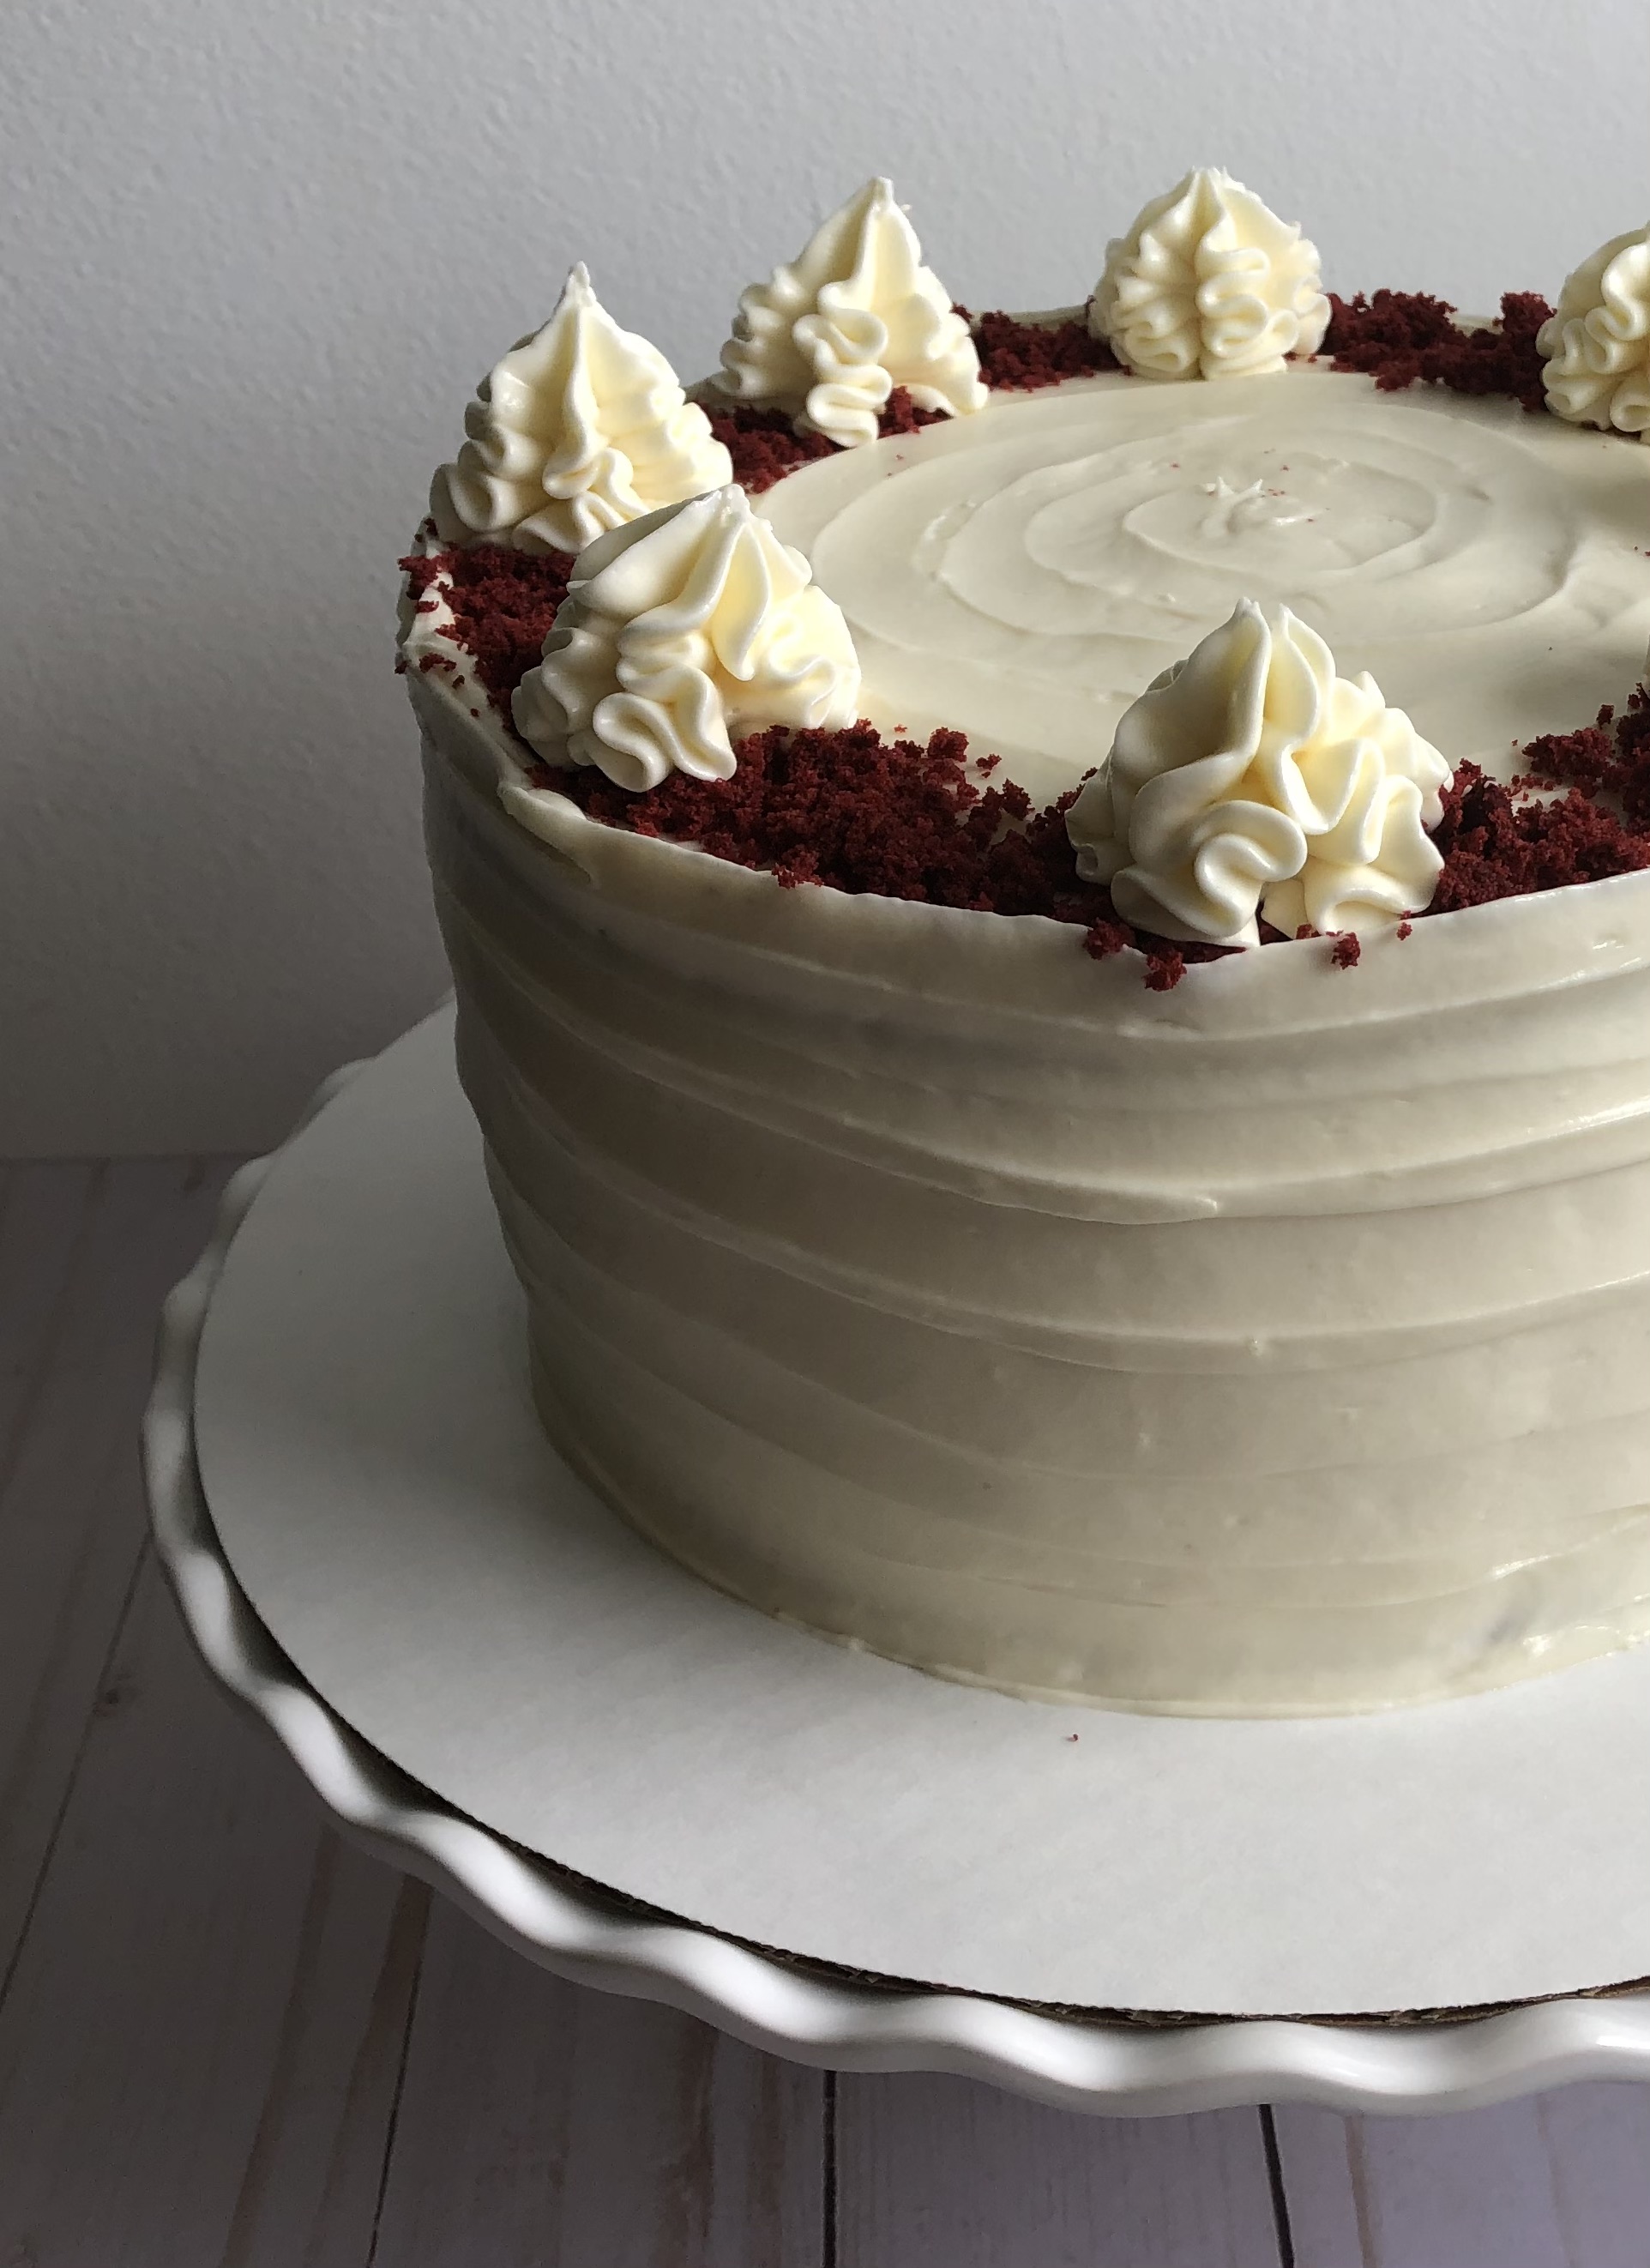
Sprinkle the top of the cake with the crumbled red velvet cake.
Transfer the reserved frosting to a piping bag fitted with a large star tip and pipe dollops on top of the cake.
Refrigerate until ready to serve.
Recipe first appeared on Bead Yarn & Spatula.