Chocolate Dipped Coconut Macaroons

Coconut is one of those things that people either love or hate. For me, I love coconut. Come the summer I can never pass up getting a Coconut Italian Ice and while I enjoy most flavors of Chobani Greek yogurt my favorite by far is the Almond Coco Loco Flip. So, it’s pretty surprising that I have never had a Coconut Macaroon. I’ve always wanted to make them, but, some other treat makes its way into my oven instead. I finally got around to making them and I must say I wish I had made them sooner!

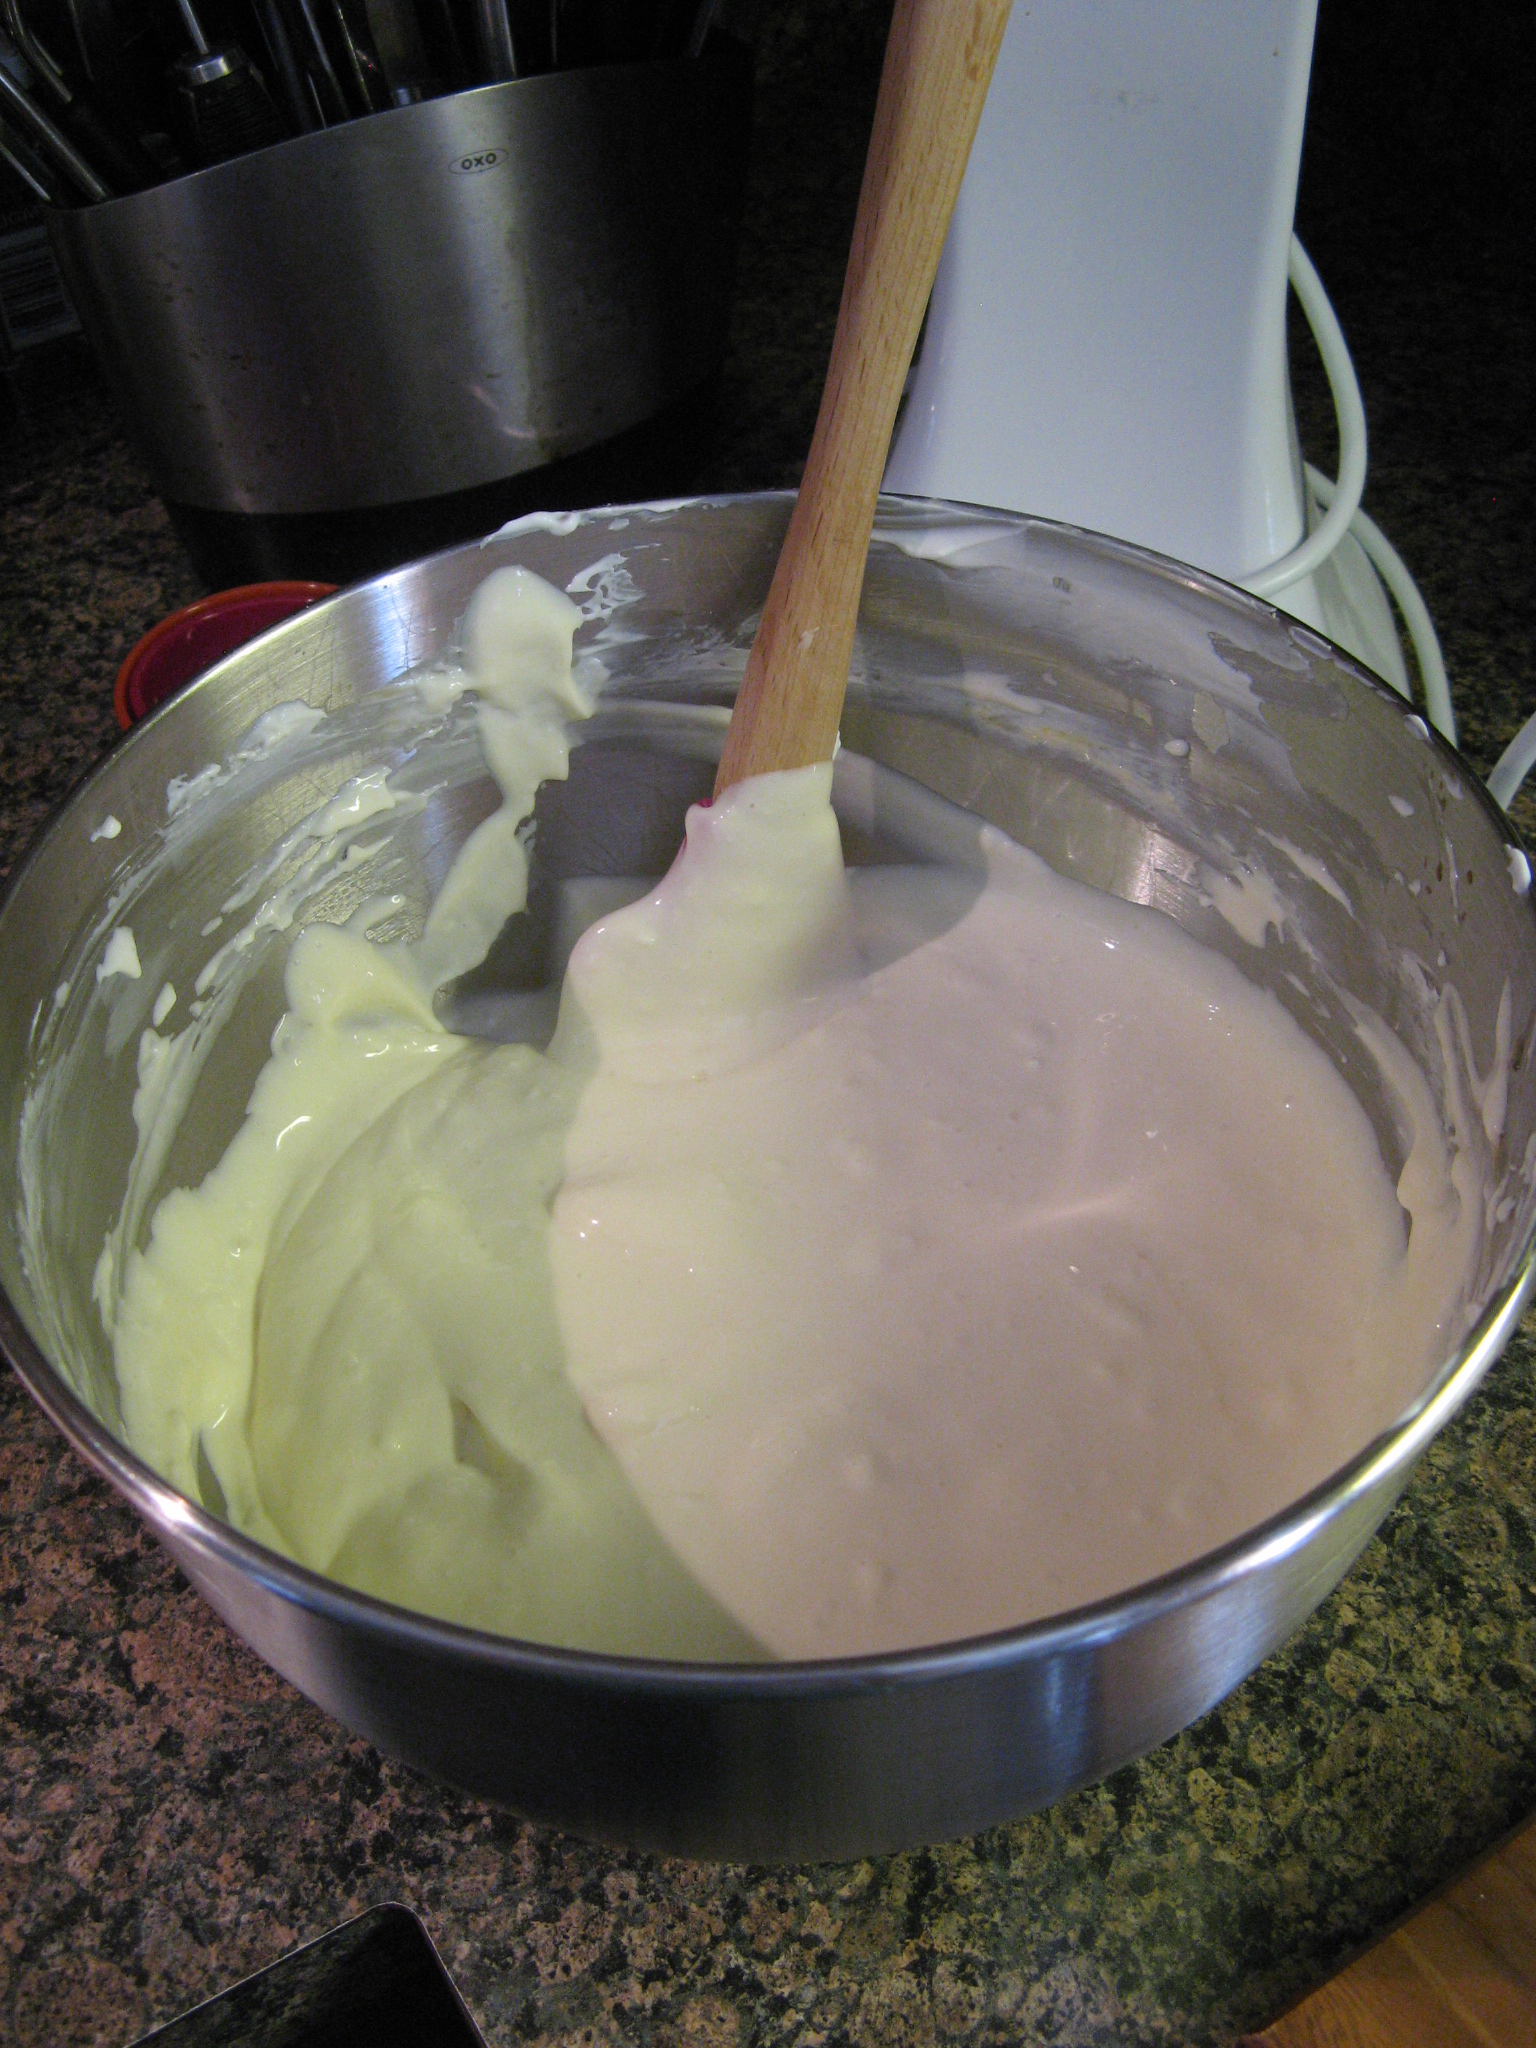
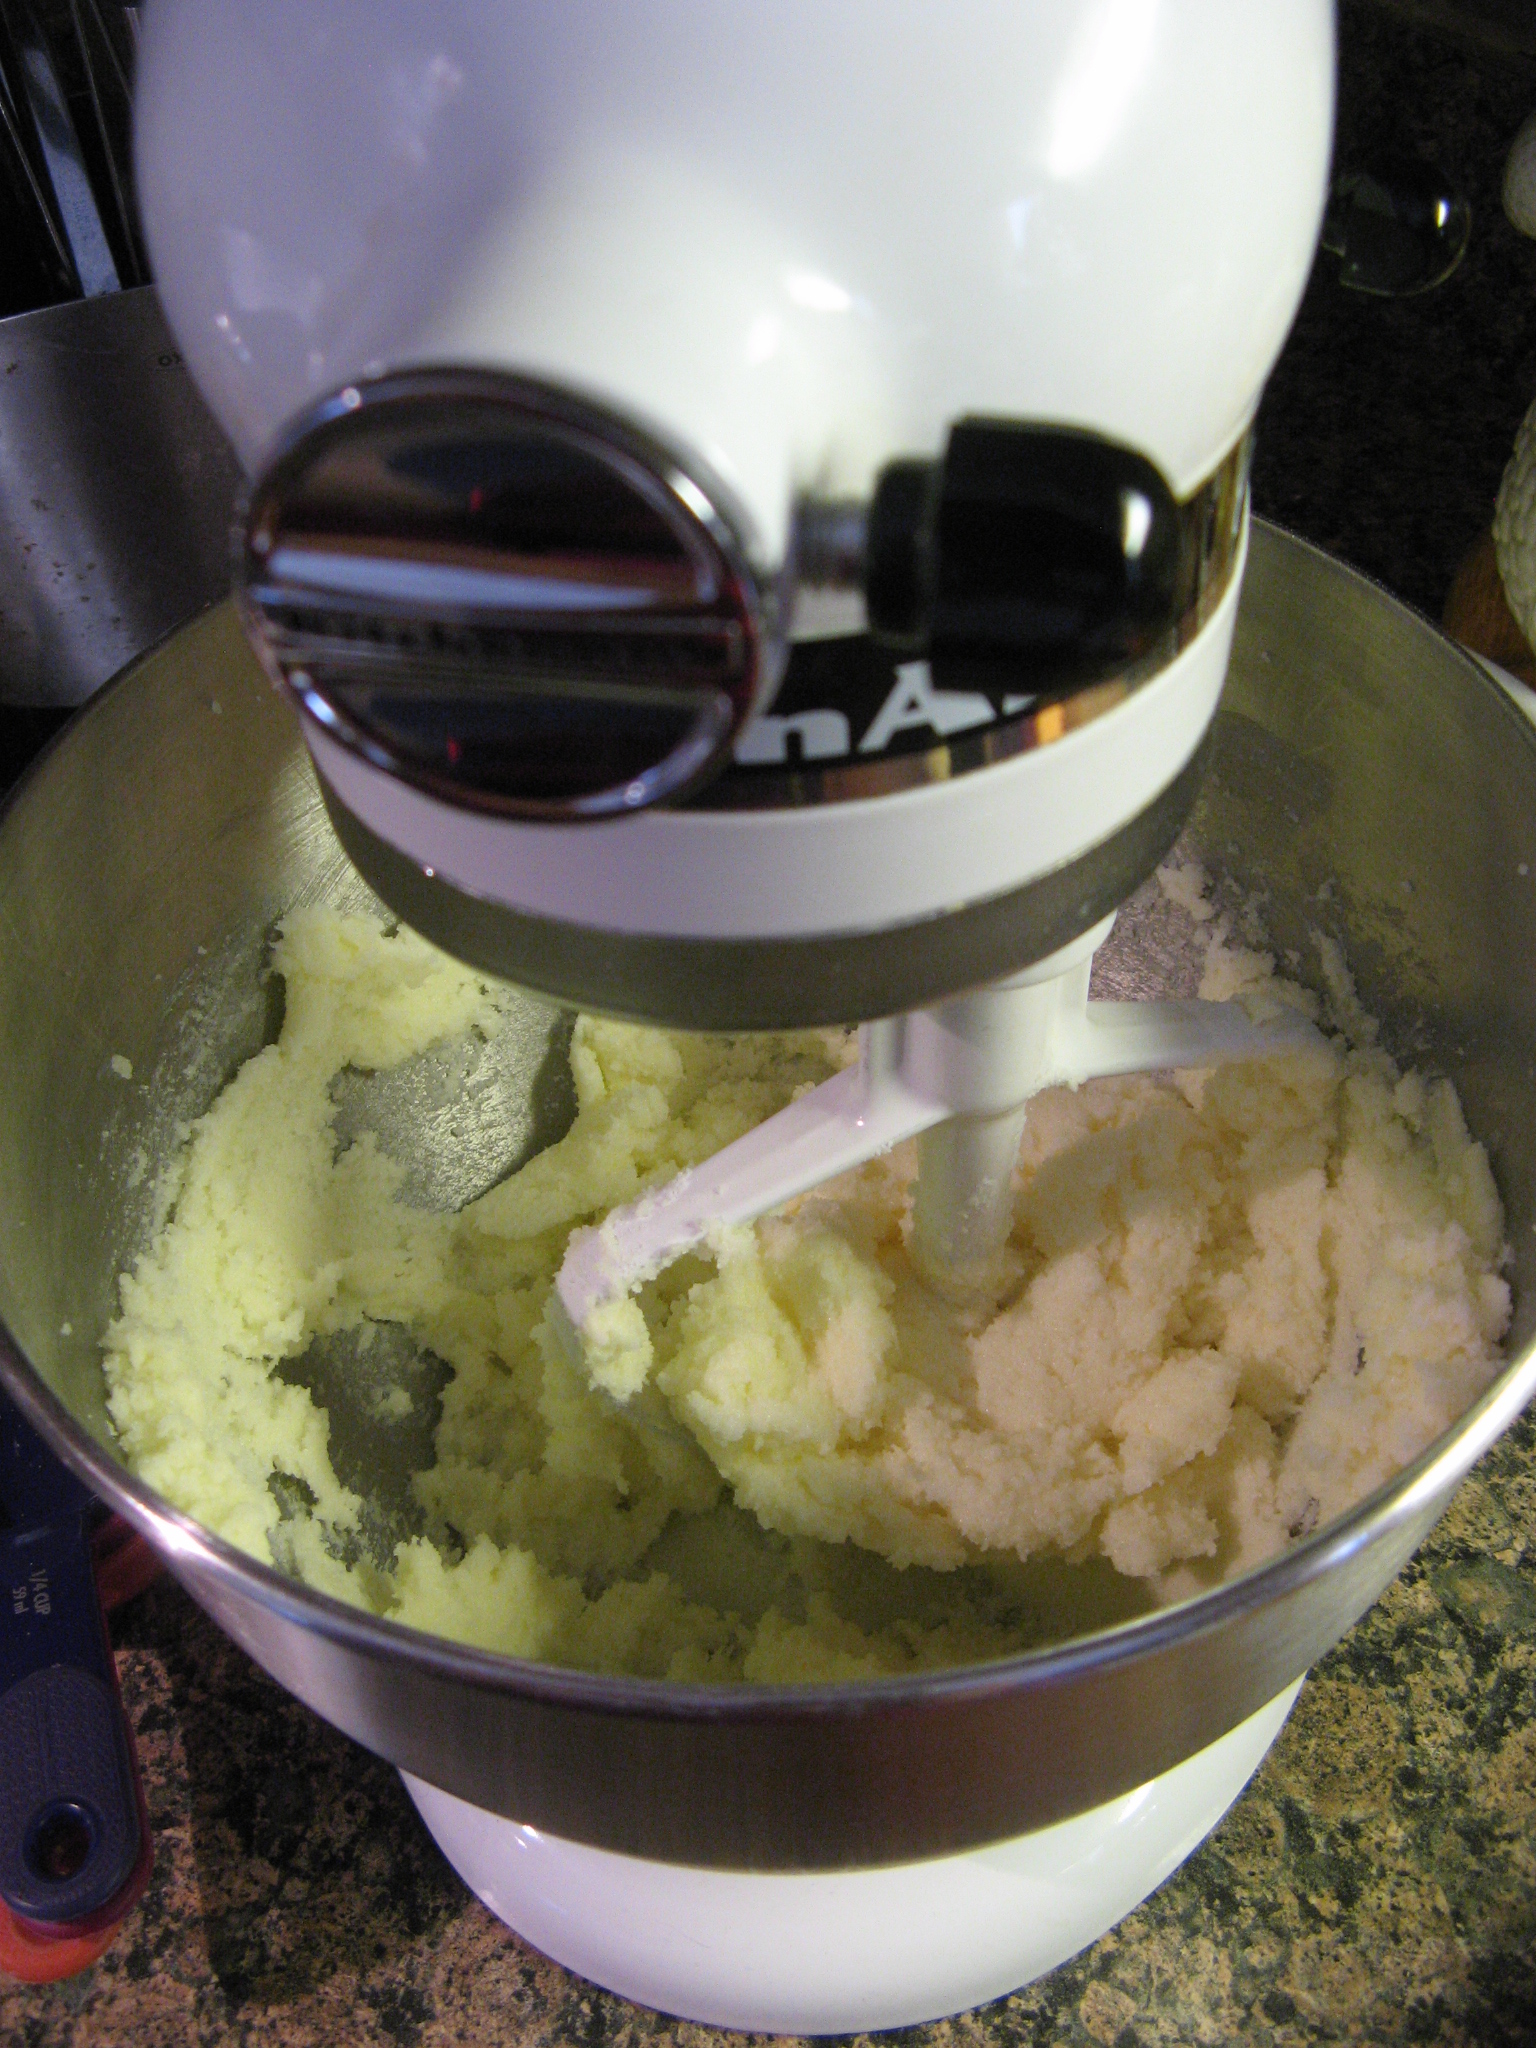
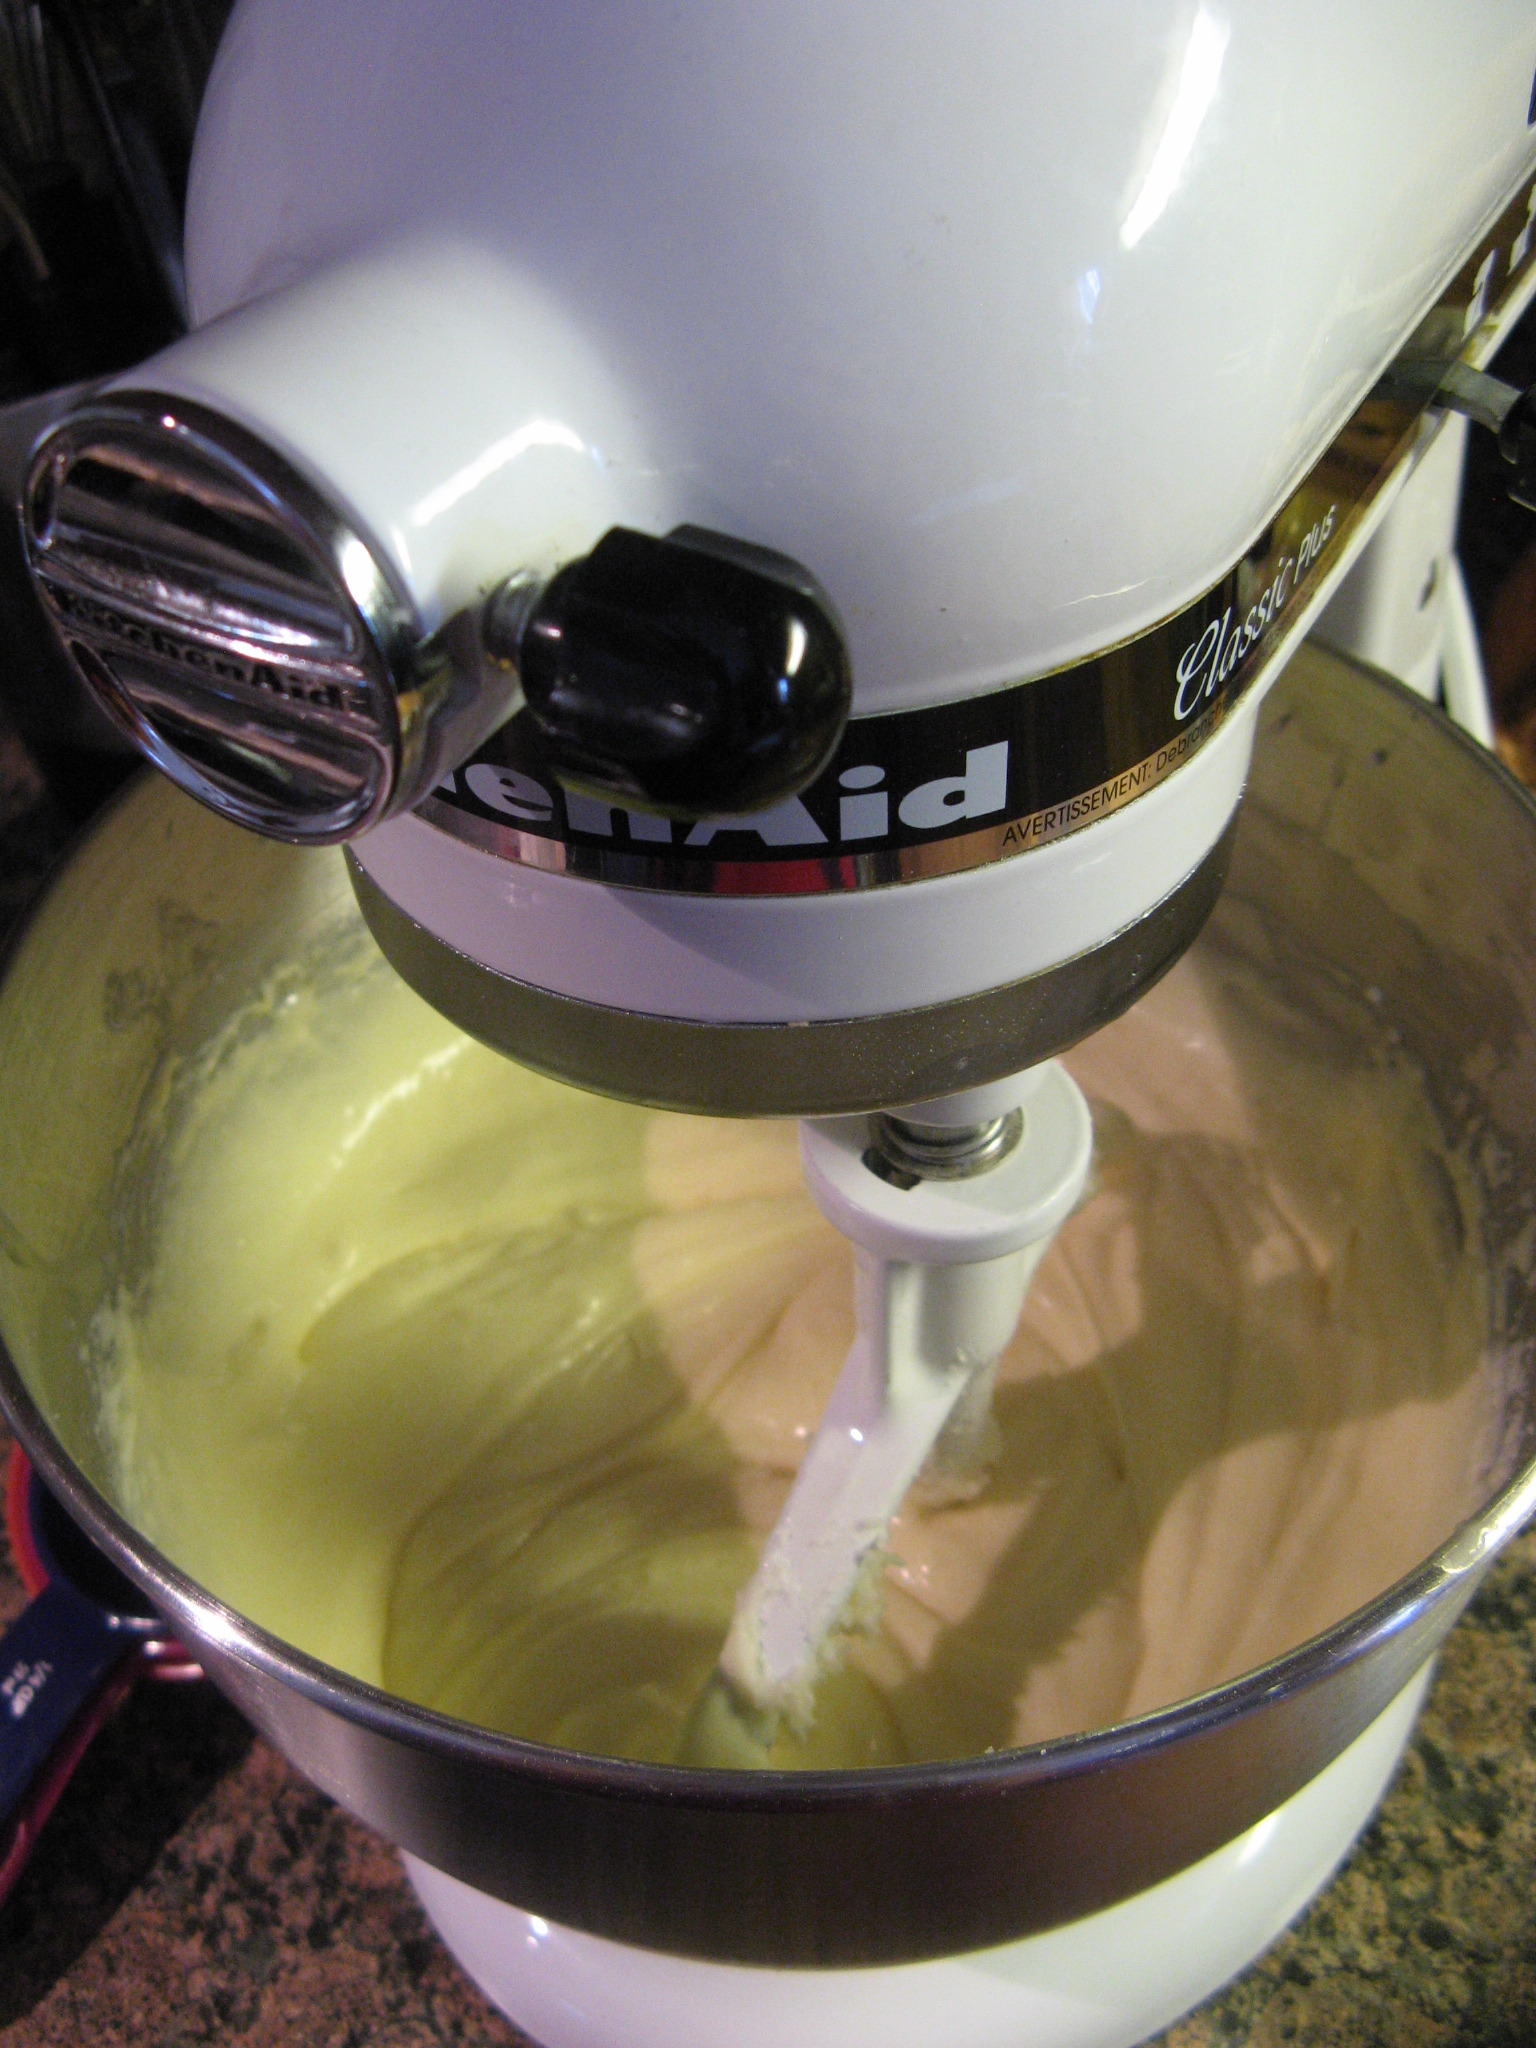
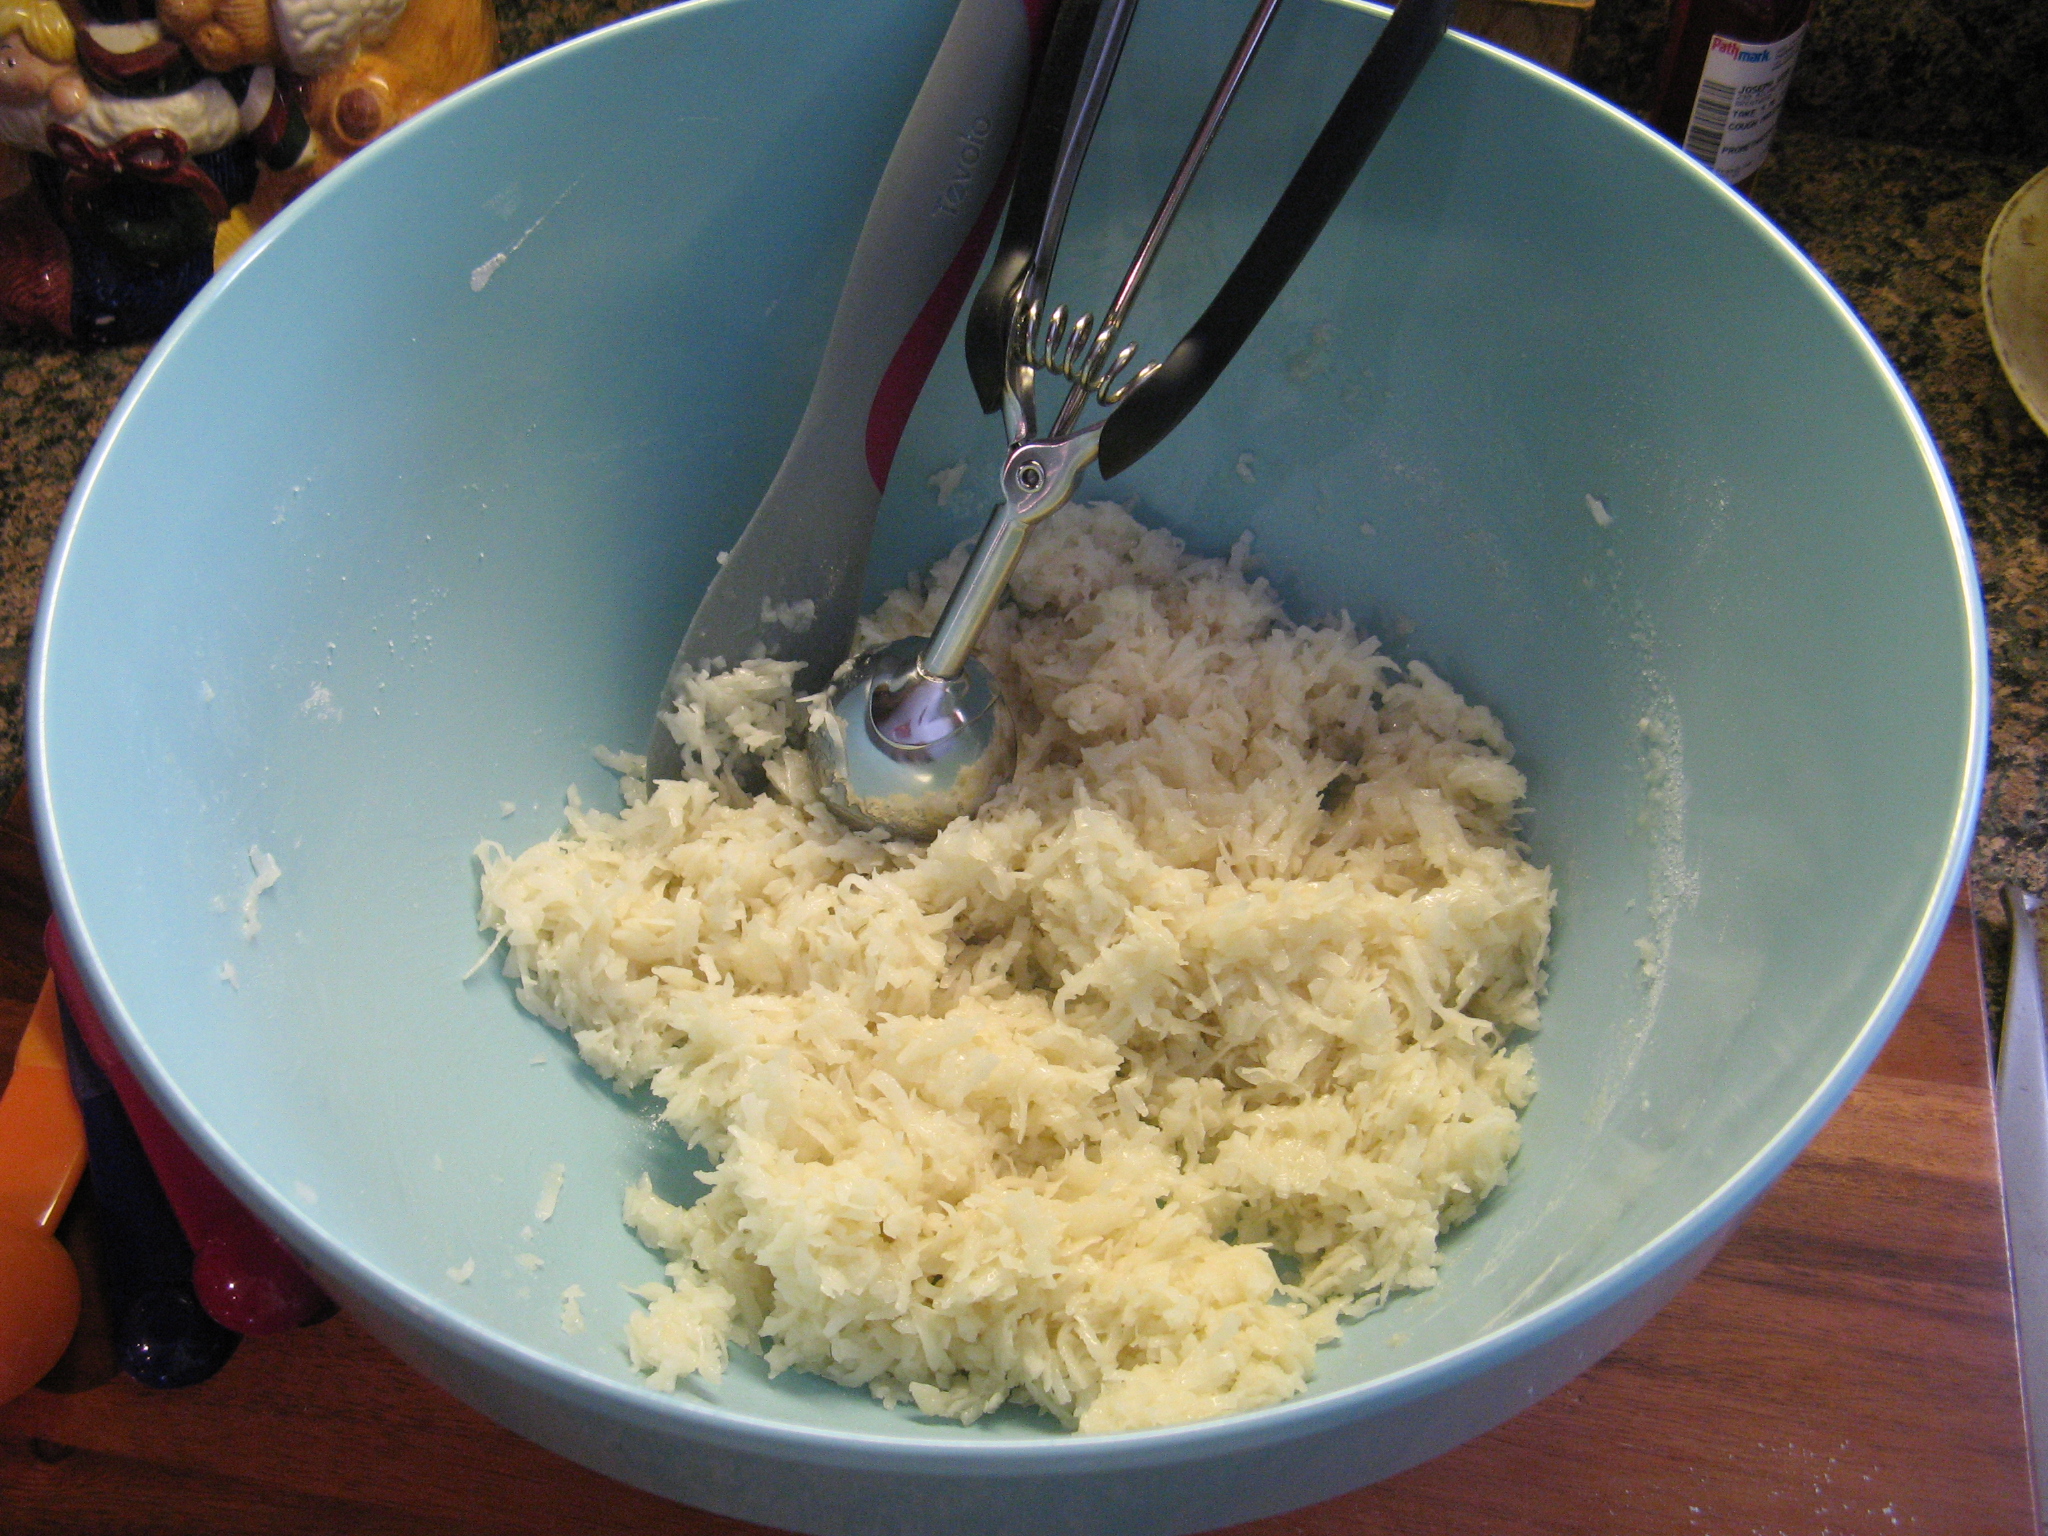
These were by far one of the easiest cookies I have ever made… They didn’t require a hand or stand mixer and were easily prepared in one bowl. You can’t beat simplicity like that. I began my mixing together shredded sweetened coconut along with sugar, flour, and salt.

IMG_7133

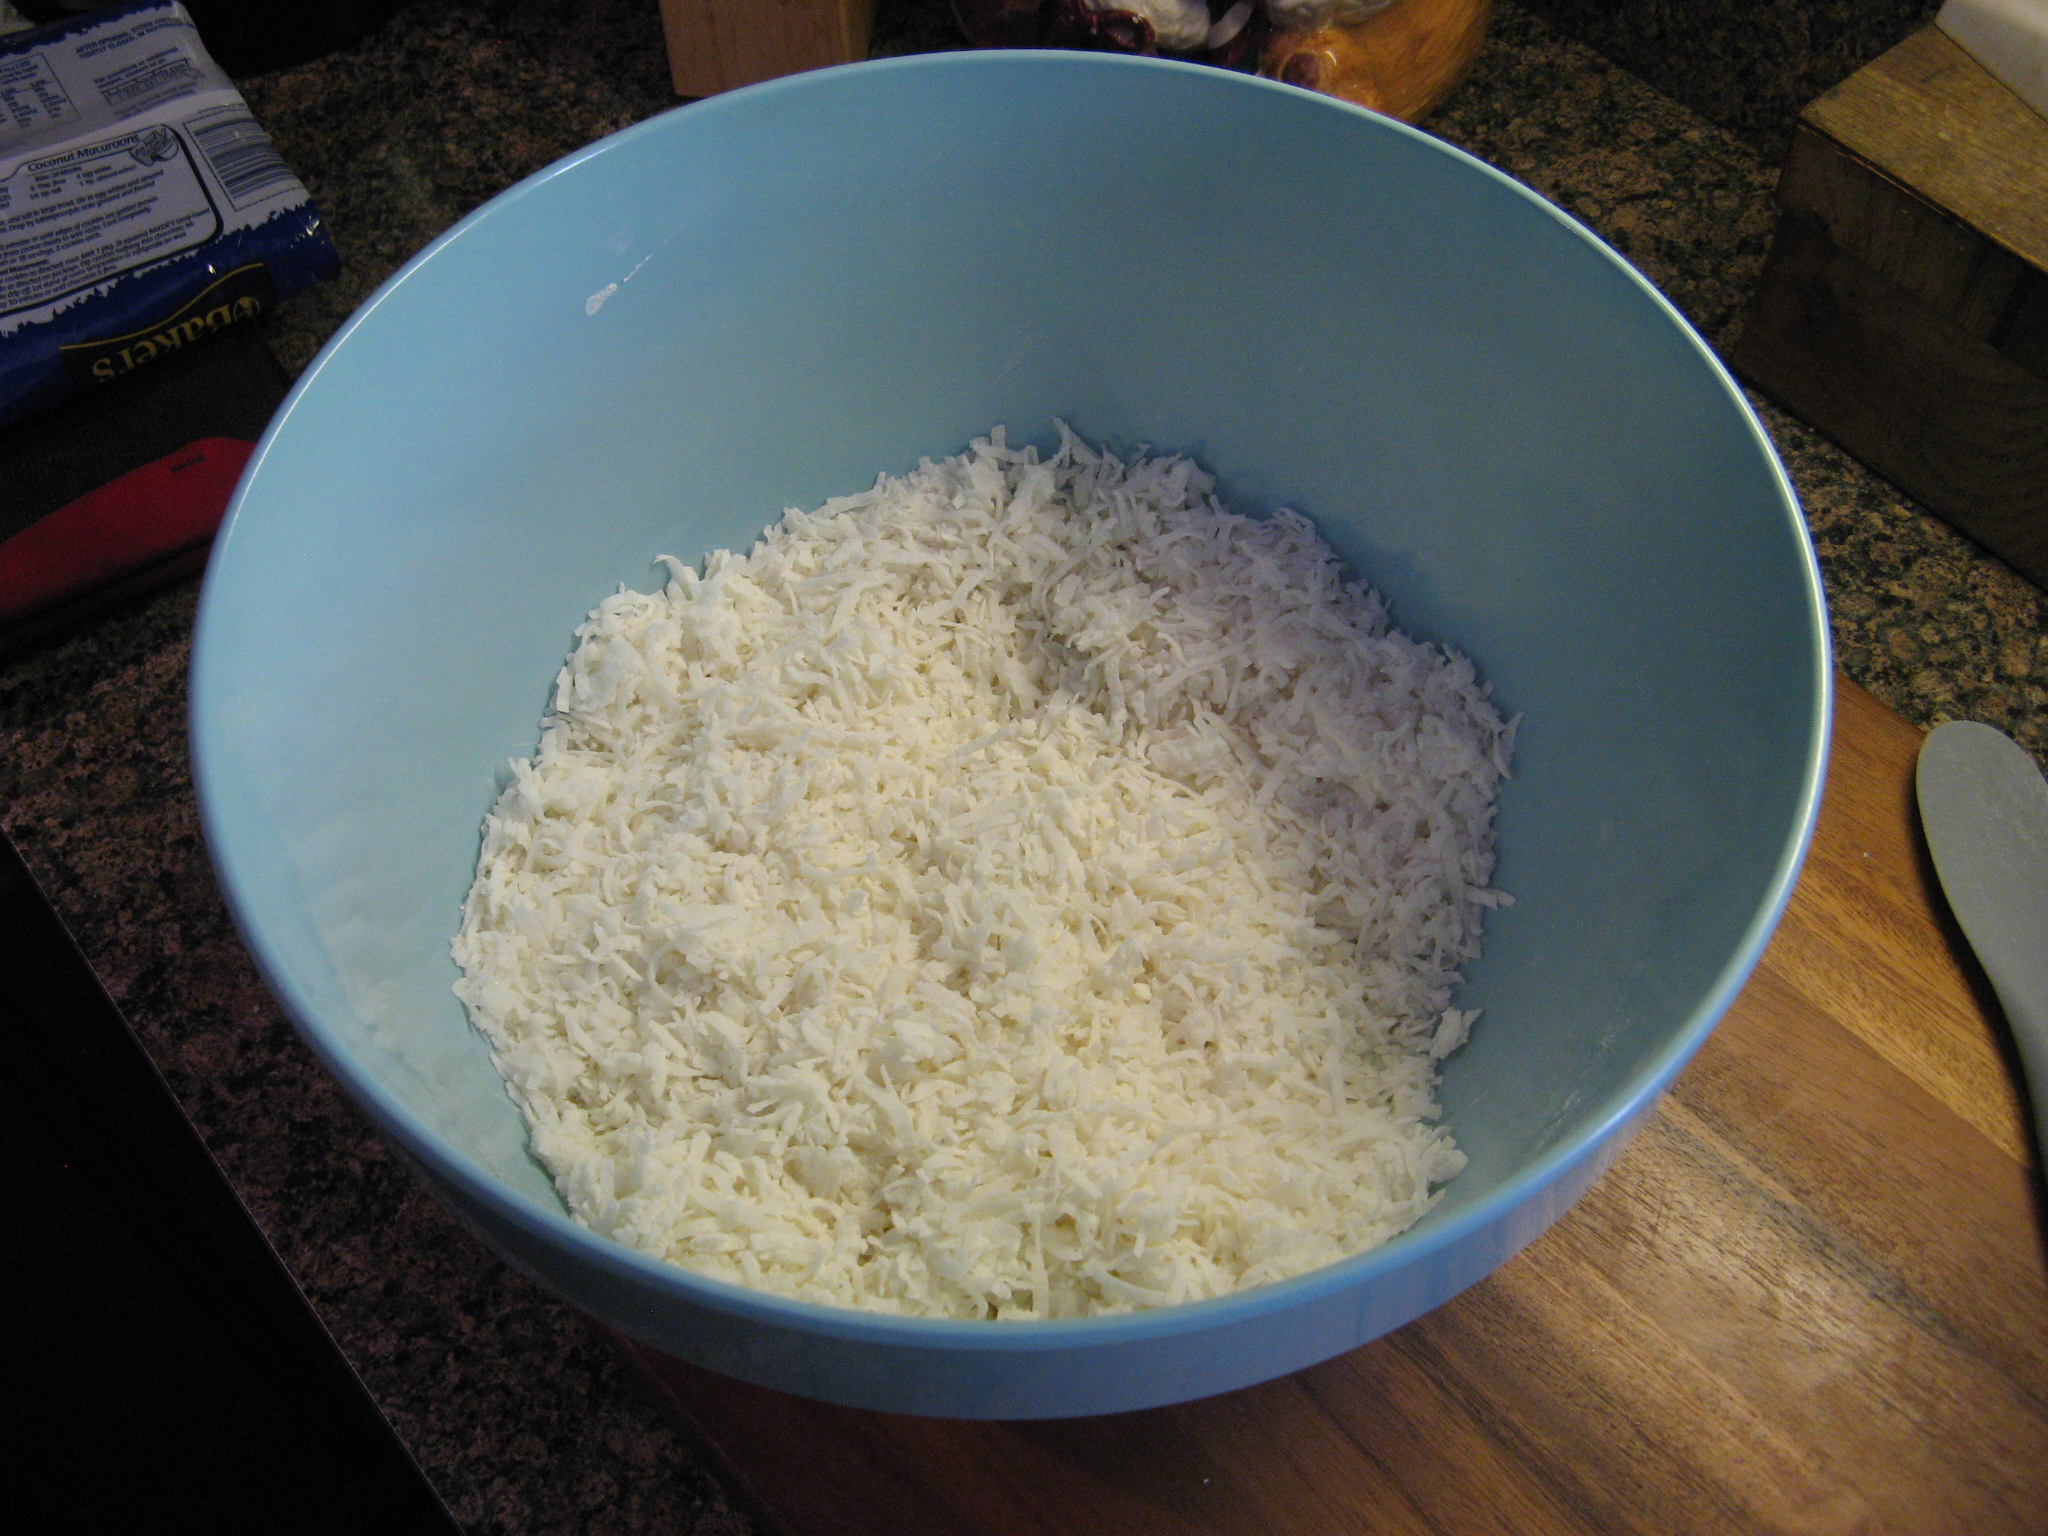
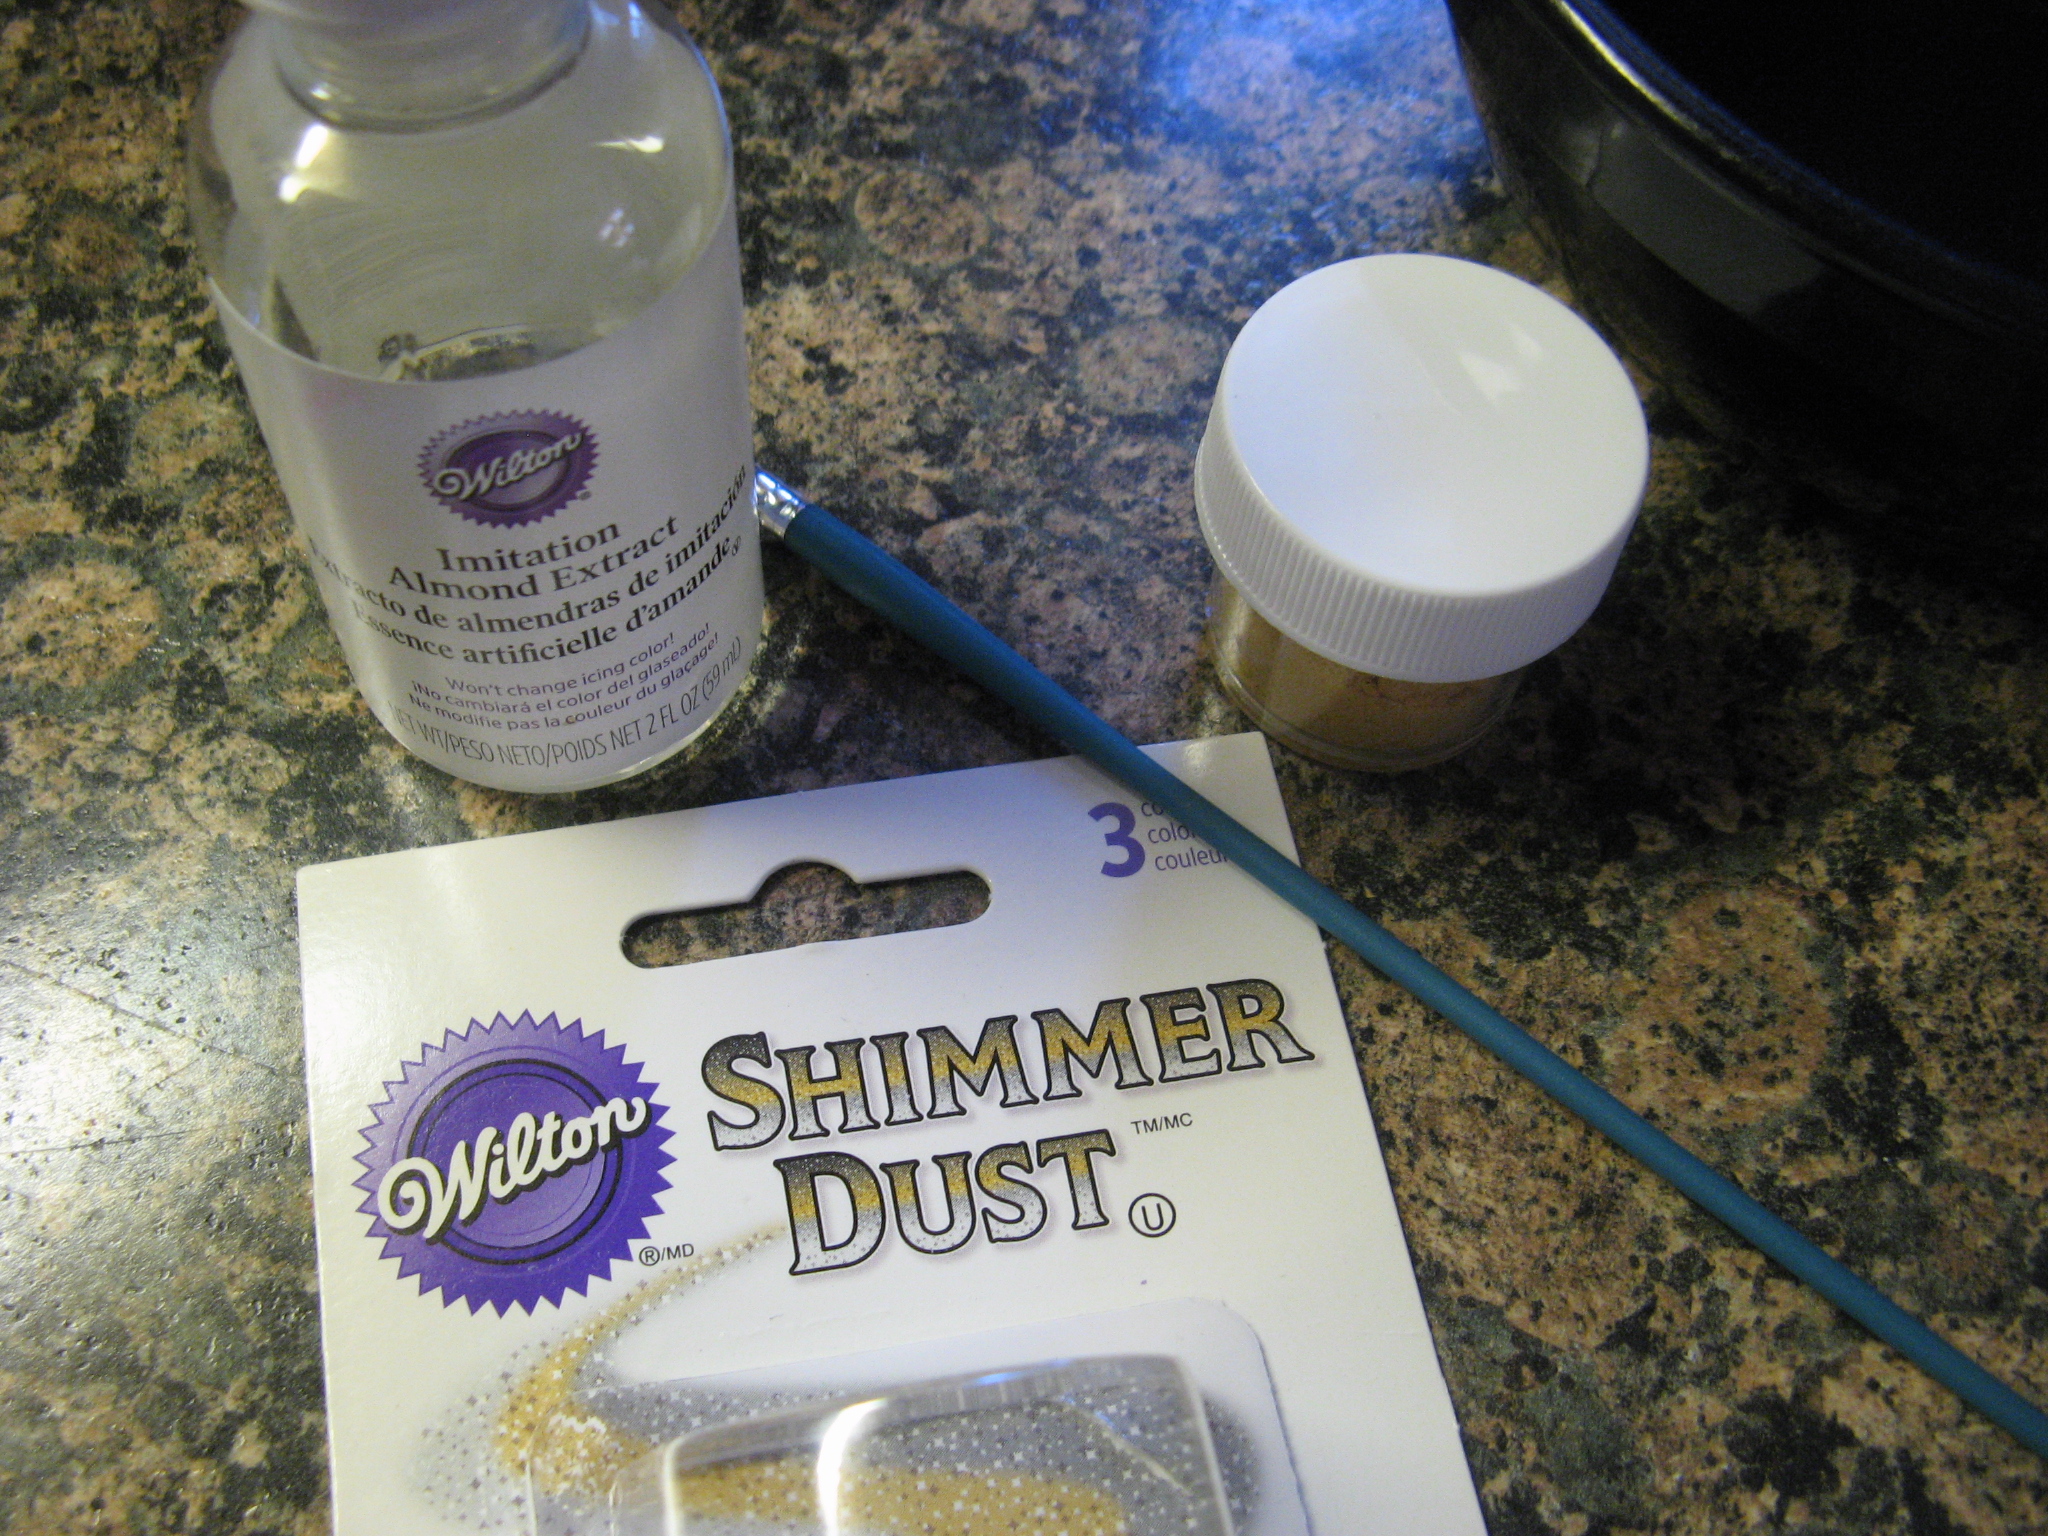
I then added in egg whites and almond extract and mixed the ingredients until they were well blended. Then using a cookie scoop I scooped up the coconut mixture…

IMG_7134

And dropped them on a parchment lined cookie sheet and baked them in a 325 F preheated oven for about 20 minutes.

IMG_7135

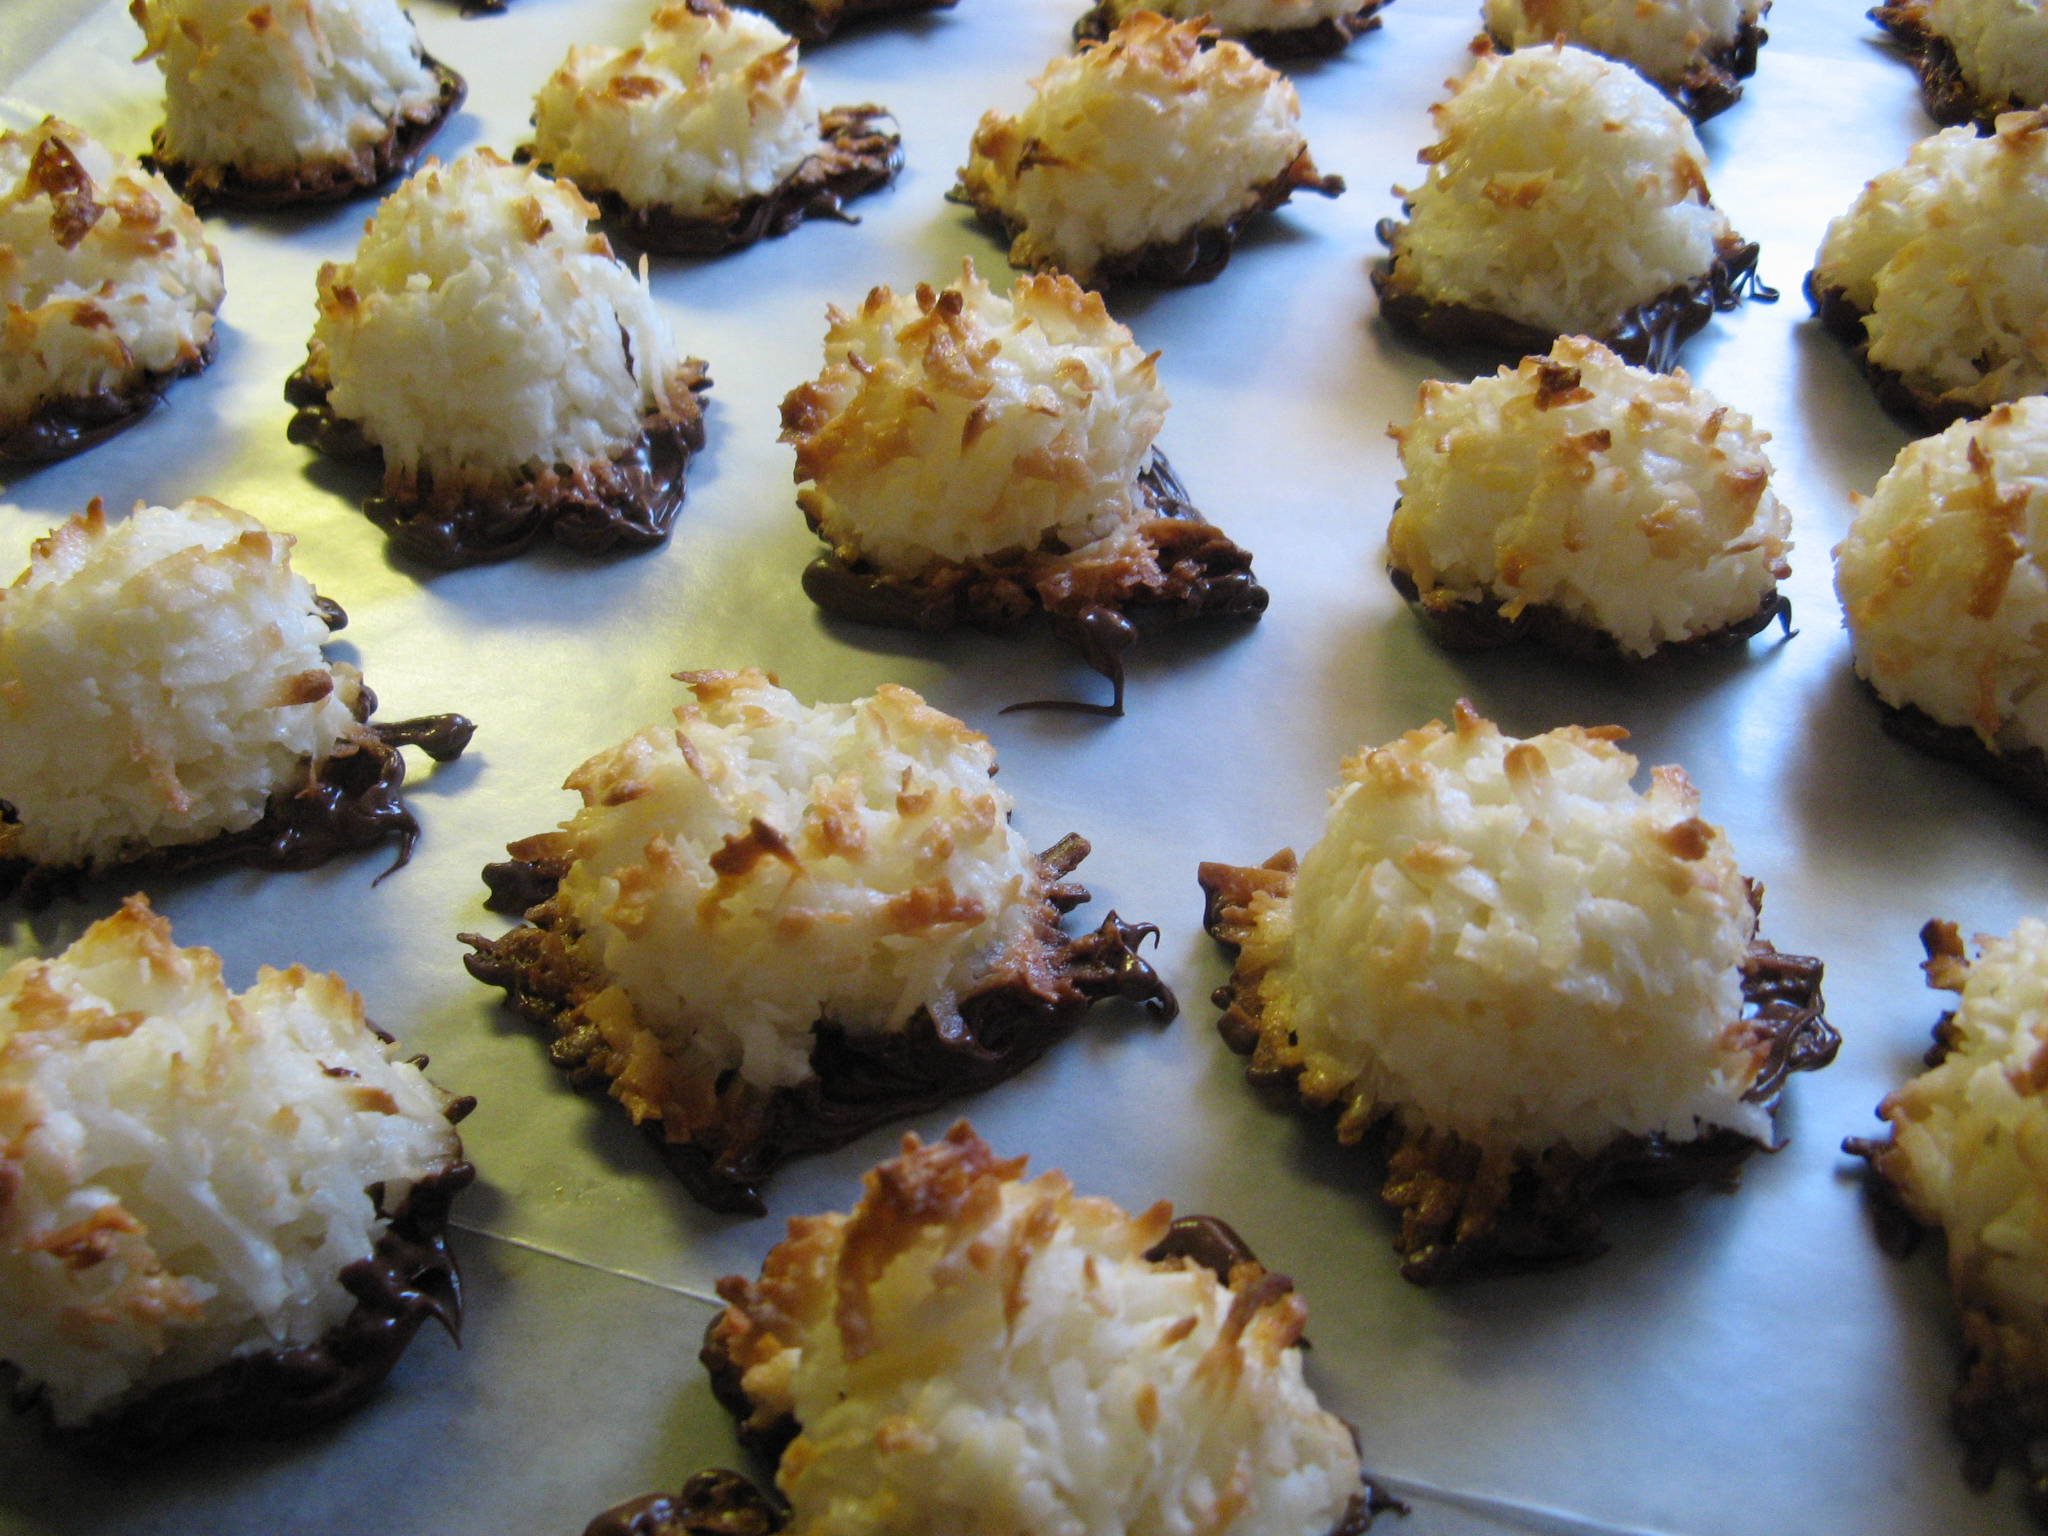
Once out of the oven I immediately transferred the macaroons to a wire rack to cool completely.

IMG_7148

After they cooled it was time to dip them in melted chocolate. Conveniently I had half a bag of semi-sweet chocolate chips in my fridge. I melted the chocolate in the microwave and then dipped the bottom of each of the macaroons in the chocolate and then placed them on a wax paper lined cookie sheet and put them in the fridge so the chocolate could set.

IMG_7152

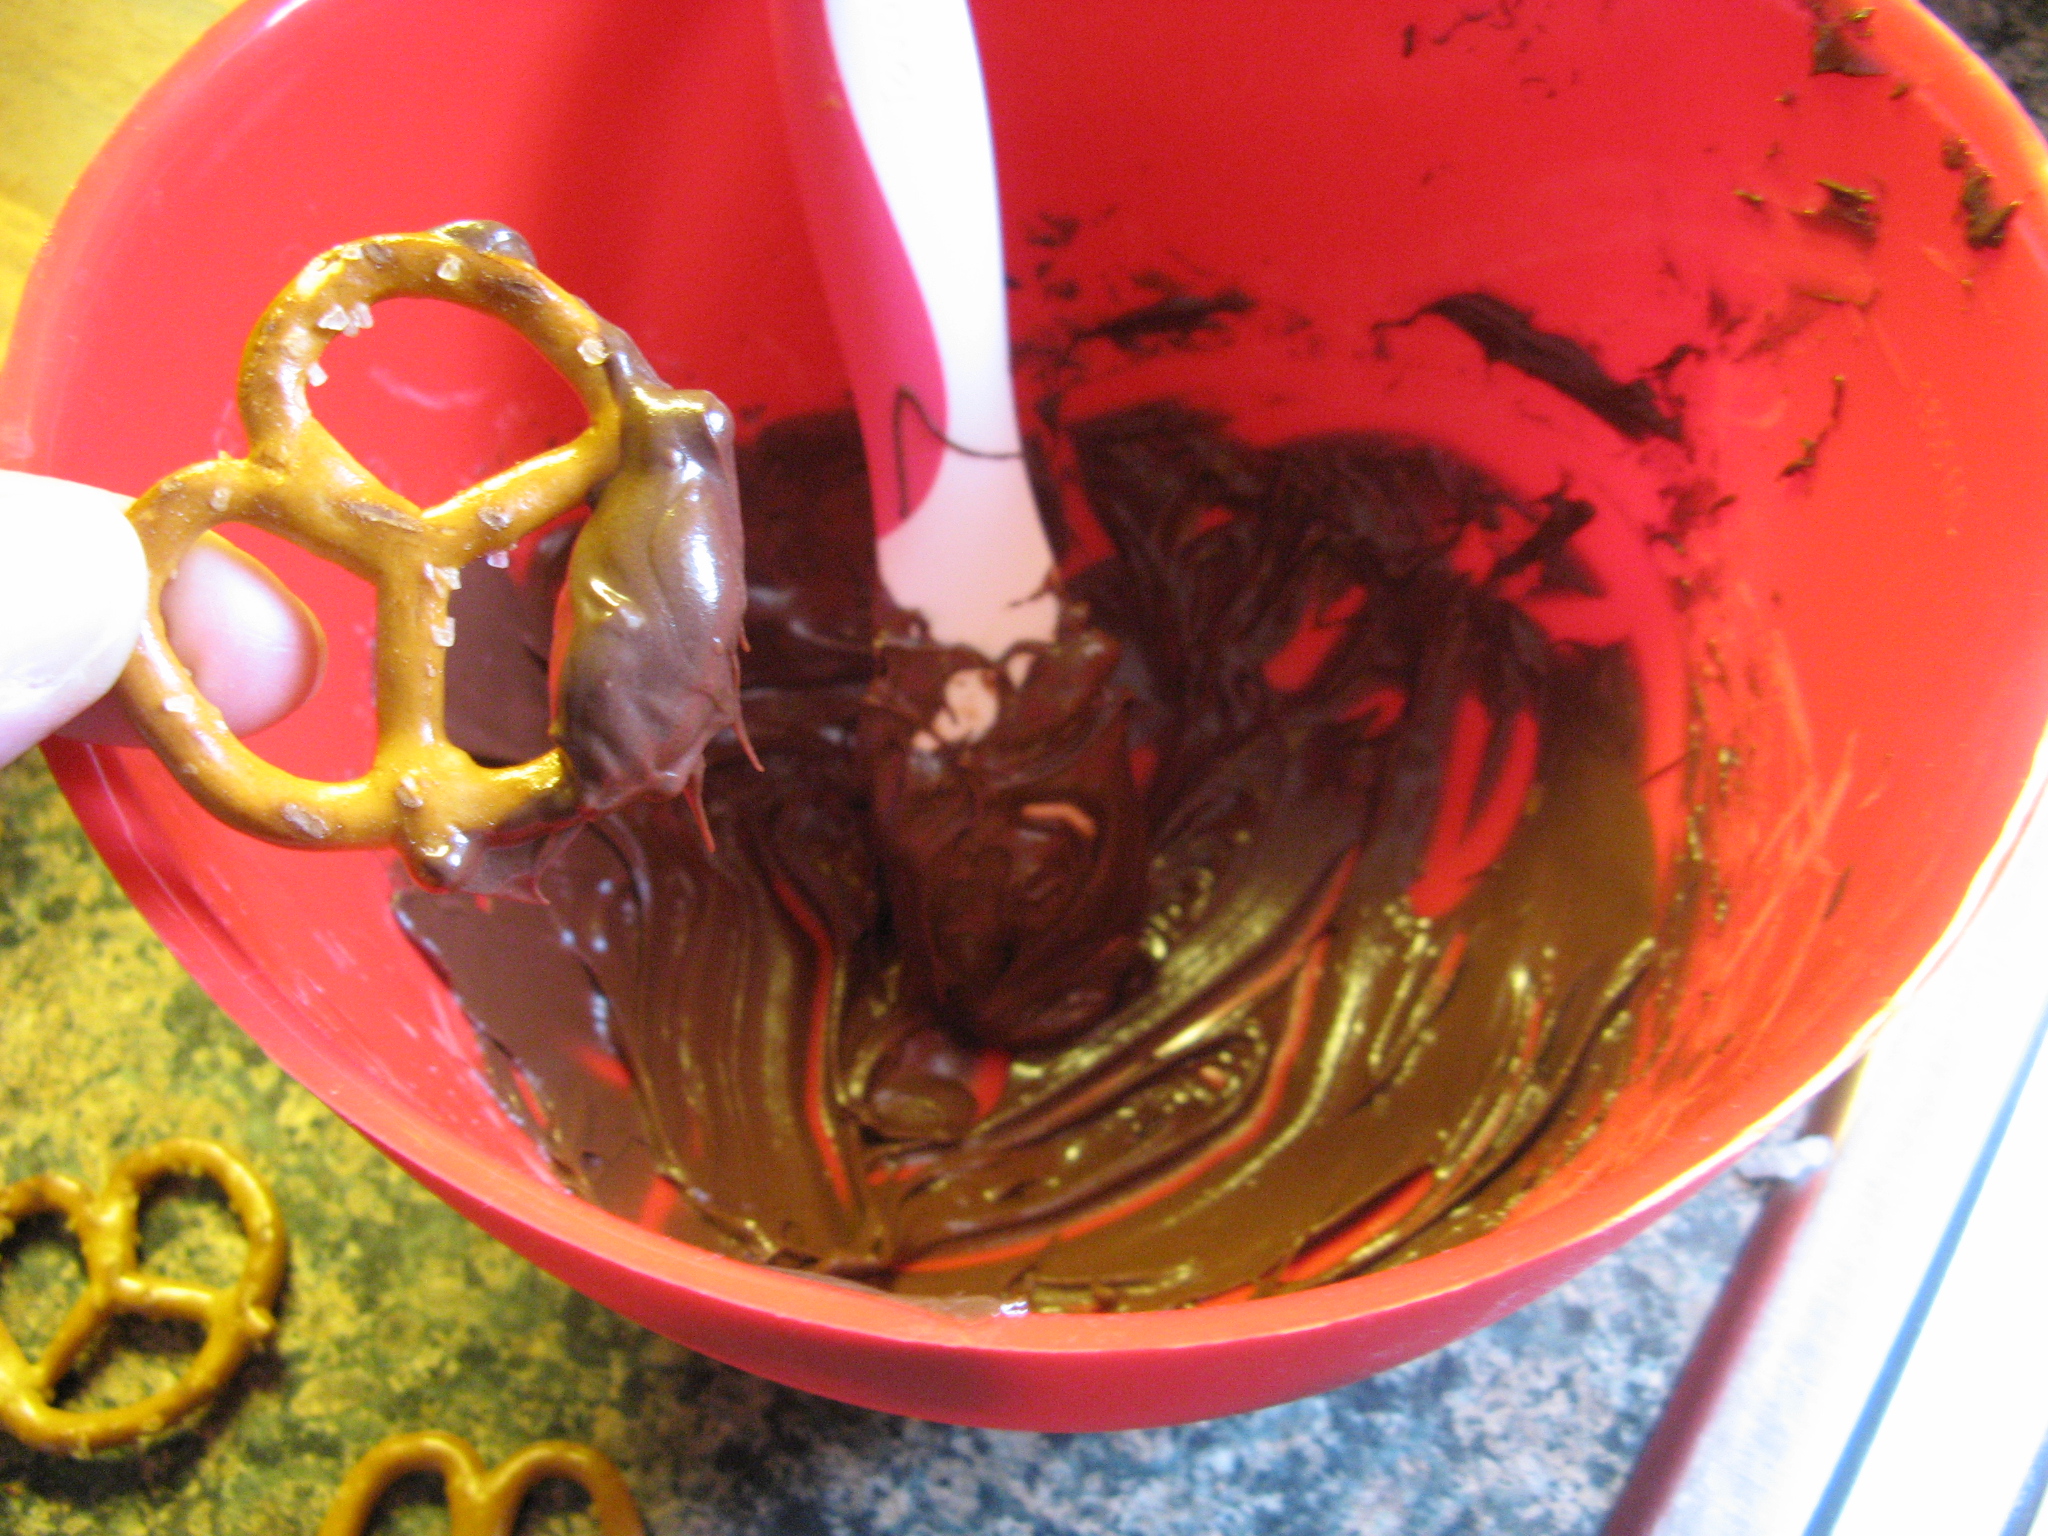
And since I had some chocolate left-over I decided to enjoy a mid-afternoon snack of chocolate dipped pretzels… You can’t go wrong with sweet & salty!

IMG_7156

Overall these macaroons were delish… With the combination of coconut, almond extract and chocolate they were reminiscent of an Almond Joy candy bar!


Coconut Macaroons

Makes 3 Dozen

Ingredients:

1 14oz. package sweetened coconut flakes (5 1/3 cups)

2/3 cup sugar

6 tablespoons flour

1/4 teaspoon salt

4 egg whites

1 teaspoon almond extract

Directions:

1. Preheat oven to 325 F. Line two cookies sheets with parchment paper.

2. Mix coconut, sugar, flour and salt in a large bowl. Stir in eggs whites and almond extract until well blended. Drop by rounded tablespoonful (I used a small cookie scoop which yielded 26 macaroons) onto prepared cookie sheets.

3. Bakes for 18-20 minutes, or until edges of cookies are golden brown. Remove from cookie sheets and transfer to a wire rack to cool completely.

Enjoy as is, or dip in melted chocolate for an extra sweet treat!

Lemon Ricotta Pancakes

When it comes to pancakes I’m a bit of a traditionalist. I’ll take plain old regular pancakes or buttermilk ones over any flavor (i.e. banana, pumpkin, corn, etc…) or additions (i.e. chocolate chips) – although blueberry pancakes are quite delish! A few years ago though I decided to try Lemon Ricotta Pancakes at a wonderful breakfast spot in Brooklyn – Tom’s Diner – and was instantly hooked. I don’t know what it is about this particular flavor that makes them so delicious – the hint of lemon, the swirl of ricotta cheese, or the combination of both – but they are definitely one pancake everyone should try. And while there are recipes for pancakes made from scratch I opted to make these pancakes using store-bought pancake mix… short-cuts aren’t always a bad thing. And with Easter just around the corner these would be perfect addition or main dish for your Easter breakfast or brunch.

To begin I whisked together pancake mix, milk and lemon oil (I didn’t have any lemons on hand to zest.) Some things to note, I used Aunt Jemima Complete Pancake Mix and while it calls for water to be used with the mix I always opt to use milk for richer tasting and fluffier pancakes. Also, the equivalent of lemon oil to lemon zest is 1/4 teaspoon vs. 1 tablespoon.

IMG_7136

I then folded in the ricotta cheese; folding in the ricotta helps to maintain the texture of the cheese and allows the ricotta to swirl into the batter.

IMG_7137

I’ll admit I’m not the best pancake maker. Usually the first one I pour into the pan is my “test” one that gets thrown out. I just haven’t mastered getting the pan to the right heat. This time around I almost nailed it.

IMG_7140

After topping my short-stack with syrup…

IMG_7142

It was time to enjoy them!

IMG_7143


Lemon Ricotta Pancakes*

Makes 5 4-inch pancakes

Ingredients:

1 cup pancake mix (I used Aunt Jemima complete)

3/4 cup milk (I used 2%)

1 tablespoon lemon zest (or 1/4 teaspoon lemon oil)

1/2 cup whole-milk ricotta cheese

Directions:

1. Whisk together the pancake mix, milk, and lemon oil (or zest) then gently fold in the ricotta cheese.

2. Spoon approximately 1/4 cup (I used an ice cream scoop) of the batter onto a lightly buttered pan or griddle heated over medium-heat.

3. Cook until bubbles form on the surface and then flip and cook for another minute or two until golden.

*This recipe can easily be doubled.

A Blanket Down, A Scarf To Go

I recently completed the toddler blanket I was working on and am very happy with how it came out. While I have crocheted/knitted my fair share of blankets, this was the first toddler blanket I completed and was a little unsure about the size I wanted to make it…. I obviously didn’t want it to be on the smaller side which would be more appropriate for a baby, but, I also didn’t want it to be so large that it would be too big for a young child. Ultimately the final size of the blanket ended up being 40 x 50 inches, which I think is a decent size for a young child.

IMG_7110

I’ve already moved on to my next yarn project… An infinity scarf (you can never have too many scarves) made with t-shirt yarn. While there a quite a few tutorials online on how to make your own t-shirt yarn I opted to buy mine. I first came across t-shirt yarn when I saw an Arm-Knitting Project using Lion Brand’s Fettuccini Yarn. After visiting the Lion Brand store in NYC I opted to pass on purchasing the yarn for the project – they didn’t have enough skeins of the yarn in the color I wanted and it just seemed like the scarf would end up being a lot more bulky than I would like. Not long after that while at my local Michael’s I came across t-shirt yarn from their Loops & Threads brand and it was more reasonable priced (about $3 skein on clearance than the $9/skein for the Fettuccini Yarn) and didn’t seem as bulky. I decided to scrap the idea of learning how to arm-knit and decided to make an infinity scarf just by regular knitting. So far so good…

IMG_7121


Lion Brand Pound of Love Delectable Shell Afghan – modified from here

Materials:

2 Balls Lion Brand Pound of Love Yarn

Crochet Hook – Size H-8

Directions:

Afghan

Chain 173

Row 1: Double-crochet in 5th Chain from hook, *Skip next  2 chains, 5 double-crochets in next chain, skip next 2 chains, double-crochet in next chain, chain 1, skip next chain, double-crochet in next chain, repeat from * across.

Rows 2 – 95: Chain 4, turn, *Skip next Chain 1 space, double crochet in next double crochet, skip next 2 double-crochets, 5 double-crochets in next double-crochet, skip next 2 double-crochets, double-crochet in next double-crochet, chain 1; repeat from * across, double-crochet in 3rd chain of turning chain. Do not fasten off.

Border

Round 1: Do not turn; work single-crochet evenly spaced around entire outside edge of Afghan, working 3 single-crochets in each corner; join with slip stitch in first single-crochet.

Round 2: Chain 1, single-crochet in same single-crochet as join, skip next single-crochet, 5 double-crochets in next single-crochet, *skip next single-crochet, single-crochet in next single-crochet, skip next single-crochet, 5 double-crochets in next single-crochet; repeat from * around; join with slip stitch in first single-crochet. Fasten off.

Weave in ends.


T-Shirt Yarn Infinity Scarf

Materials:

T-Shirt Yarn (being that I haven’t finished the scarf I am unsure of how much yarn I will ultimately use, I do have 2 skeins that are 100 yards each)

Knitting Needles: US 19 / 15 MM

Directions:

Cast on 10 stitches

Row 1: Knit 2, *Purl 2, Knit 2; repeat from * across. Repeat Row 1 until piece measures your desired length (either to loop around your neck or the classic way – topping it over a top)

Bind off.

To finish, sew the ends together and weave in the ends of the yarn.


Springtime Chocolate Chip Cookies

The sayings are that March comes in like a lion and leaves like a lamb and that April showers bring May flowers, but, what is there to be said about the first day of Spring coming with snow. Well, if you ask a New Yorker… enough already! As I write this the snow is falling and starting to accumulate. Thankfully tomorrow some spring-like temperatures are in the forecast so hopefully whatever falls today will be gone tomorrow. Since the day is gray and gloomy I decided to bring some sunshine into my kitchen with some Spring themed Chocolate Chip cookies. What makes them Spring-y you may ask? Well, pink and yellow chocolate chips that I recently picked up at my local Target. I’ve been known to aimlessly walk around Target and find some pretty cool things. I picked up a bunch of things yesterday to hopefully create an Easter cake that I have pictured in my head, but that’s a post for a later date.

IMG_7091

After making the dough for the cookies – I combined flour, baking soda and salt in one bowl and then slowly added that to a mixture of butter, granulated and brown sugars, eggs and vanilla extract which I mixed in a stand mixer and then stirred in a cup of the Spring themed chips – I used a cookie scoop to drop the dough on parchment lined cookie sheets and pressed some extra chips into the cookies and then baked them in a preheat 350 F oven for eleven minutes.

IMG_7097

After letting the cookies cool on the sheet for a few minutes I then transferred them to a wire rack to cool completely. In less than an hour I had some springtime in my kitchen while I looked at the falling snow outside of my kitchen window as I washed the dishes. Fingers crossed this will be the last snowstorm of this season, or I should say since it’s the first day of Spring, the only snowstorm of this season.

IMG_7106


Springtime Chocolate Chip Cookies

Makes 36 cookies

Ingredients:

2 1/4 cups all-purpose flour

1 teaspoon baking soda

1 teaspoon salt

1 cup (2 sticks) unsalted butter, at room temperature

3/4 cup granulated sugar

3/4 cup light brown sugar

1 teaspoon vanilla extract

2 large eggs, at room temperature

1 2/3 cups (10 oz. package) Nestle Toll House Springtime Morsels

1 cup chopped nuts*

*I opted to omit the nuts from the cookies and added in an extra 1 1/2 tablespoons of flour in addition to the 2 1/4 cups.

Directions:

1. Preheat the oven to 350 F. In a bowl combine the flour, baking soda and salt and set aside.

2. Beat the butter, sugars and vanilla extract on medium speed until creamy. Add the eggs one at a time, beating well after each addition. Gradually add in the flour mixture. Stir in 1 cup of the morsels and nuts (if using.)

3. Drop the dough using a cookie scoop on parchment lined cookie sheets and top the dough with the remaining morsels.

4. Bake for 11 to 13 minutes or until golden brown. Allow the cookies to cool on the cookie sheets for a few minutes before transferring them to a wire rack to cool completely.

A Quick and Easy Coq au Vin

The first time I had Coq au Vin was at a cooking demonstration class at Williams Sonoma. I purchased the braising base that was used at the class but unfortunately my result was nothing like the one I tasted at the class. I think part of the reason was that I still wasn’t all that comfortable with cooking – I’m more of a baker, but, slowly but surely my cooking ability is starting to even out with my baking ability. Recently I came across a recipe for Coq au Vin in a magazine and decided to try making it once again, this time from scratch, and I had much better results. And in case you are wondering, Coq au Vin is a French dish of braised chicken in red wine and normally contains bacon, garlic, onions and mushrooms.

IMG_7069

Up first I sliced baby bella mushrooms, minced 2 cloves of garlic and chopped some fresh thyme.

IMG_7048

I then cooked three slices of bacon, which I cut into half-inch pieces, in two teaspoons of olive oil until they were brown, but not crispy.

IMG_7051

After removing the bacon from the Dutch oven and setting it aside I browned four chicken thighs which I seasoned with salt and pepper.

IMG_7052

Next I cooked the mushrooms along with a 16 oz. bag of frozen white pearl onions for a few minutes until they began to soften.

IMG_7054

Following that I added in the thyme, garlic and a tablespoon of tomato paste.

IMG_7056

And then red cooking wine. I cooked the mixture for about 5 minutes until the wine reduced by half…

IMG_7058

And then added in chicken stock.

IMG_7059

And finally I returned the chicken to the pot, reduced the heat to low and partially covered the pot and allowed the chicken to cook through and the onions to soften, about 40 minutes.

IMG_7060

And for the final step, I dissolved three tablespoons of cornstarch in an equal amount of water and added it to the cooking liquid after transferring the chicken to a plate. Once the liquid thickened I returned the chicken and bacon to the pot, stirring to coat the chicken. I must say I have used cornstarch to thicken cooking liquids before but I normally just add it directly to the liquid, dissolving it in water is a much better method as it eliminates the possibility of any clumps forming in the liquid.

IMG_7062

Final Verdict… Definitely something I will make again, although I think next time I won’t add the cornstarch.

IMG_7064


Easy Coq au Vin – Slightly modified from here

Ingredients:

3 slices center cut bacon, cut into half-inch pieces

2 tsp. olive oil

4 bone-in, skinless chicken thighs

16 oz. frozen pearl onions

10 oz. baby bella mushrooms, trimmed and sliced

1 tbsp. tomato paste

2 cloves garlic, minced

1 cup red cooking wine

2 cups chicken stock

3 tbsp. cornstarch

Directions:

1. In a 5 to 6 quart Dutch oven, cook the bacon in the oil over medium heat until browned but not too crispy. Transfer the bacon to a small bowl lined with a napkin. Season the chicken with salt and pepper (I used about 1/2 tsp. each). Increase the heat to medium-high and cook the chicken until golden brown, about 5 minutes per side. Transfer the chicken to a plate.

2. Add the onions and mushrooms to the pot and cook, stirring occasionally, until they soften. Stir in the tomato paste, thyme and garlic. Add the wine and cook, scraping up any browned bits, until the wine is reduced by half, about 5 minutes. Add the stock and bring the liquid to a simmer. Return the chicken and any juices to the pot. Reduce the heat to low, partially cover and gently simmer, turning the chicken once or twice, until the chicken is cooked through and the onions are tender, about 40 minutes.

3. In a small bowl dissolve the cornstarch in tbsp. water. Transfer the chicken to a plate. Increase the heat to medium-high and bring the cooking liquid to a bowl. Add the cornstarch mixture and stir until thickened. Season with salt and pepper. Return the chicken and bacon to the pot, stirring to coat.

Cheesecake… Is it a Pie or a Cake?

Well, for today the answer to that question is going to be pie in honor of Pi Day! Yes, it’s the day that Math lovers around the world celebrate in honor of Pi, the irrational number (meaning it cannot be written as the ratio of two integers) that begins with 3.14 and goes on infinitely. This year’s Pi Day is extra special though because it only comes around once every 100 years… The first five numbers of Pi Day is the date (3/14/15) and to go even further at the time 9:26:53 you will have the first ten numbers of Pi in sequence, i.e. 3.141592653. Okay, I’ll stop being a Math geek now and go back to the pie. The idea of cheesecake falling under the pie category isn’t too much a stretch, especially for this cheesecake. Pies tend to have a crust and this one has a graham cracker crust and they also have a filling, the cheesecake part. Okay, maybe it is a tad bit of a stretch, but, I really couldn’t think of a pie I wanted to make but I have wanted to make a cheesecake.

IMG_7027

I began by making the crust… Using a food processor I ground up 18 graham crackers until they were fine crumbs. I then added in a stick of melted butter, sugar and salt and pulse to combine them. Following that I pressed the crumbs into the bottom and approximately 2-inches up the side of a 9-inch springform pan.

IMG_7006

Next I moved on to make the actual cheesecake. Using a stand mixer I beat three 8-oz. bars of cream cheese with a cup of sugar until it was smooth. It’s important to use room temperature cream cheese to ensure you won’t have any lumps in the mixture.

IMG_7007

I then added in a cup of room temperature sour cream and a teaspoon of vanilla extract; beating until these two ingredients were well incorporated.

IMG_7008

And finally I added in three eggs, one at a time.

IMG_7009

Before pouring it into the crust, I gave the cream cheese mixture a few stirs with a rubber spatula to make sure all of the ingredients were blended together well. I tend to find that sometimes ingredients are left on the bottom of the bowl of the stand mixer untouched since the paddle attachment doesn’t fully hit the bottom of the bowl.

IMG_7010

After pouring the cream cheese mixture into the prepared crust I baked it in a preheated 325 F oven for about an hour; until it was set but still wobbly in the center.

IMG_7011

A few minutes before removing the cheesecake from the oven I combined a cup of sour cream, a few tablespoons of sugar and vanilla extract in a bowl. I was happy that the cheesecake didn’t have any cracks in it – that normally happens when I bake cheesecakes.

IMG_7012

I then spread this sour cream mixture over the cheesecake and then placed the cheesecake back in the oven for about five minutes.

IMG_7014

The cheesecake right out of the oven… I let it cool for a few hours before covering it and placing it in the refrigerator.

IMG_7015

I ended up leaving it in the refrigerator overnight and then added some sliced strawberries on top of it the following morning in the shape of the Greek letter used to represent “Pi.” I had to validate this being a Pi Day pie somehow!

IMG_7022

And how did it taste… It was perfectly creamy and not overly sweet! A winning combination for the perfect cheesecake!

IMG_7044


Classic Cheesecake

Ingredients:

18 graham crackers (2 sleeves)

1/2 cup (1 stick) unsalted butter, melted

1/4 teaspoon kosher salt

1 cup plus 4 tablespoons sugar

3 8-oz. packages cream cheese, at room temperature

2 cups sour cream, at room temperature

1 1/2 teaspoons vanilla extract

3 large eggs, at room temperature

Directions:

1. Preheat oven to 325 F. In a food processor pulse the graham crackers until fine crumbs form. Add the butter, salt and 2 tablespoons of the sugar and pulse to combine. Press the mixture on the bottom and 2-inches up the side of a 9-inch springform pan.

2. Use an electric mixer to beat the cream cheese and 1 cup of sugar until smooth. Add 1 cup of the sour cream and 1 teaspoon of the vanilla extract and continue beating until combined. Beat in the eggs, one at a time. Pour the mixture into the prepared crust and bake until just set (the center will be slightly wobbly), 50 to 60 minutes.

3. In a small bowl combine the remaining 1 cup of sour cream, 2 tablespoons of sugar and 1/2 teaspoon of vanilla extract. Spread over the hot cheesecake, then bake until set, 3 to 5 minutes more. Let cool to room temperature in pan, then refrigerate for at least 2 hours. Run a knife around the edge of cheesecake before unmolding.


Where are the Beads & Yarn?

While as of late most of posts have been about baking (i.e. the Spatula) I have been working on some yarn and bead projects and today I would like to share with you some of the yarn projects.

I recently completed three scarves…

A button-through cowl I made with Lion Brand Wool-Ease Thick & Quick yarn in Barley. This was a quick cowl to crochet thanks to the nature of the yarn (hence the name of the yarn) and the easy pattern working with double crochets. I believe I was done with this in less than three hours!

IMG_6961

Next I completed another cowl using another Lion Brand yarn, their Landscapes yarn in Desert Spring. It’s a beautiful self-striping roving yarn that’s also great to work with. Well, it was great yarn to work with once I wound it up into a ball as opposed to pulling it out from the skein. I did that during my first go at making this scarf and the yarn began to fray which affected the outcome of the cowl. Thankfully I bought 2 skeins of the yarn – even though the pattern only required one – so I was able to start over with much better results. One other thing, the pattern called for the cowl to be knitted in the round but I opted to add a few extra stitches and just sewed the ends together.

IMG_6967

And finally using Red Heart With Love yarn I crocheted a puff stitch scarf. I had a slight mishap while making this scarf. I knew that it was looking a little funny while working on it but it wasn’t until I finished and needed to add the border around the scarf that I knew for sure what I had done wrong. I didn’t end one of the rows on the right stitch so every few rows the last stitch was sticking out which prevented me from adding the border. So, I had to take the scarf apart and crochet it again. Thankfully it was a quick pattern to stitch up so I was done in no time and done correctly

IMG_6970

And currently on my crochet needle is a toddler blanket for a friend’s daughter – I actually made a smaller version of this blanket last year as a baby gift for another friend. I’m about half-way done and just about to start working with another skein of Lion Brand’s Pound of Love yarn in Honey Bee. As with the button-through cowl, this blanket is just a series of double-crochets.

IMG_7003

Almond Pound Cake

I pretty much love anything made with almonds…Danishes, croissants, cookies, cakes, milk, etc. And of course almond themselves are wonderful to snack on. Their health benefits are pretty vast. To name a few… they are a great source of Vitamin E, they are packed with protein, they are gluten free and snacking on them can help curb other cravings. So, when I had half a pack of Odense Almond Paste left over from a previous recipe I knew I had to put it to good use and what better use than an Almond Pound Cake… something simple but yet so satisfying.

IMG_6789

To begin I beat 2 sticks of butter until they were creamy, then gradually added in 2 cups of sugar and continued beating the mixture until it was light and fluffy. I then added in an 8 oz. package of cream cheese, vanilla extract and the almond paste, which I crumbled.

IMG_6791

Following that I added in 6 eggs one at a time, beating well after each addition.

IMG_6792

And finally I added in 2 cups of flour that I whisked together with baking powder and salt. I beat the batter until it was well blended and then stirred the mixture a few times with a rubber spatula to ensure all of the ingredients were well combined.

IMG_6794

I then poured it into a prepared tube pan. To prepare the pan I sprayed it with a baking spray that contains flour.

IMG_6796

After baking the cake in a 325 F preheated oven for 55 minutes it came out perfect and smelled amazing.

IMG_6797

I let the cake cool in the pan for 10 minutes and then removed it and let it cool completely on a wire rack.

IMG_6800

I couldn’t wait to slice it into it and I wasn’t disappointed. This was the perfect comfort dessert for the cold weather this winter has brought. It had the dense familiarity of a pound cake while still being moist and a hint of almond flavoring thanks to the almond paste.

IMG_6813

Almond Pound Cake – Adapted from here

Ingredients:

1 cup (2 sticks) unsalted butter, at room temperature

2 cups sugar

1 8oz. package cream cheese, at room temperature

4 oz. almond paste, crumbled

1 tsp, vanilla extract*

6 eggs, at room temperature

2 cups flour

1 tbsp. baking powder

1 tsp, salt

*For an extra dose of almond flavor use almond extract

Directions:

1. Preheat the oven to 325 F. Grease and flour (or spray with a baking spray that includes flour) a fluted tube or tube pan.

2. Combine flour, baking powder and salt in a medium bowl and set aside.

3. Beat butter in a large bowl with an electric mixer on medium speed until creamy. Gradually add sugar, beating well after each addition. Continue beating until the mixture becomes light and fluffy. Add the cream cheese, almond paste and vanilla extract and beat for another minute. Add the eggs, one at a time, beating well after each addition. Add the flour mixture to the butter mixture and beat until well blended.

4. Pour the batter into the prepared pan and bake for about an hour or until golden brown and a cake tester comes out clean. Cool 10 minutes in the pan and then remove and let it cool completely on a wire rack.

Valentine’s Heart Candy Box Cake

A great thing about blogging and social media – Instagram in particular – is the chance to discover other bloggers. One blog that I have enjoyed following is The Cake Blog – a blog with amazing cake designs that include tutorials so you can recreate them yourself if you wish. Recently they featured a Valentine’s Heart Candy Box Cake that I thought was too cute not to try.

IMG_6750

Using one milk chocolate box cake mix I baked two heart cakes filling the pan with about 2 cups of batter for each of the cakes. After letting the cakes cool completely I leveled the cakes using a large serrated knife. I used to use a cake leveler but have found that using a knife allows me to level the cakes more evenly.

IMG_6697

Following that I frosted each of the cakes with vanilla frosting and then placed them in the refrigerator so the frosting could harden in preparation for decorating them with fondant.

IMG_6709

And while I was on a kick making marshmallow fondant recently, I opted to go with store bought fondant to decorate these cakes. I picked up Wilton’s Decorator Preferred Fondant in red and pink and I was pleasantly surprised; it was easy to knead and roll out. I’ve used Wilton’s Rolled Fondant in the past and it wasn’t as easy to work with.

IMG_6713

After rolling the red fondant out to an 1/8 of an inch thick I cut two strips of fondant long enough to wrap around each of the heart cakes, one an inch and half wide – the height of the cake – for the top of the candy box and the other two inches wide for the candy box.

IMG_6716

I rolled up the strips and then unrolled them around each of the cakes.

IMG_6717

Next I rolled out more of the red fondant and using my heart cake pan as a template, I traced out a heart for the cover of the candy box.

IMG_6718

Once I was done with the red fondant I rolled out the pink fondant and cut out two hearts – one smaller than the red cover I previously cut and one to fit inside of the wider red border – the candy box cake. On the smaller of the two pink hearts I used a fondant stitching wheel to etch an angle design.

IMG_6719

Next it was time to make the candy box cake actually look like a candy box and to do that I needed candy, more specifically chocolate candy. I melted some Wilton Dark Cocoa Candy Melts and filled heart & circle swirls molds to create the candy.

IMG_6712

After refrigerating the molds so the chocolate could set I tapped them out onto wax paper.

IMG_6720

I then used some of the melted chocolate to glue two pieces of the candy together so they would have a little height inside the candy box cake.

IMG_6726

To add a little more pizazz to the chocolates I drizzled them with melted chocolate and then sprinkled them with Valentine’s themed sprinkles.

IMG_6727

Then I used more of the melted chocolate to glue the pieces onto the candy box cake.

IMG_6729

On the original cake the edges were painted gold using gold dust and extract. I attempted to do the same with shimmer powder I had on hand…

IMG_6731

But unfortunately I wasn’t too successful as the powder I have didn’t have the same color intensity. It was worth a try though! While there were some imperfections with my final outcome, overall I was pleased with it. I definitely need to work on cutting fondant shapes and making straight lines when etching a design into the fondant.

IMG_6756

Roasted Tomato Basil Soup

For me any time is a good time for soup – it’s like ice cream; it can never be too cold or too hot to enjoy it. Especially since there are so many varieties of soups that can be enjoyed either hot or cold. But these days with the temperatures being so cold and every few days there is some sort of wintry mix falling from the skies hot soup is definitely the way to go! The other day while picking up some produce while grocery shopping – this is a common place (the produce section) where I get some of my cooking / baking ideas – the idea of making roasted tomato soup popped into my head. I had no idea what ingredients I needed but I figured tomatoes would be a good start and some basil. I knew I had the other basics at home that I assume I would need – yellow onions and garlic. I didn’t think I needed any specific type of tomato – i.e. plum, beefsteak, etc… – so I picked up a pack of six tomatoes but then when I got home and did some research I soon realized that I needed double that amount so I picked up another pack of six tomatoes the following day and I was ready to go.

IMG_6684

I began by slicing the tomatoes in half and tossing them with olive oil and kosher salt and placing them on a baking sheet.

IMG_6686

I then roasted them in a 400 F preheated oven for about 45 minutes.

IMG_6689

While the tomatoes cooled I chopped two yellow onions and minced four garlic cloves and sautéed both in two tablespoons each of unsalted butter and olive oil over medium heat. The smell of sautéing onions and garlic is probably one of my favorite aromas when it comes to cooking.

IMG_6691

Following that I added a quart of vegetable broth – I used College Inn’s Garden Vegetable Broth – the tomatoes and ten large basil leaves to the onion mixture.

IMG_6693

I brought the soup to a boil by raising the heat to high and then lowered the heat so the soup could simmer uncovered for about thirty minutes. I did a taste test and I already knew that this soup was a winner… The broth had a wonderful taste with a hint of the basil.

IMG_6694

I removed the pot from the heat and used an immersion blender to blend the mixture into a delicious creamy soup that still had bits of the basil in it. I seasoned it with some fresh ground pepper and it was ready to be enjoyed.

IMG_6696

While the soup was meant to be for dinner, I couldn’t wait to try it so I ladled a few spoons into a bowl and topped it with some shredded parmesan cheese and I was very happy with the result. I enjoyed a second bowl a few hours later along with a grilled cheese!

IMG_6704


Roasted Tomato Basil Soup

Makes about 4 to 6 servings

Ingredients:

12 tomatoes (approximately 3 pounds) – halved

2 medium yellow onions, chopped

4 garlic cloves, minced

10 large basil leaves

1 tablespoon kosher salt, plus more for seasoning

1/4 cup olive oil, plus more for sautéing onions and garlic

2 tablespoons unsalted butter

1 quart vegetable broth

Fresh ground pepper for seasoning

Directions:

1. Preheat oven to 400 F. Toss tomatoes with olive oil and salt and spread on a cookie sheet in a single layer and roast in the oven for 45 minutes.

2. Sauté the onions and garlic in 2 tablespoons of olive oil and the butter over medium heat for about 10 minutes, until the onions begin to brown.

3. Add the vegetable broth, tomatoes and basil to the onion mixture and raise the heat to high and bring the mixture to a boil. Lower the heat to low and simmer the soup uncovered for about 25 – 30 minutes, the tomatoes will looked stewed / poached.

4. Blend the soup with an immersion blender, or blend in a blender or a food processor, until the soup is creamy and all of the tomatoes have been blended. Season with salt and pepper.