Sprinkle Sugar Cookies

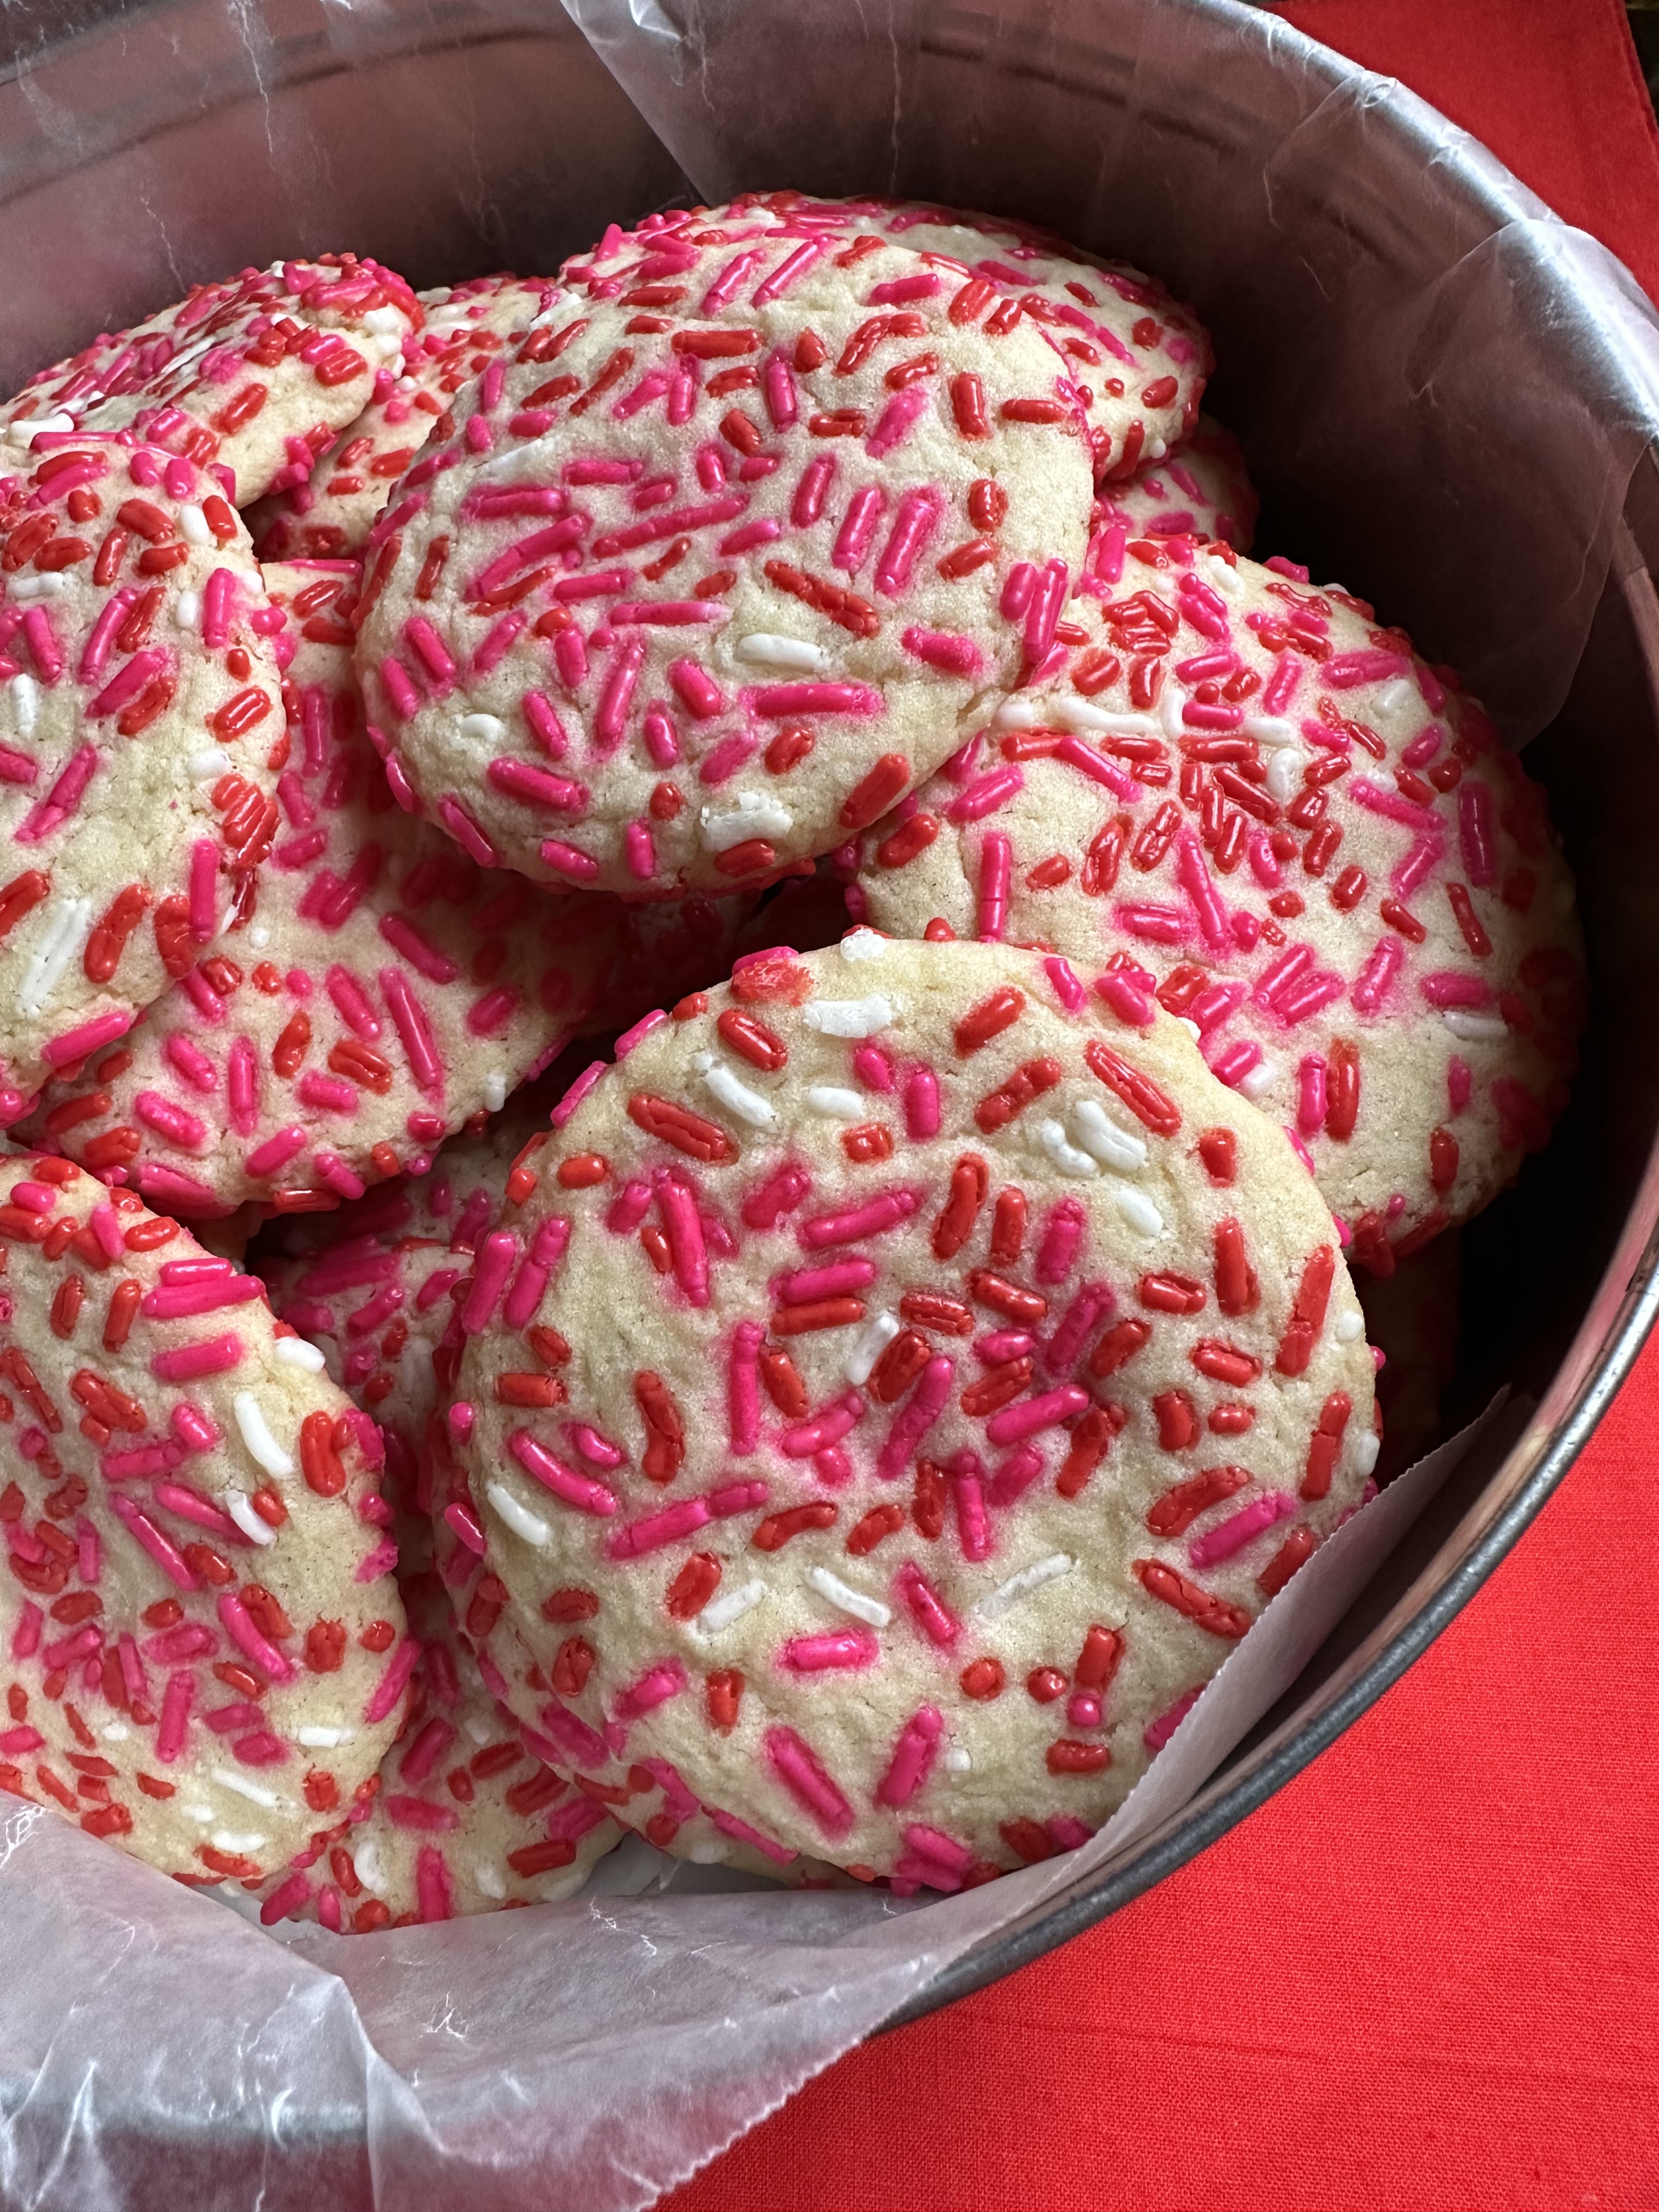
Happy Valentine’s Day! Rose are red, violets are blue, I have sprinkle cookies for you! Sorry for the cheesiness, I just couldn’t resist. That popped into my head the other day when I was thinking of what to write for these cookies. For a second I thought about switching up my plan for these cookies and using sprinkle colors to represent the teams playing in the Super Bowl this past weekend – since I was taking them to a Super Bowl party- but that would have been red & green, so I decided to spread a little love with them instead. That brings up a good point about these cookies, you can switch up the sprinkle colors for any occasion. They will taste good regardless. Similar to the Cookie Butter Chocolate Chip Cookies I shared a few weeks ago.

A couple of things to note about these cookies. The dough can be made in a food processor or using a hand/stand mixer. Since I like easy clean-ups, I opted to use my food processor. While the recipe I was following stated that you could use the butter and cream cheese right out of the refrigerator if using a food processor, I let both come to room temperature. Be sure to refrigerate the dough prior to baking, if not, the cookies will spread considerably. Also, the cookies will appear under baked when they come out of the oven but will firm up after cooling on the baking sheet for a few minutes. Resist the temptation to put them back in the oven for an extra minute or two.
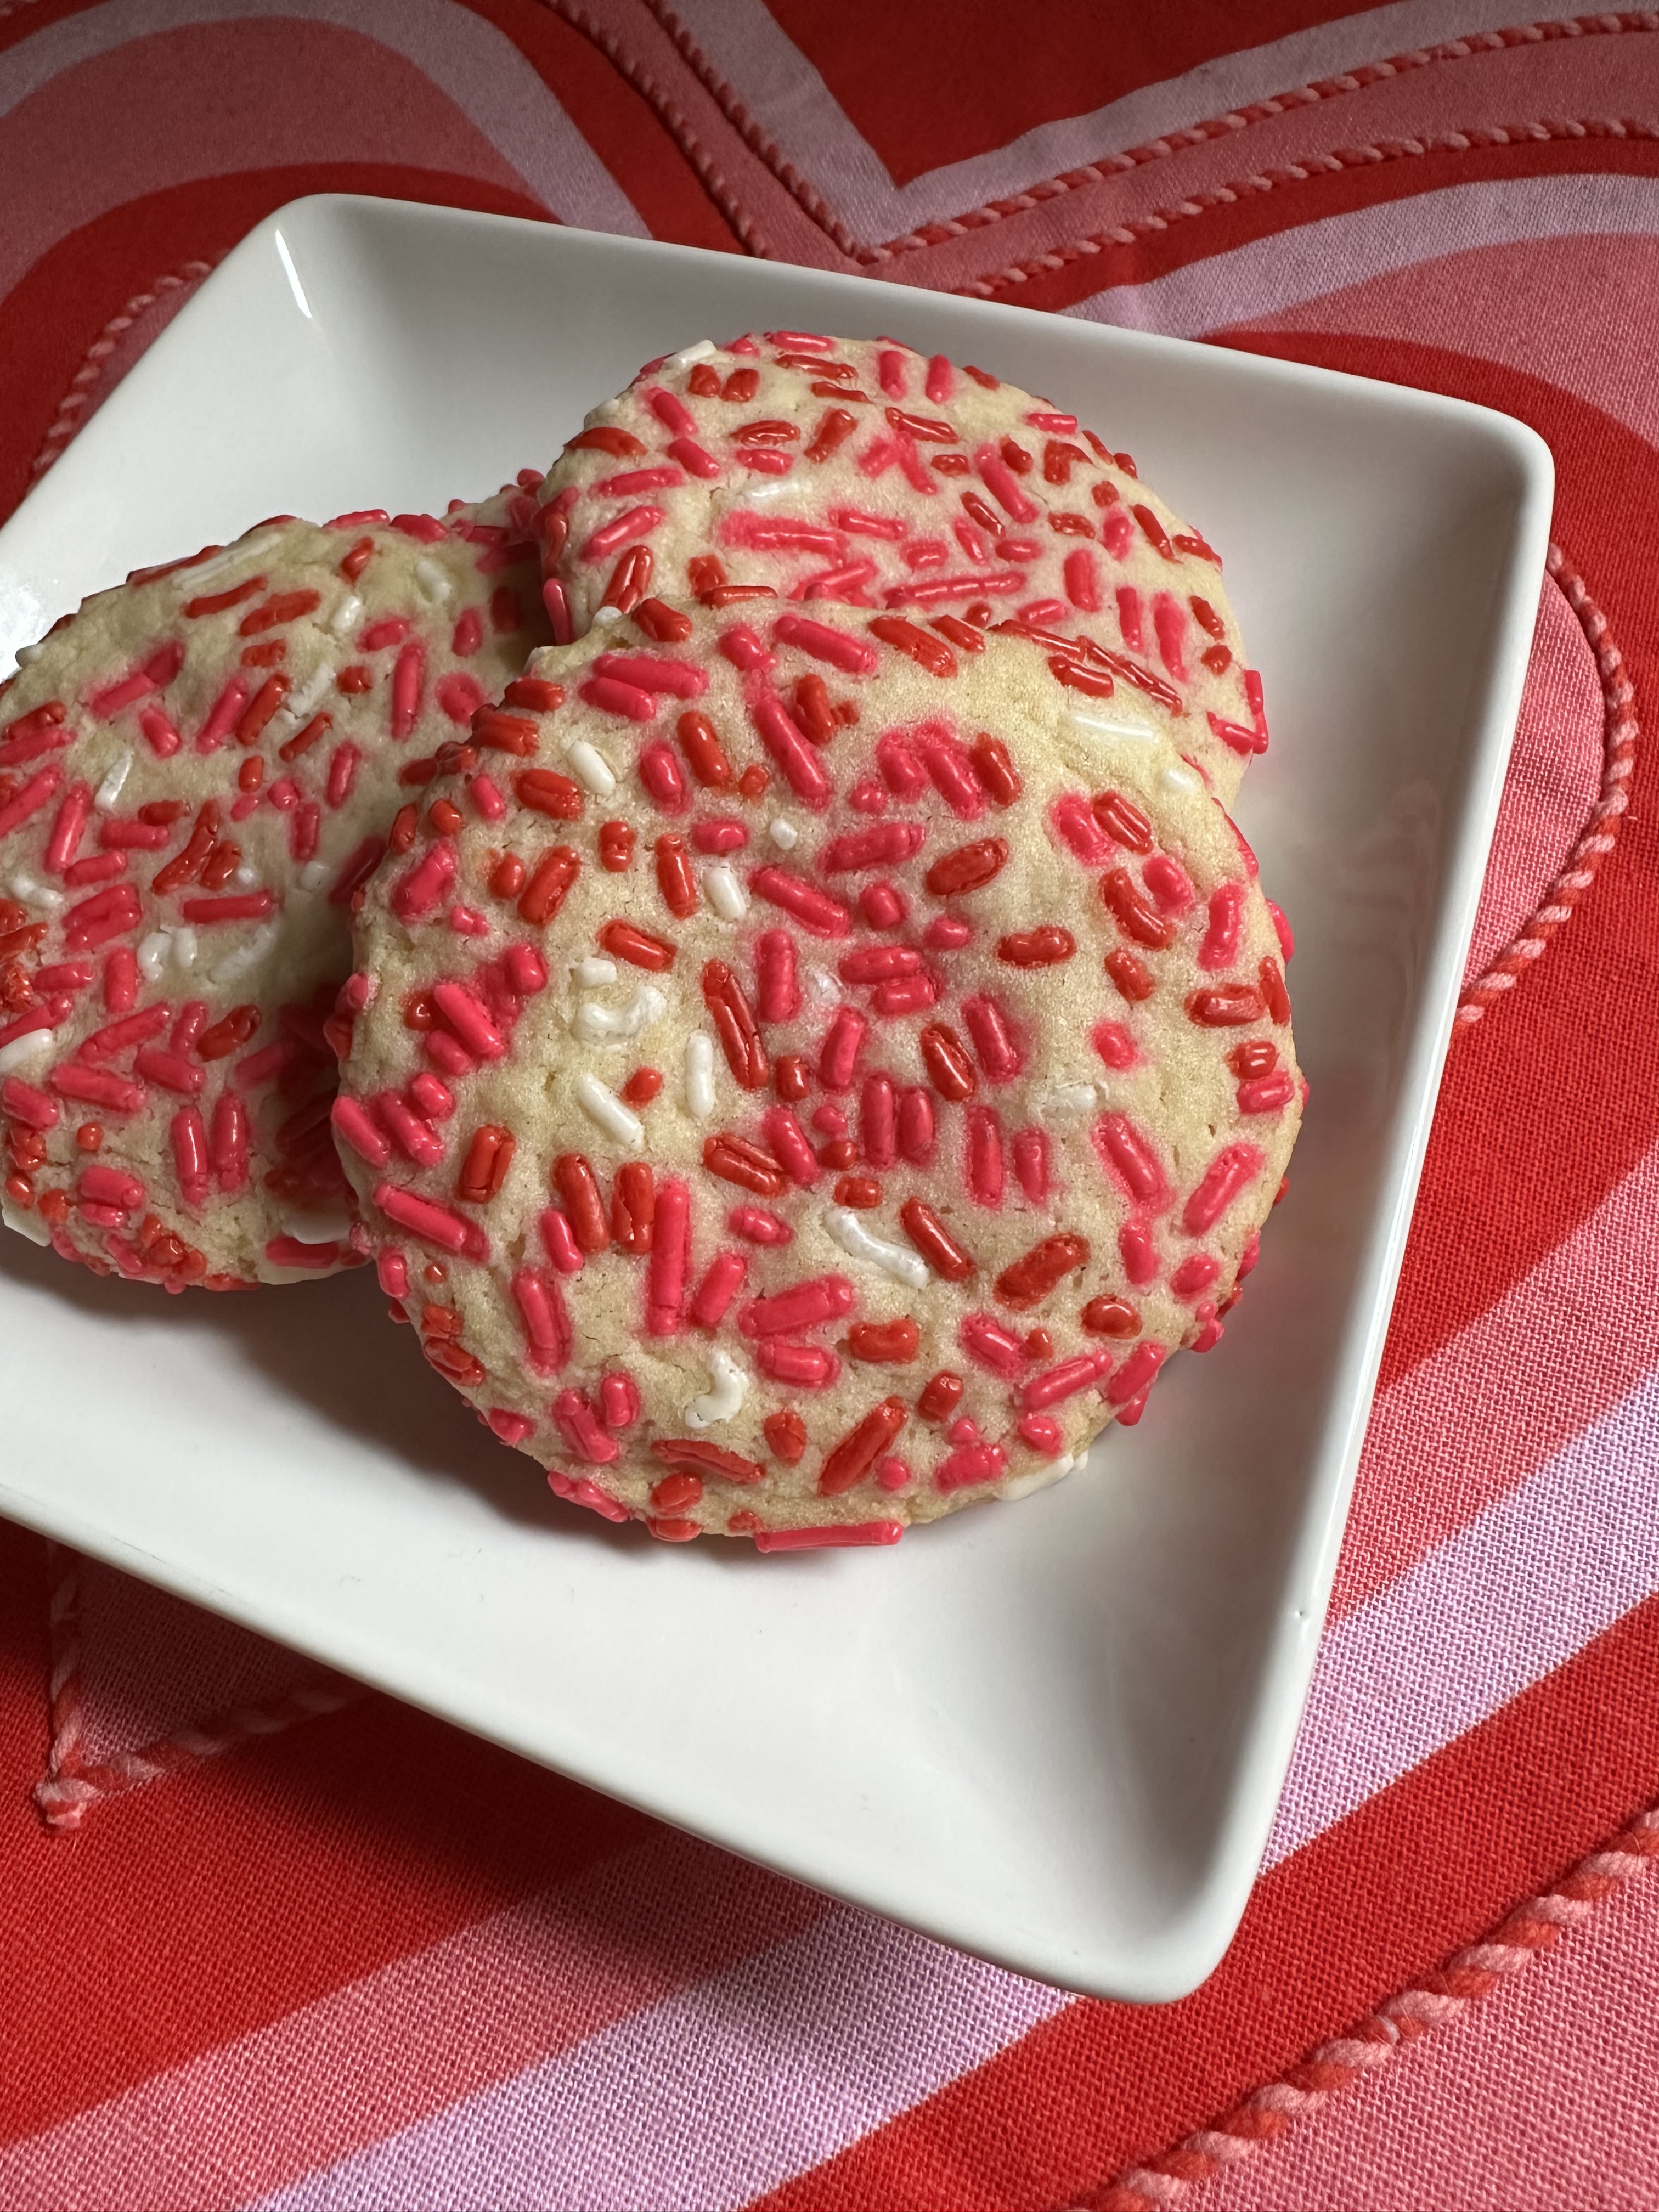
Confetti Cookies

  • Servings: 28 Cookies
  • Print

Ingredients:

3 cups flour

1 teaspoon baking powder

1/4 teaspoon baking soda

3/4 teaspoon salt

2 sticks unsalted butter, at room temperature, cut into chunks

2 ounces cream cheese (1/4 of an 8-ounce brick), cut into chunks

1 1/4 cups sugar

1 large egg

2 teaspoons vanilla extract

1 cup sprinkles

Directions:

Preheat oven to 375 F and line two baking sheets with parchment paper.

In the bowl of a food processor add the flour, baking powder, baking soda and salt. Pulse a few times to mix together. Add the butter cream cheese and sugar and process until the mixture comes together. Add the egg and vanilla extract and process until a ball of dough forms. You may need to scrape the bowl down a few times to ensure everything combines and mixes together. Transfer the dough to a bowl and refrigerate for about 20-30 minutes so the dough can firm up.

Place sprinkles in a small bowl. Use a cookie scoop to scoop the dough. Roll the dough in your hands and then roll in the sprinkles before placing on the prepared cookies sheets 2 inches apart. Use the bottom of a glass to press the cookies down about 1/4 to 1/2 – inch. If the cookies have any bare spots press more sprinkles into the dough.

Bake in the preheated oven for 9 to 10 minutes. Cookies will appear under baked and very soft. Let the cookies cool on the baking sheet for about 5 minutes before transferring to a wire rack to cool completely.

If you opt to use a hand mixer or stand mixer to make the dough… In a medium bowl whisk together the flour, baking powder, baking soda and salt. Set aside. In a large bowl (or the bowl of a stand mixer) beat the butter, cream cheese and sugar on medium speed until light and fluffy. Add the egg and vanilla extract beat again until well combined. With the mixer on low add in the flour mixture and beat until combined. Refrigerate 20-30 minutes until firm and then continue with directions.

Store in an airtight container.

Recipe from Smitten Kitchen.

Strawberry Cake with Lemon Cream Cheese Frosting

With Valentine’s Day just around the corner you may be on hunt for a pink or red dessert. You can always turn to a tried and true Red Velvet cake but what about something a little different like a Strawberry Cake. Now, strawberry cake can pose some issues. Basically, how to get the strawberry flavor into the cake without it ending up being a soggy mess thanks to the extra moisture of the strawberries. You could dice up some strawberries and add them to your batter, but, that’s not really a strawberry cake. There’s also the option of reducing the strawberries into a syrup and then incorporating that into your batter. But, a much more simpler way is to use freeze-dried strawberries. For this cake, I simply processed the strawberries in my food processor to turn them into a powder that I then incorporated with the rest of my dry ingredients.

Once my batter was ready I decided to bake it in a 6-inch heart pan. If you don’t have a heart pan on hand you can bake it in a 6-inch round cake pan instead. You could also do an 8-inch pan, but, your cake won’t have as much height to it and you will also have to adjust your baking time.

Typically, most strawberry cakes are topped with a strawberry buttercream. I opted not to do that for one simple reason. I only had enough freeze-dried strawberries to make the cake! So, I did a little brainstorming and thought that a Lemon Cream Cheese Frosting would work well with the cake. I came up with a frosting that still has the flavor of cream cheese with just the right amount of lemon. I literally could eat this frosting by the spoonful.

To frost the cake, I decided to go a little fancy and use a small star tip to decorate and then sprinkled some Valentine’s Day sprinkles around the perimeter.

And I am happy to say that the cake and frosting worked well together! You can’t tell from the picture, but, my cake was a very light pink. If you want a cake with a deeper pink or red hue you can add in some food coloring once you are done making the batter to get to the color you want.

Strawberry Cake with Lemon Cream Cheese Frosting

Ingredients:

For The Cake:

1 cup flour

1/2 teaspoon baking powder

1/2 teaspoon baking soda

1/2 teaspoon Kosher salt

1 oz. freeze dried strawberries

1/2 cup sugar

6 tablespoons unsalted butter, at room temperature

1 large egg, at room temperature

1/3 cup sour cream, at room temperature

1/4 cup milk, at room temperature

1/2 tablespoon lemon zest

2 teaspoons vanilla extract

For the Frosting:

1 8oz. block cream cheese, at room temperature

1/4 cup unsalted butter, at room temperature

2 cups confectioners’ sugar

1 tablespoon lemon juice

2 teaspoons lemon zest

1 teaspoon vanilla extract

Directions:

For the Cake:

Preheat oven to 350 F. Spray a 6-inch pan with baking spray or coat with butter and then dust with flour.

Using a food processor pulse the strawberries into a powder. 

Whisk together the strawberry powder, flour, baking powder, baking soda and salt together in a medium bowl and set aside.

In the bowl of a stand mixer cream together the butter and sugar on medium speed. Add the egg and beat until well combined. Add in the sour cream, milk, lemon zest & vanilla and continue mixing until well combined. Add in the flour mixture and beat until just combined.

Transfer the batter to the prepared pan and bake 30 to 40 minutes, or until a cake tester inserted in the center comes out clean.

Let cool in the pan for 10 minutes and then transfer to a wire rack to cool completely.

For the Frosting:

Using a handheld mixer (or stand mixer) beat the cream cheese and butter together on medium speed until smooth and creamy. With the mixer speed on low add in the sugar until well incorporated. Raise the speed to medium and add in the lemon juice, lemon zest and vanilla extract until all incorporated.

Hidden Heart Bundt Cake

Two years ago, I made my first Hidden Heart Cake in a loaf pan. This year, I decided to make another one, but, with a small twist. Instead of a loaf pan I decided to make it in a Bundt pan. I also made it more festive for Valentine’s Day by drizzling it with chocolate ganache and topping it with Valentine’s Day themed sprinkles.

To start I had to make a pink cake for the hearts. After prepping a mix of white cake per the box directions I tinted it pink. I then poured it into a Bundt pan that I sprayed with baking spray. Once it was done, I let it cool in the pan for 15 minutes before transferring it to a wire rack to cool completely. Once cooled, I wrapped it in plastic wrap and refrigerated it overnight. It’s easier and cleaner to cut up a cold cake. I will point out that I was a bit concerned after making this first cake. It didn’t bake up with a lot of height so I was worries that the chocolate cake wouldn’t be able to completely cover the hearts, but, after a little more thinking I realized it shouldn’t be a problem since the hearts would be taking up some of the pan so the chocolate cake would bake up higher.

The following morning, I cut the cake into slices (about 2-inches each) and then using a 2-inch heart cookie cutter I cut hearts from those slices. If you like making cake pops, you could use the leftover cake to make some.

I then prepped a box of chocolate cake mix per the box directions. I poured some of the batter into the bottom of my Bundt pan that I once again sprayed with baking spray. I did this to ensure that the top of the hearts would be covered by the cake.

Next, I arranged the hearts in the pan upside down. Remember, Bundt cakes are baked upside down and then you invert them once they are done.

And finally, I poured the remaining cake batter into the pan making sure to cover the hearts and getting the batter on the sides of the hearts closer to the outside of the pan.

I baked the cake in a 350 F preheated oven for about 30 minutes. And once the cake had cooled in the pan for 15 minutes, I inverted it onto a wire rack to cool completely. You can see in this close-up shot that a little bit of the pink did peek through, but I knew I would be able to cover that with the chocolate ganache I was planning on pouring over the cake.

To make the ganache, I combined chocolate chips, heavy cream and vanilla extract in a microwave safe bowl and microwaved it for 35-second intervals, stirring between each, until the chocolate chips had melted, and the mixture was smooth. I wanted the ganache to be a little thicker before I poured it over the cake, so I refrigerated it for about 15-20 minutes, stirring it every five minutes.

Before pouring the ganache on the cake, I lined a baking sheet with wax paper and then placed the wire rack the cake was cooling on on top of the wax paper.

Once the ganache was thick enough, I drizzled it over the cake and sprinkled the ganache with Valentine’s Day sprinkles. I then placed the cake in the refrigerator for a few minutes so the ganache could set.

And then it was time to slice it and I happy to say that the cake came out perfectly. It tasted good and the hearts were distinguishable when the cake was sliced.

Hidden Heart Bundt Cake

Ingredients:

For the Cake:

1 box white cake mix, plus the ingredient to prepare the batter

1 box chocolate cake mix, plus ingredients to prepare the batter

Pink food coloring


For the Ganache:

1/2 cup semi-sweet chocolate chips

1/2 cup heavy cream

1 teaspoon vanilla extract


Valentine’s Day themed sprinkles


Directions:

Preheat the oven to 350 F. Spray a 10-cup Bundt pan with baking spray, or grease with butter and dust with flour.

In a large bowl prepare the white cake mix per the directions on the box. Once prepared add in pink food coloring and stir to incorporate the color. Pour the batter into the prepared Bundt pan and bake for 35-40 minutes, or until a cake tester inserted comes out clean. Cool the cake for 15 minutes in the pan and then invert on a wire rack to cool completely. Once cooled, wrap the cake in plastic wrap and refrigerate overnight*.

Preheat the oven to 350 F. And prep the Bundt pan once again.

Remove the pink Bundt cake from the refrigerator and slice the cake into 2-inch thick slices. Using a 2-inch heart cookie cutter cut hearts from the slices. Set aside.

In a large bowl prep the chocolate cake mix per the box directions. Pour enough batter into the pan so there is about a 1/2-inch layer of cake batter on the bottom. Arrange the cut hearts upside down in the pan. They should fit in perfectly and be snugged next to one another. Pour the remaining batter over the hearts, and make sure to get it into the sides of the pan. Bake in the pre-heated oven for 30-35 minutes, or until a cake tester inserted towards the center of the cake comes out clean. Cool the cake in the pan for 15 minutes and then invert onto a wire rack to cool completely.

Once the cake has completely cooled make the ganache.

Combine all the ingredients for the ganache in a microwave safe bowl and microwave for 35-second intervals, stirring between each internal. Once the chocolate chips have melted and the mixture is smooth let cool for a few minutes before placing in the refrigerator so the ganache can thicken up. Refrigerate for about 15-20 minutes, stirring every 5 minutes.

Place a piece of wax paper on a large baking sheet and place the cake on the wire rack on top. Once the ganache is thick, drizzle over the cake. Sprinkle the cake with Valentine’s Day sprinkles and then place in the refrigerator for a few minutes so the ganache can set.

Slice and enjoy!

*It’s not necessary to refrigerate the cake overnight. You can slice the cake the same day you bake it once it’s cool. I just find it easier to work with the cake once it’s cold.

Crocheted Heart Table Runner & Garland

I normally don’t decorate for Valentine’s Day. The most I do is hang a tinsel heart wreath on my front door. This year though, possibly from spending so much time at home I decided to do a little more than just hang a wreath.

Initially I was just planning on making a crocheted heart garland. I started crocheting hearts in different colors reminiscent of the Conversation Hearts candy using Lily Sugar ‘n Cream yarn. Then I had the hearts I had completed on my coffee table in my living room and the idea came to me to make a table runner.

So, after measuring out another table runner I used on the table over the holidays I determined that I would need 60 crocheted hearts, 4 rows of 15 hearts (or 15 columns of 4 hearts.) Once I had them all crocheted it was time to settle on a pattern.

I ended up crocheting more of the lighter and darker pink hearts since I knew those colors were going to be the ones that would tie the table runner together. I went back and forth about what to do with the other colors but decided on placing them haphazardly. Doing my best to spread them out evenly. This is the pattern that I ultimately settled on.

And then the not-so-fun part… stitching the hearts together. I began by stitching the rows of 4 hearts together. Once I had finished stitching them, I laid the 15 4-heart columns out on my table and it became apparent immediately that I was going to need another row.

I crocheted 15 more hearts, thankfully they work up quickly, and placed them so I could stitch them onto the hearts I had previously stitched together. And instantly I could see that that additional row made my table runner the perfect width.

Next, I needed to stitch together all of the columns.

And finally, it was done. The finished size with the 75 hearts is 12.5” x 47”. This is the type of project though that you can completely customize to make it the size you need.

Also, this project is a great stash buster. While I used 7 different shades of Lily Sugar ‘n Cream yarn you could easily use any leftover yarn in your stash that has a similar weight (Medium/4) and use less or more colors depending on what you have on hand.

And I didn’t forget about that garland I wanted to make. To make the garland I crocheted 9 large hearts in Pretty in Pink and 8 smaller hearts in Rose Pink. Then using a long piece of yarn, I strung the hearts together. It ended up being just shy of 4 feet long. Just like the table runner though, you can adjust the length to fit your needs.

And there was one other thing I did to get my house into the Valentine’s Day spirit… I really didn’t feel like taking down my Christmas Tree, not because I was being lazy or anything, I just like how my tree looks, but, I didn’t want to leave the Christmas ornaments on it so I decided to make it into a Valentine’s Day Tree.


Crocheted Heart Table Runner & Garland

Lily Sugar ‘n Cream yarn in the following colors:

Sage Green – 2.5 oz ball

Tangerine – 2.5 oz. ball

Hot Purple – 2.5 oz. ball

Black Currant – 2.5 oz. ball

Teal – 2.5 oz. ball

Rose Pink – 4oz. ball (Super-Size Ball)

Pretty in Pink – 4oz. ball (Super-Size Ball)


Crochet Hook Size H-8 / 5mm


For the Table Runner I made 75 Larger sized hearts in the following breakdown:

24 Rose Pink, 14 Pretty in Pink, 8 Teal, 8 Tangerine, 7 Sage Green, 7 Hot Purple, 7 Black Currant


For the Garland I made 9 Larger hearts and 8 smaller hearts in the following breakdown:

9 Pretty in Pink, 8 Rose Pink


To make the smaller heart (1.5 inches long) only crochet Round 1, for the larger heart (2.5 inches long) crochet Round 1 & 2.

Magic Ring, Ch2

Round 1: Into the Magic Ring, 3 Treble Crochets, 4 Double Crochets, Treble Crochet, 4 Double Crochets, 3 Treble Crochet. Pull String, Ch2 and Slip Stitch into center. Pull string tight to close hole.

Round 2: Single Crochet in the side of starting Ch2. 2 half-double crochets in next stitch, 3 double crochets in next stitch, 2 double crochets in next stitch, Double Crochet in the next 4 stitches, 3 double crochets in next stitch, double crochets in next 4 stitches, 2 double crochets in next stitch, 3 double crochets in next stitch, 2 half-double crochets in next stitch. Single crochet and slip stitch in the side of last ch2 space.


To assemble the Table Runner:

Lay the hearts out in the pattern you wish and then stitch the hearts in the columns together first and then stitch all of the columns together


To assemble the Garland:

String the hearts, using a long piece of yarn, alternating between a large heart and a smaller heart, starting and ending with a larger heart. Tie a knot, or loop, on both ends of the yarn so the hearts will stay in place.

Valentine’s Day Cookies

While I enjoy decorating cakes one thing I rarely do is decorate cookies. Around the holidays I always have this grand idea of making sugar cookies and decorating them with royal icing. I actually have a mitten shaped cookie cutter that I have been meaning to use for the past two Christmases to make decorated cookies and it just hasn’t happened. Part of the reason is that I run out of time and the other part is that I am not fond of royal icing. I think it goes back to when I was taking Wilton decorator classes and one of the courses involved making flowers with royal icing. While I liked that the flowers would harden because of the royal icing, which meant you could make them ahead of time to decorate with them later, I just didn’t like the way my flowers looked. And I found working with the royal icing to be a bit of a headache. You have to keep it covered so it doesn’t harden and so forth. Because of all these little things I just avoid it. It’s actually been years since I’ve made royal icing, but, I decided that this year I wanted to make Valentine’s Day cookies that were decorated not just with sprinkles.

I began by making sugar cookies (I also made a batch of Gingerbread Cookies that you can see in the pics as well). I actually took a major shortcut in making the cookies. I purchased Pillsbury’s Sugar Cookie Dough, the one that comes in a roll not the pre-cut ones, and per the instructions on the wrapper I kneaded in flour before rolling the dough out on a floured surface. I then used a heart-shaped cookie cutter to cut out the cookies. I placed them on a parchment-lined cookie sheet and placed them in the refrigerator for a few minutes before baking them. I was hoping that chilling the cookies for a few minutes would help the cookies keep their shape while baking – cold cookies don’t spread as much while baking. Unfortunately this wasn’t the case. Some of my hearts ended up looking like circles or wonky shaped hearts. The two arches at the top weren’t as noticeable as I hoped they would be. I just figured I would make them look like hearts by decorating them. I ended up reading some reviews about the cookie dough and quite a few of them were negative and expressed what I had experienced. The dough spread way too much while baking. Oh well, I know for next time.

While the cookies were cooling I made a batch of royal icing. I removed about 1/2 cup of the icing and transferred it to a piping bag fitted with a small round tip. I then added in 2 tablespoons more water to the remaining icing to thin it to a syrup consistency. I then removed half of it and transferred it to another piping bag fitted with a small round tip and tinted the remaining icing a light pink and then transferred it to another bag, with, you guessed it, another small round tip. I used the thicker consistency icing to pipe the outline of the hearts on each cookie. After letting that set for a few minutes I then used the thinner consistency to flood the cookies. I didn’t go too crazy with my decorating. I piped horizontal lines in the contrasting color on some of the cookies and made a heart design in other. For both, I piped the secondary color on the icing while the first one was still wet this way the icing would dry together and be smooth. To create the heart designs I piped dots onto the cookies and then used a toothpick to drag a vertical line down the center of the dots. If you want to create a 3-D design on your cookies wait until the flooded icing dries and then pipe whatever design you would like onto the cookies.

I must say, decorating these cookies with royal icing was a lot easier than I remember it being. Or it could be that I find it easier compared to some of the cake decorating I do. I remember when I first started baking making some things seemed so daunting. Just last week I was working on a cake. I had just finished filling and crumb coating it and was about to make another batch of frosting to decorate it when I realized I had a major fail so I had to toss the cake and start over. I was able to bake and decorate another 3-layer 9-inch cake in just a few short hours. Thankfully I didn’t freak out and was able to manage my time to get it done. Had this been a few years ago I wouldn’t have been so calm.

So, will I attempt to make cookies decorated with royal icing again? Absolutely! Although next time I will be making the sugar cookies from scratch or possibly using a store-bought mix I only have to add a few ingredients to in hopes that they will keep their shape better. My gingerbread ones baked up perfectly, but, I also had made the dough a few weeks back and then rolled, cut and froze them until I was ready to bake them.

Hidden Heart Cake

Are you looking for something fun to bake for Valentine’s Day but are thinking that it’s too late? Well, this may just be the cake for you. All you need is 2 boxes of cake mix (I used white & chocolate), a loaf pan, a 2-inch heart cookie cutter and pink (or red) food coloring. While I used a white cake mix tinted pink for the hearts inside of a chocolate cake, you could try pink hearts inside of a white cake, red hearts inside of a white cake, red hearts inside of a yellow cake and so forth. It’s really up to you.

To begin, I prepped a box of white cake mix per the directions and then tinted it pink with a few drops of gel food coloring. I then poured it into a loaf pan that I sprayed with baking spray and baking it in a 350 F oven for 40 minutes, the cake wasn’t quite done but was browning considerably along the top so I dropped the temperature to 325 F and baked it for another 10 minutes. I let the cake cool for about 20 minutes in the pan and then transferred it to a wire rack to cool completely.

After the cake cooled I sliced it into approximately 1 inch slices. Some of the slices were a little thicker, some a little thinner. In the end, it didn’t matter.

Next, using a 2-inch heart cookie cutter I cut hearts from the slice of cake and set them aside. Those mini heart were for a different project that turned out to be a fail… Oh Well.

You will have a bunch of cake scraps left, I ended up snacking on a few pieces and then tossing the rest. If you make cake pops, or have been wanting to make pops, save these scraps for that.

I then prepped the chocolate cake mix per the directions on the box. I spread about a 1/2 inch later of the batter onto the bottom of my loaf pan that I prepped with baking spray.

Next, I arranged the 2-inch hearts in a row down the middle of the pan, leaving a small space between the first and last heart and then pan, while making sure the hearts in the middle were as close together as possible. This is why I said that if your slices aren’t exactly 1-inch thick it won’t matter. Once you line them together it will all be good.

I used a ladle to slowly pour the rest of the batter along the sides and on the top of the hearts. You don’t want to just pour the batter into the pan, this could disturb the hearts and you could end up with chocolate in between them. I did make sure that the hearts were completely covered with the batter. You don’t want a heart peeking out of the top of the cake… that would ruin the surprise.

I then baked it in a 350 F preheated oven for about 40 minutes. I inserted a cake tester and the inside was a still a little underdone so I lowered the oven temperature to 325 F and baked it for an additional 10 minutes, similar to what I did with the pink cake. Once again, I let the cake cool for about 20 minutes in the pan then removed it and let it cool completely on a wire rack.

Once it was cool it was time to slice and see if my hidden heart cake was a succes… And it was!!!

Pink Hot Chocolate

An all-natural Pink Hot Chocolate just in time for Valentine’s Day! How you may ask, well, instead of using red or pink food coloring to get the pink hue, you use a few tablespoons of beet juice. And before you cringe your face because beets are not your favorite vegetable or something you are willing to try once or again, just know that you will not be able to taste the beet flavor whatsoever. But, if you are still intrigued by the idea of making Pink Hot Chocolate for your Valentine this week (or for yourself) but are completely against the beet juice, I will give you a few options to get the pink color that might sound more appealing.

The base of this hot chocolate is white hot chocolate. You start off by bringing milk (I used whole milk) and salt to a simmer over medium heat. Then remove it from the heat and add in grated white chocolate and vanilla extract. Grating the chocolate allows it to melt easier and quicker. Once the chocolate has melted then stir in a few tablespoons of beet juice. But, if you are not inclined to use beet juice, you could substitute it with cherry juice or the juice from maraschino cherries. Just be aware that either of those options could make your hot chocolate a tad bit sweeter. Now, if none of those options work for you, you could tint the hot chocolate with a few drops of either pink or red food coloring. And finally, top the hot chocolate with a healthy topping of whipped cream and then sprinkle with cinnamon. YUM!

Pink Hot Chocolate

Ingredients:

2 cups milk

Kosher salt

1/2 teaspoon vanilla extract

2 ounces white chocolate, grated*

2 tablespoons beet juice**

Whipped cream, for topping

Cinnamon, for topping


*I used Baker’s White Chocolate

**substitute with cherry juice, maraschino cherry juice, food coloring


Directions:

In a small saucepan combine the milk and a pinch of the kosher salt and bring to a simmer over medium heat.

Remove the saucepan from heat and add in the vanilla extract and grated chocolate, stirring until the chocolate has completely melted. Stir in the beet juice.

Diving among mugs and top with whipped cream and cinnamon.


Recipe from Real Simple


Sweets For Your Sweet

Are you thinking of making some homemade treats for your Valentine? Or, maybe something for yourself? Well, I have two quick and easy treats for just that… Matzo Crack & Chocolate Peanut Butter Cheesecake Truffles.

For the Matzo Crack, you start off by making a simple toffee using butter and brown sugar. Which you then spread over matzo crackers that have been arranged in a single layer on an aluminum foil lined baking sheet. Pop it in the oven for about 10 minutes, remove and then spread a bag of chocolate chips – semi-sweet, milk or dark – over the bubbling toffee. Let it sit for a few minutes and then using an off-set spatula smooth the chocolate over the toffee. Sprinkle with seat salt (and nuts if you like) and refrigerate for about 45 minutes. Once the chocolate has hardened transfer to a cutting board and cut into pieces.

The truffles are just as easy… After making the filling – beat cream cheese, peanut butter, graham crumbs, sugar and peanuts together – roll it into 1-inch balls and freeze for about 10 minutes. Melt the chocolate and dip each of the balls in the chocolate, sprinkle with chopped peanuts and refrigerate until firm.

There you go… two quick, easy and delicious treats that you can enjoy this Valentine’s Day or any day!

Chocolate Toffee Matzo Crack

Ingredients:

4-5 lightly salted matzos

1 cup (2 sticks) unsalted butter

1 cup light brown sugar

12 ounce bag of chocolate chips – milk, semi-sweet or dark

Sea Salt

Favorite nuts, optional

Directions:

Preheat the oven to 350 F. Line a baking sheet with aluminum foil – make sure the foil goes up and over the edges of the pan. Top the foil with parchment paper. Cover the paper with the matzo, cutting and piecing the pieces together.

Combine the butter and sugar in a medium saucepan and cook over medium heat, stirring constantly with a whisk until the mixture comes to a boil. Once the mixture comes to a boil cook for a few more minutes until it becomes foamy and thickened. The mixture may look like its separating, continues whisking and it will come together. Pour the toffee over the matzo and spread it into an even layer using an off-set spatula. Pop it in the oven and bake it for about 10 minutes, until the toffee is bubbling. Remove from the oven and place on a wire rack

Scatter the chocolate chips over the hot toffee, let it sit for a few minutes and then using an off-set spatula spread the chocolate in an even layer over the toffee. Sprinkle with the sea salt and nuts (if using) and place in the refrigerator for about 45 minutes. Don’t let it stay in the refrigerator too long or it will be more difficult to cut.

Using the overhang aluminum foil transfer the matzo crack to a cutting board and cut it into pieces. Store in an airtight container in the refrigerator.

Recipe From Once Upon A Chef

Peanut Butter Cheesecake Truffles

  • Servings: About 28 Truffles
  • Print

Ingredients:

8oz. cream cheese, softened

1/2 cup graham cracker crumbs

1/4 cup confectioners’ sugar

1/4 cup creamy peanut butter

3 tablespoons chopped peanuts, divided

8oz. semi-sweet chocolate, chopped into pieces

Directions:

Beat cream cheese in a large bowl until creamy. Add in the remaining ingredients, except the sugar, and continue beating until all ingredients have mixed together.

Roll the cream cheese mixture into 28 balls, using about a tablespoon of the mixture for each ball. Place on a waxed covered baking sheet and freeze for 10 minutes.

Meanwhile, melt the chocolate. You can melt it in the microwave or using a double boiler. Dip the cream cheese balls into the chocolate and transfer them back to the wax-lined baking sheet. Sprinkle with the remaining chopped peanuts and refrigerate until firm, about an hour.

Store in an airtight container in the refrigerator.

Recipe from Kraft

A Red Velvet Valentine Heart

In honor of Valentine’s Day tomorrow I decided to bake up a red velvet cake heart and decorate it with cream cheese frosting. I just can’t stand when red velvet (or carrot cake for that matter) are frosted with buttercream or vanilla frosting. The flavors just don’t go well together in my opinion. So, what are your plans for Valentine’s Day? Or will you be celebrating Singletine’s Day? Or Galentine’s Day? Which is actually today!

For the cake I used a recipe that I came across on another blog that was for 12 cupcakes. In one bowl I combined all of my dry ingredients – flour, sugar, baking soda, baking powder, unsweetened cocoa powder and salt. And in a smaller bowl I whisked together buttermilk, vegetable oil, vanilla extract, an egg, vinegar and red food coloring. I didn’t have buttermilk so I made my own by combining a 1/2 cup of milk with 1/2 tablespoon of lemon juice (you could use vinegar in lieu of the lemon juice). I stirred the two together and let it sit at room temperature until it was slightly thickened. You may also see some curdling on the top as well. Ever since I learned I could make my own buttermilk I have opted to do that as opposed to buying it. Inevitably I always end up throwing out most of the buttermilk since I have nothing else to use it for.

img_0437

Next, I added the wet ingredients to the dry ingredients and beat them until they were well combined. And then slowly added in hot water – I boiled the water and then let it cool a bit.

img_0439

And finally, I poured the batter into my prepared 6-inch heart pan (I sprayed it with baking spray) and baked it in a 350 F oven for about 40 minutes. Now, if you plan on using a 6-inch heart pan like I did, don’t make the same mistake I did. I poured all of the batter into the pan. I probably should have only poured in enough to fill half or 3/4 of the pan, but, it was slightly more than 3/4. So, what happened, it overflowed when I baked it. Thankfully I had the premonition that it would so I placed aluminum foil on the rack beforehand so I didn’t have a huge mess in my oven.

img_0440

It wasn’t all that bad though, after letting the cake cool I was able to torte the cake. I just used the cut side as the bottom of the cake.

img_0442

And then it was time to decorate. I made cream cheese frosting and let it firm up a bit in the fridge before decorating with it. I began by make two large rosettes on the cake using a Wilton 1M tip…

img_0443

And soon enough, using various sizes and shapes of decorating tips, my heart was completely decorated.

img_0452

So, however you will be celebrating, or if you’re not celebrating at all, I hope you have a wonderful day.


Red Velvet Cake

Ingredients:

1 1/4 cups all-purpose flour

1 cup sugar

1 1/8 teaspoons baking soda

1/4 teaspoon baking powder

2 teaspoons unsweetened cocoa powder

1/2 teaspoon salt

1/2 cup buttermilk

1/4 cup vegetable oil

1 teaspoon vanilla extract

1 large egg

1 teaspoon white vinegar

2 teaspoons red food coloring

1/2 cup hot water

Directions:

Preheat oven to 350 F and prepare your desired pan. This recipe was originally for 12-14 cupcakes, but, can be easily used for a single layer 6-inch or 8-inch cake.

In a large bowl combine the dry ingredients – flour, sugar, baking soda, baking powder, cocoa powder and salt, set aside.

In a medium bowl whisk together the buttermilk, vegetable oil, vanilla extract, egg, vinegar and red food coloring.

Add the wet ingredients to the dry ingredients, and using a hand mixer beat until well combined.

Slowly add the hot water to the batter and mix on low speed until well combined. Scrape the sides of the bowl as needed.

If using a cupcake pan, bake for about 15 – 17 minutes. If using a cake pan, bake for 30 – 40 minutes. Until a cake tested comes out clean.

Remove the pan from the oven and let cool for 2 minutes and then remove to a cooling rack to finish cooling.

Recipe from The Cake Blog

Cream Cheese Frosting

Ingredients:

1 8-oz. package cream cheese, at room temperature

1/2 cup unsalted butter, at room temperature

3 cups confectioners’ sugar

1 1/2 teaspoons vanilla extract

Directions:

Combine the cream cheese and butter in a bowl and beat until smooth.

Gradually add in the confectioners’ sugar and continue beating until smooth.

Add in the vanilla extract and beat until well incorporated.

Valentine’s Heart Candy Box Cake

A great thing about blogging and social media – Instagram in particular – is the chance to discover other bloggers. One blog that I have enjoyed following is The Cake Blog – a blog with amazing cake designs that include tutorials so you can recreate them yourself if you wish. Recently they featured a Valentine’s Heart Candy Box Cake that I thought was too cute not to try.

IMG_6750

Using one milk chocolate box cake mix I baked two heart cakes filling the pan with about 2 cups of batter for each of the cakes. After letting the cakes cool completely I leveled the cakes using a large serrated knife. I used to use a cake leveler but have found that using a knife allows me to level the cakes more evenly.

IMG_6697

Following that I frosted each of the cakes with vanilla frosting and then placed them in the refrigerator so the frosting could harden in preparation for decorating them with fondant.

IMG_6709

And while I was on a kick making marshmallow fondant recently, I opted to go with store bought fondant to decorate these cakes. I picked up Wilton’s Decorator Preferred Fondant in red and pink and I was pleasantly surprised; it was easy to knead and roll out. I’ve used Wilton’s Rolled Fondant in the past and it wasn’t as easy to work with.

IMG_6713

After rolling the red fondant out to an 1/8 of an inch thick I cut two strips of fondant long enough to wrap around each of the heart cakes, one an inch and half wide – the height of the cake – for the top of the candy box and the other two inches wide for the candy box.

IMG_6716

I rolled up the strips and then unrolled them around each of the cakes.

IMG_6717

Next I rolled out more of the red fondant and using my heart cake pan as a template, I traced out a heart for the cover of the candy box.

IMG_6718

Once I was done with the red fondant I rolled out the pink fondant and cut out two hearts – one smaller than the red cover I previously cut and one to fit inside of the wider red border – the candy box cake. On the smaller of the two pink hearts I used a fondant stitching wheel to etch an angle design.

IMG_6719

Next it was time to make the candy box cake actually look like a candy box and to do that I needed candy, more specifically chocolate candy. I melted some Wilton Dark Cocoa Candy Melts and filled heart & circle swirls molds to create the candy.

IMG_6712

After refrigerating the molds so the chocolate could set I tapped them out onto wax paper.

IMG_6720

I then used some of the melted chocolate to glue two pieces of the candy together so they would have a little height inside the candy box cake.

IMG_6726

To add a little more pizazz to the chocolates I drizzled them with melted chocolate and then sprinkled them with Valentine’s themed sprinkles.

IMG_6727

Then I used more of the melted chocolate to glue the pieces onto the candy box cake.

IMG_6729

On the original cake the edges were painted gold using gold dust and extract. I attempted to do the same with shimmer powder I had on hand…

IMG_6731

But unfortunately I wasn’t too successful as the powder I have didn’t have the same color intensity. It was worth a try though! While there were some imperfections with my final outcome, overall I was pleased with it. I definitely need to work on cutting fondant shapes and making straight lines when etching a design into the fondant.

IMG_6756

%d bloggers like this: