Red White & Blue Roll Cake

Are you looking for something fun to bake for the 4th of July? A lot of the fun desserts you may come across may involve using berries to create a flag design, which is always delicious and inventive, but why not try something a little different. How about a Red White & Blue Roll Cake?

All you’ll need is a white cake mix, eggs, water, oil and sour cream. It’s pretty much just like making a box cake except you’ll need more eggs and the sour cream. You’ll also need something for the filling. I made a marshmallow whipped cream for my filling, but, you could use store bought vanilla frosting or any other flavor you choose. You could also do a fruit compote.

 After making the batter I divided it in three (about 1 1/3 cups each) and tinted two of them blue and red respectively and left the third one untinted.

Next, I transferred the batters to pastry bags – I used 16-inch ones –   and snipped off the ends of each. I didn’t cut the holes too big so I could control the amount of batter I piped. If your hole is too big you might end up with a big mess while piping. I then started piping the batter into a 12×18 inch baking sheet I lined with parchment paper and sprayed with baking spray. You could also use two smaller baking sheets as well. I was concerned that I would run out of batter before I was done piping, so I made my stripes a bit thin. Once I was done though, I still had some batter left over so I went back and filled in any gaps I had.

I then baked the cake in a 350 preheated oven for about 10 minutes.

While the cake was baking I laid out a clean kitchen towel on my counter and dusted it with confectioners’ sugar. Once the cake was done, I immediately flipped it onto the towel. I removed the parchment paper and using the towel I rolled the cake from short end to short end. I placed it on a wire rack and let it cool for 30 minutes. And as the cake was cooled I made the marshmallow whipped cream for the filling.

Once the cake was cooled I unrolled it (and yes it did break a little), frosted it and then rerolled it again. I refrigerated it for a few hours before slicing and enjoying.

Red White & Blue Roll Cake

Ingredients:

For the Cake:

1 box white cake mix

6 large eggs

1/4 cup sour cream

1/4 cup water

1/4 vegetable oil

Red & Blue food coloring

For the Filling:

1 cup heavy whipping cream

1 7oz. jar marshmallow crème

1 teaspoon vanilla extract

Directions:

Preheat the oven to 350 F. Spray a 12×18 baking sheet with baking spray, line with parchment paper and then spray the parchment paper with baking spray. Set aside.

In a large bowl beat the eggs on medium until thick and pale (about 6 minutes). Add in the cake mix, sour cream, water and oil and beat on low for 30 seconds and then medium for 1-2 minutes until the batter is smooth.

Divide the batter in three, about 1 1/3 cups each. Leave one untinted and tint the other two blue and red respectively. Transfer the batter to pastry bags or resealable plastic bags. Cut a small opening in the bags and pipe the batter diagonally into the prepared pan.

Once done piping tap the pan on the counter a few times to release any air bubbles. If you have batter left-over you can use it to fill any gaps.

Bake in the preheated oven for 8-10 minutes.

While the cake is in the oven, lay out a clean dish towel and dust with confectioners’ sugar.

Once the cake is done, flip it out on the prepared towel. Remove the parchment paper and roll the cake from short end to short end. Roll the towel up with the cake. This will prevent the cake from sticking to itself. Place on a wire rack and let cool for 30 minutes.

While the cake is cooling make the filling. In a chilled bowl beat the heavy whipping cream on medium speed until soft peaks form. Add in the marshmallow crème and vanilla extract and continue beating until stiff peaks form. Refrigerate until ready to use.

Carefully unroll the cake and spread the filling on top. Re-roll the cake, this time without the towel. Refrigerate for at least an hour before slicing and serving.

Hidden Heart Bundt Cake

Two years ago, I made my first Hidden Heart Cake in a loaf pan. This year, I decided to make another one, but, with a small twist. Instead of a loaf pan I decided to make it in a Bundt pan. I also made it more festive for Valentine’s Day by drizzling it with chocolate ganache and topping it with Valentine’s Day themed sprinkles.

To start I had to make a pink cake for the hearts. After prepping a mix of white cake per the box directions I tinted it pink. I then poured it into a Bundt pan that I sprayed with baking spray. Once it was done, I let it cool in the pan for 15 minutes before transferring it to a wire rack to cool completely. Once cooled, I wrapped it in plastic wrap and refrigerated it overnight. It’s easier and cleaner to cut up a cold cake. I will point out that I was a bit concerned after making this first cake. It didn’t bake up with a lot of height so I was worries that the chocolate cake wouldn’t be able to completely cover the hearts, but, after a little more thinking I realized it shouldn’t be a problem since the hearts would be taking up some of the pan so the chocolate cake would bake up higher.

The following morning, I cut the cake into slices (about 2-inches each) and then using a 2-inch heart cookie cutter I cut hearts from those slices. If you like making cake pops, you could use the leftover cake to make some.

I then prepped a box of chocolate cake mix per the box directions. I poured some of the batter into the bottom of my Bundt pan that I once again sprayed with baking spray. I did this to ensure that the top of the hearts would be covered by the cake.

Next, I arranged the hearts in the pan upside down. Remember, Bundt cakes are baked upside down and then you invert them once they are done.

And finally, I poured the remaining cake batter into the pan making sure to cover the hearts and getting the batter on the sides of the hearts closer to the outside of the pan.

I baked the cake in a 350 F preheated oven for about 30 minutes. And once the cake had cooled in the pan for 15 minutes, I inverted it onto a wire rack to cool completely. You can see in this close-up shot that a little bit of the pink did peek through, but I knew I would be able to cover that with the chocolate ganache I was planning on pouring over the cake.

To make the ganache, I combined chocolate chips, heavy cream and vanilla extract in a microwave safe bowl and microwaved it for 35-second intervals, stirring between each, until the chocolate chips had melted, and the mixture was smooth. I wanted the ganache to be a little thicker before I poured it over the cake, so I refrigerated it for about 15-20 minutes, stirring it every five minutes.

Before pouring the ganache on the cake, I lined a baking sheet with wax paper and then placed the wire rack the cake was cooling on on top of the wax paper.

Once the ganache was thick enough, I drizzled it over the cake and sprinkled the ganache with Valentine’s Day sprinkles. I then placed the cake in the refrigerator for a few minutes so the ganache could set.

And then it was time to slice it and I happy to say that the cake came out perfectly. It tasted good and the hearts were distinguishable when the cake was sliced.

Hidden Heart Bundt Cake

Ingredients:

For the Cake:

1 box white cake mix, plus the ingredient to prepare the batter

1 box chocolate cake mix, plus ingredients to prepare the batter

Pink food coloring


For the Ganache:

1/2 cup semi-sweet chocolate chips

1/2 cup heavy cream

1 teaspoon vanilla extract


Valentine’s Day themed sprinkles


Directions:

Preheat the oven to 350 F. Spray a 10-cup Bundt pan with baking spray, or grease with butter and dust with flour.

In a large bowl prepare the white cake mix per the directions on the box. Once prepared add in pink food coloring and stir to incorporate the color. Pour the batter into the prepared Bundt pan and bake for 35-40 minutes, or until a cake tester inserted comes out clean. Cool the cake for 15 minutes in the pan and then invert on a wire rack to cool completely. Once cooled, wrap the cake in plastic wrap and refrigerate overnight*.

Preheat the oven to 350 F. And prep the Bundt pan once again.

Remove the pink Bundt cake from the refrigerator and slice the cake into 2-inch thick slices. Using a 2-inch heart cookie cutter cut hearts from the slices. Set aside.

In a large bowl prep the chocolate cake mix per the box directions. Pour enough batter into the pan so there is about a 1/2-inch layer of cake batter on the bottom. Arrange the cut hearts upside down in the pan. They should fit in perfectly and be snugged next to one another. Pour the remaining batter over the hearts, and make sure to get it into the sides of the pan. Bake in the pre-heated oven for 30-35 minutes, or until a cake tester inserted towards the center of the cake comes out clean. Cool the cake in the pan for 15 minutes and then invert onto a wire rack to cool completely.

Once the cake has completely cooled make the ganache.

Combine all the ingredients for the ganache in a microwave safe bowl and microwave for 35-second intervals, stirring between each internal. Once the chocolate chips have melted and the mixture is smooth let cool for a few minutes before placing in the refrigerator so the ganache can thicken up. Refrigerate for about 15-20 minutes, stirring every 5 minutes.

Place a piece of wax paper on a large baking sheet and place the cake on the wire rack on top. Once the ganache is thick, drizzle over the cake. Sprinkle the cake with Valentine’s Day sprinkles and then place in the refrigerator for a few minutes so the ganache can set.

Slice and enjoy!

*It’s not necessary to refrigerate the cake overnight. You can slice the cake the same day you bake it once it’s cool. I just find it easier to work with the cake once it’s cold.

Hidden Heart Cake

Are you looking for something fun to bake for Valentine’s Day but are thinking that it’s too late? Well, this may just be the cake for you. All you need is 2 boxes of cake mix (I used white & chocolate), a loaf pan, a 2-inch heart cookie cutter and pink (or red) food coloring. While I used a white cake mix tinted pink for the hearts inside of a chocolate cake, you could try pink hearts inside of a white cake, red hearts inside of a white cake, red hearts inside of a yellow cake and so forth. It’s really up to you.

To begin, I prepped a box of white cake mix per the directions and then tinted it pink with a few drops of gel food coloring. I then poured it into a loaf pan that I sprayed with baking spray and baking it in a 350 F oven for 40 minutes, the cake wasn’t quite done but was browning considerably along the top so I dropped the temperature to 325 F and baked it for another 10 minutes. I let the cake cool for about 20 minutes in the pan and then transferred it to a wire rack to cool completely.

After the cake cooled I sliced it into approximately 1 inch slices. Some of the slices were a little thicker, some a little thinner. In the end, it didn’t matter.

Next, using a 2-inch heart cookie cutter I cut hearts from the slice of cake and set them aside. Those mini heart were for a different project that turned out to be a fail… Oh Well.

You will have a bunch of cake scraps left, I ended up snacking on a few pieces and then tossing the rest. If you make cake pops, or have been wanting to make pops, save these scraps for that.

I then prepped the chocolate cake mix per the directions on the box. I spread about a 1/2 inch later of the batter onto the bottom of my loaf pan that I prepped with baking spray.

Next, I arranged the 2-inch hearts in a row down the middle of the pan, leaving a small space between the first and last heart and then pan, while making sure the hearts in the middle were as close together as possible. This is why I said that if your slices aren’t exactly 1-inch thick it won’t matter. Once you line them together it will all be good.

I used a ladle to slowly pour the rest of the batter along the sides and on the top of the hearts. You don’t want to just pour the batter into the pan, this could disturb the hearts and you could end up with chocolate in between them. I did make sure that the hearts were completely covered with the batter. You don’t want a heart peeking out of the top of the cake… that would ruin the surprise.

I then baked it in a 350 F preheated oven for about 40 minutes. I inserted a cake tester and the inside was a still a little underdone so I lowered the oven temperature to 325 F and baked it for an additional 10 minutes, similar to what I did with the pink cake. Once again, I let the cake cool for about 20 minutes in the pan then removed it and let it cool completely on a wire rack.

Once it was cool it was time to slice and see if my hidden heart cake was a succes… And it was!!!

Pistachio Quick Bread

I’ve been using Jell-O pudding mixes for quite some time now as a base to make mousse fillings for my cakes. I’ve actually started picking up different flavors of the boxes to switch up my filling flavor. While there is nothing wrong with vanilla and chocolate of course, a chocolate cake with either a caramel or banana mousse flavor wouldn’t be too bad either. I sometimes wonder though what other desserts they can be turned into and then recently I found the perfect recipe to use a box of pistachio pudding, a Pistachio Quick Bread. Combined with a package of white cake mix and a few other ingredients you have two delicious loaves in less than an hour. For a little more texture and crunch add in a cup of chopped of pistachios to the batter, or scatter them along the top of the batter before baking. I’m looking forward to trying this recipe with a box pumpkin spice Jell-O (I finally found them at the supermarket, as you may recall I used my last box to make a Chocolate Roll Cake with a Pumpkin Mousse Filling) and a box of yellow cake mix. Baking from scratch is great, but, taking short cuts and sprucing up a box of store bought cake mix is never a bad thing.

img_1285


Pistachio Quick Bread

Ingredients:

1 Box White Cake Mix

1 3.4 oz. package of pistachio pudding mix

4 large eggs

1 cup sour cream

1/4 cup water

1/4 cup canola oil


Directions:

Preheat the oven to 350 F. Spray 2 8×4-inch loaf pans with baking spray (or grease with butter) and set aside.

In a large bowl combine the cake mix and pudding mix. Add the eggs, sour cream, water and oil. Beat on low for 30 seconds to combine and then raise the speed to medium and continue mixing until well blended (the batter will be thick)

Divide the batter amongst the two prepared pans and bake in the oven for 35-40 minutes, until a cake tester inserted in the middle come out clean.

Allow to cool in the pan for 10 minutes and then remove from pans and cool completely on a wire rack.

The original recipe included a cinnamon sugar swirl which I decided to omit. The link for the recipe with the swirl is below.

Recipe from Taste of Home

Rainbow Cookie Cake

This cake might be a stretch as a holiday cake, but, since I normally make Rainbow Cookies around the holidays I figured a Rainbow Cookie Cake would be a nice addition as a holiday cake. It definitely has a bit of a wow factor and it’s much easier & quicker to make than the cookie version.

One of the things that made this cake easy was using three boxes of white cake mix. I prepped each following the directions on the package and added in 1/2 teaspoon of almond extract to each. While the almond flavor was noticeable, I think it would have been better to add in 3/4 to 1 teaspoon of extract to each. Or, you could skip the extract altogether and grate in almond paste. I would suggest buying one package of almond paste and dividing it into three equal parts. Once the cake mix was prepped I then added in gel food coloring to achieve the pink, yellow & green colors. Here’s a tip, instead of adding a bunch of one color to achieve your desired shade, add in a little orange to the yellow, add a drop of red to the pink and a bit of blue for the green. This will also result in more vibrant shades of each color as well.

I baked each of the layers in a 9 inch square pan. While the directions said to bake the cakes in a 350 F oven for about 35 minutes, I found that after 30 minutes my cakes were still undercooked so I lowered the oven temperature to 325 F and baked the cakes for an additional 10-12 minutes. I let the layers cool in the pan for about 15 minutes and then inverted them on wire racks to cool completely.

Once the layers were cooled I leveled each of them with a serrated knife. I placed the pink layer on a cake board, trimmed side up, and spread about 1/2 cup of raspberry jam. I repeated this step with the yellow layer and then topped the cake the green layer, trimmed side down. While the directions called for the cake to be frozen for 1 hour, unfortunately I used a round cake board that wouldn’t fit in my freezer so I ended up refrigerating it for about 2-3 hours. Don’t worry if your layers are not flush, i.e. not the same width, you will be trimming the sides of the cake once you top it with chocolate. This ended up happening to me because while both of the pans I used were 9 inch squares the sides of one of the pans was straighter than the other.

Before removing the cake from the refrigerator I made the chocolate topping. I melted chocolate and butter together in the microwave in 30 second intervals. Well, to be truthful, I microwaved it once at 30 seconds and the second time at 45 seconds and then stirred it together until smooth. I set it aside for about 10-15 minutes so it could cool and thicken before pouring it on the cake. If you pour it right away the chocolate will be too thin and just run down the sides of cake when you try to spread it. Also, you won’t be able to create the usual wavy lines in the chocolate that rainbow cookies normally have.

Once the chocolate was ready I removed the cake from the refrigerator and poured the chocolate over the top and using an offset spatula I spread it into a thick even layer over the cake. And for the final touch, using the tines of a fork I created wavy lines in the chocolate. If you find that the chocolate isn’t holding the wavy pattern, wait a minute or two and then go over the patter again with the fork. It could just be that the chocolate needs to cool a bit more. I then returned the cake to the refrigerator so the chocolate could set, but, not harden.

And finally, I trimmed all for sides of the cake. I did find this part a bit tricky as my cake was crumbling while doing so. Partly because, as per the directions, I only used eggs whites in the batter which produces a much lighter cake. You could use whole eggs as opposed to the egg whites which would produce a denser and moister cake and one that is slightly yellower, which would be good when tinting the yellow layer of the cake.

So, everyone who tried this cake, including me, loved it. They all agreed that it was light and not crazy sweet. The perfect type of dessert.

Rainbow Cookie Cake

Ingredients:

Cake:

3 16 to 18–ounce boxed of white cake mix (plus the required ingredients)

1 1/2 teaspoons pure almond extract

Pink, yellow and green gel food coloring

1 cup seedless raspberry jam

Chocolate Topping:

2 4–ounce bars semisweet chocolate, chopped

6 tablespoons unsalted butter, cubed

Directions:

Preheat the oven to 350 F. Spray a 9-inch square pan with baking spray and set aside.

Prepare 1 cake mix per box directions adding in 1/2 teaspoon of vanilla extract. Tint with the pink food coloring, stirring well making sure no white streaks remain. Transfer to the prepared pan and bake in the preheated oven for 35 minutes. Let cool in the pan for 15 minutes and then transfer to a wire rack to cool completely.

Repeat to make the yellow and green layers.

Trip the tops of each of the cakes to make level. Don’t worry if the widths of the cakes are different, you will even it out at the end.

Place the pink cake, trimmed side up, on a cake board and spread with 1/2 cup of jam. Top with the yellow cake, trimmed side up, and spread the remaining jam on top. Top with the green layer, trimmed side down. Freeze for 1 hour.

Microwave the chocolate and butter together in 30 second intervals, stirring after each, until melted and smooth. Let it cool slightly.

Pour the cooled chocolate over the top of the cake and using an offset spatula, spread the chocolate in a thick even layer over the cake.

Using the tines of a fork create a wavy lines pattern in the chocolate. Return the cake to the freezer so the chocolate can set, but not harden, about 15 minutes.

Using a long serrated knife trim all four sides of the cake.


Recipe notes:

You can use whole eggs as opposed to the recommended egg whites on the box directions

For a stronger almond taste try adding in more almond extract, or substituting it with almond paste.

To achieve brighter shades of pink, yellow and green, add a little red to the pink, orange to the yellow and blue to the green

You can place the cakes in the refrigerator as opposed to the freezer, but, will need to leave them in longer.

Recipe from Food Network

Cookies and Cream Cake

If you love Oreos then this is the cake for you… A Cookies and Cream Cake that has crushed Oreos baked into the batter as well as folded into the buttercream.

I took the easy route and opted to use a box cake, a Duncan Hines Classic White Cake Mix to be exact. I made one minor adjustment to the batter, I added in an extra 1/4 cup of water so that the Oreo crumbs wouldn’t thicken the batter too much. Once the batter was ready, I then folded in a cup of Oreo crumbs. To create the crumbs I placed a bunch of Oreos in a Ziploc bag, sealed it and then rolled it with a rolling pin. I left some of the Oreos in fairly large crumbs so that the cake wouldn’t just be speckled with little pieces of Oreos, but have some noticeable pieces. I then divided the batter between two 8-inch round pans that I sprayed with baking spray and baked it in a350 F preheated oven until a cake tester inserted in the middle came out clean, about 25 to 30 minutes. I let the cakes cool for a few minutes and then inverted them on wire racks to cool completely.

Meanwhile, I made the frosting. My go-to frosting is a Fluffy Vanilla Frosting that I got from a Martha Stewart cookbook and have been using for quite some time now when it comes to decorating my cakes. It tastes good (not overly sweet) and holds up well to piping and tinting. If frosting is too soft when you tint it it will only get softer and when you try to pipe it it inevitably droops. While I love using the frosting, I am not a fan of making it. It involves adding the confectioners’ sugar 1/2 cup at a time and raising and lowering the speed of my stand mixer. What ultimately happens, even though I cover the mixer with a kitchen towel, is sugar dust gets everywhere on my counter. I was also concerned that the recipe wouldn’t yield enough frosting to fill, frost & decorate the cake. So, while doing a little research for this cake – I couldn’t decide in the beginning if I should make the cake from scratch or use a box mix – I came across a buttercream frosting that incorporated crushed Oreos that I decided to try. I began by beating the butter in my stand mixer until it was light and fluffy and then added in confectioners’ sugar and heavy cream and mixed it on low speed until the sugar was incorporated and then slowly raised it to medium until everything was well blended. Using a rubber spatula I folded in Oreo cookie crumbs. You may be tempted to make the frosting in advance and then store it in the refrigerator. I suggest not doing that. Doing so will allow the cookie crumbs to soften and when you go to use it your frosting may end up looking more gray than speckled with Oreos.

Once the cake cooled I torte both to remove the small dome that formed during baking and then spread some of the frosting on one the cakes and then topped it with the other. I then crumb coated the cake and refrigerated it for about 15 minutes so the frosting could set and then finished frosting it. I had some remaining Oreo crumbs so I pressed them along the bottom of the cake.

Next, I made the chocolate ganache that I poured on top of the cake and spread around. Using a squeeze bottle I tried to create a chocolate drip around the cake. Unfortunately it was a bit warm in my house so the chocolate didn’t set well (even after refrigerating it for a few minutes) so it was a bit runny, hence the chocolate drizzle running down the sides of the cake. Oh well! Finally, using a Wilton 1M tip I piped dollops with the remaining frosting on top of the cake and place a mini Oreo in each one. A little tip, if you plan on piping frosting that has crumbs in it make sure your tip is large enough for the crumbs to pass through. I actually had a few instances of the crumbs getting stuck.

And there you have it… A Cookies and Cream Cake.


Cookies and Cream Cake

Ingredients:

For the Cake:

1 15.25 oz. white cake mix

3 large egg whites

1 1/4 cups water

1/3 cup vegetable oil

1 cup Oreo crumbs


For the Frosting:

3 sticks unsalted butter, at room temperature

5 cups confectioners’ sugar

1 1/3 cups Oreo crumbs

1/4 cup heavy cream


For the Chocolate Ganache:

1 cup (8 ounces) semi-sweet chocolate (can use chocolate chips or a baking bar chopped)

1/2 cup heavy cream


*You will need 1 package of Oreos and 1 small container of mini Oreos


Directions:

Preheat the oven to 350 F. Spray two 8-inch round cake pans with baking spray or butter and flour.

In a large bowl combine the cake mix, egg whites, water and oil. Prepare according to box directions then fold in the Oreo crumbs. Divide the batter among the two pans and bake in the preheated oven for 25 to 30 minutes, until a cake tested inserted in the middle comes out clean. Let the cakes cool in the pans for 15 minutes and then invert them on a wire rack to cool completely.

While the cakes are cooling make the frosting. Beat the butter on medium speed until light and fluffy. Add in the confectioners’ sugar and heavy cream and beat on low speed until incorporated and then raise the speed to medium and continue beating until well blended. Using a rubber spatula fold in the Oreo crumbs.

Once the cake has cooled, torte, fill and apply a crumb coat. Refrigerate the cake for about 15 minutes.

While the cake is in the refrigerator make the chocolate ganache. Place the chocolate in a bowl. Warm the heavy cream in a small saucepan over low heat until steaming and then pour over the chocolate. Let sit for 5 minutes and then stir until smooth. Set aside until ready to use.

Remove the cake from the refrigerator and finish frosting. If you have Oreo crumbs remaining press them along the bottom of the cake. Once the ganache has thickened, transfer to a squeeze bottle and squeeze some of the ganache on the center of the cake. Using an off-set spatula gently spread the ganache towards the outside of the cake, careful not to let it spill over. Add more ganache is necessary. With the remaining ganache in the squeeze bottle drip the chocolate the chocolate along the sides of the cake. Place in the refrigerator so the chocolate can set.

Once chocolate has set use the remaining frosting to pipe dollops on top of the cake. Add mini Oreos to the dollops or cut larger Oreos in half and add those to the dollops.

Frosting Recipe from the Preppy Kitchen

Russian Decorating Tips

If you’ve been perusing decorated cakes on Instagram or Pinterest lately you may have noticed an influx of cakes decorated with some fancy and elaborate looking flowers. You may have thought to yourself that they require some advanced skill in cake decorating to create, but, the truth is, they only require specific types of decorating tips, a little patience and the right frosting consistency to replicate.

When I first started seeing them I did a little research and discovered that the flowers were being created with decorating tips known as “Russian Decorating Tips.” After a little more research I discovered that these tips have nothing to do with Russia. So, how did they get their name? Per another blogger, I Am Baker, they got their name because they were being sold by a company called Ali Express and they named them “Russian Tips.” At the time I didn’t feel like ordering a set over the internet, but, not too long ago I discovered that my local AC Moore began selling a set of 8 (along with an extra-large coupler to use with them) for less than $10. Truth be told, you don’t need the coupler. You can just cut your decorator bag and drop the tip in. I would suggest using a 16-inch decorator bag with these tips as opposed to a 12-inch one.


Unlike traditional decorating tips from Wilton & Ateco, these tips do not have numbers on them. The tips have a laser cut design on the end that allows the frosting to be piped through and form the different flowers. I will say that some of the tips are easier to use than others. Some of the designs, especially those that have detailed centers meant to emulate the stamen & stigma part of the flower, take a little more practice to master. One other thing that is different is the way you pipe them. With your usual tips you sometimes have to add a little wrist twist to get the flower design, or, you have to hold the bag at a 45 degree angle. But, with these tips you hold the bag at a 90 degree angle about an inch or so from your cake (or cupcake) and squeeze for a few seconds to form the flower. Before piping the next flower I would suggest wiping the tip clean to get a nice flower for the next pipe.

Like I mentioned earlier I purchased a set of these tips from my local AC Moore store. I can’t remember how I knew they carried them; I probably saw something on their Instagram feed. I decided to hold off on using them until I made my Mother’s Day cake. I did test them out using store bought vanilla frosting and as I had suspected and had read a little bit about, the frosting was too thin to get a well-formed flower. All of my test flowers looked like little blobs of frosting as opposed to a flower.

So, using my go-to Fluffy Vanilla Frosting that I then tinted in 4 different colors I began decorating the top of my cake. I was soon a bit frustrated with some of the tips. The flowers weren’t piping well and even though the frosting was a stiffer consistency the centers of the flowers weren’t looking nice. So, I decided to switch the tips I had chosen to use. Soon enough I got the hang of it and ended up with a flower topped cake I was content with. It wasn’t until I added in leaves (using a Wilton 352 tip) that I piped around the cake and in between the flowers to fill in the gaps that I was truly happy with the outcome.


Funfetti Cake

Are you ever too old for sprinkles? If you ask me, I’ll say absolutely not! I’m thirtysomething and when I go to Carvel to get a cup of soft serve vanilla ice cream I always ask for them to put sprinkles in the bottom of the cup before swirling in the ice cream and then ask for more sprinkles on top. So, when a friends’ younger sister asked me to make her a Funfetti cake for her 30th birthday I was more than happy to oblige!

To create this Funfetti cake, I followed a recipe to make a white cake and in the end I folded in a cup of rainbow sprinkles. To create the batter for the cake I began by beating butter until it was creamy and then gradually added in sugar and continued beating it until it was light and fluffy. In a separate bowl I sifted together flour and baking powder and in a measuring cup I mixed together milk and vanilla extract. I added these two to the butter mixture alternating between the two, starting and ending with the flour mixture. In another separate bowl, I beat 5 egg whites until stiff peaks formed. I then folded the egg whites along with the sprinkles into the batter.

img_0307

I divided the batter among 3 8-inch round cake pans that I sprayed with baking spray and then baked them in a 350 F oven for about 25 minutes. After letting the cakes cool in the pans for about 10 minutes I then turned the cakes out on wire racks so they could cool completely.

img_0309

I then made my go-to frosting, a Fluffy Vanilla Frosting from Martha Stewart. After crumb coating the cake…

img_0319

I finished frosting it, added some dropped dollops on top and of course some sprinkles. While everyone wasn’t a fan of the Funfetti Cake – I never realized it was one of those cakes that you either love or hate – the Birthday girl thoroughly enjoyed it!

img_0329


Funfetti Cake

Ingredients:

1 cup whole milk

1 1/2 teaspoons vanilla extract

1 cup (2 sticks) unsalted butter, at room temperature

2 cups sugar

3 cups cake flour

1 tablespoon baking powder

5 egg whites

3/4 cup rainbow sprinkles

Directions:

Preheat the oven to 350 F. Grease and flour 3 8-inch round cake pans.

Stir together the milk and vanilla extract and set aside.

Beat the butter at medium speed until creamy; gradually add in the sugar, beating until the mixture becomes light and fluffy.

In a separate bowl sift together the cake flour & baking powder.

Alternatively add the whole milk and flour mixture into the butter mixture, beginning and ending with the flour mixture. Beat at low speed after each addition until just combined.

Gently fold in the egg whites and sprinkles and then divide the batter among the 3 pans.

Bake for 20 to 25 minutes, or until a cake tested come out clean. Cool the cakes in the pans on wire racks for 10 minutes, and then invert the cakes on the racks and let cool completely.

Recipe based on Mrs. Billets White Cake


Fluffy Vanilla Frosting

Ingredients:

1 1/2 cups (3 sticks) unsalted butter, at room temperature

1 pound (4 cups) Confectioners’ sugar, sited

1/2 teaspoon vanilla extract

Directions:

With an electric mixer, beat the butter on medium-high speed until pale and creamy.

Reduce the speed to medium and add the sugar 1/2 cup at a time, after every 2 additions increase the speed to high for 10 seconds to aerate the frosting. Scrape the bowl as necessary.

Add the vanilla and continue mixing until smooth.

Recipe from Martha Stewart

Candy Corn Inspired Ombre Cake

Not all Halloween treats have to be spooky ones. This ombre cake is simple to make with 2 tubs of vanilla frosting, a box of white cake mix, yellow and orange food colors, your favorite cake filling and is inspired by a candy that is synonymous with Fall… Candy Corn. There’s nothing spooky about that.

IMG_9529

I used my Wilton 5-layer pan set to make this cake since I wanted the inside of the cake to emulate a piece of candy corn as well. But, there’s no need to get that precise. You could simply bake a two-layer, three-layer or a one-layer cake and let the frosting on the outside speak for itself.

IMG_9493

Since I was planning on tinting the cake batter I opted to use a box of Betty Crocker White cake mix. Betty Crocker is my go-to cake mix when I am not in the mood or just don’t have the time to make a cake from scratch.

IMG_9494

After mixing the batter per the directions on the box I divided the batter to tint it. From making quite a few cakes in the past I knew that the batter yielded about 4 cups so each pan would have just shy of a cup of batter. Since the top layer of the cake was going to be white I immediately poured that batter into one of the prepared pans (I sprayed it with baking spray) and then divvied up the rest of the batter to tint – about 3 cups for the orange layers and 1 cup for the yellow layer.

IMG_9497

Following that I poured the yellow batter (the bottom layer) in the prepared pan and divided the orange batter (the middle layers) among the three remaining pans.

IMG_9501

I then placed all of the pans on a rack in my 350 F preheated oven for about 15 minutes and after letting the cakes cool in the pans for 10 minutes I transferred them to a wire rack to cool completely. Once they cooled, I did a little torting to make sure the layers would sit evenly on top of one another…

IMG_9506

It was then time to fill the layers – I opted to fill them with a quick vanilla mousse recipe that uses two ingredients: 2 cups of heavy cream and Jell-O vanilla pudding mix.

IMG_9509

And then I crumb coated the cake with vanilla frosting and placed it in the refrigerator for about 20 minutes.

IMG_9510

Then it was time to create the candy corn ombre effect on the outside of the cake. I tinted about a cup and a half of the vanilla frosting with the yellow food color and frosted that along the bottom of the cake…

IMG_9511

Next I tinted about two and a half cups of the vanilla frosting with the orange food color and spread that along the middle of the cake and finally I used the vanilla frosting untinted to frost the remaining portion of the side of the cake as well as the top of the cake. To create the ombre effect, I smoothed the sides of the cake with a long icing spatula.

IMG_9512

And for presentation some candy corns around the base of cake…

IMG_9532

And here’s a peek inside…

IMG_9558

And there you have it, a super cute and super simple unspooky Halloween treat!

Patriotic Treats

Hope you all had a wonderful Independence Day and enjoyed the rest of the holiday weekend! Mine was filled with great food, great friends and a delicious and patriotic dessert.

IMG_8376

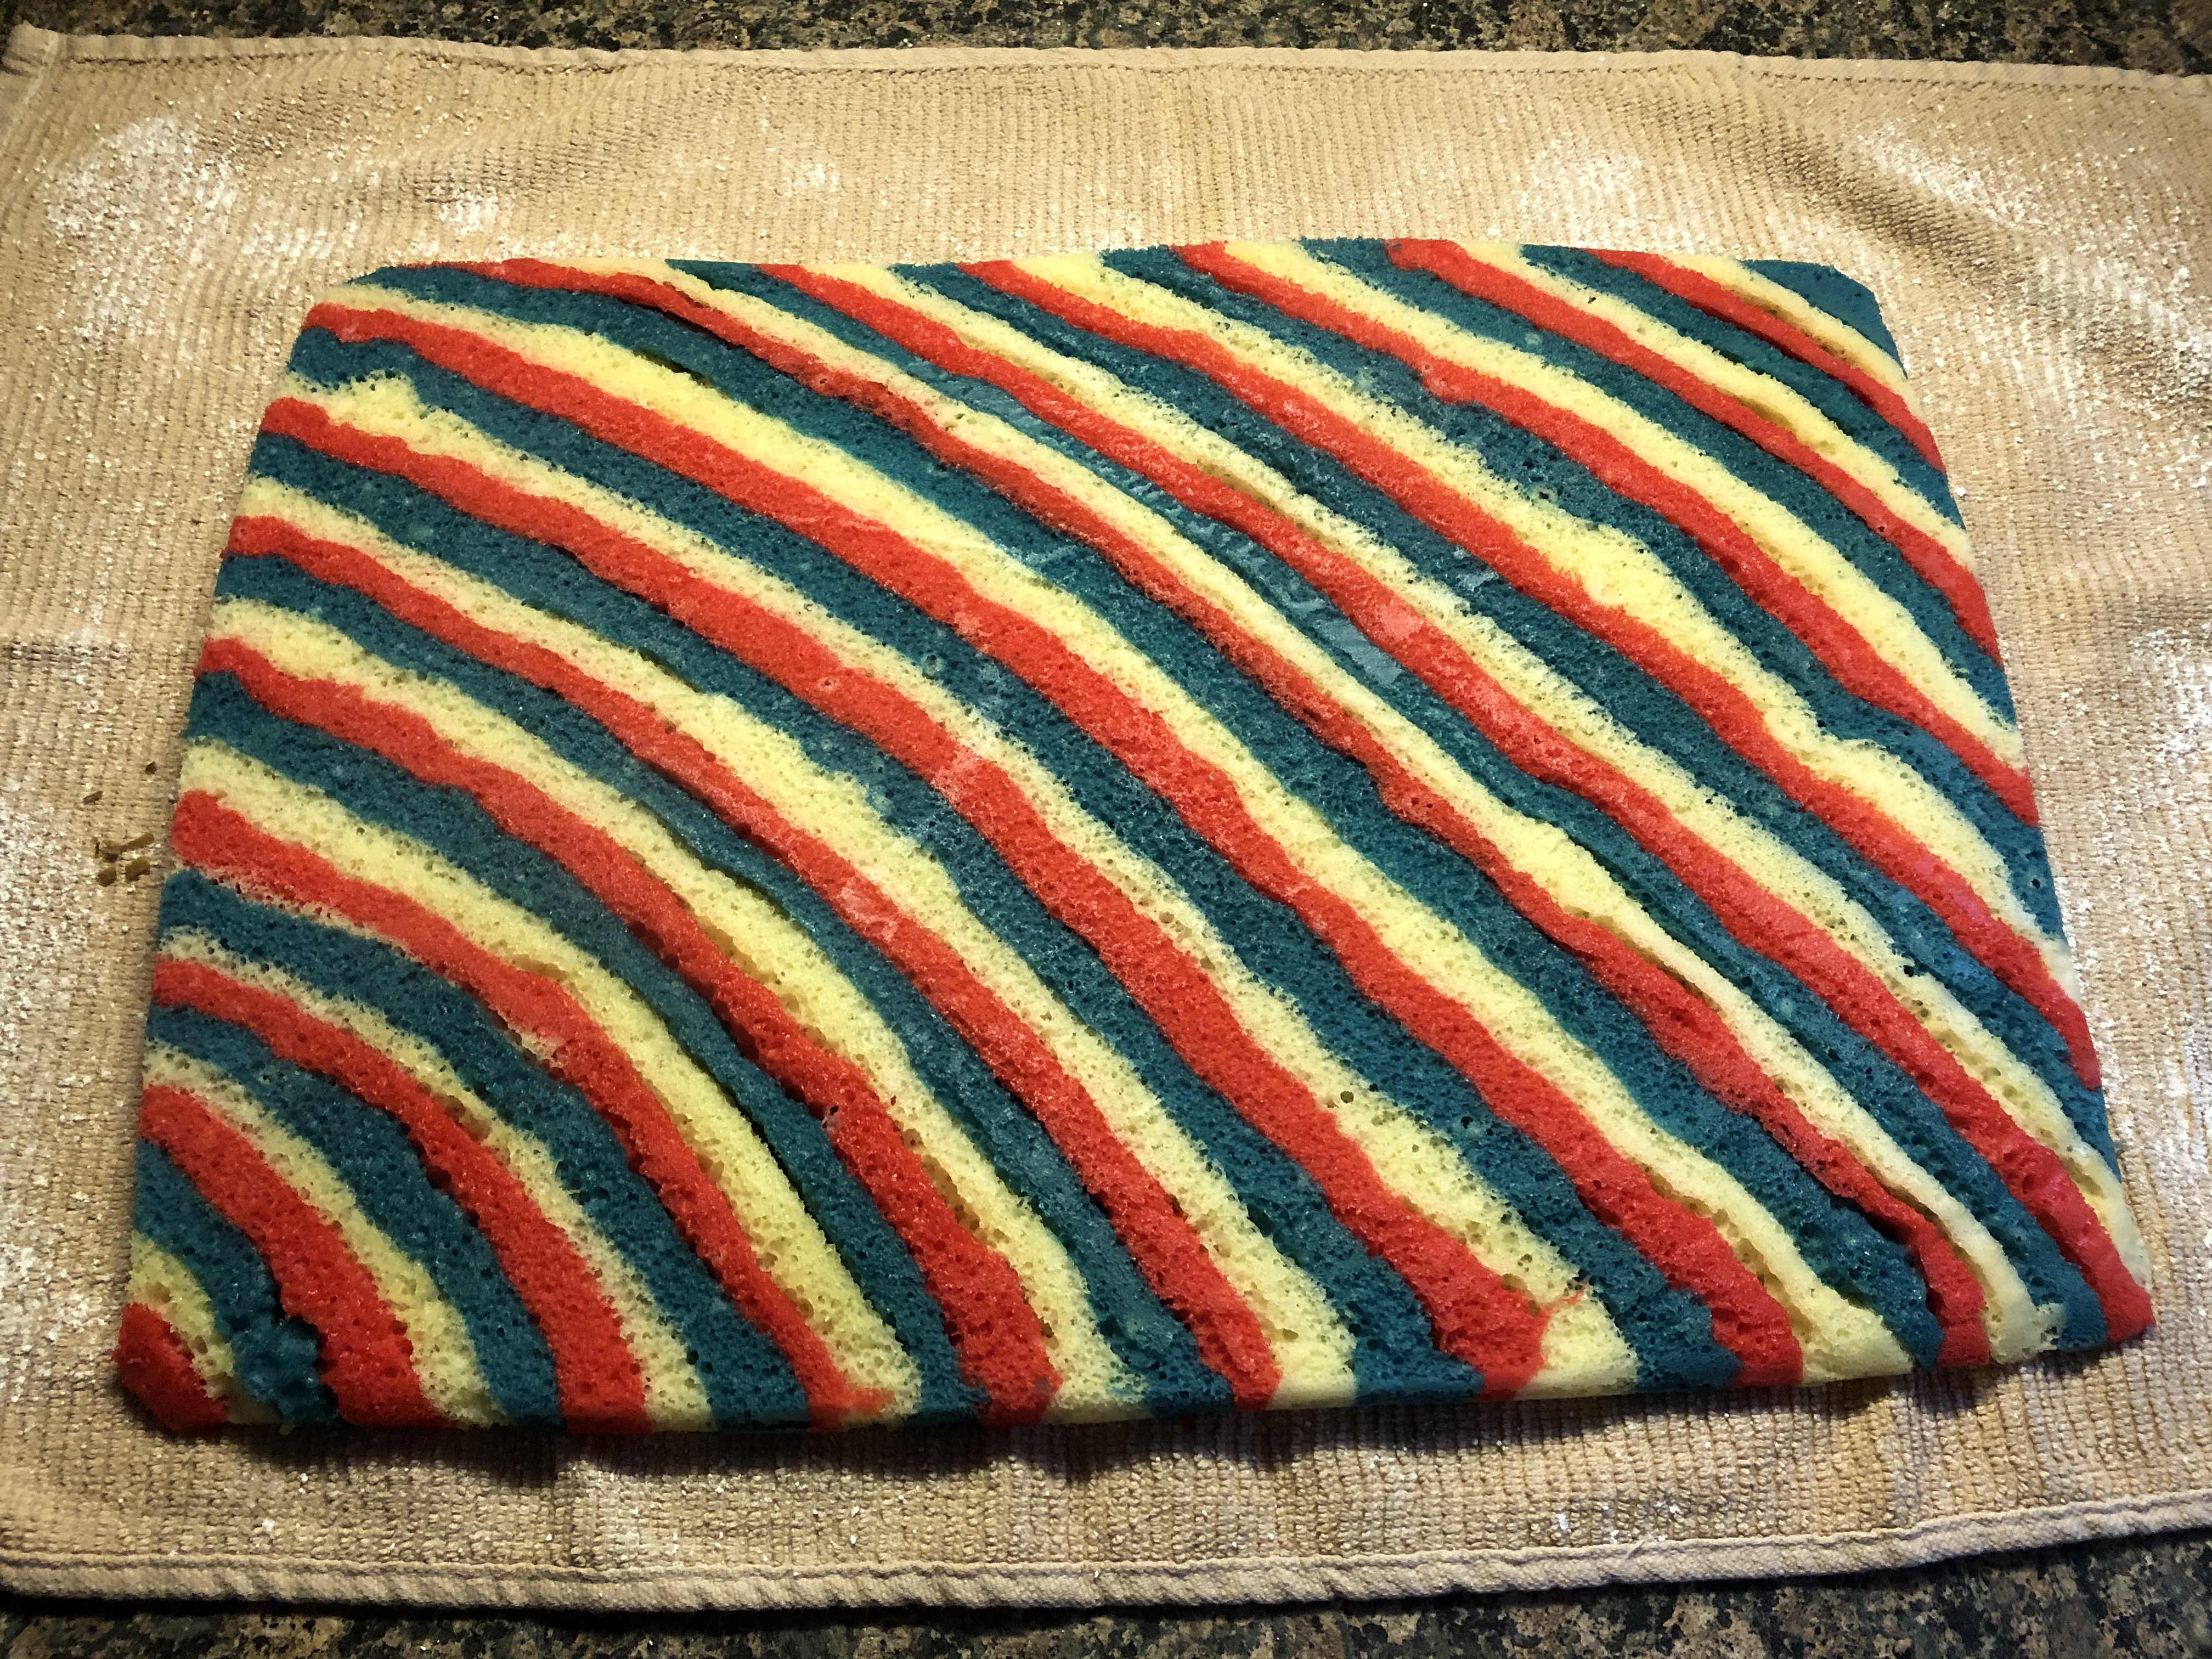
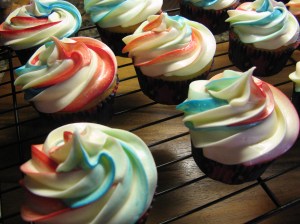
Before I get to that amazing cake though, here are some patriotic cupcakes that I made earlier in the week. They were simply a yellow cupcake with a vanilla frosting – sometimes there’s nothing better than a classic combination. To create the striped icing effect I brushed the inside of a plastic decorator bag with red food gel coloring on one side and blue on the other after fitting it with a 1M Wilton Tip. I then filled the bag with vanilla frosting and began piping each of the cupcakes. Once I ran out of frosting in the bag I simply brushed the colors once again inside the bag and then filled it with more frosting.

IMG_8283

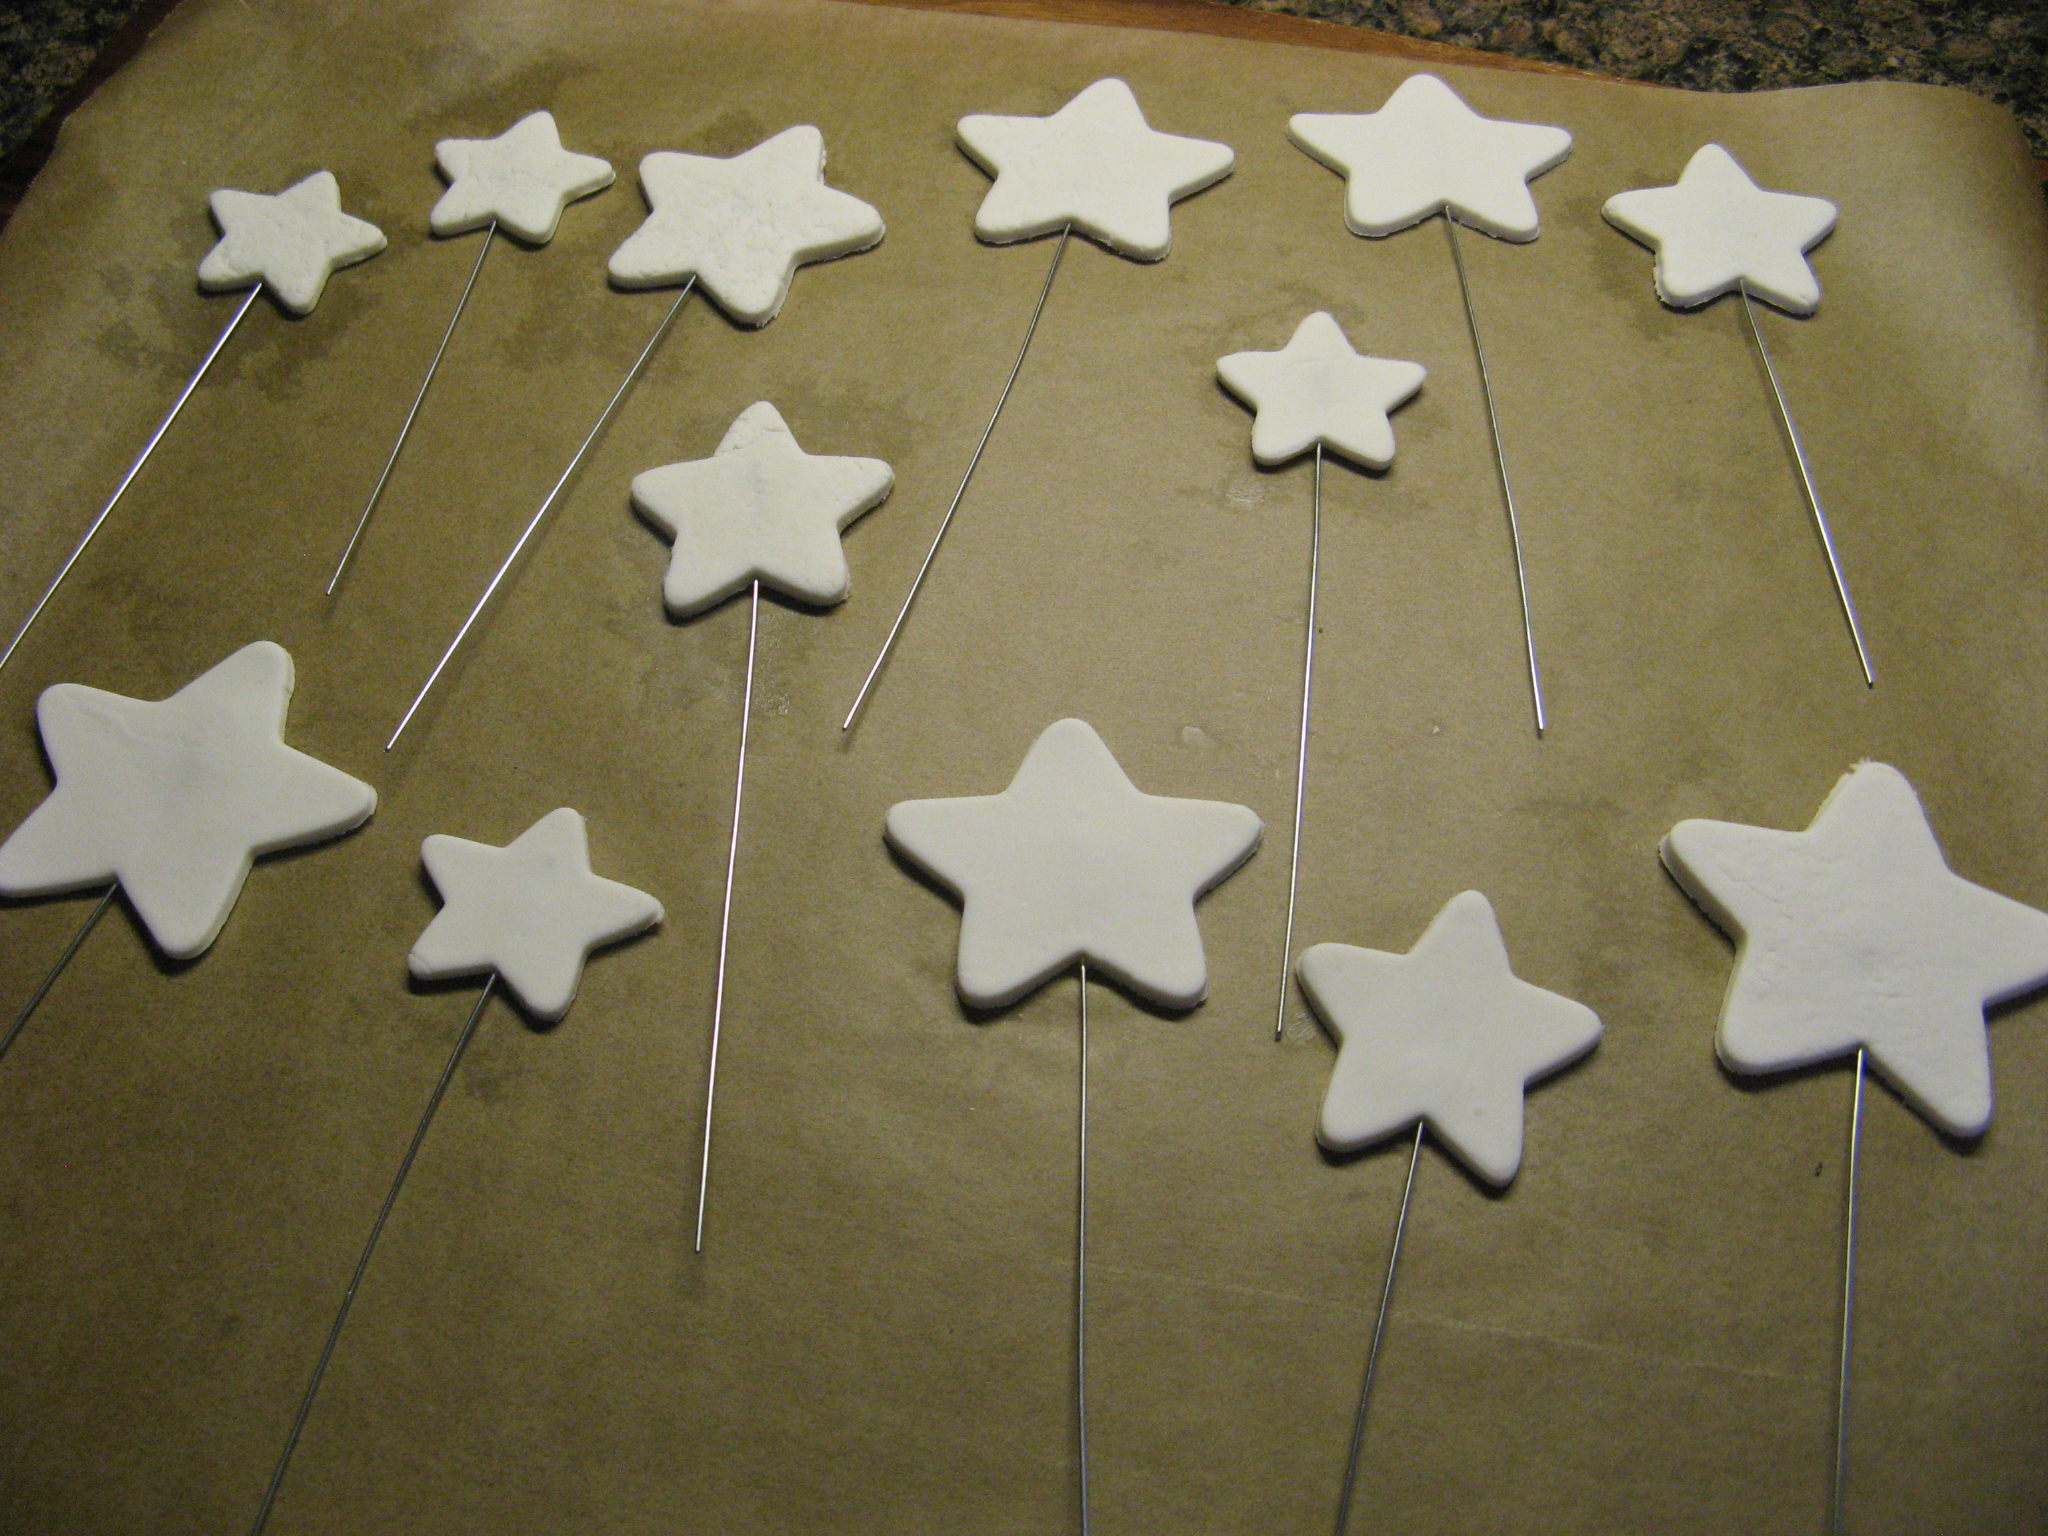
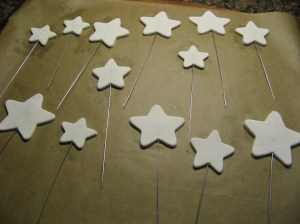
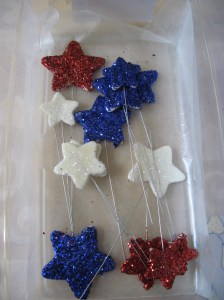
Now, onto the cake. Prep work for this cake actually began a week before July 4th. I made the glitter stars that topped the cake by rolling out gum paste 1/8″ thick and used varying sizes of cookie cutters to cut out stars. After snipping 22 gauge silver floral wire into different lengths I dipped one end into egg white and gently pushed that end of the wire into the stars about 3/4 of the way up. I laid the stars out on a parchment lined cookie sheet and let them dry out (harden) for a full day, flipping them occasionally.

IMG_8265

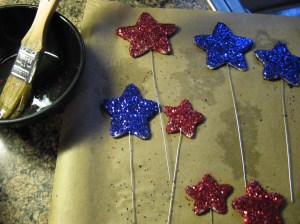
After they were completely dry it was time to decorate them. To do so, I brushed the stars with egg white and then sprinkled glitter on them, making sure that I covered the edges of the stars as well.

IMG_8267

I let them sit out for a day or two to make sure they were completely dry and then stored them in a waxed lined plastic shoe box.

IMG_8285

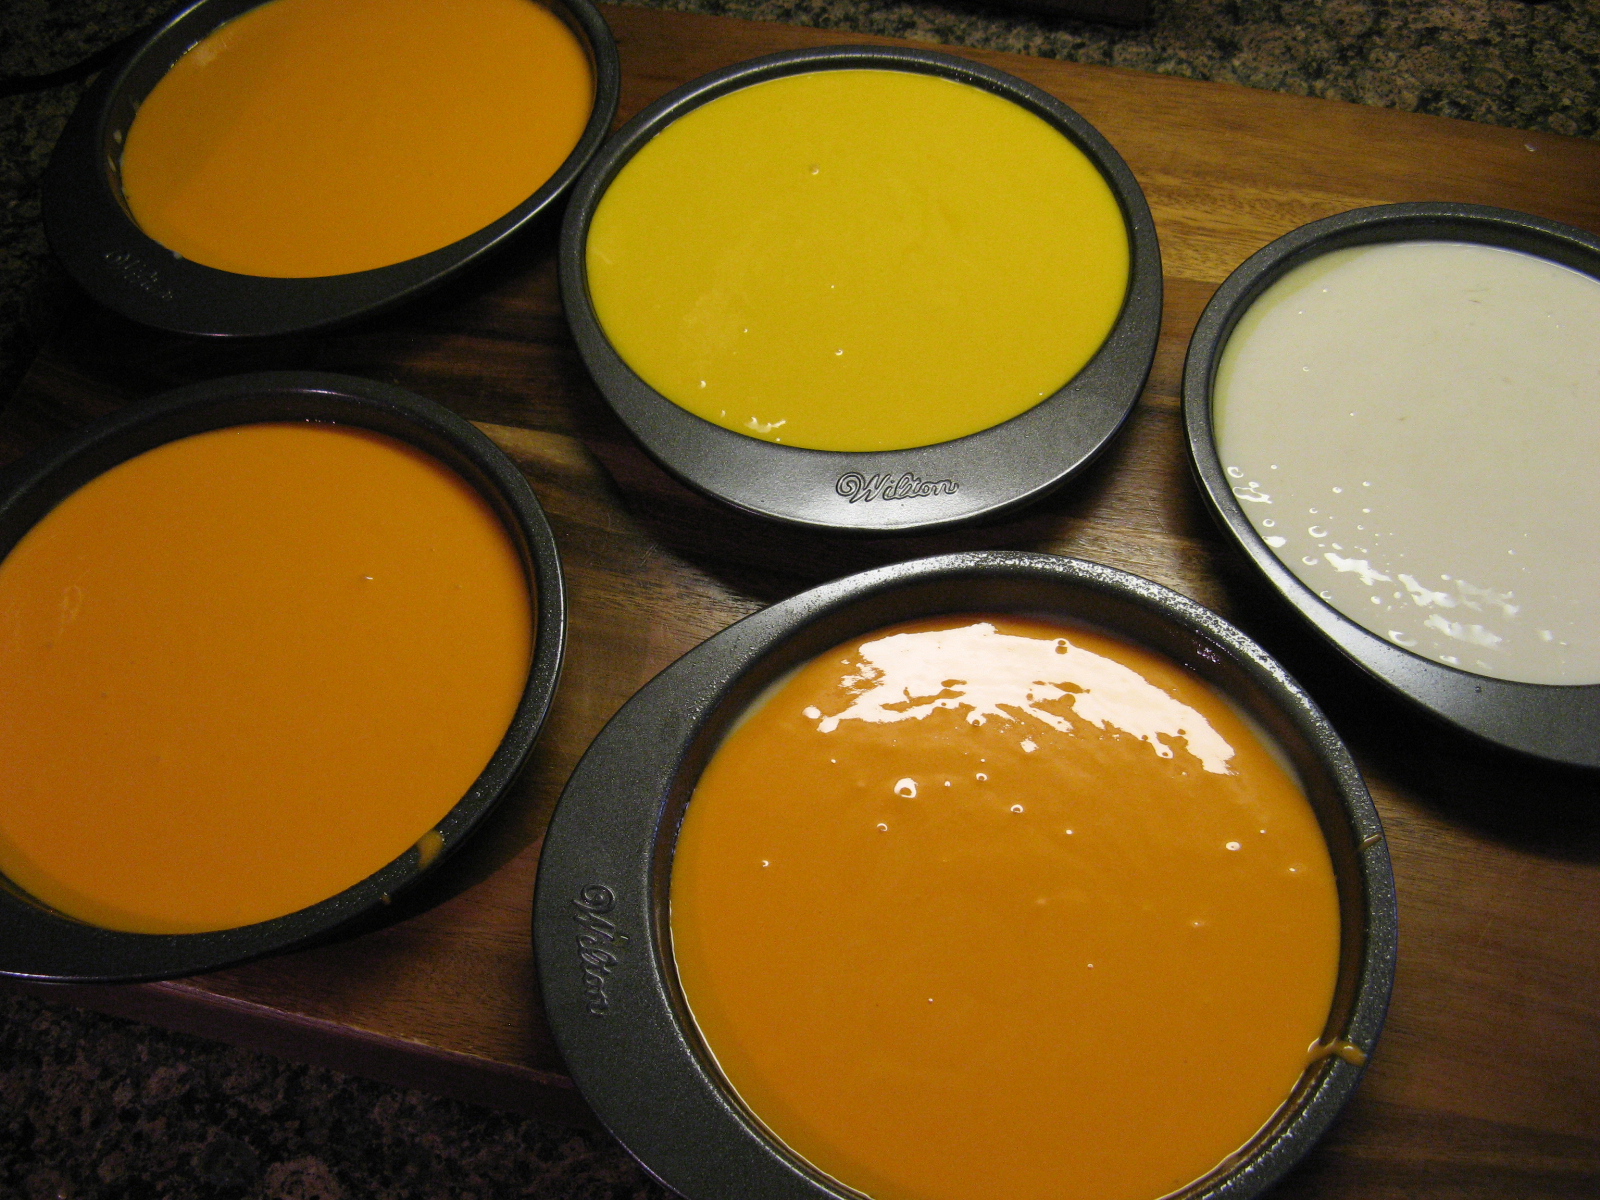
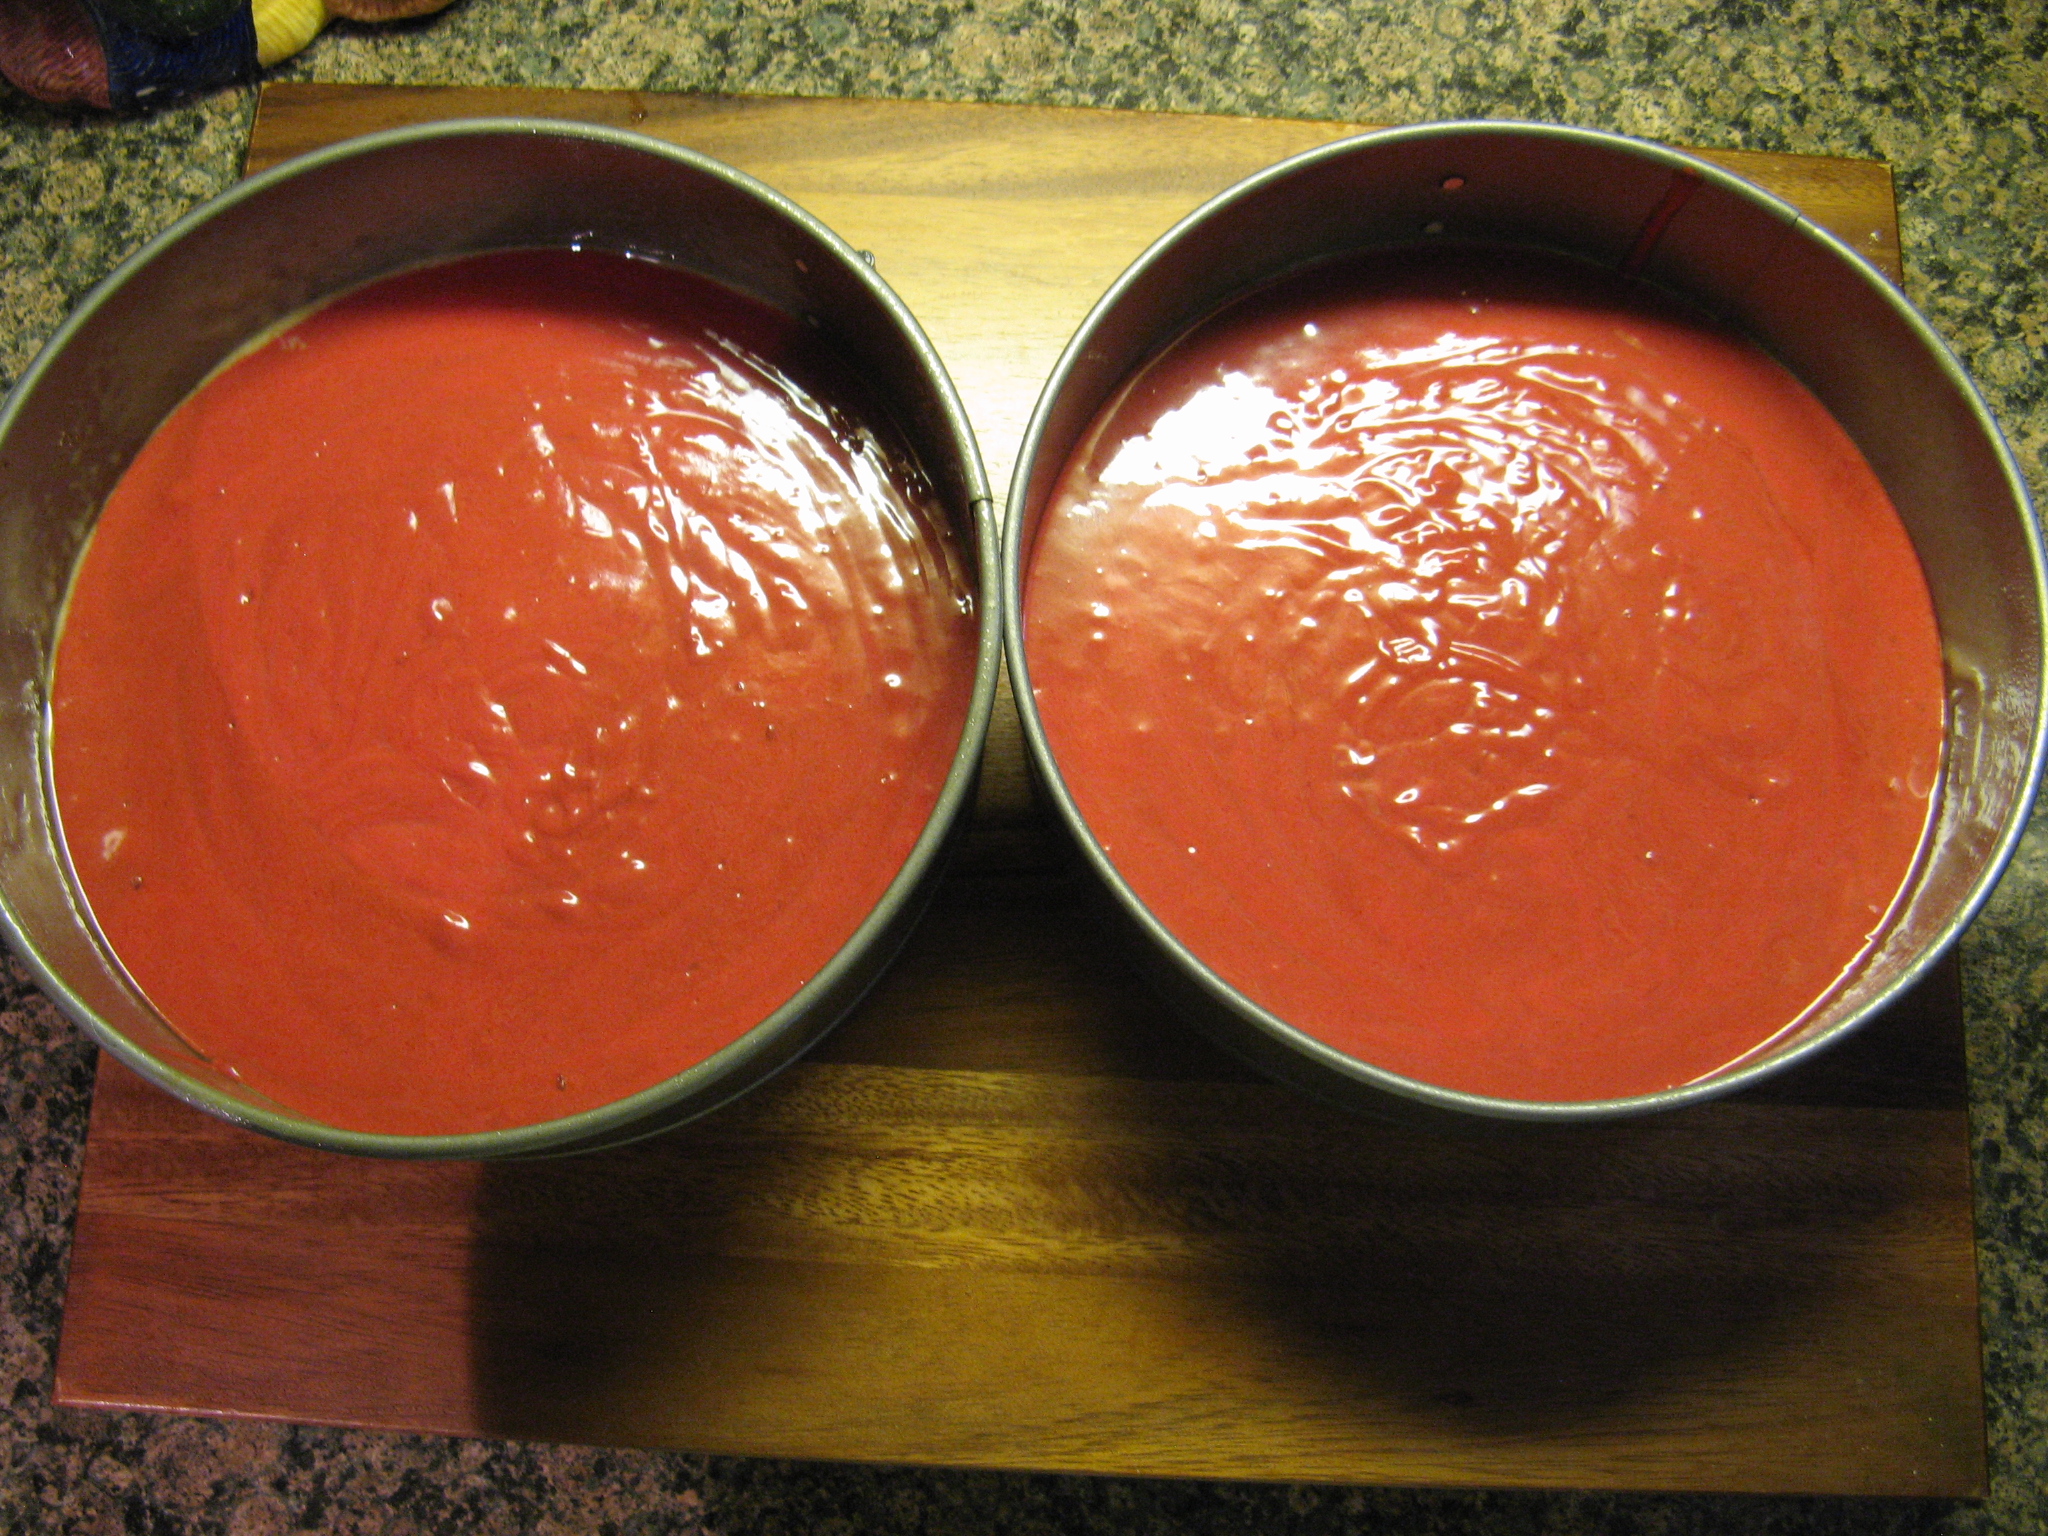
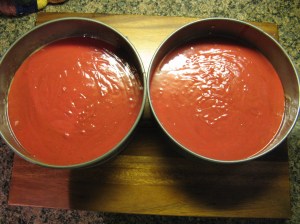
To make the actual cake I began by baking the red velvet layers of the cake – 2 of them. I’ve made red velvet cake quite a few times before and this recipe was quite different than the ones I have normally followed. For one thing, instead of buttermilk this recipe called for sour cream to be whisked with water to thin it down to the consistency of buttermilk. I’ve heard of using lemon juice and milk as a substitute for buttermilk, but never sour cream. I was fine with this though as I usually have sour cream in my fridge as opposed to buttermilk. Also, this recipe called for butter and oil to be used, which turned out an incredibly moist cake. After making the batter I divided it into two 9-inch pans tapping the pans down to release any air bubbles and then baked them in a 350 F oven for twenty-five minutes.

IMG_8308

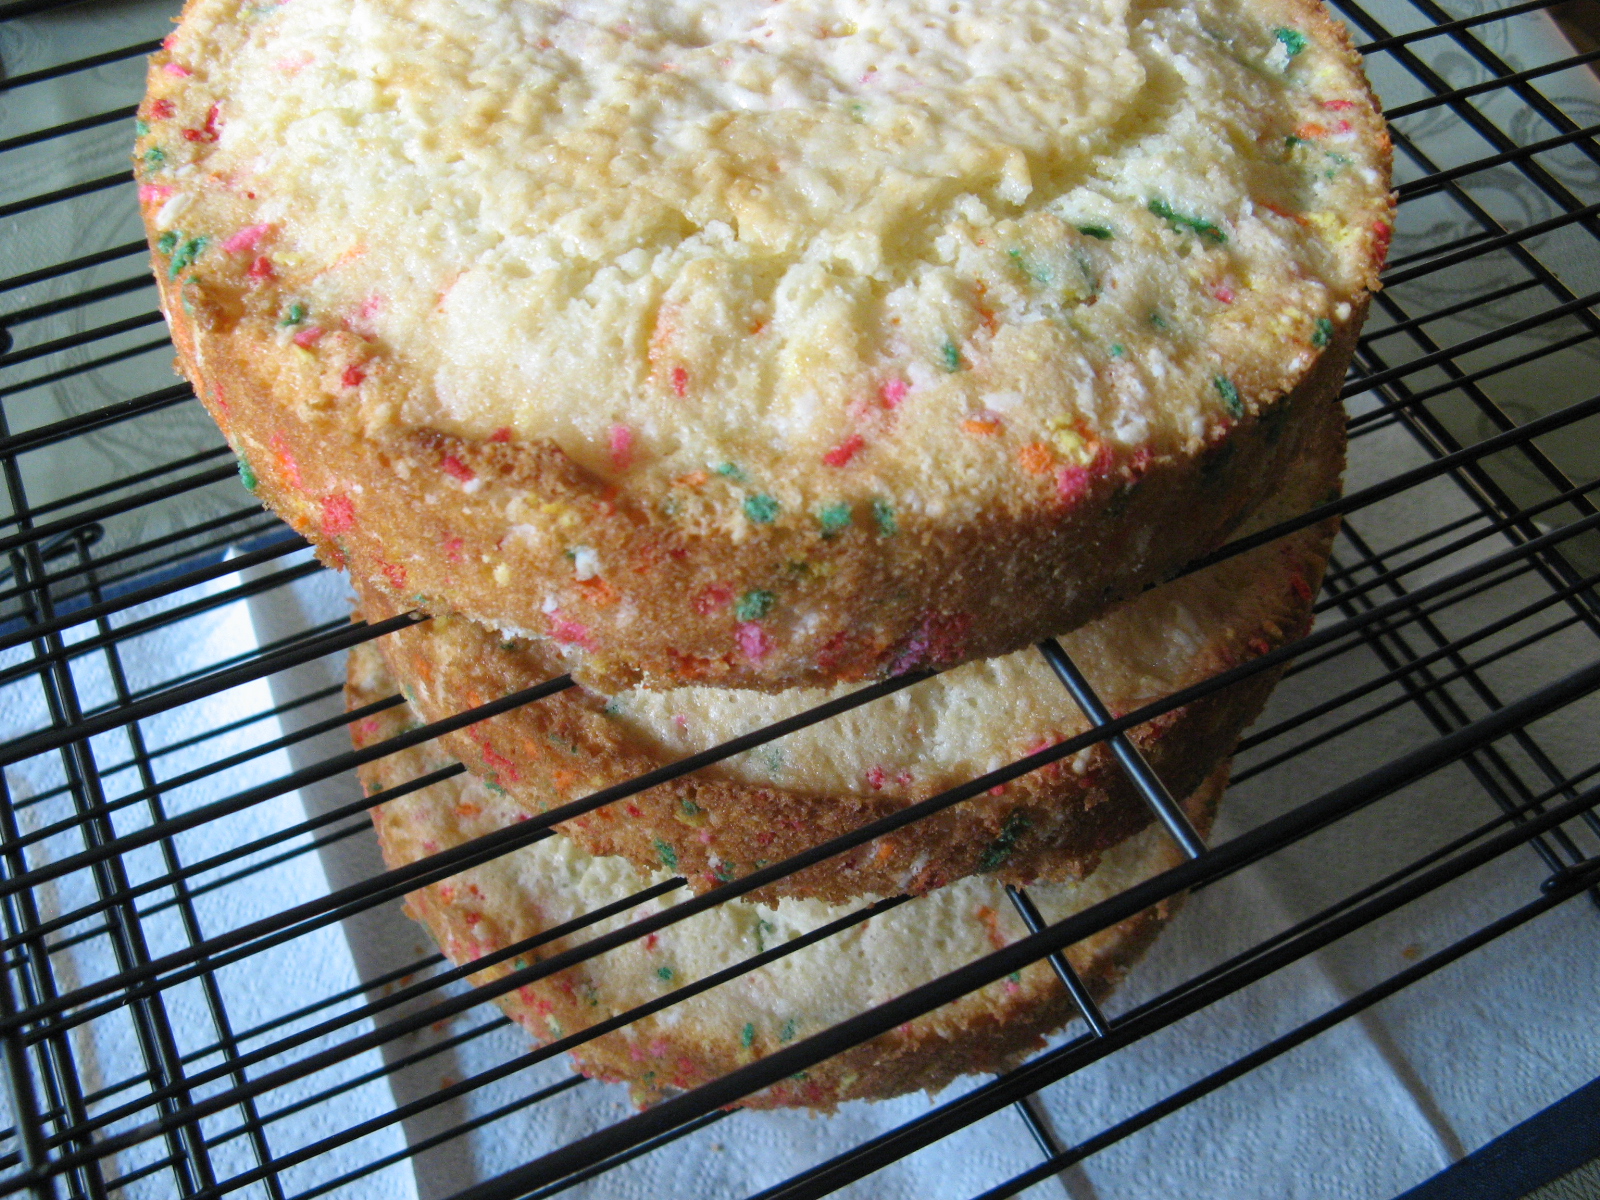
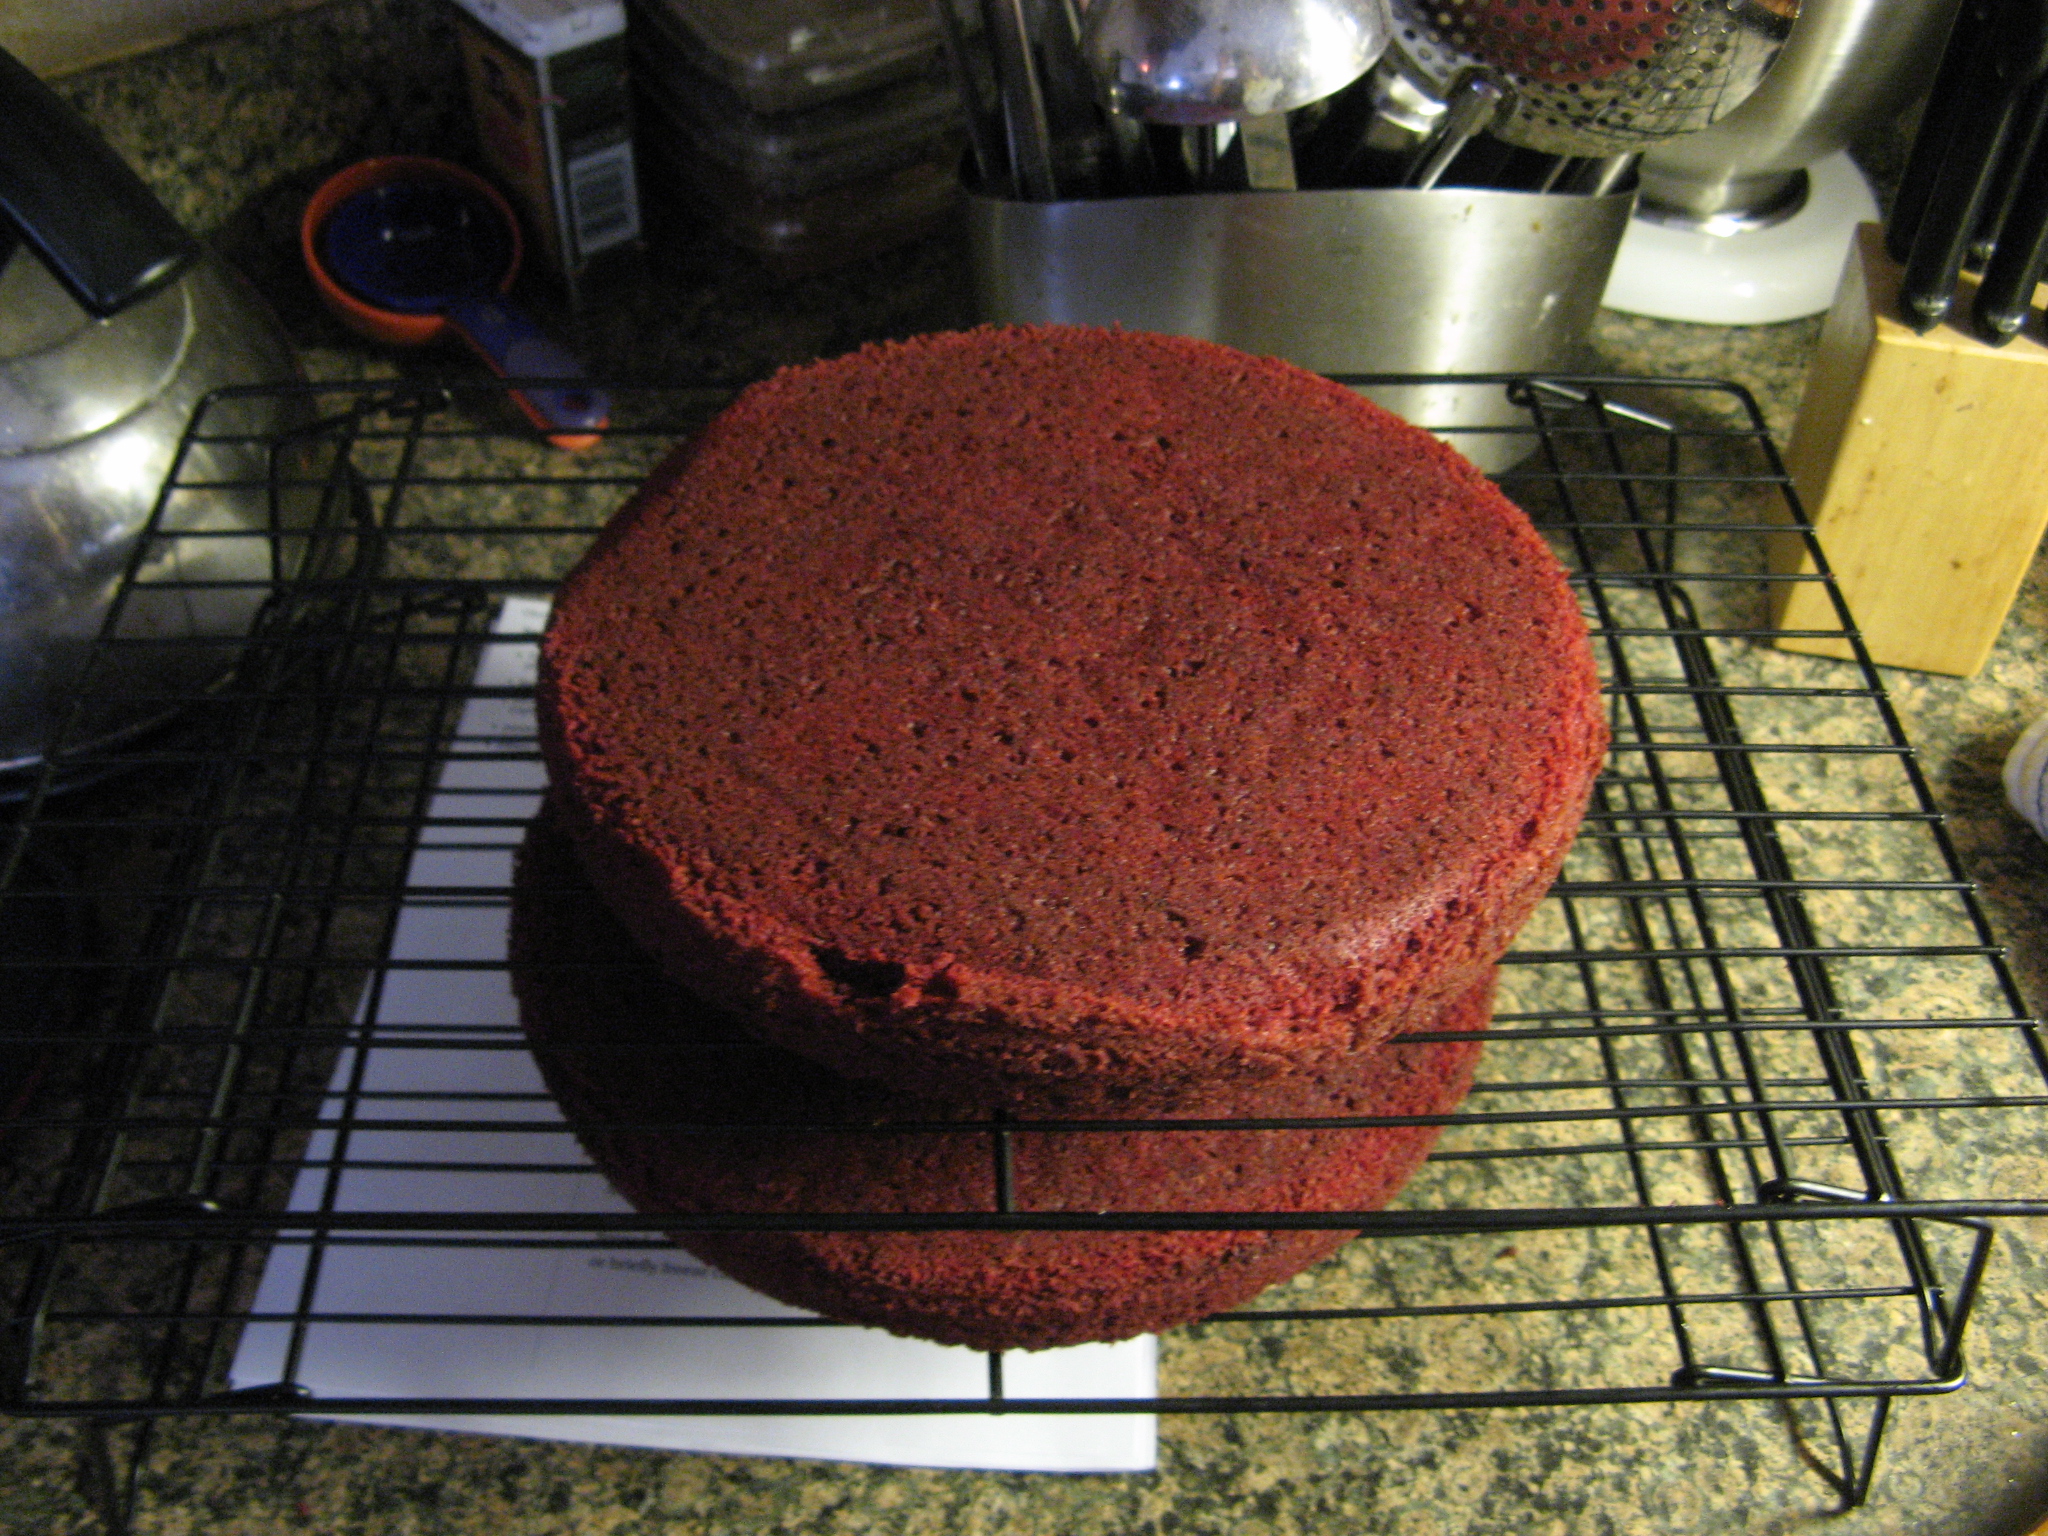
Following that I let the cakes cool in the pans for about ten minutes and then inverted them onto wire racks so they could cool completely.

IMG_8322

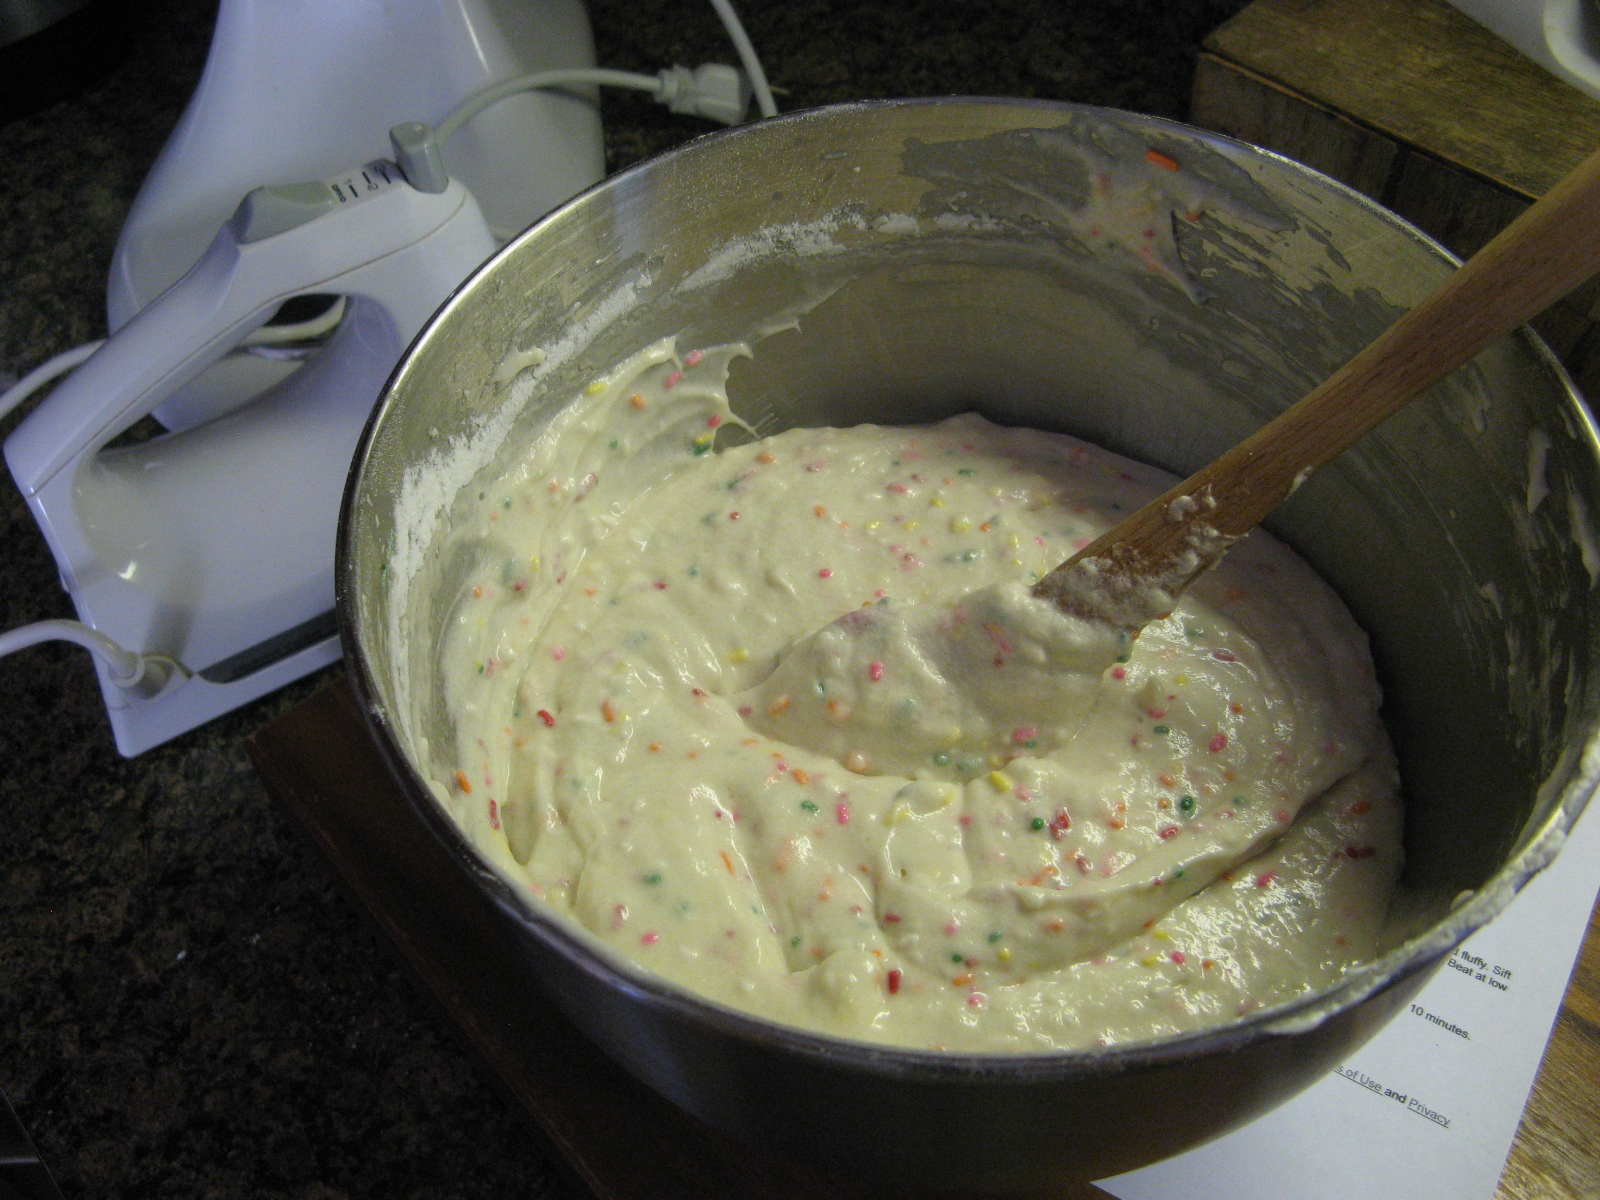
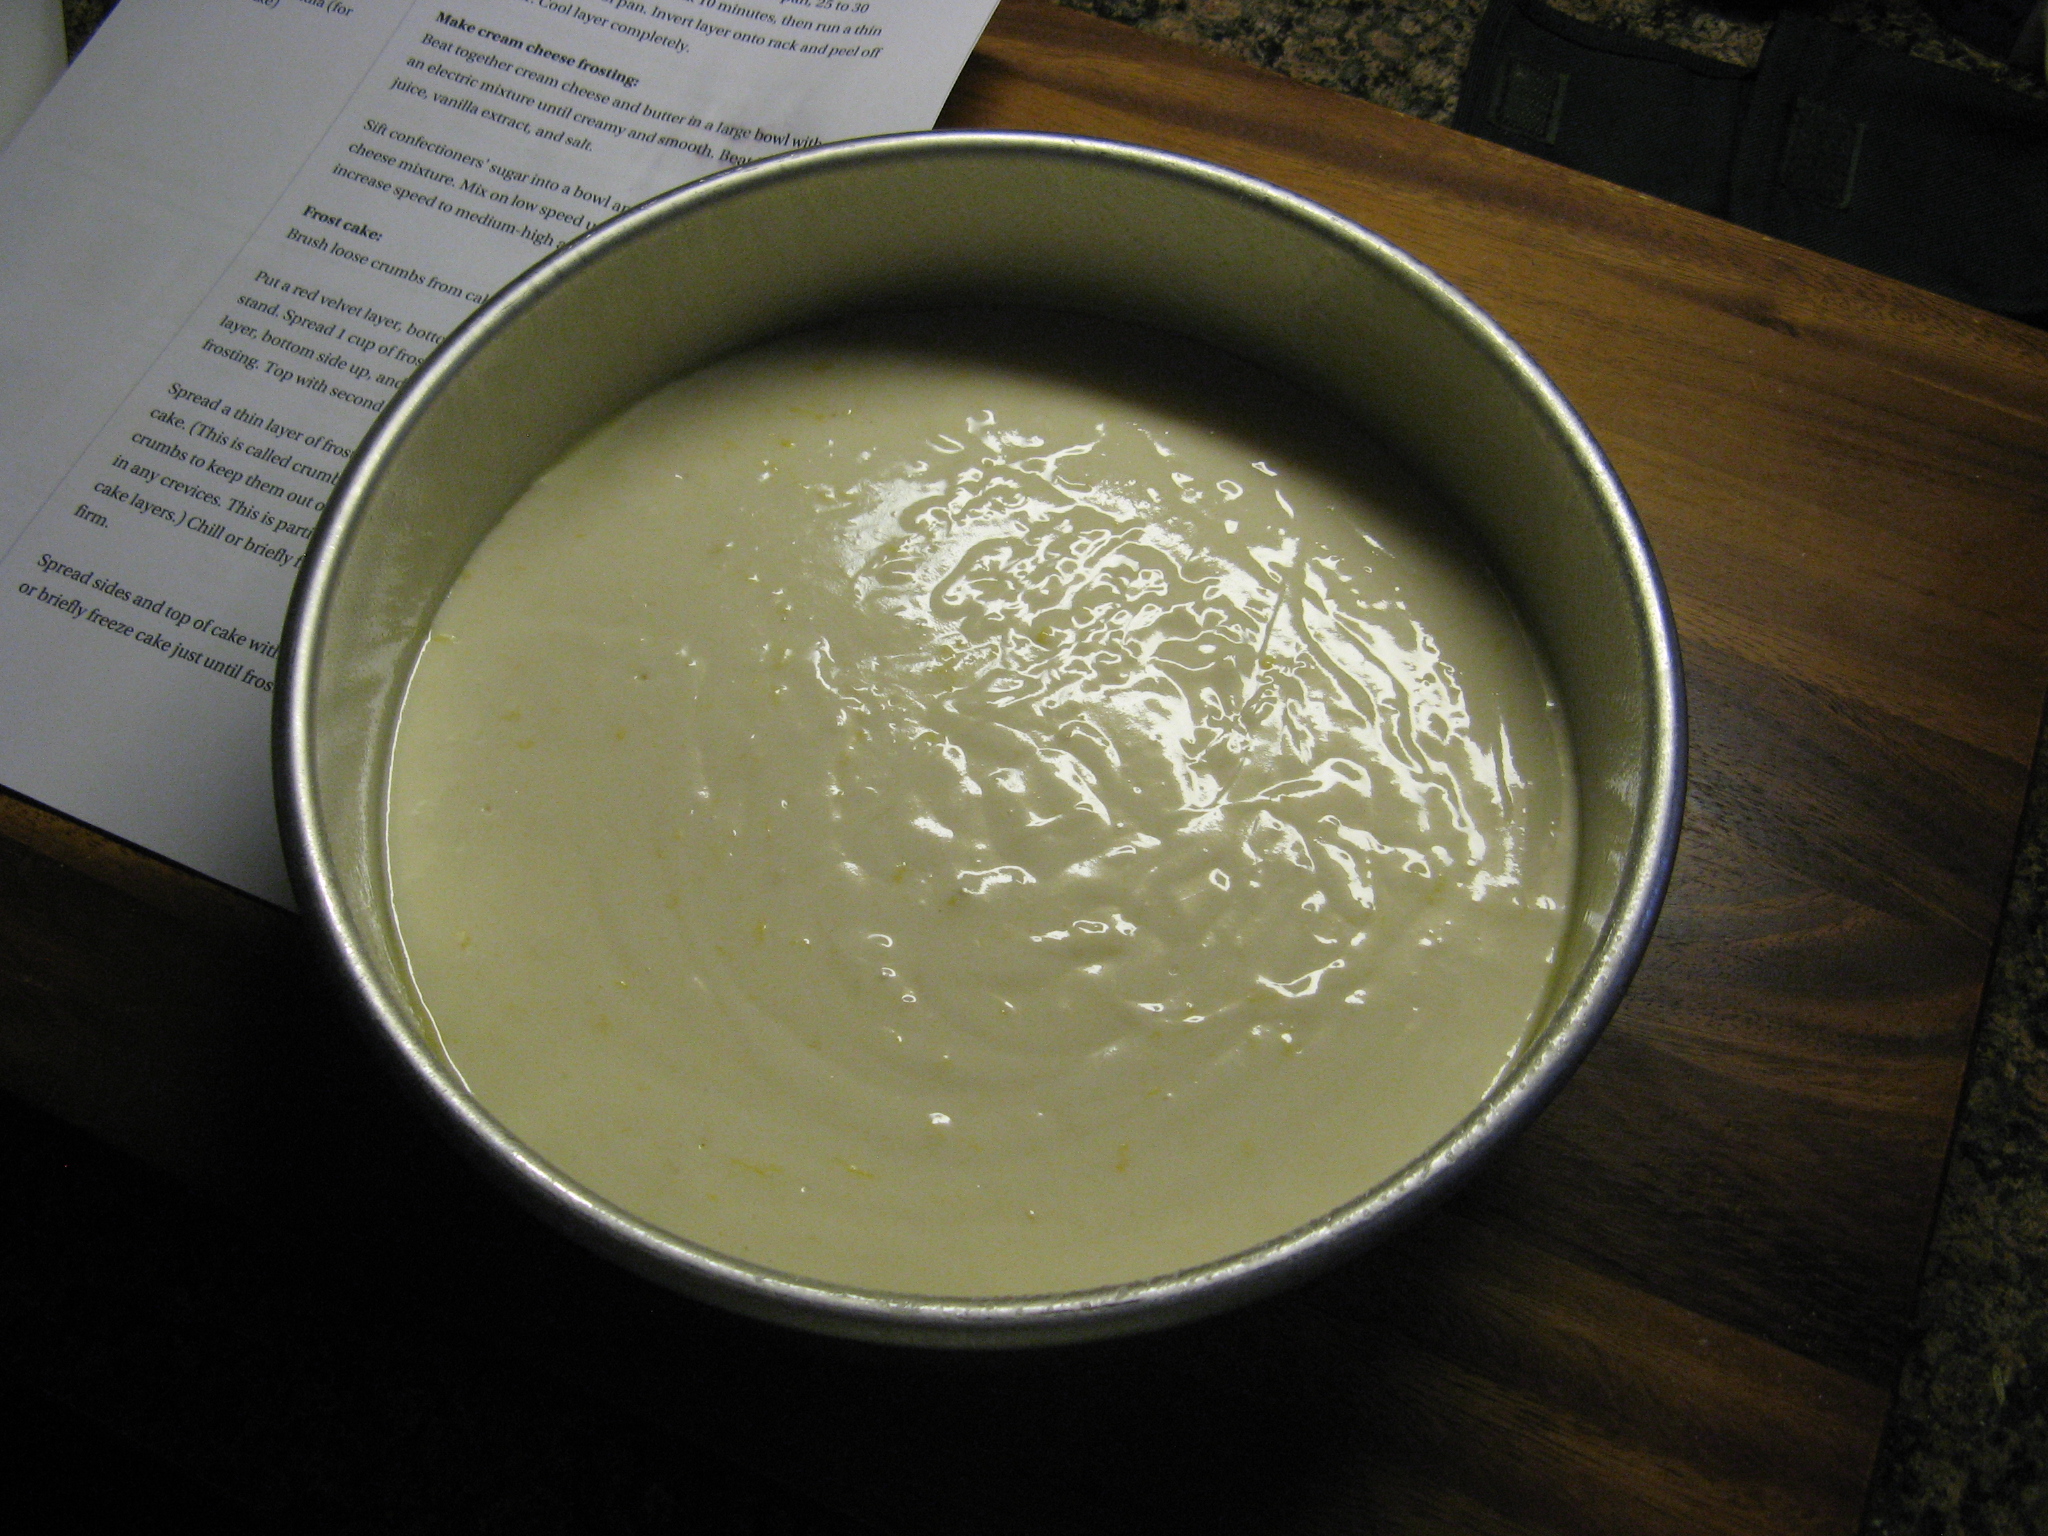
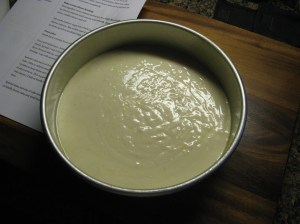
While the red velvet layers were cooling I baked the white cake which had a hint of lemon thanks to the addition of lemon zest. Once I made the batter I poured it into a 9-inch pan that I sprayed with baking spray and lined with parchment paper – which I also sprayed with baking spray. I did this same prep work for the pans I used for the red velvet layers as well. As I also did with the red velvet layers, I tapped the pan down to release the air bubbles and baked it in a 350 F once again for twenty-five minutes.

IMG_8315

After cooling the cake in the pan for a few minutes I inverted it onto a wire rack so it could cool completely.

IMG_8320

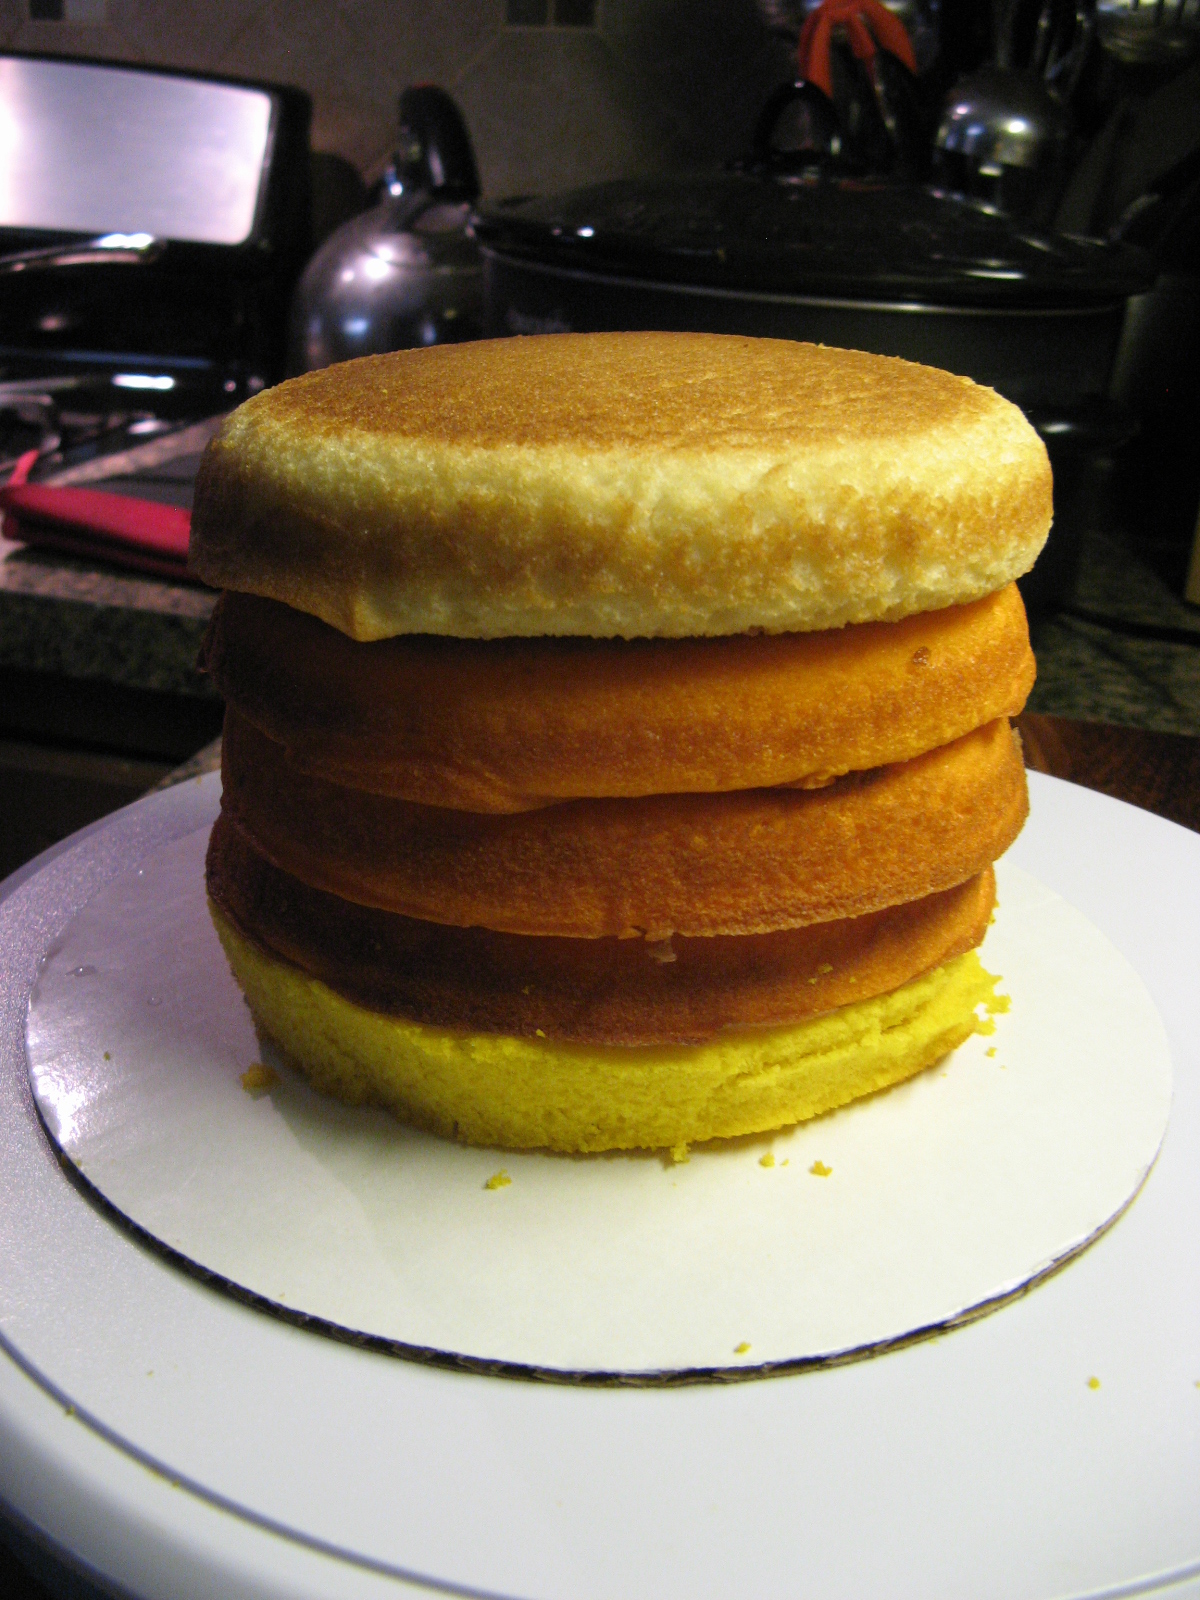
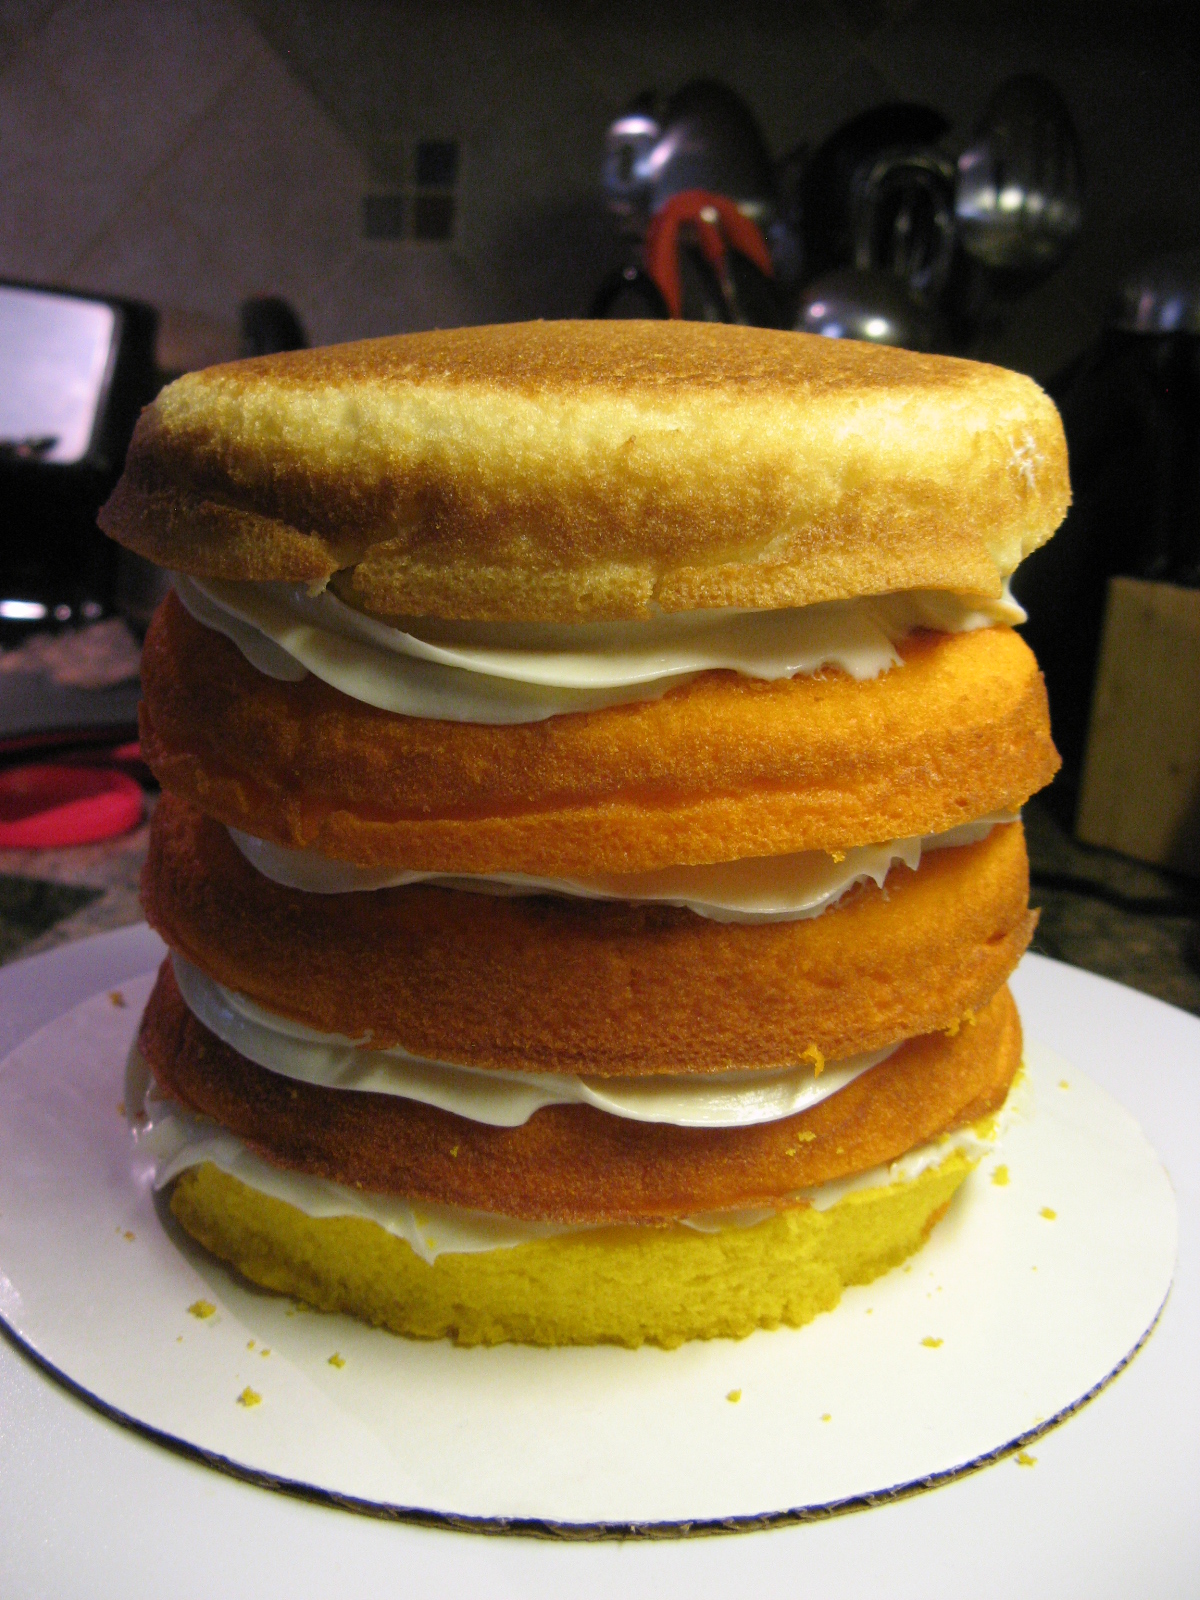
Once the cakes were cooled it was time to make the frosting – cream cheese frosting – and assemble the cake. I spread about a cup of frosting between each of the layers…

IMG_8354 IMG_8358

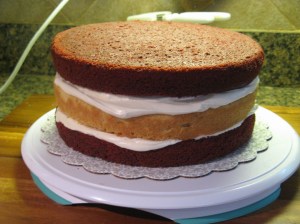
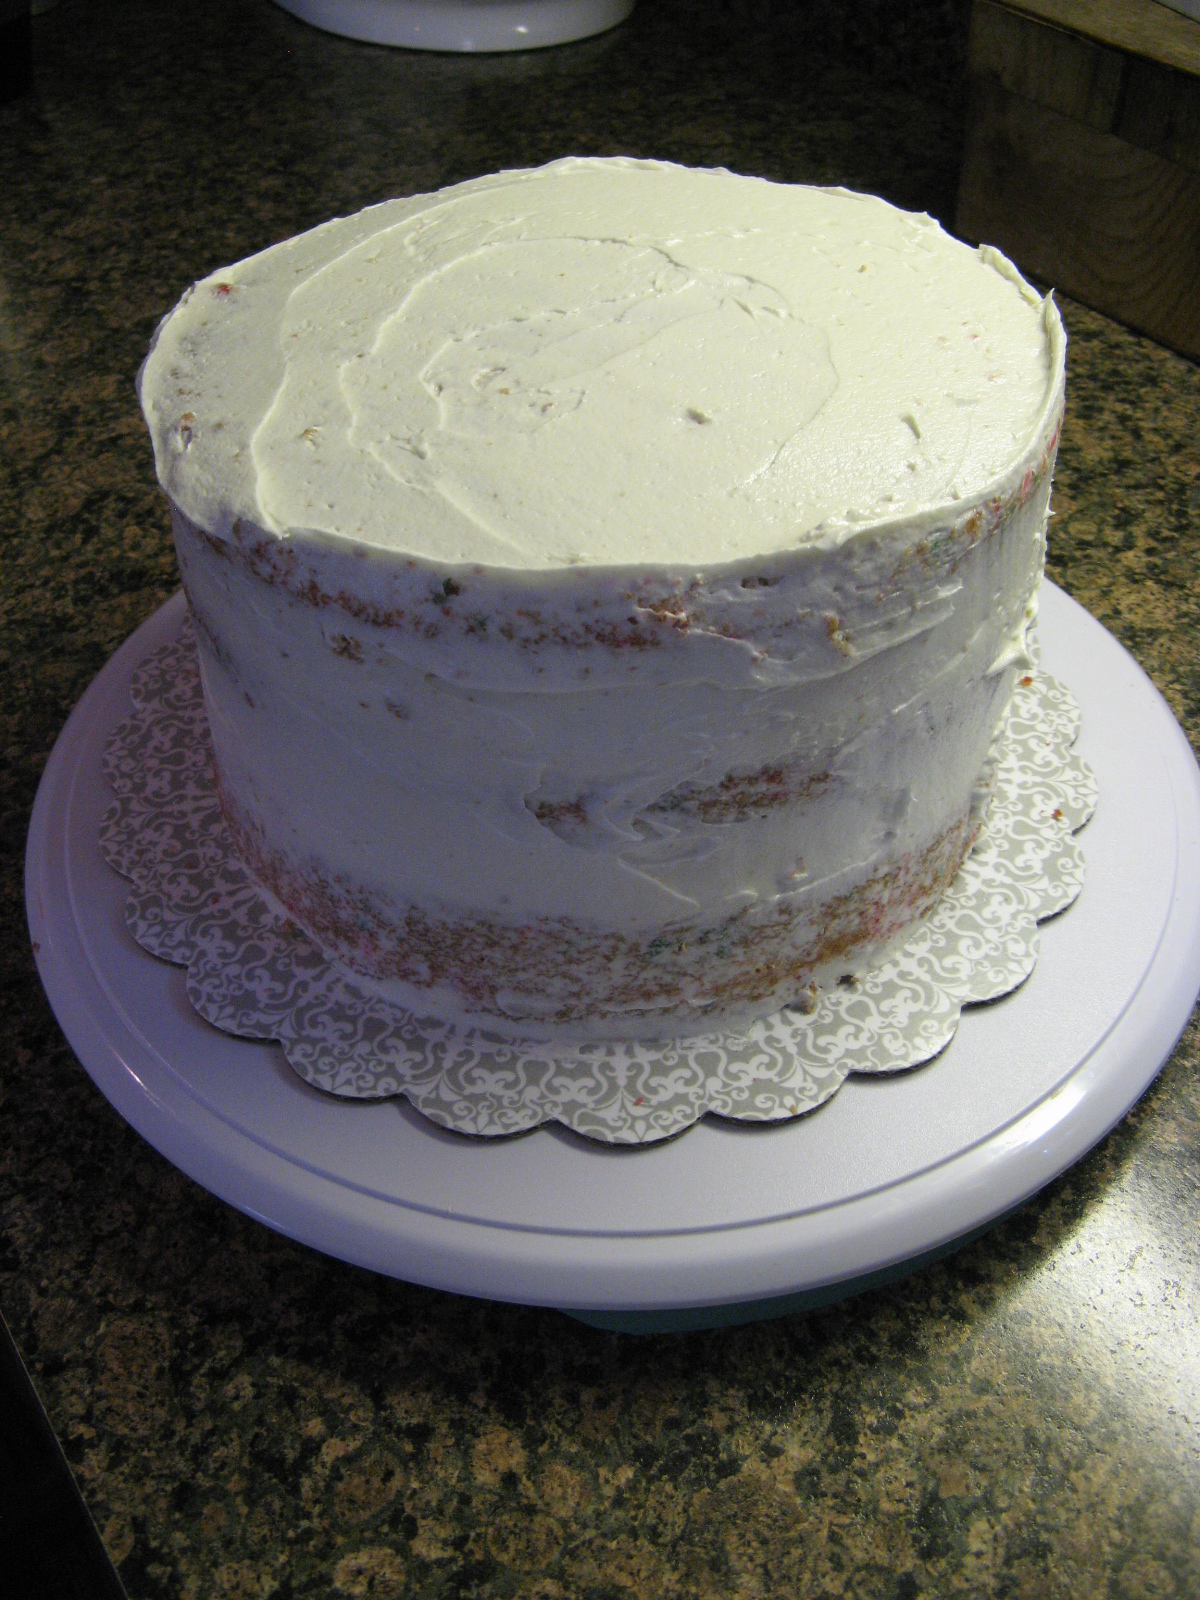
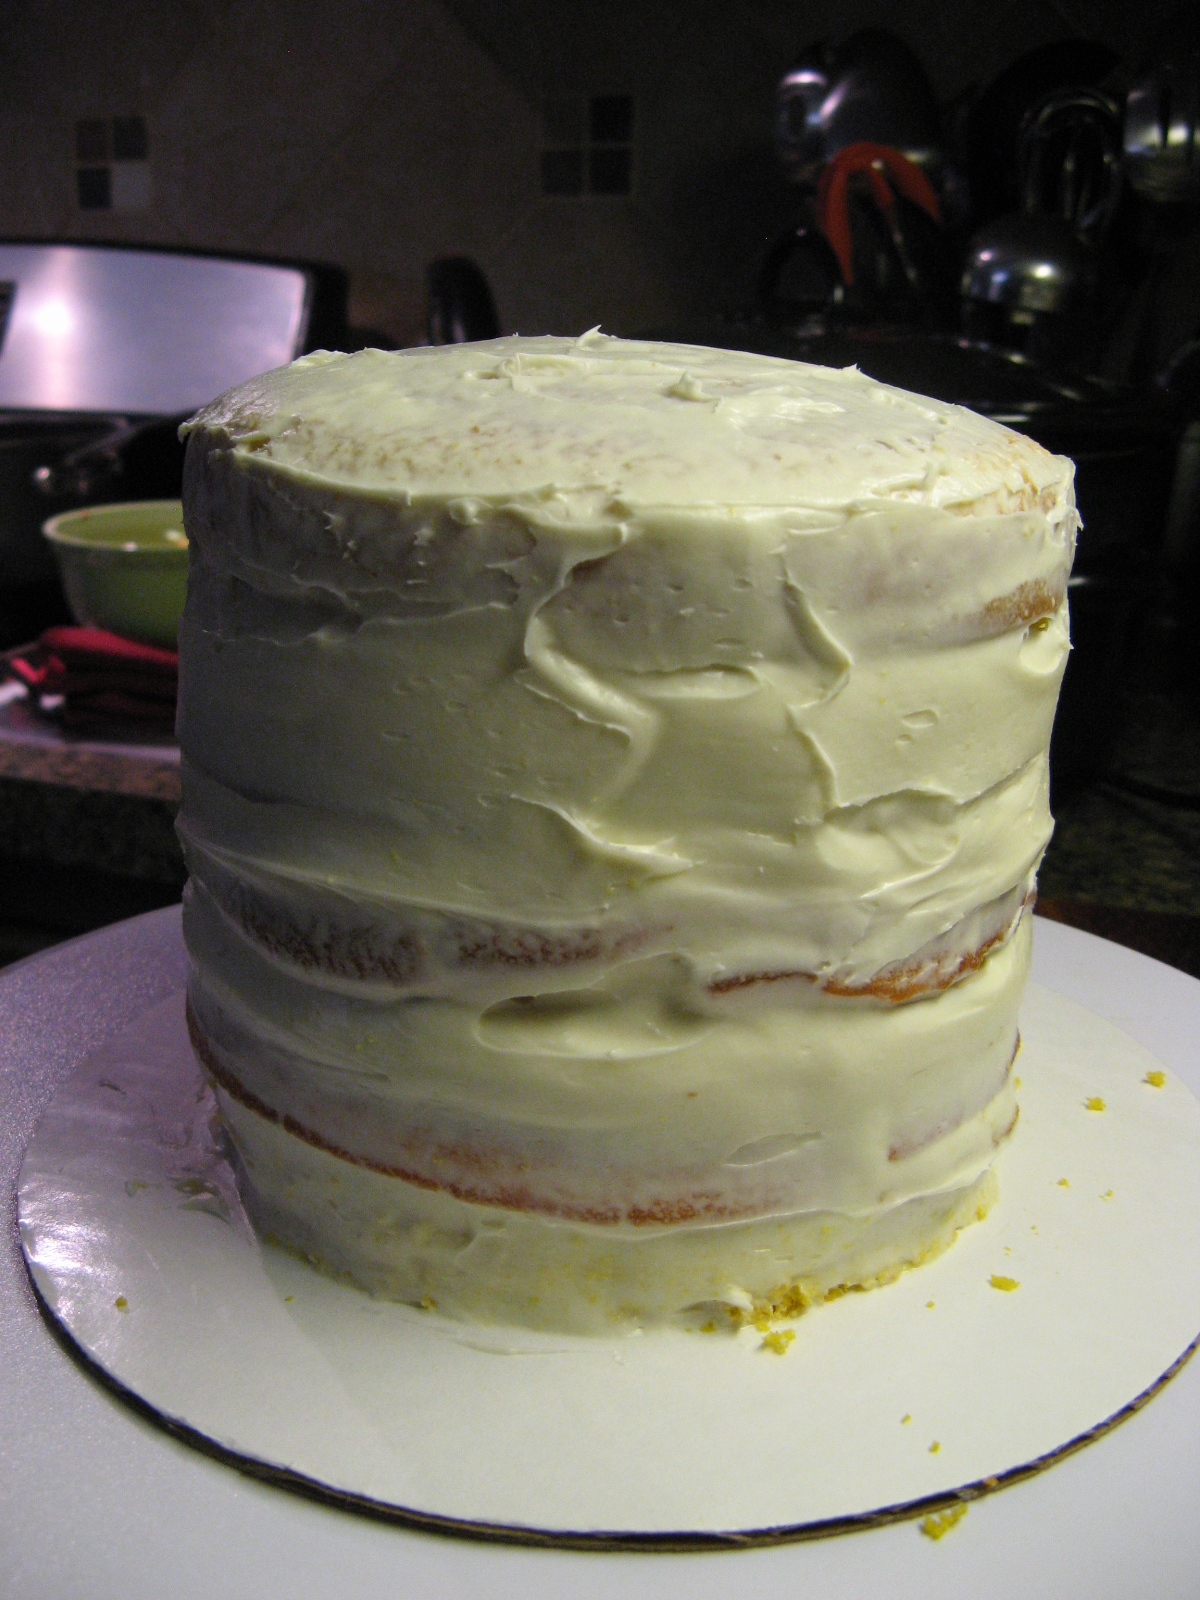
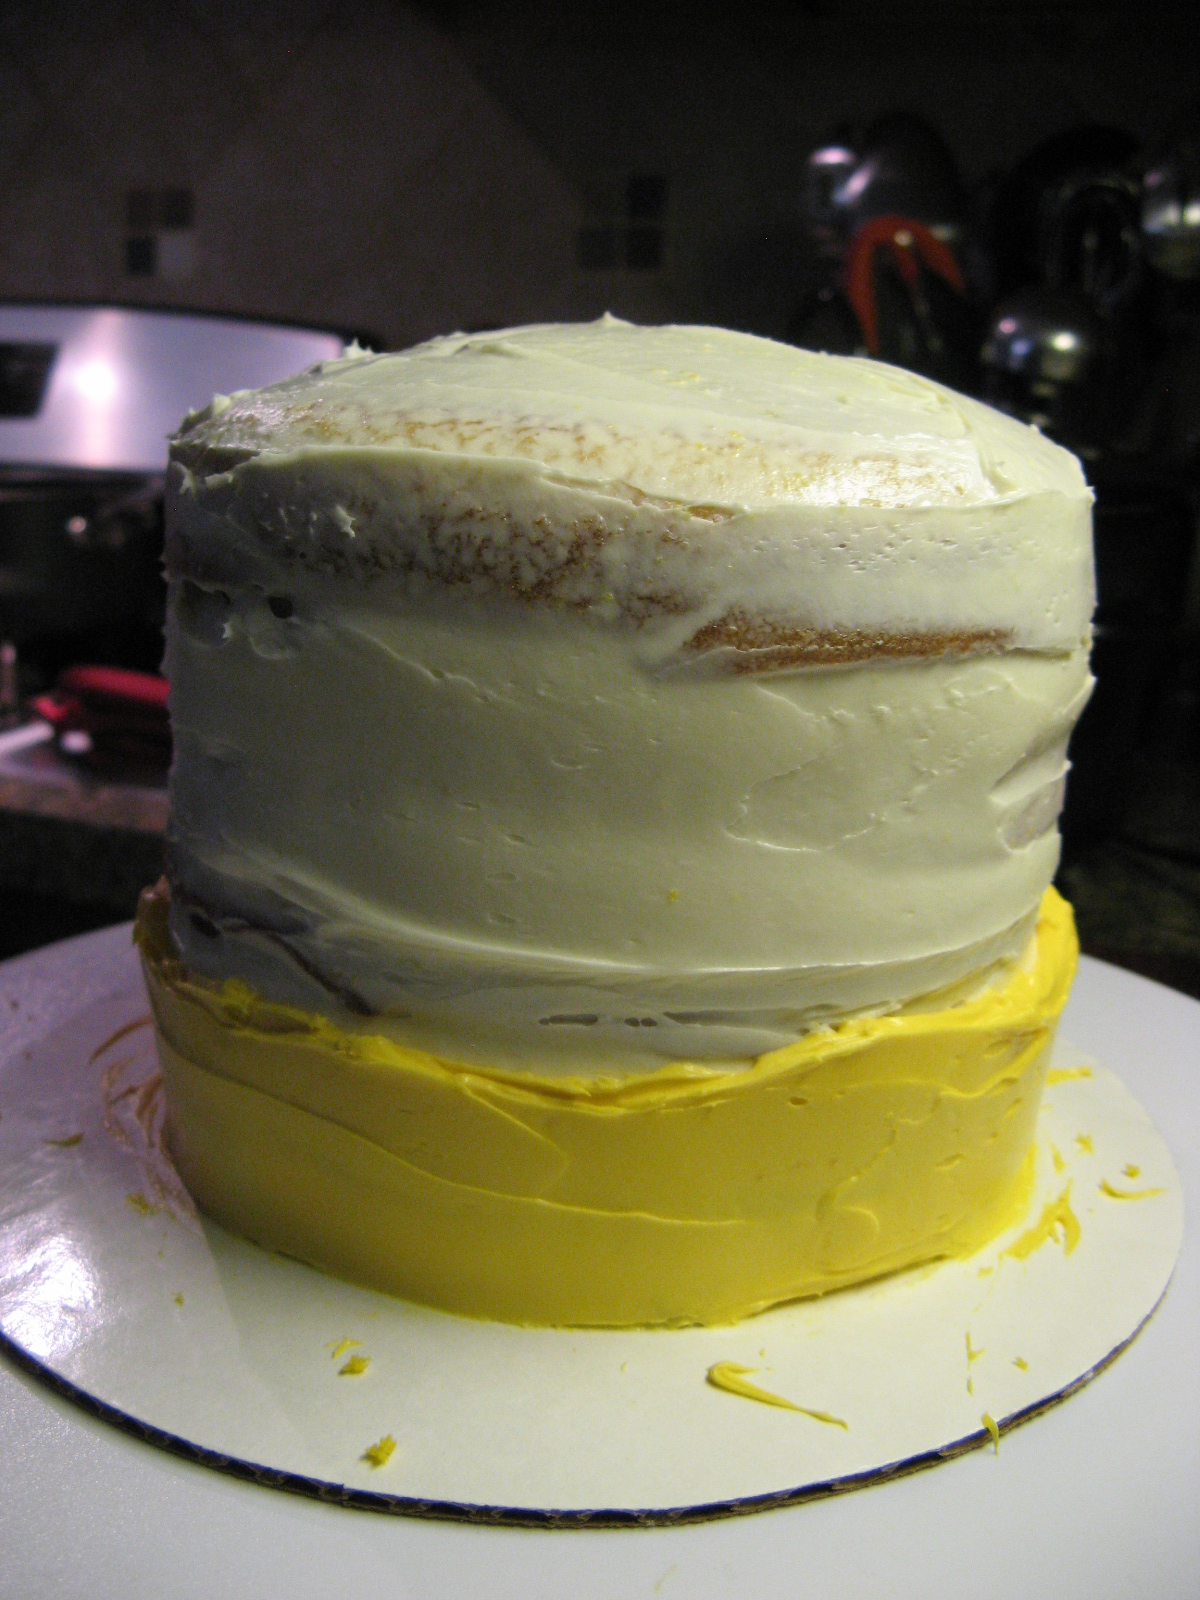
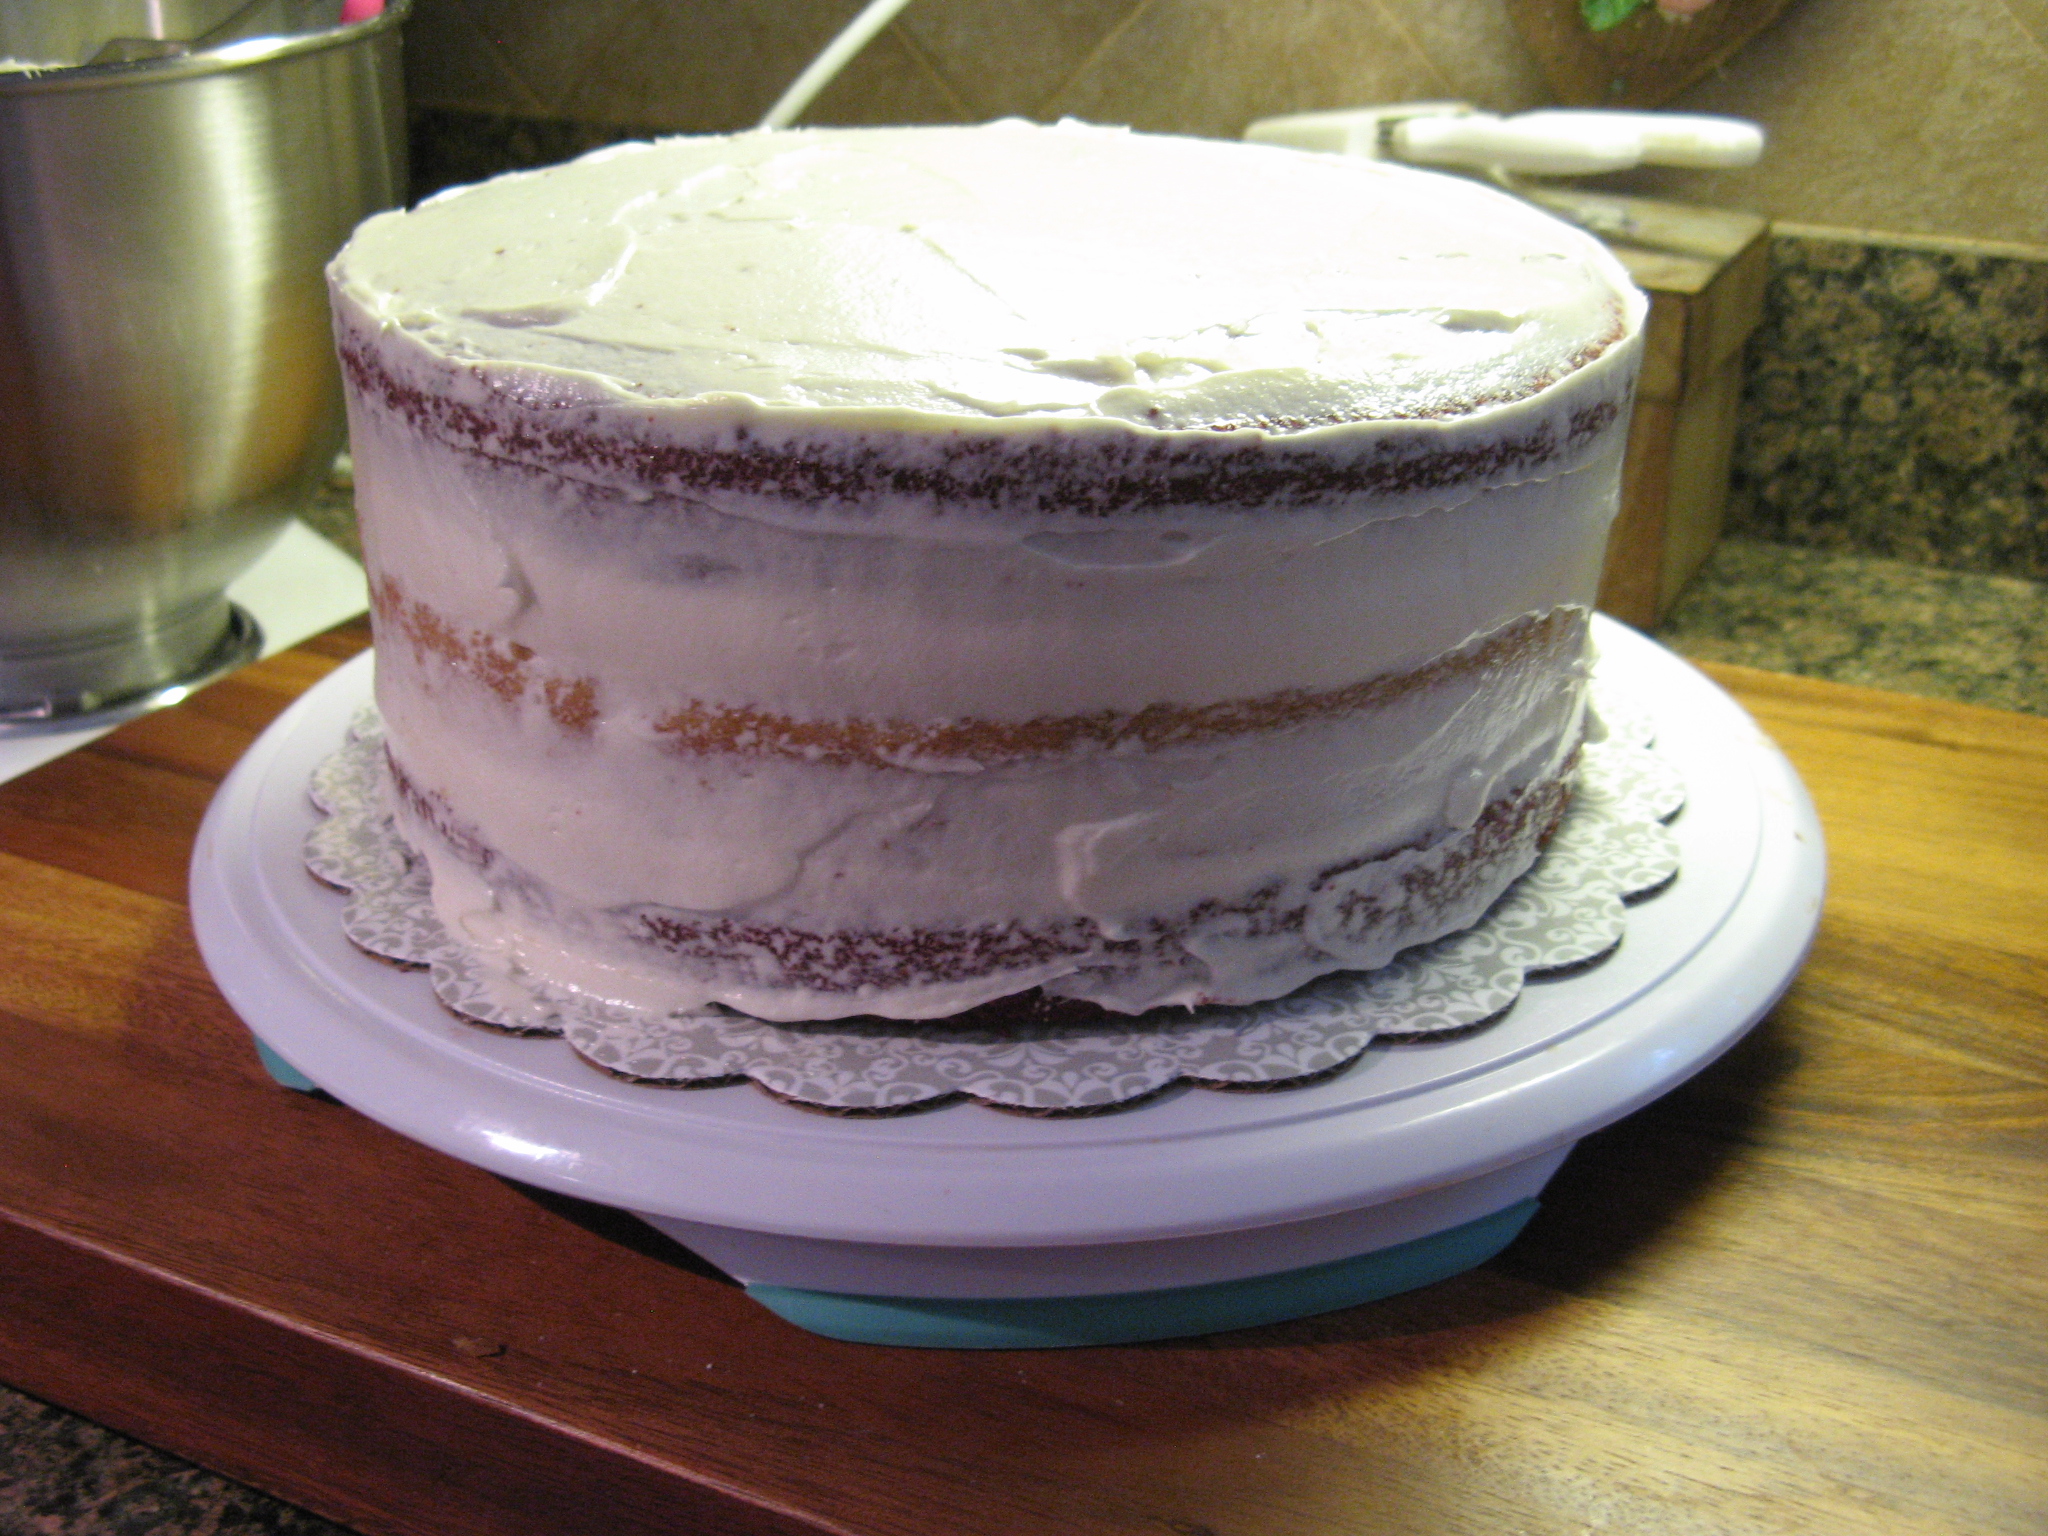
And then crumb coated the cake and placed it in the refrigerator so the frosting could firm up.

IMG_8360

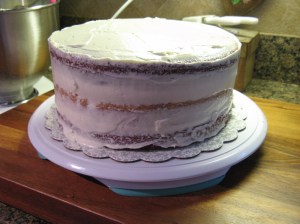
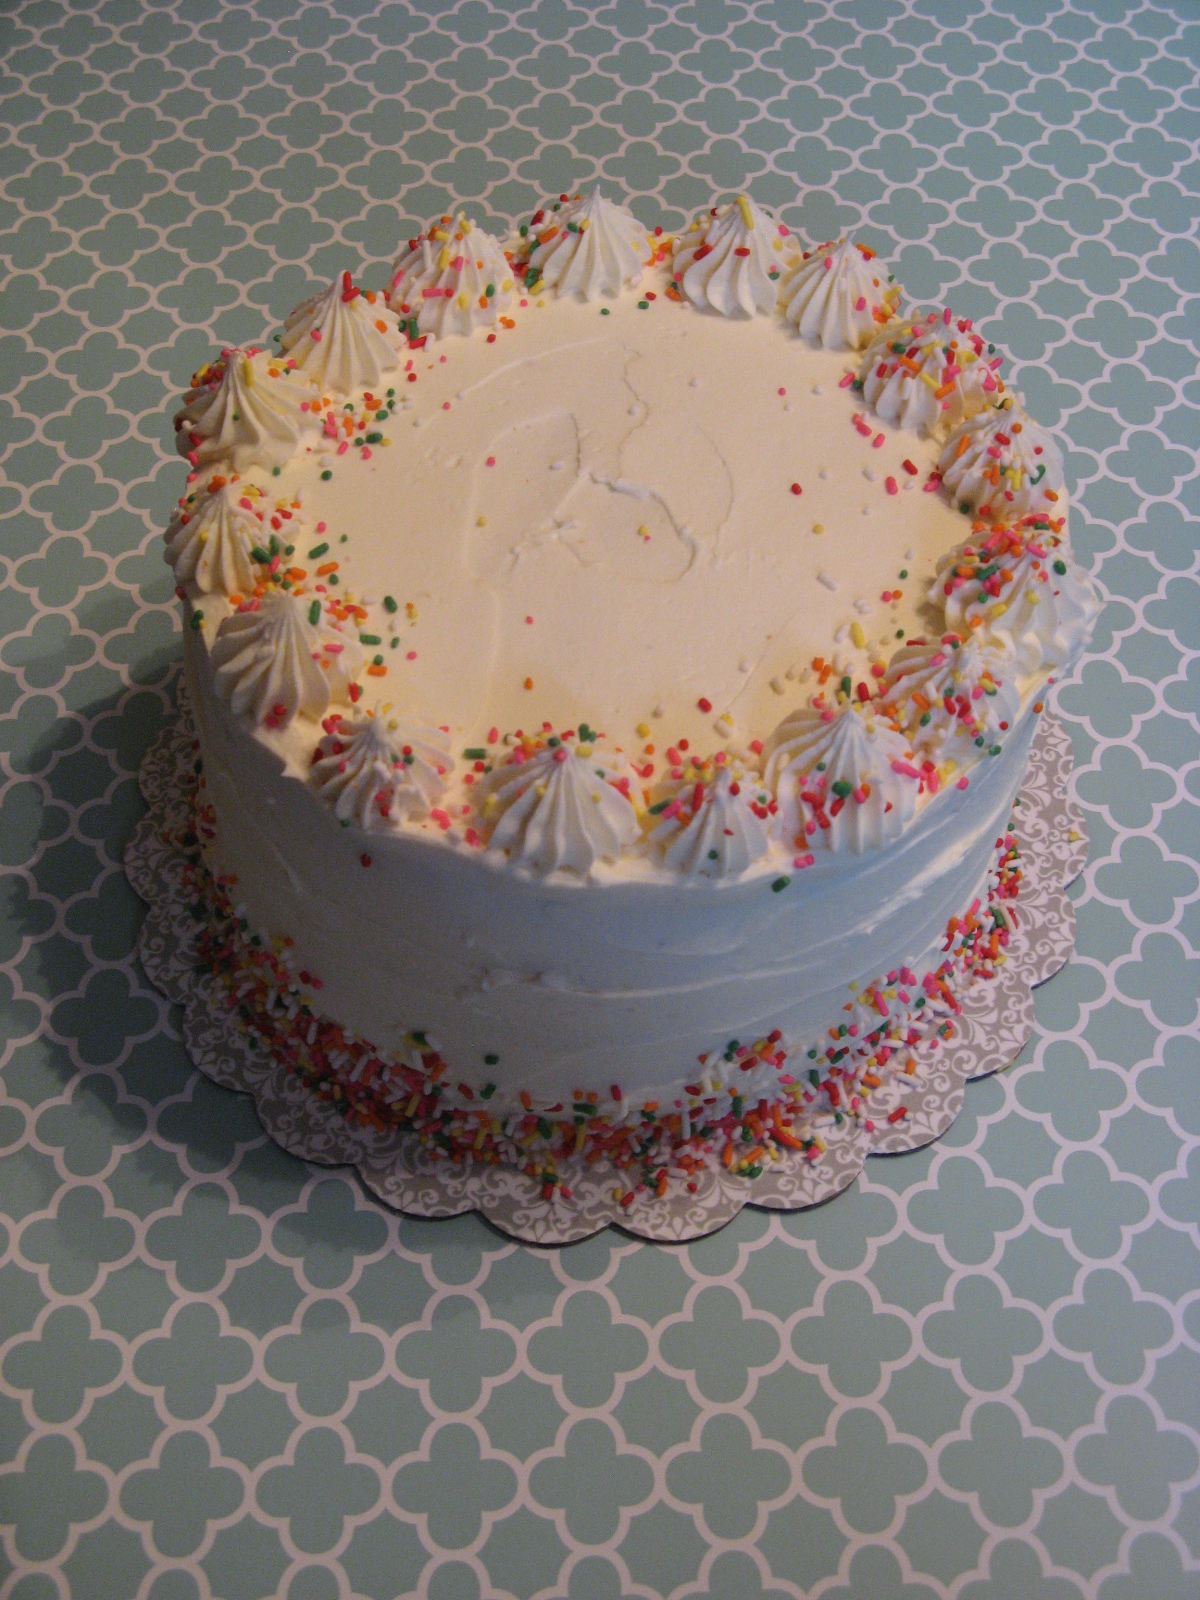
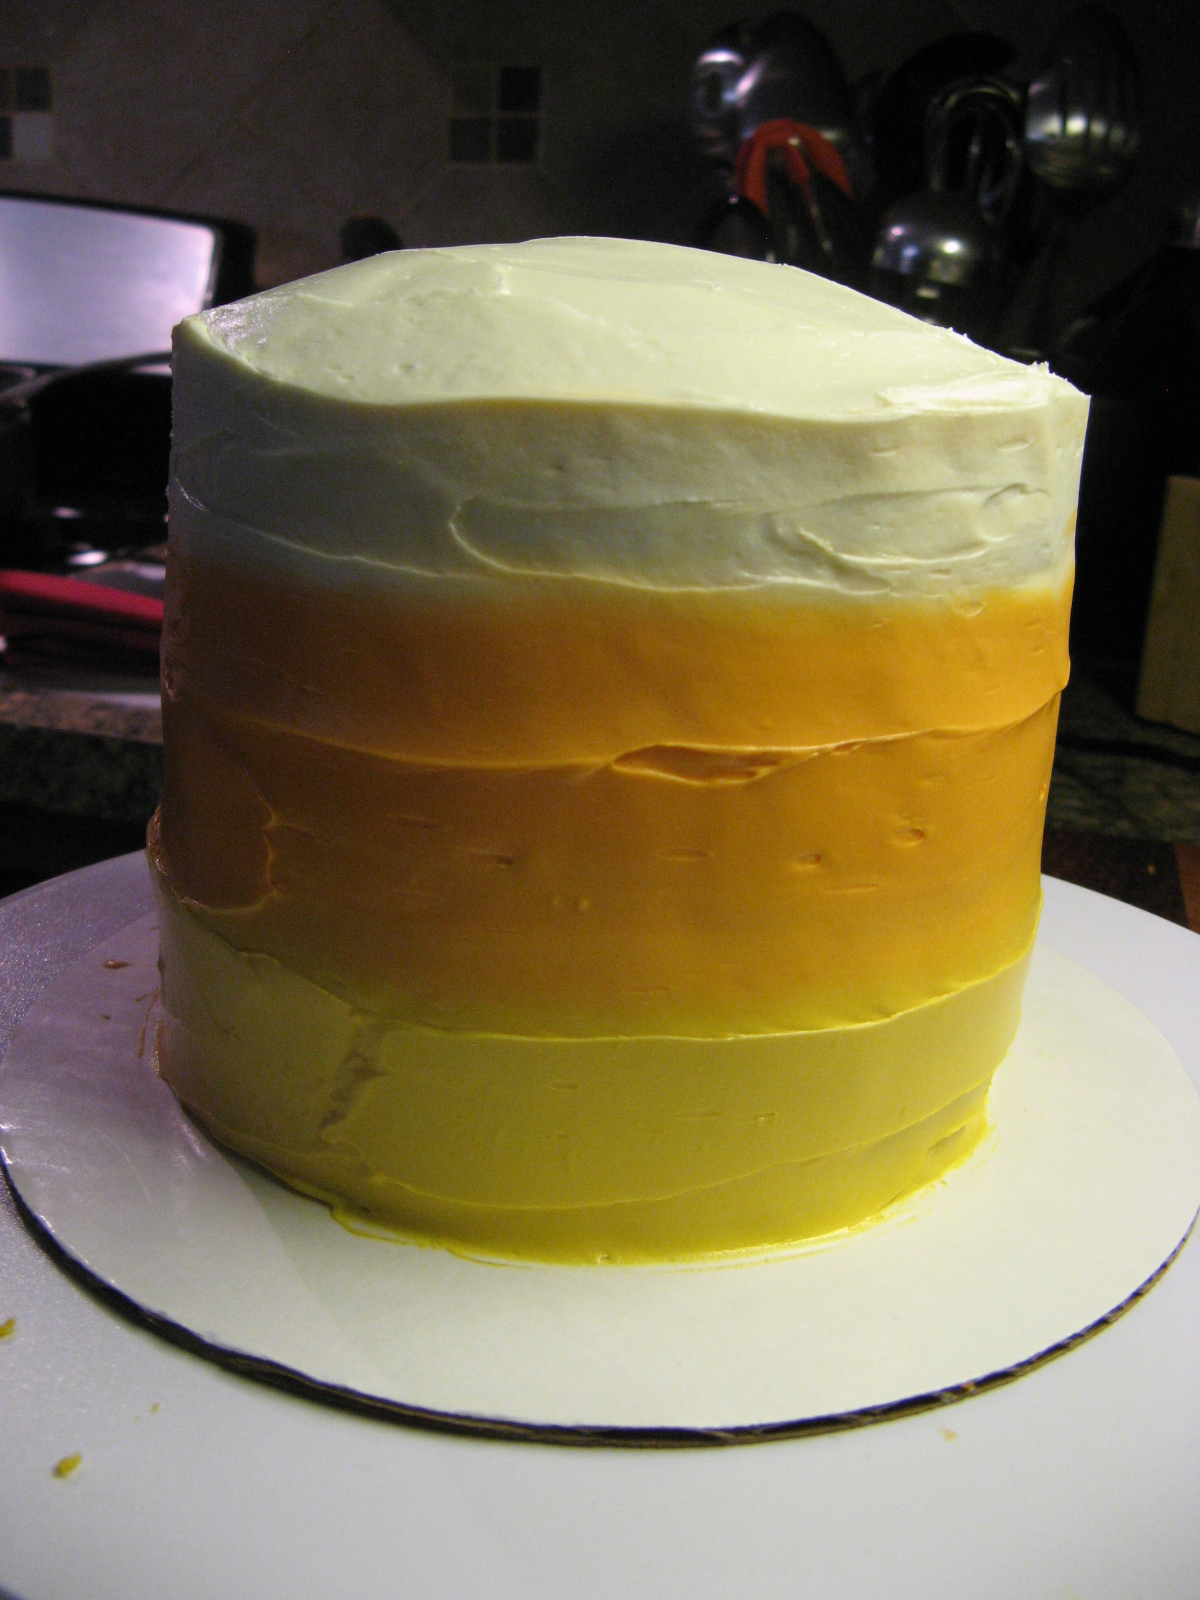
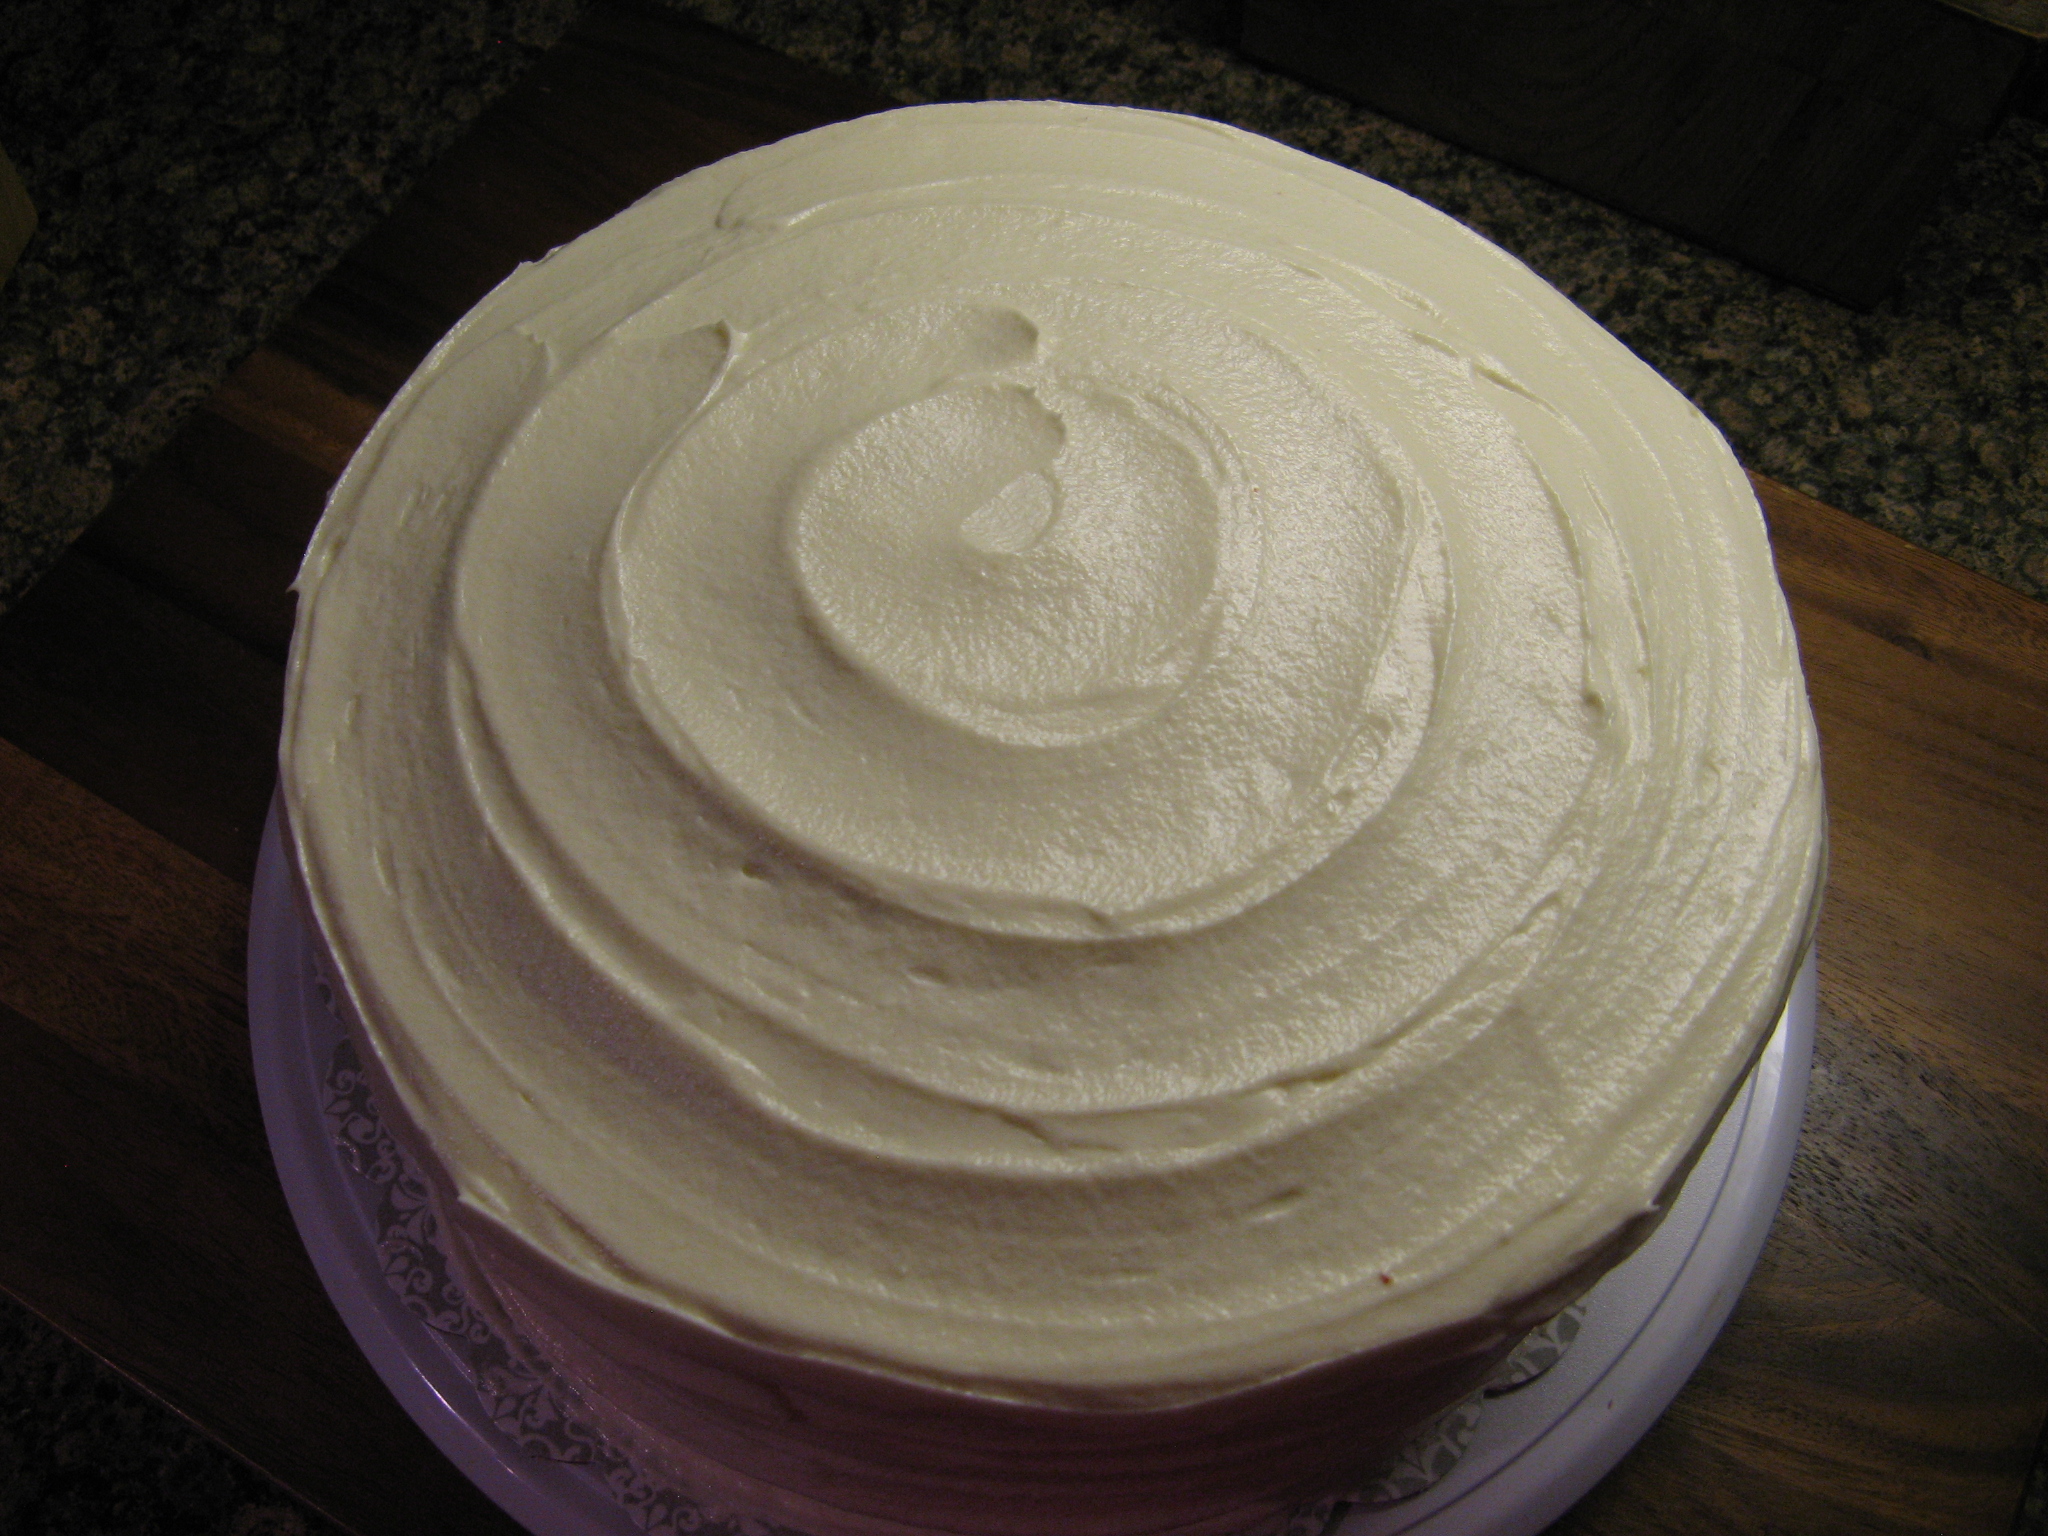
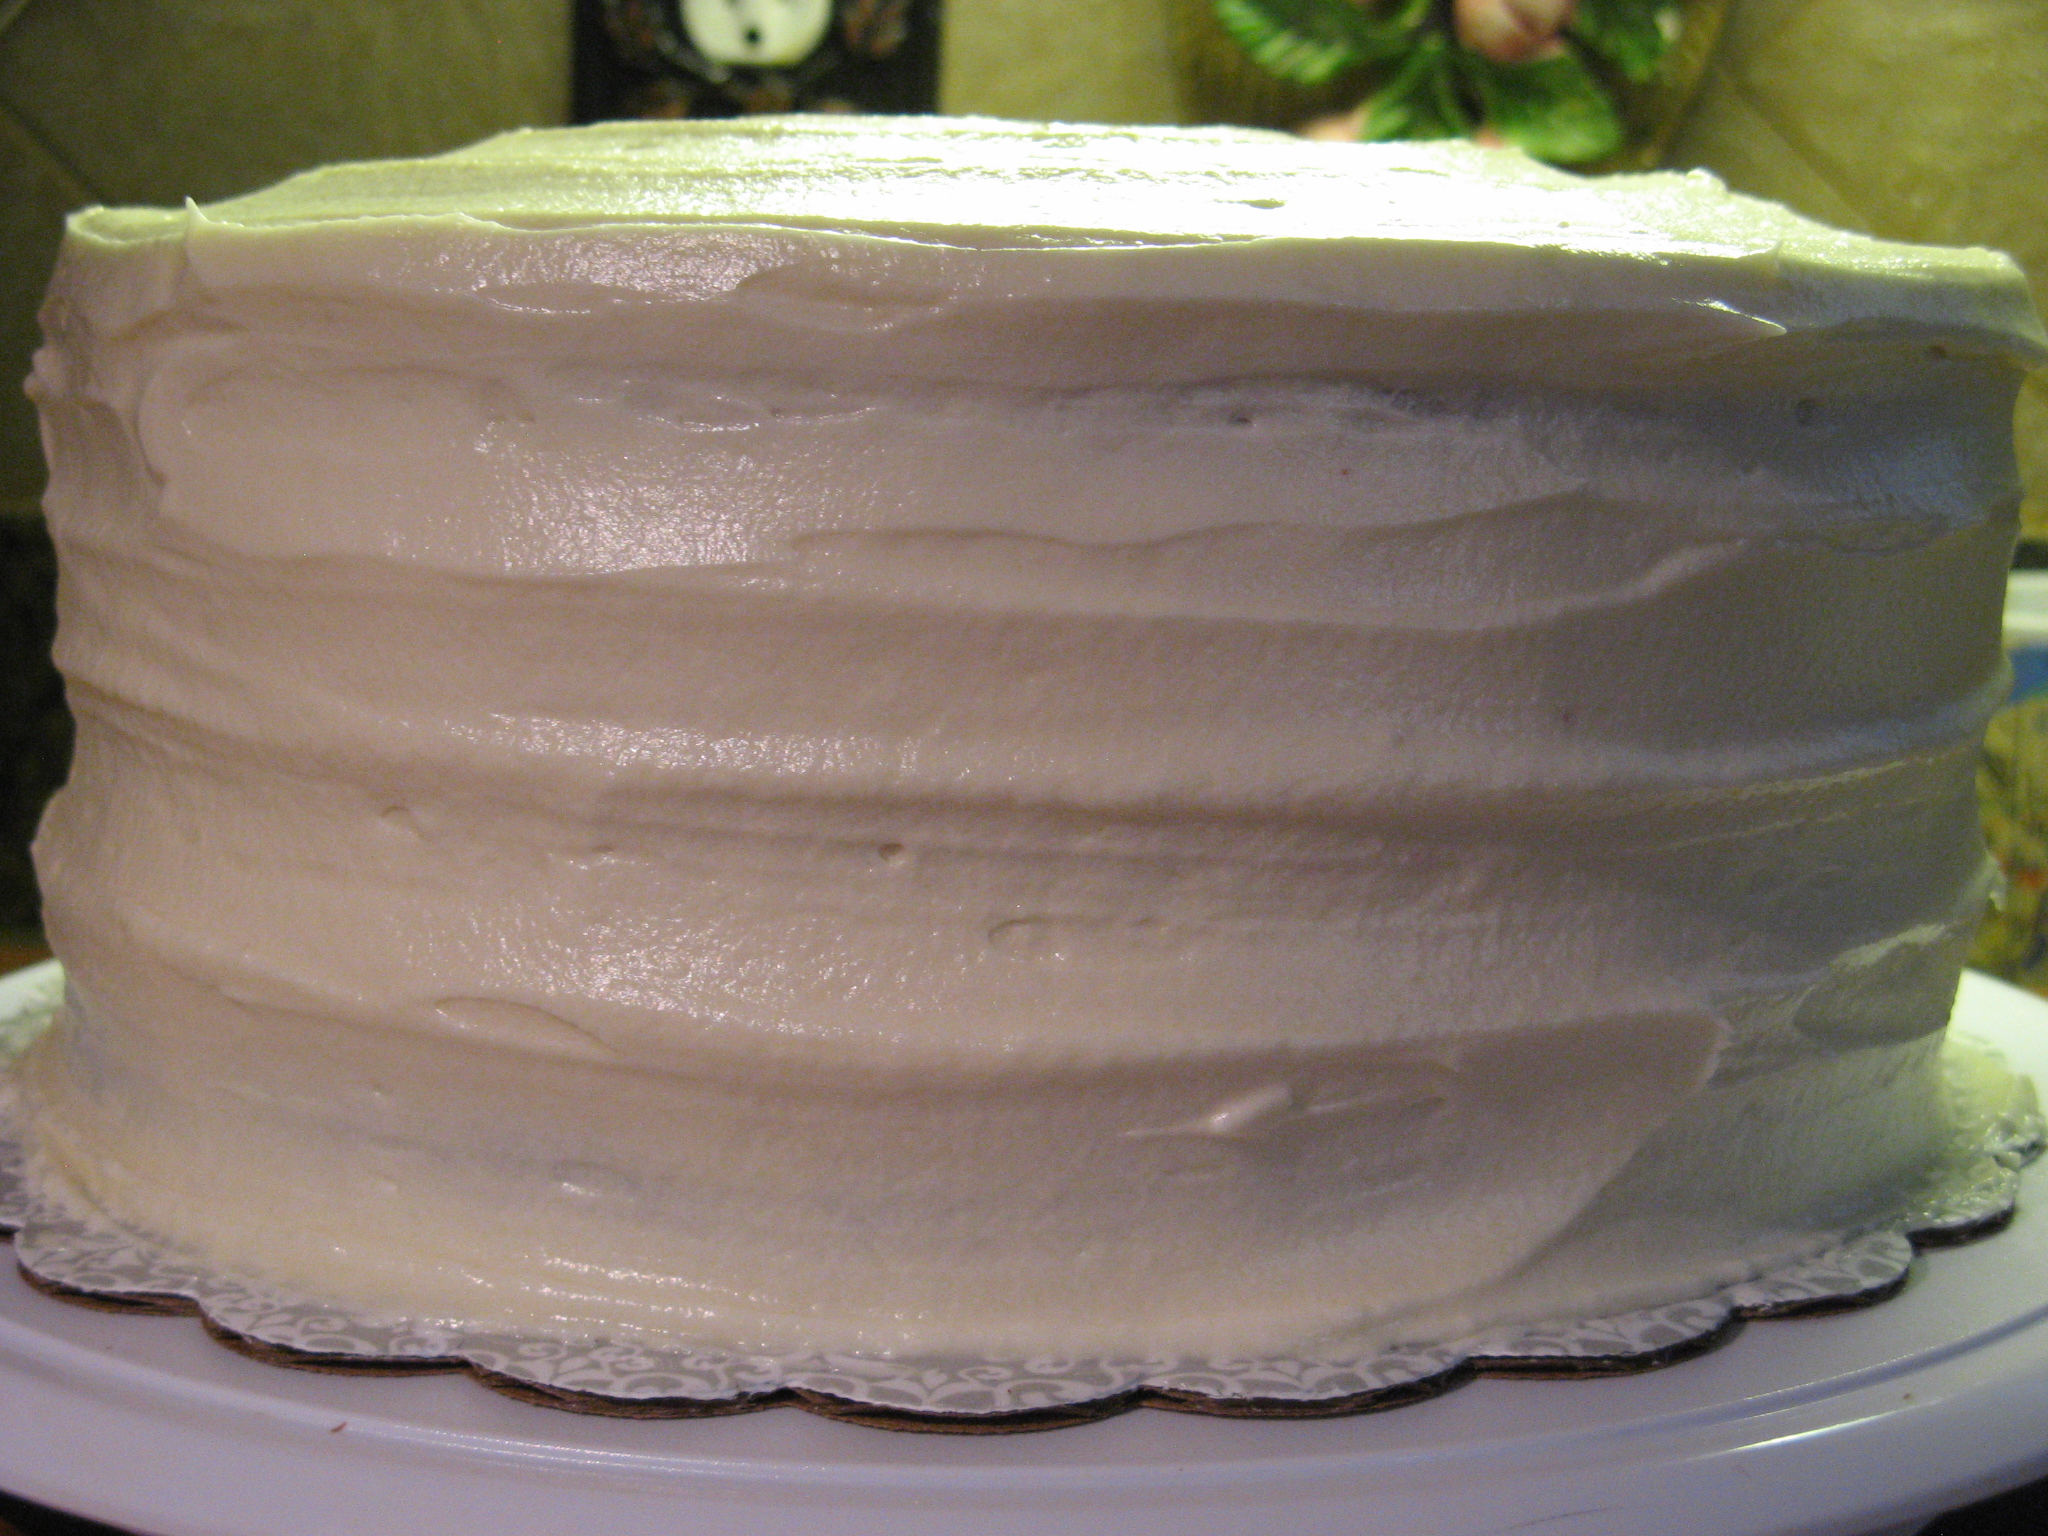
Once the crumb coat was firm I finish frosting the cake and created a design on the cake by using the back of a spoon. While rotating the cake on a cake turntable I ran the back of the spoon along the edge of the cake and around the top.

IMG_8361 IMG_8364

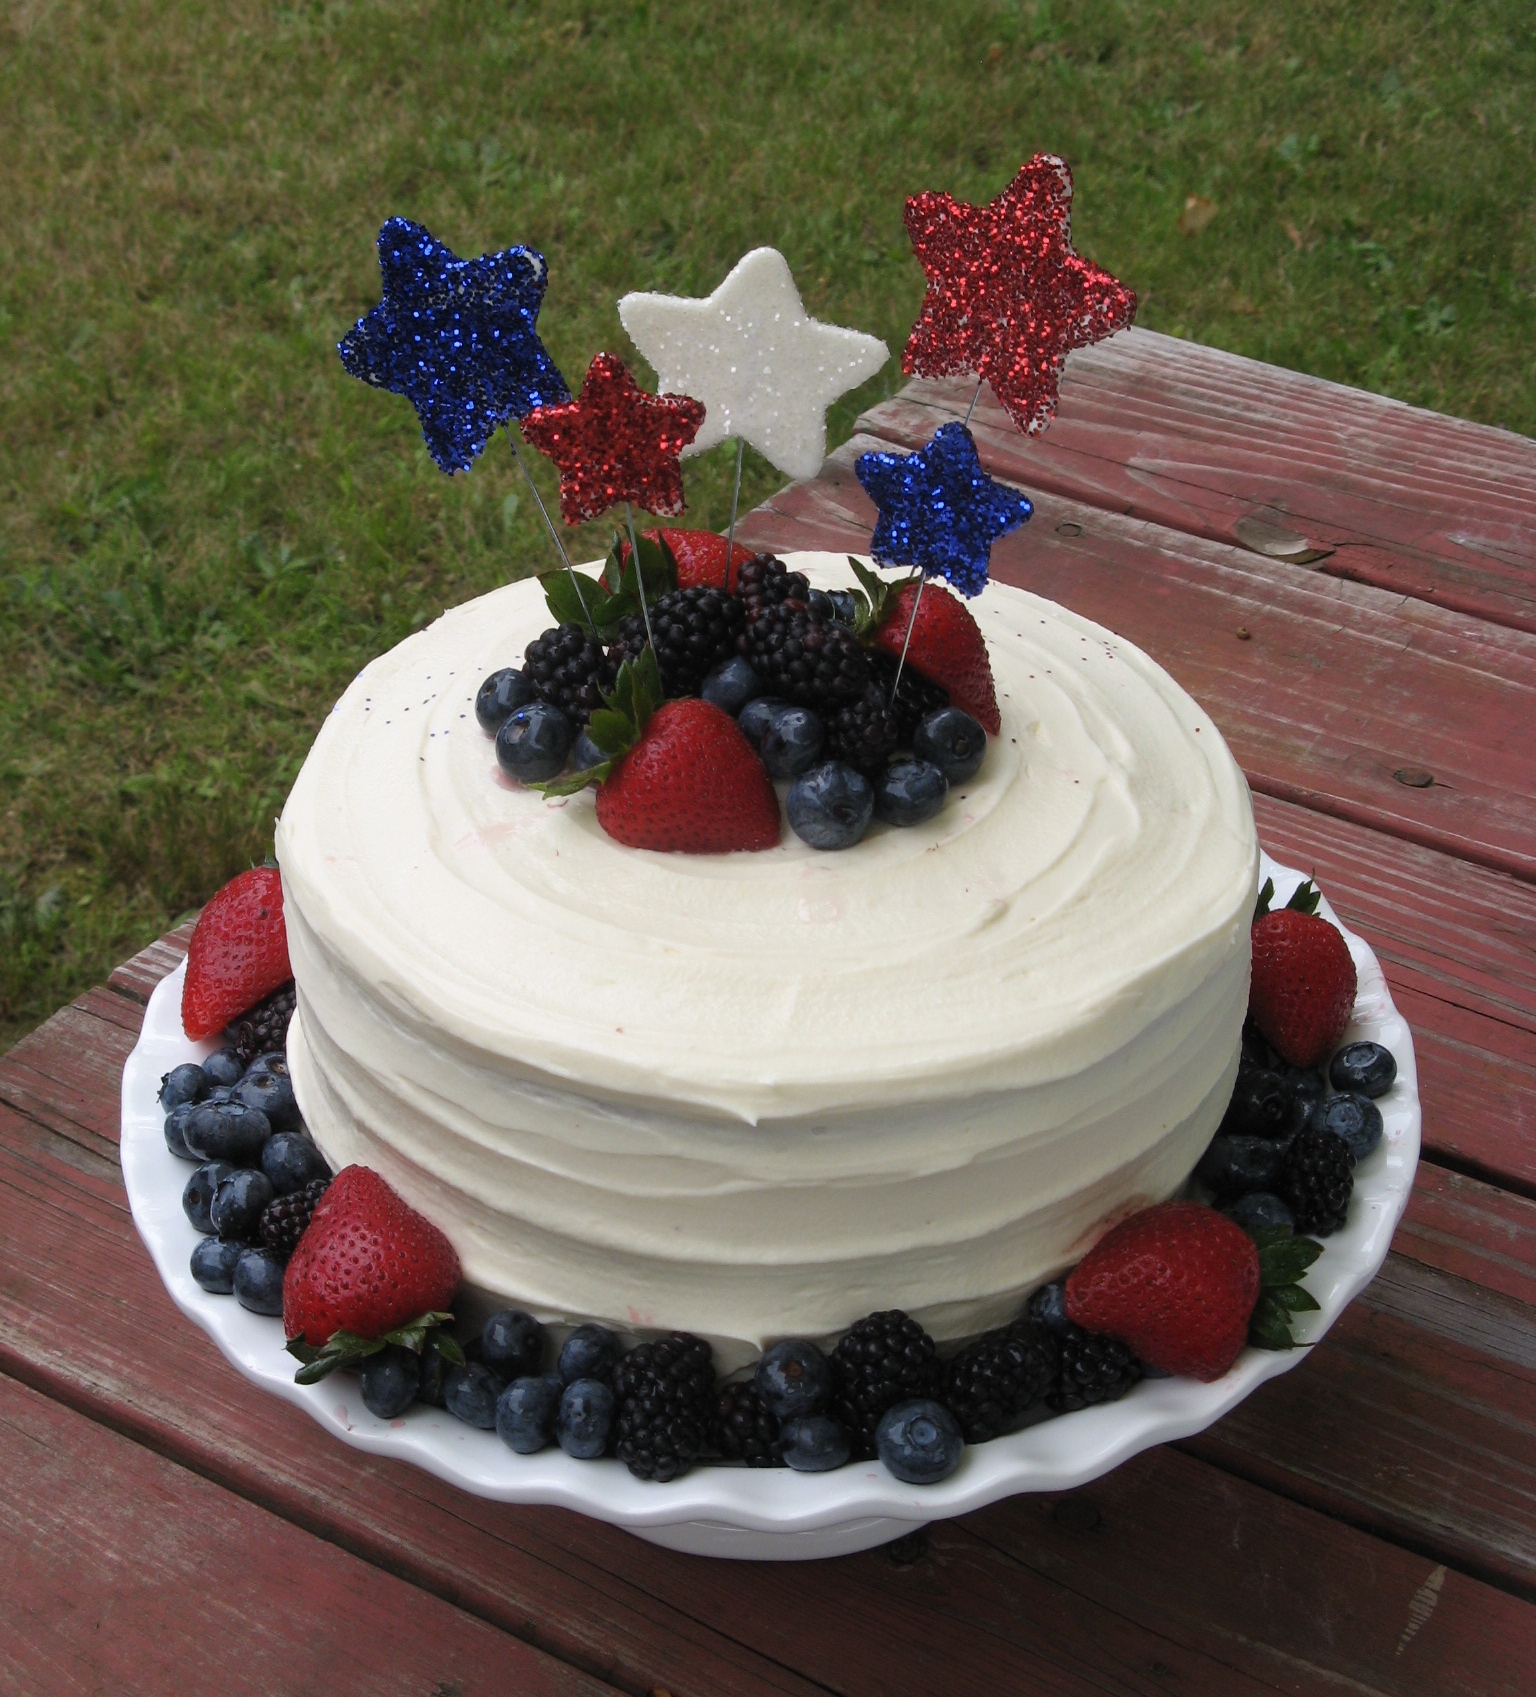
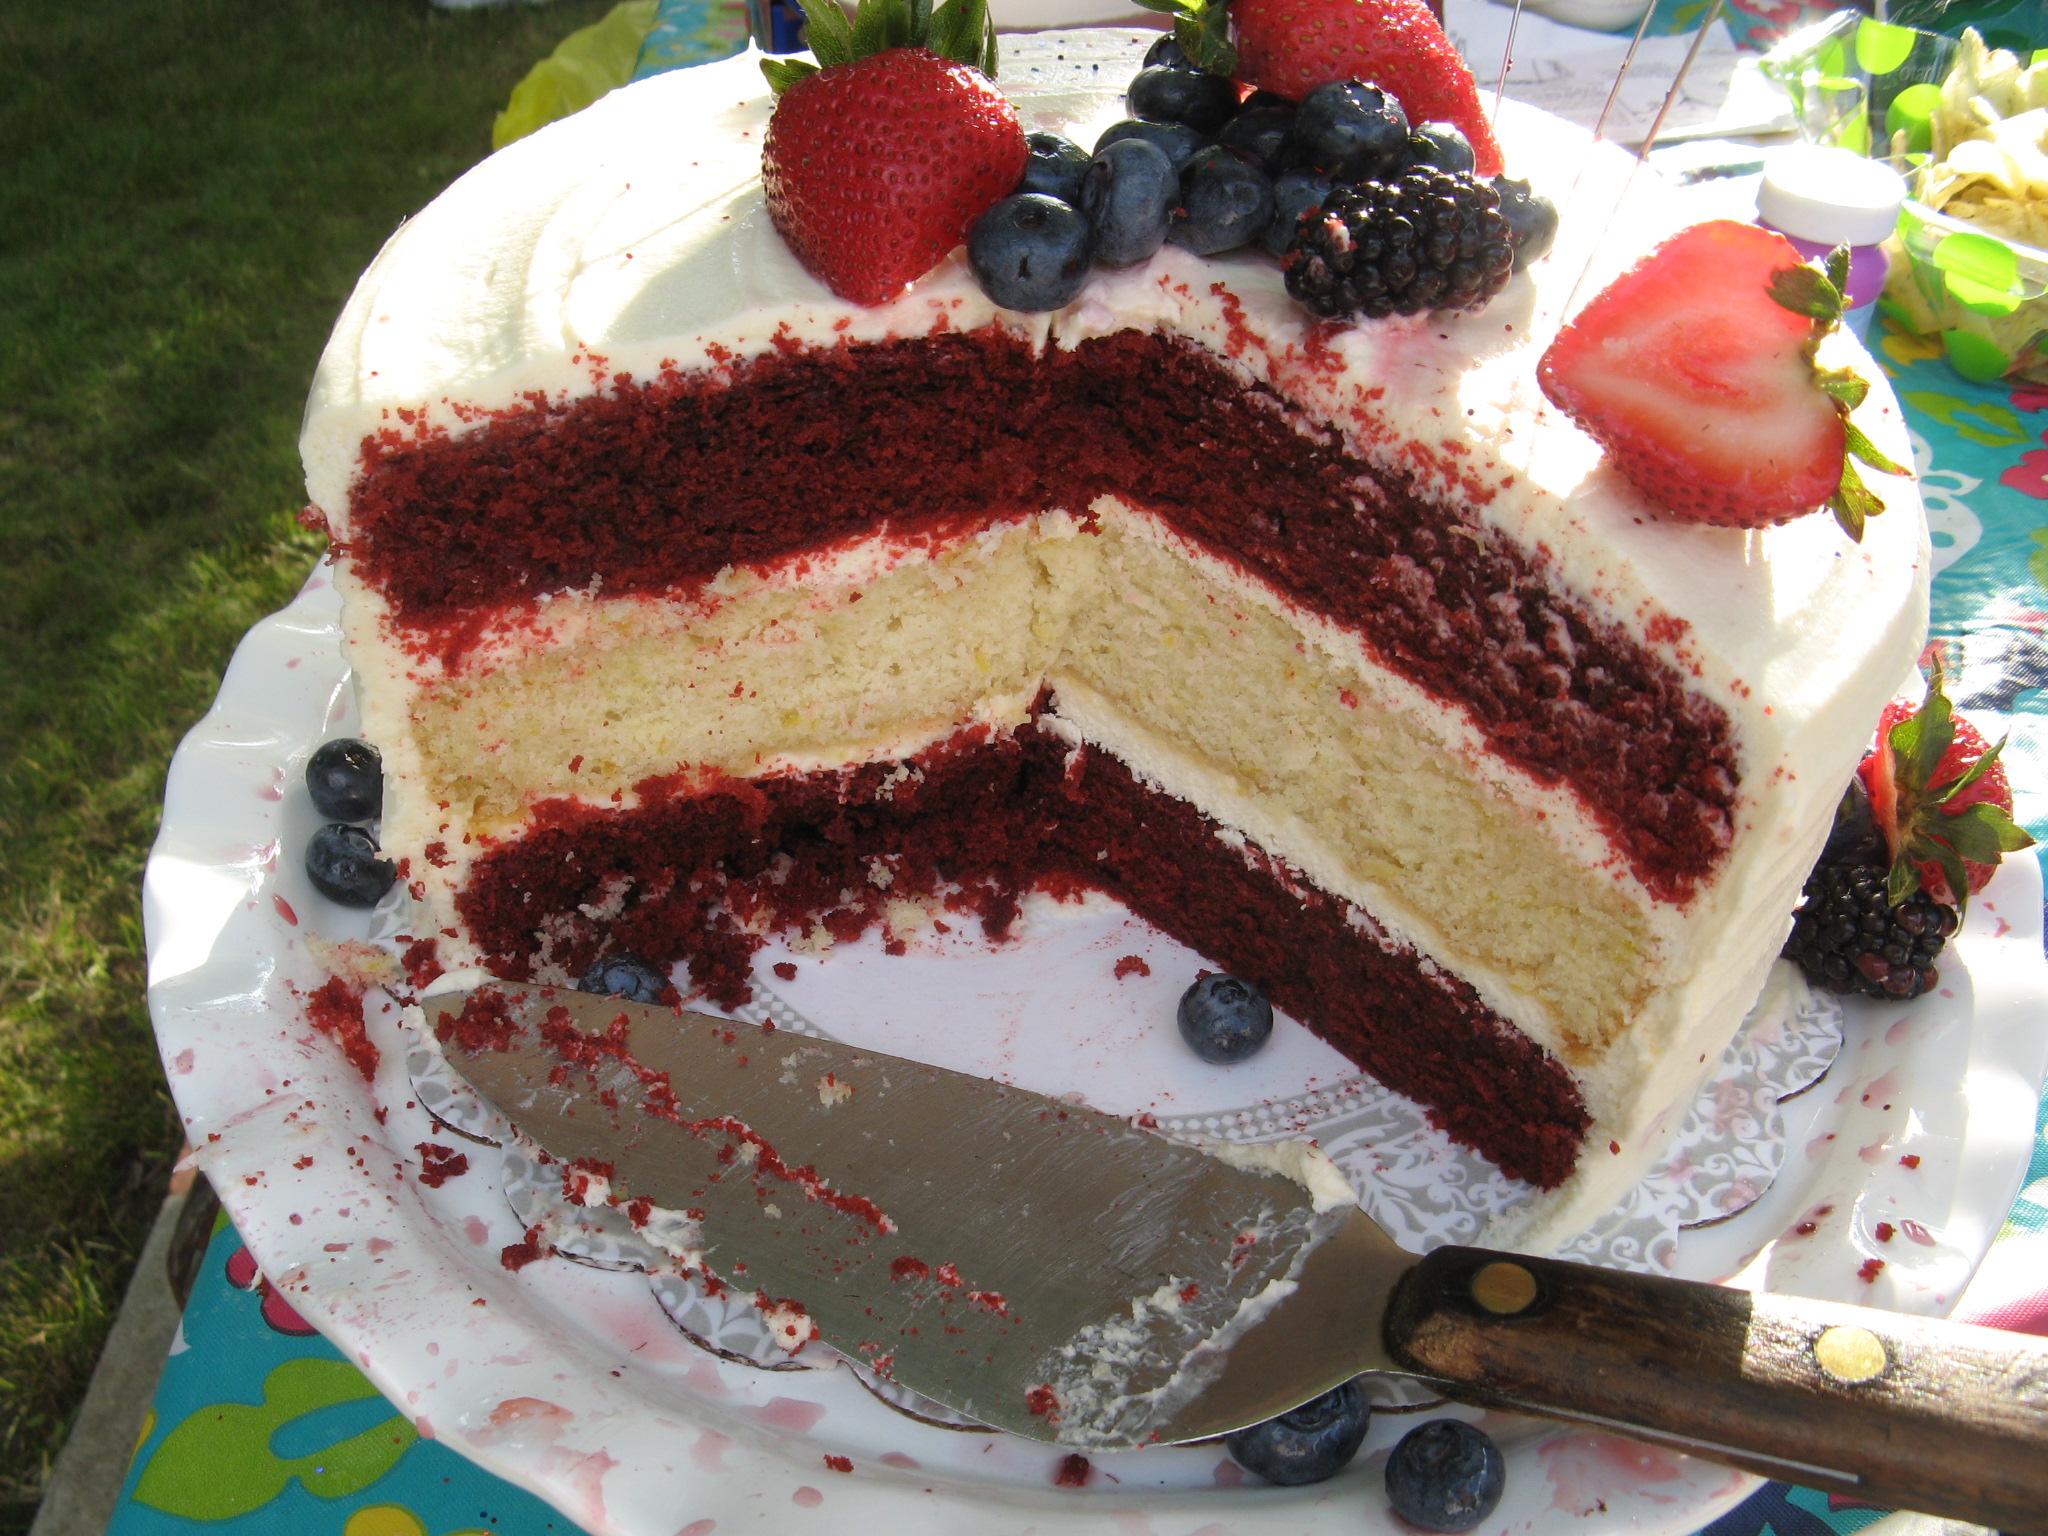
And then it was time to decorate the cake with the glittered stars and some fresh berries – blackberries, blueberries and strawberries.

IMG_8378

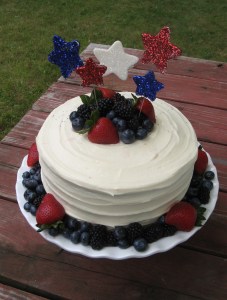
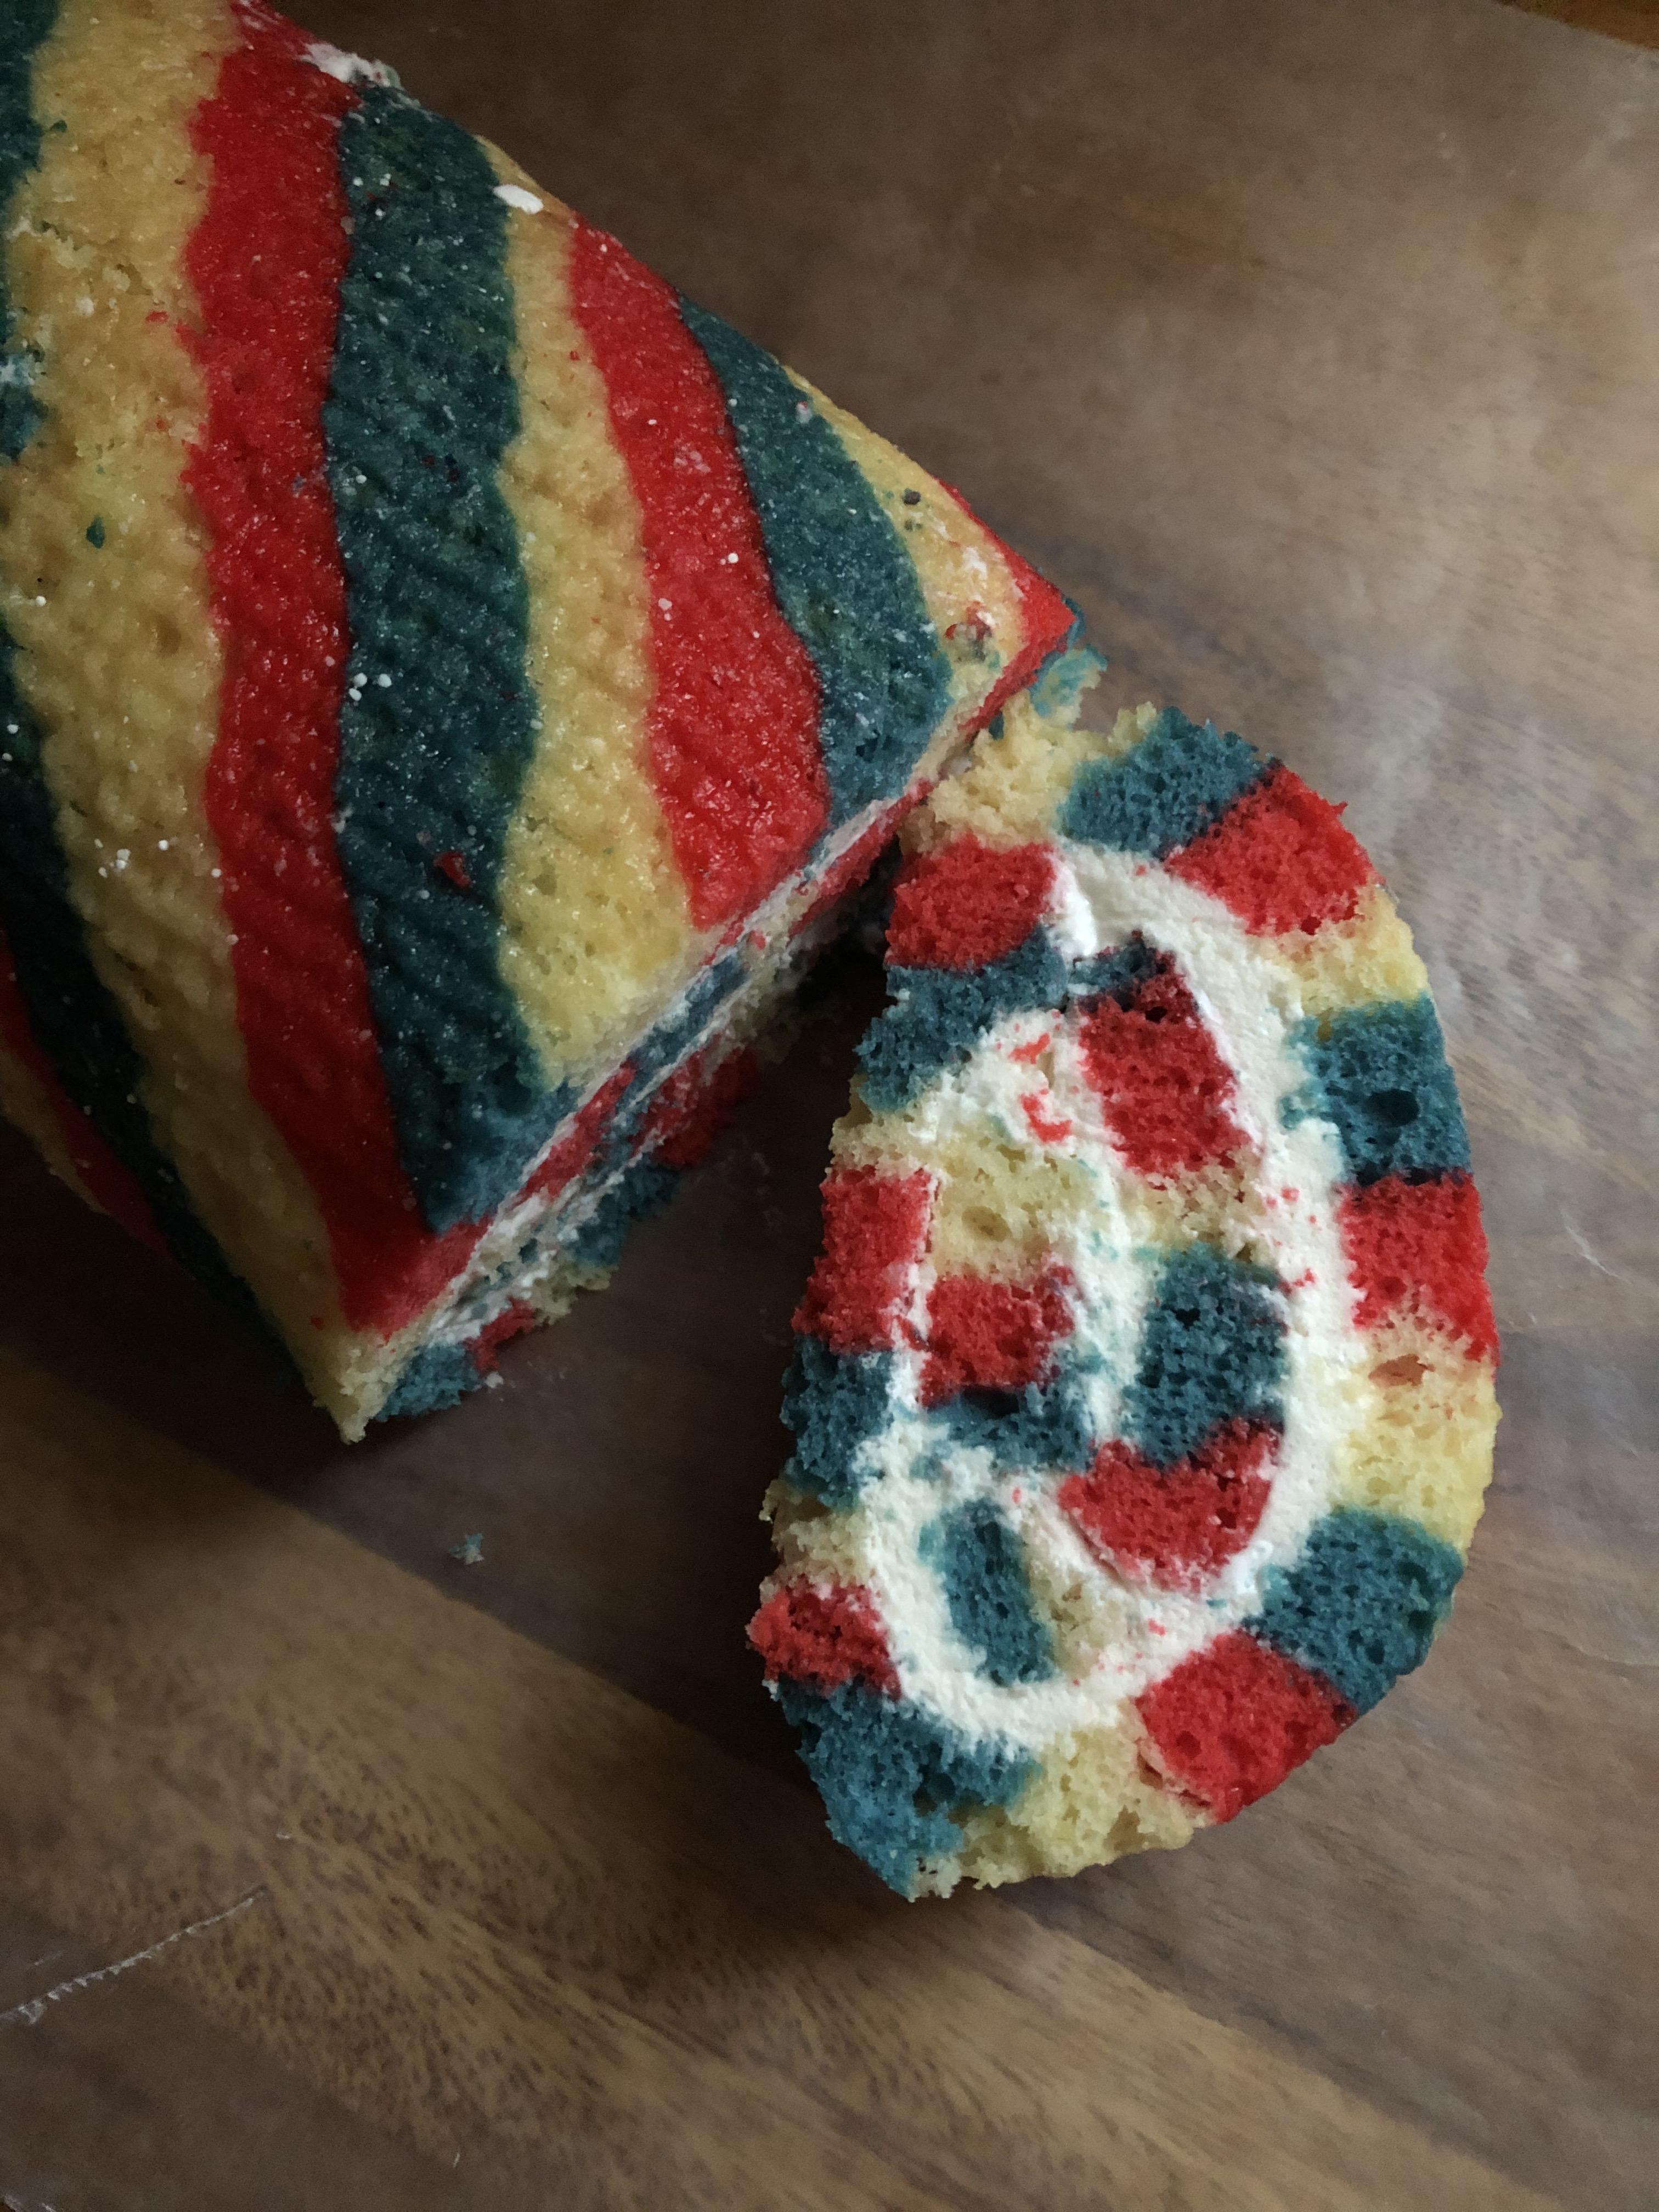
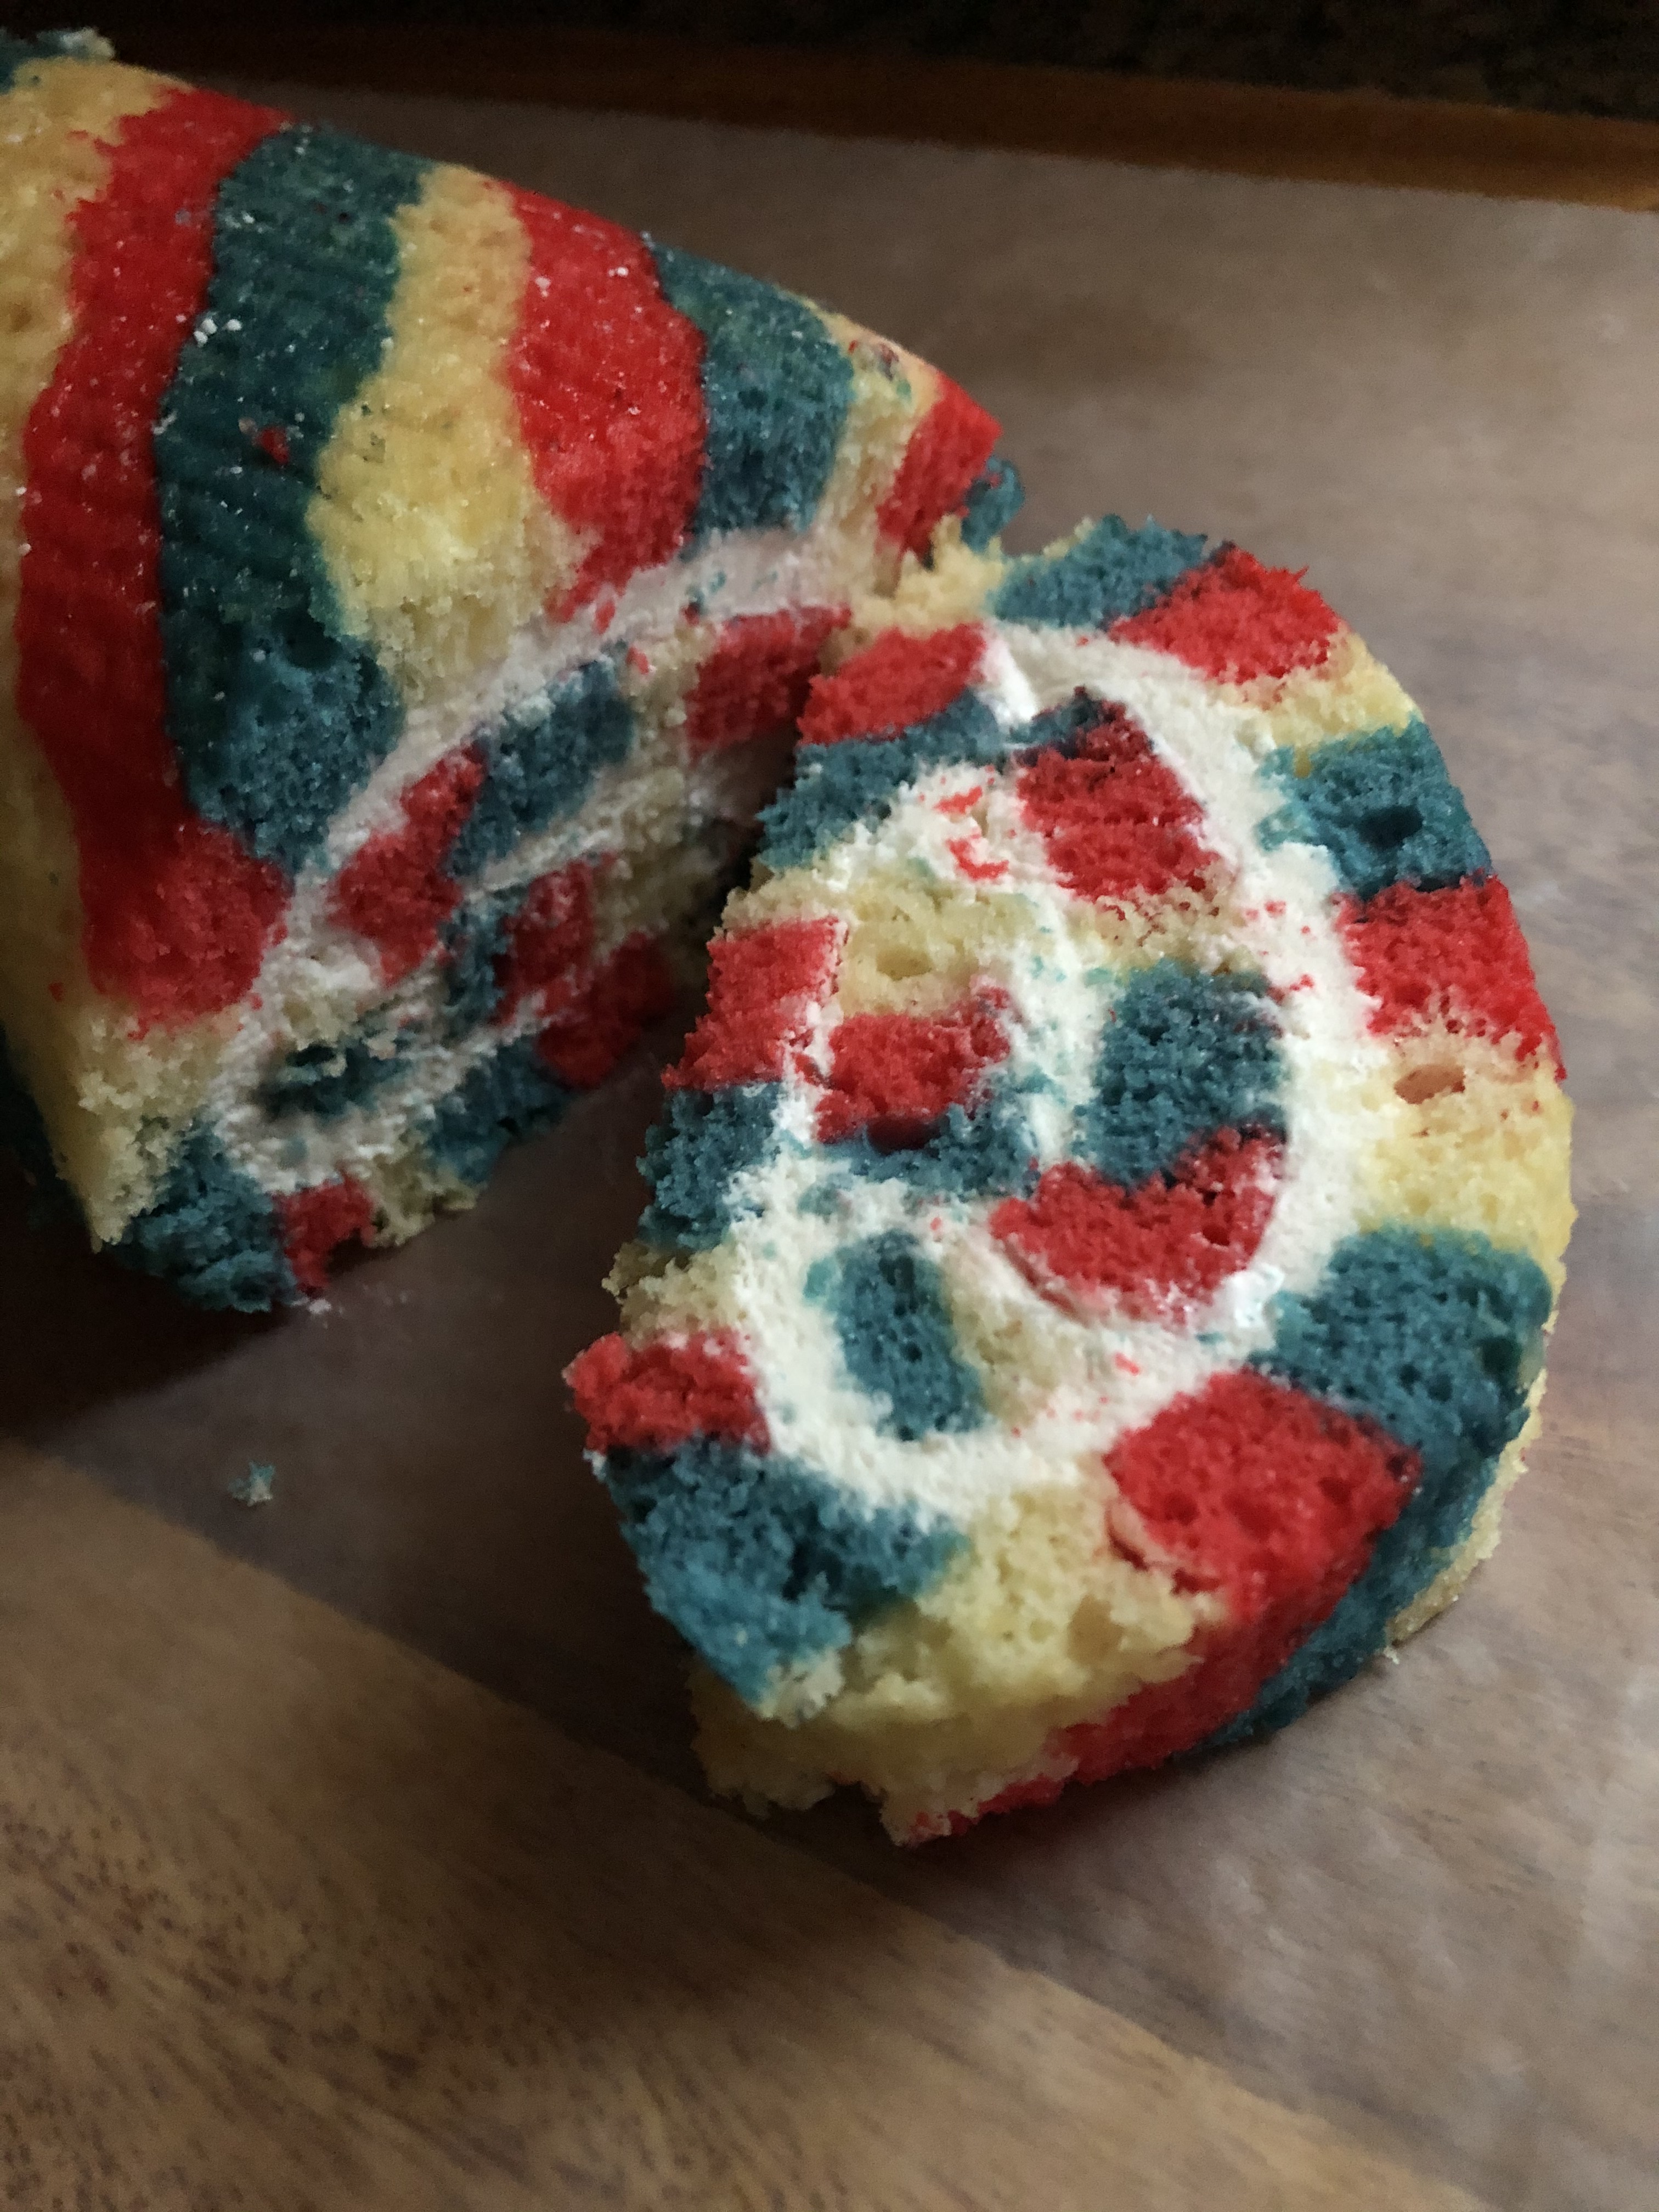
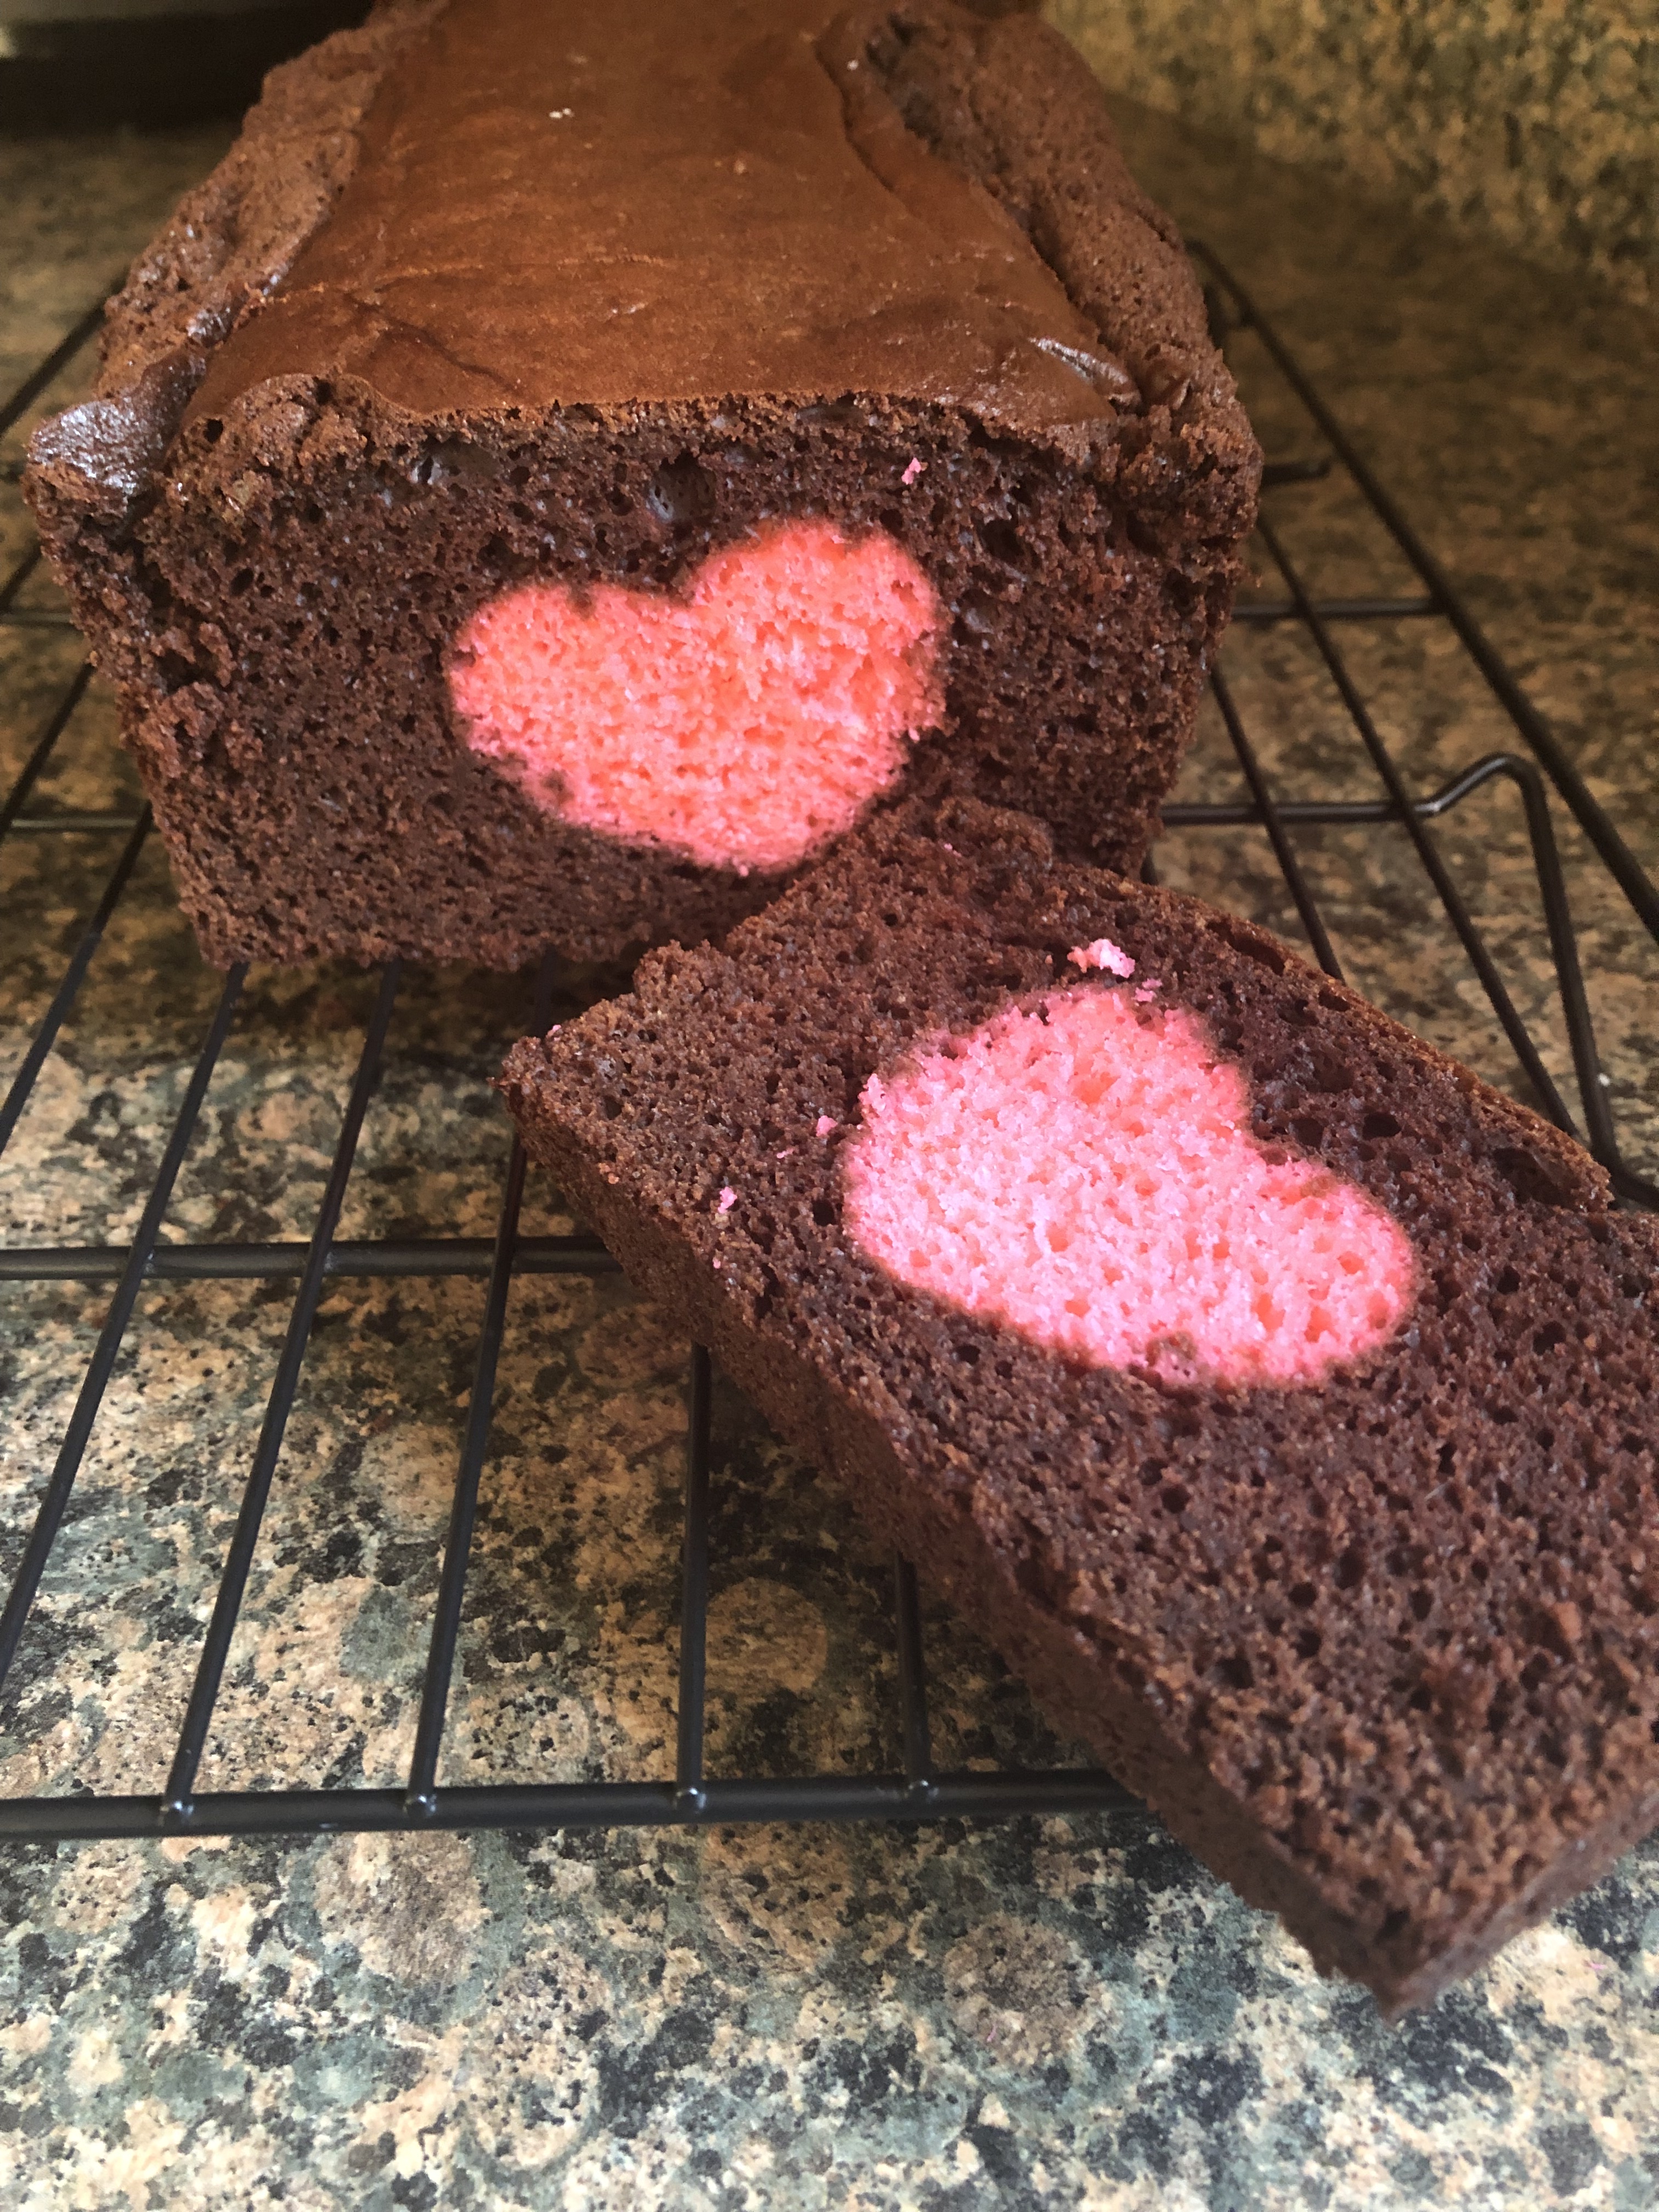
And how did the stripes look once the cake was cut into…. Perfect!

IMG_8403

This was definitely one cake that tasted just as good as it looked!

Red, White and Blue Cake

Red Velvet Cake Layers:

2 1/2 cups sifted cake flour (sift before measuring)

1/4 cup unsweetened natural cocoa

1 teaspoon baking soda

3/4 teaspoon salt

1 stick (1/2 cup) unsalted butter, softened

1 1/2 cups sugar

1 cup vegetable oil

2 large eggs

1 1-ounce bottle red food coloring

1 1/2 teaspoons white vinegar

1 1/2 teaspoons vanilla extract

3/4 cup sour cream mixed with 1/4 cup water

1. Heat oven to 350°F. Butter two 9-inch round cake pans, then line bottoms with rounds of wax paper. Butter paper and dust pans with some additional flour, knocking out excess.

2. Resift cake flour together with cocoa, baking soda, and salt into a bowl.

3. Beat butter and sugar in a large bowl with an electric mixer (fitted with paddle attachment if using stand mixer) at medium-high speed until combined well, then add oil and beat until very pale and creamy, about 3 minutes.

4. Add eggs, one at a time, beating well after each addition, and beat in food coloring, vinegar, and vanilla extract.

5. Reduce speed to low and mix in flour mixture and sour cream mixture in batches, beginning and ending with flour mixture, and mixing until batter is smooth.

6. Divide batter between pans (about 3 cups in each) and smooth tops. Rap pans on counter a couple of times to expel any air bubbles. Bake in middle of oven until a wooden pick comes out clean and cake begins to pull away from sides of pans, 25 to 30 minutes. Keep oven on.

7. Cool layers in pans on racks 10 minutes, then run a thin knife around edge of pans. Invert layers onto racks and peel off wax paper. Cool layers completely.

White Cake Layer:

1 1/3 cups sifted cake flour (sift before measuring)

1/2 teaspoon baking soda

1/4 teaspoon salt

3 large egg whites

1/4 cup sour cream mixed with 2 tablespoons water

5 tablespoons unsalted butter, softened

3/4 cup sugar

1/3 cup vegetable oil

1 tablespoon grated lemon zest

1 teaspoon vanilla extract

1. Butter one 9-inch round cake pan, then line bottom with wax paper. Butter paper and dust pan with some additional flour, knocking out excess.

2. Resift cake flour together with baking soda and salt into a bowl. Whisk egg whites in another bowl with sour cream mixture until combined.

3. Beat butter and sugar in a large bowl with an electric mixer (fitted with paddle attachment if using stand mixer) at medium-high speed until combined well, then add oil and beat until very pale and creamy, about 3 minutes. Beat in zest and vanilla extract.

4. Reduce speed to low and mix in flour mixture and sour cream mixture in batches, beginning and ending with flour mixture and mixing until batter is smooth. Transfer batter to pan and spread evenly. Rap pan on counter a couple of times to expel any air bubbles.

5. Bake in middle of oven until a wooden pick comes out clean and cake begins to pull away from side of pan, 25 to 30 minutes. Cool in pan on a rack 10 minutes, then run a thin knife around edge of pan. Invert layer onto rack and peel off wax paper. Cool layer completely.

Cream Cheese Frosting:

2 1/2 8-ounce packages cream cheese (20-ounces total), softened

2 1/2 sticks (1 1/4 cups) unsalted butter, softened

2 1/2 tablespoons fresh lemon juice

2 teaspoons vanilla extract

1/4 teaspoon salt

3 1/4 cups confectioners’ sugar, sifted

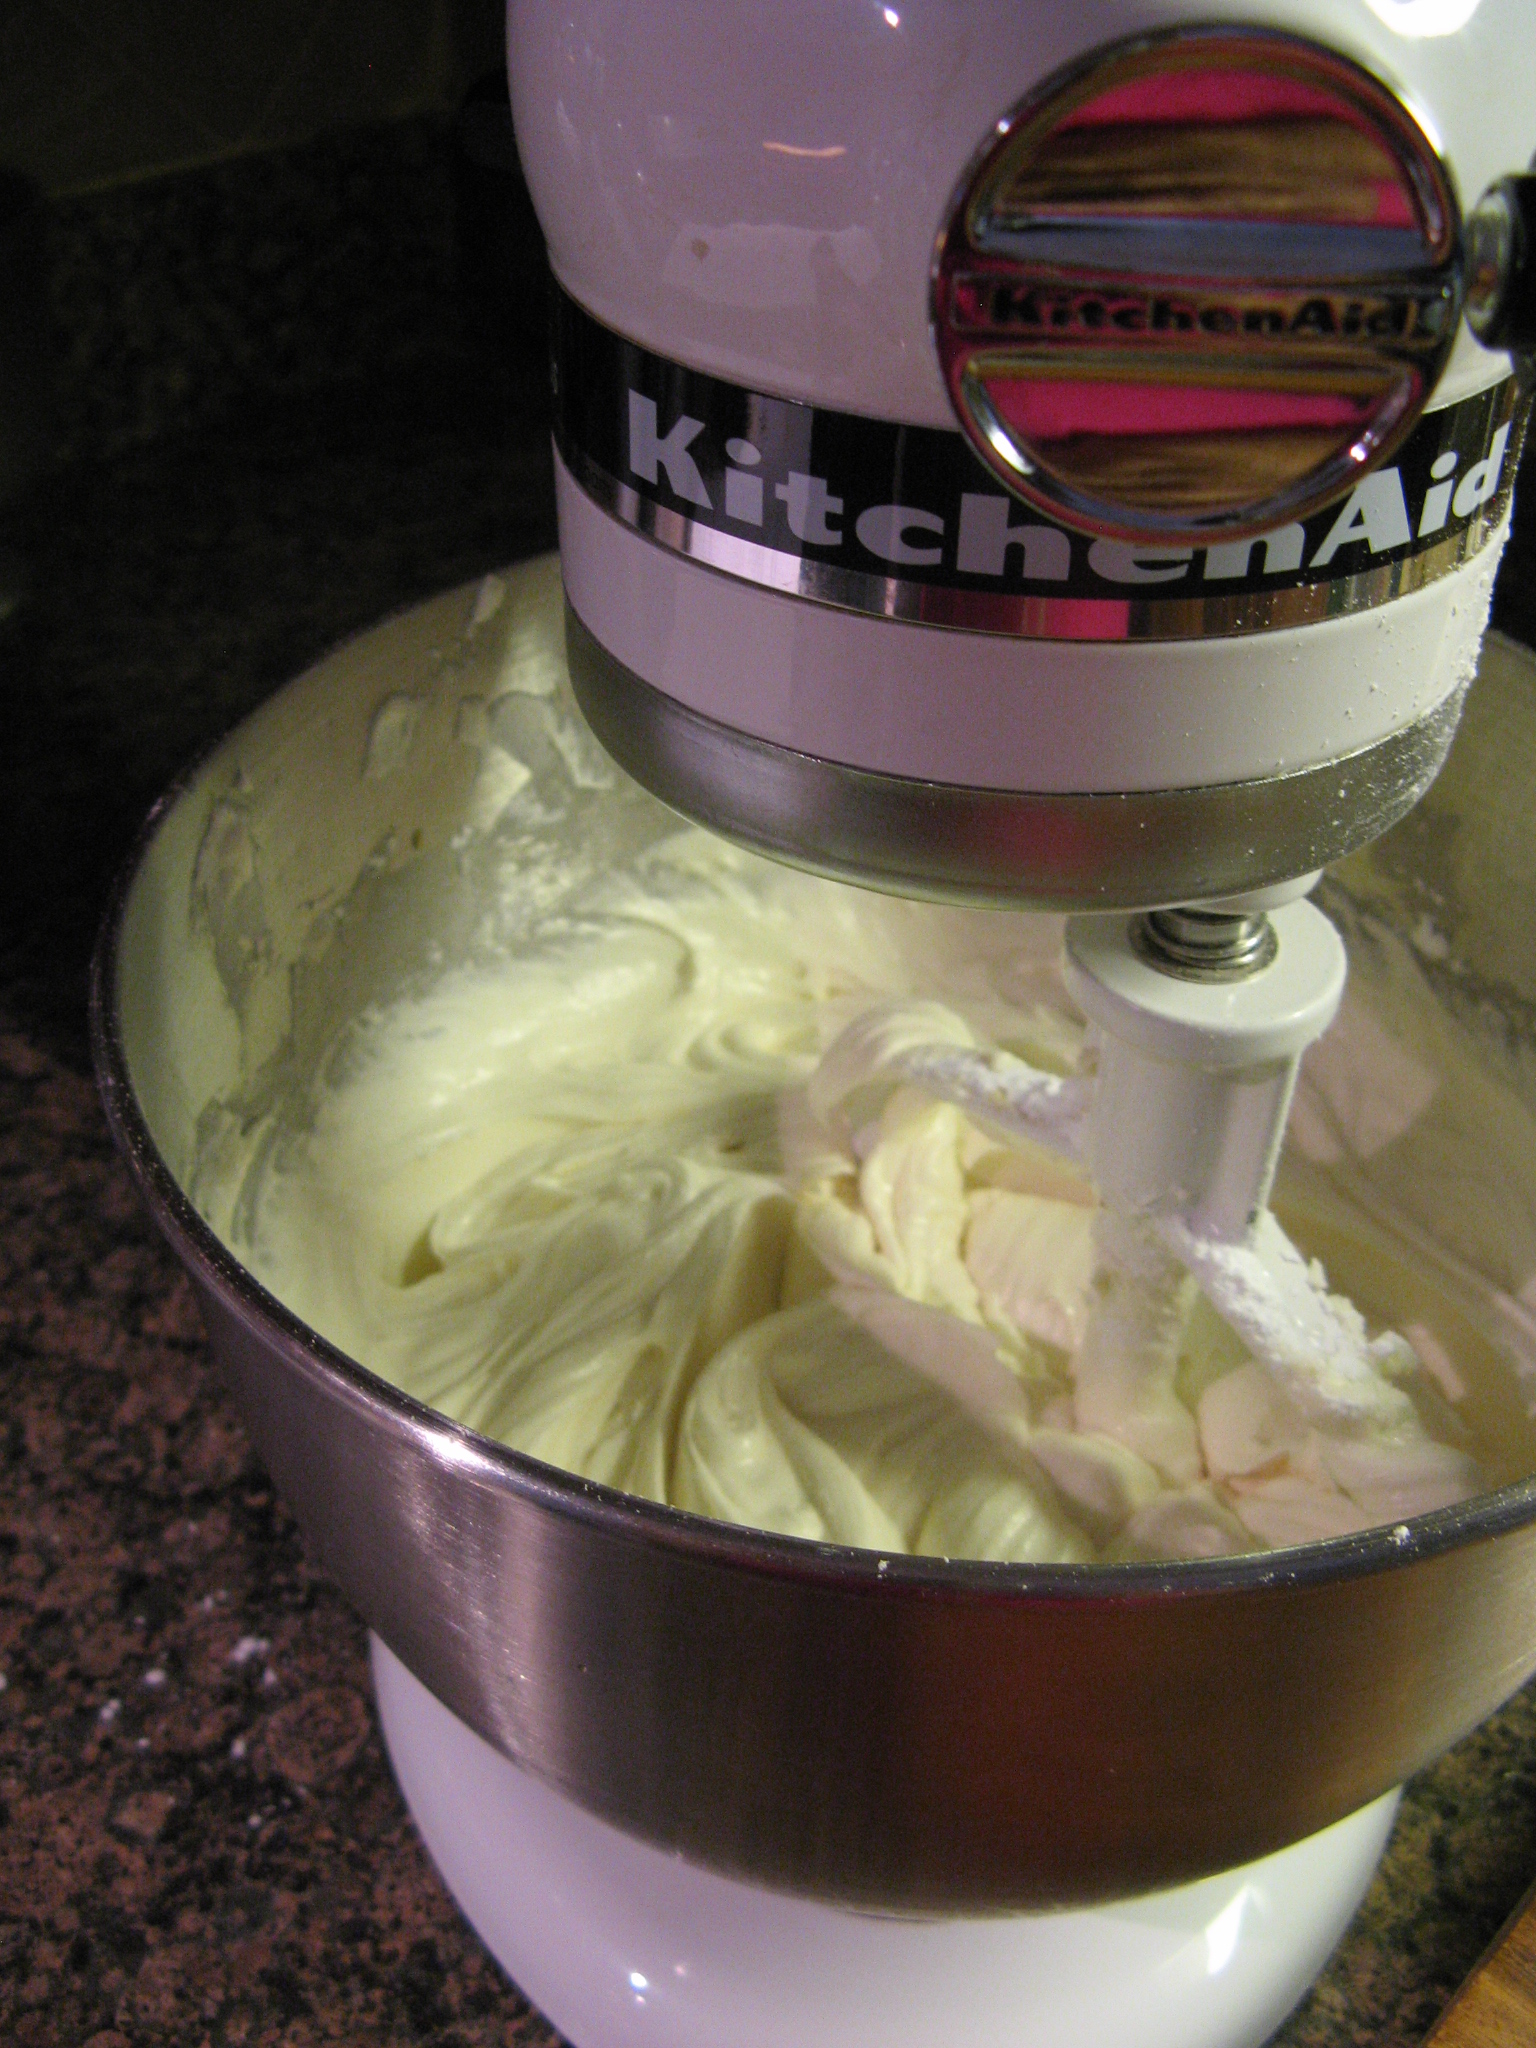
1. Beat together cream cheese and butter in a large bowl with an electric mixture until creamy and smooth. Beat in lemon juice, vanilla extract, and salt.

2. Sift confectioners’ sugar into a bowl and add to cream cheese mixture. Mix on low speed until incorporated, then increase speed to medium-high and beat until smooth.

Frost cake:

Brush loose crumbs from cake layers with a pastry brush.

Put a red velvet layer, bottom side up, on a cake plate or stand. Spread 1 cup of frosting over layer. Cover with white layer, bottom side up, and spread with another cup of frosting. Top with second red velvet layer, bottom side up.

Spread a thin layer of frosting around sides and over top of cake. (This is called crumb-coating. It tamps down any loose crumbs to keep them out of the top layer of frosting and fills in any crevices. This is particularly important with red velvet cake layers.) Chill or briefly freeze cake just until frosting is firm.

Spread sides and top of cake with remaining frosting. Chill or briefly freeze cake just until frosting is firm.

Fruit Topping:

1 pint (8 ounces) strawberries, halved

1 pint (12 ounces) blueberries

1/2 pint (6 ounces) blackberries

Toss fruit together in a bowl, add a teaspoon of sugar if desired. Top cake with fruit and spread some around the sides of the cake.

For a complete list of supplies and a more detailed description of how to create the stars check out this link. I’m planning on using this technique to create other shapes for cakes in the future.

%d bloggers like this: