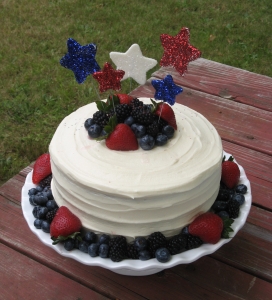
Hope you all had a wonderful Independence Day and enjoyed the rest of the holiday weekend! Mine was filled with great food, great friends and a delicious and patriotic dessert.
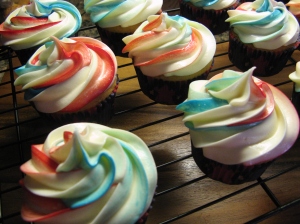
Before I get to that amazing cake though, here are some patriotic cupcakes that I made earlier in the week. They were simply a yellow cupcake with a vanilla frosting – sometimes there’s nothing better than a classic combination. To create the striped icing effect I brushed the inside of a plastic decorator bag with red food gel coloring on one side and blue on the other after fitting it with a 1M Wilton Tip. I then filled the bag with vanilla frosting and began piping each of the cupcakes. Once I ran out of frosting in the bag I simply brushed the colors once again inside the bag and then filled it with more frosting.
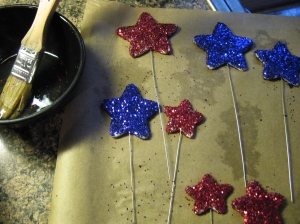
Now, onto the cake. Prep work for this cake actually began a week before July 4th. I made the glitter stars that topped the cake by rolling out gum paste 1/8″ thick and used varying sizes of cookie cutters to cut out stars. After snipping 22 gauge silver floral wire into different lengths I dipped one end into egg white and gently pushed that end of the wire into the stars about 3/4 of the way up. I laid the stars out on a parchment lined cookie sheet and let them dry out (harden) for a full day, flipping them occasionally.
After they were completely dry it was time to decorate them. To do so, I brushed the stars with egg white and then sprinkled glitter on them, making sure that I covered the edges of the stars as well.
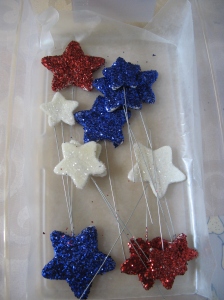
I let them sit out for a day or two to make sure they were completely dry and then stored them in a waxed lined plastic shoe box.
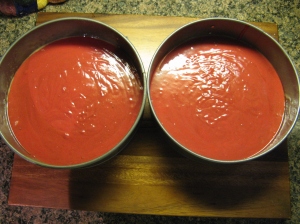
To make the actual cake I began by baking the red velvet layers of the cake – 2 of them. I’ve made red velvet cake quite a few times before and this recipe was quite different than the ones I have normally followed. For one thing, instead of buttermilk this recipe called for sour cream to be whisked with water to thin it down to the consistency of buttermilk. I’ve heard of using lemon juice and milk as a substitute for buttermilk, but never sour cream. I was fine with this though as I usually have sour cream in my fridge as opposed to buttermilk. Also, this recipe called for butter and oil to be used, which turned out an incredibly moist cake. After making the batter I divided it into two 9-inch pans tapping the pans down to release any air bubbles and then baked them in a 350 F oven for twenty-five minutes.
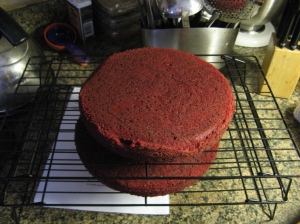
Following that I let the cakes cool in the pans for about ten minutes and then inverted them onto wire racks so they could cool completely.
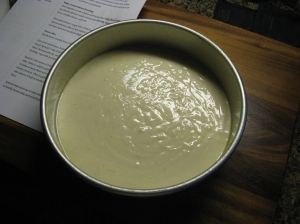
While the red velvet layers were cooling I baked the white cake which had a hint of lemon thanks to the addition of lemon zest. Once I made the batter I poured it into a 9-inch pan that I sprayed with baking spray and lined with parchment paper – which I also sprayed with baking spray. I did this same prep work for the pans I used for the red velvet layers as well. As I also did with the red velvet layers, I tapped the pan down to release the air bubbles and baked it in a 350 F once again for twenty-five minutes.
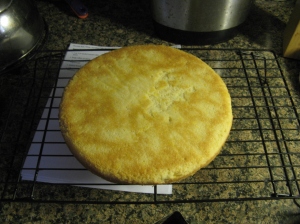
After cooling the cake in the pan for a few minutes I inverted it onto a wire rack so it could cool completely.
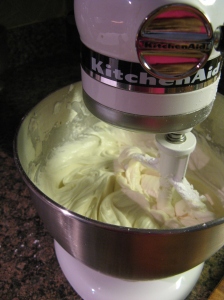
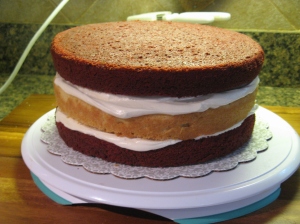
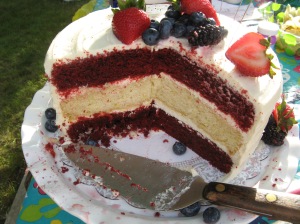
Once the cakes were cooled it was time to make the frosting – cream cheese frosting – and assemble the cake. I spread about a cup of frosting between each of the layers…
And then crumb coated the cake and placed it in the refrigerator so the frosting could firm up.
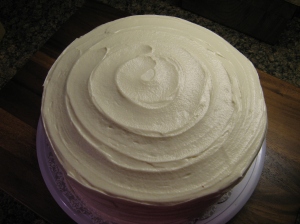
Once the crumb coat was firm I finish frosting the cake and created a design on the cake by using the back of a spoon. While rotating the cake on a cake turntable I ran the back of the spoon along the edge of the cake and around the top.
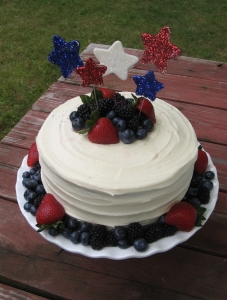
And then it was time to decorate the cake with the glittered stars and some fresh berries – blackberries, blueberries and strawberries.
And how did the stripes look once the cake was cut into…. Perfect!
This was definitely one cake that tasted just as good as it looked!
Red Velvet Cake Layers:
2 1/2 cups sifted cake flour (sift before measuring)
1/4 cup unsweetened natural cocoa
1 teaspoon baking soda
3/4 teaspoon salt
1 stick (1/2 cup) unsalted butter, softened
1 1/2 cups sugar
1 cup vegetable oil
2 large eggs
1 1-ounce bottle red food coloring
1 1/2 teaspoons white vinegar
1 1/2 teaspoons vanilla extract
3/4 cup sour cream mixed with 1/4 cup water
1. Heat oven to 350°F. Butter two 9-inch round cake pans, then line bottoms with rounds of wax paper. Butter paper and dust pans with some additional flour, knocking out excess.
2. Resift cake flour together with cocoa, baking soda, and salt into a bowl.
3. Beat butter and sugar in a large bowl with an electric mixer (fitted with paddle attachment if using stand mixer) at medium-high speed until combined well, then add oil and beat until very pale and creamy, about 3 minutes.
4. Add eggs, one at a time, beating well after each addition, and beat in food coloring, vinegar, and vanilla extract.
5. Reduce speed to low and mix in flour mixture and sour cream mixture in batches, beginning and ending with flour mixture, and mixing until batter is smooth.
6. Divide batter between pans (about 3 cups in each) and smooth tops. Rap pans on counter a couple of times to expel any air bubbles. Bake in middle of oven until a wooden pick comes out clean and cake begins to pull away from sides of pans, 25 to 30 minutes. Keep oven on.
7. Cool layers in pans on racks 10 minutes, then run a thin knife around edge of pans. Invert layers onto racks and peel off wax paper. Cool layers completely.
White Cake Layer:
1 1/3 cups sifted cake flour (sift before measuring)
1/2 teaspoon baking soda
1/4 teaspoon salt
3 large egg whites
1/4 cup sour cream mixed with 2 tablespoons water
5 tablespoons unsalted butter, softened
3/4 cup sugar
1/3 cup vegetable oil
1 tablespoon grated lemon zest
1 teaspoon vanilla extract
1. Butter one 9-inch round cake pan, then line bottom with wax paper. Butter paper and dust pan with some additional flour, knocking out excess.
2. Resift cake flour together with baking soda and salt into a bowl. Whisk egg whites in another bowl with sour cream mixture until combined.
3. Beat butter and sugar in a large bowl with an electric mixer (fitted with paddle attachment if using stand mixer) at medium-high speed until combined well, then add oil and beat until very pale and creamy, about 3 minutes. Beat in zest and vanilla extract.
4. Reduce speed to low and mix in flour mixture and sour cream mixture in batches, beginning and ending with flour mixture and mixing until batter is smooth. Transfer batter to pan and spread evenly. Rap pan on counter a couple of times to expel any air bubbles.
5. Bake in middle of oven until a wooden pick comes out clean and cake begins to pull away from side of pan, 25 to 30 minutes. Cool in pan on a rack 10 minutes, then run a thin knife around edge of pan. Invert layer onto rack and peel off wax paper. Cool layer completely.
Cream Cheese Frosting:
2 1/2 8-ounce packages cream cheese (20-ounces total), softened
2 1/2 sticks (1 1/4 cups) unsalted butter, softened
2 1/2 tablespoons fresh lemon juice
2 teaspoons vanilla extract
1/4 teaspoon salt
3 1/4 cups confectioners’ sugar, sifted
1. Beat together cream cheese and butter in a large bowl with an electric mixture until creamy and smooth. Beat in lemon juice, vanilla extract, and salt.
2. Sift confectioners’ sugar into a bowl and add to cream cheese mixture. Mix on low speed until incorporated, then increase speed to medium-high and beat until smooth.
Frost cake:
Brush loose crumbs from cake layers with a pastry brush.
Put a red velvet layer, bottom side up, on a cake plate or stand. Spread 1 cup of frosting over layer. Cover with white layer, bottom side up, and spread with another cup of frosting. Top with second red velvet layer, bottom side up.
Spread a thin layer of frosting around sides and over top of cake. (This is called crumb-coating. It tamps down any loose crumbs to keep them out of the top layer of frosting and fills in any crevices. This is particularly important with red velvet cake layers.) Chill or briefly freeze cake just until frosting is firm.
Spread sides and top of cake with remaining frosting. Chill or briefly freeze cake just until frosting is firm.
Fruit Topping:
1 pint (8 ounces) strawberries, halved
1 pint (12 ounces) blueberries
1/2 pint (6 ounces) blackberries
Toss fruit together in a bowl, add a teaspoon of sugar if desired. Top cake with fruit and spread some around the sides of the cake.
For a complete list of supplies and a more detailed description of how to create the stars check out this link. I’m planning on using this technique to create other shapes for cakes in the future.



Beautiful!! 🙂
Thanks Linda!