Russian Decorating Tips

If you’ve been perusing decorated cakes on Instagram or Pinterest lately you may have noticed an influx of cakes decorated with some fancy and elaborate looking flowers. You may have thought to yourself that they require some advanced skill in cake decorating to create, but, the truth is, they only require specific types of decorating tips, a little patience and the right frosting consistency to replicate.

When I first started seeing them I did a little research and discovered that the flowers were being created with decorating tips known as “Russian Decorating Tips.” After a little more research I discovered that these tips have nothing to do with Russia. So, how did they get their name? Per another blogger, I Am Baker, they got their name because they were being sold by a company called Ali Express and they named them “Russian Tips.” At the time I didn’t feel like ordering a set over the internet, but, not too long ago I discovered that my local AC Moore began selling a set of 8 (along with an extra-large coupler to use with them) for less than $10. Truth be told, you don’t need the coupler. You can just cut your decorator bag and drop the tip in. I would suggest using a 16-inch decorator bag with these tips as opposed to a 12-inch one.


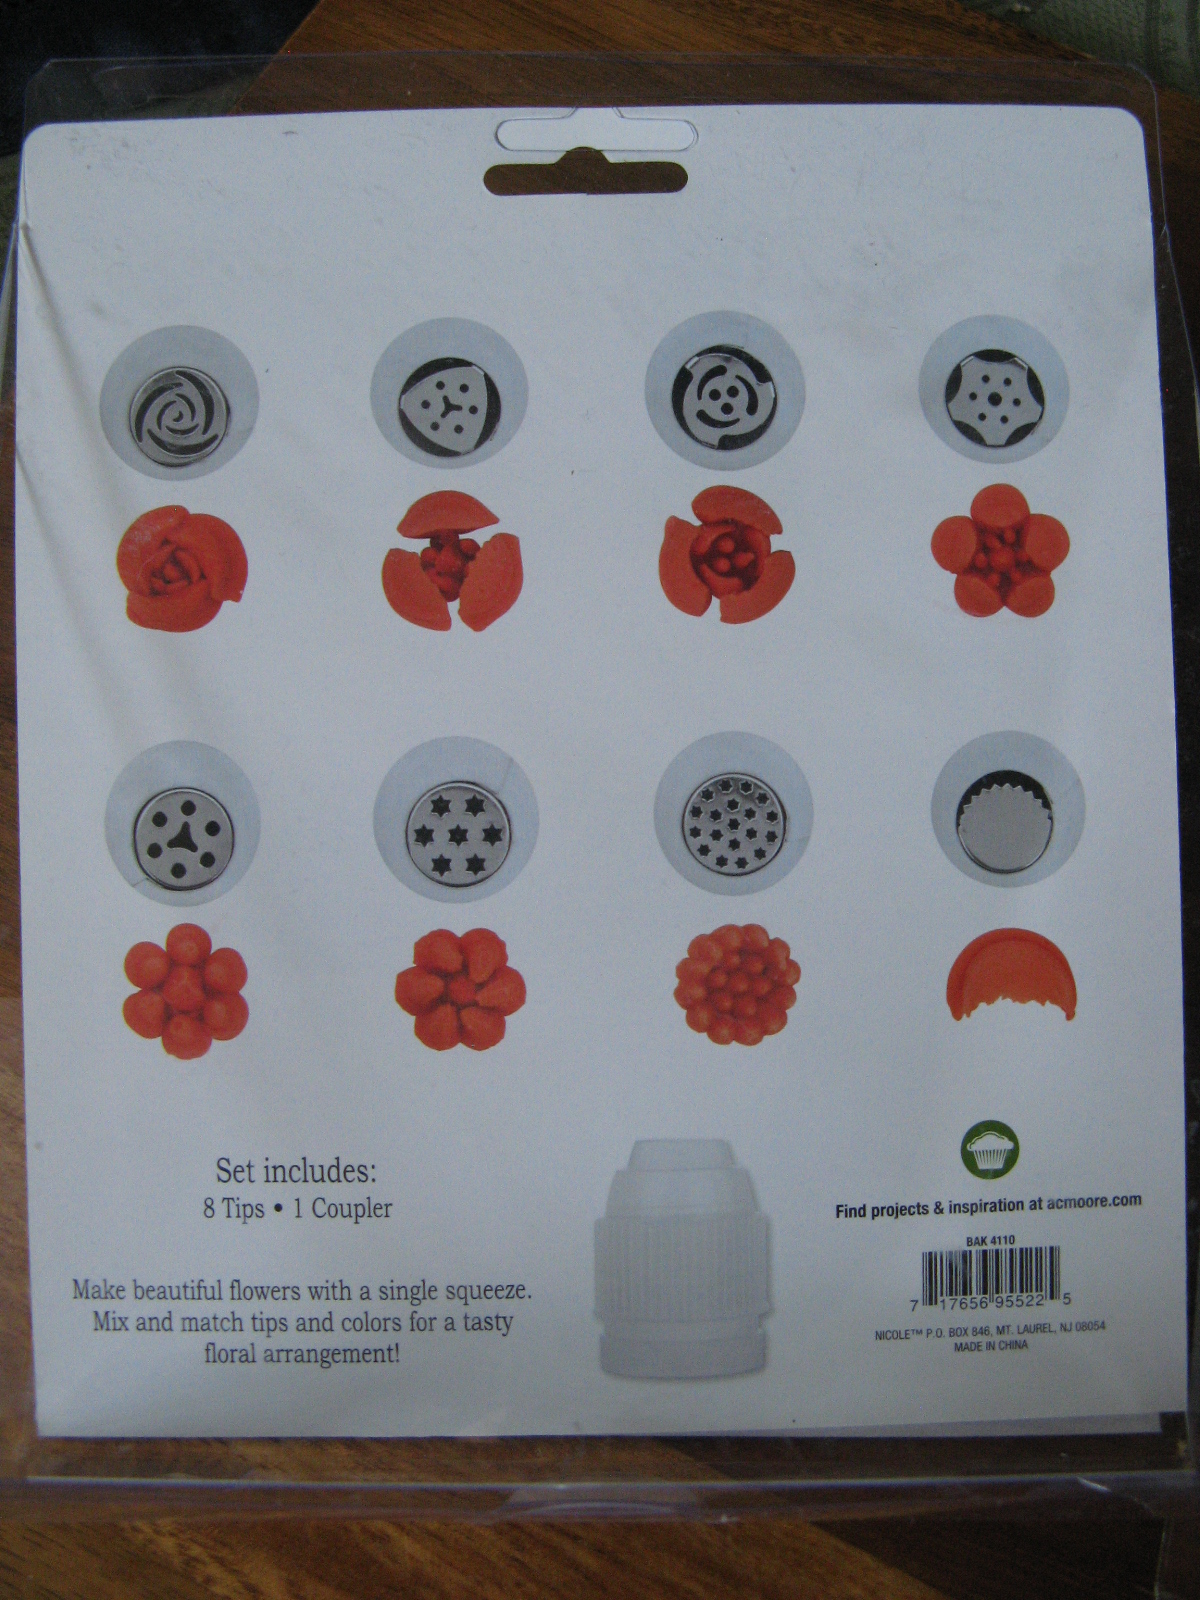
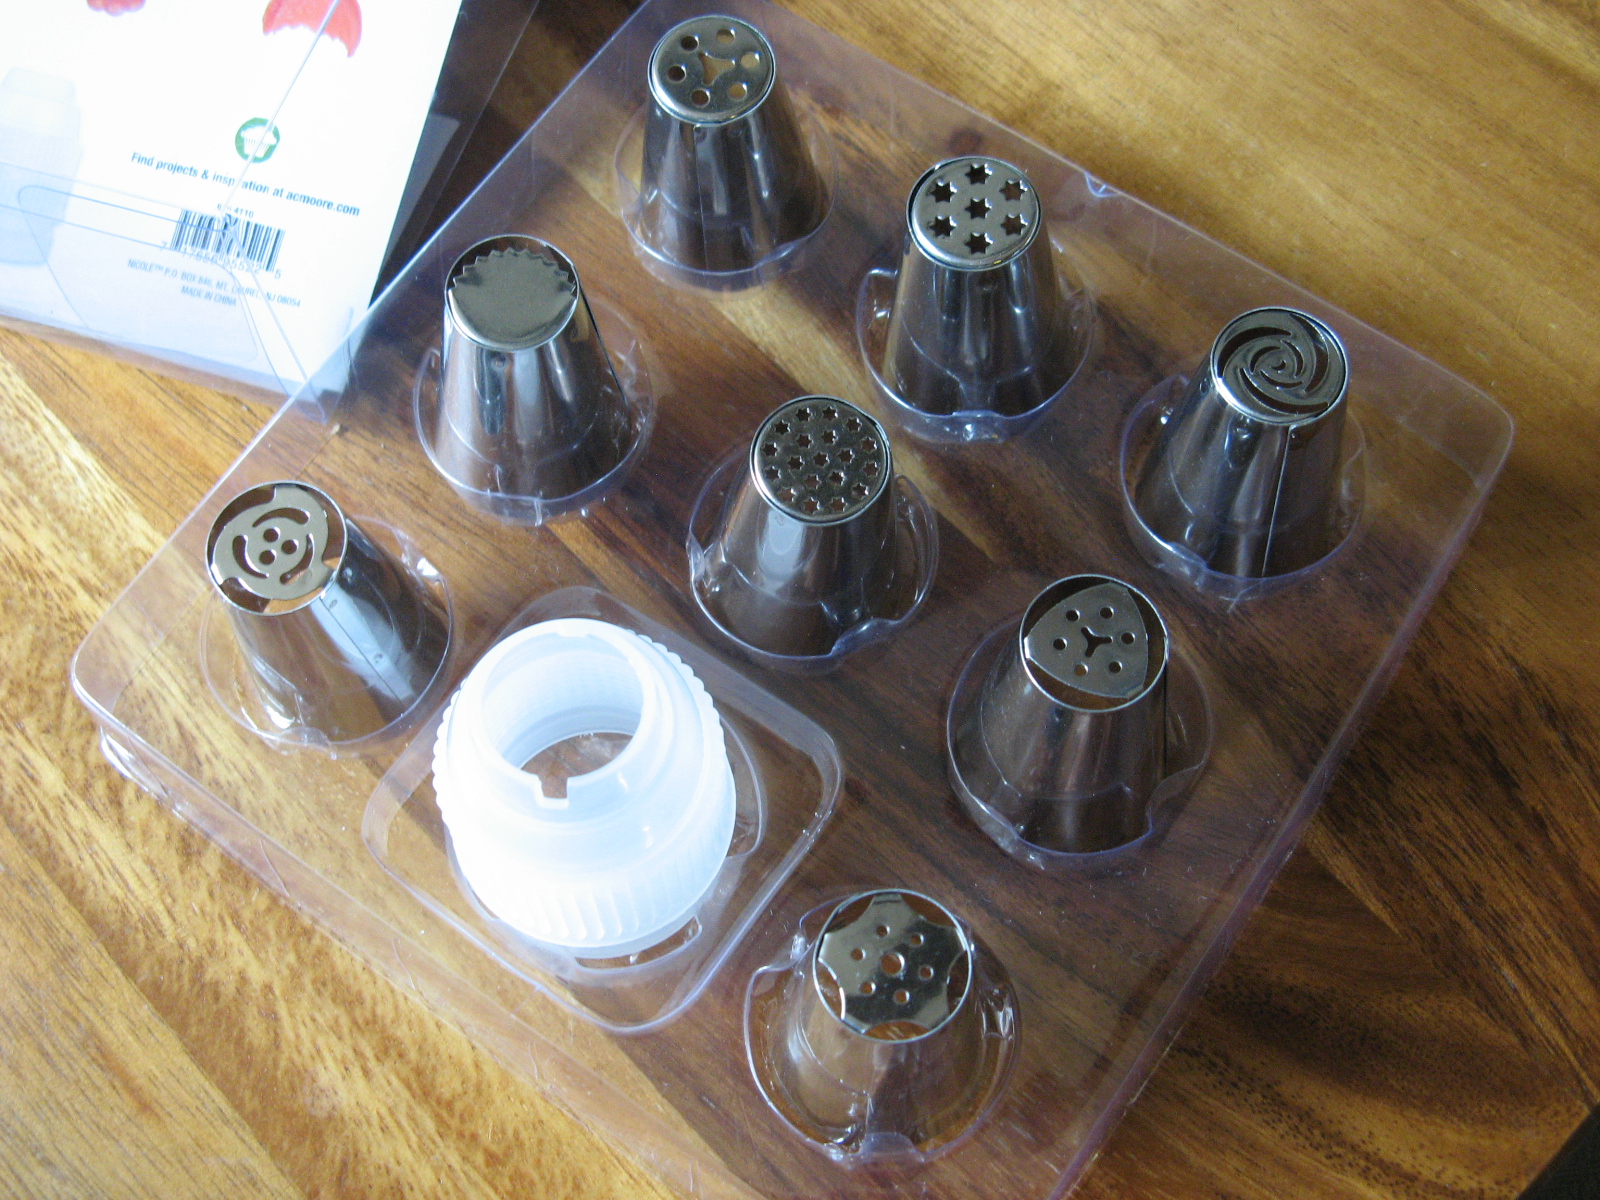
Unlike traditional decorating tips from Wilton & Ateco, these tips do not have numbers on them. The tips have a laser cut design on the end that allows the frosting to be piped through and form the different flowers. I will say that some of the tips are easier to use than others. Some of the designs, especially those that have detailed centers meant to emulate the stamen & stigma part of the flower, take a little more practice to master. One other thing that is different is the way you pipe them. With your usual tips you sometimes have to add a little wrist twist to get the flower design, or, you have to hold the bag at a 45 degree angle. But, with these tips you hold the bag at a 90 degree angle about an inch or so from your cake (or cupcake) and squeeze for a few seconds to form the flower. Before piping the next flower I would suggest wiping the tip clean to get a nice flower for the next pipe.

Like I mentioned earlier I purchased a set of these tips from my local AC Moore store. I can’t remember how I knew they carried them; I probably saw something on their Instagram feed. I decided to hold off on using them until I made my Mother’s Day cake. I did test them out using store bought vanilla frosting and as I had suspected and had read a little bit about, the frosting was too thin to get a well-formed flower. All of my test flowers looked like little blobs of frosting as opposed to a flower.

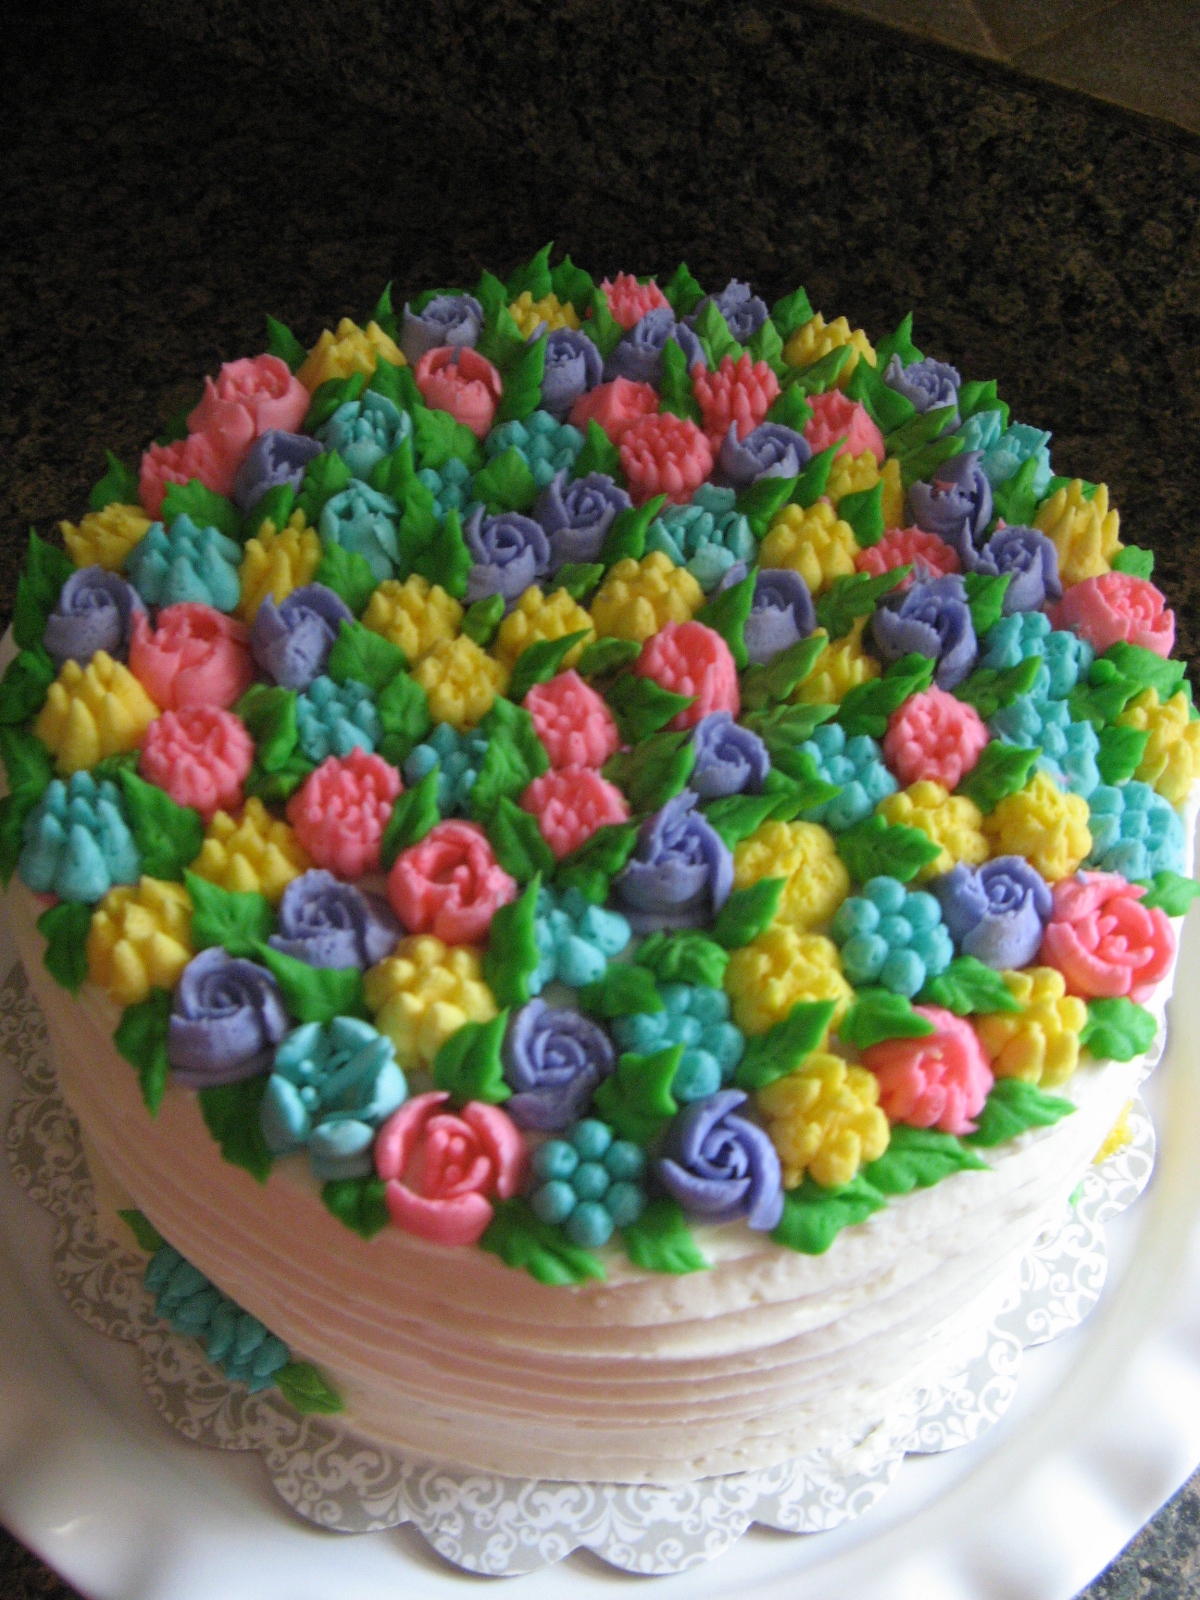
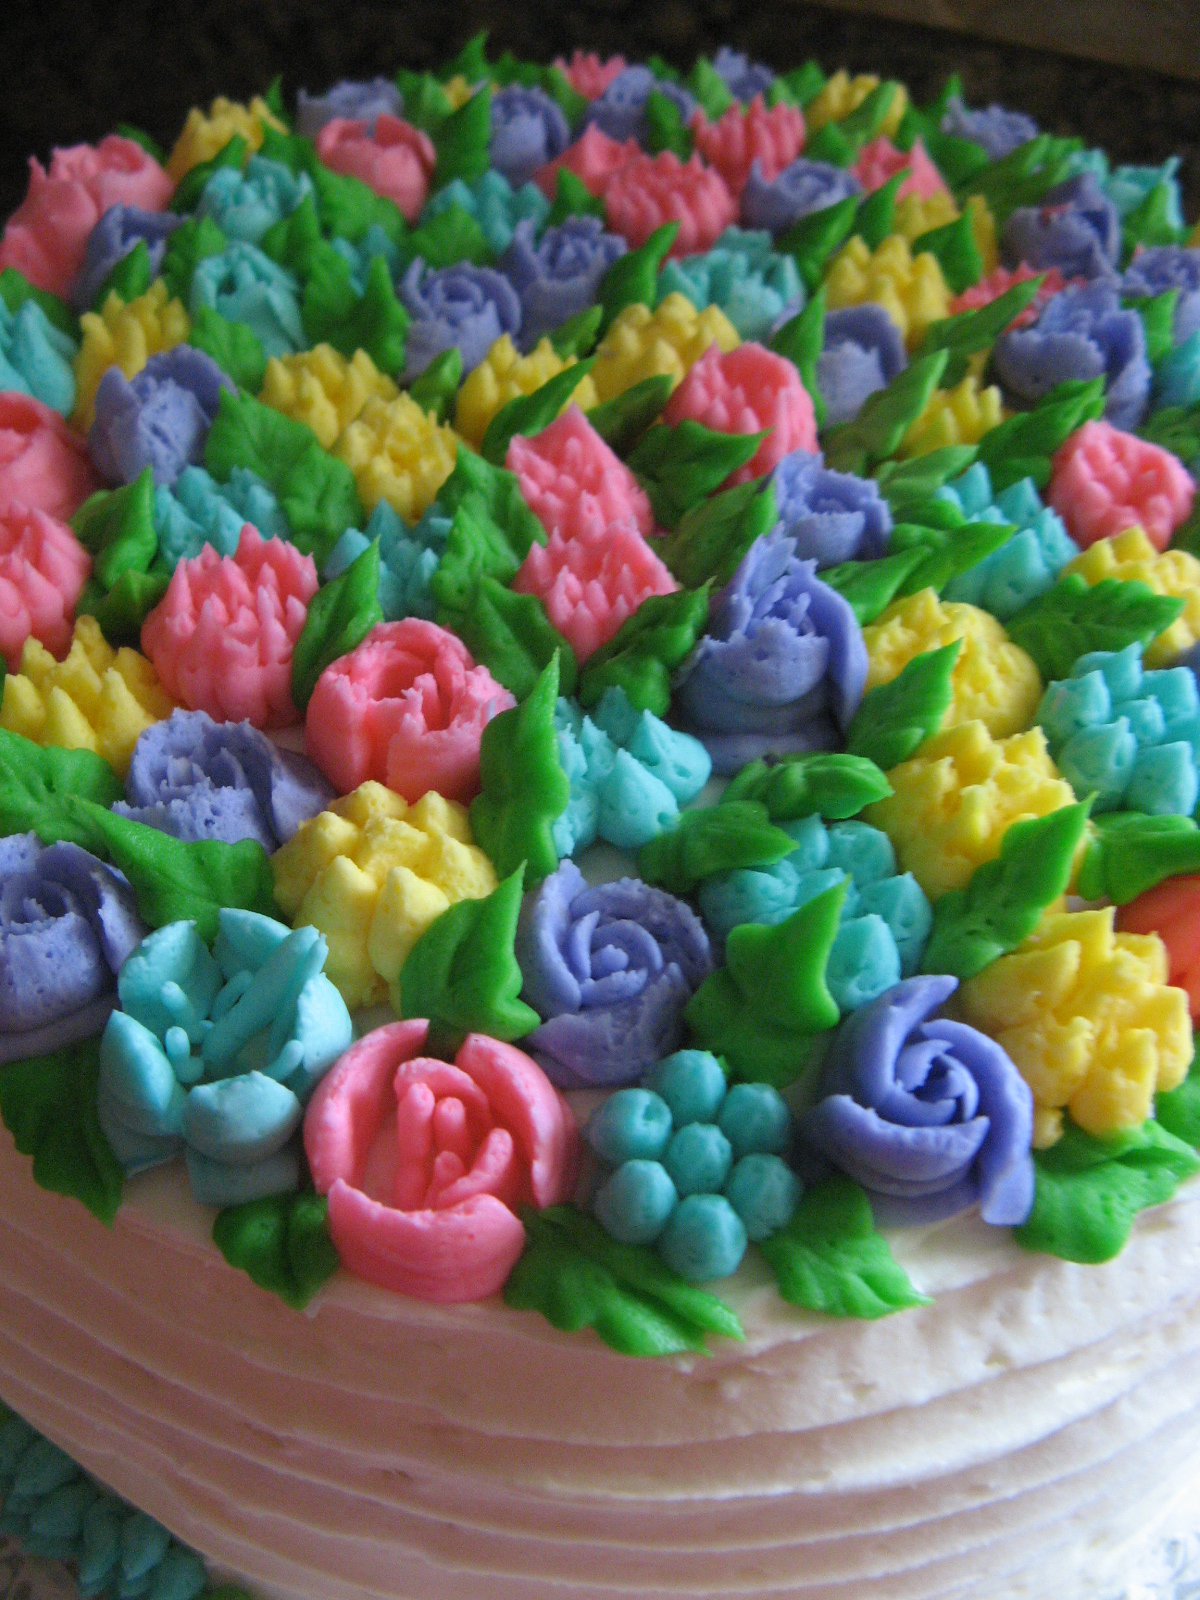
So, using my go-to Fluffy Vanilla Frosting that I then tinted in 4 different colors I began decorating the top of my cake. I was soon a bit frustrated with some of the tips. The flowers weren’t piping well and even though the frosting was a stiffer consistency the centers of the flowers weren’t looking nice. So, I decided to switch the tips I had chosen to use. Soon enough I got the hang of it and ended up with a flower topped cake I was content with. It wasn’t until I added in leaves (using a Wilton 352 tip) that I piped around the cake and in between the flowers to fill in the gaps that I was truly happy with the outcome.


Descendants Themed Cake

It’s my Blogiversary! I started this blog 6 years ago and my very first post was an Elmo Cake I created for a friend’s daughter, aka my niece. Since then the cakes have gotten a bit more elaborate and 3 years ago they turned into fondant creations. I normally ask her a month or so in advance of her birthday what theme she’s thinking of. When she told me Descendants for this year I was stumped. I had only heard of Descendants, but had no clue what the deal was behind them. So, it was off to Pinterest to get some ideas. Once I had my idea down it was time to get my supplies and test out a few.

I needed to make sure that the icing was easily pipeable and also to test how thick the piping would be with the tip it came with. I opted to go with a smaller tip.

I also needed to make sure that the flower cut-out I purchased would make nice roses. Thankfully it did.

One more thing, I opted to purchase a dummy cake for the top tier of the cake. I normally do bake the cake, but, it usually doesn’t get eaten because it’s too much cake, so, to avoid waste and a little bit of stress on my part I purchased a dummy cake. In case you are wondering, it’s made out of Styrofoam. No one knew it was a dummy cake once it was covered and decorated.

To prep the dummy cake I covered it in frosting

I then covered it, as well as the actual cake, in fondant.

And after some piping, fondant rolling and cutting the cake came together. I have definitely learned with making these cakes that it’s important to walk away for a few minutes and then come back to truly appreciate the way it looks. So, I take a lot of mini-breaks, if not, I would probably drive myself crazy. One thing I did decide, I am going to avoid covering a cake with black fondant. I find that it tends to dry out fast and inevitably it always breaks. I had a few challenges trying to cover up the imperfections from it.

So, what will my next themed cake be…? Not sure yet. I’ll have to ask my other niece what’s she’s thinking of for her June birthday!


Valentine’s Heart Candy Box Cake

A great thing about blogging and social media – Instagram in particular – is the chance to discover other bloggers. One blog that I have enjoyed following is The Cake Blog – a blog with amazing cake designs that include tutorials so you can recreate them yourself if you wish. Recently they featured a Valentine’s Heart Candy Box Cake that I thought was too cute not to try.

IMG_6750

Using one milk chocolate box cake mix I baked two heart cakes filling the pan with about 2 cups of batter for each of the cakes. After letting the cakes cool completely I leveled the cakes using a large serrated knife. I used to use a cake leveler but have found that using a knife allows me to level the cakes more evenly.

IMG_6697

Following that I frosted each of the cakes with vanilla frosting and then placed them in the refrigerator so the frosting could harden in preparation for decorating them with fondant.

IMG_6709

And while I was on a kick making marshmallow fondant recently, I opted to go with store bought fondant to decorate these cakes. I picked up Wilton’s Decorator Preferred Fondant in red and pink and I was pleasantly surprised; it was easy to knead and roll out. I’ve used Wilton’s Rolled Fondant in the past and it wasn’t as easy to work with.

IMG_6713

After rolling the red fondant out to an 1/8 of an inch thick I cut two strips of fondant long enough to wrap around each of the heart cakes, one an inch and half wide – the height of the cake – for the top of the candy box and the other two inches wide for the candy box.

IMG_6716

I rolled up the strips and then unrolled them around each of the cakes.

IMG_6717

Next I rolled out more of the red fondant and using my heart cake pan as a template, I traced out a heart for the cover of the candy box.

IMG_6718

Once I was done with the red fondant I rolled out the pink fondant and cut out two hearts – one smaller than the red cover I previously cut and one to fit inside of the wider red border – the candy box cake. On the smaller of the two pink hearts I used a fondant stitching wheel to etch an angle design.

IMG_6719

Next it was time to make the candy box cake actually look like a candy box and to do that I needed candy, more specifically chocolate candy. I melted some Wilton Dark Cocoa Candy Melts and filled heart & circle swirls molds to create the candy.

IMG_6712

After refrigerating the molds so the chocolate could set I tapped them out onto wax paper.

IMG_6720

I then used some of the melted chocolate to glue two pieces of the candy together so they would have a little height inside the candy box cake.

IMG_6726

To add a little more pizazz to the chocolates I drizzled them with melted chocolate and then sprinkled them with Valentine’s themed sprinkles.

IMG_6727

Then I used more of the melted chocolate to glue the pieces onto the candy box cake.

IMG_6729

On the original cake the edges were painted gold using gold dust and extract. I attempted to do the same with shimmer powder I had on hand…

IMG_6731

But unfortunately I wasn’t too successful as the powder I have didn’t have the same color intensity. It was worth a try though! While there were some imperfections with my final outcome, overall I was pleased with it. I definitely need to work on cutting fondant shapes and making straight lines when etching a design into the fondant.

IMG_6756

Rosette Covered Cannoli Cake

A while back I picked up a five-layer cake pan set at Sur La Table– I saw it one of their catalogs which also included a coupon so it was destined to be. I wasn’t sure what kind of cake I wanted to make to test it out but then all of a sudden I had the idea that I wanted to make one with a cannoli cream filling – something I had never made before. Another thing I hadn’t done before… Decorate a cake entirely with rosettes. I did take the Wilton decorating classes some time ago and while I did learn how to make rosettes I normally just decorate a spot or two with them but lately I have been seeing these beautifully cakes decorated with large rosettes and wanted to try it myself.
IMG_3071 IMG_3075
I opted to use a white cake box mix for this cake since I wanted to be sure that I would have enough batter for the five pans and right on the box it said that one box cake would suffice. After mixing the batter according to the directions on the box, I filled the pans evenly with batter (I used an ice cream scoop to be precise,) baked them and then let them cool.
Cannoli Cake 1
While the cakes cooled I worked on the cannoli filling. I settled on a recipe from Sargento. I figured this recipe would be a good one to follow since Sargento is a producer of cheese products. To begin I whipped heavy cream until soft peaks formed. I then beat together ricotta cheese, sugar and vanilla extract. Following that I folded the whipped cream along with mini chocolate chips into the ricotta mixture.
Cannoli Cake 2
Now it was time to prep my mini cakes for assembly. I used a cake leveler to remove the crowns of the cakes to make them all level.
IMG_3114
To assemble the cake, I filled each layer with about a cup and a half of cannoli filling.
IMG_3117
Then it was time to frost it. Initially I wanted to frost it with a whipped cream frosting, but, since I wanted to cover the entire cake with rosettes the whipped cream wasn’t going hold up well on the sides of the cake… On top of the cake it would have looked great though. So I opted to whip up some Fluffy Vanilla Frosting – which I first made when I made Chocolate Malted Cupcakes. I started by crumb coating the cake.
IMG_3127
And then using a 2D Wilton Tip I covered the cake with large rosettes and I think I may have found my new way of decorating cakes….
IMG_3132 IMG_3133

Cannoli Filling

2 cups Part-Skim Ricotta Cheese

3 tablespoons sugar

1 1/2 teaspoon vanilla

1 cup whipping cream, whipped

1 cup semi-sweet mini chocolate chips

1. Beat ricotta cheese, sugar and vanilla on medium speed in bowl with electric mixer for 3 minutes.

2. Fold in whipped cream and chocolate chips.


Fluffy Vanilla Frosting

Makes About 4 Cups

1 1/2 cups (3 sticks) unsalted butter, room temperature

1 pound (4 cups) confectioners’ sugar, sifted

1/2 tsp. pure vanilla extract

1. With an electric mixer, beat butter on medium-high speed until pale and creamy, about 2 minutes.

2. Reduce speed to medium. Add the confectioners’ sugar, 1/2 cup at a time, beating well after each addition and scraping down sides of bowl as needed; after every two additions, raise speed to high and beat 10 seconds to aerate frosting, then return to medium. This process should take about 5 minutes. Frosting will be very pale and fluffy.

3. Add vanilla, and beat until frosting is smooth. If not using immediately, frosting can be refrigerated up to 10 days in an airtight container. Before using, bring to room temperature, and beat on low speed until smooth again, about 5 minutes.


Enchanted Castle Cake

First it was an Elmo Cake, then a Minnie Mouse Cake and this year my friend’s daughter requested a “princess cake.” I stretched that idea a tad and made an Enchanted Castle Cake which I then surrounded with her Disney Princess figurines. My reasoning… Princesses usually live in castles! The most important thing though…. She loved it. And while last year I opted to rent the Minnie Mouse pan this year I just went ahead and purchased the Enchanted Castle Pan from Wilton. Luckily Wilton has numerous different ideas for that pan so I am sure I will get a few more uses out of it. I will say that I did cheat a bit for this cake by using a Betty Crocker Yellow Cake Mix and a few containers of Betty Crocker Vanilla Frosting which I tinted in the appropriate colors.

IMG_2639 IMG_2643

The before picture of the cake. Luckily the important aspects of the cake were visible for me to decorate, but, I did have to freehand the windows.

IMG_2537

Little by little the castle came alive. Of course I had my doubts along the way.

Enchanted Castle Step by Step

But, at this point of the decorating I was very happy with the outcome.

IMG_2547

All that was left was to add flowers to the castle. Since I have never been that good at making flowers, I decided to make them separately and then add them to the cake. I made simple drop flowers on wax paper and then let them set for a while before placing them in the freezer for a few minutes to make transferring them to the cake easier.

IMG_2549

I then “glued” them onto the cake with green tinted icing and then piped in some leaves for the final touch.

IMG_2572

And you can’t have a princess cake without some princesses.

IMG_2617

Along with the cake I also make Vanilla Squared (vanilla cake with vanilla frosting) cupcakes which I baked in Disney Princess cupcake liners and sprinkled with pink and purple cake sparkles then displayed on a Disney Princess cupcake stand.

IMG_2590 IMG_2595

I wonder what next year’s theme will be….

Vanilla Cupcakes

Makes 12 Cupcakes

Ingredients

1 1/2 cups all-purpose flour

1 1/4 teaspoons baking powder

1/4 teaspoon salt

1 stick unsalted butter, softened

1 cup sugar

2 large eggs, at room temperature

2 teaspoons vanilla extract

2/3 cup whole milk, at room temperature

Directions

Preheat the oven to 350 degrees F. Line a 12-cup muffin pan with paper liners. Whisk the flour, baking powder and salt in a bowl. Beat the butter and sugar in a stand mixer fitted with the paddle attachment on medium-high speed until fluffy, about 4 minutes. Beat in the eggs, one at a time, scraping down the bowl as needed. Beat in the vanilla. Reduce the mixer speed to medium low; beat in half of the flour mixture, then all of the milk, then the remaining flour mixture until just combined.

Divide the batter among the muffin cups, filling each three-quarters full. Bake until a toothpick inserted into the center of a cupcake comes out clean, 18 to 20 minutes, rotating the pan halfway through. Transfer the pan to a rack and let cool 5 minutes, then remove the cupcakes to the rack to cool completely. Top with frosting

Quick Vanilla Buttercream Frosting

Ingredients

3 cups confectioners’ sugar

1 cup butter

1 teaspoon vanilla extract

1 to 2 tablespoons whipping cream

Directions

In a standing mixer fitted with a whisk, mix together sugar and butter. Mix on low speed until well blended and then increase speed to medium and beat for another 3 minutes.

Add vanilla and cream and continue to beat on medium speed for 1 minute more, adding more cream if needed for spreading consistency.

%d bloggers like this: