Chicken Pad Thai

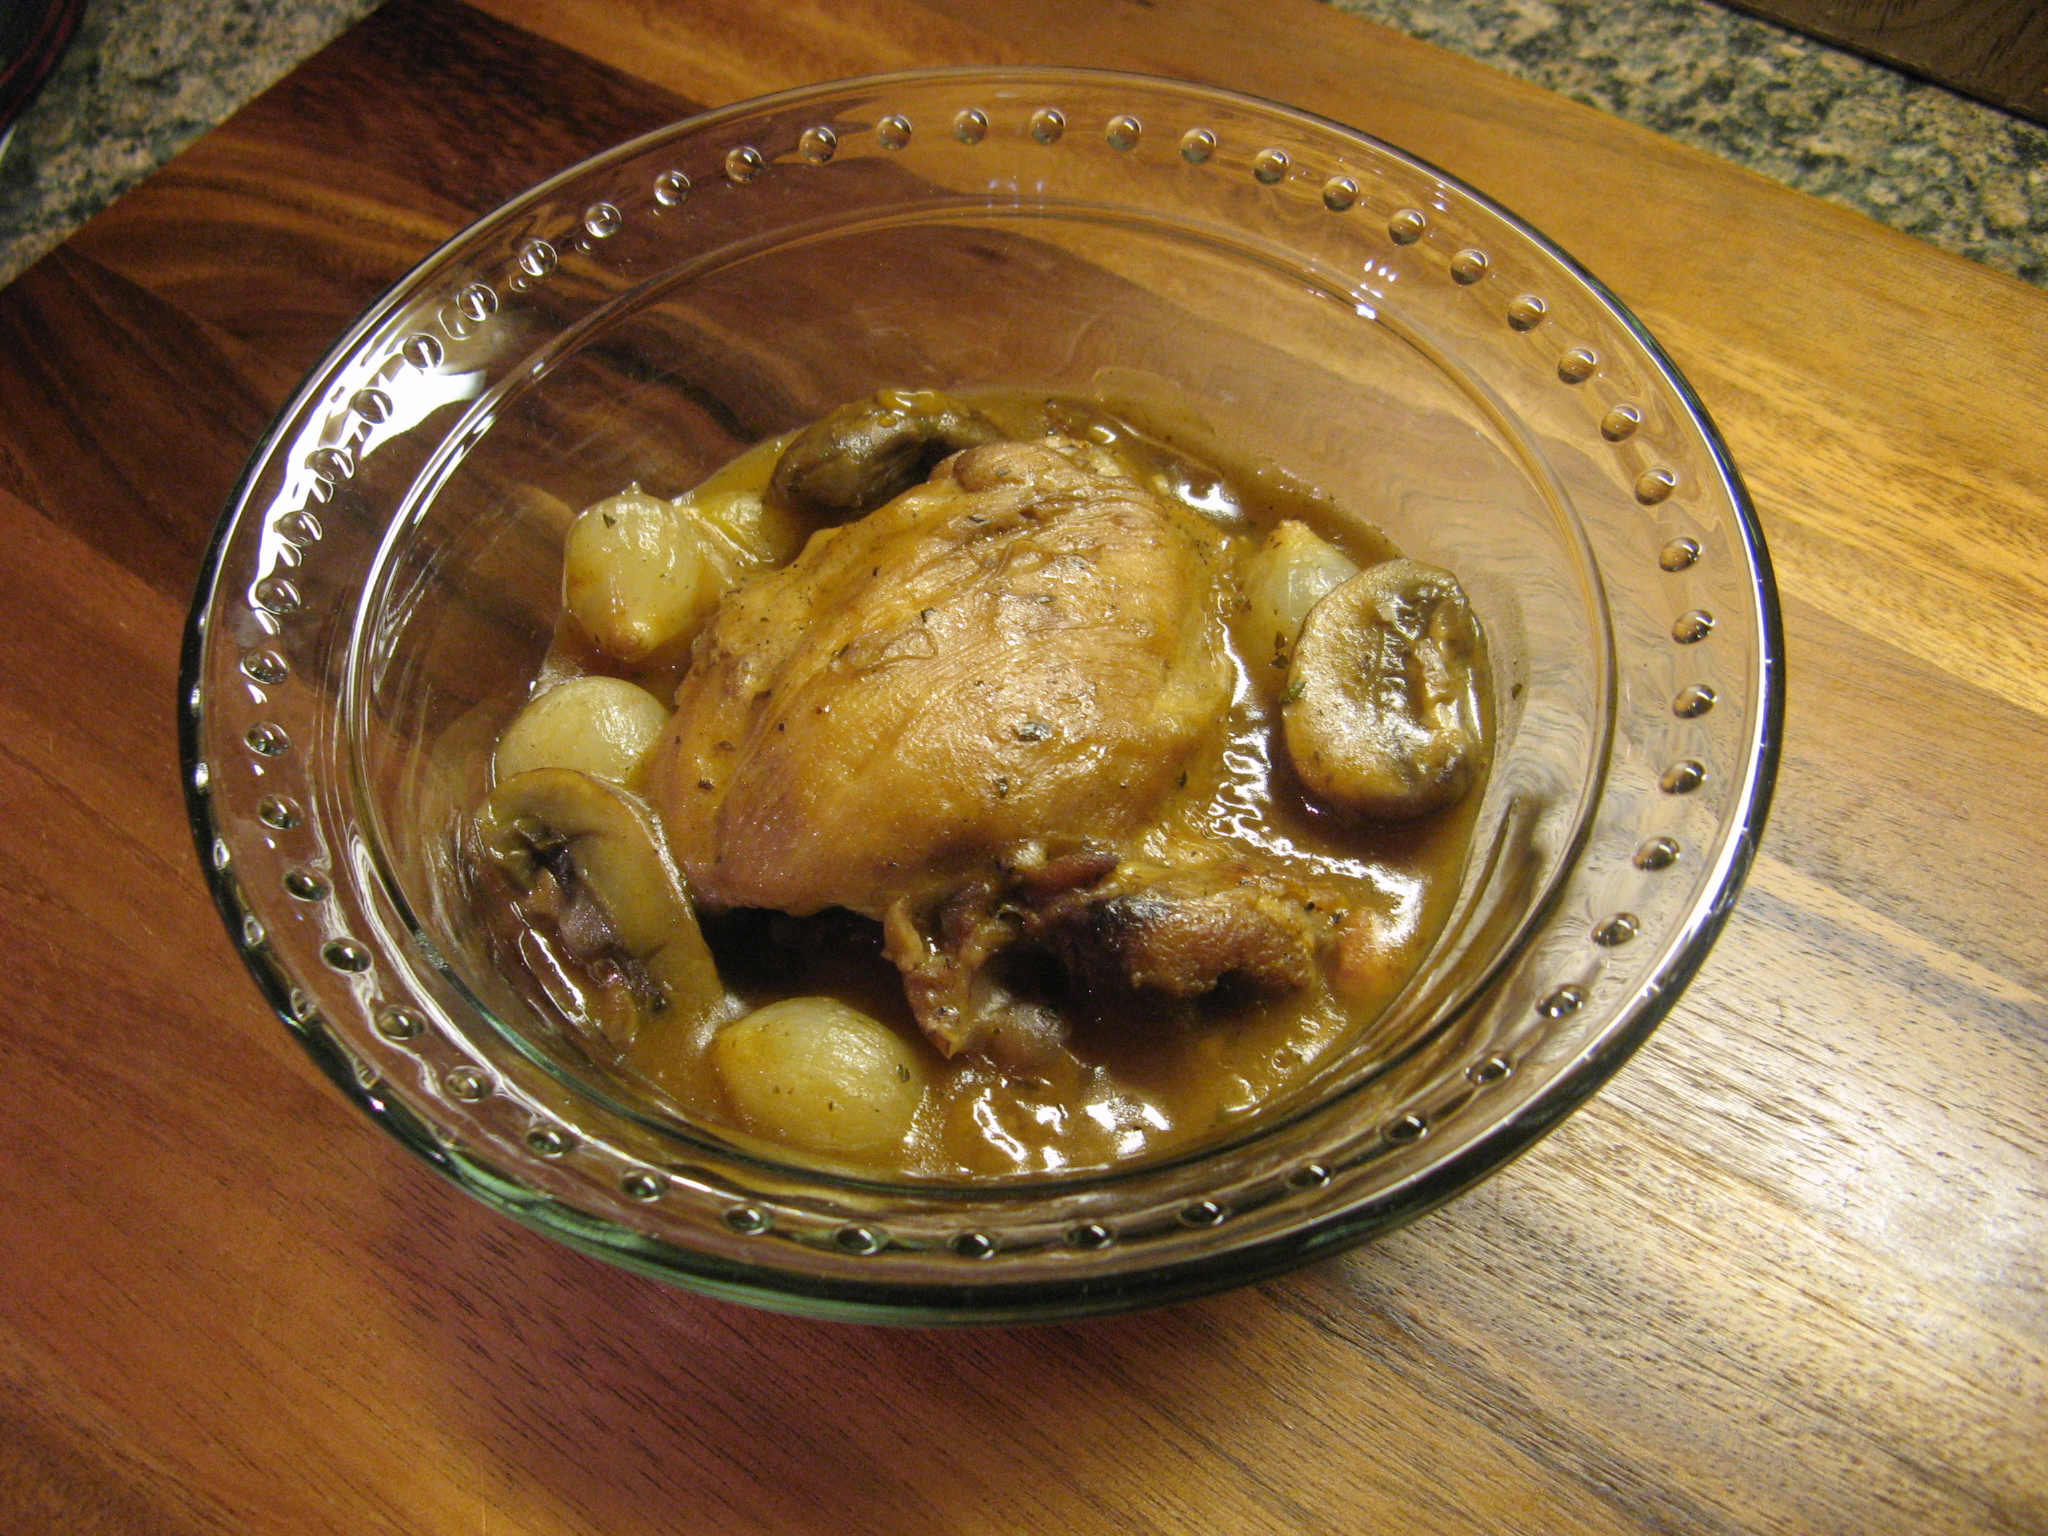
Whenever I go to a Thai restaurant my go-to dish is always Chicken Pad Thai. It’s pretty much foolproof and always delicious. A few years ago I attempted to make it myself and was happy with the outcome – it was super simple and tasted awesome. I recently dug out the recipe I used and whipped it up for dinner.

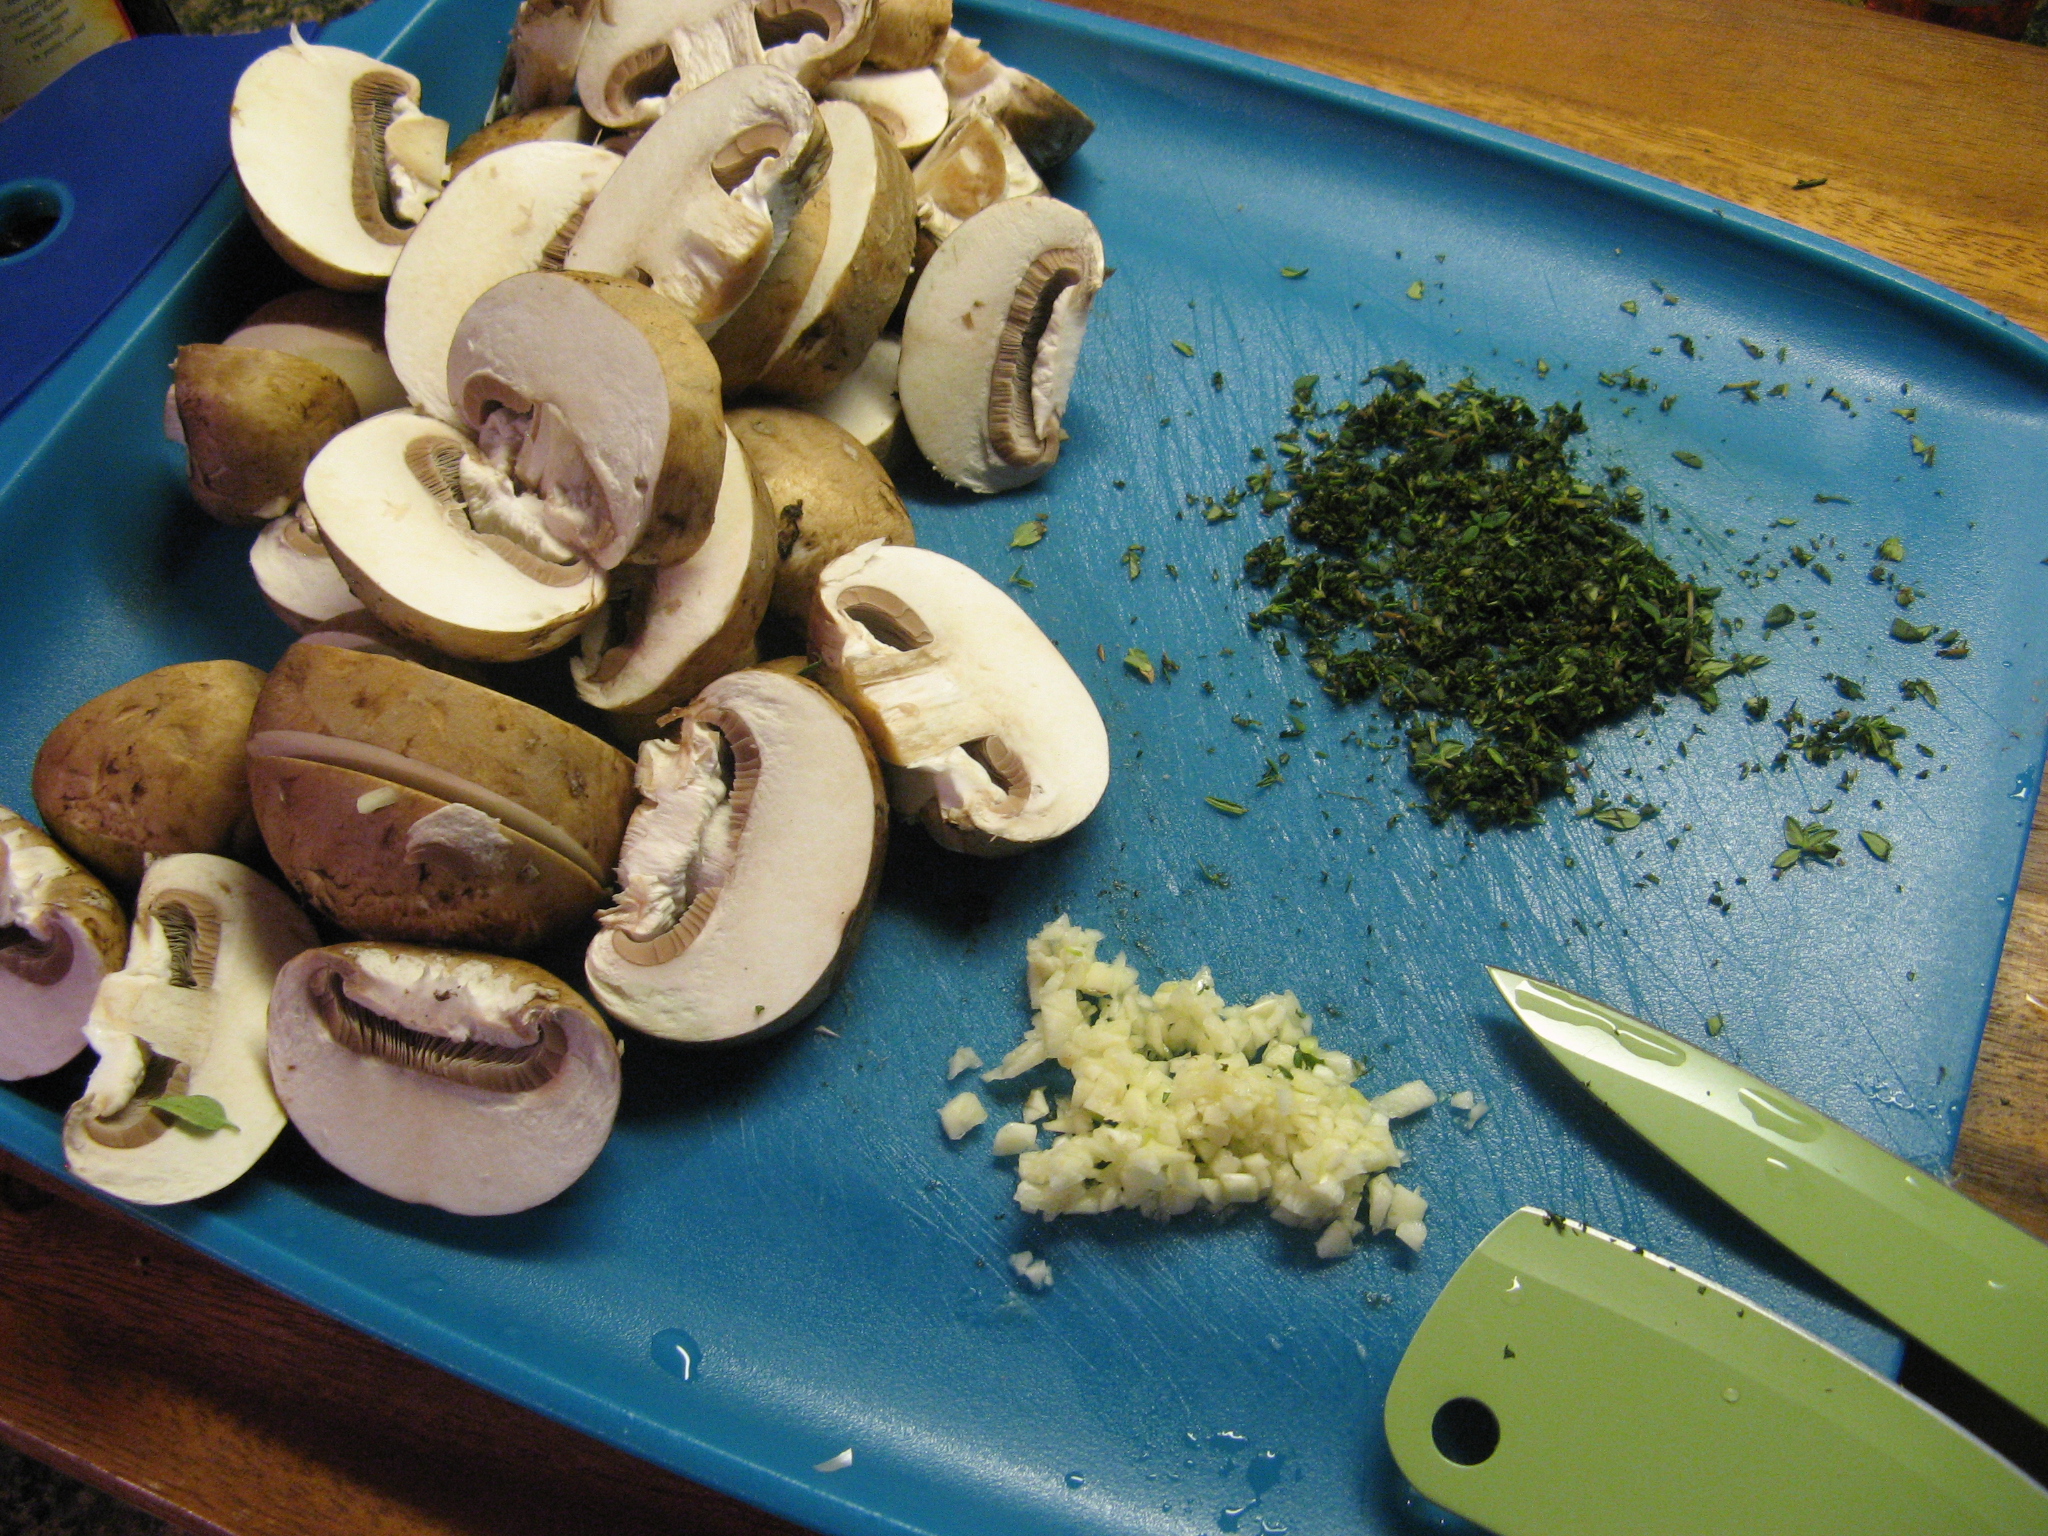
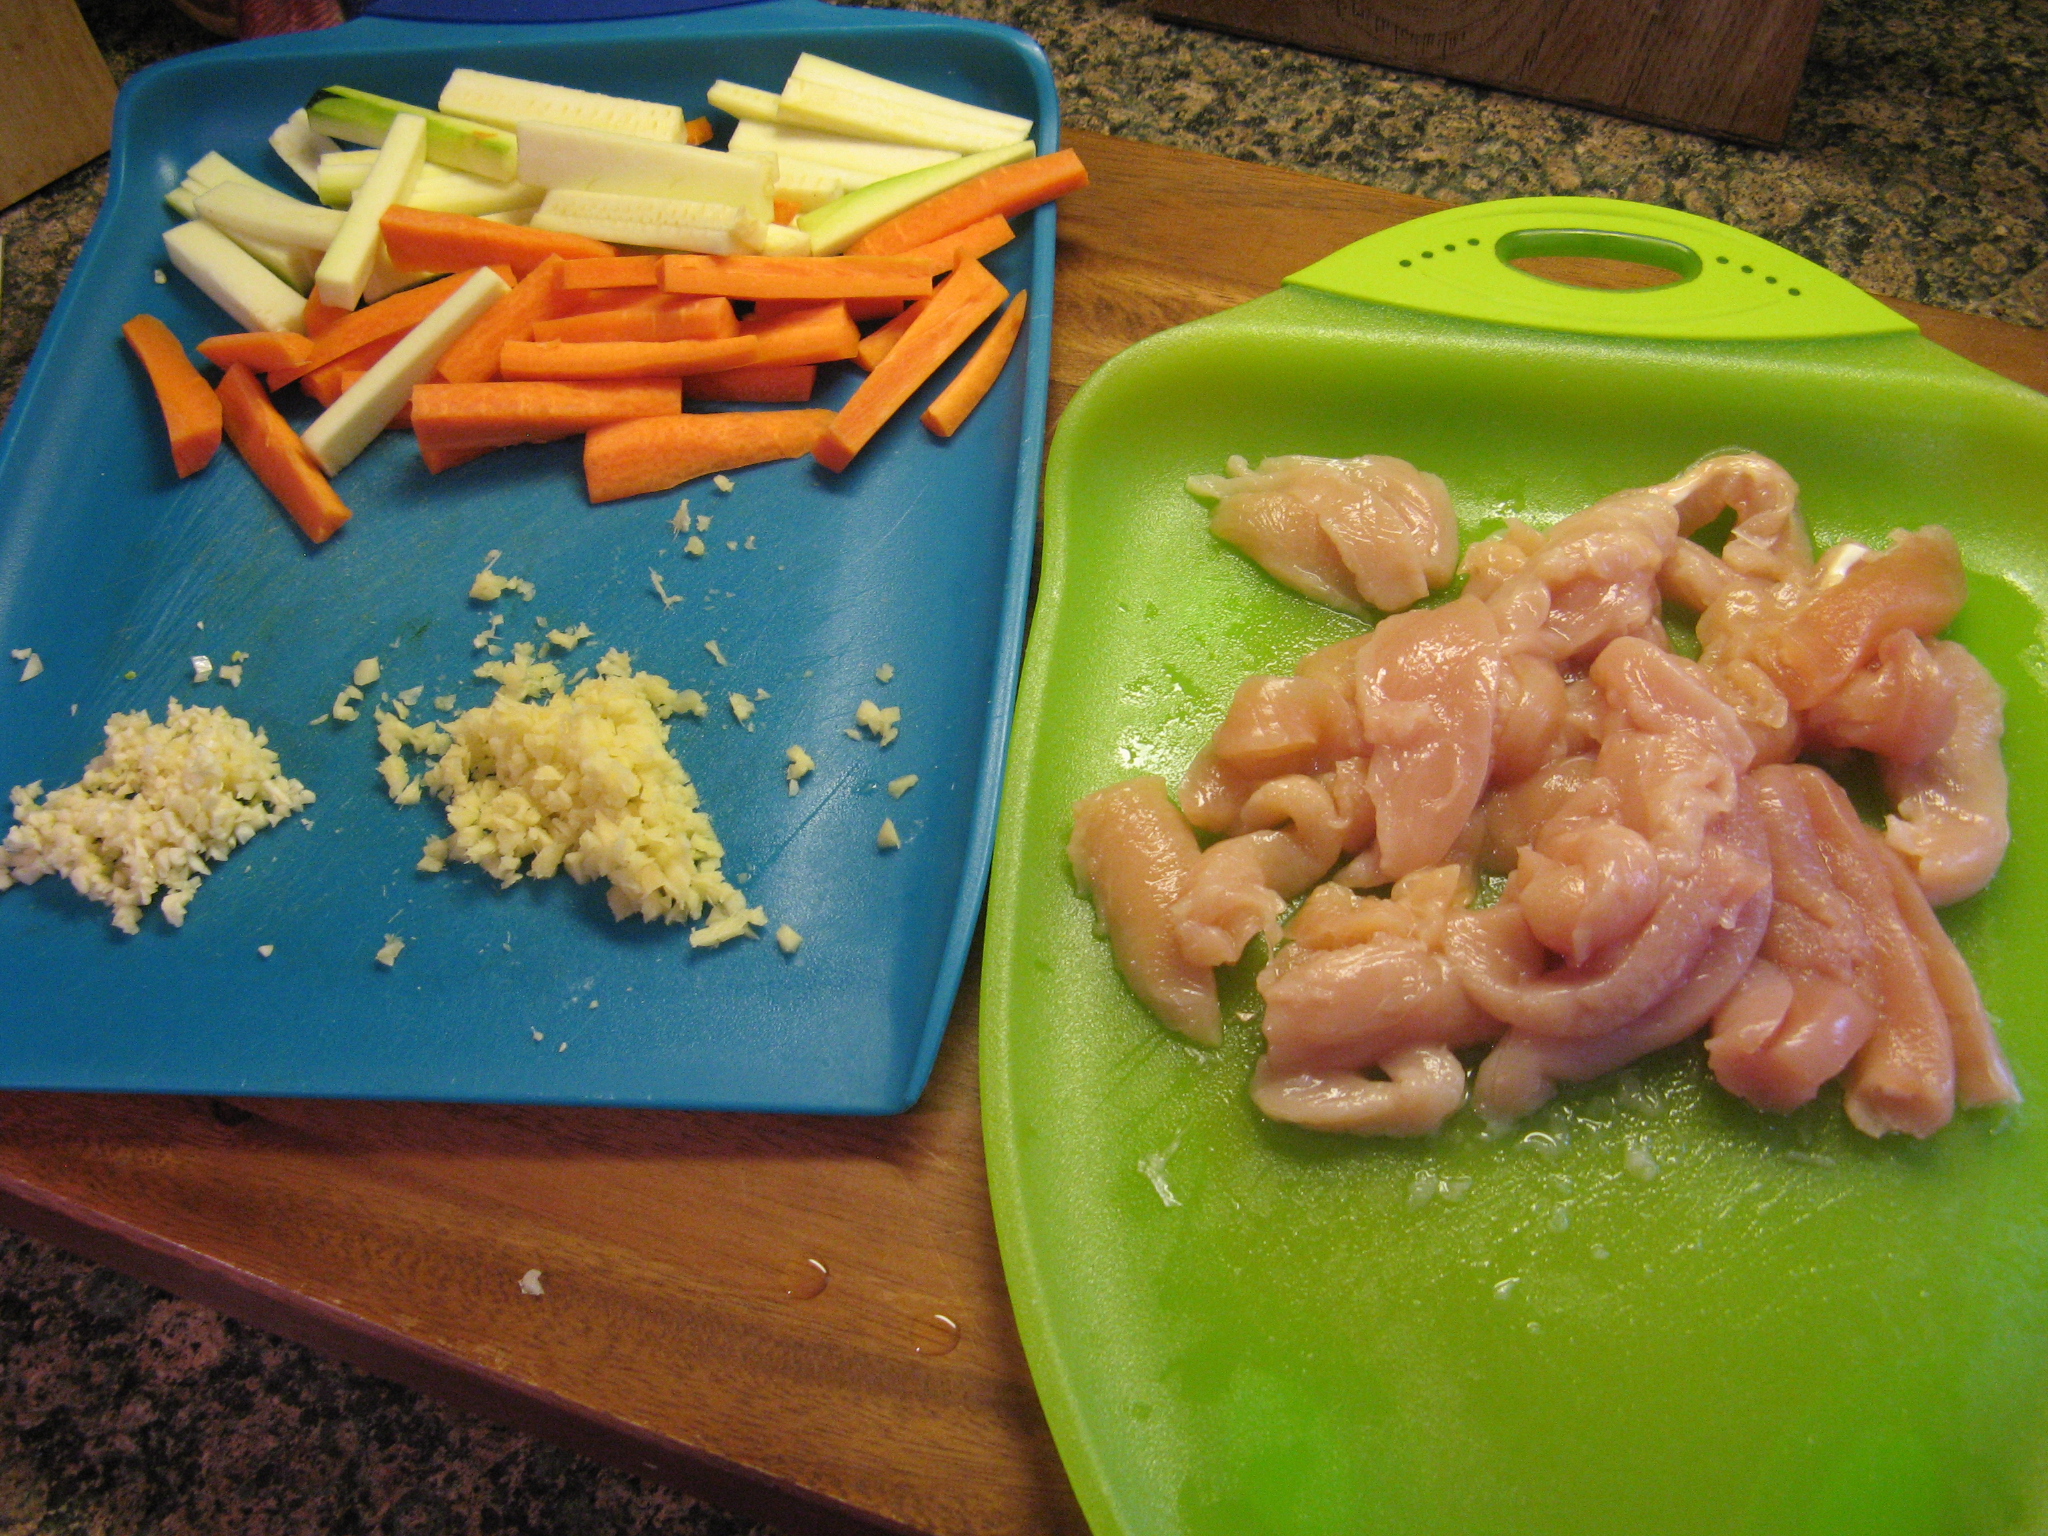
To begin I prepped all of my ingredients; minced garlic and ginger, sliced three thinly sliced chicken breasts into strips and julienned 2 carrots and 1 zucchini.

IMG_7158

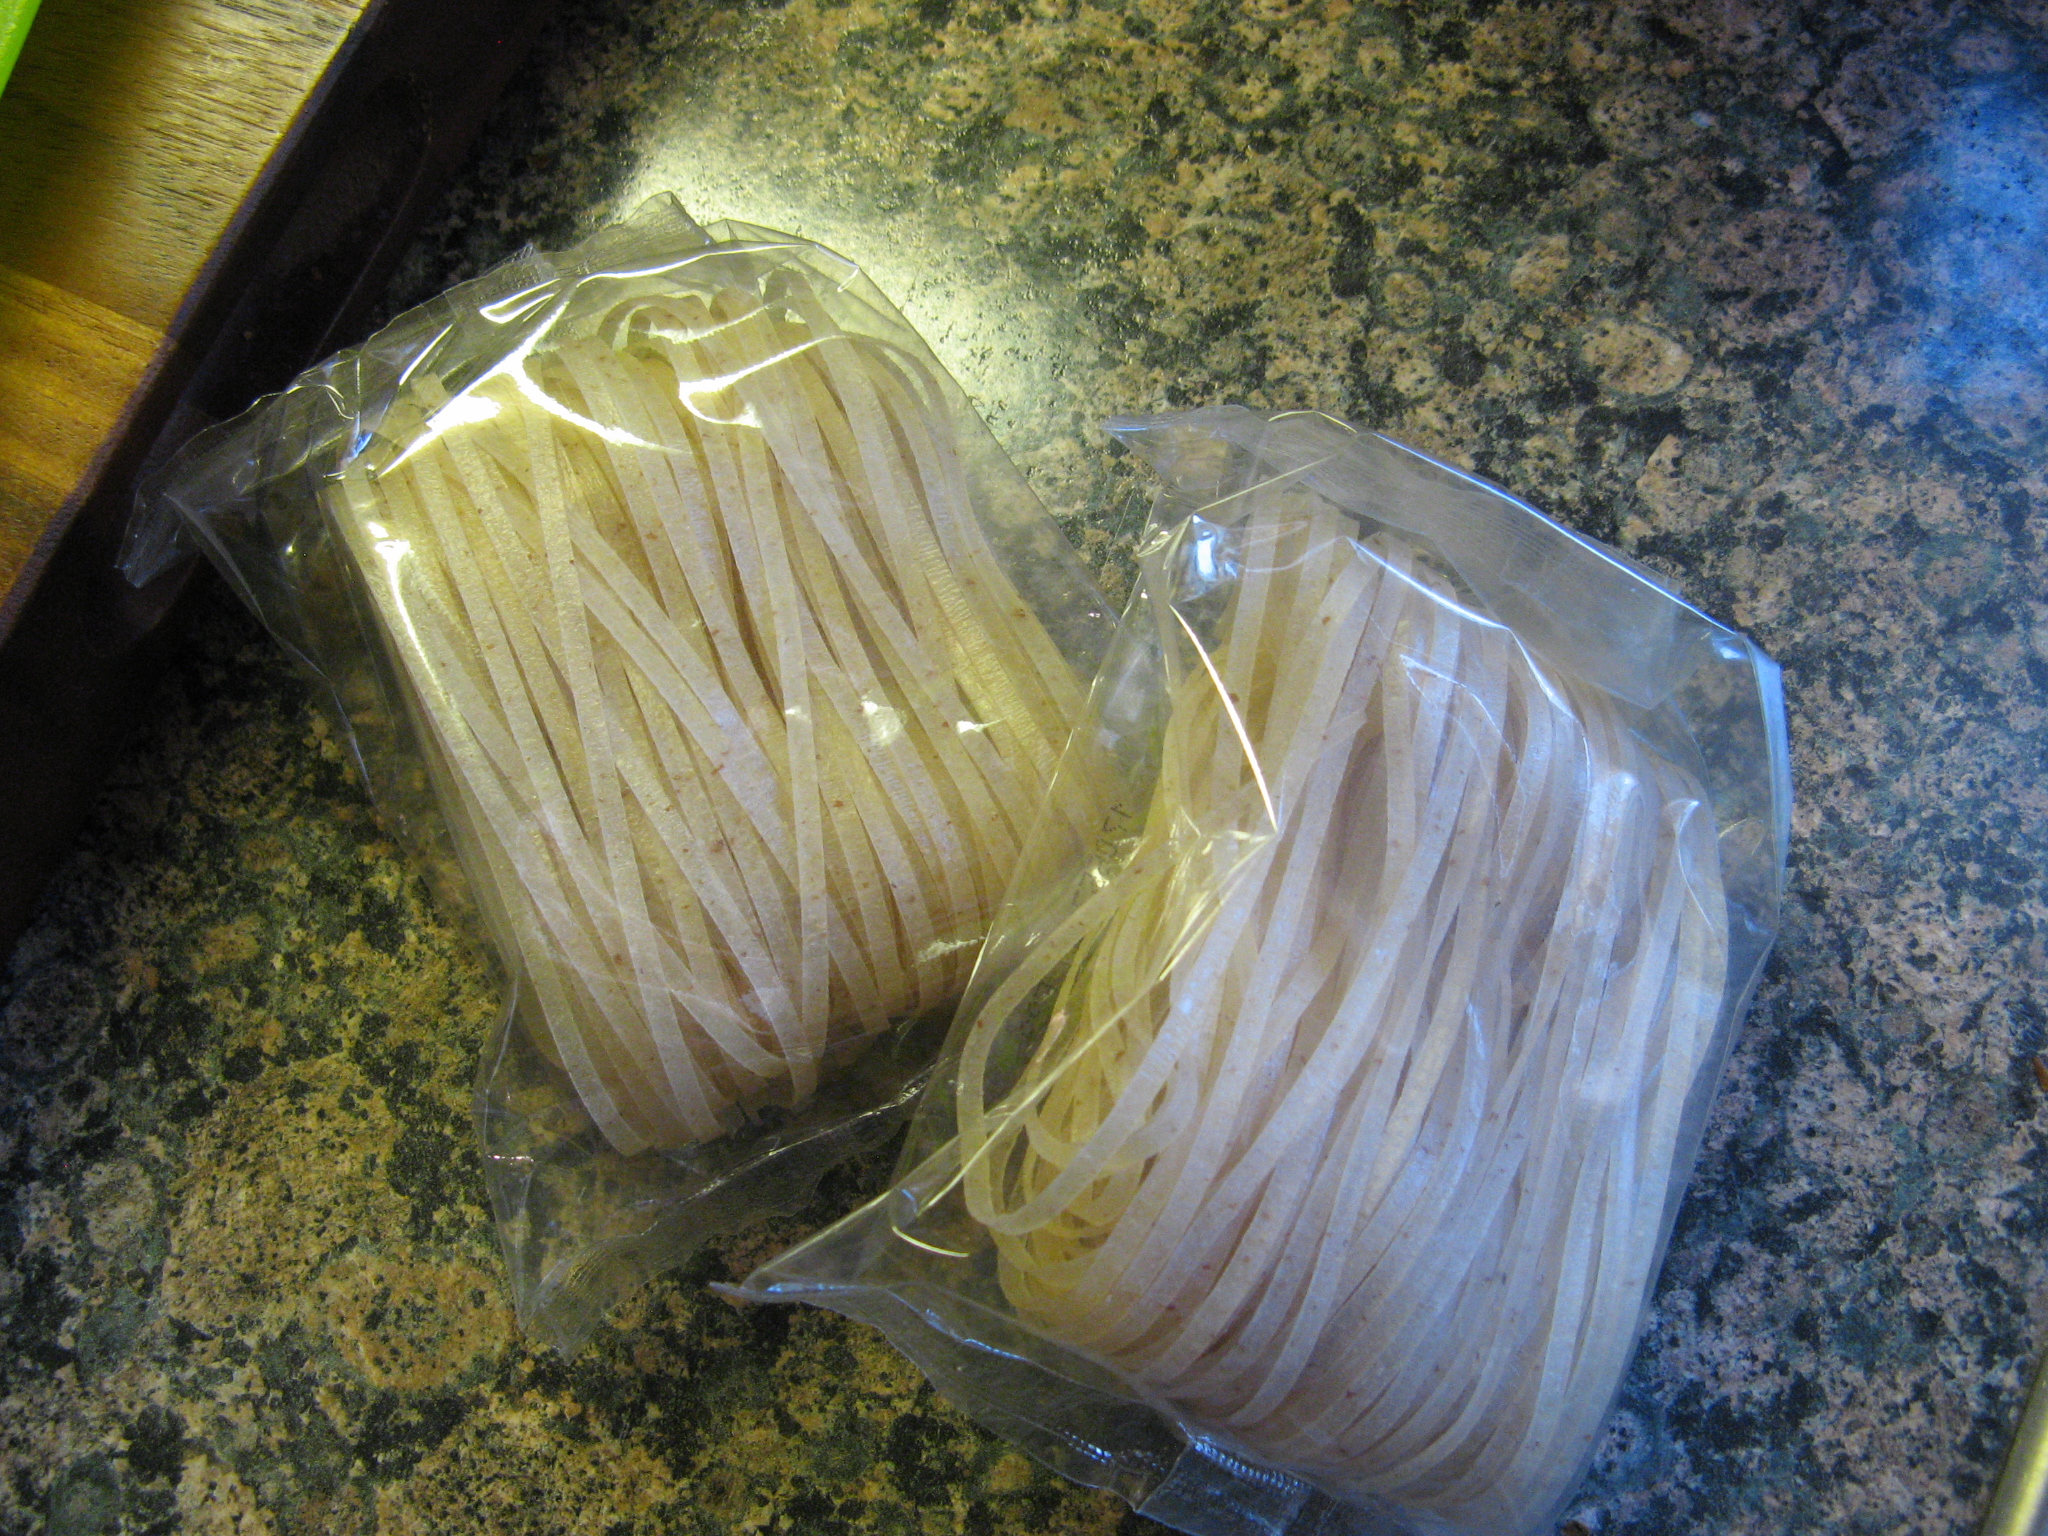
Two of my other ingredients were rice noodles and Asian chili paste.

IMG_7162

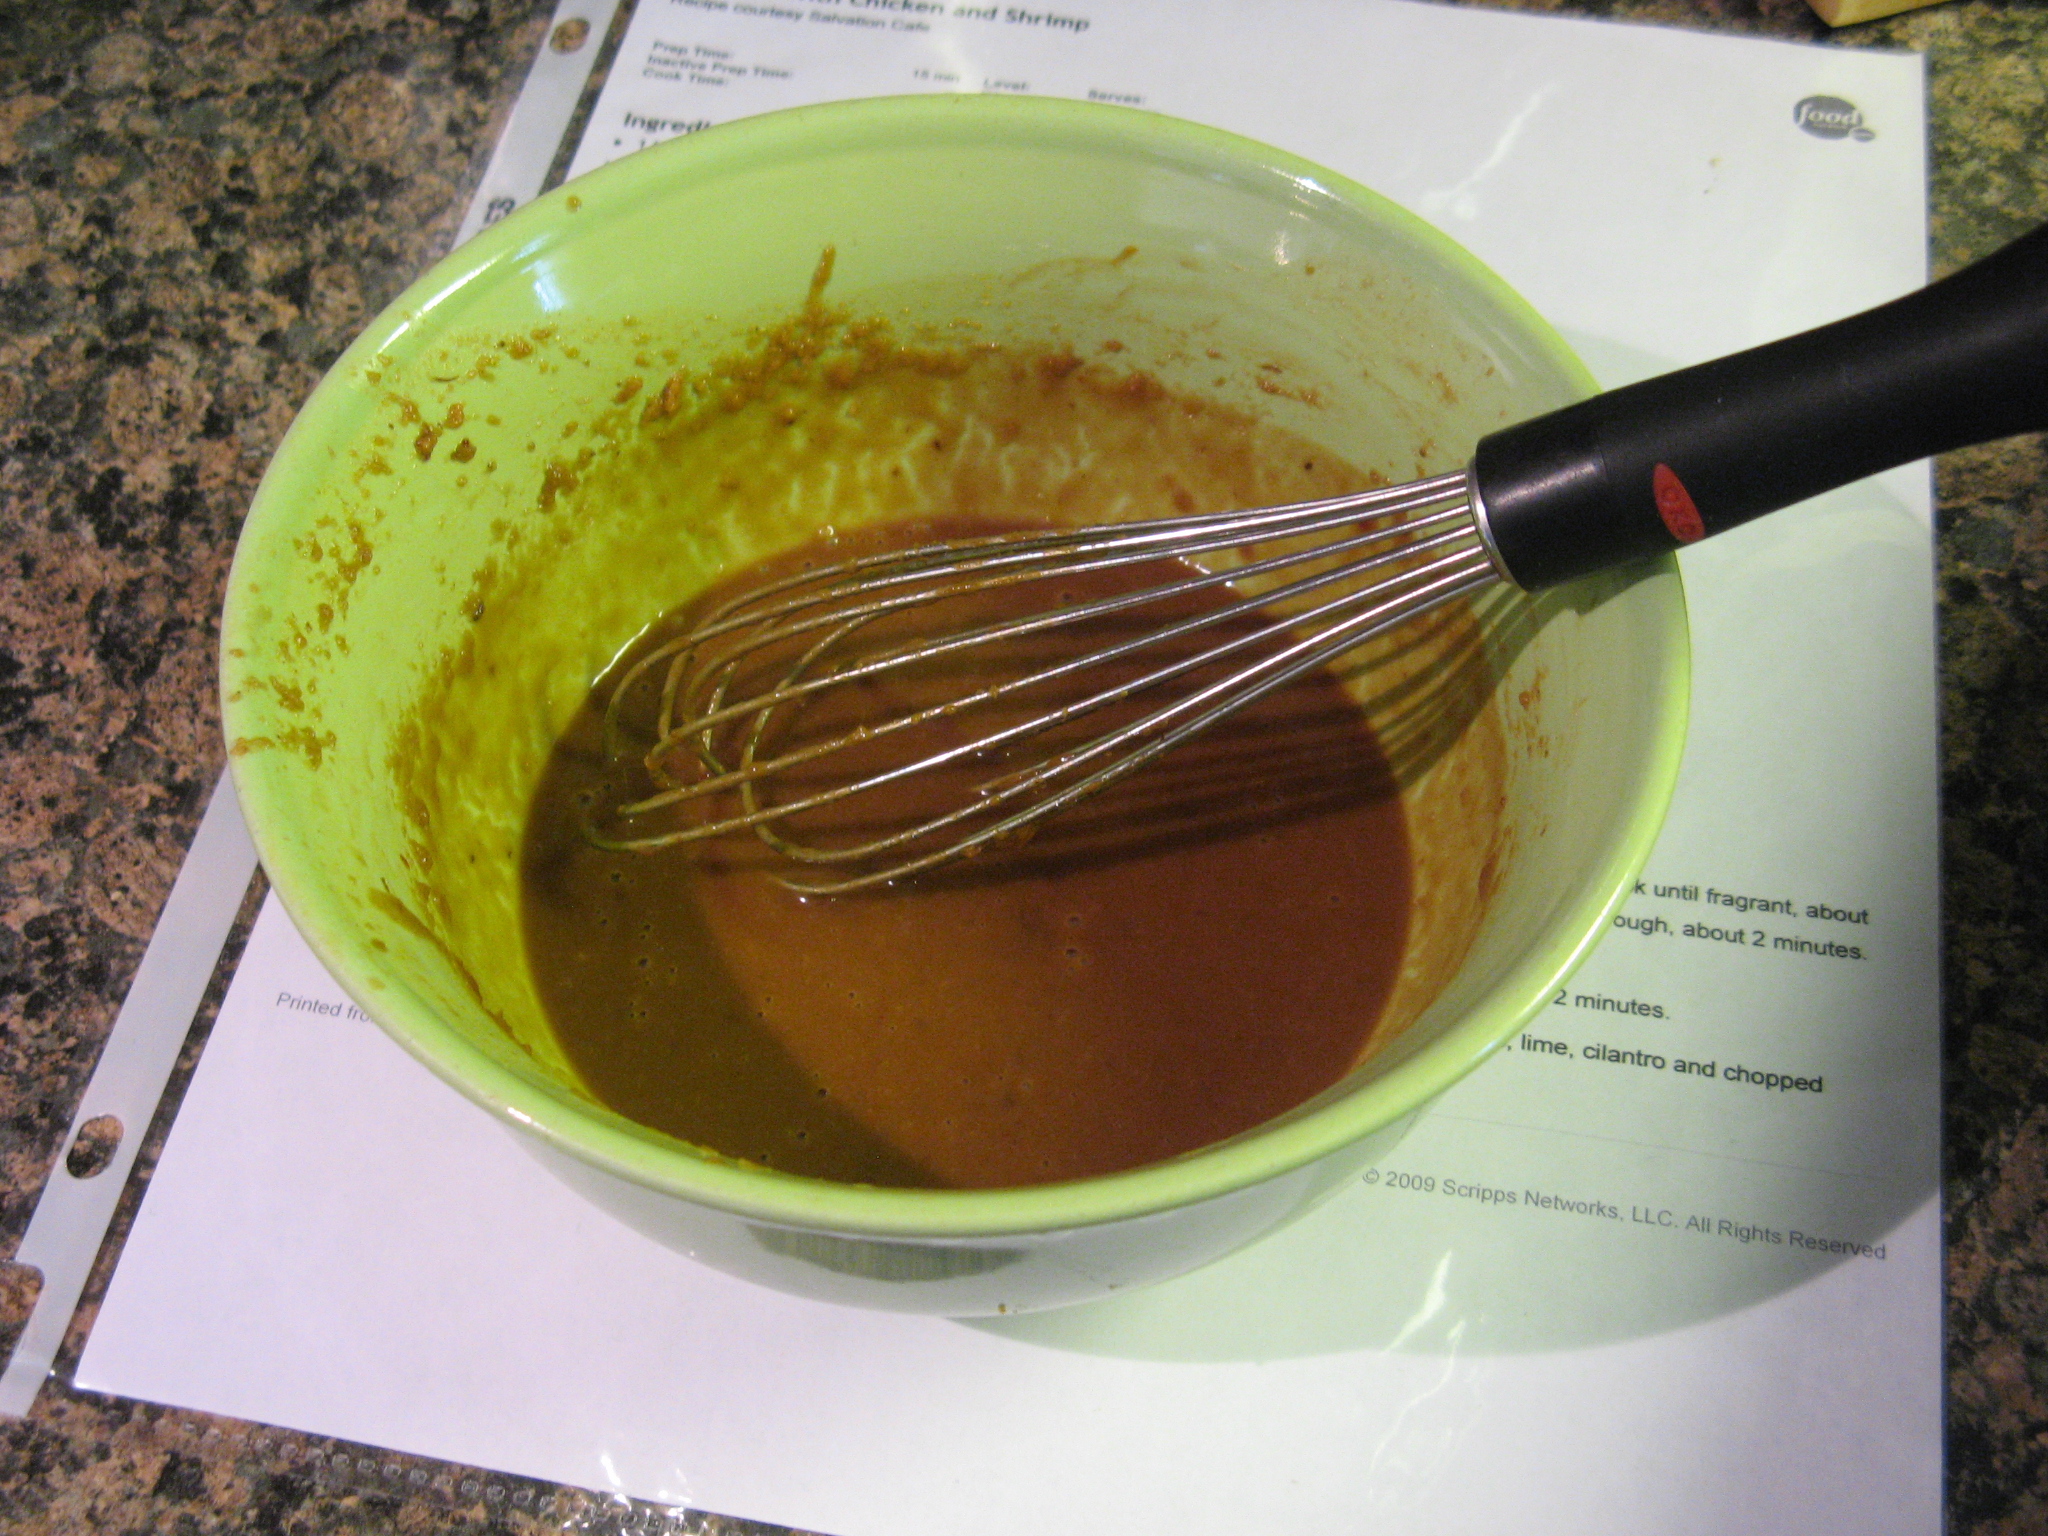
Next I whisked together soy sauce, water, peanut butter and the chili paste until it was smooth.

IMG_7163

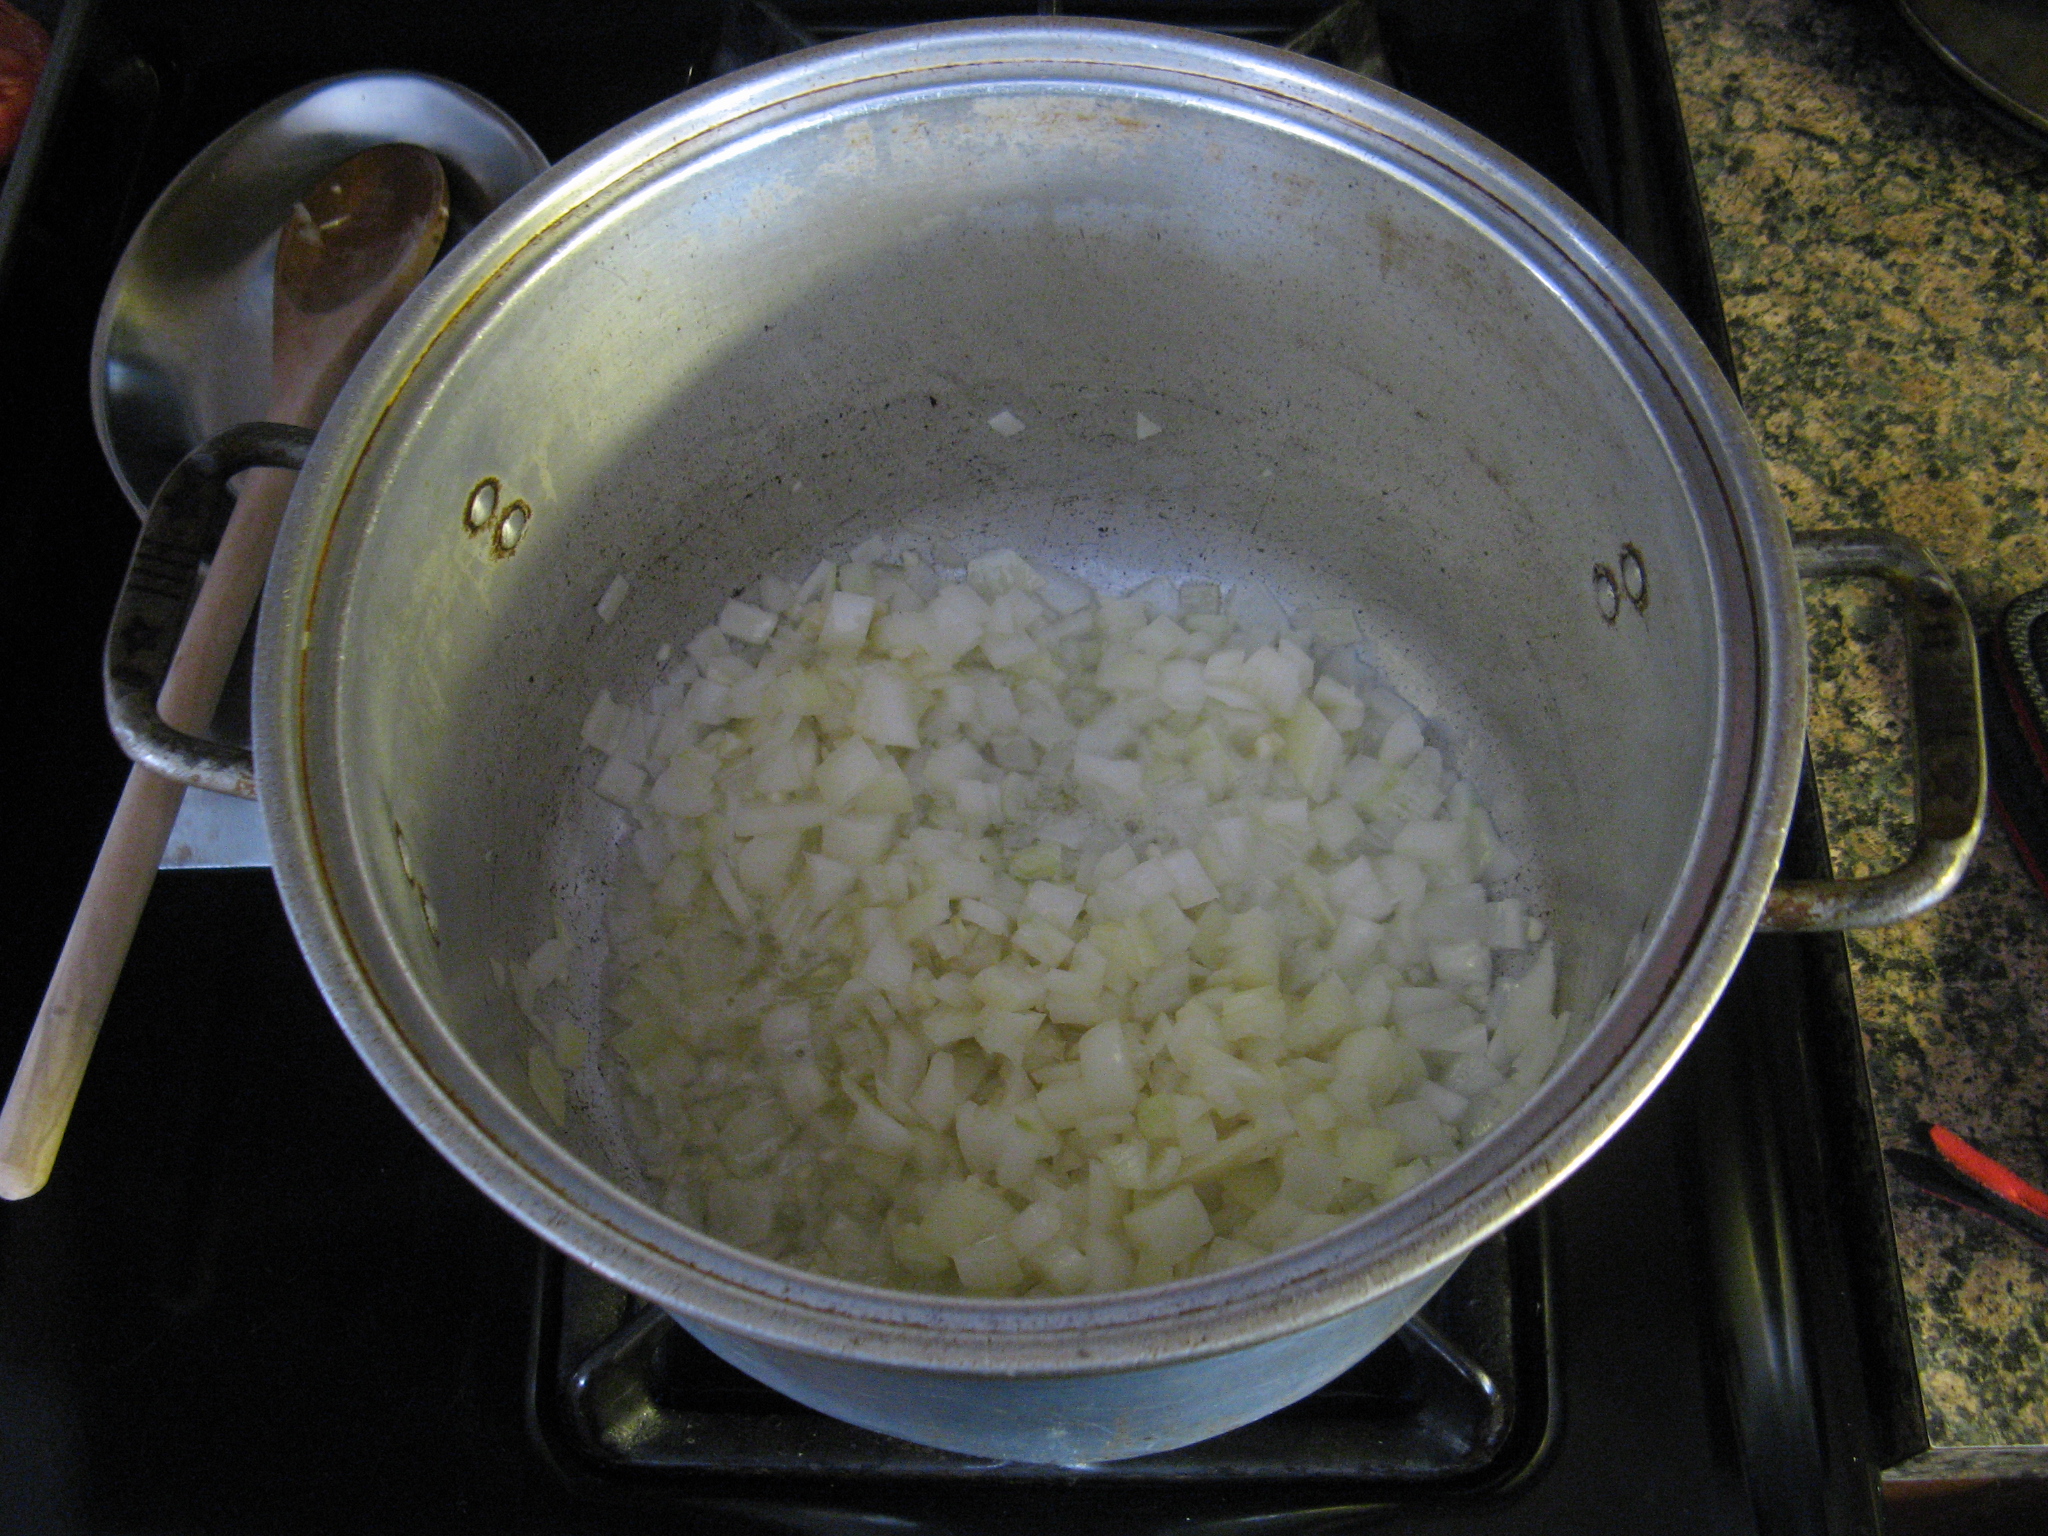
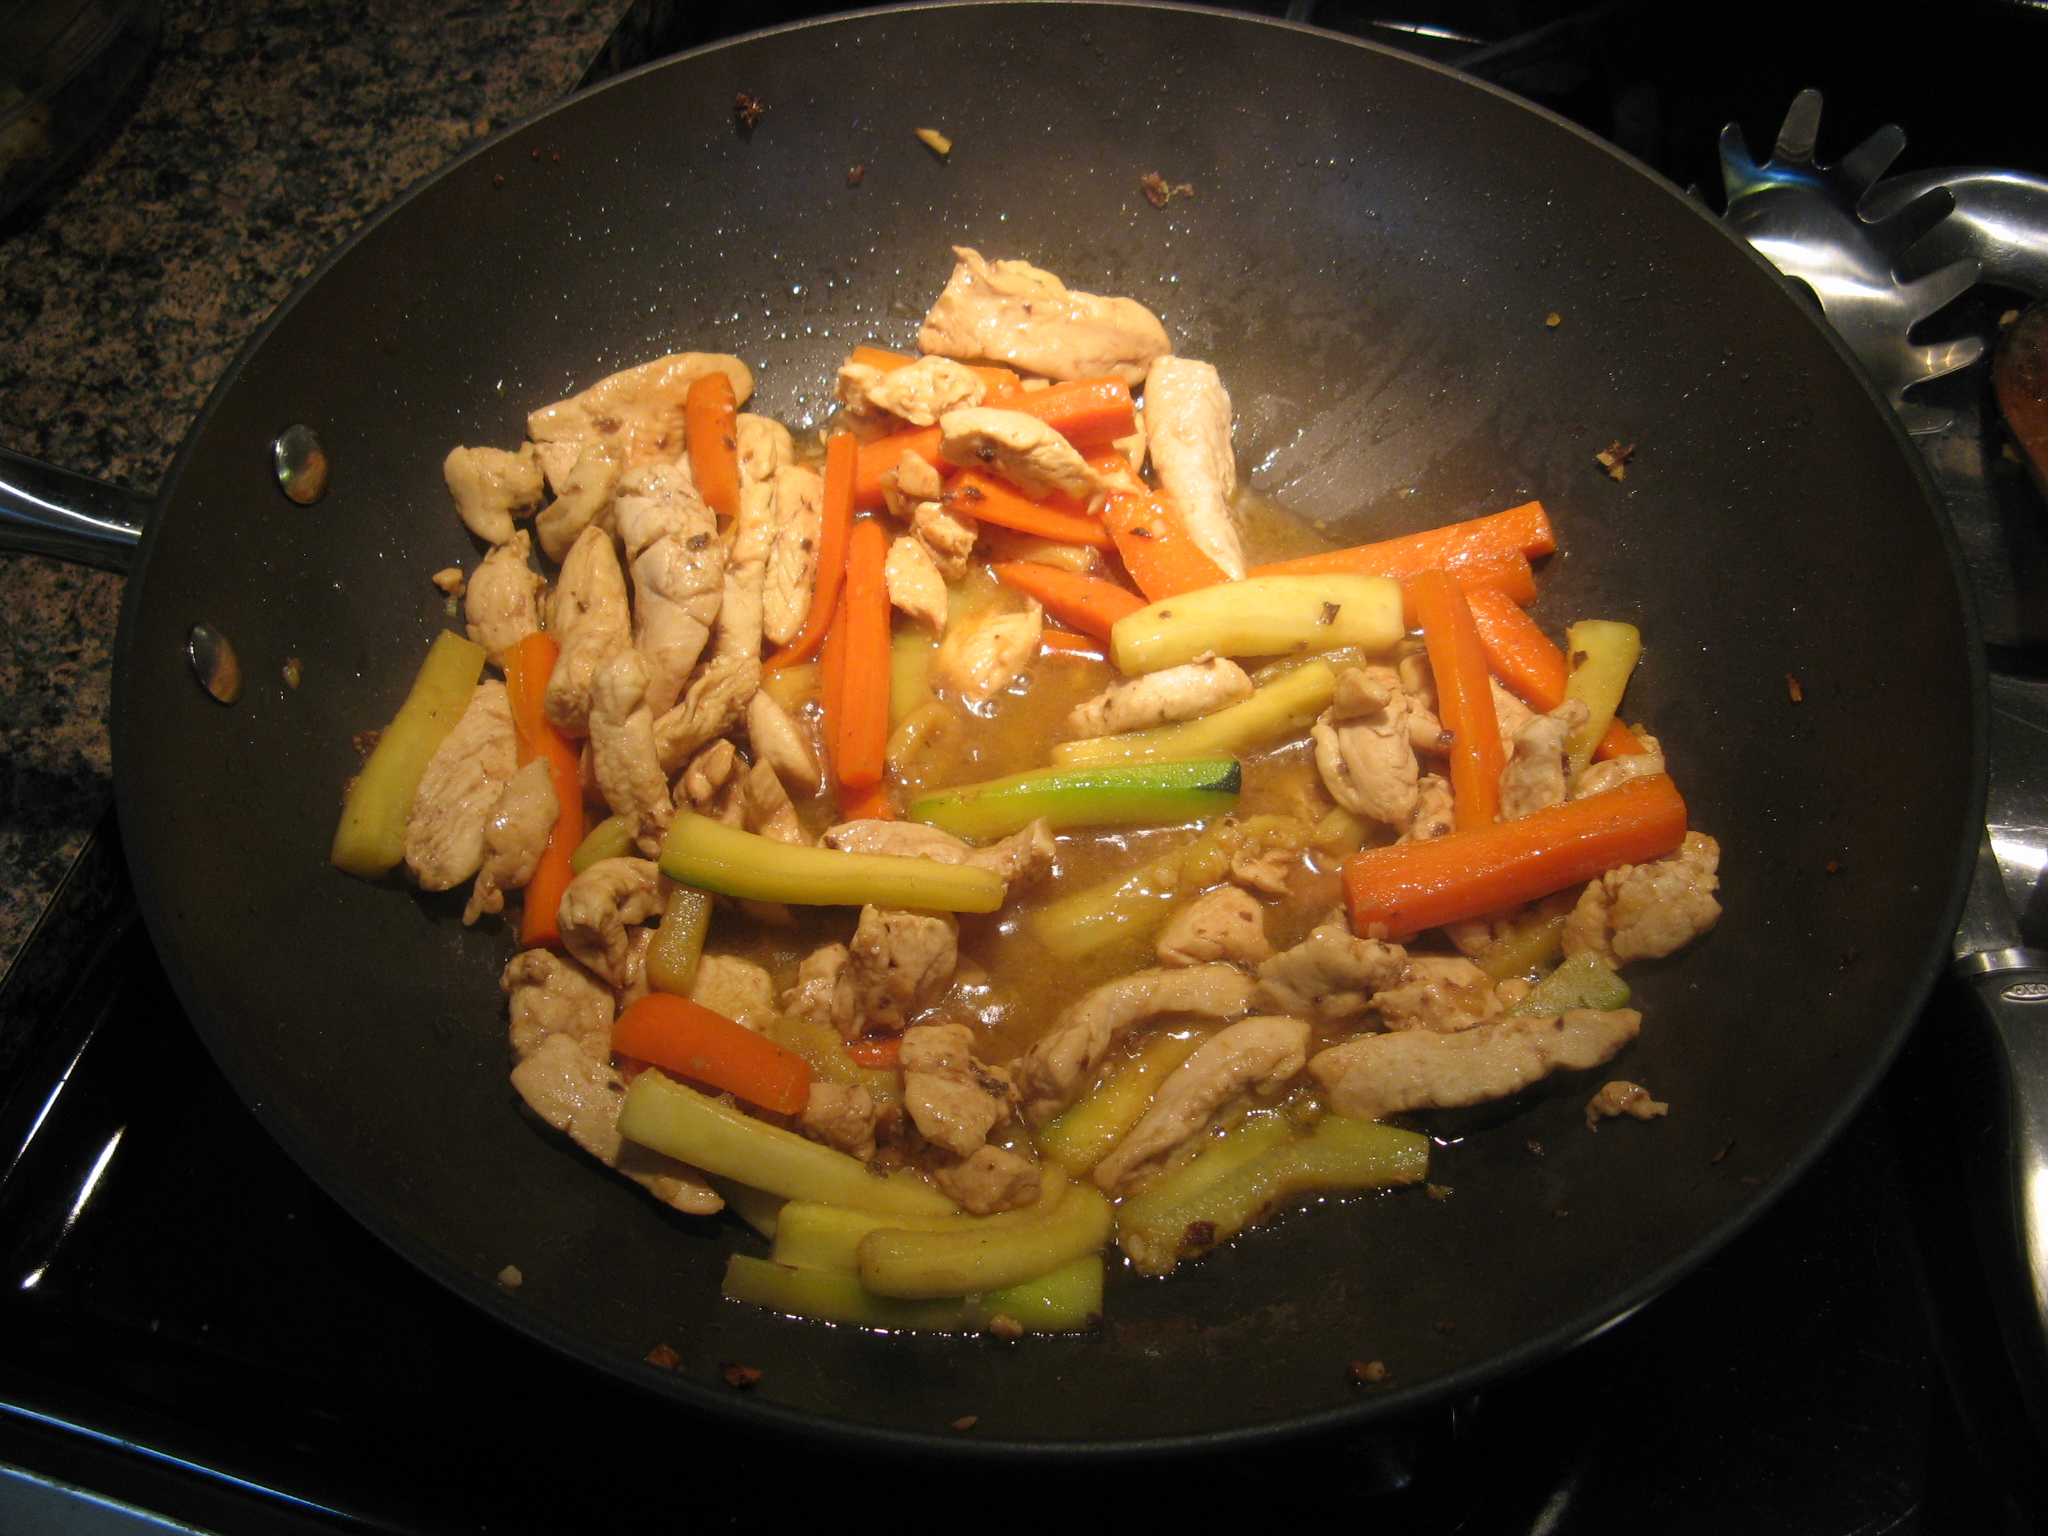
To cook the vegetables and chicken I began by sautéing the garlic and ginger for about a minute and then adding the vegetables and chicken and cooking everything until the chicken was cooked through.

IMG_7166

While I was cooking the vegetables I prepped the rice noodles by soaking them in warm water (I brought a pot of water to boil and then removed it from the heat). Luckily the rice noodles now come in these individual packets (there are four in a box) so I knew exactly how many noodles I needed – 2 packets. The last time I cooked with rice noodles – granted it was some time ago – they didn’t come in these nifty packages so I had to use my best guess as to what was half of the package.

IMG_7164

The noodles soaking…

IMG_7165

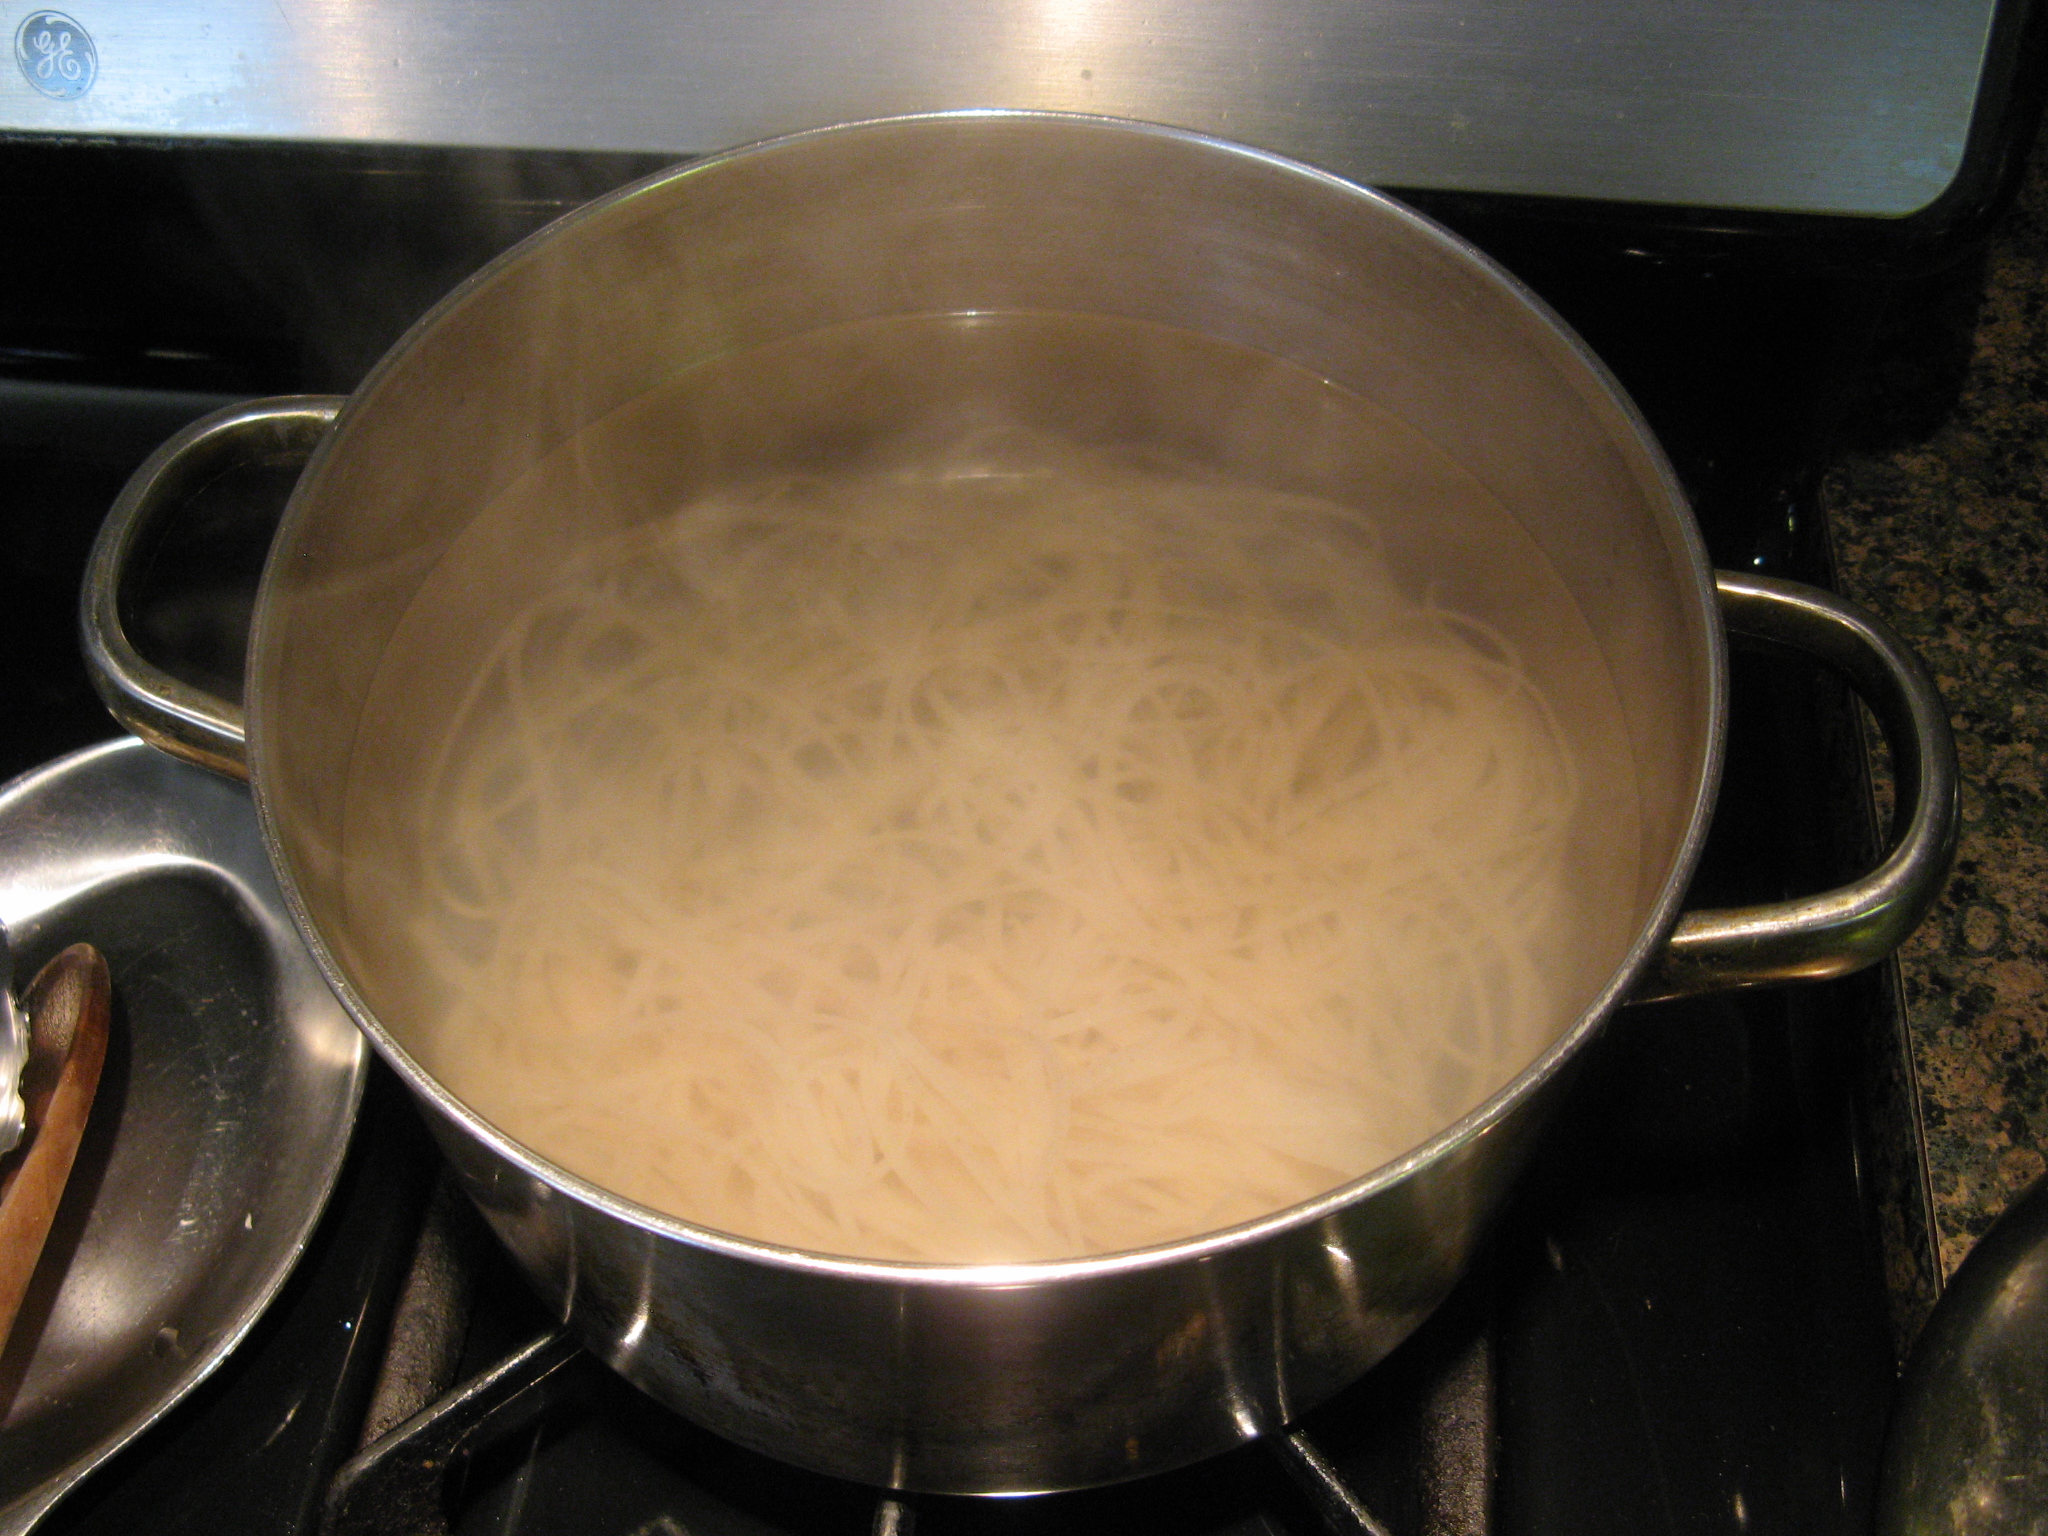
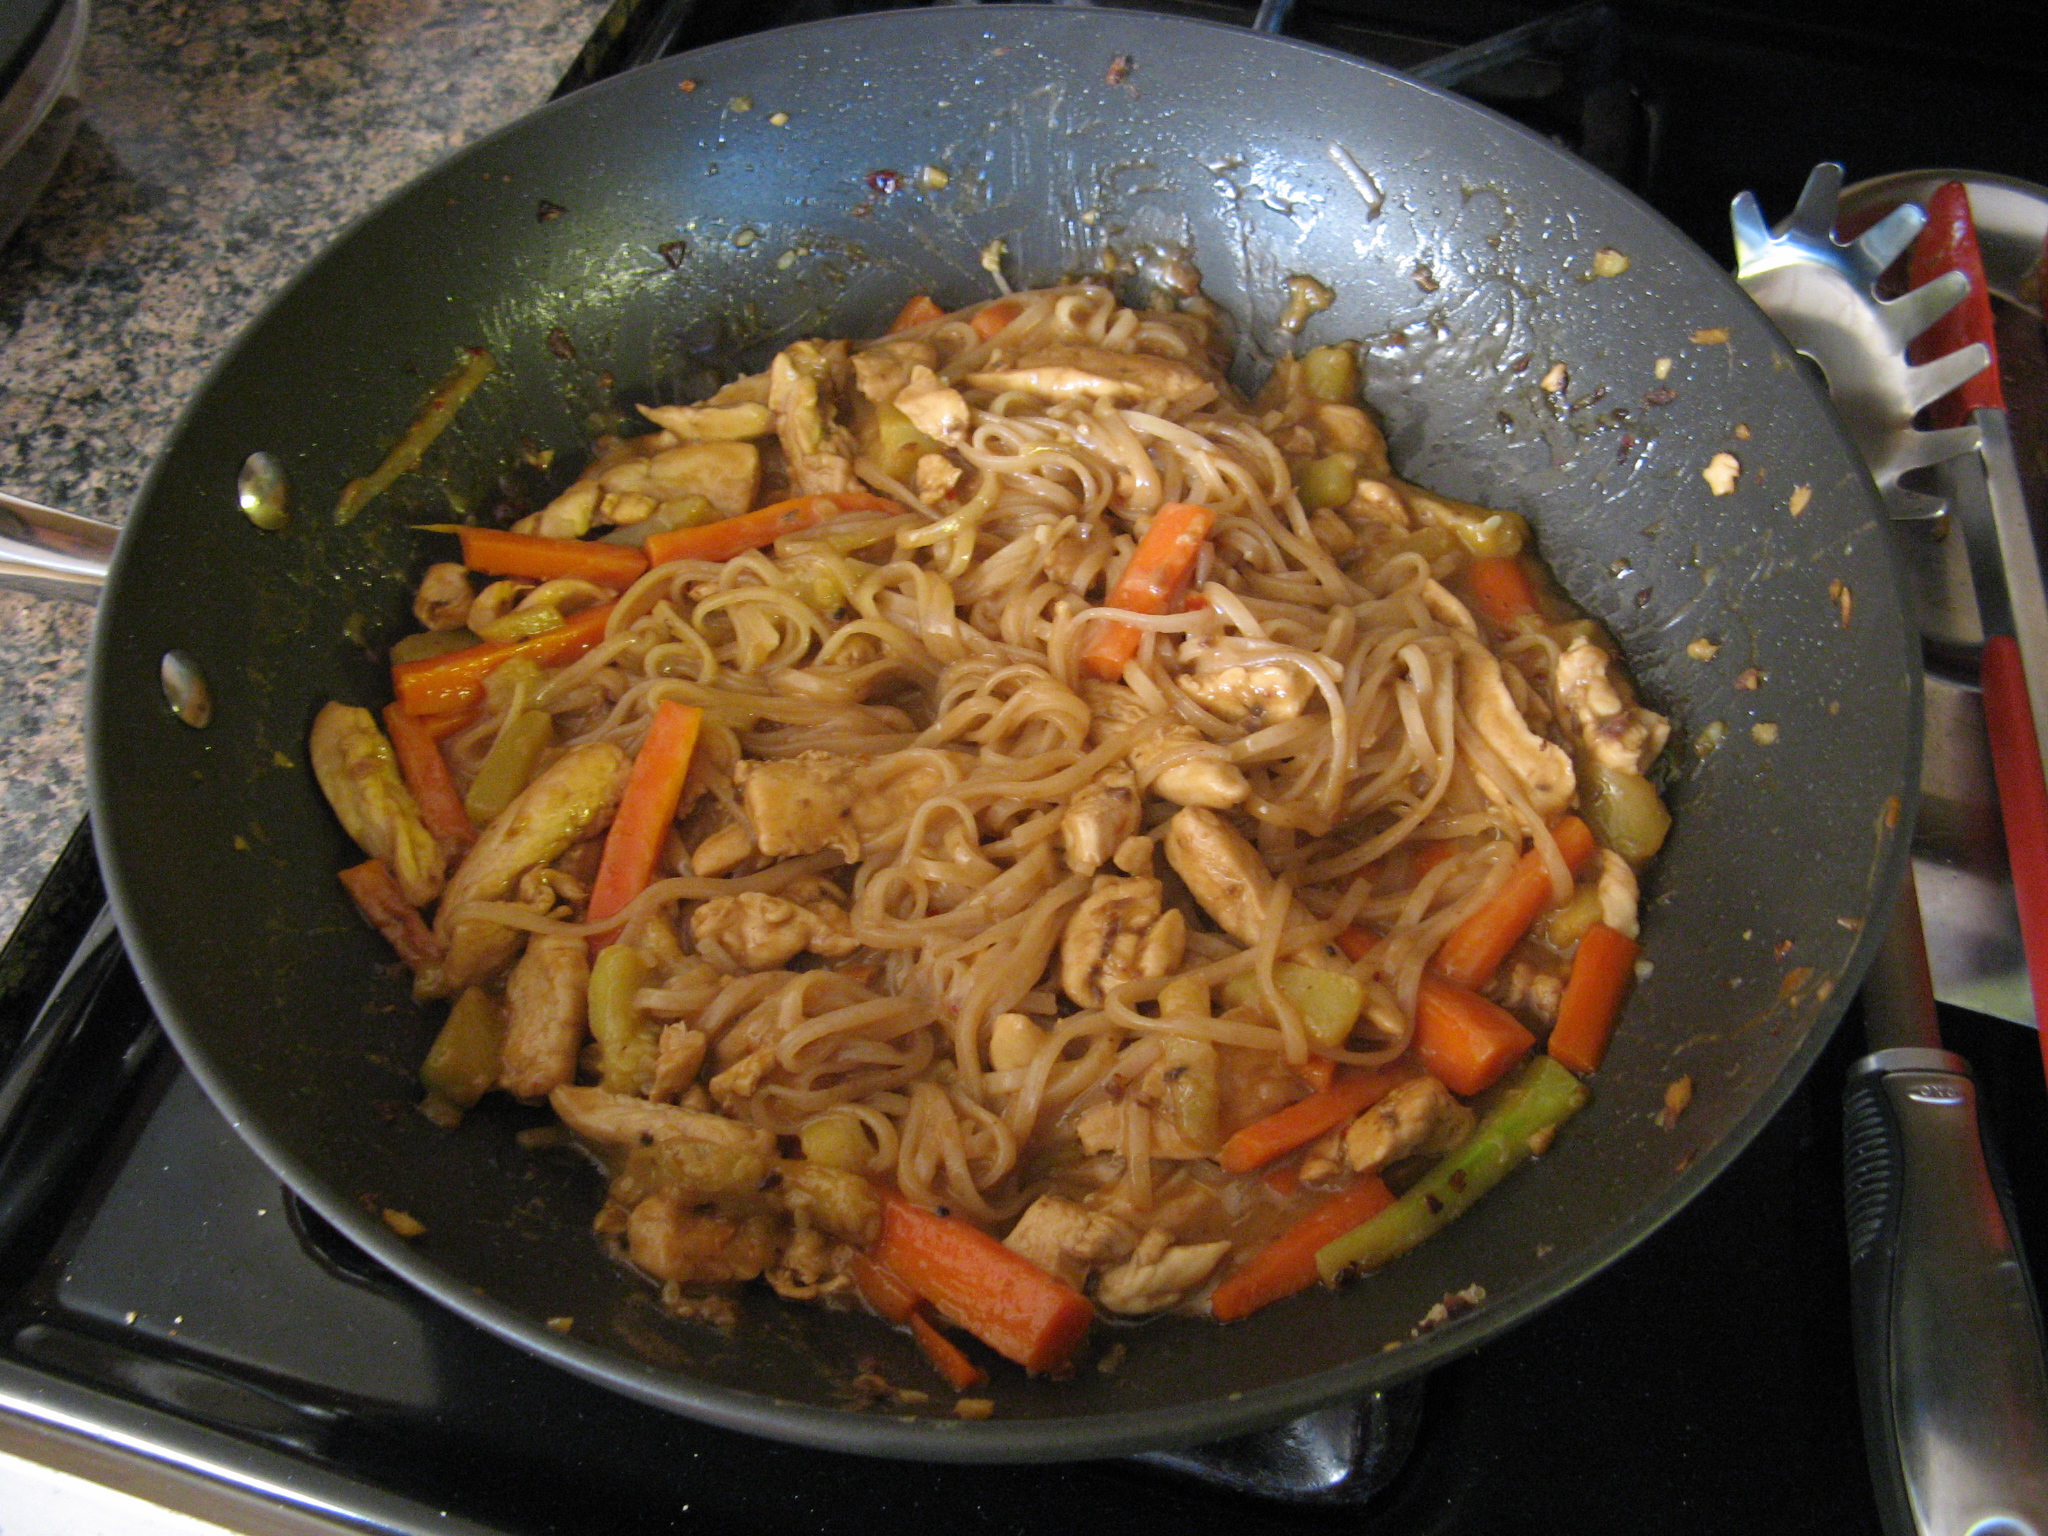
Once the noodles were ready (I followed the directions on the package and soaked them for 5 minutes) I added them to the pan with the vegetables and then added in the peanut/soy sauce I made along with light brown sugar and cider vinegar. I tossed all of the ingredients together to distribute the sauce and let everything cook for a few more minutes and then it was time to enjoy my homemade Chicken Pad Thai and it was delicious!

IMG_7168

Chicken Pad Thai – Modified from here

Servings 4

Ingredients:

2 tablespoons soy sauce

2 tablespoons water

1 1/2 tablespoons creamy peanut butter

2 teaspoons Asian chili paste

3 tablespoons canola oil

2 teaspoons minced garlic

2 teaspoons minced ginger

1 zucchini, julienned

2 carrots, julienned

8 ounces chicken breast, sliced into strips

1/4 pound rice noodles, follow directions on package to prepare

1 tablespoons light brown sugar

1 tablespoons cider vinegar

Optional for garnish:

Lime Wedges

Chopped Peanuts

Bean Sprouts

Directions:

1. In a bowl whisk together the soy sauce, water, peanut butter and chili paste.

2. Heat a large sauté pan (or wok) over medium heat and add the canola oil. Once the oil is hot add the garlic and ginger and cook for about a minute. Add the vegetables and chicken and cook until the chicken is browned and cooked through. Add the noodles and toss to coat them.

3. Add the peanut/soy sauce, brown sugar and cider vinegar and toss to distribute. Cook until heated through.

A Quick and Easy Coq au Vin

The first time I had Coq au Vin was at a cooking demonstration class at Williams Sonoma. I purchased the braising base that was used at the class but unfortunately my result was nothing like the one I tasted at the class. I think part of the reason was that I still wasn’t all that comfortable with cooking – I’m more of a baker, but, slowly but surely my cooking ability is starting to even out with my baking ability. Recently I came across a recipe for Coq au Vin in a magazine and decided to try making it once again, this time from scratch, and I had much better results. And in case you are wondering, Coq au Vin is a French dish of braised chicken in red wine and normally contains bacon, garlic, onions and mushrooms.

IMG_7069

Up first I sliced baby bella mushrooms, minced 2 cloves of garlic and chopped some fresh thyme.

IMG_7048

I then cooked three slices of bacon, which I cut into half-inch pieces, in two teaspoons of olive oil until they were brown, but not crispy.

IMG_7051

After removing the bacon from the Dutch oven and setting it aside I browned four chicken thighs which I seasoned with salt and pepper.

IMG_7052

Next I cooked the mushrooms along with a 16 oz. bag of frozen white pearl onions for a few minutes until they began to soften.

IMG_7054

Following that I added in the thyme, garlic and a tablespoon of tomato paste.

IMG_7056

And then red cooking wine. I cooked the mixture for about 5 minutes until the wine reduced by half…

IMG_7058

And then added in chicken stock.

IMG_7059

And finally I returned the chicken to the pot, reduced the heat to low and partially covered the pot and allowed the chicken to cook through and the onions to soften, about 40 minutes.

IMG_7060

And for the final step, I dissolved three tablespoons of cornstarch in an equal amount of water and added it to the cooking liquid after transferring the chicken to a plate. Once the liquid thickened I returned the chicken and bacon to the pot, stirring to coat the chicken. I must say I have used cornstarch to thicken cooking liquids before but I normally just add it directly to the liquid, dissolving it in water is a much better method as it eliminates the possibility of any clumps forming in the liquid.

IMG_7062

Final Verdict… Definitely something I will make again, although I think next time I won’t add the cornstarch.

IMG_7064


Easy Coq au Vin – Slightly modified from here

Ingredients:

3 slices center cut bacon, cut into half-inch pieces

2 tsp. olive oil

4 bone-in, skinless chicken thighs

16 oz. frozen pearl onions

10 oz. baby bella mushrooms, trimmed and sliced

1 tbsp. tomato paste

2 cloves garlic, minced

1 cup red cooking wine

2 cups chicken stock

3 tbsp. cornstarch

Directions:

1. In a 5 to 6 quart Dutch oven, cook the bacon in the oil over medium heat until browned but not too crispy. Transfer the bacon to a small bowl lined with a napkin. Season the chicken with salt and pepper (I used about 1/2 tsp. each). Increase the heat to medium-high and cook the chicken until golden brown, about 5 minutes per side. Transfer the chicken to a plate.

2. Add the onions and mushrooms to the pot and cook, stirring occasionally, until they soften. Stir in the tomato paste, thyme and garlic. Add the wine and cook, scraping up any browned bits, until the wine is reduced by half, about 5 minutes. Add the stock and bring the liquid to a simmer. Return the chicken and any juices to the pot. Reduce the heat to low, partially cover and gently simmer, turning the chicken once or twice, until the chicken is cooked through and the onions are tender, about 40 minutes.

3. In a small bowl dissolve the cornstarch in tbsp. water. Transfer the chicken to a plate. Increase the heat to medium-high and bring the cooking liquid to a bowl. Add the cornstarch mixture and stir until thickened. Season with salt and pepper. Return the chicken and bacon to the pot, stirring to coat.

Roasted Tomato Basil Soup

For me any time is a good time for soup – it’s like ice cream; it can never be too cold or too hot to enjoy it. Especially since there are so many varieties of soups that can be enjoyed either hot or cold. But these days with the temperatures being so cold and every few days there is some sort of wintry mix falling from the skies hot soup is definitely the way to go! The other day while picking up some produce while grocery shopping – this is a common place (the produce section) where I get some of my cooking / baking ideas – the idea of making roasted tomato soup popped into my head. I had no idea what ingredients I needed but I figured tomatoes would be a good start and some basil. I knew I had the other basics at home that I assume I would need – yellow onions and garlic. I didn’t think I needed any specific type of tomato – i.e. plum, beefsteak, etc… – so I picked up a pack of six tomatoes but then when I got home and did some research I soon realized that I needed double that amount so I picked up another pack of six tomatoes the following day and I was ready to go.

IMG_6684

I began by slicing the tomatoes in half and tossing them with olive oil and kosher salt and placing them on a baking sheet.

IMG_6686

I then roasted them in a 400 F preheated oven for about 45 minutes.

IMG_6689

While the tomatoes cooled I chopped two yellow onions and minced four garlic cloves and sautéed both in two tablespoons each of unsalted butter and olive oil over medium heat. The smell of sautéing onions and garlic is probably one of my favorite aromas when it comes to cooking.

IMG_6691

Following that I added a quart of vegetable broth – I used College Inn’s Garden Vegetable Broth – the tomatoes and ten large basil leaves to the onion mixture.

IMG_6693

I brought the soup to a boil by raising the heat to high and then lowered the heat so the soup could simmer uncovered for about thirty minutes. I did a taste test and I already knew that this soup was a winner… The broth had a wonderful taste with a hint of the basil.

IMG_6694

I removed the pot from the heat and used an immersion blender to blend the mixture into a delicious creamy soup that still had bits of the basil in it. I seasoned it with some fresh ground pepper and it was ready to be enjoyed.

IMG_6696

While the soup was meant to be for dinner, I couldn’t wait to try it so I ladled a few spoons into a bowl and topped it with some shredded parmesan cheese and I was very happy with the result. I enjoyed a second bowl a few hours later along with a grilled cheese!

IMG_6704


Roasted Tomato Basil Soup

Makes about 4 to 6 servings

Ingredients:

12 tomatoes (approximately 3 pounds) – halved

2 medium yellow onions, chopped

4 garlic cloves, minced

10 large basil leaves

1 tablespoon kosher salt, plus more for seasoning

1/4 cup olive oil, plus more for sautéing onions and garlic

2 tablespoons unsalted butter

1 quart vegetable broth

Fresh ground pepper for seasoning

Directions:

1. Preheat oven to 400 F. Toss tomatoes with olive oil and salt and spread on a cookie sheet in a single layer and roast in the oven for 45 minutes.

2. Sauté the onions and garlic in 2 tablespoons of olive oil and the butter over medium heat for about 10 minutes, until the onions begin to brown.

3. Add the vegetable broth, tomatoes and basil to the onion mixture and raise the heat to high and bring the mixture to a boil. Lower the heat to low and simmer the soup uncovered for about 25 – 30 minutes, the tomatoes will looked stewed / poached.

4. Blend the soup with an immersion blender, or blend in a blender or a food processor, until the soup is creamy and all of the tomatoes have been blended. Season with salt and pepper.


Mushroom & Sausage Quiche

Usually I add ground sausage to my Thanksgiving stuffing, this year though I was on the fence as to whether or not to add it in. As you can guess from this post I opted not to add it, but then the question was what to do with it. I could have frozen it and used it another time but then I remembered a recipe I had for a quiche that called for sausage and mushrooms, another ingredient for the quiche that I had left over from said stuffing. The recipe – Mushroom & Sausage Quiche – is one I came across in a cookbook I picked up years ago and ended up not using. While it was filled with many recipes most of them weren’t appealing to me except this one – which I ended up photocopying and then donating the book.

IMG_6080

I began by cooking the ground sausage.

IMG_6051

While the ground sausage was cooking I chopped up half a Vidalia onion and sliced half-a-pound of white mushrooms.

IMG_6053

After the sausage was cooked I transferred it to a bowl and wiped the skillet down and cooked the chopped onions and sliced mushrooms in a tablespoon of melted butter.

IMG_6055

Meanwhile in the bowl of my food processor I combined eggs, sour cream, cottage cheese (those of you not fond of cottage cheese don’t worry once the quiche is done you won’t even remember it’s there), flour and parmesan cheese and blended them until the mixture was smooth.

IMG_6056

I then stirred together the sausage, sautéed onions and mushrooms, the egg mixture and shredded sharp Cheddar cheese in a large bowl.

IMG_6057

And then spooned it into my pie dish which I fitted with a refrigerated piecrust.

IMG_6060

Following that I baked it in a 350 F preheated oven for about 50 minutes.

IMG_6079

After letting it cool for about 10 minutes I sliced into it and enjoyed the every bite of it!

IMG_6083

Mushroom and Sausage Quiche 

Ingredients:

One 9-inch refrigerated piecrust, fitted into a 9-inch glass plate

One 1-pound package ground sausage

1 tablespoon butter

1/2 pound fresh mushrooms, sliced

1/2 large Vidalia onion, chopped

4 eggs

1 cup sour cream

1 cup cottage cheese, 2% or 4% milk fat

3 tablespoons all-purpose flour

3 tablespoons freshly grated Parmesan cheese

1 teaspoon hot sauce*

One 8-ounce package shredded sharp Cheddar cheese

*I omitted this from my version

Directions:

1. Preheat the oven to 350 F. Crimp the edges of the crust.

2. In a large skillet, cook and drain the sausage, and set aside. Wipe out the pan, and in the same pan, melt the butter over medium-high heat. Add the mushrooms and onion, and sauté for 5 minutes, or until tender.

3. Place the eggs, sour cream, cottage cheese, flour, Parmesan cheese, and hot sauce in a food processor and process until smooth, stopping to scrape down the sides of the bowl.

4. Stir together the crumbled sausage, mushroom mixture, egg mixture, and Cheddar cheese, and spoon into the piecrust. Cover the edges of the piecrust with aluminum foil to prevent the crust from burning.

5. Bake for 50 to 60 minutes, until golden brown and the center is set. Cool for 10 minutes and cut into 8 wedges.

Parmesan Herb Loaf

If you follow my blog you know that I tend to try out a lot of Food Network recipes. It’s one of my go-to stops for looking for a recipe when I have something in mind and since I receive their monthly magazine it’s hard to resist the amazing recipes they include each month. Also included each month is a tear out booklet with 50 recipes designated to a specific thing… for the October issues it was 50 Quick Breads. And I was quick to try out one of those breads, the Parmesan Herb Bread to go along with the soup I posted about yesterday.

IMG_5607

To begin I caramelized two onions on medium-low heat for about 30 minutes.

IMG_5582

Following that I whisked sour cream, vegetable oil and eggs together in one bowl.

IMG_5585

In another bowl I combined flour, grated parmesan cheese, sugar, chopped rosemary, baking powder, lemon zest, baking soda, salt and pepper and finally the caramelized onions. If you are wondering why the onions were mixed in to the flour mixture as opposed to the egg mixture it’s because coating the onions with the flour will prevent them from sinking to the bottom of the bread. Hence they will be evenly distributed throughout the bread.

IMG_5588

After that I folded the wet ingredients into the dry ingredients.

IMG_5595

I then poured the batter into my prepared loaf pan – I lined it with parchment paper and sprayed it with baking spray – and baked it in a 350 F preheated oven for 40 minutes.

IMG_5598

I let the bread cool in the pan for about an hour and then removed it and let it cool completely on a wire rack.

IMG_5601

Then it was time to slice it up… As you can see each slice had a nice amount of onions throughout it as opposed to just on the bottom. This bread was super simple to make; granted waiting for the onions to caramelize does take some patience but the end product is definitely worth it. It was incredibly moist and flavorful, it reminded me of Thanksgiving!

IMG_5618


Parmesan Herb Bread

Ingredients:

2 onions sliced and caramelized

3/4 cup sour cream

1/2 cup vegetable oil

2 eggs

1 3/4 cups flour

1/2 cup grated parmesan cheese

1 tablespoon sugar

2 teaspoons chopped rosemary*

1 1/2 teaspoon baking powder

1 teaspoon lemon zest

1/2 teaspoon salt

1/2 teaspoon pepper

1/4 teaspoon baking soda

*The original recipe also called for 2 teaspoons of chopped thyme which I omitted

Directions:

1. Preheat the oven to 350 F. Prepare a 9 x 5 loaf pan by lining it with parchment paper, leaving an overhang, and spraying it with baking spray.

2. To caramelize the onions, cook in olive oil over medium-low heat for 30 minutes.

3. Whisk together the sour cream, vegetable oil and eggs in a medium-sized bowl.

4. In a large bowl whisk together the flour, grated parmesan, sugar, chopped rosemary, baking powder, lemon zest, salt, pepper and baking soda. Add in the onions.

5. Fold the wet ingredients into the dry ingredients and pour the batter into the prepared pan and bake 40 to 50 minutes until a tester comes out clean.

6. Let cool 1 hour, then remove the bread from the pan and transfer to a wire rack to cool completely.


Roasted Butternut Squash & Sweet Potato Soup

The temperatures have begun to drop and it’s the perfect excuse to make warm and hearty soups, albeit I made this soup last week on a rainy day, which as we all know is also a perfect day for soup. I’ve actually made this soup a few times before after coming across it on a fellow blogger’s blog last year, but, this was the first time that I made the soup by roasting a whole butternut squash as opposed to the prepackaged chopped ones you sometimes see in the produce area and as crazy as it sounds, it made such a difference in the flavor.

IMG_5579

Luckily the butternut squash wasn’t as difficult to slice as the pumpkins were for the homemade puree I made. Granted the two slices weren’t perfectly equal but they were close enough. After I sliced them I cleaned out all of the pulp and seeds and placed the two halves on a baking sheet and drizzled them with olive oil and a pinch of salt and pepper. I roasted them in a 425 F preheated oven for just shy of an hour, until they were fork tender.

IMG_5591

Along with the butternut squash I also roasted a large sweet potato which I peeled and cubed, the roasting time for the potato was considerably less, about 20 minutes. Once the butternut squashed cooled I removed the peel and chopped it into cubes as well. Of course I couldn’t help but trying a piece and it was absolutely delish. Roasting vegetables really brings out their inner sweetness.

IMG_5605

I then gathered all of the ingredients I needed for the soup along with the squash and sweet potato; 2 diced onions, minced ginger, coconut milk and vegetable stock.

IMG_5606

Now on to making the actual soup… I began by sautéing the onion and ginger until the onions were translucent. I then added in the cubed squash and sweet potato and finally the vegetable stock. Once I brought it to a boil over medium heat I reduced the heat to low and let the soup simmer for 20 minutes.

IMG_5621

And finally using a handheld blender (immersion blender) I pureed the soup until it was smooth and then stirred in the coconut milk.

IMG_5624

I cannot say enough good things about this soup… There is sweetness from roasting the squash and the sweet potato and a hint of ginger that makes this soup so delicious. Another plus, it’s great for many who follow different types of diets… Its vegan, gluten-free, dairy-free and all around healthy. Even those of you who are not keen on veggies will find this soup tasty!

IMG_5636

Roasted Butternut Squash & Sweet Potato Soup – adapted from here

Ingredients:

1 butternut squash sliced in half and pulp and seeds removed

1 large sweet potato, peeled and cubed

2 medium-sized onions, peeled and diced

2-inch piece of ginger, peeled and minced

4 cups vegetable stock

3/4 cup coconut milk

Kosher salt and fresh ground pepper

Olive oil

Directions:

1. Preheat oven to 425 F.

2. Drizzle olive oil over squash and sweet potato; add a pinch of salt and pepper. Place squash cut side down onto a baking sheet. On another baking sheet lay out the sweet potatoes. Cook the sweet potatoes for about 20 minutes, or until fork tender. Cook the squash for about 50 minutes, once again until fork tender. Remove from the oven and let cool for a few minutes.

3. In a large pot, heat a tablespoon olive oil over medium heat. Add the onion and ginger and sauté for 5 minutes, or until the onions are translucent.

4. Remove the peel from the squash and roughly cut it into large cubes and add it to the pot with the onions and ginger along with the sweet potato.

5. Add the vegetable stock and bring to a boil. Lower heat and let the soup simmer for 20 minutes, making sure the squash is tender.

6. Using a handheld blender, puree the soup. Add the coconut milk and stir.


Tomato and Corn Custard Pie

A few weeks ago I posted about a Tomato Fontina Torte with Rosemary Crust that was quite delicious. I got the recipe from a recent issue of Food Network Magazine, well, when I went to put the recipe back into my recipe binder (I’m one of those super-organized individuals) I noticed another recipe that I must have overlooked when I flipped through the magazine, a recipe for a Tomato and Corn Custard Pie that I knew I had to try and finally got around to it earlier this week. It ended up being the perfect combination of sweet and savory.

IMG_5524

To begin I baked the pie crust. I wish I had used my crust cover while baking the crust so it wouldn’t have browned as much during the final cooking with the actual pie in it.

IMG_5537

While the crust was in the oven I prepped all of my ingredients. I began by coring the tomatoes and slicing them into quarters. I then tossed them with kosher salt and spread them on a paper towel lined baking sheet so they could release their juices.

IMG_5528

Next I chopped up 6 scallions and divided them into two bowls and lightly beat three eggs. I took two major shortcuts for this recipe… I used pre-shredded sharp cheddar cheese and instead of using fresh corn I opted to use frozen corn that I steamed in the microwave.

IMG_5533 IMG_5530

Following that I reserved 1/2 cup of the cooked corn in a large bowl and placed the remaining corn, about 1 1/2 cups, in a sauté pan with heavy cream and brought it to a simmer on medium heat.

IMG_5534

I then poured the mixture into the bowl of my food processor and blended it until it was smooth.

IMG_5539

I transferred the pureed corn-heavy cream mixture to the bowl with the reserved corn and whisked in the eggs, half of the cheese and scallions and some fresh ground black pepper.

IMG_5540

I poured this mixture into my cooked pie crust and placed it in a 350 F oven for 35 minutes until it was just set.

IMG_5541

While the custard was cooking in the oven I mixed the remaining scallions and cheese along with panko breadcrumbs and seasoned it with paprika, salt and pepper.

IMG_5548

I reserved 1/4 cup of the mixture and tossed the remaining mixture with the tomatoes.

IMG_5552

Once I removed the pie from the oven I increased the oven temperature to 400 F…

IMG_5549

And then topped the pie with the reserved mixture and placed the coated tomatoes on top of the pie and topped it with the remaining panko mixture left in the bowl. Finally I dotted the top of the pie with a tablespoon of butter.

IMG_5556

I placed the pie back in the oven for another 15 minutes, until the top was golden, and let it cool for a bit before slicing into it.

IMG_5563

Final verdict… Absolutely delicious! The custard is a tad bit sweet because of the corn and the panko breadcrumb topping is on the savory side because of the addition of the scallions, paprika and cheddar cheese. This is a definite winner I can see myself making many times to come!

IMG_5572


Tomato and Corn Custard Pie

Serves 6 to 8

Ingredients:

1 round refrigerated pie dough (half of a 14-ounce package)

2 beefsteak tomatoes (about 12 ounces)

Kosher salt

2 tablespoons unsalted butter

2 ears of corn, kernels cut off (1 to 1 1/2 cups) *I opted to use a 10 ounce bag of frozen corn that I steamed in the microwave)

1 cup heavy cream

3 large eggs, lightly beaten

6 scallions, chopped

1 cup grated sharp cheddar cheese (about 4 ounces)

Freshly ground black pepper

1/2 cup panko breadcrumbs

1 teaspoon chopped fresh thyme*

1/2 teaspoon paprika

Pinch of cayenne pepper*

*I omitted these two spices from my version

Directions:

1. Position racks in the middle and upper third of the oven and preheat to 350 F. Line a 9-inch pie plate with the dough, crimping the edge with your fingers. Poke the bottom of the crust all over with a fork. Line with foil and fill with pie weights or dried beans. Bake on the middle rack until golden around the edge, about 20 minutes. Remove the foil and weights; continue baking until golden all over, about 10 more minutes.

2. Meanwhile, core the tomatoes and cut into 1/2-inch wedges; toss with 1 1/2 teaspoons salt. Spread the tomatoes in a single layer on paper towels to drain until ready to use.

3. Melt 1 tablespoon butter in a medium saucepan over medium heat. Add the corn and cook stirring occasionally, until tender, about 5 minutes. Transfer 1/2 cup of the corn to a large bowl.

4. Add the heavy cream to the saucepan with the remaining corn and bring to a simmer. Carefully transfer the mixture to a blends and puree until smooth; transfer to the bowl with the corn. Whisk in the eggs, half each of the scallions and cheese, and a few grinds of black pepper; pour into the crust. Bake of the middle rack until the custards is just set, 35 to 40 minutes. Remove from the oven and increase the temperature to 400 F.

5. Mix the remaining scallions and cheese, the panko, thyme, paprika and 1/4 teaspoon each salt and pepper in a bowl. Sprinkle 1/4 cup of the mixture on top of the pie. Pat the tomato wedges with paper towels to absorb the excess moisture, then coat with the remaining panko mixture and arrange on top of the tart. Sprinkle any remaining panko on top; dot with the remaining 1 tablespoon butter. Return to the oven on the upper rack and bake until the top is golden, about 15 minutes. Let cool 30 minutes before slicing.


Homemade Pumpkin Puree

While at the supermarket a few weeks ago I came across sugar pumpkins on sale, I thought for a second or two of buying them and making my own pumpkin puree but it was just a fleeting thought at the moment and I stuck with the list of items I had in hand. Once I got home though I was curious as to how difficult it would be to turn those small pumpkins into puree and I was pleasantly surprised at how simple it would be, well, minus the elbow grease and patience. So, a few days later I picked up two pumpkins and got to work.

IMG_5173

I began by slicing the top of the pumpkin off. I should say I sawed it off as I did mention it required some elbow grease.

IMG_5264

Next, I sliced the pumpkin in half. This was by far the most difficult part. Since my knives were sharpened I probably just need some refresher tips on knife skills.

IMG_5266

And then scooped out all of the seeds and pulp.

IMG_5268

Following that I sliced the halves into halves – or simply put I cut the pumpkin into quarters. I then repeated these steps with the second pumpkin and placed all of the quarters on a baking sheet.

IMG_5272

I roasted the pumpkin in a 350 F preheated oven for just shy of an hour until the pieces were fork tender. And I must say the smell of pumpkin in my house was heaven during that hour.

IMG_5284

After letting the pieces cool for a few minutes I was easily able to remove the skin from the pumpkin.

IMG_5288

And then it was time for the simplest part – well besides roasting the pumpkin – to making the puree, the blending.  I put a few pieces at a time in the bowl of my food processor and added a few tablespoons of water to help the process along.

IMG_5289

All in all I ended up with about 8 cups of fresh pumpkin puree.

IMG_5290

I refrigerated half of it and froze the other half in sandwich bags – putting a cup of puree in each of the bags.

IMG_5296

And since I didn’t want that refrigerated puree to go bad I was quick to whip up some delicious treats with it.

There was pumpkin pie, which I must say definitely had a much richer taste with the fresh puree.

IMG_5324

Pumpkin Ravioli using wonton wrappers…

IMG_5345 IMG_5344

And my favorite, a homemade Pumpkin Spice Latte. I usually get one or two of these during the Fall at Starbucks but the coffee flavor is such a turn off for me since I am not a coffee drinker that being able to make this at home and control the coffee amount was perfect!

IMG_5415


Pumpkin Ravioli – Adapted from here and here

Ingredients:

1 cup fresh (or canned) pumpkin puree

4 tablespoons unsalted butter

1 shallot minced

3 tablespoons heavy cream

1/3 cup parmesan cheese grated

pinch of nutmeg

salt and pepper

Directions:

1. Melt butter in a large sauté pan over medium heat. Add the shallots and sauté for 1 minute.

2. Add the pumpkin and cook until the pumpkin has absorbed the butter.

3. Season with salt and pepper and stir in the cream.

4. Remove from the heat and add in the cheese and nutmeg and stir until both are incorporated.


Pumpkin Spice Latte – Recipe from October 2014 Food Network Magazine

Ingredients:

3 tbsp. sugar

2 1/2 tablespoons pumpkin puree

1 tablespoon vanilla extract

heaping 1/4 teaspoon cinnamon

heaping 1/4 teaspoon ginger

1/4 teaspoon nutmeg

2 1/4 cup milk (I used whole milk)

1/4 cup espresso (or strong brewed coffee)

whipped cream, for topping

Directions:

1. Combine the sugar, pumpkin puree, vanilla, cinnamon, ginger and nutmeg in a small saucepan.

2. Whisk in milk and espresso and bring to a simmer over medium-high heat.

3. Pour into 2 mugs and top with whipped cream and more nutmeg.


If you would like a more detailed description of how to make you own pumpkin puree check-out the directions I followed here from the Pioneer Woman’s (Ree Drummond) website.


Sweet & Sour Chicken

The past few days I have been on a roll with cooking dinner. It probably helped that I went through my recipe binder and planned out a few meals for the week. Today I am going to share with you a quick and simple recipe for Sweet & Sour Chicken that I got from an issue of Rachael Ray Magazine a while back.

I usually try to do all of my prep-work for whatever I am cooking or baking before getting started, this way I don’t miss anything and I can work smoothly through the recipe. For this Sweet & Sour Chicken recipe I prepped my ingredients by doing the following: cut a pound of boneless skinless chicken thighs into 3/4 inch pieces which I then coated with cornstarch and soy sauce, chopped up a green bell pepper into 3/4 inch pieces, minced up a tablespoon worth of fresh ginger, and finally, drained the pineapple juice of an 8-ounce can of pineapple chunks and set the chunks aside while whisking the juice along with cornstarch, soy sauce, ketchup, sugar, cider vinegar and sugar.

IMG_5231

It was then time to start cooking. I began by cooking the chicken in a large skillet over medium-high heat that I coated with canola oil. Once the chicken was browned I added in the minced ginger.

IMG_5234

Next up I added in the pineapple chunks and the bell pepper and continued cooking the mixture until the peppers were just beginning to get tender.

IMG_5235

And lastly I added in the ketchup mixture and brought it to a boil and cooked it until the sauce thickened. I then lowered the heat to low and continued cooking it for about another 15 minutes to be sure that the chicken was cooked through.

IMG_5238

Then it was time to enjoy my homemade take-out cuisine. I served the chicken with basmati rice and it was the perfect complement. While you do get some hints of the sour components – the soy sauce and cider vinegar – of the chicken the sweet part is definitely the stronger flavor of the two. I am definitely not complaining though… This is one dish I can see myself making quite a few more times.

IMG_5240


Sweet & Sour Chicken

Ingredients:

1 lb. boneless skinless chicken thighs, fat trimmed, then cut into 3/4-inch pieces

6 teaspoons cornstarch

2 tablespoons lower-sodium soy sauce

1/3 cup ketchup

1/4 cup sugar

1/4 cup cider vinegar

1 can (8-oz.) pineapple chinks in juice, drained, juice reserved

2 tablespoons canola oil

1 tablespoon minced ginger

1 green bell pepper, cut into 3/4-inch pieces


Directions:

1. In a medium bowl, combine the chicken, 4 teaspoons cornstarch and 1 tablespoon soy sauce. In a small bowl, whisk the remaining cornstarch and soy sauce, with the ketchup, sugar, cider vinegar, and pineapple juice.

2. In a large skillet, heat the oil over medium-high heat until it shimmers. Add the chicken and cook, turning once, until browned, about 4 minutes. Add the ginger and cook, stirring often, until fragrant, 30 seconds. Add the pineapple chunks and bell peppers. Cook, stirring occasionally, until the pepper is crisp-tender, about 3 minutes. Stir in the ketchup mixture, bring to a boil and cook until sauce thickens, about 1 minute.

Chicken Parm Pizzas

Aaaahhh pizza. What is there not to like about it? I have been a pizza lover since a very young age. I can remember quite a few times when I was younger (I am talking under the age of 10) when I didn’t want to eat whatever my mom cooked for dinner so then dinner for me would be a slice of pizza. When I got to college, pizza was one of the tastiest (and safest) things to eat in the cafeteria. Thankfully they switched it up every day with Hawaiian pizza, pepperoni pizza, white pizza, focaccia pizza and so forth. So, what if you combined pizza – one Italian classic – with another classic, Chicken Parmesan? Well, you would get Chicken Parm Pizzas. And no, it’s not just a breaded chicken cutlet shaped into a circle. The key to this classic combo mash-up is using ground chicken to get that perfectly round pie.

IMG_5201

To begin I mixed a pound of ground chicken with Italian herb blend, salt, garlic and onion powders. I divided the mixture in half and then pressed it into two 8-inch cake plans that I lined with plastic wrap. Following that I covered the two pans with plastic wrap and placed them in the freezer for 4 hours.

IMG_5181

Before removing the ground chicken from the freezer I preheated the oven to 400 F and assembled the three separate coatings I would need for the chicken: Wondra Flour, 3 eggs lightly beaten and a breadcrumb – cheese mixture.

IMG_5186 IMG_5189 IMG_5188

The frozen chicken…

IMG_5190

Which I then coated in the flour, then in the eggs and finally in the breadcrumb – cheese mixture and then placed on a baking sheet.

IMG_5191

I then heated olive oil in a large skillet over medium-high heat and cooked the chicken rounds until they were golden. After draining them on paper towels I transferred them to a wire rack set inside a rimmed baking sheet.

IMG_5193

And then it was time for them to become “pizza.” I topped them with marinara sauce and sprinkled them with mozzarella and Parmesan cheese.

IMG_5195

I cooked them on the wire rack set inside the baking sheet for about 15 minutes, until the cheese was melted and the chicken was fully cooked through.

IMG_5202

While Chicken Parmesan is customarily served with pasta I opted to serve these pizza versions with steamed broccoli.

IMG_5216

Overall, these were quite tasty, but, I didn’t find them to be better than your typical Chicken Parmesan that definitely doesn’t require as much time or work. It’s definitely a nice twist on two classics though. One thing though, if I do make them again I will reduce the salt content in the seasoning for the ground chicken from a teaspoon to 1/2 teaspoon (or even a 1/4) since I did find them to be a bit salty.


Chicken Parm Pizzas

Ingredients:

1 1/4 lbs. ground chicken

1 1/2 teaspoon Italian herb blend

3/4 teaspoon garlic powder

3/4 teaspoon onion powder

3 eggs

1/4 cup Wondra flour

1 cup seasoned Italian breadcrumbs

1/2 cup panko

4 tablespoons grated Parmesan*

4 tablespoons grated pecorino*

1 cup extra virgin olive oil

1 cup shredded mozzarella

1/2 cup marinara sauce

*I didn’t have pecorino so I opted to use 8 tablespoons of Parmesan

 Directions:

1. Line 2 eight-inch cake pans with plastic wrap. In a medium bowl, mix the chicken, 1 tsp. herb blend, 1 tsp. salt, and 1/2 tsp. each garlic and onion powders. Divide chicken mixture and press into the prepared pans. Cover with plastic wrap. Freeze 4 hours.

2. Preheat the oven to 400 F. In a shallow bowl, beat the eggs. Place the flour on a large plate. On another plate, combine the breadcrumbs, panko, 2 tbsp. Parmesan, 2 tbsp. pecorino, and the remaining Italian herb blend and garlic and onion powders. Unwrap the chicken; remove from the pans. Coat the chicken in the flour, then the egg, then the breadcrumb mixture. Transfer to a baking sheet.

3. Set a rack inside a rimmed baking sheet. In a skillet, heat the olive oil over medium high. Cook 1 chicken round, turning once, until golden, about 4 minutes. Transfer the patty to paper towels. Repeat with the second chicken round. Transfer both to the rack.

4. Combine the remaining cheeses. Spread the marinara on the chicken, leaving a 1-inch border; sprinkle with the cheese mixture. Bake until the chicken is cooked through, about 15 minutes.