Cookie Palooza: Cranberry Pecan Chocolate Chip Cookies

Welcome to day 4 of Cookie Palooza. Today’s cookie is basically a kitchen sink cookie. Don’t worry, there are no food scraps in this cookie, but, there are a bunch of add-ins, hence the kitchen sink analogy. There are pecans, dried cranberries, semi-sweet chocolate chips, milk chocolate chips, oatmeal and coconut. And while I know many people are not a fan of coconut (it seems people either love it or hate it) don’t fear, this cookie does not have a coconut flavor. The coconut adds texture to the cookie. And I am sure I may have lost some of you already as I know people are not always fond of a cookie with texture, especially a cookie like this that already has so much going on, but, trust me, all of the ingredients work so well together you will forget that there may be an ingredient or two you don’t like. Unless you have an allergy to one of them of course.

I got this recipe from Food Network’s 50 Chocolate Chip Cookies, and while there were quite a few among those 50 that sounded yummy I opted to make this one because it reminded me of another cookie I like to make around the holidays, a White Chocolate Chip Cranberry Cookie, that I just realized I have never posted about. I’ll have to do that this holiday season as I am sure I will be making it again. Something I did realize though going through some old posts, I need to stop taking pictures at night. Unfortunately I do a lot of baking at night, but, I will have to refrain from taking picture then because they just do not post well.

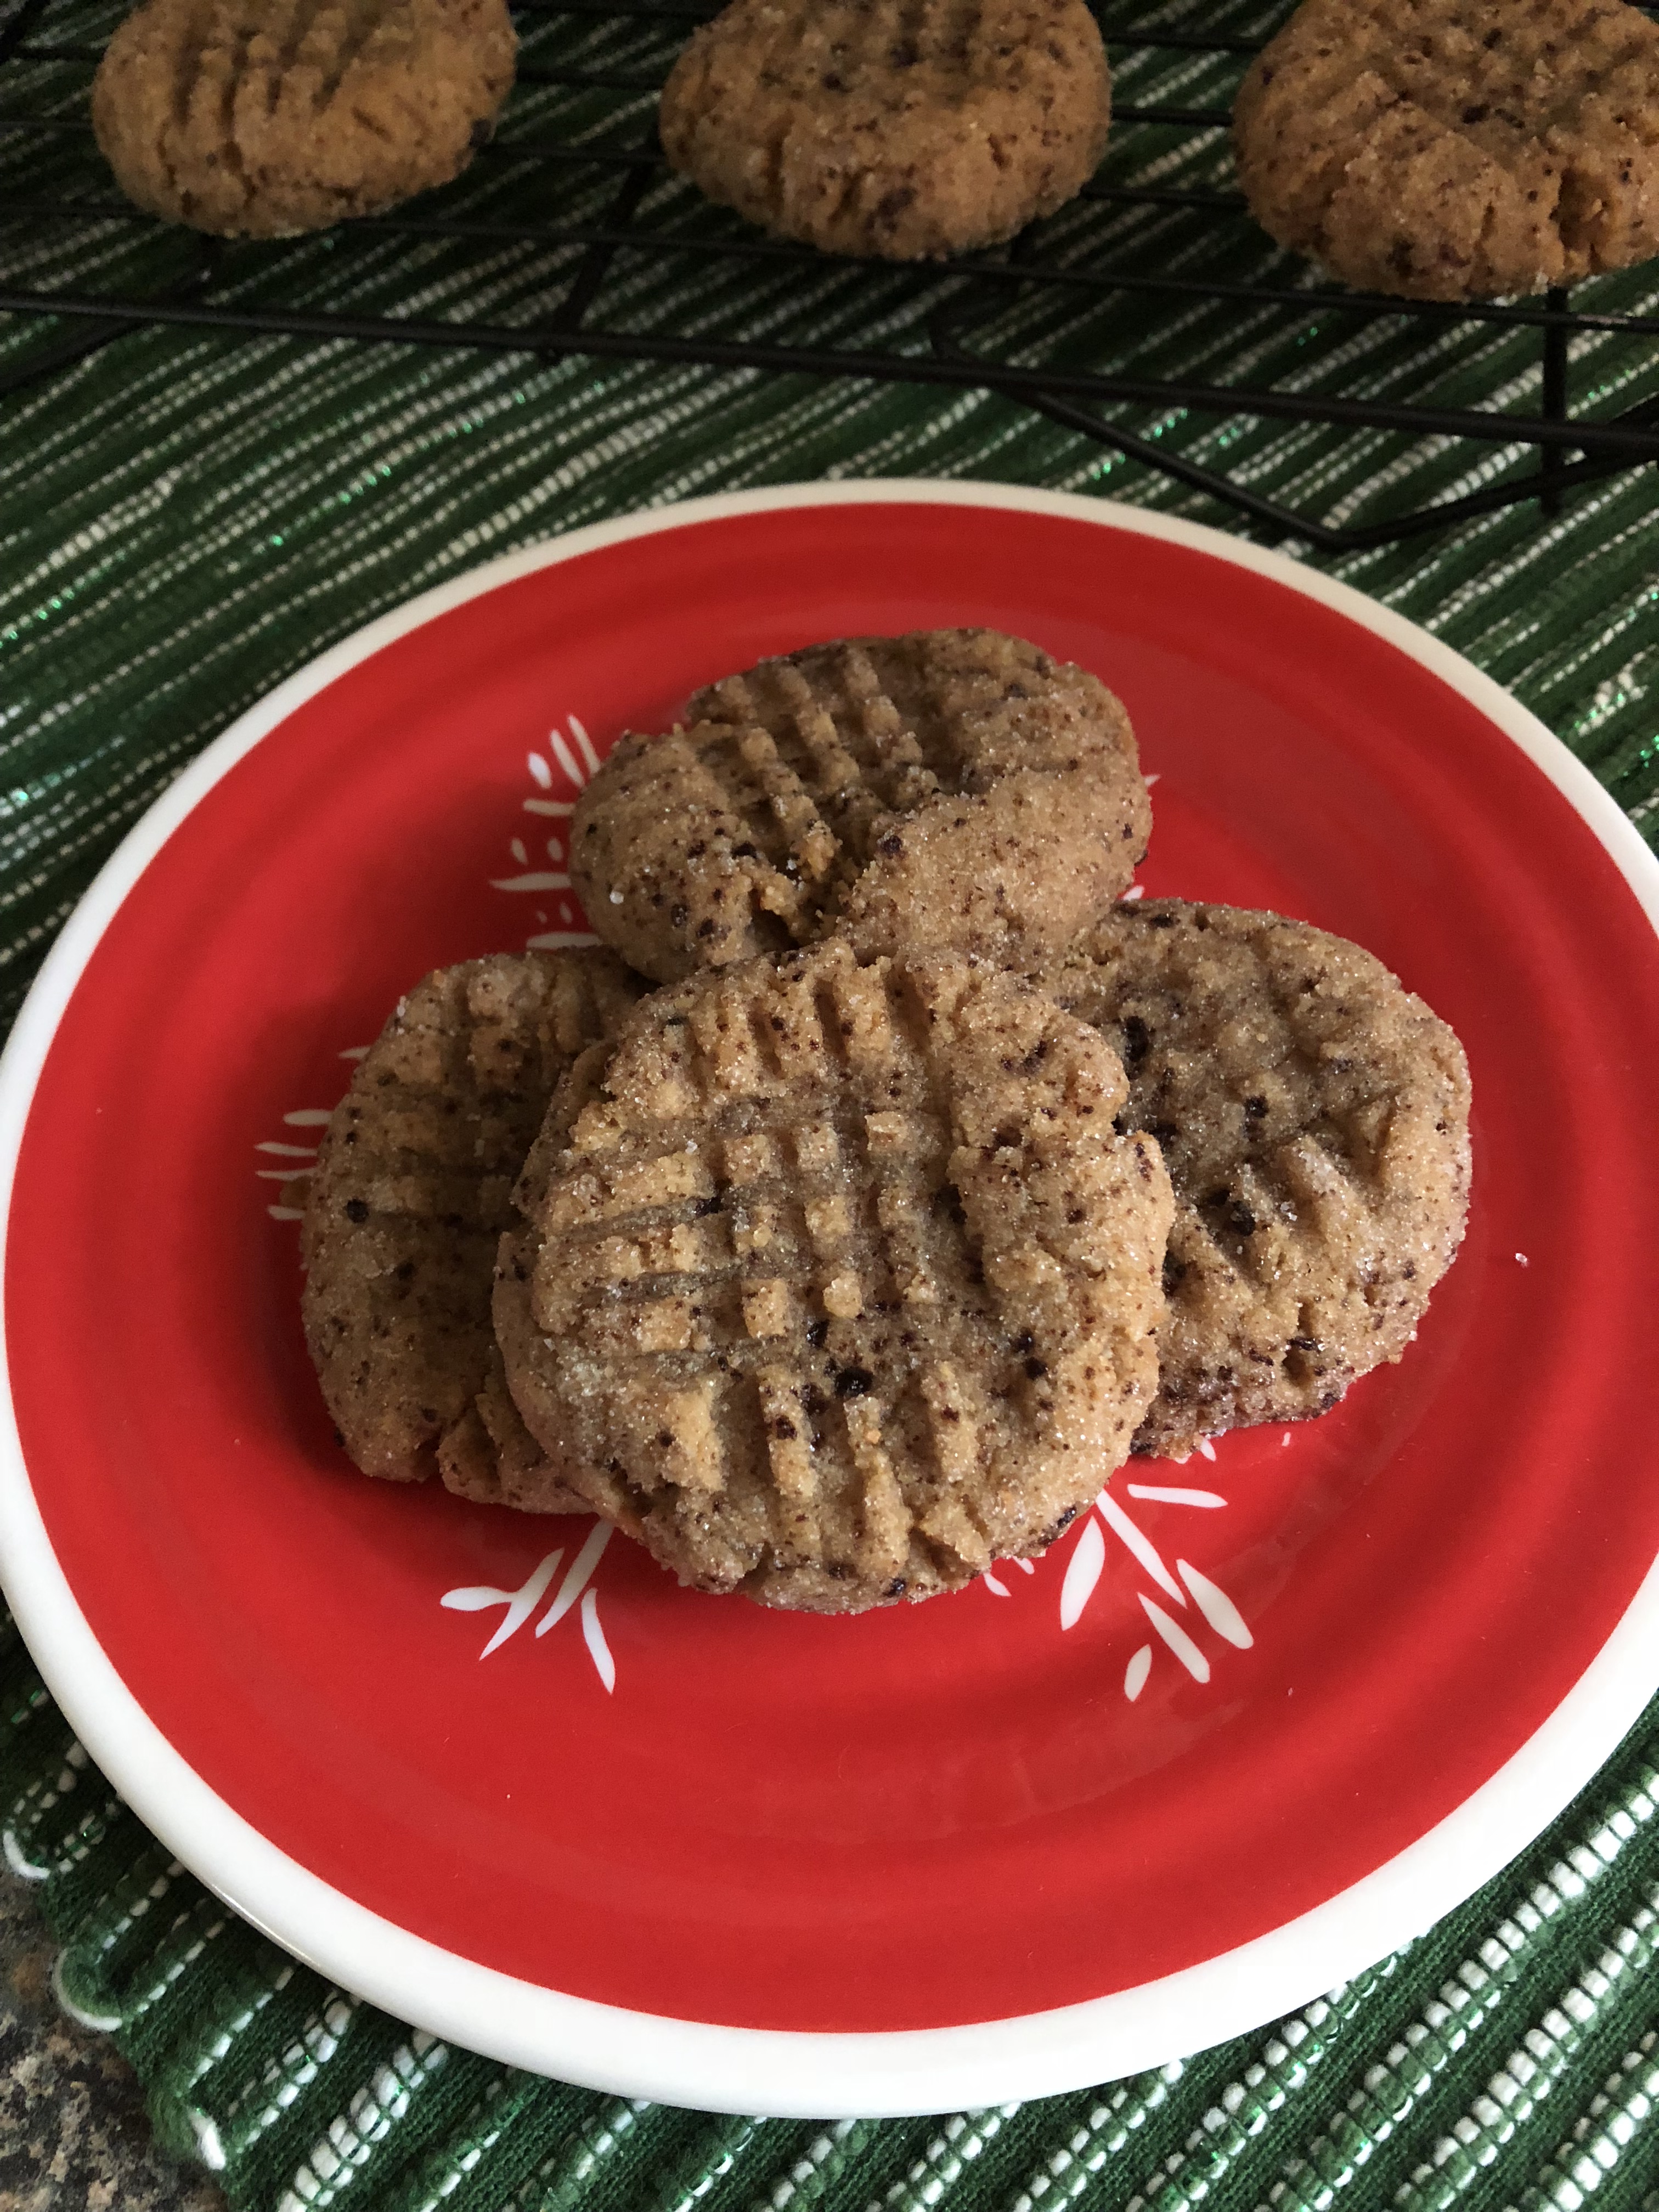
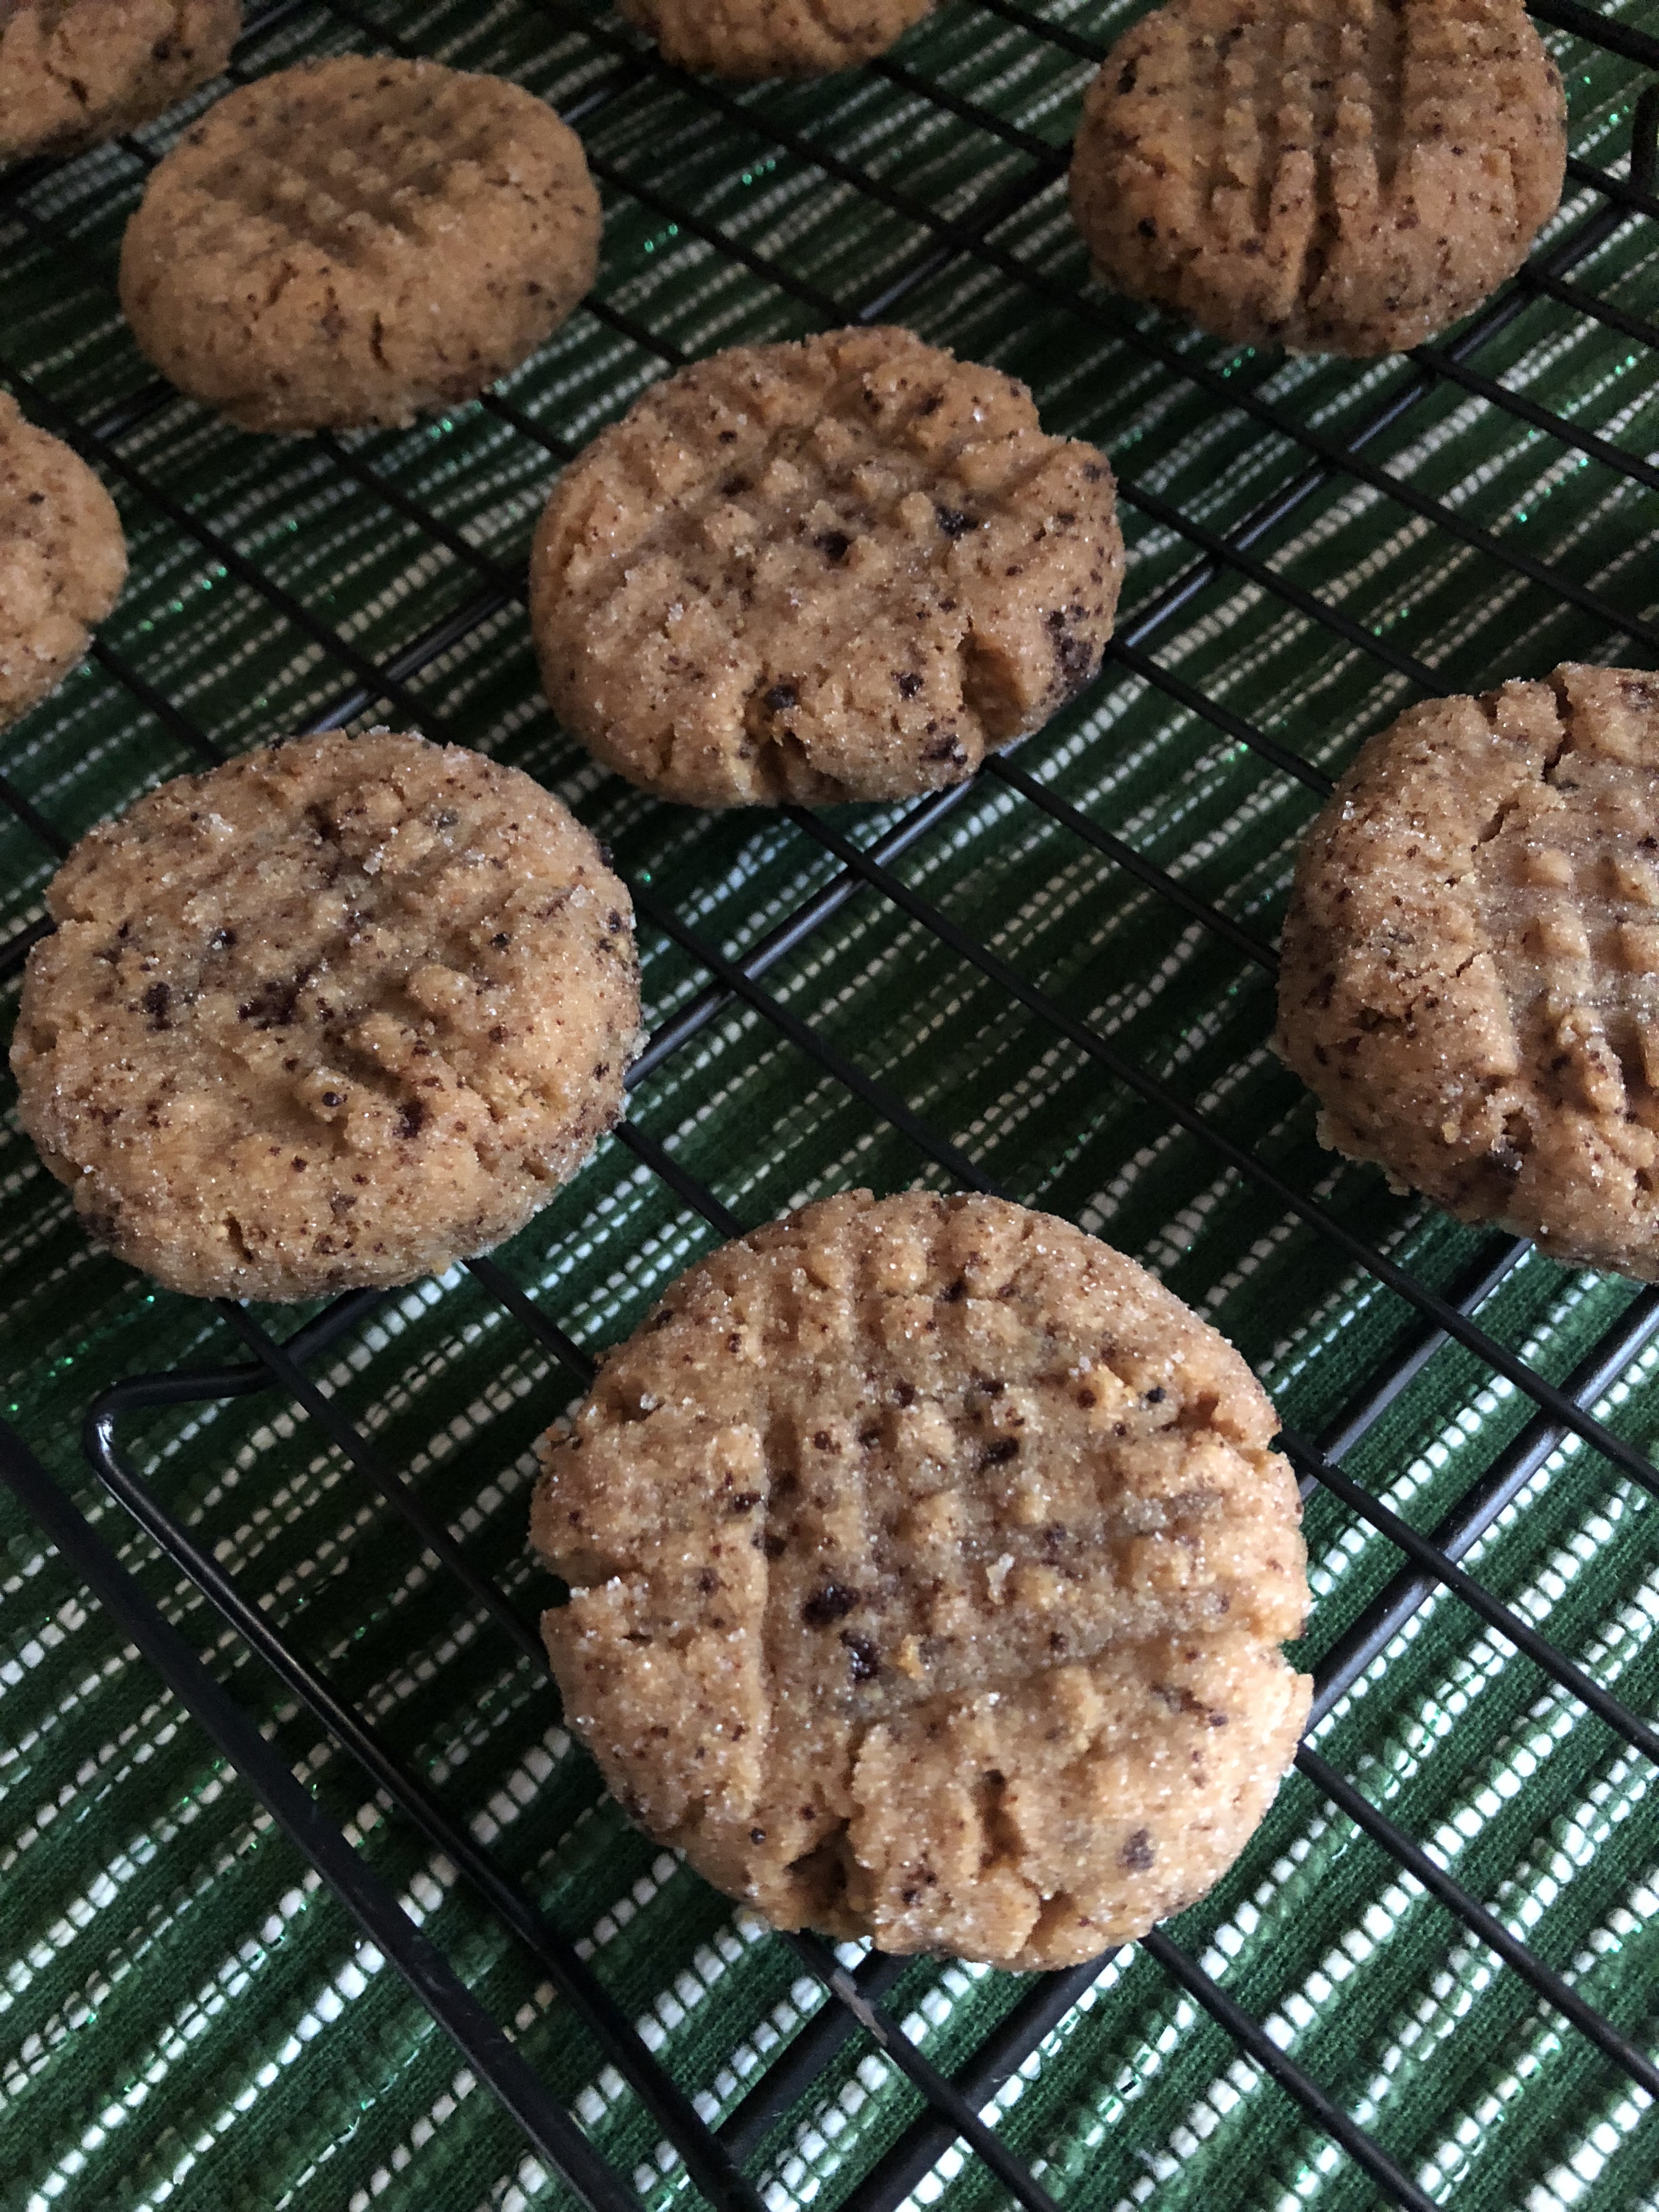
The recipe called for 1/4 cupfuls of dough (about an ice cream scoop size) to make about 10 cookies, I opted to use a cookie scoop to make mine. Which yielded about 30 cookies. A nice amount to gift or to have on hand for a holiday guests.


Cranberry Pecan Chocolate Chip Cookies

Ingredients:

1 1/2 cups flour

3/4 teaspoon baking soda

1/2 teaspoon salt

10 tablespoons unsalted butter, at room temperature

1 cup brown sugar

1 large egg, at room temperature

1 teaspoon vanilla extract

2/3 cup semi-sweet chocolate chips

2/3 cup milk chocolate chips

2/3 cup old fashioned oats

2/3 cup sweetened shredded coconut

2/3 cup dried cranberries

2/3 cup chopped pecans


Directions:

Preheat oven to 350 F and line two baking sheets with parchment paper.

Whisk the flour, baking soda and salt together in a medium bowl and set aside.

In a large bowl beat the butter and sugar with a mixer on medium-high speed until light and fluffy. Beat in the egg and vanilla. Reduce the speed to low and beat in the flour mixture until just combined. Stir in the remaining ingredients.

Using a cookie scoop, drop the dough 2 inches apart on the prepared baking sheets. Bake for 12 to 15 minutes, until set around the edges. Let cool for 10 minutes on the cookie sheets then transfer to a wire rack to cool completely.

Recipe from Food Network

Cookie Palooza: Checkerboard Cookies

It’s Day 3 of Cookie Palooza and once again I am bringing you a cookie that looks difficult to make but really isn’t, a Checkerboard Cookie. Normally I avoid making slice and bake cookies. Mine never end up looking like a perfect circle, but more like an oval. They taste good, but, the shape is off. I prefer drop cookies and occasionally I will make roll-out cookies. But, I am trying to step up my baking and challenge myself a little more and figure out ways to overcome the pitfalls that I encounter when I try different things in the kitchen. Sounds a little silly since I am just talking about simple cookies, but, it’s a good attitude to adopt to face other challenges that life may throw at you. So, I figured these Checkerboard Cookies were a good way to overcome my avoidance of slice and bake cookies. They are simple to make, are pretty forgiving in terms of their shape once sliced and are pretty impressive looking.

To make the dough I combined butter, sugar and vanilla extract and beat it until it was light and fluffy. I then added in flour and an egg and continued mixing until the dough came together. Finally, I divided the dough in half and transferred one half to a piece of parchment paper and left the other half in the bowl I made the dough in. To the bowl I added unsweetened dark cocoa powder and used a rubber spatula to fold the powder into the dough making sure it was fully incorporated and no streaks of the plain dough remained.

Next, I divided the plain dough in half and rolled each piece into a 12-inch log. I did the same with the chocolate dough. I placed one plain log and one chocolate log next to each other on the piece of parchment paper and then placed the remaining 2 logs on top of them alternating the dough. I then wrapped the dough in the parchment paper and rolled it a few times to smooth the dough and to make sure all 4 pieces were pressed together well. Finally I placed the dough in the refrigerator until it was firm, at least an hour.

Once firm, I removed the dough from the refrigerator and sliced a small piece from both ends of the log so it would have straight ends. Next, using a ruler and a sharp knife I scored the dough before actually slicing the cookies. You want to work pretty fast as the dough will begin to soften and your slices will become more oval-like than square as the dough warms up. If this happens you can place the dough back in the refrigerator for a few minutes to firm up again, or, simply flip the log so the bottom is now the top.


I placed the slices on a parchment lined baking sheet and placed it in the refrigerator for 10 minutes before baking in a 350 F preheated oven for 12 minutes.

While some of my cookies didn’t have a perfect checkerboard look to them – partly because each of my logs wasn’t the same width – they did taste delicious and the shape wasn’t completely off.  These would be a nice addition to any cookie platter you are making this holiday season. Here’s a fun idea, instead of mixing half of the dough with cocoa powder you could tint one half of the dough red and the other green for a real festive checkerboard cookie!

Checkerboard Cookies

  • Servings: 40 cookies
  • Print

Ingredients:

1 stick of unsalted butter, at room temperature

3/4 cup sugar

1 teaspoon vanilla extract

1 3/4 cups flour

1 egg

2 tablespoons unsweetened dark cocoa powder


Directions:

In a large bowl beat the butter, sugar and vanilla extract with a hand mixer on medium speed until light and fluffy, about 2 minutes.

Sift the flour 3 times and add half of it to the butter mixture, beating until just combined. Add the remaining flour and the egg and beat until combined, about 2 minutes.

Divide the dough in half and transfer one piece to a sheet of parchment paper. Leave the other half in the bowl and add in the cocoa powder. Using a rubber spatula, fold the dough and cocoa powder together until no streaks of the plain dough remain.

Divide each piece of dough (plain and chocolate) in half. Roll each of these pieces into a 12-inch log. Place one plain and one chocolate log next to each other on the piece of parchment paper. Place the other two logs on top of them, alternating the pattern to create the checkerboard pattern. The chocolate log should be on top of the plain log and the plain log should be on top of the chocolate one. Wrap the log in the parchment paper and press each of the logs together while rolling and smoothing the edges. Place in the refrigerator until firm, at least an hour.

Preheat the oven to 350 F and line two cookies sheets with parchment paper.

Remove the dough from the refrigerator and unwrap it. Using a sharp knife (and a ruler if necessary) slice the log into 1/4 inch slices and place on the parchment lined cookie sheet, about 2 inches apart. Refrigerate for 10 minutes.

Bake until the cookies are just beginning to turn golden brown around the edges, 10 to 15 minutes. Let cool on the baking sheets for five minutes and then transfer to a wire rack to cool completely. Store in an airtight container at room temperature.

Recipe from Nik Sharma

Cookie Palooza: Bakery Style Butter Sandwich Cookies

Welcome to Day 2 of Cookie Palooza 2018! Today I am bringing you a traditional butter bakery cookie. Not the round ones covered in sprinkles, but the long sandwich ones that are filled with jam, dipped in chocolate and then rolled in sprinkles. YUM! It’s actually one of my favorite cookies, but it wasn’t always. I used to buy a package of butter cookies from my local Costco and I would always eat the round ones with the sprinkles from the package, leaving the sandwich ones for my parents to eat. Then one day I tried them and realized that they tasted much better than the other ones. Unfortunately Costco changed their supplier and the new ones they carry do not taste half as good. They taste more artificial. Thankfully this homemade version fills the void.

You may be slightly intimidated to make these cookies, but don’t be. They are super simple and don’t require any special ingredients. The hardest part is squeezing the dough out of the piping bag onto the prepared baking sheet. But after a few squeezes the dough softens up and it becomes easier and you soon get the hang of it. Using a Wilton 6B Tip I piped the dough into 2-inch pieces on a parchment lined cookie sheet. To end the dough for each cookie you can cut them with a knife or scissors. What I did is a little harder explain. I kind of nudged the tip into the cookie sheet to end it. I tried using a knife and it just wasn’t working for me. After you have piped all of your cookies bake them in a 350 F preheated oven for about 12 minutes. Let them cool completely and then the fun begins, the assembling.

Before assembling I did my best to par up similar sized cookies. If they were off a little in length I dipped the mismatched end in the melted chocolate so no one would be the wiser. Next, I filled a piping bag with about half a cup of seedless raspberry jam to a piping bag (you could also use a small sandwich bag) and snipped off a small piece of the end. I piped a single line of jam down the center of one half of each cookie. I didn’t want to add too much jam as I didn’t want the jam to ooze out of the sides once the cookie was pressed together.

Once I had all of my cookies sandwiches together I melted a bag of semi-sweet chocolate chips in the microwave in a deep enough bowl that would allow me to dip the cookies at least a third of the way in. To ensure that I didn’t scorch the chocolate, I melted it at 30 second intervals and stirred between each. Once the chocolate was about 3/4 quarters of the way melted I continued stirring it to melt the rest of it. You could also melt the chocolate in a small saucepan on your stovetop if you choose. Just keep an eye on it so it doesn’t burn. In a shallow bowl I poured out some sprinkles- you will need a decent amount. I also lined two baking sheets with wax paper to place the cookies once they were decorated. I began by dipping a cookie in the chocolate, allowing the excess to drip off. I actually used a knife to wipe off some of the excess. If you leave too much chocolate on the sprinkles will just slide off. Next I rolled the cookie in the sprinkles and placed it on the prepared baking sheet. Once I was done I placed the baking sheets in the refrigerator for a few minutes so the chocolate could set.

And there you have it…. Easy to make fancy bakery cookies that will impress everyone you share them with!

Butter Sandwich Cookies

Ingredients:

2 sticks unsalted butter, at room temperature

2/3 cup sugar

2 large egg yolks

1 teaspoon vanilla extract

1/2 teaspoon salt

2 cups flour

Filling & Decorating:

1/2 cup jam (flavor of your choice)

1 cup sprinkles

12 ounce bag of semi-sweet chocolate chips

Directions:

Preheat oven to 350 F and line two baking sheets with parchment paper.

Combine the butter and sugar in a large bowl and beat on medium speed with a hand mixer until well combined. Add the egg yolks, vanilla extract and salt and beat until combined, scraping the bowl as necessary. Add the flour and mix until just combined. Fit a star tip with a 1/2-inch opening on a piping bag and snip off the end. Transfer the batter to the bag.

Pipe the dough into 2 inch long segments about 1 inch apart on the prepared baking sheet. You can use a knife or scissor to cut the pieces. Bake the cookies for 11 to 13 minutes, until they are golden at the edges.

Let them cool for a few minutes on the baking sheet and then transfer to a wire rack to cool completely. Set aside the parchment lined baking sheets.

Place the jam in a sandwich bag (or another piping bag) and place the sprinkles in a shallow dish.

Once the cookies are cool, flip half of them over and snip a small corner of the jam filled bag. Squeeze a little jam down the center of each flipped cookie. Don’t squeeze too much jam on the cookies as you don’t want it to ooze out when sandwiched. Top with the other half of the cookie.

Melt the chocolate chips in the microwave or a small saucepan until they are three-quarters of the way melted and then stir to melt it completely. Place the chocolate in a bowl deep enough for dipping the cookies about a third of the way in. Dip the sandwiched cookies into the melted chocolate, letting the excess drip off, and then roll in the sprinkles. Place on the baking sheet. Once all cookies have been decorated place the cookie sheets in the refrigerator so the chocolate can set.

Recipe from Smitten Kitchen

Cookie Palooza: Peanut Butter Espresso Cookies

It’s that time of year again… Everywhere you look there is sweet treats to be had or you yourself are about to start some holiday baking. Well, I am here to help. It’s my 3rd annual Cookie Palooza and I am kicking it off with Peanut Butter Espresso Cookies. Before you make a face or think I am a little nutty (some pun intended with that one) I will say don’t knock the flavor combination until you try it. It’s actually quite good and the coffee flavor becomes more pronounced – but not in a bad way – by the second day. And if you’re planning on leaving cookies out for Santa these may help him get the jolt of caffeine he needs to deliver all those toys (or for you to put together those impossible toys you just don’t want to deal with on Christmas morning and would rather have assembled and ready to go with a bow on the under the tree).

What’s really nice about these cookies that the recipe only requires one bowl (less clean-up is always a good thing) to come together. No mixing flour and spices in a separate bowl as these cookies are gluten free. So, those of you who have a gluten allergy can partake in your holiday cookie indulgence without worry. The key to these cookies is natural peanut butter. The exact amount is 16 oz. and thankfully that’s an easy sized jar to find at your local supermarket, I used Smucker’s branch. Make sure you read the label on the brand you buy. The first brand I picked up said peanut butter spread and it was labeled as natural peanut butter. Peanut butter spread is not the same as actual peanut butter. It actually contains about 30% less peanuts and that difference can be supplemented with Trans fats that are not healthy.

Natural peanut butter separates so when you open the jar there will be a layer of oil on top. Don’t be concerned with mixing the peanut butter to incorporate the oil. Just pour it into the bowl you’re using to make the dough along with the peanut butter and the remaining ingredients and the oil will incorporate as you mix all of your ingredients together. This is exactly what I did. After making the dough, I then used a cookie scoop to scoop the dough and shaped it into balls that I then rolled in a sugar espresso coating. And for that traditional peanut butter cookie look I flattened the cookies with a crisscross pattern using the tines of a ford. I baked them for 11 minutes in a 350 F preheated oven and then let them cool on the baking sheet for a few minutes before transferring them to a wire rack to cool completely. Definitely allow them to cool for a few minutes before transferring them so the cookies can set. If you transfer them too quickly the cookies will break, you’ll still have delicious cookies, but, they will be more like cookies pieces.

Peanut Butter Espresso Cookies

  • Servings: 28 Cookies
  • Print

Ingredients:

1 16 oz. jar natural peanut butter

1 cup light brown sugar

1/2 cup sugar

2 large eggs, beaten

2 teaspoons vanilla extract

1/2 teaspoon kosher salt

1 tablespoon instant espresso powder*

1/4 teaspoon sea salt

Sugar-Espresso Coating:

1/4 cup sugar

2 teaspoons espresso powder*

*I use Bustelo coffee


Directions:

Preheat the oven to 350 F. Line two baking sheets with parchment paper and set aside.

In a large bowl combine the peanut butter, brown sugar, and sugar and stir with a rubber spatula until combined. Add the eggs, vanilla, salts and espresso powder and continue stirring with the rubber spatula until all of the ingredients are incorporated.

In a small combine the ingredients for the coating.

Using a cookie scoop to scoop the dough and then shape into balls. Rolls the cookies in the sugar-espresso mixture and then transfer to the prepared baking sheets. Place the cookies about 2 inches apart. Using the tines of a fork, flatten each cookie creating a crisscross pattern. Bake in the preheated oven for 10 to 12 minutes. Let cool on the pan for a few minutes before transferring to a wire rack to cool completed.

Recipe from Real Simple

Happy Holidays!

How was your Thanksgiving? Mine was good… Surrounded by loved ones, delicious food and sweet-tooth satisfying desserts. Of course, I did my fair share of baking… Key Lime Pie, Pumpkin-Brownie Swirl Pie, Pumpkin Pie, a Pumpkin Tiramisu Cake and the below Pear Cranberry Pie, just to name a few things.


I’ll admit that I took some major shortcuts when it came to making the crust for this pie. First off, I used a frozen deep dish pie crust as the base and for the lattice pattern I used refrigerated pie crust that I cut into strips to weave and braid and then added a decorative border with leaf cut-outs. I decided to brush the pie with milk prior to baking – I usually use an egg, but, after all of the baking I did I was feeling lazy and didn’t feel like cracking and whisking an egg – so I made sure to dab a little milk under the leaf border so to that the leaves and the lattice and braided strips would adhere to the crust. One other thing to note, I let the frozen crust sit out at room temperature for a few minutes after filling it so that it would be easier for my top crust stick to it. As for the filling, if you’ve never had pear pie you should definitely try one. For me, pear pie isn’t as sweet as apple pie and while I do bake a lot I actually don’t like things that are overly sweet. If you want the best of both worlds, try this Brown Butter & Vanilla Pear Pie I made last year for Thanksgiving. While the filling consists mainly of pears, there is 1 apple in the mix. As for the recipe for this or, I got it from the premiere issues of Magnolia Journal last year. You can find the recipe here.

Now that Thanksgiving is over I am looking forward to Christmas and New Year’s. I can’t believe how quickly the year has flown by. Fourth of July honestly feels like it was just a few short weeks ago, but, it was more like 5 long months ago. Today marks my three-month anniversary at my new job, oh yeah, I never mentioned that, I got a new job. I was working part-time before but I am now working full-time, which has given me some challenges when it comes to writing blog posts and sometimes baking, but, not really. I can always squeeze in some time for baking.

Next week I will be bringing you my 3rd annual Cookie Palooza… Hopefully you’ll try at least one of the recipes and just maybe it will become one of your staples. One of the cookies is actually one I am planning on making and gifting later this month, oops, later next month – we are still in November. I kind of like that Thanksgiving was early this year. I feel like it cuts down on the panic of realizing that the next set of holidays are just around the corner. Although, I was at Walmart a few weeks ago and seeing people shopping for what seemed like Christmas gifts already had me panicking a bit. Like I was short on time to get things done. Yikes! I have to-do lists everywhere I look.

The second week in December I am bringing you something new… A Holiday Cake Week. The idea came about last year when I never seemed to get the time to post about a Yule Log Cake I made and then some Snickerdoodle Cupcakes I made. So, I figured I would save the write-up for both and create a special week for them this year. Rounding out the five is a Pull-Apart Cupcake Christmas Wreath, a Rum Cake and a Rainbow Cookie Cake. Yum!

So, sit back, enjoy this last month of the year and don’t forget to indulge in some delicious treats. ‘Tis the season!

Promote your blog here; Blog Party #3!!

Hey Everyone! Join in on this Blog Party… It’s a great way to meet new bloggers and discover their amazing blogs and an opportunity to spread the word about your own!

Slow Cooker Sunday: Pumpkin Cheesecake

I am sneaking in one more pumpkin recipe this season before the Holidays take over… A Slow Cooker Pumpkin Cheesecake. This is actually the third cheesecake I’ve made in my slow cooker. Earlier this year I shared with you a Chocolate Chip Cheesecake and a Sour Cream Cheesecake. Out of the three, this one is my favorite. What can I say… I am a fan of Pumpkin. I actually adapted this recipe for a slow cooker as the original one called for it to be made in a pressure cooker. While I do own one, only because it was my parents, I am a bit fearful of using it. I remember my mom always using it to make beans. She preferred using dry beans over can ones to make habichuelas guisada (stewed beans) so she would use the pressure cooker to soften them up before making them in the stew… YUM! Maybe one day I will work up the courage to using it, but, for now, it is perfectly situated on the back of a shelf in my cabinet.

I began by making the crust. In my food processor I pulsed graham crackers into crumbs. I transferred the crumbs to a medium bowl and added in melted butter, cinnamon and sugar and mixed it together until it was well combined. I then pressed the crumbs into the bottom and slightly up the sides of a 6-inch springform pan that I sprayed with cooking spray.

Next, I made the filling. I beat cream cheese and butter together until smooth and then added in pumpkin, pumpkin pie spice, flour, and whipping cream and continued beating until it was well blended. Finally, I added in the eggs and vanilla extract and beat it until just combined. I then poured this into the prepared crust.

I placed a rack in the insert of my slow cooker and then filled it with a 1/2-inch of water (about 2 cups for my 6qt. slow cooker) and then placed the pan on top of the rack. I covered it and cooked it on high for 2 hours. The center should still be a bit wobbly and the rest of the cheesecake set. You don’t want to overbake it. After the 2 hours, I turned off my slow cooker and left it covered so the cheesecake could cool. After the hour, I removed the pan and transferred it to a wire rack so it could cool completely.

After refrigerating it overnight, the following day I enjoyed a slice!

Slow Cooker Pumpkin Cheesecake

Ingredients:

Crust:

3/4 cup graham cracker crumbs (from 7 graham crackers)

4 tablespoons unsalted butter, melted

1/4 teaspoon cinnamon

1 tablespoon sugar

Filling:

2 8oz. packages cream cheese, at room temperature

1 cup sugar

3/4 cup canned pumpkin

1 tablespoon pumpkin pie spice

2 tablespoons all-purpose flour

2 tablespoons heavy whipping cream

2 eggs, lightly beaten

1 teaspoon vanilla extract

Directions:

Spray a 6-inch springform pan with cooking spray. Place a rack inside the insert of your slow cooker and fill with a 1/2 inch of water (about 2 cups for a 6qt. slow cooker).

In a medium bowl mix the graham crack crumbs, melted butter, cinnamon and sugar. Press the crumbs in the bottom and slightly up the sides of the springform pan.

Using an electric mixer, beat the cream cheese and butter until smooth. Add in the pumpkin, pumpkin pie spice, flour and whipping cream and continue beating until well blended. Add the eggs and vanilla and beat until just combined. Pour into the prepared crust.

Place the pan onto the rack inside of the slow cooker, cover and cook on high for 2 hours. Turn the slow cooker off and keeping the lid on, let the cheesecake cool in the slow cooker for an hour. After the hour, remove the cheesecake and transfer to a wire rack to cool completely. Refrigerate for at least four before serving.

Recipe adapted from Dear Crissy

Baked Apple Cider Donuts

I remember that the only time I was able to get Apple Cider Donuts was when I would go apple picking in upstate NY. I used to look forward to that 2-hour car trip, not only for the apples, but because I knew on the 2+ – hour (thanks to the inevitable traffic) car ride home I would be enjoying some freshly made warm donuts. Nowadays, it seems like you can get Apple Cider Donuts just about anywhere. Practically every apple orchard and farm I have visited sells them. Thankfully there are two places not terribly far from me that sell them year-round and both are quite delicious. There are some other places that sell them and they are, well, to be kind, I will say not so delicious.

While the Apple Cider Donuts I have had are deep-fried, I have attempted to make my own baked Apple Cider Donuts at home and until recently haven’t been that successful. The recipes I tried usually involved reducing the apple cider and I am not sure if I wasn’t reducing it enough or what, but, they were always a fail. Recently though I came across a recipe that didn’t involve reducing the apple cider and included olive oil that produced a delicious donut that actually stayed fresh & moist for a few days – thanks to said olive oil. I wouldn’t say that these are a perfect substitution to the delicious ones I get upstate, but, they are pretty close.

If you are looking for something bite-sized so you don’t feel as guilty (granted, they are fried though!), check out these Apple Cider Fritters I posted last year.

Baked Apple Cider Donuts

  • Servings: 18-21 Donuts
  • Print

Ingredients:

3 cups flour

1 1/2 teaspoons ground cinnamon*

1/8 teaspoon ground nutmeg*

1/8 teaspoon ground allspice*

1 1/2 teaspoons baking powder

1/2 teaspoon baking soda

1 teaspoon kosher salt

1 1/2 cups sugar

1 cup apple cider

3/4 cup unsweetened applesauce

3/4 cup extra-virgin olive oil

3 large eggs

2 teaspoons vanilla extract


Topping:

4 tablespoons unsalted butter, melted

1/2 cup sugar**

2 tablespoons cinnamon**


*If you have apple spice, use 1 teaspoon of ground cinnamon & 1 teaspoon of apple pie spice and omit the nutmeg & allspice.

**If you have cinnamon sugar you can use that in place of mixing together cinnamon & sugar


Directions:

Preheat oven to 350 F. Spray donut pans with baking spray and set aside.

In a large bowl whisk together the dry ingredients: flour, spices, baking powder, baking soda and salt.

In a second large bowl whisk together the sugar, apple cider, olive oil, applesauce, vanilla and eggs. Once well combined, add in the flour mixture and stir to combine.

Transfer the batter to the prepared donut pan, filling each cavity three-quarters full.

Bake for 18-20 minutes, until a cake tester inserted comes out clean.

Let the donuts cool for a few minutes in the pan and then invert onto a wire rack.

In a small bowl whisk together the sugar & cinnamon. Brush each donut with the melted butter and the sprinkle the cinnamon sugar on to the donut.

Store the donuts in an air tight container.

Recipe from Inspired By Charm

Slow Cooker Sunday: Maple Cinnamon Pear-Applesauce

I have an abundance of apples from my recent apple picking outing and while I have been enjoying eating them, I decided to use some of them to make a homemade pear-applesauce. Making homemade applesauce is quicker and easier than you may think. And healthier since you can control the level of sweetness. You could also customize the flavors by adding in different fruits (i.e. peaches, mangoes, cranberries) or different spices.

I began by peeling, coring and chopping 2 lbs. each apples (I used red delicious and granny smith) and pears (I used Bartlett). I added the apples along with pure maple syrup, vanilla extract, a cinnamon stick, lemon juice and water to the inset of a slow cooker.

I set it took on low for 4 hours and was left with apples and pears that were perfectly tender for the next step.

I removed the cinnamon stick and using a slotted spoon transferred the apples and pears to the bowl of a food processor. To prevent the sauce from becoming too watery I didn’t add too much of the juices. I then pulsed the mixture to my desired consistency, making sure no large apple or pear chunks remained.

I transferred the pear-applesauce to a container to let it cool and then covered and refrigerated it.


Slow Cooker Maple Cinnamon Pear-Applesauce

Ingredients:

2 pounds apples, peeled, cored and chopped

2 pounds pears, peeled, cored and chopped

3/4 cup pure maple syrup

3/4 cup water

Juice from 1 lemon

1/2 teaspoon pure vanilla extract

Directions:

Combine all of the ingredients in a slow cooker (at least 6 quarts) and stir to combine. Cover and cook on low until the apples and pears are tender, about 4 hours.

Remove the cinnamon stick and transfer the mixture to a food processor or blender and pulse until desired consistency. You could also transfer to a large bowl and mash with a potato masher for a chunkier sauce.

Let cool and then transfer to an airtight container and refrigerate.

Recipe from Real Simple

If you would prefer to make this on the stove, increase the water amount to a cup and combine all of the ingredients in large pot and cook over medium heat, stirring occasionally, until the apples are tender, about 25 minutes.

For both versions (slow cooker or stove top) you could substitute apple juice for the water.


Sugar Skull Cake

Feliz Dia De Los Muertos! Today is the final day of the three-day celebration to remember and honor loved ones who have died. If you want a little more info on the holiday check out my Dia De Los Muertos Cupcakes blog post. In celebration of the day I am sharing with you a Sugar Skull Cake. Sugar Skulls, or Calaveras, are often used to decorate the ofrendas (offerings) & gravestones during the three-day celebration. They got their name because they are traditionally made of clay molded sugar and then decorated with colorful adornments. The sugar skull I created definitely has sugar in it, but, not molded sugar. I opted to make a chocolate cake, frosted it with buttercream frosting and then decorated it with fondant and confetti sprinkles.

To begin, using the same skeleton pan I used to make my Mummy Cake, I baked a chocolate cake – I used a box cake mix. After letting the cake cool I covered it in plastic wrap and refrigerated it overnight.

The next day, I made a batch of Brenda’s Bakery Buttercream – also the same frosting I used for the Mummy Cake. After removing the cake from the refrigerator, I used a large circle cookie cutter to cut out larger eyes for the skull. I used the cookie cutter to make an indentation in the cake and then used a butterknife to carve out the eyes.

Next, I crumb coated the cake and placed it back in the refrigerator so the frosting could set, about a half hour.

After 30 minutes I finished frosting the cake. I added a little extra frosting in the cheek area so the skull would have a more defined look. I then placed it back in the refrigerator so the frosting could firm up.

Once the frosting was firm, I removed the cake from the refrigerator and attempted to smooth the spatula swipe marks by laying a piece of paper towel on sections of the cake and then gently rubbed the sections with my fingers. This worked for the most part, except I then had the imprint of the paper towel on my cake.

Then, the fun part began. I brought my skull to life using fondant & sprinkles. Luckily, I had left-over fondant from the Trolls Cake I made last year. Don’t worry, the fondant was un-opened and still good. Using black fondant and the same round cookie cutter I used to widen the eyes I cut out eye sockets. For the mouth, I actually had a band aid cookie cutter from a Doc McStuffins themed cake I made last year that was the perfect size. You could easily cut out a rectangle using black fondant though. For the nose socket, I cut out a pink heat and then placed it on the cake upside down. And for the rest of the cake I used daisy cutters to cut out different sizes to decorate around the cake along with confetti sprinkles. This was probably one of the simplest cakes I decorated (I feel like I say that about a lot of cakes these days!)

For a more detailed instruction on creating your own Sugar Skull cake check out The Cake Girls