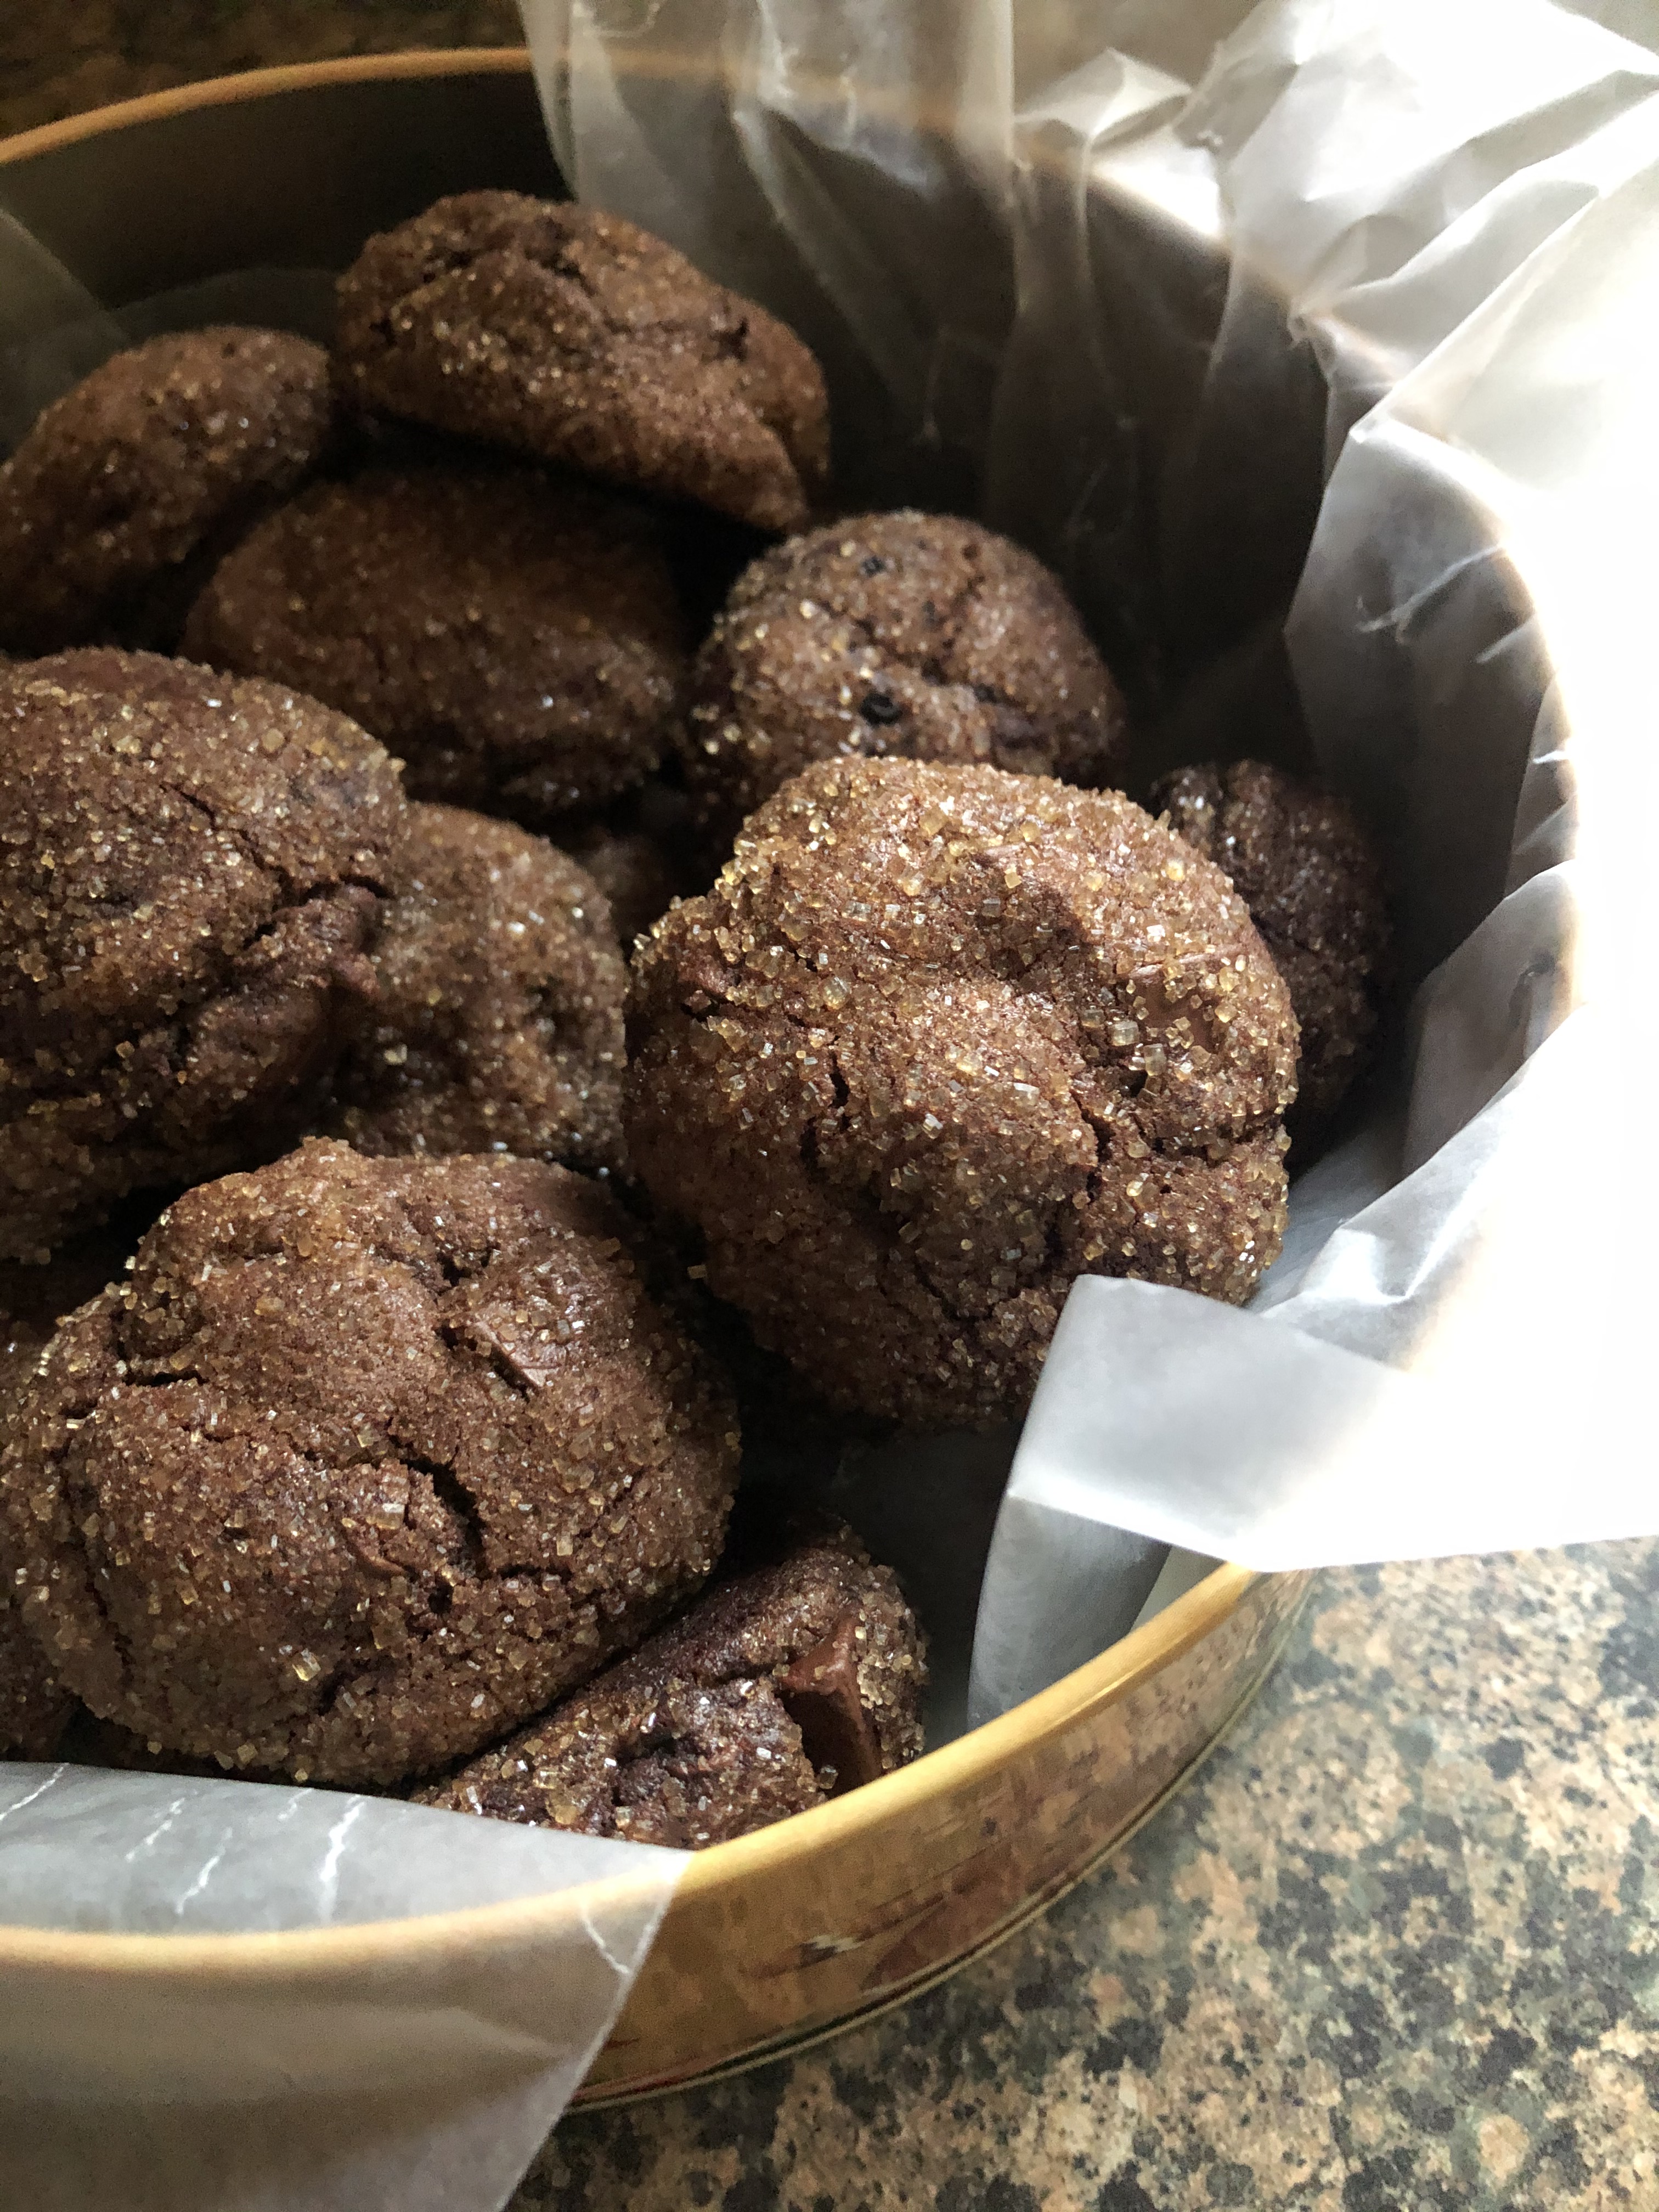
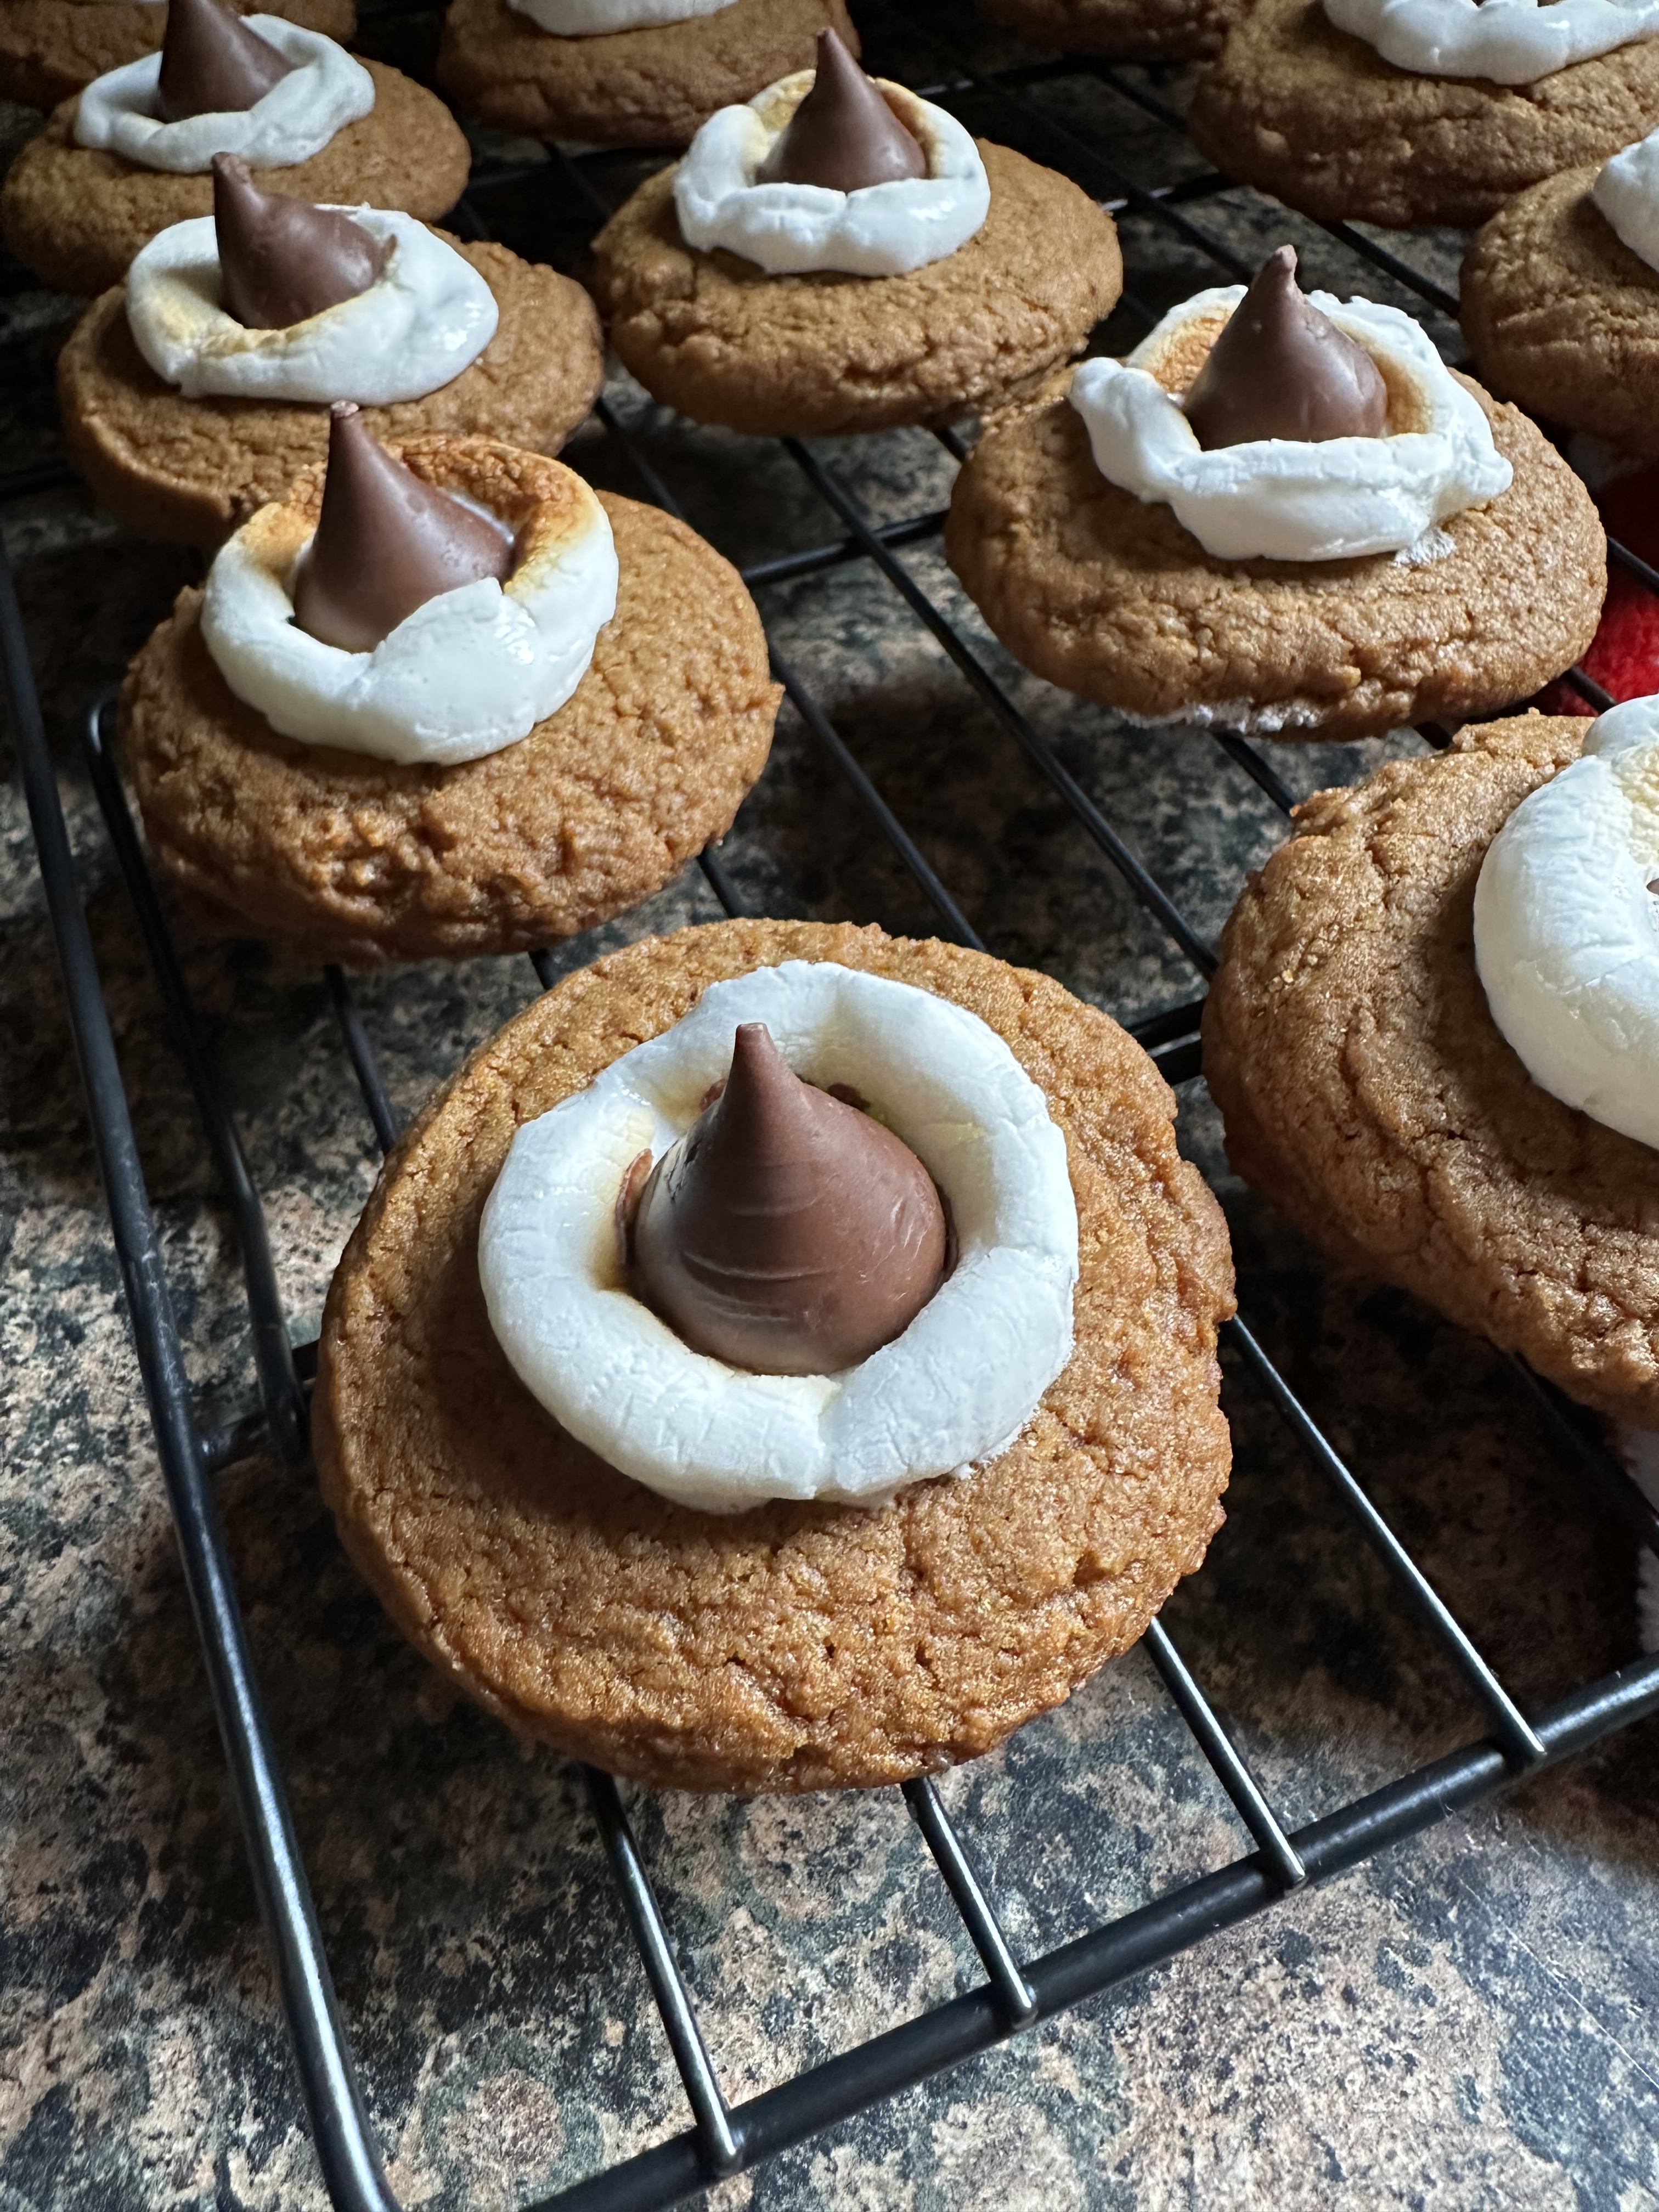
Cookie Palooza: Spicy Chocolate Cookies

Winter is the perfect time to enjoy a warm mug of hot chocolate. I am partial to peppermint hot chocolate myself. Today’s Cookie Palooza cookie, Spicy Chocolate Cookies, has all the decadence of hot chocolate in one bite, but, with the addition of cinnamon and cayenne pepper they are reminiscent of a Mexican Hot Chocolate. Don’t fear though, the cayenne doesn’t make these super spicy or anything. It’s actually a nice complement to the chocolate. And the chocolate chunks added to the cookies melt perfectly while baking to create a nice smooth texture within them. To top them off, they are rolled in turbinado sugar before baking… Yum!

Spicy Chocolate Cookies

  • Servings: 30 Cookies
  • Print

Ingredients:

1 1/2 cups unbleached flour

1/4 cup unsweetened Dutch-process cocoa powder

1 teaspoon ground cinnamon

1/2 teaspoon coarse salt

1/4 teaspoon cayenne pepper

1 teaspoon baking soda

1 stick unsalted butter, at room temperature

1 cup dark brown sugar

1 large egg, at room temperature

1 teaspoon vanilla extract

12 ounces semi-sweet chocolate chunks

1/2 cup turbinado sugar


Directions:

Preheat the oven to 325 F. Line two baking sheets with parchment paper and set aside.

In a medium bowl whisk together the dry ingredients – flour, cocoa powder, cinnamon, salt, cayenne pepper and baking soda.

In a large bowl, using an electric hand mixer on medium-high speed, beat the butter and dark brown sugar together until light and fluffy. Beat in the egg and vanilla extract until well combined. Reduce the speed to low and beat in the flour mixture until just combined.

Place the turbinado sugar in a small bowl. Use a cookie scoop to scoop the dough and then roll into a ball and gently roll in the turbinado sugar and then place on the prepared cookie sheets 2 inches apart.

Bake in the preheated oven for 11 to 14 minutes, or until the cookies begin to crack slightly. Let the cookies cool on the baking sheets for 5 minutes until transferring to a wire rack to cool completely.

Recipe from Martha Stewart’s Cookie Perfection

Cookie Palooza: Kitchen Sink Oatmeal Cookies

While many aspects of the holidays will be different this year due to COVID, one thing can remain the same… the baking. While cookie swaps may have to take a back seat this year that doesn’t mean you can’t enjoy the holiday goodies yourself and with those in your quarantine circle. With that being said welcome to Cookie Palooza 2020. Each day this week I will bring you a new cookie recipe that will hopefully make it on your holiday baking list. Up first a loaded oatmeal cookie. While the recipe called these a White Chocolate Chunk Cookie, I decided to refer to them as a Kitchen Sink Oatmeal Cookie for the title of this blog post thanks to the walnuts, coconut, golden raisins, white chocolate chips and of course oatmeal added to the dough. That’s quite a mouthful. And while the recipe for these cookies makes 4 dozen, you could easily halve the recipe to suit your needs.

Here’s a look of all of the add-ins together before I added them to the dough…

And what the dough looked like after stirring them all in.

And while these cookies do have a lot going on, not one thing overpowers the other. And don’t worry, if you are not a fan of coconut, you won’t even notice the coconut in the cookies. Or, you could just leave them out to be on the safe side.

White Chocolate-Chunk Cookies

Ingredients:

1 cup unsalted butter, at room temperature

1/2 cup sugar

1/2 cup light brown sugar

2 large eggs

1 teaspoon vanilla extract

2 cups flour

1 teaspoon baking soda

1/2 teaspoon baking powder

1/2 teaspoon Kosher salt

2 cups old-fashioned oats

12oz. bag white chocolate chips

1 cup sweetened coconut flakes

1 cup golden raisins

1 cup chopped walnuts

Directions:

Preheat oven to 350 F. Line two cookie sheets with parchment paper.

In a large bowl cream the butter and both sugars together with a hand mixer on medium speed until creamy. Mix in the eggs one at a time until combined and then stir in the vanilla extract.

In a medium bowl sift together the flour, baking soda, baking powder and salt. Gradually add the flour mixture into the butter mixture until combined. Stir in the oats, chocolate chips, coconut, raisins and walnuts.

Using a cookie scoop, drop the dough onto the prepared cookie sheets about 2 inches apart. Flatten the dough slightly. Bake in the preheated oven for 14 to 16 minutes, or until the cookies are golden. Transfer the cookies to wire racks to cool completely.

Recipe from Martha Stewart’s Cookies

Chocolate Peppermint Chunk Cookies

Today we are celebrating Christmas in July with Ghirardelli’s Chocolate Peppermint Chunk Cookies. I always pick up a few bags of Ghirardelli’s Peppermint Chunks during the holiday season and I always end up with one stray bag that I don’t use. I am sad to say that sometimes it ends up getting tossed in the trash because I don’t use it before the expiration date, but, this year I made it a point to use it and to try out the recipe on the back of the package… their Chocolate Peppermint Chunk Cookies.

Before we get to the cookies though a little history on where Christmas in July came from.  You might quickly just think that it’s the halfway point to Christmas, but, it’s not, that would be back in June.

According to legend, Christmas in July dates back to 1933 at Keystone Camp in Brevard, North Carolina. They decided to dedicate two days (July 24th & 25th) to the holiday with fake snow, a tree, gift exchange and of course Santa. In the 1940’s there was the movie “Christmas In July”. The plot, a man’s coworkers prank him into thinking he won a $25,000 cash prize. He ends up going on a shopping spree and finally proposes to his girlfriend. By the 1950’s retailers got in on the action. I wonder if this was the catalyst to many people starting (and some completing) their Christmas shopping during the summer months. Nowadays Amazon Prime has their Prime Day in July, unfortunately due to Covid-19 this year it will be held in the Fall. Speaking of shopping this year, I was watching the news last week and there was a segment on the best things to buy during the month of July and at the end of it the two reporters began to discuss when a good time to start Christmas shopping is and they agreed that now might be the best time since there’s no way of knowing what the situation will be come the Fall/Winter. There is that possibility that stores will be closed again, and shipping times may be delayed again.

Even television has gotten in on the action. Hallmark channel takes full advantage and airs their original Christmas movies across their networks, and it coincides with the release of their Keepsake Ornaments in their stores. I won’t lie, I have been enjoying my fair share of Christmas movies these past few weeks.

I always have the great idea to make my Christmas cards during the month of July as a way of celebrating and to have one thing off my list come the holidays. But it never happens. I came close this year. I had a design all picked out and I started working on them, but quickly decided I didn’t like them. So, it’s back to the drawing board. Maybe I can get another design narrowed down by the end of the month. I got an email the other day with the top 10 reasons as to why you should start preparing for Christmas now and it makes total sense. Especially if you make handmade items and you do a lot of baking.

And now, back to the cookies. One thing I like about this recipe is that it’s only for 2 dozen cookies. Sometimes you need 3 or 4 dozen cookies and other times, you just don’t. Granted, these wouldn’t be great for a cookie swap, but they are the perfect amount for a get together with friends or to snack on while you are decorating your home for the holidays. And they are the perfect combination of peppermint and chocolate, without the peppermint being to overpowering even with those huge chunks!

Merry Christmas in July!


Ghirardelli Chocolate Peppermint Chunk Cookies

  • Servings: 24 Cookies
  • Print

Ingredients:

1 cup Ghirardelli 60% Cacao Bittersweet Chocolate Baking Chips

1 cup flour

1/2 teaspoon baking soda

1/4 teaspoon salt

6 tablespoons unsalted butter, softened

1 cup light brown sugar

2 eggs, at room temperature

1 teaspoon vanilla extract

1 10oz. bag Ghirardelli Peppermint Chunks


Directions:

Preheat the oven to 350 F. Line two cookie sheets with parchment paper and set aside.

Melt the bittersweet chocolate chips in the microwave in 30 second intervals, stirring between each until completely melted. Set aside to cool.

Sift together the flour, baking soda & salt in a medium bowl.

In a separate bowl cream together the butter and sugar using a hand mixer on medium speed until light and fluffy. Beat in the eggs one at a time. Add in the cooled melted chocolate and vanilla extract and continue mixing until well combined. Fold in the flour mixture and stir in the peppermint chunks.

Using a cookie scoop, scoop the cookie dough onto the prepared cookies sheets about 2 inches apart.

Bake in the preheated oven for 9 minutes, do not overbake. The cookies should be soft and fudgy. Let them cook on the cookie sheets for a few minutes before transferring to a wire rack to cool completely.

Store in an airtight container at room temperature.

A New Year…

The holidays are officially over! Yes, I believe in the 12 days of Christmas and that the holidays officially end on January 6th. Too bad I can’t gifts like the song though, not necessarily 5 golden rings, but maybe 5 skeins of yarn and 4 pairs of shoes as opposed to the calling birds. You catch my drift. All in all though my holidays were good. Filled with good times with friends and family and delicious food and treats. I am planning on getting my house back to “normal” this week. I unplugged my Christmas lights this morning, I never want to be the house with the lights on after the fact, and will start taking down decorations today. Not like it’s a lot, but, I don’t want to just rip it all down and throw it back in the box. I like to take my time.

How has the New Year been treating you thus far? A week in and I have no complaints. Although one could complain but it doesn’t mean anything will change overnight. I am not one to make resolutions. If you want to make a change then make it. I read an article recently that said we sometimes make these grand resolutions without truly giving thought as to how to accomplish them. You can’t simply say I am going to lose weight this year. There has to be something behind it. For example, I will walk/jog/run x amount of days per week, or I will watch my intake of certain foods, and so forth. I think making small life changes like that can have a bigger impact on one that some broad goal. I do apologize if that is your resolution and I just burst your bubble. By no means was that my intention. And while I don’t make specific resolutions I think what I am trying to keep in mind this year is Einstein’s definition of insanity… Doing the same thing over and over and expecting different results. I know I want certain things to happen and other things to change but hoping they will happen without doing anything differently isn’t going to get my anywhere near those goals. I hope you will all get something out of that one. It’s definitely an important life lesson that can drive us to take chances and push us out of our comfort zones, which I have found always leads to a rewarding experience. There’s nothing like finding out you are a lot stronger physically, mentally and emotionally than what you think.

One thing I need to stop doing this year is being a procraftinator. Yes, you read that correctly, a procraftinator. I have numerous projects lying around that need to be finished. Just how bad am I? Well, I have a shrug that I finished knitting 3 years ago that I still haven’t stitched together. Don’t ask me why, I can’t really give you an answer on that one. Maybe it’s because finishing my yarn projects is my least favorite activity. But, I am sure once I start and finish I will be so happy I did. I also have a scarf I started over the summer (or maybe it was sooner) that I put down and just never picked up again. This seems to a recurrent problem of mine… LOL! I just put something else on my knitting needles that I am determined to finish, especially since it’s a small project, a coffee cozy. A friend gave me a cup for Christmas that needs one if I plan on drinking hot tea from it. I began to think that just maybe I could make them and sell them on my Etsy shop. Yes, I still have my Etsy shop (CraftedByFran). I haven’t mentioned it, but, it’s still there. I have actually found it a bit frustrating because getting sales is such a challenge, well, getting traffic to my shop is the main challenge. I have updated my keywords and still nothing. Not really sure how some people have it so easy. If any of you can offer some tips and tricks I am all ears!

And just maybe this year I will work on creating my own baking recipes. Cooking is a lot easier and forgiving, but, baking not so much. I have dabbled with it and have had success but I definitely need to delve more into it. I always have recipe ideas swirling around in my head, but I just need to build the confidence to come up with the ingredient list on my own and not depend on Google so much. I have baked enough that I should be able to do so. Who knows, maybe one day I will write my own cookbook. It would definitely be a mish mosh of different things… LOL! Did I just throw something out into the universe? Oh wait, I didn’t explain that one. Some people believe that in order for things to come to fruition you need to say them to the universe. I guess the universe needs to hear you in order to answer you.

Hopefully I will be blogging more often and including more posts like these. A little rambling, a little insight, a little more about me. I’ve been doing this for about 7 years now so I figured it’s about time. So, I welcome 2019 and whatever it has to offer and teach me.


Chocolate Truffle Cookies

Are you all set for Christmas? Are your gifts wrapped? Cards in the mail? Cookies baked? Or, are you looking for just one more treat to make? If so, you should try these Chocolate Truffle Cookies.  They are chocolaty without being overly sweet thanks to the addition of unsweetened chocolate, which helps to offset the sweetness of the semi-sweet chocolate and sugar.

One thing you will definitely need to make these cookies is time. Once the batter is made it needs to be refrigerated for at least 3 hours so it can become firm enough to handle, but, it’s worth the time. The final result is a cookie similar to a truffle, firm on the outside and soft on the inside.

These cookies were part of a box of treats I mailed to a friend. Included in the box were the Chocolate Covered Pretzels and Candied Nuts I posted about earlier this week. Also included were Peanut Butter Blossoms. All wonderful homemade treats to gift to anyone on your list and can easily be made this last weekend before Christmas.


Chocolate Truffle Cookies

Ingredients:

12oz. bag of semi-sweet chocolate chips

4 oz. unsweetened chocolate, chopped

1/3 cup unsalted butter, cubed

1 cup sugar

3 large eggs

1 1/2 teaspoons pure vanilla extract

1/2 cup flour

2 tablespoons cocoa powder

1/4 teaspoon baking powder

1/4 teaspoon salt

Confectioners’ sugar for dusting (optional)


Directions:

In a microwave, melt 1 cup of the chocolate chips, unsweetened chocolate and butter; stir until smooth and let cool for 10 minutes.

In a large bowl beat the sugar and eggs on medium speed until well blended. Beat in the cooled chocolate mixture and vanilla extract.

In a separate bowl whisk together the flour, cocoa, baking powder and salt. Gradually beat this into the chocolate mixture. Once fully incorporated stir in the remaining chocolate chips.  Cover and refrigerate for at least 3 hours.

Preheat the oven to 350 F and line 2 baking sheets with parchment paper. Using a cookie scoop, scoop the dough (it will be quite firm) and then roll into a ball and place on the prepared baking sheet. Bake for 10-12 minutes, until cookies have puffed and are set. Cool on the pan for 3 minutes and then transfer to a wire rack to cool completely. Dust with confectioners’ sugar, if using.

Recipe from Taste of Home

Freezing Cookie Dough

I knew I would be pressed for time this year when it came to baking cookies for Christmas, so, I decided to do something I’ve never done before and was always skeptical of doing… freezing cookie dough. I normally have a good day or two to bake, but, the way things are falling this year I am only going to have one good full day to bake all of my cookies and I just knew that it wouldn’t be enough time due to the fact that I have a few other things to take care of that day as well. So, currently there are about 6 or 7 different batches of drop cookies in my freezer along with the dough for these Checkerboard Cookies . And, there is also a batch of Gingerbread People ready to be popped in the oven. I also went out and purchased some extra-large baking sheets. I am sure you have seen them, the Wilton Mega-Sized Baking Sheet. As you can tell, I am serious about baking these cookies in record time.

So, let’s talk about freezing cookie dough. Were or are some of you skeptical like me about it? Or, is it something you have been doing for years and are shocked to read my apprehension about it? The best cookies to freeze are drop cookies and slice and bake cookies. You can also freeze the dough for roll out cookies (sugar cookies, gingerbread people, etc.), but, I would suggest rolling out the dough and cutting it into your desired shapes first and then freezing it. That’s exactly what I did with the Gingerbread ones. Using a freezer-safe container, I lined it with two pieces of plastic wrap lengthwise and widthwise leaving a few inches of overhang. I layered the cookies in the containers making sure they were flat and placed a piece of parchment paper between each layer and on the top layer. Once filled, I wrapped the plastic wrap over the top layer making sure to press out any air. Topped the container with the cover and placed it in the freezer. You could freeze the entire disk of dough as well, but, I personally think that the time spent waiting for it to defrost would be better spent just making the dough to use immediately. My plan for these is to let them thaw a little and then press mini M&M’s into them before baking and then ultimately decorating them with royal icing.


Back to the drop cookies and slice and bake variety…. For the drop cookies I simply made the dough, rolled the dough into balls (scooping it with a cookie scoop) and then placed it on a baking sheet. Since the dough was going in the freezer and not in the oven I was able to place the dough really close together on the baking sheet. I just made sure none of them were touching which could ultimately lead to them freezing together. I then placed the sheet in the freezer for a few hours until the dough was thoroughly frozen. Once frozen, I transferred the dough to a freezer-safe plastic zip bag. I labeled the outside of the bag with the type of cookie it was. Since I wasn’t planning on leaving it in the freezer too long I opted not to include the date, oven temperature and baking time on the bag as well. The suggested length of time for leaving dough in the freezer is 3 months. I actually baked a batch of one of the cookies this weekend and I am happy to say it was a success. To bake them, I placed the dough on a parchment lined baking sheet 1 to 2 inches apart and increase the suggested baking time by 1 to 2 minutes to account for the dough being frozen. The cookies baked perfectly and tasted like I had just made the dough that morning. That’s really what my fear was (and still is to a certain extent), that the cookies will somehow have a weird flavor from the dough being frozen.


For the slice and bake cookies, you can follow your directions and form the dough into a log, wrap it in a few layers of plastic wrap, place it in a freezer-safe bag that has been labeled and then freeze it. It’s not necessary to refrigerate the dough prior to freezing as most slice and bake cookies require prior to slicing. To bake these cookies, let the dough sit at room temperature unwrapped for 10 to 15 minutes. The dough should feel cold to the touch, but soft enough that you will be able to slice it. Slice and bake per the directions, once again adding an additional minute or two to the time.

Since my test batch was a success I am little less unnerved by the process. Fingers crossed I will still be singing high praises come Sunday when I bake quite a few more batches.

Chocolate Covered Pretzel Rods

Sweet & Salty is as good a combination as you can get and there’s no better way to get satisfy that craving for both than with chocolate covered pretzels. If you’re looking for a last minute treat to give your loved ones this Holiday season these may be the answer. You only need three ingredients to make them, pretzels, chocolate and a topping (if you choose). Now, when I’ve made chocolate covered pretzels in the past I’ve used the mini pretzel twists and while they taste good I always have an issue with getting the excess chocolate to drip off… It never does. I never end up with pretzels that are nice and evenly coated with chocolate, there is always one or two spots that has a little too much. As I mentioned, they taste good, but, I am just not 100% happy with how they look. This year, I decided I would make chocolate dipped pretzels rods rolled in sprinkles. Figuring that the sprinkles could easily cover any imperfections with the chocolate. Which it did!

Now, I know a lot of directions for chocolate covered pretzels call for a bit of shortening to be added to the chocolate when melting, I have never done this. From what I have read the shortening creates a smoother and more manageable consistency of chocolate – which I suppose would be ideal for the chocolate covered pretzel twists – but, I have also read that it can alter the flavor of the chocolate and that sometimes the chocolate doesn’t harden as well, so I stick with plain old chocolate. If I find that the chocolate is beginning to thicken too much while I am working with it I pop it back in the microwave for a quick 10 seconds just to get it smooth again. Not much longer because I don’t want to scorch the chocolate. Oh, and I melt my chocolate in the microwave as well. I have melted chocolate in my own make-shift double boiler – I place a bowl over a saucepan of simmering water – but, I find the microwave quicker and with less clean-up. I simply pour a bag of semi-sweet chocolate chips into a microwave-safe bowl (I normally use a silicone one) and heat it for 1 minute. I give it a good stir and continue melting the chocolate in 30 second intervals, stirring the chocolate between each zap in the microwave. I don’t melt the chocolate completely in the microwave. Once it begins to melt stirring it will help melt the rest of the chocolate into a smooth mixture. For dipping pretzel rods you want to use a small bowl that is pretty deep so you can get a lot of the pretzel rods coated in the chocolate. As you go along and find yourself with less and less chocolate but pretzel rods remaining you can use a spoon/knife to spread the chocolate on to the rod.

Once the chocolate is ready I pour my sprinkles onto a rimmed baking sheet and push them to the center of the pan. Using a baking sheet will make it easy to roll the pretzel rods in the sprinkles. I set up another baking sheet with wax paper to place the rods on once they are dipped and sprinkled. And then I simply dipped a rod into the chocolate and then rolled it in the sprinkles. I then placed it on the wax lined paper so it could set and once I was done I placed the entire pan in the refrigerator to be sure that the chocolate would harden.

Here are some tips that may help you get a good coating of chocolate on your pretzels… If you have too much chocolate and it’s just not dripping off use a butter knife to smooth it out, or, another pretzel rod. I did the latter a few times. I simply rolled the pretzels next to each other over the bowl to coat the one without the chocolate. For those rods that I wasn’t planning on rolling in sprinkles I actually rolled it on a sheet of wax paper to smooth the chocolate out and then placed them in the refrigerator so the chocolate could harden and then drizzled them with the red and green chocolate the following day. To do so, I melted candy melts and then poured it in squeeze bottles and drizzled the chocolate over the pretzels and once again placed the sheet back in the refrigerator so the drizzle could harden.

My apologies for not having step-by-step pictures, but, I made these late at night (a lot later than I had planned since my car decided to act up that day and I had to be towed from work to the mechanic and then have a friend bring me home… thankfully my car was fixed and back on the road the following day!) and I have learned that late-night pictures are not good for blogging!

So, to recap, all you need for these Chocolate Covered Pretzels is a bag of pretzel rods (I used a 12oz bag that had about 30 good (unbroken) pretzel rods), a 12oz. bag of semi-sweet chocolate chips, and to decorate sprinkles, candy melts, chopped nuts or coconut. You will also need wax paper, at least 3 baking sheets and a bowl to melt and dip the chocolate.

Happy Dipping & Rolling!

Snickerdoodle Cupcakes

For today’s Holiday Cake Week treat I am bringing you Snickerdoodle Cupcakes. Snickerdoodles are a simple cookie rolled in cinnamon sugar and are a traditional Christmas cookie. People sometimes confuse them with sugar cookies, but, there is a distinct difference between the two of them, besides the cinnamon sugar topping, Snickerdoodles are chewy while sugar cookies traditionally have a more crisp bite to them. These cupcakes have a cinnamon sugar topping similar to the cookie and are the perfect texture. The original recipe called for a Brown Sugar Buttercream frosting that I opted to omit, I truly feel the cupcake is enough on its own. If you’re interested in the frosting, follow the link after the recipe below. And, if you are looking for a yummy Snickerdoodle recipe, check out the one I post a few years ago. I still use it to this day.

Snickerdoodle Cupcakes

  • Servings: 18 cupcakes
  • Print

Ingredients:

Cupcakes:

1 2/3 cups all-purpose flour

1/2 teaspoon baking powder

1/4 teaspoon baking soda

1/2 teaspoon salt

1/2 cup unsalted butter, melted

3/4 cup sugar

1/4 cup light brown sugar

3/4 cup buttermilk

1/4 cup sour cream

1 tablespoon vanilla extract

2 egg whites

Cinnamon Sugar Topping:

1/4 cup granulated sugar

1 teaspoon ground cinnamon

Directions:

Preheat the oven to 350 F and line cupcake pans with cupcake liners.

In a medium bowl combine the dry ingredients: flour, baking powder, baking soda and salt.

In a microwave safe bowl, melt the butter. Then whisk in the sugar, buttermilk, sour cream and vanilla.

Add the liquid ingredients to the dry ingredients and mix until incorporated.

Using a stand mixer or a hand mixer, beat the egg whites until soft peaks form. Fold into the batter until combined.

Fill the cupcake liners 3/4 full – about 1/4 cup batter in each one.

Mix the sugar and cinnamon for the topping and sprinkle a generous 1/2 teaspoons on top of each cupcake.

Bake for 15 – 18 minutes, or until a cake tester comes out with a few crumbs.

Allow cupcakes to cool in pan for 5 minutes and then transfer to a wire tack to cool completed.

Recipe from The Cake Blog

Yule Log Cake

Each day this week I will be bringing you a cake / cupcake idea that is perfectly festive for this time of the year… It’s Holiday Cake Week.

To kick off Holiday Cake Week a traditional cake seen around the holidays… A Yule Log Cake. It originated in France and is a sponge cake rolled and then frosted with chocolate frosting to resemble a tree bark. Customarily a small portion of the cake is cut off and either placed on top of the cake or protruding from the side of the cake to resemble a chopped off branch. The cake can then be furthered decorated with powdered sugar to resemble snow, fresh berries, mushrooms made of marzipan and so forth.

I opted to go the easy route with my cake and used a box cake mix and a container of vanilla frosting for the filling. Also, while the recipe didn’t call for it, I ended up a slicing off a portion of the cake and placing it on the side to get that traditional branch look. And to top it off, I sifted confectioners’ sugar over the cake and placed some decorative holly berry picks I got from a local craft store around it.

Yule Log Cake

Ingredients:

Cake:

6 eggs

1 box of Devil’s food cake mix

1/2 cup water

1/4 cup vegetable oil

1 tablespoon confectioners’ sugar


Chocolate Frosting:

1/2 cup whipping cream

1 cup semi-sweet chocolate chips

1 tablespoon corn syrup

1/4 teaspoon vanilla extract


Filling:

1 container whipped vanilla frosting


Directions:

Heat oven to 375 F. Line the bottom of a 15x10x1-inch (Jelly Roll Pan) pan with foil or waxed paper, spray with baking spray.

In a large bowl beat the eggs with an electric mixer on high until the eggs are thick and lemon colored, about 5 minutes. Add the cake mix, water and oil and beat on low speed for 30 seconds, then on medium speed for 1 minutes. Pour about 2 3/4 – 3 cups of the batter into the prepared pan. Use the remaining batter to make cupcakes, or as you wish.

Bake 14 to 16 minutes, or until the cake springs back when lightly touched in the center. Turn the cake out on a clean kitchen towel sprinkled with the confectioners’ sugar. While the cake is still hot, carefully roll up the cake and towel together from one shorter end to the other. Cool completely on a wire rack from 1 hour.

While the cake is cooling make the chocolate frosting… In a medium pot heat the whipping cream over medium heat until the cream starts to boil. Remove from the heat and add in the chocolate chips and corn syrup, let stand for 3 minutes. Beat with a wire whisk until smooth and then add in the vanilla. Refrigerate for about 1 hour, stirring every 15 minutes, until it’s a spreadable consistency.

After an hour, unroll the cake carefully and remove the towel. Spread the vanilla frosting evenly over the cake and roll it up once again. Place the cooling rack on sheet of waxed paper and return the cake to the wire rack and frost the cake with the chocolate frosting. Drag the tines of a fork through the frosting to give the cake a log look. Let the cake stand for 15 minutes and then refrigerate loosely covered until ready to serve. Let stand at room temperature prior to serving.

*If you want to make the log resemble more of a branch, prior to frosting with the chocolate frosting, cut a piece of the cake off and place on the side of the cake or on top and then frost.

Recipe from Betty Crocker

Cookie Palooza: Bakery Style Butter Sandwich Cookies

Welcome to Day 2 of Cookie Palooza 2018! Today I am bringing you a traditional butter bakery cookie. Not the round ones covered in sprinkles, but the long sandwich ones that are filled with jam, dipped in chocolate and then rolled in sprinkles. YUM! It’s actually one of my favorite cookies, but it wasn’t always. I used to buy a package of butter cookies from my local Costco and I would always eat the round ones with the sprinkles from the package, leaving the sandwich ones for my parents to eat. Then one day I tried them and realized that they tasted much better than the other ones. Unfortunately Costco changed their supplier and the new ones they carry do not taste half as good. They taste more artificial. Thankfully this homemade version fills the void.

You may be slightly intimidated to make these cookies, but don’t be. They are super simple and don’t require any special ingredients. The hardest part is squeezing the dough out of the piping bag onto the prepared baking sheet. But after a few squeezes the dough softens up and it becomes easier and you soon get the hang of it. Using a Wilton 6B Tip I piped the dough into 2-inch pieces on a parchment lined cookie sheet. To end the dough for each cookie you can cut them with a knife or scissors. What I did is a little harder explain. I kind of nudged the tip into the cookie sheet to end it. I tried using a knife and it just wasn’t working for me. After you have piped all of your cookies bake them in a 350 F preheated oven for about 12 minutes. Let them cool completely and then the fun begins, the assembling.

Before assembling I did my best to par up similar sized cookies. If they were off a little in length I dipped the mismatched end in the melted chocolate so no one would be the wiser. Next, I filled a piping bag with about half a cup of seedless raspberry jam to a piping bag (you could also use a small sandwich bag) and snipped off a small piece of the end. I piped a single line of jam down the center of one half of each cookie. I didn’t want to add too much jam as I didn’t want the jam to ooze out of the sides once the cookie was pressed together.

Once I had all of my cookies sandwiches together I melted a bag of semi-sweet chocolate chips in the microwave in a deep enough bowl that would allow me to dip the cookies at least a third of the way in. To ensure that I didn’t scorch the chocolate, I melted it at 30 second intervals and stirred between each. Once the chocolate was about 3/4 quarters of the way melted I continued stirring it to melt the rest of it. You could also melt the chocolate in a small saucepan on your stovetop if you choose. Just keep an eye on it so it doesn’t burn. In a shallow bowl I poured out some sprinkles- you will need a decent amount. I also lined two baking sheets with wax paper to place the cookies once they were decorated. I began by dipping a cookie in the chocolate, allowing the excess to drip off. I actually used a knife to wipe off some of the excess. If you leave too much chocolate on the sprinkles will just slide off. Next I rolled the cookie in the sprinkles and placed it on the prepared baking sheet. Once I was done I placed the baking sheets in the refrigerator for a few minutes so the chocolate could set.

And there you have it…. Easy to make fancy bakery cookies that will impress everyone you share them with!

Butter Sandwich Cookies

Ingredients:

2 sticks unsalted butter, at room temperature

2/3 cup sugar

2 large egg yolks

1 teaspoon vanilla extract

1/2 teaspoon salt

2 cups flour

Filling & Decorating:

1/2 cup jam (flavor of your choice)

1 cup sprinkles

12 ounce bag of semi-sweet chocolate chips

Directions:

Preheat oven to 350 F and line two baking sheets with parchment paper.

Combine the butter and sugar in a large bowl and beat on medium speed with a hand mixer until well combined. Add the egg yolks, vanilla extract and salt and beat until combined, scraping the bowl as necessary. Add the flour and mix until just combined. Fit a star tip with a 1/2-inch opening on a piping bag and snip off the end. Transfer the batter to the bag.

Pipe the dough into 2 inch long segments about 1 inch apart on the prepared baking sheet. You can use a knife or scissor to cut the pieces. Bake the cookies for 11 to 13 minutes, until they are golden at the edges.

Let them cool for a few minutes on the baking sheet and then transfer to a wire rack to cool completely. Set aside the parchment lined baking sheets.

Place the jam in a sandwich bag (or another piping bag) and place the sprinkles in a shallow dish.

Once the cookies are cool, flip half of them over and snip a small corner of the jam filled bag. Squeeze a little jam down the center of each flipped cookie. Don’t squeeze too much jam on the cookies as you don’t want it to ooze out when sandwiched. Top with the other half of the cookie.

Melt the chocolate chips in the microwave or a small saucepan until they are three-quarters of the way melted and then stir to melt it completely. Place the chocolate in a bowl deep enough for dipping the cookies about a third of the way in. Dip the sandwiched cookies into the melted chocolate, letting the excess drip off, and then roll in the sprinkles. Place on the baking sheet. Once all cookies have been decorated place the cookie sheets in the refrigerator so the chocolate can set.

Recipe from Smitten Kitchen

%d bloggers like this: