Passion Fruit Pie

Happy Pi Day! That wonderful day on the calendar, 3/14, were we celebrate the irrational number Pi. Irrational because it cannot be expressed exactly as a simple fraction and therefore is an infinite decimal. What it is exactly though is the ratio of a circle’s circumference to its diameter, and regardless of the size of the circle, it will always be the same number. So, due to this fun math themed day I bring you a new recipe for pie. I am always stumped to come up with a new pie recipe for today. When I start searching for a recipe most of the ones I come across are some sort of variation of an apple or pumpkin pie. Both of which I prefer baking during the Fall months. And of course there are the berry pies, but, I think those are better in the summer months when berries are in season. So I run out of options quickly. This year I started to think about pies I’ve made and flavors that I haven’t come across and I thought to myself what about a Passion Fruit Pie.

I decided to follow the recipe for my go-to Key Lime Pie but switch out the key lime juice for passion fruit pulp. I purchased frozen passion fruit pulp and let it defrost in my refrigerator overnight. I also switched up the crust I use. Normally I make Key Lime Pie with a store bought graham cracker crust, but for this pie I decided to make a shortbread cookie crust. And that was my first step in making this pie.

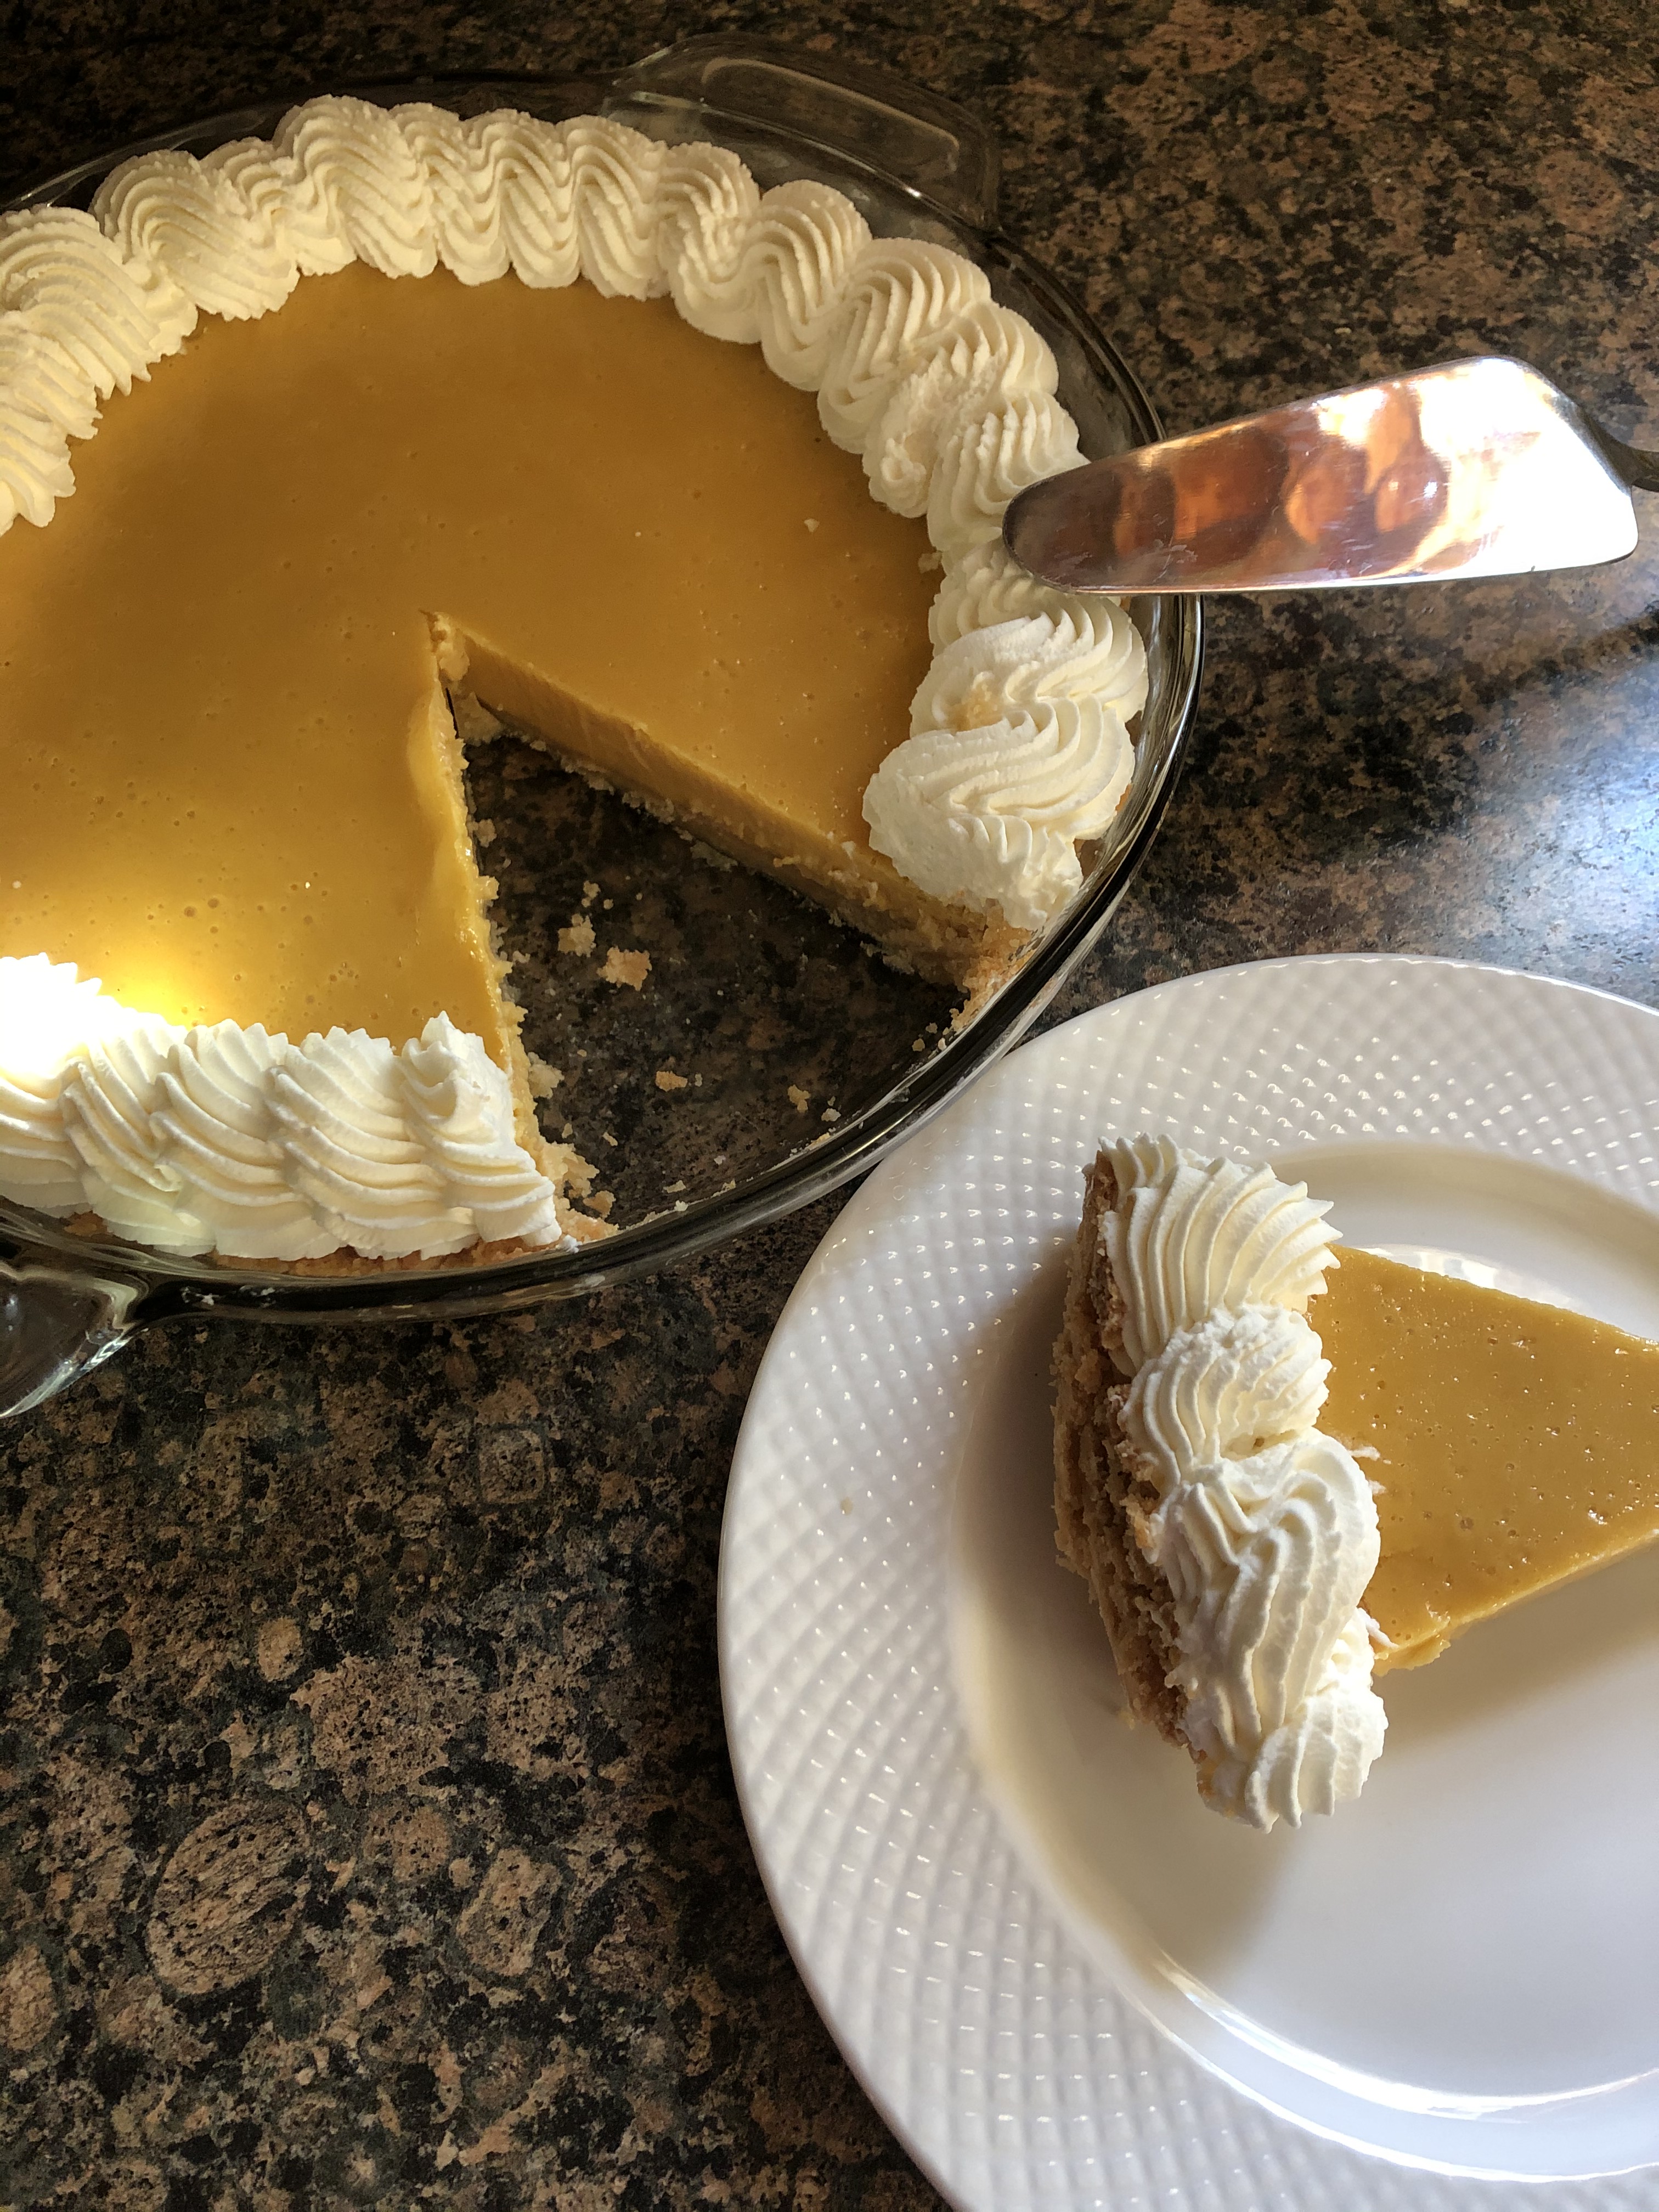
Using my food processor I pulsed shortbread cookies, I used Keebler Sandies Classic Shortbread Cookies, into fine crumbs and then combined the crumbs with melted unsalted butter. Next, I pressed the crumbs into the bottom and along the sides of a 9-inch pie plate. After baking it in a preheated 350 F oven for 10 minutes I let it cool while I made the filling. While baking the crust beforehand isn’t completely necessary I decided to do so so that the crust would be firmer once the pie was done. This would minimize the chances of it crumbling when cutting a piece of the pie.

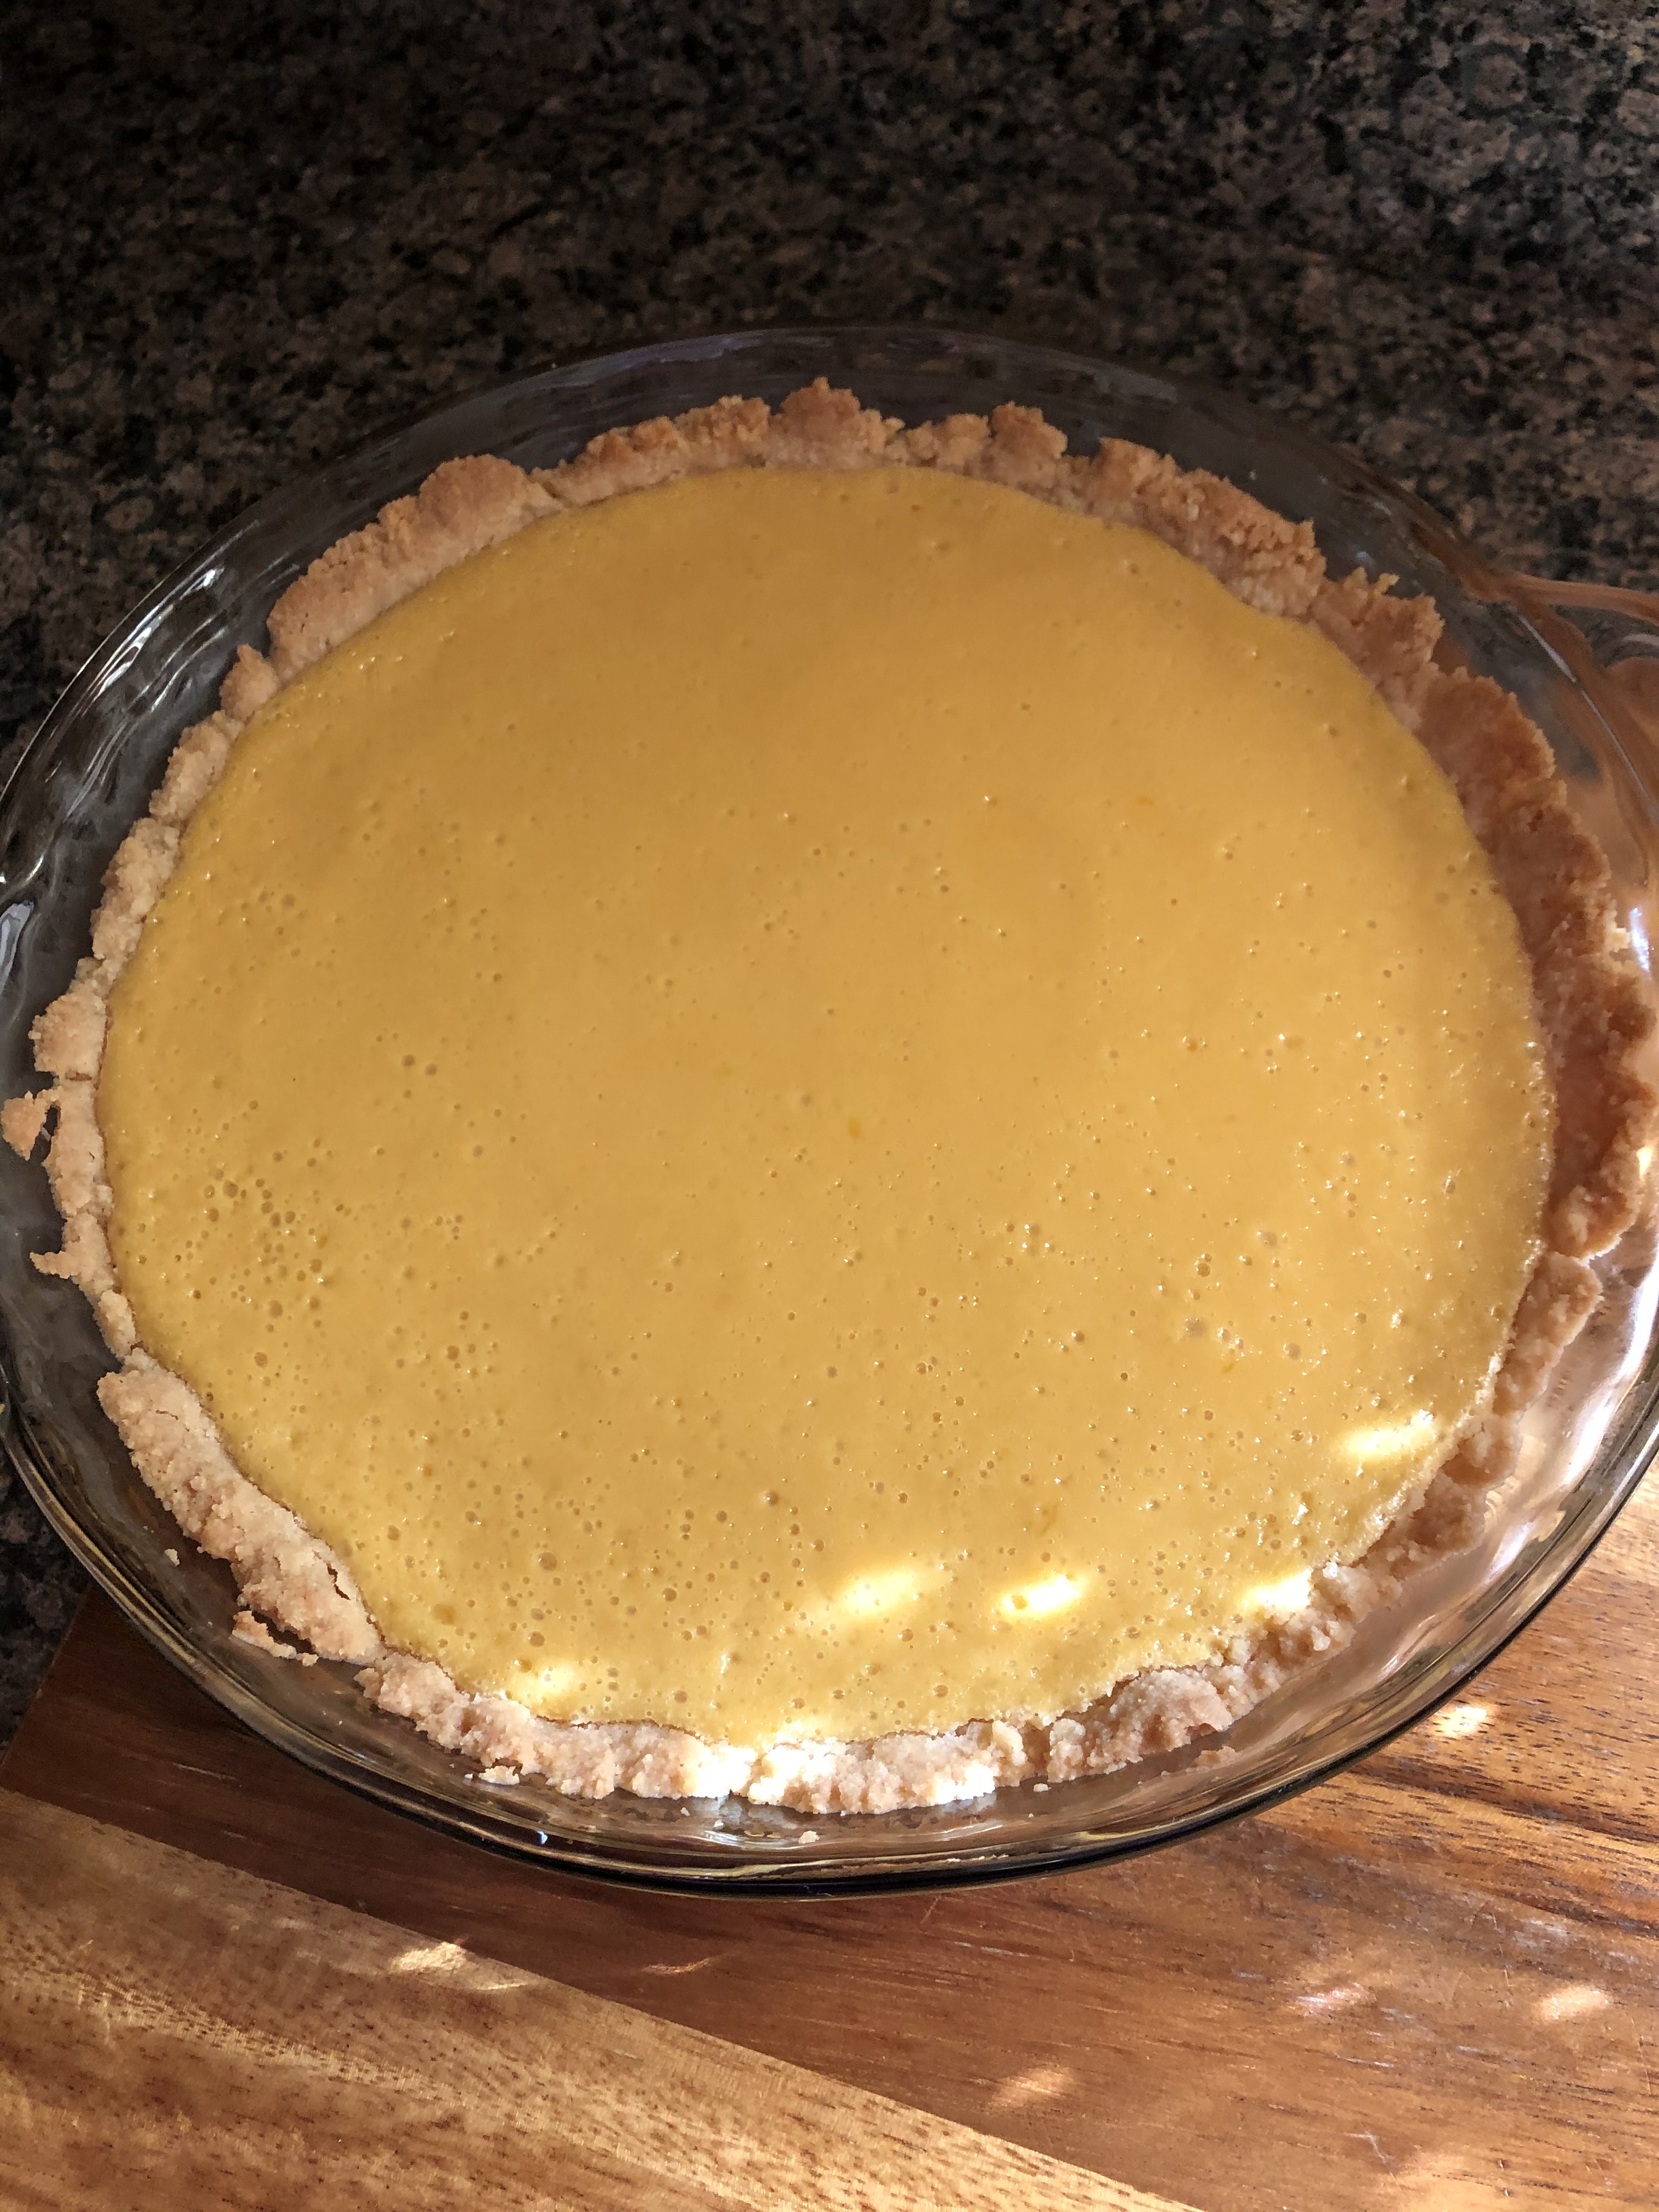
In a large bowl, using a handheld mixer, I beat egg yolks until they were light and fluffy. I continued beating the eggs while gradually adding in sweetened condensed milk. And finally, I added in the defrosted passion fruit pulp. Once the mixture was combined I poured it into the shortbread cookie crust and returned the dish to the oven for an additional 20 minutes. When done, the pie filling will be set.

I let the pie cool completely on a wire rack before transferring it to the refrigerator to chill before serving.

Before serving I whipped up a small batch of homemade whipped cream and decorated the top of the pie. To create the swirls I used a Wilton 6B piping tip.

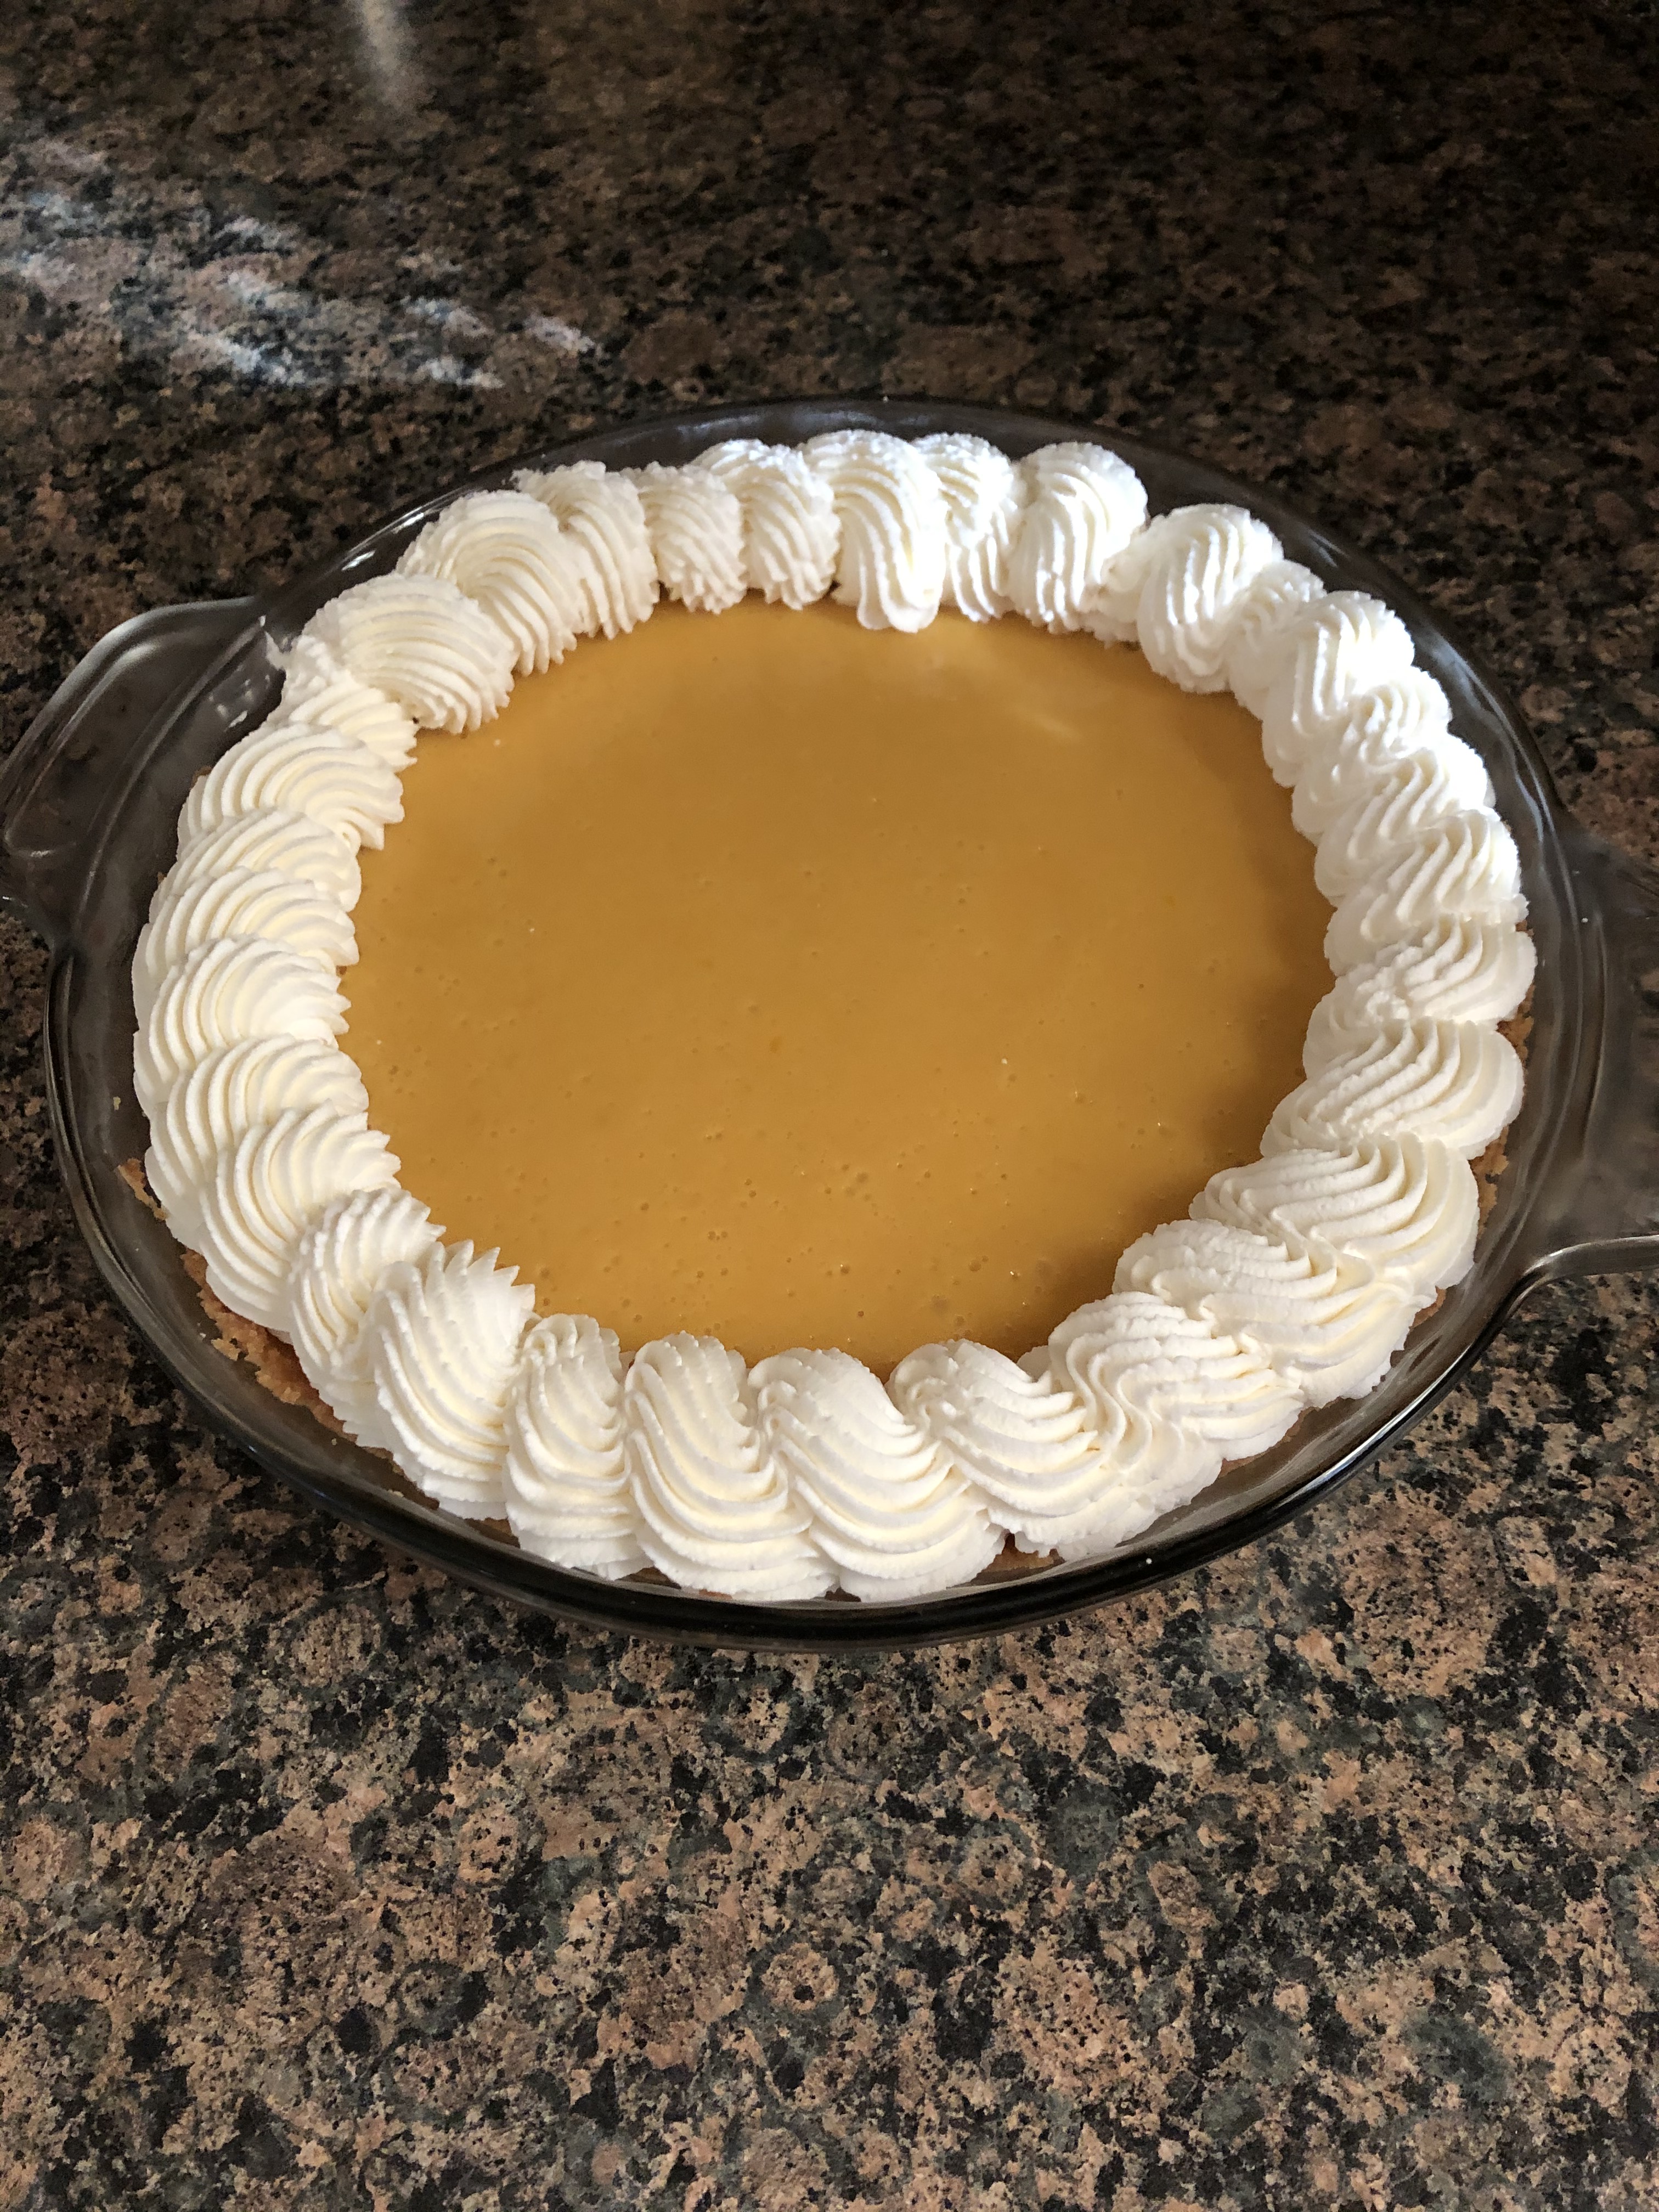
This pie was delicious… It was the perfect texture and a wonderful combination of sweet and tart! And yes, pre-baking the crust did help in preventing it from falling apart when slicing into the pie.

Passion Fruit Pie

Ingredients:

For the crust:

1 3/4 cups shortbread cookie crumbs*

6 tablespoons unsalted butter, melted

For the filling:

4 egg yolks

14oz. can condensed milk

1/2 cup passion fruit pulp**

Whipped cream for decorating and/or serving


* I used about 15 Keebler Sandies Classic Shortbread Cookies. You could also purchase a 9-inch shortbread pie crust. If using a store bought pie crust there is no need to pre-bake it. Just fill it with the pie filling and bake as directed below.

** I purchased a frozen 14oz. package from Goya and left it in the refrigerator overnight to defrost.


Directions:

Preheat the oven to 350 F.

Combine the shortbread cookie crumbs and the butter in a medium bowl and mix them together. Once mixed, transfer to a 9-inch pie plate and press the crumbs in an even layer along the bottom and sides of the dish. Bake in the preheated oven for 10 minutes. Remove from the oven and set aside.

While the crust is cooling make the filling. In a large bowl, using a handheld mixer on medium, beat the egg yolks until they are light and fluffy. Gradually add in the condensed milk and continue beating until combined. Finally, add in the passion fruit pulp and continue beating until combined.

Pour the filling into the pie crust and bake for 20 minutes. The filling will be set.

Transfer to a wire rack to cool completely and then refrigerate for a few hours before serving and/or decorating with whipped cream.


Whipped Cream

  • Servings: About 2 cups
  • Print

Ingredients:

1 cup heavy cream

2 tablespoons confectioners’ sugar

1 teaspoon vanilla extract


Directions:

In a medium bowl combine the heavy cream and confectioners’ sugar and beat with a handheld mixer until soft peaks form. Add in the vanilla extract and continue beating until stiff peaks form. Refrigerate until ready to use.


Slow Cooker Sunday: Triple Chocolate Brownies

Sometimes baking in my slow cooker is a hit or miss situation. I recently made a Banana Bread Pudding in it and that was a definite hit and I once made a Chocolate Peanut Butter Cake that was more burnt than cake. I don’t let those mishaps discourage me though. I recently tried making brownies in my slow cooker and while they tasted good, there were a few pieces along the edge that were burnt. But, I believe I know what the problem was. The recipe called for a 5 quart slow cooker and I used a 5.5 quart slow cooker. You wouldn’t think it would make a difference, but, having a slightly larger slow cooker means that my brownies were probably slightly thinner than the recipe intended, hence the baking time I followed was too long which resulted in slightly burnt brownies.

I prepped my slow cooker by spraying the insert with non-stick cooking spray and then lining the bottom with parchment paper that I then sprayed with the spray as well.

After making the batter for the brownies I poured it into my slow cooker and smoothed the top with a small offset spatula.

And while I let the brownies cook for 3.5 hours, I really should have let them cook for only 3 hours and then uncovered the slow cooker for the final 30 minutes of cooking. Truth be told, I am not greatest at gauging when I should take my brownies out of the oven. I know they are supposed to be slightly underdone when you take them out, but, I inevitably leave them in a minute or two too long because I don’t want them to be too underdone. I should learn by now. So, while I had a feeling my brownies were done at 3 hours, I ended up leaving them in too long and I ended up with burnt edges, but, I was able to salvage most of them and they were delicious.

You may be wondering why I don’t have any pics of those brownies I did salvage…. Well, by the time the brownies cooled and I sliced them it was too dark in my house to get a good picture. It’s so much easier to take pictures during the summer months! I debated whether or not to share the recipe since there were so many mishaps, but, they were good nonetheless and worth another try at perfecting. Or maybe just baking them in the oven instead!

Slow Cooker Triple Chocolate Brownies

  • Servings: 14 brownies
  • Print

Ingredients:

1 1/4 cups flour

1/4 cup unsweetened cocoa powder

3/4 teaspoons baking powder

1/2 teaspoons coarse salt

1 stick unsalted butter, cut into pieces

8oz. bittersweet chocolate, cut into pieces*

1 cup sugar

3 large egss, lightly beaten

1 cup chopped walnuts

1 cup semi-sweet chocolate chips

Non-stick cooking spray


*I used 1 1/3 cups of bittersweet chocolate chips


Directions:

Spray the insert of a 5-quart slow cooker with the cooking spray. Line the bottom with parchment paper and then spray the paper with the spray as well.

In a small bowl whisk together the flour, cocoa powder, baking powder and salt. Set aside.

Place the butter and the bittersweet chocolate in a medium microwave-safe bowl and microwave on 30 second intervals, stirring after each, until the chocolate and butter has melted. Add the sugar and stir to combine. Stir in the eggs, then add in the flour mixture, the walnuts and chocolate chips. Stirring everything together until just combined, be sure not to overmix. Transfer the mixture to the slow cooker insert and smooth the top.

Cover and cook on low for 3.5 hours*. Uncover and cook for an additional 30 minutes. Remove the insert from the slow cooker and run a knife around the edges to loosen the brownies. Place the insert on a wire rack and allow the brownies to cool completely, at least 2 hours. Turn the brownies out onto a cutting board / work surface and slice into 14 brownies. Store in an airtight container.

*If using a larger slow cooker your cooking time will be less. I used a 5.5 quart slow cooker and I probably should have uncovered them for the last 30 minutes at around the 3 hour mark.

Recipe from Martha Stewart

Pumpkin Cinnamon Pudding Cake

Monday has become my day for sharing new pumpkin recipes with you. That’s not a bad way to kick off the week if you ask me. Today’s recipe is a Pumpkin Cinnamon Pudding Cake. It’s a nice light dessert that creates its own sauce for drizzling while baking. I found the recipe during a recent cleaning/organizing frenzy. I went through a bunch of holiday baking magazines I had sitting on a bookshelf for quite some time (some for almost 10 years.) I had flagged recipes in each of them and then never made them. I found quite a few pumpkin recipes, some cookie recipes, and some other goodies that I am hoping to try out sooner rather than later.

You may be wondering how exactly this cake created its own sauce. Well, after making the batter for the cake I spread it into an 8x8x2-inch baking pan I sprayed with baking spray and then sprinkled the top with brown sugar and cinnamon. Next, I poured a mixture of boiling water and butter over the top of the cake prior to baking. While baking the water combines with the sugar and cinnamon to create a sauce under the cake. You may be tempted to reduce the amount of brown sugar you sprinkle over the cake thinking a cup is too much (I did!), but, the end result isn’t overly-sweet. Since the cake itself isn’t that sweet it offers a perfect balance for the cake.

After baking the cake in a 350 F preheated oven for about 35 minutes I let the cake cool on a wire rack before enjoying.

And the best way to enjoy this cake is warm with the sauce drizzled on top with a scoop (or two) of vanilla ice cream on the side. I made the mistake of letting the cake cool for too long before enjoying a piece so I placed it in the microwave for about 30 seconds to warm it up and then added my ice cream.

If you are really in a pumpkin mood you could also make my No Churn Pumpkin Spice Ice Cream from last week to go along with this cake. The best part, you can try both recipes with just 1 can of pumpkin puree.


Pumpkin Cinnamon Pudding Cake

Ingredients:

1 1/4 cups flour

2 teaspoons baking powder

1 1/2 teaspoons ground cinnamon

1/2 teaspoon ground ginger

1/4 teaspoon salt

1/4 teaspoon ground nutmeg

1/4 cup unsalted butter, at room temperature

1 3/4 cups light brown sugar

1/2 cup sour cream

1/2 cup pumpkin puree

1 teaspoon vanilla extract

1 cup boiling water

2 tablespoons unsalted butter, at room temperature

Vanilla ice cream, for serving


Directions:

Preheat the oven to 350 F and spray and 8x8x2-inch square pan with baking spray.

In a medium bowl whisk together the flour, baking powder, ginger, salt, nutmeg and 1/2 teaspoon of the cinnamon. Set aside.

In a large bowl, using a handheld mixer, beat the 1/4 cup butter and 3/4 cup of the brown sugar together on medium speed until light and fluffy. Add the sour cream, pumpkin puree and vanilla and continue beating until the mixture become light and fluffy again. Add the flour and stir with a spoon until just combined. Transfer the mixture to prepared pan and spread it into an even layer with an offset spatula. Sprinkle the remaining sugar over the batter and then sprinkle the remaining cinnamon over the sugar.

In a measuring cup combine the boiling water with the 2 tablespoons of butter and stir until the butter is melted. Pour this over the batter in the pan.

Bake for 30 to 40 minutes, or until the top springs back when touched. Let the cake cool in the pan on a wire rack for 30 minutes and then spoon the cake into a bowl and top with vanilla ice cream and drizzle the syrup from the pan over it.

Recipe from Mixing Bowl Magazine from Fall/Winter 2010

A Classic Pound Cake

You may or may not have noticed that I recently streamlined my category groups. I realized that I had too many and that some of the categories only had one or two posts under them. So, I took some time to clean it up. Which meant pretty much re-categorizing about half of my posts. While doing so I noticed how my picture quality has improved since I started blogging. Not to say that they are anywhere near perfect now, but, I have definitely gotten better from the beginning in terms of background and lighting.  It also gave me the chance to see some of the baked goods I have shared with you – some that I can’t believe I haven’t made again and others that tasted good but I am sure I won’t be making again. This all led me to realizing that there was one recipe I haven’t shared… my go-to pound cake recipe. I have been making this recipe for a few years now. I actually posted an almond variation of the recipe a few years ago and today I am finally posting the original recipe.

This cake is super simple to make, moist, delicious and will be sure to please all palates. You can’t beat that!

And while it’s delicious on its own, adding fresh whipped cream (and fresh berries when they are in season) is a nice addition. Since its Fall I decided to whip up pumpkin spice whipped cream to go along with it. I’ve shared my recipe below, but if you have a favorite whipped cream recipe you swear by simply add in a teaspoon or two of pumpkin pie spice to give it a nice twist.


Classic Pound Cake

Ingredients:

2 cups flour

1 tablespoon baking powder

1 8oz. package cream cheese, at room temperature

2 sticks unsalted butter, at room temperature

2 cups sugar

1 teaspoon vanilla extract

6 eggs


Directions:

Preheat oven to 325 F. Spray a Bundt pan with baking spray and set aside.

In a medium bowl combine the flour and baking powder and set aside.

Using a handheld mixer cream together the cream cheese, butter, sugar and vanilla extract in a large bowl until well blended. Add the eggs 1 at a time, beating after each addition. With the mixer on low gradually add in the flour mixture until incorporated.

Transfer the batter to the prepared pan and bake for about an hour or until a cake tester inserted in the cake comes out clean.

Let the cake cool in the pan for 10 minutes before inverting it on a wire rack to cool completely.

Recipe from Kraft


Pumpkin Spice Whipped Cream

  • Servings: About 2 cups
  • Print

Ingredients:

2 cups heavy whipping cream

1/2 cup confectioners’ sugar

1 teaspoon pumpkin pie spice

1 teaspoon vanilla extract


Directions:

Place the beaters of a handheld mixer and a metal in the freezer for at least 15 minutes.

Place the whipping cream, sugar, pumpkin pie spice and vanilla extract in the chilled bowl and beat on medium speed until stiff peaks form. Do not over beat. Refrigerate until ready to use.

Strawberry Trifle with Mascarpone Whipped Cream

Hope you all had a wonderful 4th! Unfortunately the holiday weekend is now over and it’s back to the daily grind of work, but, on the bright side there is still more summer to enjoy. I had my annual BBQ on the 4th and it was a great time… You can never go wrong with great friends, delicious food and yummy desserts.

This year, one of my friends and his mother-in-law decided to have a rib throw-down. Everyone was a winner in this throw-down. One of them was declared as having the best ribs and the rest of us got to enjoy them. In all honesty both were equally delicious in my book… One had a bit of a kick and the other one had a nice amount of homemade BBQ sauce on it.

I made a few salads (macaroni, potato, black and a Greek chickpea salad), macaroni and cheese, slow cooker baked beans and of course dessert.

I made this very patriotic funfetti cake…

A Strawberry Blueberry Icebox Cake (this is actually a dessert I make every year for the 4th)…

And for the first time ever I made a trifle. It had layers of Angel Food Cake, Mascarpone Whipped Cream and Mint Macerated Strawberries. I took a major time-saving shortcut and used a store-bought Angel Food Cake as opposed to baking one from scratch. If you’re not keen on Angel Food Cake, a Pound Cake would be a nice substitute. And, if you don’t have a trifle bowl you could use a large flat-bottomed glass bowl.


Strawberry Trifle with Mascarpone Whipped Cream

Ingredients:

Store-bought or Homemade Angel Food Cake or Pound Cake, cut into cubes

For the macerated strawberries:

2 lbs. strawberries, hulled and quartered

1/2 cup sugar

2 tablespoons chopped fresh mint

For the mascarpone whipped cream:

1 1/3 cups mascarpone cheese

1/2 cup confectioners’ sugar

2 cups heavy whipping cream

1/2 teaspoon vanilla extract

Directions:

For the Mascarpone Whipped Cream:

Using a handheld mixer on medium speed beat the mascarpone cheese and sugar until combined. Add the heavy cream and vanilla extract and continue beating until stiff peaks form. Use immediately or cover and refrigerate for up to 2 days.

For the strawberries:

In a large bowl stir together the strawberries, sugar and mint. Let stand at room temperature until the strawberries begin to release their juices, about 15 minutes.

To assemble the trifle:

Place a single layer of cake in the bottom of the bowl. Spoon a third of the macerated strawberries over the cake and then spread a third of the mascarpone whipped cream over the strawberries. Repeat these layers two more times ending with a layer of mascarpone whipped cream. Place a few strawberries in the center of the whipped cream for decoration. Serve immediately or cover and refrigerate for a few hours before serving.

Recipe slightly modified from Williams-Sonoma

Churro Cake with a Spiced Chocolate Sauce

With Cinco de Mayo just a few days away (and it falling on the weekend this year) you may be searching for some fun and delicious recipes to make. If you’re thinking of making churros but aren’t keen on the idea of having to fry them or just want a fun alternative how about a Churro Cake with a Spiced Chocolate Sauce for drizzling over it. And don’t worry, you will still have the cinnamon sugar coating that makes a churro extra yummy.

I began by combining my dry ingredients – flour, baking powder, cinnamon and salt – in a medium bowl and setting it aside. In the bowl of my stand mixer I beat butter, sugar and vanilla on medium-high speed until it was light and fluffy – about five minutes. I then added in four eggs and two egg yolks, one at a time. And finally I beat in sour cream. With the mixer on low, I added in the flour mixture in three parts alternating with milk. Once the mixtures were combined I poured it into a Bundt pan that I sprayed with baking spray. I tapped the pan down on my counter a few times to release any air bubbles and then baked it in a 350 F preheated oven for about 50 minutes. Once the cake was done I let it sit in the pan for about 10 minutes and then inverted it on a wire rack to cool completely.

Once the cake was cool I placed it along with the cooling rack over a large bowl. I combined cinnamon and sugar in a small bowl and set it aside. In another small bowl I melted three tablespoons of unsalted butter in the microwave. Next, using a pastry brush, I brushed sections of the cake with the melted butter and then sprinkled the cinnamon-sugar mix over the section. Pressing the mixture on to the cake to adhere it. Hence me placing the rack over a large bowl, any excess melted butter and cinnamon sugar mixture simply fell into the bowl, making for an easier clean-up. You want to do this in sections, if you simply brush the entire cake and then tried sprinkling it with the cinnamon sugar it will not adhere to the cake as well (or at all) since the butter will seep into the cake.

Next, I made the chocolate sauce to go along with the cake. I combined half and half, chile powder, dark brown sugar, unsweetened cocoa powder, vanilla extract and salt in a small saucepan. I brought it to a simmer over medium heat and then removed it from the heat and added in semi-sweet chocolate chips. I let the mixture stand for a few minutes and then stirred it until it was smooth.

The best way to eat this… With the chocolate sauce drizzled over the cake. YUM! This cake was hit amongst my friends with some of us going back for seconds and practically drenching the cake with the sauce – it’s that GOOD!

Churro Cake with a Spiced Chocolate Sauce

Ingredients:

For the Cake:

2 3/4 cups flour

1 tablespoon baking powder

1 teaspoon cinnamon

1 teaspoon salt

2 sticks unsalted butter, at room temperature

1 3/4 cups sugar

1 tablespoon vanilla extract

4 large eggs plus 2 egg yolks, at room temperature

1/2 cup sour cream

3/4 cup whole milk


For the Cinnamon Sugar Topping:

3 tablespoons unsalted butter, melted

1/4 cup sugar

1 teaspoon ground cinnamon


For the Spiced Chocolate Sauce:

1 1/4 cups half-and-half

1/4 cup dark brown sugar

2 tablespoons unsweetened cocoa powder

1/2 teaspoon vanilla extract

1/4 teaspoon chile powder**

Pinch of salt

3/4 cup semi-sweet chocolate chips*


*original recipe called for 4 ounces semi-sweet chocolate, chopped

**If you want your sauce to have more of a kick add in 1/2 – 1 teaspoon of chile powder


Directions:

Preheat the oven to 350 F. Prep a Bundt pan by spraying it with baking spray (or brushing it with butter and then coating it with flour).

In a medium bowl whisk together the flour, baking powder, cinnamon and salt.

In the bowl of a stand mixer, or using a handheld mixer, beat the butter, sugar and vanilla extract on medium-high speed until light and fluffy, about 5 minutes. Beat in the eggs one at a time, and then the egg yolks. Beat in the sour cream. Reduce the speed to low and add in the flour mixture in three parts alternating with the milk. Beat until combined.

Pour the batter into the prepared pan and tap the pan on the counter a few times to release any air bubbles. Smooth the top of the batter with a spatula and then place in the oven for about 50 – 55 minutes. Until a cake tester inserted in the center comes out clean.

Let the cake cool in the pan for 10 minutes and then loosen the edges with your cake tested or butter knife and invert the cake on a wire rack to cool completely.

Once the cake has cooled make the topping.

Combine the cinnamon and sugar in a small bowl. Place the cake along with the rack over a large bowl. Working in sections, brush the cake with the melted butter and then sprinkle the cinnamon sugar over the cake, pressing to adhere it to the cake.

To make the spiced chocolate sauce combine all of the ingredients, minus the chocolate chips, in a small saucepan. Bring to a simmer over medium heat, stirring until the sugar dissolves. Remove from the heat and add in the chocolate chips. Let it sit for 2 minutes and then stir until smooth.

Serve the cake with the spiced chocolate sauce.

Recipe from Food Network

Sprouting Carrot Cupcakes – Tutorial

With Easter right around the corner I decided to make some fun themed cupcakes to get in the spirit of the holiday. Today I am sharing with you these Sprouting Carrot Cupcakes and later this week I will be sharing with you Bunny Ear Coconut Cupcakes.

I began by baking a batch of chocolate cupcakes. While they cooled, I made the frosting. I made a basic buttercream frosting and then removed a third of it. In this third I stirred in melted unsweetened chocolate until it was fully incorporated. I tinted the remaining frosting orange and then transferred it to a piping bag fitted with a large round tip.

After the cupcakes were cool I used a paring knife to cut a small cone-shaped piece out of the center of each one. I crumbled these small pieces of cake into a small bowl and set it aside.

Next, I spread the chocolate frosting over the cupcakes leaving the holes open. I then patted the crumbled pieces of chocolate cake onto the frosting to resemble dirt.

To make the carrots I piped the orange tinted frosting into the holes and then mounded it a bit above the hole. And finally, I cut small pieces of green sour apple straws and placed them in the piped carrots.

And there you have it… Sprouting Carrot Cupcakes.


While I opted to make my cupcakes and frosting from scratch, you could easily go the time-saving route and use a box chocolate cake mix and store bought chocolate and vanilla frosting. If you opt for store bought frosting I would advise refrigerating the vanilla frosting after tinting it orange for about 10-15 minutes prior to piping the carrots. Store bought frosting tends to be on the softer side so decorating with it can be frustrating since it won’t take shape, refrigerating it helps to stiffen it.


Supplies:

12 chocolate cupcakes

1 cup chocolate frosting

1 1/2 cups vanilla frosting

Orange food coloring

Green sour apple straws

Piping Bag fitted with a round tip


Spring Themed Palette Knife Painted Cake – Tutorial

Happy First Day of Spring! To celebrate I decided to try my hand at a Palette Knife Painted Cake. Using a spatula and buttercream frosting you basically paint a picture, design, flowers onto the sides of a cake. It’s definitely a lot more forgiving that piping a design on a cake and cake easily be fixed with a little more buttercream and some extra strokes of your spatula.

I used a yellow box cake mix to bake a two layer 6-inch cake. While the cake was cooling I whipped up a batch of my go-to Fluffy-Vanilla Frosting from Martha Stewart. I reserved about 3/4 cup of the frosting and then applied a thin crumb coat to the cake and then refrigerated the cake for about 30 minutes. While the cake was in the refrigerator I tinted the reserved 3/4 cup yellow and tinted the remaining frosting teal, for the background of the cake.

I then applied a generous amount of frosting to the cake and smoothed it as much as possible. I wanted a fairly thick layer of frosting around the cake for the next steps.

Next, using the tines of a fork I created a basket weave pattern around the cake. To begin, I placed the tines of a fork at the base of the cake and dragged them upwards about 1-inch. You don’t want to press so deeply that you are touching the cake though, hence, having a thick coat of frosting on the cake. Then, holding the tines horizontally above the first set of lines on the left I dragged the fork to the right stopping when I reached the last line from the bottom set of lines. I repeated this pattern up the side of the cake until I reached the top. I then started the next row with a set of horizontal lines, and then vertical and so forth. Continuing the alternating pattern until the entire cake was covered.

I then reserved about a tablespoon of the teal frosting and then tinted the remaining frosting green by adding in green gel food coloring. Using a tapered spatula and starting at the base of the cake I began dragging the tip of the spatula through the buttercream to create stems. Making sure not to press too deep as to touch the cake, but, going deep enough to create a channel. I passed the spatula through a few times to make sure it was deep enough making sure to wipe the spatula between each pass. I did this around the cake and even added in a few smaller channels between the larger stems.

To paint these channels, I picked up a small dollop of the green frosting and then using my fingers I round the frosting onto the tip of spatula so it was smooth. Next, I simply dragged the frosting through the channels. I repeated this step – making sure to wipe the spatula between each pass – until all of my stems were painted with frosting. At this point I placed the cake in the refrigerator for about an hour.

After the hour, I removed the cake from the refrigerator. Using the reserved yellow buttercream I painted flowers onto the cake. Using a rounded spatula I picked up a small dollop of yellow frosting and once again smoothed it with my fingers. I then pressed the dollop onto the cake and pulled the spatula away to create a petal. I continued doing this around the cake. I’ll admit, my petal didn’t come out exactly as I had hoped. This step actually reminded me of the pulled dot design on a cake. I actually wondered afterwards if it would have been easier to create the petals using that technique, although then the cake wouldn’t completely be a palette knife painted cake then.

I got the idea for this cake from The Cake Blog, for more detailed instructions click here .


Meyer Lemon Scones

I recently purchased 2 bags of Meyer Lemons to make a pie which I will be sharing with you in a couple of weeks in honor of Pi Day. I was pretty sure I only needed 1 bag of the lemons since each bag had about 6 each, but, I wanted to be sure I had enough in case of any mishaps and I figured I could always make something else with the extra ones. Initially I was thinking of making muffins, which I may still do, but quickly realized that most lemon muffins include poppy seeds, which I didn’t have. Then I came across a recipe for scones and for some reason I always thought that scones were difficult and time-consuming to make but the recipe I opted to try was the complete opposite.

Unfortunately I did not take any pictures of the prep work that went into making these scones. I was cooking/baking about three or four other things so my counter was a mess and I was trying to make sure I didn’t overcook or burn anything. What was nice about this recipe was that it only required two bowls to mix all of the ingredients and it came together quickly. After stirring together my dry ingredients (flour, sugar, salt, baking soda and baking powder) I added in diced cold butter. Here’s a tip, if you want to ensure your butter is cold enough and incorporates into the flour well, freeze it for a few minutes and instead of dicing it grate it in to the flour mixture. I then used a combination of a pastry cutter and my hands (actually just one hand, I ended up with a pretty bad cut on one of my fingers when I was cleaning lemon zest off my Microplane Grater) to work the butter in and get the mixture into the consistency of small peas. In a measuring cup I whisked together the heavy cream, an egg yolk and lemon zest and then added this to the flour mixture and stirred it until the dough formed. I then transferred the dough to a baking sheet, formed it into a circle and then cut it using a pizza cutter into four equal pieces. I separated the pieces so they weren’t touching and then brushed them with heavy cream. While the scones were baking, I whisked together a glaze of confectioners’ sugar, heavy cream and lemon juice to pour on them right out of the oven. I was never one to add glazes to my baked goods, I always thought doing so would make them super sweet. But, I have come around and realized that all glazes are not super sweet and sometimes can add another level of flavor to things. Like the cardamom glaze on the Rum-Raisin Apple Bundt Cake I posted a few months ago… YUM!

These scones were delicious and made for a nice breakfast treat. Maybe next time I will add some blueberries. Blueberries and lemon go together like peanut butter and chocolate!

Meyer Lemon Scones

Ingredients:

For the Scones:

1 1/4 cups flour

1/4 cup sugar

1/4 teaspoon salt

1/4 teaspoon baking soda

4 tablespoon unsalted butter, cold and diced

1/3 cup + 2 tablespoons heavy cream, plus more for brushing

1 large egg yolk

Zest of 2 Meyer lemons


For the Glaze:

1/3 cup Confectioners’ sugar

1 teaspoon heavy cream

2 teaspoons freshly squeezed Meyer lemon juice

Directions:

Preheat the oven to 400 F.

In a large bowl whisk together the flour, sugar, salt, baking soda and baking powder. Add the butter and using your preferred method (knives, pastry cutter or hands) work the butter into the flour mixture until the consistency is smaller than peas.

In a measuring cup whisk together the heavy cream, egg yolk and lemon zest and then pour over the flour mixture. Stir the mixture until a shaggy dough forms and everything is incorporated, being careful not to overmix the dough.

Transfer the dough to a small cookie sheet and form it into a circle.

Using a knife (or pizza cutter) cut the circle into 4 equal pieces. Separate the pieces a bit so they are not touching and brush the pieces with heavy cream.

Whisk together the ingredients for the glaze in a small bowl and set aside.

Bake the scones for 13-15 minutes in the preheated oven, or until a cake tester inserted in the middle comes out clean and the edges of the scones are beginning to brown.

Drizzle the glaze on the scones immediately after removing them from the oven. Enjoy warm.

To store, place the scones in an airtight container at room temperature for 1-2 days.

Recipe from Dessert for Two

Slow Cooker Sunday: Maple Cinnamon Pear-Applesauce

I have an abundance of apples from my recent apple picking outing and while I have been enjoying eating them, I decided to use some of them to make a homemade pear-applesauce. Making homemade applesauce is quicker and easier than you may think. And healthier since you can control the level of sweetness. You could also customize the flavors by adding in different fruits (i.e. peaches, mangoes, cranberries) or different spices.

I began by peeling, coring and chopping 2 lbs. each apples (I used red delicious and granny smith) and pears (I used Bartlett). I added the apples along with pure maple syrup, vanilla extract, a cinnamon stick, lemon juice and water to the inset of a slow cooker.

I set it took on low for 4 hours and was left with apples and pears that were perfectly tender for the next step.

I removed the cinnamon stick and using a slotted spoon transferred the apples and pears to the bowl of a food processor. To prevent the sauce from becoming too watery I didn’t add too much of the juices. I then pulsed the mixture to my desired consistency, making sure no large apple or pear chunks remained.

I transferred the pear-applesauce to a container to let it cool and then covered and refrigerated it.


Slow Cooker Maple Cinnamon Pear-Applesauce

Ingredients:

2 pounds apples, peeled, cored and chopped

2 pounds pears, peeled, cored and chopped

3/4 cup pure maple syrup

3/4 cup water

Juice from 1 lemon

1/2 teaspoon pure vanilla extract

Directions:

Combine all of the ingredients in a slow cooker (at least 6 quarts) and stir to combine. Cover and cook on low until the apples and pears are tender, about 4 hours.

Remove the cinnamon stick and transfer the mixture to a food processor or blender and pulse until desired consistency. You could also transfer to a large bowl and mash with a potato masher for a chunkier sauce.

Let cool and then transfer to an airtight container and refrigerate.

Recipe from Real Simple

If you would prefer to make this on the stove, increase the water amount to a cup and combine all of the ingredients in large pot and cook over medium heat, stirring occasionally, until the apples are tender, about 25 minutes.

For both versions (slow cooker or stove top) you could substitute apple juice for the water.