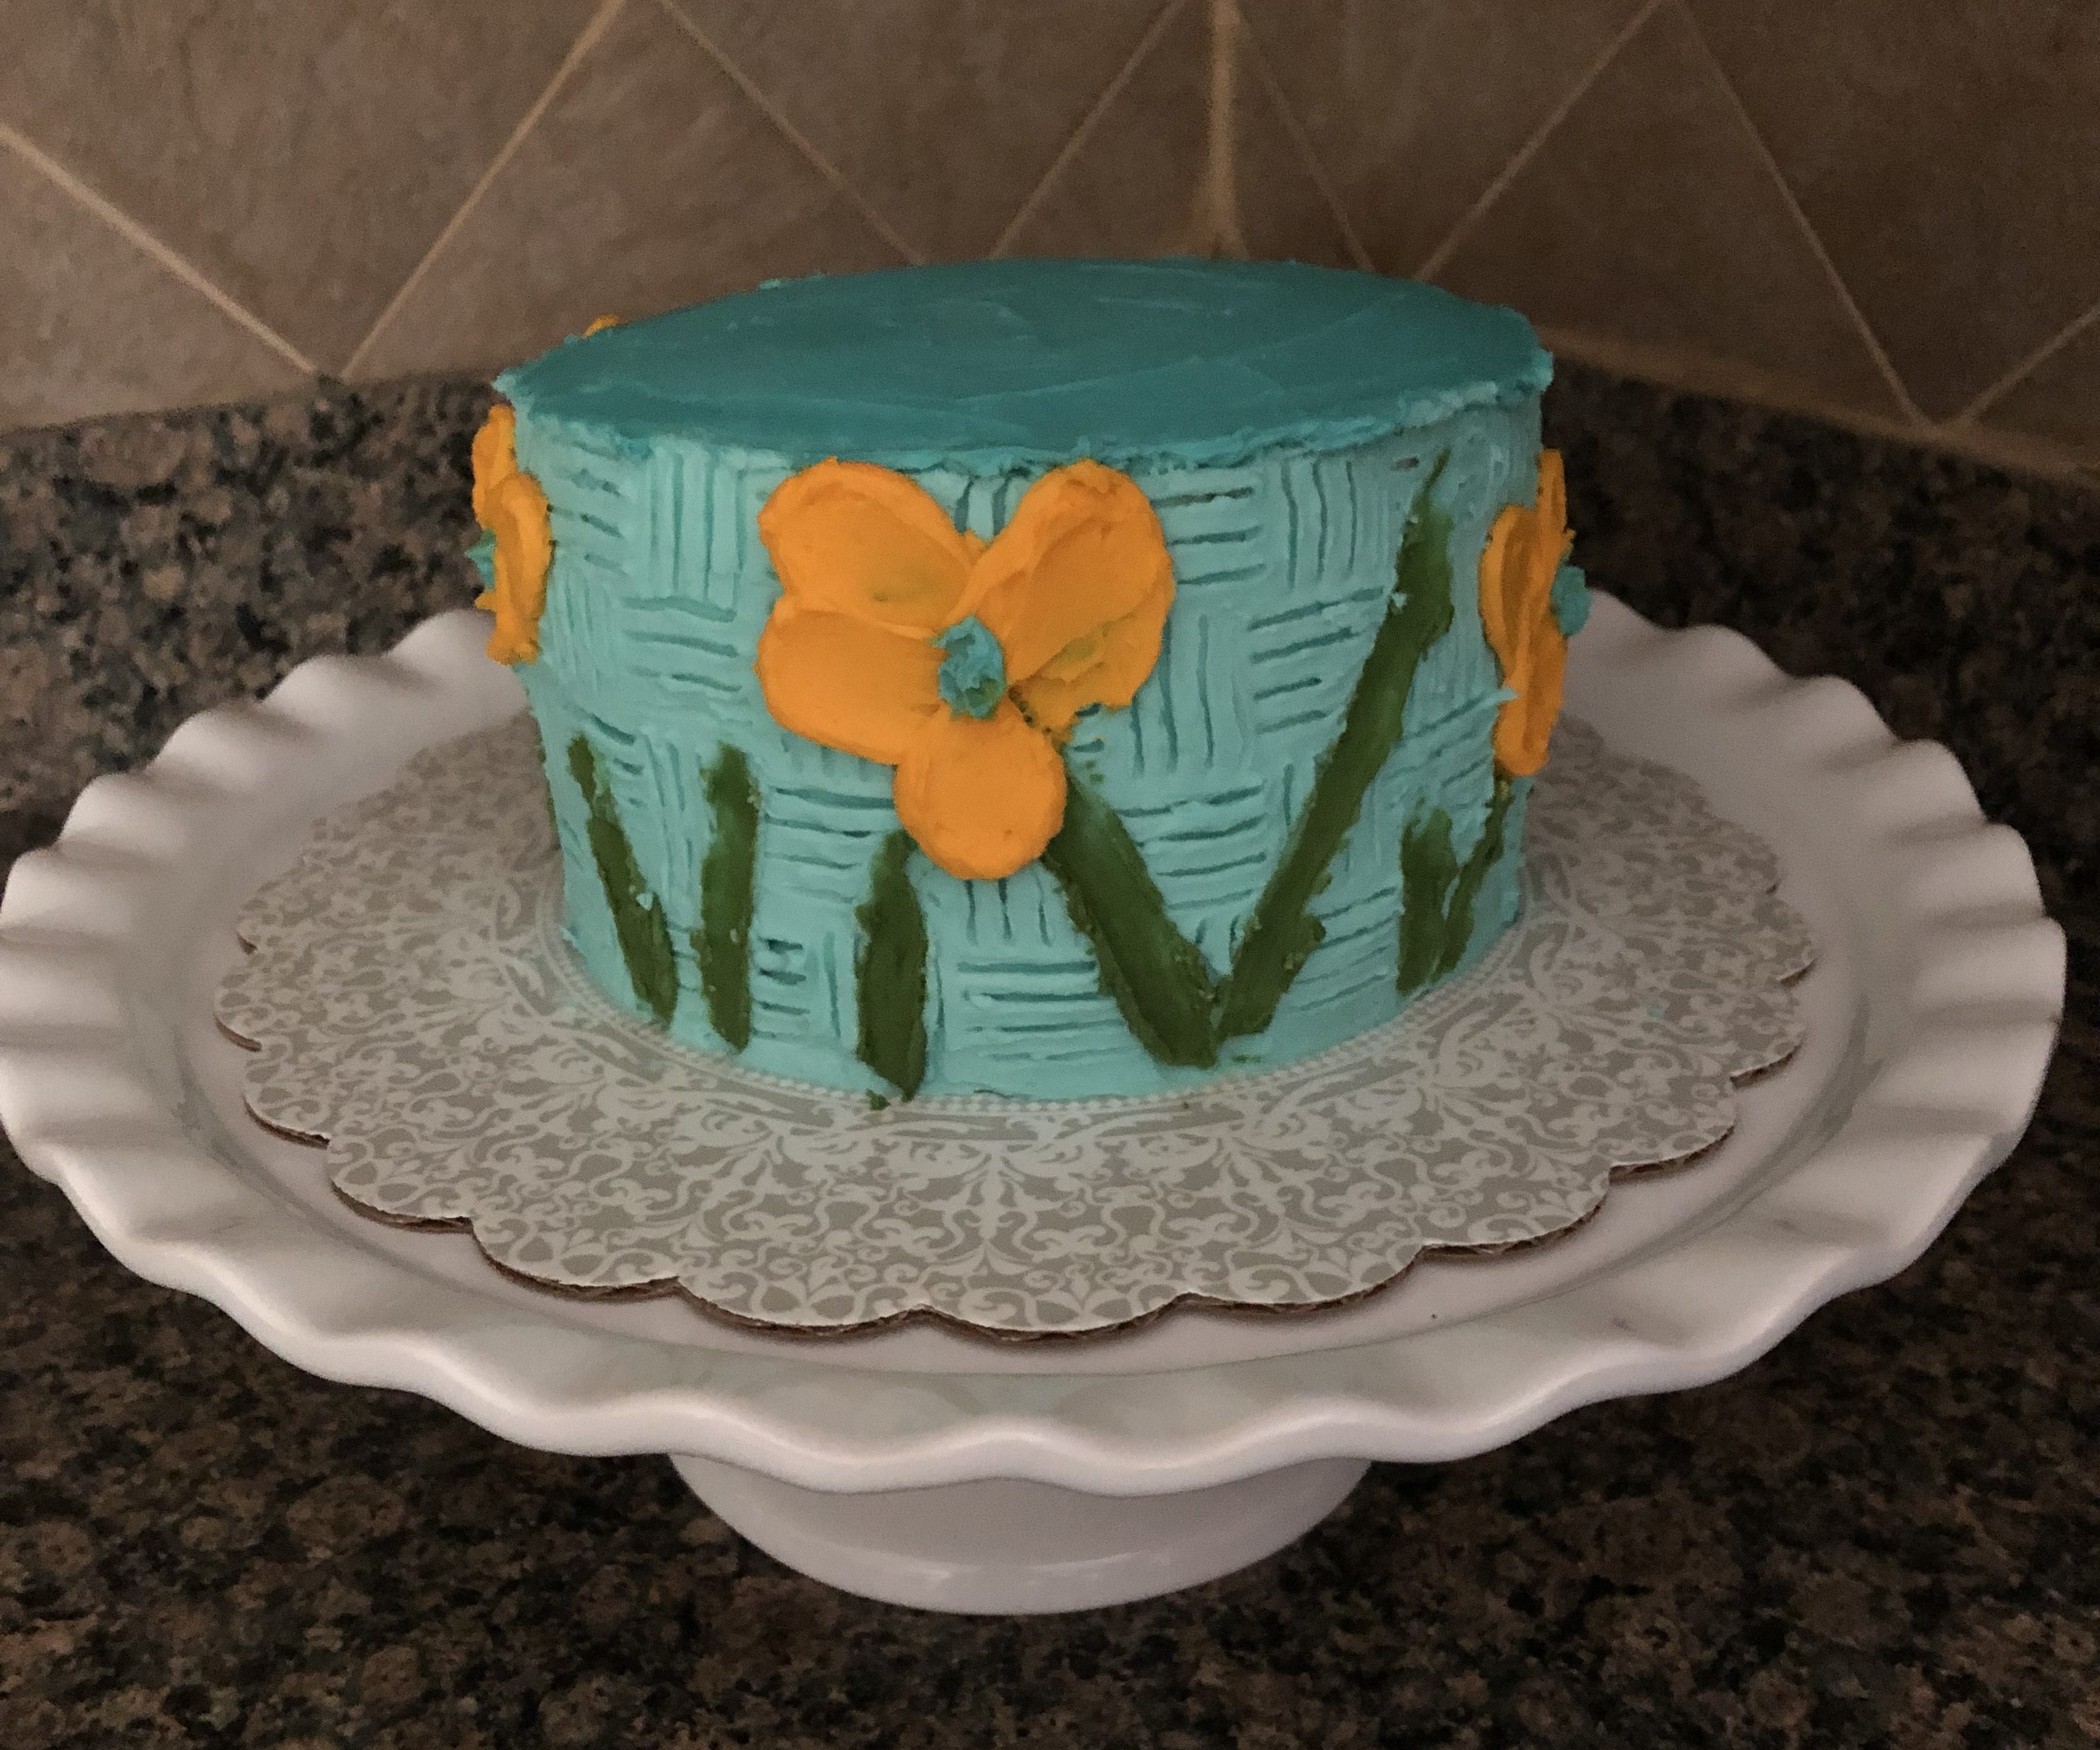
Happy First Day of Spring! To celebrate I decided to try my hand at a Palette Knife Painted Cake. Using a spatula and buttercream frosting you basically paint a picture, design, flowers onto the sides of a cake. It’s definitely a lot more forgiving that piping a design on a cake and cake easily be fixed with a little more buttercream and some extra strokes of your spatula.
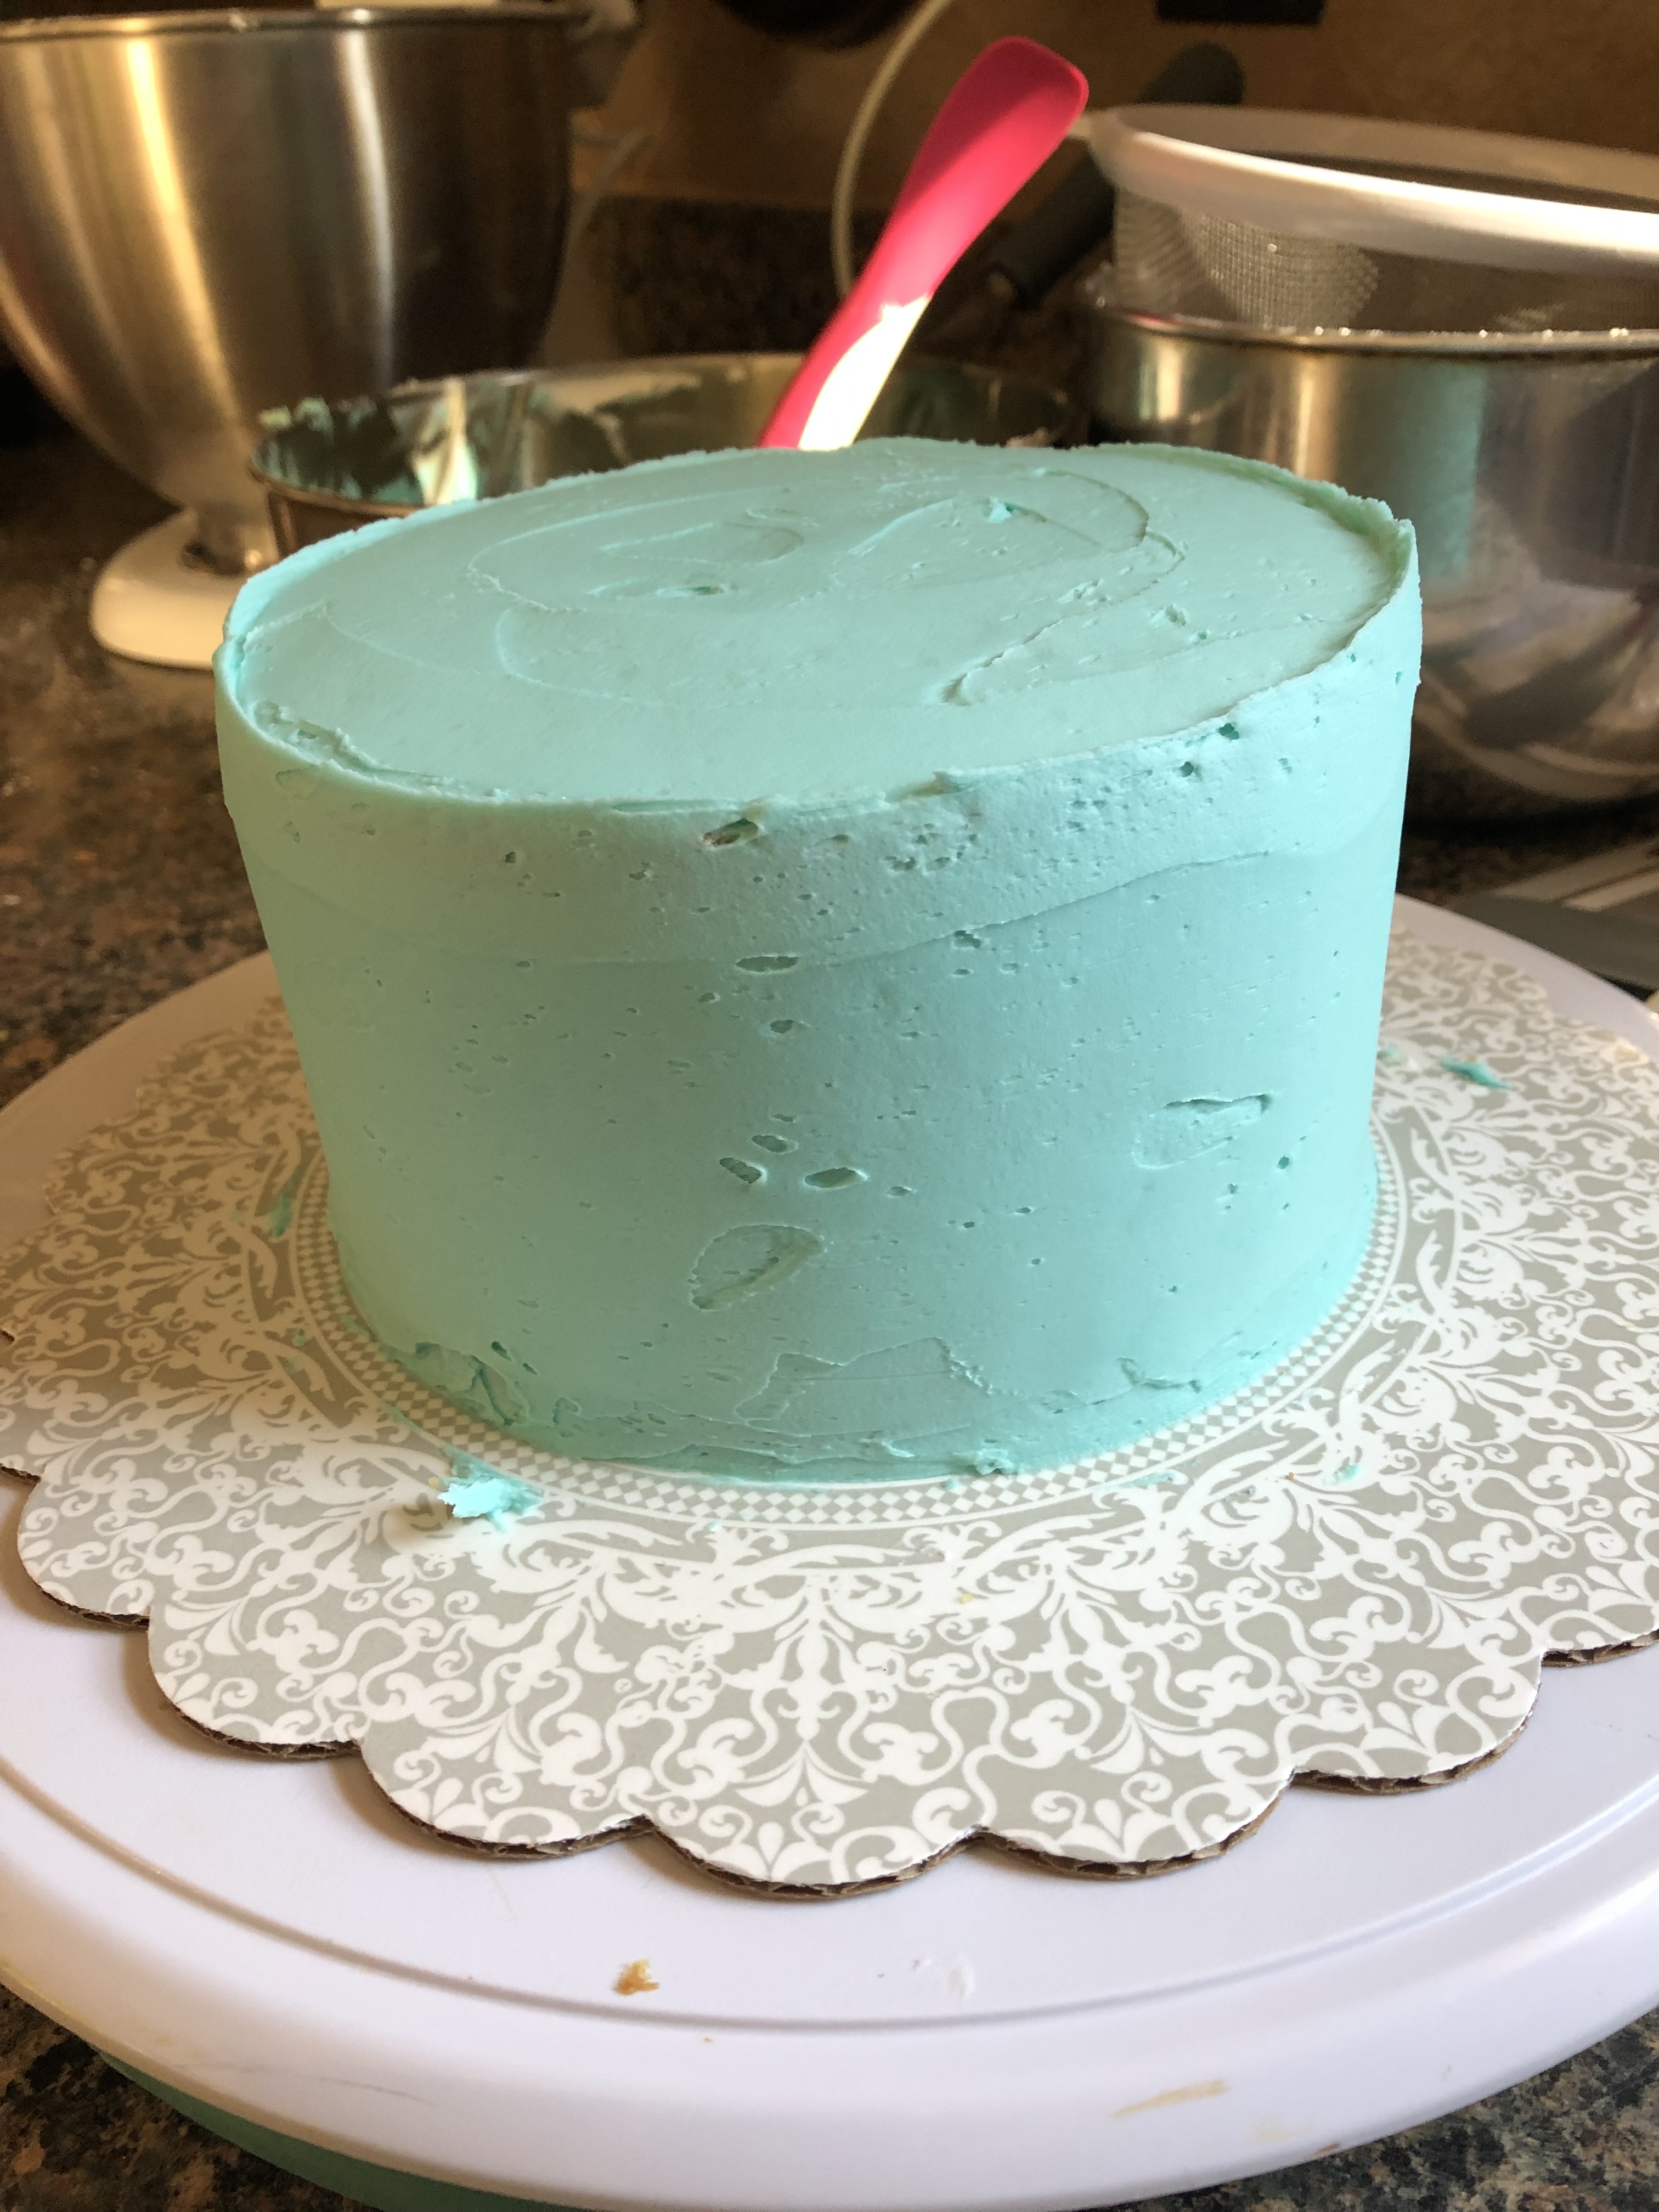
I used a yellow box cake mix to bake a two layer 6-inch cake. While the cake was cooling I whipped up a batch of my go-to Fluffy-Vanilla Frosting from Martha Stewart. I reserved about 3/4 cup of the frosting and then applied a thin crumb coat to the cake and then refrigerated the cake for about 30 minutes. While the cake was in the refrigerator I tinted the reserved 3/4 cup yellow and tinted the remaining frosting teal, for the background of the cake.

I then applied a generous amount of frosting to the cake and smoothed it as much as possible. I wanted a fairly thick layer of frosting around the cake for the next steps.
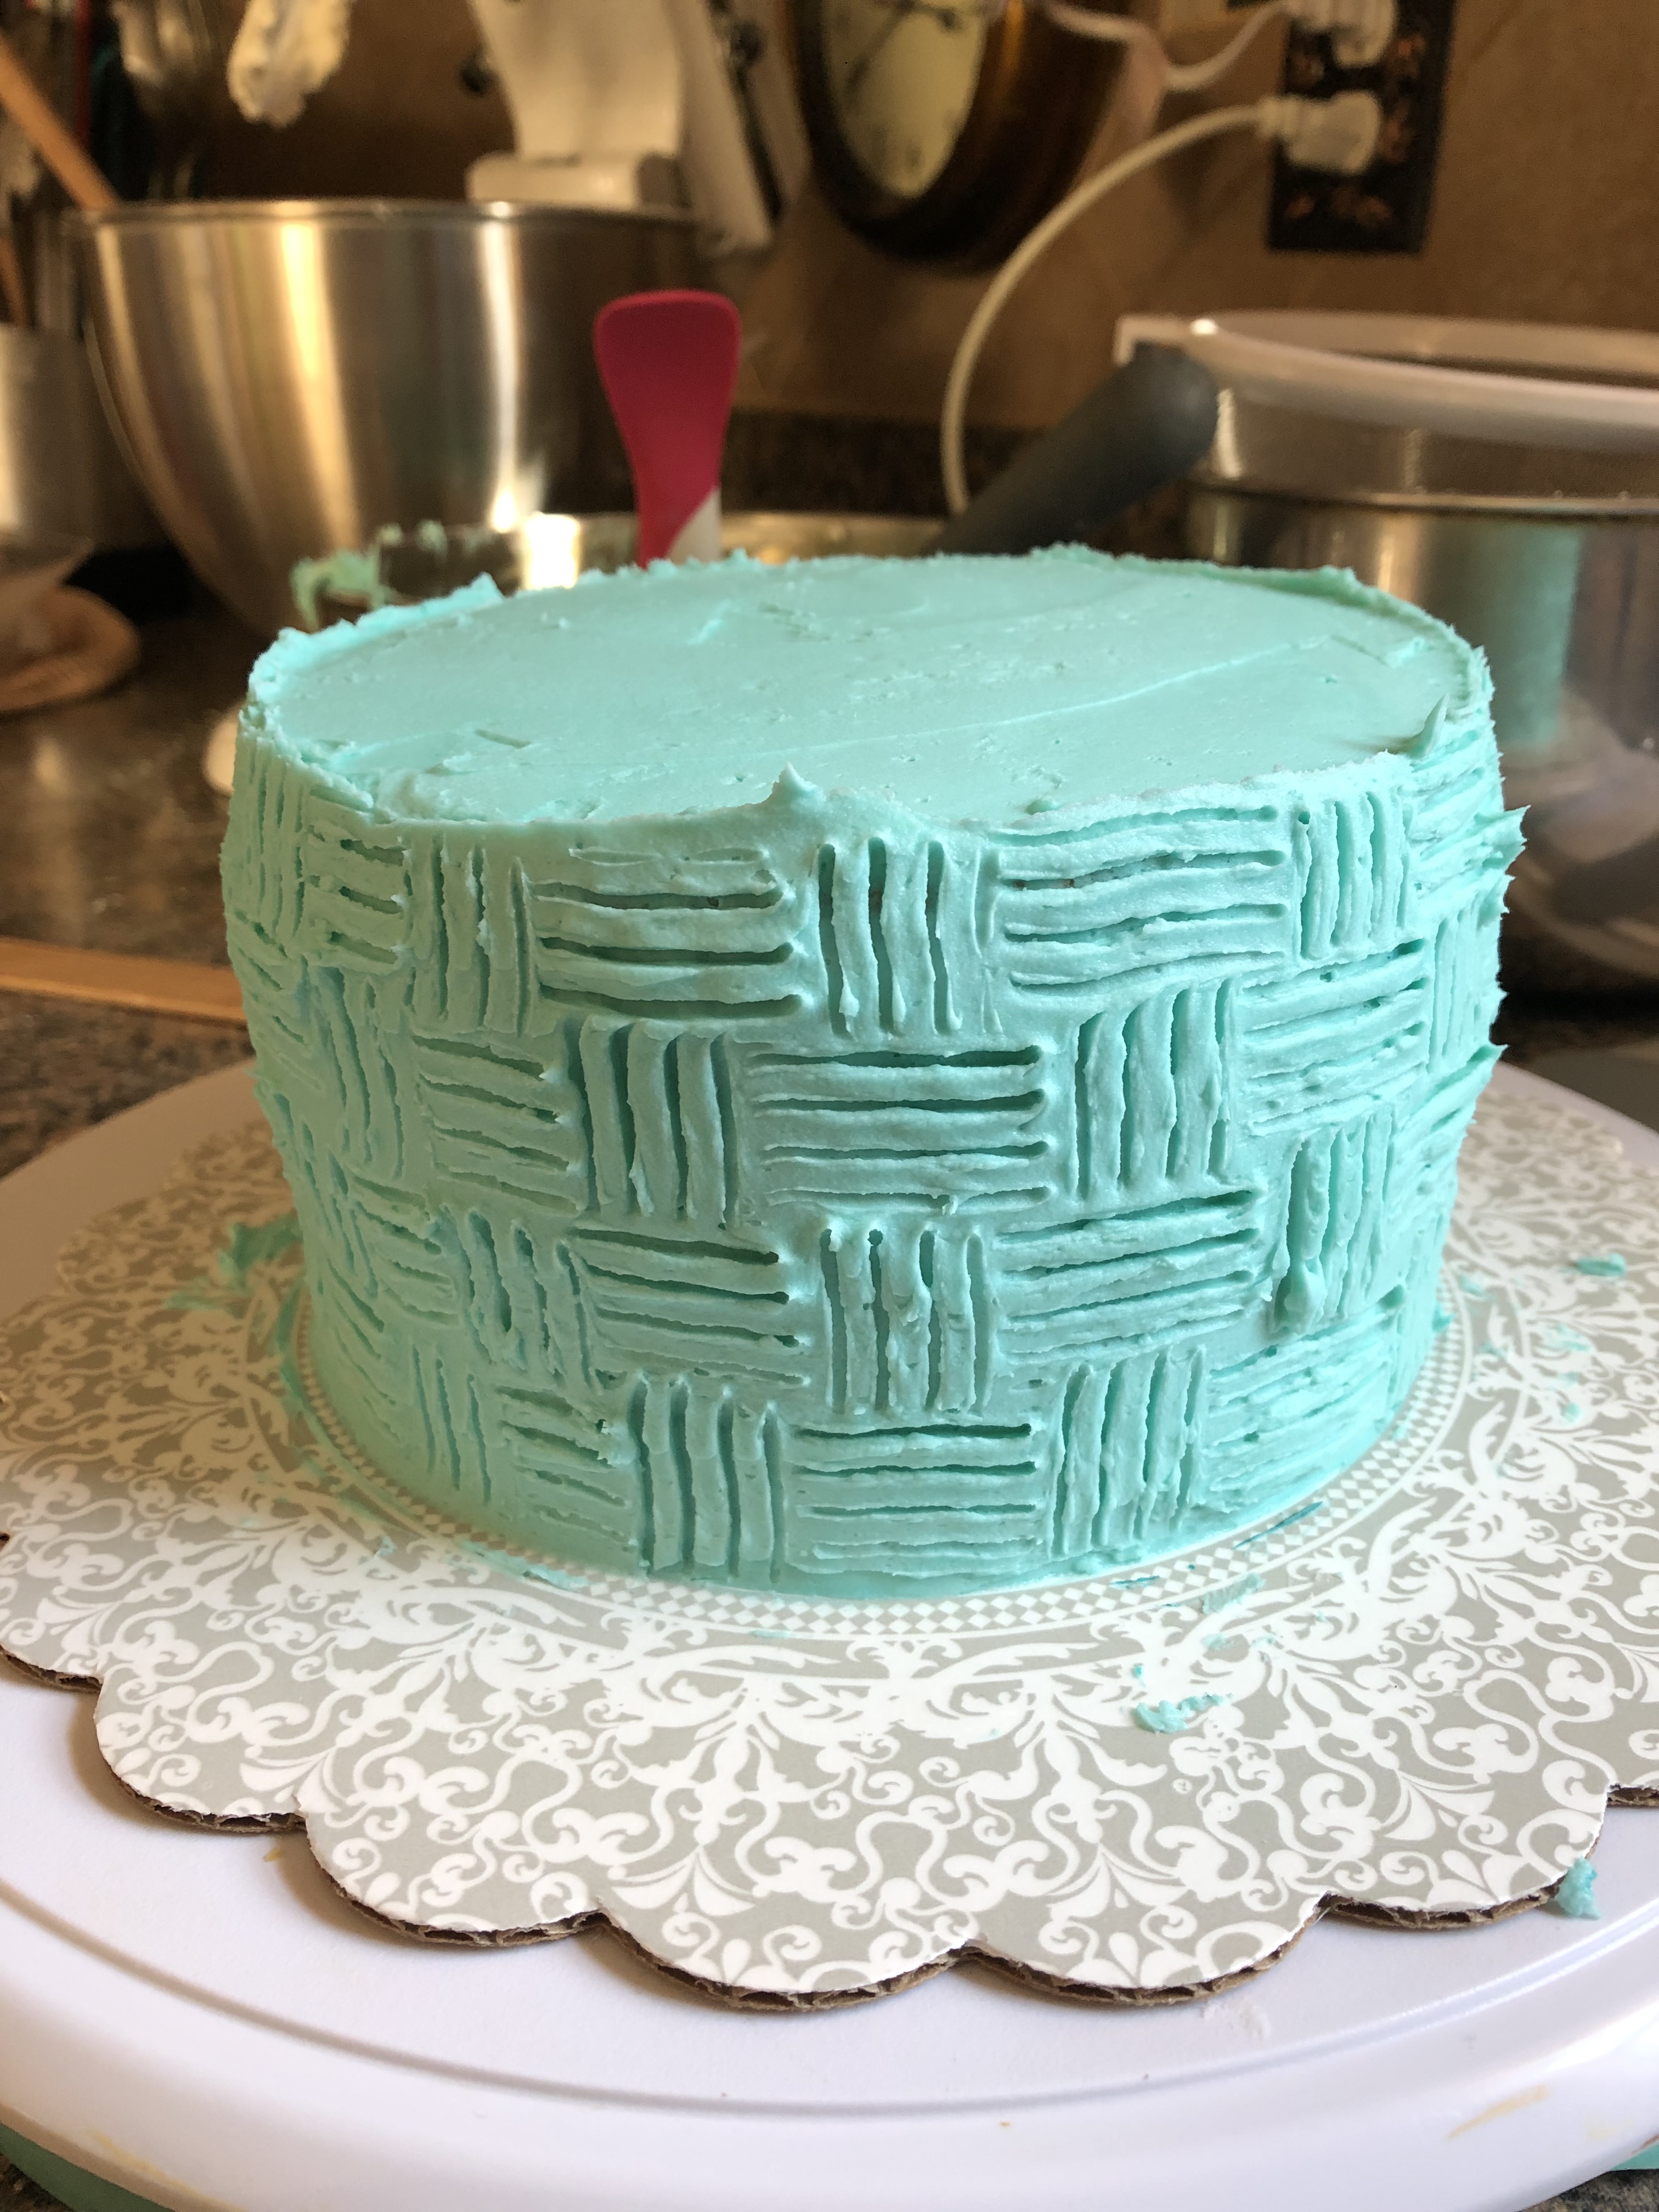
Next, using the tines of a fork I created a basket weave pattern around the cake. To begin, I placed the tines of a fork at the base of the cake and dragged them upwards about 1-inch. You don’t want to press so deeply that you are touching the cake though, hence, having a thick coat of frosting on the cake. Then, holding the tines horizontally above the first set of lines on the left I dragged the fork to the right stopping when I reached the last line from the bottom set of lines. I repeated this pattern up the side of the cake until I reached the top. I then started the next row with a set of horizontal lines, and then vertical and so forth. Continuing the alternating pattern until the entire cake was covered.
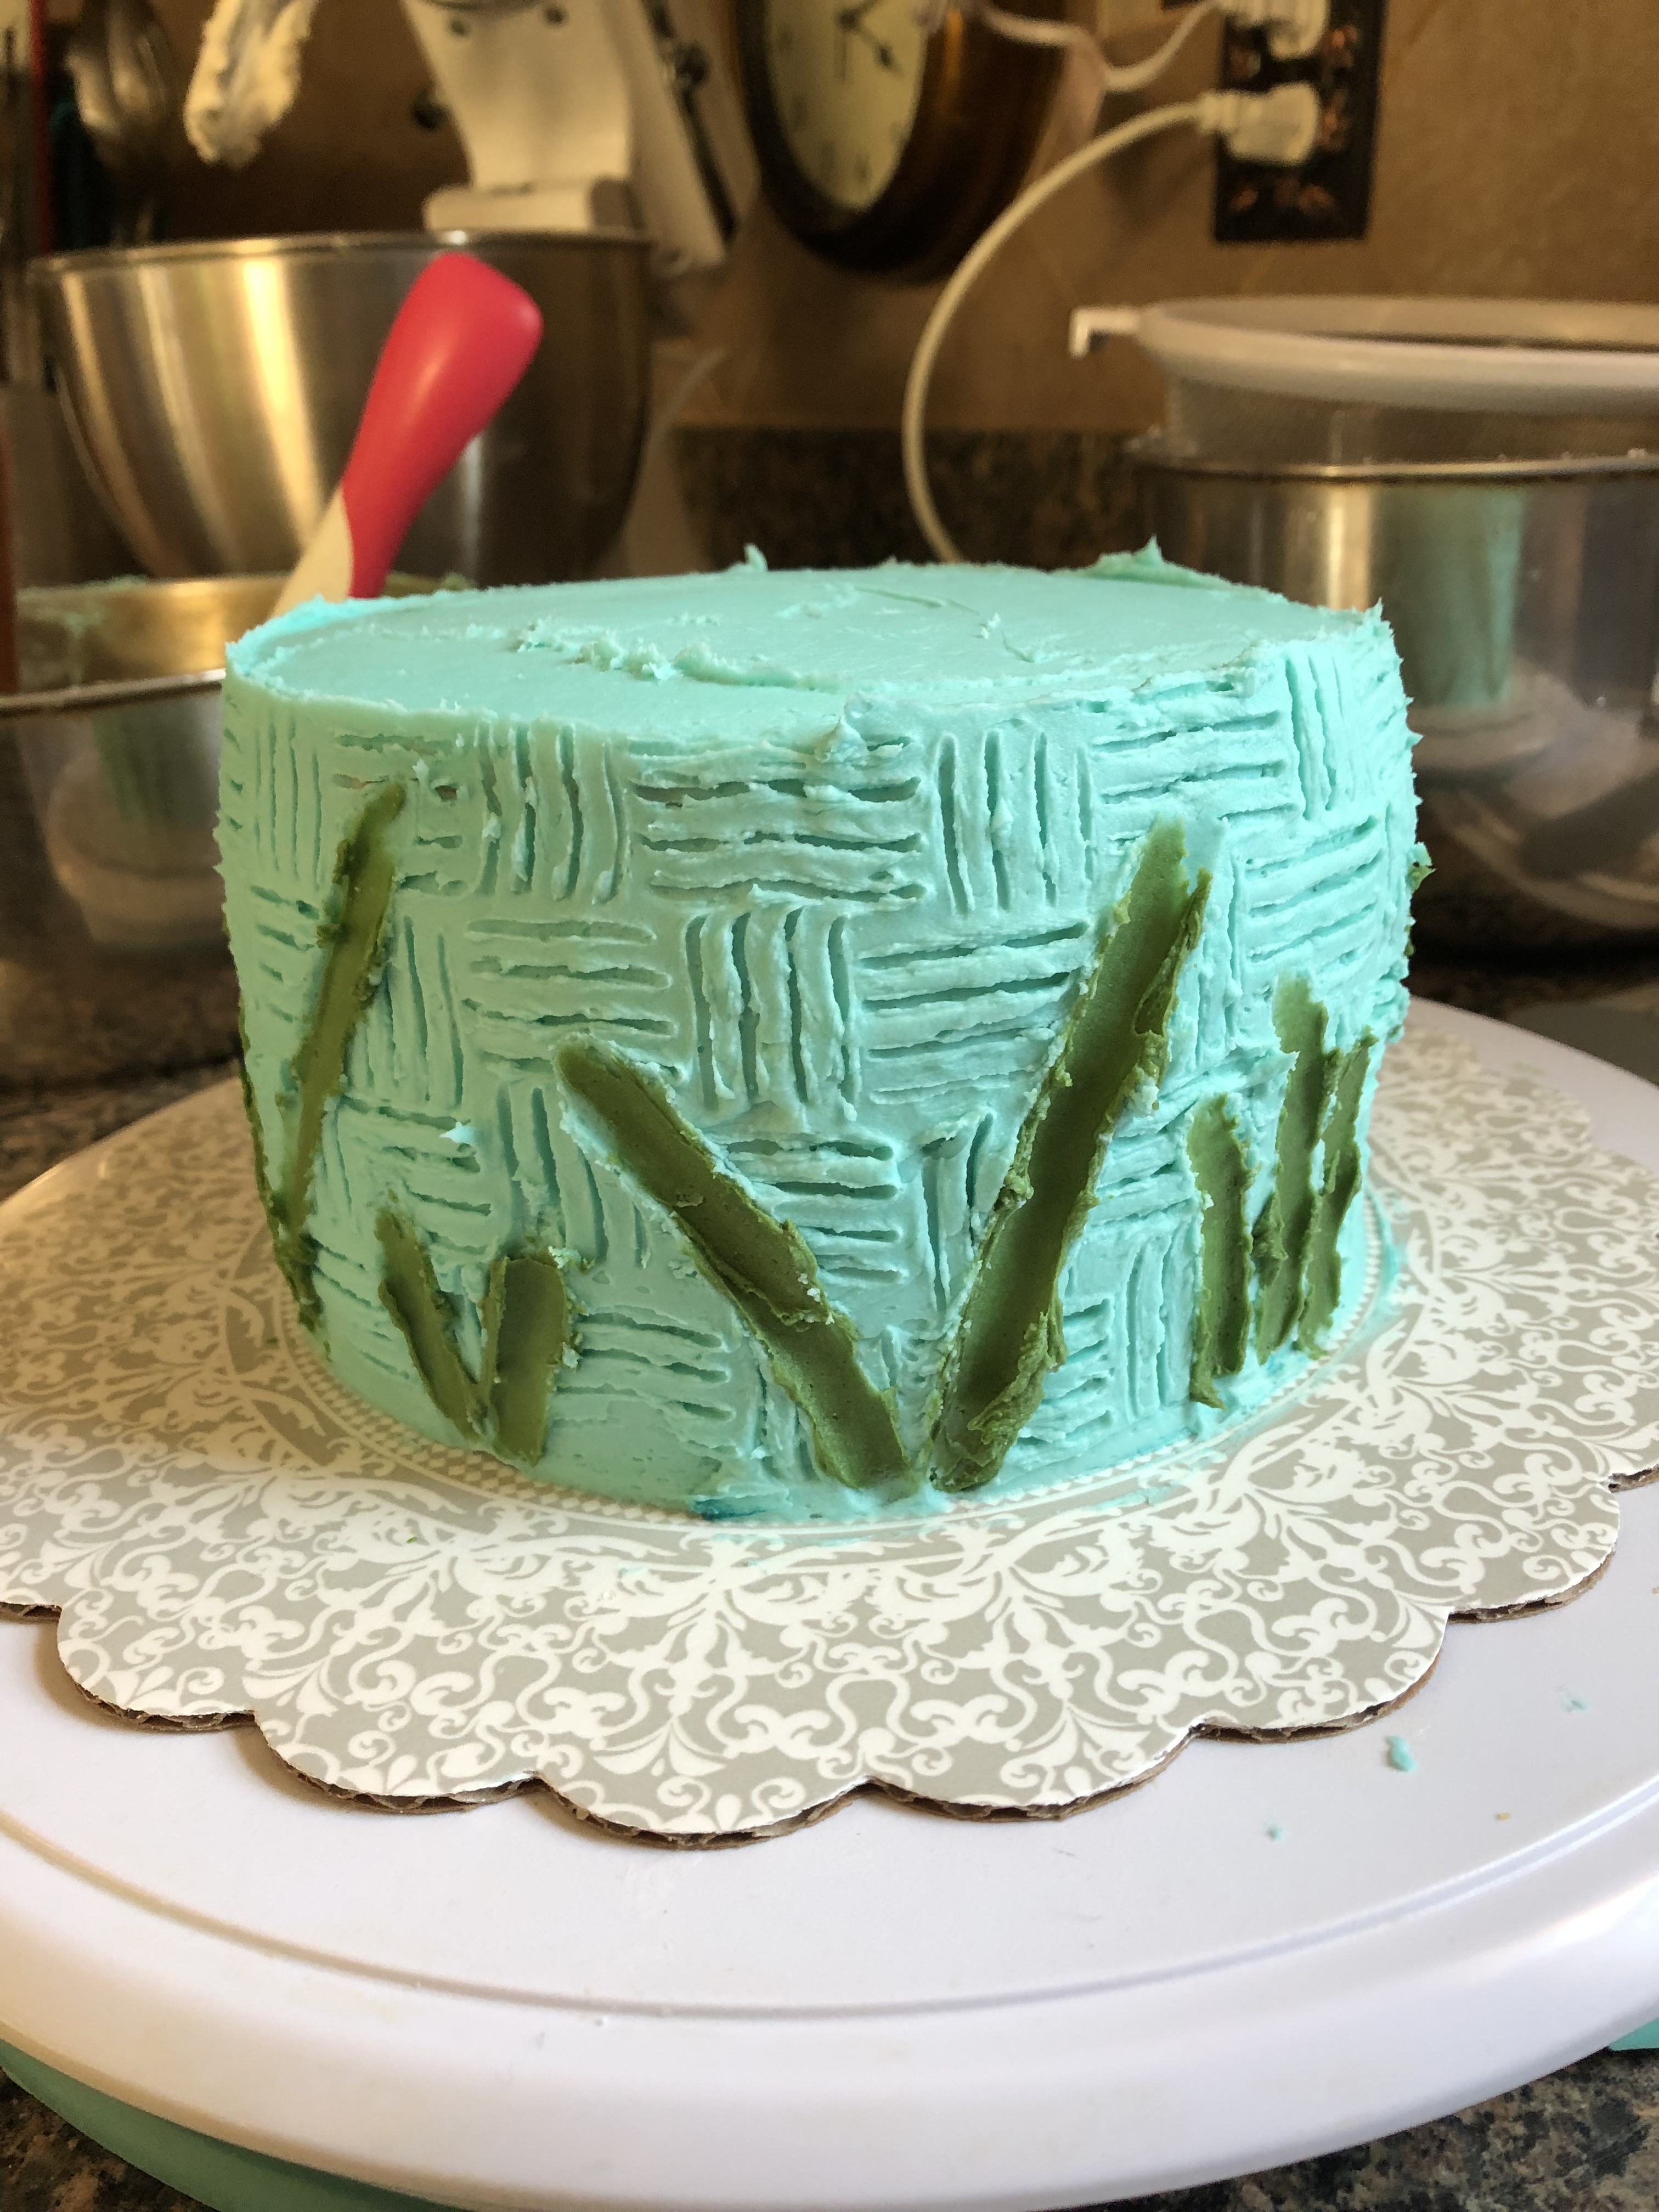
I then reserved about a tablespoon of the teal frosting and then tinted the remaining frosting green by adding in green gel food coloring. Using a tapered spatula and starting at the base of the cake I began dragging the tip of the spatula through the buttercream to create stems. Making sure not to press too deep as to touch the cake, but, going deep enough to create a channel. I passed the spatula through a few times to make sure it was deep enough making sure to wipe the spatula between each pass. I did this around the cake and even added in a few smaller channels between the larger stems.

To paint these channels, I picked up a small dollop of the green frosting and then using my fingers I round the frosting onto the tip of spatula so it was smooth. Next, I simply dragged the frosting through the channels. I repeated this step – making sure to wipe the spatula between each pass – until all of my stems were painted with frosting. At this point I placed the cake in the refrigerator for about an hour.
After the hour, I removed the cake from the refrigerator. Using the reserved yellow buttercream I painted flowers onto the cake. Using a rounded spatula I picked up a small dollop of yellow frosting and once again smoothed it with my fingers. I then pressed the dollop onto the cake and pulled the spatula away to create a petal. I continued doing this around the cake. I’ll admit, my petal didn’t come out exactly as I had hoped. This step actually reminded me of the pulled dot design on a cake. I actually wondered afterwards if it would have been easier to create the petals using that technique, although then the cake wouldn’t completely be a palette knife painted cake then.

I got the idea for this cake from The Cake Blog, for more detailed instructions click here .
