Blueberry Vanilla Ice Cream

With berries in season there’s so many delicious treats you can make with them… Pies, Cakes, Muffins and probably something that doesn’t come as quickly to mind… ice cream! Ever since I got my ice cream maker a few years ago I am always trying to come up different flavors to make – Pumpkin, Lavender Vanilla, Mint Chocolate Chip – some common and some not so common. I’ve even made Hibiscus Sorbet. So, with a fridge full of blueberries I decided to make a vanilla ice cream base and then swirl in a blueberry compote, hence Blueberry Vanilla Ice Cream.

To make the vanilla ice cream base I combined milk, sugar and salt in a medium bowl and blended it with a hand mixer on low speed until the sugar was dissolved. I then stirred in heavy cream and vanilla bean paste (you could use vanilla extract.) I covered the bowl and refrigerated it for about 5 hours (you could do as little as 1 to 2 hours, you just want to make sure that the mixture is cold.)

Meanwhile, to make the blueberry compote, I combined blueberries, sugar and lemon juice in a small saucepan over medium-low heat and let the mixture simmer until some of the blueberries burst and the mixture began to thicken. I removed it from the heat to let it cool and then covered it and refrigerated it as well.

Once the ice cream and compote were properly chilled it was time to combine them to make the Blueberry Vanilla Ice Cream. Per the instructions of my ice cream maker, I turned it on and poured in the vanilla ice cream base and let it churn for about 15-20 minutes until it had a soft creamy mixture. With the machine still running, I then poured in the compote and let the machine run for about another 30 seconds until the compote had swirled through the ice cream and was lightly incorporated. I then transferred the ice cream to a freezer-safe container and placed it in the freezer so the ice cream could firm up – about an hour.

IMG_0219

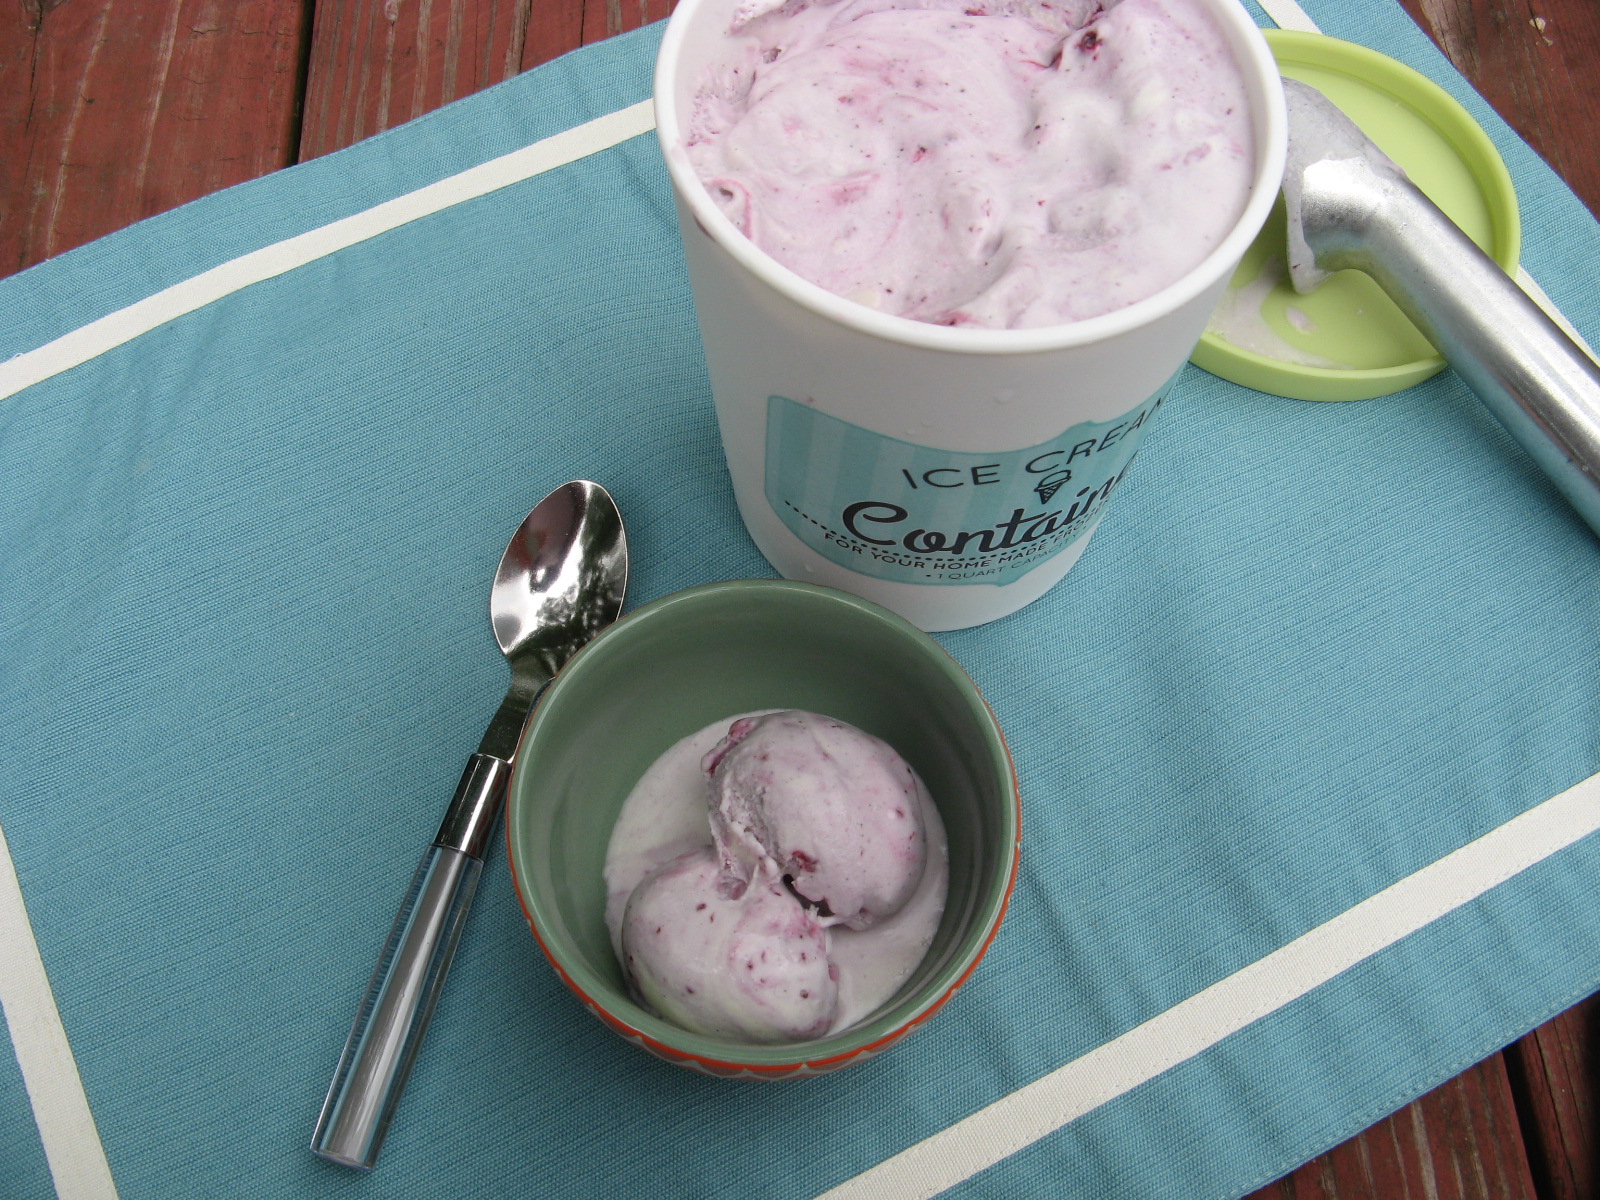
And then it was time to enjoy… And one simple sentence sums up the flavor…. There’s nothing like homemade!

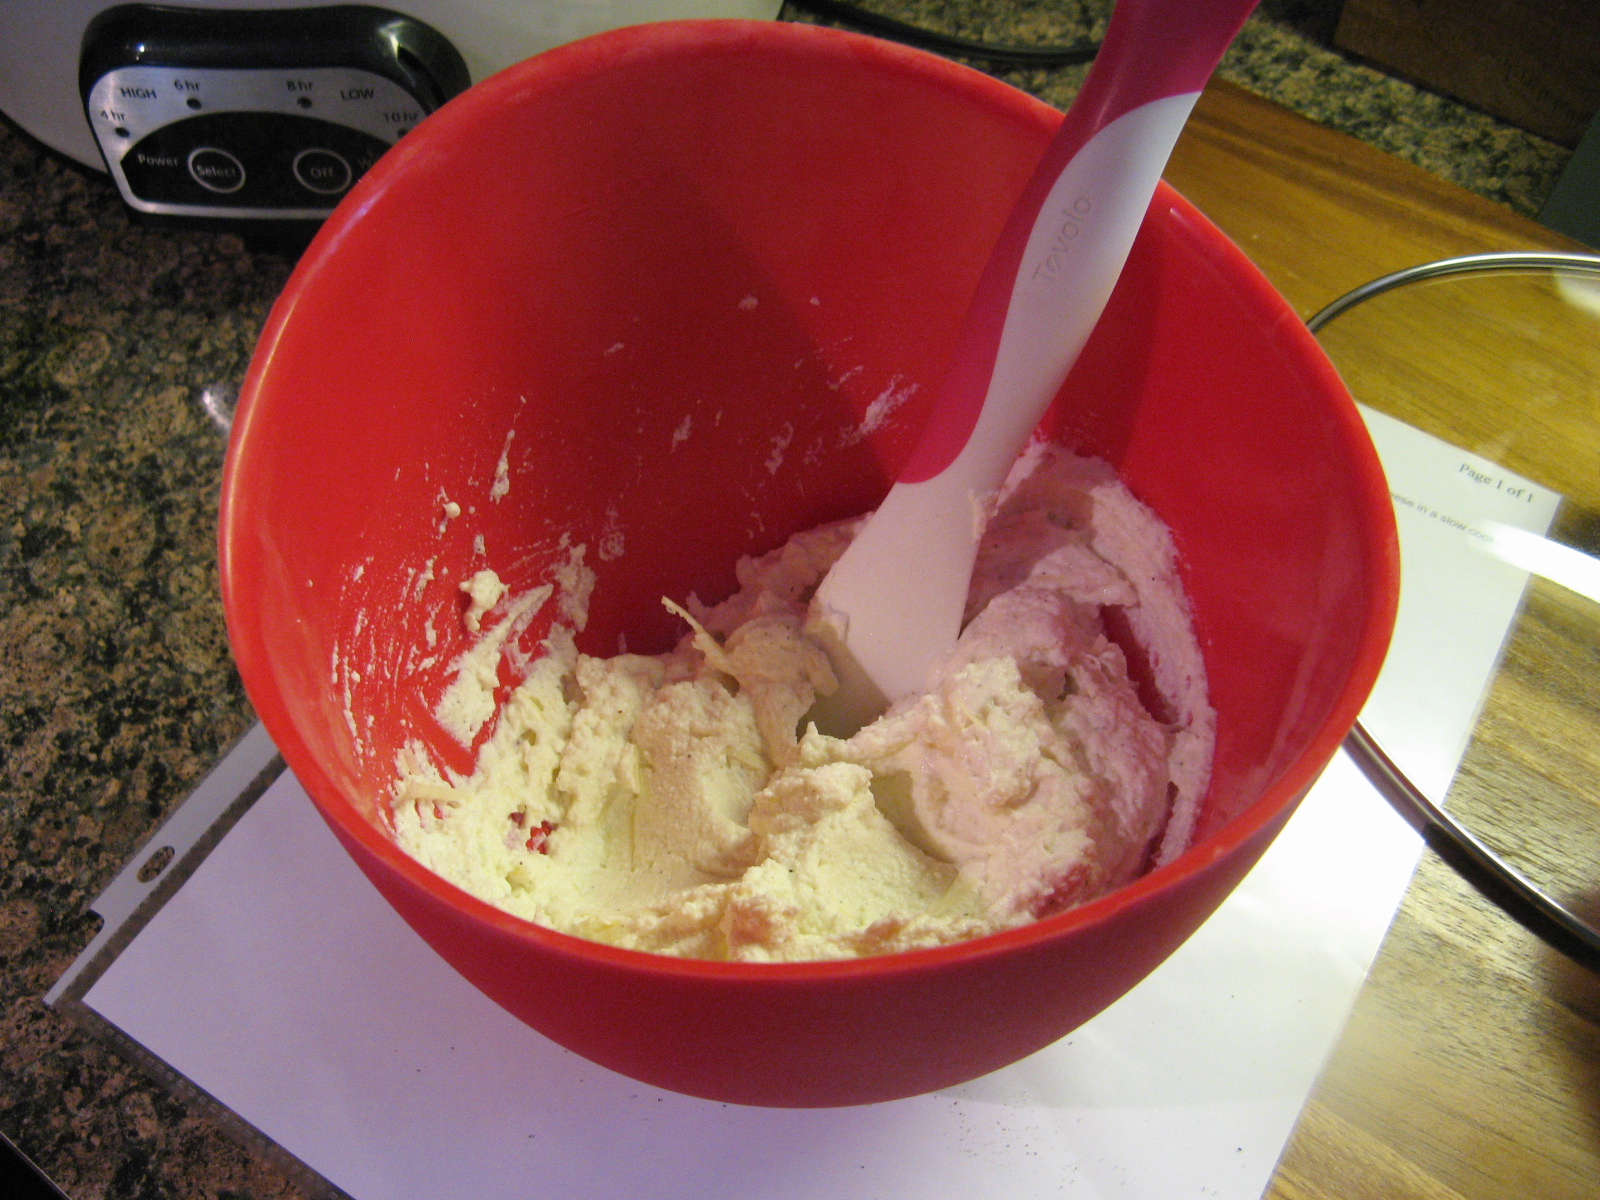
But, if you don’t have an ice cream maker here are two quick ideas on how to make your own Blueberry Vanilla Ice Cream. Use the compote as a topping on your favorite vanilla ice cream. Or take it one step further and soften a pint of your favorite vanilla ice cream and then add it to a large bowl and using a rubber spatula fold the compote into the ice cream. Place the ice cream in a freezer-proof container and place it back in the freezer so it can firm up, about 1-2 hours.


Blueberry Vanilla Ice Cream

Ingredients:

For the vanilla ice cream

1 cup whole milk

3/4 cup granulated sugar

Pinch of salt

2 cups heavy cream

1 tablespoon pure vanilla extract*

*can substitute vanilla bean paste


For the blueberry compote

1/2 cup fresh blueberries

2 tablespoons sugar

1 teaspoon lemon juice


Directions:

For the vanilla ice cream; In a medium bowl, use a hand mixer on low speed (or by hand use a whisk) to combine the milk, granulated sugar and salt until the sugar dissolves. Stir in the heavy cream and vanilla extract. Cover the bowl and refrigerate for 1 to 2 hours, or overnight.

For the blueberry compote; In a small saucepan combine the blueberries, sugar and lemon juice and simmer over medium-low heat until the blueberries begin to burst and the sauce thickens. Let cool, cover and refrigerate.

Follow the directions for your ice cream maker to churn the vanilla ice cream. Once the ice cream thickens slowly pour in the compote and continue to churn for about 30 seconds to lightly incorporate the compote into the vanilla ice cream.

Transfer the ice cream to a freezer-proof container and freeze for about 1 to 2 hours to firm.

Vanilla ice cream recipe from Cuisinart


White Chocolate Blackberry Tiramisu

Out of all the desserts I’ve made I think Tiramisu has been my favorite. In all honesty though, it’s always been one of my favorite desserts. Today, I’m bringing you a twist on the classic Tiramisu, a White Chocolate Blackberry Tiramisu. And now is the perfect time to make it with berries, including blackberries, being in-season.

To begin I soaked ladyfingers in a mixture of orange juice and blackberry liqueur and arranged them in a 11×7 inch baking dish. Don’t let the ladyfingers soak up too much of the liquid, you don’t want them to become mushy.

IMG_0048

Next, I melted white chocolate in a double boiler. I don’t own an actual double boiler, so, I created my own by simmering water in a pot and then placing a heat-proof bowl over the water without touching it. Once the chocolate had melted I let it cool slightly and in another bowl I beat cream cheese, vanilla extract and confectioners’ sugar until creamy. I then stirred in the melted white chocolate. In another bowl, I beat heavy whipping cream until stiff peaks formed and took 1 cup of the whipped cream and folded it into the cream cheese mixture. And finally, I spread half of this mixture over the ladyfingers.

IMG_0052

On top of the cream cheese mixture I laid an even layer of fresh blackberries which I pressed lightly into the cream cheese. I then dipped the remaining ladyfingers into the orange juice / liqueur mixture and placed them on top of the blackberries.

IMG_0053

With the remaining cream cheese mixture I added in more confectioners’ sugar and then folded in the remaining whipped cream and spread this over the second layer of ladyfingers. To top it off, I melted a few tablespoons of blackberry preserves and combined it with a tablespoon of the blackberry liqueur and then drizzled it over the tiramisu and then topped it with some fresh blackberries.

IMG_0058

And after chilling for a few hours it was time to dive in…

IMG_0060

And it was delish… Sweet, but just sweet enough!


White Chocolate Blackberry Tiramisu

Ingredients:

2/3 cup orange juice

1 tbsp. blackberry liqueur

24 ladyfingers

6oz. white chocolate, chopped*

8oz. brick cream cheese, softened

1 tsp. vanilla extract

3/4 cup Confectioners’ sugar, divided use

1 1/2 cups whipping cream

2 cups fresh blackberries, divided use

 Garnish

3 tbsp. melted blackberry preserves

1 tbsp. blackberry liqueur

*I used 3/4 cup of white chocolate chips

Directions:

Combine orange juice and liqueur in a shallow bowl. Dip half of the ladyfingers in the orange juice mixture – a quick dip will suffice – and line the bottom of an 11×7 inch baking dish.

Melt the white chocolate in a double boiler. If you don’t have a double boiler you can create one yourself by simmering water in a pot and placing a heat-proof bowl over the water without allowing it to touch the water. Once melted let the chocolate cool for a few minutes.

In a large mixing bowl beat the cream cheese along with the vanilla extract and 1/4 cup of the Confectioners’ sugar until creamy. Stir in the melted chocolate and let the mixture cool for about 5 minutes.

In another bowl beat the whipping cream until stiff peaks form. Fold 1 cup of the whipped cream into the cream cheese mixture and spread half of it over the ladyfingers. Lay about 1 1/2 cups of the fresh blackberries over the cream cheese mixture, pressing down slightly.

Dip the remaining ladyfingers into the orange juice mixture and arrange them over the blackberries.

Add the remaining 1/2 cup of Confectioners’ sugar to the remaining cream cheese mixture, then fold in the remaining whipped cream. Spread this mixture over the second layer of ladyfingers.

In a small bow mix together the melted preserves and liqueur and drizzle over the top of the tiramisu. And finally, top the entire thing with the remaining blackberries.

Chill 3-5 hours and Enjoy!

Recipe from Better Recipes.

Piñata Cake

Today I’m bringing you a cake that I’ve wanted to make for quite some time… A Piñata Cake!

I took the easy route and opted to use two box yellow cake mixes. Yes, you read that right, two boxes. To get the full effect of this cake it really needs to be 4 layers. And while I could have just used one box divided into 4, lets be honest, that wouldn’t have been much of a cake and more than likely the layers would be so thin that the two layers I cut the hole into would have fallen apart. So two boxes it is (and was.)

So, after baking my 4 layers following the directions on the box (I used Duncan Hines cake mix) I let them cool and then began assembling.

Up first, the base layer which I covered in frosting.

IMG_0065

Next, one of the layers I cut a hole into using a 3-inch round cookie cutter. Truthfully you don’t want to go larger than that, if you do, you run the risk of the cake splitting in half since you won’t have much cake left in the ring left when making the hole. To ensure that my holes were evenly placed on both cakes I stacked the layers and then cut the hole. So, I placed one of these rings on top of the base layer and covered it with frosting, including the inside of the circle cut-out.

IMG_0066
I repeated this step with the second ring.

IMG_0067

Next, I filled the cake. I opted for M&M’s. It took an 11 oz bag of M&M’s to fill the hole. You can fill it with whatever you choose; M&M’s, sprinkles, gummy worms or bears, and so forth. Whatever you choose, make sure it’s nicely packed in and filled to the top so you get the full Piñata affect when you cut into it.

IMG_0068

Finally I placed the top layer on the cake and frosted it with a crumb coating. I did a crumb coating because…

IMG_0073

I decorated the cake with spiraling rosettes – which I created using a Wilton 2D tip.

IMG_0088

And after a few slices the M&M’s came pouring out. The M&M’s did start falling out after the first slice, but it took a few more to get them to really pour out.

IMG_0108

Dump Cakes

Memorial Day Weekend is upon us- the unofficial start of the summer – and with the official start right around the corner and the inevitable warmer temperatures, you may be looking for desserts that will satisfy your sweet tooth but won’t take too long to put together and don’t require a slew of ingredients. If so, today I have the recipe for you… A Dump Cake! And trust me, it tastes a whole lot better than the images the name may conjure up for you.

I wish I could say that I came up with this genius idea of a dessert myself, but the credit goes to Pioneer Woman: Ree Drummond. Warning… If you are adverse to box cake mix, can pie filling / canned fruit and butter stop reading now and deprive yourself of the opportunity to make something super simple and delicious. Hey, you have standards to keep. And yes, it only takes those three ingredients to make this cake.

To begin, in a 9×13-inch baking dish pour out a can of cherry pie filling and a can of crushed pineapple (okay, this version of the cake requires four ingredients, but, you could easily omit the pineapple.) Mix the two together well.

IMG_0107

Next, evenly pour the cake mix over the fruit… Make sure you get the corners.

IMG_0108

And finally, top it with a stick and a half of unsalted butter sliced into tablespoons, making sure to space the butter evenly over the cake.

IMG_0111

Bake it in a preheated 350 F oven for 45 minutes – 1 hour; until the top is browned and the fruit filling is bubbling.

IMG_0114

Let it cool for a few minutes before digging in. Enjoy slightly warmed with a scoop or two of vanilla ice cream or a dollop or two of whipped cream.

This cake was so delicious that I soon made another one along with a peach version.

IMG_0132


Dump Cake

Ingredients:

Cherry and Pineapple

1 21oz. can cherry pie filling

1 20oz. can crushed pineapple

1 box white cake mix

12 tablespoons unsalted butter, sliced


Peach

1 29oz. can sliced peaches in syrup

1 box yellow cake mix

12 tablespoon unsalted butter, sliced


Directions

Preheat oven to 350 F.

Pour fruit into a 9×13-inch baking dish. For the cherry and pineapple version mix both fruits together well.

Top evenly with the cake mix, making sure to get the corners.

Space the butter evenly over the cake and bake in the oven for 45 minutes – 1 hour, until the top is browned and the fruit is bubbling.

Let it cool for a few minutes before slicing so the cake can “set.”

Enjoy with ice cream, whipped cream or on its own.

Recipe from Food Network


Tres Leches Cake

Pardon my blogging hiatus… Maybe another day I will explain, but for now, in honor of Cinco De Mayo I’m bringing you a super simple, a tad bit sweet but perfectly textured Tres Leches Cake. Many versions of this cake can turn into a mushy wet mess thanks to the tres leches (three milks) the cake is soaked in – heavy cream, evaporate milk and condensed milk. But this one holds together perfectly and you’re not left feeling as though you’re eating a cake pudding but an actual cake.

I began by making a sponge cake. In a medium bowl I whisked flour along with baking powder and salt. In the bowl of my stand mixer I combined 3 eggs with sugar and vanilla extract and beat them on medium-high speed until the mixture was light and fluffy. I then added in half of the flour mixture at low speed, then gradually added in whole milk and finally the remaining flour. After pouring the batter into a 9×13-inch buttered dish I baked it in a 350F preheated oven for about 25 minutes.

I let the cake cool for about a half hour and then poked holes in it with a fork and then poured the three milk mixture over the cake.

 IMG_0091

After letting the cake sit overnight in the fridge, the following day I enjoyed a piece with some strawberries and whipped cream. One word for this dessert… YUM!!!

 IMG_0098


Tres Leche Cake

Ingredients:

1 1/2 cups flour

2 teaspoons baking powder

1/2 teaspoon salt

3 large eggs, at room temperature

1 cup sugar

2 teaspoons pure vanilla extract

1/2 cup whole milk, at room temperature

1 1/2 cups heavy cream

1 12oz. can evaporated milk

1 cinnamon stick

2 whole cloves (about 1/8 teaspoon ground)

1 14oz. can sweetened condensed milk

1/2 teaspoon ground cinnamon


Directions:

Preheat the oven to 350 F. Spray a 9×13 inch glass dish with non-stick spray (or lightly butter). In a medium bowl whisk together the flour, baking powder and salt. In the bowl of a stand mixer combine the eggs, sugar and 1 teaspoon of vanilla extract and beat on medium-high speed until light and fluffy – about 10 minutes. Switch the mixer to low speed and add half of the flour mixture, then gradually add in the milk and finally the remaining flour mixture.

Pour the batter into the prepared baking dish and bake for 20-25 minutes, until the center of the cake springs back to the touch. Transfer the dish to a wire rack and let cool for at least 30 minutes.

While the cake is cooling, in a medium saucepan whisk the heavy cream with the evaporated milk, cinnamon stick and cloves and bring to a boil over moderately high heat. Reduce the heat and simmer for about 3 minutes. Remove from the heat, cover and let steep for 10 minutes.

In a heatproof bowl, combine the condensed milk with the remaining 1 teaspoon of vanilla extract and ground cinnamon. Strain the steeped cream mixture into the condensed milk and stir to combine and let cool for 20 minutes.

With a fork, poke holes all over the cake and gradually pour the milk mixture over the entire cake. Cover with plastic wrap and refrigerate for at least 4 hours or overnight.

Serve with strawberries and/or whipped cream.

Recipe from Food & Wine

Slow Cooker Sunday: Mushroom & Spinach Lasagna

I love lasagna; I just don’t like all the work that goes into it. It can be time consuming and making sure the noodles don’t tear while boiling them always deters me from making it. But those road blocks are gone since I found a winning recipe to make in my slow cooker.

To begin, over medium-high heat I sautéed mushrooms in olive oil for a few minutes and then added in baby spinach and continued sautéing until the mushrooms were tender and the spinach had wilted.

IMG_0013

Next I added in diced tomatoes, tomato sauce, Italian seasoning and salt. Once the mixture began to boil I lowered the heat and let it simmer for a few minutes.

IMG_0014

Meanwhile I combined ricotta cheese, shredded parmesan cheese and pepper in a small bowl.

IMG_0015

After spraying the inside of my slow cooker with cooking spray I spread 3/4 cup of the sauce into the bottom of it. I then layered 3 lasagna noodles over the sauce…

IMG_0016

And topped it with another 3/4 cups of the sauce, the ricotta cheese mixture and 1 cup of shredded mozzarella cheese.

IMG_0017

I then topped the cheese with another 3/4 cup of the sauce and the remaining 3 lasagna noodles and finally the remaining sauce.

IMG_0020

After covering it and cooking it on low for 5 hours I topped it with the remaining mozzarella and parmesan cheeses, covered it once again and let it stand for an additional 5 minutes until the cheeses had melted.

IMG_0022

And while it was delicious, unfortunately it didn’t stay together when I tried to cut it out of the slow cooker. Oh well! Taste wins over plating sometimes!

IMG_0023


Slow Cooker Mushroom Spinach Lasagna

Ingredients:

No Stick Cooking Spray

1 tablespoon olive oil

1 8oz. package fresh sliced mushrooms

1 6oz. package baby spinach leaves

1 14.5 oz. can diced tomatoes with basil, garlic and oregano, undrained

2 cups tomato sauce

1/2 teaspoon dried Italian seasoning

1/4 teaspoon salt

1 cup ricotta cheese

1/2 cup grated parmesan cheese, divided

1/4 teaspoon ground black pepper

6 dry lasagna noodles, uncooked

1 1/2 cups shredded mozzarella cheese, divided


Directions:

Spray the inside of a 4-quart slow cooker with the cooking spray. Heat oil in a large skillet over medium-high heat. Add the mushrooms and cook for 3 minutes, stirring occasionally. Add in the spinach cook a few more minutes, until the mushrooms are tender and the spinach has wilted, stirring occasionally. Stir in the undrained tomatoes, tomato sauce, Italian seasoning and salt. Bring to a boil then reduce the heat and simmer for 3 minutes.

Combine the ricotta, 1/4 cup parmesan cheese and pepper in a small bowl and set aside.

Spread 3/4 cup of the sauce on the bottom of the slow cooker. Layer 3 lasagna shells over it, breaking the shells to hit. Top with 3/4 cup of sauce, ricotta cheese mixture and 1 cup of mozzarella cheese. Top with an additional 3/4 cup of sauce and remaining 3 lasagna noodles. Spoon the remaining sauce over the noodles.

Cover and cook on low for 5 hours, or until noodles are tender. Sprinkle with remaining parmesan and mozzarella cheeses, cover and let stand for 5 minutes or until the cheeses have melted.

Recipe from Hunts

A Sweet Way to Ring in the New Year… Chocolate and Strawberries!

Happy New Year! So, how did you ring in the year? Asleep? Out and about? Or like me, surrounded by family and friends? In my case, the friends actually fall under the family category, so I should say I rang it in with family. Either way, I hope it was an enjoyable time and a great kick off to the new year ahead. And how about those resolutions? Did you make any? I may have mentioned it before, but, I don’t make resolutions. I think it’s great for those people who do so, but, I don’t think you need a new year to make a new start. Every day you wake up is an opportunity to do something different and better for yourself and those around you. I sound like self-help guru or something… LOL! But, it’s true. Every day we have a choice as to how we are going to lead our day and we can make the decisions that are best for us or the ones that are not so great. But, it’s up to each of us to make those decisions. So, maybe that’s my resolution, to live the best day possible each and every day. And trust me I know from experience that it’s not always easy, but, you always have to try and find the silver lining because if you don’t you may always wonder, “Why me?” And now on to the Chocolate and Strawberries!

So, I always want to make something different and delicious as a sweet treat for New Year’s Eve and I was pondering attempting to make macarons, but, I quickly decided against it. I think that’s best left for when it’s just a random day and if they don’t come out well I don’t have to scramble to make something else in their place. So I opted for cupcakes. Something that is foolproof and always a crowd favorite. And these were cupcakes that I wanted to make for a month or two now. I came across the recipe when I was flipping through an old holiday magazine for cookie recipe ideas – remember I am a bit of a recipe hoarder! They are a super simple mocha chip cupcake with a chocolate sour cream frosting. The coffee in the cupcake offsets the chocolate from the chocolate chips in it and the sour cream adds a nice tang to the frosting so overall this isn’t an overly sweet or chocolatey cupcake. And to make it festive I sprayed a few using an edible gold shimmer spray and topped the others with strawberries.

IMG_0246

And since I had leftover strawberries and half a bag of chocolate chips left it was the perfect set-up for some chocolate covered strawberries. I simply melted the chocolate chips in the microwave in minute intervals and then dipped the strawberries in it and then placed them on a wax-paper covered cookie sheet and placed them in the refrigerator until set. Once they were set I drizzled more melted chocolate over them. These were a HIT and barely made it to midnight!

IMG_0243

So, stay tuned in 2016 for more sweet treats, slow cooker meals, beaded jewelry and yarn projects!


Mocha Chip Cupcakes

  • Servings: 12 cupcakes
  • Print

Ingredients:

1 cup all-purpose flour

1/2 teaspoon baking soda

1/4 teaspoon salt

1/2 cup unsalted butter, room temperature

1 cup sugar

2 large eggs

1 1/2 teaspoon vanilla extract

3 ounces unsweetened chocolate, melted and cooled slightly

2 teaspoons instant espresso powder, dissolved in 1/2 cup cool water

2/3 cup semi-sweet chocolate chips


Directions:

Preheat the oven to 350 F and line a 12 standard cup muffin tin with paper liners.

Sift the flour, baking soda, and salt together in a bowl and set aside.

In a large bowl beat the butter on medium speed until smooth, 30 to 60 seconds. While the mixer is running, slowly poor in the sugar, scraping the sides of the bowl as necessary, with the mixer on medium-high speed beet until the mixture is light and fluffy, 2 to 3 minutes. Beat in the eggs, one at a time, on medium speed. Beat until the batter is smooth and scraping the bowl as necessary. Add the vanilla and the melted chocolate and beat until smooth and blended. With the mixer on low speed add the flour mixture in three parts, alternating with the dissolved espresso powder. Finally stir in the chocolate chips by hand.

Divide the batter among the prepared muffin tin and bake 20 to 22 minutes, until the cupcakes spring back when gently pressed in the center.

Let the cupcakes cool in the tin for 5 minutes on a wire rack and then remove them allowing them to cool completely on the wire rack.

Recipe from Fine Cooking


Chocolate Sour Cream Frosting

  • Servings: 1 1/4 cups
  • Print

Ingredients:

1 tablespoon unsalted butter, at room temperature

1/3 cup sour cream

3/4 teaspoon vanilla extract

pinch of salt

1 1/2 cups confectioners’ sugar, spooned and leveled

2 ounces unsweetened chocolate, melted and cooled slightly

milk, if necessary

Directions:

In a medium bowl whisk butter, sour cream, vanilla extract and salt to blend. Gradually whisk in the sugar until smooth. Add the chocolate and beat it in with the whisk until the frosting is smooth and creamy. The frosting must be thick and spreadable; if it’s too thick thin it with a drops of milk. If it’s too thin, chill it briefly, stirring occasionally until thickened.

Recipe from Fine Cooking

Christmas Wrap-Up

How was your Christmas? Mine was good… Filled with great times, great food and great cookies! As I’ve done in years past I had a Christmas baking marathon and baked various cookies to give as gifts. I took my last sheet of cookies out of the oven early in the day Christmas Eve. This year along with the usual rugelach and malted chocolate chip cookies, I made another batch of these vanilla spritz cookies along with peanut butter cookies and oatmeal cookies. YUM! And, there was also a batch of Gingerbread Men, one of who was a bit angry after losing part of his leg.

IMG_0197

And luckily this year I got my handmade Christmas gifts done in plenty of time, okay, with about a week to spare. This for me is good, since it gave me enough time to wrap them with pretty ribbon bows. I made two Afghans and an earring and bracelet set.

The first afghan was made with Lion Brand’s Thick & Quick Yarn following their Cromwell Court Afghan Pattern. Here’s a pic of the start…

IMG_9788

And the finish product…

IMG_0170

The second afghan was made with Lion Brand’s Vanna’s Choice Yarn following their 5 1/2 Hour Throw Pattern… Truthfully it took me longer than the 5 1/2 hours and since it involved crocheting three colors together I opted to wind the three colors into a ball to make crocheting a lot simpler.

IMG_9781

And the finish product…

IMG_0180

And finally the earring and bracelet set that I made using tila beads, superduo beads, seed beads and crystals just using basic beadweaving techniques.

IMG_0092 IMG_0089

I also squeezed in some time to make my Christmas cards once again this year.

IMG_0110

I hope you are all enjoying the holidays and that you all have a wonderful New Year!


Christmas Sugar Cookies

It’s Christmas Eve! Have you gotten all of your baking done? I took my last sheet of cookies out of the oven not too long ago. Speaking of cookies… Decorated sugar cookies are synonymous with the Holidays. Whether they are decorated with royal icing, sprinkles or both, you can usually find them on most cookie platters this time of the year. Now, there are so many different recipes for sugar cookies out there. I once tried one with orange juice… it definitely wasn’t my favorite. What grabbed me about this recipe was that it was for Soft Sugar Cookies. Yes, sugar cookies are supposed to be on the crispier side but I sometimes find that if you leave those cookies in the oven for a few seconds too long your bordering on hard cookies not crispy ones.

To make the dough for these cookies I began by beating butter in the bowl of my stand mixer on medium-high speed until it was light and fluffy. I then added in sugar, egg, vanilla extract and sour cream. Once all of those ingredients were well incorporated I added a flour mixture that included flour, baking powder, salt and baking soda. After the dough came together I shaped the dough into a disk, covered it with plastic wrap and refrigerated it until it was firm.

IMG_0155

Once it was firm I rolled it out on a floured surface and began cutting out my Christmas shapes.

IMG_0158

After transferring the cutouts to a parchment lined cookie sheet I decorated them with holiday themed sprinkles and sugar.

IMG_0160

I baked them in a 350 F preheated oven for 5 to 6 minutes and then transferred them to a wire rack to cool completely. This recipe is definitely going to be my go-to recipe for whenever I want to make sugar cookies. They are not overly sweet and are the perfect texture. They have a little bite to them but overall are nice and soft!

IMG_0164

Hope you all have a wonderful Christmas!!!

Soft Sugar Cookies

  • Servings: 36 3-inch cookies
  • Print

*Please note that I halved the recipe which yielded me 30 2-inch cookies. If you would like to do the same follow the measurements in parenthesis.


Ingredients:

3 cups flour (1 1/2 cups)

1 teaspoon baking powder (1/2 teaspoon)

1/2 teaspoon salt (1/4 teaspoon)

1/4 teaspoon baking soda (1/8 teaspoon)

1 1/2 sticks unsalted butter, at room temperature (6 tablespoons)

1 cup sugar (1/2 cup)

1 egg (2 tablespoons of a whisked egg)

1 teaspoon vanilla extract (1/2 teaspoon)

1/4 cup sour cream (2 tablespoons)


Directions:

In a medium bowl whisk together the flour, baking powder, salt and baking soda and set aside.

In a large bowl using an electric mixer (or using a stand mixer) beat the butter on medium-high speed until light and fluffy. Add the sugar and beat to blend. Add in the egg and vanilla and then the sour cream. Switch the speed to low and beat in the flour until just blended. Halve the dough, shape into disks and wrap plastic wrap and refrigerate until firm – 1 1/2 to 2 hours. If using the smaller measurements just shape into one disk.

Preheat the oven to 375 F and line cookie sheets with parchment paper.

On a floured surface roll out the disk to about 1/8 inch thick and cut out using desired cookie cutters. Place on prepared cookie sheets about 1-inch apart.

Bake until the bottoms of the cookie are light golden, 5 to 7 minutes. Transfer to a wire rack to cool completely.

If you plan on decorating with sprinkles and sugar, place those on the cookies prior to baking. If you plan on decorating with royal icing wait until the cookies have completely cooled to do so.

Recipe from Rachael Ray Magazine

Raspberry Almond Shortbread Thumbprints

There are some recipes you see that you know that you must instantly try… As was the case when I got a recipe in my inbox last week from Land O’ Lakes for a Raspberry Almond Shortbread Thumbprint cookie. I pretty much love any pastry / baked item that involves almonds and then when you throw raspberry into the mix you are definitely in for something pretty delicious. Best of all, not only are these cookies amazing, but, they are simple to make and add a festive to look to your holiday cookie platters.

I began by making the dough (obviously… LOL!)… I combined butter, sugar and almond extract in the bowl of my stand mixer and beat it at medium speed until it was well combined, scraping the bowl as necessary. On low speed I added in flour and continued beat the mixture until it was well combined. Once the dough had come together I covered and refrigerated it for an hour or until the dough was firm.

IMG_0070

Once it was firm, I rolled dough into 1-inch sized balls – I used approximately 1/2 tablespoon of dough for each ball.

IMG_0075

Then using the back of a 1/4 teaspoon (you could simply use your thumb as well, hence the name of the cookie) I made a small indentation into the center of each cookie and then filled them with raspberry jam.

IMG_0076

After refrigerating the cookies for about 10 minutes I baked them in a 350 F preheated oven for about 12-14 minutes, until the edges just began to brown. You don’t have to refrigerate the cookies prior to baking, but, I did so so that the dough could firm up again a bit so the cookies wouldn’t spread as much while baking. My cookies did spread some so I probably could have left them in the refrigerator a bit longer. After removing them from the oven I let them sit on the cookie sheet for a minute or two and then transferred them to a wire rack to cool completely.

IMG_0083

Once the cookies cooled I drizzled a glaze of water, confectioners’ sugar and almond extract over them.

IMG_0096

One word for these cookies… YUM!


Raspberry Almond Shortbread Thumbprints

  • Servings: 36-42 cookies
  • Print

Ingredients:

1 cup (2 sticks) unsalted butter, softened

2/3 cup sugar

1/2 teaspoon almond extract

1/2 cup raspberry jam


For the Glaze:

1 cup powdered sugar

2 to 3 teaspoons water

1 1/2 teaspoons almond extract


Directions:

Combine the butter, sugar and almond extract in a bowl and beat at medium speed until creamy, scraping the sides of the bowl as necessary. Switch to low speed and add in the flour, beating well until all the ingredients have been combined. Cover and refrigerate for at least 1 hour.

Preheat oven to 350 F and cover cookie sheet with parchment paper.

Shape the dough into 1-inch balls; approximately 1/2 tablespoon of dough. Place 2 inches apart on prepared cookie sheets. Make a small indentation in the center of each of the cookies and fill with a 1/4 teaspoon of the raspberry jam.

You could place the cookies back in the refrigerator for a few minutes for the dough to firm up again, or place them directly in the oven for about 12-14 minutes, or until the edges are slightly browned. Let stand on the cookie sheets for 1 minute and then transfer to a cooling rack to cool completely.

Combine all the ingredients for the glaze in a bowl and whisk together until smooth and then drizzle over the cooled cookies.

Recipe from Land O’ Lakes