Etsy Shop Update

My Etsy Shop has been open for just about a month and so far so good. I’ve made three sales, added some bead, crystal & pearl snowflake ornaments and had to adjust how I do my listings. I still haven’t fine-tuned the latter, but I am sure I’ll get it eventually. This is the issue… the necklace from my first sale came in different colors, I thought by listing each of the colors when one was purchased that color would be eliminated from my inventory, unfortunately I had listed my quantity as 1 so the necklace was then sold out, so I had to readjust the listing and the others that I had set- up similarly. I had a similar issue with my following sale of 2 snowflake ornaments… I had to manually remove them from my inventory. So, I have some research to do on listings.

I also ran my first sale over Black Friday weekend and promoted Small Business Saturday. And that’s pretty much where I am.

Here are the Snowflake Ornaments:

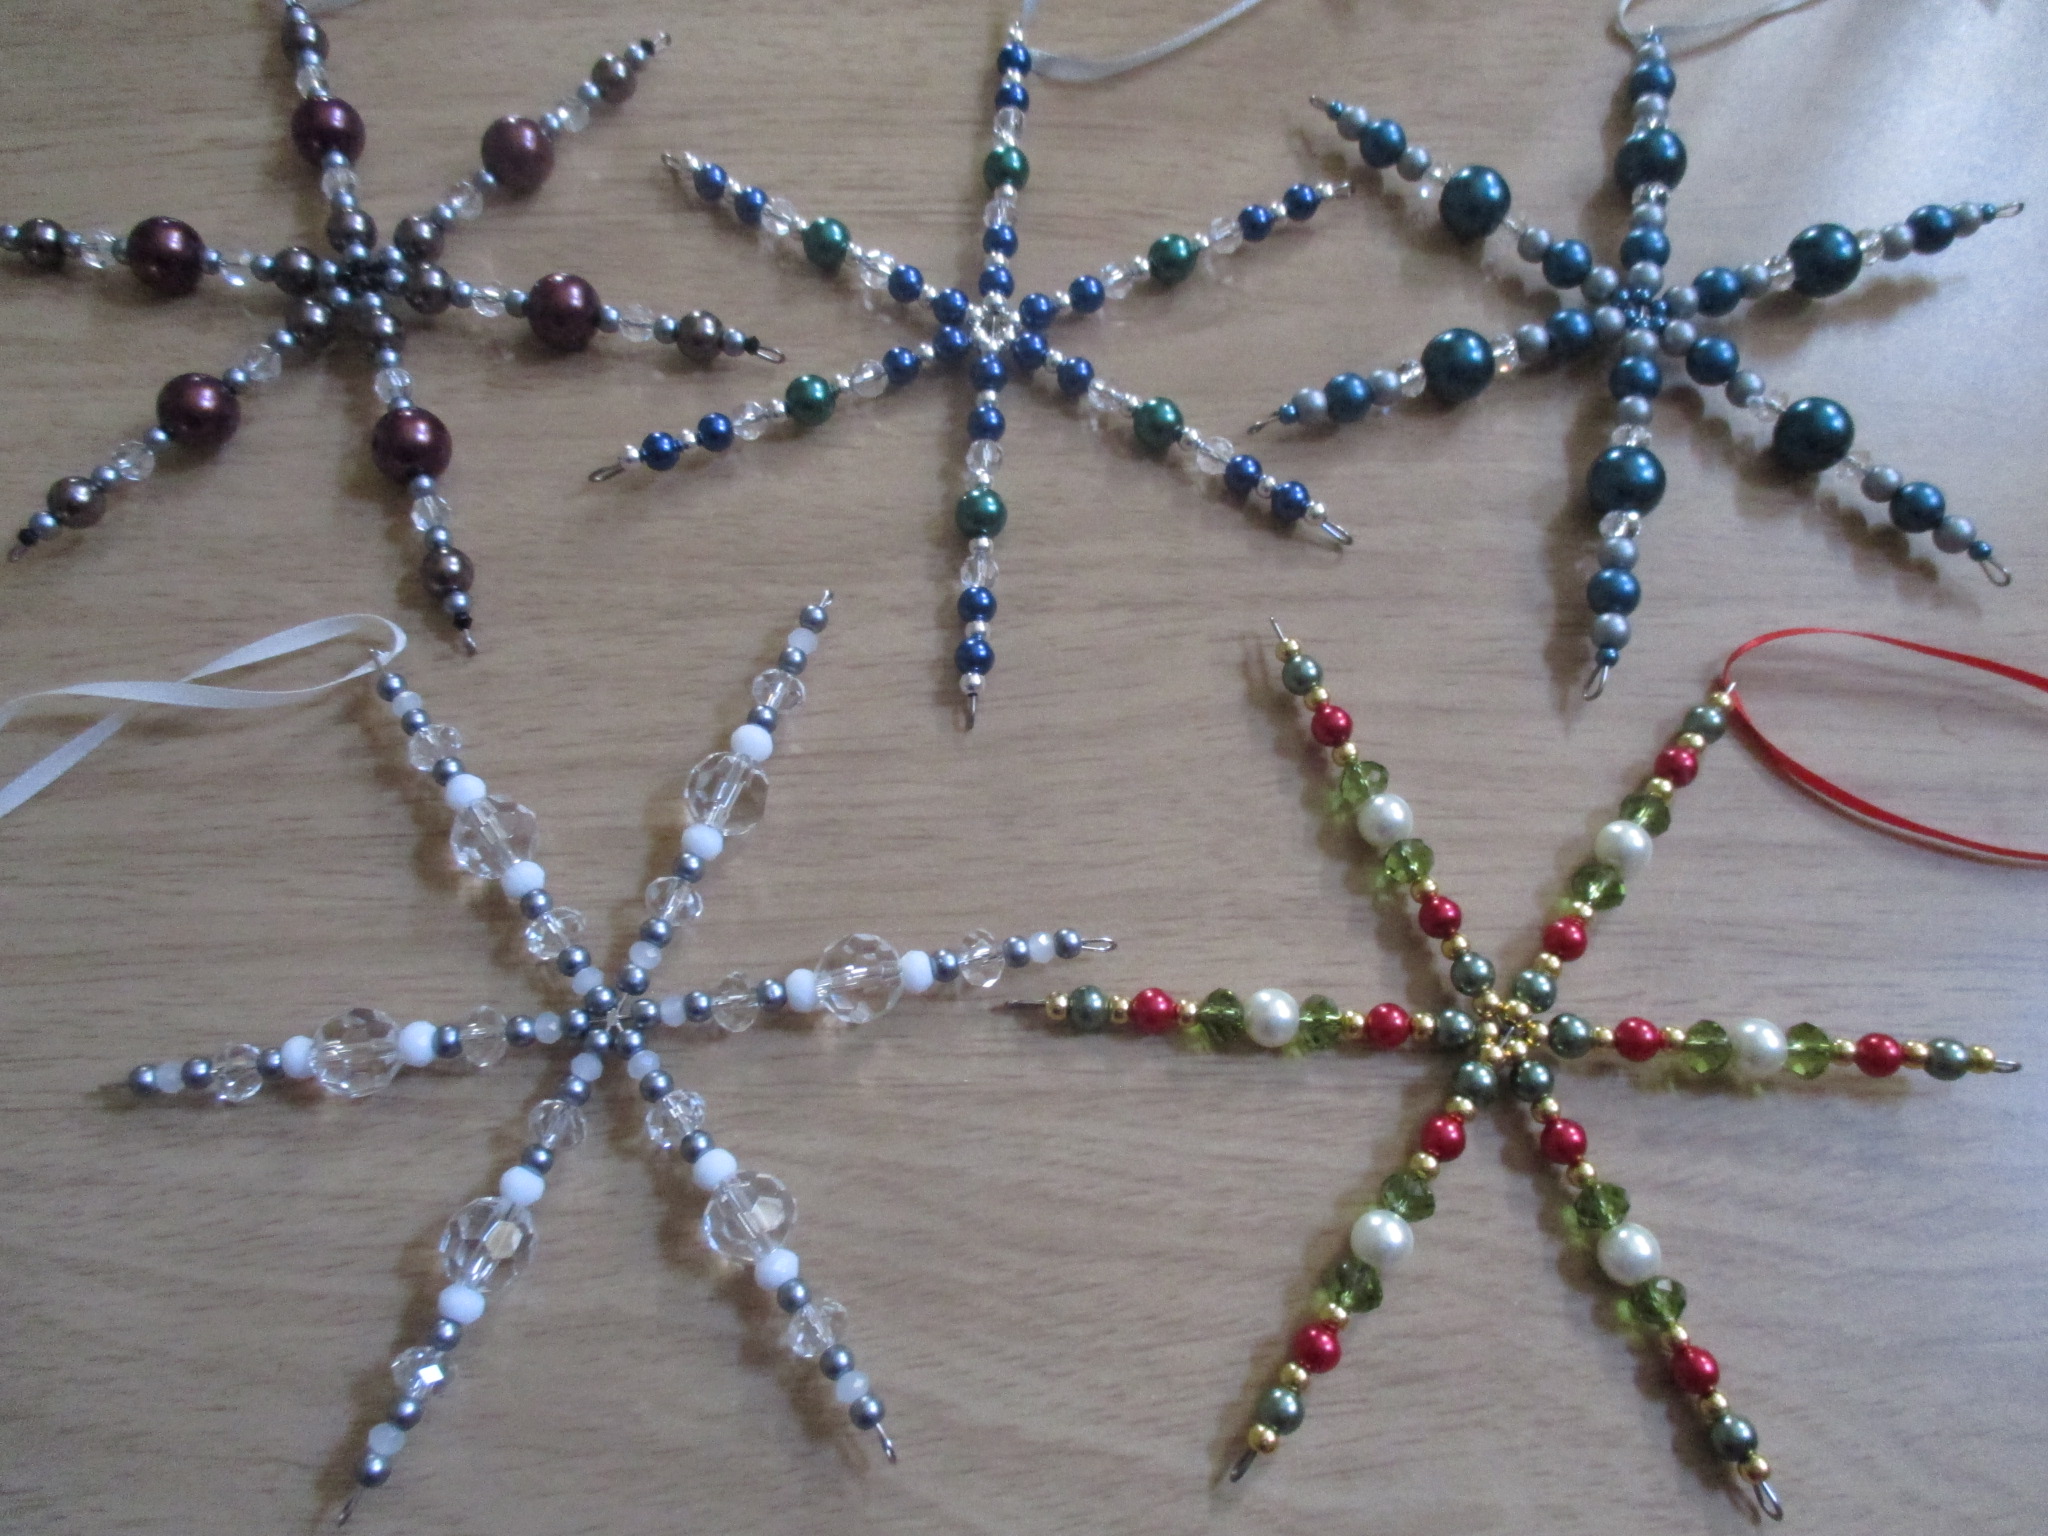
If you’re interested in one of the ornaments or are looking for a piece of jewelry for yourself or someone else on your list check out my shop: CraftedByFran

Etsy Shop – CraftedByFran

After making jewelry for a few years and creating pieces to give as gifts, sell to friends and at a few local craft fairs, I finally decided to open an Etsy shop. Truthfully, I’ve been thinking about it for a while but held back because I thought it would be difficult.

So, what did I think it would be difficult? Figuring out shipping costs for one. I did a little research and discovered that this stumps many would-be Etsy sellers. There were a few other things as well: the whole creating a listing, taking good pictures, do I have to give my pieces “names?” And a few other silly little things. In the end, I am opting to offer free shipping and decided not to give most of my pieces a name since they are one-of-a-kind. And after creating my first listing and learning how to navigate the process it became a lot easier and not as daunting. Let’s be honest, trying anything new is a learning process. Soon enough I’ll learn what works and what doesn’t. There is one thing that always gets me… Tagging. Which ones work best and which ones don’t. I have that same issue with my blog posts sometimes.

Below is the link to my shop. Feel free to like a piece, like my shop or maybe you’ll find something perfect for you.

CraftedByFran

Here are some of the pieces available now…


Christmas Wrap-Up

How was your Christmas? Mine was good… Filled with great times, great food and great cookies! As I’ve done in years past I had a Christmas baking marathon and baked various cookies to give as gifts. I took my last sheet of cookies out of the oven early in the day Christmas Eve. This year along with the usual rugelach and malted chocolate chip cookies, I made another batch of these vanilla spritz cookies along with peanut butter cookies and oatmeal cookies. YUM! And, there was also a batch of Gingerbread Men, one of who was a bit angry after losing part of his leg.

IMG_0197

And luckily this year I got my handmade Christmas gifts done in plenty of time, okay, with about a week to spare. This for me is good, since it gave me enough time to wrap them with pretty ribbon bows. I made two Afghans and an earring and bracelet set.

The first afghan was made with Lion Brand’s Thick & Quick Yarn following their Cromwell Court Afghan Pattern. Here’s a pic of the start…

IMG_9788

And the finish product…

IMG_0170

The second afghan was made with Lion Brand’s Vanna’s Choice Yarn following their 5 1/2 Hour Throw Pattern… Truthfully it took me longer than the 5 1/2 hours and since it involved crocheting three colors together I opted to wind the three colors into a ball to make crocheting a lot simpler.

IMG_9781

And the finish product…

IMG_0180

And finally the earring and bracelet set that I made using tila beads, superduo beads, seed beads and crystals just using basic beadweaving techniques.

IMG_0092 IMG_0089

I also squeezed in some time to make my Christmas cards once again this year.

IMG_0110

I hope you are all enjoying the holidays and that you all have a wonderful New Year!


Statement Necklaces

With Summer finally here and temperatures on the rise it’s the perfect time to start wearing amazing necklaces that the world can see. Wearing a beautiful necklace that’s covered by a coat keeping you warm during the colder months is just not cool. I recently made a few necklaces that are worth showing off that I would like to share with you today.

Up first… Statement pendants that I picked up at my local craft store that I accentuated with beads, crystals and metal beads to create one-of-a-kind necklaces that can be worn with a tank top and jeans or dressed up for a more formal occasion.

IMG_7667

Next, two multi-strand necklaces that have instantly become two of most favorite necklaces I have made. I especially love the silver-tone necklace as I used a variety of stones in different colors so the necklaces can be worn with multiple outfits.

IMG_7375

And finally another multi-strand necklace made with Tila beads, seed beads, stones and crystals. I came across this pattern a while back and had been eyeing to make it for a while. I ordered all the beads and stones to make it and then let it sit for a while. I’m happy that I finally got around to making it though as the final piece is definitely not something you see everyday.

IMG_6845

Now onto making more pieces…

Spiraling Pearls, Crystals and Seed Beads

I currently subscribe to Bead & Button  magazine and while I normally rip out a few patterns from each issue that I want to make, I usually find that there is one pattern that I am eager to try over the other ones. From the most current issue that pattern was Sea Strand by Sue Neel. The pictures made it look really intricate and complicated but in actuality it’s quite simple to follow.

From the title of my post you can guess what components I used: 4mm & 12mm glass pearls, 6mm crystal rondelles and Size 11 seed beads.

IMG_0187

To start the necklace I strung alternating rondelles and 12mm pearls on a yard of 6lb fireline – beginning and ending with a rondelle – for my desired length. I then centered the beads on the thread so the two tails would be the same length. I sewed each tail through its corresponding rondelle once so they could essentially be stop beads as I continued to work on the piece.

IMG_0190

Next up, using about a yard and a half of thread I sewed twelve seed beads around alternating sides of the pearls by sewing through the rondelles. Once again I sewed the tails of the thread – which should be the same length as the original thread – through their respective rondelle.

IMG_0192 IMG_0193

And for the final strand I used another yard and a half of thread to sew three 4mm pearls and additional seed beads onto the piece. As with before, the tails of this thread should be the same length as the original thread and sewn through their respective rondelle. To end the necklace I used one thread from each end to connect the clasp – I used the original thread – and I ended the other two threads by weaving them through the path of the clasp and ending them in the necklace.

IMG_0194  IMG_0197

While a bracelet wasn’t part of the pattern I saw in the article, I decided to make one after completing the necklace. I followed the exact same pattern and technique as the necklace just for a shorter length.

IMG_0198

And finally I made the earrings that were included in the pattern to complete the set.

IMG_0199 IMG_0201

IMG_0217

Earring Class Redo

This past weekend I went to a jewelry making class with some friends. Initially we thought the class was going to be for a pair of earrings and a necklace so we were a tad bit disappointed when we learned it was just earrings and not the earrings that we saw when we signed up for the class but something completely different. I had some difficulty trying to figure what I wanted to do since I wasn’t too keen on the design we were being taught and with the stones provided to us. So, I came up with this while I was there, figuring I would go home and change them up afterwards.
So today I decided to take them apart and brainstorm with the other beads and stones I got from the class.
After a few attempts I finally came up with these by using a basic wire wrapping technique. I wasn’t all that sure about them at first, but after putting them on they grew on me.
%d bloggers like this: