Tiles, Tilas & Triangles

While round seed beads are fun to work with – they are versatile and offer a uniform look to most jewelry pieces – sometimes it’s nice to try out different shapes and sizes to get pieces that are unique and more intricate looking.

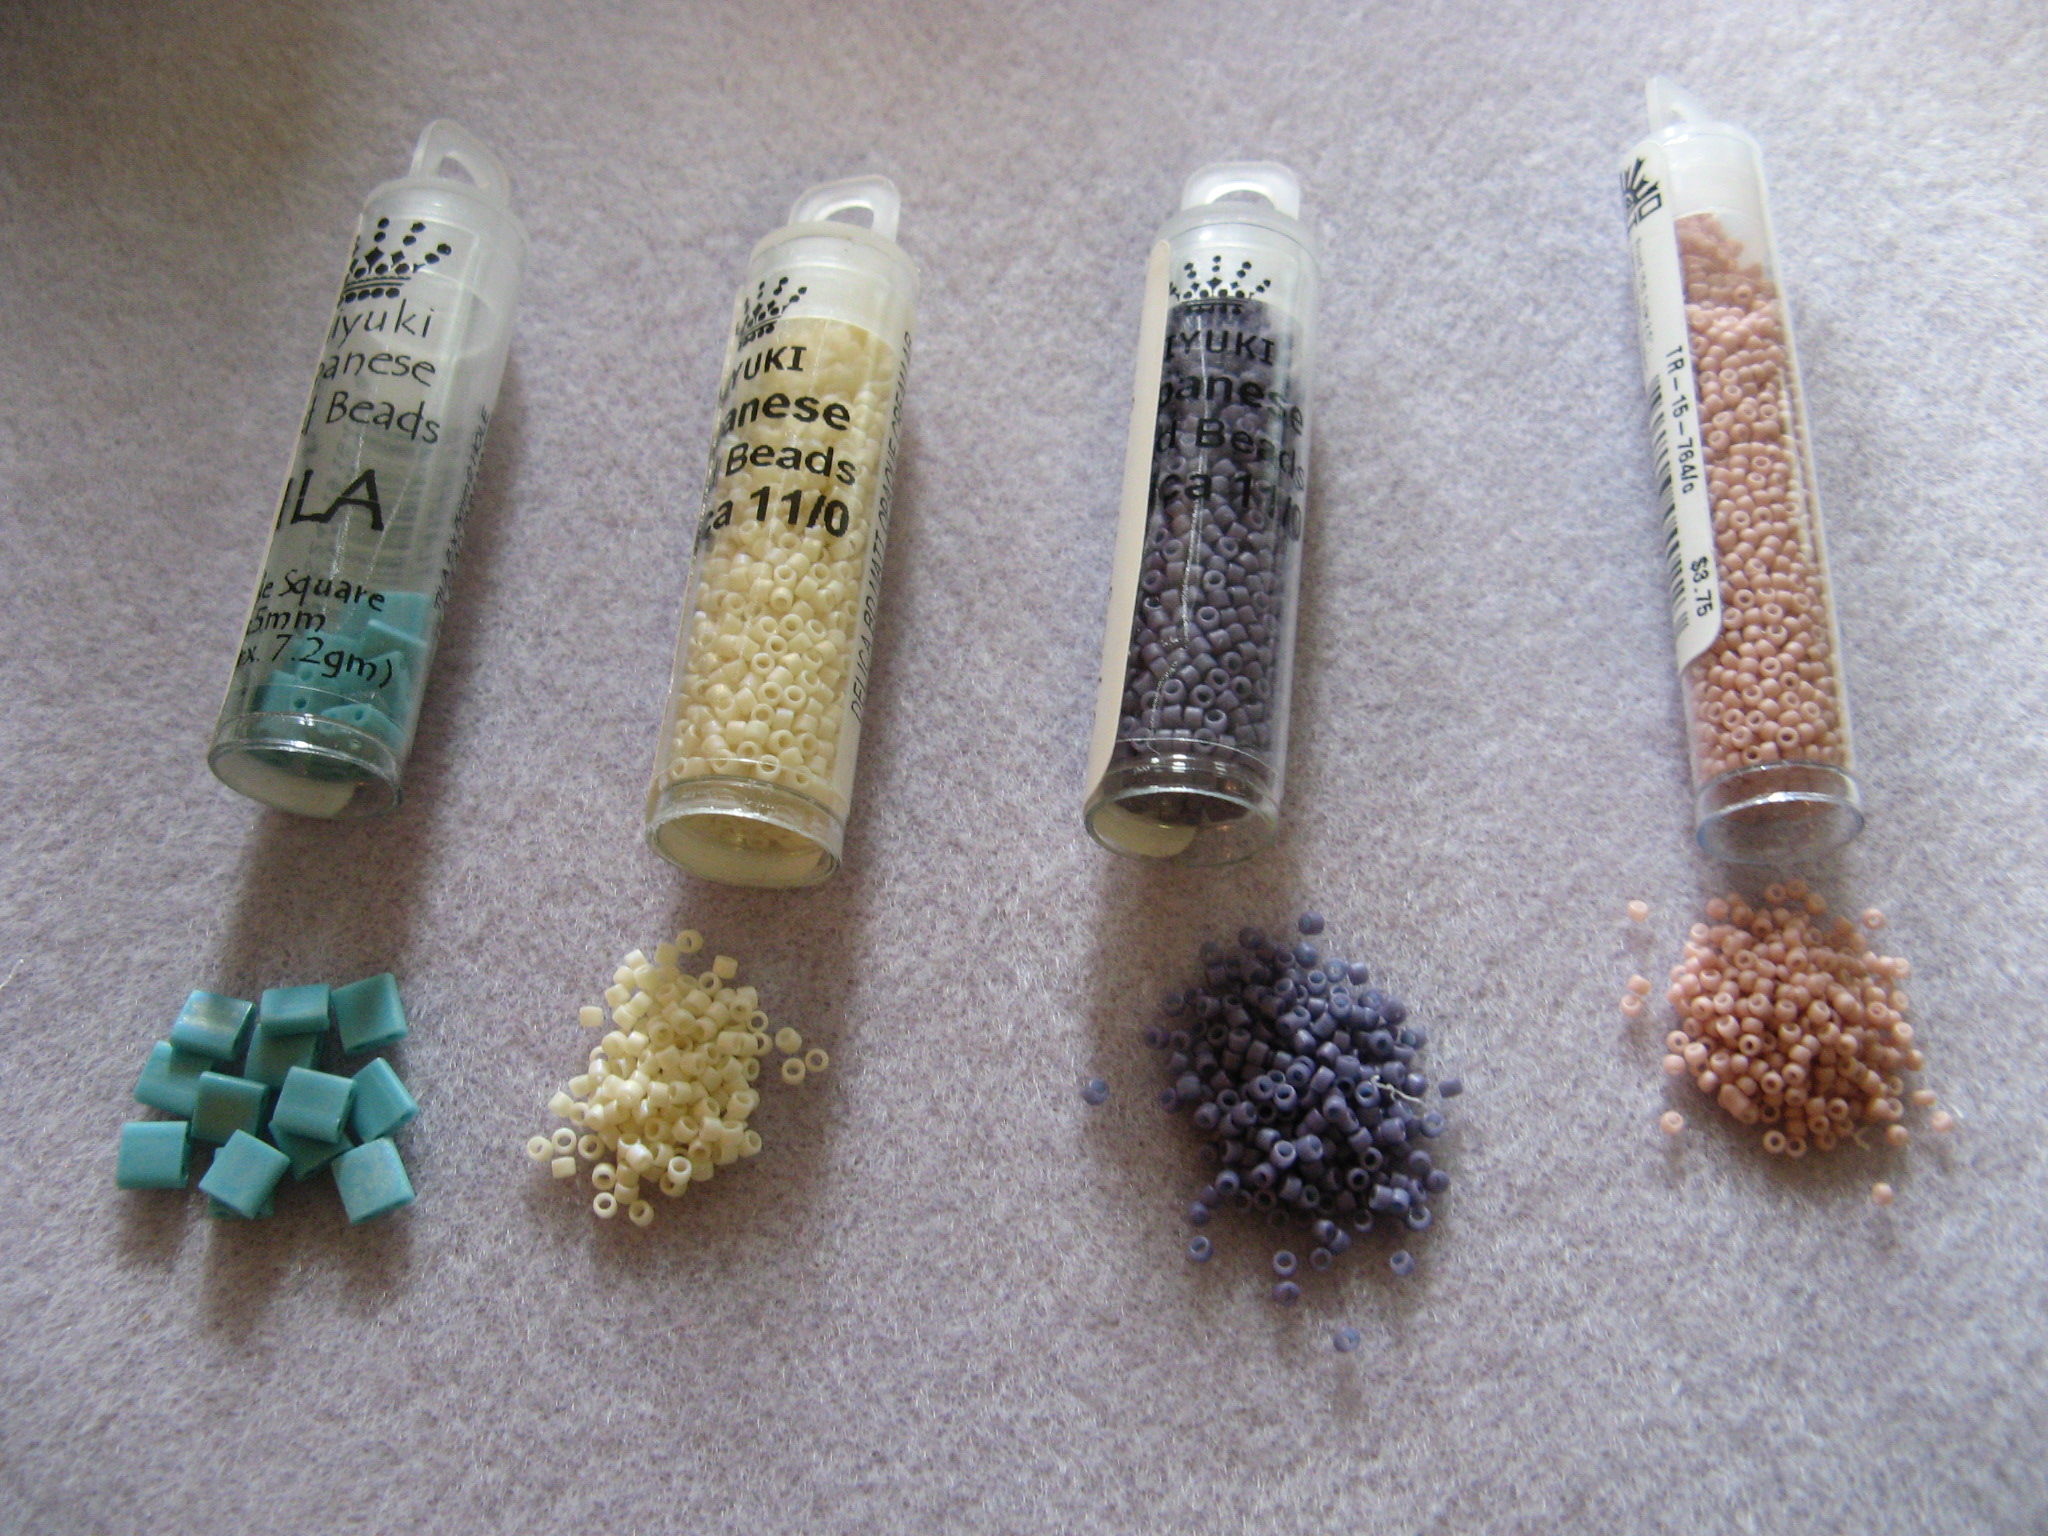
One such bracelet is the Tila Token bracelet by Marcia Balonis that was featured in the June 2012 issue of Bead & Button Magazine Bead & Button Magazine. When I started working on this bracelet I went by the material list that came with the pattern; 5mm Miyuki Tila beads, Size 11 Japanese cylinder beads (Delicas) in 2 colors and Size 15 seed beads.

IMG_0564

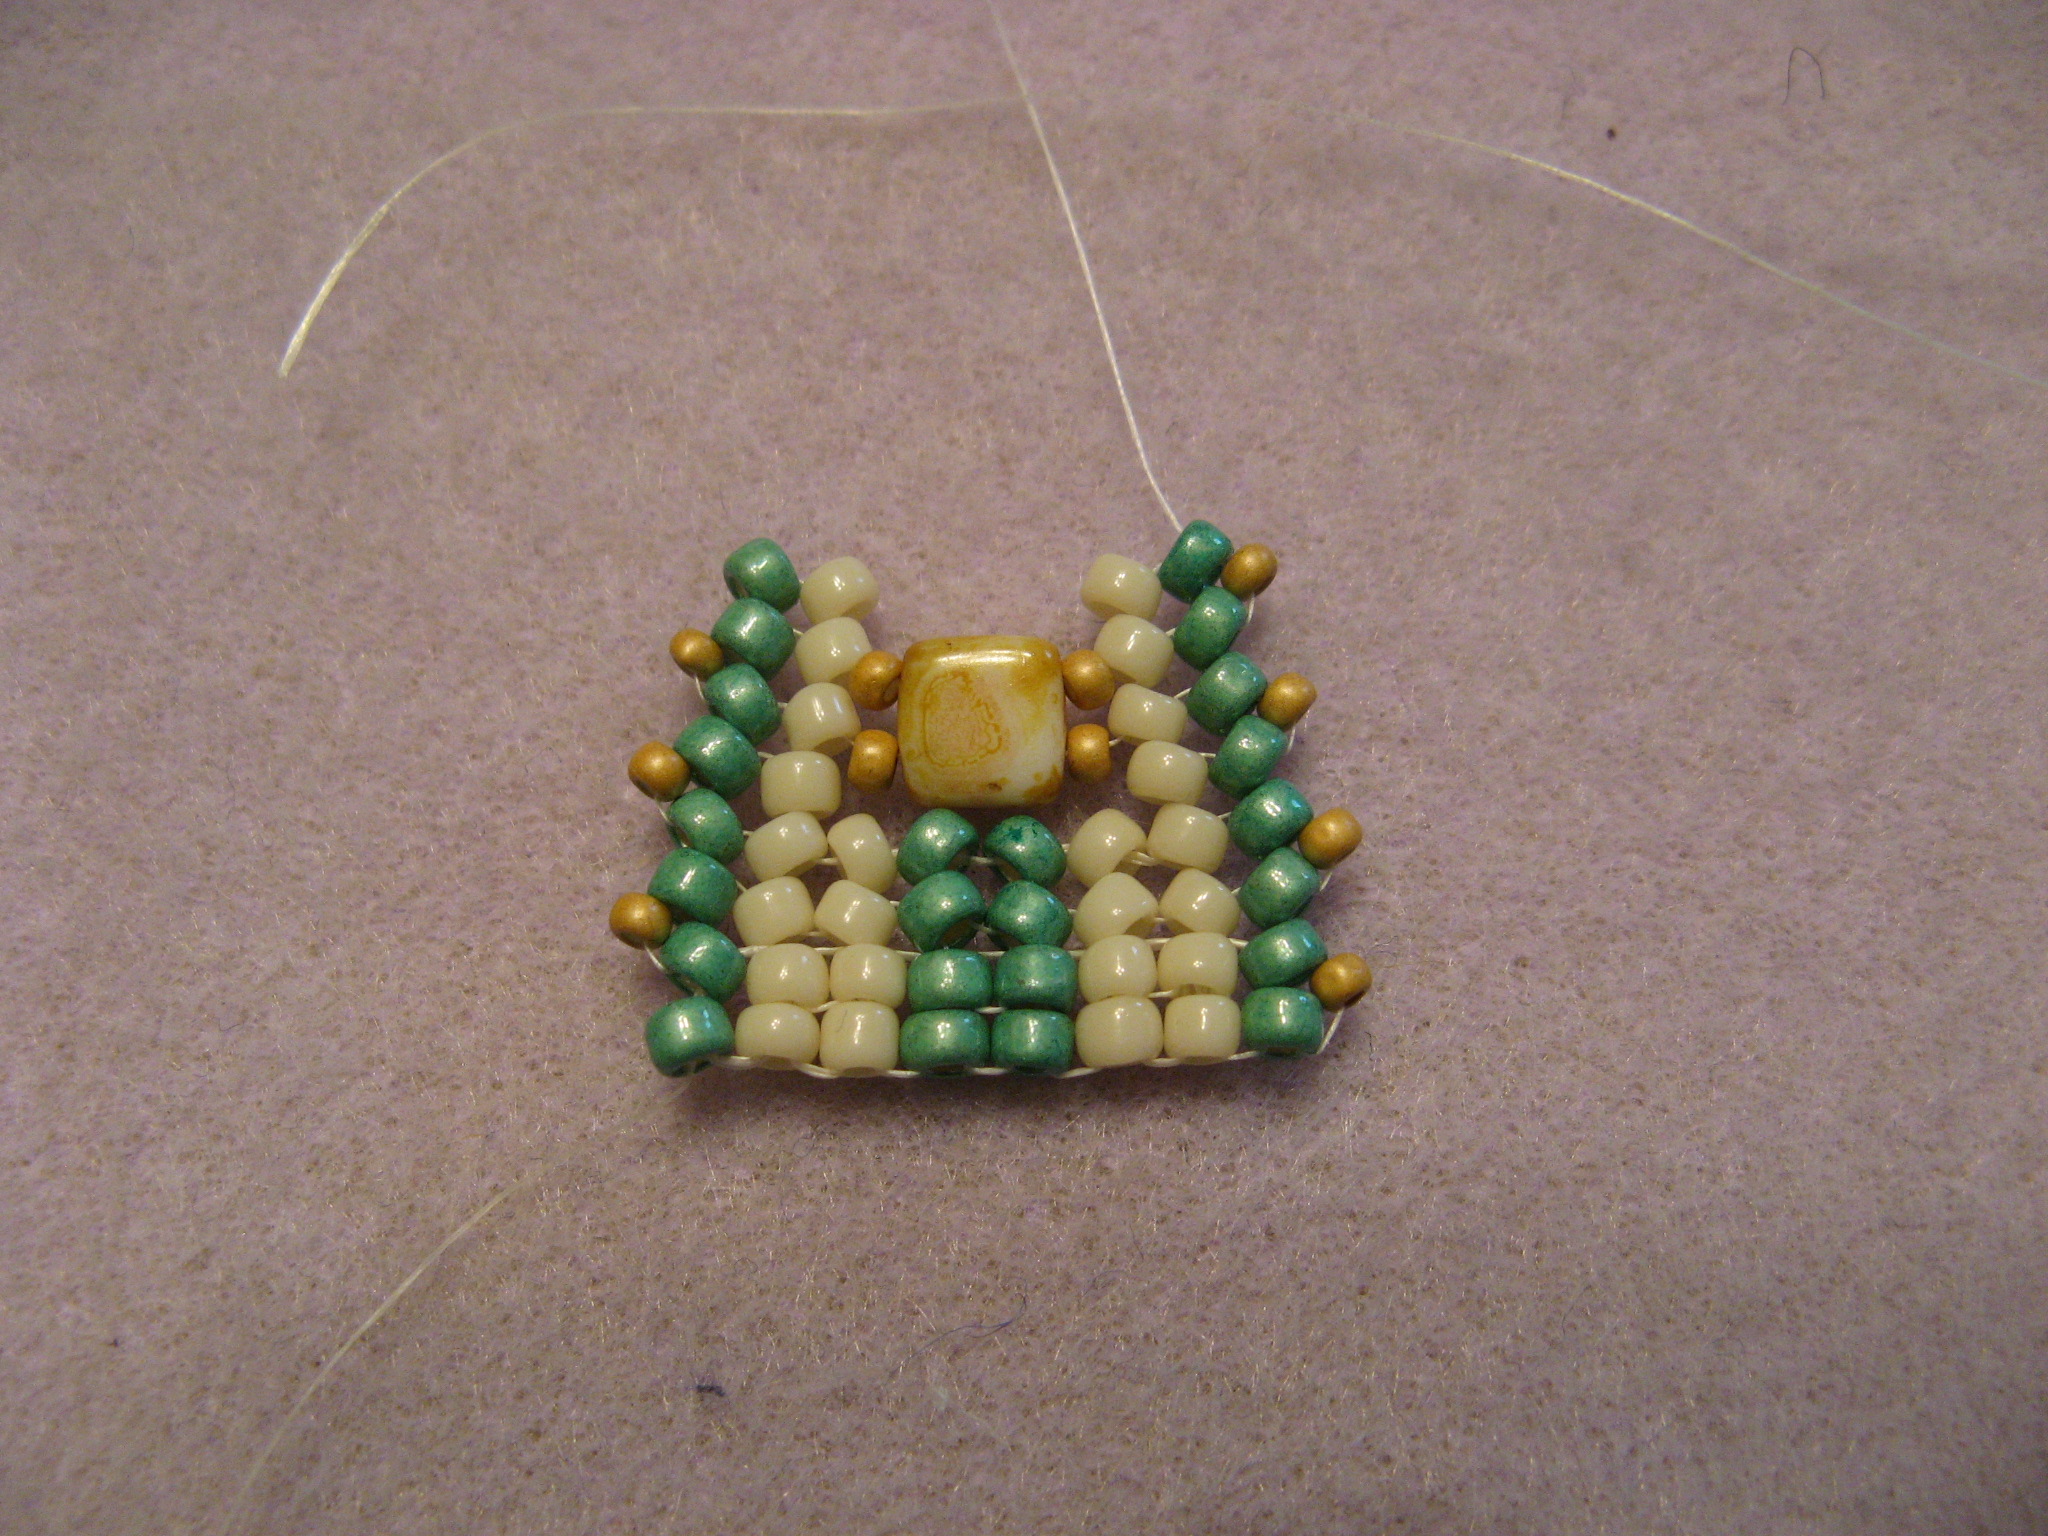
Things were going well through the first few steps…

IMG_9856

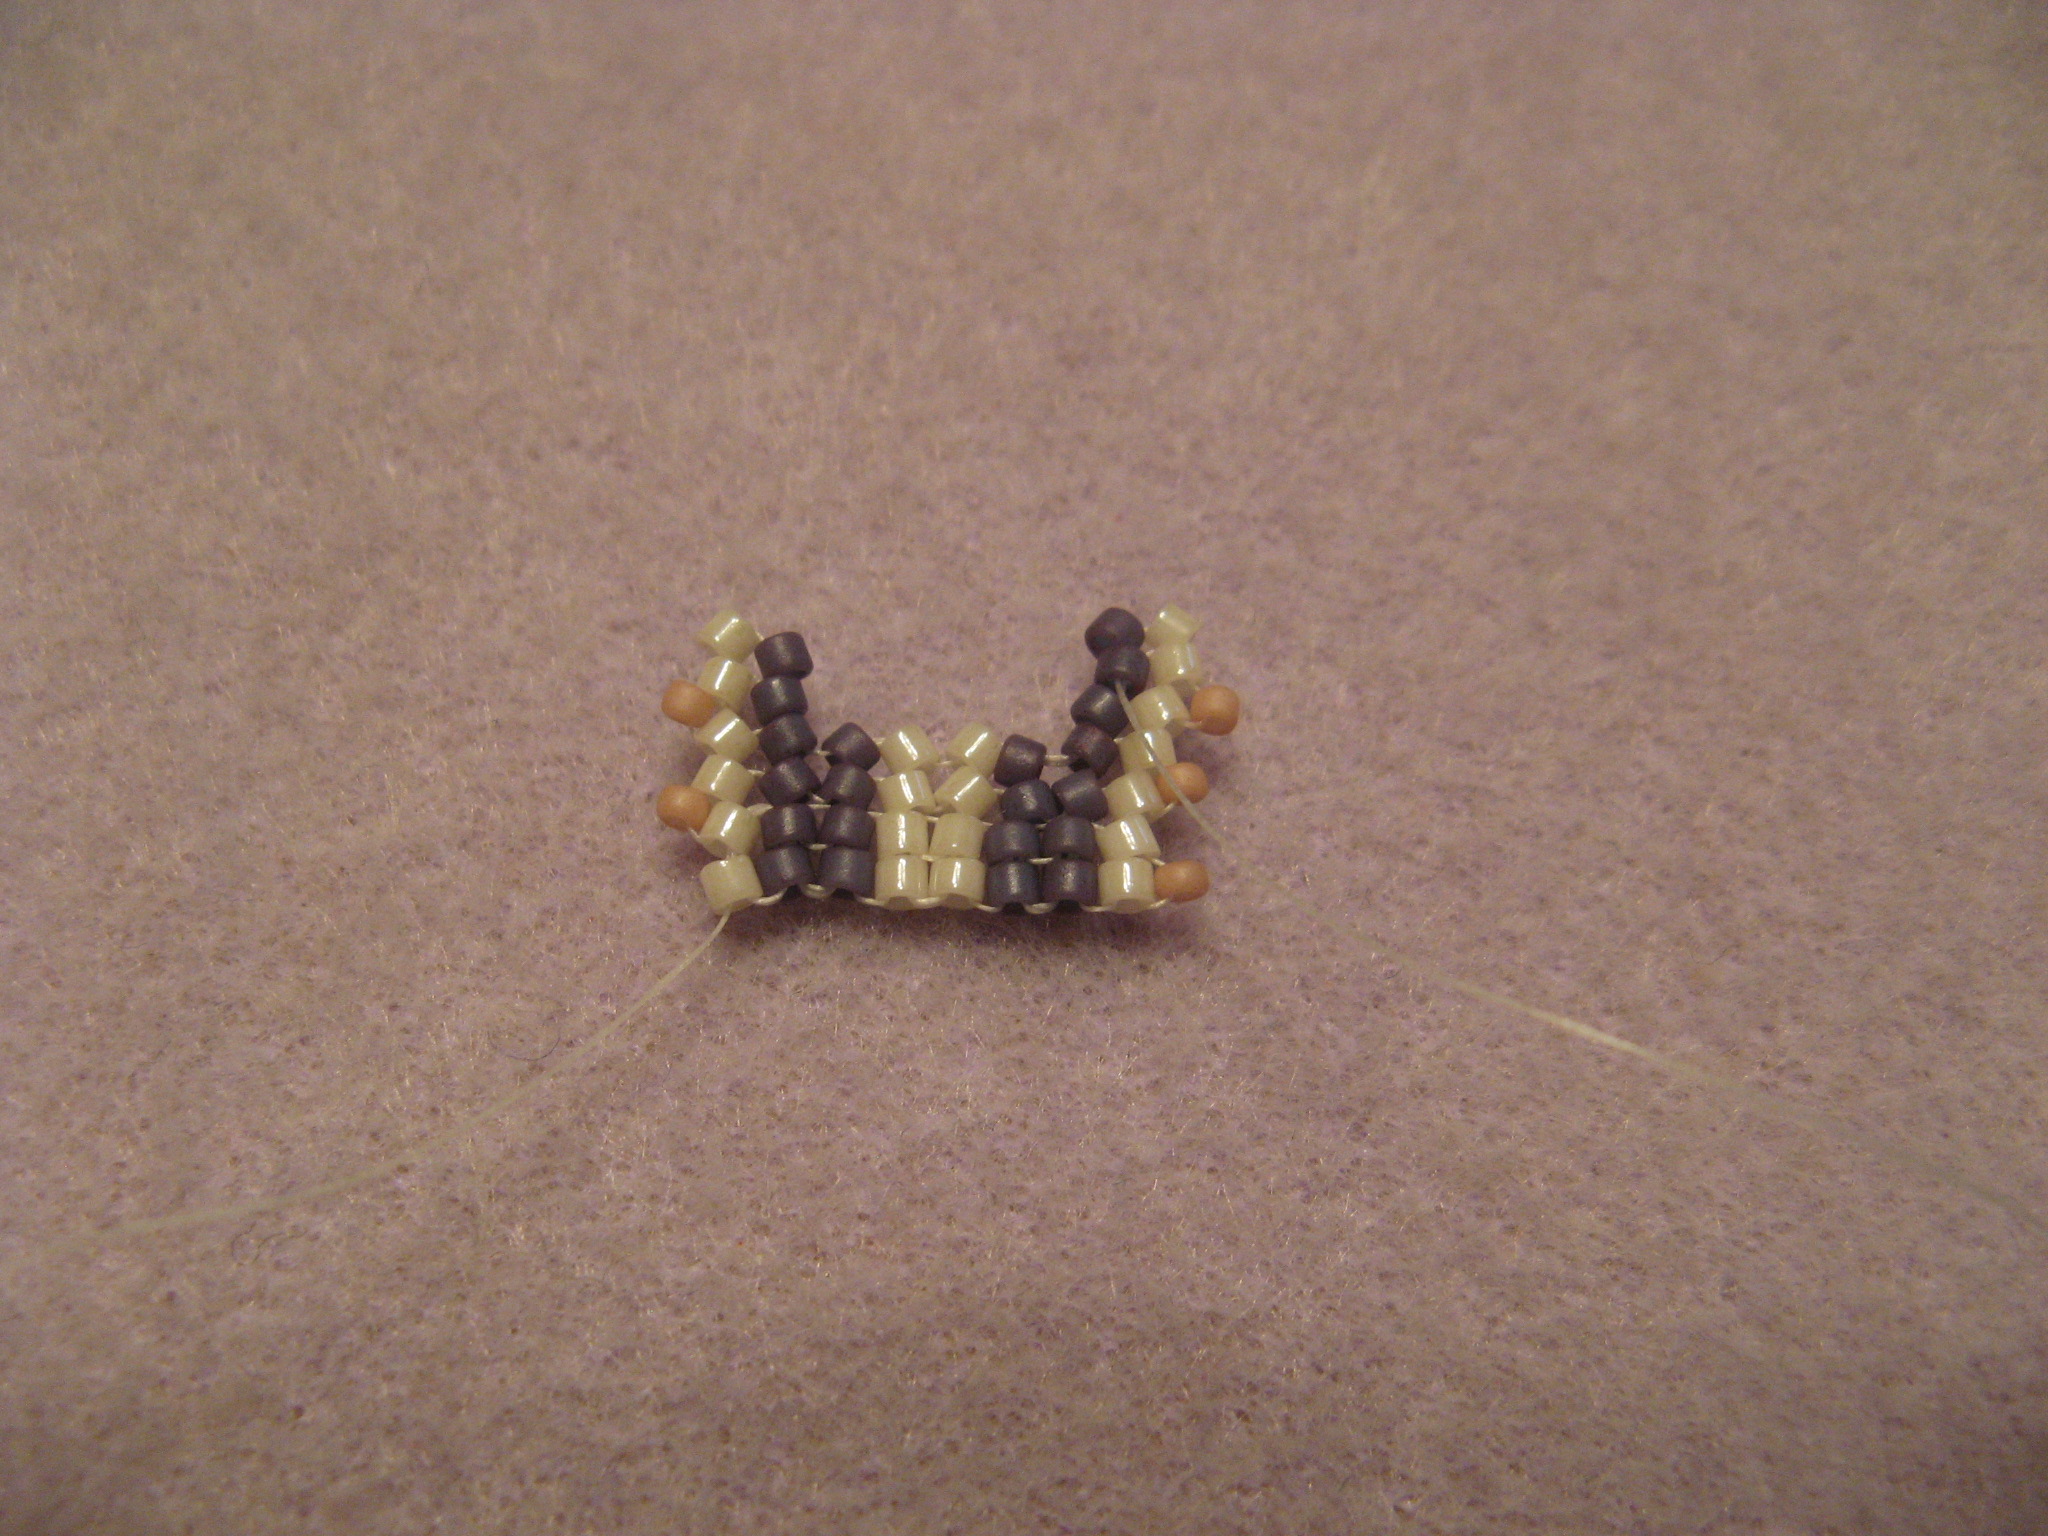
But when I started to add the Tila beads they weren’t lying flat and although it’s not pictured here I was having a hard time keeping the Delicas close together on the sides of the bracelet. I tried restarting the bracelet a few times but in the end decided to try it with different size beads altogether.

IMG_9858

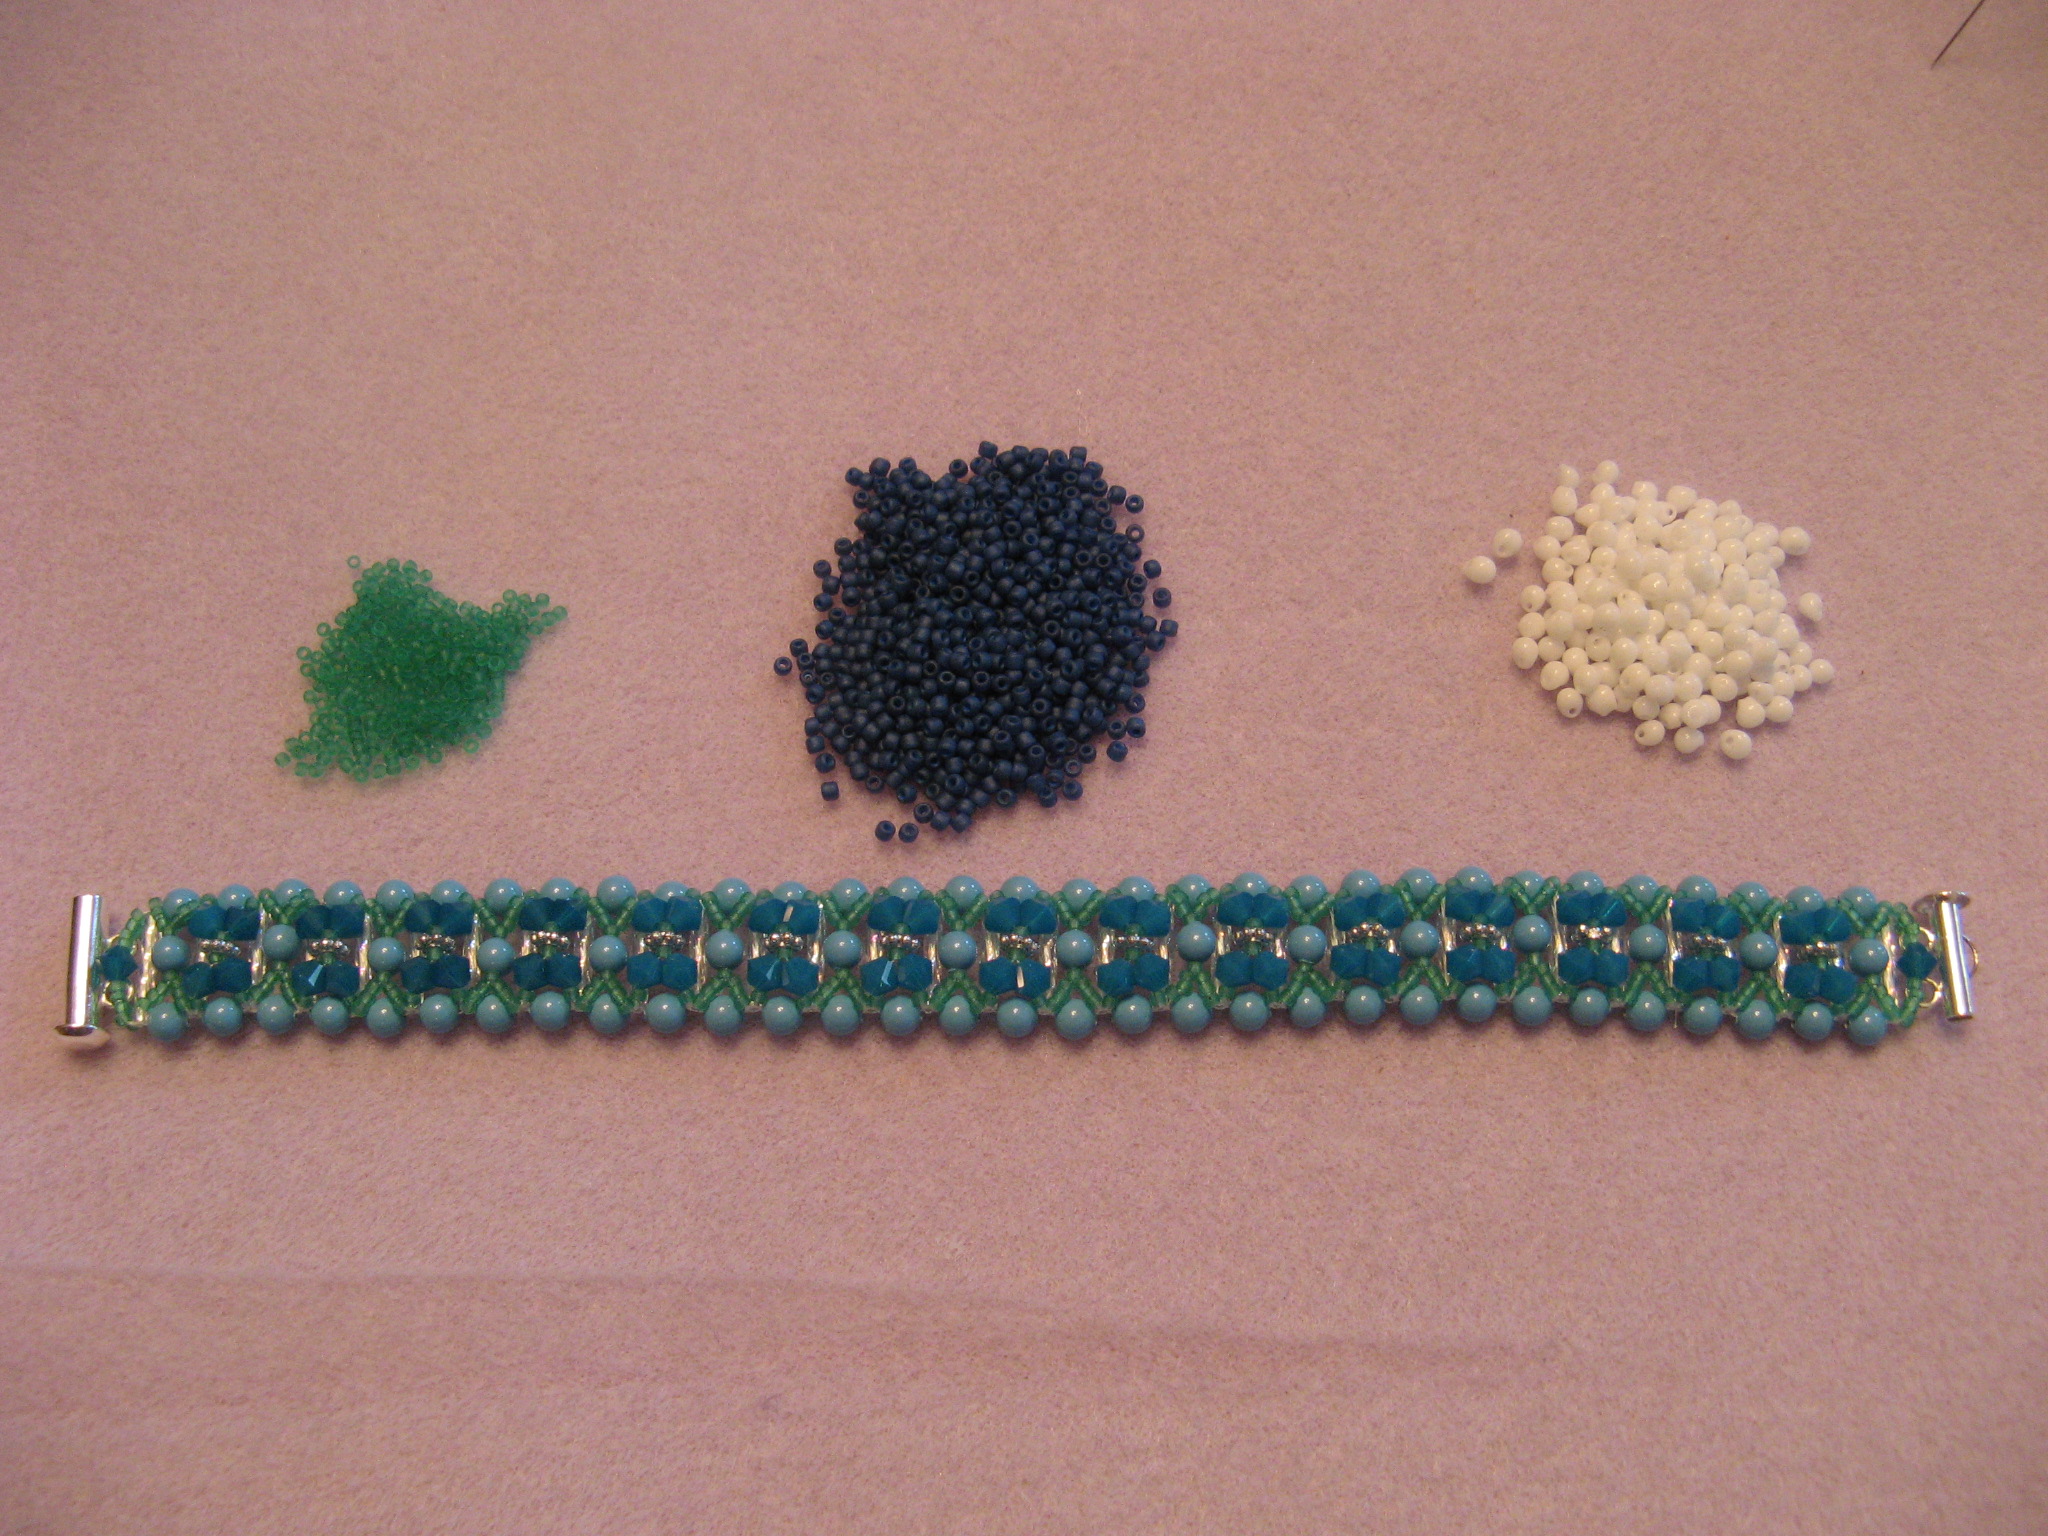
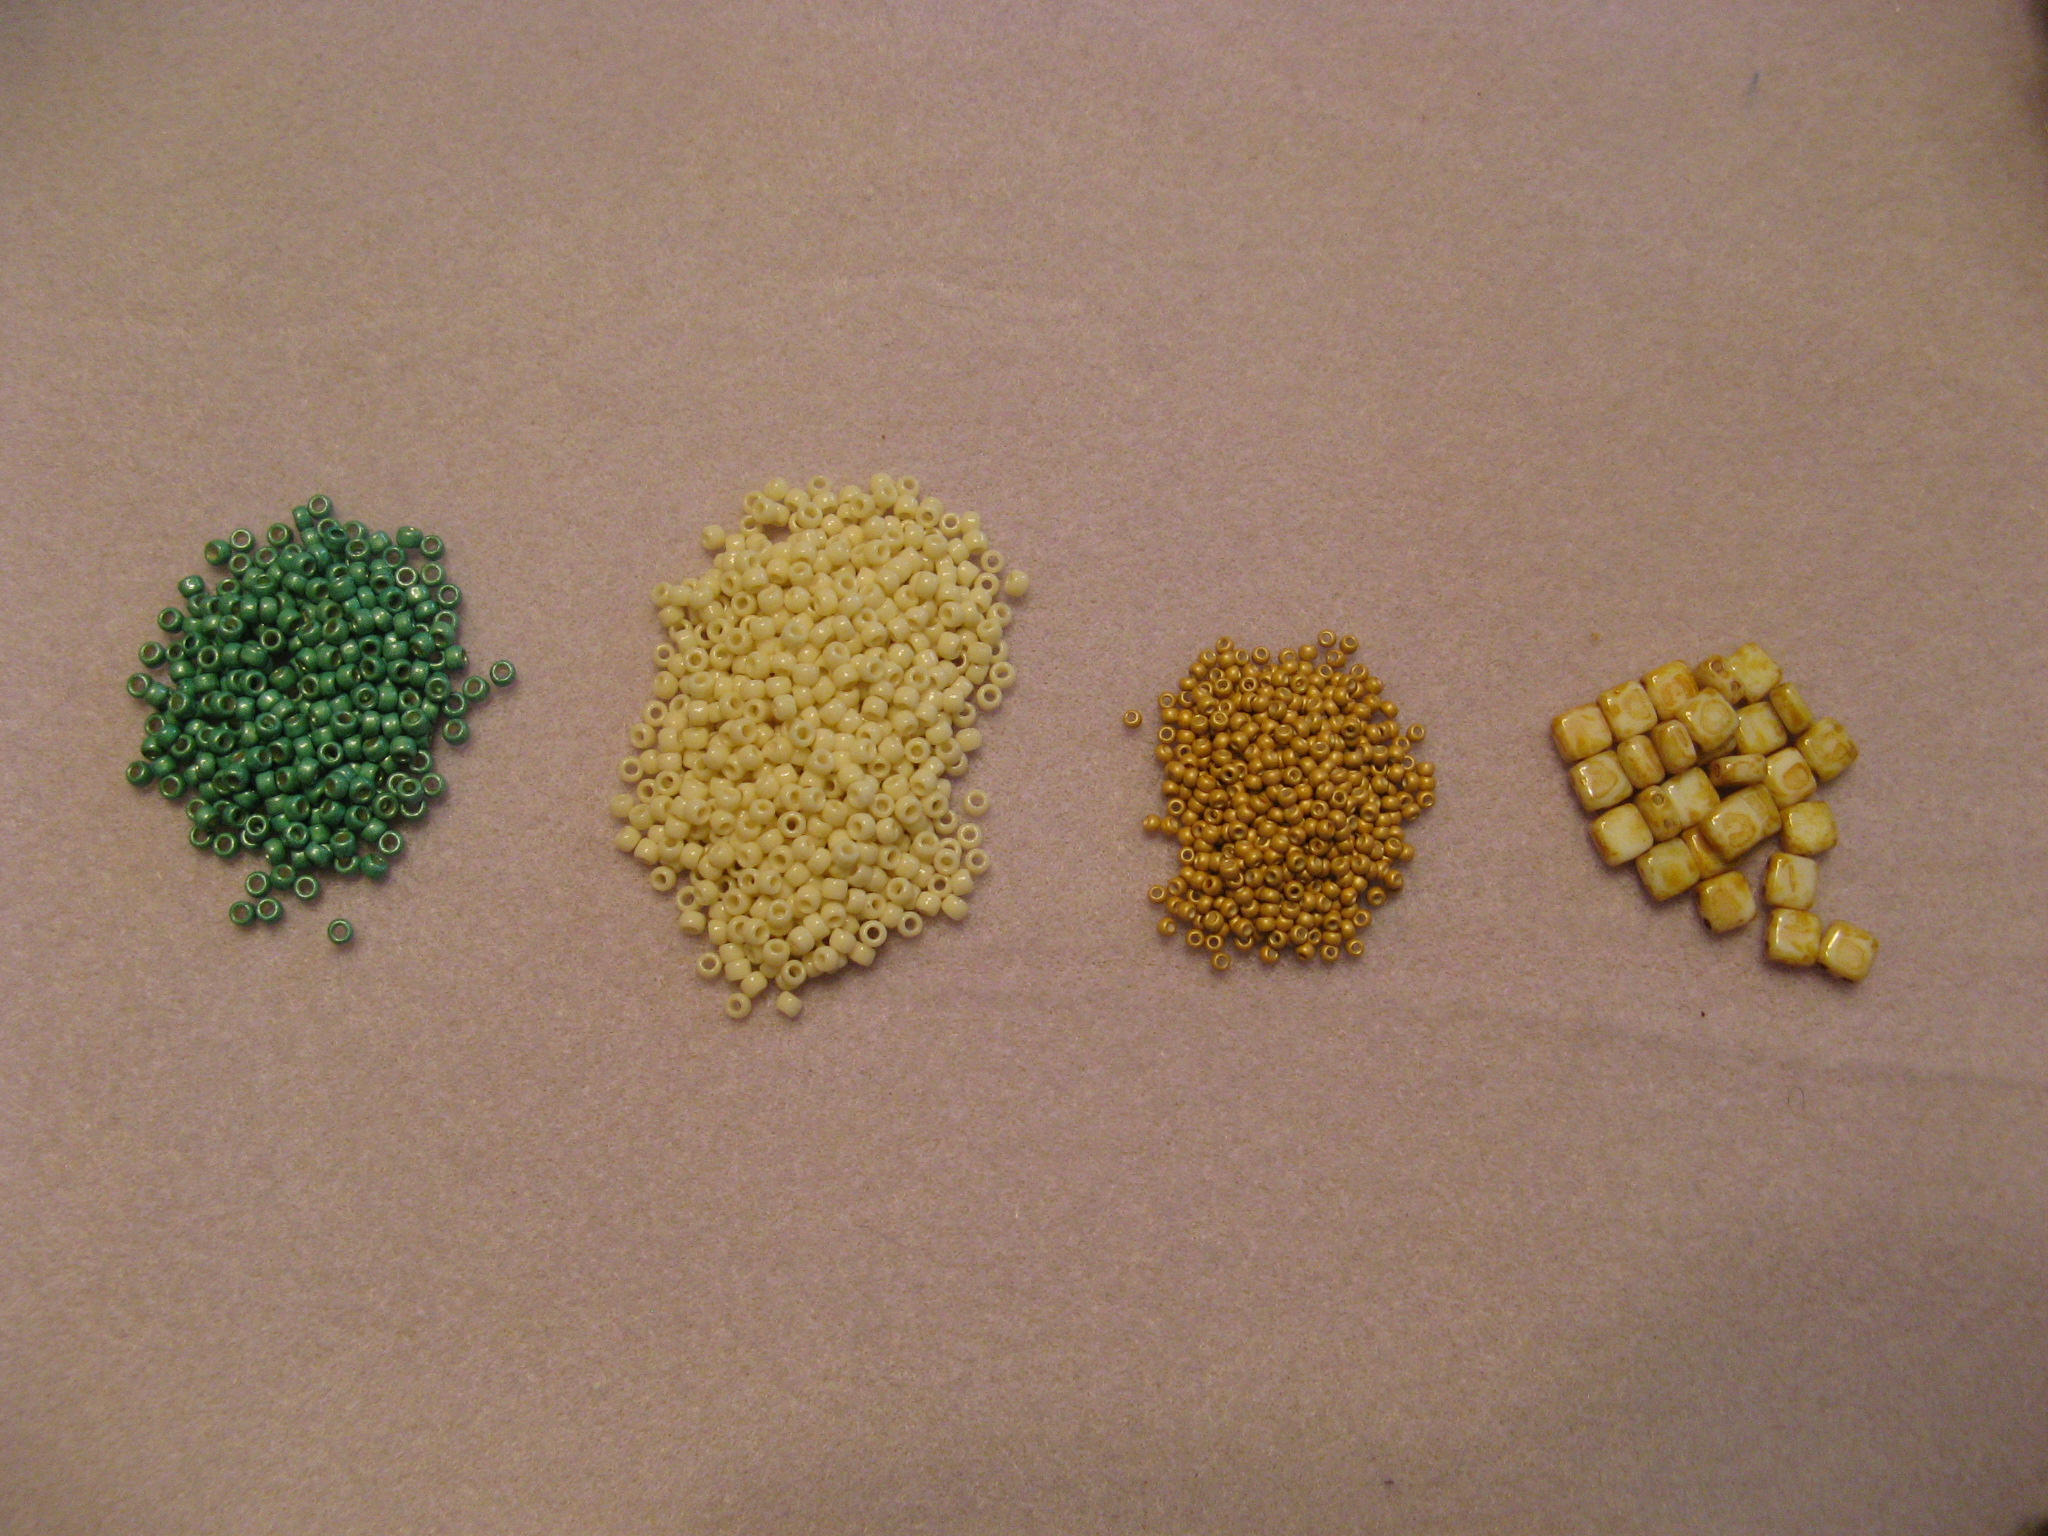
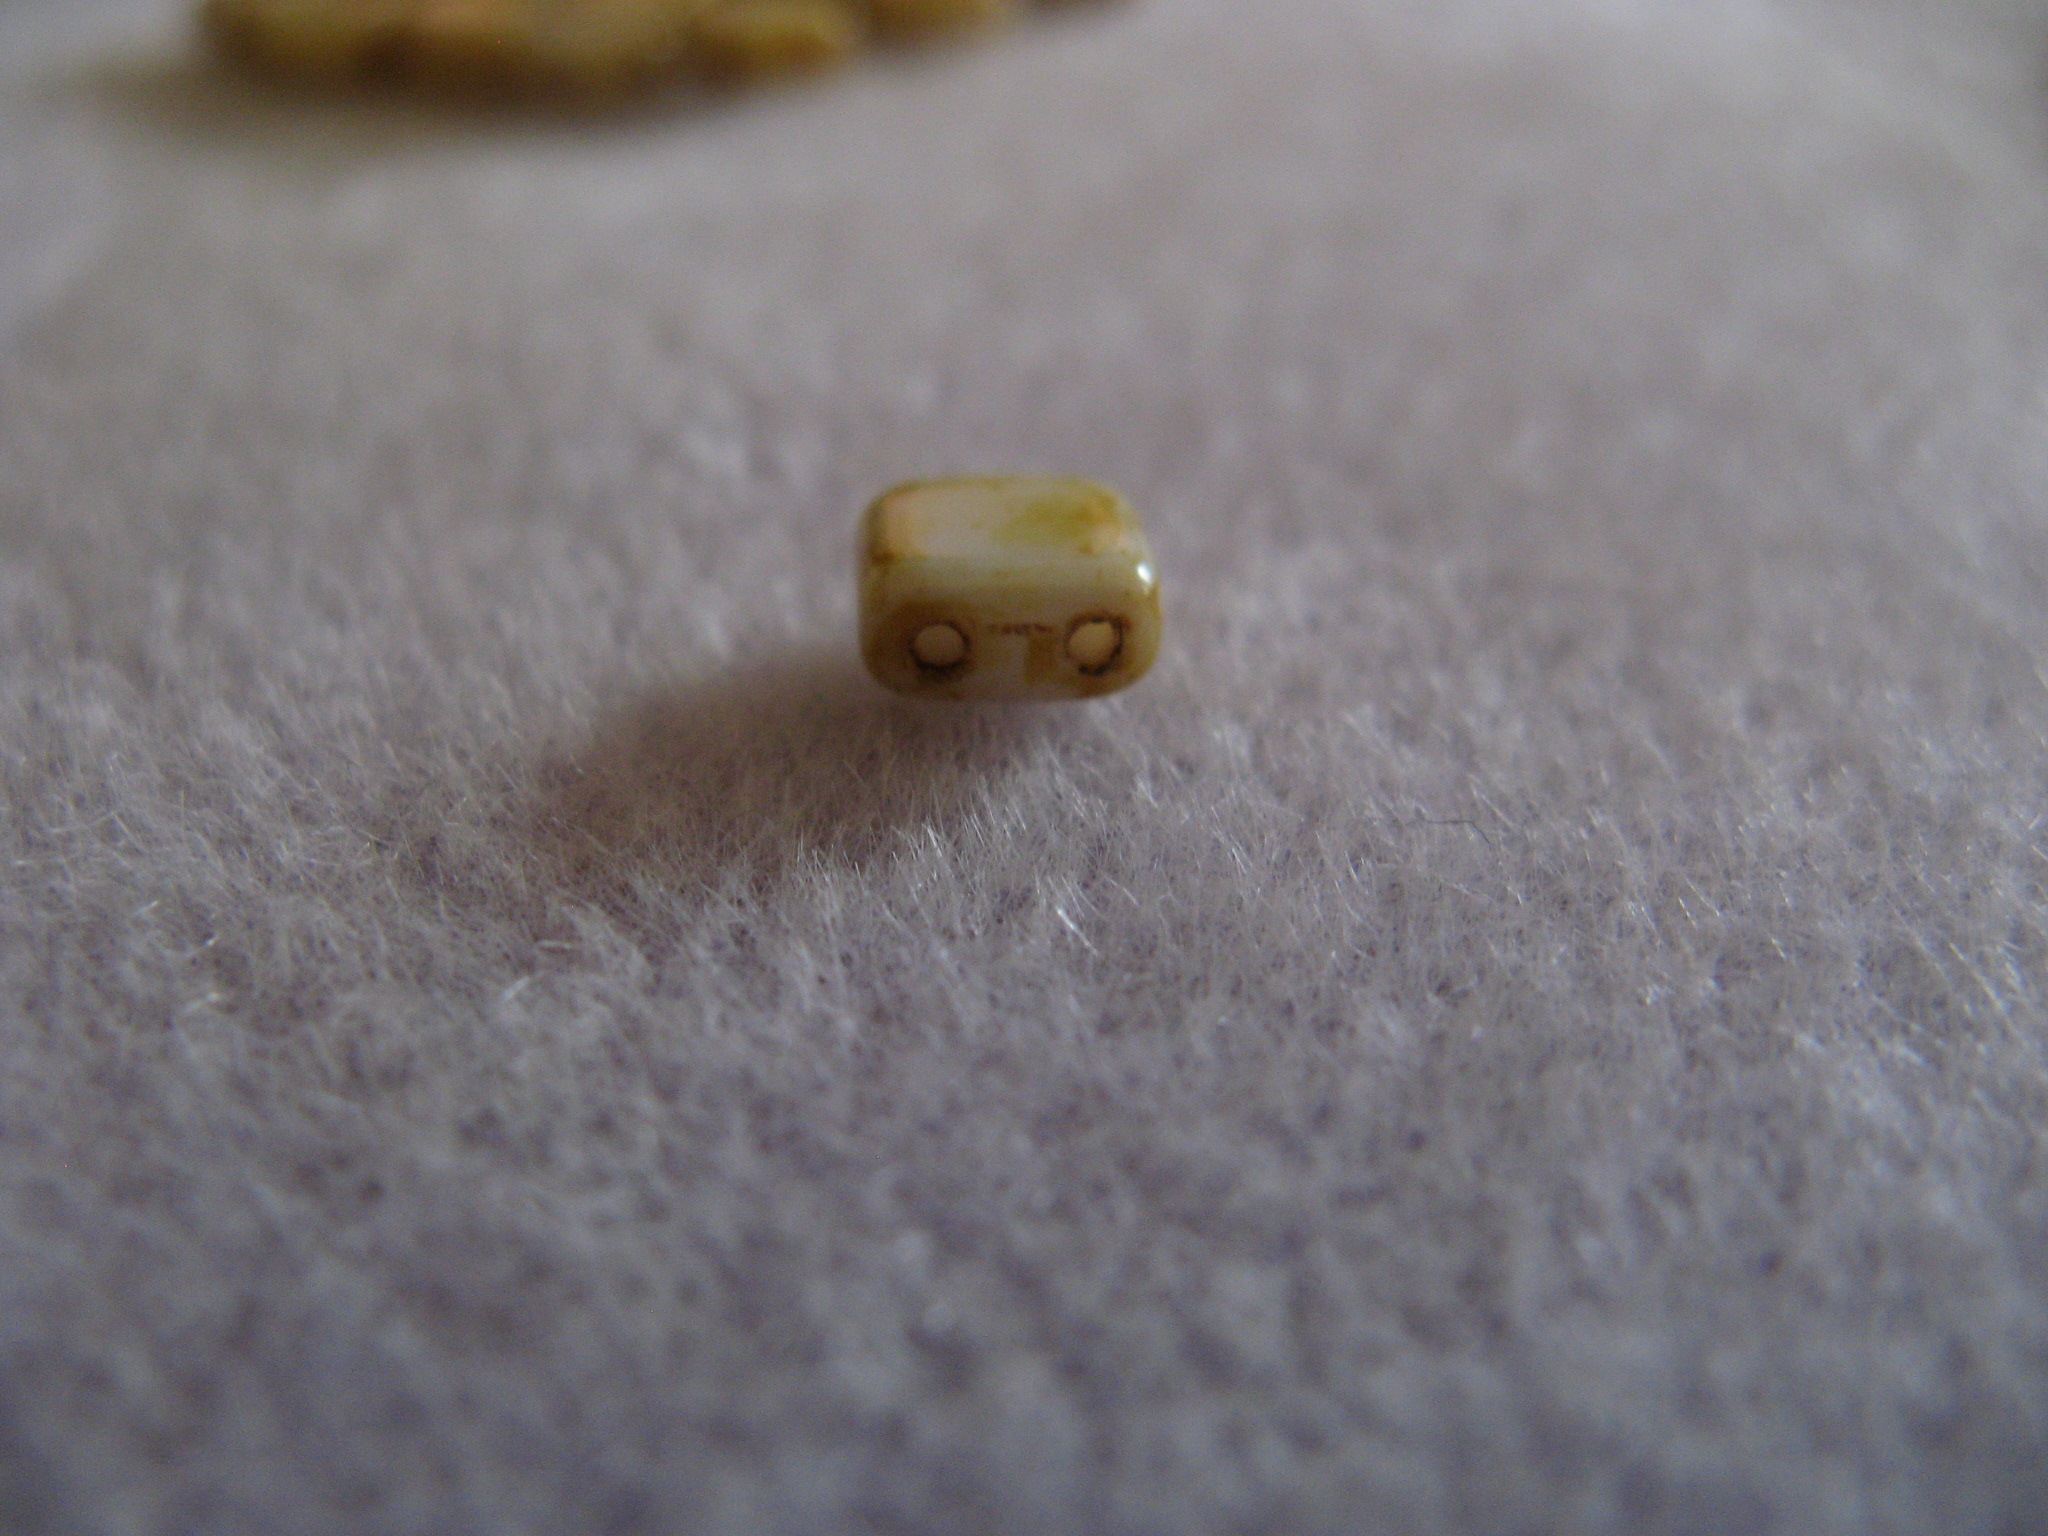
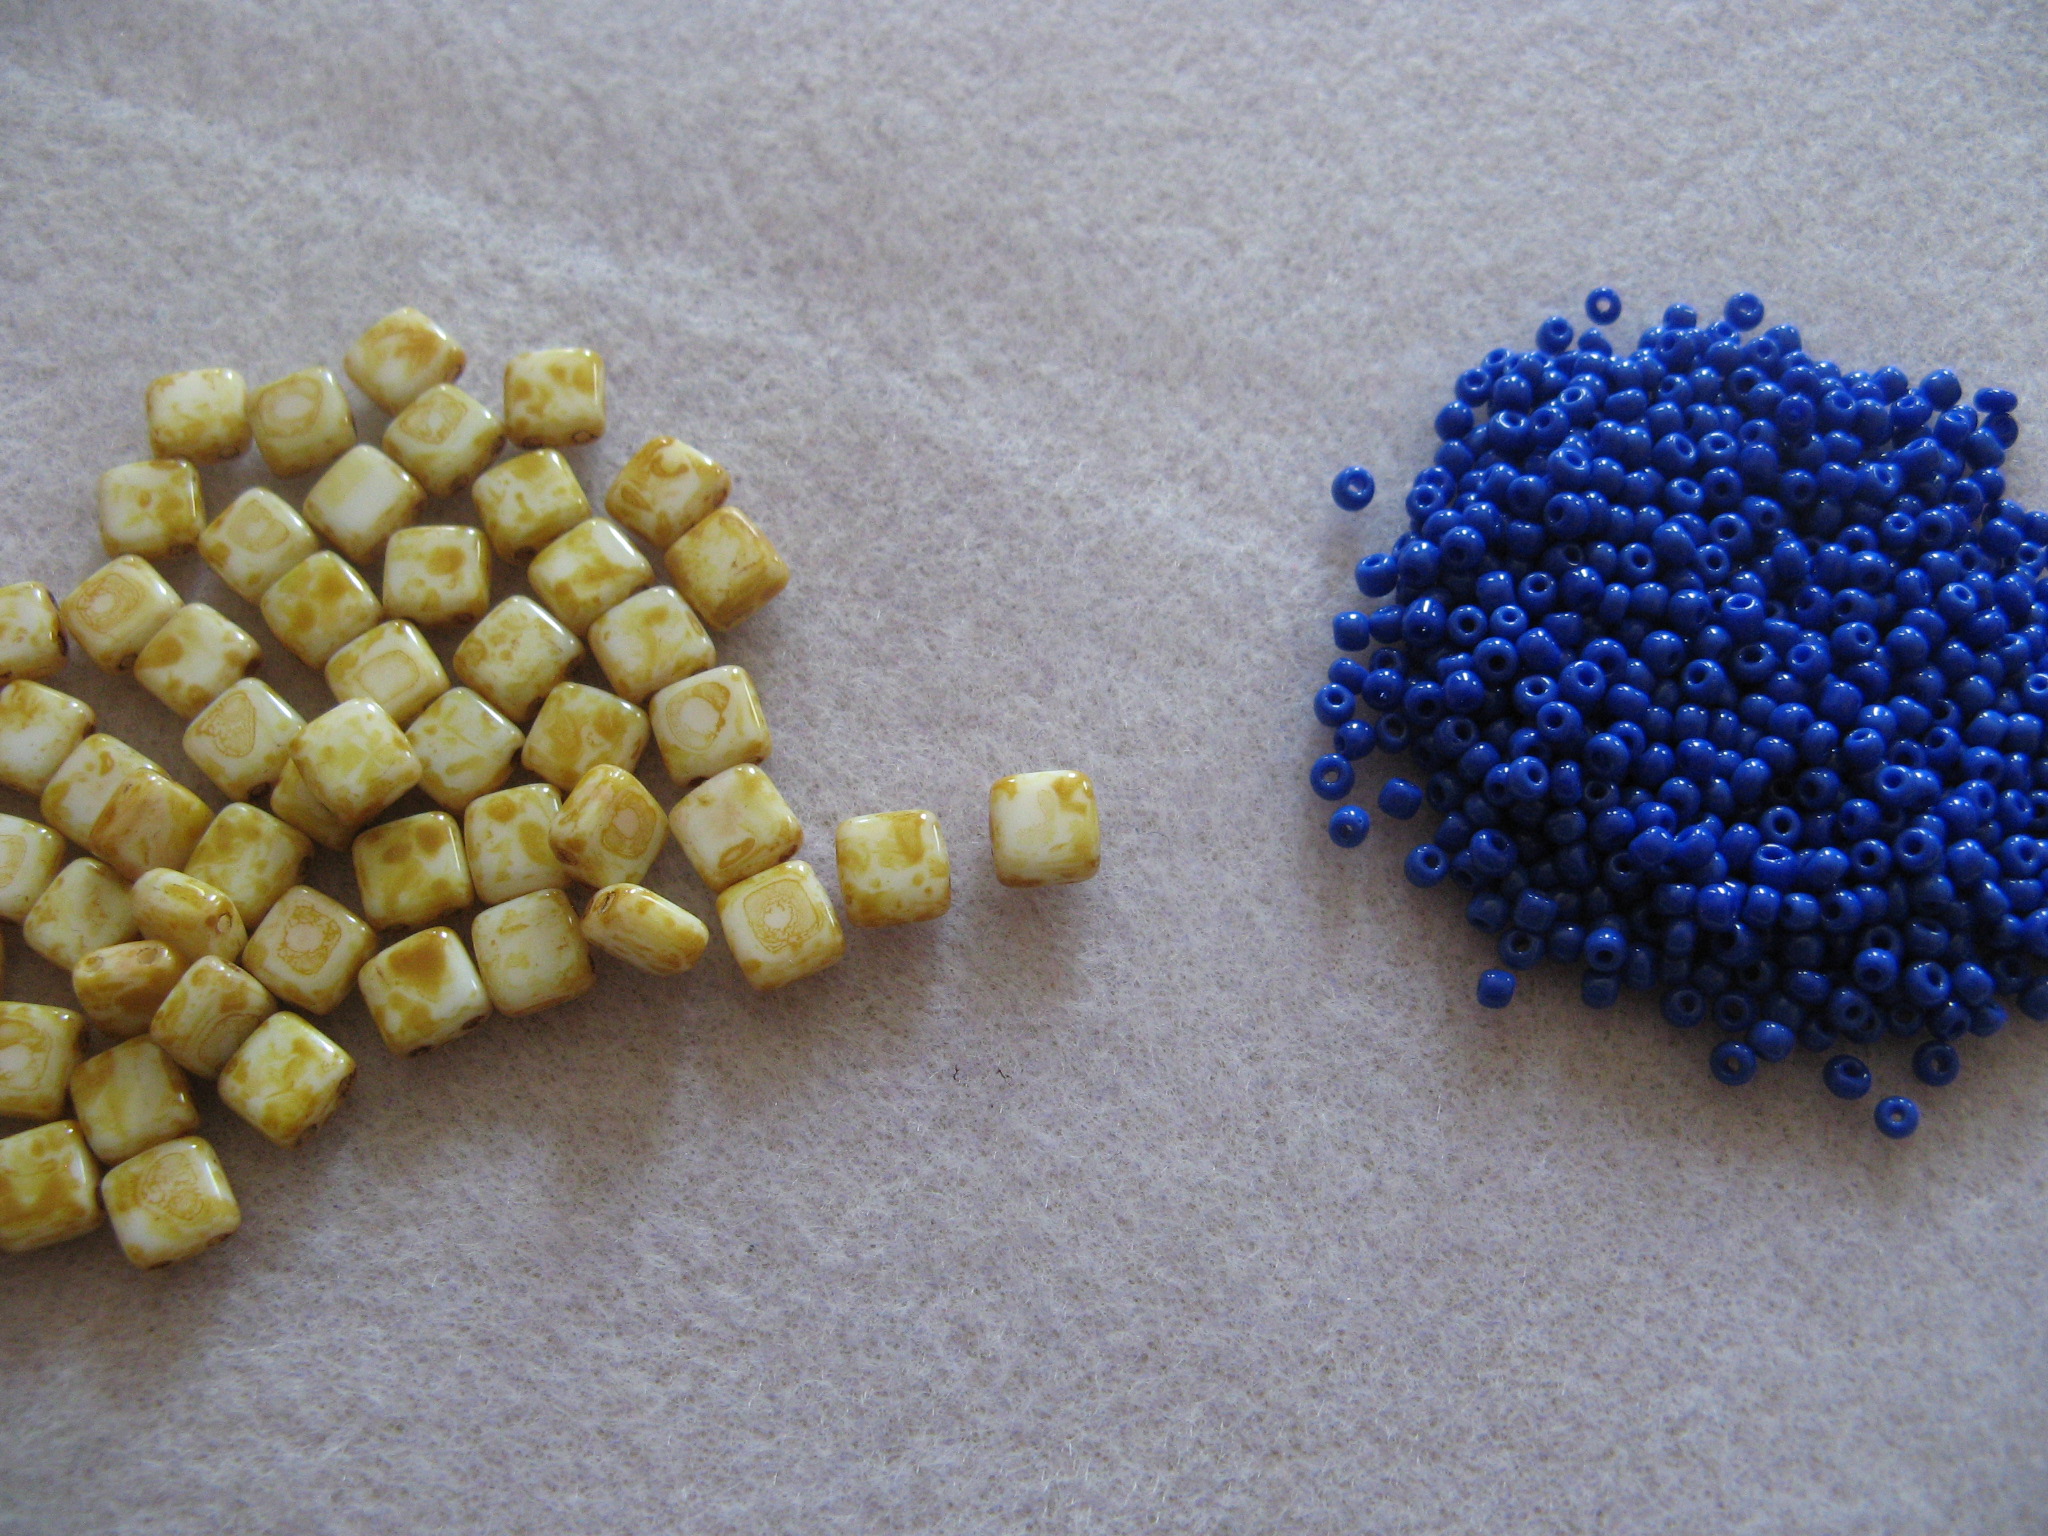
I opted to go with Czech Tile beads, Size 8 seed beads in 2 colors and Size 11 seed beads. Czech Tile and Miyuki Tila beads are similar in that they are square beads with two holes but they differ in that Tila beads are 5mm and Tile beads are slightly larger at 6mm and are more rounded around the edges and corners. Because of that roundness I prefer the look that Tile beads give a bracelet over Tila beads.

IMG_9825 IMG_9785

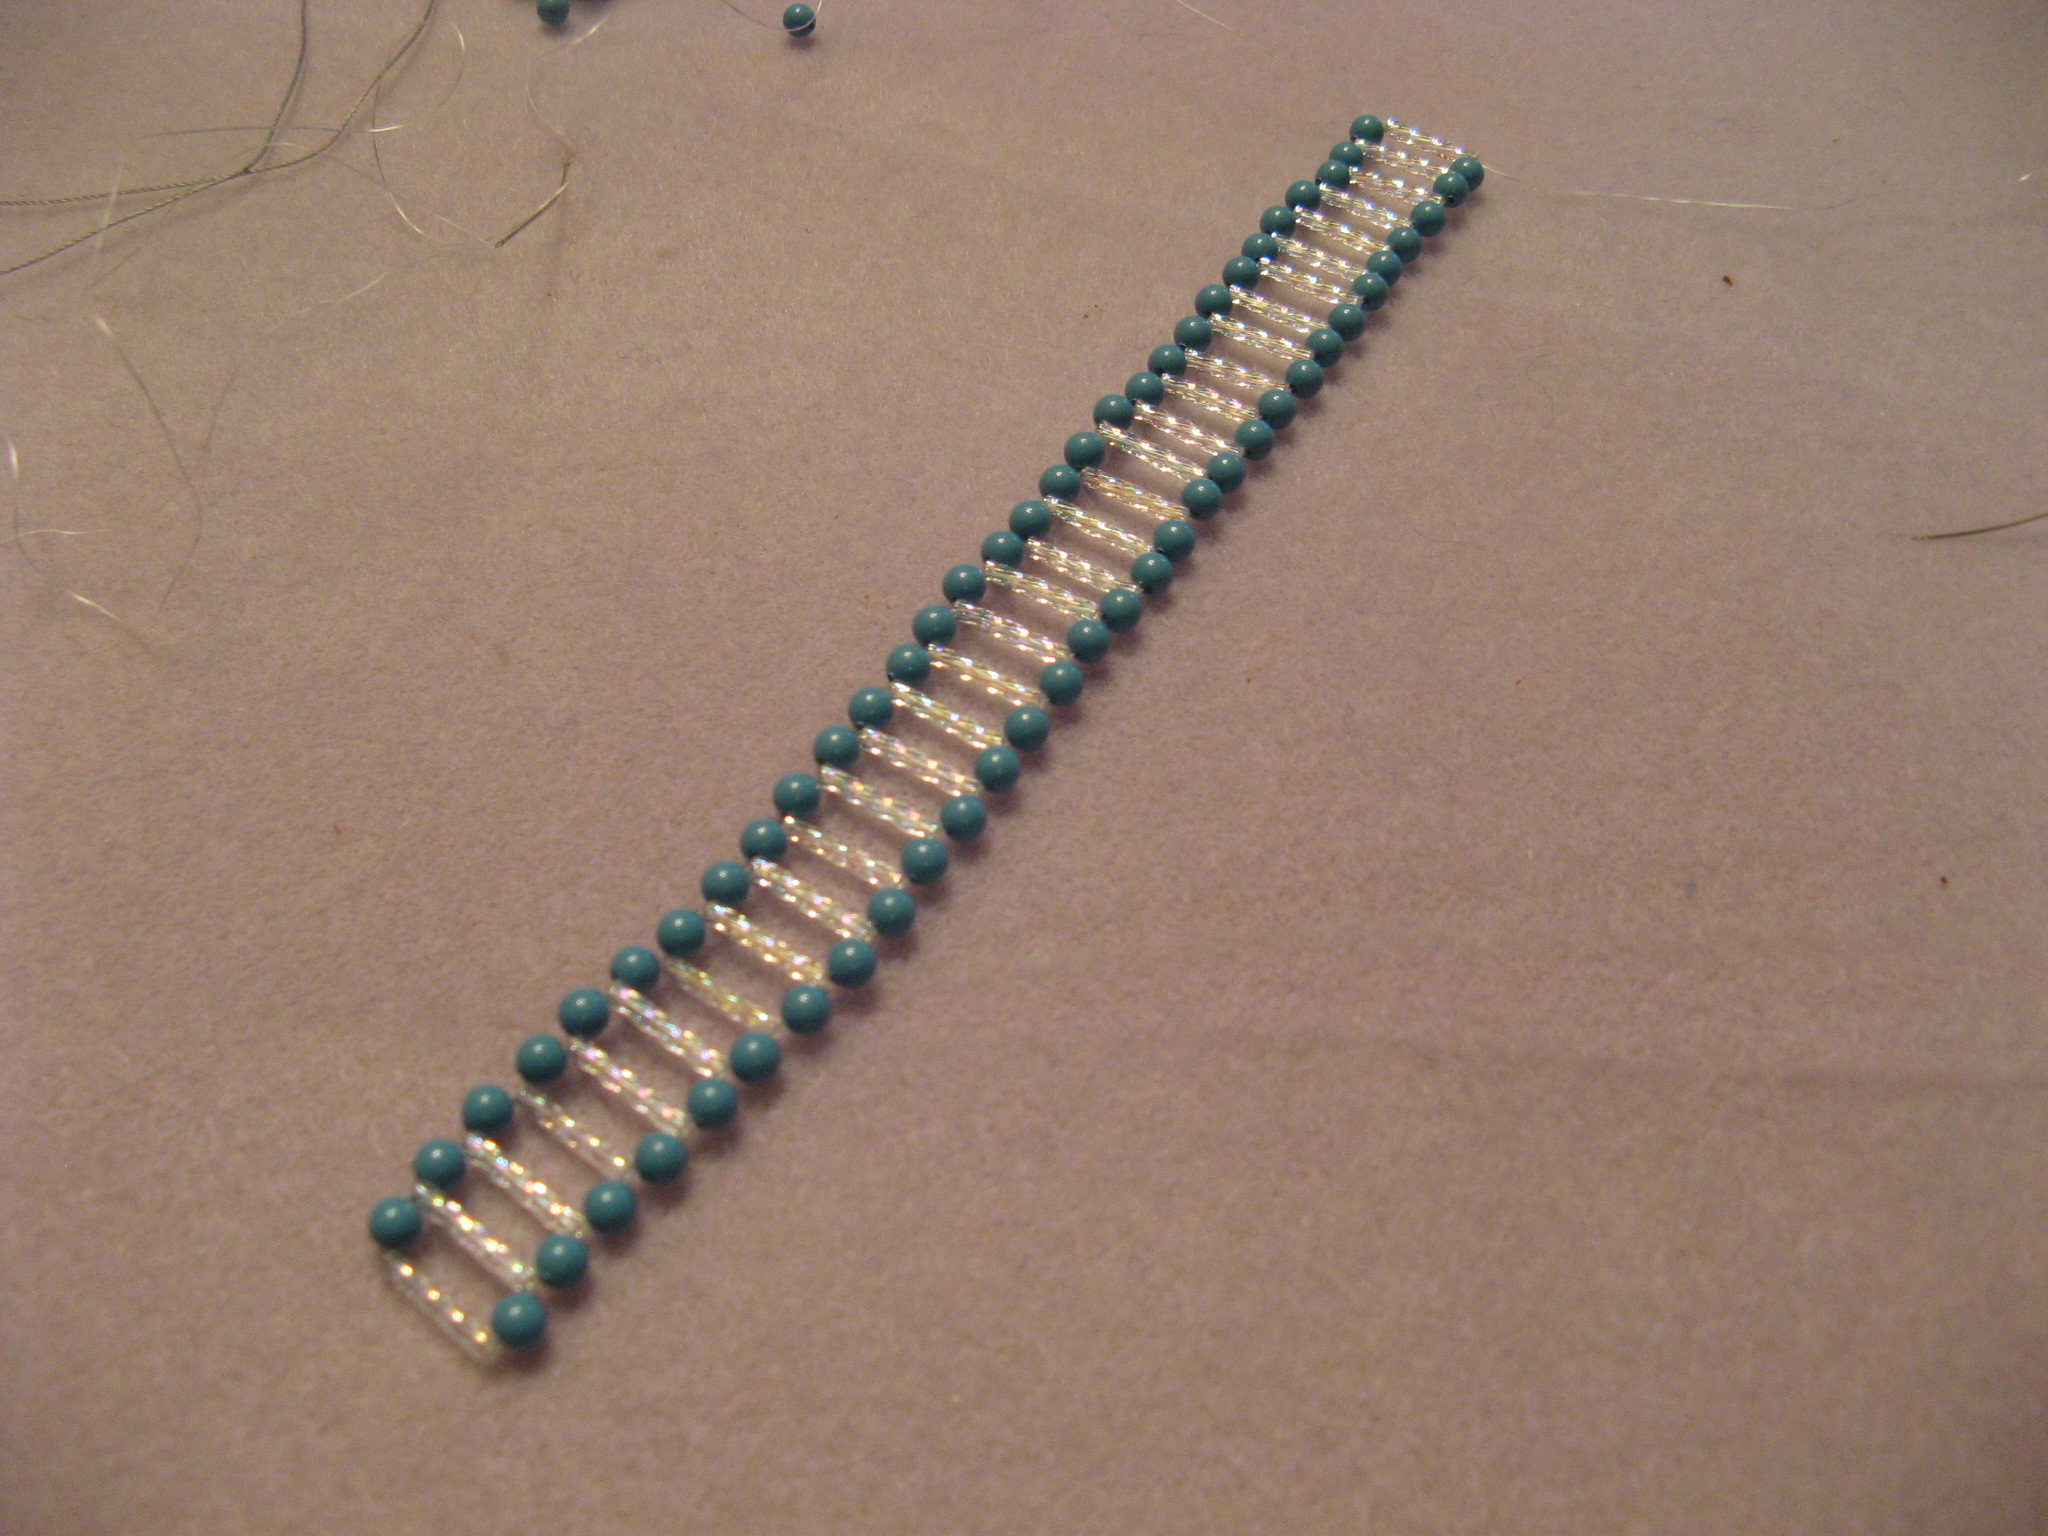
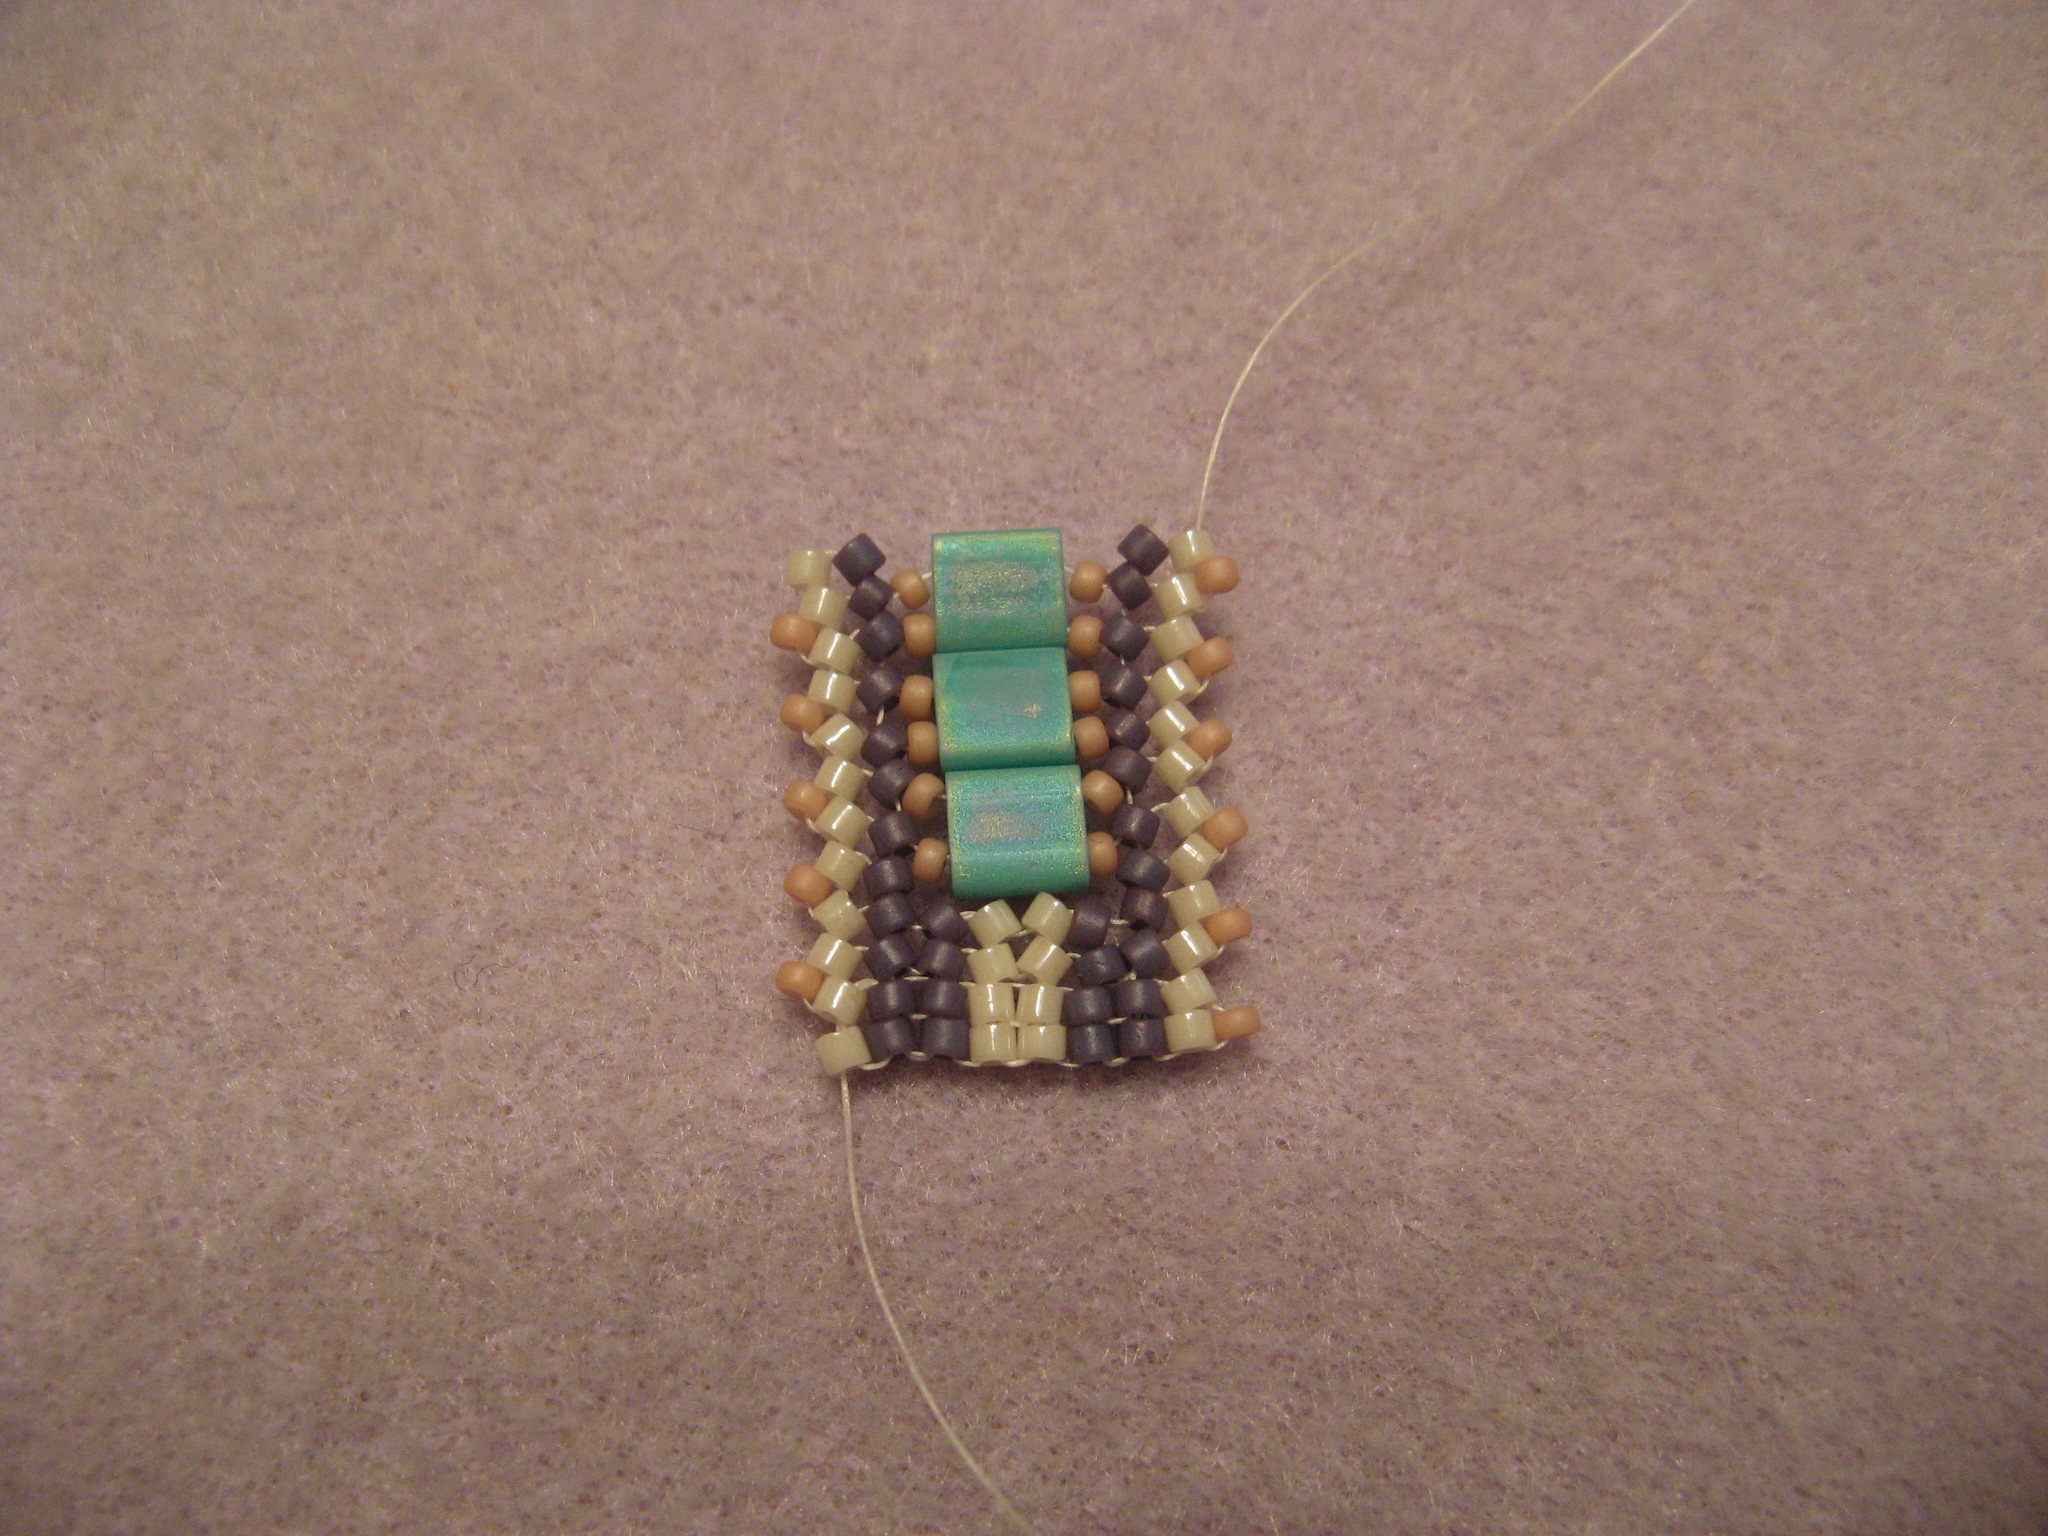
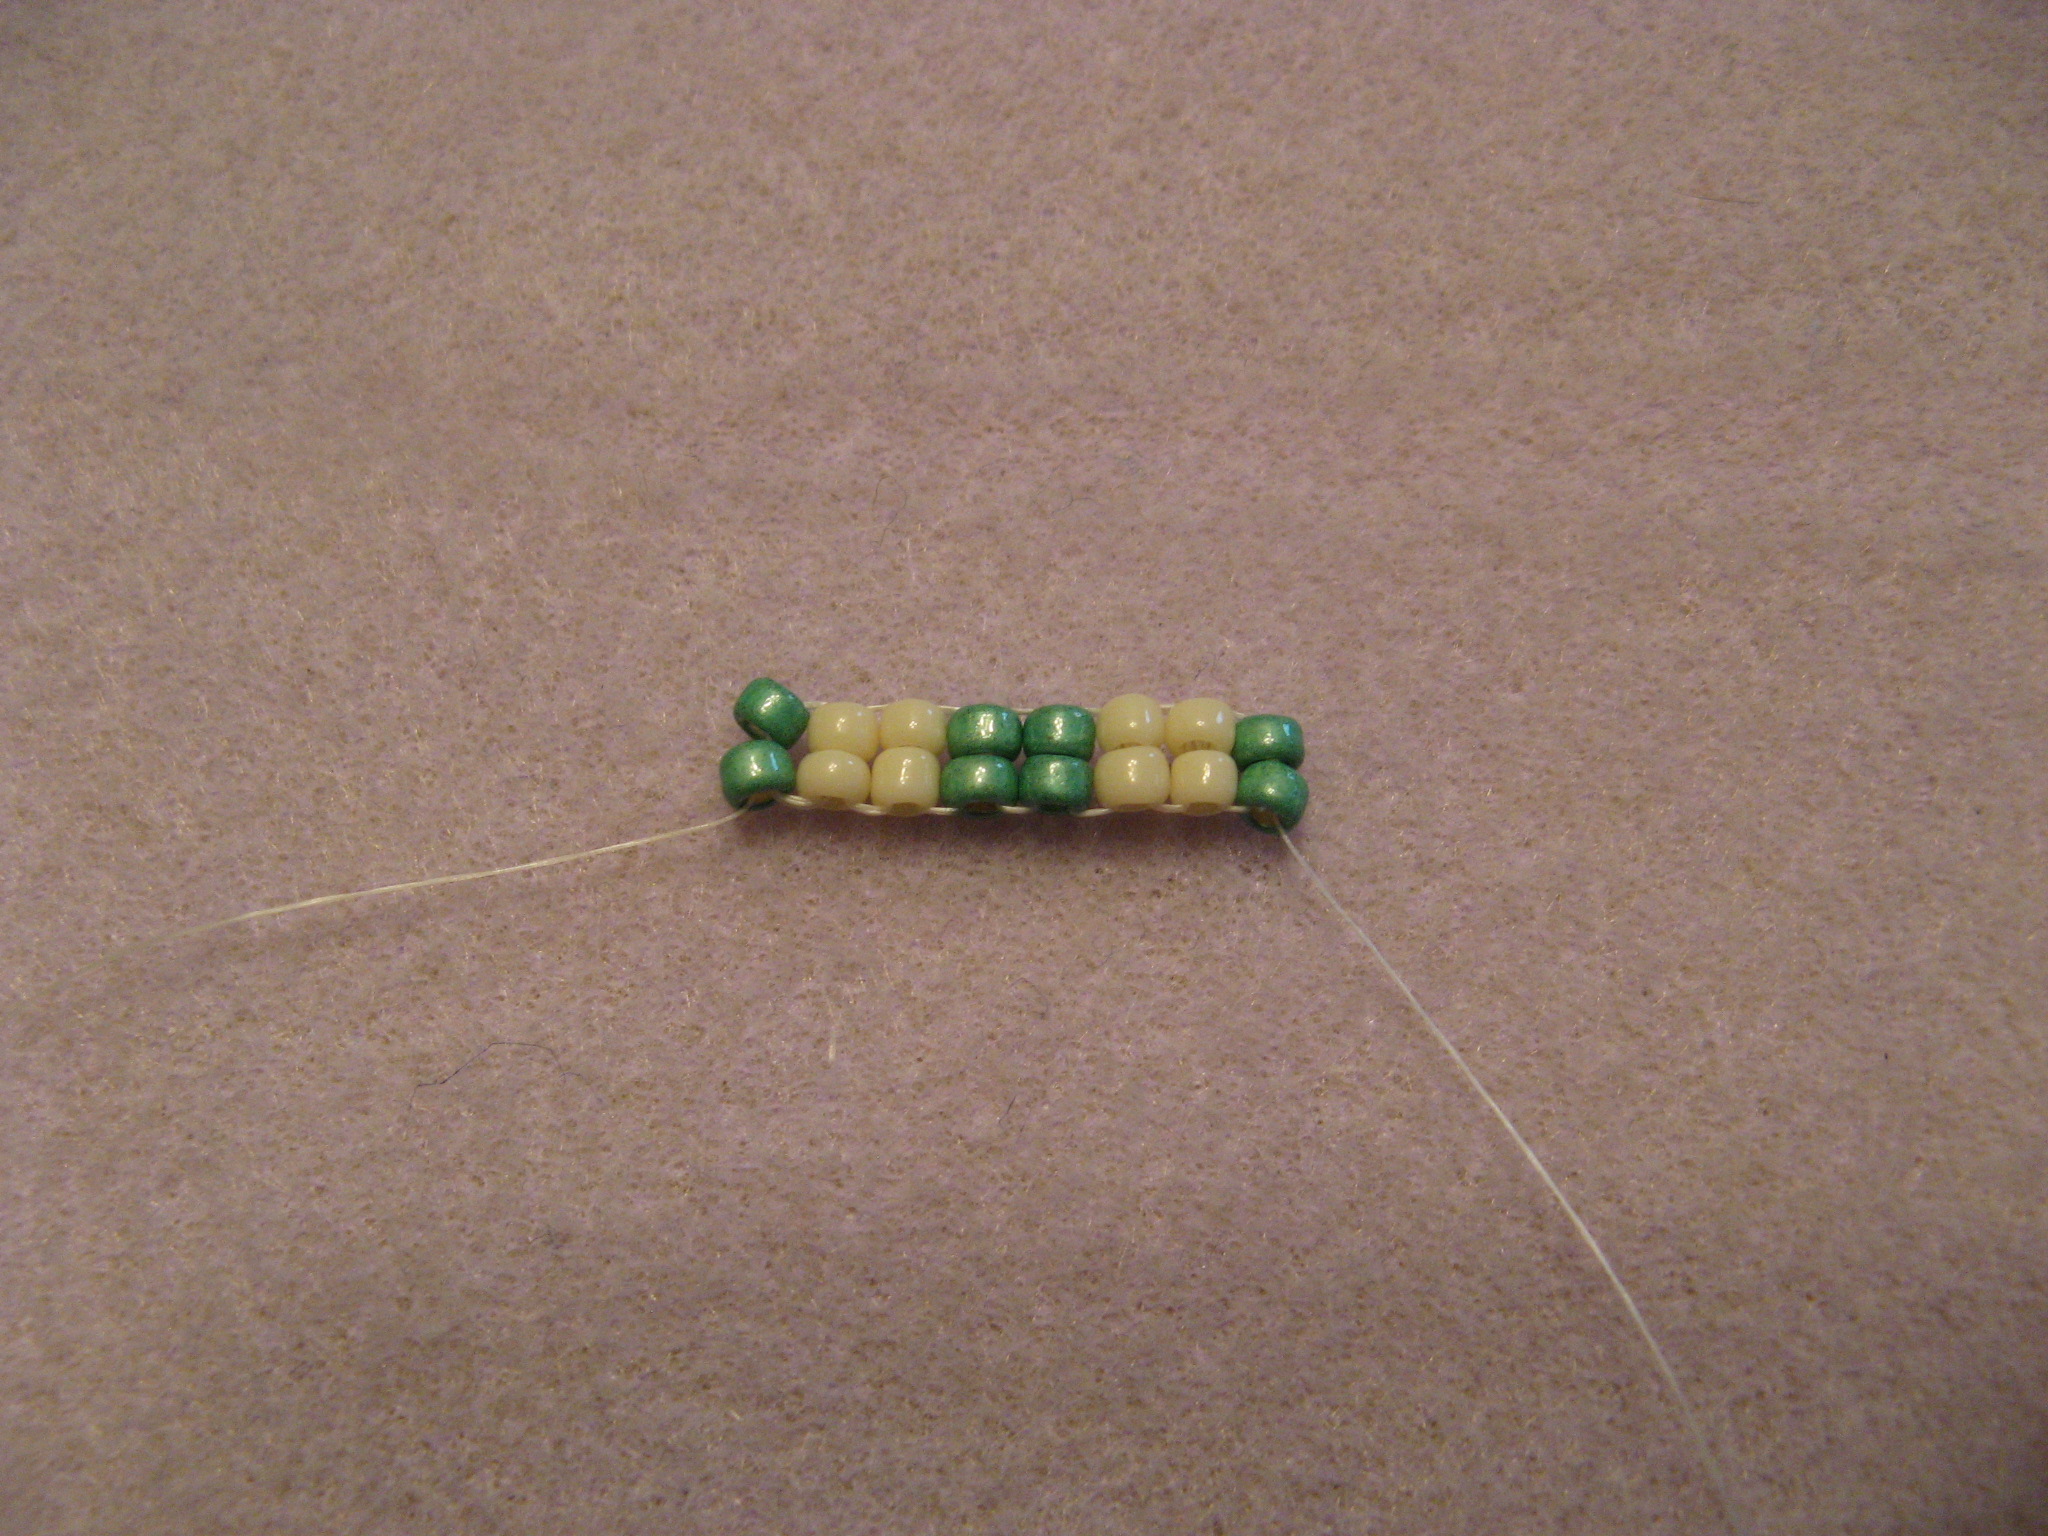
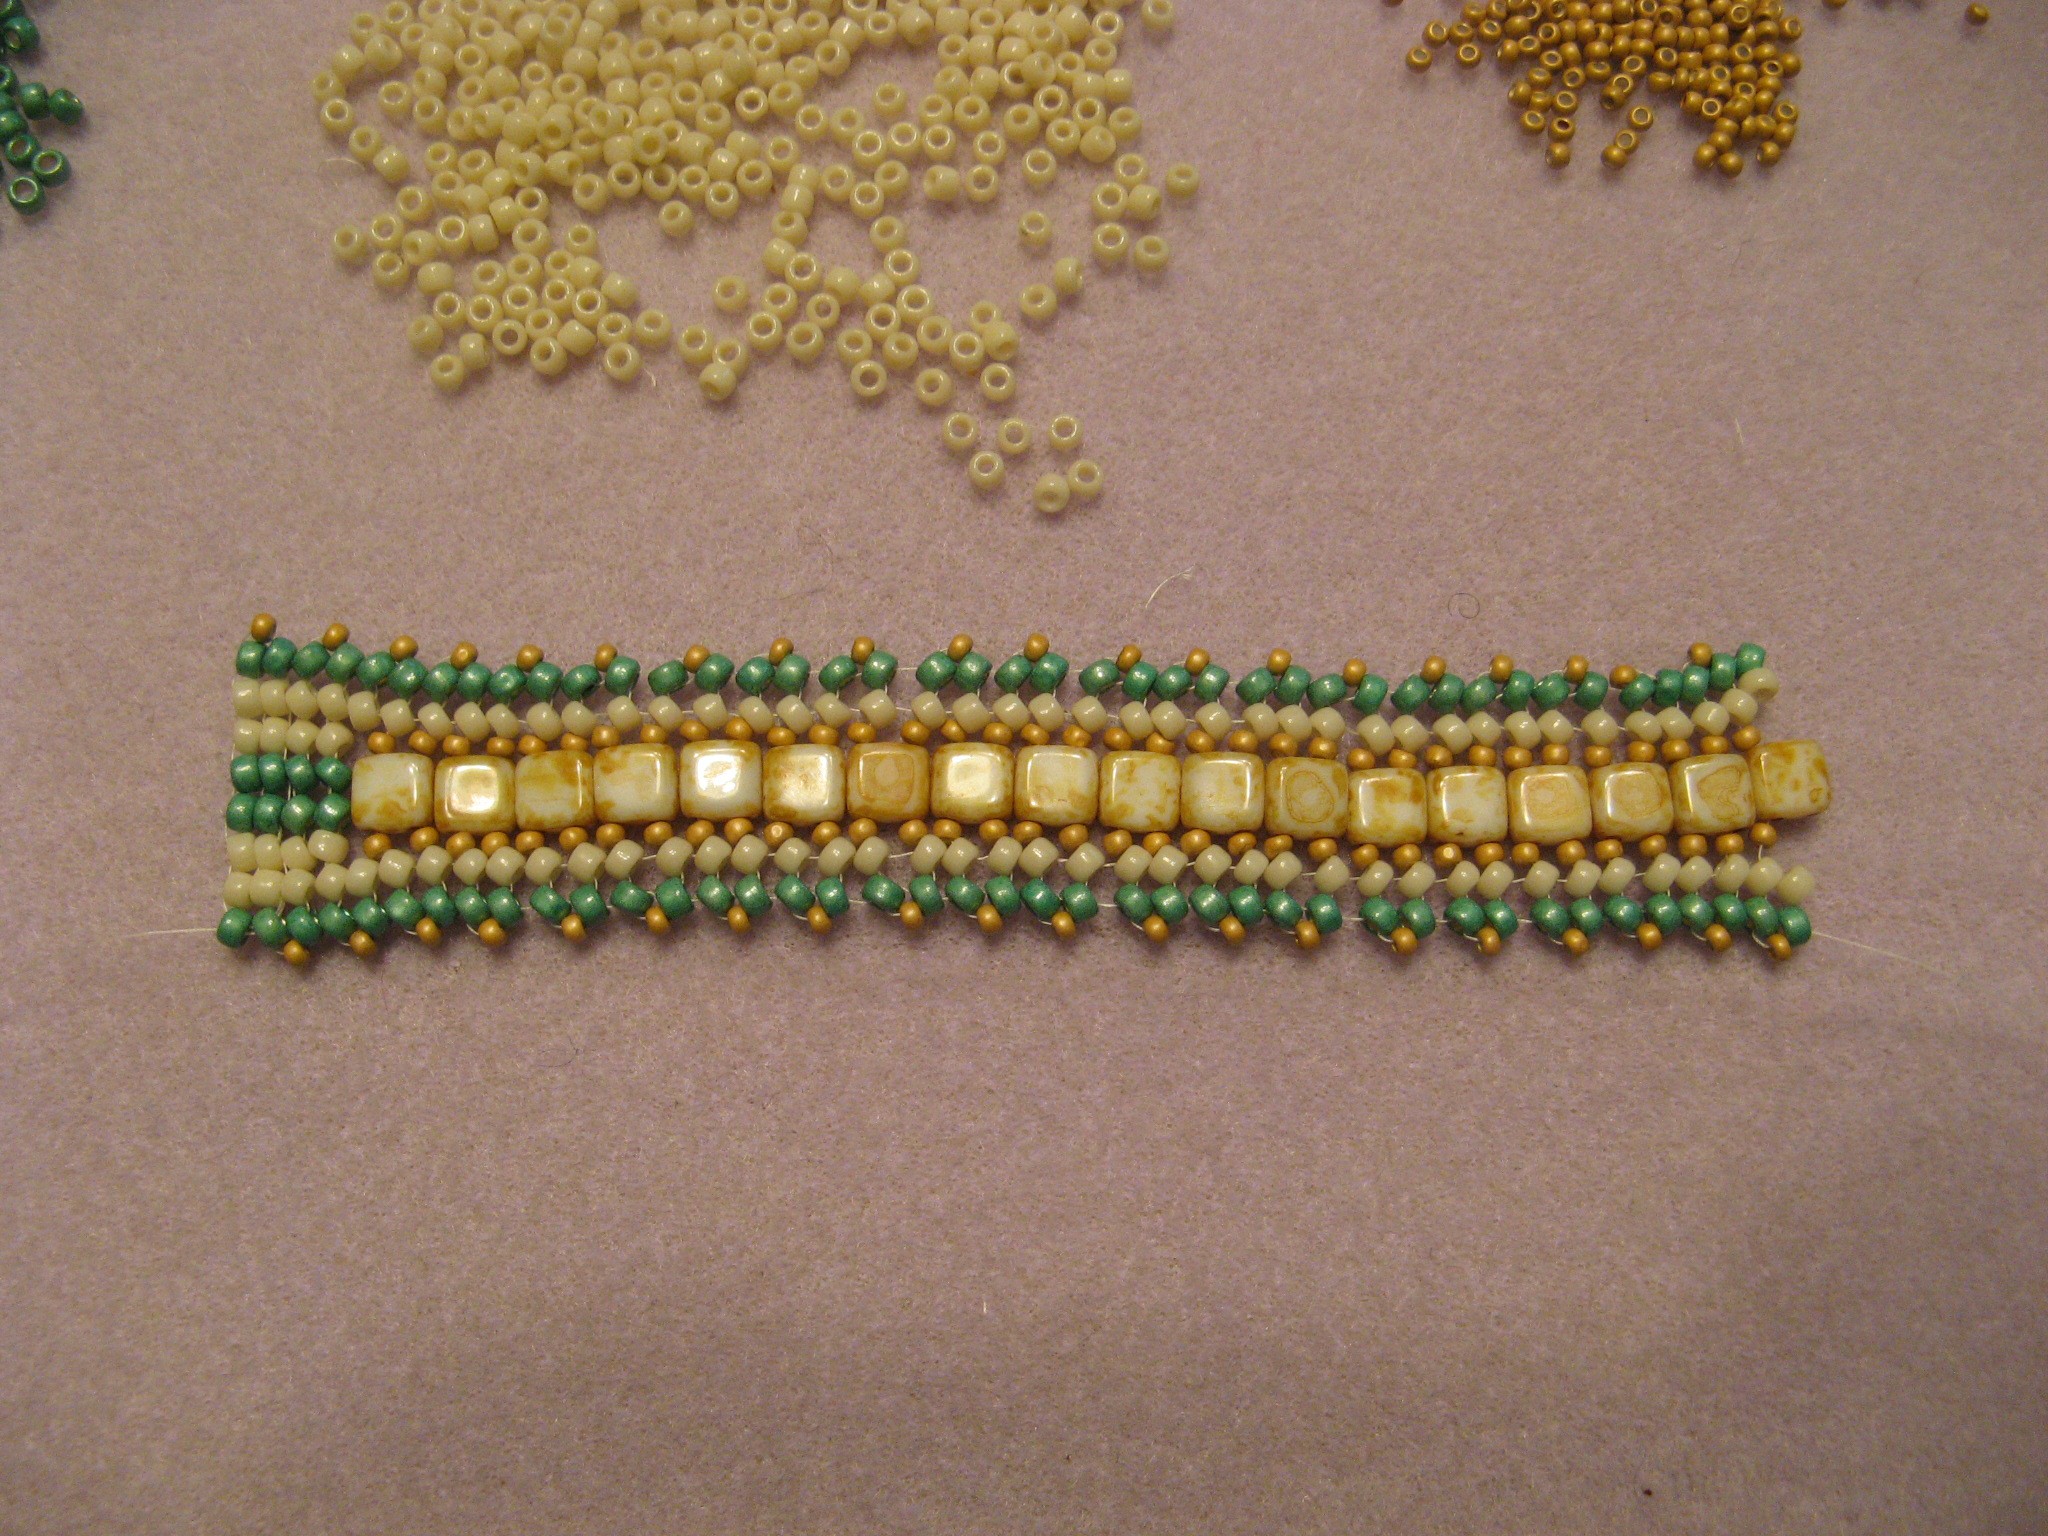
I started off by working in ladder stitch to create the first two rows of the bracelet.

IMG_9827

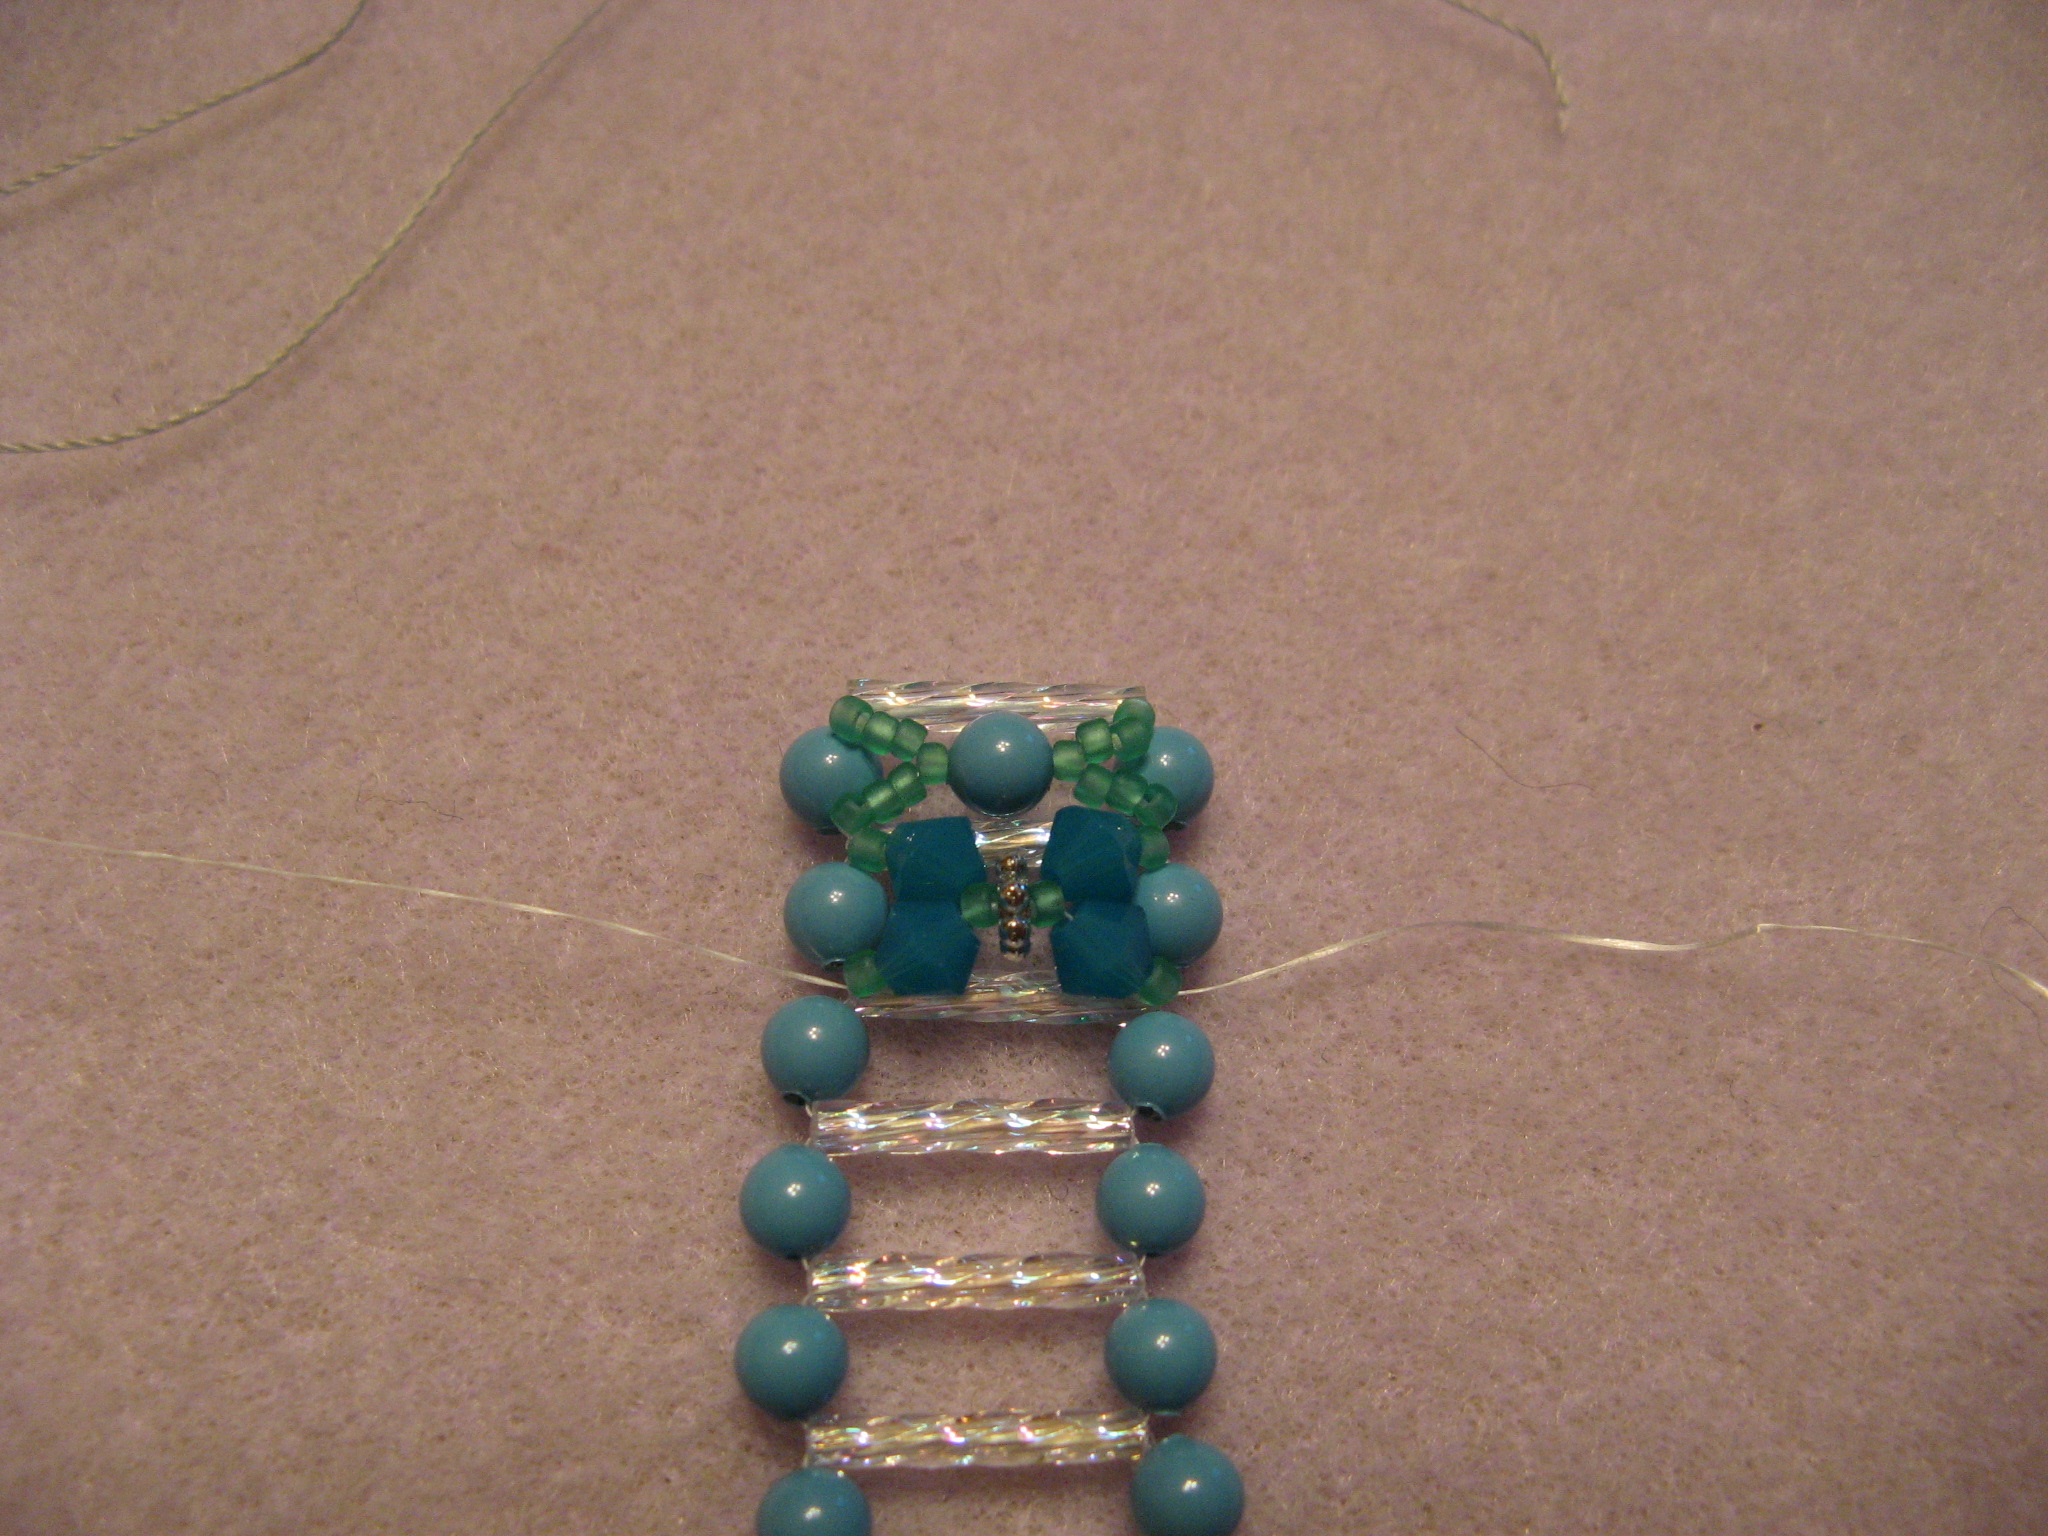
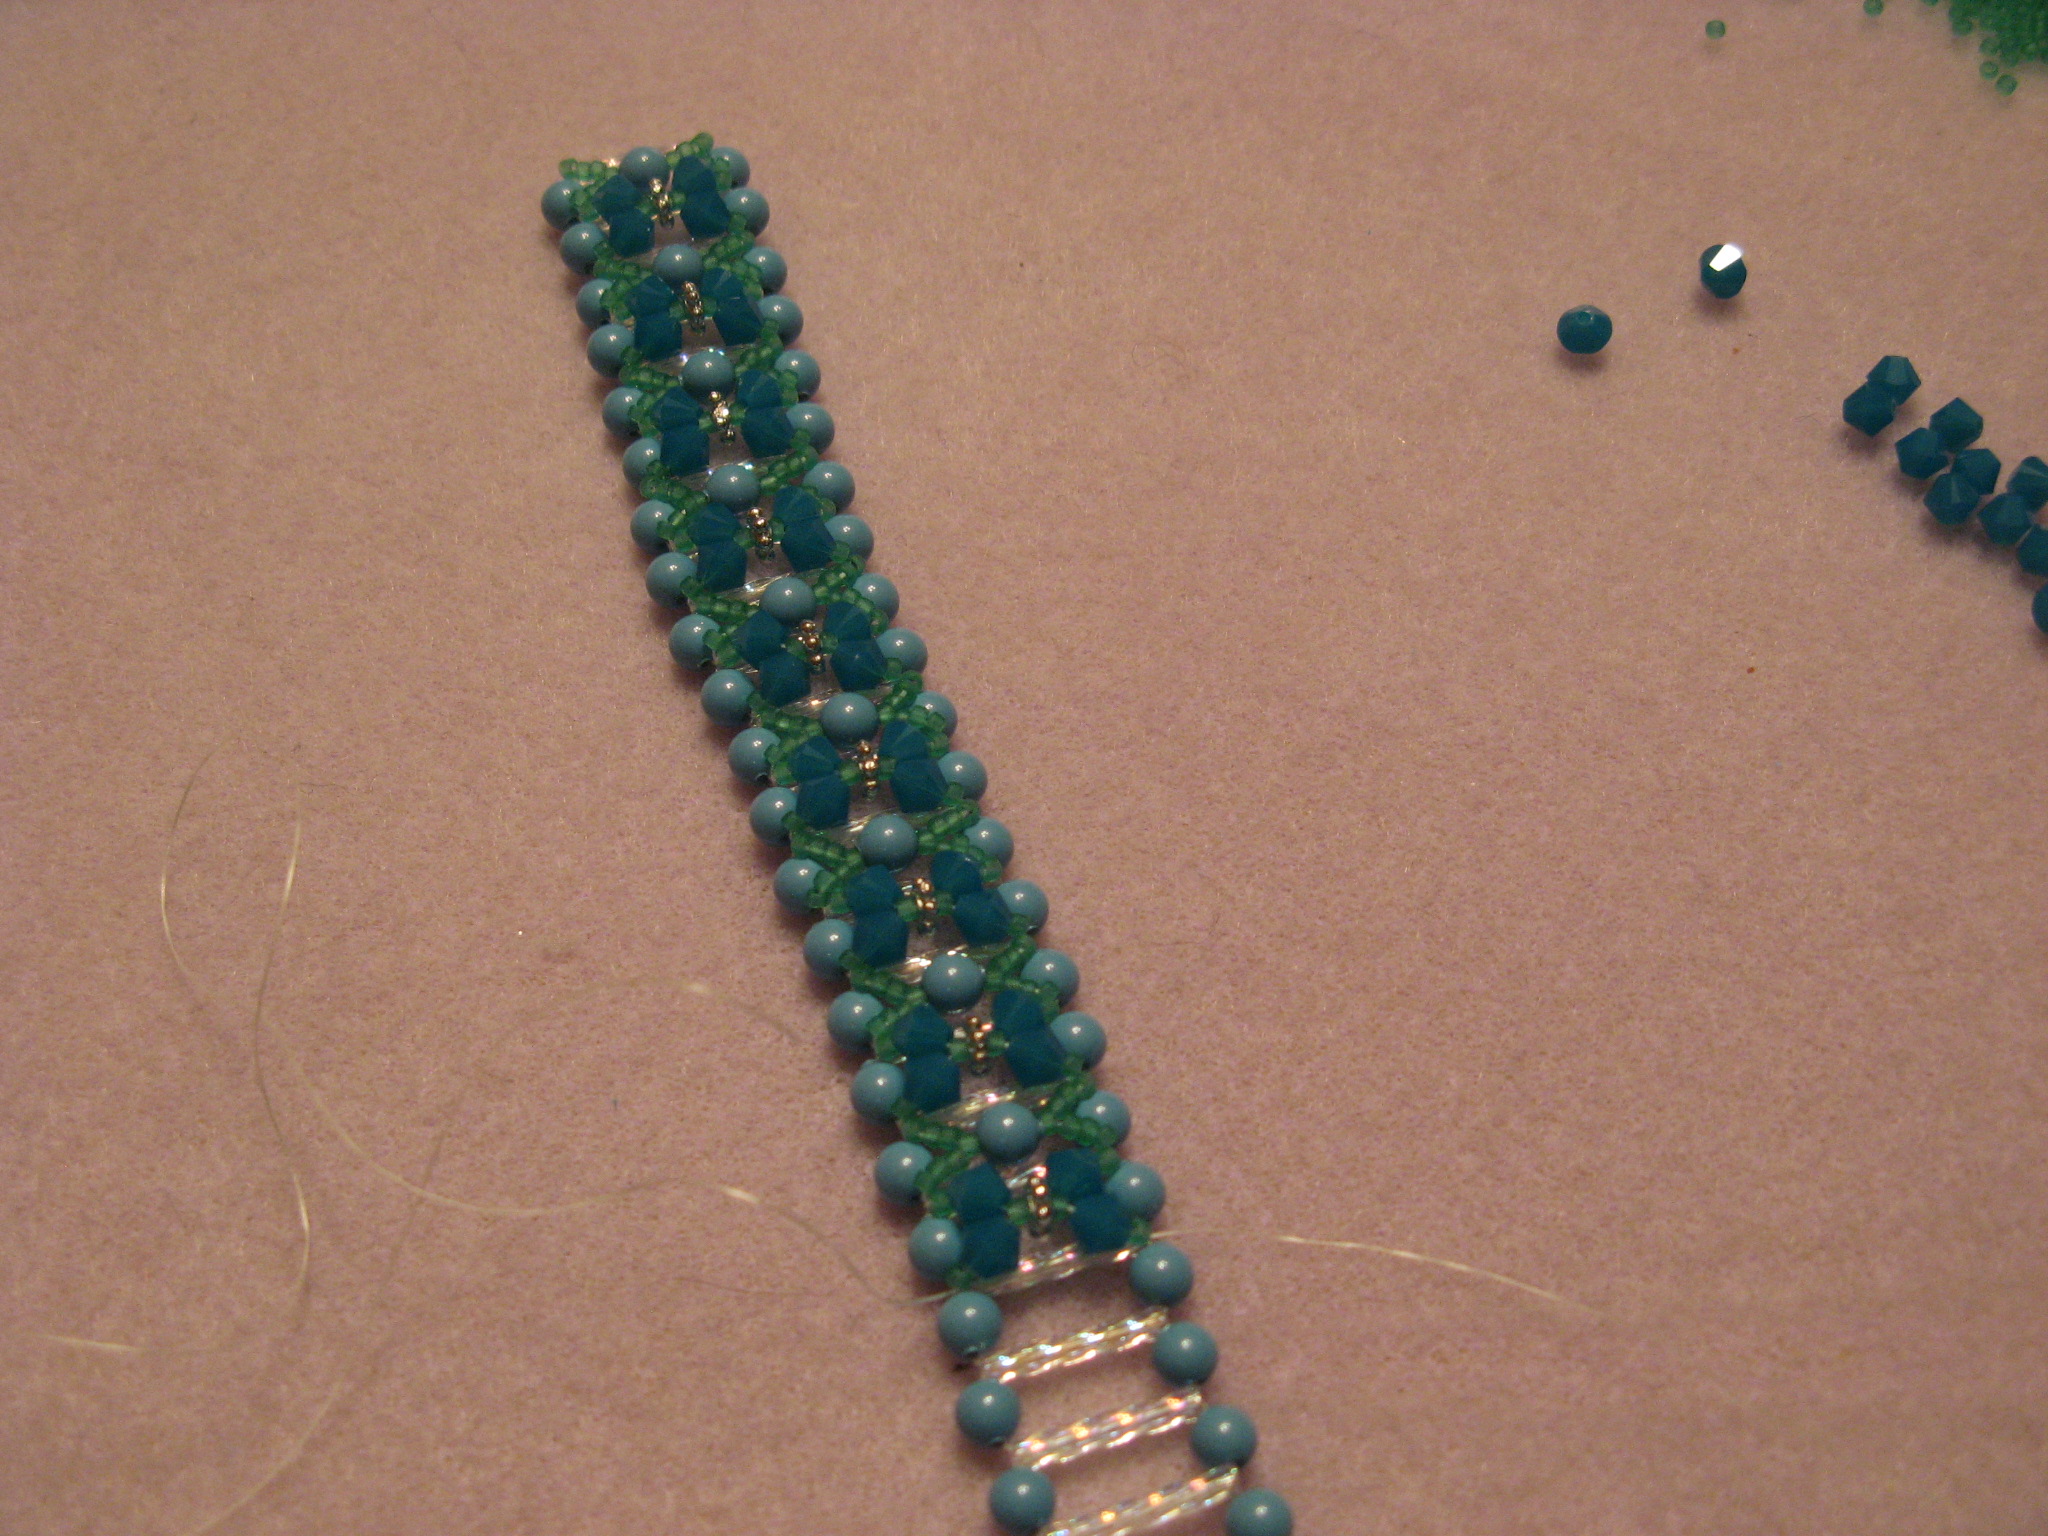
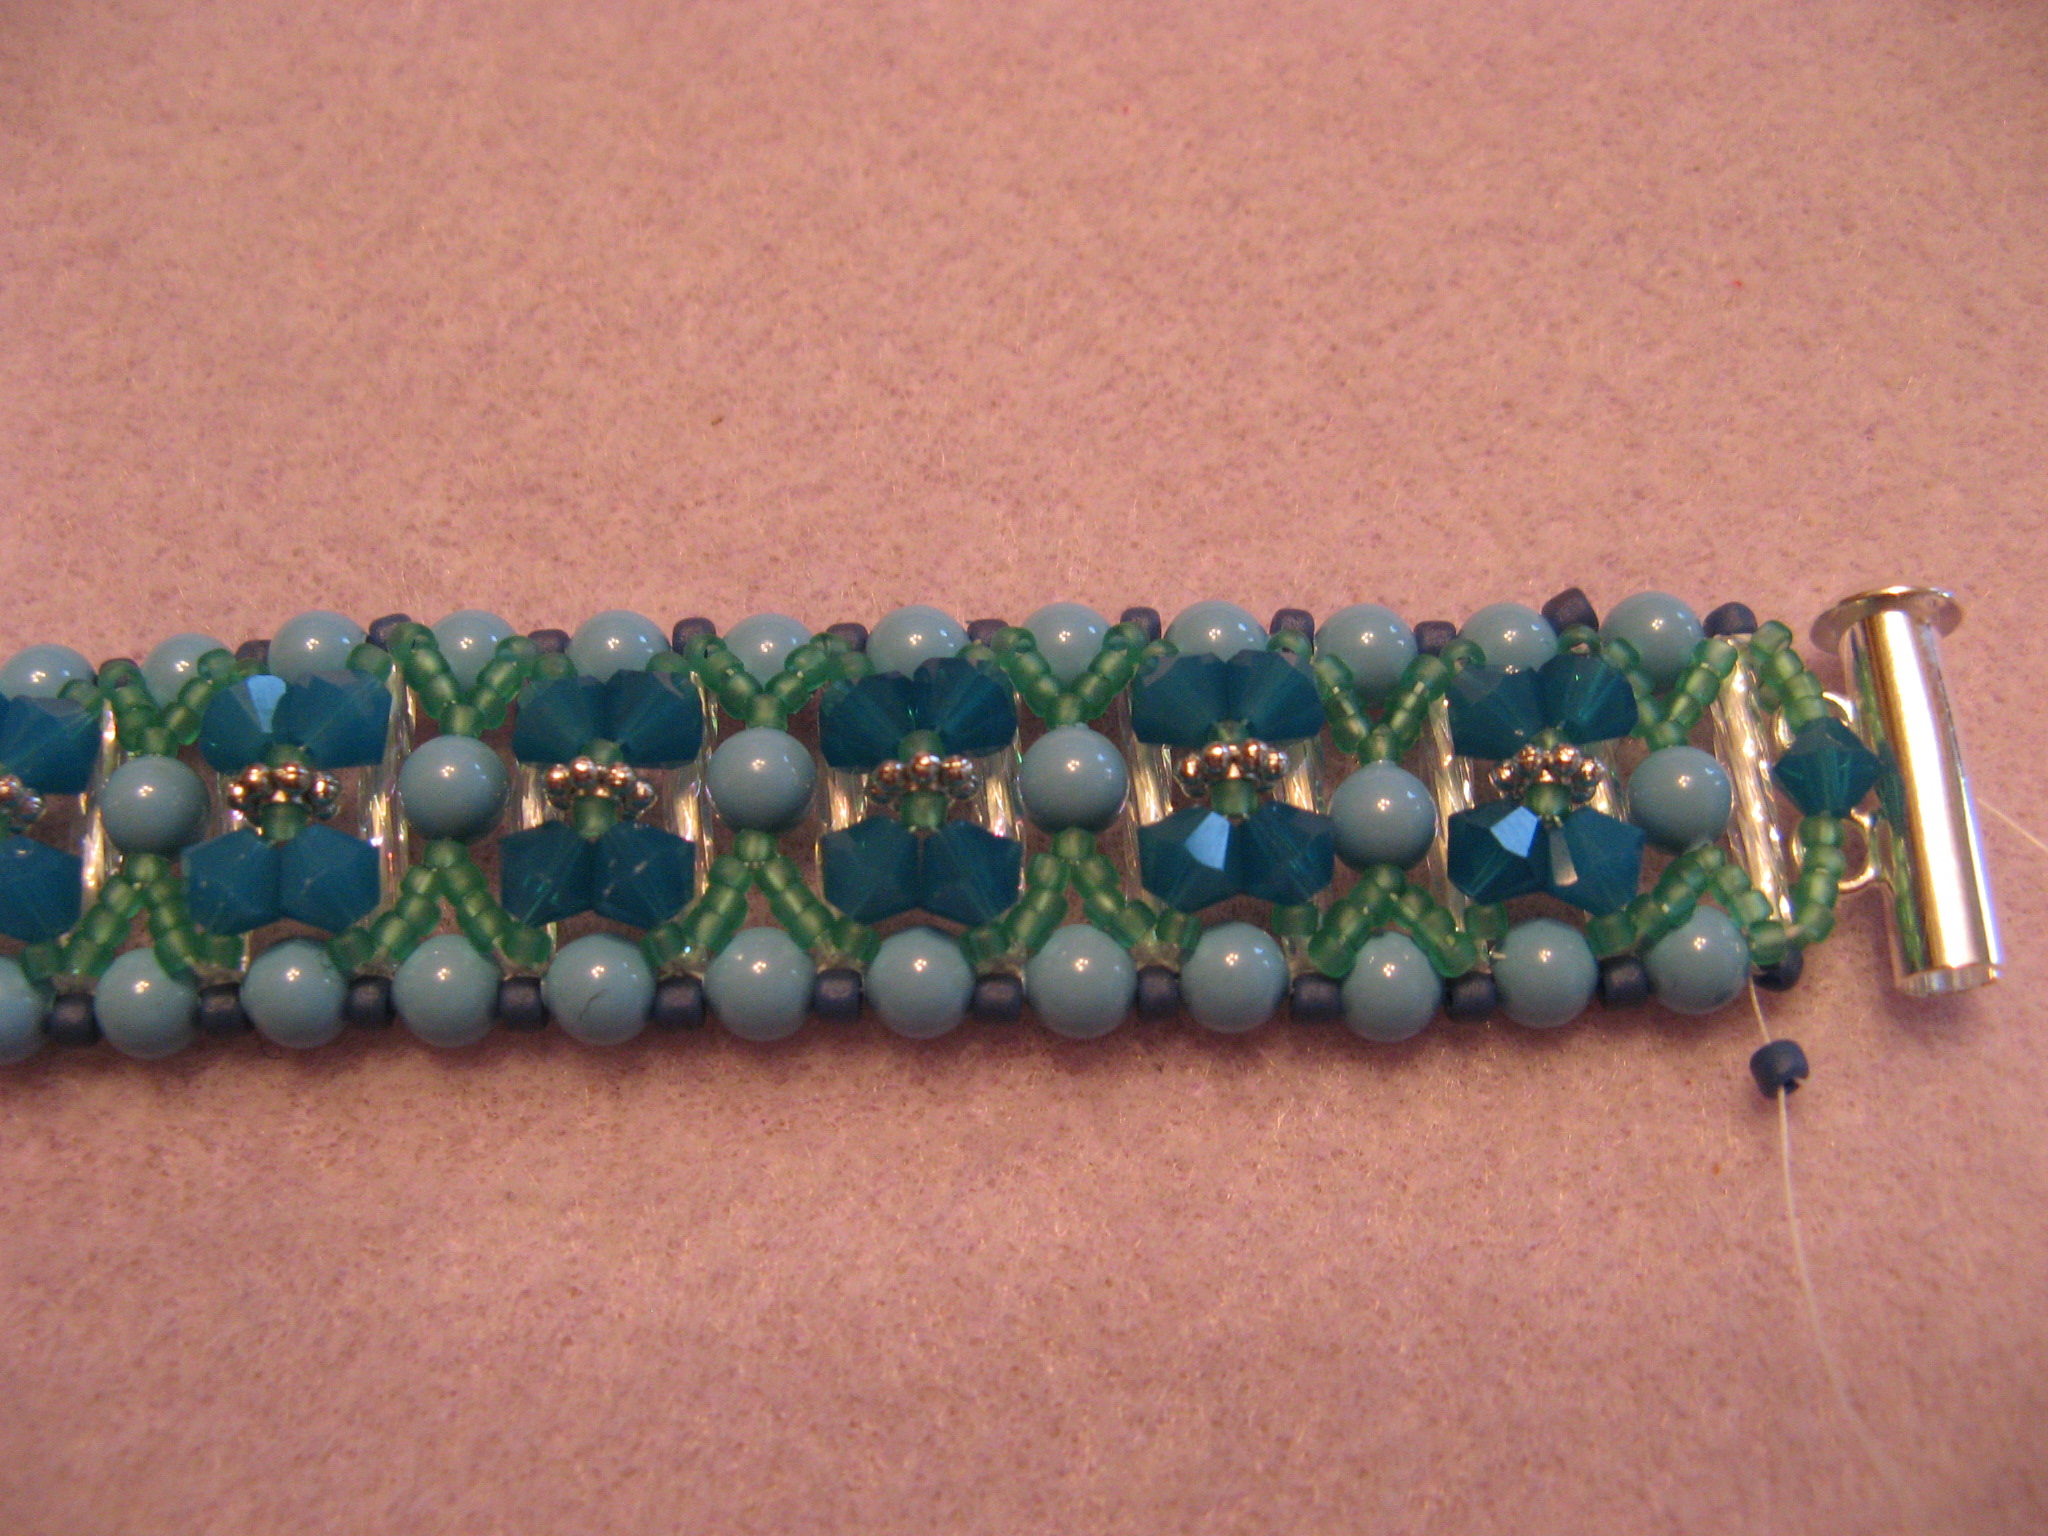
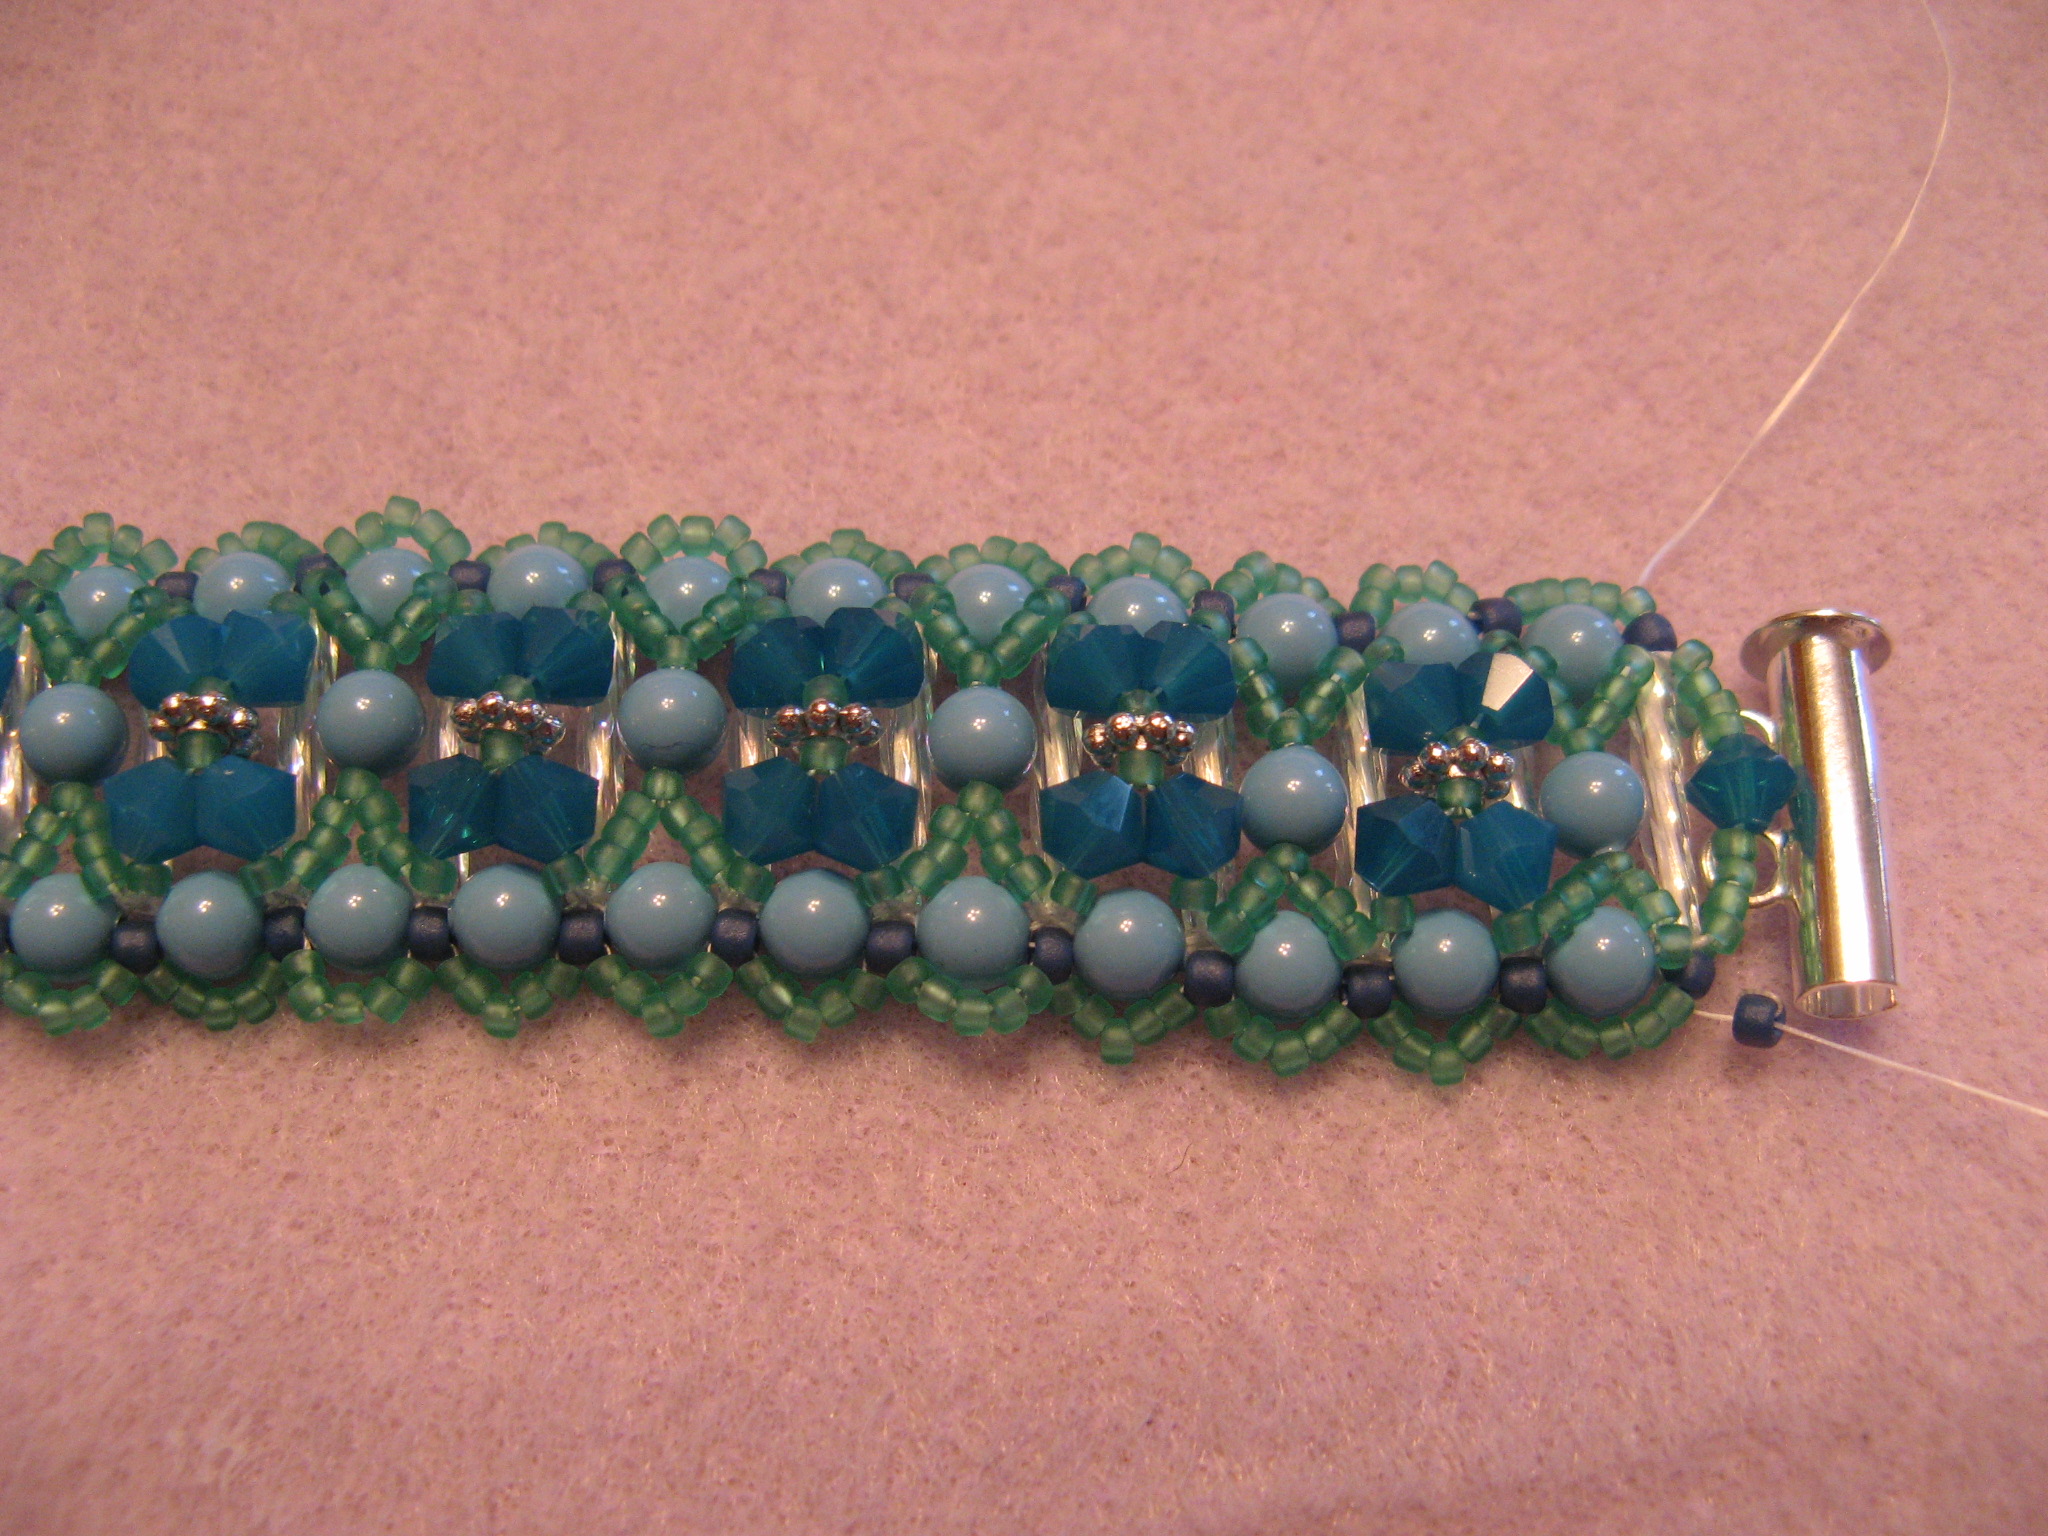
I then switched to flat herringbone stitch to create the next few rows and to add the Tile beads throughout the bracelet.

IMG_9828 IMG_9831

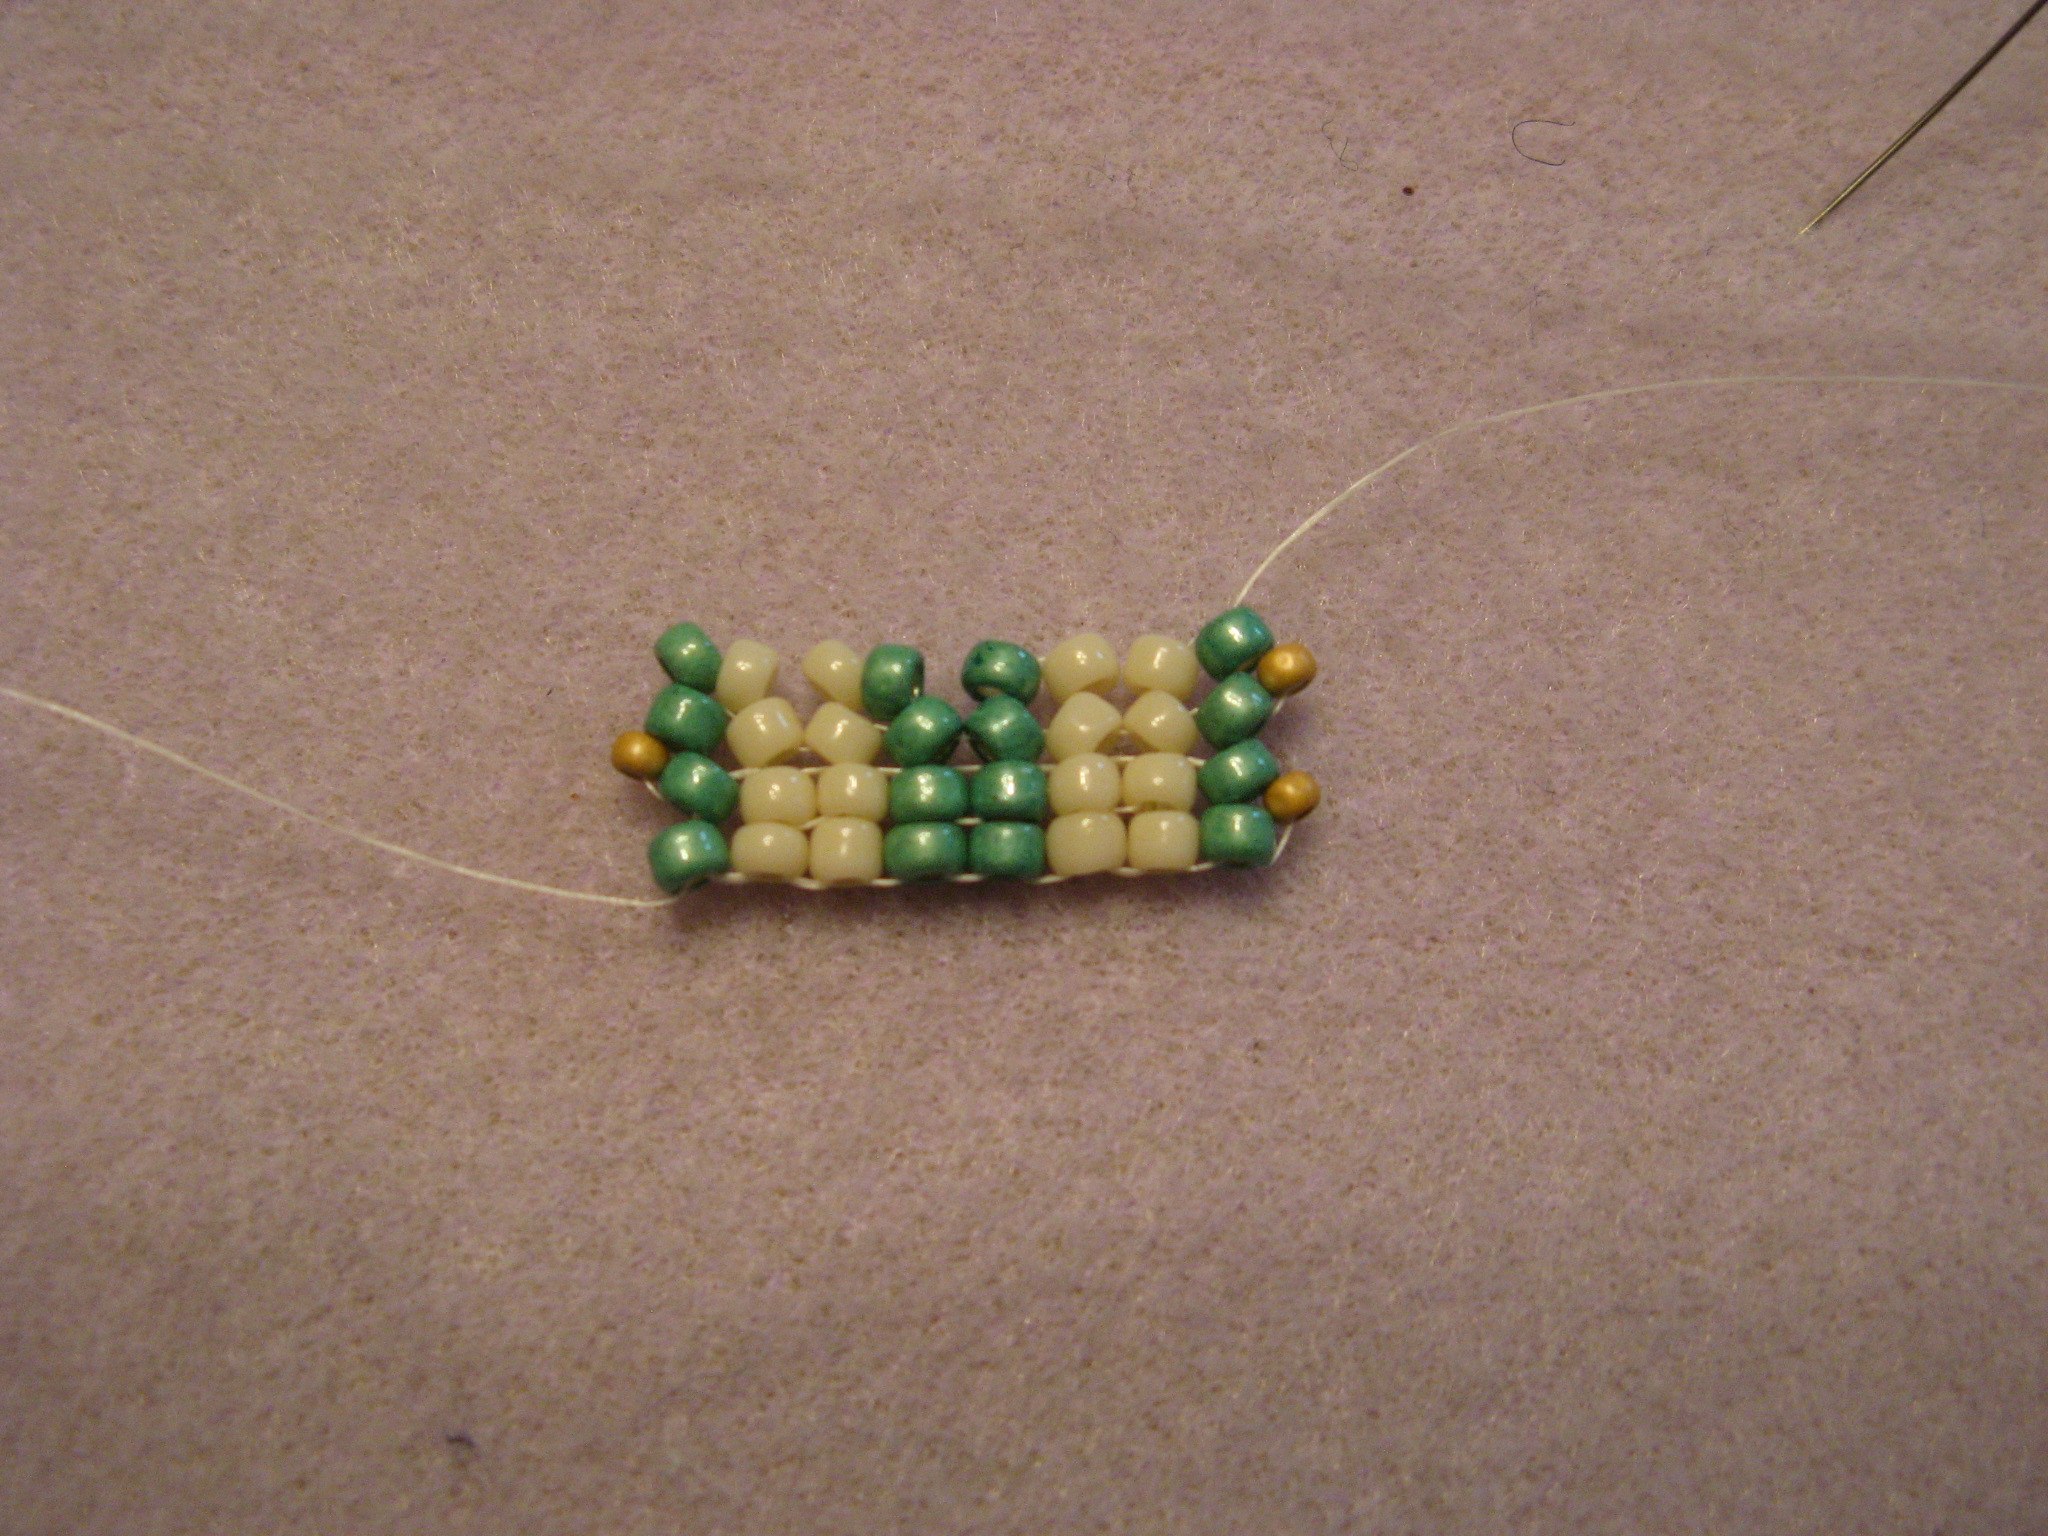
This was actually the first time I used the herringbone stitch and while it took a few minutes to get the hang of it once I did the bracelet came together rather quickly.

IMG_9832

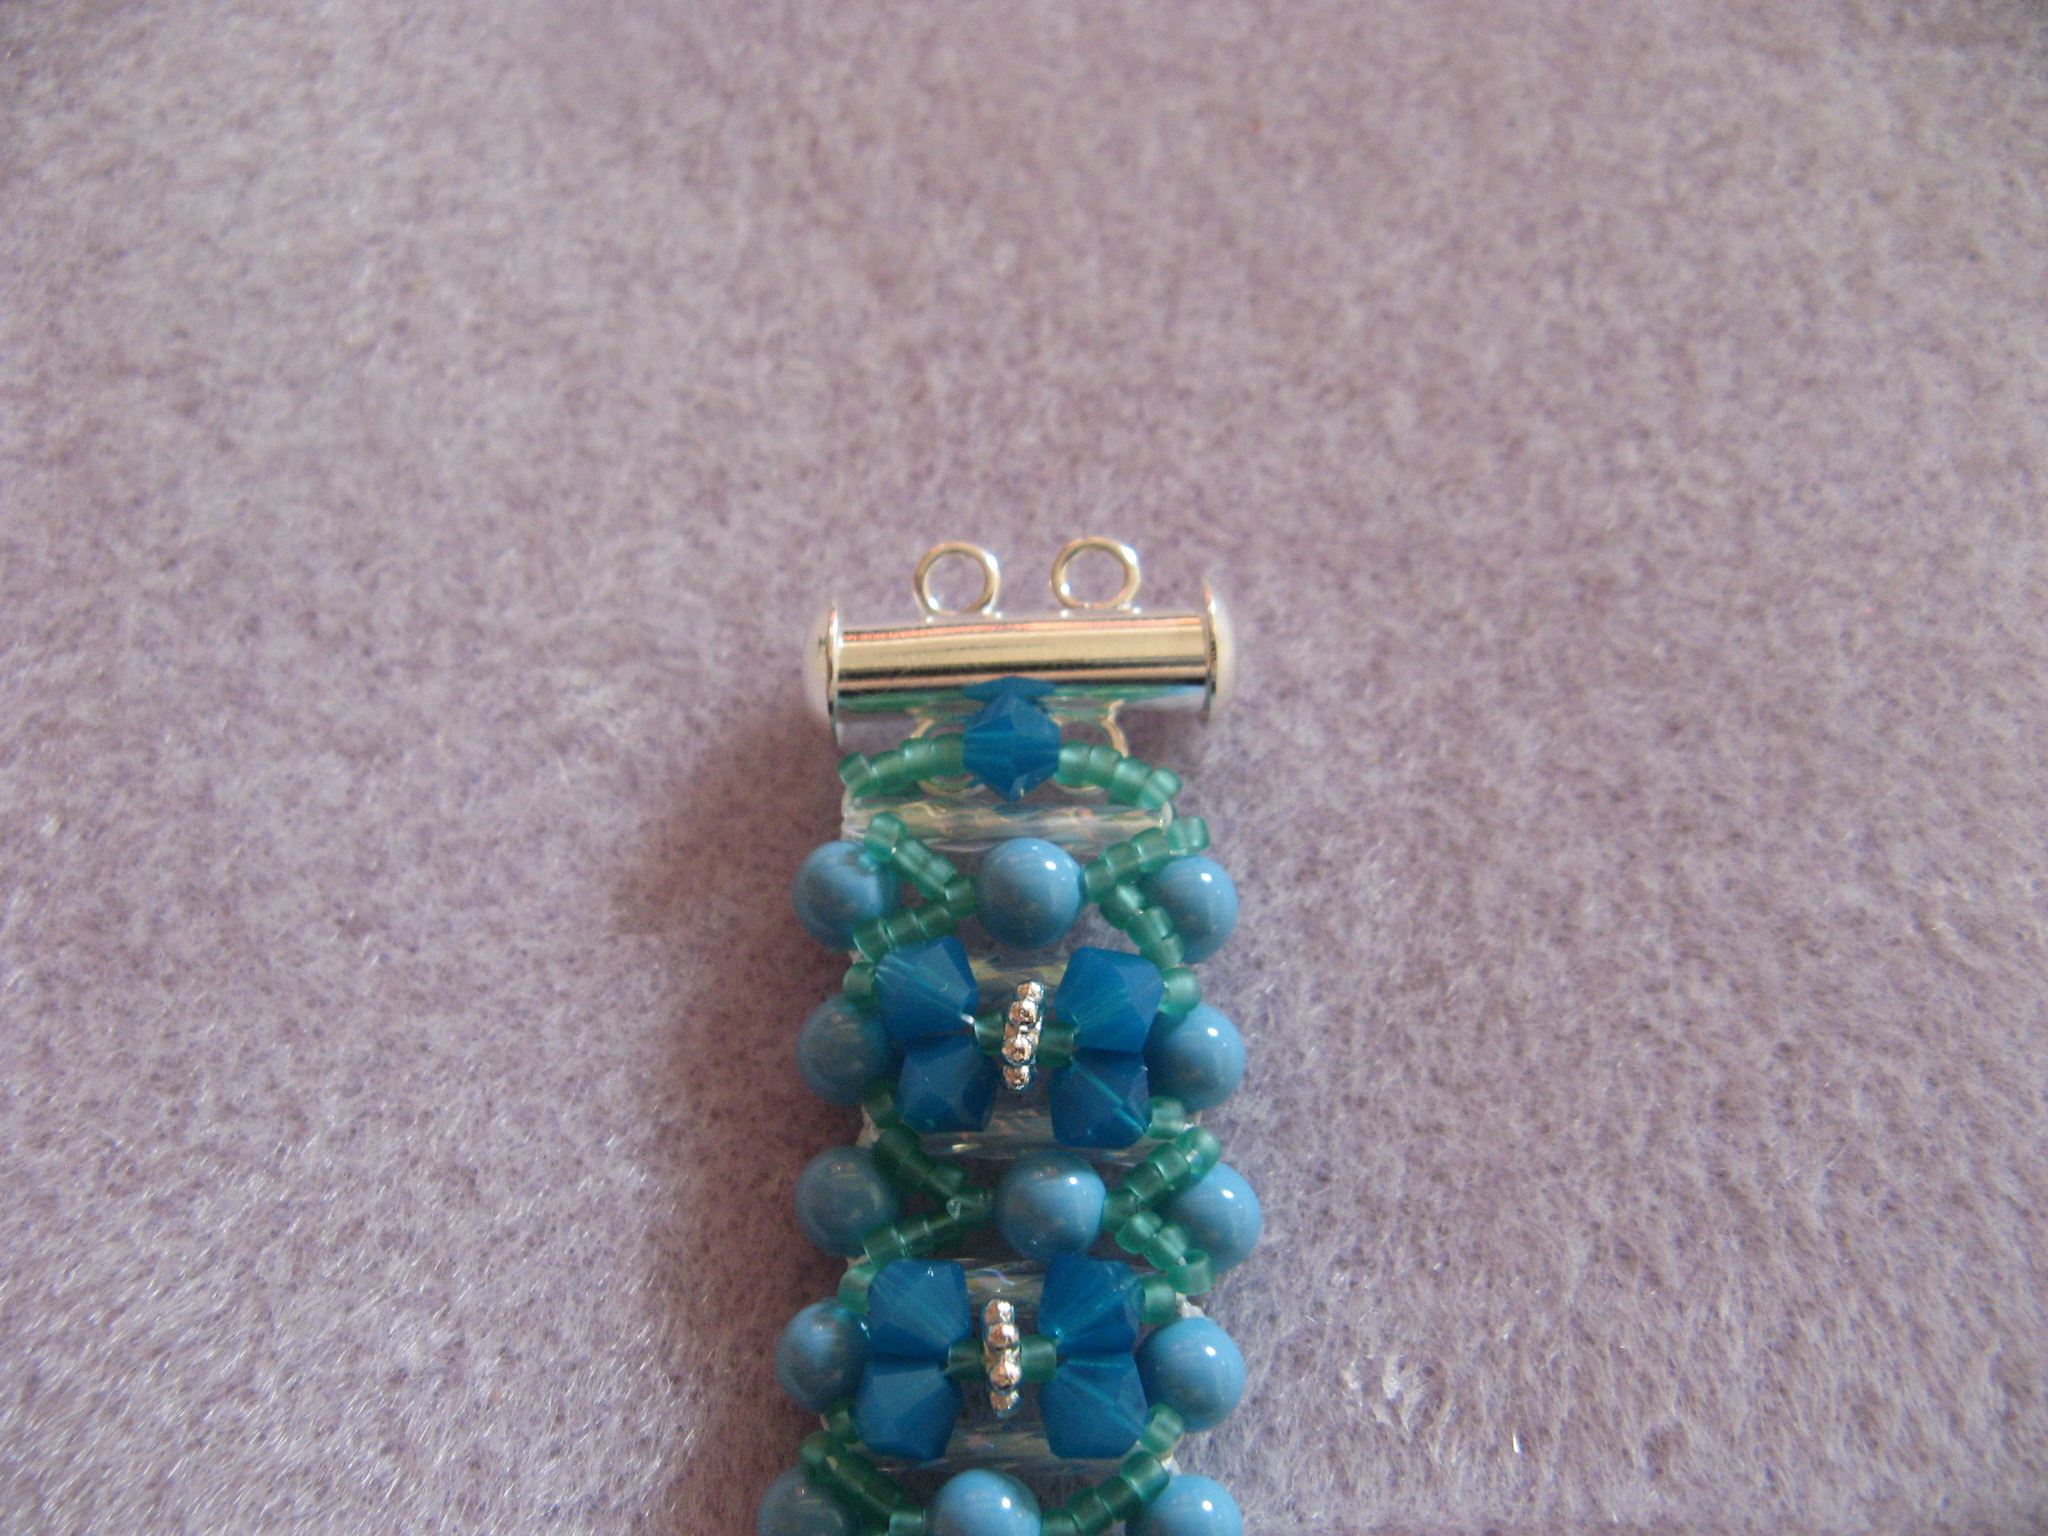
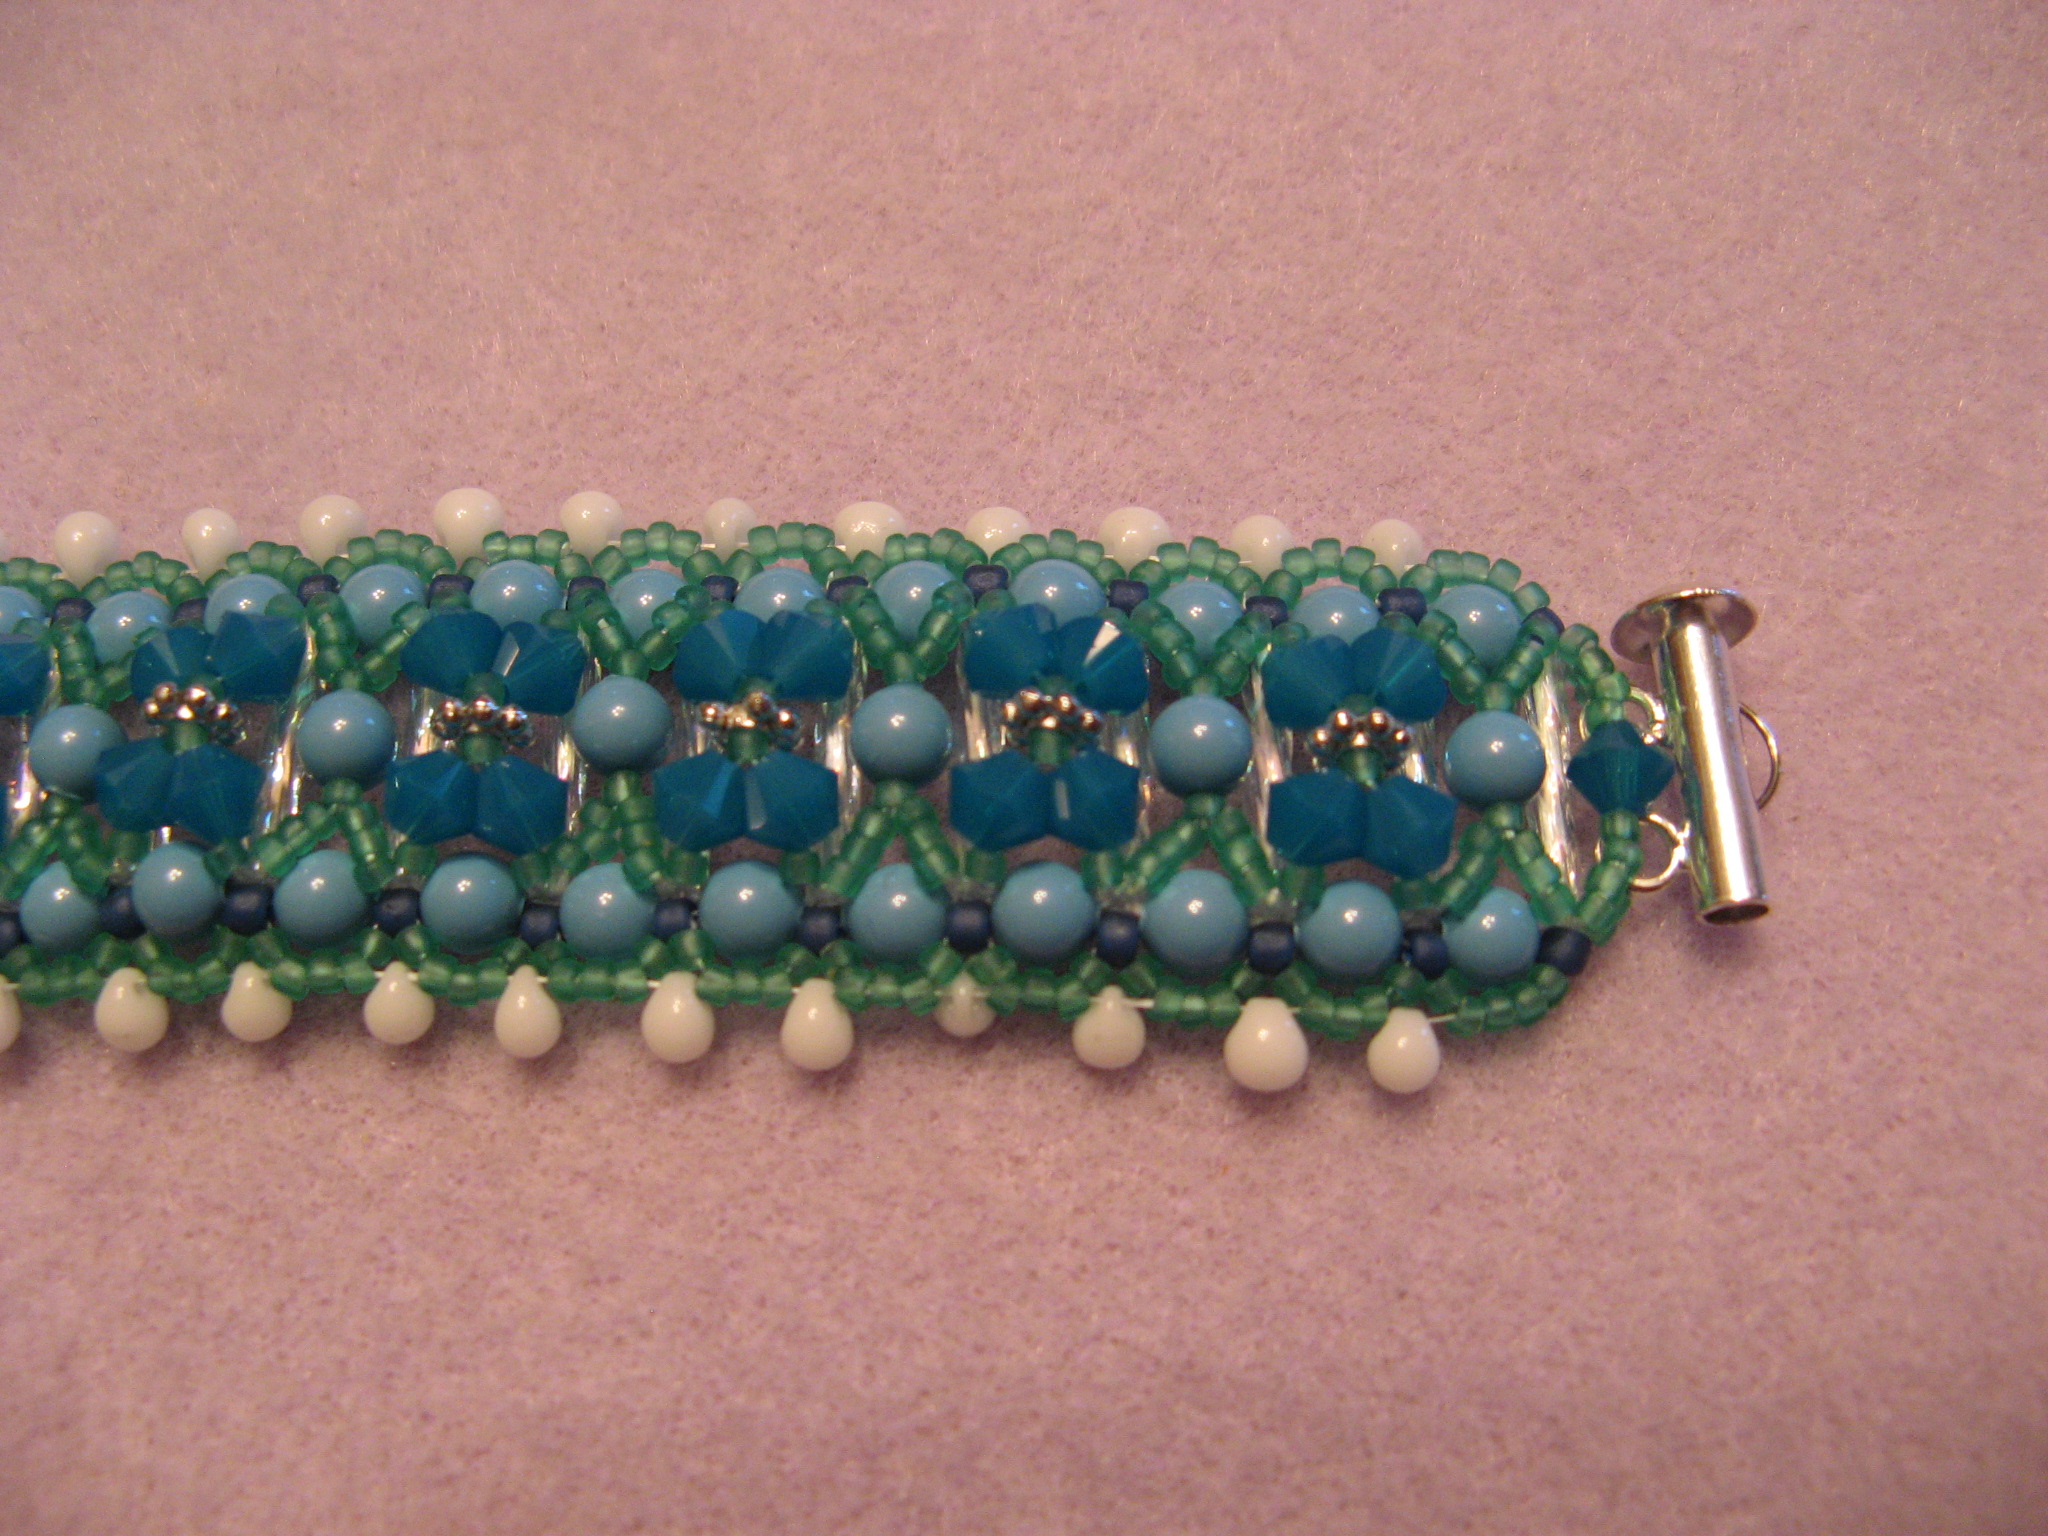
To complete the other end of the bracelet I once again worked in ladder and herringbone stitch and then attached a magnetic clasp and the bracelet was done.

IMG_9840

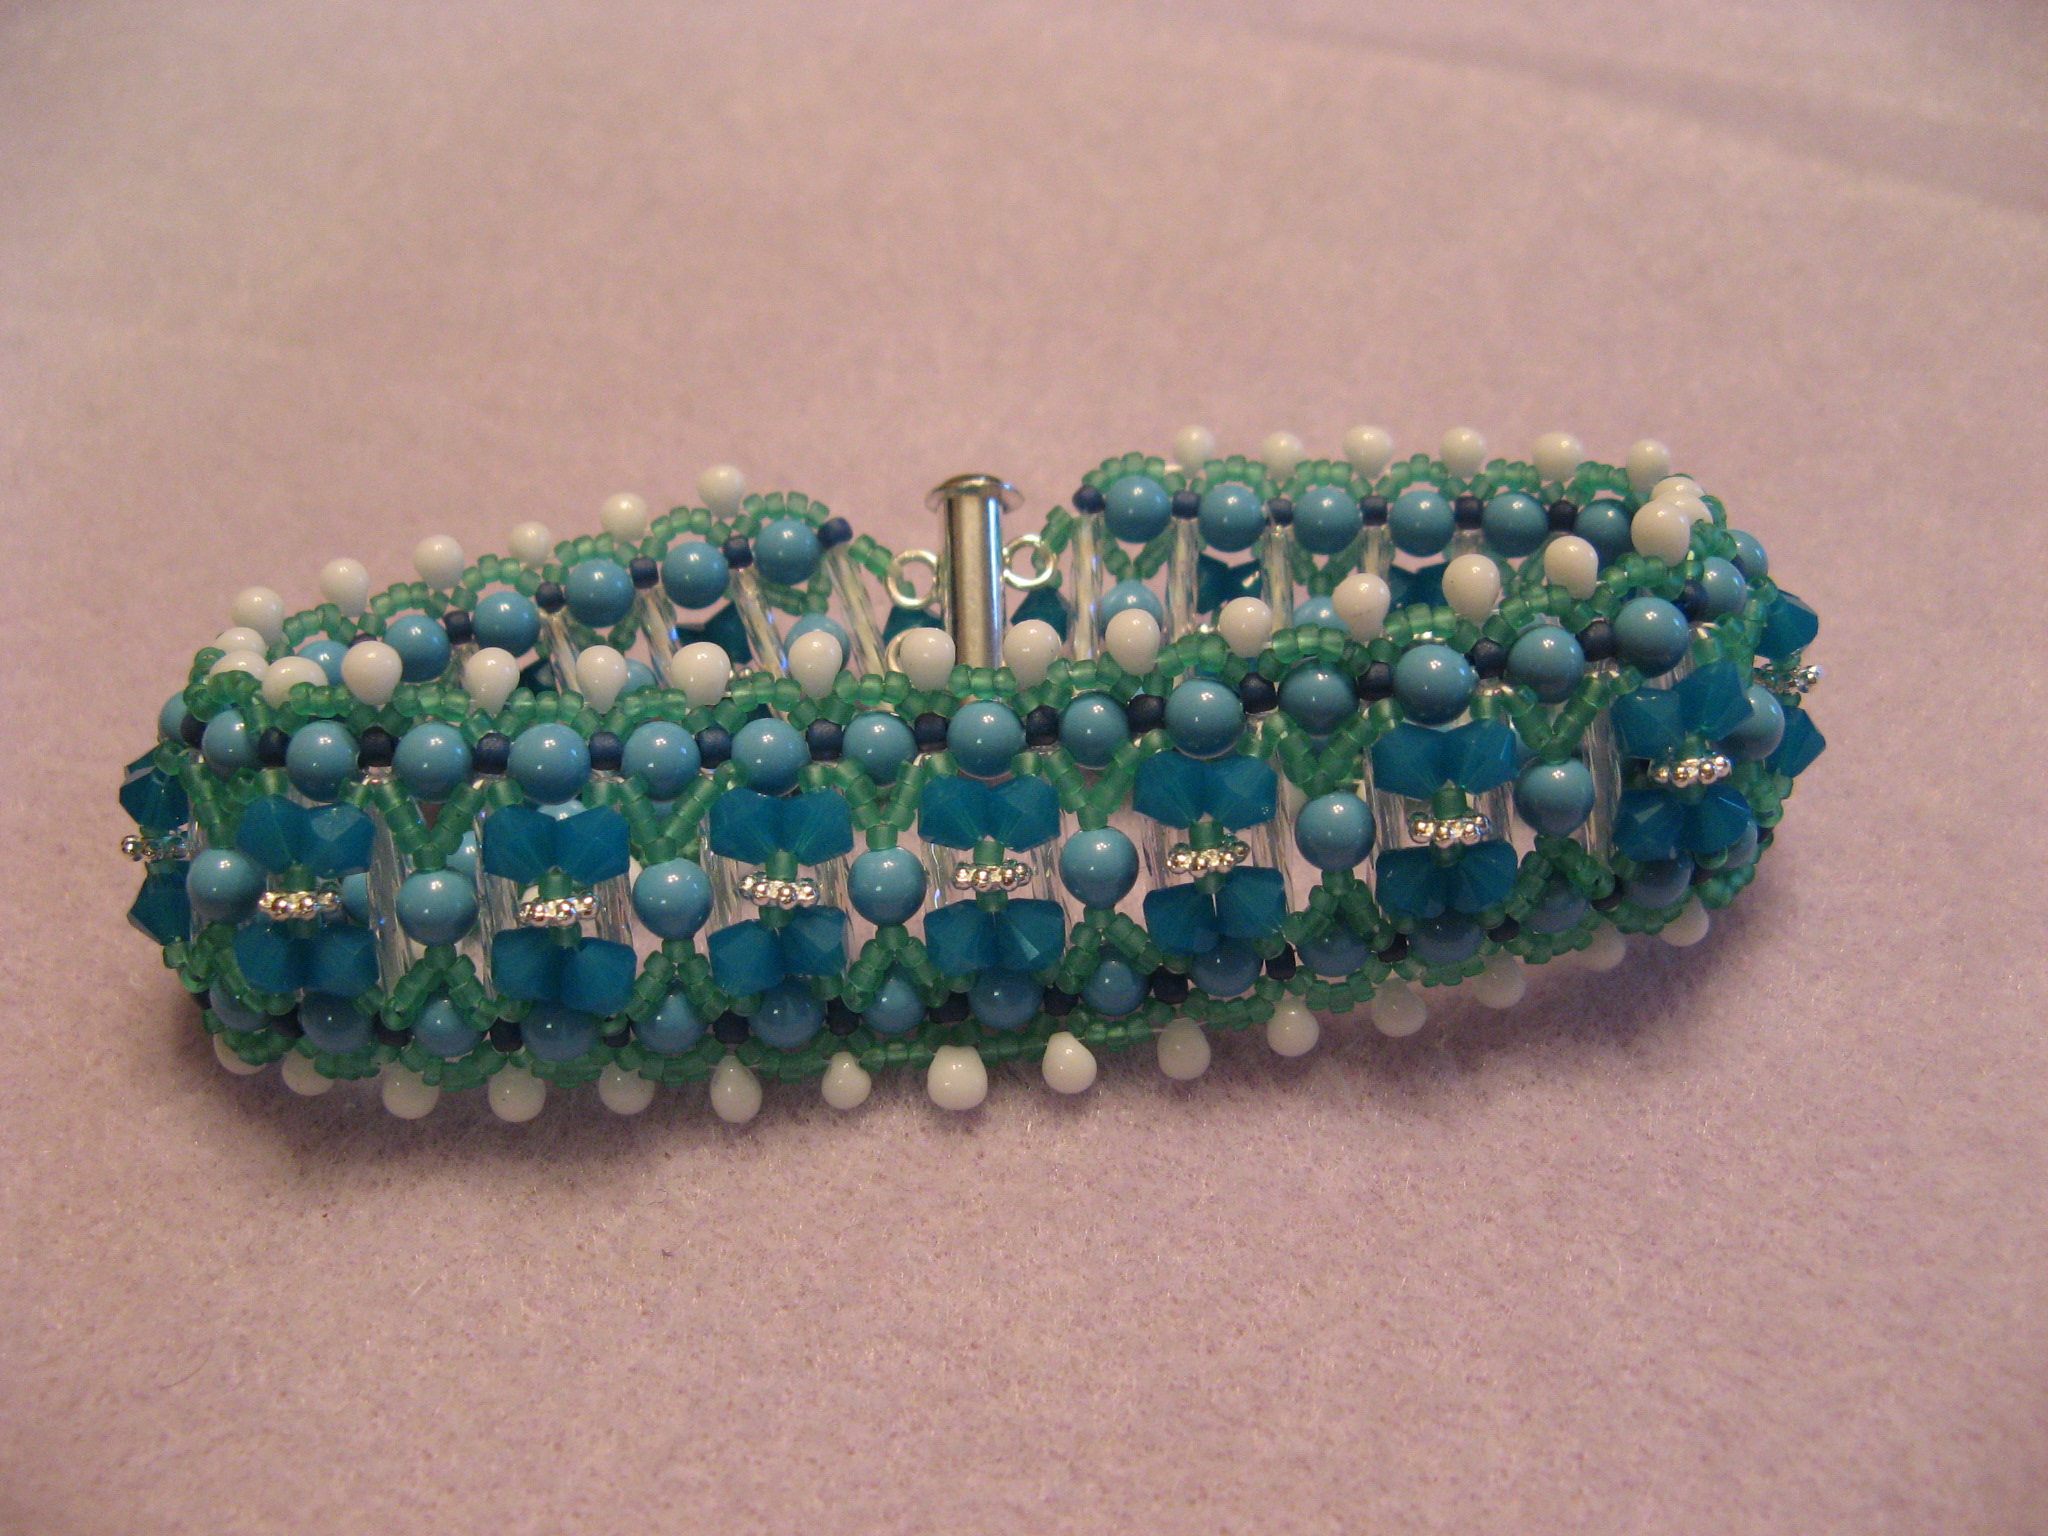
Using the same Czech Tile beads again – along with Size 11 seed beads – I created a bracelet I will call Squared V’s.

IMG_0489

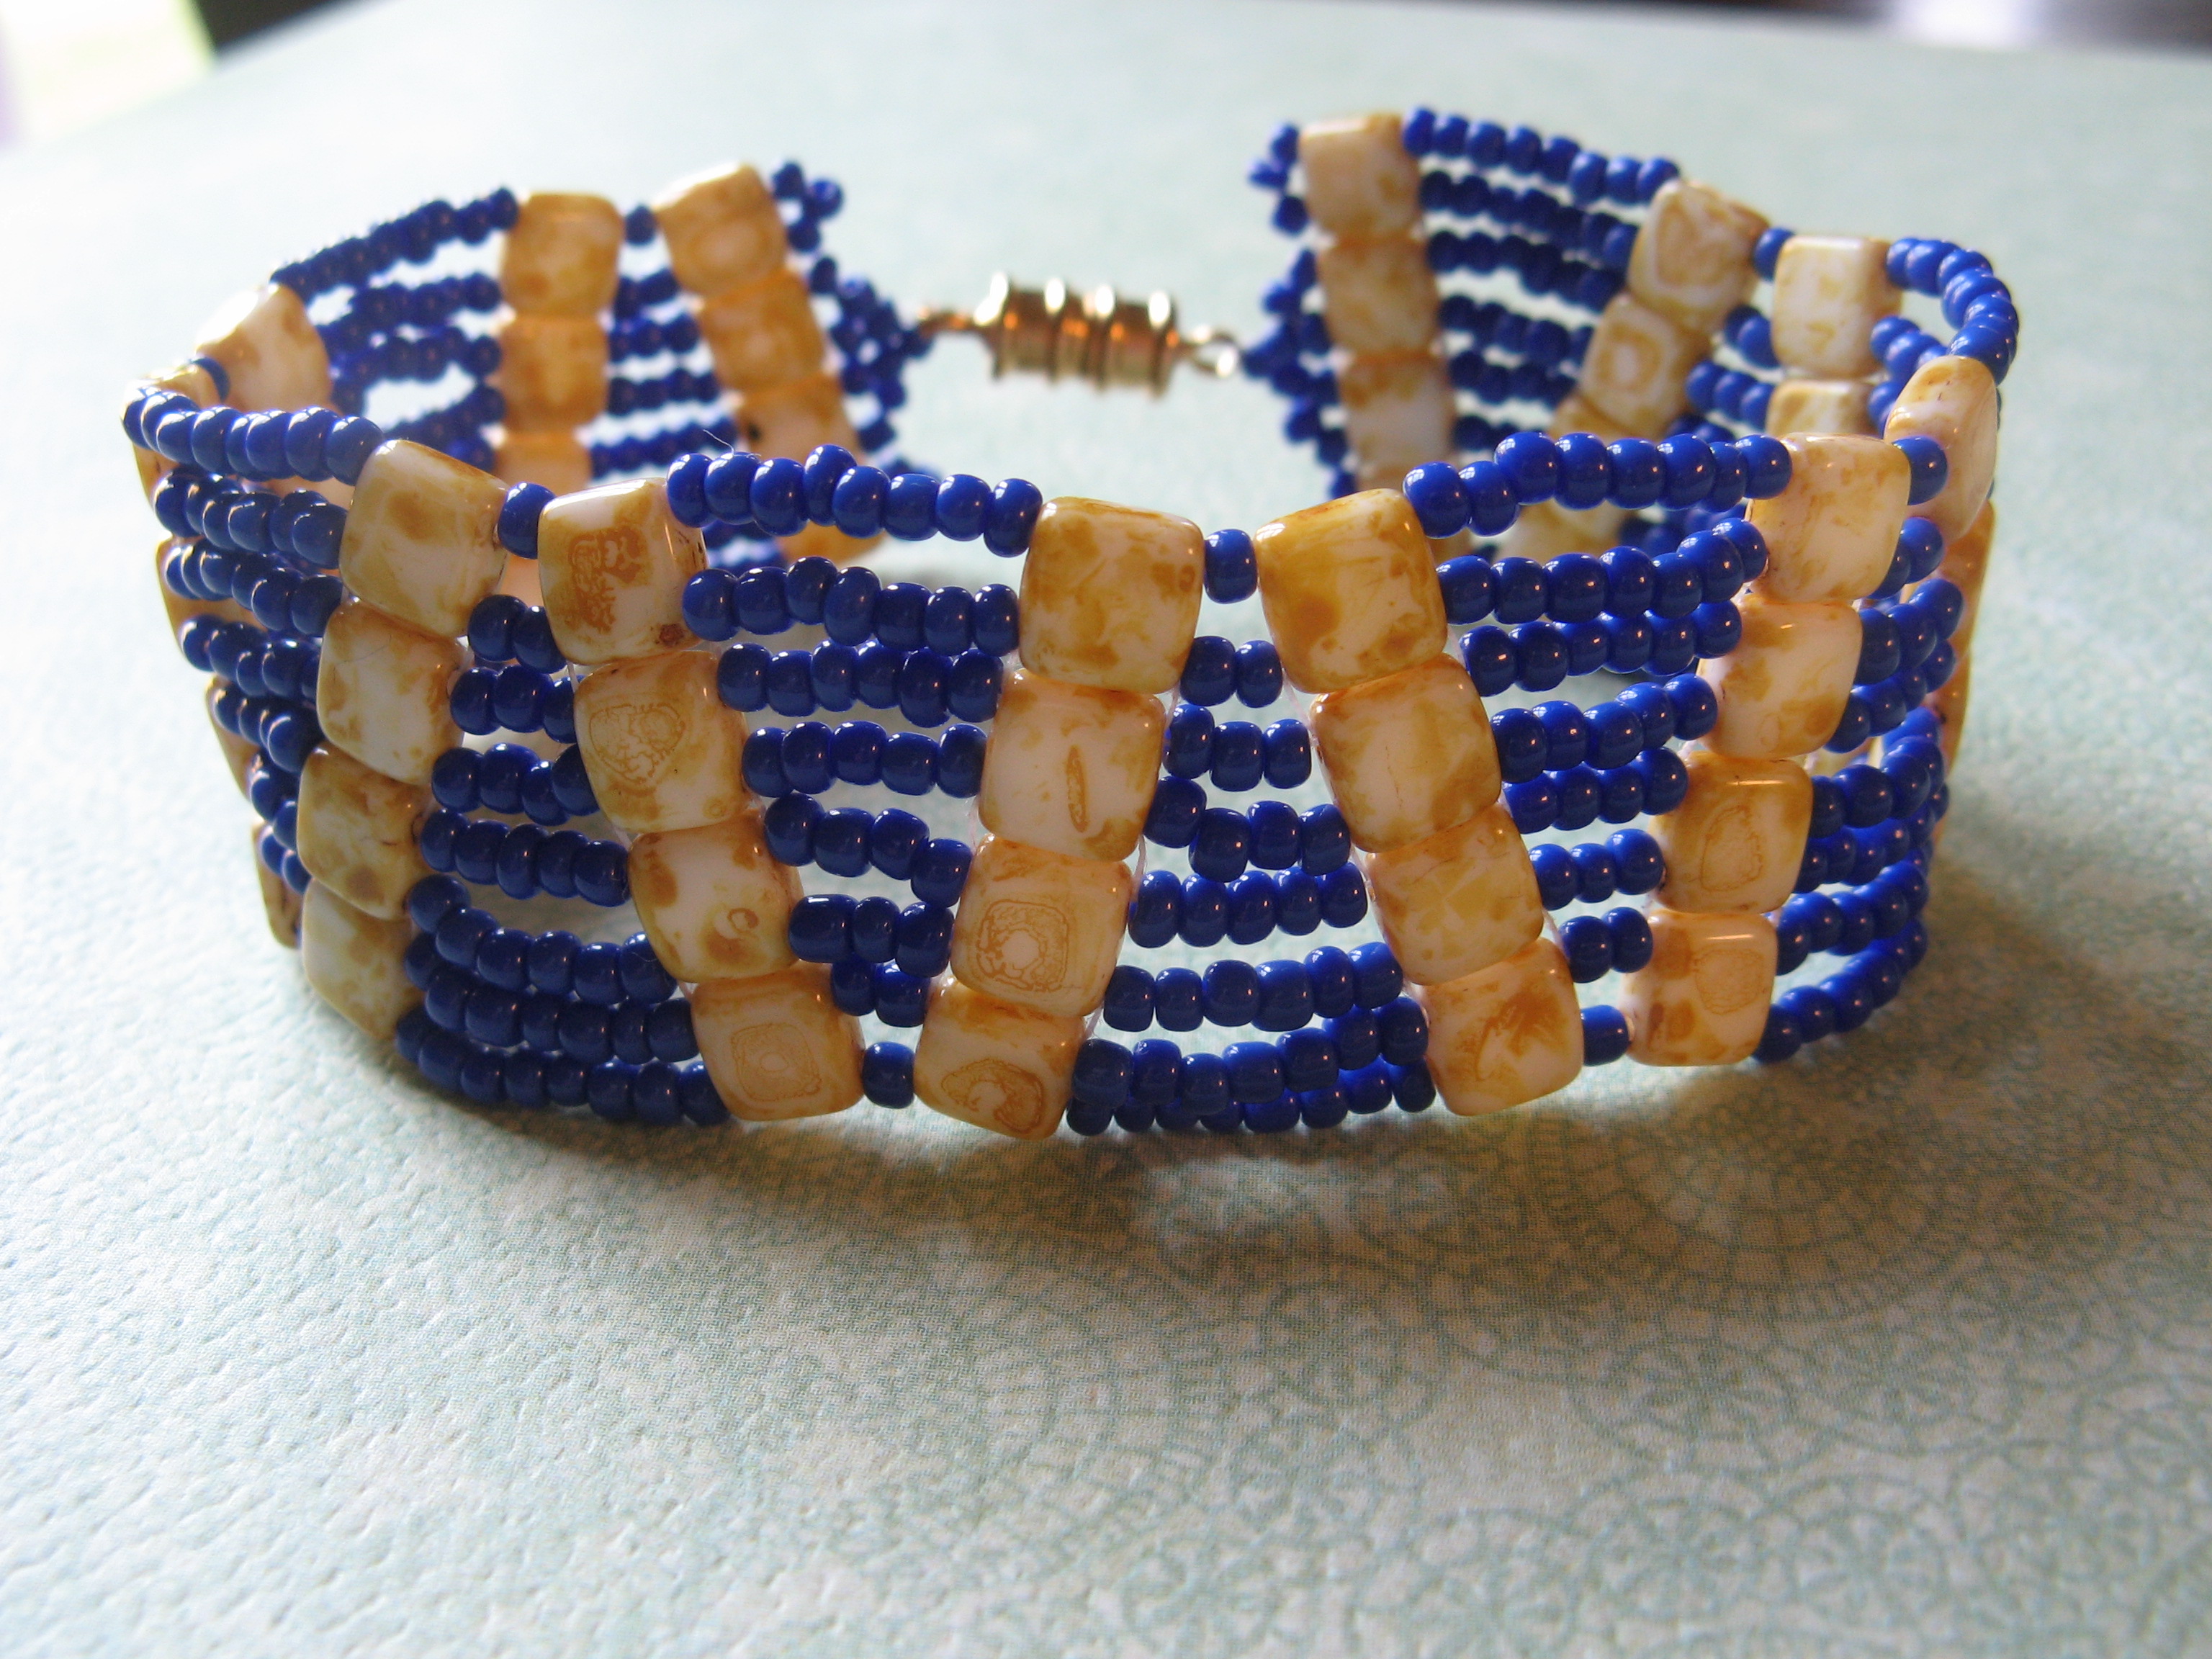
I knew that the bracelet was going to be four tile beads wide so I began by stringing the following pattern for my desired length: one seed bead, one Tile bead, eight seed beads, one Tile bead, one seed bead, one Tile bead, eight seed beads, one Tile bead, etc. Once I reached by desired length I went in the opposite direction and sewed through the Tile beads adding seed beads by one where my starting point was one seed bead and decreasing by one seed bead where my starting point was eight seed beads.

IMG_0490

I kept this pattern going adding the Tile beads where necessary and it wasn’t long before the bracelet was done. FYI… The greatest amount of seed beads between your Tile beads will always be the number wide of Tile beads you want to use times two. For example, if you only want your bracelet to be three Tile beads wide the greatest number of seed beads used would be six, if it was five Tile beads it would then be 10 seed beads. I then added seed beads to the ends to attach the clasp and the bracelet was done.

IMG_0492 IMG_0495 IMG_0516


Since I did have some Miyuki Tile beads sitting in my stash waiting to be used I decided to make a few more of these bracelets.

IMG_0808

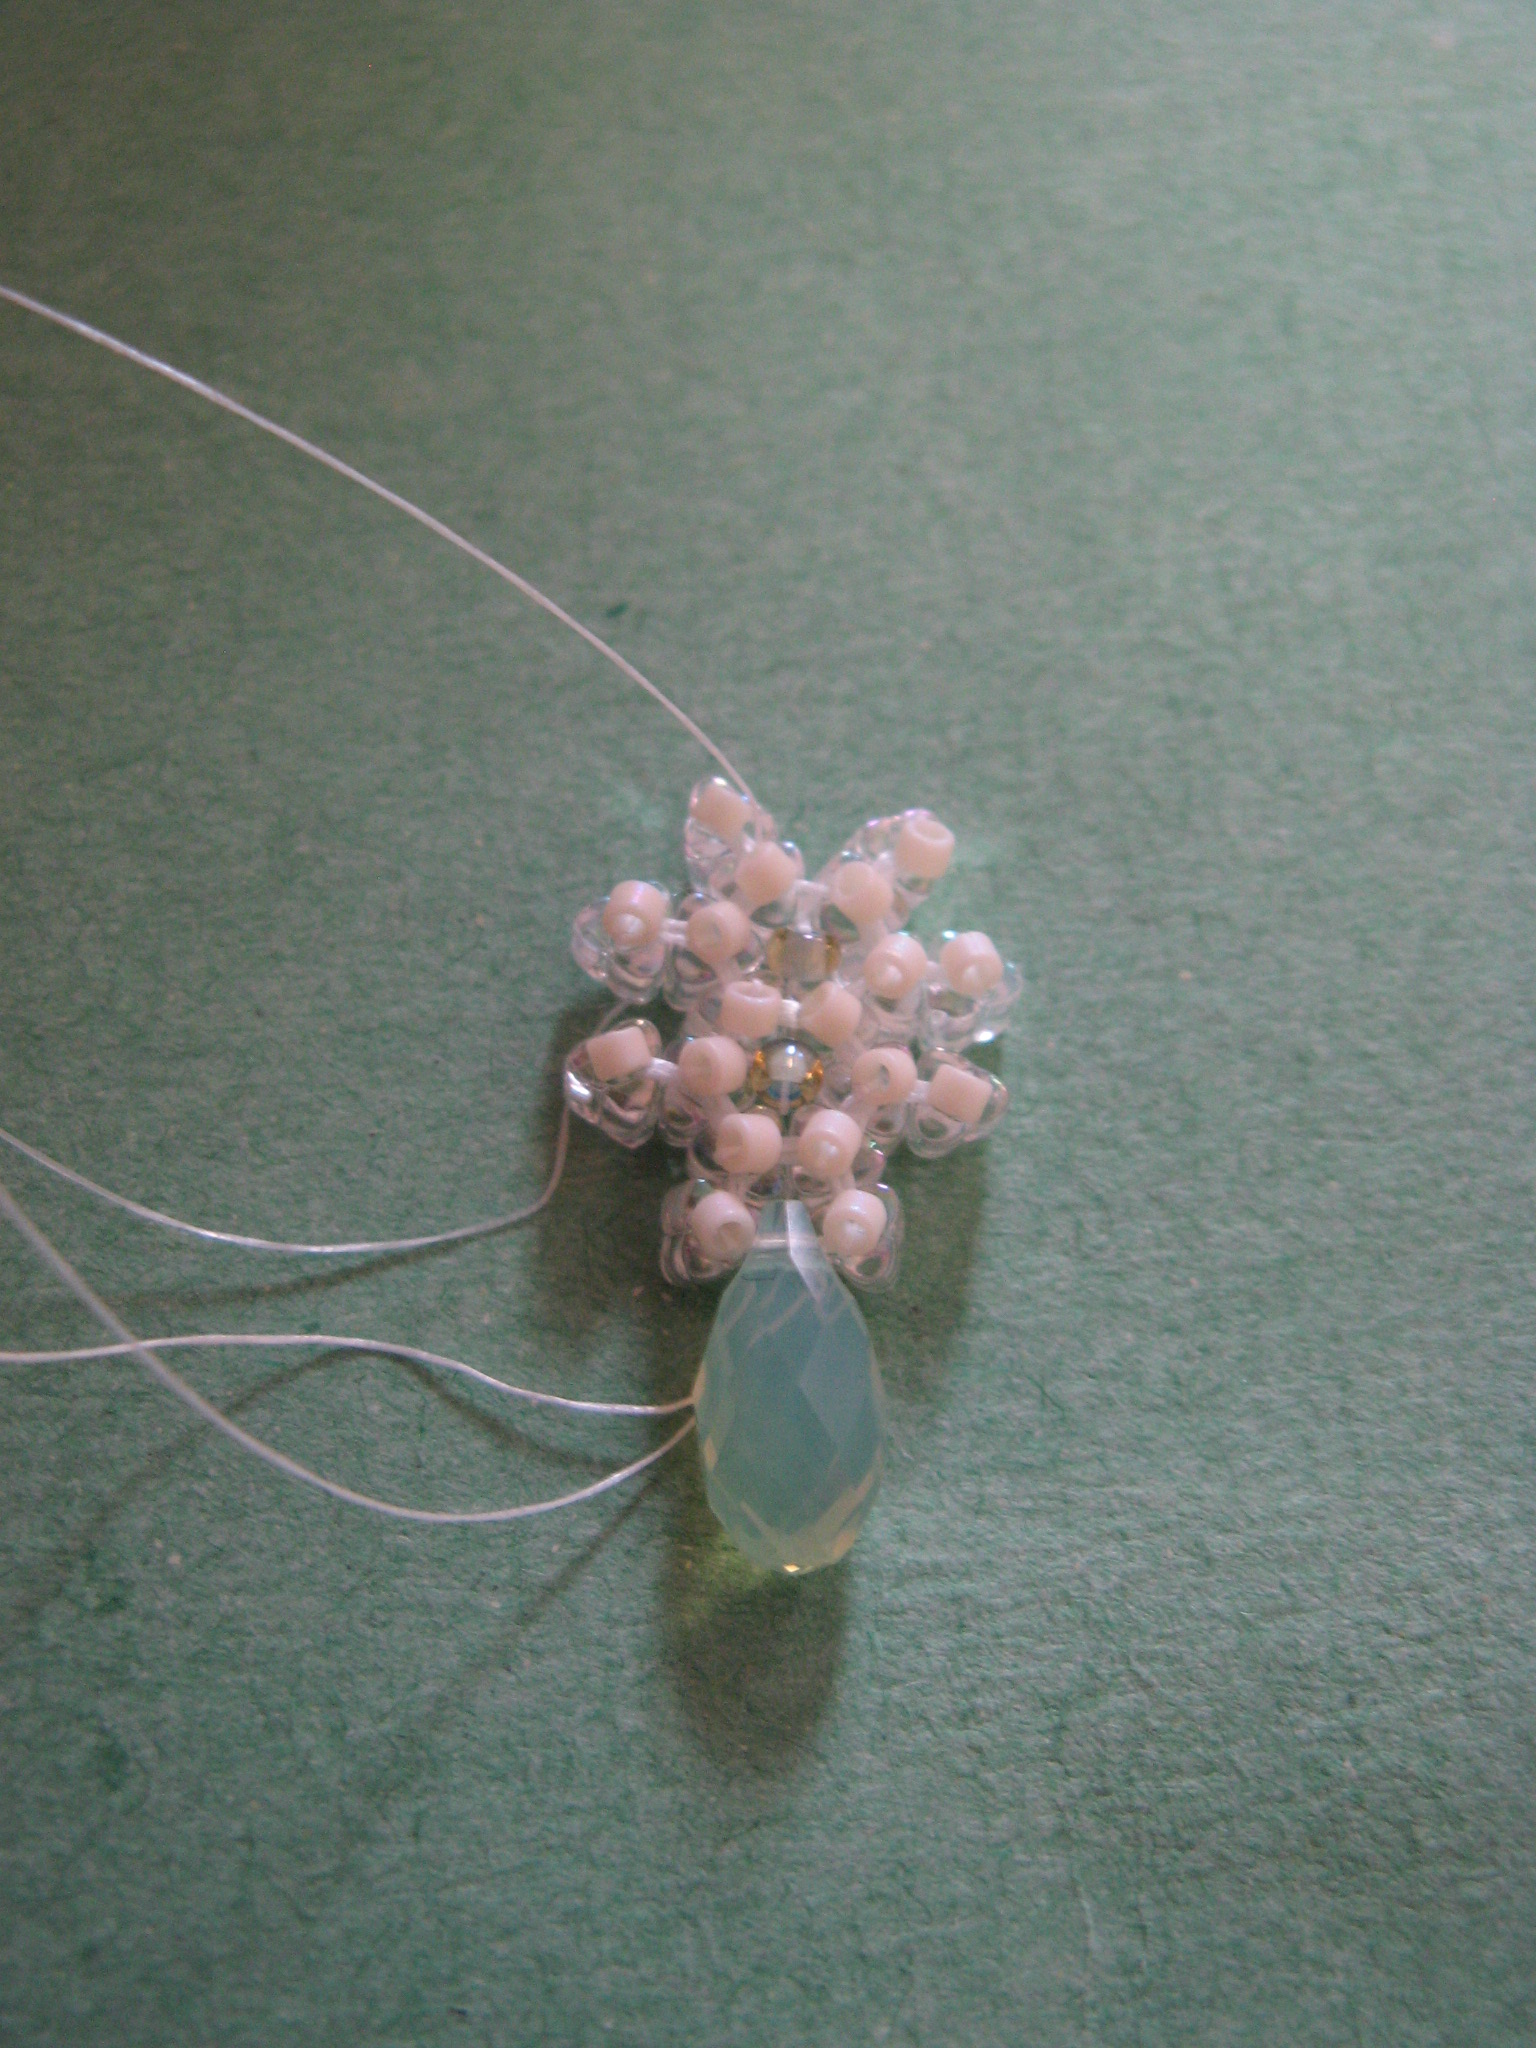
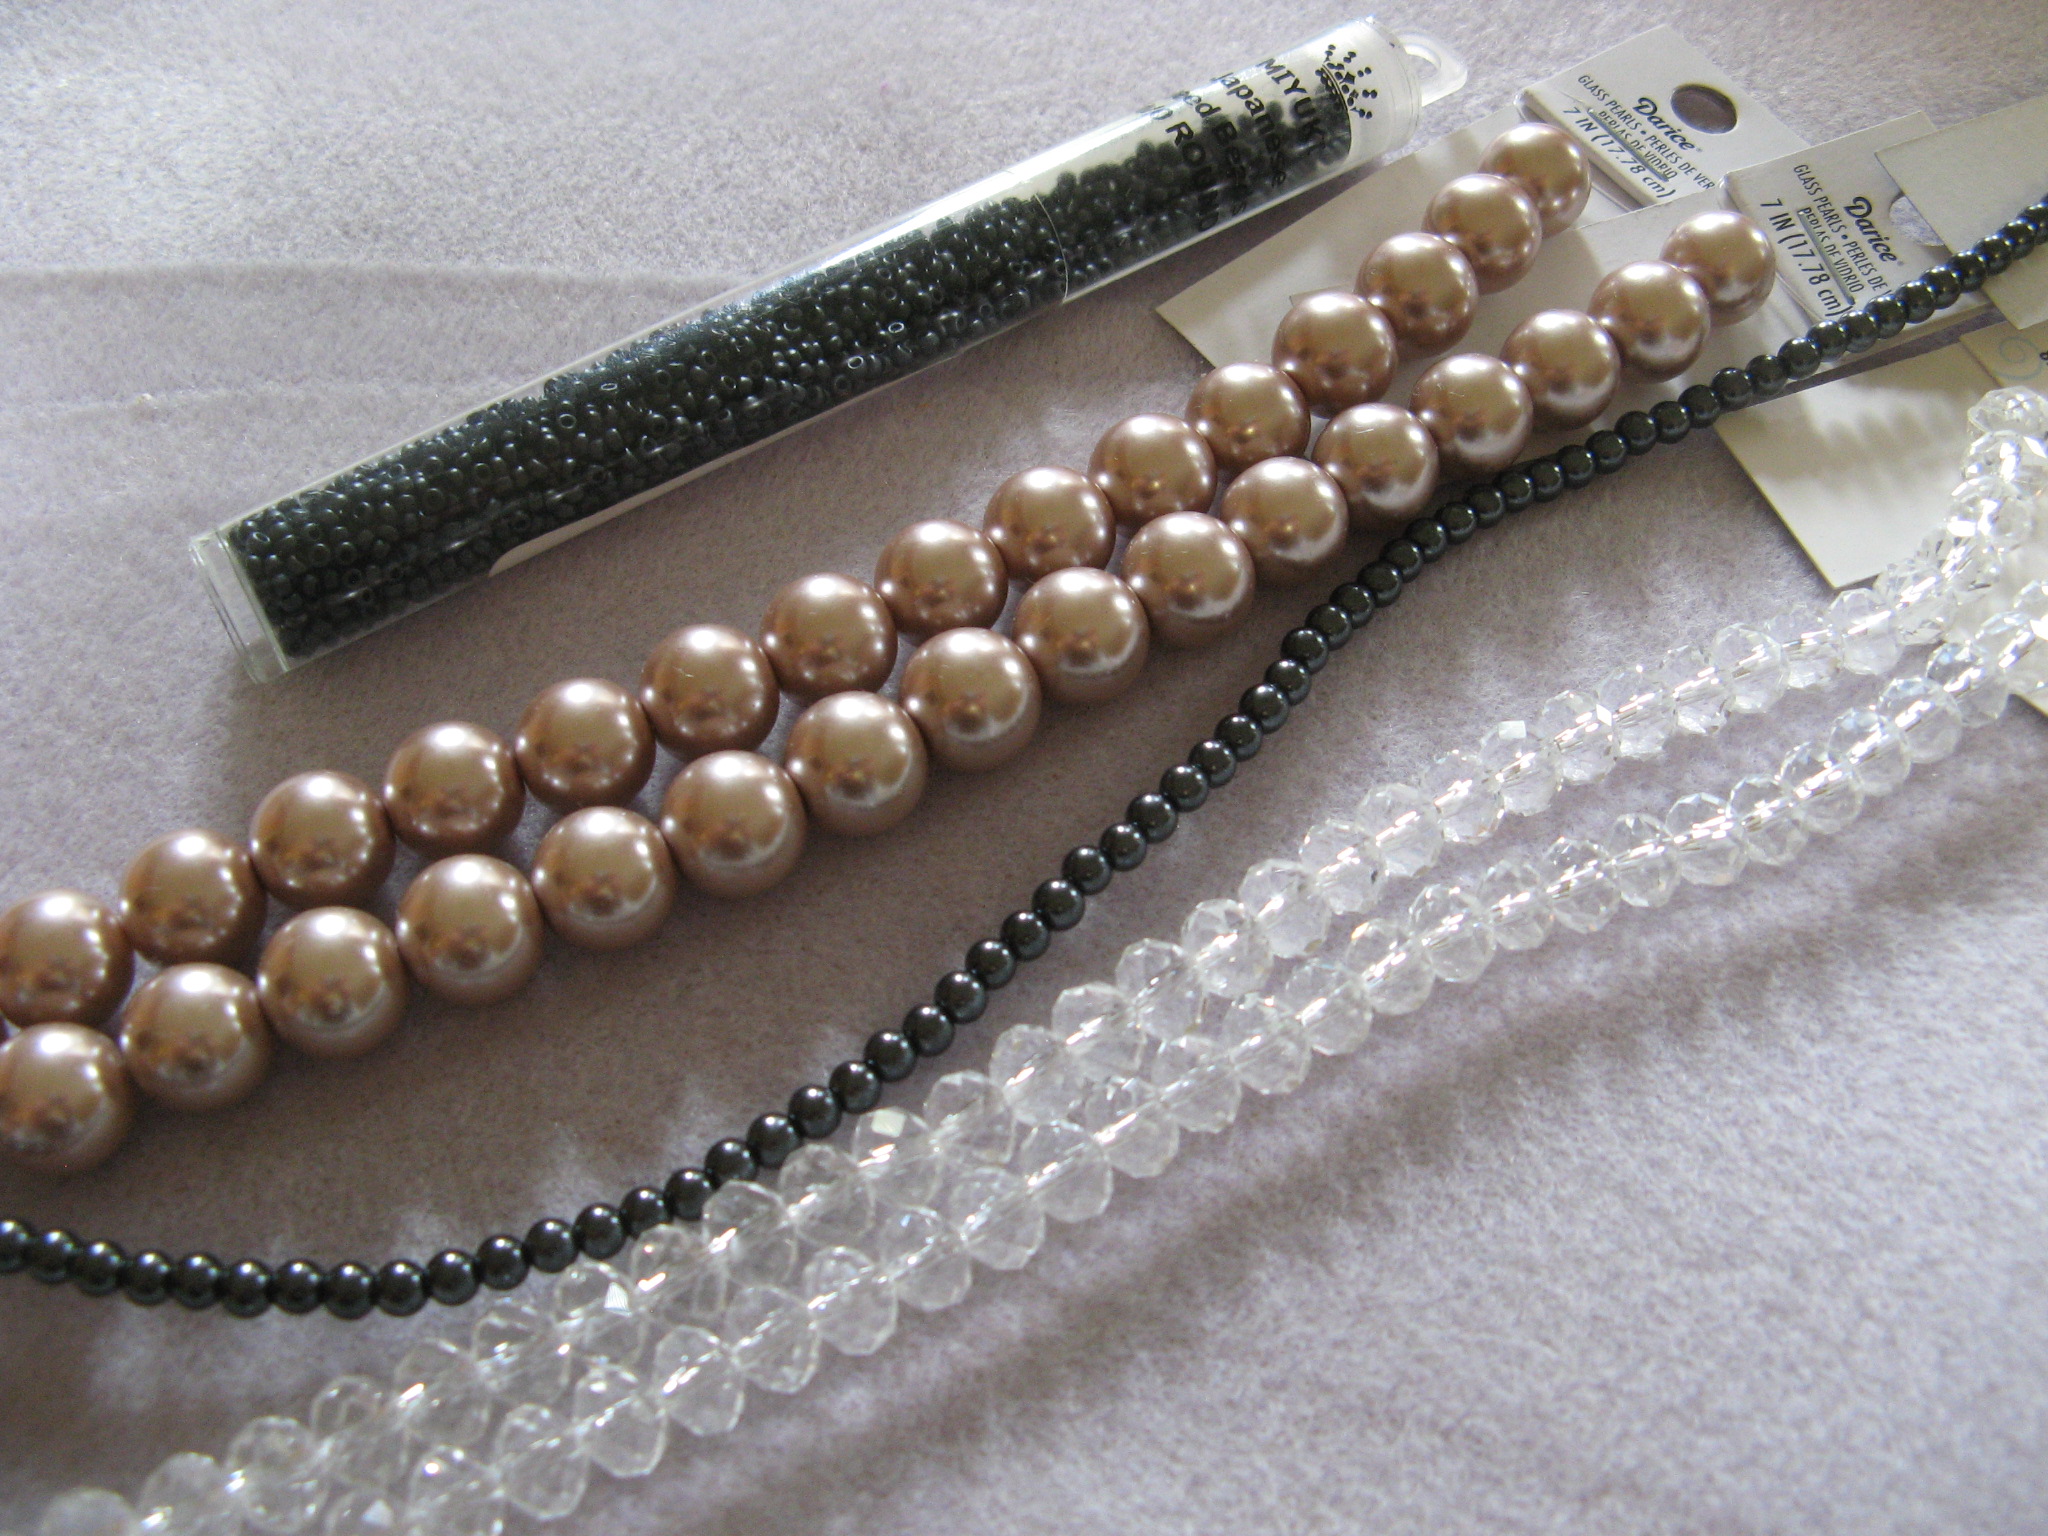
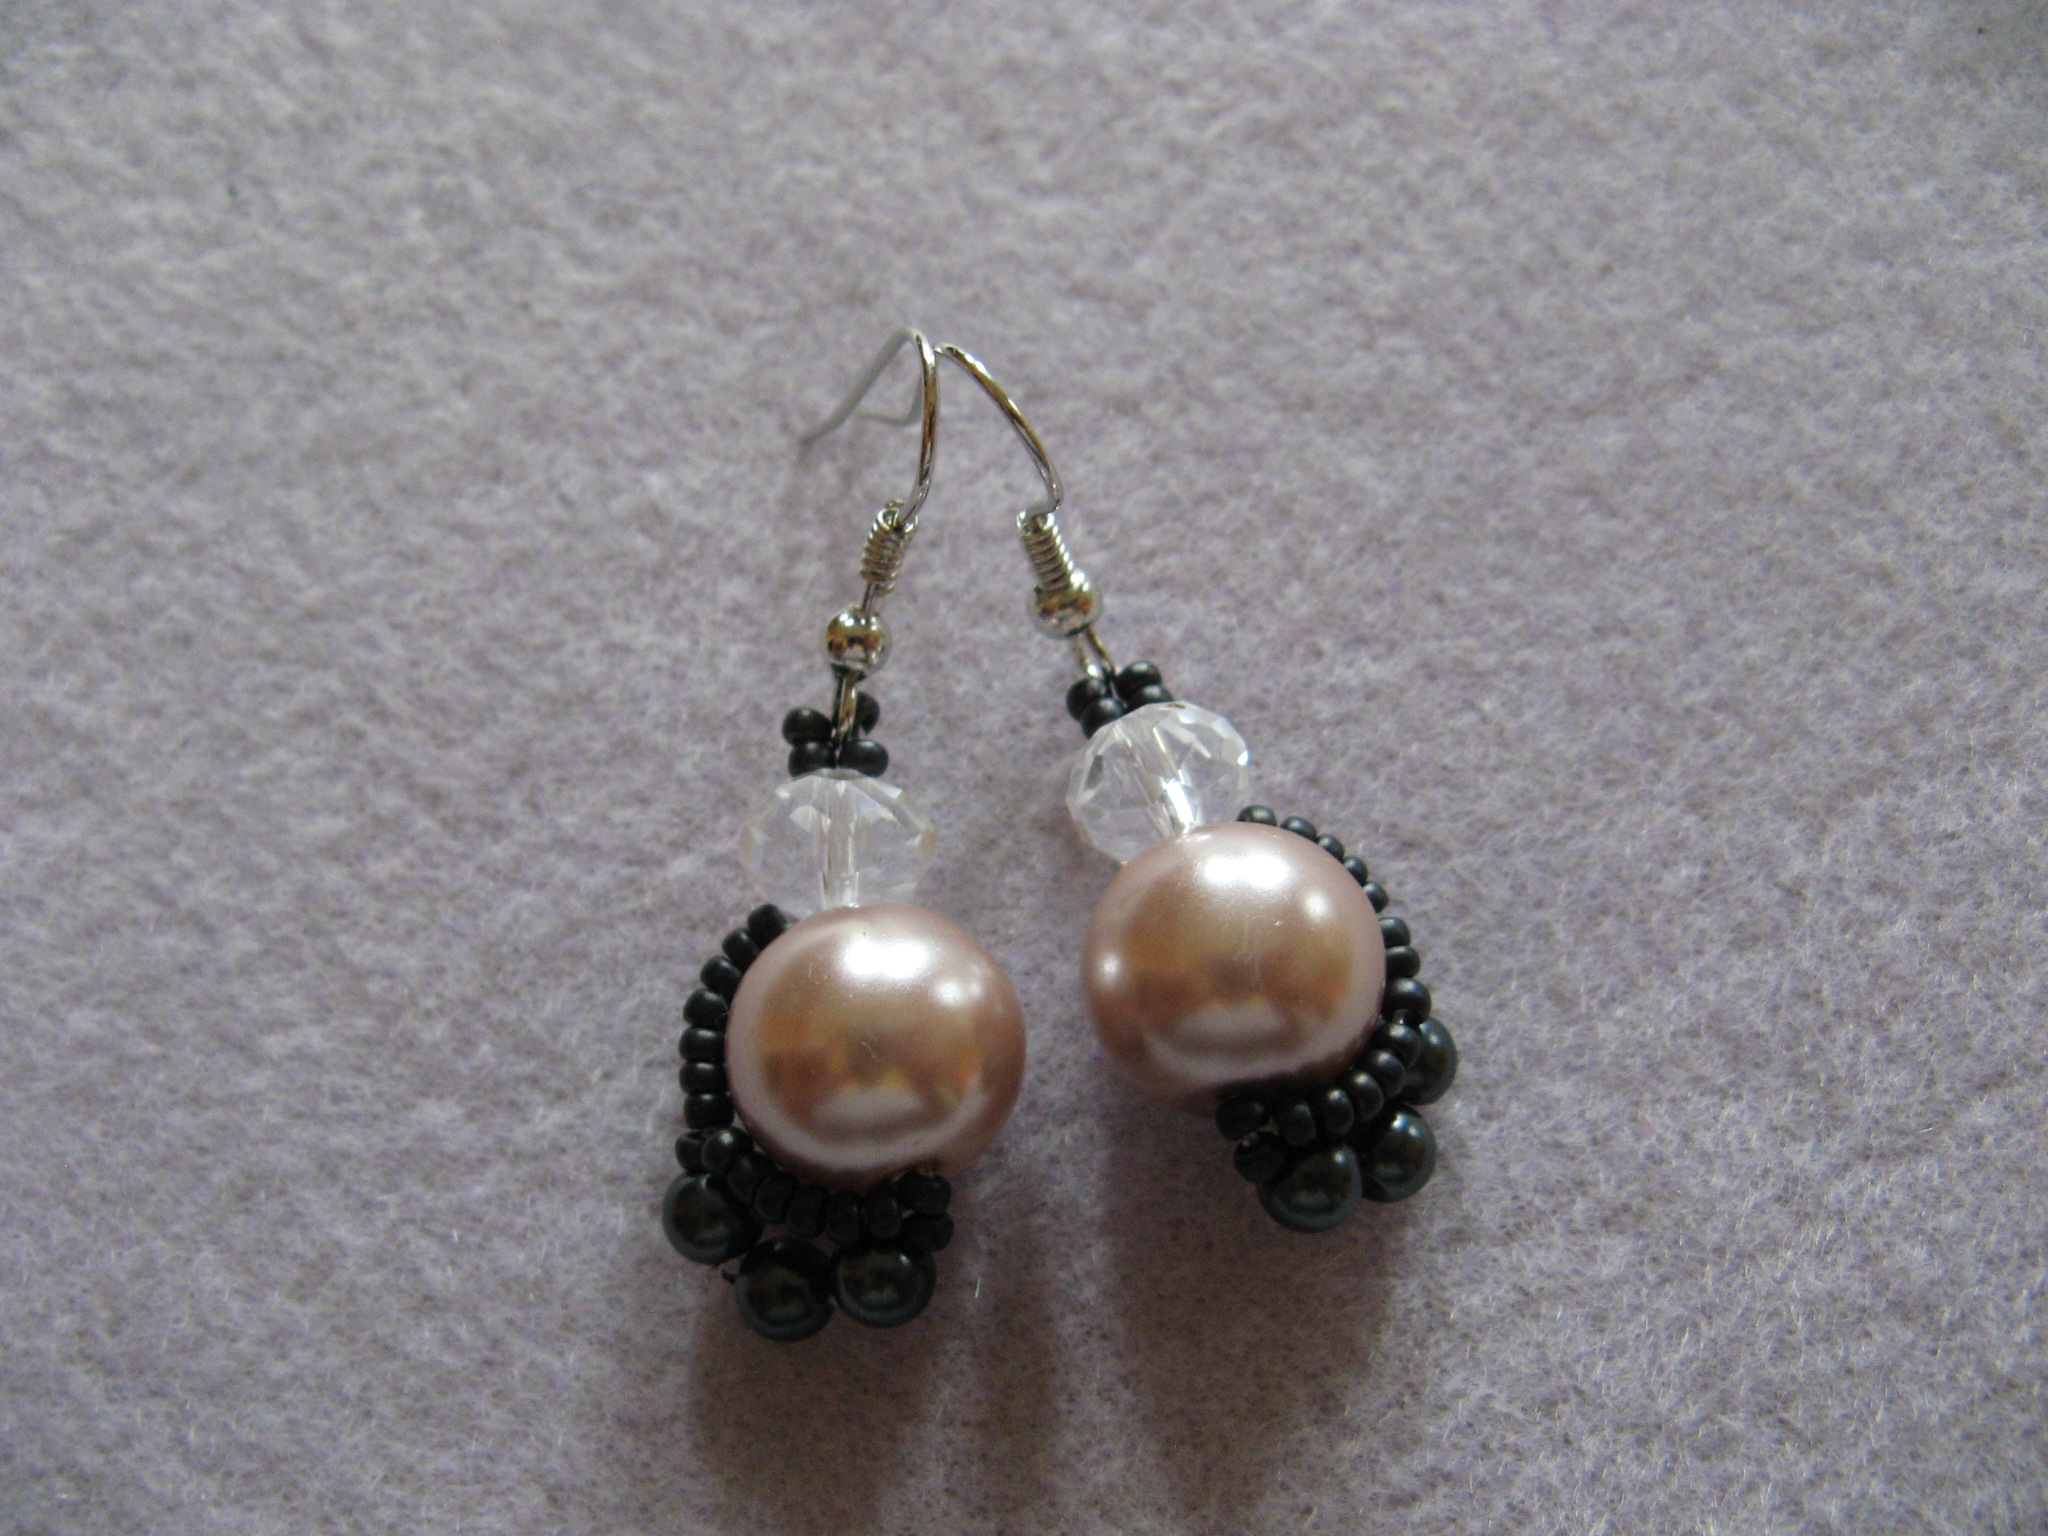
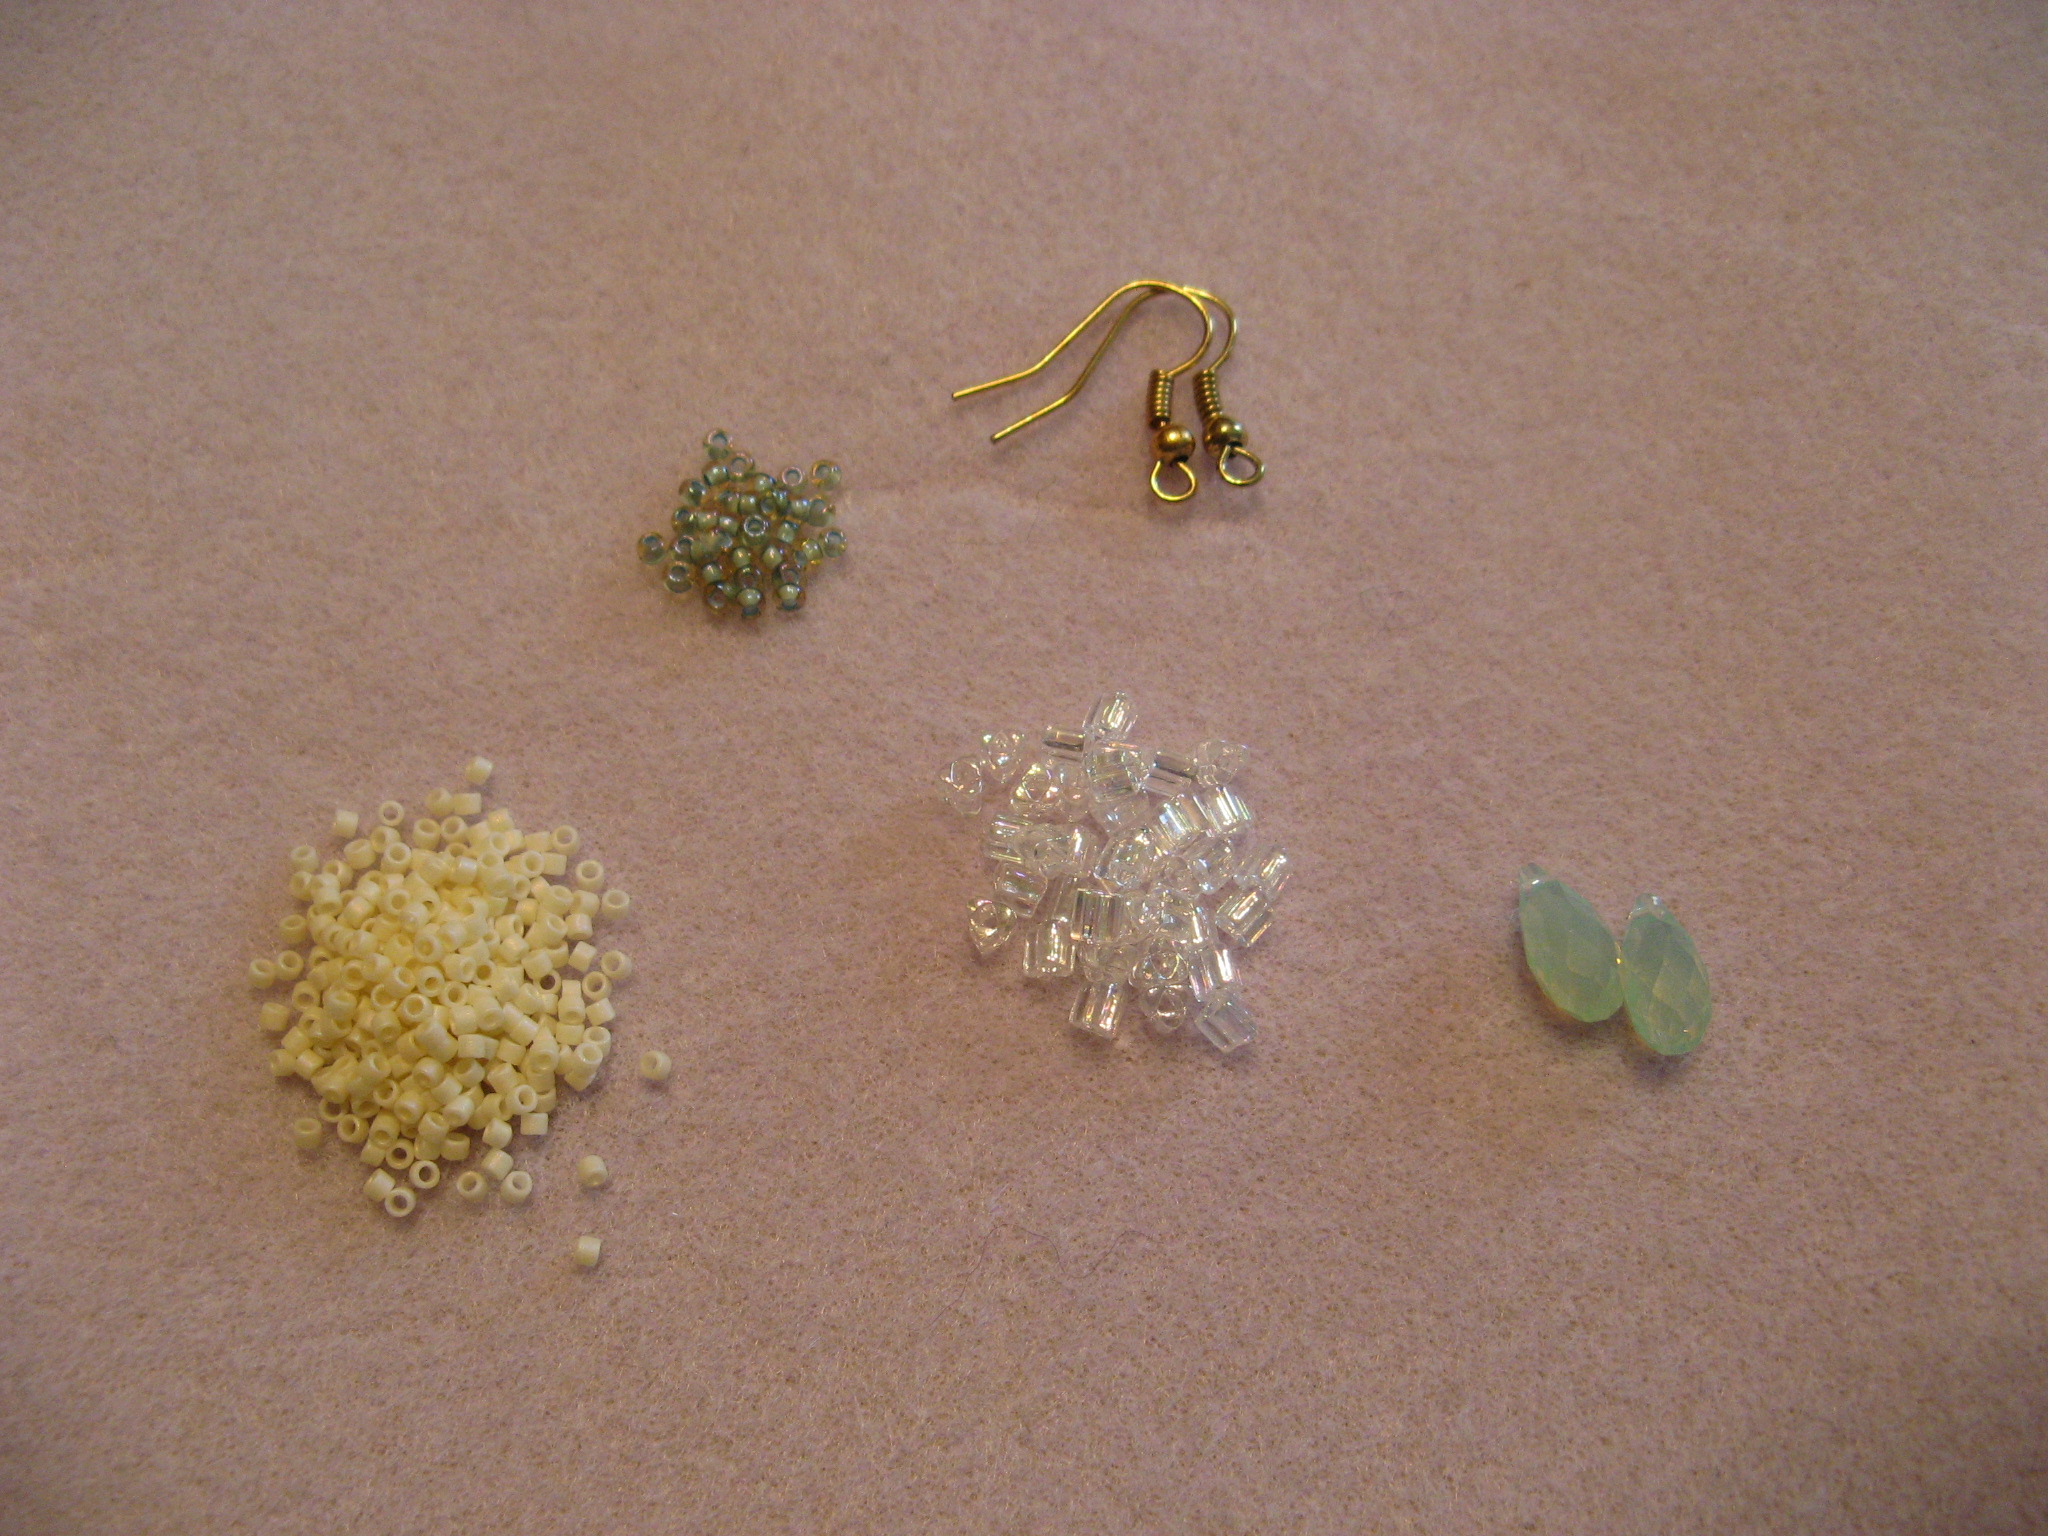
And finally I used Triangle beads to create a pair of earrings that I came across in the April 2013 issue of Bead & Button Magazine under the pattern called Triangular Opulence by Ana Rao. To be honest I am still on the fence as to whether or not I like them. I am thinking it has something to do with the color; I opted to buy clear Triangles to make them since I figured I should stick with something neutral. I guess I should have gone with something bold instead. Along with the triangles I also used 11mm crystal drops, Size 11 seed beads, and Size 11 cylinder beads (Delicas) to make the earrings.

IMG_9798

Using the ladder stitch I stitched together six triangles to form one unit and then stitched four more triangles to that unit to add on a second unit. I then added triangles to each of the end units, once again via the ladder stitch.

IMG_9808

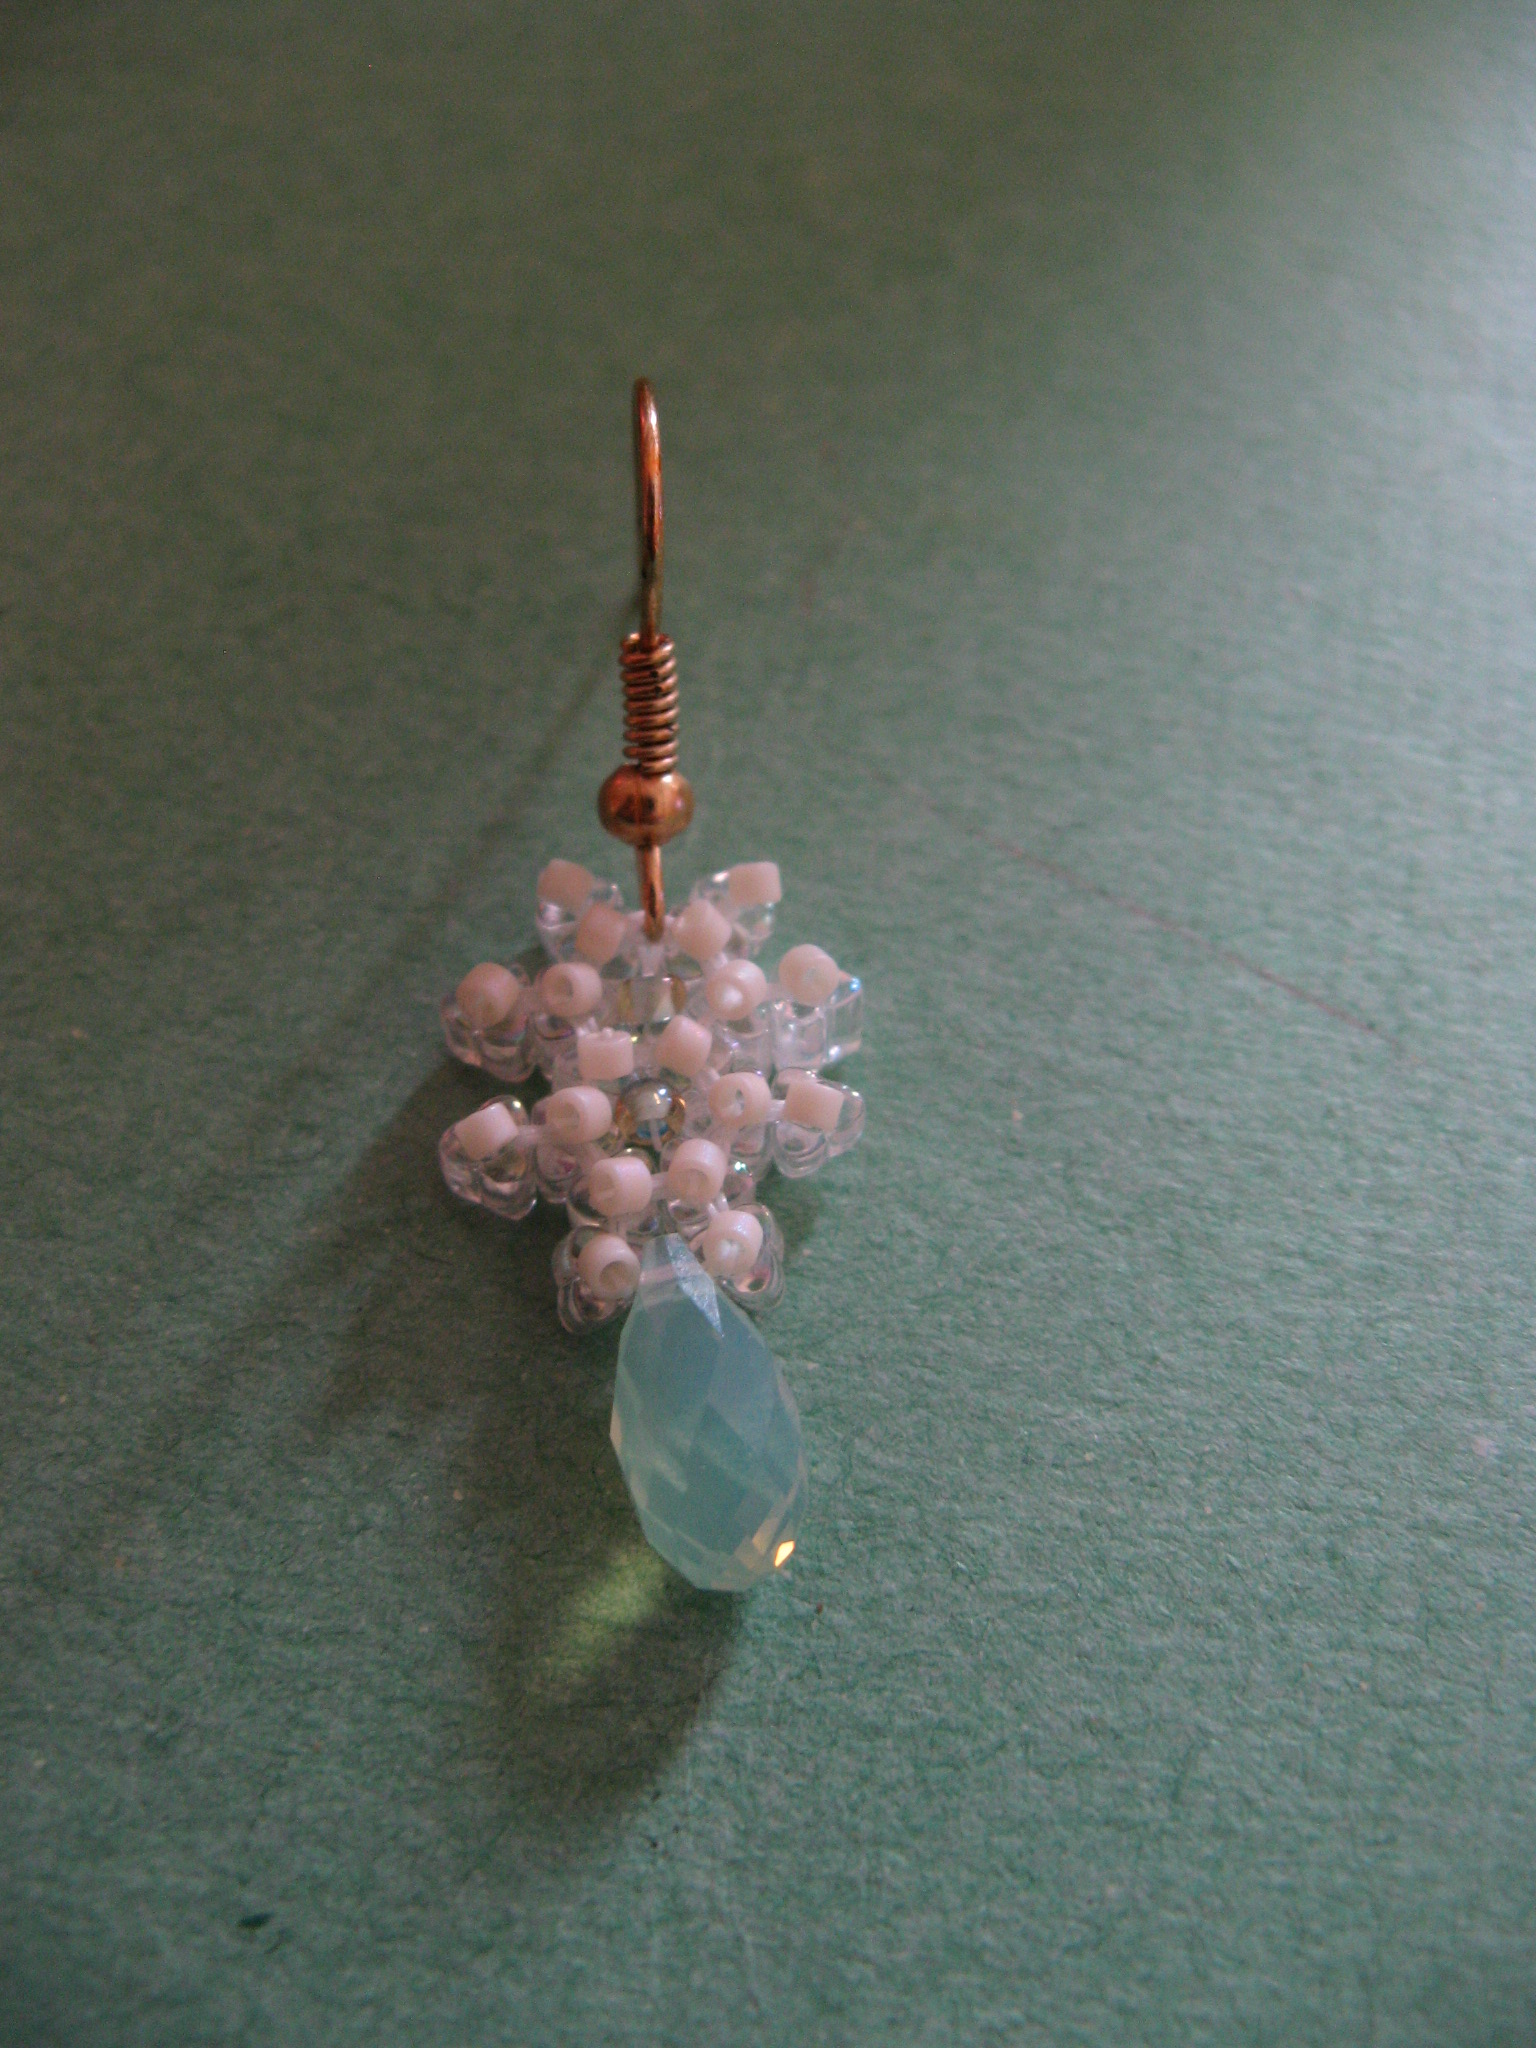
Once the base was done it was time to start embellishing it. I started by adding the crystal drop.

IMG_9815

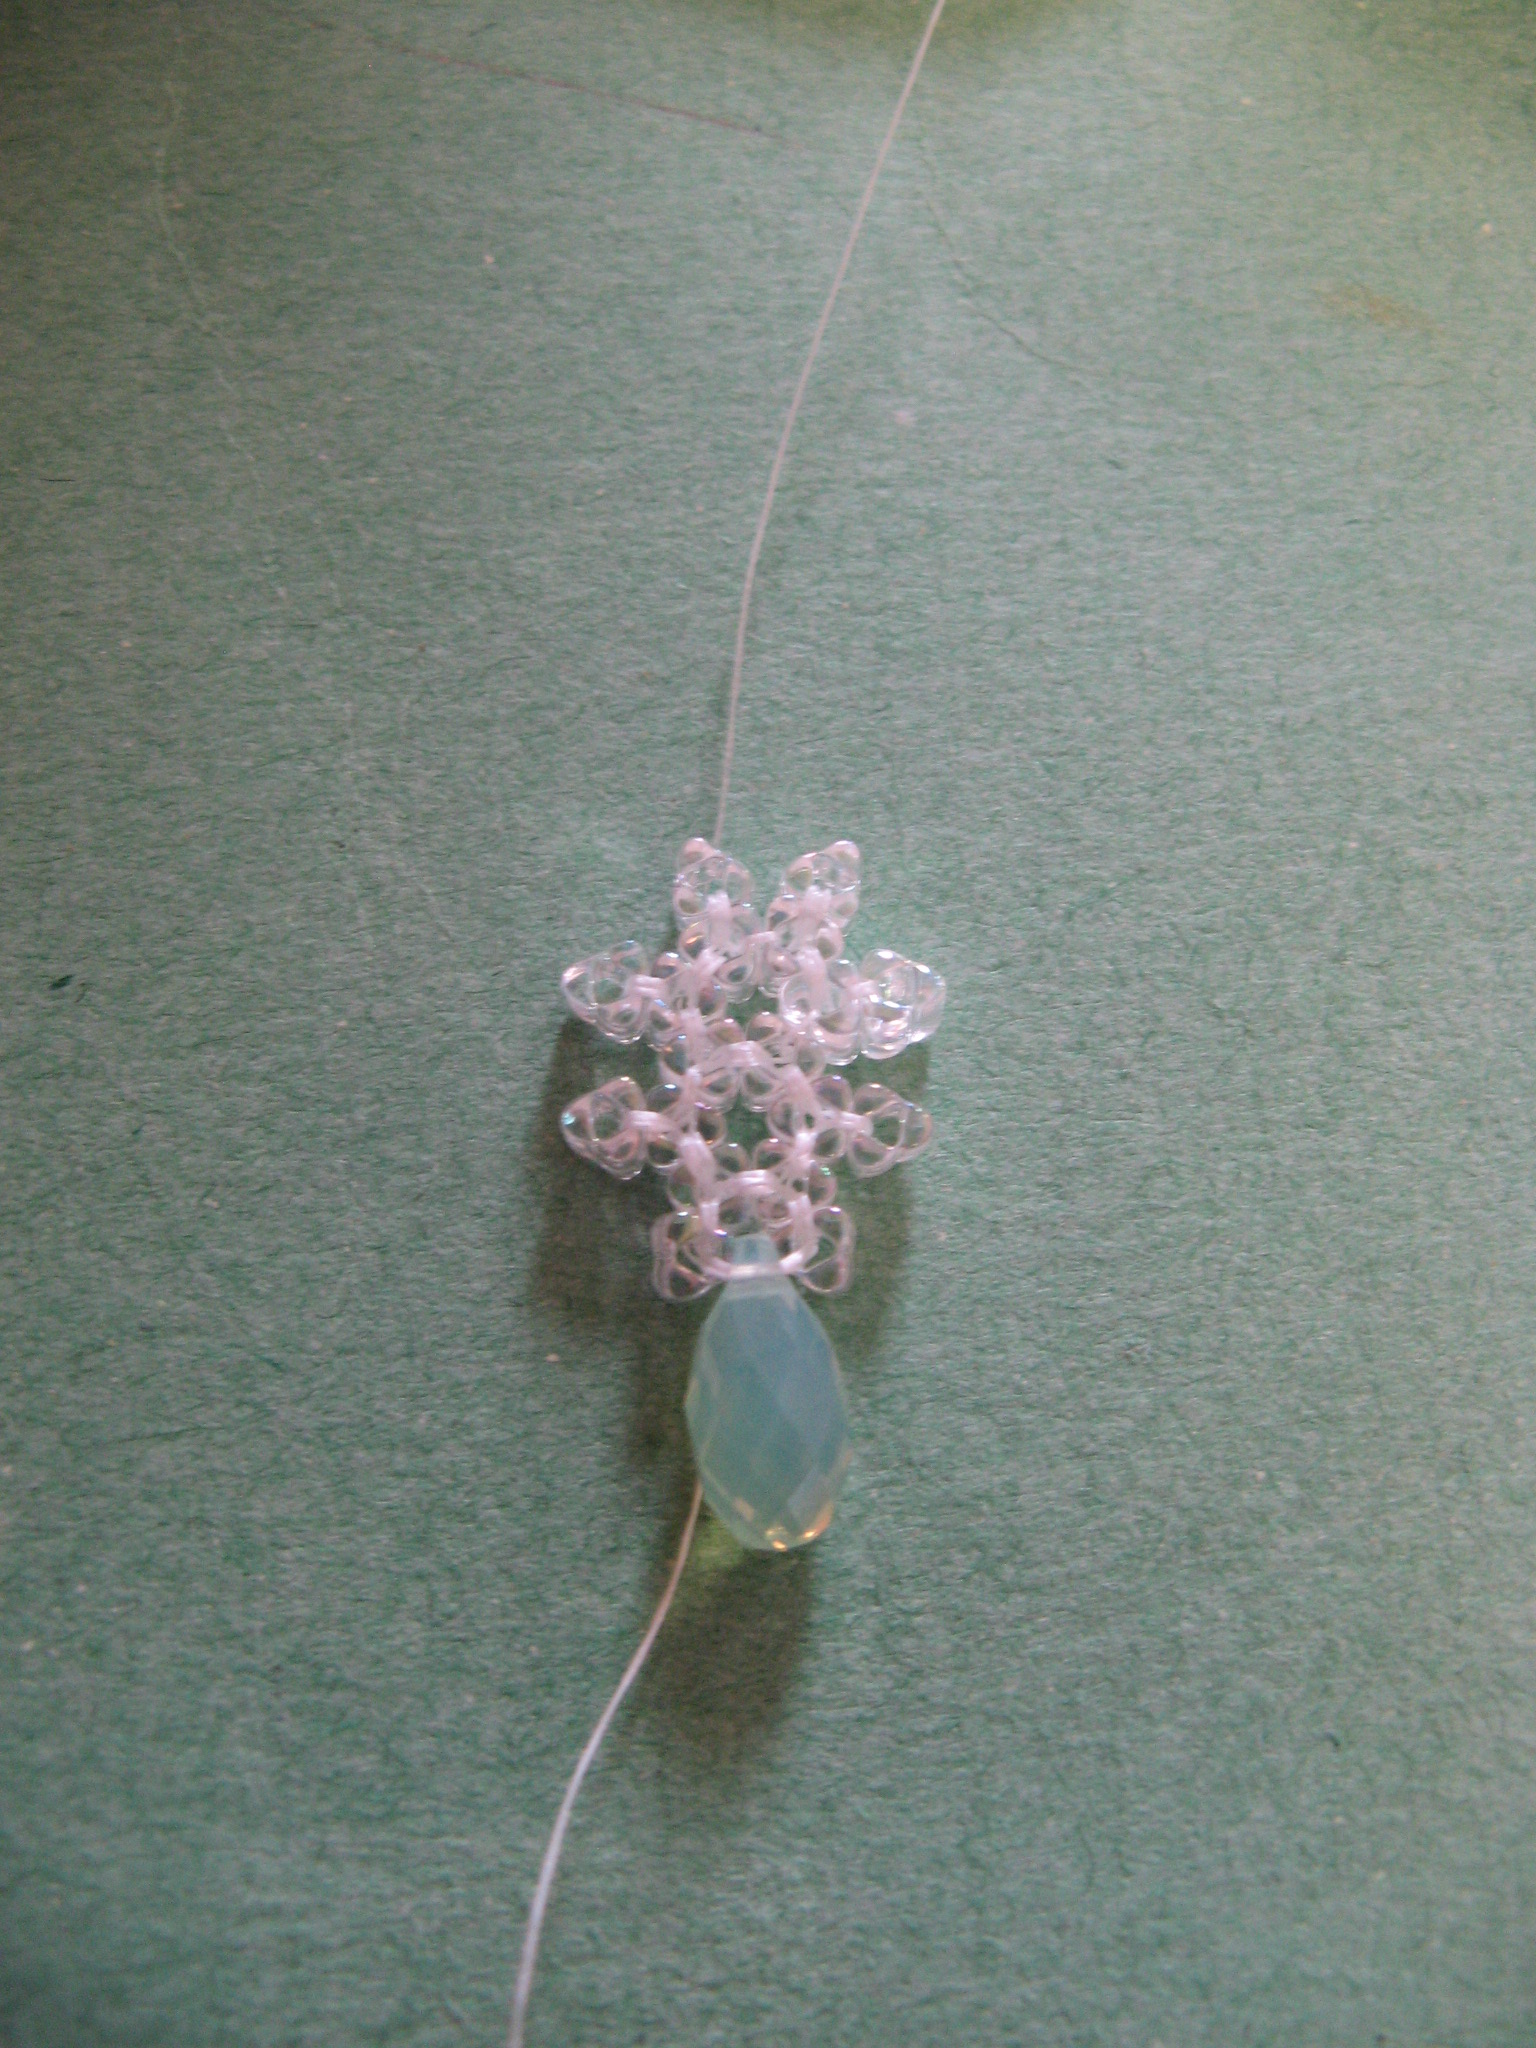
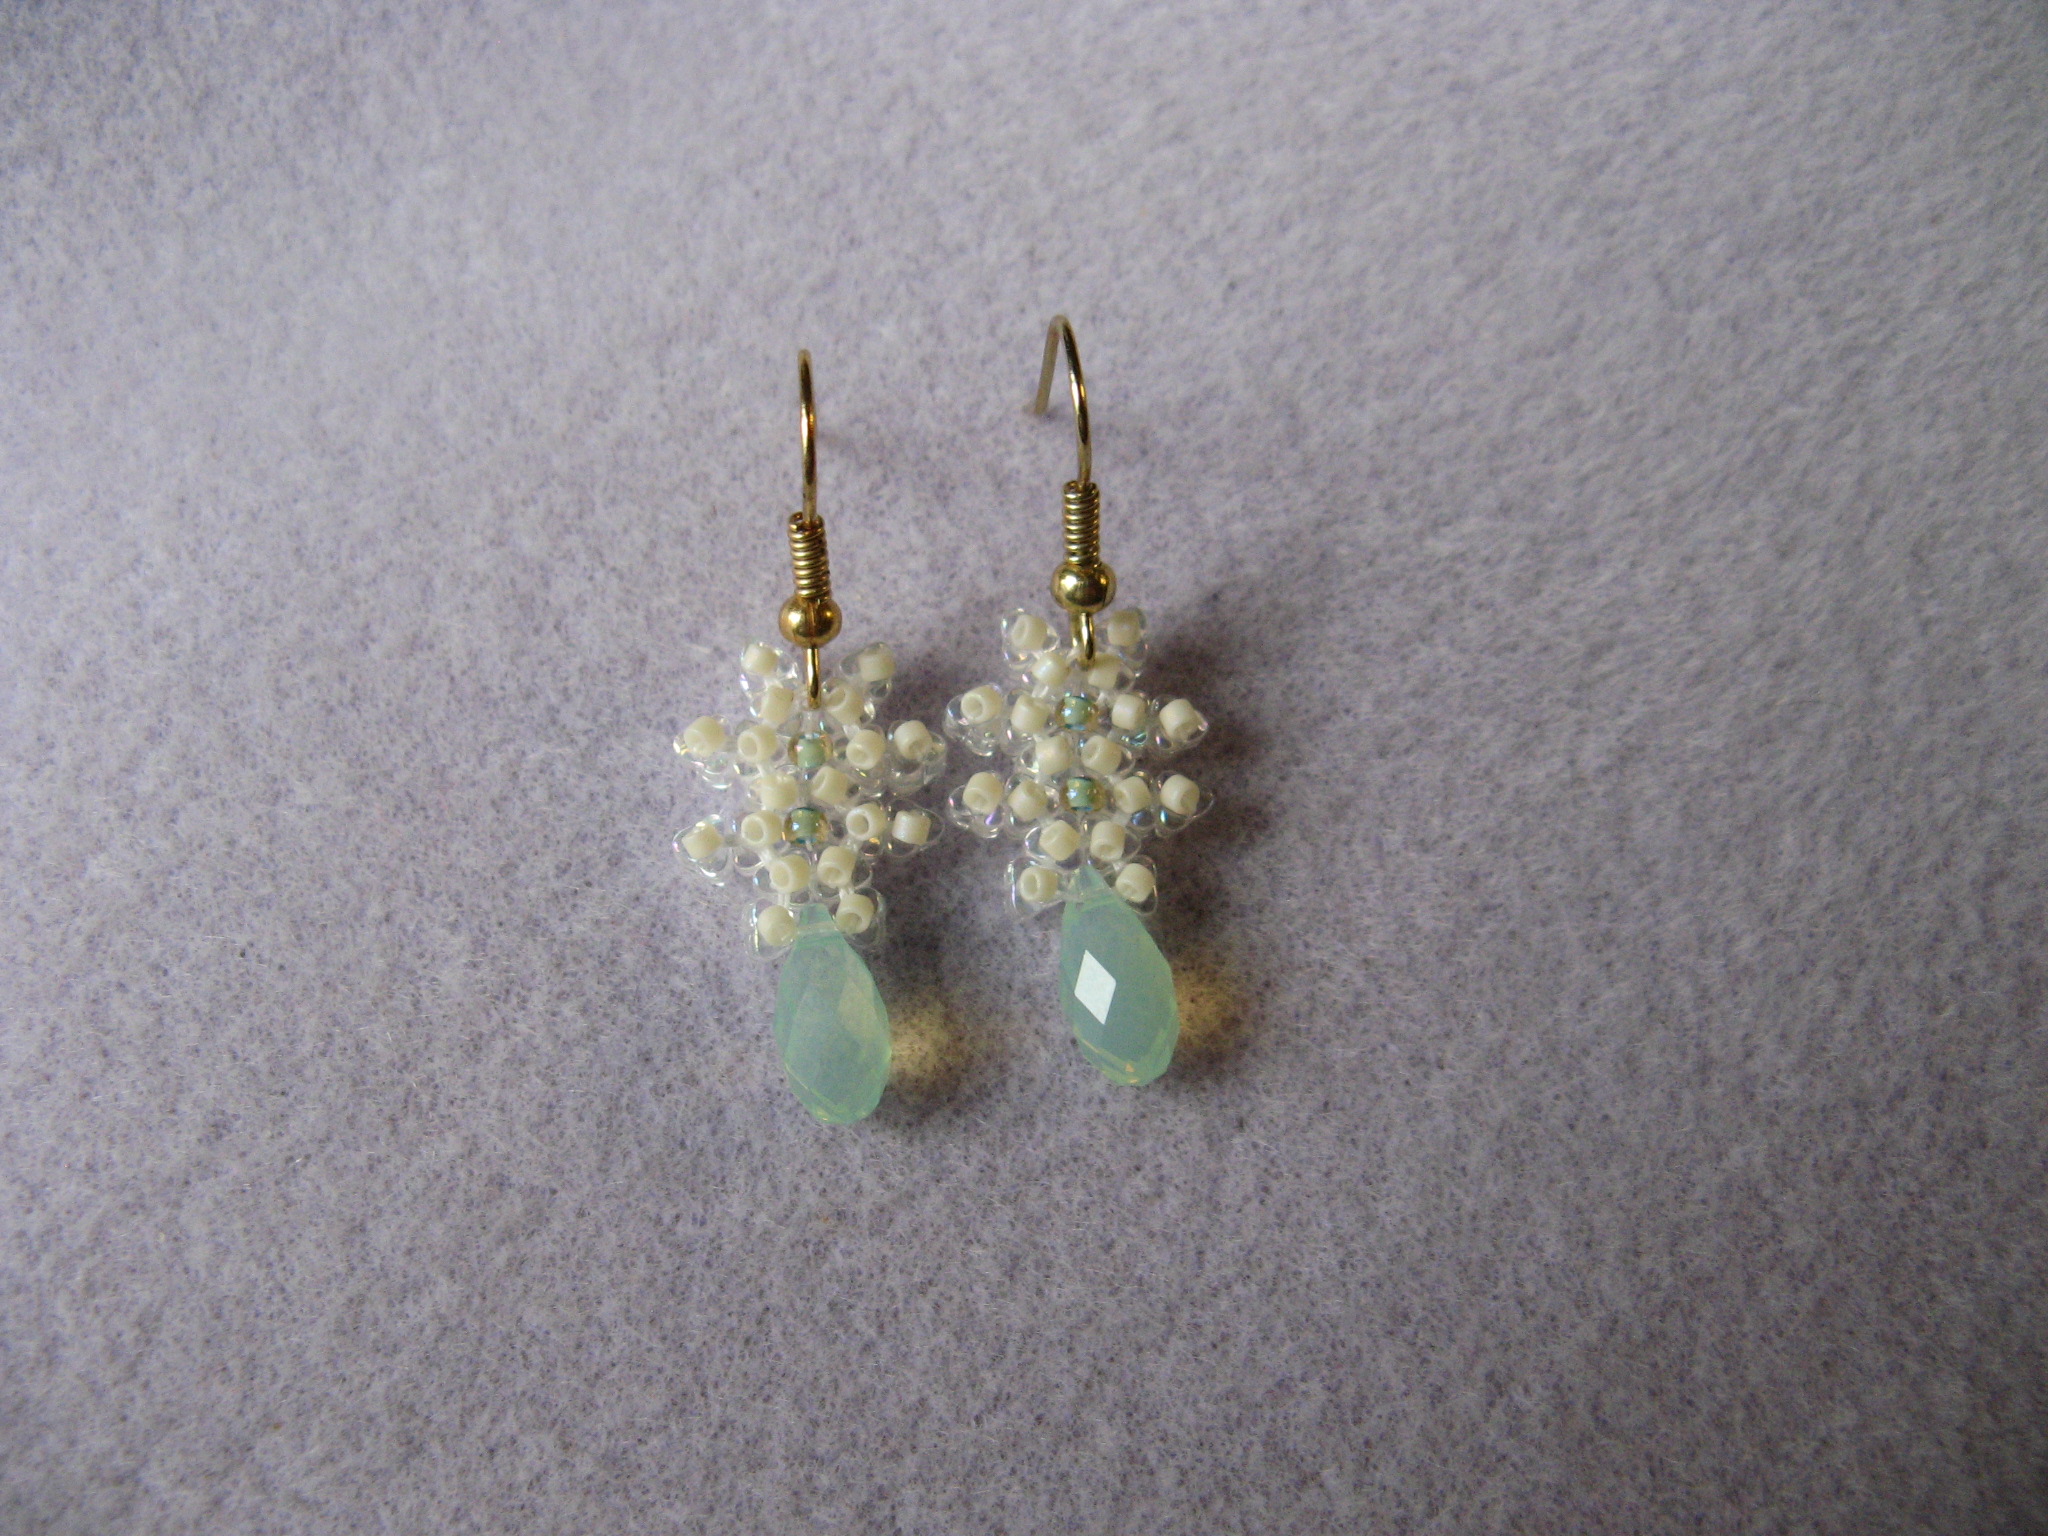
I then stitched a Delica bead to the front of each of the triangles and a Size 11 seed bead to the two centers of the base units. I attached an earring finding to the top and as simple as that the earrings were done.

IMG_9817 IMG_9819 IMG_9847

The Great Gatsby Inspired Bracelet

If you haven’t seen “The Great Gatsby” I highly recommend it. After watching it I actually regretted never having read the book. I was supposed to read it in high school but after reading a page or two I opted to read the cliff notes instead. It’s probably one of the few cliff notes I have ever read as I have always enjoyed reading, but that was just one book that was impossible for me to get in to. I thought for a second of reading it now but that regret soon subsided as my previous sentiments were validated by many… the book is boring. Baz Luhrmann apparently took some liberties in adapting the book to the big screen.

The movie has inspired a new wave of fashion trends especially in jewelry. Just check out the new collection from Tiffany’s, which is gorgeous but out of most peoples price range. I suppose jewelry made by the company 1928 Jewelry will be experiencing a surge in sales now as it’s a little more affordable. The jewelry from that era was more like pieces of art more than anything else. A friend of mine came across a bracelet/hand ornament on M&JTrimming’s blog that was inspired by the piece Carey Mulligan’s character Daisy wore in the movie that she liked and asked me to recreate.

The supplies: a yard of pearl rosary chain, a pearl and rhinestone applique and a clasp.

IMG_0408

To begin I made the actual bracelet part first. Since the pearl rosary chain is connected by interlocking eye hooks I was able to connect the chain to the clasp without the use of jump rings which gave it a much cleaner look.

IMG_0416

Next, I used fireline to sew one section of pearl chain to each end of the applique.

IMG_0417

I then made a ring with some of the chain and attached it to one end of the applique.

IMG_0419

I then attached the other end to the bracelet and voila, as simple as that a Great Gatsby inspired bracelet.

IMG_0487 IMG_0441

Spiraling Pearls, Crystals and Seed Beads

I currently subscribe to Bead & Button  magazine and while I normally rip out a few patterns from each issue that I want to make, I usually find that there is one pattern that I am eager to try over the other ones. From the most current issue that pattern was Sea Strand by Sue Neel. The pictures made it look really intricate and complicated but in actuality it’s quite simple to follow.

From the title of my post you can guess what components I used: 4mm & 12mm glass pearls, 6mm crystal rondelles and Size 11 seed beads.

IMG_0187

To start the necklace I strung alternating rondelles and 12mm pearls on a yard of 6lb fireline – beginning and ending with a rondelle – for my desired length. I then centered the beads on the thread so the two tails would be the same length. I sewed each tail through its corresponding rondelle once so they could essentially be stop beads as I continued to work on the piece.

IMG_0190

Next up, using about a yard and a half of thread I sewed twelve seed beads around alternating sides of the pearls by sewing through the rondelles. Once again I sewed the tails of the thread – which should be the same length as the original thread – through their respective rondelle.

IMG_0192 IMG_0193

And for the final strand I used another yard and a half of thread to sew three 4mm pearls and additional seed beads onto the piece. As with before, the tails of this thread should be the same length as the original thread and sewn through their respective rondelle. To end the necklace I used one thread from each end to connect the clasp – I used the original thread – and I ended the other two threads by weaving them through the path of the clasp and ending them in the necklace.

IMG_0194  IMG_0197

While a bracelet wasn’t part of the pattern I saw in the article, I decided to make one after completing the necklace. I followed the exact same pattern and technique as the necklace just for a shorter length.

IMG_0198

And finally I made the earrings that were included in the pattern to complete the set.

IMG_0199 IMG_0201

IMG_0217

Two Bracelets and a Ring

I decided to take a break from my knitting projects last week to work on some jewelry pieces that I have wanted to get done. In all honesty my arms and wrists needed a break from all of the shoveling I did from when I was snowed-in.

Up first was something super simple… Yarn Wrapped Bangle. I got the idea from a craft email I receive every day from Martha Stewart’s website. All I needed to complete this project was yarn (you can also use ribbon), tacky glue and a plastic bangle. It doesn’t matter the color or pattern of the bangle since you will be covering it up. The one I used had sequins on the inside and only cost $2… You can’t beat that!

IMG_9460

To start off I wound a few yards of yarn into small ball and glued one end to the inside of the bangle. I let the glue dry completely and then started wrapping the yarn tightly around the bangle. Every so often I stopped to make sure there weren’t any spaces between the yarn and around the midway point I added some glue to secure the yarn in place.

IMG_9466 IMG_9478

It didn’t take long before I had a completely new bangle.

IMG_9482

After that was done I moved on to a Cabochon and Seed Bead Ring. I got the idea for this piece from the February 2013 issue of Bead & Button Magazine in an article called Ring Tones. I used two different color size 15 seed beads, an oval cabochon, an adjustable ring and prestiffened felt for my beading foundation. I was able to find the ring and felt at my local Michael’s store and I ordered an assortment of cabochons from Fire Mountain Gems (www.firemountaingems.com) for under $3 so I have plenty more to use if I want to make more rings or pendants and such. As for the size 15 seed beads, I had one of the colors and then took advantage of a sale at Beada Beada (www.beadabeada.com) and ordered an assortment of colors that I normally wouldn’t pick just to have a nice assortment for future projects.

IMG_9472

To start off I cut a piece of the felt to fit into the bezel of the ring. While the directions called for using two or more pieces of foundation I opted to use only one piece since the ring I was using had a very shallow well.

IMG_9474

Next up, I glued the cabochon to the center of the felt. After it completely dried I began to stitch the seed beads around the cabochon using the beaded backstitch. I started with a round of yellow and then added a second round of yellow on top of that round so that those seed beads would come up the sides of the cabochon. I then stitched two rounds of turquoise seed beads around the yellow.

IMG_9488

It wasn’t long before I was done and my embroidered piece was ready to be adhered to the ring. While I did have jewelry glue (which I used to glue the cabochon onto the felt) I opted to use Krazy Glue to adhere the entire piece to the ring so I could be sure it would stay put.

IMG_9492

I was really happy with how it came out and I can’t wait to wear it. And now that I know how to embroider on felt I am looking forward to making other pieces of jewelry.

IMG_9502

And finally the last piece I made was a bracelet that I also came across in the February 2013 issue of Bead & Button Magazine called Crystal Bridges. The bracelet is made with 12mm bugle beads, 4mm pearls, 4mm bicone crystals, 3mm fringe drops, size 11 & size 15 seed beads, 4x1mm daisy spacers and a two-strand slide clasp. While the article did have suggested colors for the bracelet I opted to go a different route and made my bracelet in shades of blue. I had Swarovski Crystal bicones in my beading stash that I wanted to use so I based my other colors off of them.

IMG_9513

To start I created the base of the bracelet by using the crossweave technique to add the bugles and pearls. On a comfortable length of Fireline I threaded a size #12 beading needle onto each end and then centered a bugle bead onto the thread. Then with each of the needles I picked up a pearl and with one of the needles a bugle bead and then crossed the other needle through it. In total I added 32 bugles for the bracelet to be approximately 7 1/2 inches. Just to note, if the size needs to be adjusted the number of bugles beads on the base must be an even number for the top embellishment to work.

IMG_9515

Following that I added the top embellishment. I once again used the crossweave technique to add the pearls, size 15 seeds beads, bicones   and daisy spacers.

IMG_9516 IMG_9519

Once that was done it was time to add the clasp. This was a little backwards to me since I am accustomed to adding a clasp to piece of jewelry only once it’s completely done. Once again I used the crossweave technique to add size 15 seed beads and a bicone crystal to attach the clasp to the bracelet. In all honesty the bracelet could be worn like this and you could forgo the side embellishment, but, if you want more of a unique piece I think it’s necessary to keep going – which is what I did.

IMG_9530

To add the side embellishment – which consists of the size 11 & 15 seed beads and the fringe beads – I worked in a simple bead weaving technique.   To start I added one size 11 seeds between each of the pearls.

IMG_9531 IMG_9534

I then added five size 15 seed beads by stitching my thread through the size 11 seed beads I had just added, which basically left the size 15   seed beads arching around the pearls. I was concerned at this point because the size 15 seed beads weren’t sitting flat. I kept playing with the thread   by pulling it snug and then loosening it in an attempt to have them fall flat, but, it didn’t work. Luckily the final step rectified the problem.

IMG_9535

Finally, I added the fringe drop beads by sewing through the three middle size 15 seed beads from the five I added in the previous step.   Basically the fringe drops sat next to the size 11 seed beads. I ended my thread and my bracelet was ready to wear. Unfortunately I’ll   have to wait a while to wear it since the colors are more for Spring/Summer.

IMG_9549 IMG_9550

The Runaround Knit Cowl

It’s my first project of the New Year and it’s a simple and versatile one! It’s called The Runaround Cowl and I came across it on a Lion Brand Yarn Facebook post. Originally it came from a blog known as Smashed Peas and Carrots and can be found here: Smashed Peas and Carrots: The Runaround Cowl

As for supplies, all you need is one skein of Lion Brand Homespun Yarn and Size 15 knitting needles. While Homespun yarn does come in an array of colors I am not too fond of the heather and striping colors so I chose to stick with something neutral – Cream.

IMG_9209

At first I was a bit unsure of how the end product was going to look. I started and wasn’t too happy with how it was working up and it took some getting used to working with the yarn. Sometimes my tension is a bit too tight and that can make working with this yarn a little frustrating.

IMG_9216

Unfortunately once I got on a roll I somehow ended up with an extra stitch and instead of trying to correct the problem I opted to just start over. This is one of the reasons I prefer crocheting over knitting, it’s much easier to correct any errors. The second time around I was much happier with how it was looking and after a few hours of knitting I reached my desired length of 55 inches – I decided to make mine a few inches longer than the directions said. I will also note that while the directions state to bind off in pattern I decided to bind off by knitting my last row, I just find it easier to do that and I figured it wouldn’t alter the look of the cowl since I was going to stitch the two ends together.

I then weaved in the ends of my yarn, created a twist and stitched the ends together. And voila I had a new cowl! Once the weather gets a little warmer I’m sure this will become one of my go-to scarves.

IMG_9220 IMG_9234 IMG_9236

Runaround Cowl

Courtesy: www.smashedpeasandcarrots.blogspot.com

Cast of 25 stitches

Row 1: *K1 P1, Repeat from * across, K1

Continue with this pattern until cowl measures 50 inches or your desired length.

Bind off loosely in pattern.

Weave in tails.

Sew short ends together with a yarn needle making sure that you have made one twist in the cowl before sewing ends.

Knitting for the Holidays

I wasn’t intending on knitting or crocheting any Christmas gifts this year except for the toddler hat and scarf set I had finished a month or two ago for a friend’s daughter, but, when another friend sent me a pic of cowl neck scarf she liked with button closures I decided that I would have time to finish this one item. Every year I find myself racing to finish things a day or two before Christmas because at times I can be such a procrastinator and as we all know the Christmas holiday just sort of sneaks up on you regardless of how early you start your shopping and/or crafting. There was actually one year that I was up until 2am Christmas morning finishing up scarves… Not fun!

While I did start this project about two weeks prior to the holiday I knew I would be able to get it done since I opted to use Lion Brand Wool-Ease Thick & Quick Yarn. This is probably my favorite yarn to knit with since as its name suggests it does work up quite quickly. I did crochet a scarf with it once and for me personally I find it too thick to crochet with. I opted to use neutral colors – Black and Grey Marble – this way the scarf could match with anything. As for the buttons, I spent a good amount of time at my local JoAnn’s trying to find the right ones. I really wanted wooden ones but, the only wooden cylinder shaped ones were on the small side so I decided to go with simple black ones.

IMG_8916

As for a pattern, I sort of followed one that I found on the Lion Brand Yarn website – the Buttoned Cowl – but, modified it a bit this way my finished product would be bulkier. Essentially I just casted on more stitches than the original pattern called for, forty-one vs. twenty-seven. Since the pattern just called for a straightforward garter stitch – knitting every row – I knew this was going to be a piece of cake. I really wanted to knit this in a rib pattern, but, was having a hard time adjusting the pattern into one that would still incorporate the stitches to create the buttonholes. Speaking of buttonholes, it took a few tries before I was able to get them right. I kept missing one and would end up with only three as opposed to four. After about five tries though I finally got it right and I was on my way. If by any chance you are wondering, I decided to start with the grey marble yarn as opposed to the black yarn this way the black buttons would stand out on it.

IMG_8930

I wanted the finished cowl to be approximately twenty-four inches so I worked in garter stitch for about twelve inches, which equates to about fifty-eight rows and then I switched to the black yarn.

IMG_8978

After knitting another fifty-eight rows with the black yarn and binding off this is what I ended up with. Admittedly it doesn’t look like much and I was a little concerned that I wasn’t going to be happy with it.

IMG_9009

But, once I sewed the two buttons on – for buttonholes one and three – and tried it on I was happy with how it looked. And while this picture makes it seem like it’s on the small side it actually has a considerable amount of stretch to it.

IMG_9011

And although my mannequin isn’t doing it justice, its intended recipient was very happy with it and it fit her perfectly.

IMG_9022

And finally, here’s a pic of the toddler-sized hat and scarf set I made. She was ecstatic with it, especially since it matched her new pink coat so well. Making a pom-pom and adding fringe to a scarf was a first for me with this set but it definitely added that fun factor that little kids accessories always need.

IMG_9153

Knitted Flower Headband

I’ve seen knitted headbands practically everywhere this season that I got inspired to make one.

While I do have a decent stash of leftover yarn from previous projects that would have sufficed for this small one, I ended up buying a new skein of yarn after coming across it on sale at my local Michaels store. I am partial to most shades of blue and this basic navy blue yarn from Loops & Threads Charisma caught my eye. The one downfall about this yarn is that it fuzzes a great deal so I doubt I’ll be using it again.

IMG_8826

I opted to semi-follow the Seed Stitch Headband pattern from Lion Brand modifying it a bit to get my desired length and width. Using size 9 knitting needles I casted on 13 stitches (which gave me a width of 4 1/4 inches) and then simply followed a pattern of Slip 1, *P1, K1 (repeat from * to end of row) and continuing it for each row until I reached a length of 20 inches.

IMG_8858
I decided I wanted to spruce up this basic headband so I crocheted a simple flower to attach to it. Once again I followed a Lion Brand Yarn pattern – the Six-Petal Flower Motif – using Red Heart yarn that I had leftover from my Easy Slouchy Beret Hat. This actually wasn’t my first yarn choice to make the flower. I wanted to incorporate a sparkle yarn with the navy blue yarn but unfortunately the navy yarn was just too thick to work with.
IMG_8859
Now that I had all of my pieces it was time to put this headband together.
IMG_8856
I first stitched the two ends of the headband together and then attached the flower and was quite pleased with the final product. I’m sure I’ll make a few more of these, if anything, just for fun.
IMG_8874

Gearing Up For Winter

One of my favorite things about the temperatures dropping is the opportunity to wear scarves. I’ve always viewed scarves as shoes. Shoes can make or break an outfit and a cool scarf can dress up even the most basic black coat. Once I learned how to knit and crochet scarves were the one thing I was looking forward to making – they are also the easiest things to make when you are just starting out. While I am usually partial to working with Lion Brand Yarn I came across yarn from Red Heart that I couldn’t resist.
Using Red Heart’s Boutique Magical Yarn in Wizard – which is actually four yarns in one – I created a scarf following a pattern called Spectrum. While the pattern said that only one skein of yarn was necessary to complete the scarf I actually used half of a second skein to get my desired length. One thing I learned quickly while using this yarn is that one section of it is not meant to be pulled apart in the unfortunate event you make a mistake while using it. That happened a few times to me and I ended up ripping the yarn when I tried to pull out the stitches – probably why I needed that second skein of yarn.


Next up I followed the Flights of Fancy scarf pattern from Lion Brand Yarn’s website while using Red Heart’s Boutique Midnight Yarn in Whisper – a yarn that has subtle changes in color with a metallic thread weaved throughout it. It’s a quick and simple pattern mainly comprised of double-crochet stitches.


And for the final scarf I used Red Heart’s Boutique Treasure Yarn in Tapestry – which again is a yarn that has subtle gradations in color – and followed the Snapdragon Stitch which is made up of double-crochet stitches and the V-Stitch. This was definitely my favorite of the three scarves because of the yarn color and the overlook look of the stitches. And while most scarves are made with at most two skeins of yarn this one actually took three. I initially only bought two but was lucky enough to find a third one with the same dye lot.


My winter accessory collection wouldn’t be complete without a good hat to keep me warm but I have always avoided wearing one. I have curly hair so hats tend to flatten down my curls… Not good. But, I have wanted to get a slouchy beret which seems to have enough room in it to allow my curls to stay intact. Before buying one though I decided to try and make one. First the search was on to find a pattern that would be simple enough to follow. I haven’t made a hat since I learned how to crochet a few years ago so I figured I should stick with something somewhat simple. With a Google search of “slouchy beret crochet pattern” I found a pattern from Donna Rutledge-Okoro appropriately titled Easy Slouchy Beret Hat Crochet. It was simple to follow and suggested using another Red Heart Yarn, their Supersaver Yarn which comes in a variety of colors but I chose Gray Heather. I was able to work this up in just a few hours and just in time too because it snowed the following day!


Crystals & Wire Pendant

At a shopping event I went to last month I saw a pendant that was made with crystals and wire that instantly caught my eye. While I did like it I thought it was a little too pricey and knew it was something that I could make myself since it was a free-form design that didn’t follow a specific pattern.

I used 22 gauge gold-tone wire (anything thinner would probably not hold up to all of the wrapping and anything thicker may be too difficult to wrap with) and random Swarovski crystals that I had left over from other projects to create my pendant.

Using about a yard length of wire I just haphazardly started wrapping the wire around itself adding crystals wherever I thought necessary. Afterwards I used round-nose pliers to curve any loose portions of the wire to ensure that the pendant would stay together. After about 25 minutes of work I ended up with a unique piece of jewelry.

I’m sure I’ll make a few more of these but I’m thinking I’ll use stones and seed beads next time to create more of a statement piece.

Ruffle Scarves

I came across Red Heart’s Boutique Sashay yarn at my local Michael’s store and thought it looked pretty cool, but, I had no idea how to use it – it’s a fishnet yarn that creates ruffles as you knit or crochet with it. So, after watching a few video tutorials and finding a pattern for a scarf I was ready to try out this new yarn.


With my first attempt at making the scarf I started by casting on 10 stitches, but, as I was going along I soon realized that the scarf was going to be a bit too puffy for my liking.

So, I started over by casting on only 8 stitches and was much happier with the final result. Using only one ball of yarn and knitting every row I ended up with a pretty cool looking scarf.

I’ve actually made a few more in different colors after a friend saw mine and requested I make her some. Once I realized that it was quicker and easier to work with the yarn by winding it into a ball before knitting, making these additional scarves was a piece of cake.

And in turn she showed hers to someone and they requested I make some for them to give as Christmas gifts. So I have a few colors all wound up and ready to be knitted.

%d bloggers like this: