Granny Square Cardigan

While I’ve been crocheting for over 10 years it wasn’t until recently that I learned how to make a granny square. A little backwards since learning how to make a granny square is usually one of the first things you learn to make when you start crocheting. When you are pretty much self-taught though you learn things as you go and as you need. So, why did I finally learn? Well, I was asked if I could make a granny square cardigan and since I am always up for a challenge and I like to learn new things I said yes.

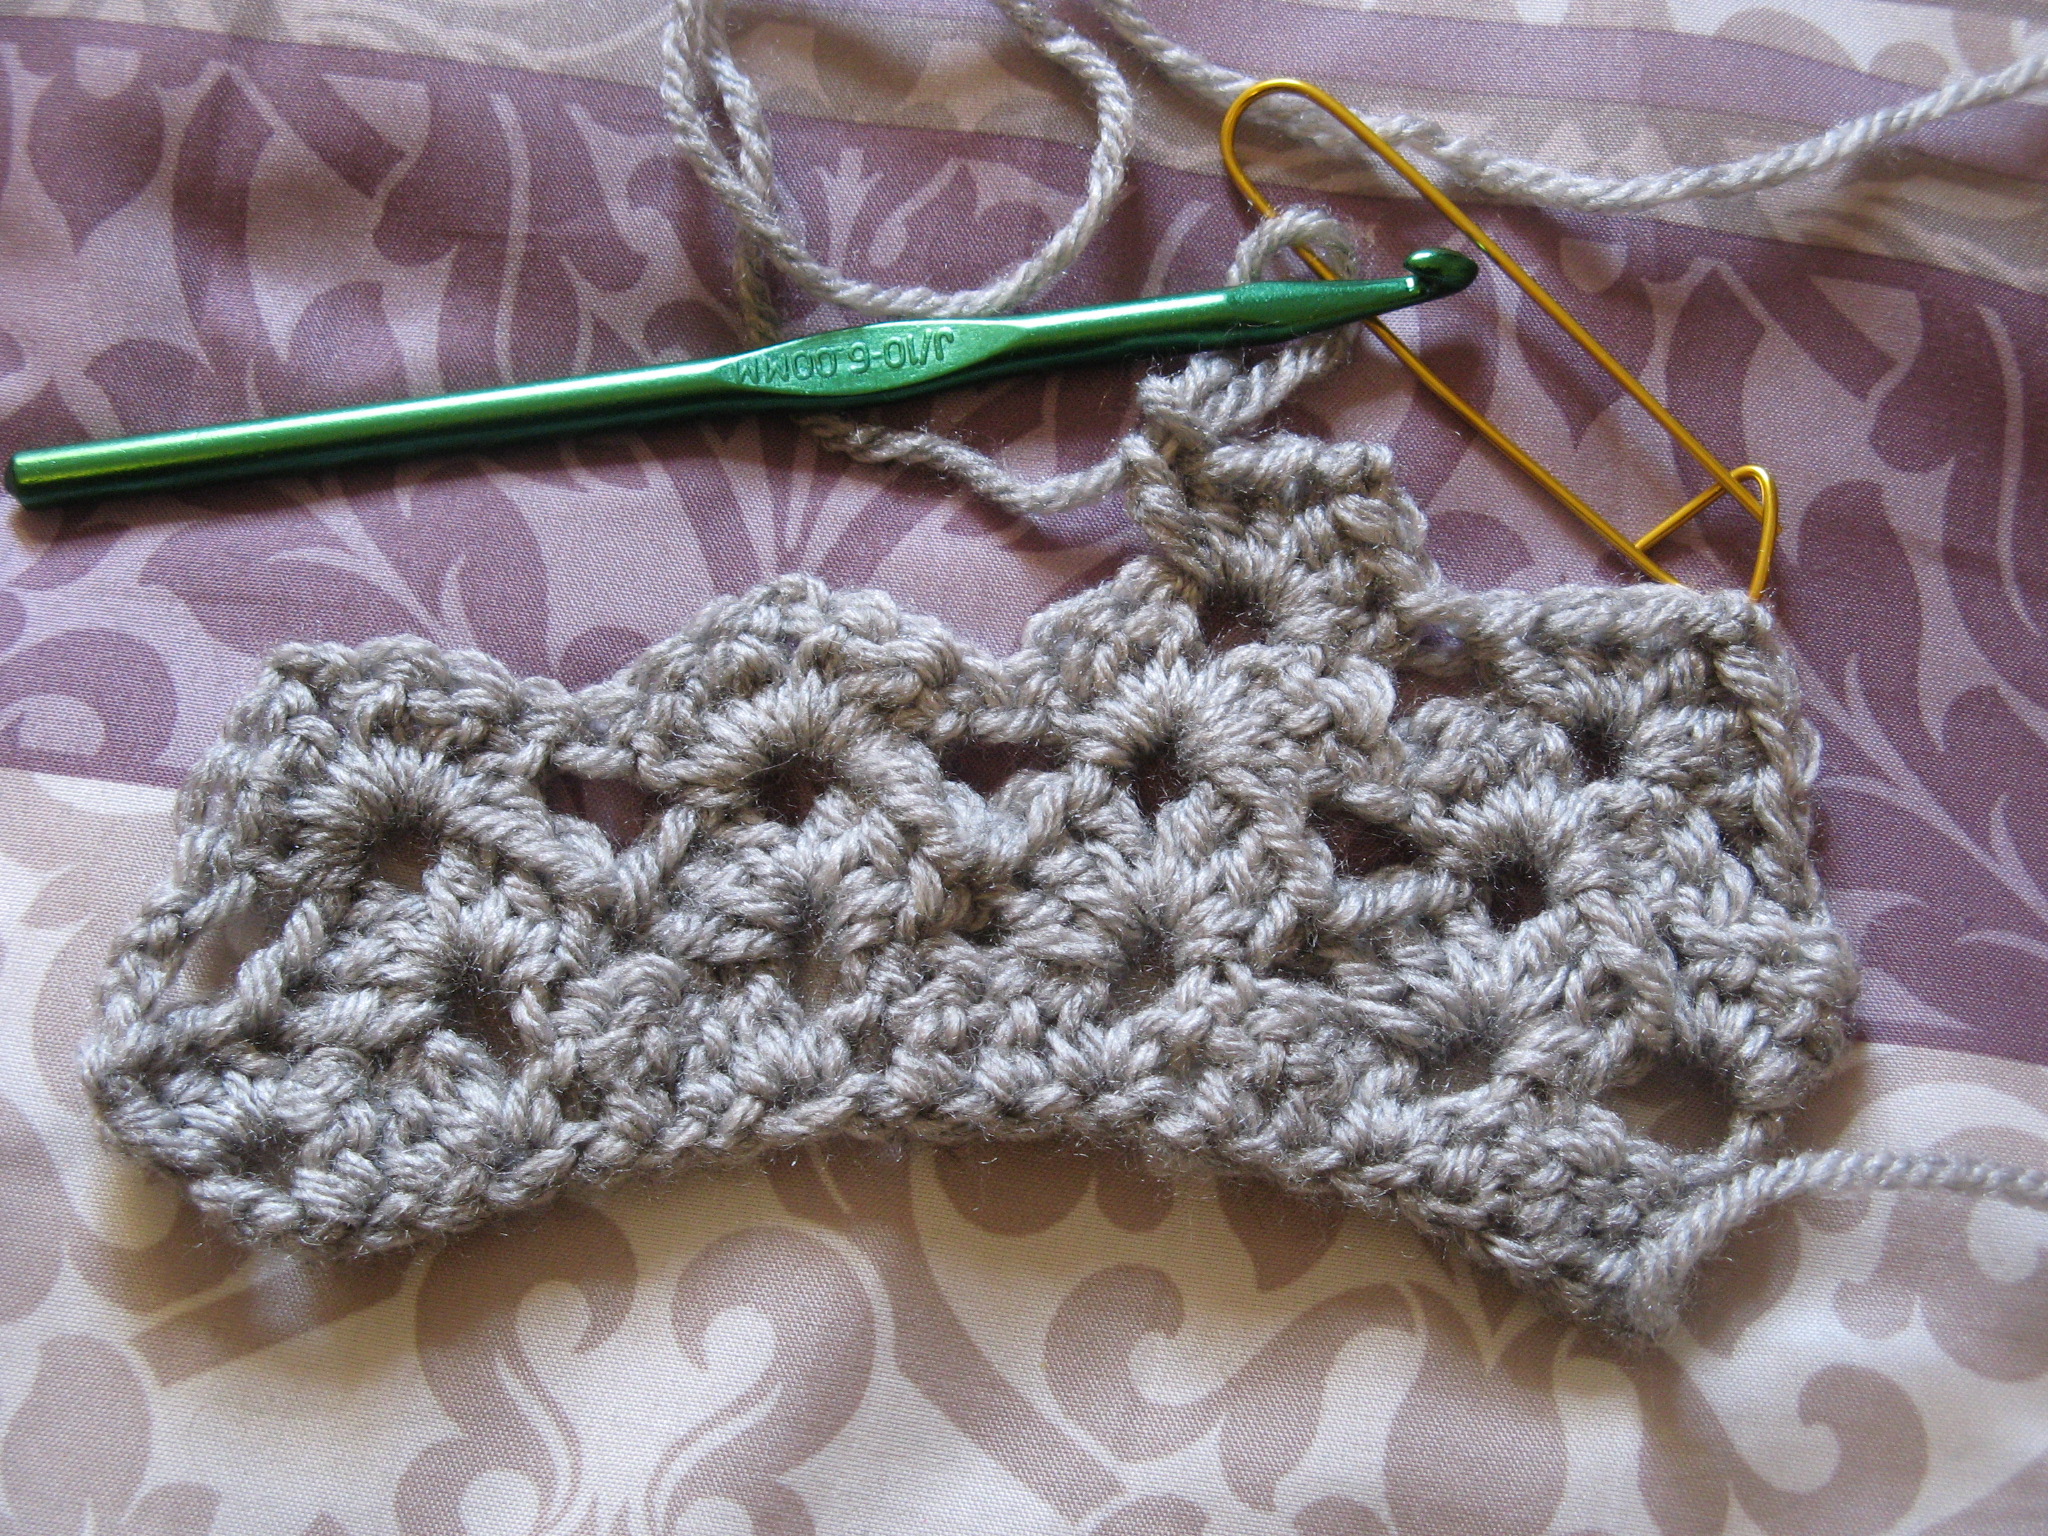
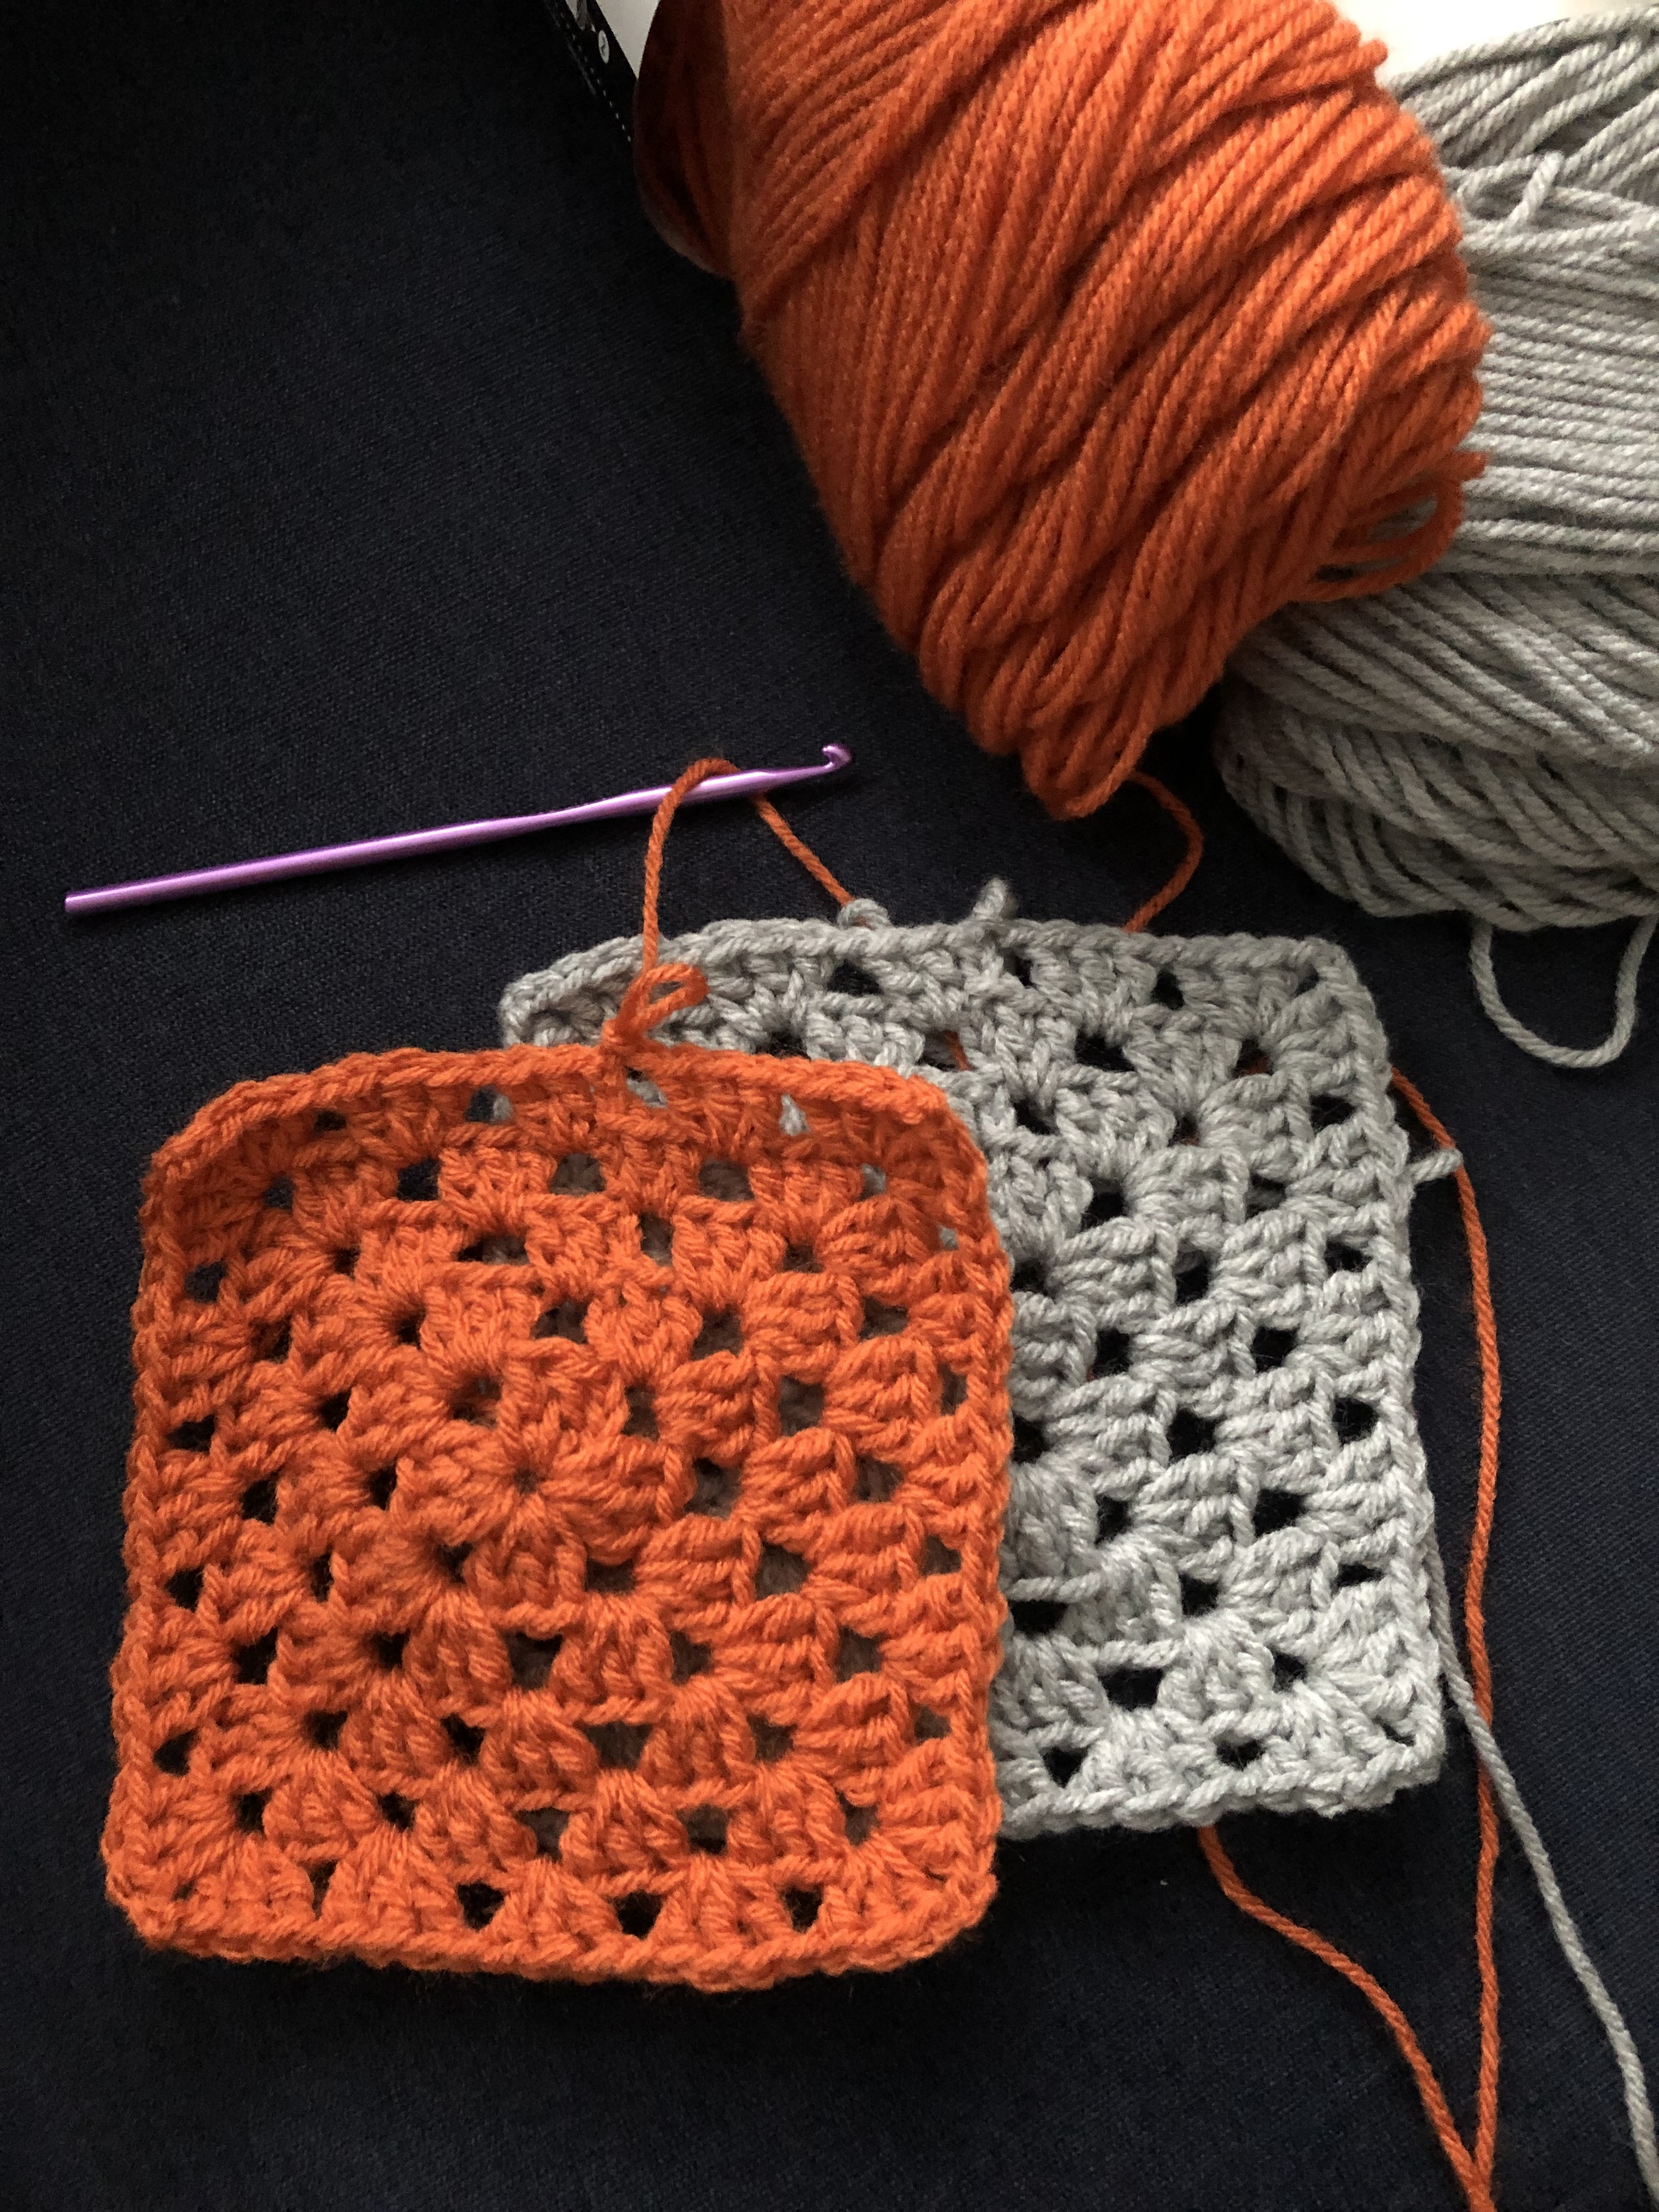
First though I had to learn how to make a granny square. Once I found a pattern that was simple enough to follow I used some extra yarn from my stash to test it out a few times to make sure I had the hang of it.

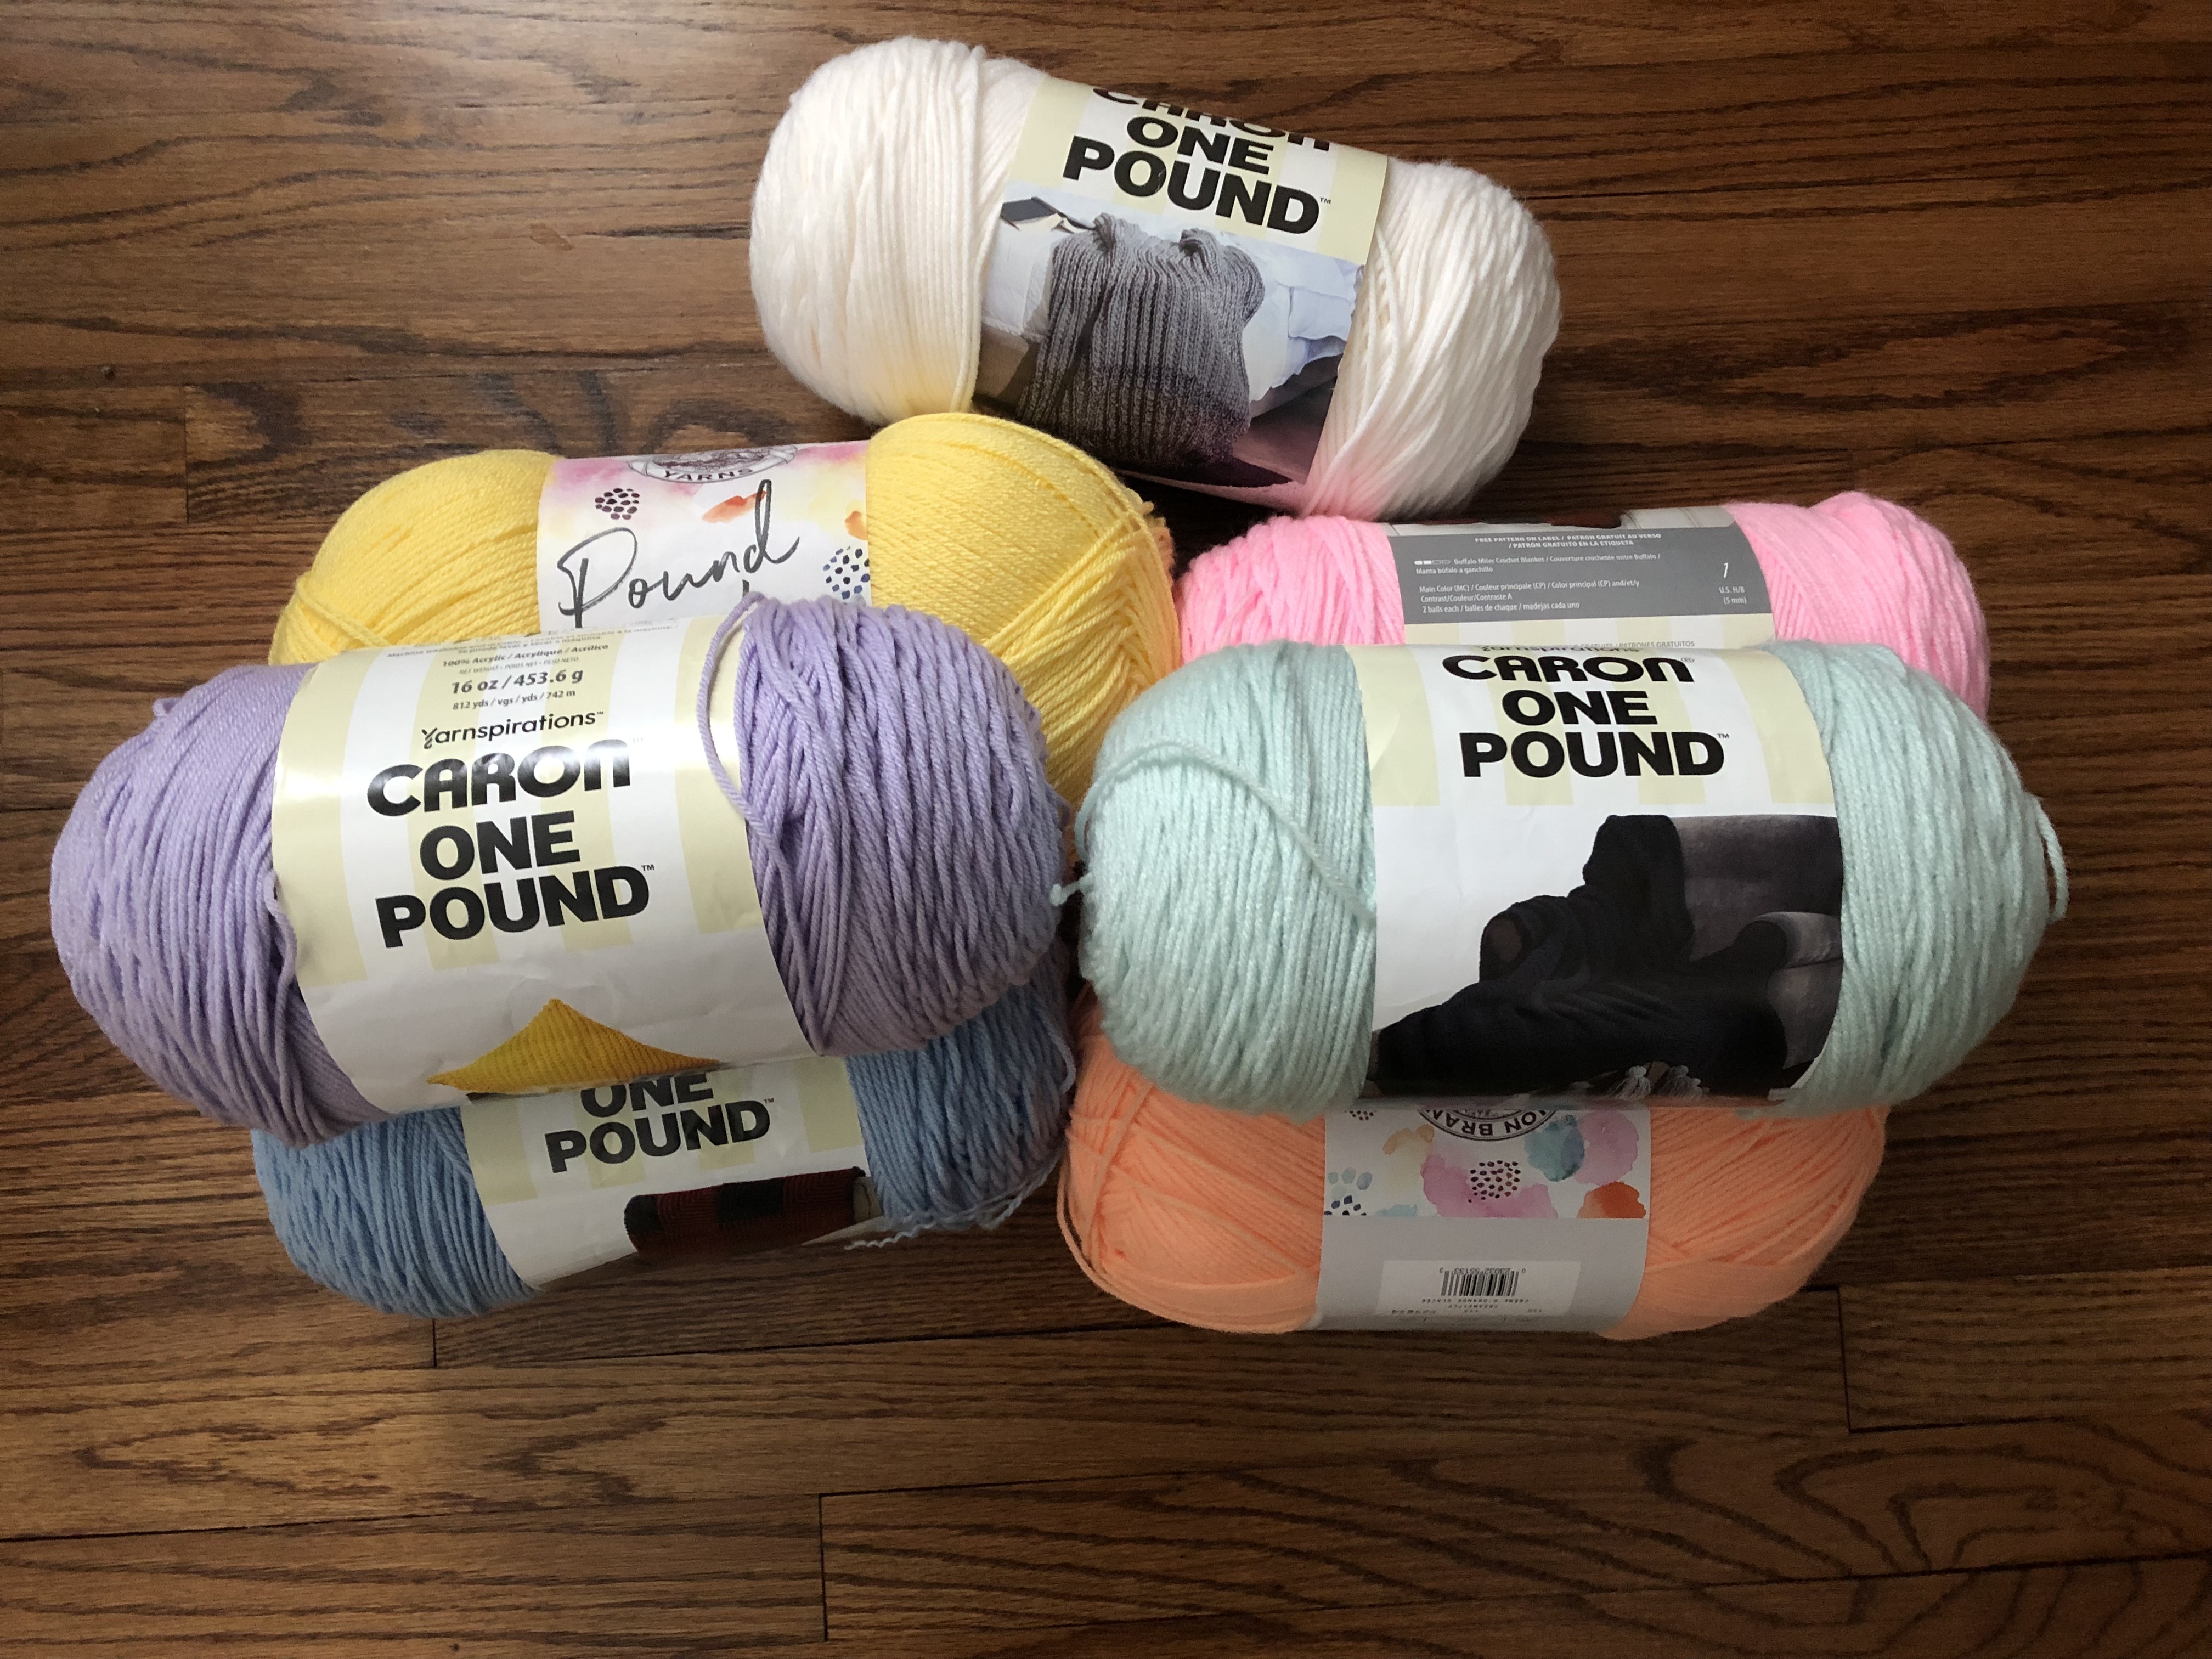
Next, I had to finalize the colors. The person who I was making it for had a color scheme in mind from a cardigan they already saw. They were looking for pastel colors so after going back and forth with different options she decided on the colors below.

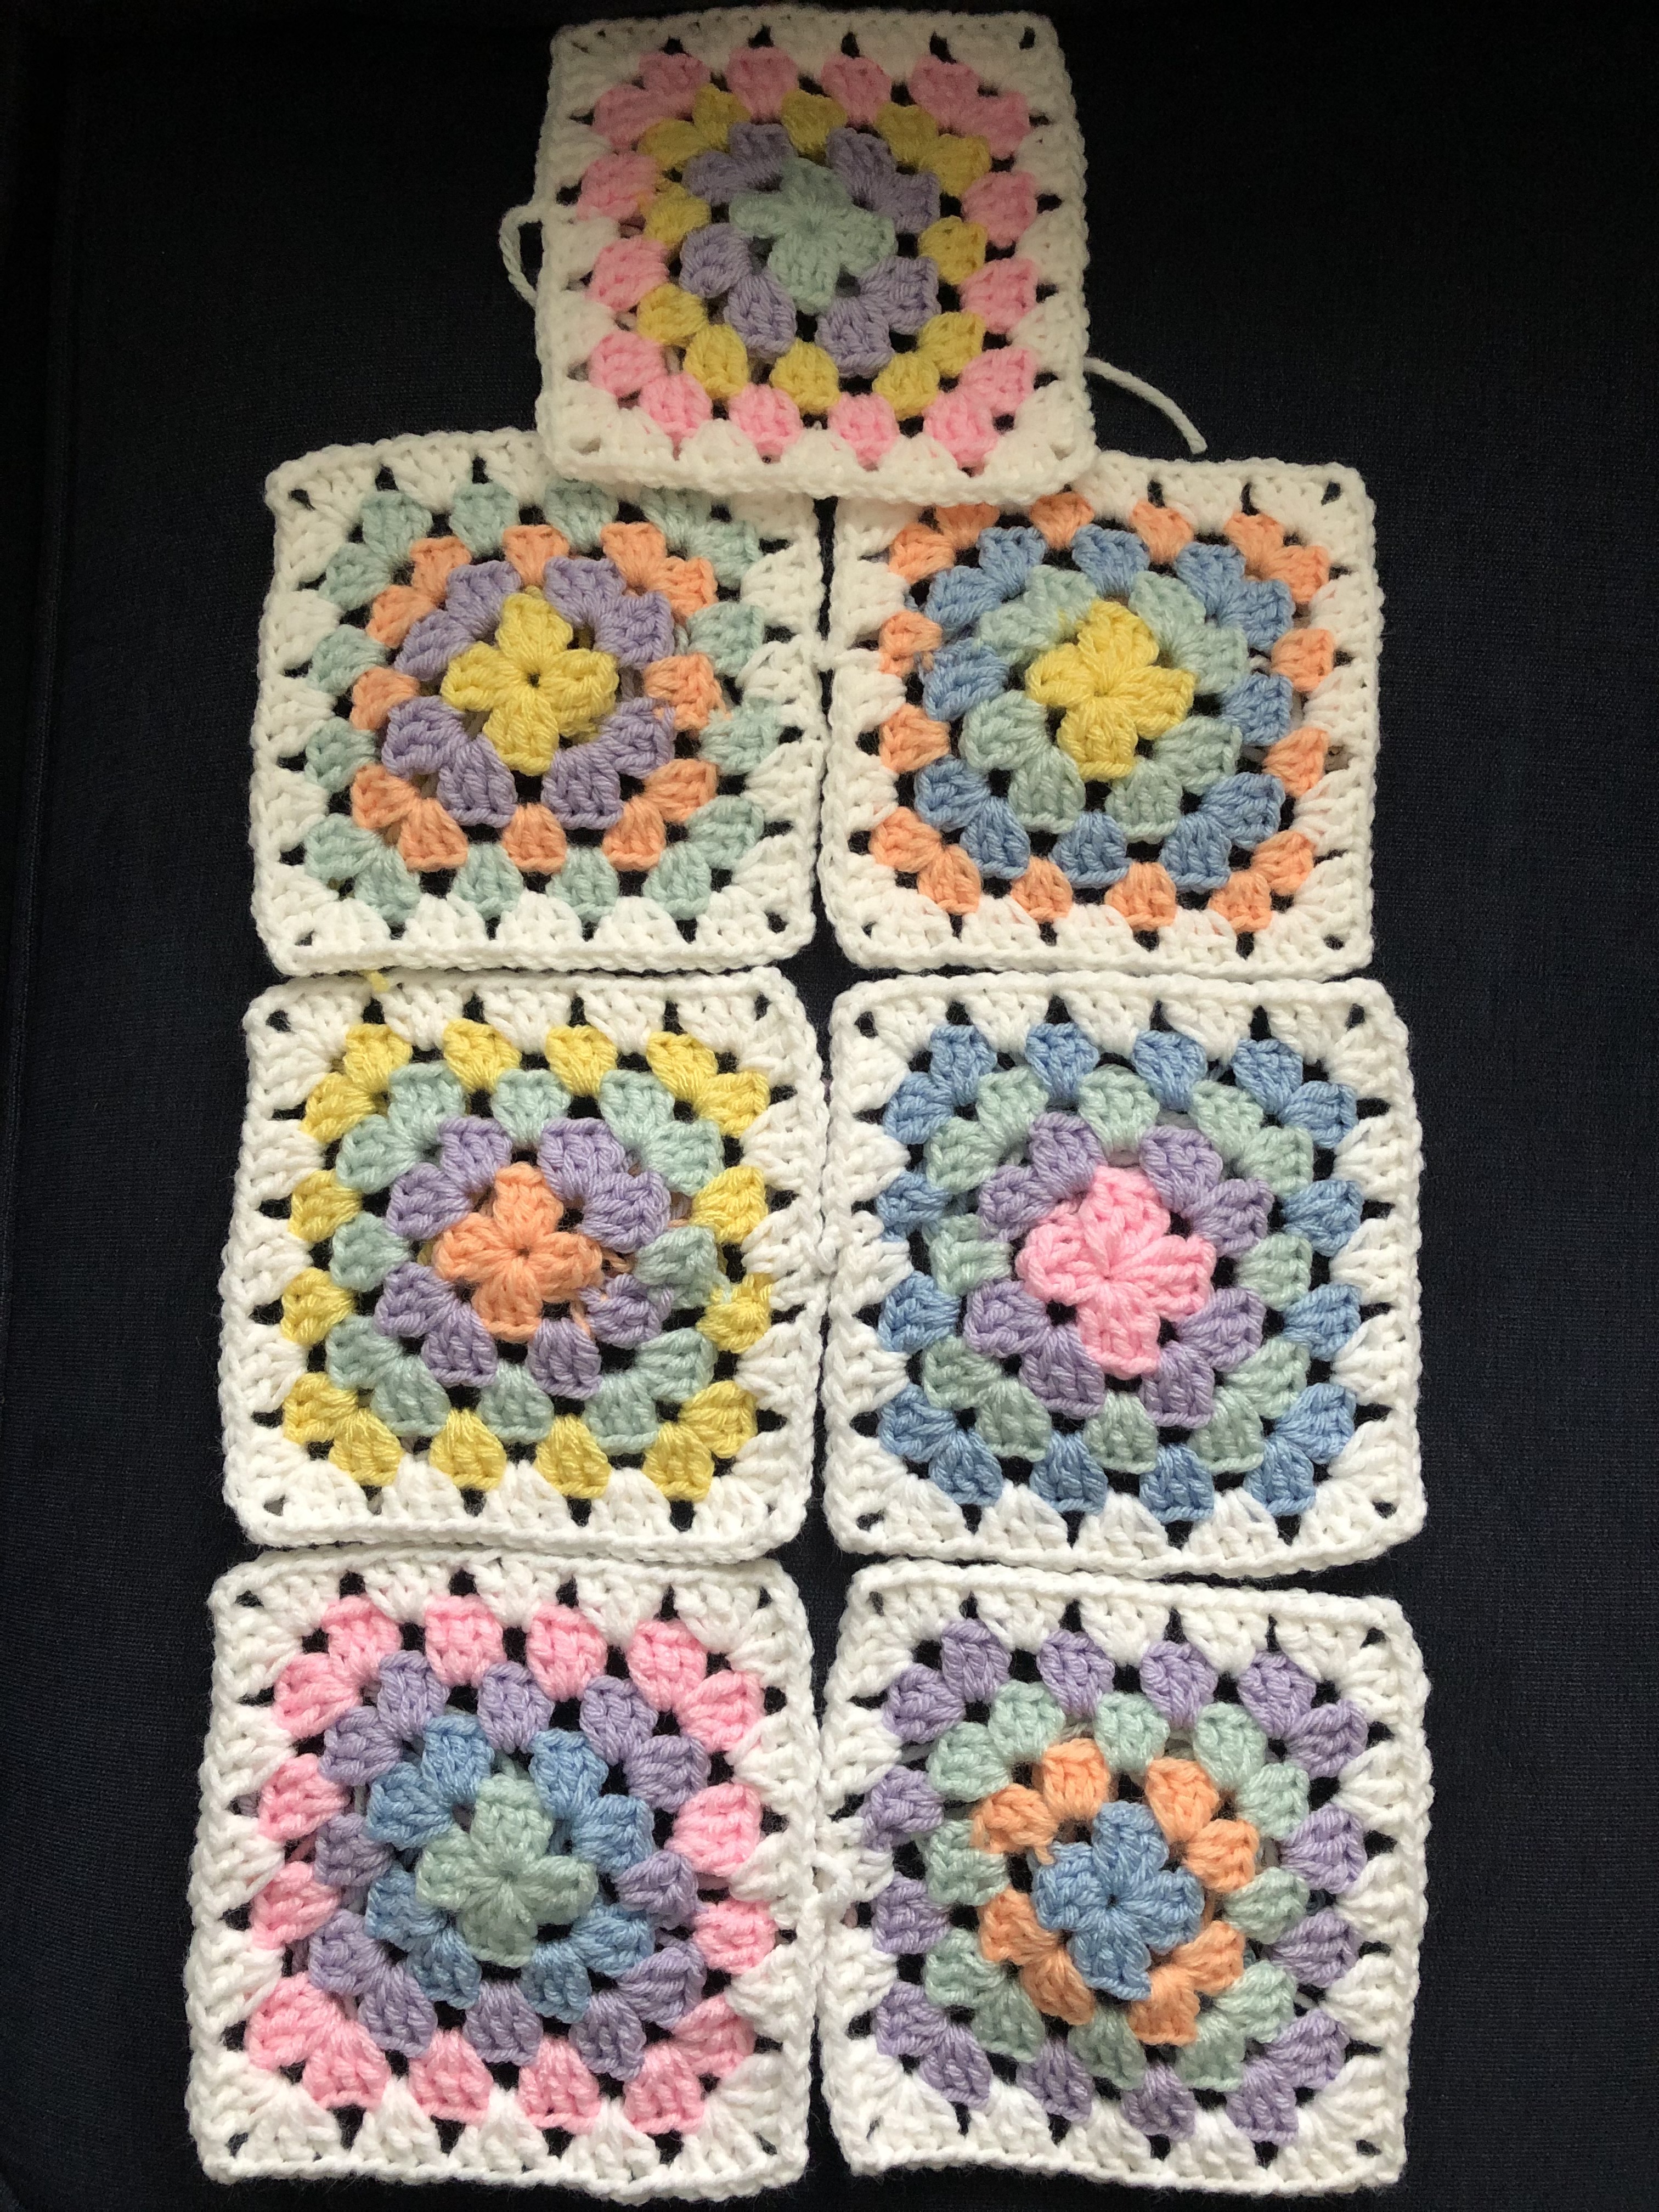
Now, the fun part. I started making the granny squares. I made a few and sent her a picture to make sure she liked the colors once they were all put together.

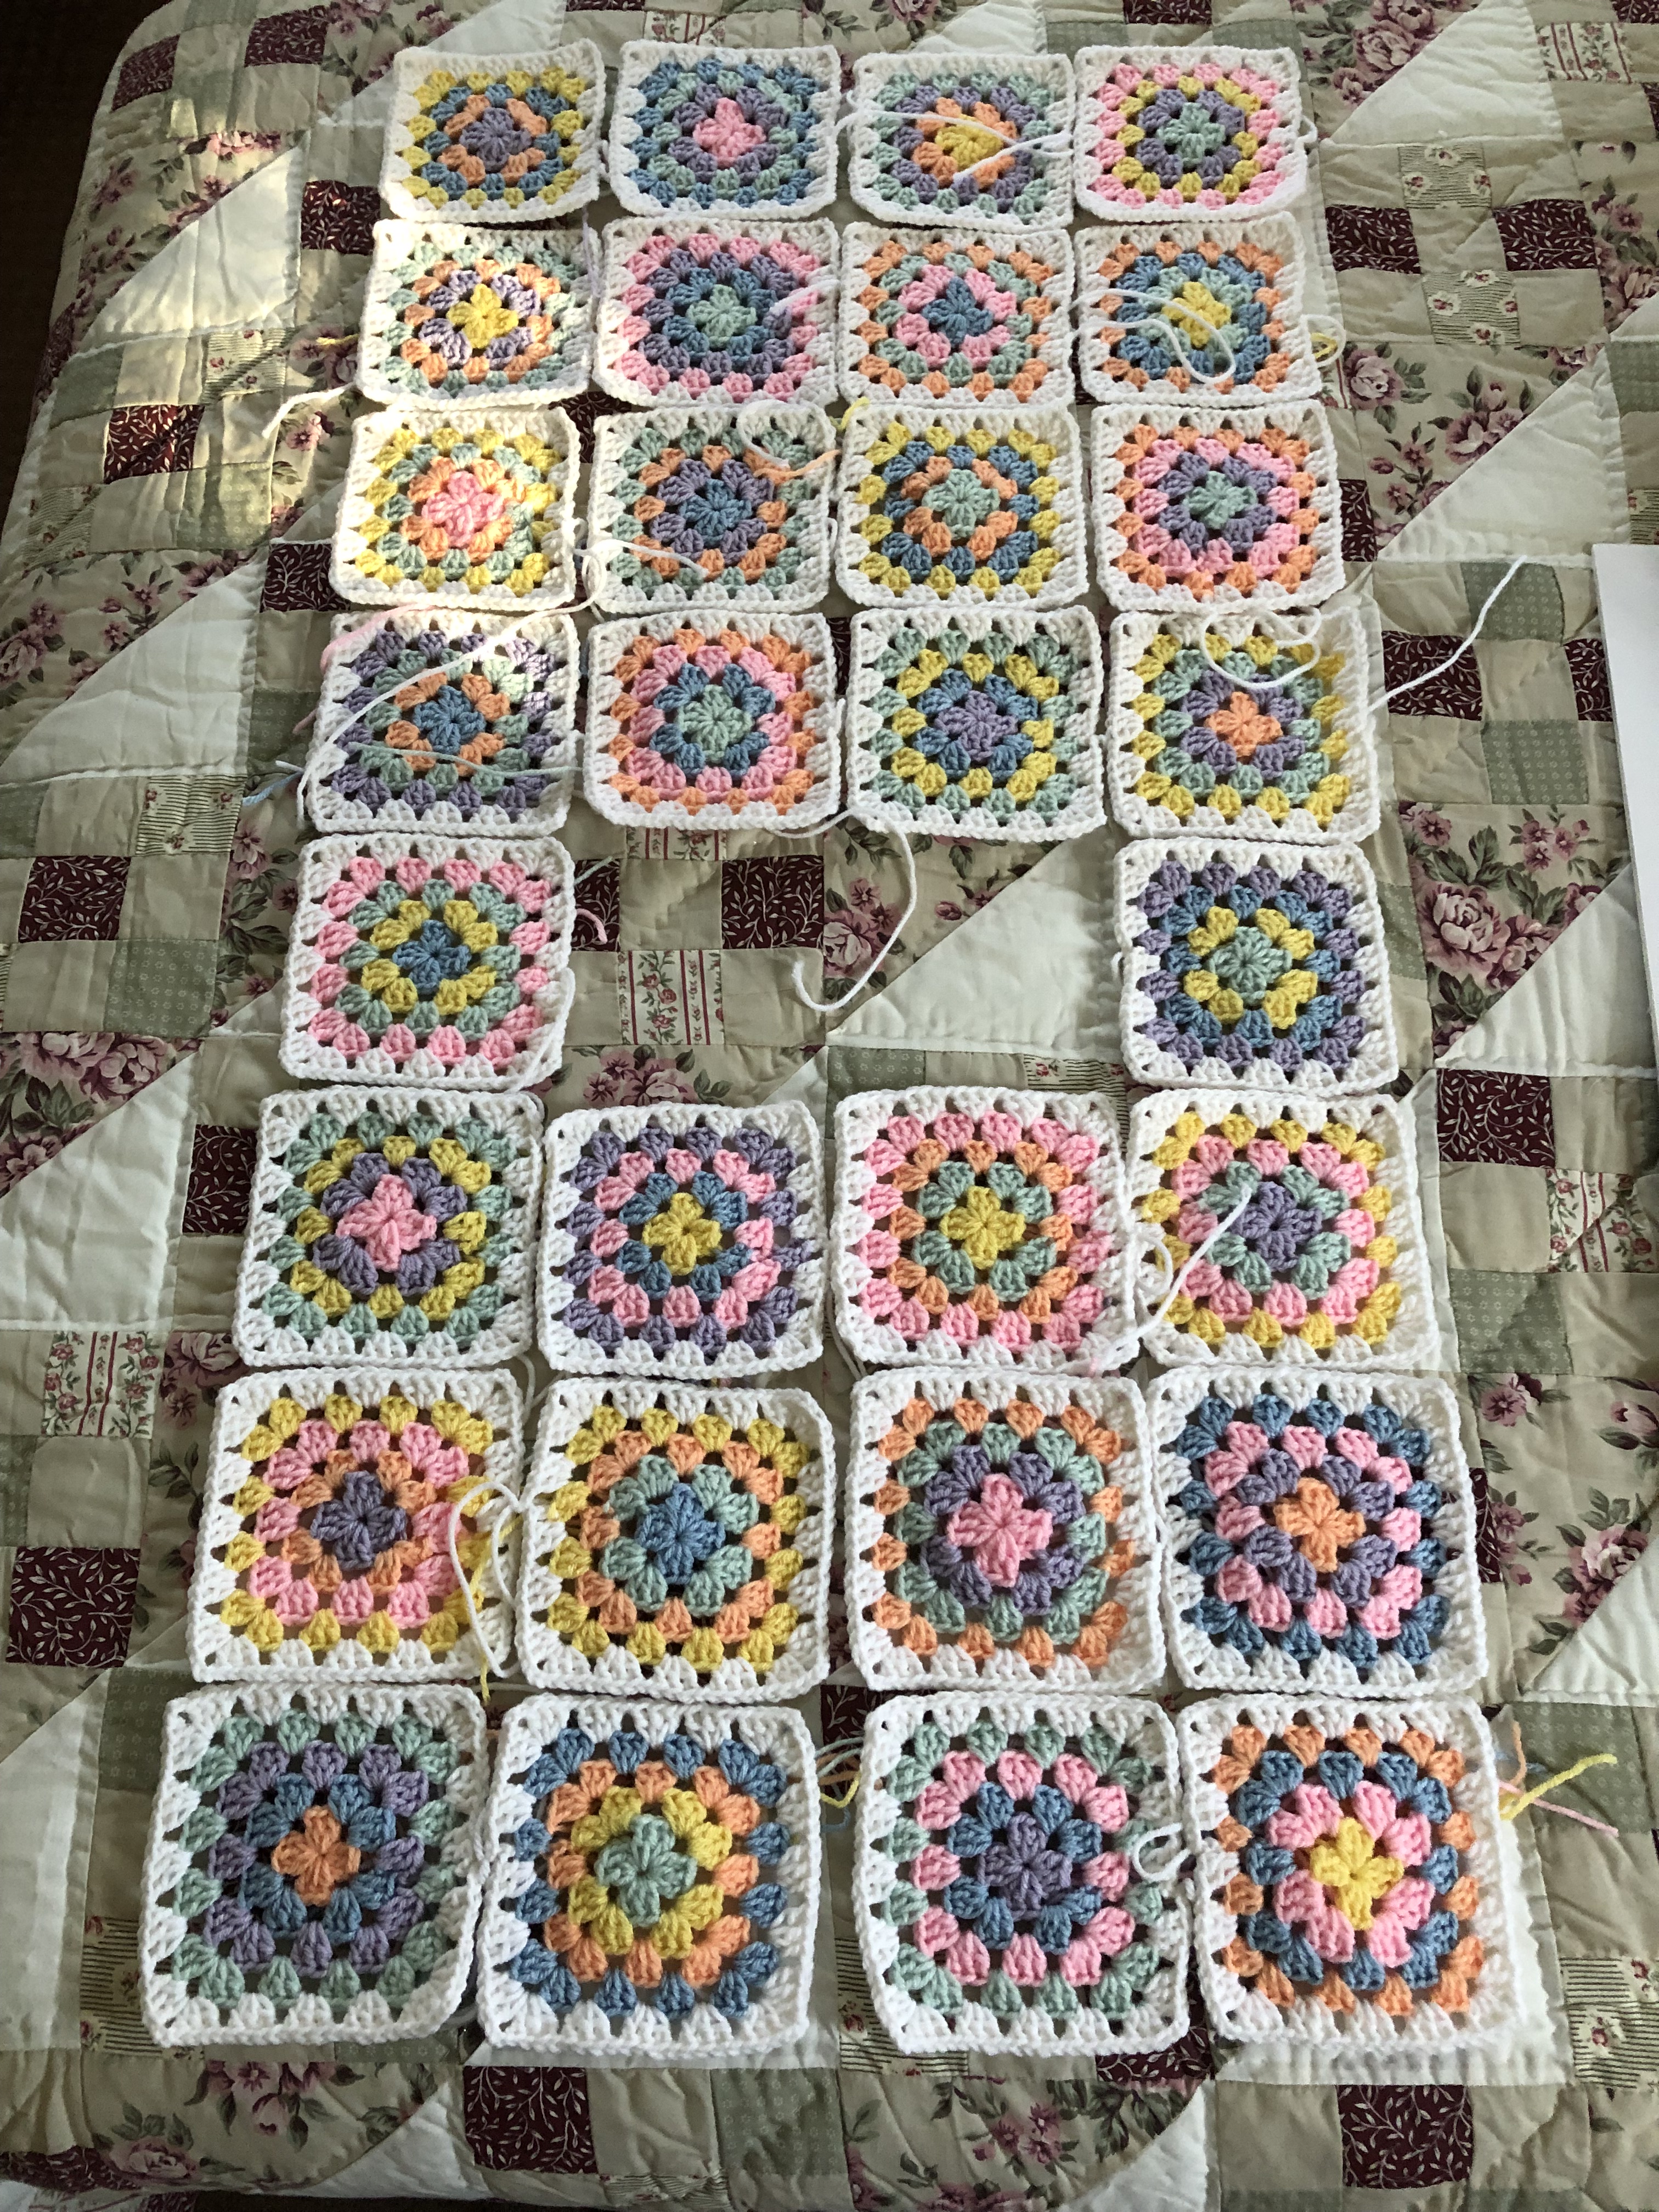
Once I got the greenlight that those looked good I went ahead and continued to crochet more. Truth be told I didn’t have an exact pattern to follow for how many squares I needed. I looked at various patterns and pictures to get an idea. I knew that I had to make the equivalent to a size medium. From doing my research I initially went with making 30 squares and I placed them in the layout below. I had a feeling that it wasn’t completely right but I decided to move on to another part of the cardigan… the sleeves.

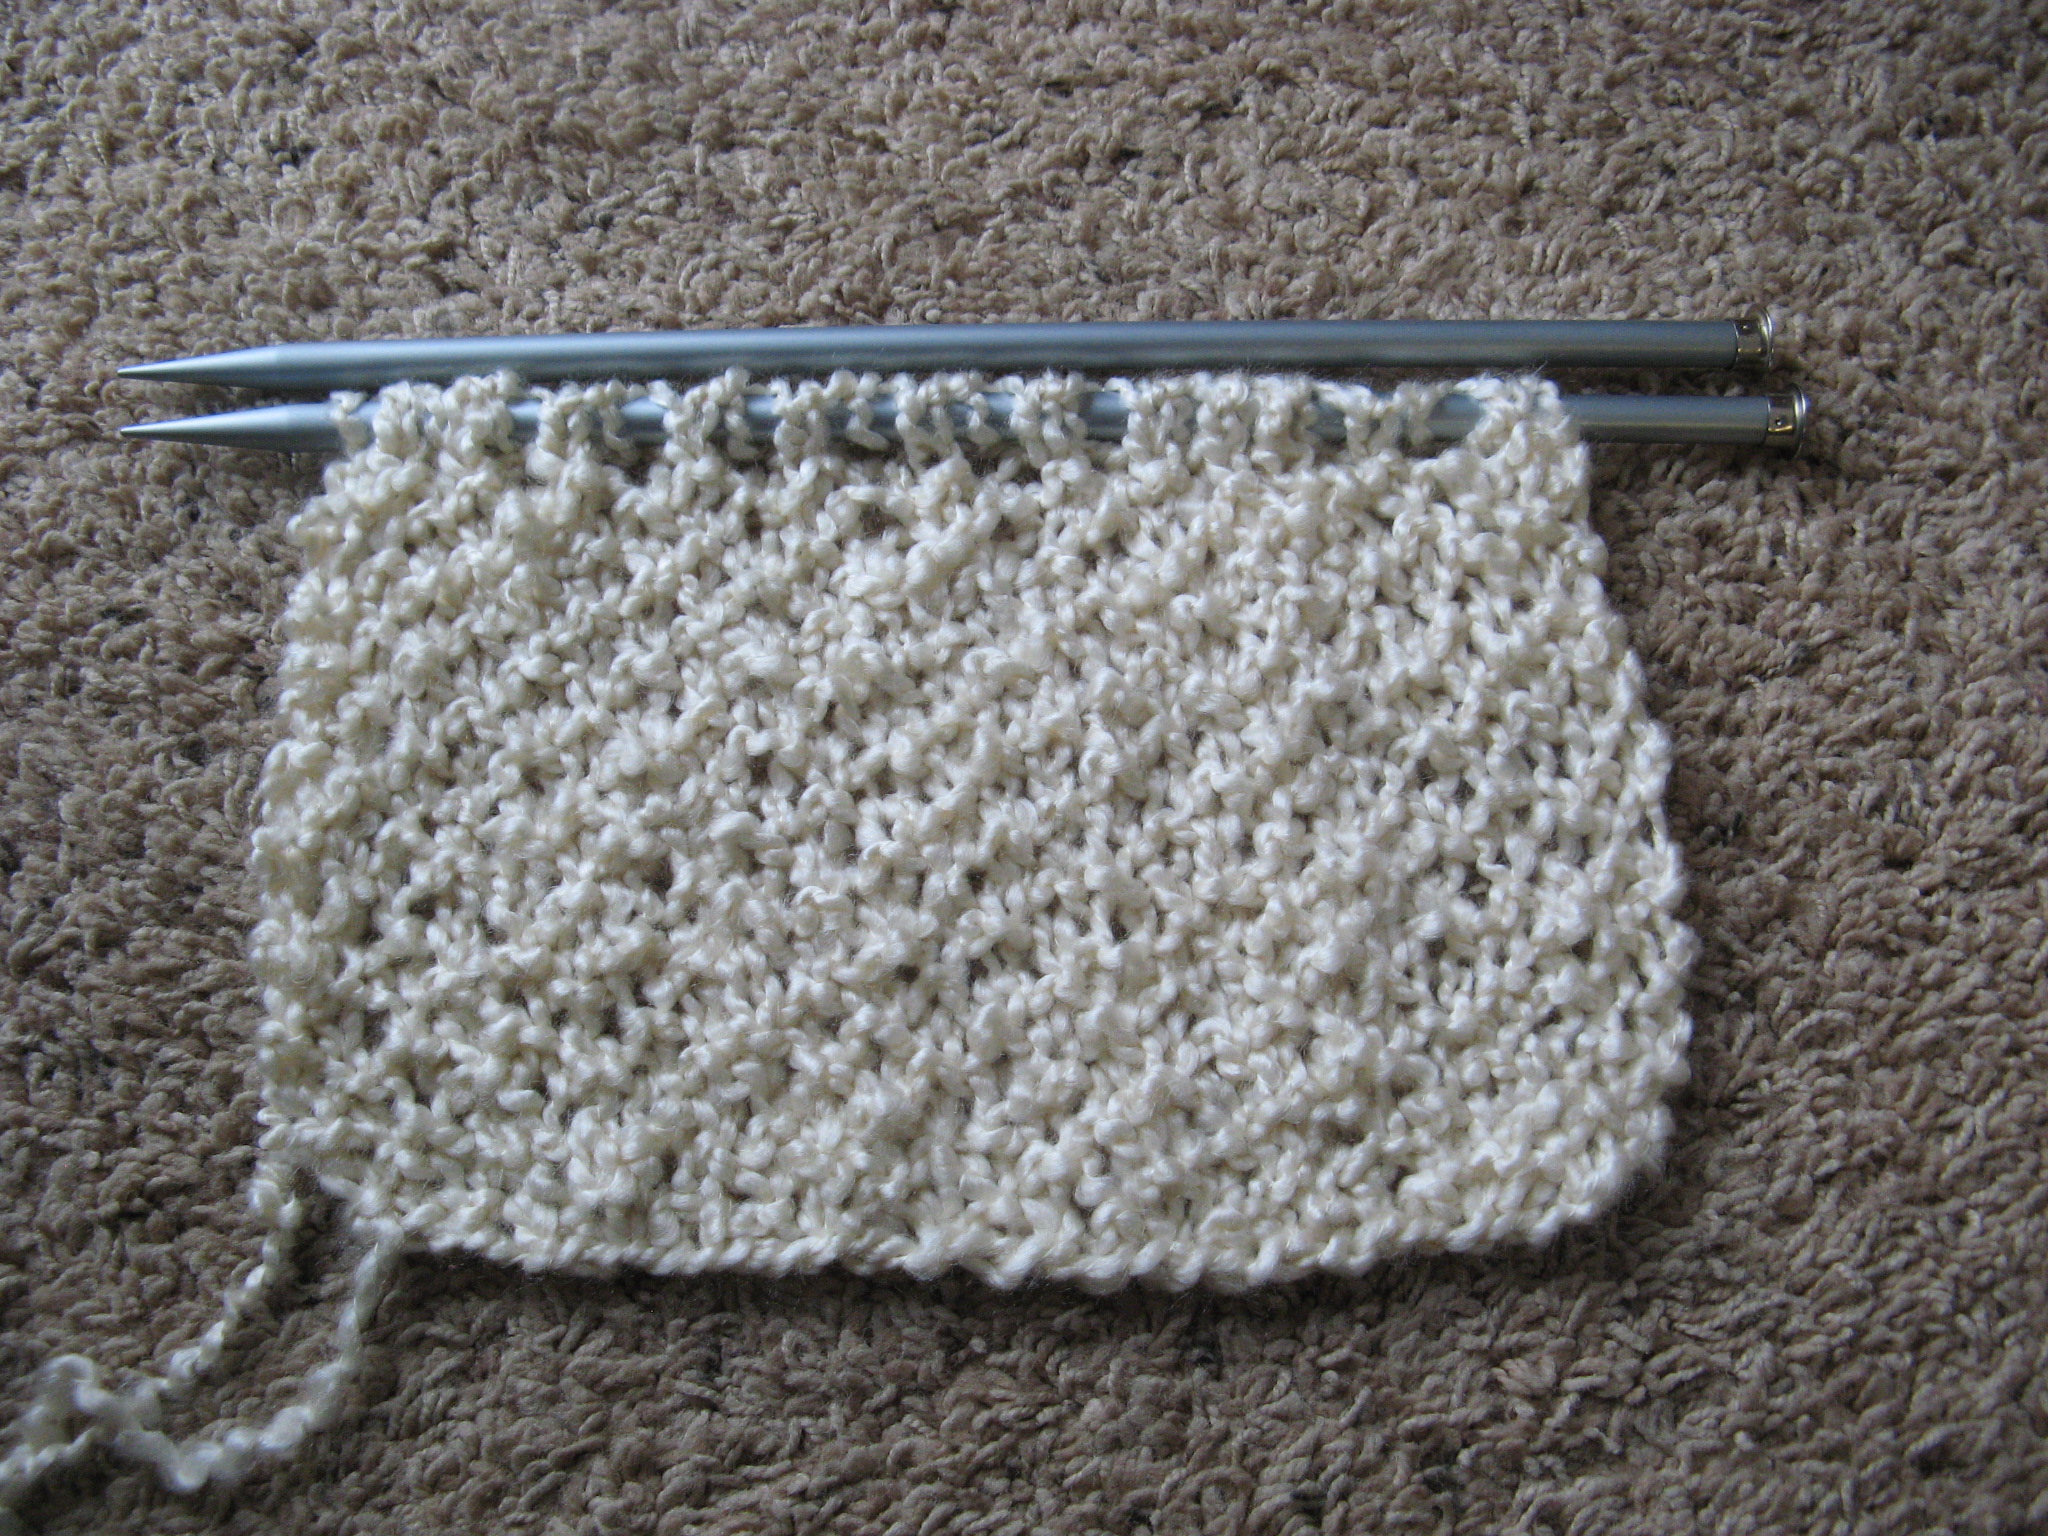
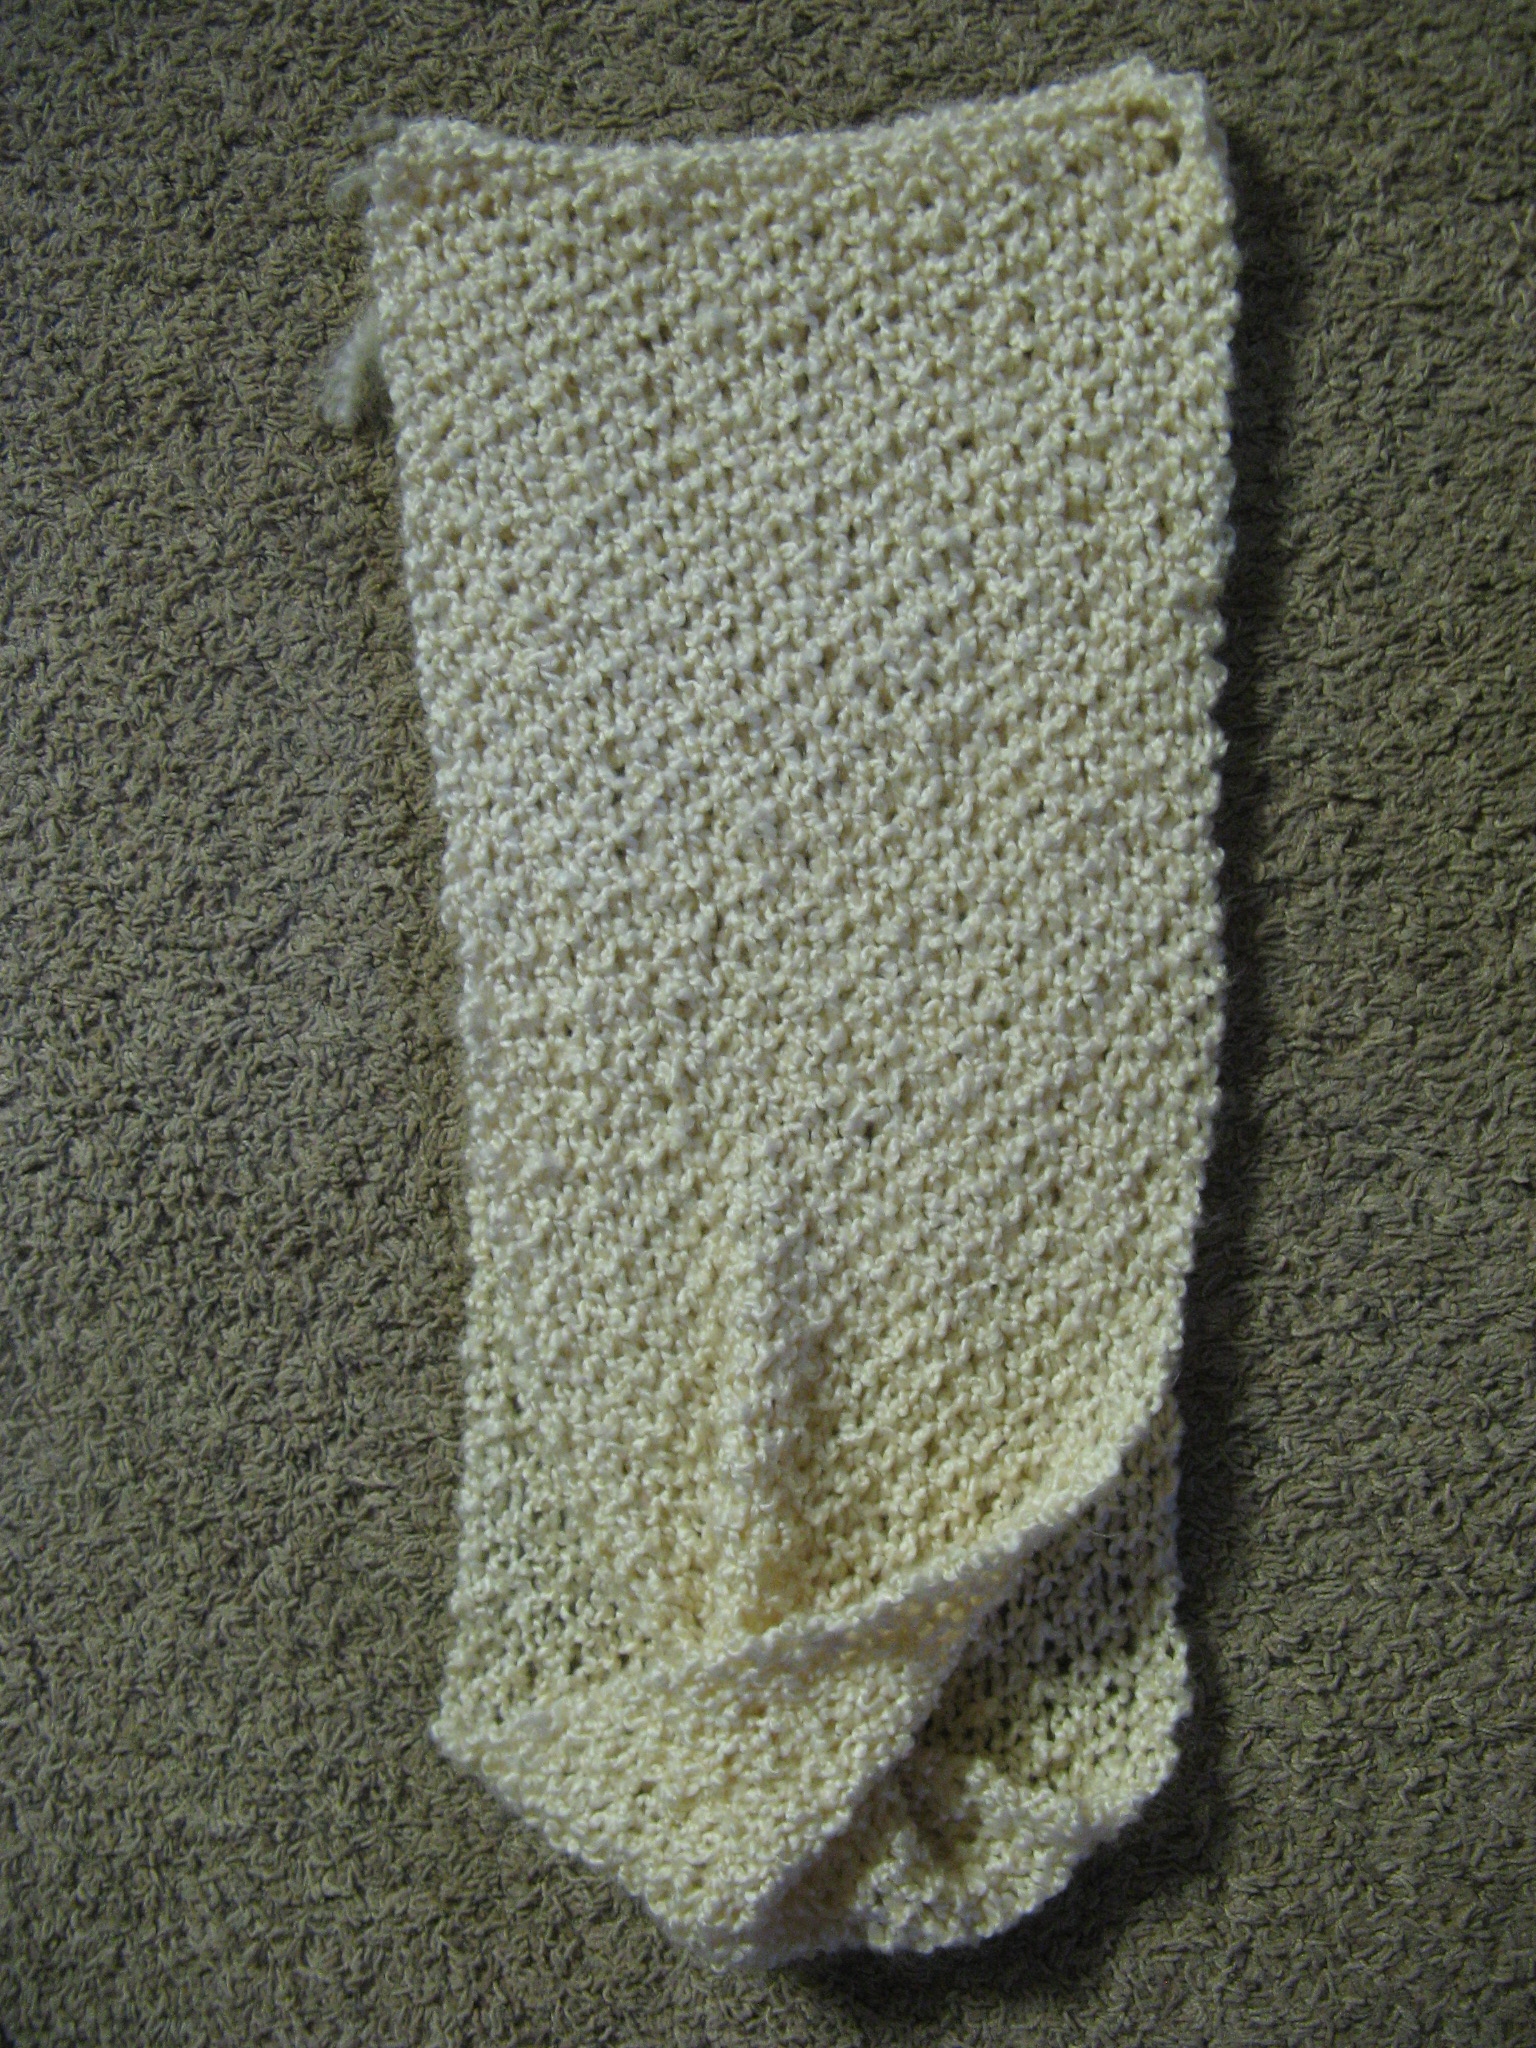
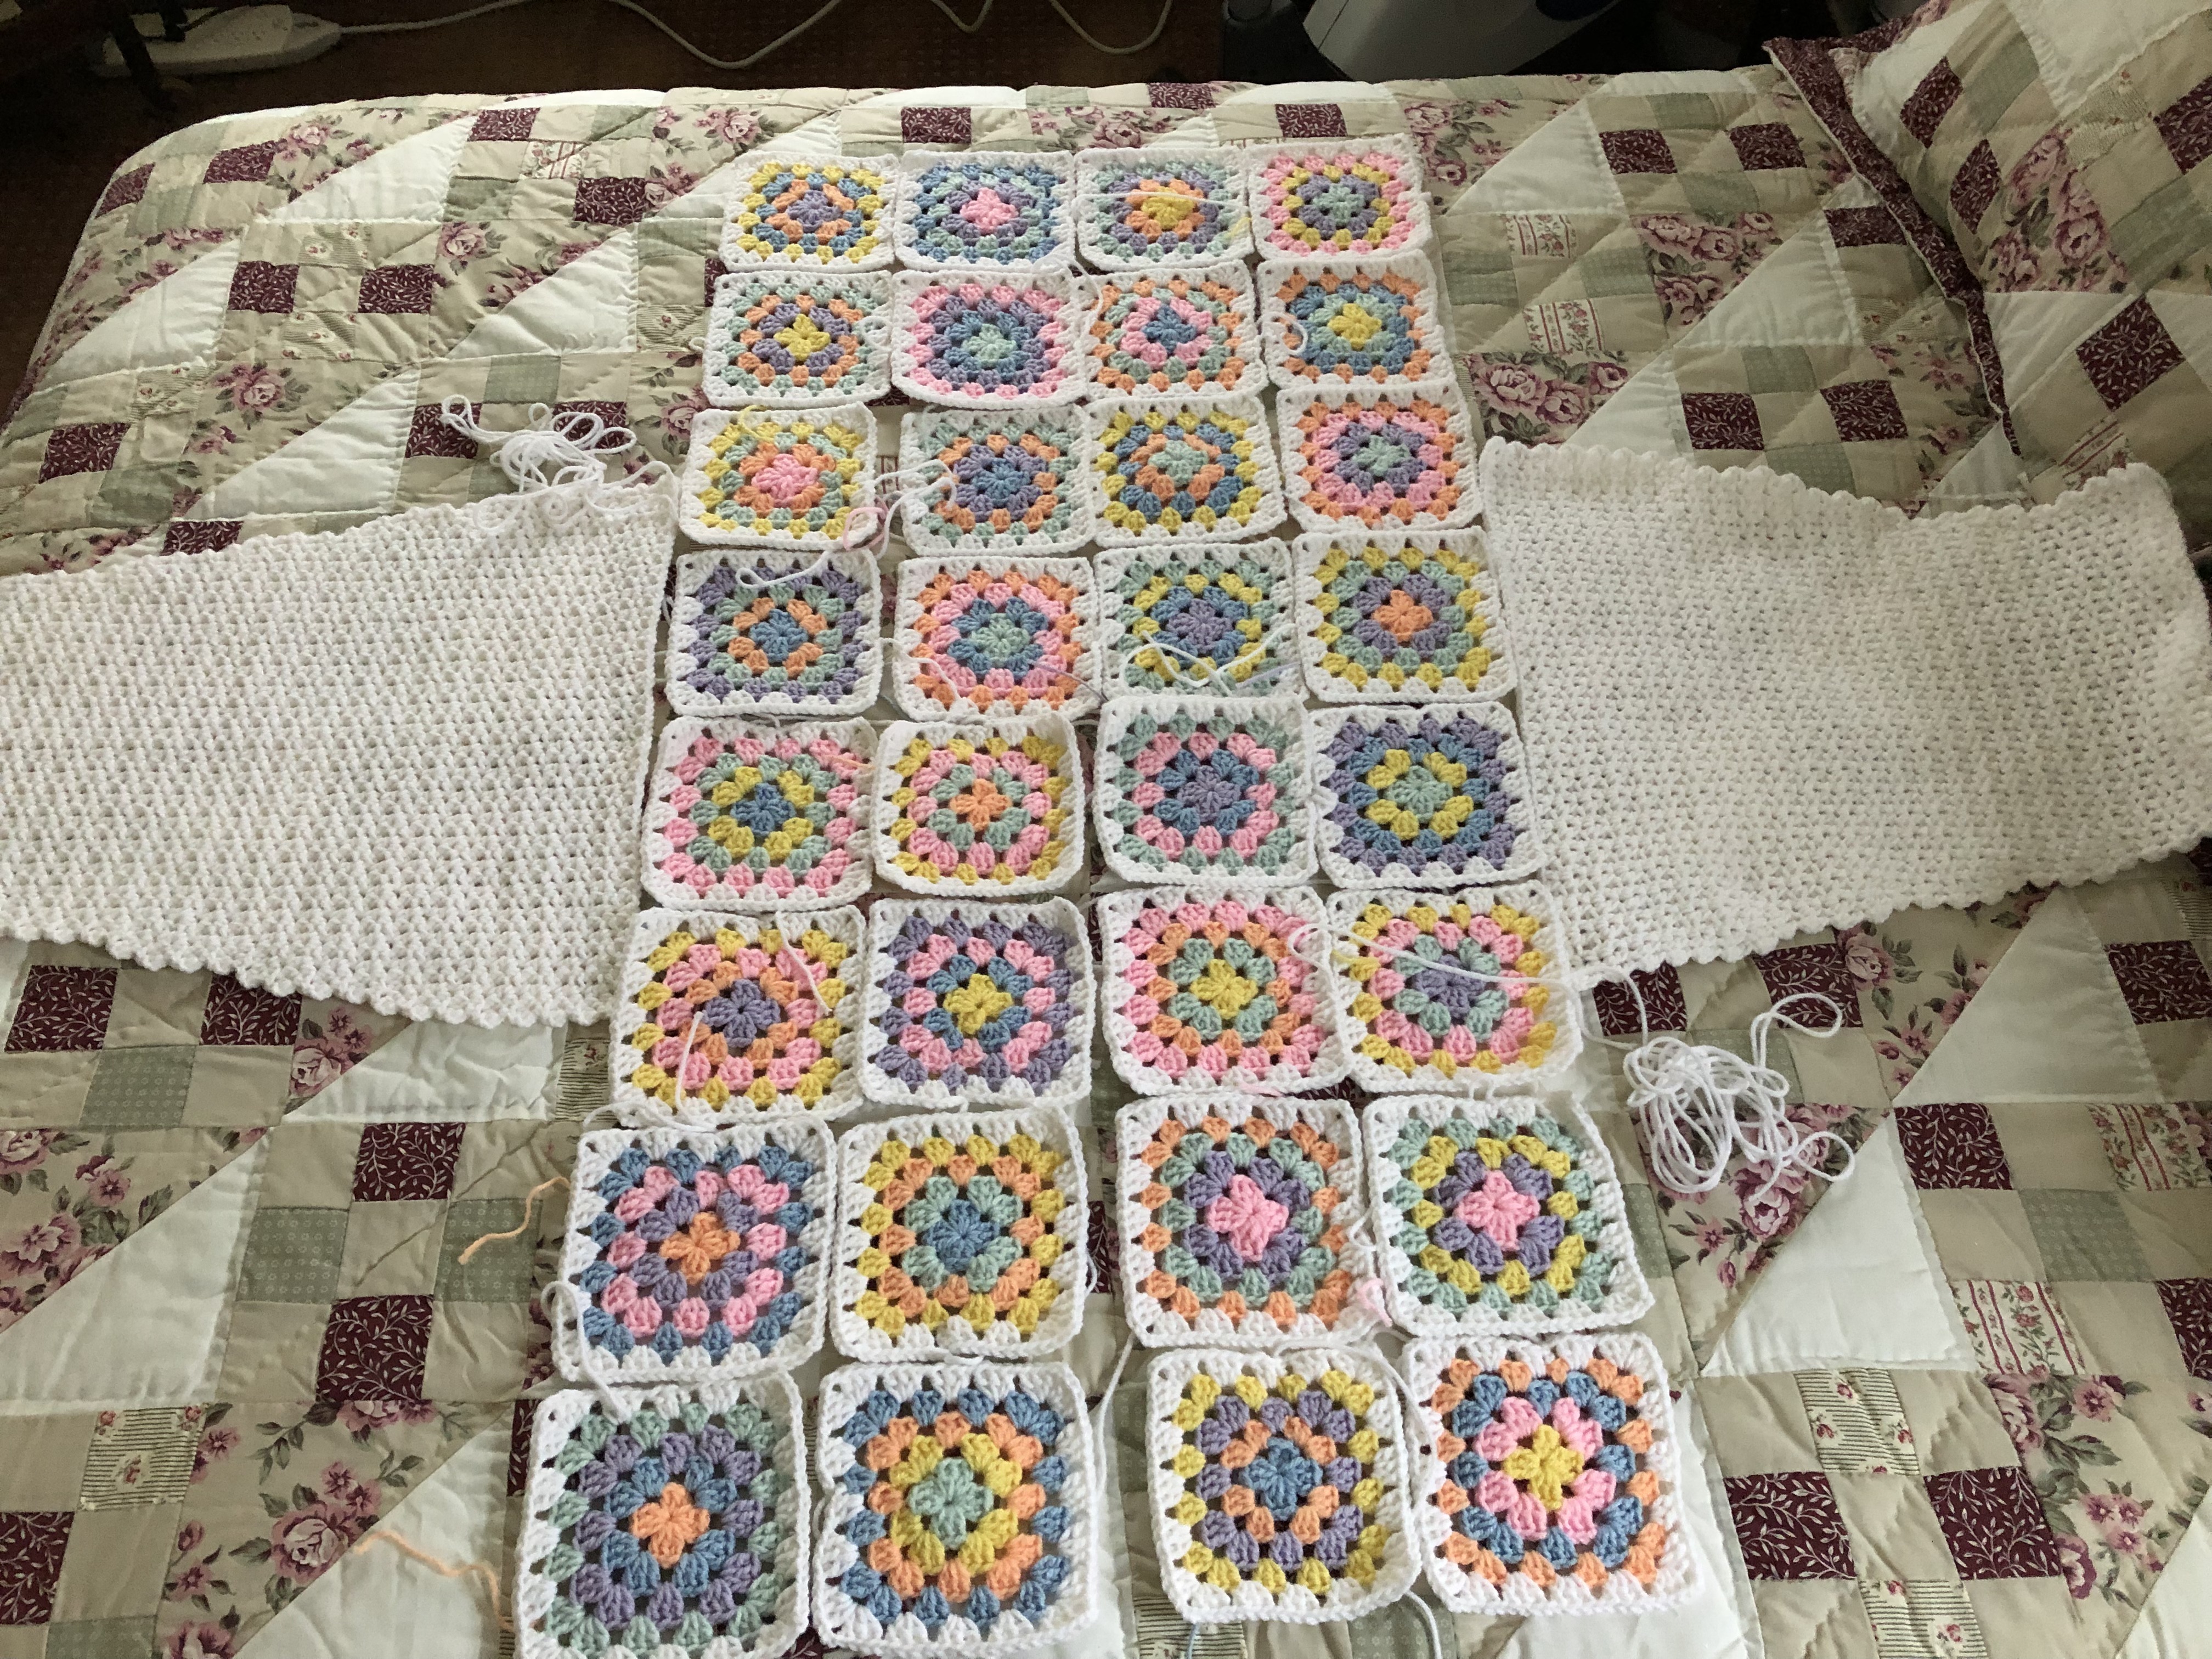
Normally with granny square cardigans the sleeves are made using granny squares as well, but, the person I was making it for requested the sleeves to be solid white and they didn’t want them to be granny squares. So, more research. I knew that when it came to making sleeves they needed to be tapered to accommodate a wider upper arm to a narrower wrist. But, I didn’t want to just wing it and start crocheting. I was able find a sweater pattern that had the sleeves broken down exactly as I needed them. The width on top was perfect to be placed in the center of two specific granny squares. I also went ahead and crocheted two additional squares and placed them in the empty spaces I had.

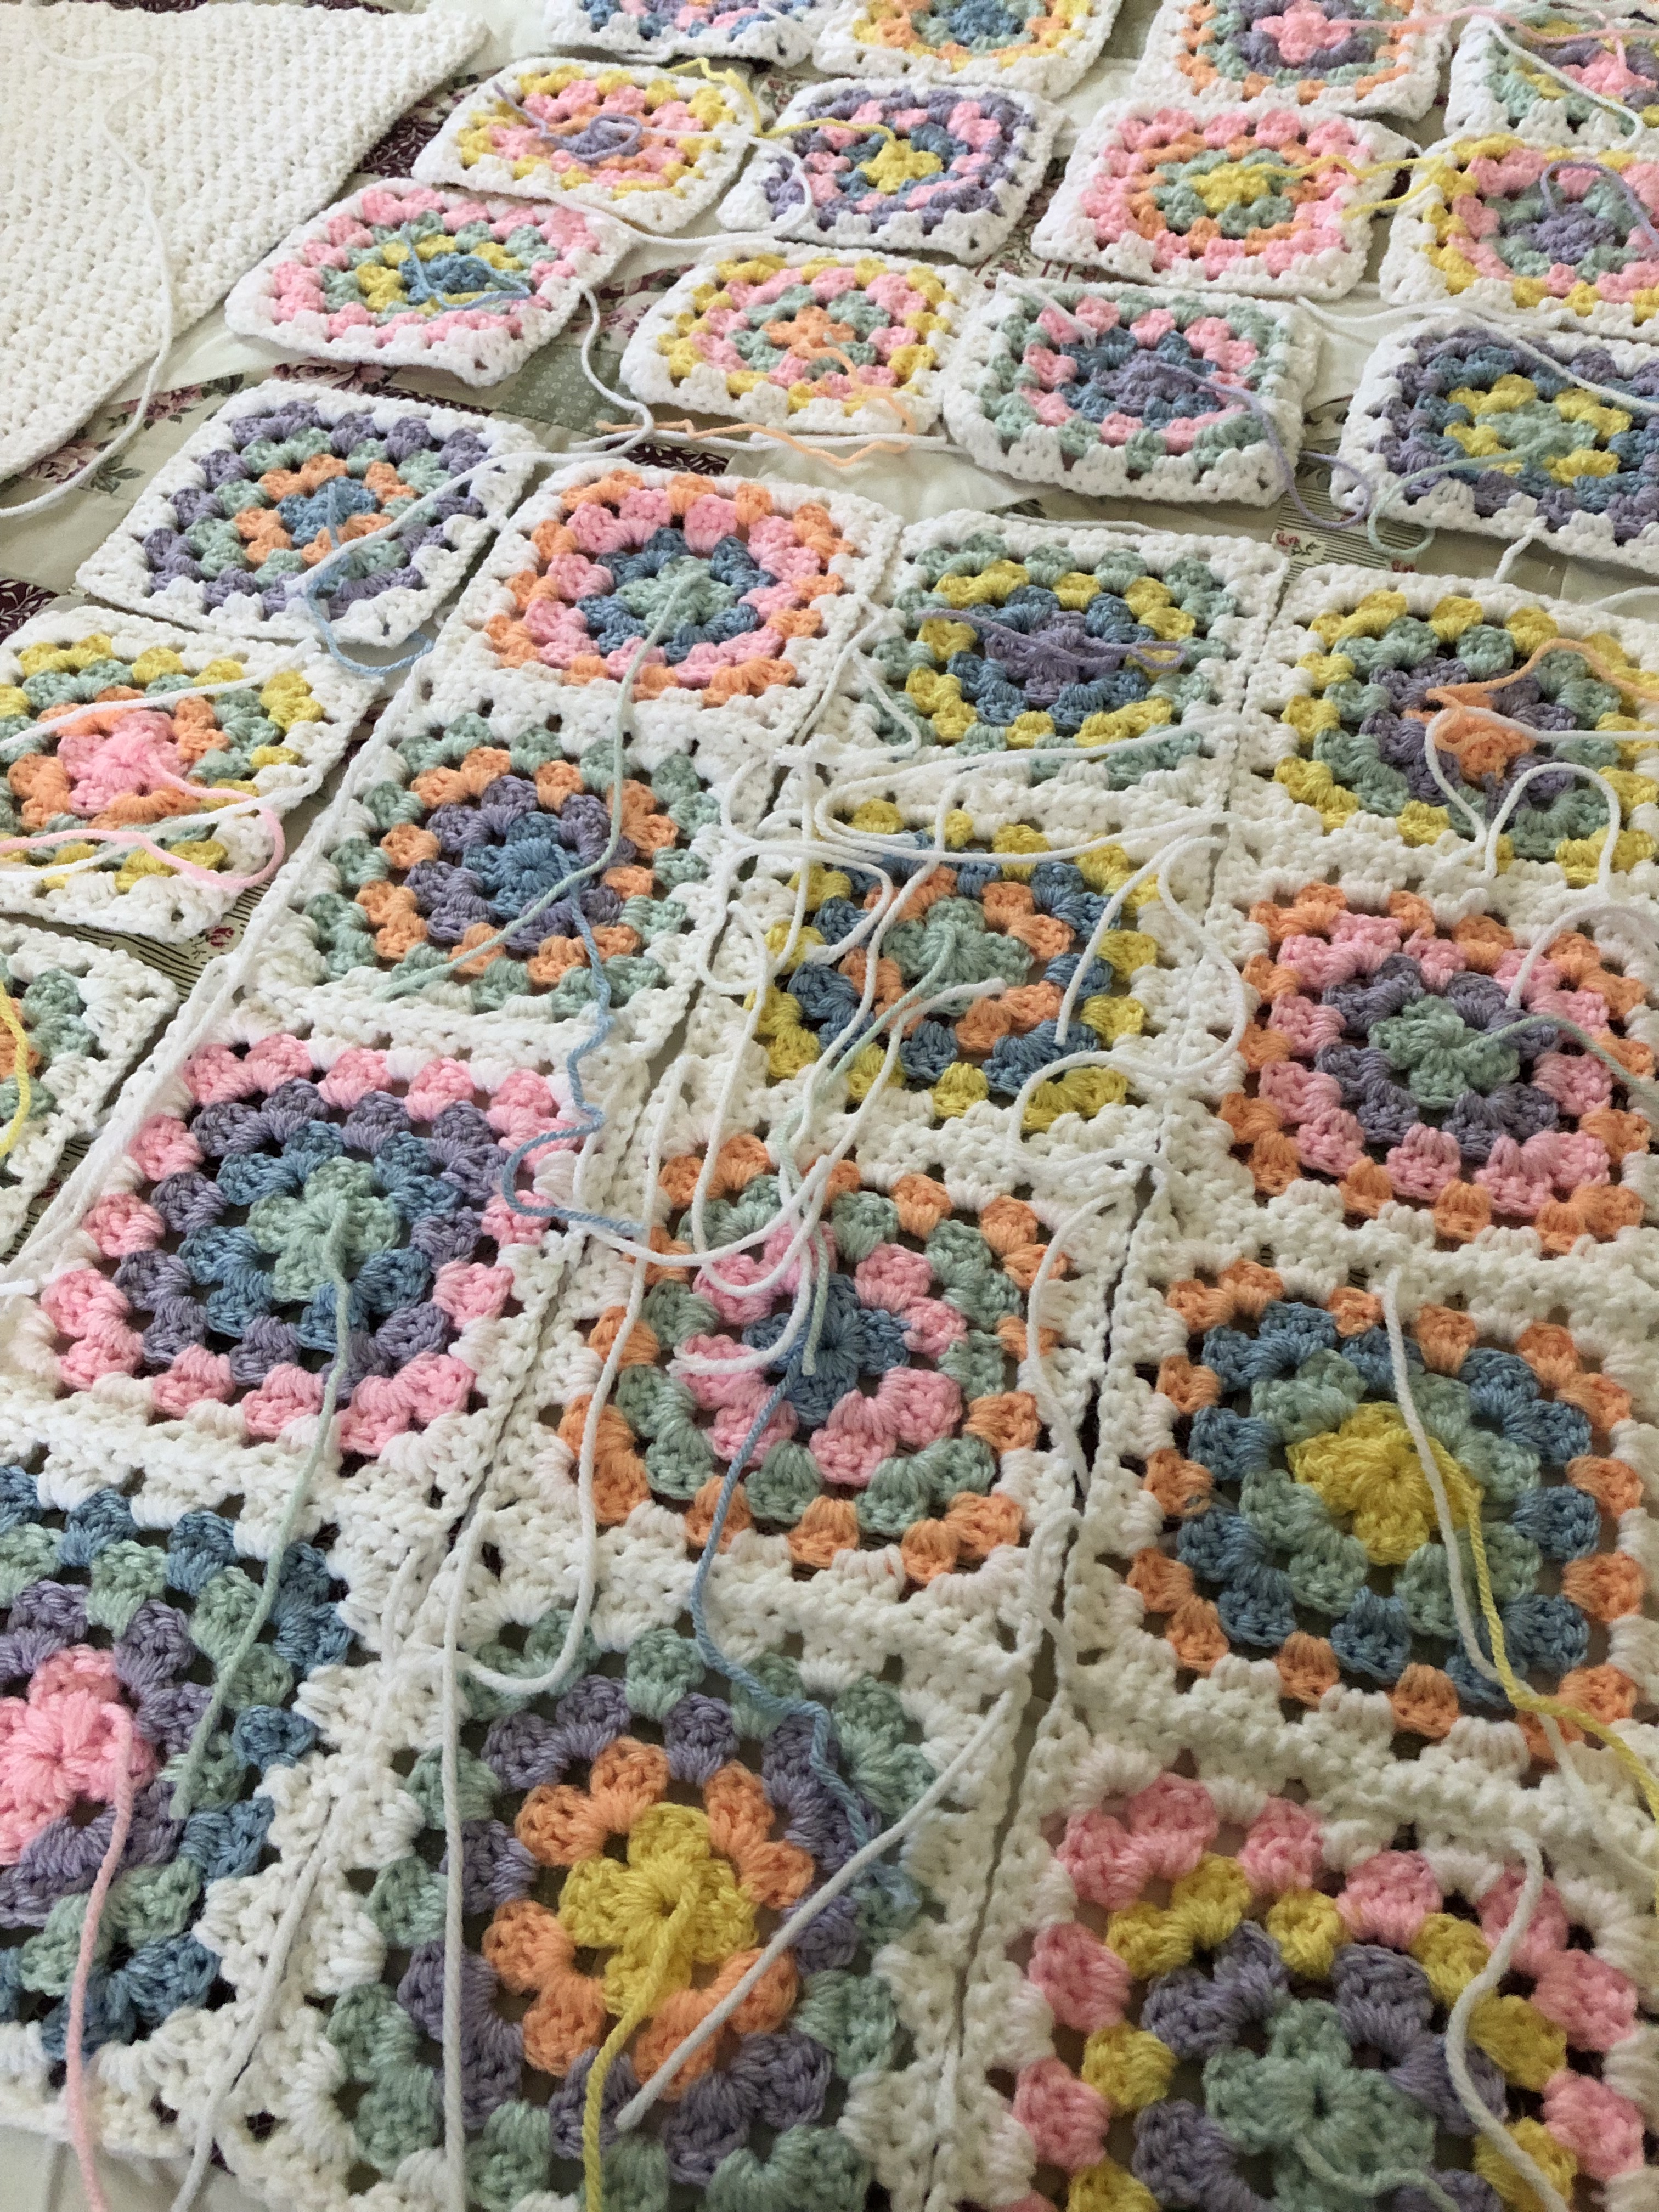
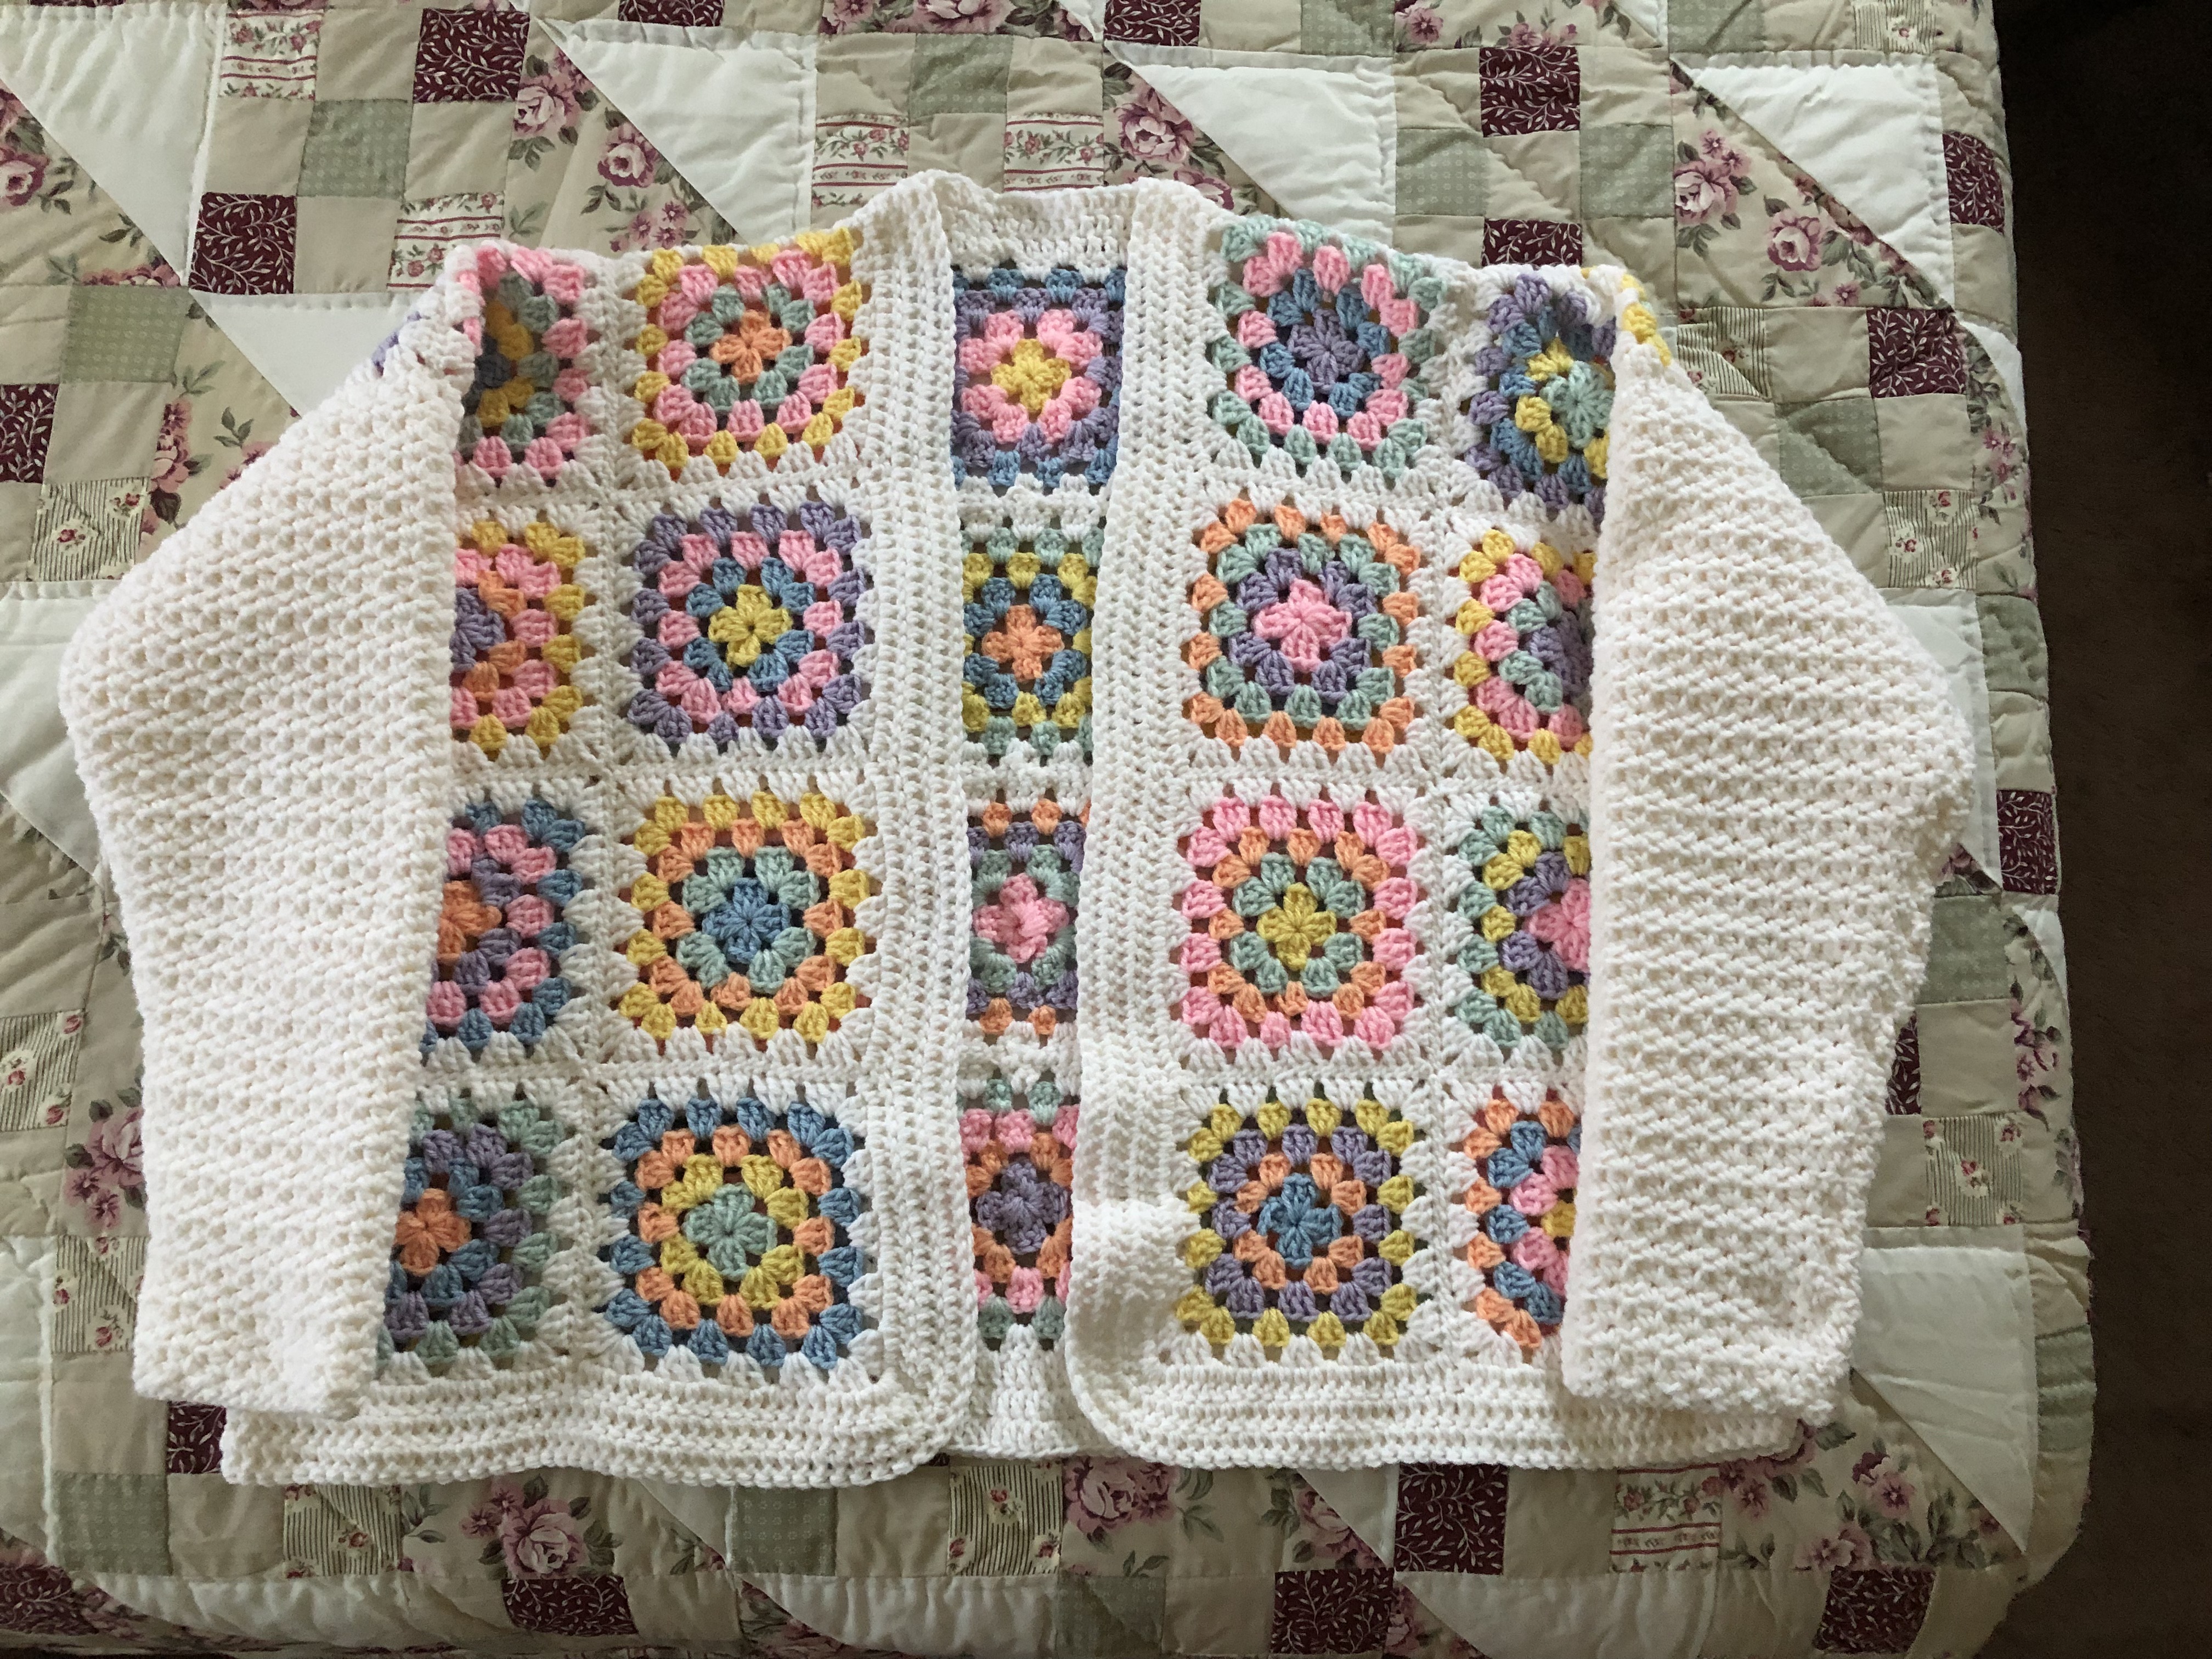
I started seaming together the squares for the back of the cardigan but I still had my doubts about the layout. It just didn’t seem like it was going to fit correctly.

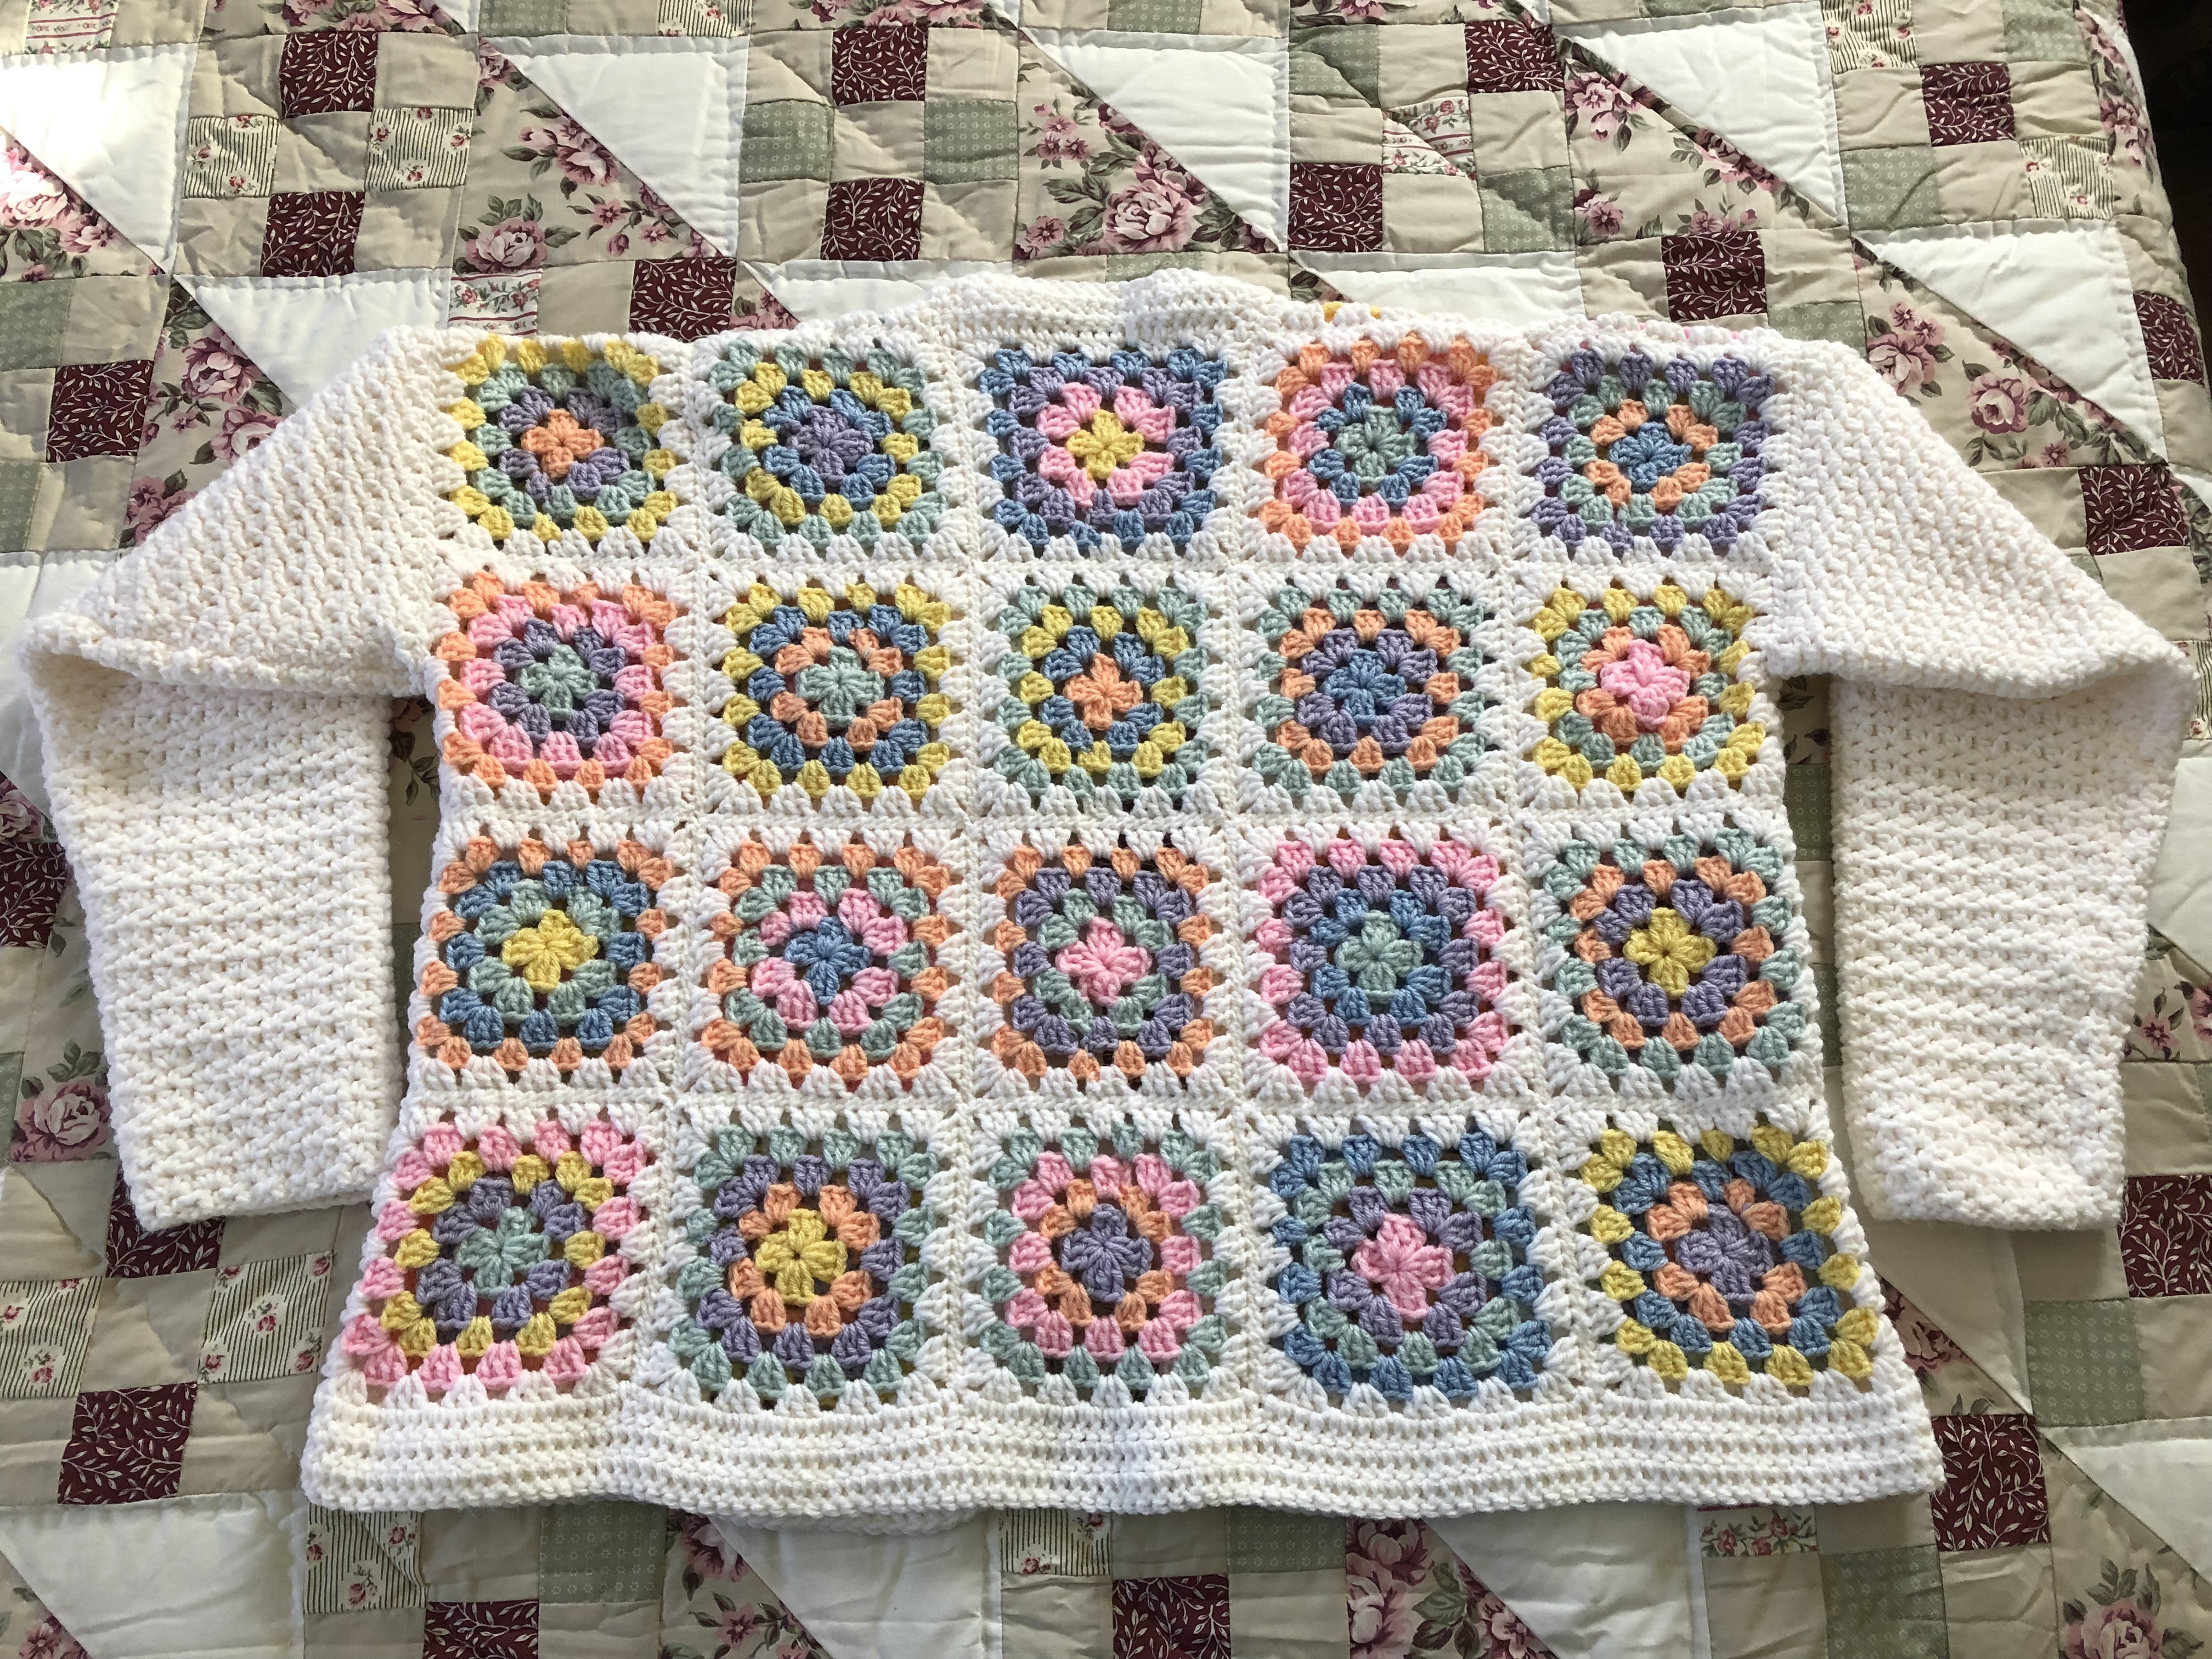
I ended up crocheting four more granny squares and added an additional row to the back of the cardigan so it would sit better. I then finished seaming all the other squares together and then attached the arms and seamed them together. I tried it on and it fit perfectly.

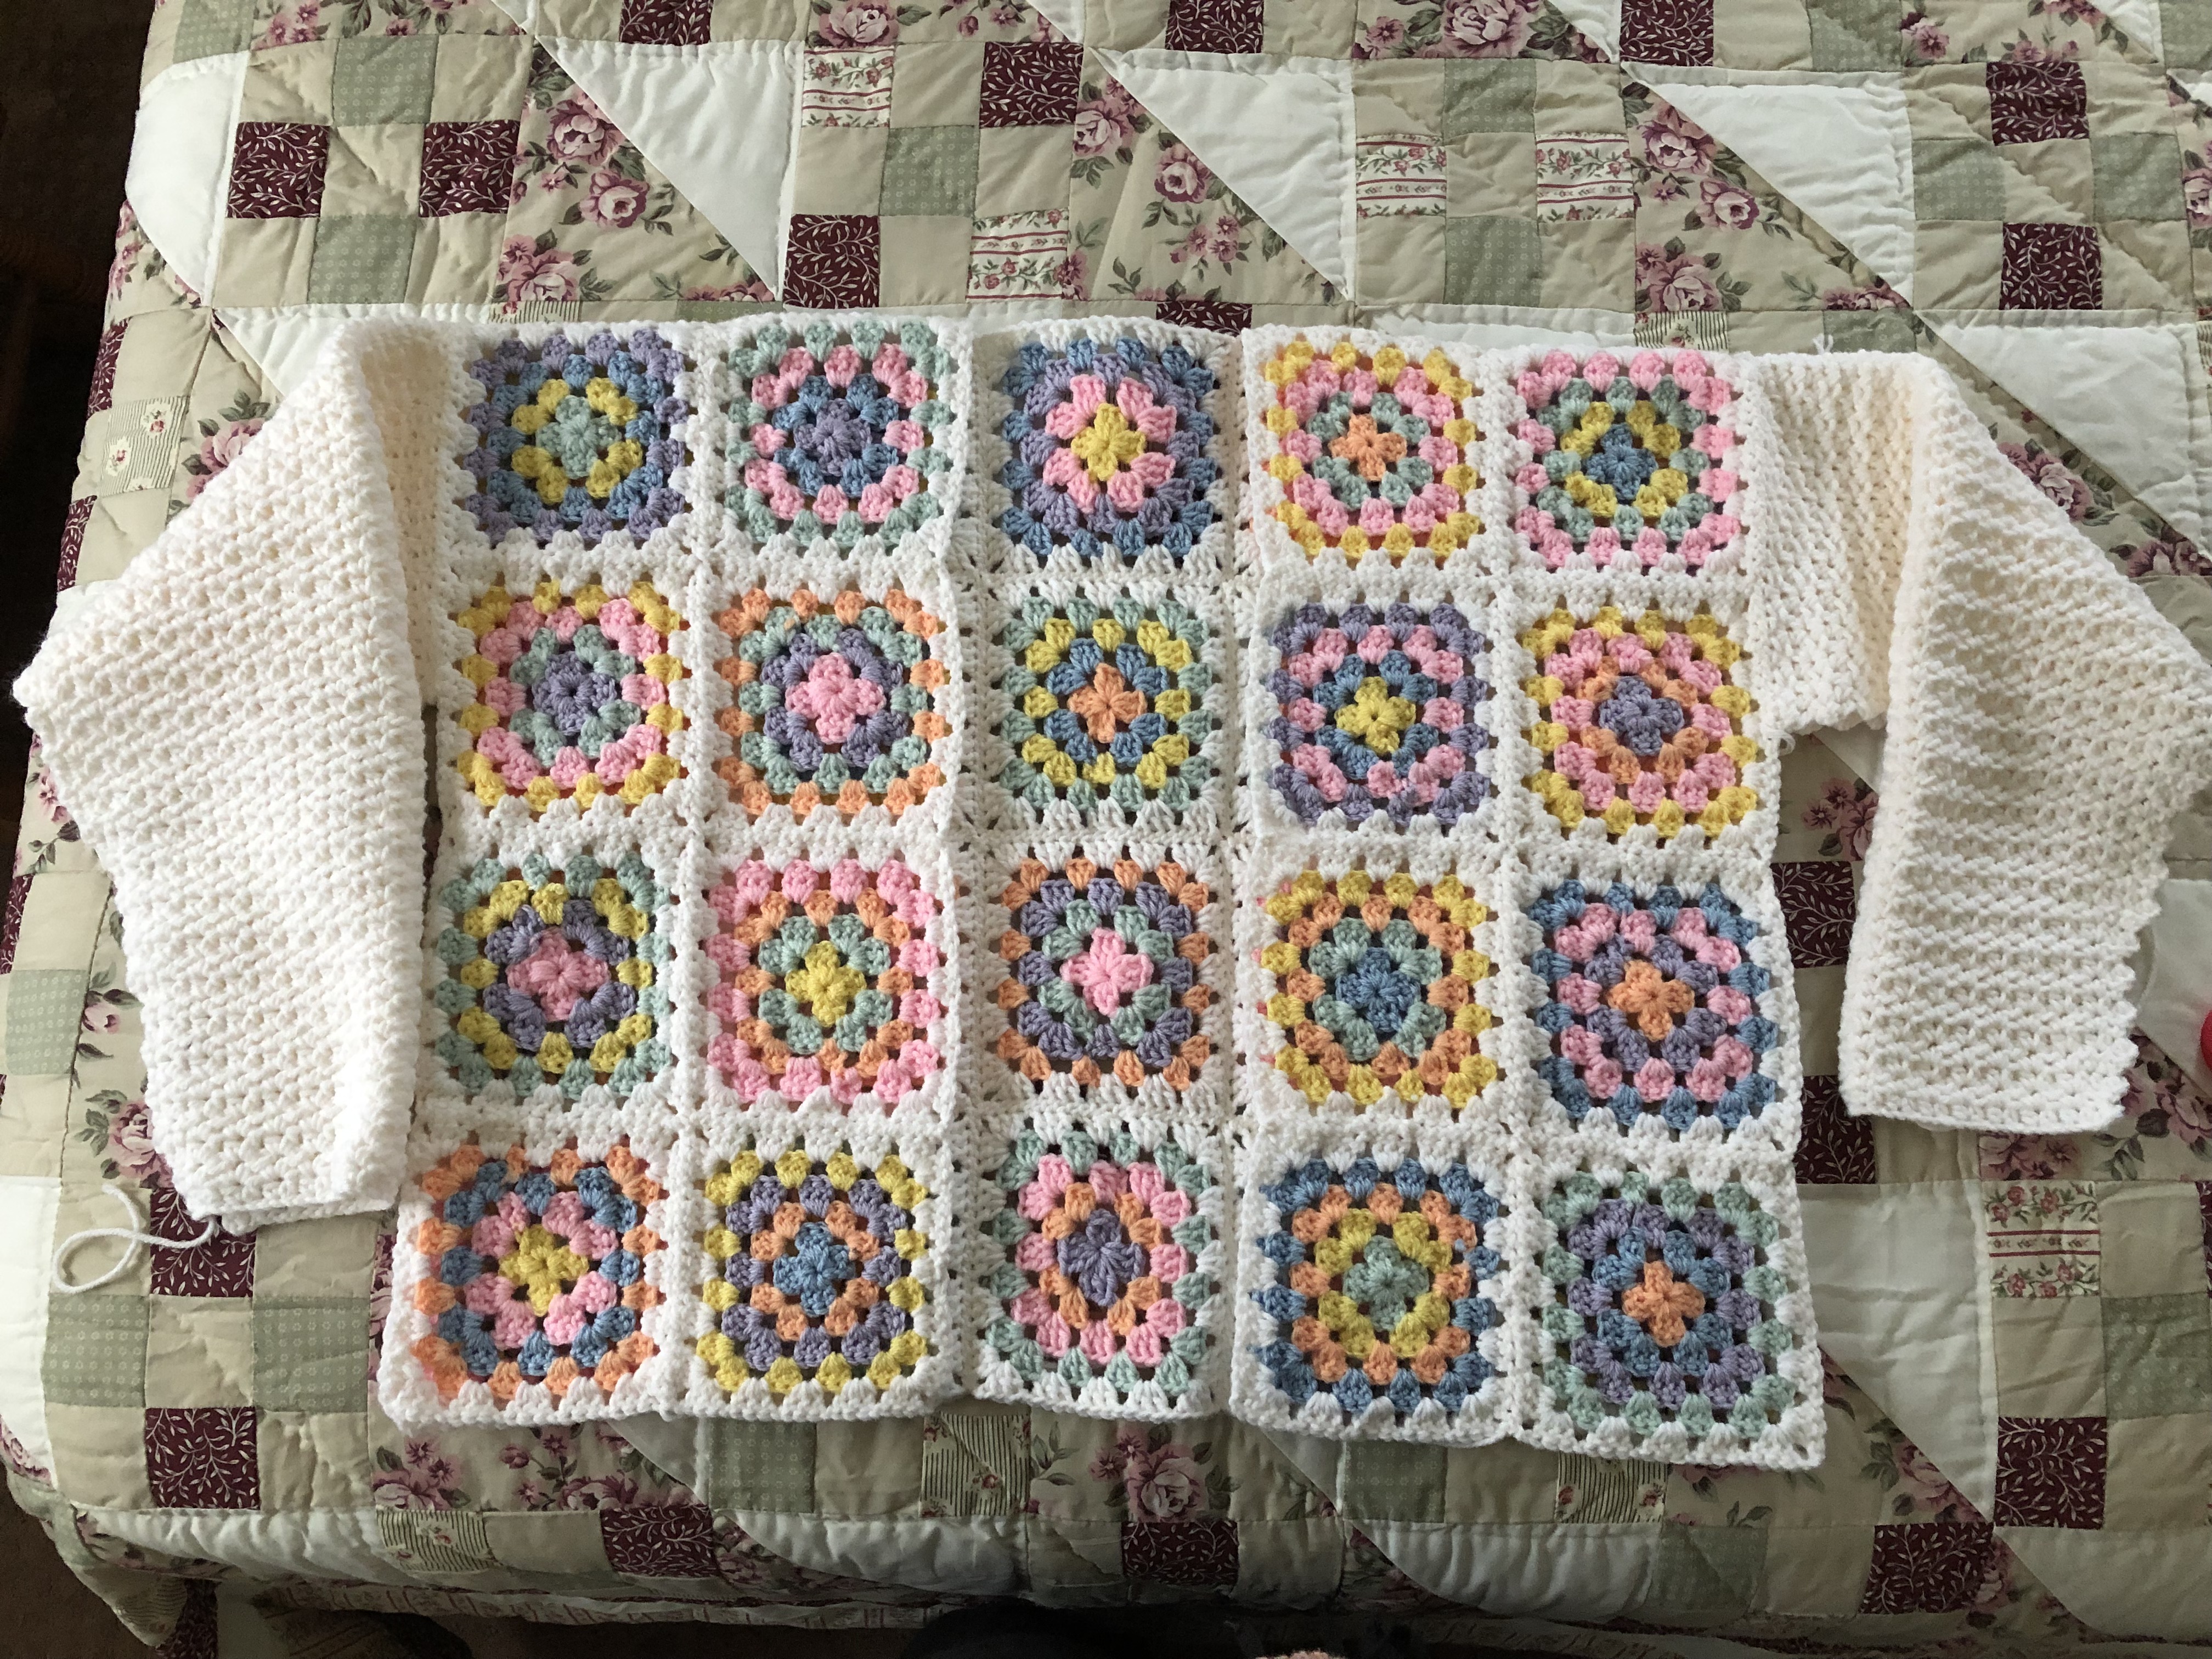
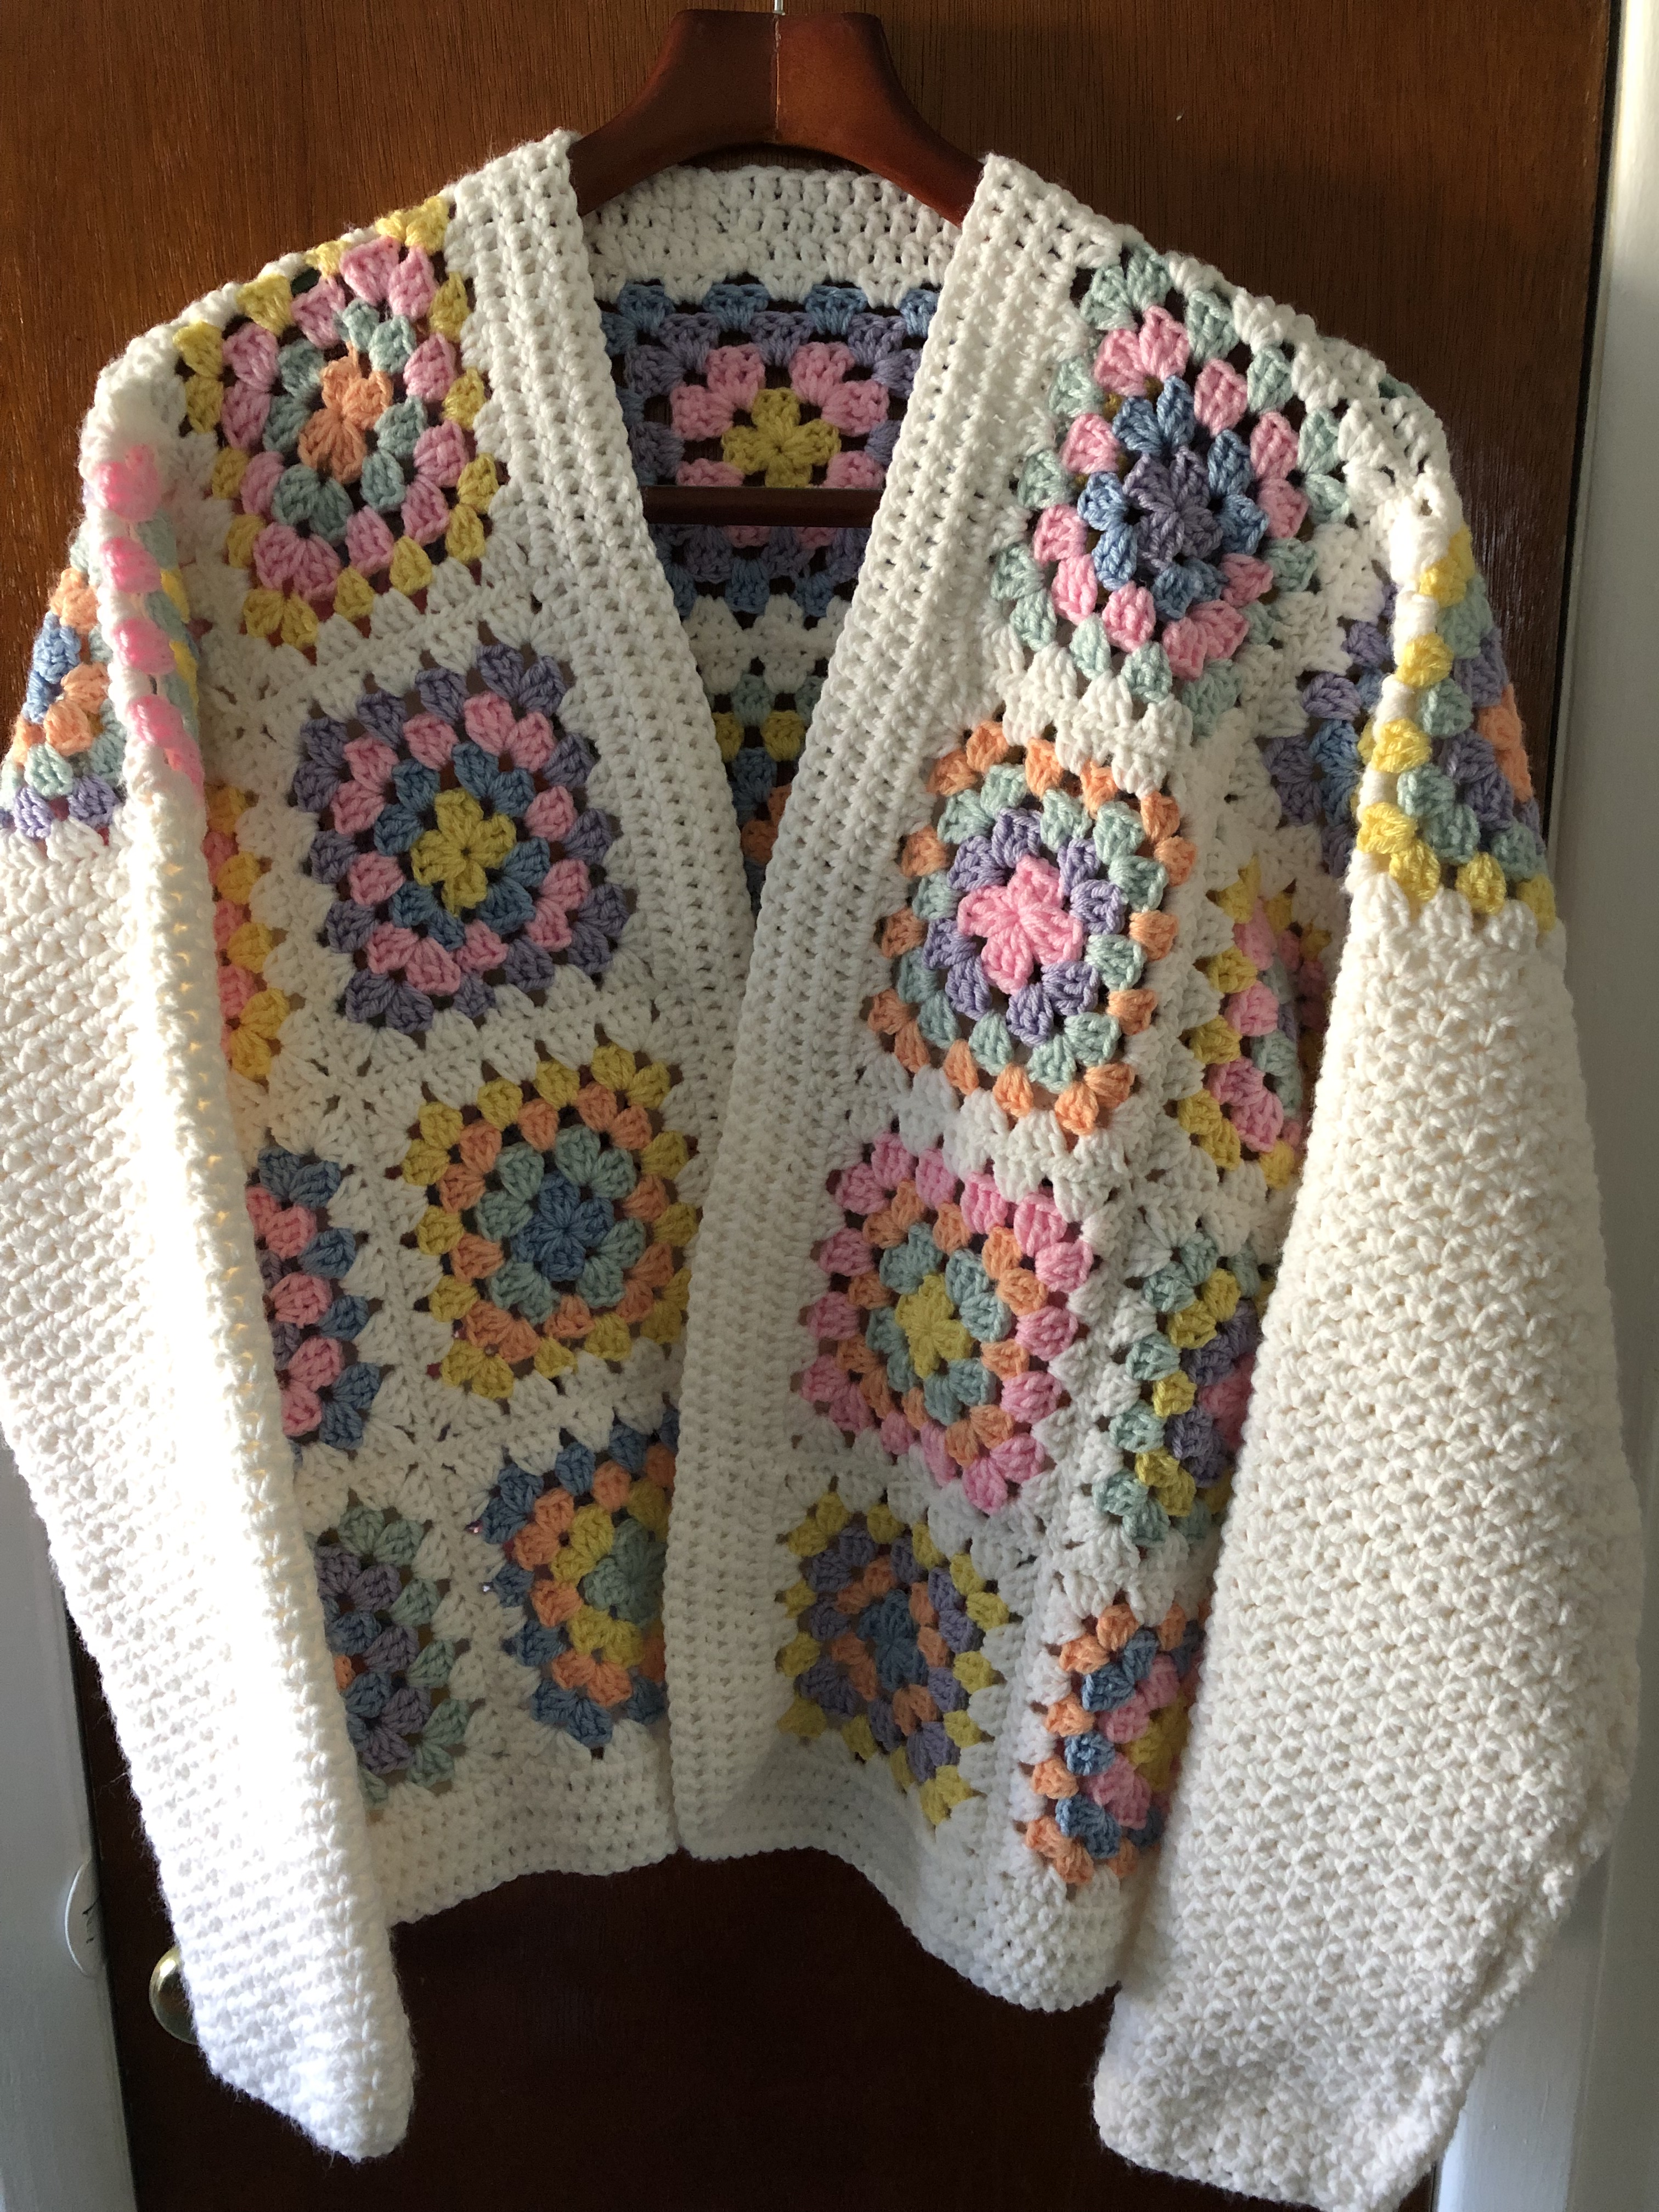
And finally, I crocheted a border around the entire cardigan to give it a more finished look.

I am happy to say that the person I made this for was very happy with it. I may make one for myself one of these days!

Knitted Cocoon Shrug

Have you ever completed a craft project and felt a bit disappointed with the outcome? I’m sure we have all been there… I know I have quite a few times. You kind of feel like you wasted your time and possibly money on the supplies.

For the longest (a few years to be sort of exact) I finished knitting a rectangle that would ultimately become a shrug – all that was left to do was seam it together. I folded it and placed stitch markers on the sides so I knew exactly where I needed to seam, but then I folded it up and placed it in a corner and kept reminding myself that I had to finish it. I would put it on my desk and in other places so that it would be in my line of vision, but, it just wasn’t working. Not really sure why I was procrastinating. I was possibly thinking that it was going to be more difficult than it really was. Truth be told, I enjoy crocheting and knitting, but I am just not fond of those projects that require seaming at the end to complete them.

But then I finished up another project that requires seaming (hexagons for a Christmas Tree Skirt) and I thought to myself that there was no way I could start seaming this project if I still hadn’t finished the one from years ago. So, I took the rectangle out of the corner and procrastinated for a few more days and then finally sat down and got to work. And guess what, I realized that all that procrastinating was for nothing. I seamed up the sides of the shrug in about an hour. I did one side while watching television and the other side laying in bed before going to sleep. Finishing it prompted me to get out of bed and try it on and that’s when the feeling of disappointment came over me. I tried it and my first thought was “Eh.” The pattern was one size fits all, but, I think if I was a little taller I would like the way it fit in the back better. And while the picture accompanying the pattern had the sleeves coming down about 3/4 of the way on the model’s arm, on me the sleeves end before my elbows. Maybe trying it on over my pj’s didn’t help give me the best impression of the shrug, but, considering that I was fussing with it so much to get it to look just right I don’t know if my thoughts will change. Ultimately, I ended up folding it back up and placing it in another spot. At least it’s done, so, I can to get to work on seaming the hexagons that I am determined to get done before my Christmas Tree goes up this year. I have some time so fingers crossed I will get it done.


Crocheted Tote Bag

You may recall a little over a month ago I posted about having trouble mastering (really just figuring out) the Magic Ring in Crochet. I was making a bunch of hexagons – which by the way has been put on hold as I haven’t been able to get 4 skeins of the shade of green I want from any of my local craft stores, seems like I will have to order it online – and the starting point was to make a magic ring and it just wasn’t working out for me. So, I ended up bypassing this step and in lieu of it made a short chain and joined it with a slip stitch to get my hexagons going. Well, fast forward a week or two and once again I was faced with a pattern that required a magic ring as the starting point. The thing is though, I couldn’t crochet a chain and join it with a slip stitch as this project was for a tote bag and a small hole in the bottom of a tote bag could prove disastrous for any small items in the bag. So, I had to bite the bullet and figure this out once and for all. It’s really not as serious as it sounds to be honest, but, the thing is with crocheting (and knitting) the more stitches and techniques you learn the more items you are able to make and the easier it is.

So, I attempted the magic ring once again and guess what… I actually got it. And, I figured out why I was having issues with it before, the yarn I was using was too thin. Not for the project, but for me to figure out how to make the magic circle. Maybe I wasn’t holding the yarn with enough tension or something, but, I just couldn’t get it before. The yarn I used this time was Lion Brand Wool-Ease Thick & Quick Yarn. A super bulky yarn that comes in an array of colors and one that I have used quite a few times before to make scarves and blankets.

After all this set-up, you may be wondering what exactly it is that I made. Well, I did mention it was a tote and below is a picture of said tote. The pattern is from Two of Wands and is called The Red Hook Afternoon Shoulder Bag. You can purchase the pattern on her blog or purchase a kit on Lion Brand’s website. Initially I was thinking of using a more muted color but, when I went to buy the yarn I was drawn to this raisin color. While I haven’t actually used my tote yet, I am thinking it might be perfect for carrying around yarn projects as I am working on them. Or, for carrying around the plethora of magazines I get every month (and week) that I never seem to have time to fully read. I’ll admit while I was working on this I was unsure at times if I was getting it right… Especially in the beginning when I was increasing each round (and may have missed or added a stitch or two), but, once I got about midway through the project I knew that it was turning out okay. And it sounds silly, but, once I completed the opening for the handle I was quite pleased (and excited). I think it’s the idea of learning new steps, it opens your mind to creating other projects and seeing things differently. All of sudden I understood how to make a button-hole if a pattern called for it.

It’s the perfect size for me to carry around yarn projects, a book, magazines, etc…

Now I just need to stitch together the rectangle I finished three years ago so it can resemble a cardigan that I can actually wear. Oh yeah, and get those final 4 skeins of green yarn so I can finish my new Christmas Tree Skirt before Christmas this year!


Bead & Yarn Project Round-Up

Hope you all had a good weekend! So, as of late most of my posts have mainly been focused on the “spatula” part of the title of my blog, but, I definitely haven’t forgotten about the “bead” nor the “yarn” part. Hence the Bead & Yarn Project Round-Up title of this post. I tend to work on these projects without taking the time to take pictures of the process or the progress so today I will be sharing with you pictures of the final product.
 
Up first two yarn projects…
 
This is a clutch I crocheted following the Candy Color Clutch pattern from Lion Brand Yarn using their Bonbons Yarn in Nature. While the pattern called for using simple buttons that would need a crocheted button cover, I opted to add a little pizazz to the clutch and used gold-toned buttons instead. The pattern was super simple to follow, but, I did find it a little annoying to change the color of the yarn every two rows, but, the final look was worth that extra work.
 IMG_3318
Up next, a baby blanket. The Dreamy Lace Baby Throw – also a Lion Brand Yarn pattern – which I used Pound of Love yarn (also from Lion Brand) in Honey Bee. This pattern was also quick and easy to follow, the one thing that concerned me was adding the shell border, but luckily I was able to add it without incident.
IMG_3907

And now on to the bead pieces…

My new favorite beads to work with are SuperDuo beads. The beads have two-holes so you are able to create some pretty cool earring and bracelet designs.

Like this bracelet…

IMG_3662
These earrings…
IMG_4113
Or this earring and bracelet set…
IMG_4038
Another two-hole bead that’s been fun to work with are Tila beads and CzechMates Two-Hole Tile beads.
IMG_4059 IMG_3375
I’ve also finished a few crystal embellished seed bead bracelets. These are probably one of my favorite bracelets to make because even though they do require a bit of work to complete, you can play with all kinds of color combinations to create a very unique and original bracelet.
IMG_3529 IMG_4137
The cross-weave bracelet using bugle beads, pearls, seed beads and crystals.
IMG_3547
The same bracelet but with an embellished edge comprised of seed beads and drop beads.
IMG_3539
Some ladder stich earrings.
IMG_4076
And finally, a cube and crystal bracelet.
IMG_4167
Hope you enjoyed looking at these items as much as I enjoyed making them. Have a great week!

Easy Lace Shrug… It’s Finally Done!

It’s been over a month since I posted about the Easy Lace Shrug I was working on. I honestly didn’t think it would take me this long to finish it, especially since I didn’t have much left to go, but that’s what procrastination will do to you. (And also a few mistakes.)

This is where I was when I last posted… I still had to two more sections of the lace pattern to knit up, the seed stich border to complete and I also had to the cuffs to do which I needed to pick up stitches for along the border. Something I had never done before and while it seemed challenging at first I quickly got the hang of it. Although I did have to pull out the first cuff I did because I somehow miscalculated the number of stitches or more likely mistook some space for stitches when they weren’t.

IMG_2729

So, after I corrected my mistake I successfully knitted the cuffs onto each end of the shrug.

IMG_2978

And finally I seamed the cuffs together and it was done (YAY!!!) I’ve been thinking about knitting up a sweater for myself since I got this down. I probably should start soon though so that I can be sure to have it done before next winter.

IMG_2994 IMG_2997

One other thing I got done… The scarf I had mentioned in the post about the shrug. And while it’s officially Spring today the temperatures will be on the colder side early next week so I am thinking I may get to wear this before I have to pack it away for next winter.

IMG_3003 IMG_3007

A Shrug In Progress

As of late most of my posts have been about baking but today I thought I would share with you a quick picture or two of my current knitting project. Initially I started the year trying to make myself a slouchy hat. I had made one once before and in all honesty I never wore it. I didn’t care for the yarn I used for it and my rounds were a little off, so, I attempted to make another one with a different type of yarn. Once again, I didn’t like it. Although this time I decided that before I even finished it. So, I unraveled it and will be using the yarn for a scarf instead – my favorite winter accessory. I actually started it already…

IMG_2732

But, I digress, back to the knitting project. This is probably the “biggest” thing I have made for myself. While I have knitted (and crocheted) baby blankets and afghans for others I usually stick to making scarves for myself. But, after the hat debacle I decided I would make something for myself that has been sitting on my to-do list for over a year – the Easy Lace Shrug from Lion Brand Yarn – or as I have just been telling others when they see me knitting it… a cardigan. Starting this was my biggest obstacle. I couldn’t get the Seed Stitch correct. This is probably one of the easiest knitting stiches out there but for some reason it just wasn’t clicking with me until I watched a video on how to do it. I kept reverting back to a Rib Stitch. After, well, I won’t say how many tries because in all honesty I lost count, I finally got it right and I was on my way.

IMG_2730

After knitting up two inches of the Seed Stitch it was time to start my pattern – a Shell Lace. Luckily this didn’t give me as many issues as that initial stitch. Although, I did have to do a few Google searches to figure out what the pattern meant by “end last repeat SSK.” Once I figured that out that the Shell Lace pattern quickly came together. I am mainly a self-taught knitter and crocheter so a lot of these terminologies escape me, but, there is definitely a satisfaction that comes along with learning things on your own as you go. That “aha moment” is priceless!!! So at this point I have completed the Shell Lace pattern six times and will probably do it two more times before finishing it up with two more inches of Seed Stitch. After that I have to pick up stitches on the side of the shrug to complete the cuffs… YIKES! I will definitely be watching some more videos to get that right…. Stay tuned!

IMG_2729

Two Ruffles And A Cowl

While at Jo-Ann’s a while back I came across one of Red Heart’s new ruffle yarns, the Boutique Filigree Yarn, which is quite similar to their Boutique Sashay Yarn I used to create ruffle scarves last year. The main difference between the two is that the Filigree yarn is described as a woven fabric strip while the Sashay yarn is flat out called a yarn. After working with both yarns I can honestly say that I prefer working with the Filigree yarn since I didn’t have to stretch it open to use it like I did with the Sashay yarn. What caught my eye about the yarn was a nice shade of purple – called Imperial – that I thought would be the perfect color for a scarf for a friend who would be celebrating a birthday soon.

Using the Halley’s Comet Scarf pattern – which was included on the inside of the yarn wrapper – I created this scarf in less than 2 hours.

IMG_1570

I liked it so much – thankfully my friend like hers as well – that I went ahead and knitted one for myself in a shade of blue called Tealy.

IMG_1775

And since I was on a roll with knitting I decided to knit up a cowl that I have been wanting to make for quite some time. To create it I followed a pattern that I came across on Ravelry called the Drop Stitch Cowl and used Lion Brand yarn’s Hometown USA in Little Rock Granite. I initially made the cowl following the directions of casting on 47 stitches but once I finished it it was too big so I decided to start over and casted on 33 stitches. While the final product is a tad bit snug to get over my head, I am hoping that it will stretch out over time.

IMG_1780

The Runaround Knit Cowl

It’s my first project of the New Year and it’s a simple and versatile one! It’s called The Runaround Cowl and I came across it on a Lion Brand Yarn Facebook post. Originally it came from a blog known as Smashed Peas and Carrots and can be found here: Smashed Peas and Carrots: The Runaround Cowl

As for supplies, all you need is one skein of Lion Brand Homespun Yarn and Size 15 knitting needles. While Homespun yarn does come in an array of colors I am not too fond of the heather and striping colors so I chose to stick with something neutral – Cream.

IMG_9209

At first I was a bit unsure of how the end product was going to look. I started and wasn’t too happy with how it was working up and it took some getting used to working with the yarn. Sometimes my tension is a bit too tight and that can make working with this yarn a little frustrating.

IMG_9216

Unfortunately once I got on a roll I somehow ended up with an extra stitch and instead of trying to correct the problem I opted to just start over. This is one of the reasons I prefer crocheting over knitting, it’s much easier to correct any errors. The second time around I was much happier with how it was looking and after a few hours of knitting I reached my desired length of 55 inches – I decided to make mine a few inches longer than the directions said. I will also note that while the directions state to bind off in pattern I decided to bind off by knitting my last row, I just find it easier to do that and I figured it wouldn’t alter the look of the cowl since I was going to stitch the two ends together.

I then weaved in the ends of my yarn, created a twist and stitched the ends together. And voila I had a new cowl! Once the weather gets a little warmer I’m sure this will become one of my go-to scarves.

IMG_9220 IMG_9234 IMG_9236

Runaround Cowl

Courtesy: www.smashedpeasandcarrots.blogspot.com

Cast of 25 stitches

Row 1: *K1 P1, Repeat from * across, K1

Continue with this pattern until cowl measures 50 inches or your desired length.

Bind off loosely in pattern.

Weave in tails.

Sew short ends together with a yarn needle making sure that you have made one twist in the cowl before sewing ends.

Knitting for the Holidays

I wasn’t intending on knitting or crocheting any Christmas gifts this year except for the toddler hat and scarf set I had finished a month or two ago for a friend’s daughter, but, when another friend sent me a pic of cowl neck scarf she liked with button closures I decided that I would have time to finish this one item. Every year I find myself racing to finish things a day or two before Christmas because at times I can be such a procrastinator and as we all know the Christmas holiday just sort of sneaks up on you regardless of how early you start your shopping and/or crafting. There was actually one year that I was up until 2am Christmas morning finishing up scarves… Not fun!

While I did start this project about two weeks prior to the holiday I knew I would be able to get it done since I opted to use Lion Brand Wool-Ease Thick & Quick Yarn. This is probably my favorite yarn to knit with since as its name suggests it does work up quite quickly. I did crochet a scarf with it once and for me personally I find it too thick to crochet with. I opted to use neutral colors – Black and Grey Marble – this way the scarf could match with anything. As for the buttons, I spent a good amount of time at my local JoAnn’s trying to find the right ones. I really wanted wooden ones but, the only wooden cylinder shaped ones were on the small side so I decided to go with simple black ones.

IMG_8916

As for a pattern, I sort of followed one that I found on the Lion Brand Yarn website – the Buttoned Cowl – but, modified it a bit this way my finished product would be bulkier. Essentially I just casted on more stitches than the original pattern called for, forty-one vs. twenty-seven. Since the pattern just called for a straightforward garter stitch – knitting every row – I knew this was going to be a piece of cake. I really wanted to knit this in a rib pattern, but, was having a hard time adjusting the pattern into one that would still incorporate the stitches to create the buttonholes. Speaking of buttonholes, it took a few tries before I was able to get them right. I kept missing one and would end up with only three as opposed to four. After about five tries though I finally got it right and I was on my way. If by any chance you are wondering, I decided to start with the grey marble yarn as opposed to the black yarn this way the black buttons would stand out on it.

IMG_8930

I wanted the finished cowl to be approximately twenty-four inches so I worked in garter stitch for about twelve inches, which equates to about fifty-eight rows and then I switched to the black yarn.

IMG_8978

After knitting another fifty-eight rows with the black yarn and binding off this is what I ended up with. Admittedly it doesn’t look like much and I was a little concerned that I wasn’t going to be happy with it.

IMG_9009

But, once I sewed the two buttons on – for buttonholes one and three – and tried it on I was happy with how it looked. And while this picture makes it seem like it’s on the small side it actually has a considerable amount of stretch to it.

IMG_9011

And although my mannequin isn’t doing it justice, its intended recipient was very happy with it and it fit her perfectly.

IMG_9022

And finally, here’s a pic of the toddler-sized hat and scarf set I made. She was ecstatic with it, especially since it matched her new pink coat so well. Making a pom-pom and adding fringe to a scarf was a first for me with this set but it definitely added that fun factor that little kids accessories always need.

IMG_9153

Knitted Flower Headband

I’ve seen knitted headbands practically everywhere this season that I got inspired to make one.

While I do have a decent stash of leftover yarn from previous projects that would have sufficed for this small one, I ended up buying a new skein of yarn after coming across it on sale at my local Michaels store. I am partial to most shades of blue and this basic navy blue yarn from Loops & Threads Charisma caught my eye. The one downfall about this yarn is that it fuzzes a great deal so I doubt I’ll be using it again.

IMG_8826

I opted to semi-follow the Seed Stitch Headband pattern from Lion Brand modifying it a bit to get my desired length and width. Using size 9 knitting needles I casted on 13 stitches (which gave me a width of 4 1/4 inches) and then simply followed a pattern of Slip 1, *P1, K1 (repeat from * to end of row) and continuing it for each row until I reached a length of 20 inches.

IMG_8858
I decided I wanted to spruce up this basic headband so I crocheted a simple flower to attach to it. Once again I followed a Lion Brand Yarn pattern – the Six-Petal Flower Motif – using Red Heart yarn that I had leftover from my Easy Slouchy Beret Hat. This actually wasn’t my first yarn choice to make the flower. I wanted to incorporate a sparkle yarn with the navy blue yarn but unfortunately the navy yarn was just too thick to work with.
IMG_8859
Now that I had all of my pieces it was time to put this headband together.
IMG_8856
I first stitched the two ends of the headband together and then attached the flower and was quite pleased with the final product. I’m sure I’ll make a few more of these, if anything, just for fun.
IMG_8874
%d bloggers like this: