Staying Home and Crafting

How have you been spending all this extra time at home? Cleaning crevices of your home you never thought of cleaning? Finally clearing out your closets to discover items you had long forgotten? Constantly searching the internet for recipes to use up obscure items found in your pantry? Or simply catching up on television shows or discovering new ones? And of course, there are those things on your to do list that you know you should get to, but, just don’t seem to have the motivation to do so. One of those things for me is raking the leaves in my backyard. A task I am never fond of doing, but, once done I am so happy to have done. Sometimes too we put so many things on our to-do lists that we become overwhelmed with what to do first. I know that happens with me often. Especially on my list of crafts I want to do.

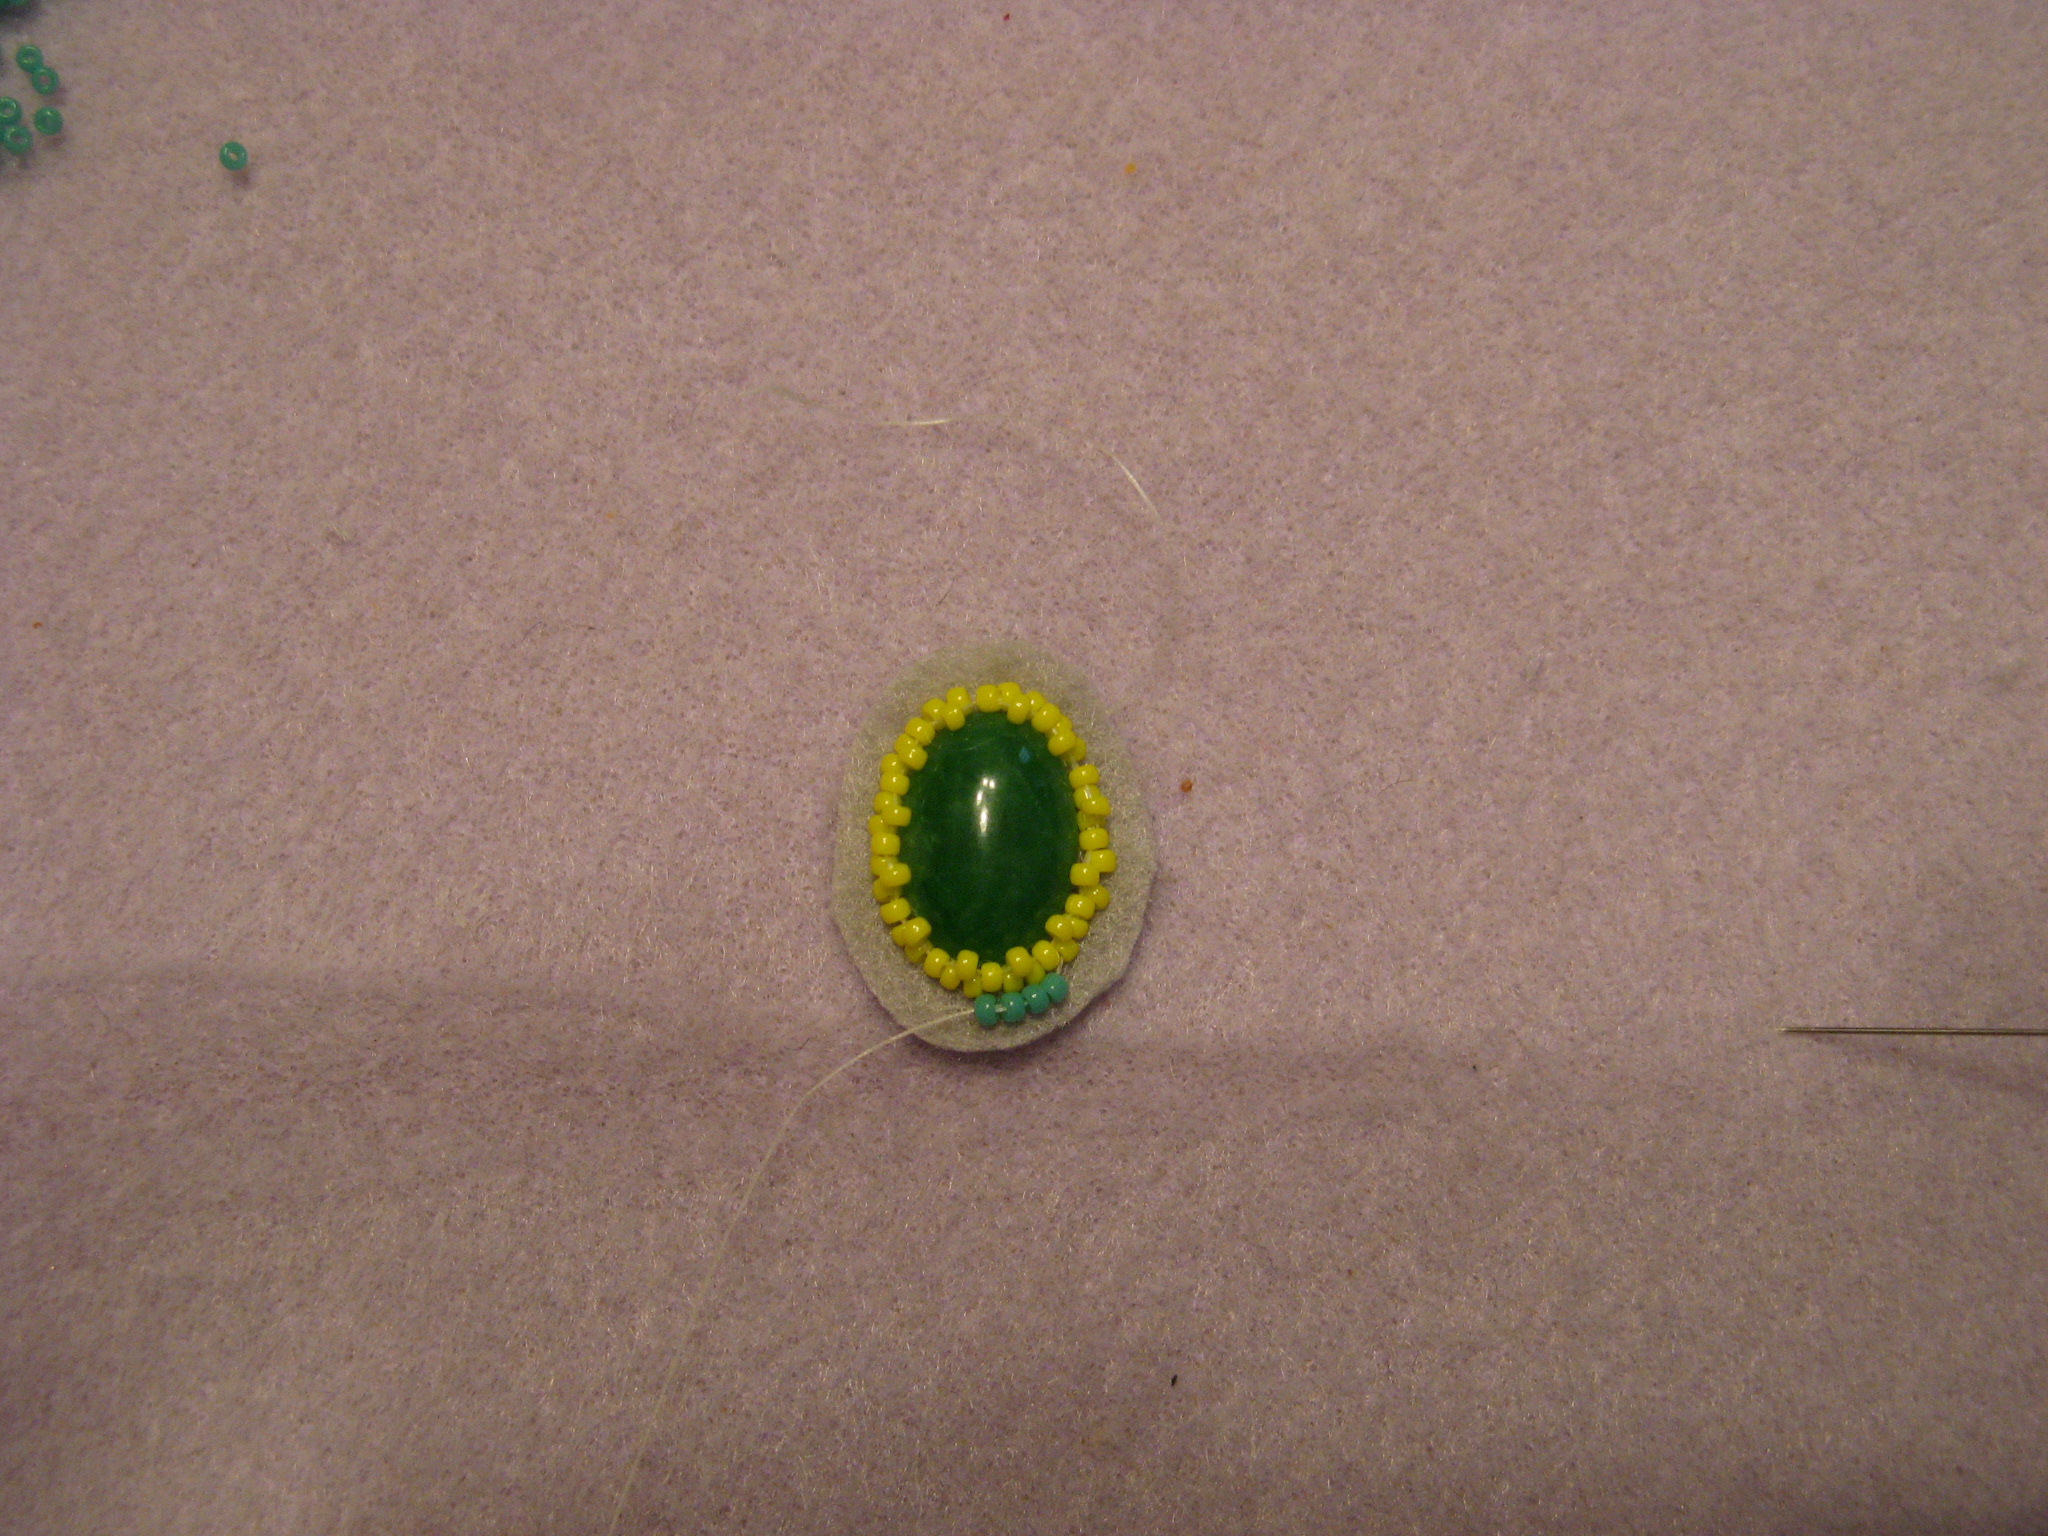
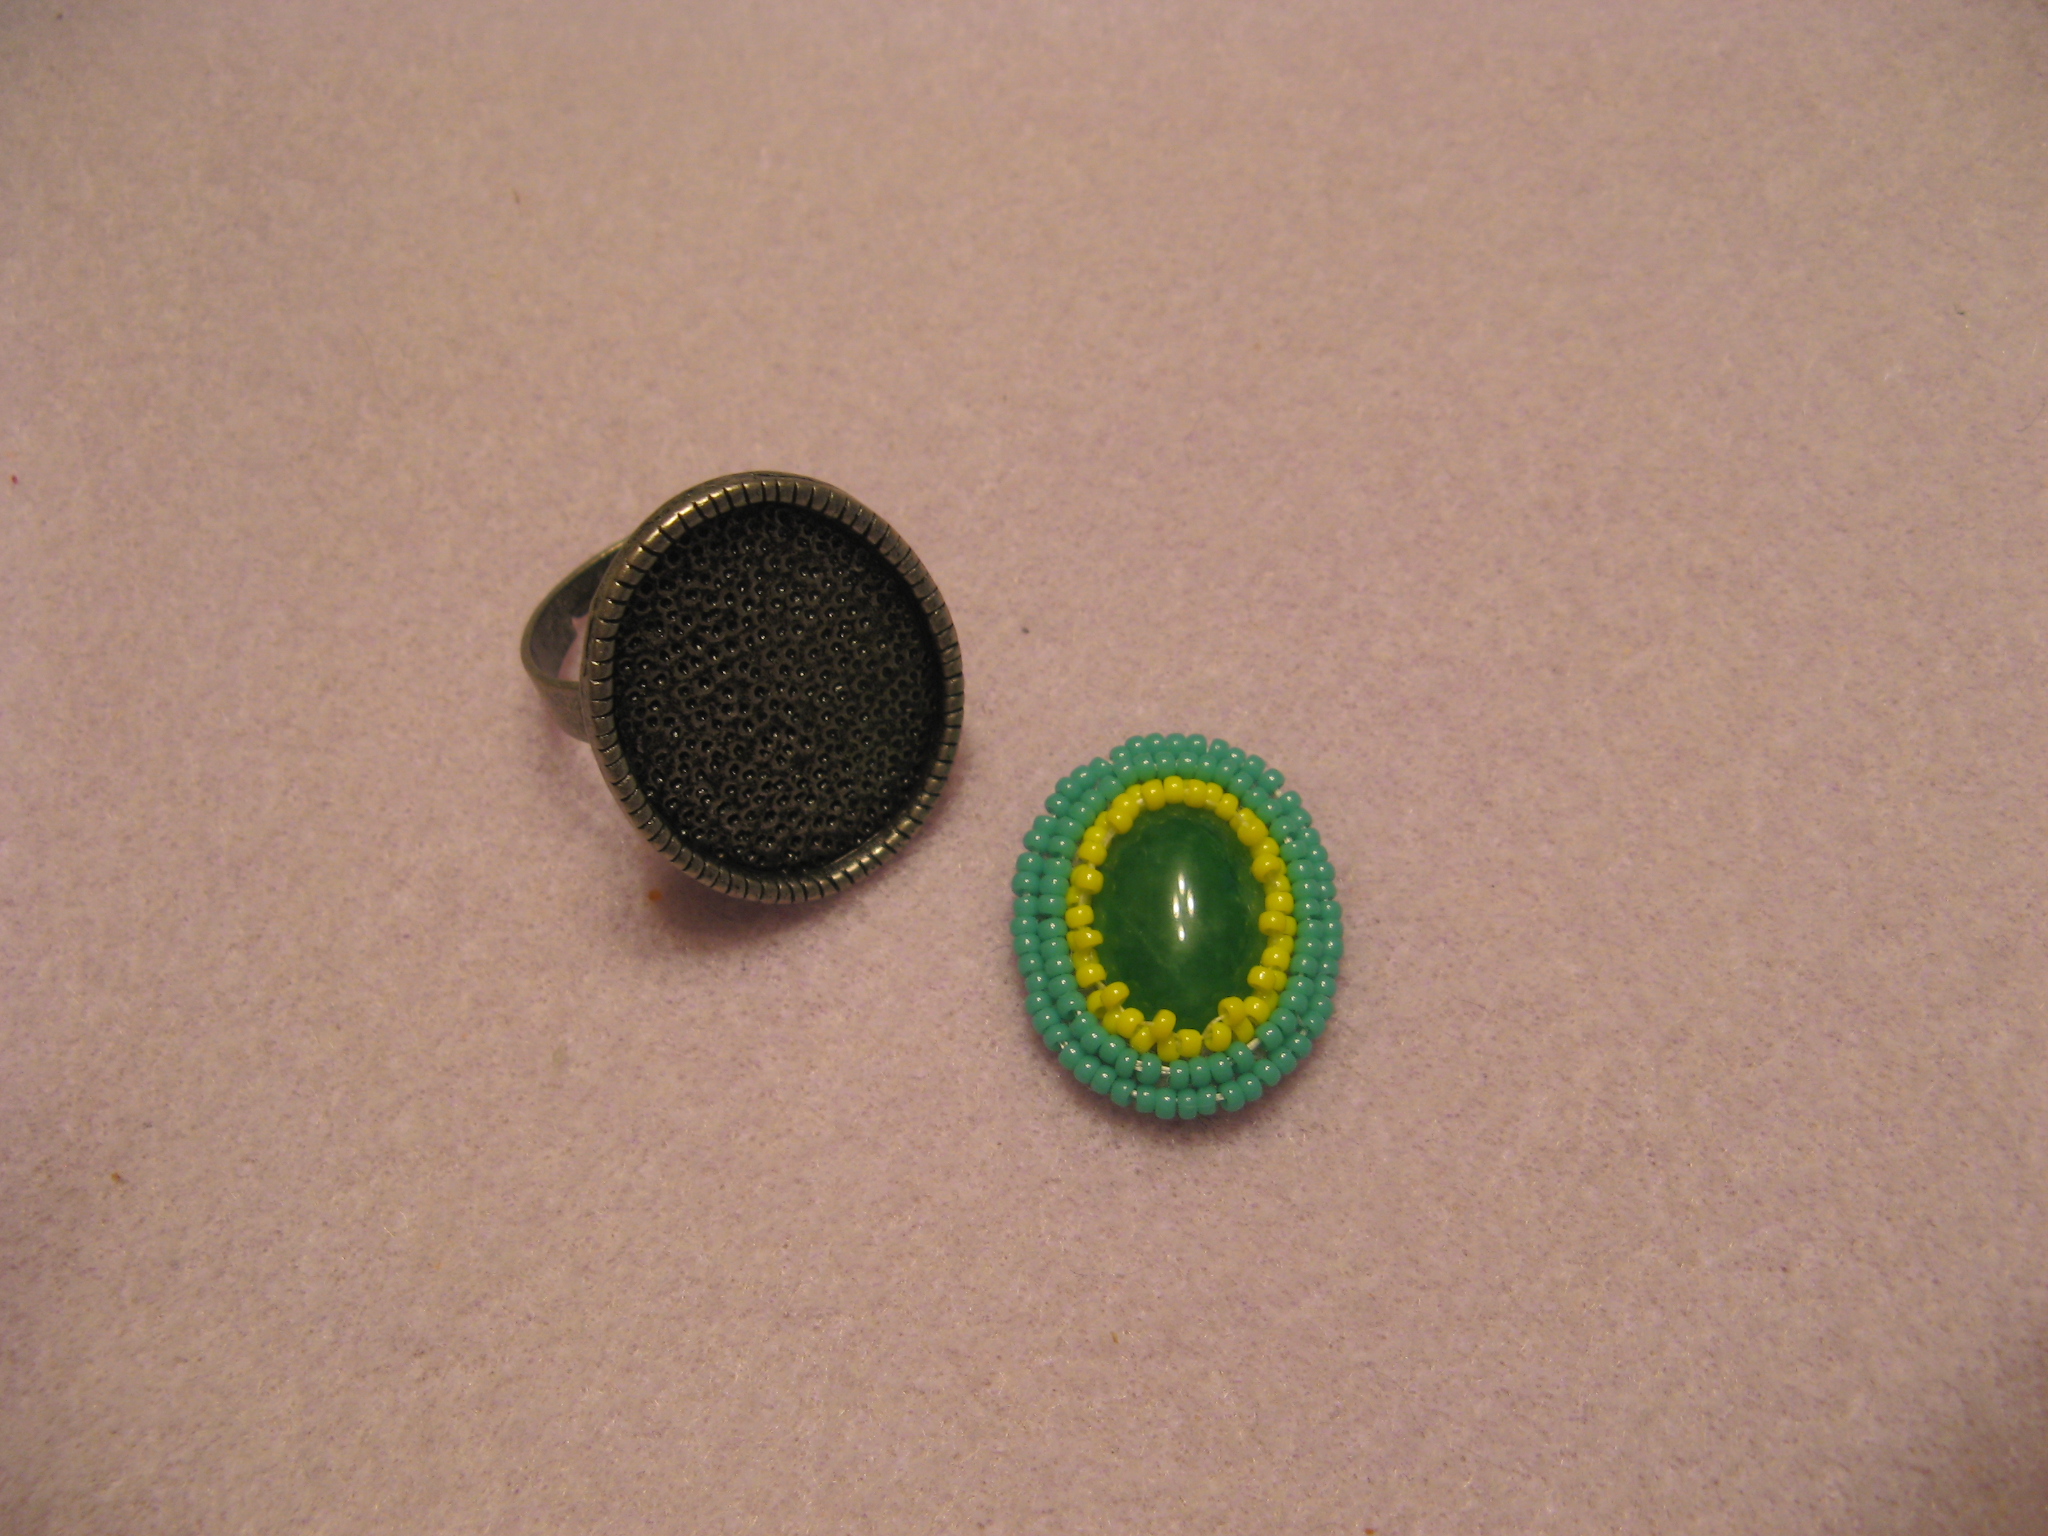
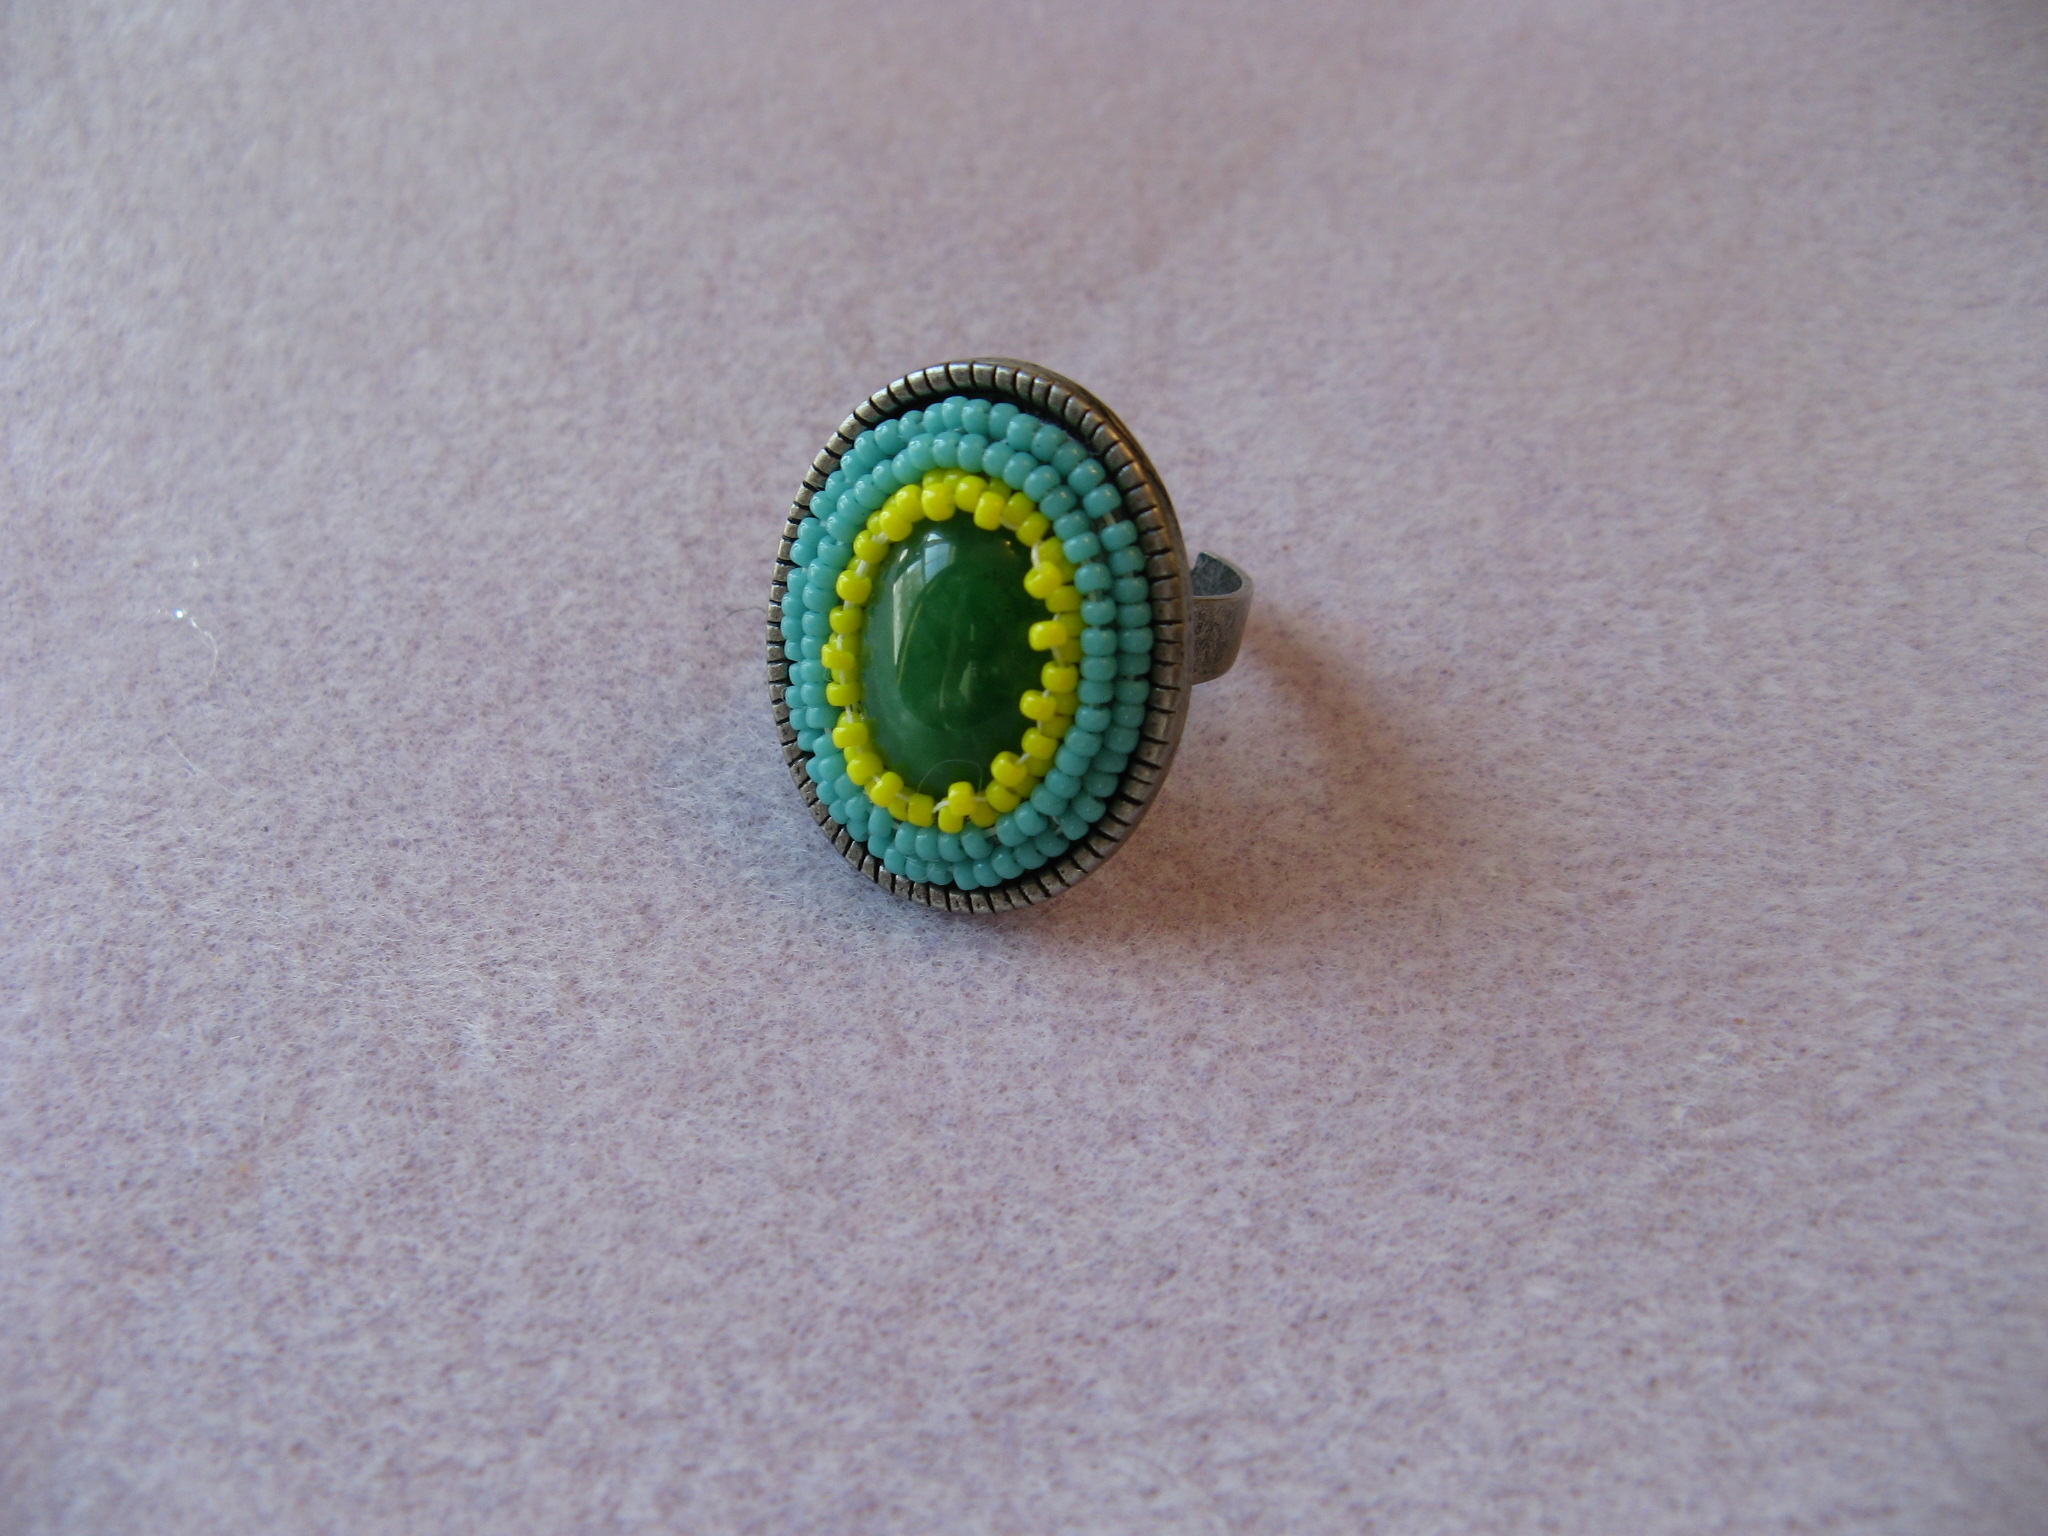
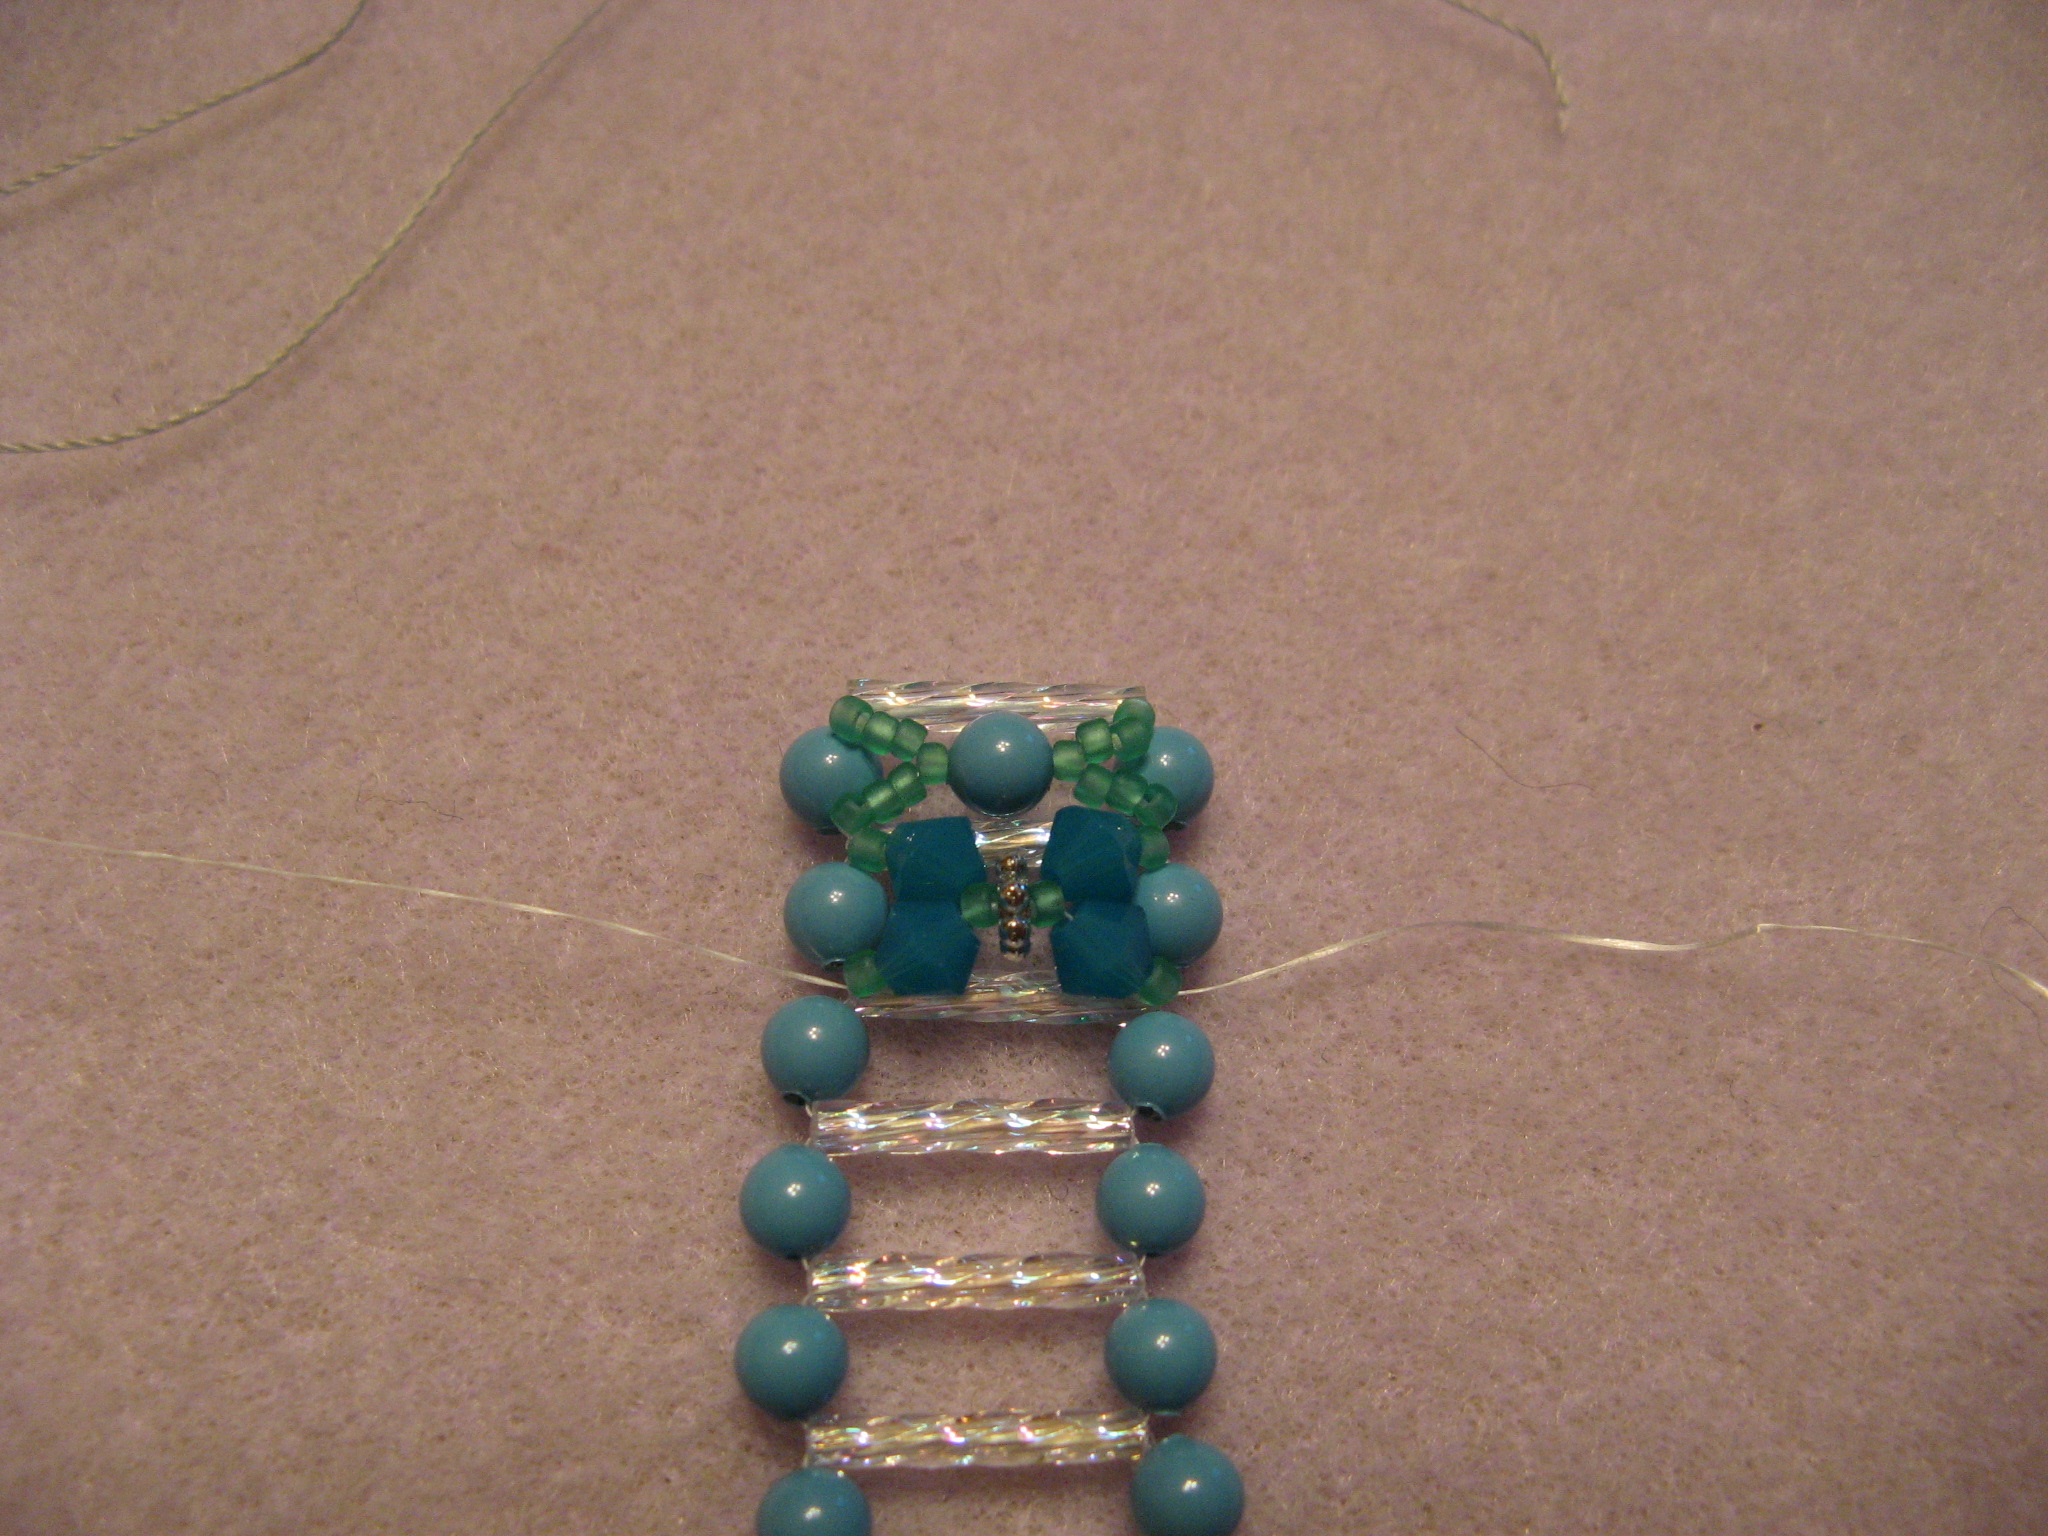
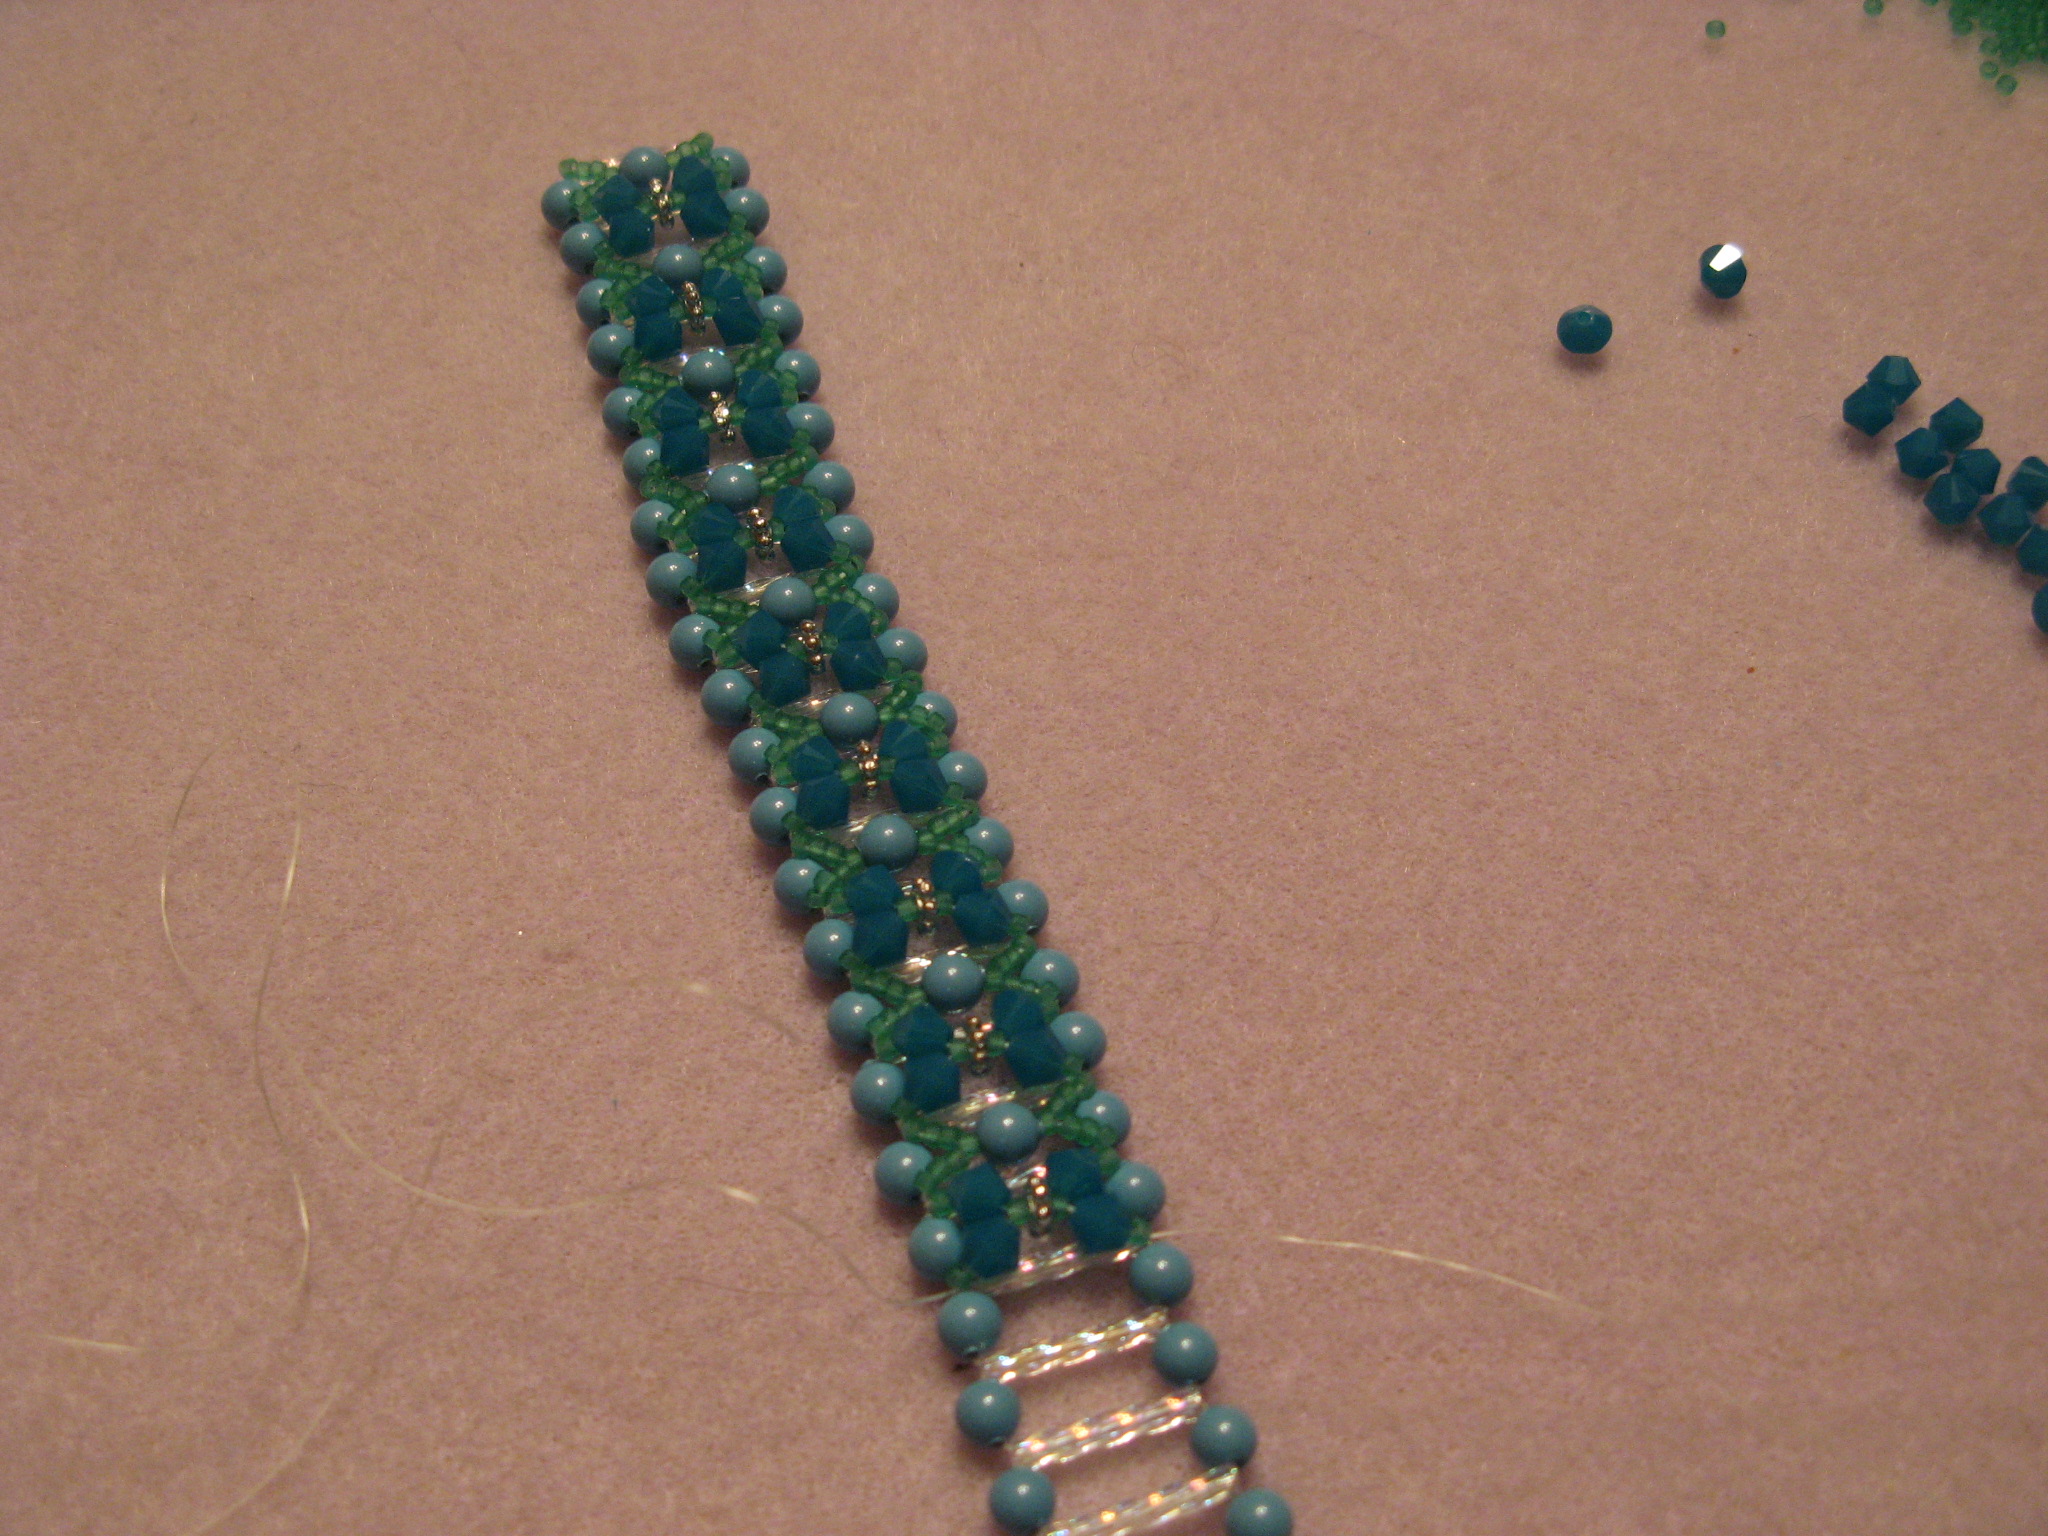
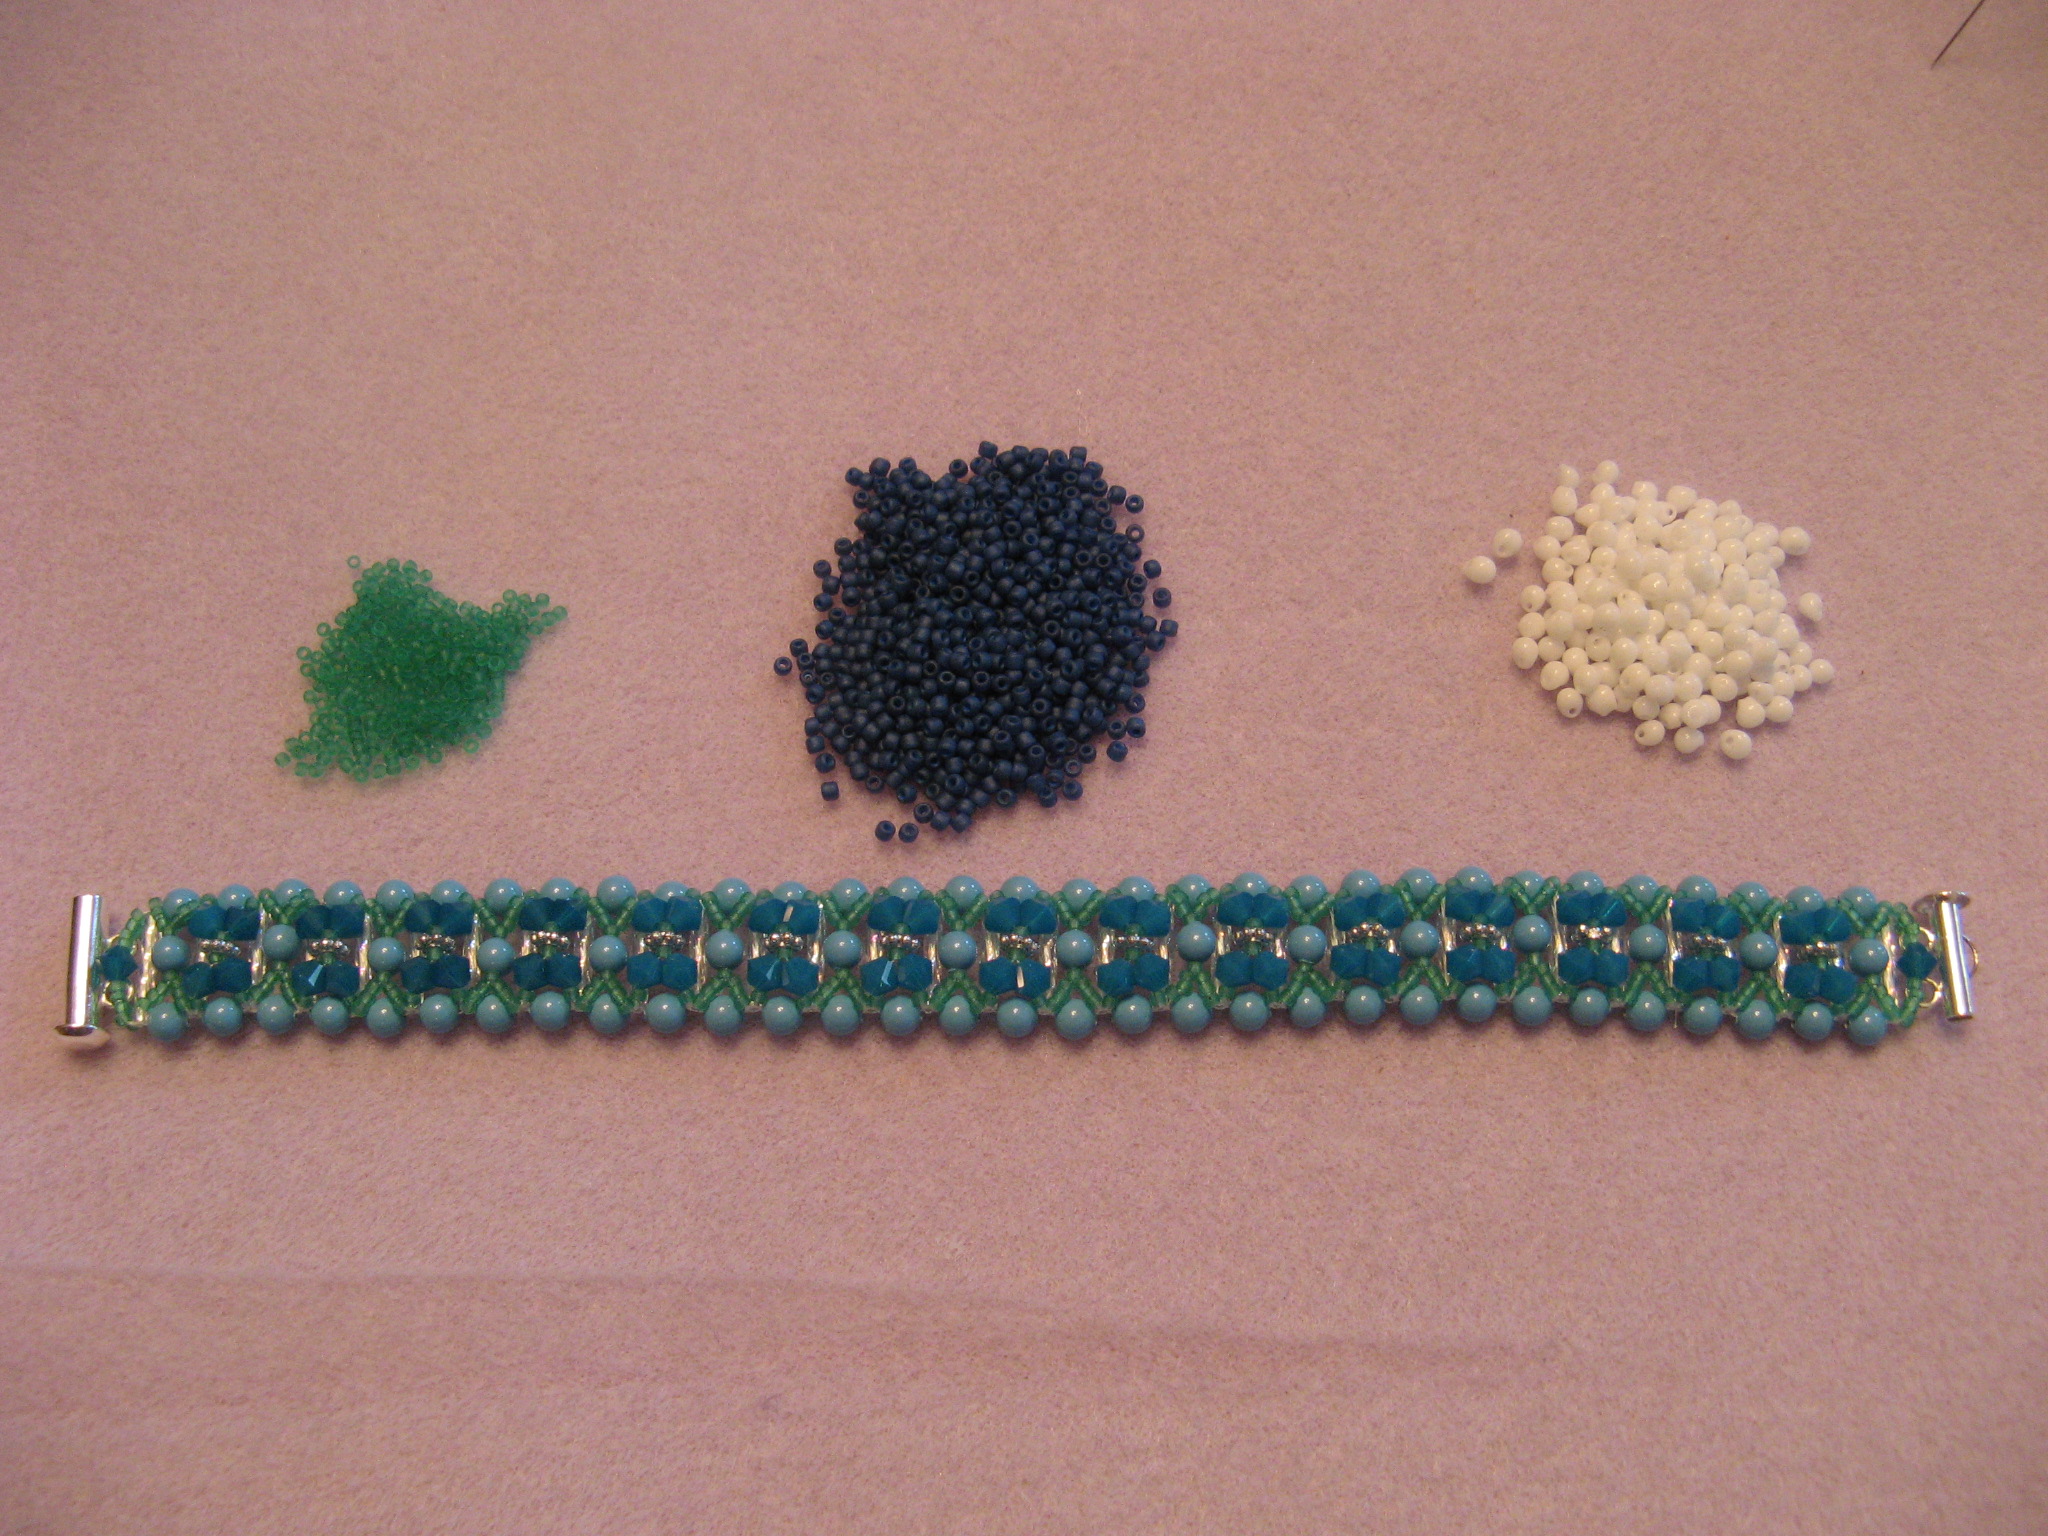
For quite some time I had a small pile of beadweaving projects that I wanted to get to. I even organized the beads I wanted to use for the projects so all I had to was actually sit down and make them. Well, I finally started working on some of those projects and soon discovered that I didn’t like how a few of them were turning out or I just didn’t have the patience so I gave up and moved on to the next one. I did find one project that I liked and I ended up making two pairs of earrings.

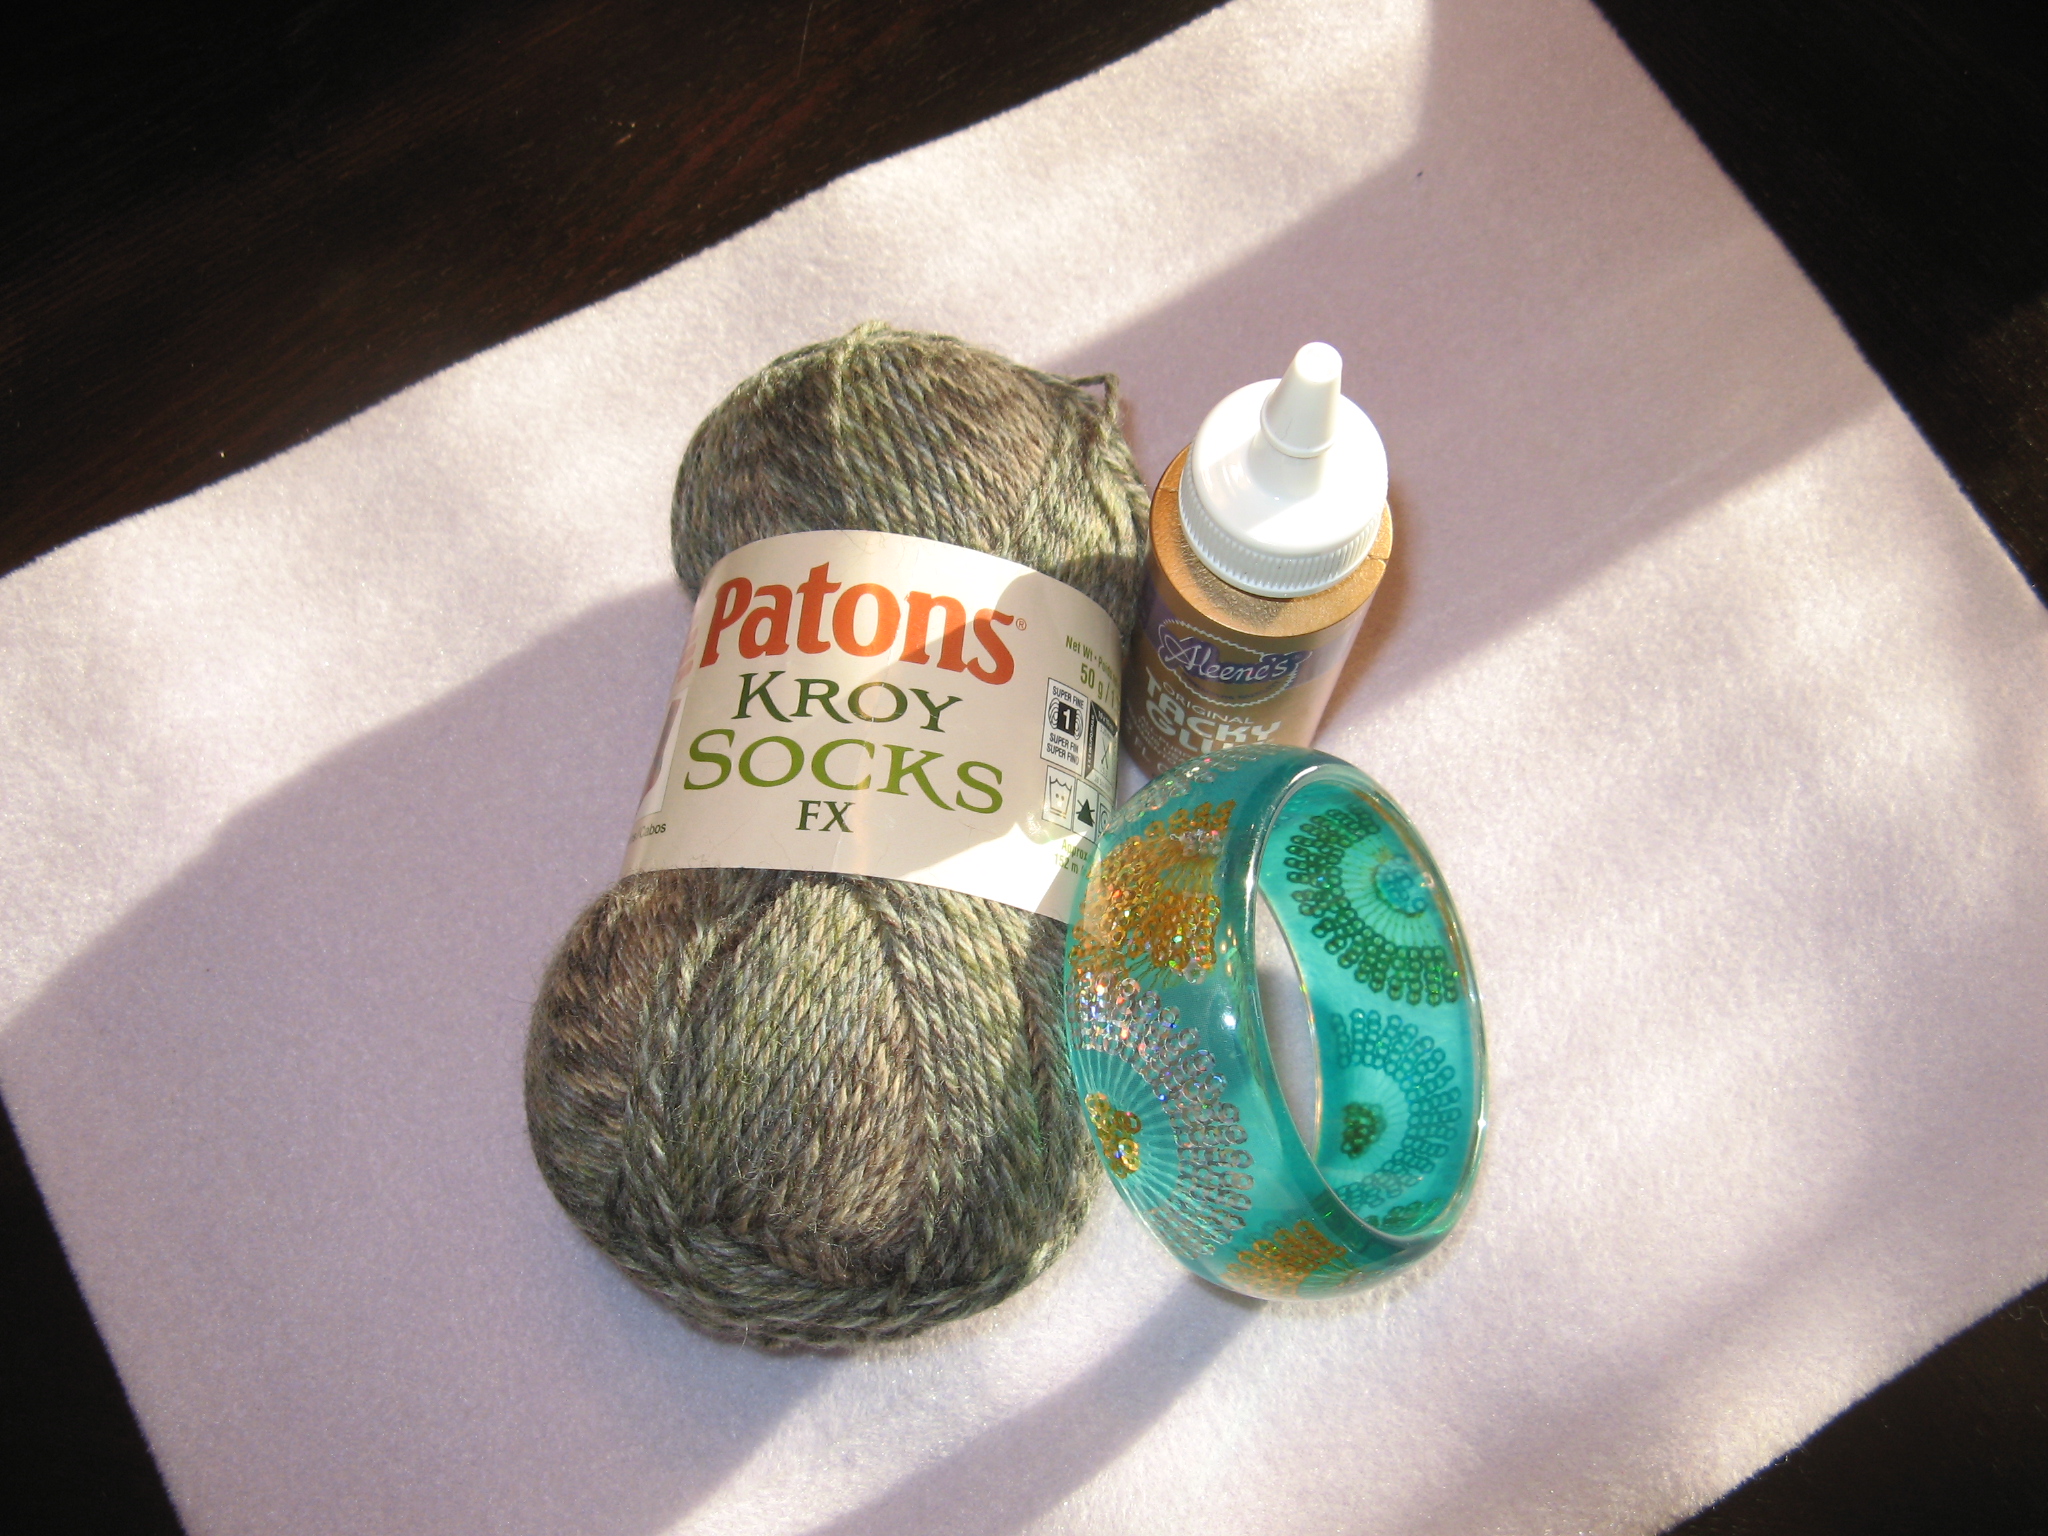
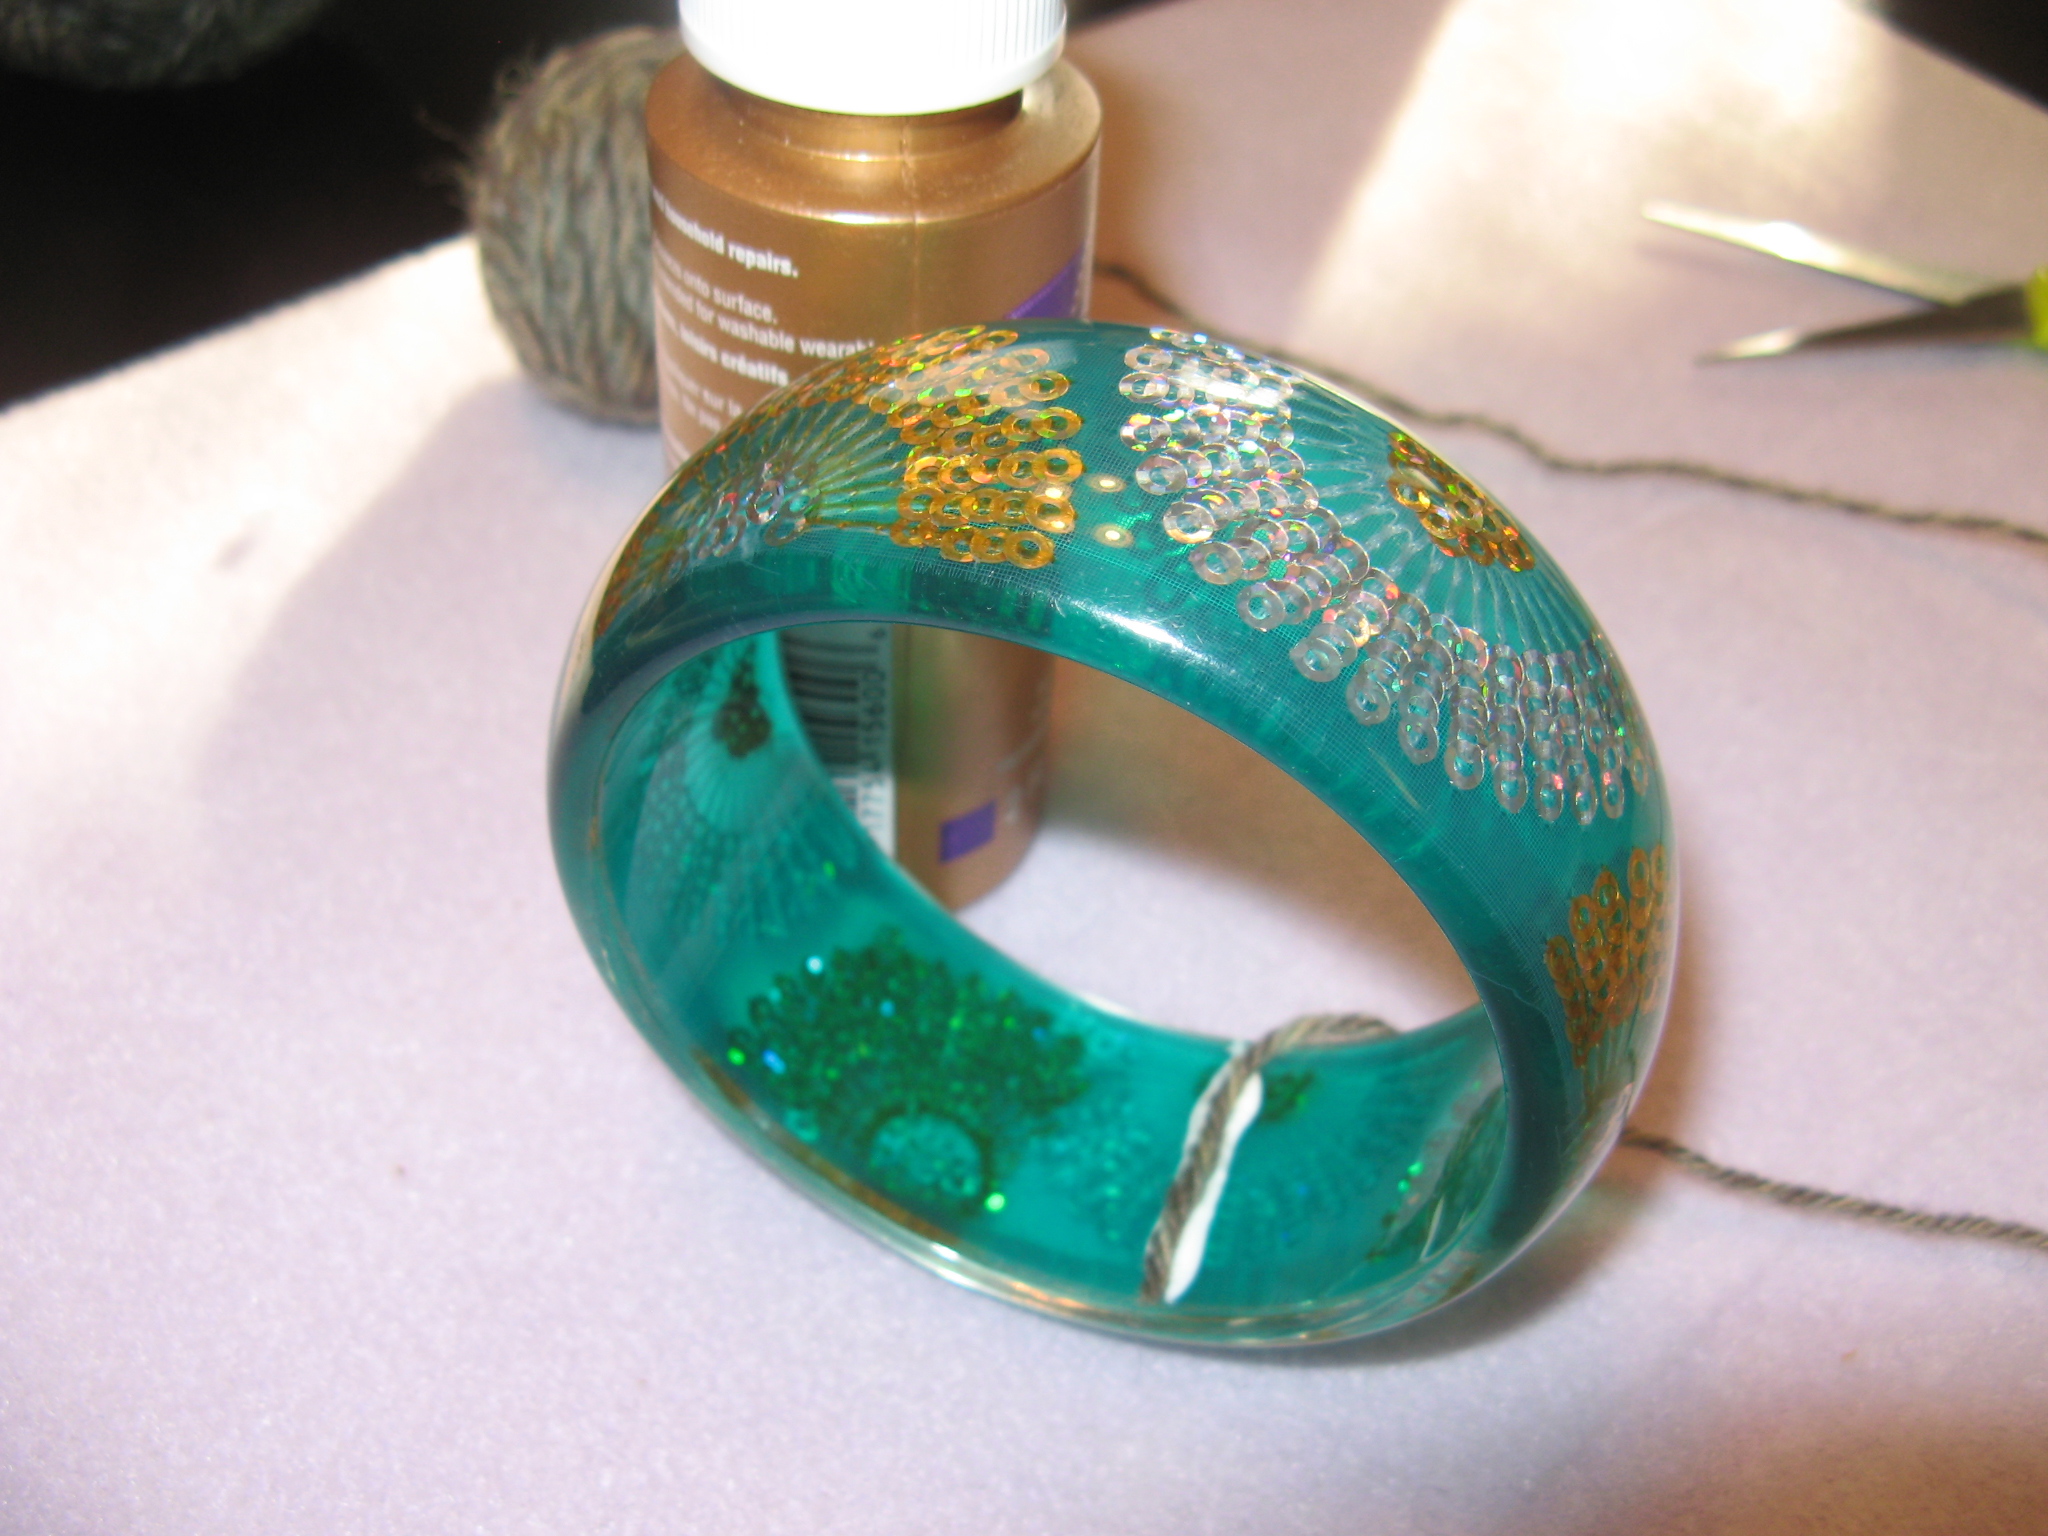
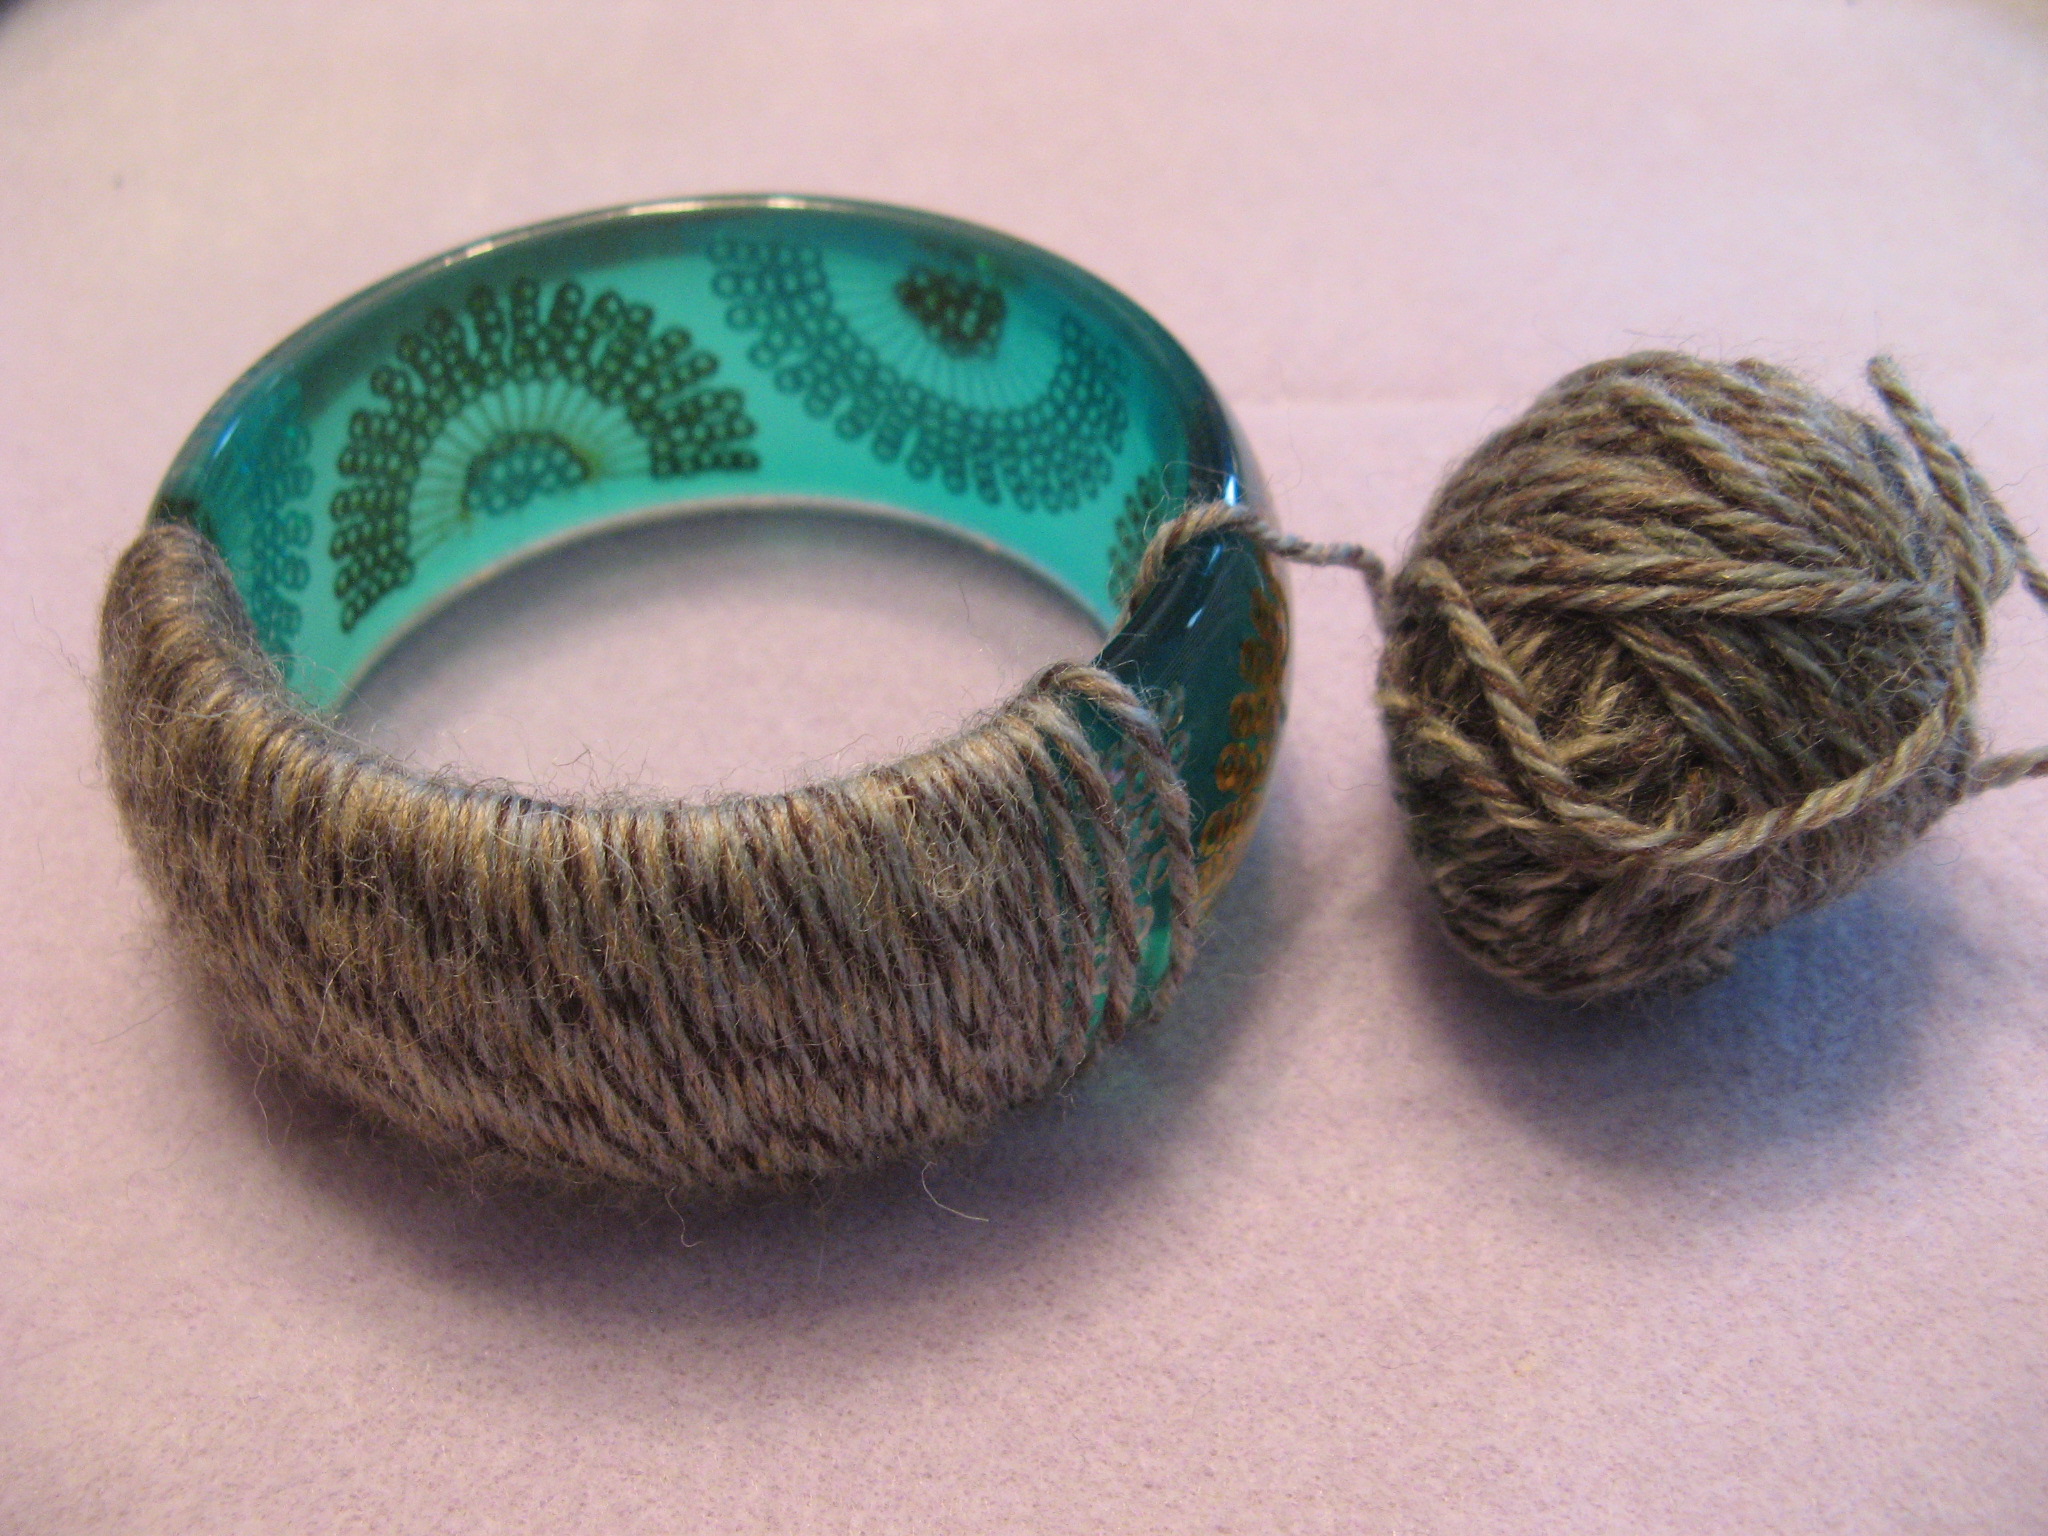
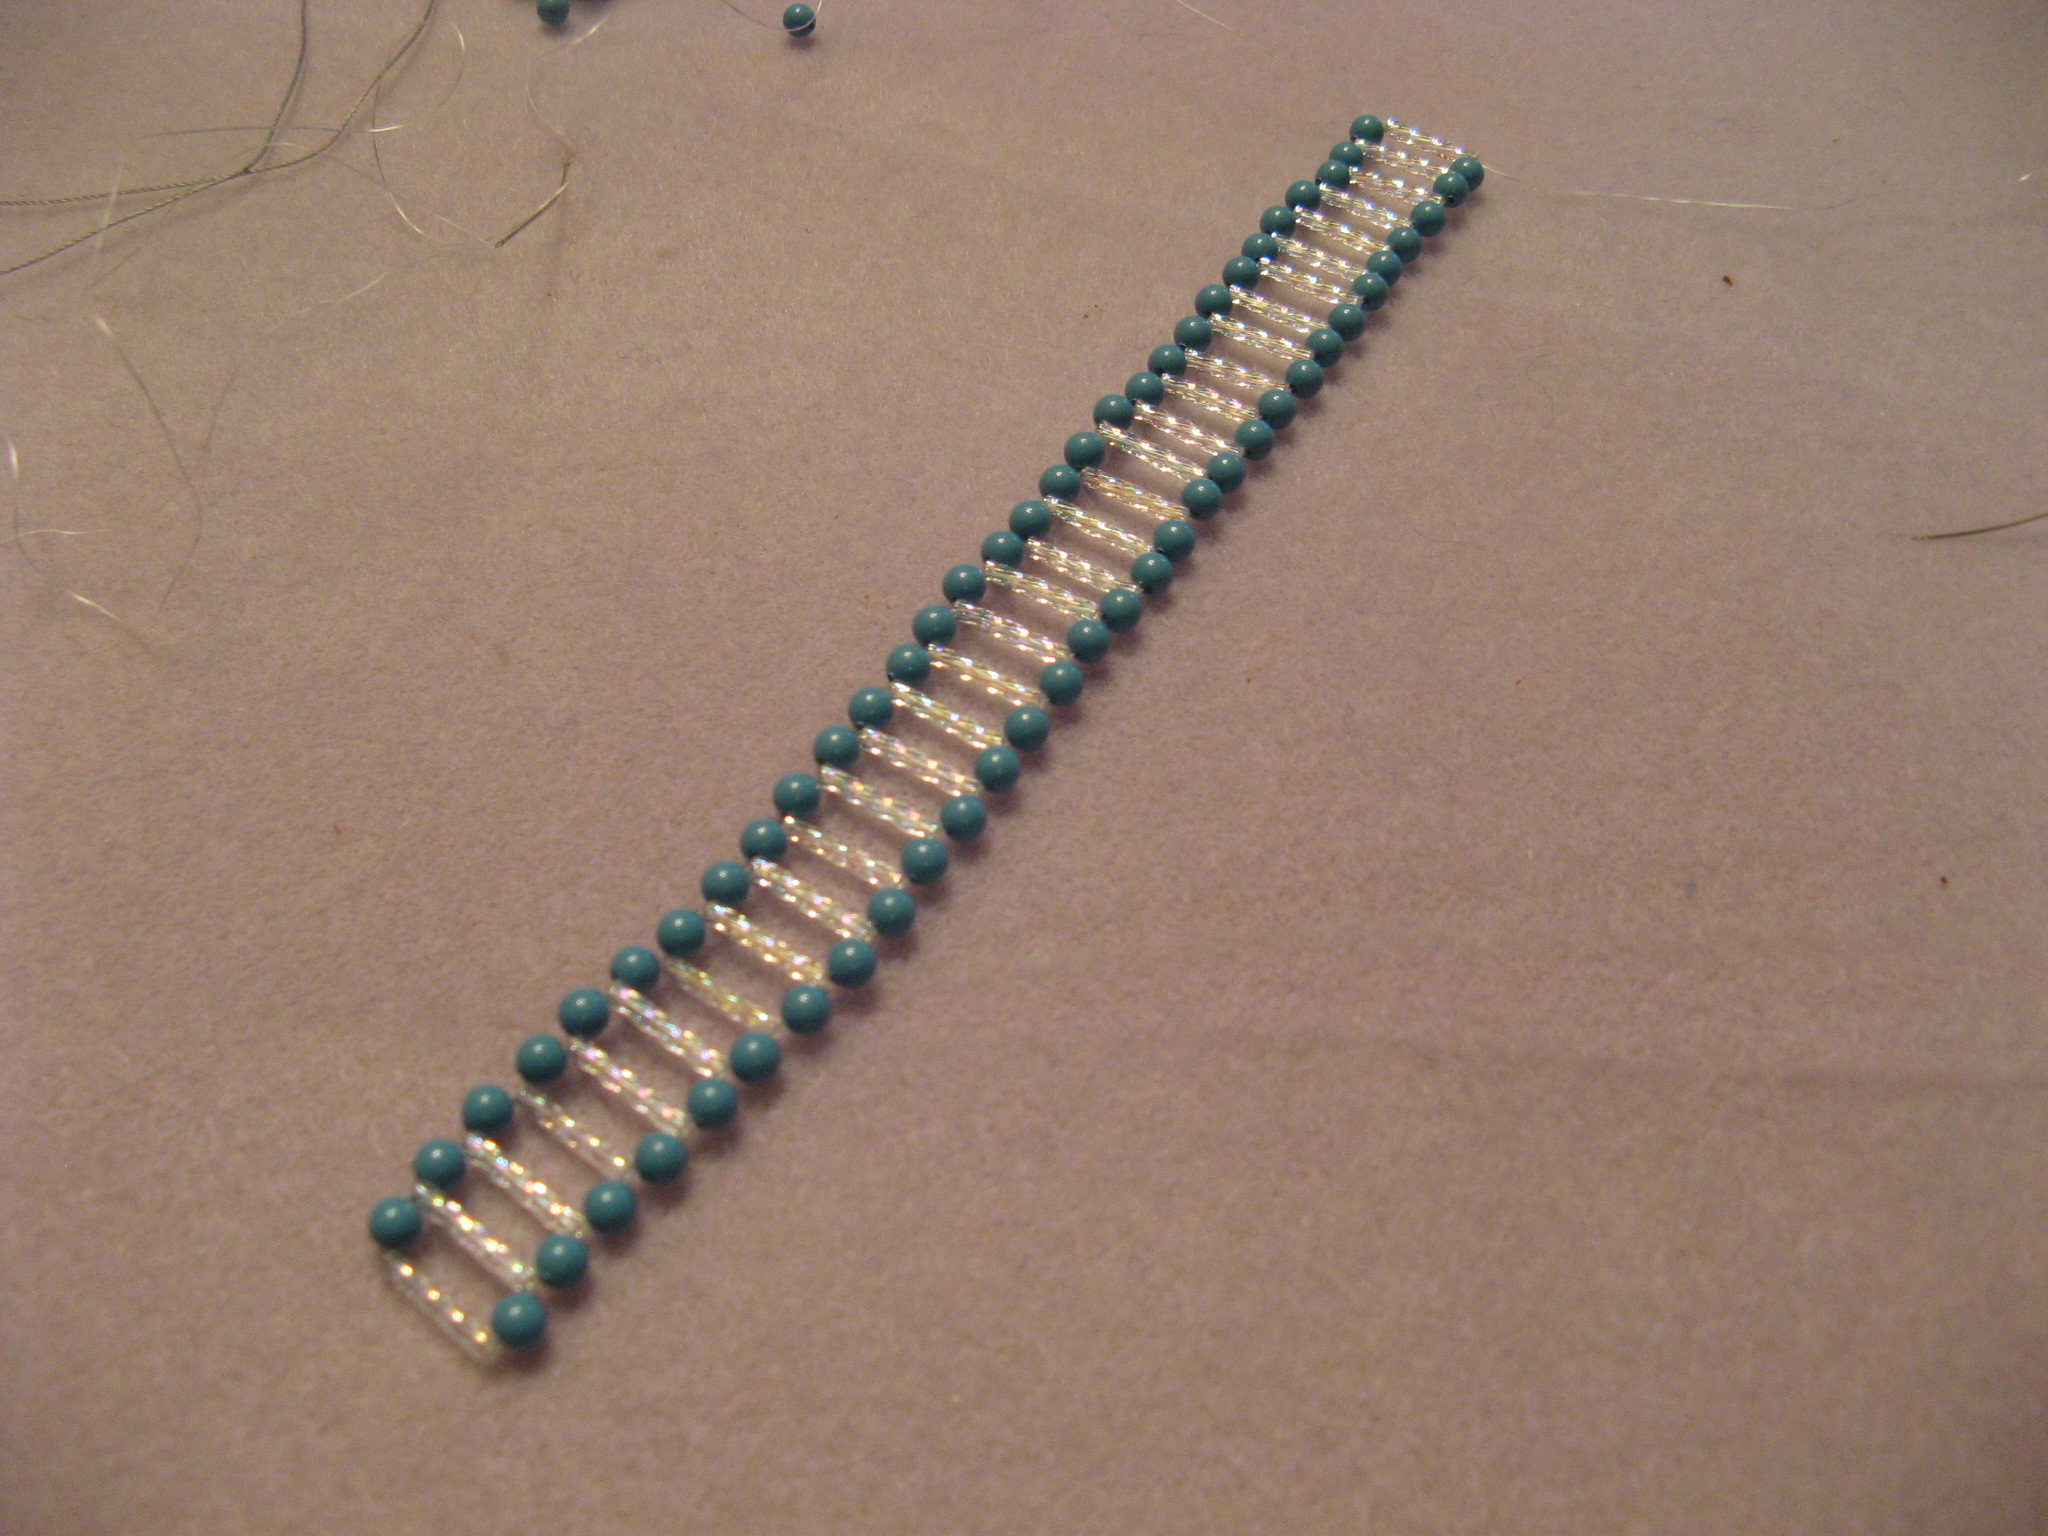
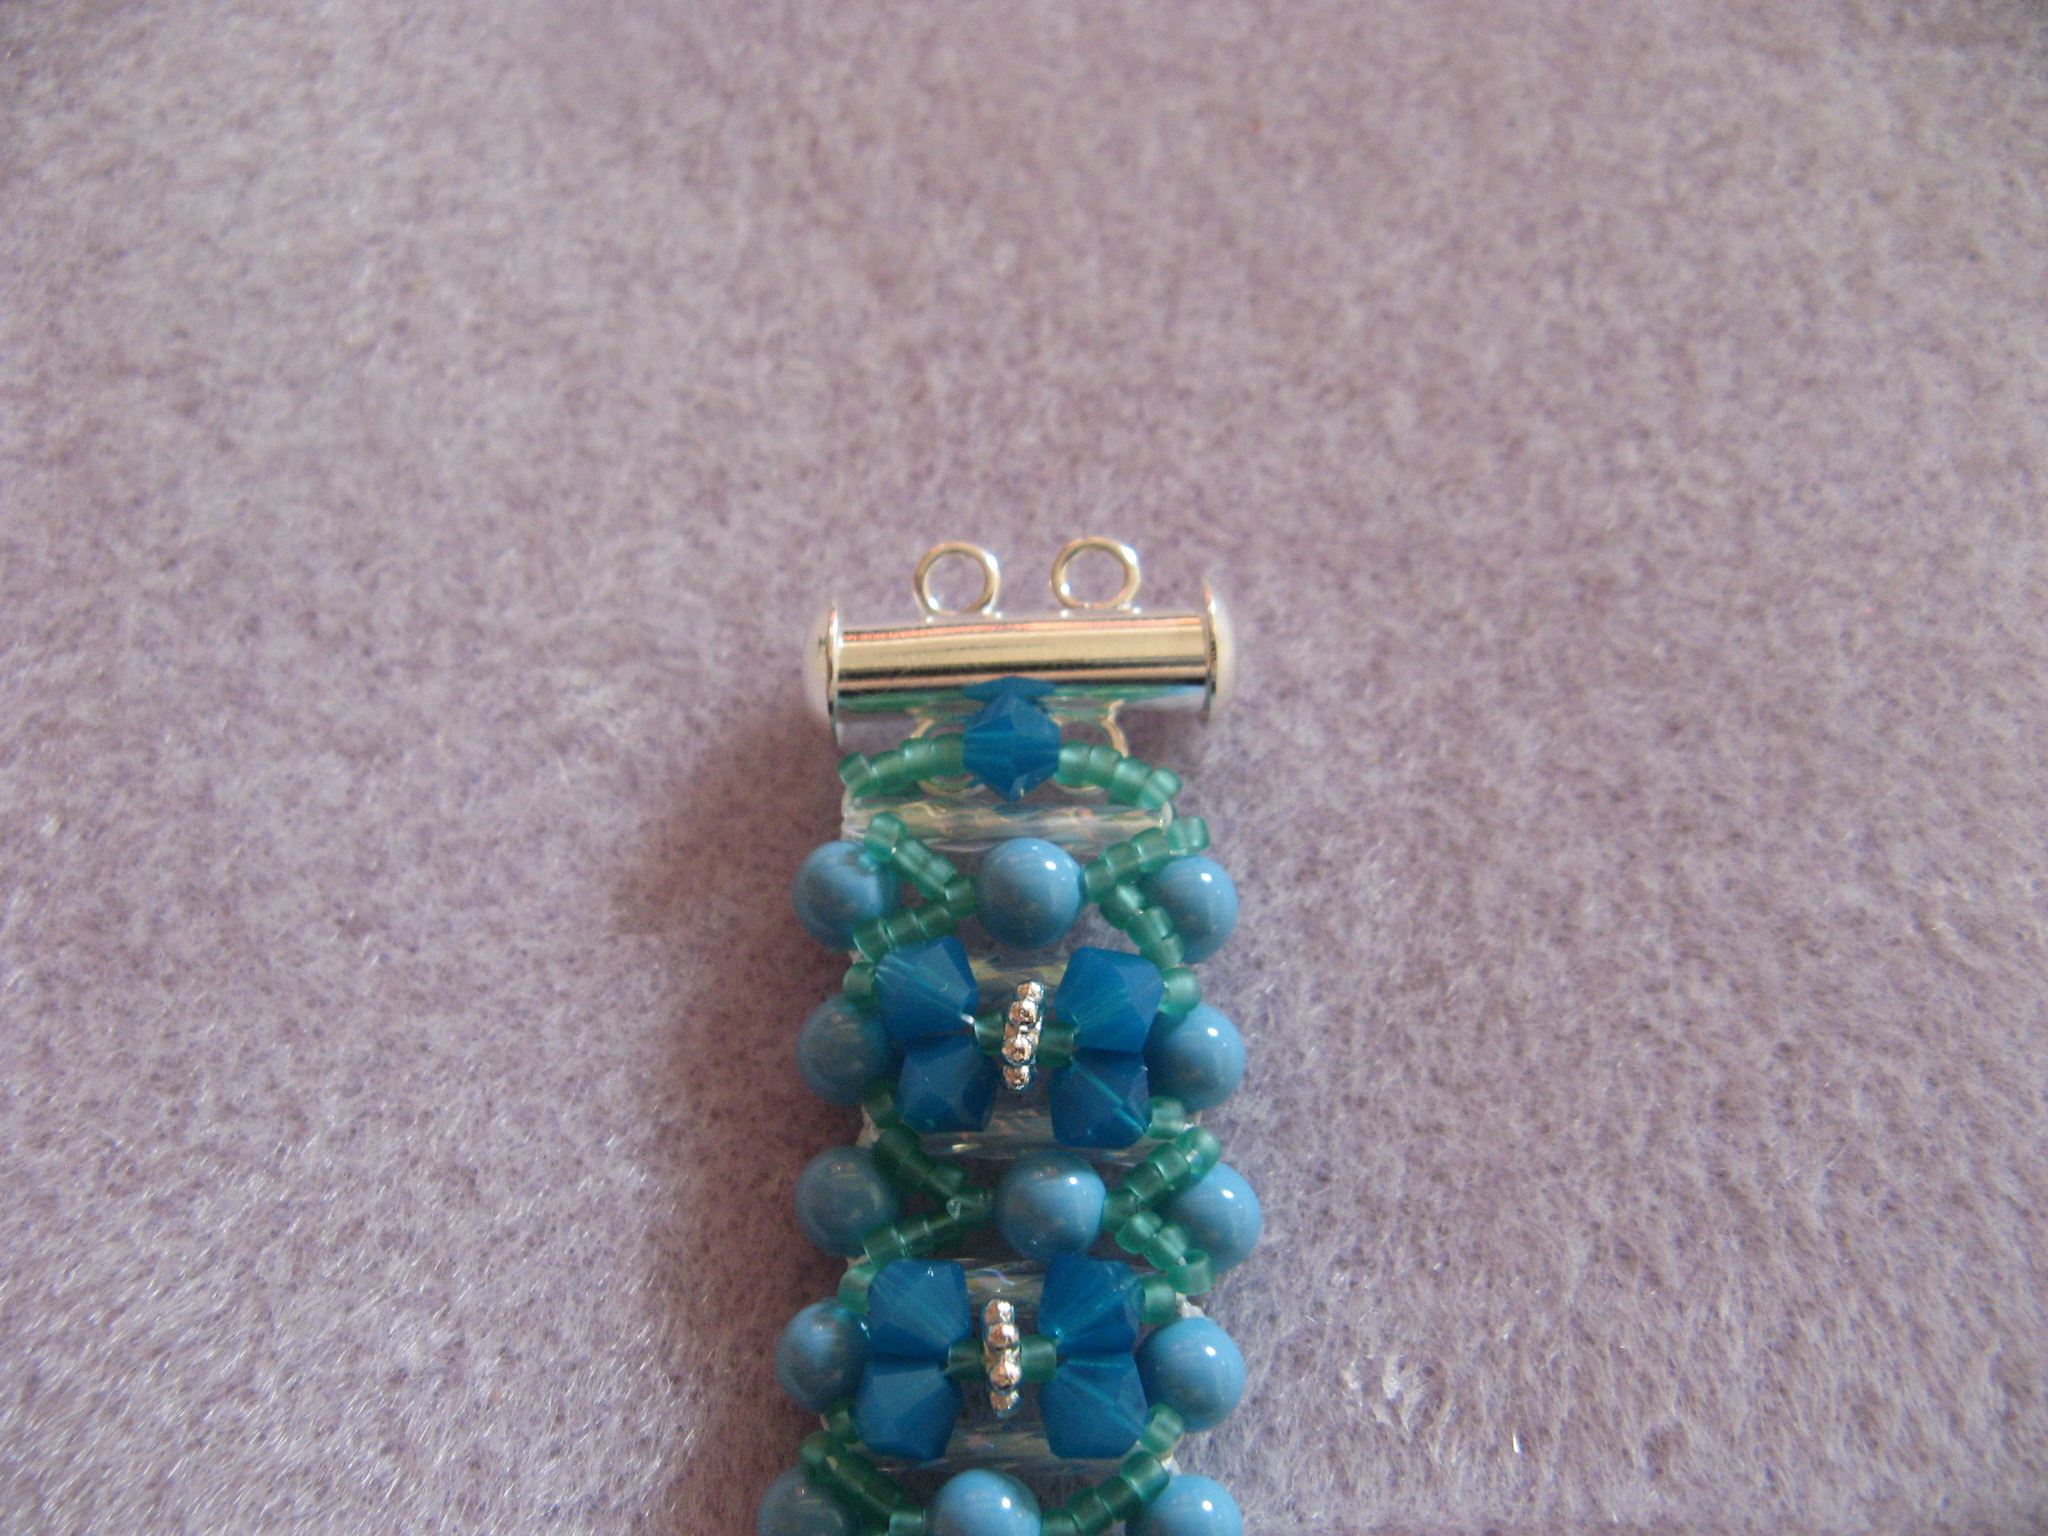
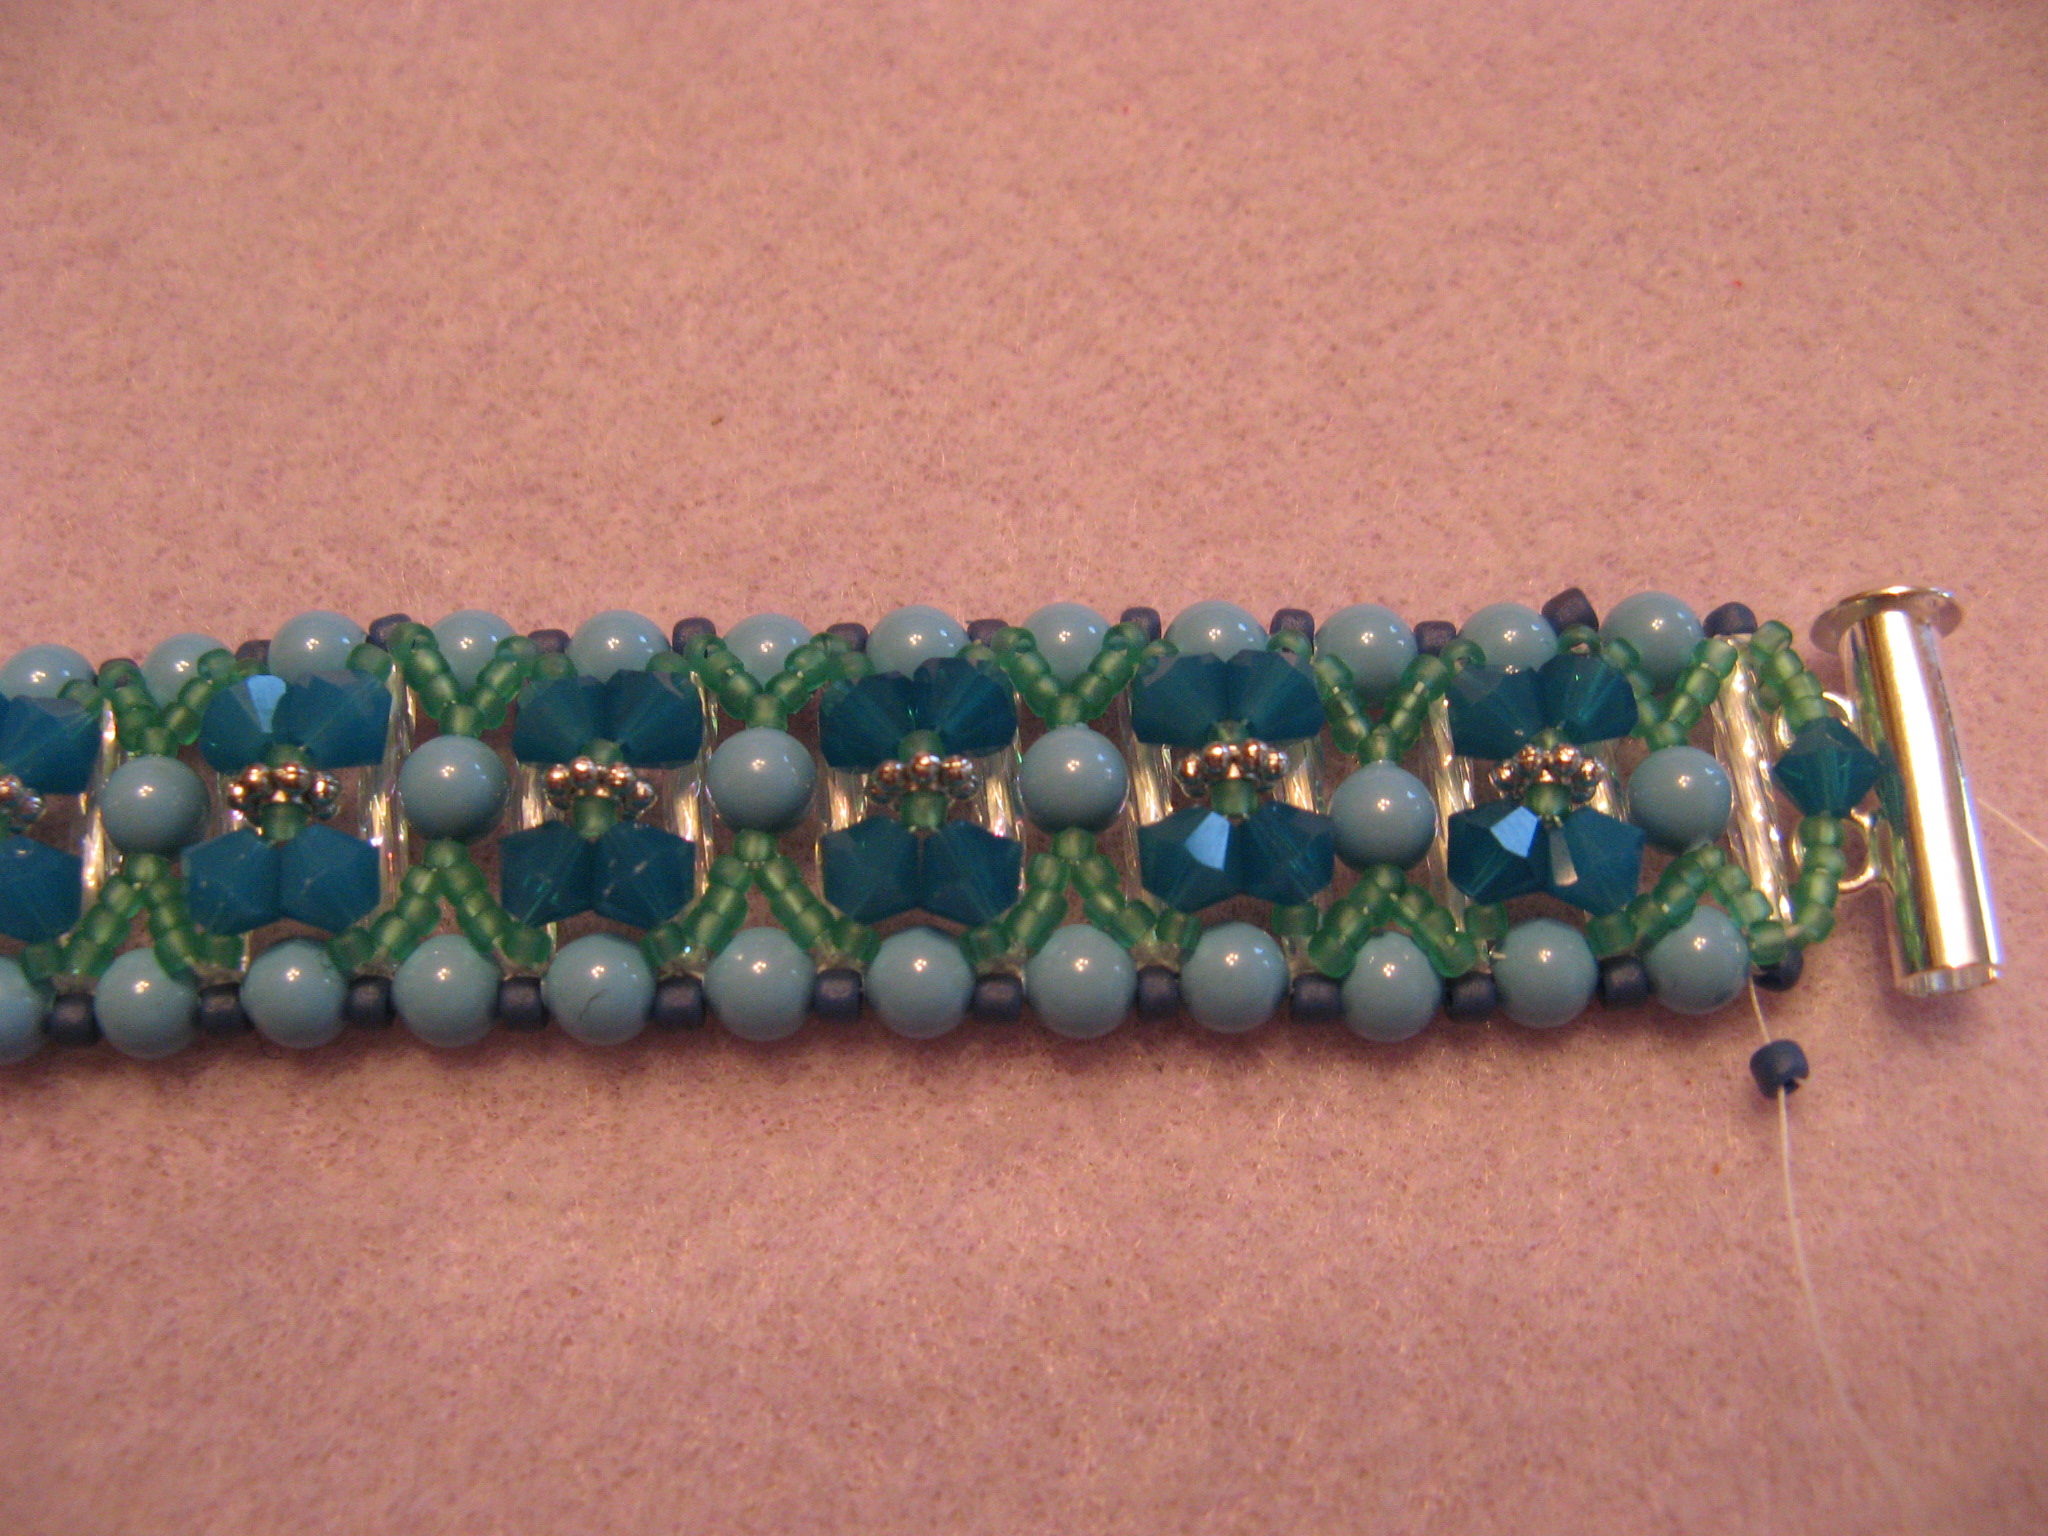
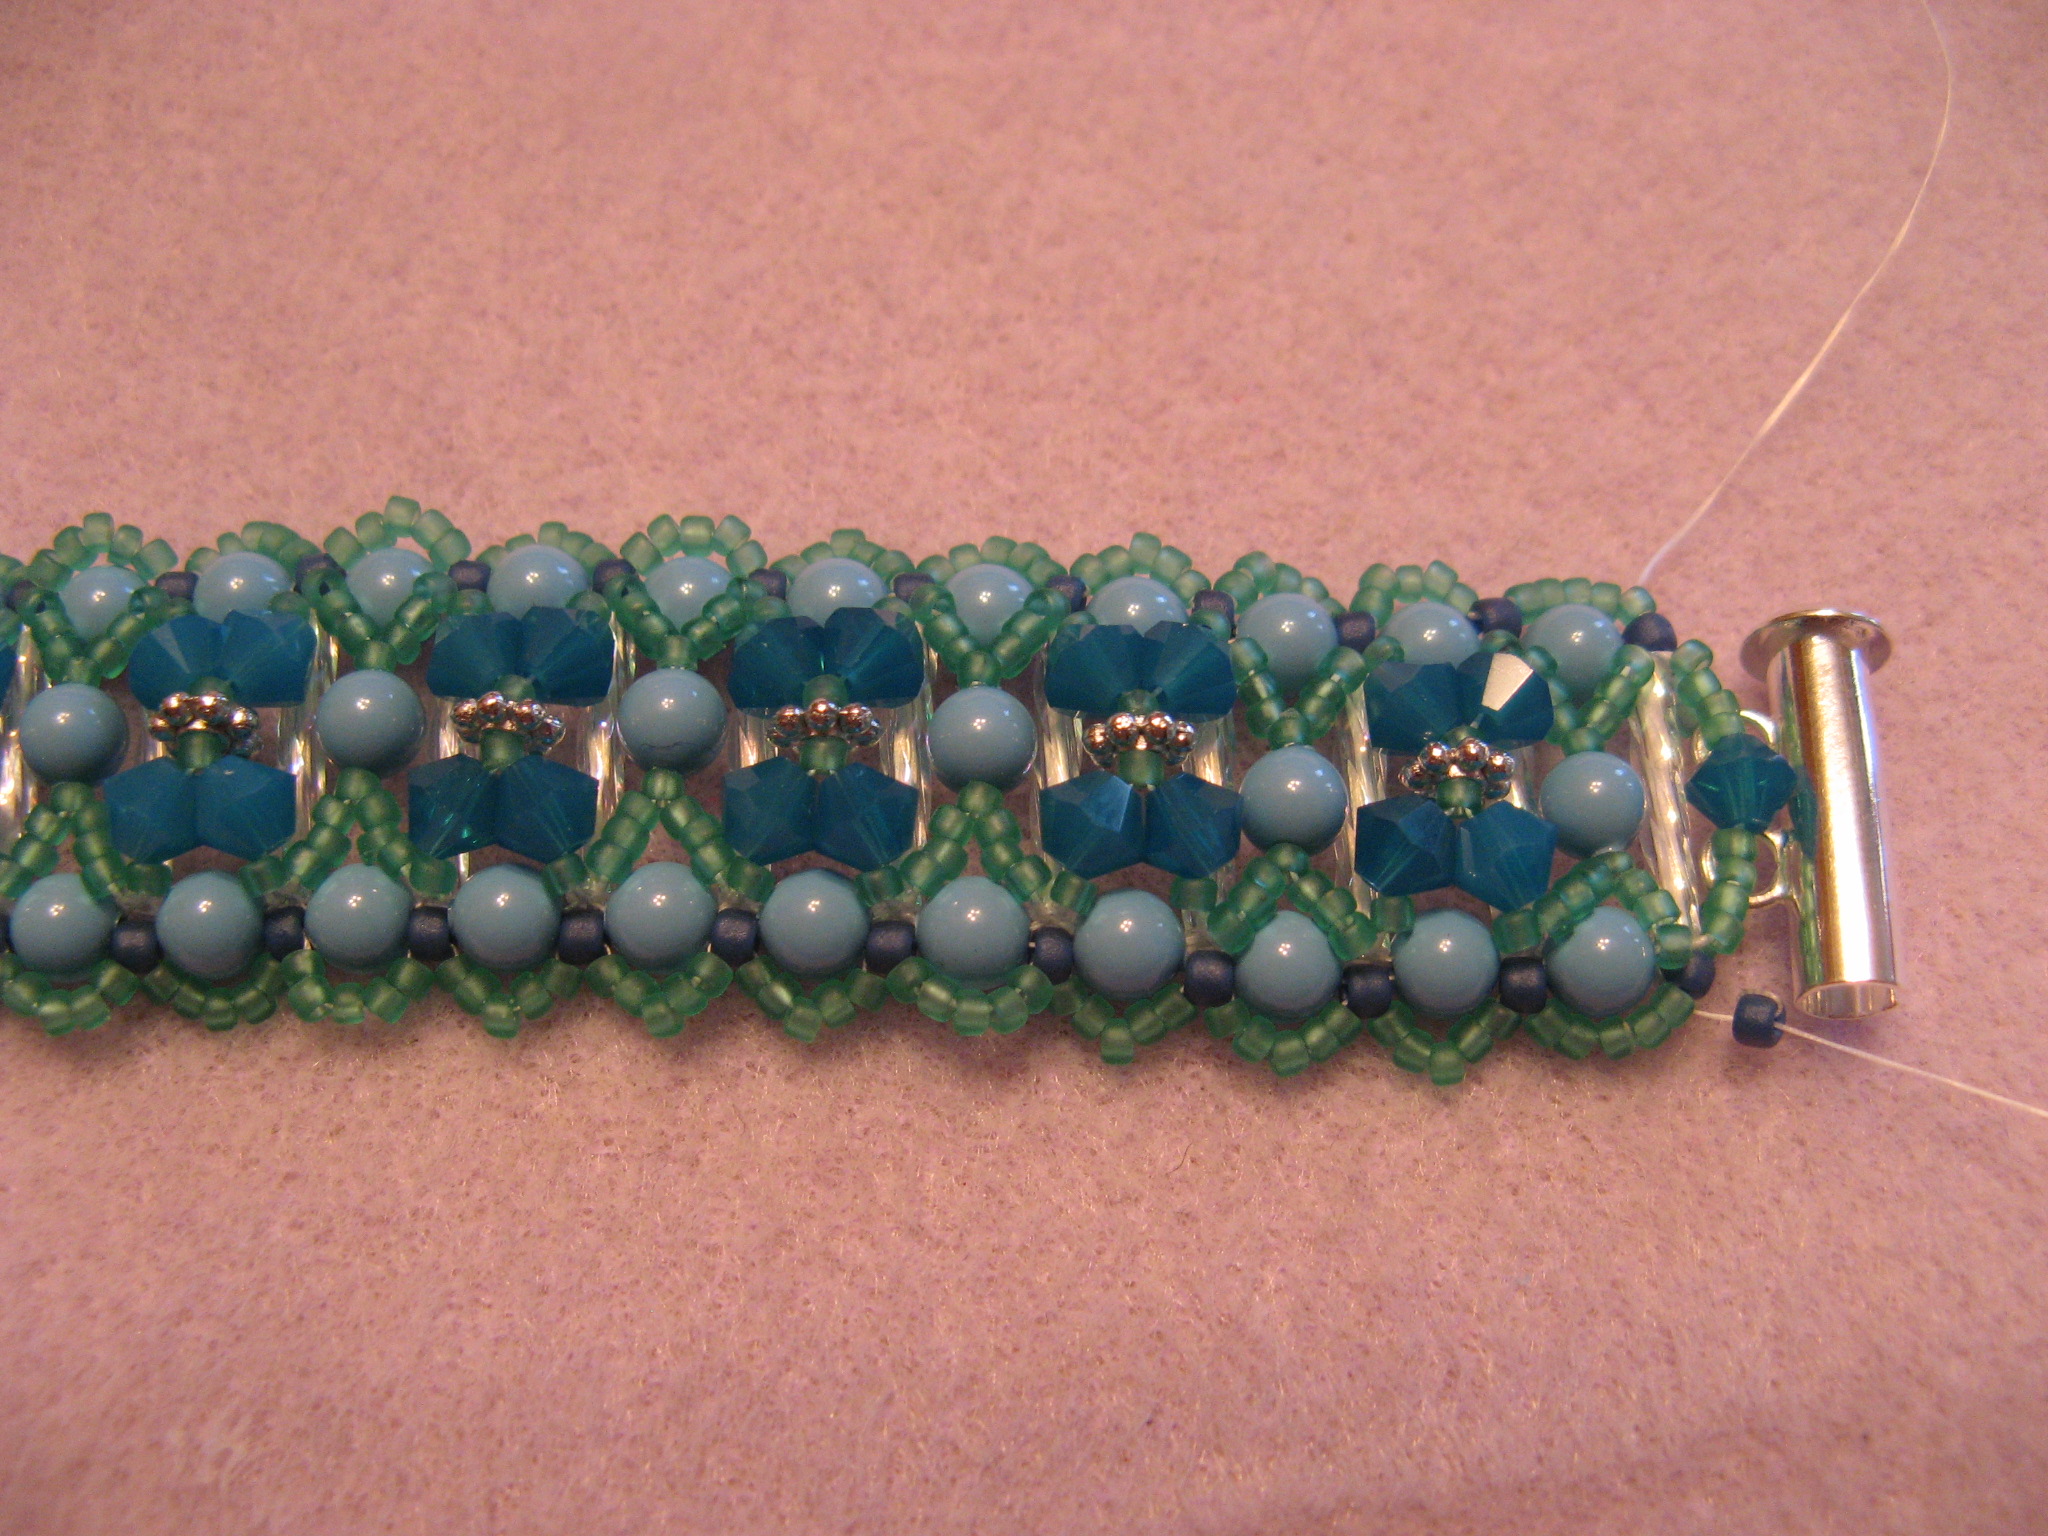
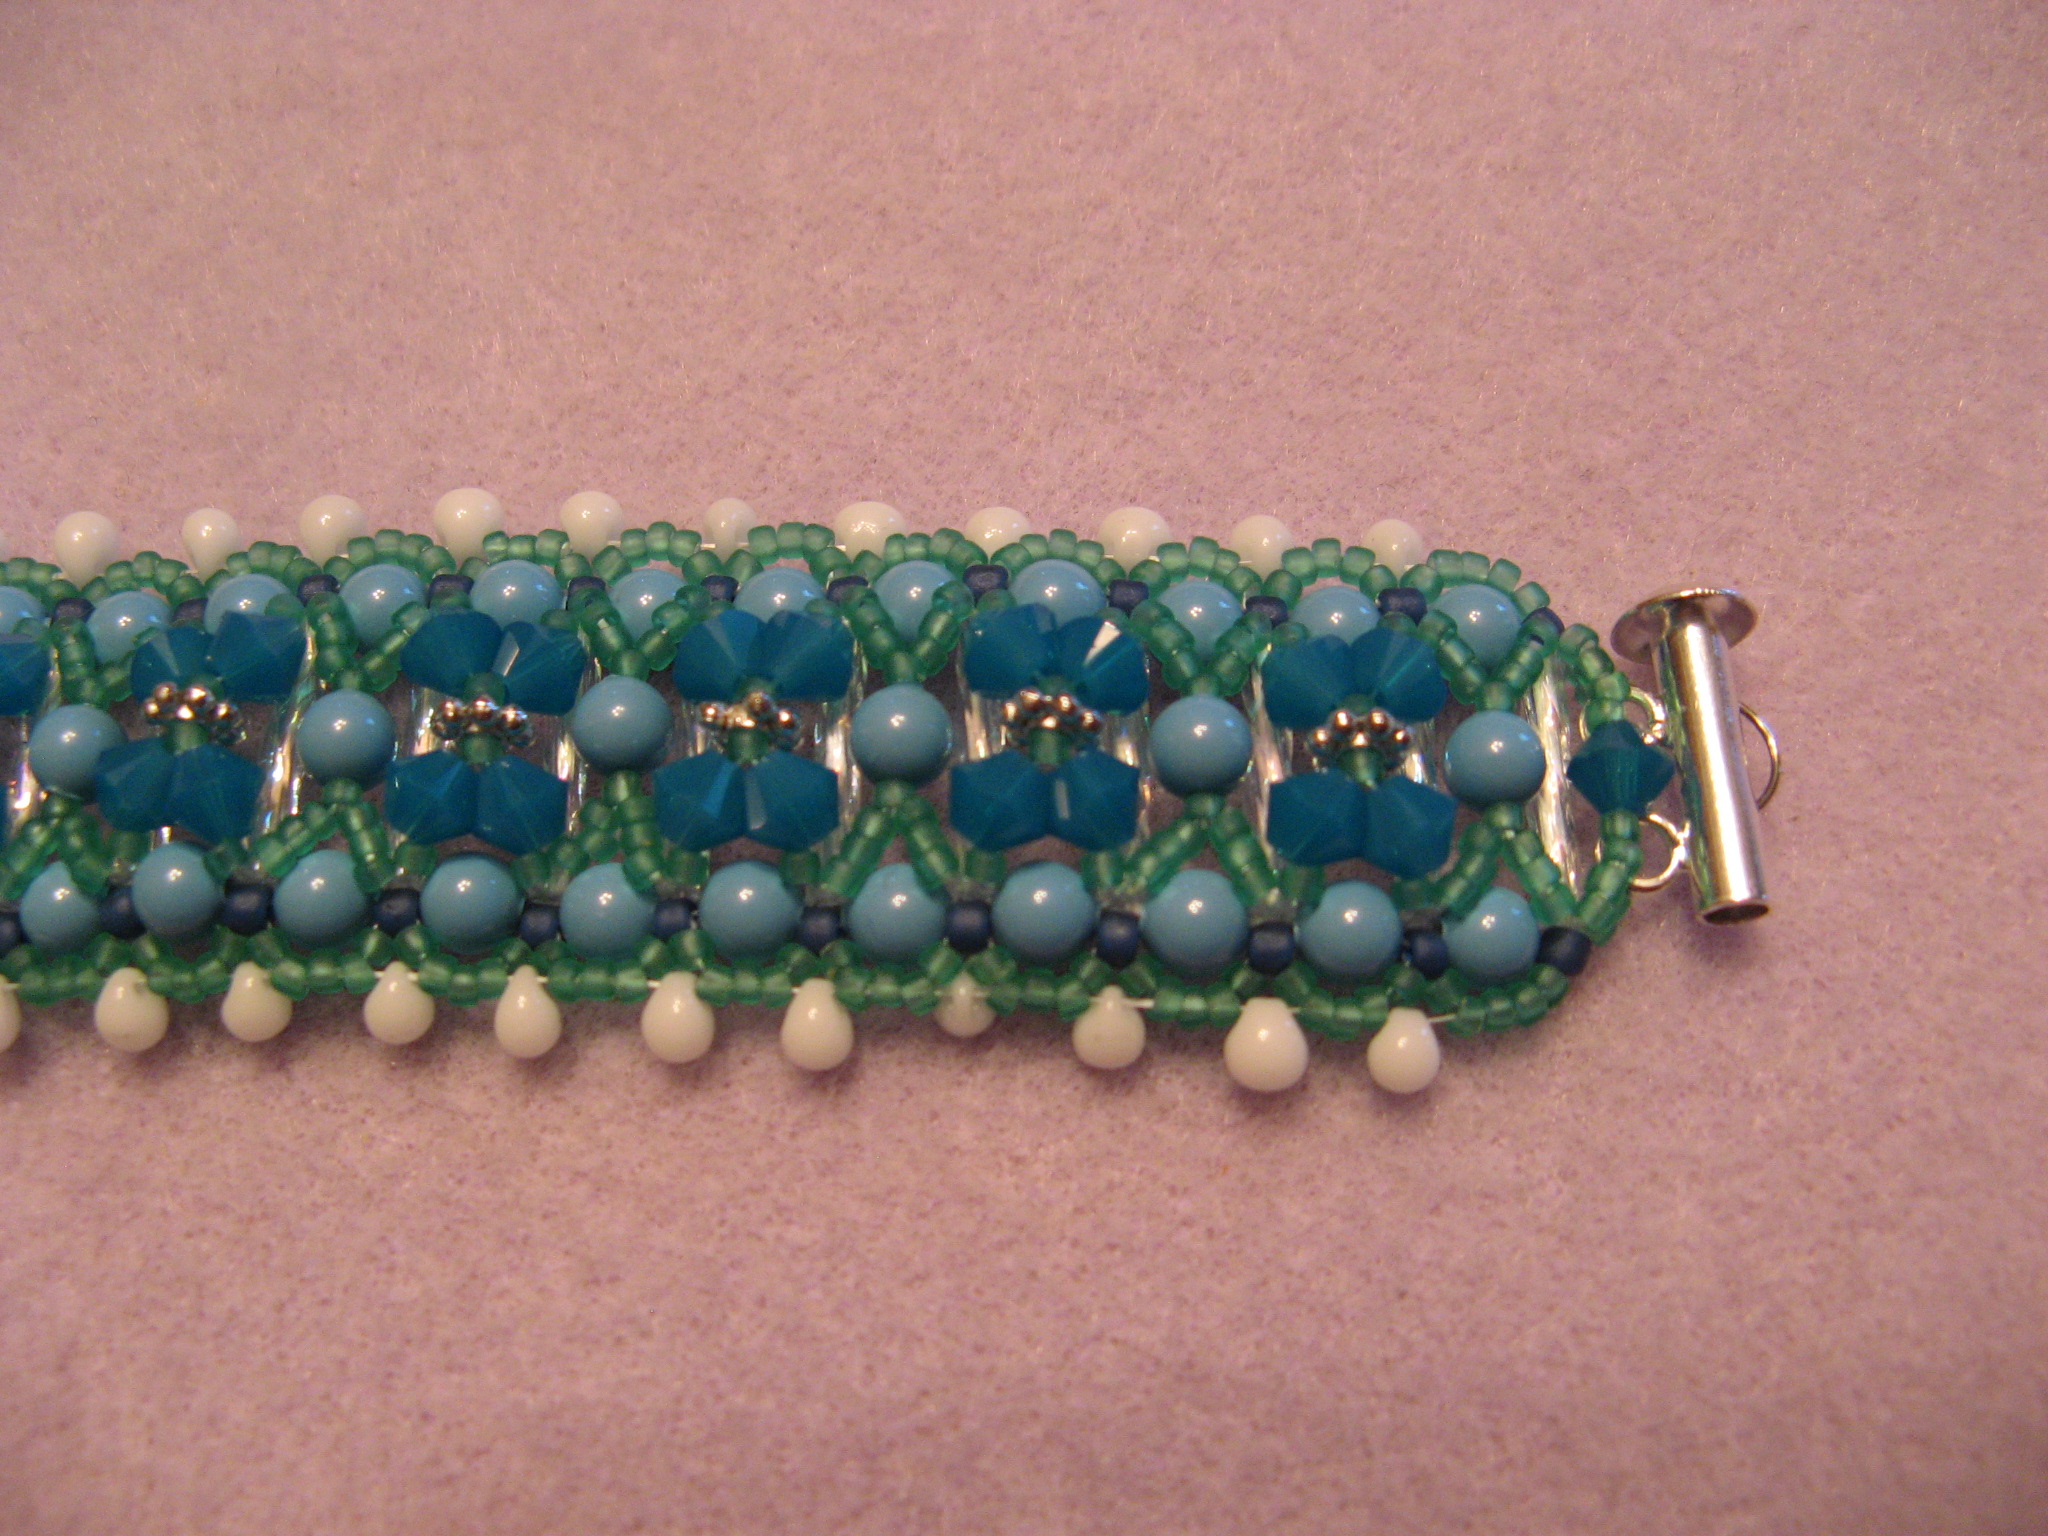
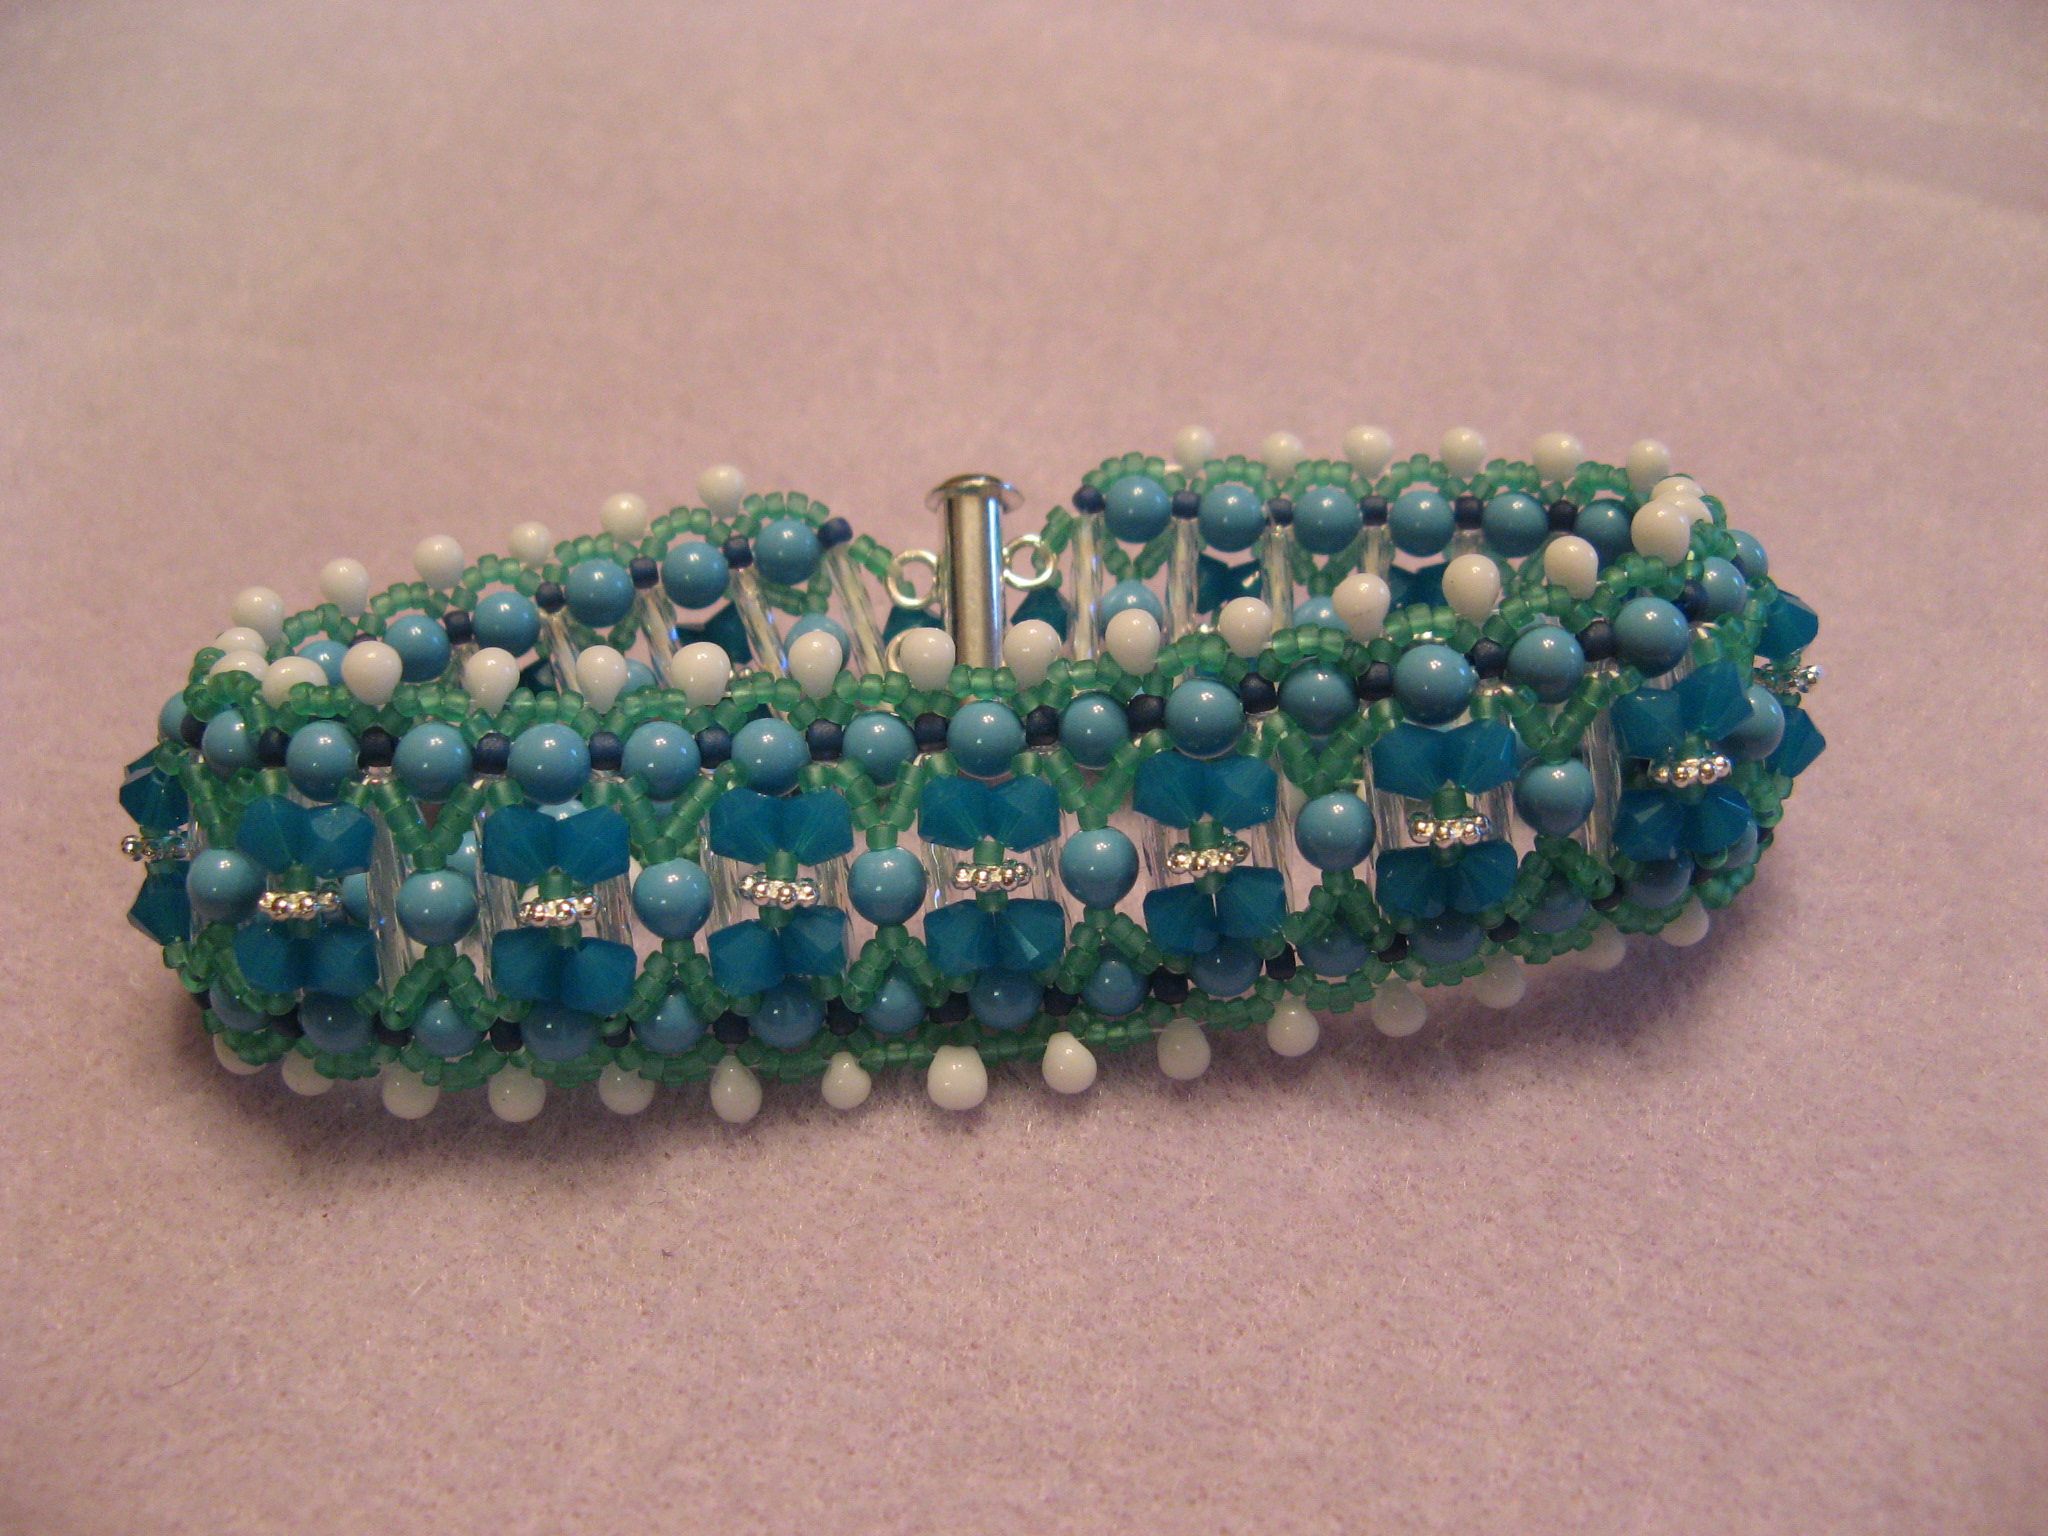
I’m in the middle of making this bracelet. So far so good, I just need to figure out how to put a knot in the end of the bracelet without destroying the braid or making it look wonky.

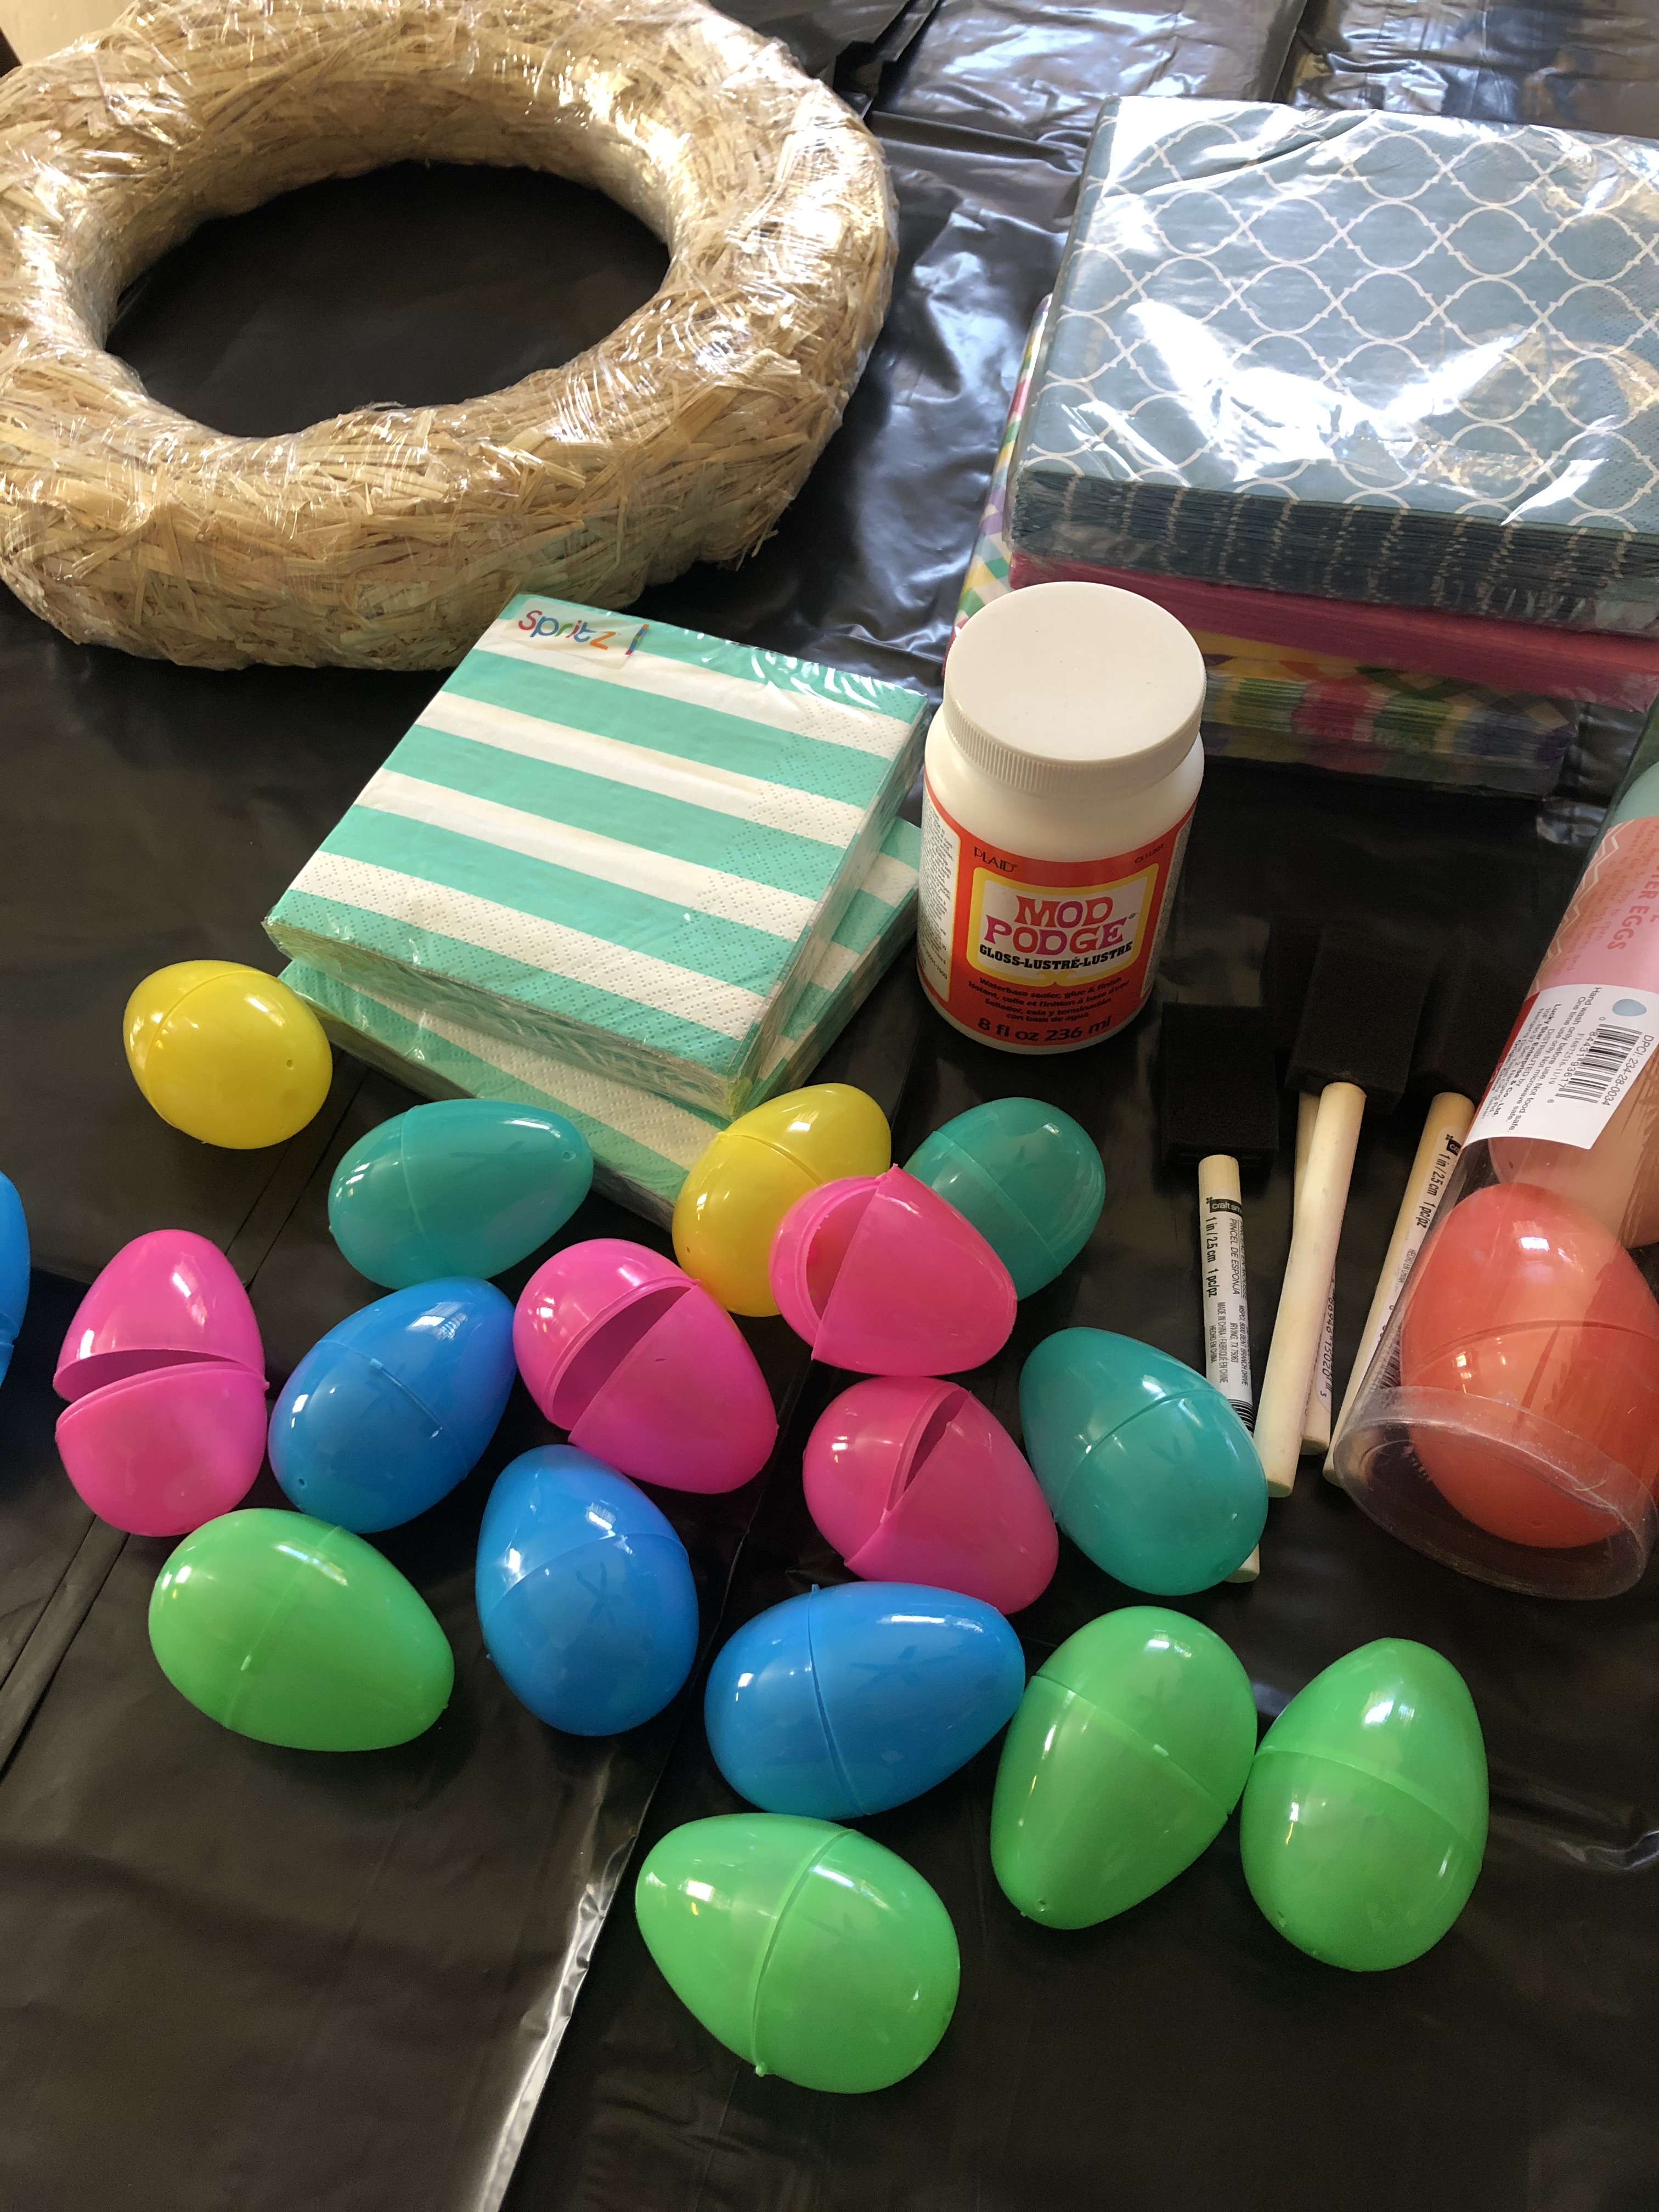
I also attempted to make a new Easter wreath. I picked up the supplies in late February after coming across the directions and they sounded simple enough. Decoupage plastic Easter eggs with small pieces of paper napkins and then glue them to a straw wreath adorned with Spanish moss. I’ve made quite a few wreaths so I thought I would have no problem with this one. I started, well, I should say I tried to decoupage the eggs and it was a mess. The paper wasn’t flat on the eggs regardless of how small I cut the napkin and I couldn’t stand the smell of the decoupage glue. Oh well. Thankfully the supplies weren’t that expensive and they are all things I can use for other projects so it wasn’t a total loss.

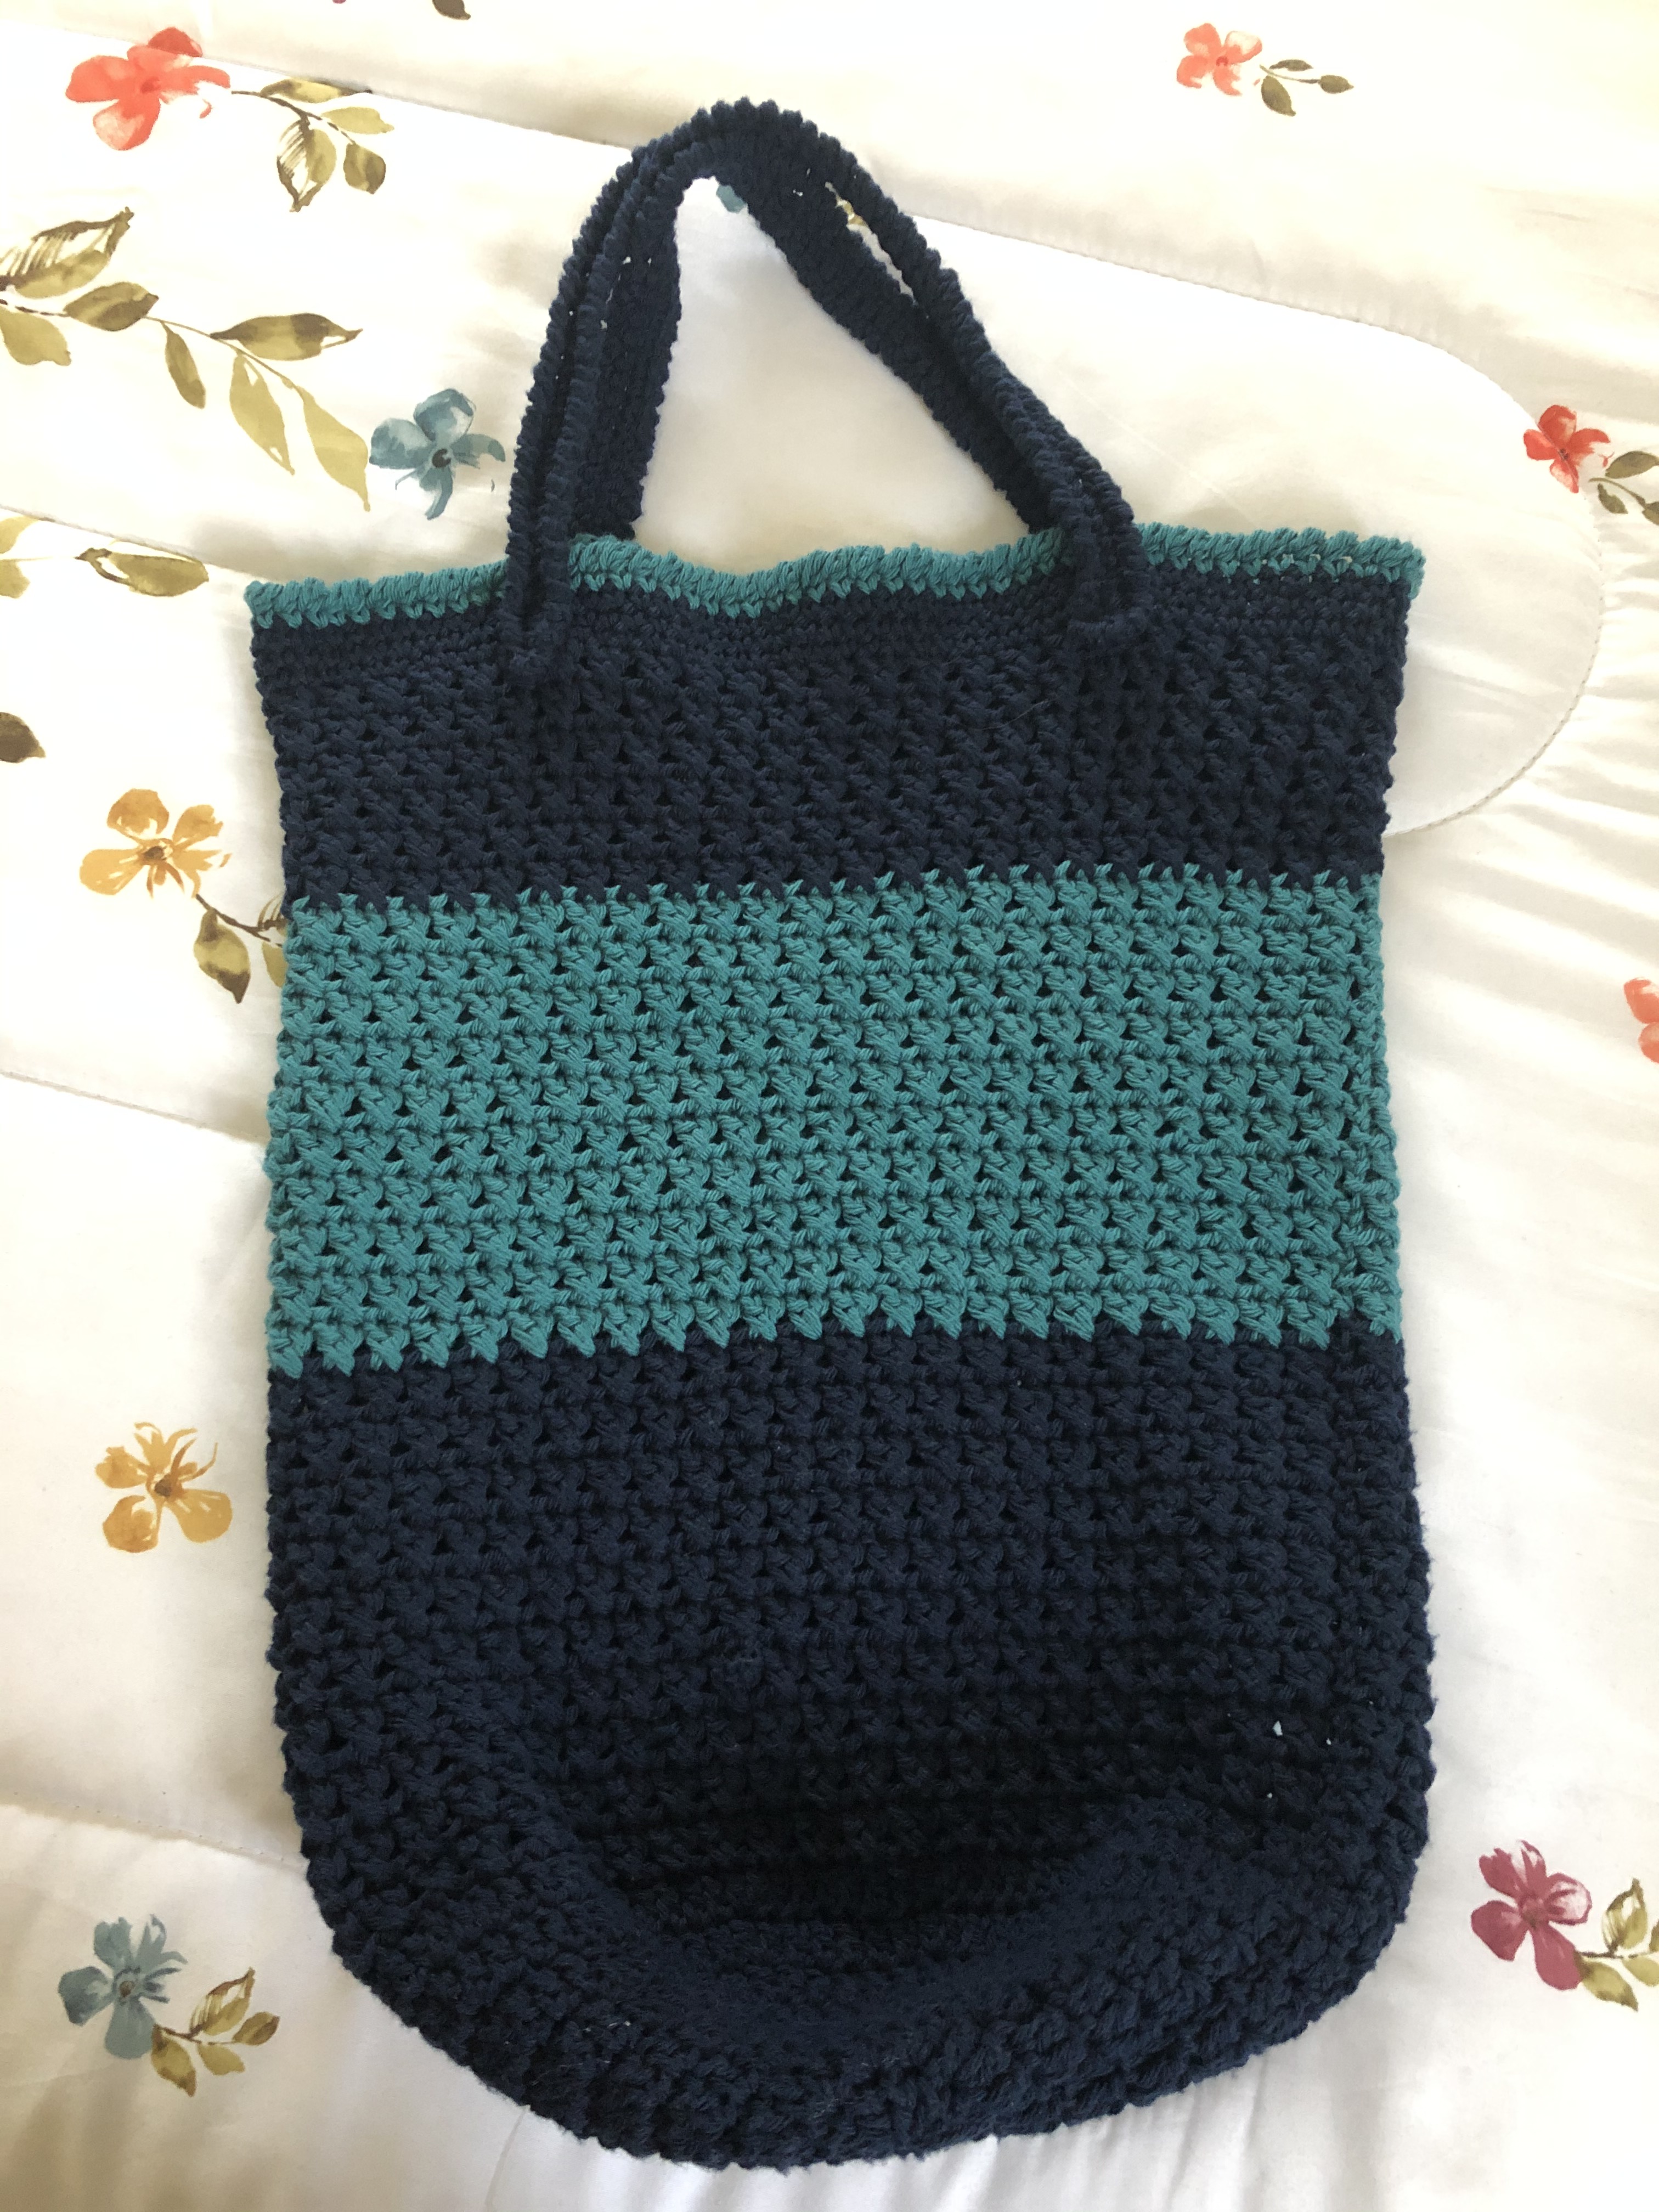
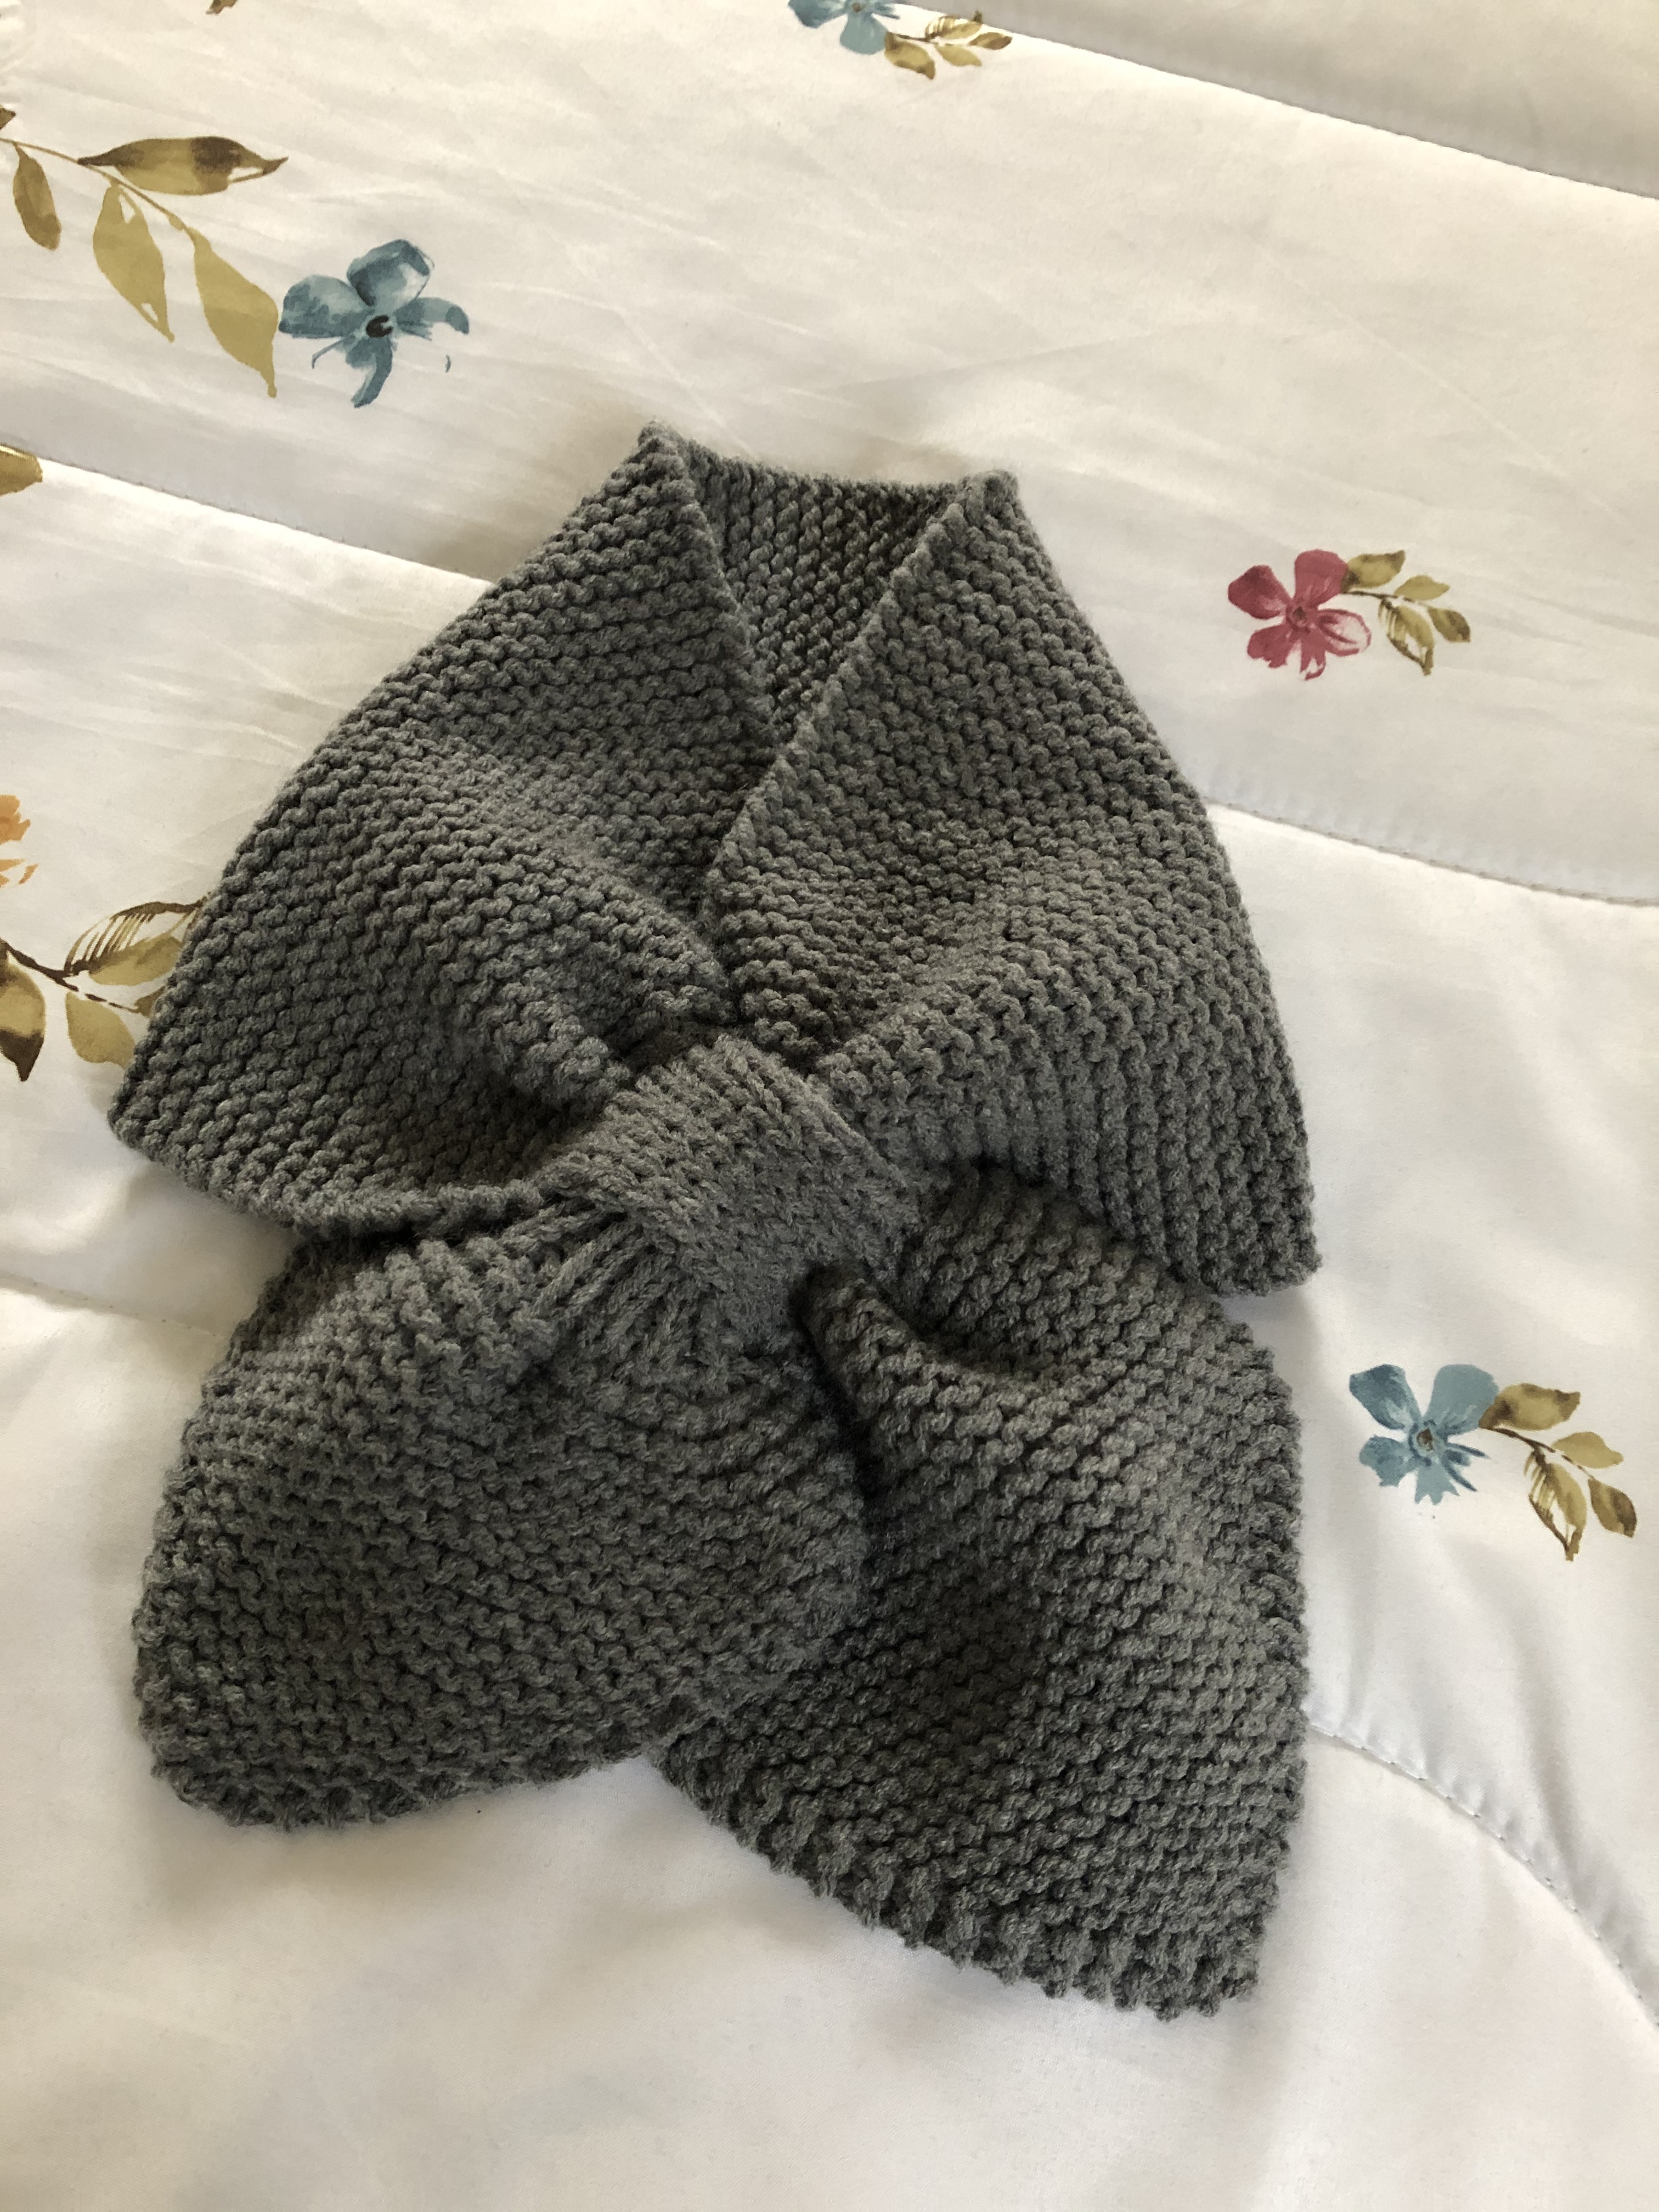
Before things got really bad with the virus and places were still open I was taking crocheting/knitting classes at my local library. I had just finished a series of three classes where we made crocheted tote bags and was starting another series of three classes to make a knitted keyhole scarf. I actually made a crocheted version last year. We got through one class before the library decided to cancel all classes and then ultimately closed. Thankfully in that one class I got the gist of how to make the scarf – it involved splitting stitches and using double-pointed needles, neither of which I had done nor used before in knitting – so, I was able to complete it on my own.

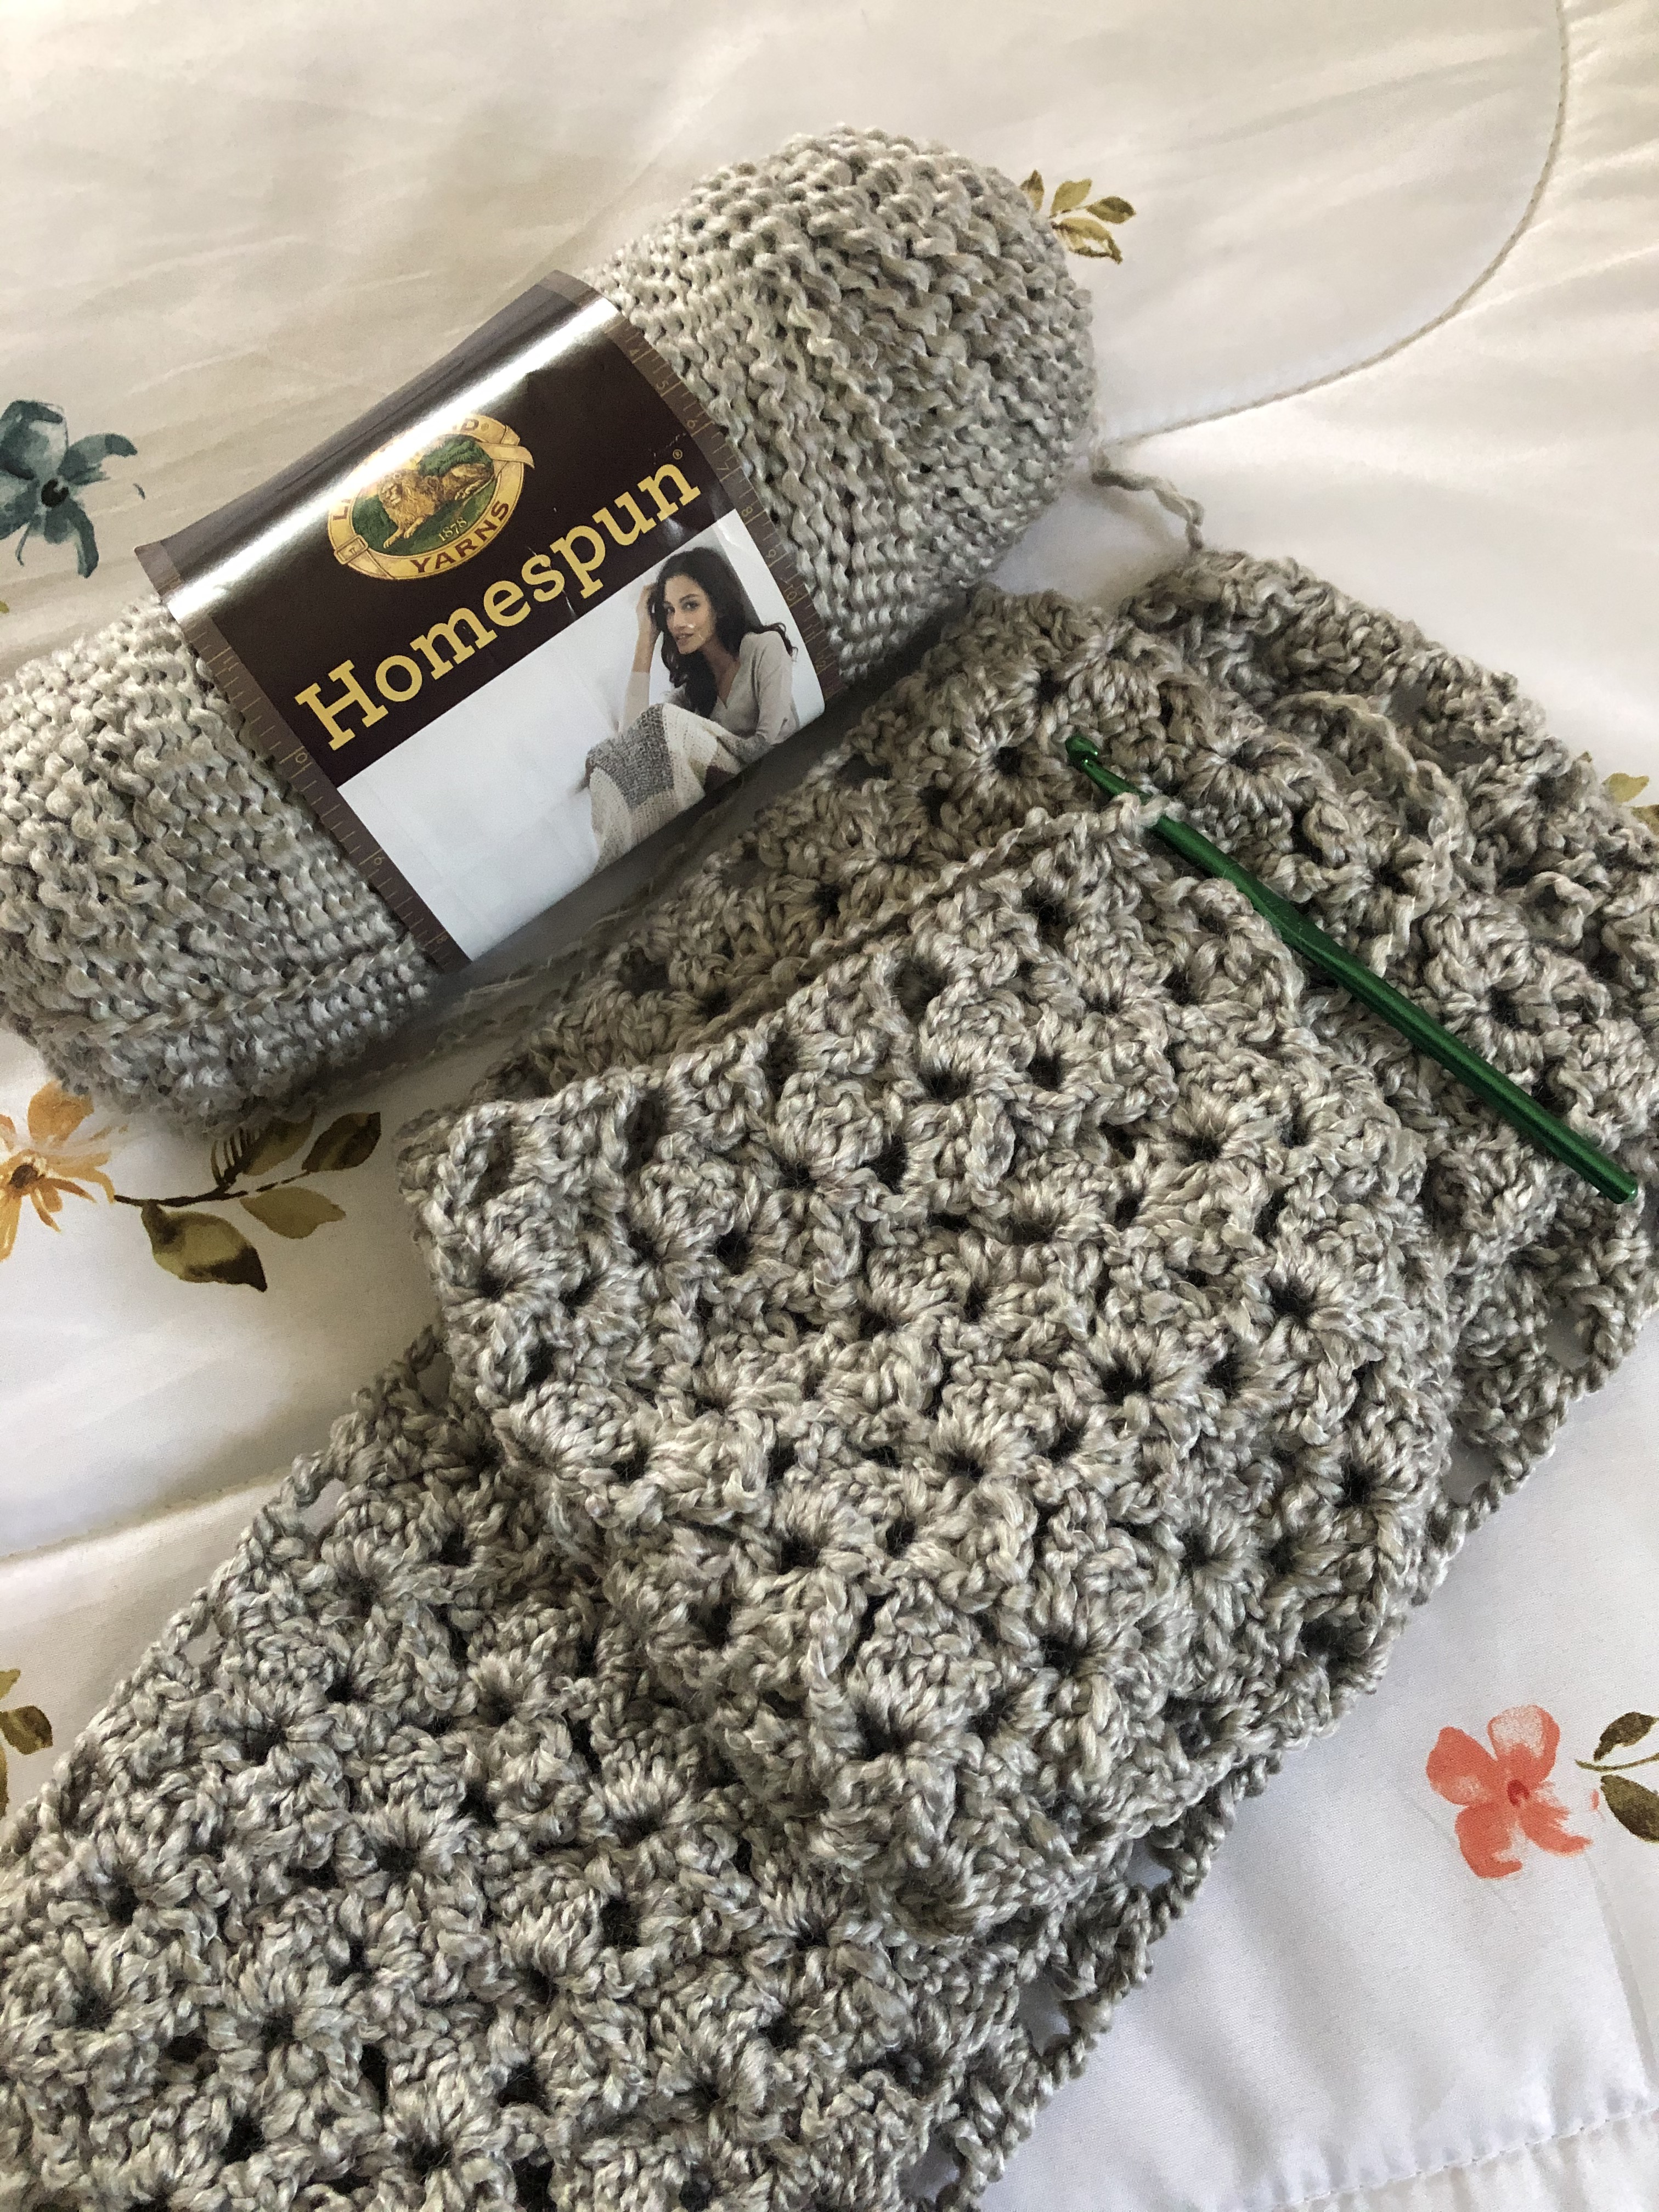
And then I started another scarf (my neck is ready for next winter). Initially, using Lion Brand’s Homespun yarn, I was knitting a scarf in garter stitch (knitting every stitch in each row) and once completed I was going to weave ribbon through the scarf in a basketweave pattern. I got to a certain point and tested out weaving the ribbon through and just didn’t like how it was looking so I decided to go with a pattern (Flights of Fancy) I had in a folder and I am liking this much better. I’ve thought about going through my yarn stash and putting all my remnant yarns together to make a blanket. For now though, I’ll just add that to my to-do list.

So, I’ve definitely been trying to keep myself busy at home as you can see. And yes, I have cleaned corners of my house I never thought of cleaning all while avoiding those leaves. As for television, I don’t subscribe to any streaming services so I split my time between watching actual television and listening to music. I am always amazed how there are so many channels and still nothing to watch at times. As for cooking and baking, I haven’t gotten too creative yet. I did make this Banana Cake with Mascarpone Whipped Cream Frosting last week as a means to use up some bananas and mascarpone cheese. I do have a pasta dish that I have yet to hit publish on that I give quite a few ideas to customize with what you have in your pantry. The main thing right now though is to stay home, stay safe and stay healthy!


Two Bracelets and a Ring

I decided to take a break from my knitting projects last week to work on some jewelry pieces that I have wanted to get done. In all honesty my arms and wrists needed a break from all of the shoveling I did from when I was snowed-in.

Up first was something super simple… Yarn Wrapped Bangle. I got the idea from a craft email I receive every day from Martha Stewart’s website. All I needed to complete this project was yarn (you can also use ribbon), tacky glue and a plastic bangle. It doesn’t matter the color or pattern of the bangle since you will be covering it up. The one I used had sequins on the inside and only cost $2… You can’t beat that!

IMG_9460

To start off I wound a few yards of yarn into small ball and glued one end to the inside of the bangle. I let the glue dry completely and then started wrapping the yarn tightly around the bangle. Every so often I stopped to make sure there weren’t any spaces between the yarn and around the midway point I added some glue to secure the yarn in place.

IMG_9466 IMG_9478

It didn’t take long before I had a completely new bangle.

IMG_9482

After that was done I moved on to a Cabochon and Seed Bead Ring. I got the idea for this piece from the February 2013 issue of Bead & Button Magazine in an article called Ring Tones. I used two different color size 15 seed beads, an oval cabochon, an adjustable ring and prestiffened felt for my beading foundation. I was able to find the ring and felt at my local Michael’s store and I ordered an assortment of cabochons from Fire Mountain Gems (www.firemountaingems.com) for under $3 so I have plenty more to use if I want to make more rings or pendants and such. As for the size 15 seed beads, I had one of the colors and then took advantage of a sale at Beada Beada (www.beadabeada.com) and ordered an assortment of colors that I normally wouldn’t pick just to have a nice assortment for future projects.

IMG_9472

To start off I cut a piece of the felt to fit into the bezel of the ring. While the directions called for using two or more pieces of foundation I opted to use only one piece since the ring I was using had a very shallow well.

IMG_9474

Next up, I glued the cabochon to the center of the felt. After it completely dried I began to stitch the seed beads around the cabochon using the beaded backstitch. I started with a round of yellow and then added a second round of yellow on top of that round so that those seed beads would come up the sides of the cabochon. I then stitched two rounds of turquoise seed beads around the yellow.

IMG_9488

It wasn’t long before I was done and my embroidered piece was ready to be adhered to the ring. While I did have jewelry glue (which I used to glue the cabochon onto the felt) I opted to use Krazy Glue to adhere the entire piece to the ring so I could be sure it would stay put.

IMG_9492

I was really happy with how it came out and I can’t wait to wear it. And now that I know how to embroider on felt I am looking forward to making other pieces of jewelry.

IMG_9502

And finally the last piece I made was a bracelet that I also came across in the February 2013 issue of Bead & Button Magazine called Crystal Bridges. The bracelet is made with 12mm bugle beads, 4mm pearls, 4mm bicone crystals, 3mm fringe drops, size 11 & size 15 seed beads, 4x1mm daisy spacers and a two-strand slide clasp. While the article did have suggested colors for the bracelet I opted to go a different route and made my bracelet in shades of blue. I had Swarovski Crystal bicones in my beading stash that I wanted to use so I based my other colors off of them.

IMG_9513

To start I created the base of the bracelet by using the crossweave technique to add the bugles and pearls. On a comfortable length of Fireline I threaded a size #12 beading needle onto each end and then centered a bugle bead onto the thread. Then with each of the needles I picked up a pearl and with one of the needles a bugle bead and then crossed the other needle through it. In total I added 32 bugles for the bracelet to be approximately 7 1/2 inches. Just to note, if the size needs to be adjusted the number of bugles beads on the base must be an even number for the top embellishment to work.

IMG_9515

Following that I added the top embellishment. I once again used the crossweave technique to add the pearls, size 15 seeds beads, bicones   and daisy spacers.

IMG_9516 IMG_9519

Once that was done it was time to add the clasp. This was a little backwards to me since I am accustomed to adding a clasp to piece of jewelry only once it’s completely done. Once again I used the crossweave technique to add size 15 seed beads and a bicone crystal to attach the clasp to the bracelet. In all honesty the bracelet could be worn like this and you could forgo the side embellishment, but, if you want more of a unique piece I think it’s necessary to keep going – which is what I did.

IMG_9530

To add the side embellishment – which consists of the size 11 & 15 seed beads and the fringe beads – I worked in a simple bead weaving technique.   To start I added one size 11 seeds between each of the pearls.

IMG_9531 IMG_9534

I then added five size 15 seed beads by stitching my thread through the size 11 seed beads I had just added, which basically left the size 15   seed beads arching around the pearls. I was concerned at this point because the size 15 seed beads weren’t sitting flat. I kept playing with the thread   by pulling it snug and then loosening it in an attempt to have them fall flat, but, it didn’t work. Luckily the final step rectified the problem.

IMG_9535

Finally, I added the fringe drop beads by sewing through the three middle size 15 seed beads from the five I added in the previous step.   Basically the fringe drops sat next to the size 11 seed beads. I ended my thread and my bracelet was ready to wear. Unfortunately I’ll   have to wait a while to wear it since the colors are more for Spring/Summer.

IMG_9549 IMG_9550

%d bloggers like this: