Etsy Shop Update

My Etsy Shop has been open for just about a month and so far so good. I’ve made three sales, added some bead, crystal & pearl snowflake ornaments and had to adjust how I do my listings. I still haven’t fine-tuned the latter, but I am sure I’ll get it eventually. This is the issue… the necklace from my first sale came in different colors, I thought by listing each of the colors when one was purchased that color would be eliminated from my inventory, unfortunately I had listed my quantity as 1 so the necklace was then sold out, so I had to readjust the listing and the others that I had set- up similarly. I had a similar issue with my following sale of 2 snowflake ornaments… I had to manually remove them from my inventory. So, I have some research to do on listings.

I also ran my first sale over Black Friday weekend and promoted Small Business Saturday. And that’s pretty much where I am.

Here are the Snowflake Ornaments:

If you’re interested in one of the ornaments or are looking for a piece of jewelry for yourself or someone else on your list check out my shop: CraftedByFran

Christmas Crafting

With Christmas just a few days away I finally got my cards in the mail the other day. I was so gung-ho about making them super early this year – I took out all of my supplies for them back in late October and put it on my crafting table all ready to go, but, got sidetracked with a few other Christmas crafts I wanted to get done first.

So, while I only have one main door to hang a wreath on – as most people – I ended up making three new wreaths this year. I only planned on making a new garland wreath to replace the one I made a few years back but while searching for ideas for that one I came across a yarn ball wreath that I had many of the supplies for – mainly yarn – and then I got an email that described how to make an ornament ball wreath in perfect detail. I tried making one of these a few years ago and didn’t have much success.

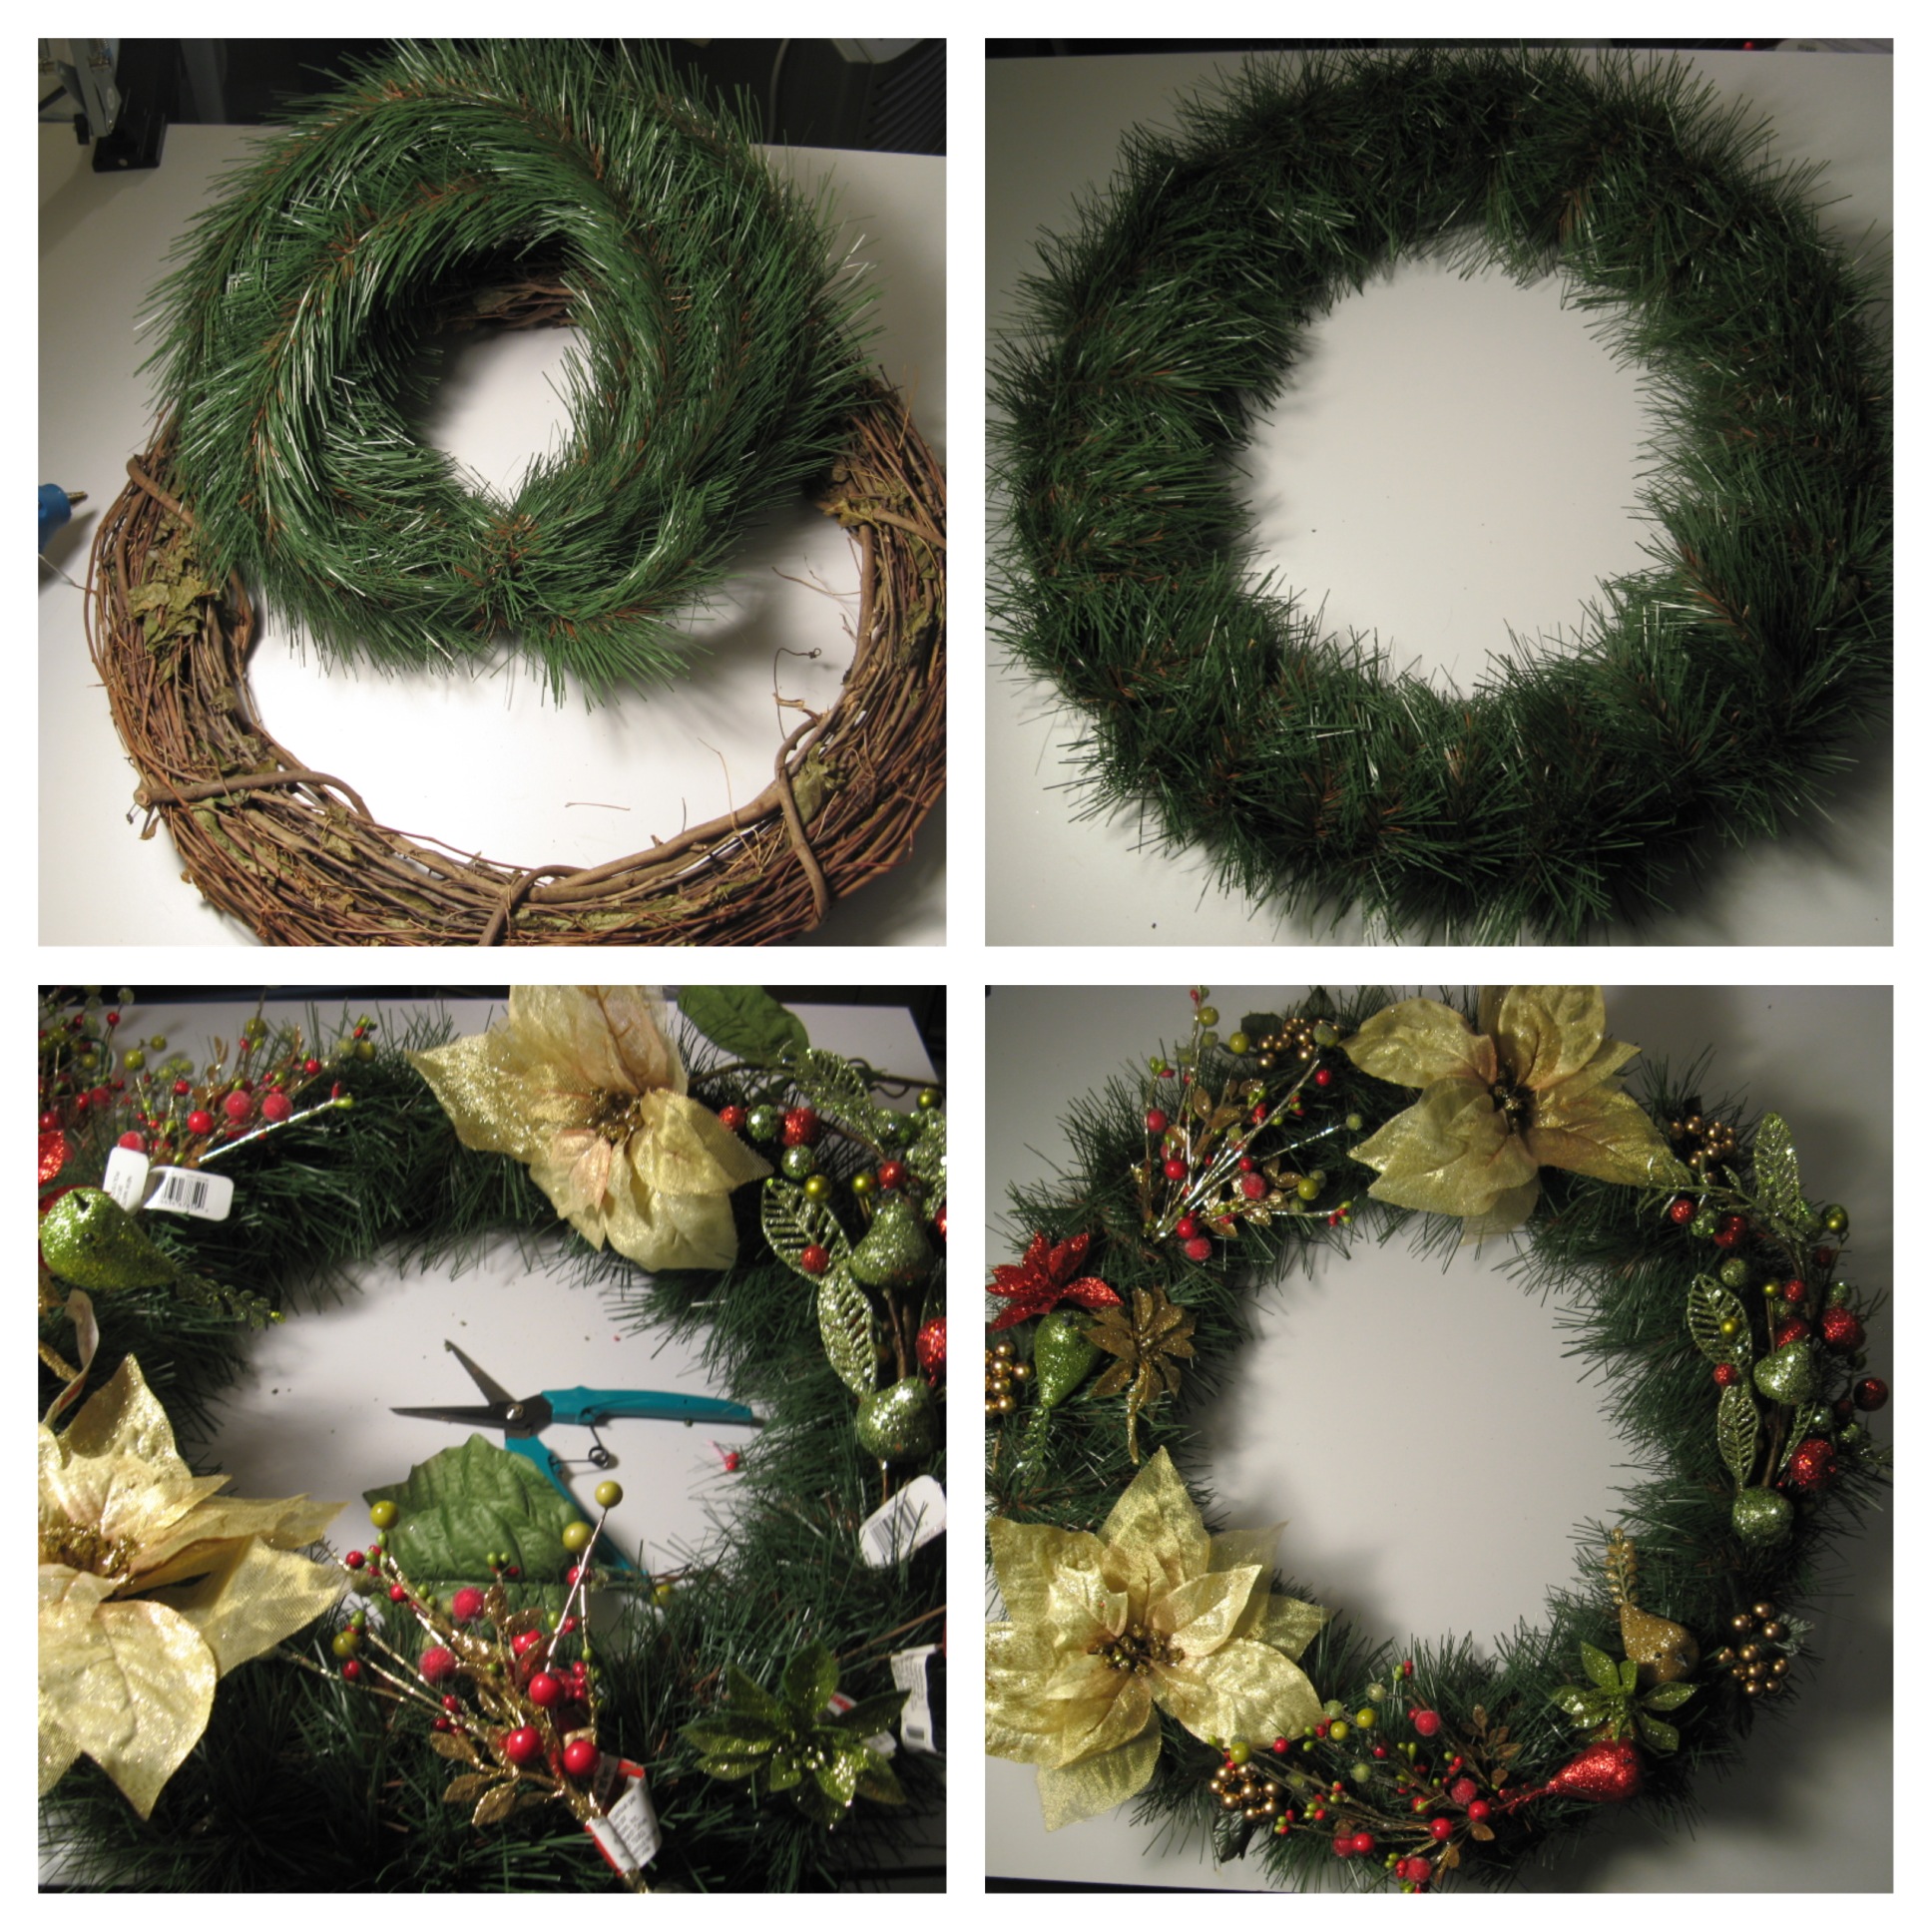
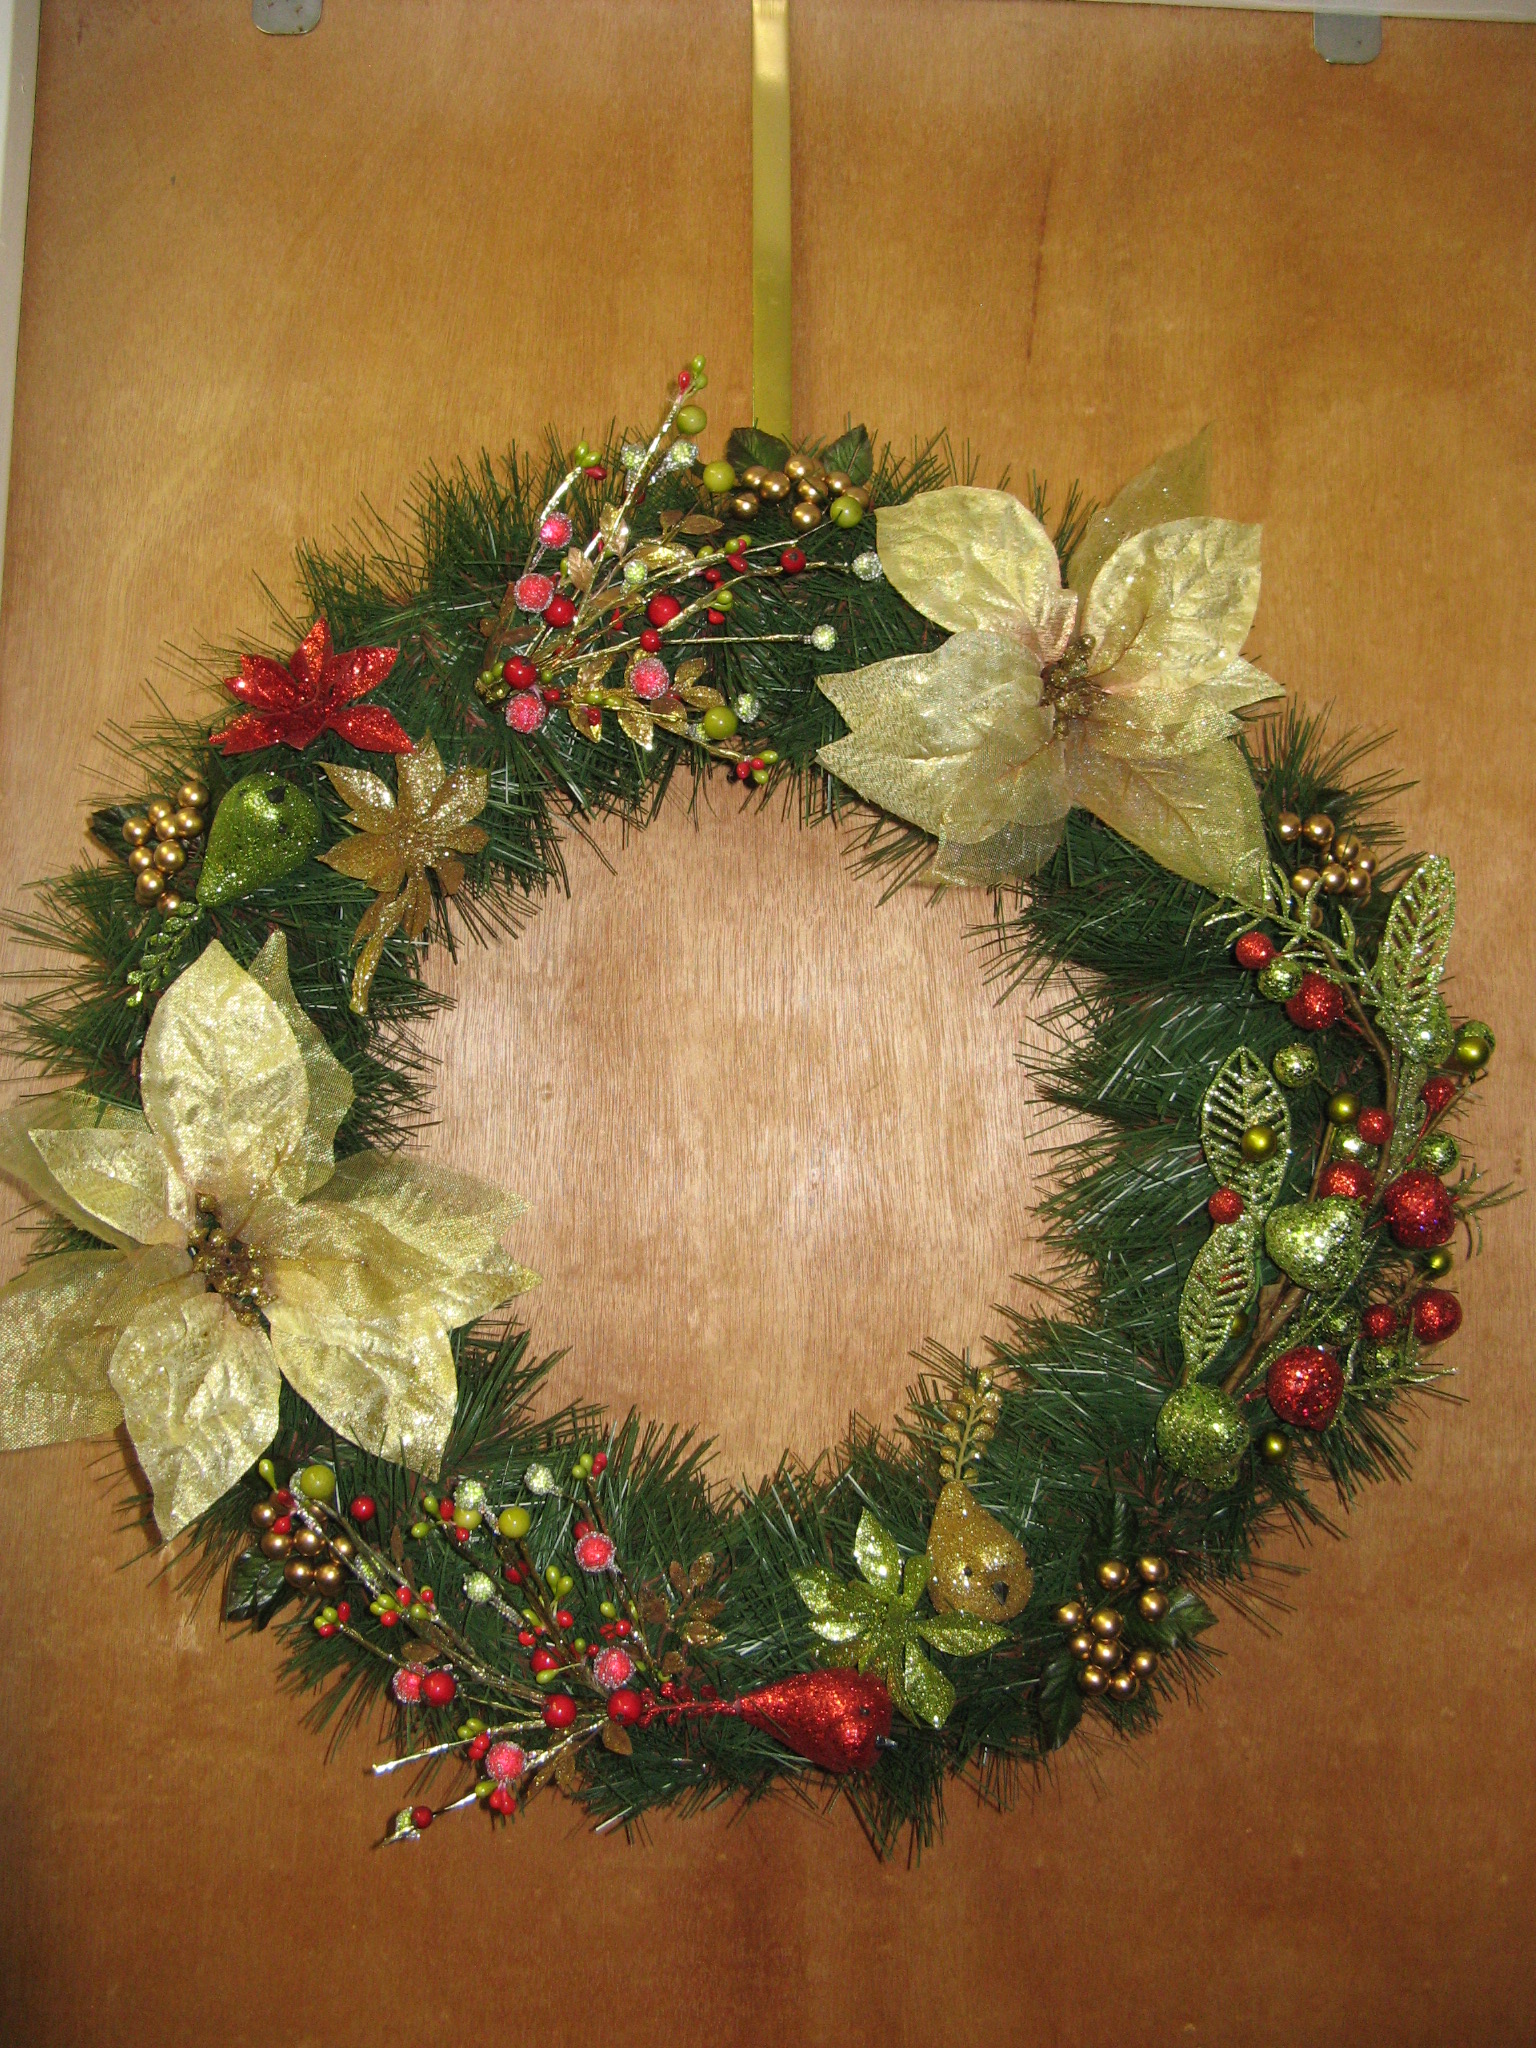
Up first… the Garland Wreath. While my local craft store did have those green wreaths I could have just bought and decorated I wasn’t too fond of the way they looked – that’s actually what my original wreath is made with and I never really liked it because of it – so I opted to wrap an 18″ grapevine wreath with garland. After that was done I then decorated it with various Christmas picks. I bought and returned quite a few of them before I was happy with the layout. This is actually the wreath that made it to my front door.

Garland Wreath 2 IMG_2027

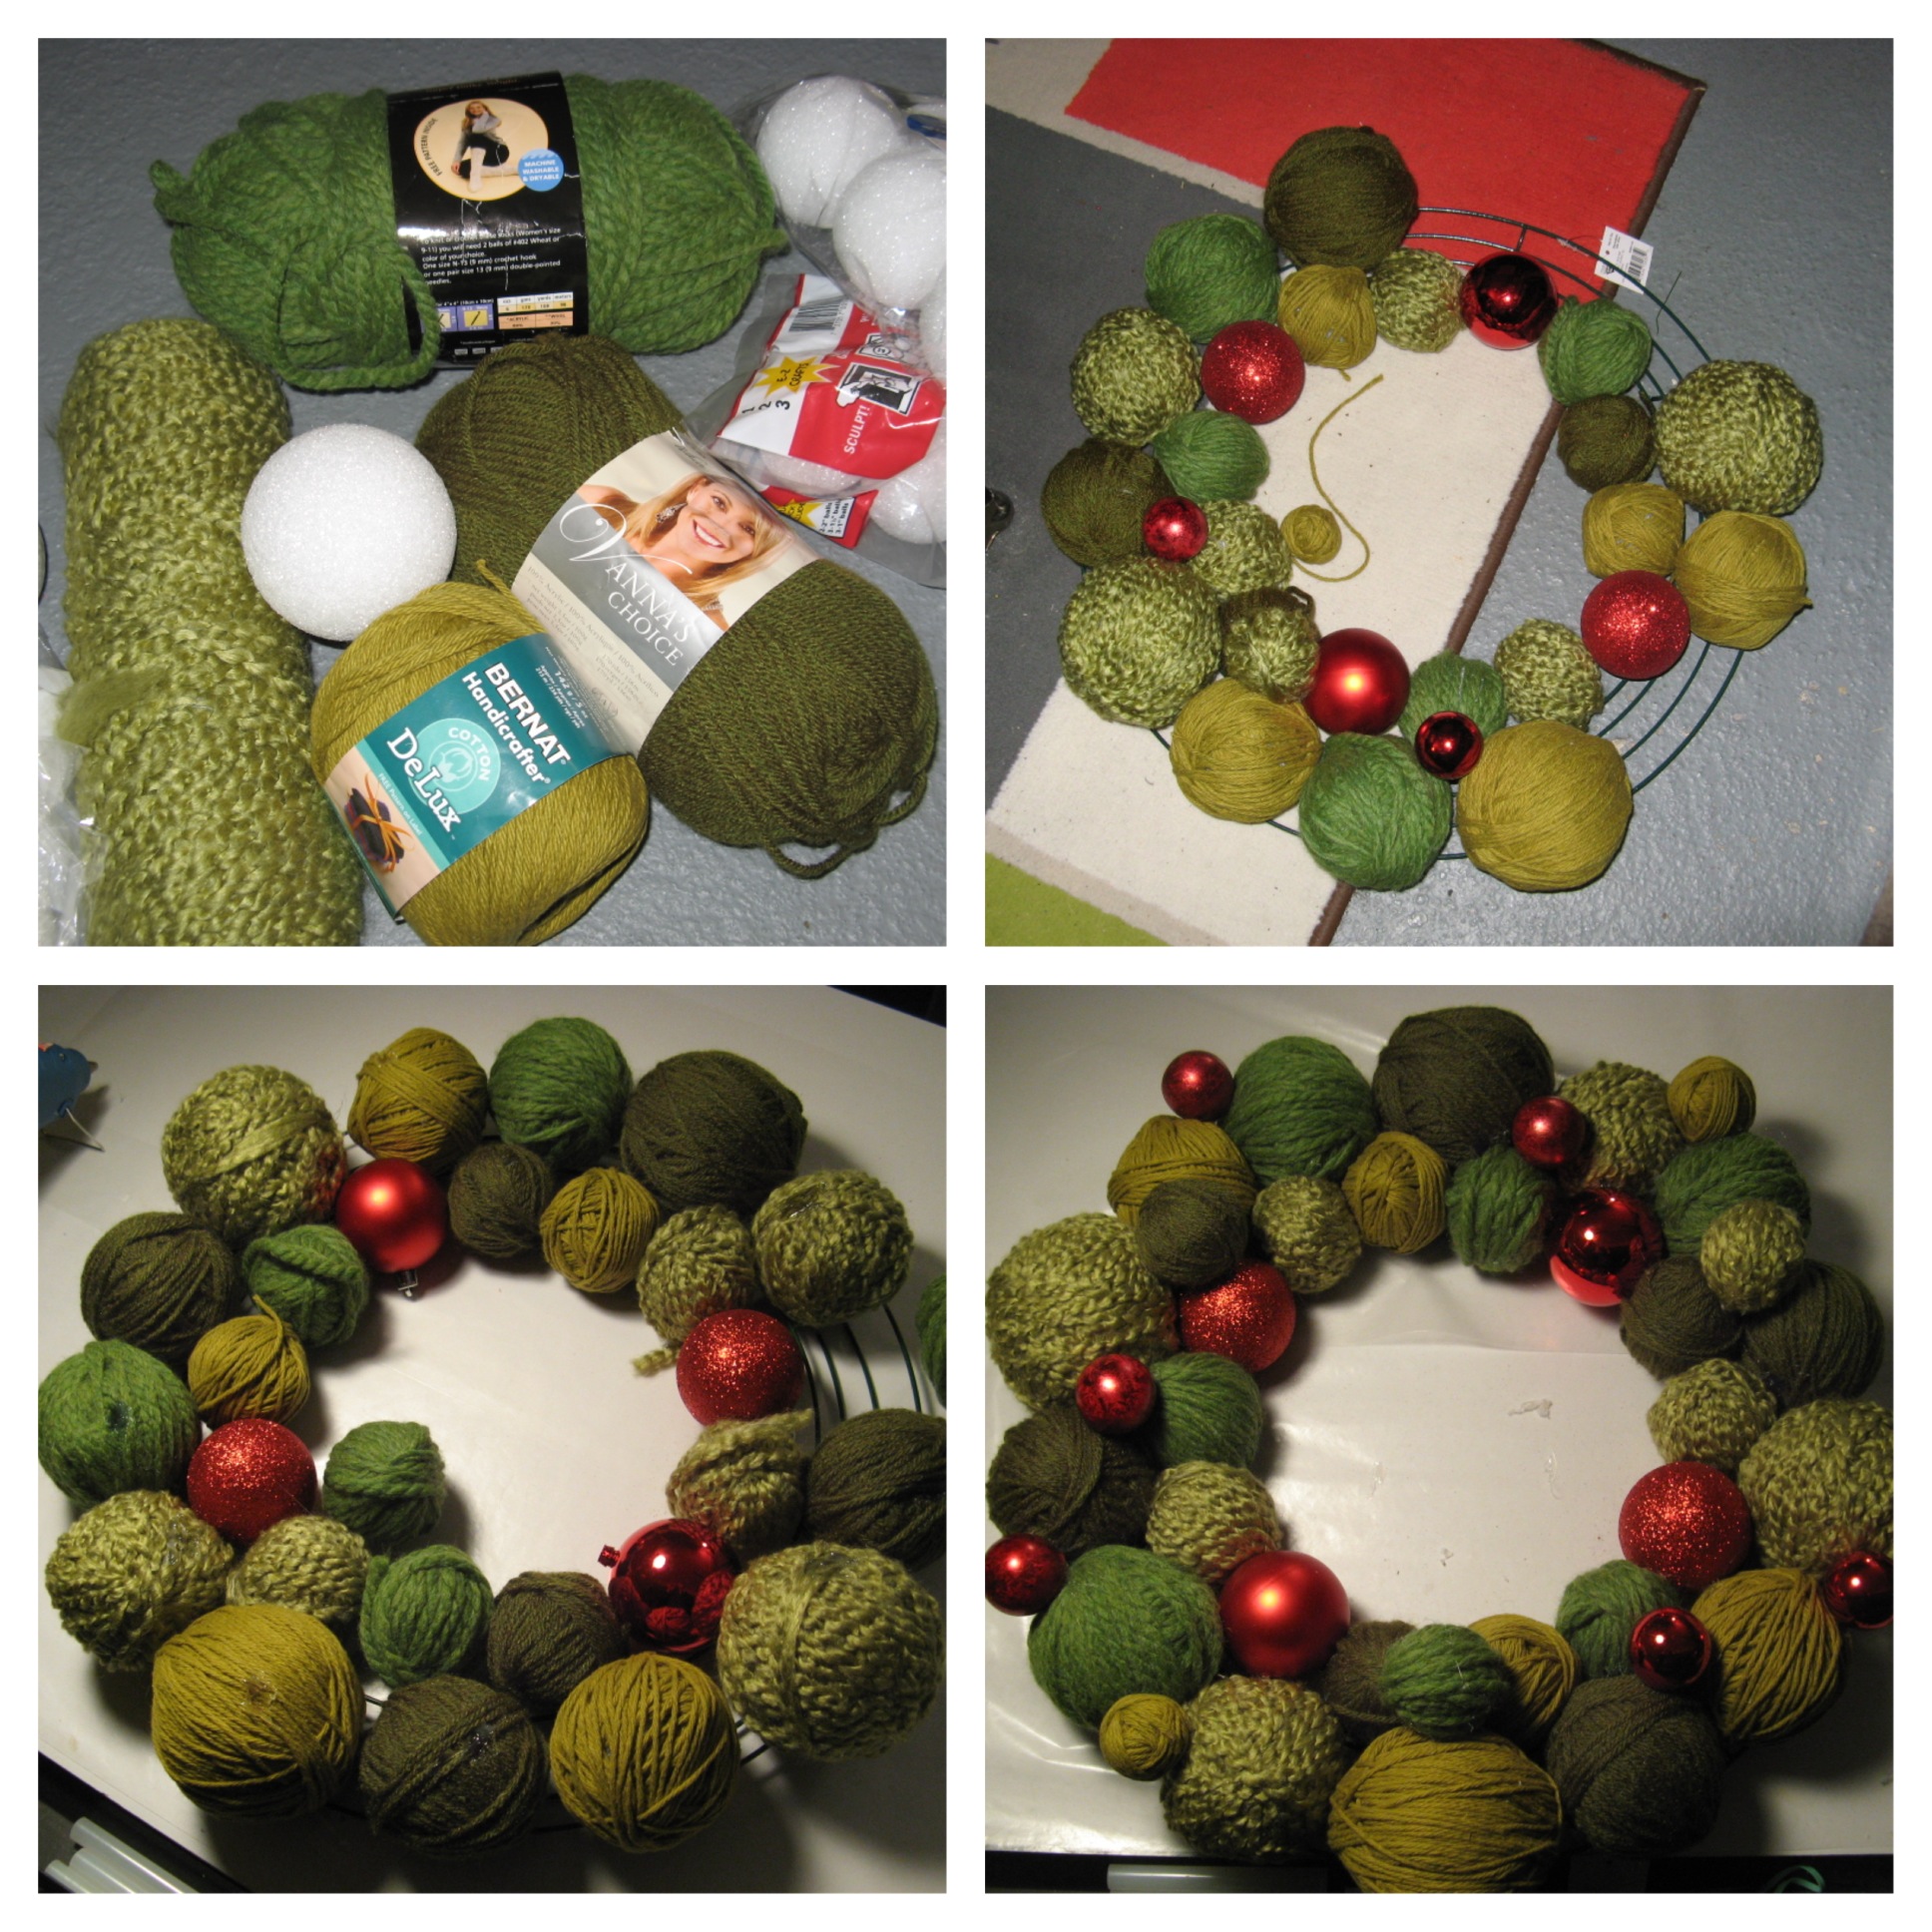
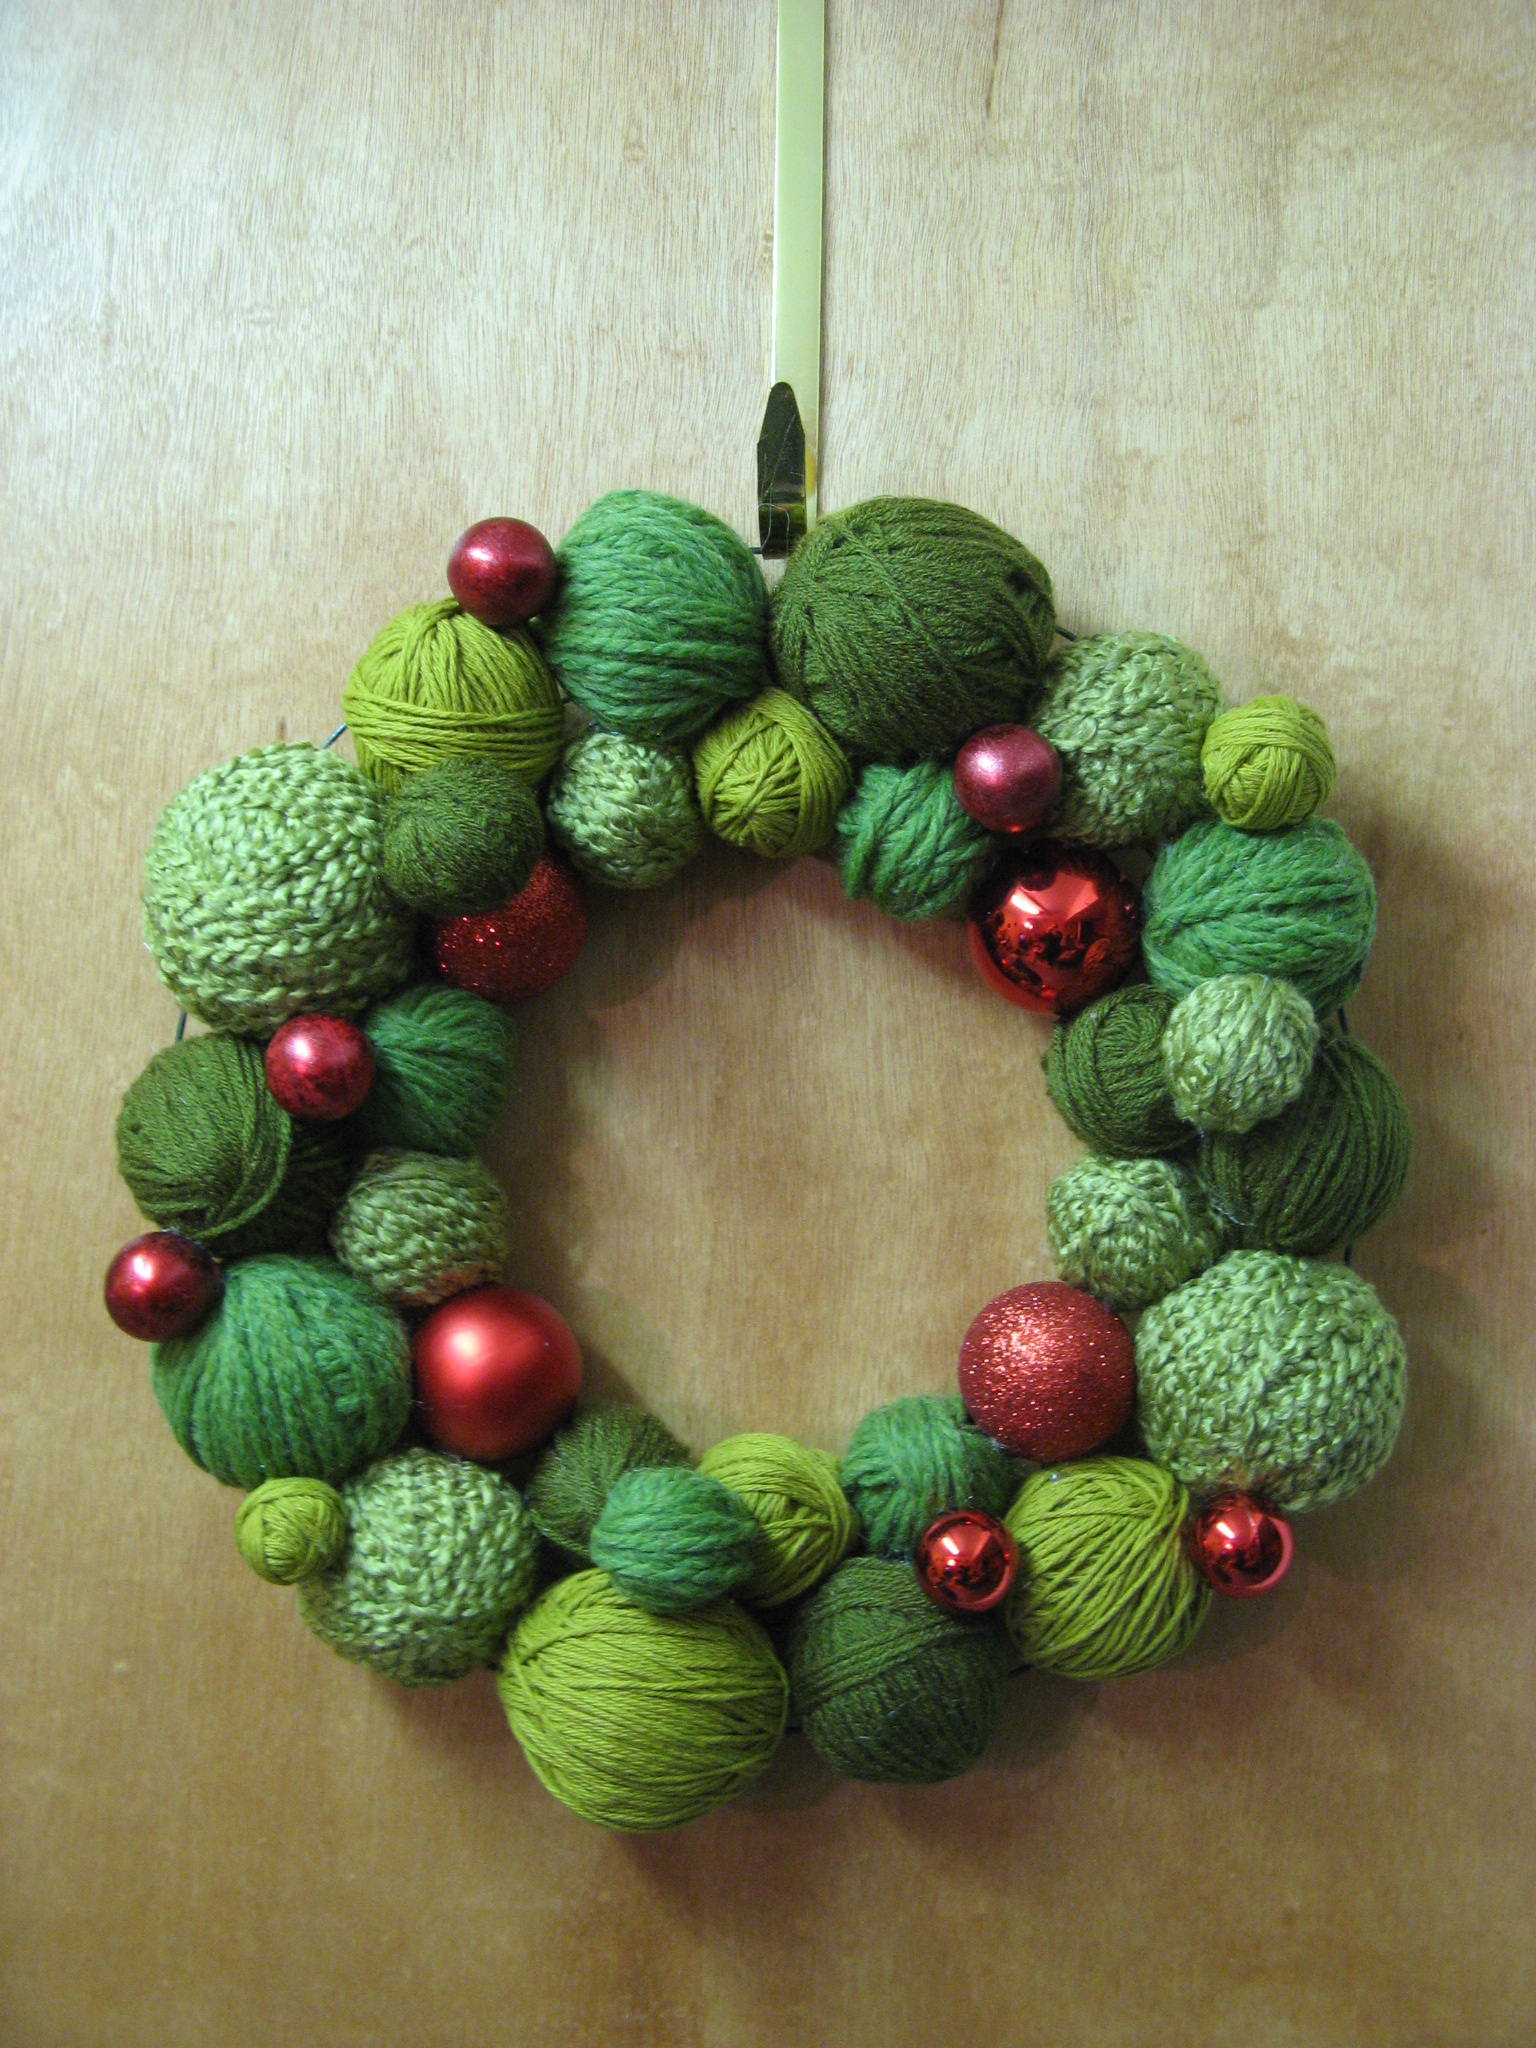
Then there’s the Yarn Ball Wreath. I used different shades of green yarn I had leftover from different crocheting/knitting projects to wrap various sized Styrofoam balls. I then mapped out their placement on a wire wreath form and attached them using a hot glue gun. I then added in some red shatterproof ornaments for a pop of color and to make the wreath a bit more festive.

Yarn Wreath 2 IMG_2031

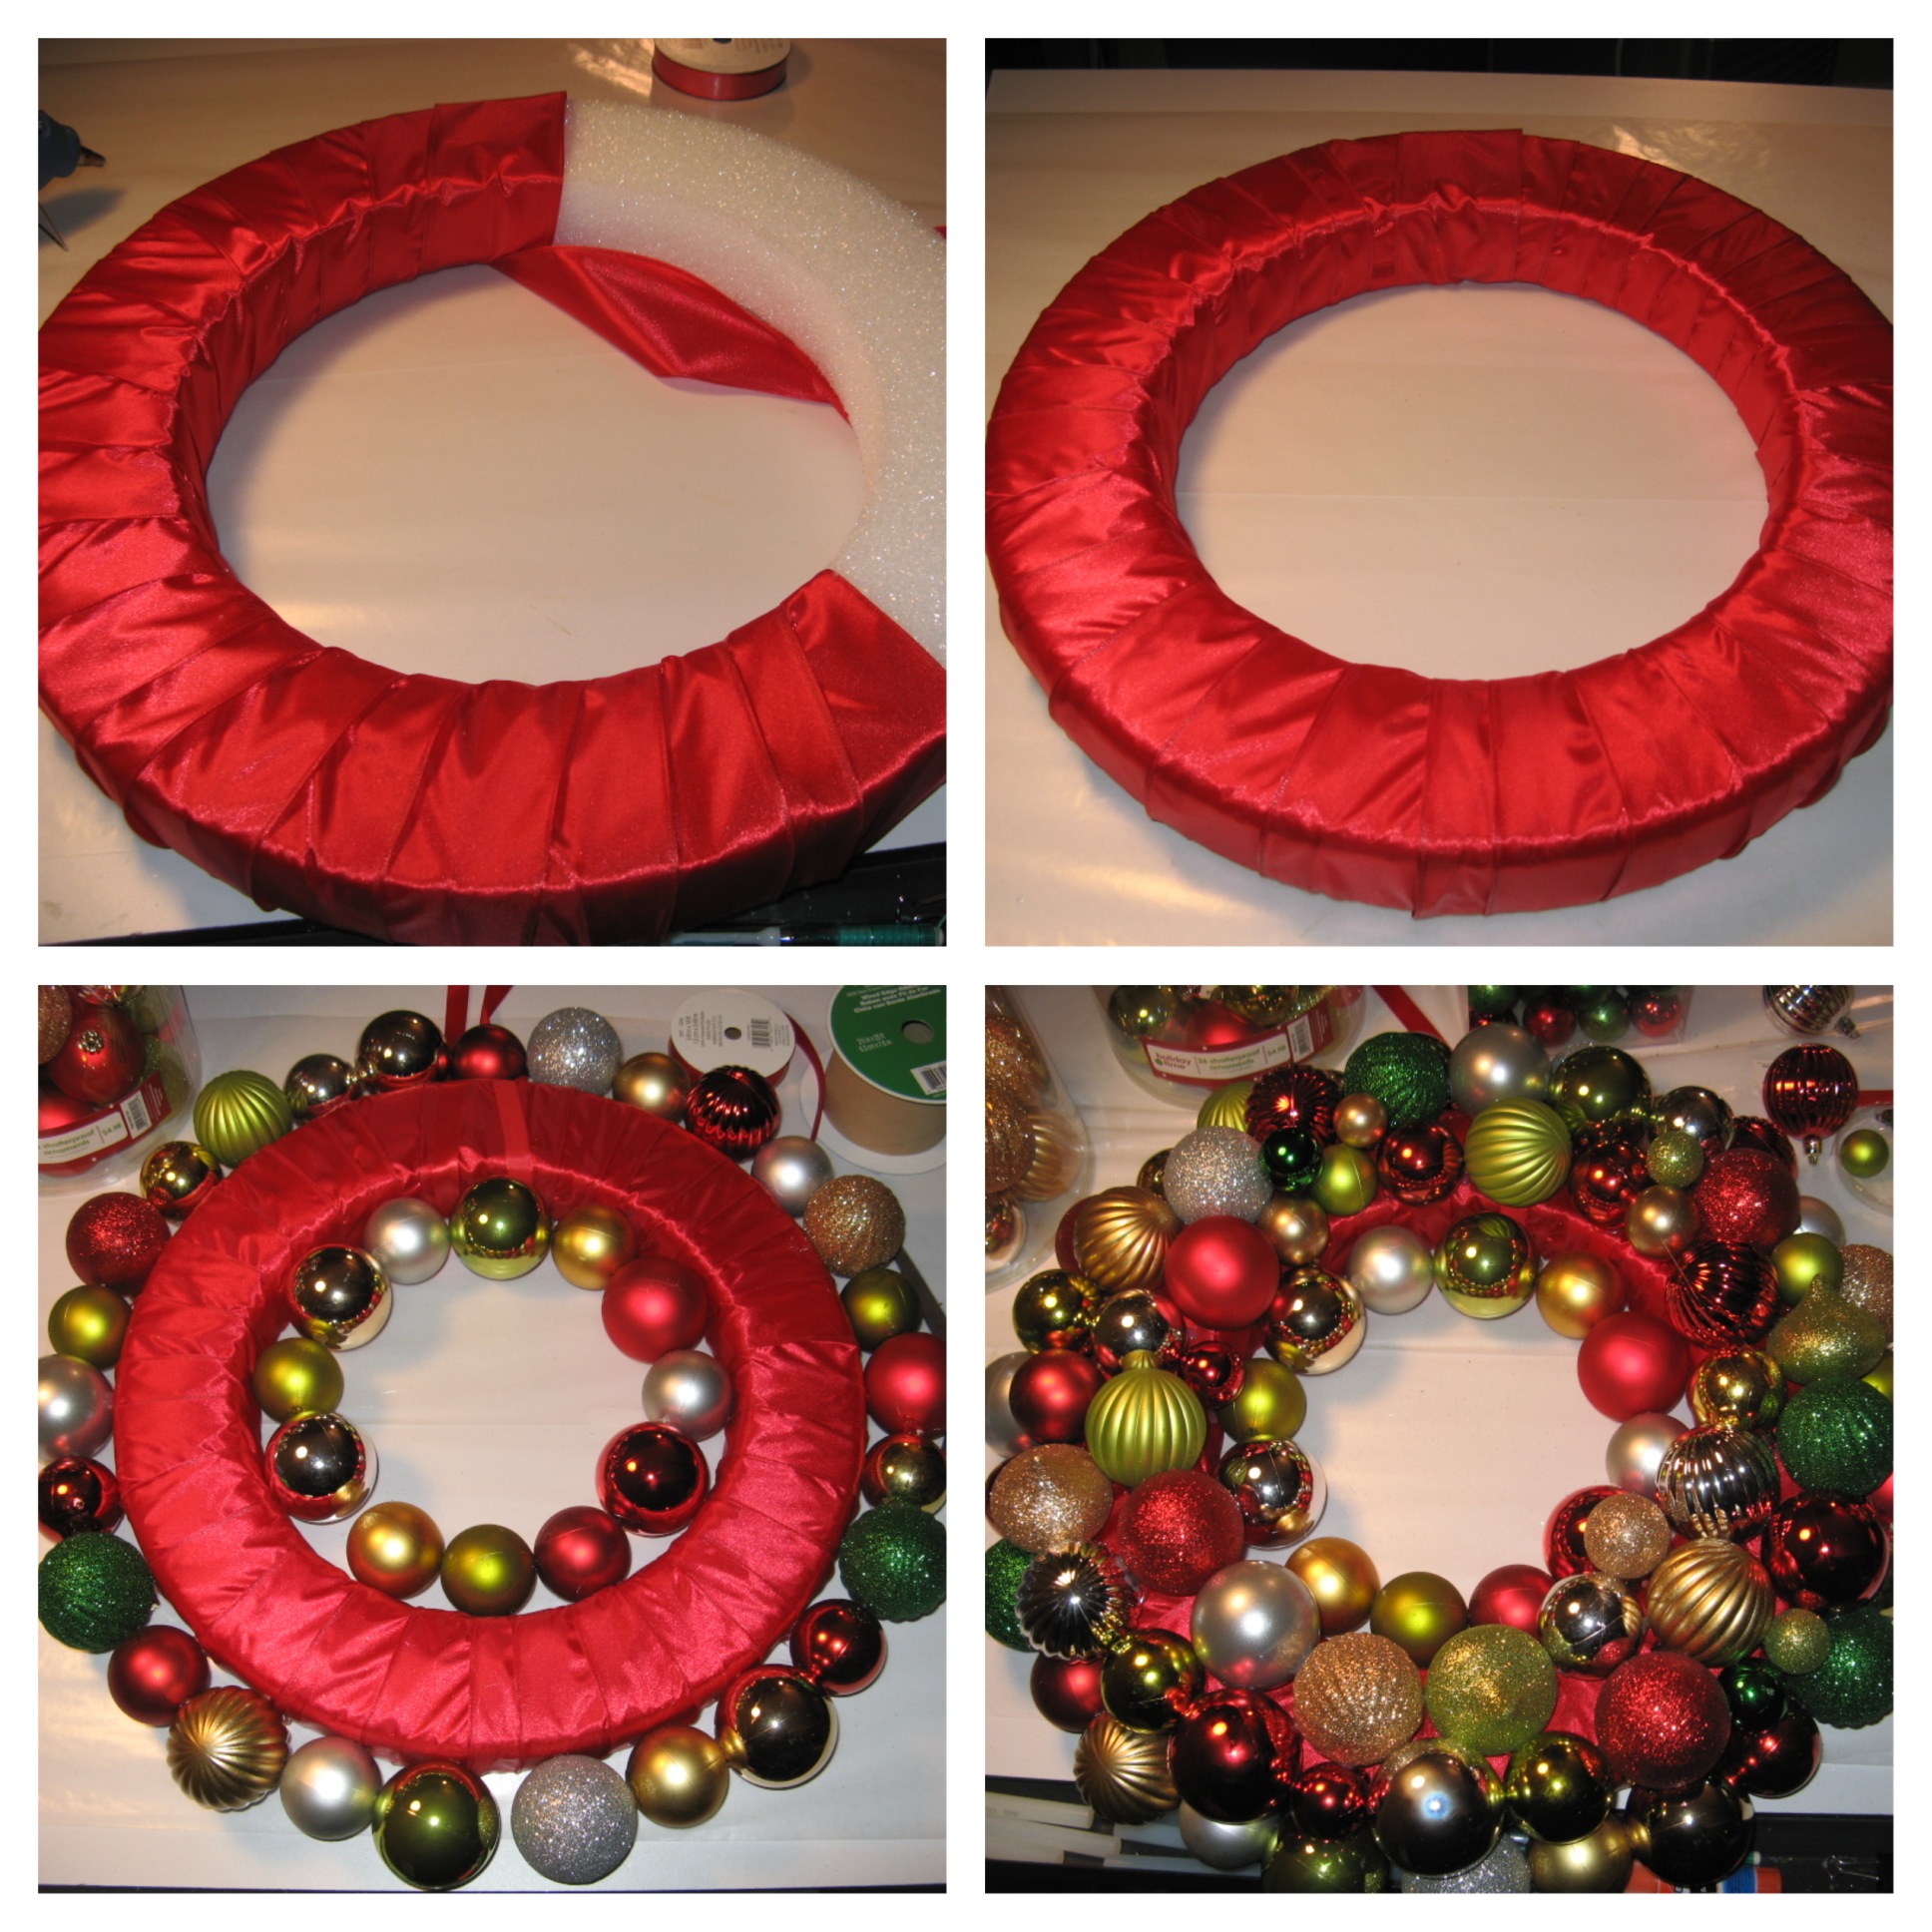
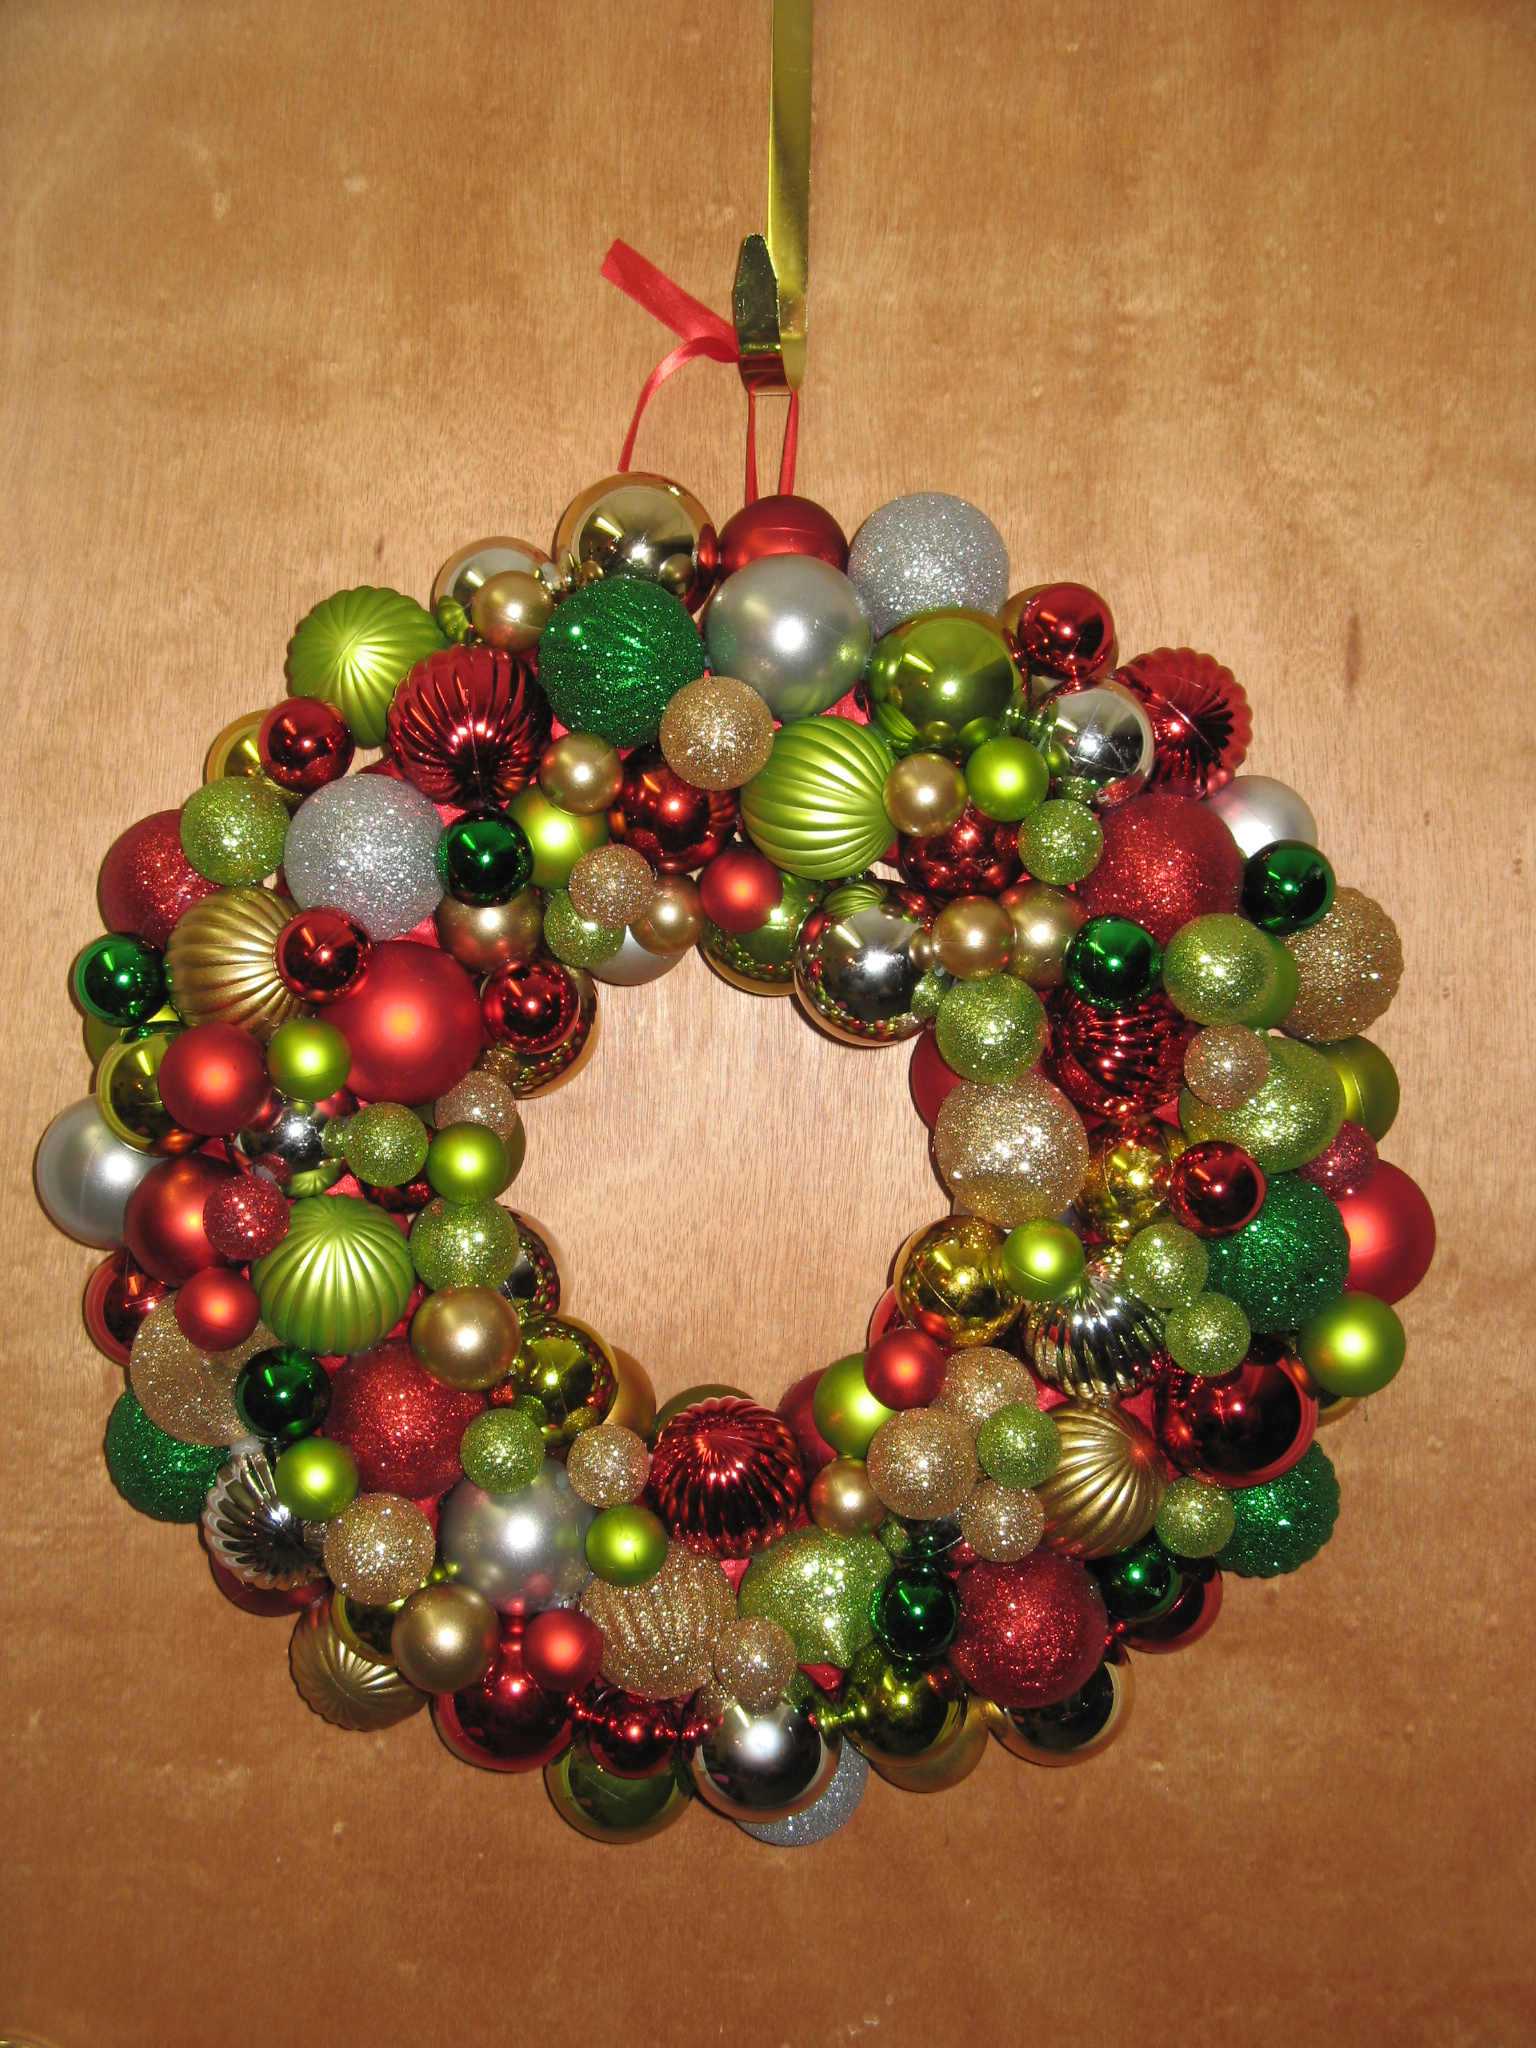
And finally, my favorite, the Ornament Ball Wreath. This was definitely the most time consuming, but, worth every minute. To begin I wrapped a Styrofoam ring with red ribbon tying a loop with the ribbon at one point so the wreath could be hung. I then lined the inside and outside of the ring with alternating sized shatterproof ornaments. I then filled in the flat part of the ring with various sized ornaments and finally – the part I couldn’t get too crazed with – I filled in the gaps with smaller sized ornaments. It’s very easy to go from beautiful to gaudy when adding the ornaments.

Ornament Wreath 2 IMG_2091

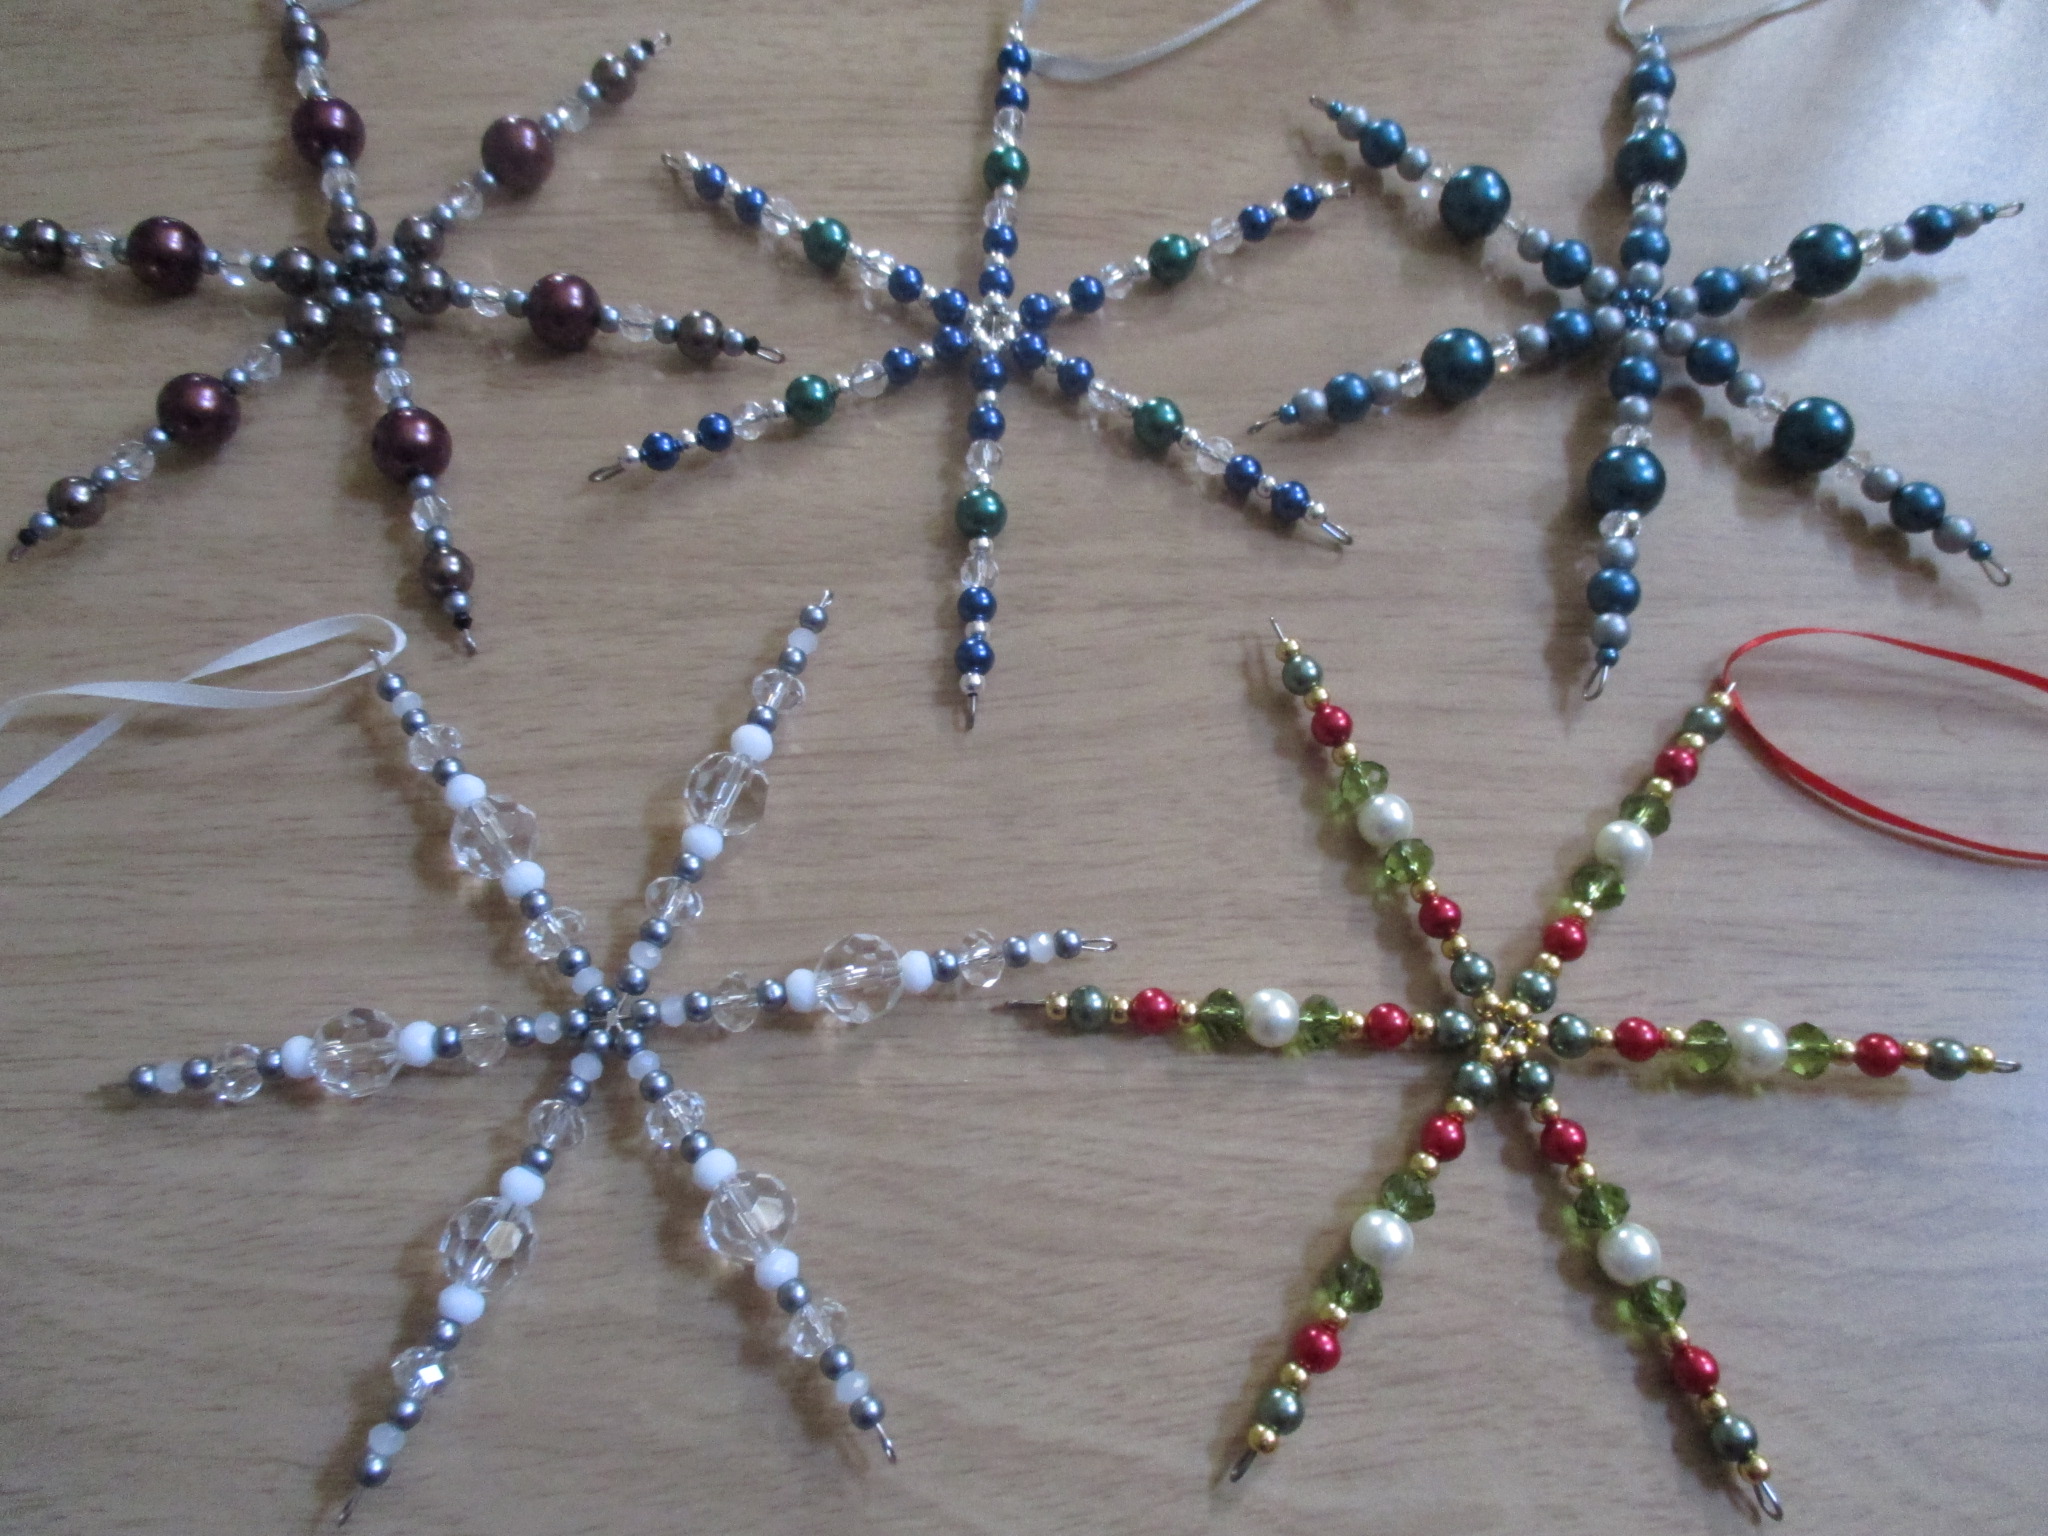
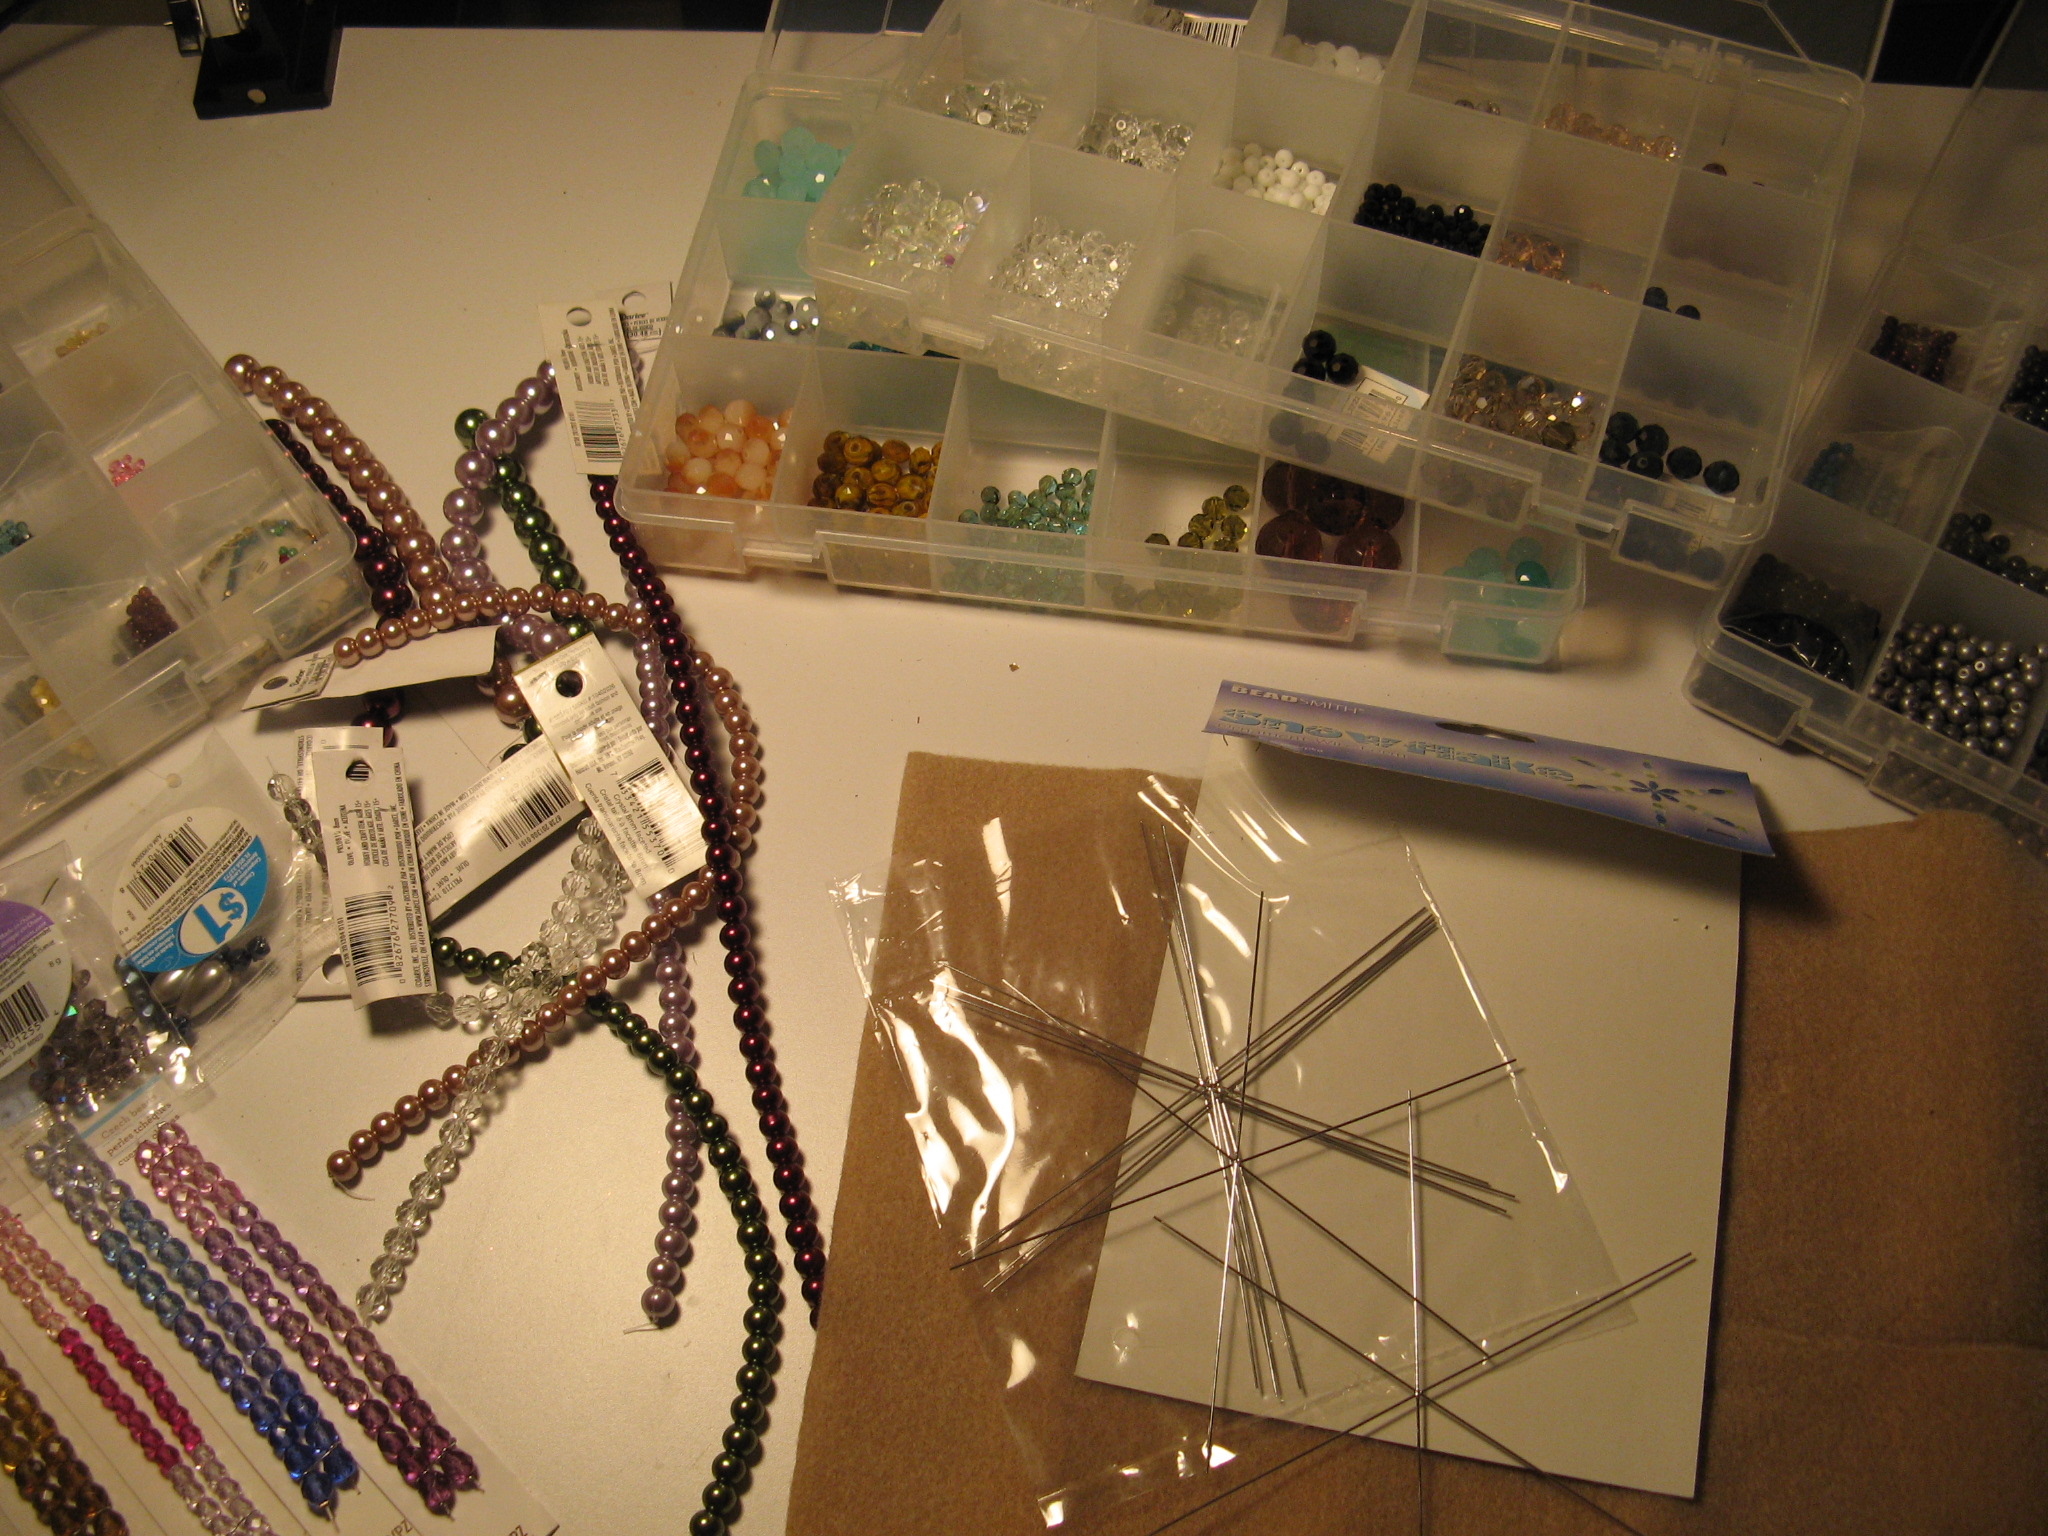
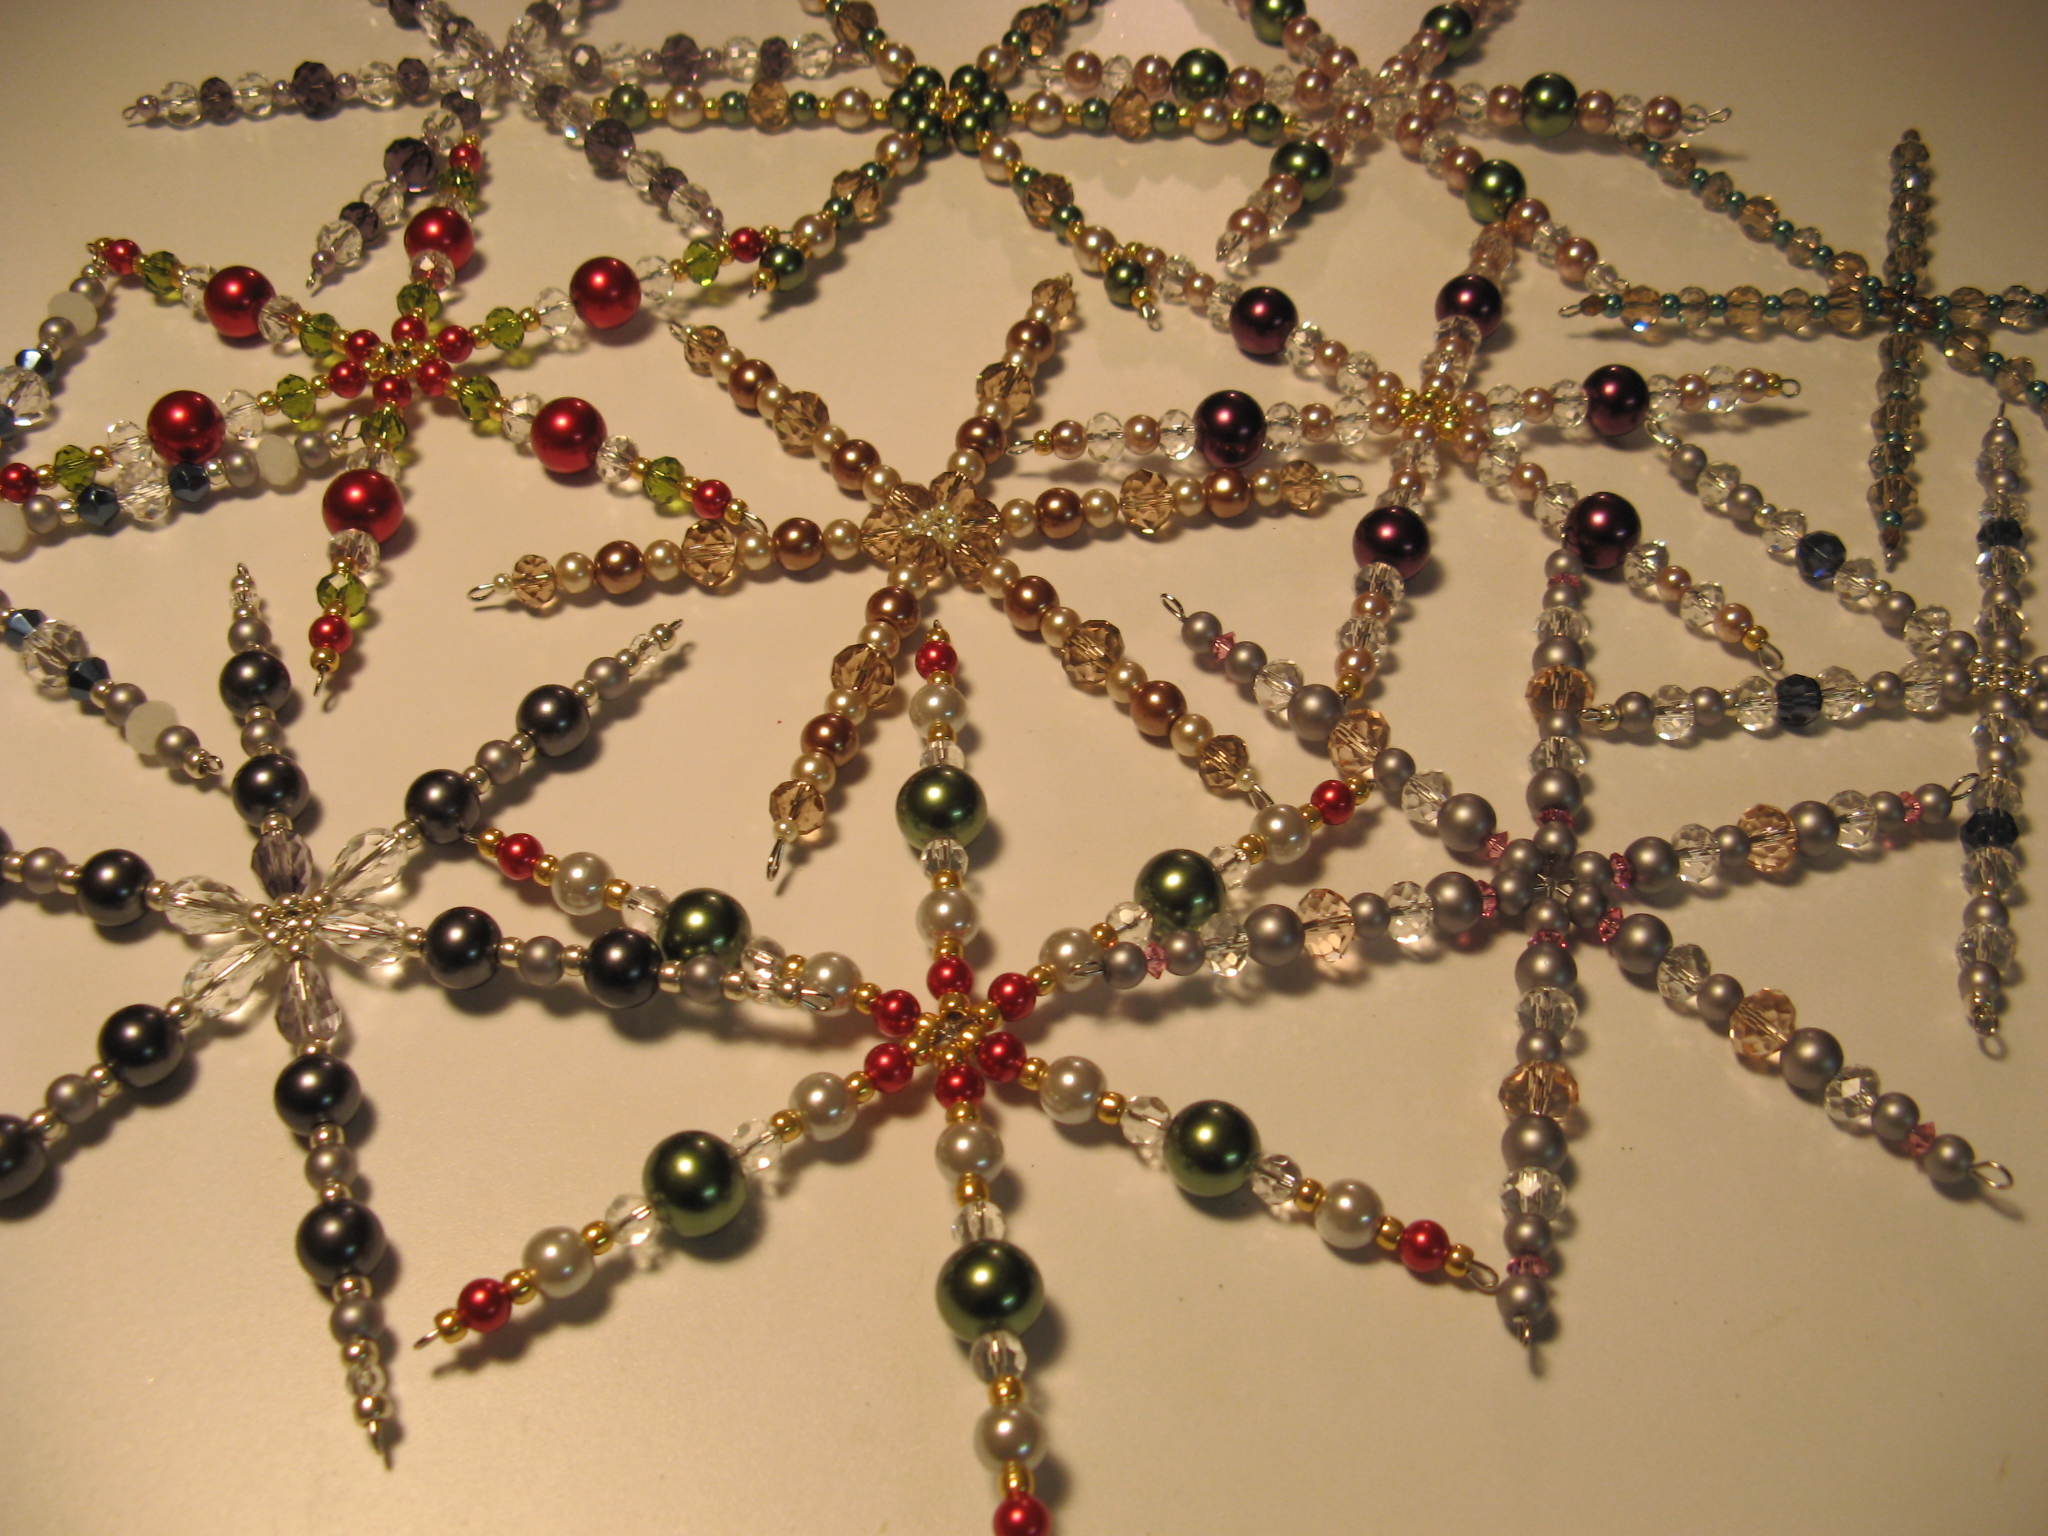
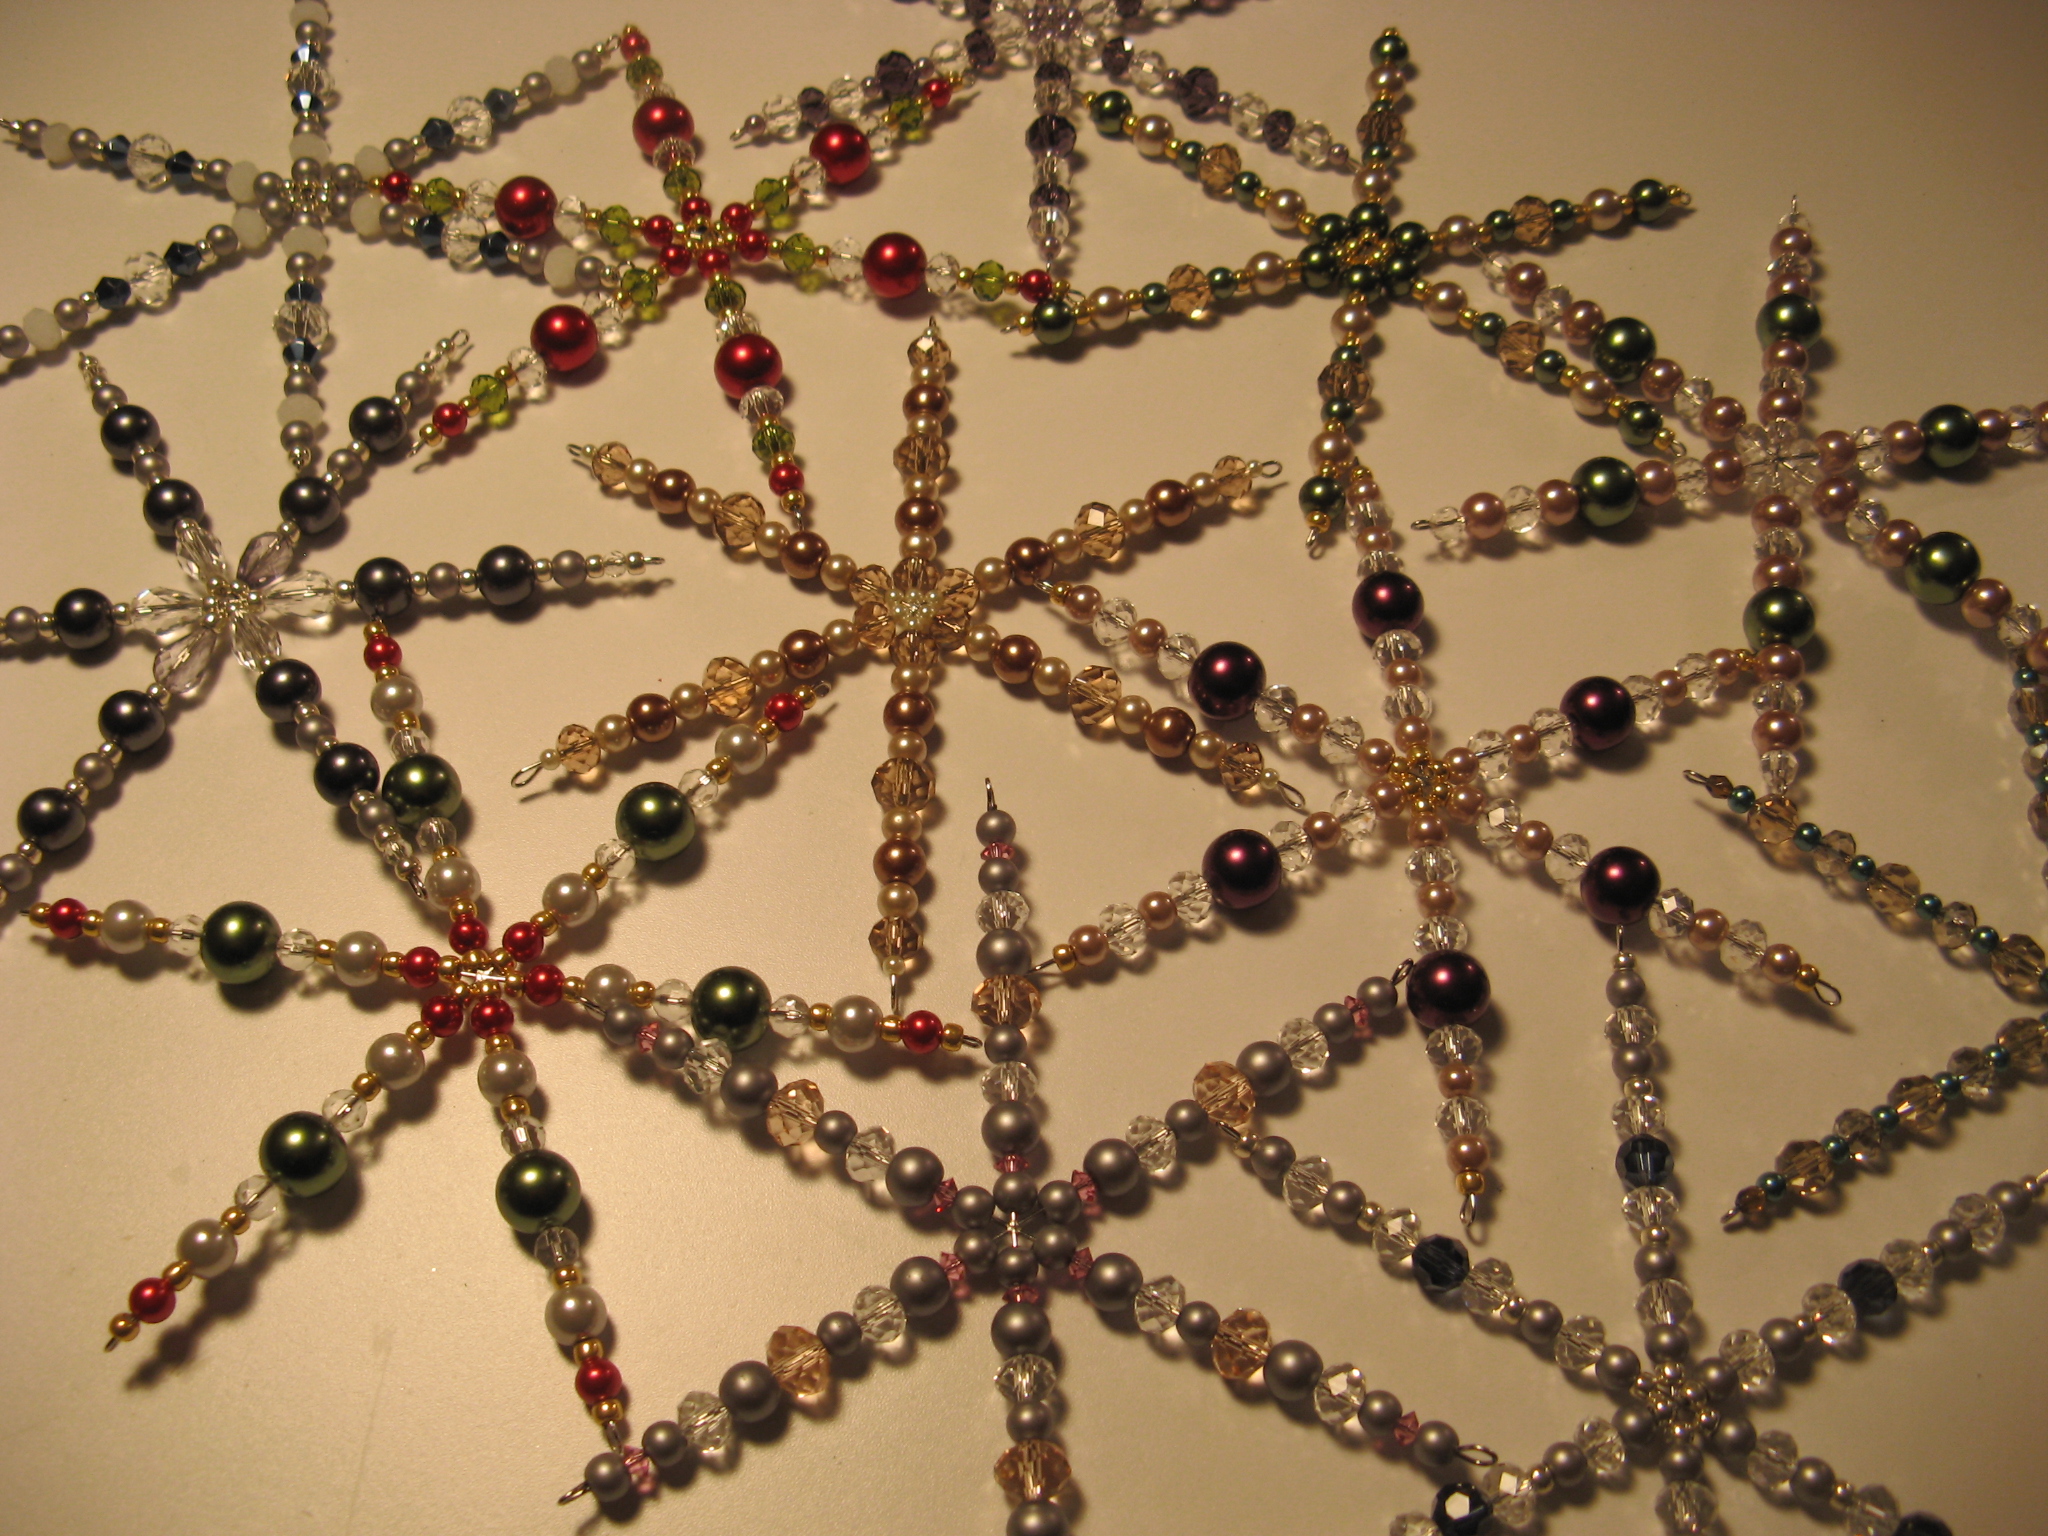
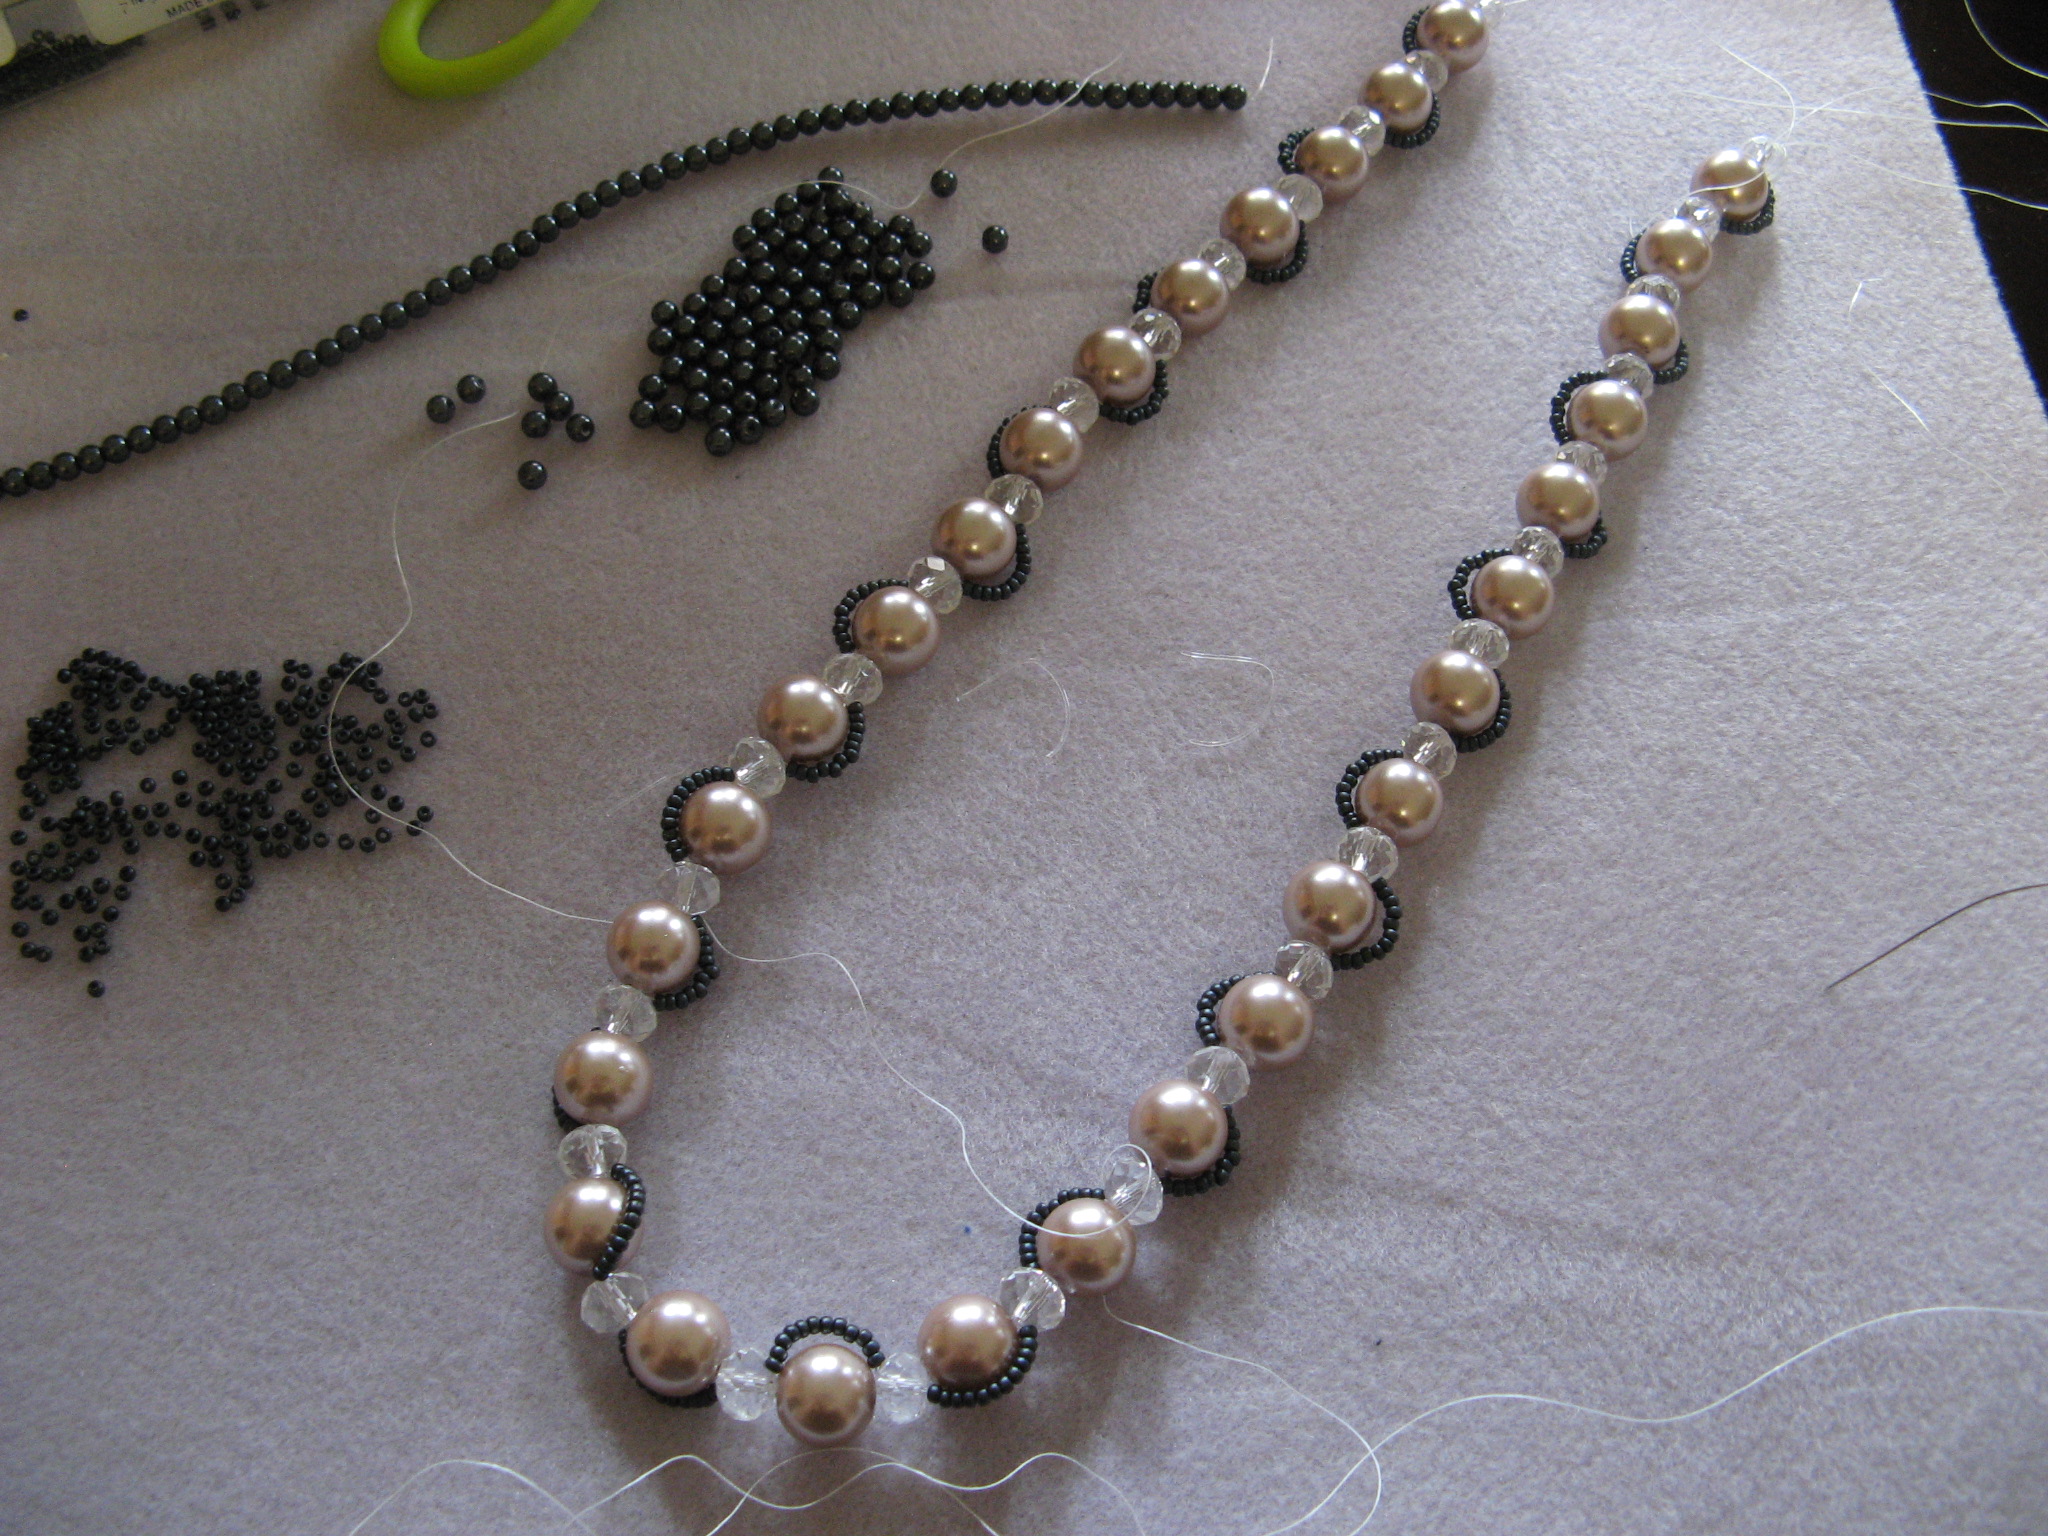
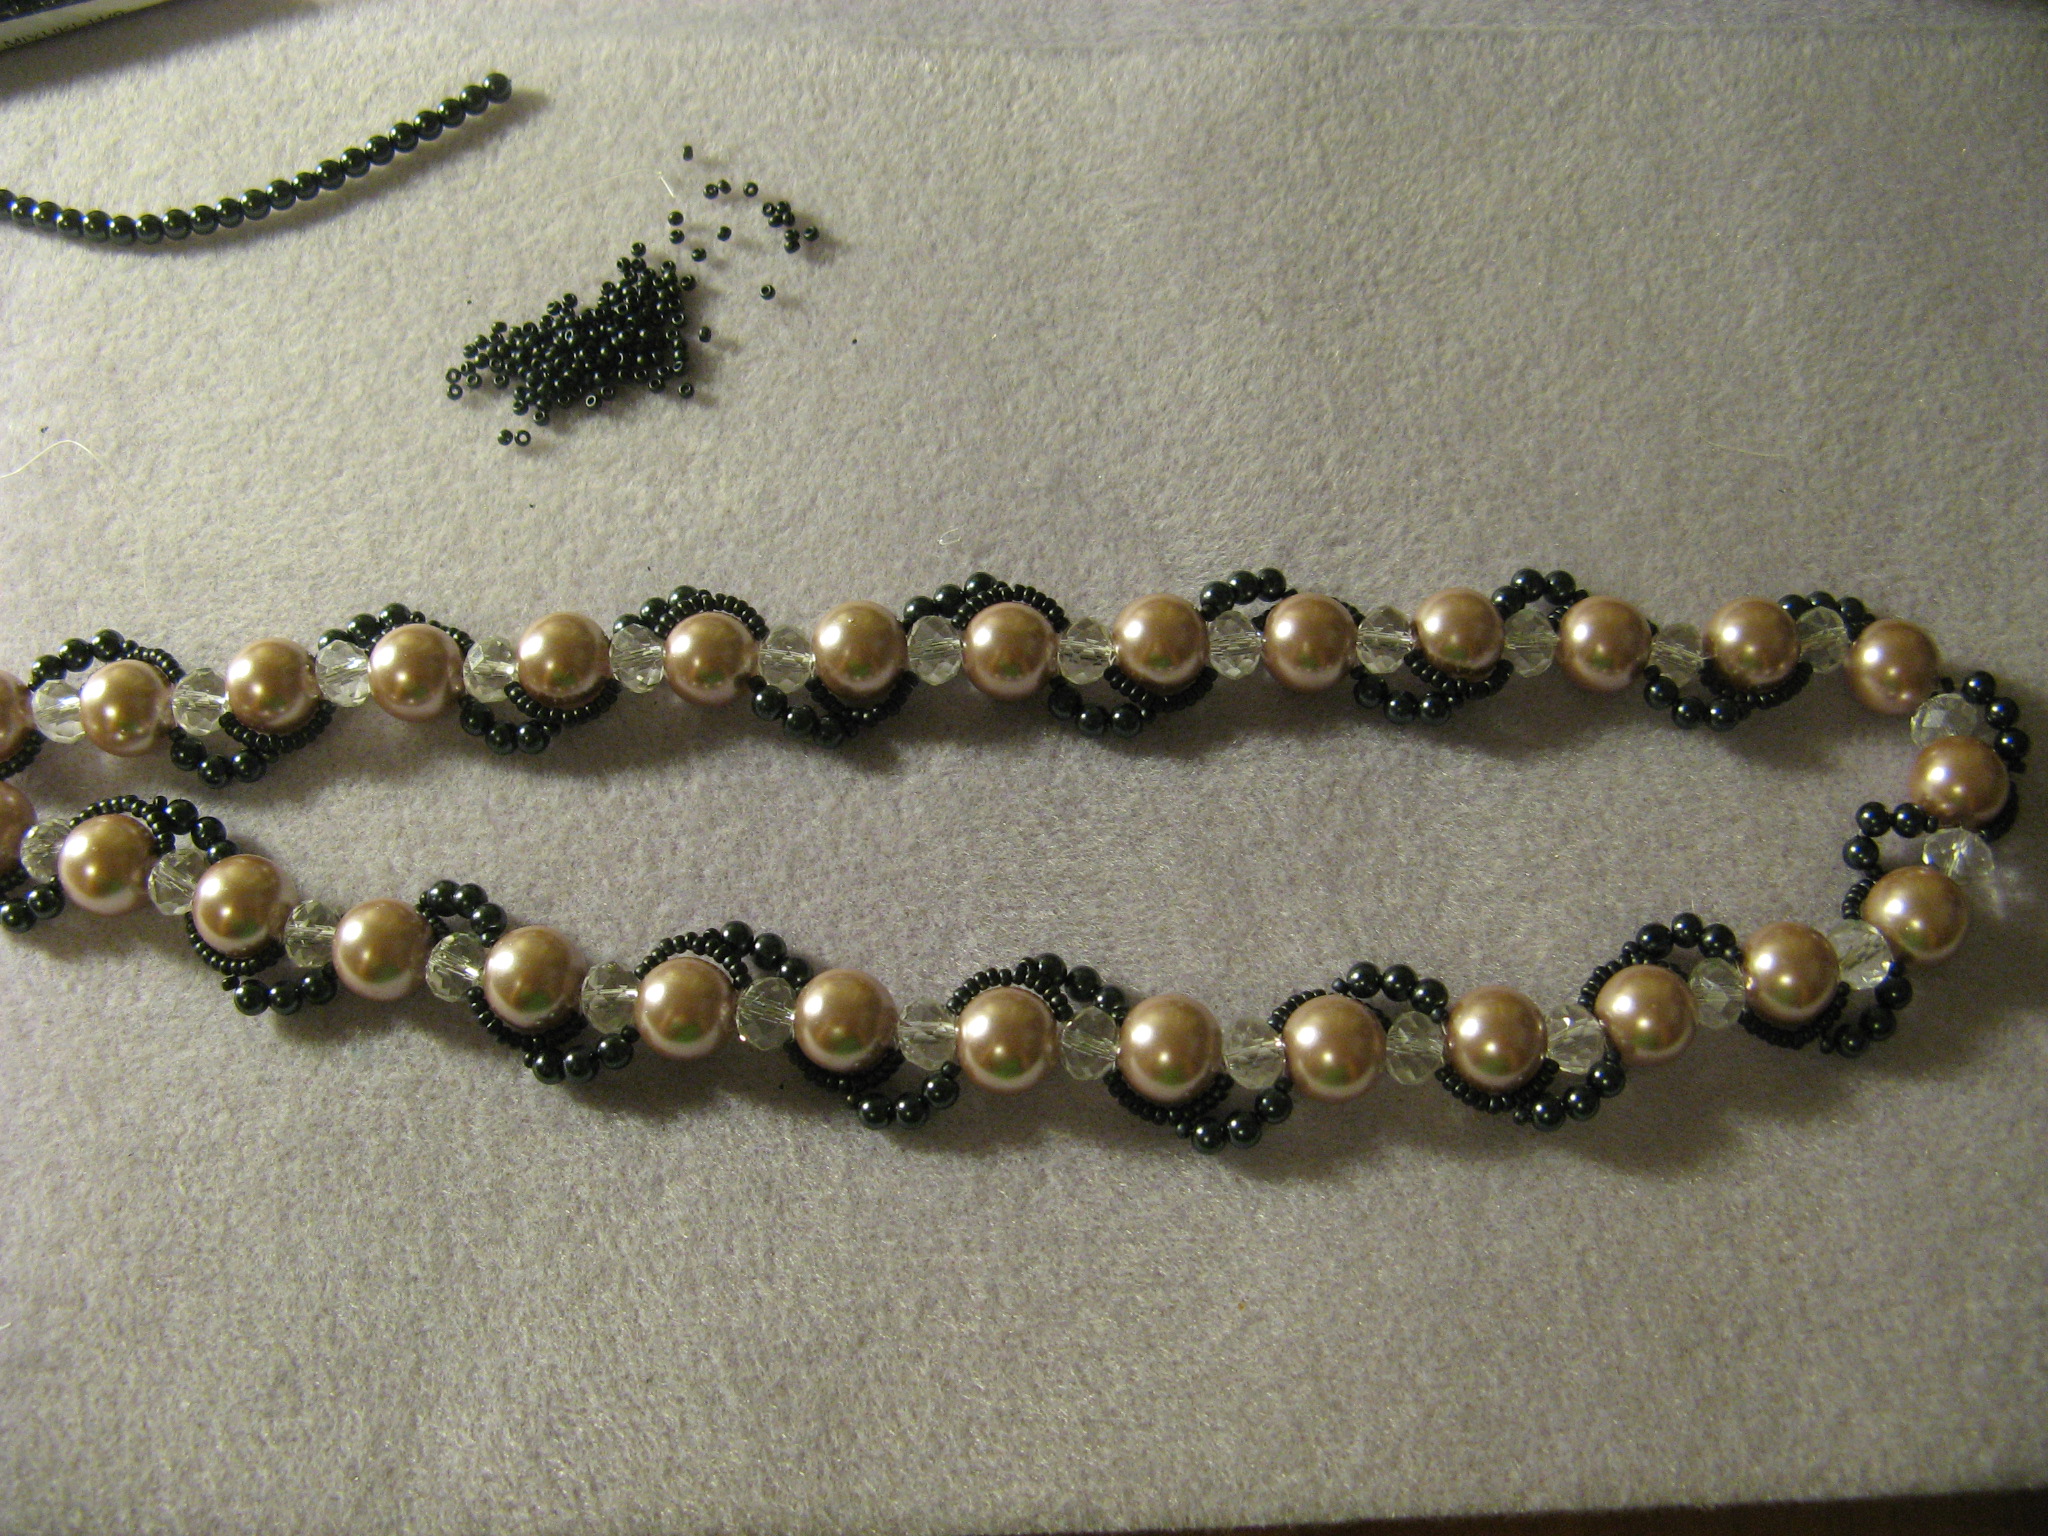
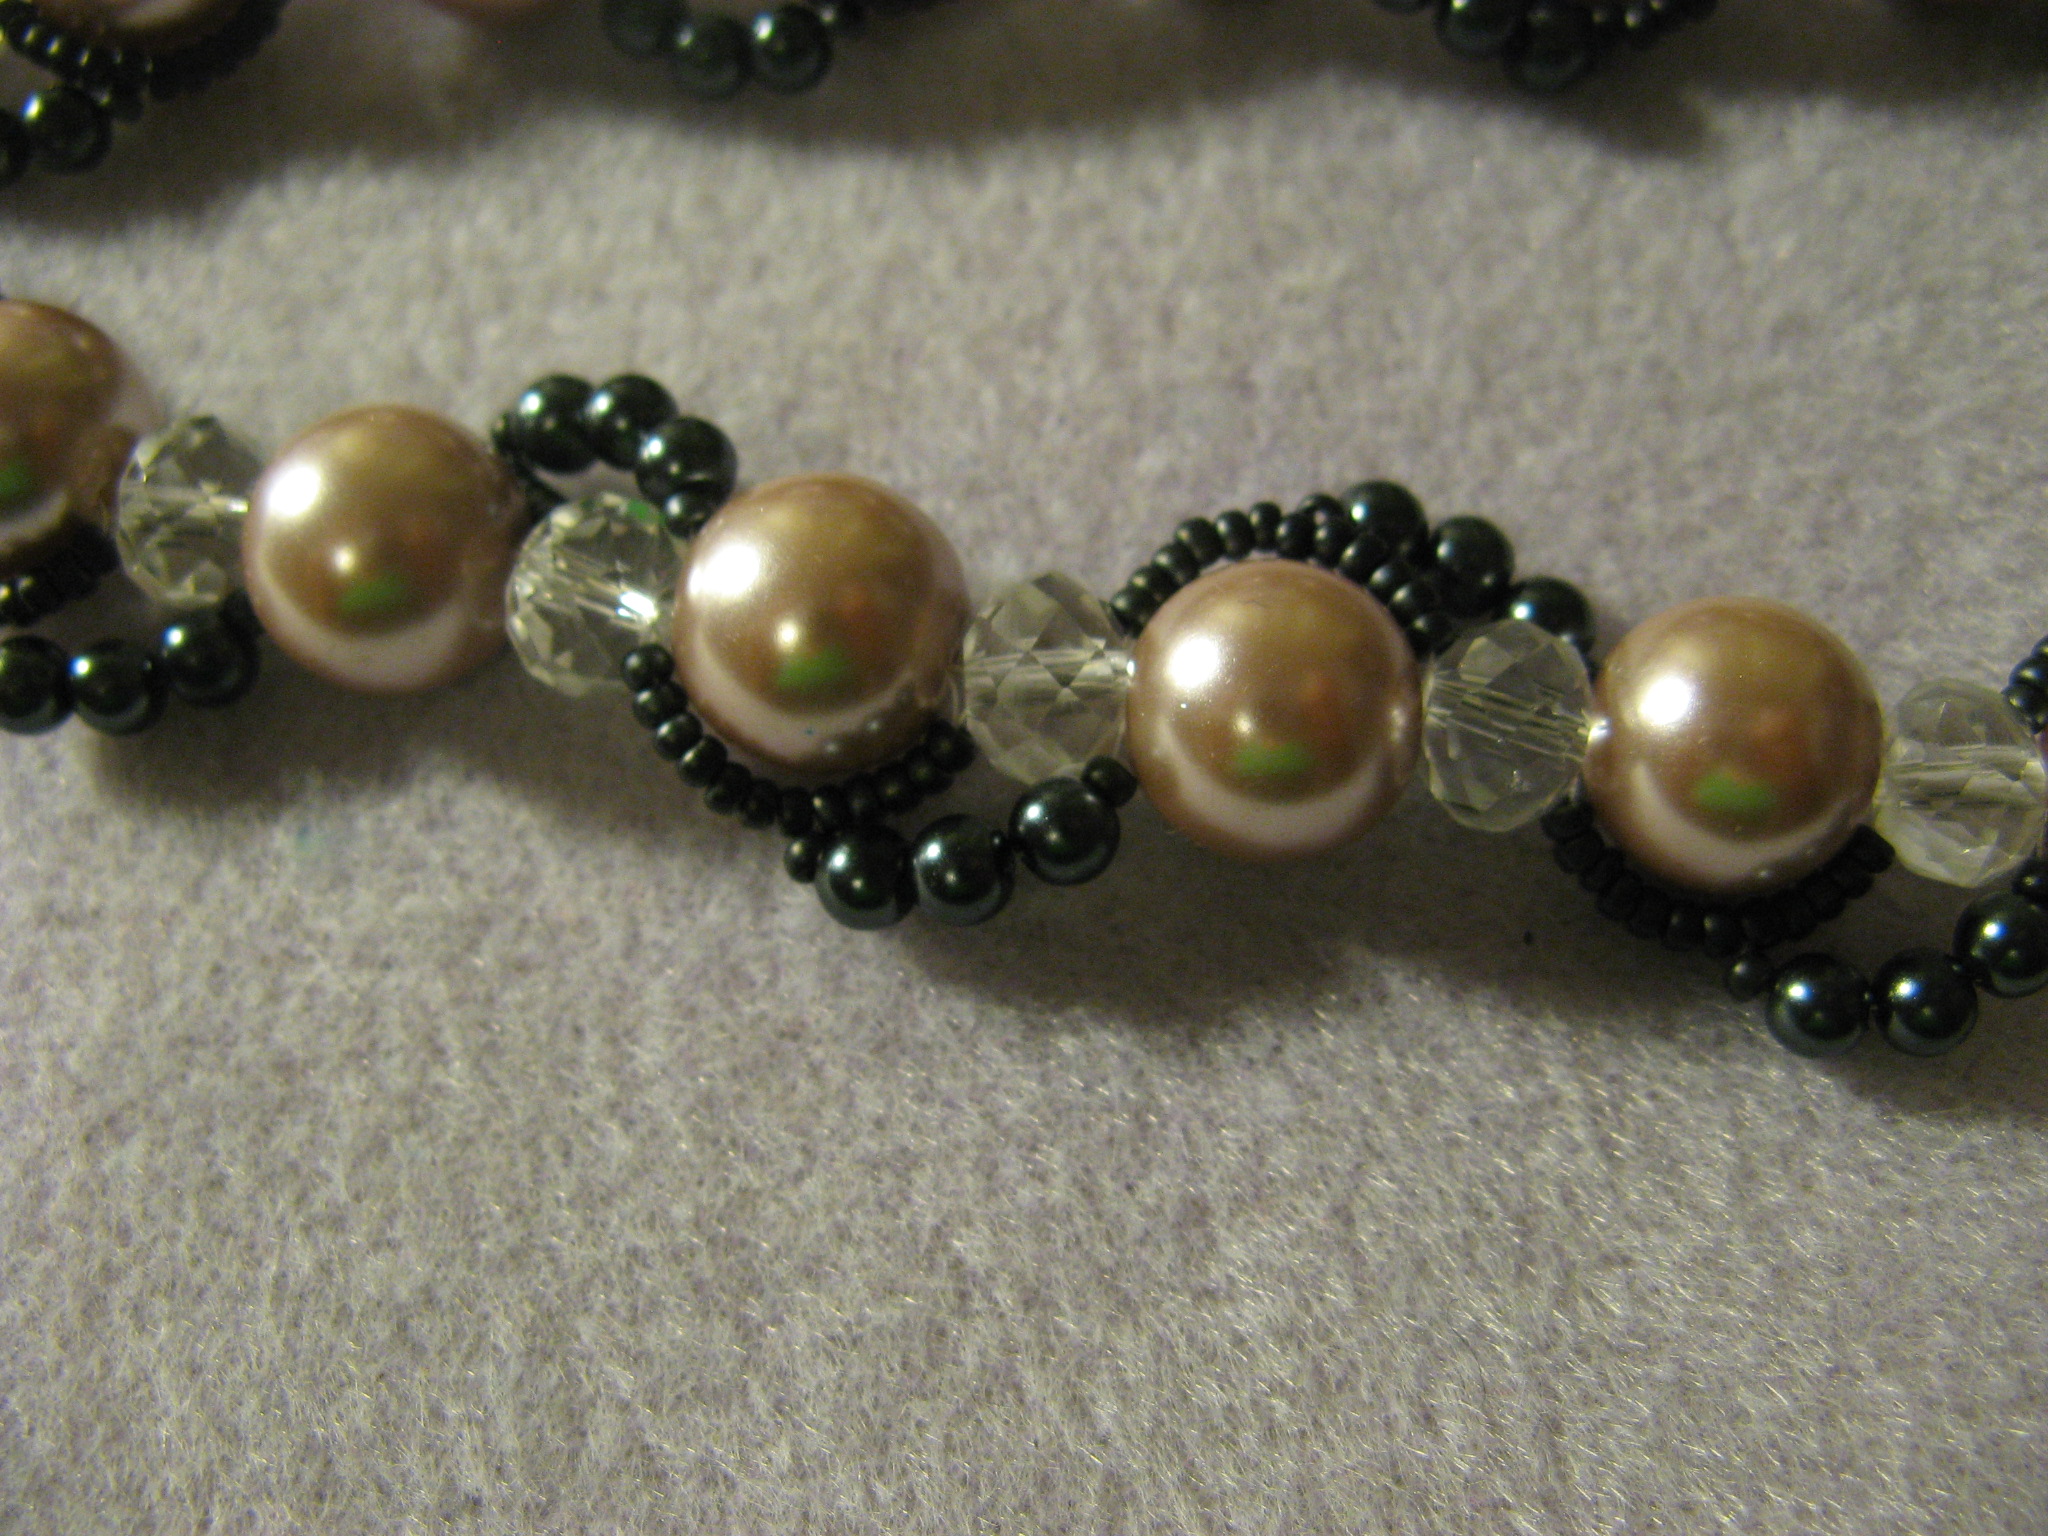
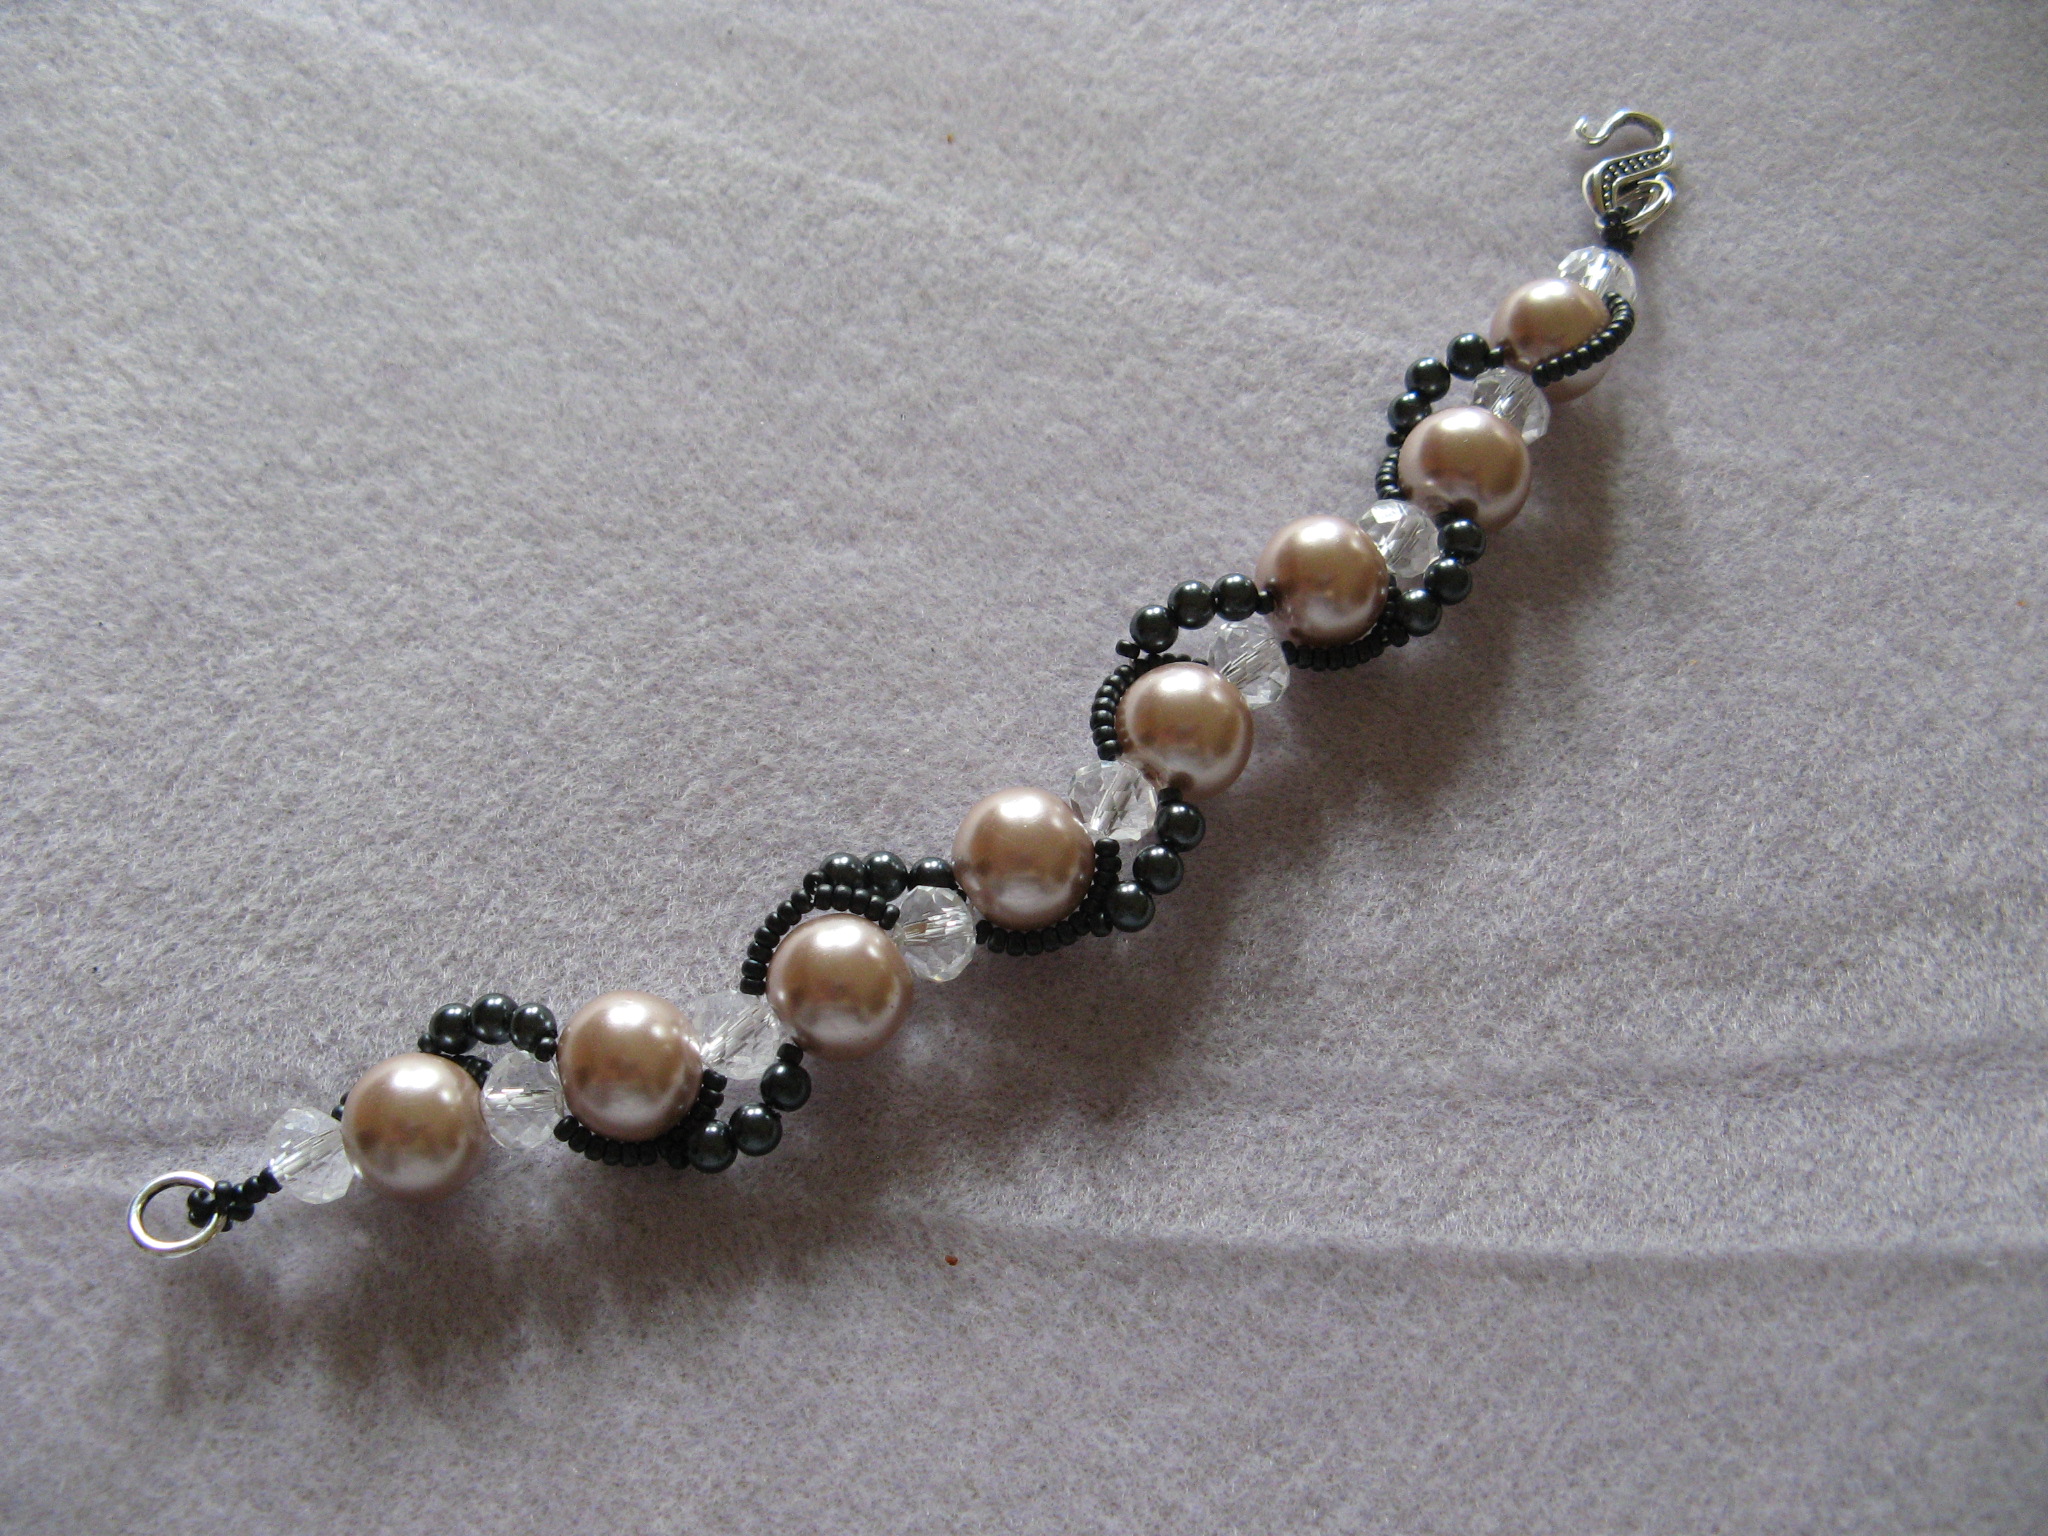
After the wreaths I moved on to making snowflake ornaments. I got the wire forms (6-inch) from Fusion Beads and then it was just a matter of decorating them with pearls, crystals and seed beads in colors that reflected the holiday season or the intended recipient’s favorite color. This was made all the more easier since I recently organized all of my jewelry supplies into storage containers.

IMG_1989

After a few wire mishaps (thankfully I bought extra wire forms) and a couple of wire gashes all of my snowflakes were done. After taking this picture I threaded all of them with coordinating ribbon so they could be hung from a Christmas tree, in a window, or wherever.

IMG_2107 IMG_2103

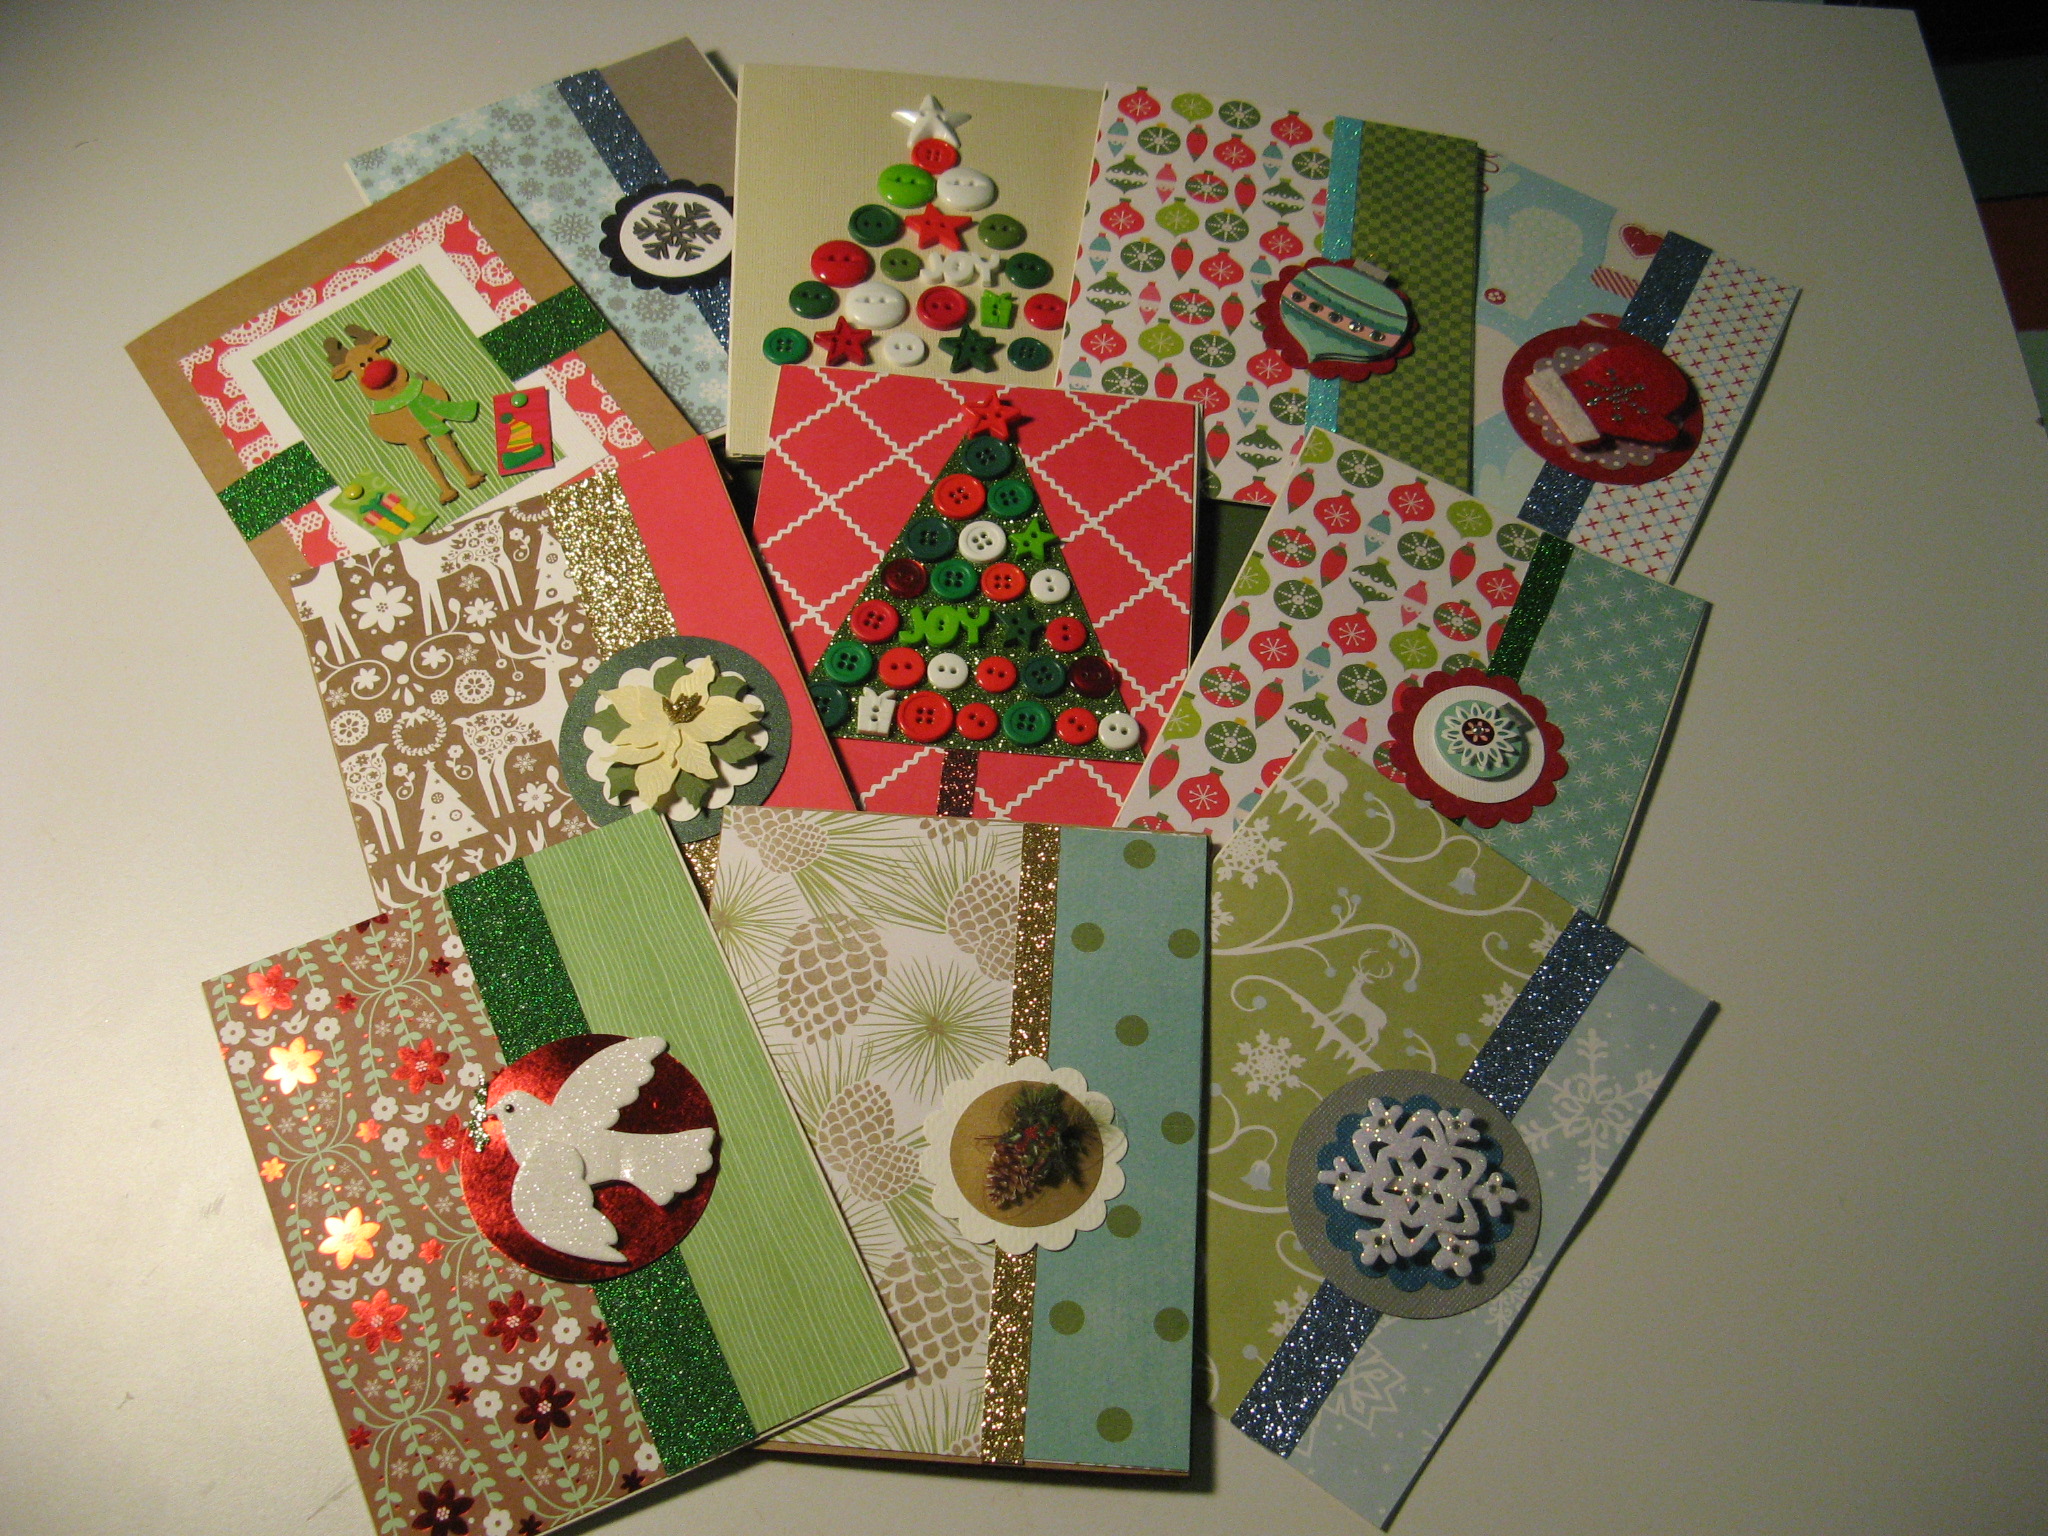
And finally… My handmade Christmas cards. While getting started is always a daunting task, by the third card I am full speed ahead. I even got a jump on next year’s cards by making a few extra this year. We’ll see if I still like them in a year’s time or I may just have other ideas of what I want to make by then.

IMG_2204

Happy Holidays!!!

IMG_1986

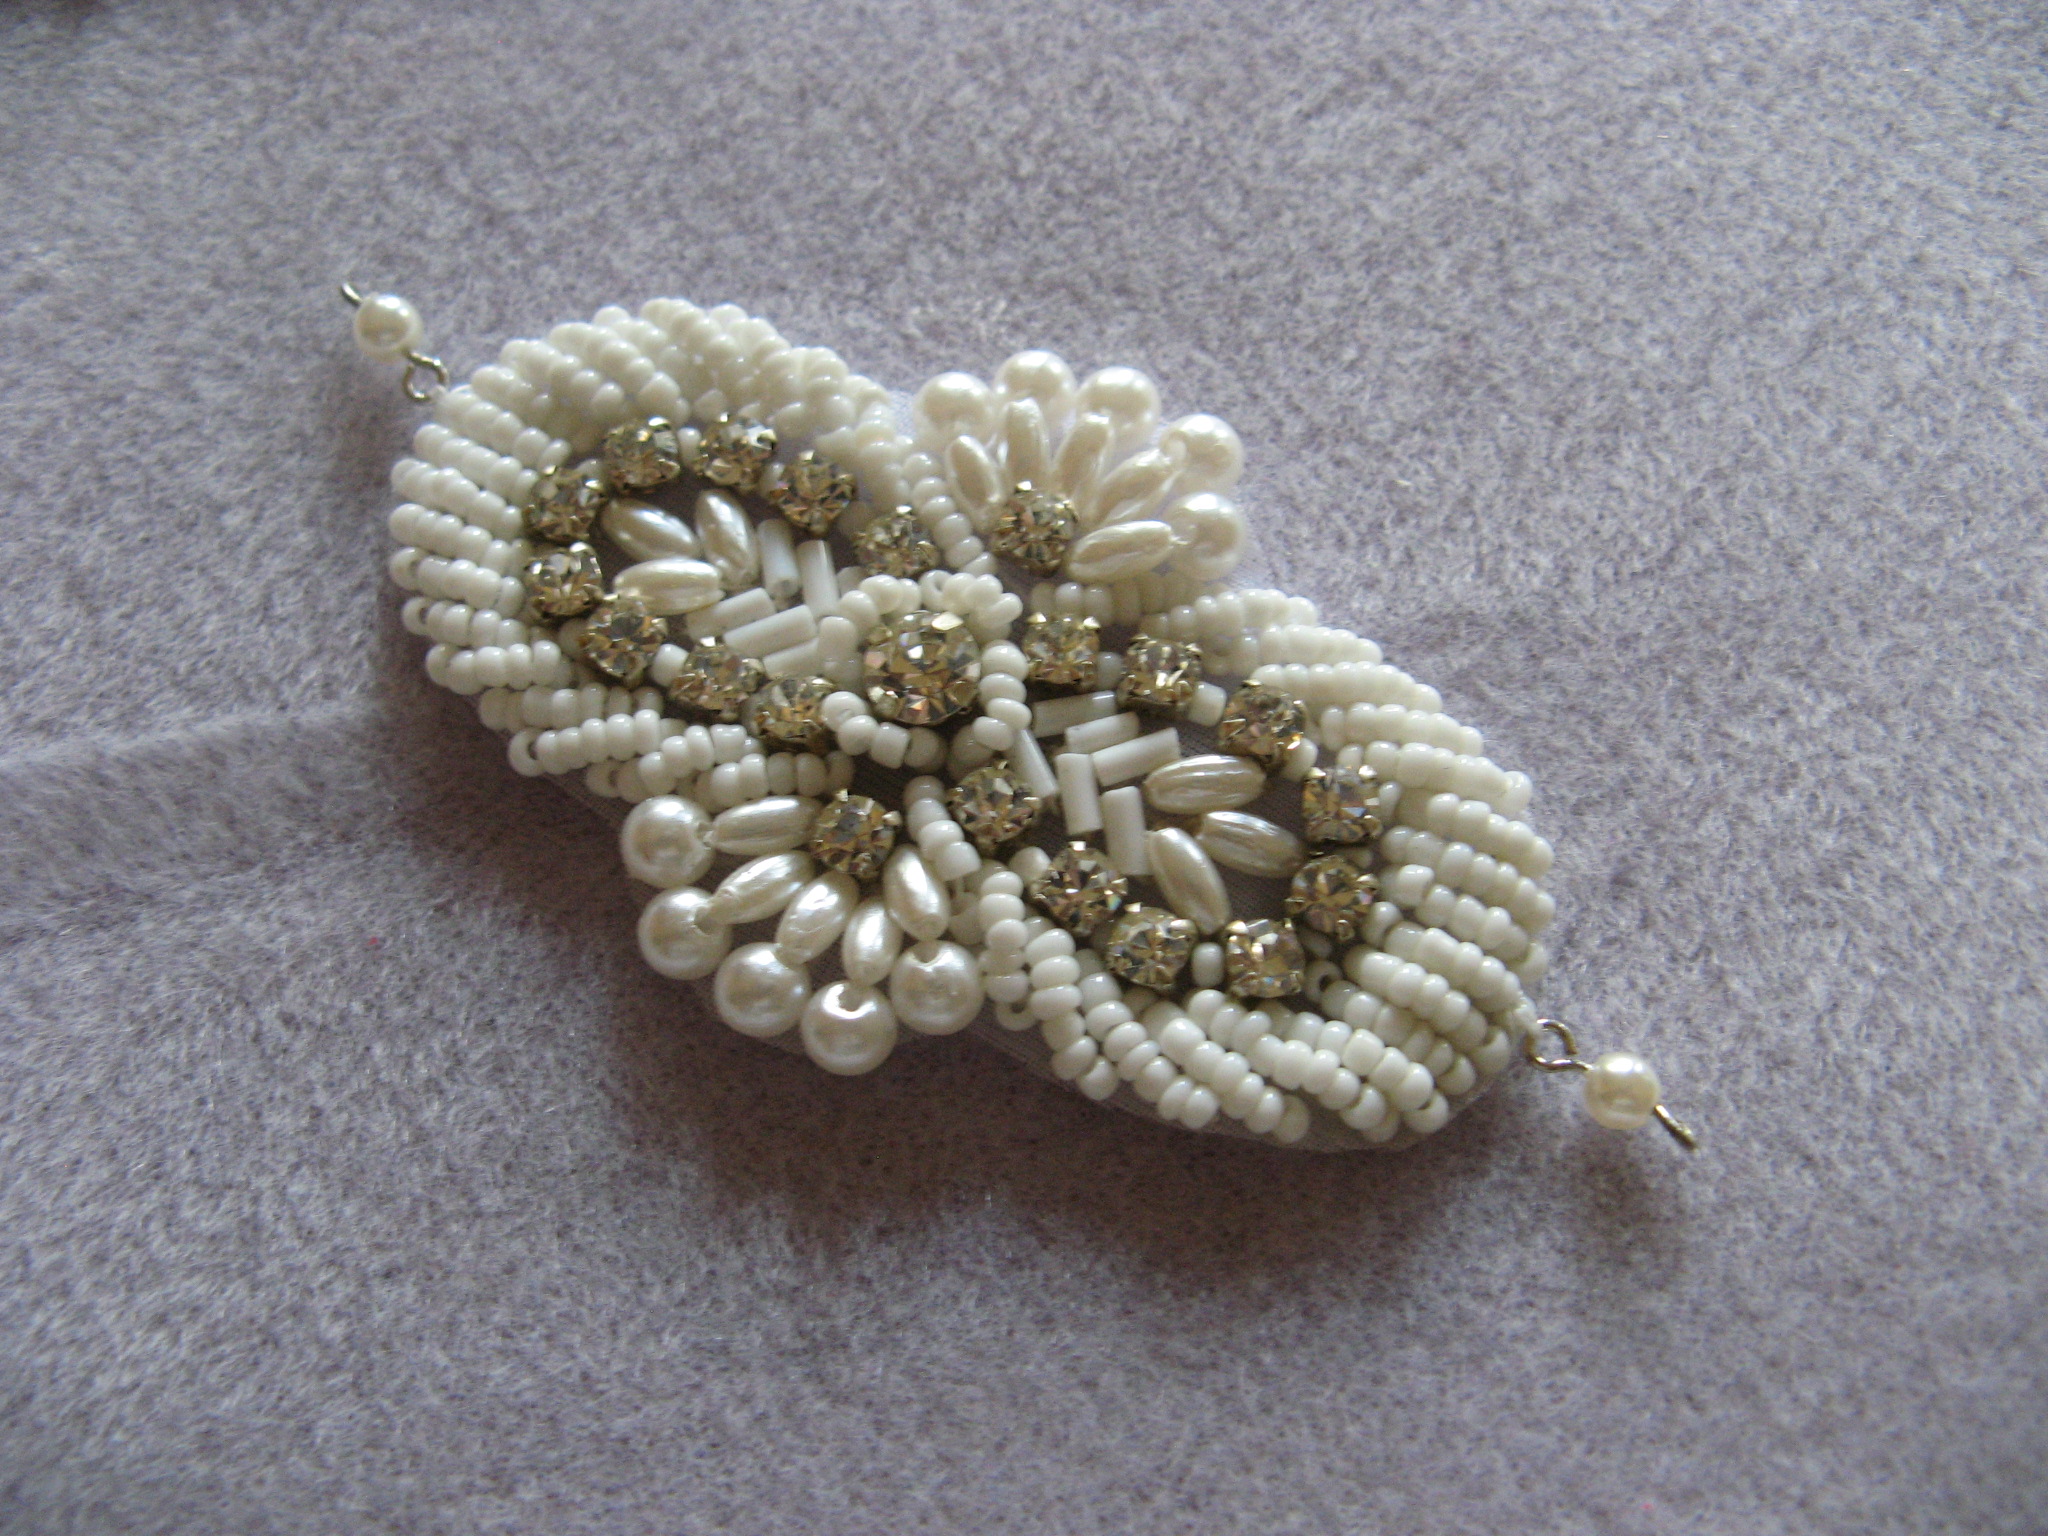
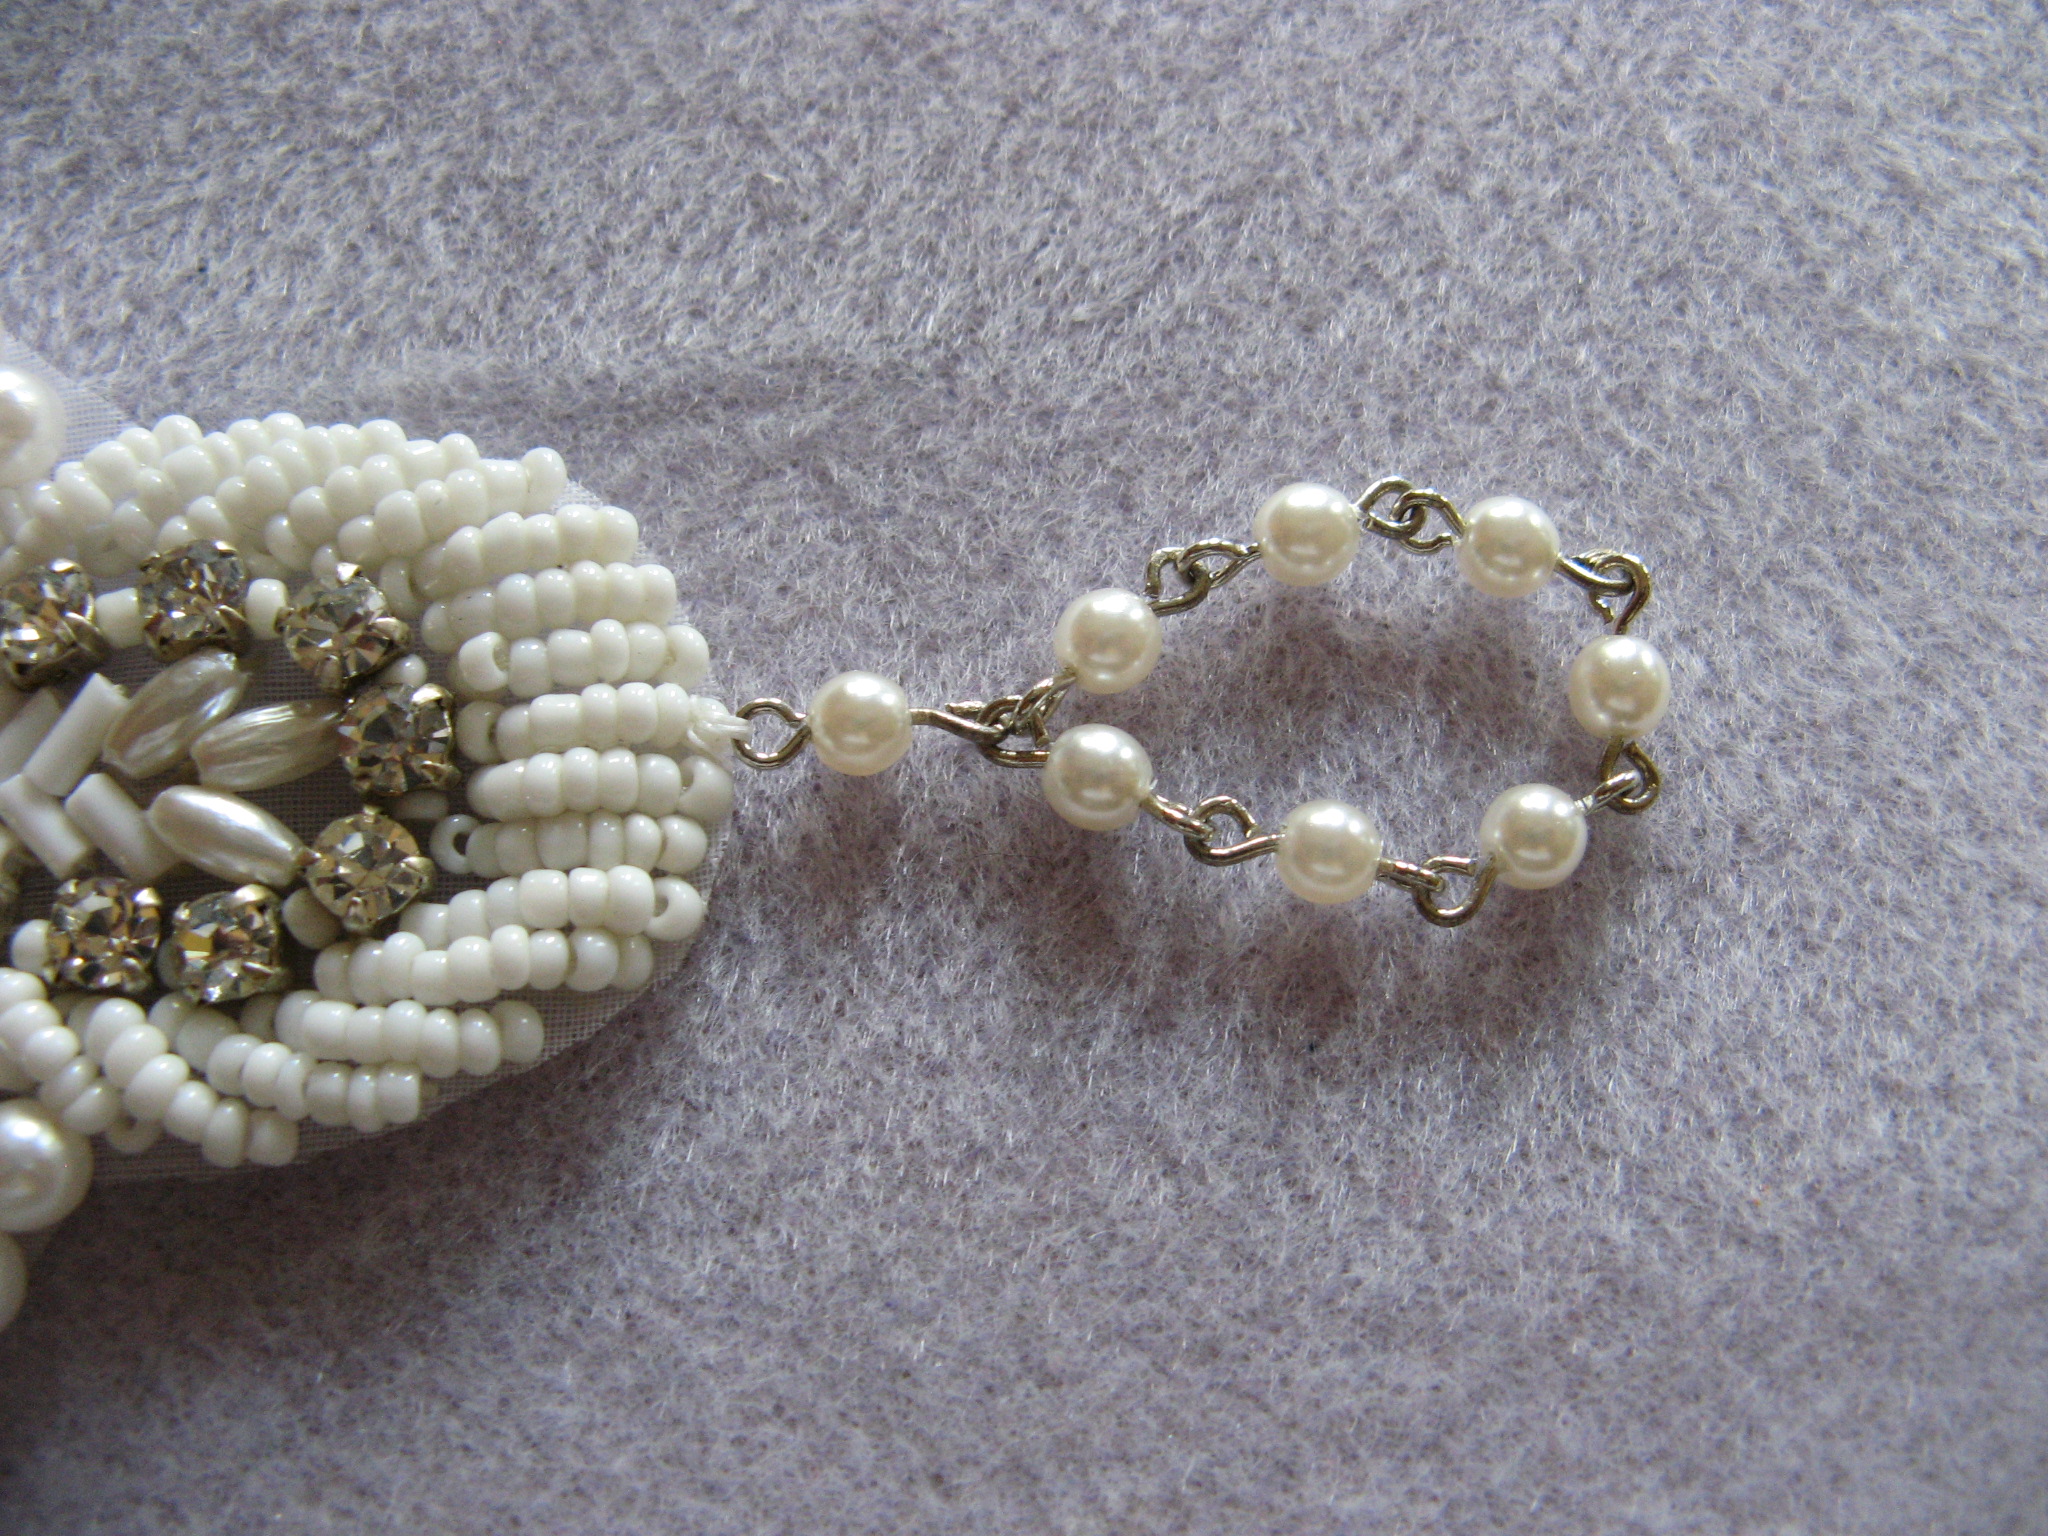
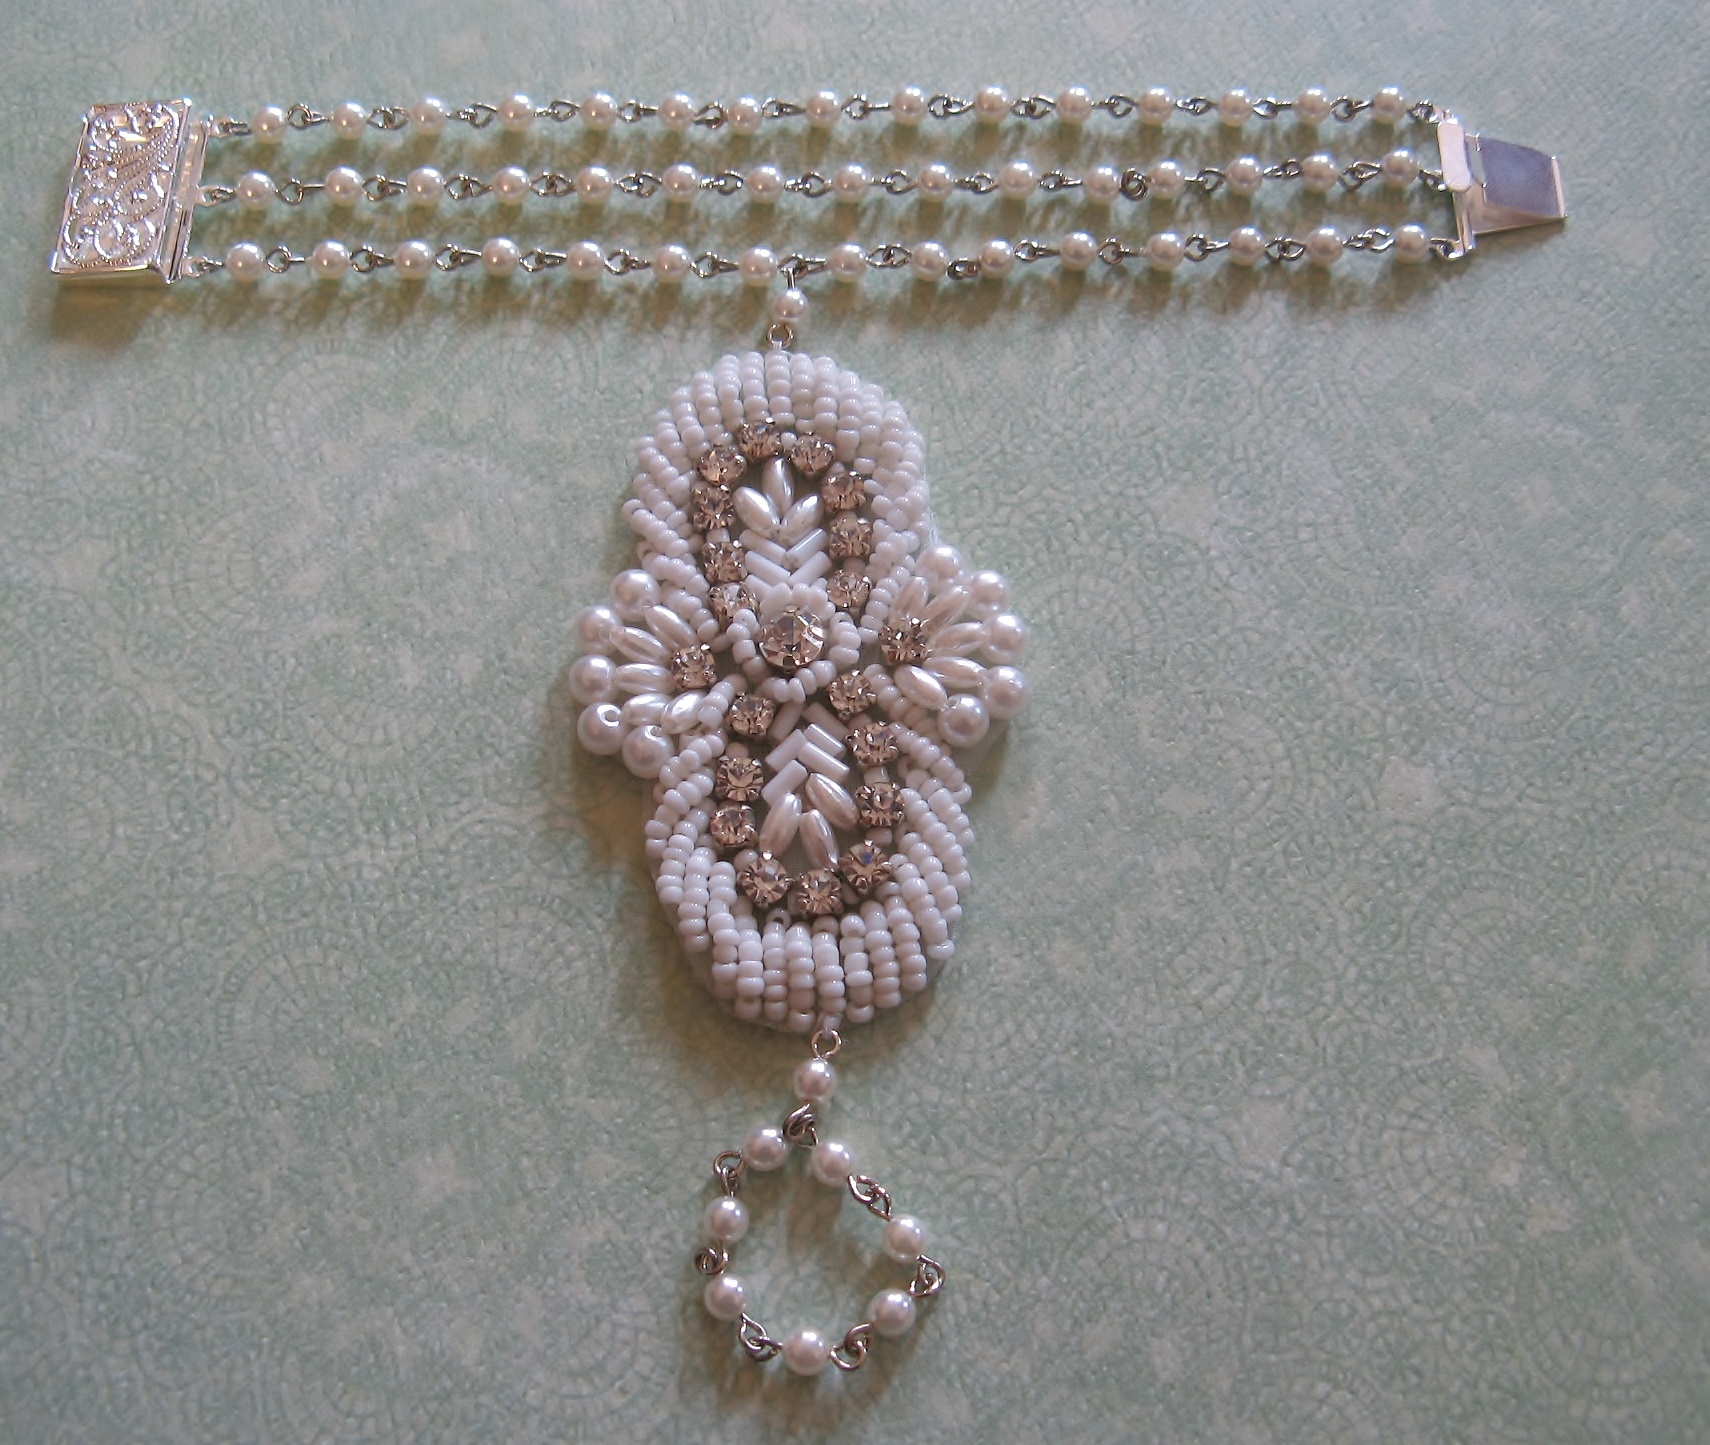
(And yes, I did make this as well.)

The Great Gatsby Inspired Bracelet

If you haven’t seen “The Great Gatsby” I highly recommend it. After watching it I actually regretted never having read the book. I was supposed to read it in high school but after reading a page or two I opted to read the cliff notes instead. It’s probably one of the few cliff notes I have ever read as I have always enjoyed reading, but that was just one book that was impossible for me to get in to. I thought for a second of reading it now but that regret soon subsided as my previous sentiments were validated by many… the book is boring. Baz Luhrmann apparently took some liberties in adapting the book to the big screen.

The movie has inspired a new wave of fashion trends especially in jewelry. Just check out the new collection from Tiffany’s, which is gorgeous but out of most peoples price range. I suppose jewelry made by the company 1928 Jewelry will be experiencing a surge in sales now as it’s a little more affordable. The jewelry from that era was more like pieces of art more than anything else. A friend of mine came across a bracelet/hand ornament on M&JTrimming’s blog that was inspired by the piece Carey Mulligan’s character Daisy wore in the movie that she liked and asked me to recreate.

The supplies: a yard of pearl rosary chain, a pearl and rhinestone applique and a clasp.

IMG_0408

To begin I made the actual bracelet part first. Since the pearl rosary chain is connected by interlocking eye hooks I was able to connect the chain to the clasp without the use of jump rings which gave it a much cleaner look.

IMG_0416

Next, I used fireline to sew one section of pearl chain to each end of the applique.

IMG_0417

I then made a ring with some of the chain and attached it to one end of the applique.

IMG_0419

I then attached the other end to the bracelet and voila, as simple as that a Great Gatsby inspired bracelet.

IMG_0487 IMG_0441

Spiraling Pearls, Crystals and Seed Beads

I currently subscribe to Bead & Button  magazine and while I normally rip out a few patterns from each issue that I want to make, I usually find that there is one pattern that I am eager to try over the other ones. From the most current issue that pattern was Sea Strand by Sue Neel. The pictures made it look really intricate and complicated but in actuality it’s quite simple to follow.

From the title of my post you can guess what components I used: 4mm & 12mm glass pearls, 6mm crystal rondelles and Size 11 seed beads.

IMG_0187

To start the necklace I strung alternating rondelles and 12mm pearls on a yard of 6lb fireline – beginning and ending with a rondelle – for my desired length. I then centered the beads on the thread so the two tails would be the same length. I sewed each tail through its corresponding rondelle once so they could essentially be stop beads as I continued to work on the piece.

IMG_0190

Next up, using about a yard and a half of thread I sewed twelve seed beads around alternating sides of the pearls by sewing through the rondelles. Once again I sewed the tails of the thread – which should be the same length as the original thread – through their respective rondelle.

IMG_0192 IMG_0193

And for the final strand I used another yard and a half of thread to sew three 4mm pearls and additional seed beads onto the piece. As with before, the tails of this thread should be the same length as the original thread and sewn through their respective rondelle. To end the necklace I used one thread from each end to connect the clasp – I used the original thread – and I ended the other two threads by weaving them through the path of the clasp and ending them in the necklace.

IMG_0194  IMG_0197

While a bracelet wasn’t part of the pattern I saw in the article, I decided to make one after completing the necklace. I followed the exact same pattern and technique as the necklace just for a shorter length.

IMG_0198

And finally I made the earrings that were included in the pattern to complete the set.

IMG_0199 IMG_0201

IMG_0217

%d bloggers like this: