Pineapple Upside Down Cake

I recently made a Pineapple Upside Down Cake for a birthday celebration. Secretly I was happy to make it because it meant I wouldn’t have to make frosting to decorate the cake and I could final try a Pineapple Upside Down Cake. Yes, I have never had it before. Not really sure why… I like pineapples and obviously I like cake, but, it never crossed my mind to make one.  Well, as they say, there’s no time like the present.

This cake is super simple to make, especially if you use a box yellow cake mix. After preheating my oven to 350 F, I melted a stick of unsalted butter directly in a 9×13 inch pan in the oven. I checked on the butter every so often to make sure it didn’t burn and also to tilt the pan so the butter wouldn’t melt in one spot. Once the butter had melted I removed the pan from the oven and sprinkled 1 cup of light brown sugar over the butter. Next, I arranged 12 pineapple slices – I used pineapple slices in pineapple juice and I reserved the juice to make the cake – and then place a maraschino cherry inside of each pineapple.

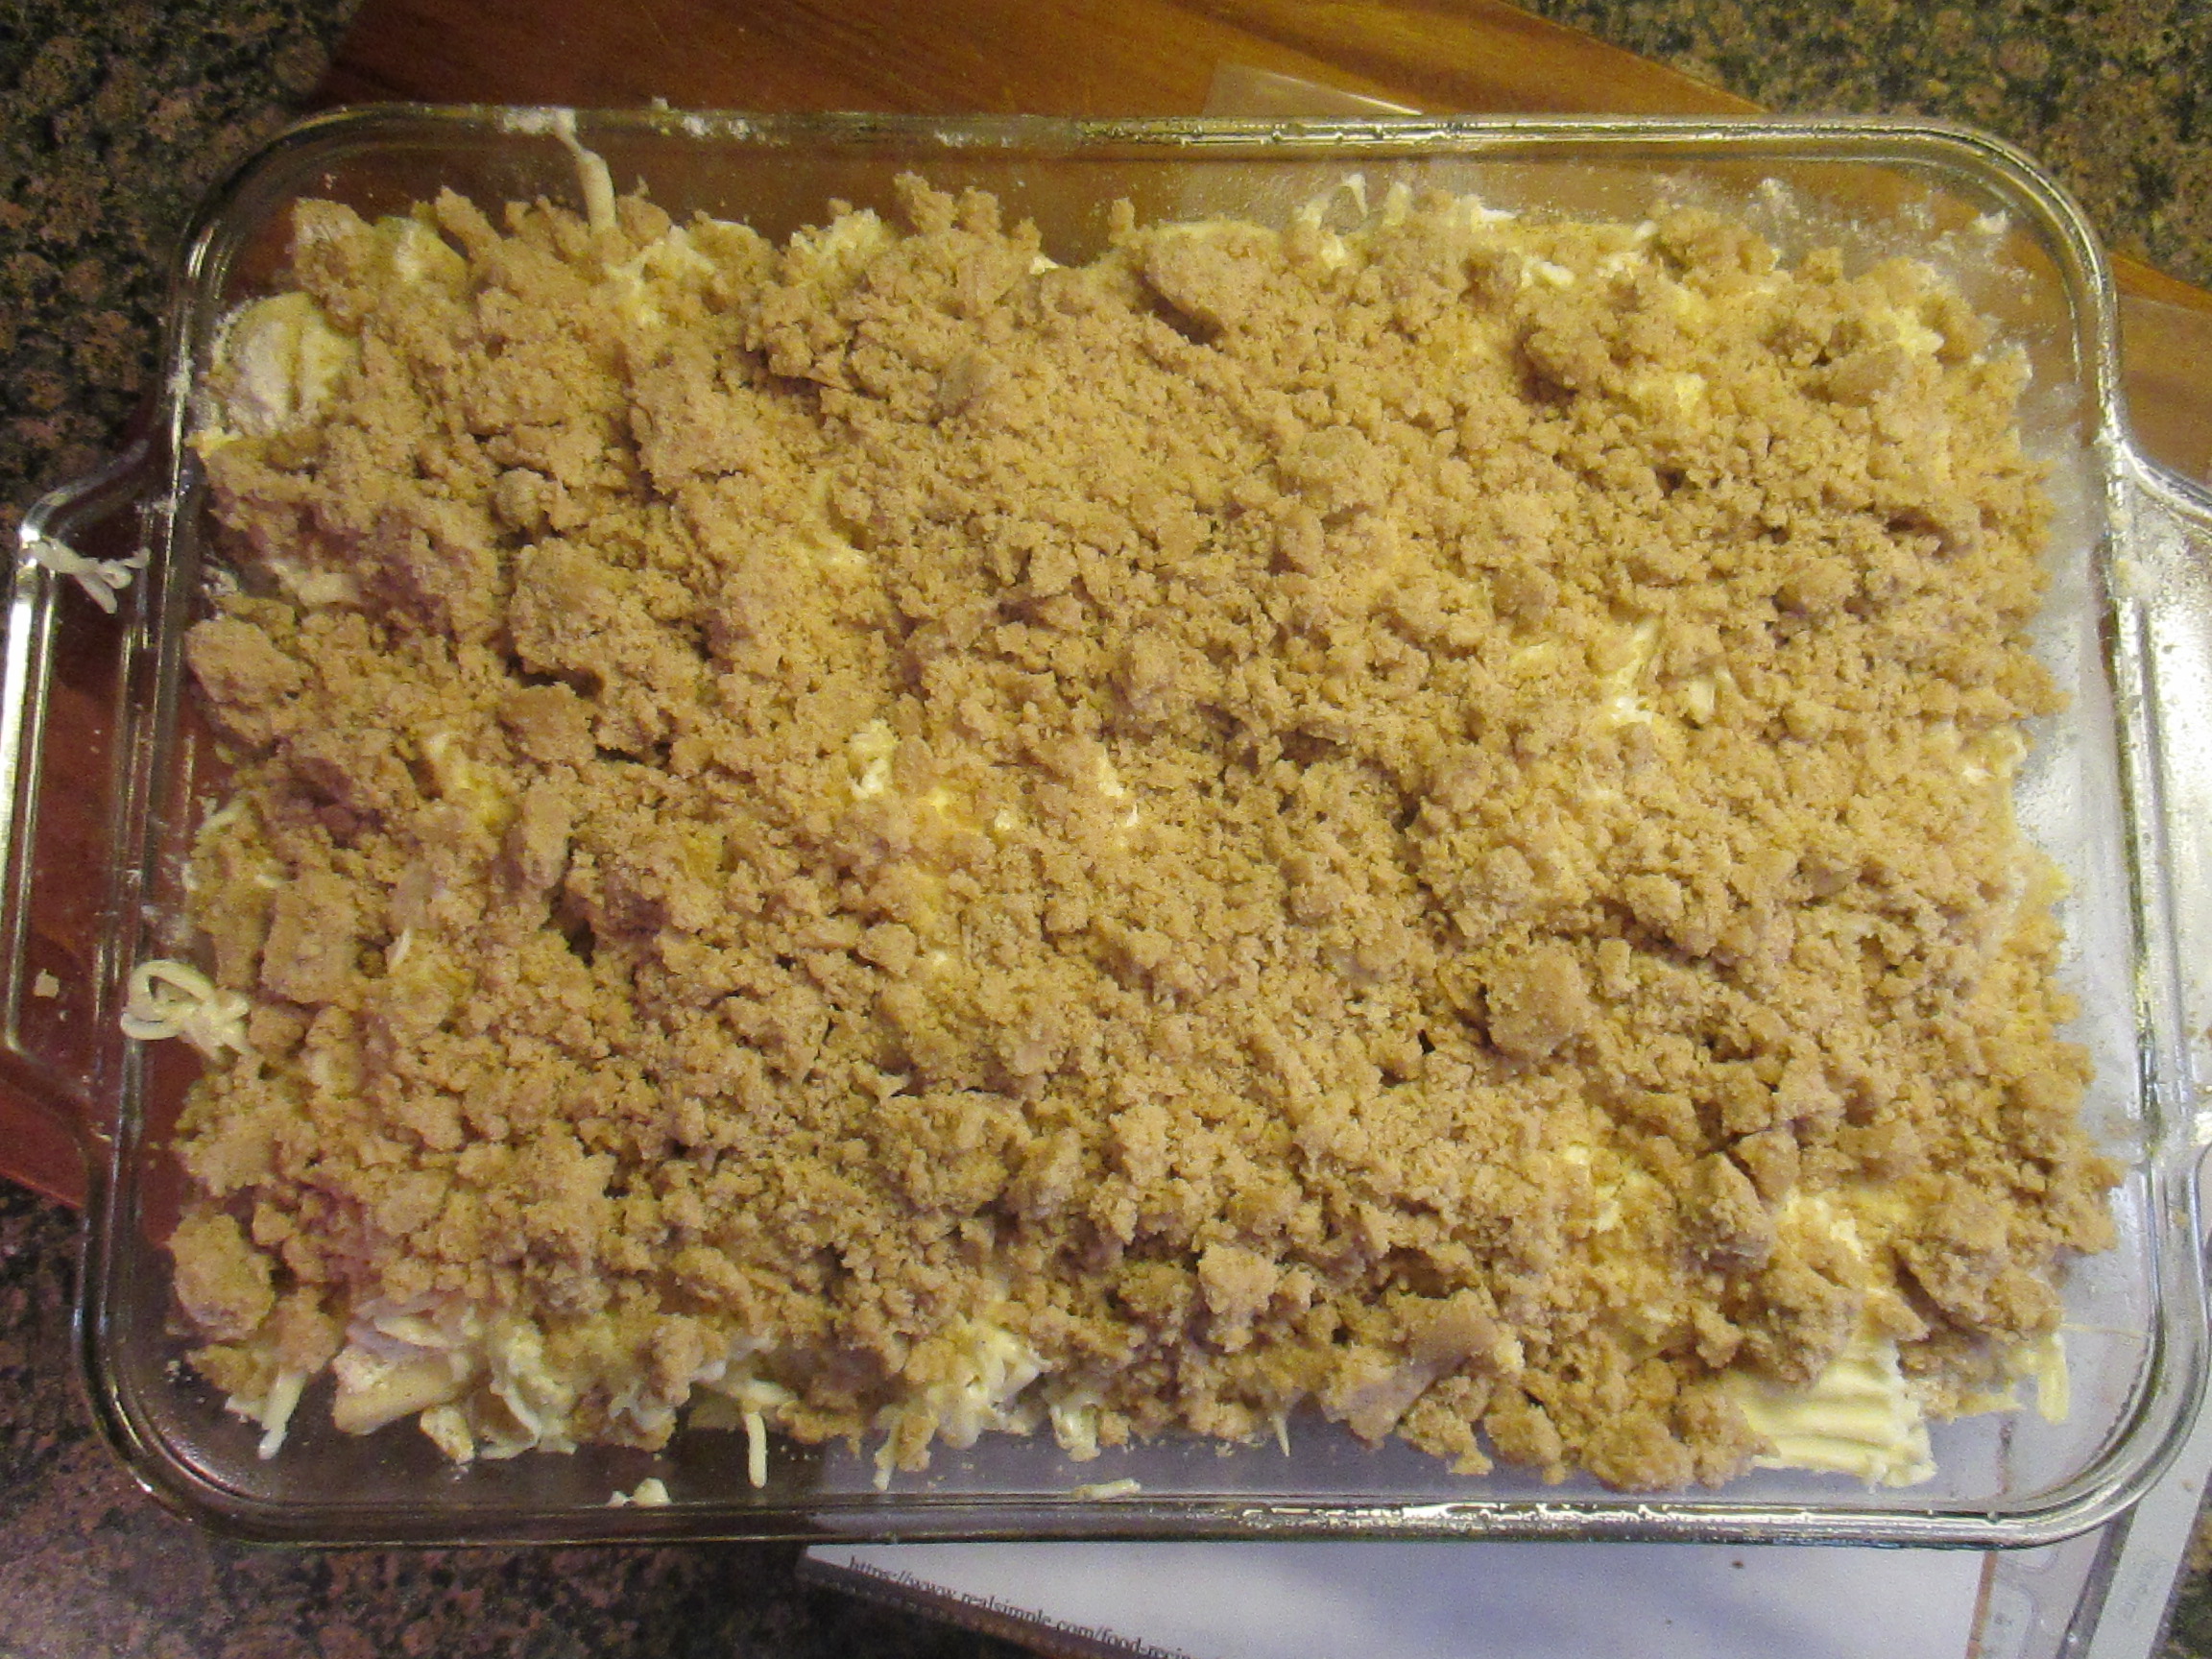
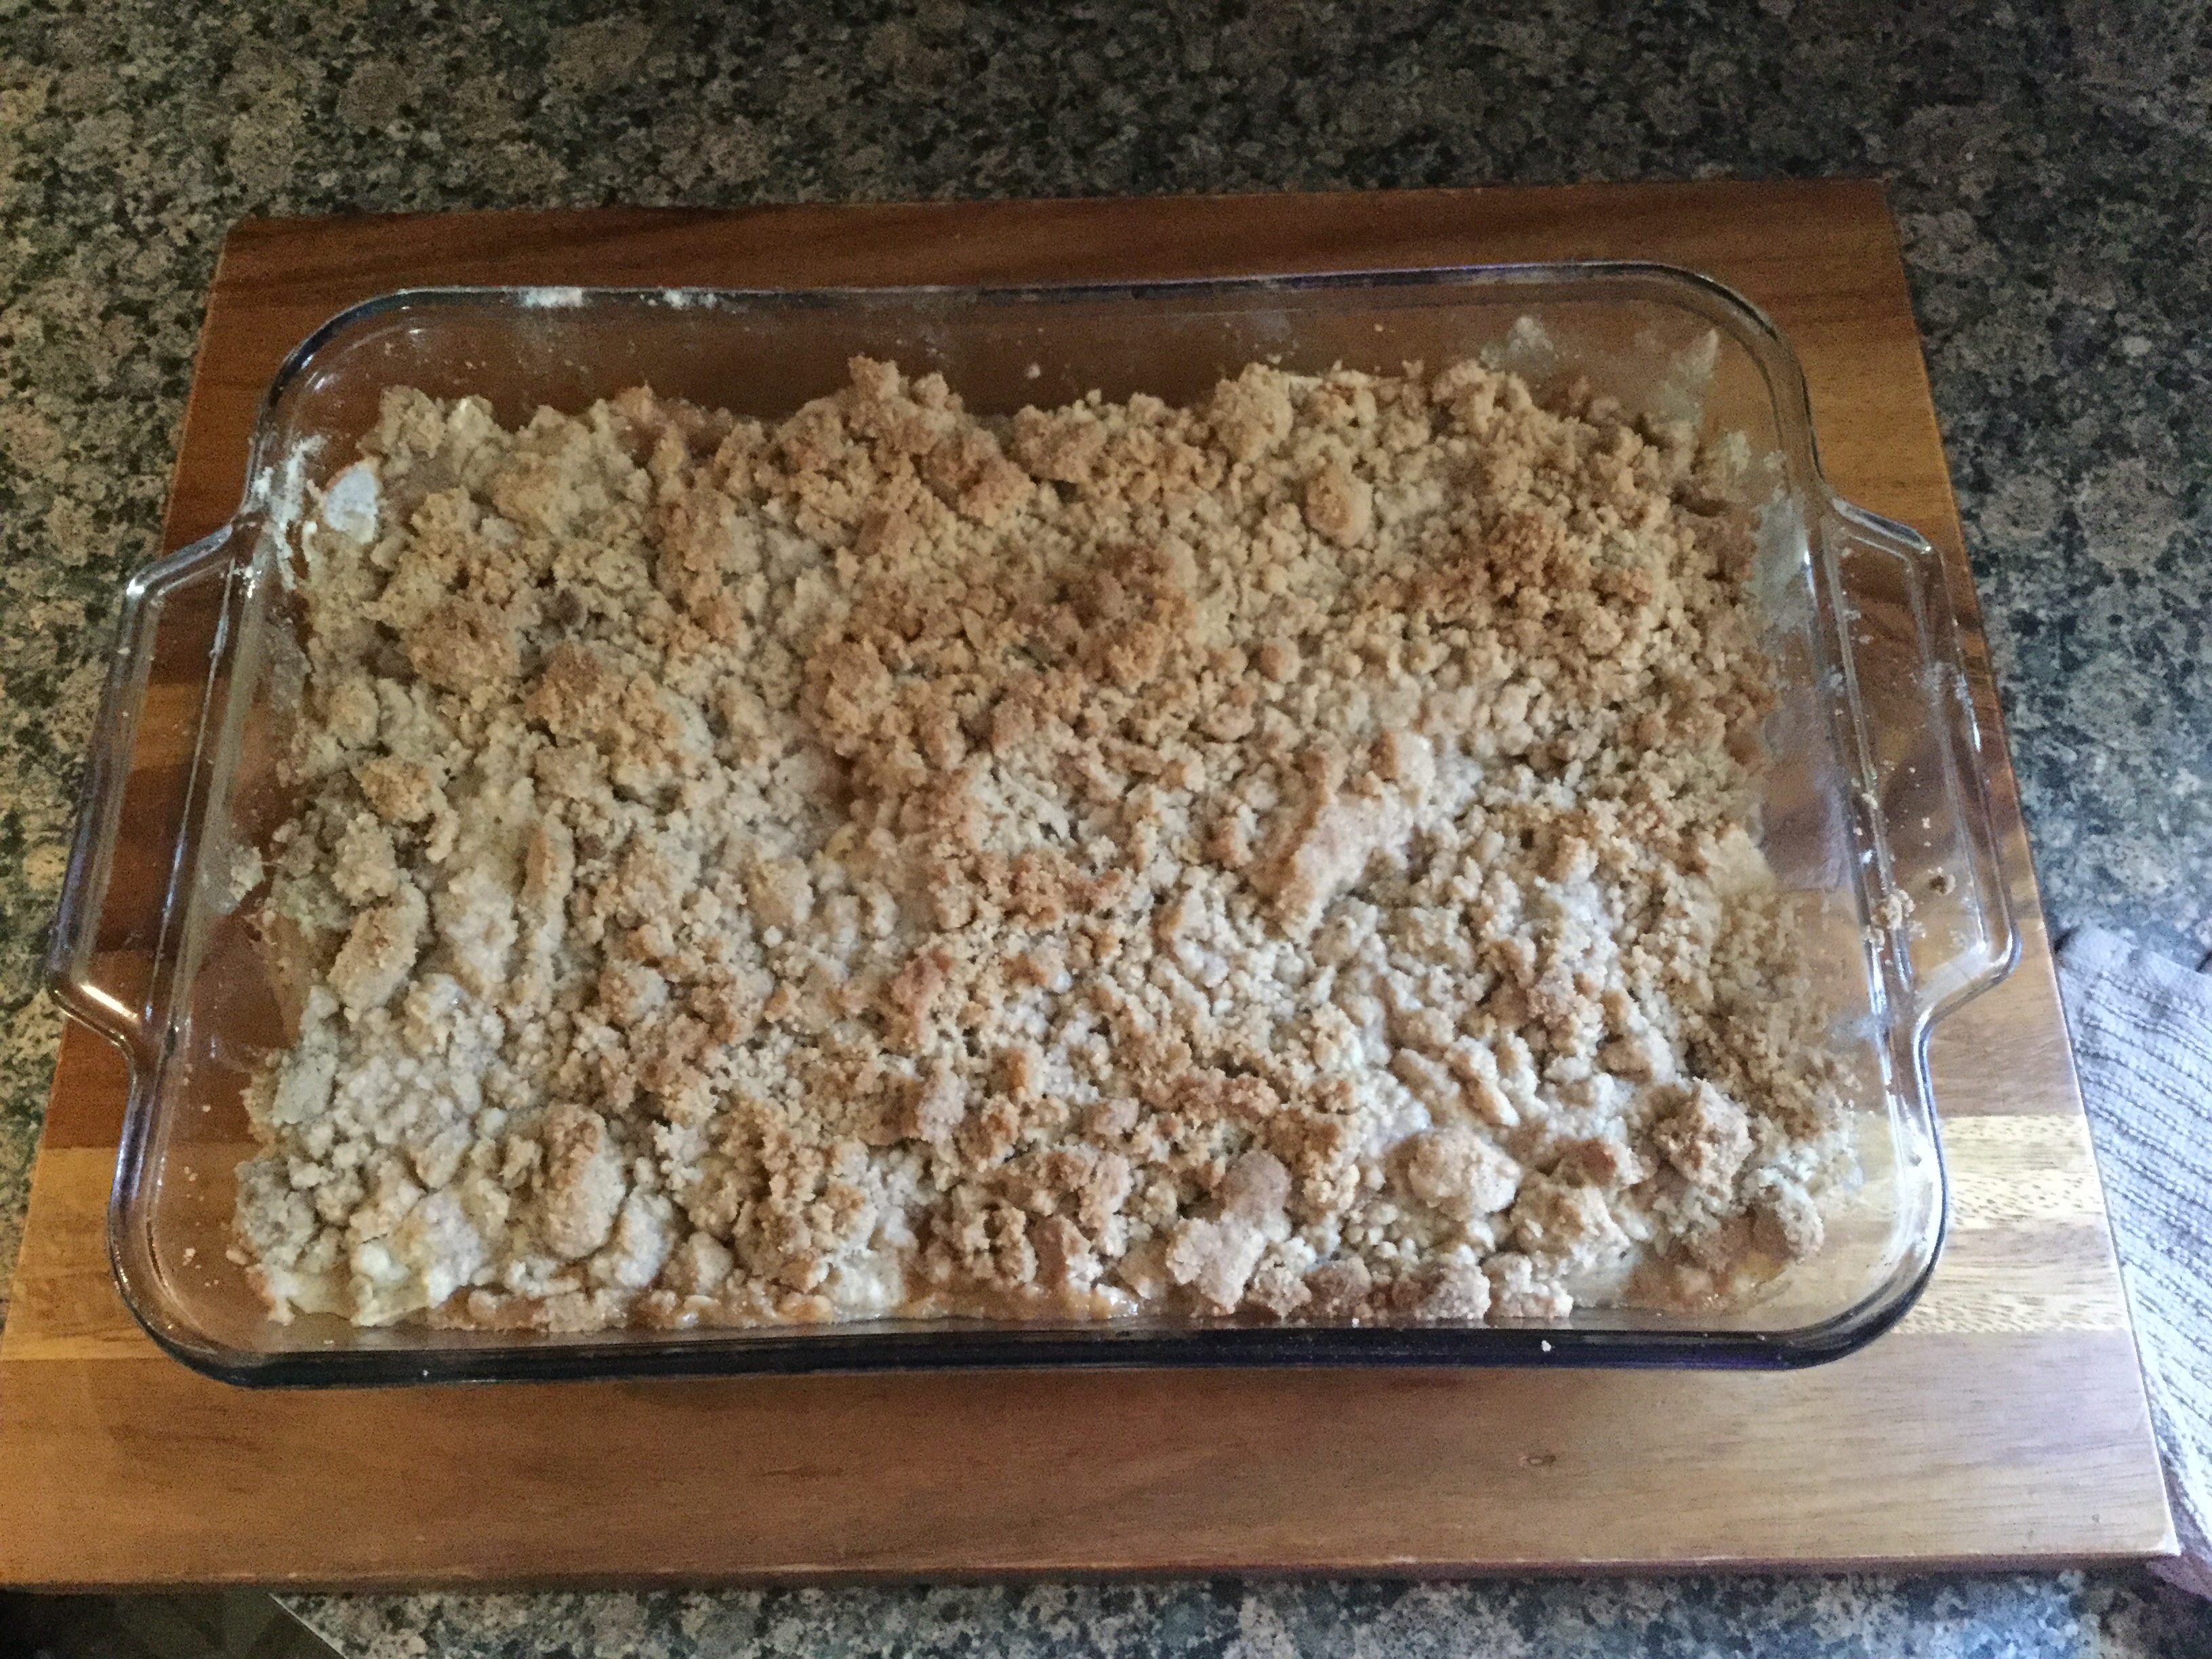
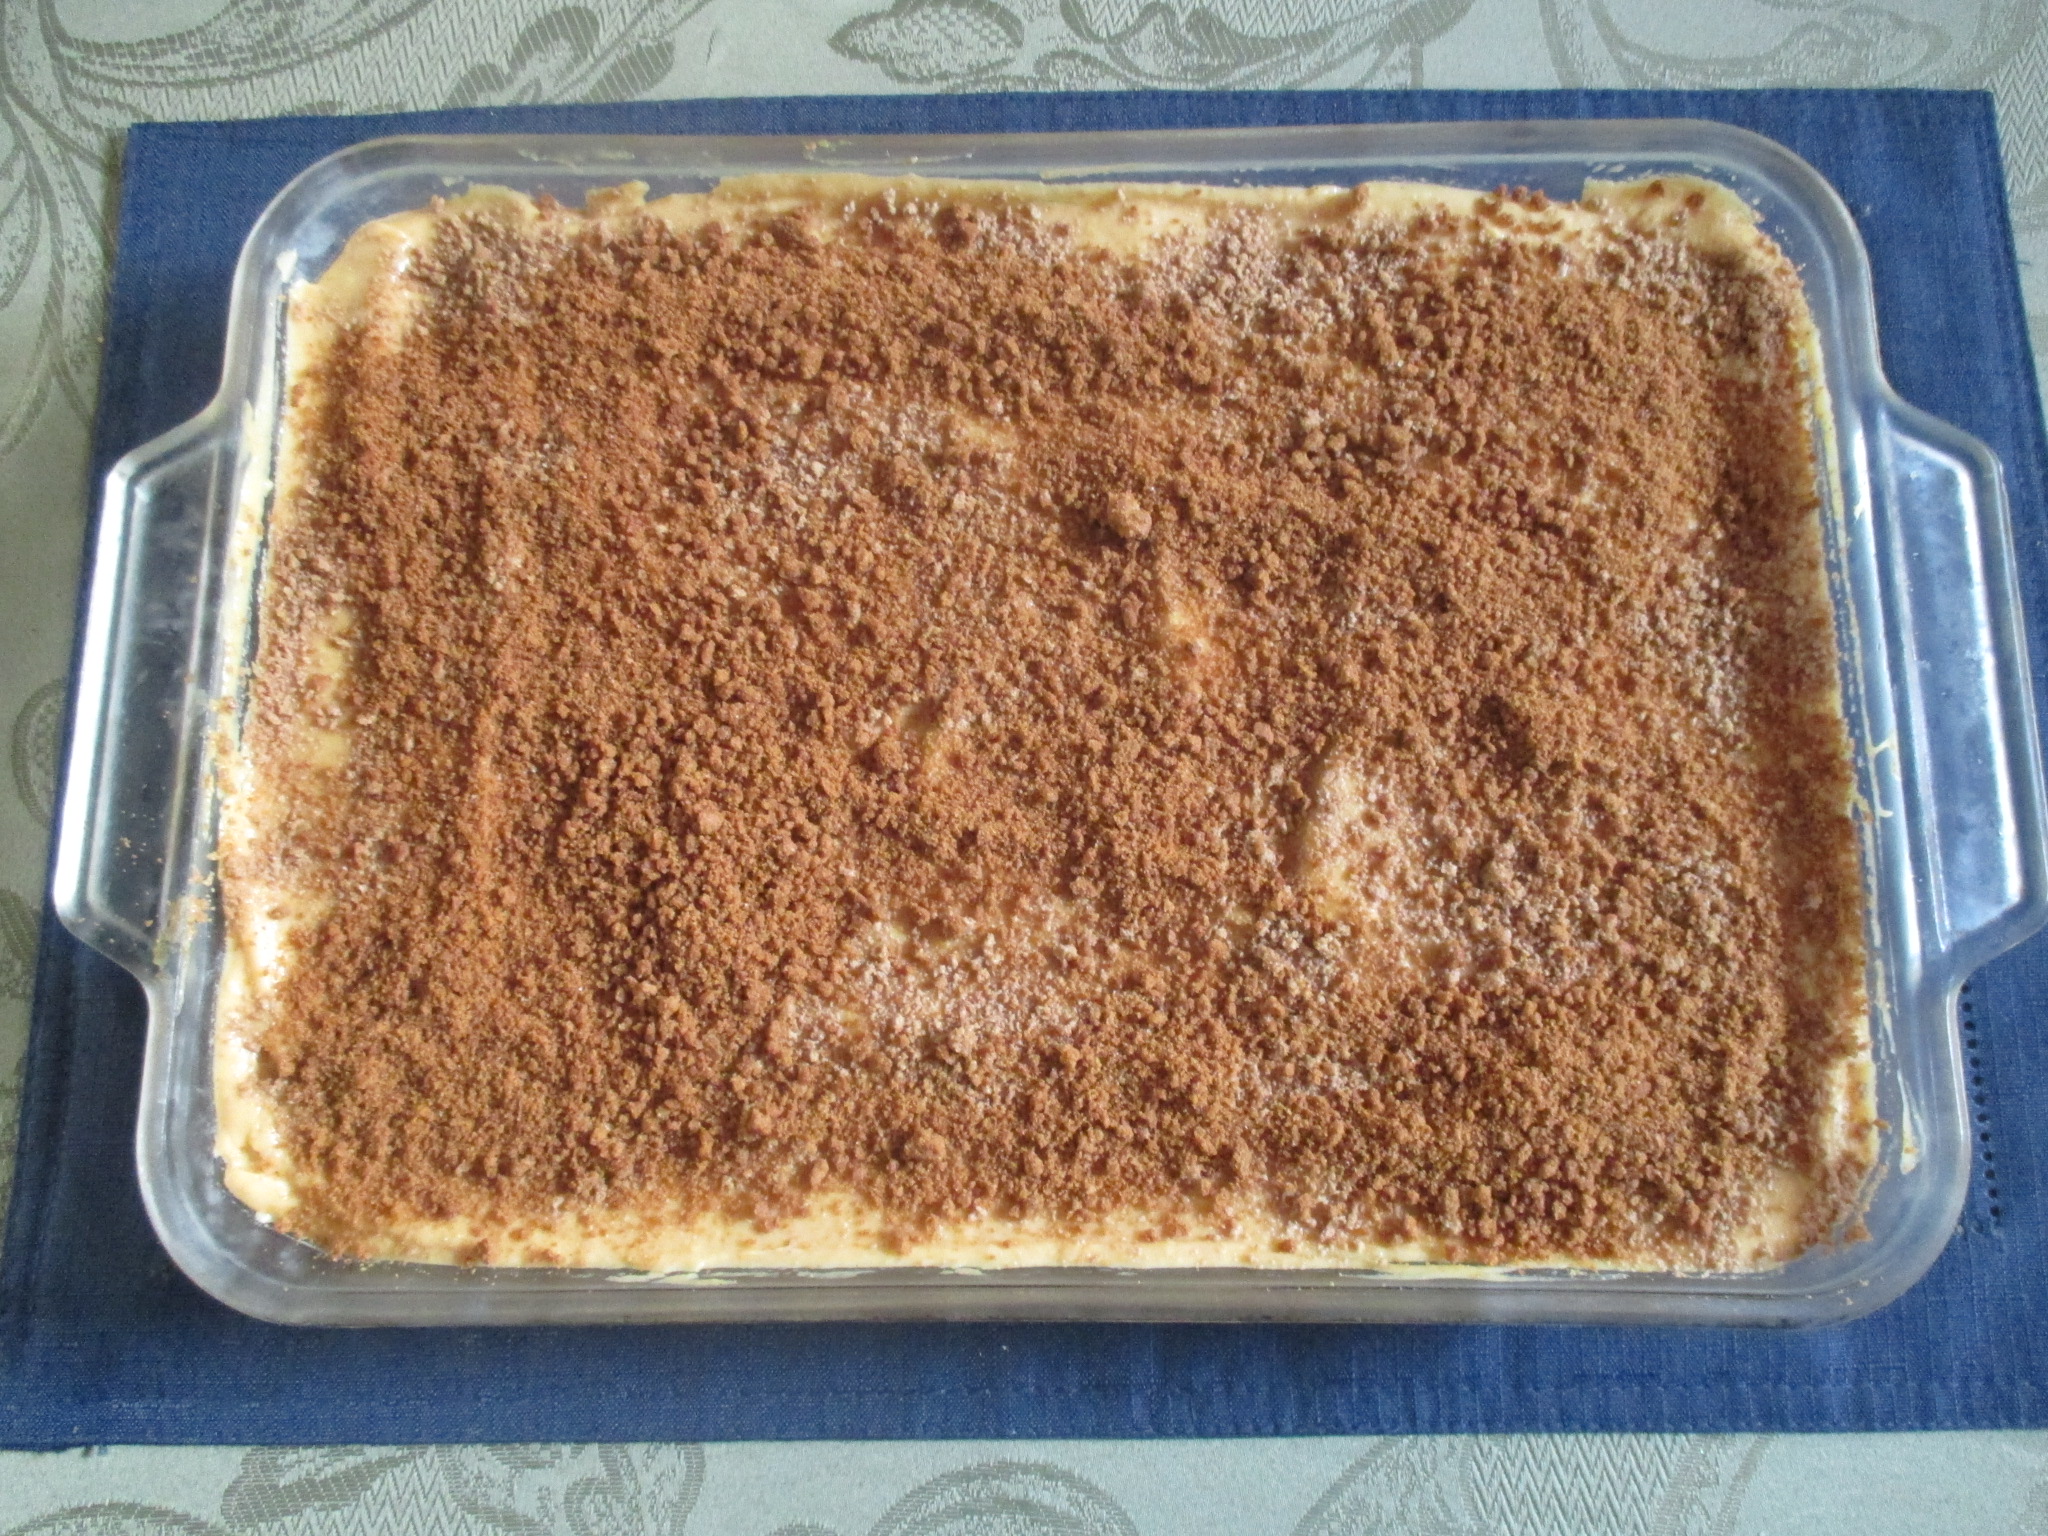
Next, I prepared the cake mix per the box directions. The cake mix called for 1 cup of water and I opted to use ½ cup of the reserved pineapple juice and ½ of water. You could also use an entire cup of pineapple juice. Since this was my first time make the cake I didn’t want to go overboard with the pineapple flavor, next time though – yes, there will be a next time for this cake – I will use the entire cup. Once the batter was ready I poured it over the pineapples and cherries in my prepared pan. I was concerned that the cake might end up sticking to the sides of the pan, but, once I added the batter to the pan some of the melted butter rose up to the sides so I didn’t have to worry about that. I spread the batter a little to even it out and then baked it for about 40 minutes – until a cake tester inserted in the center of the cake came out clean.

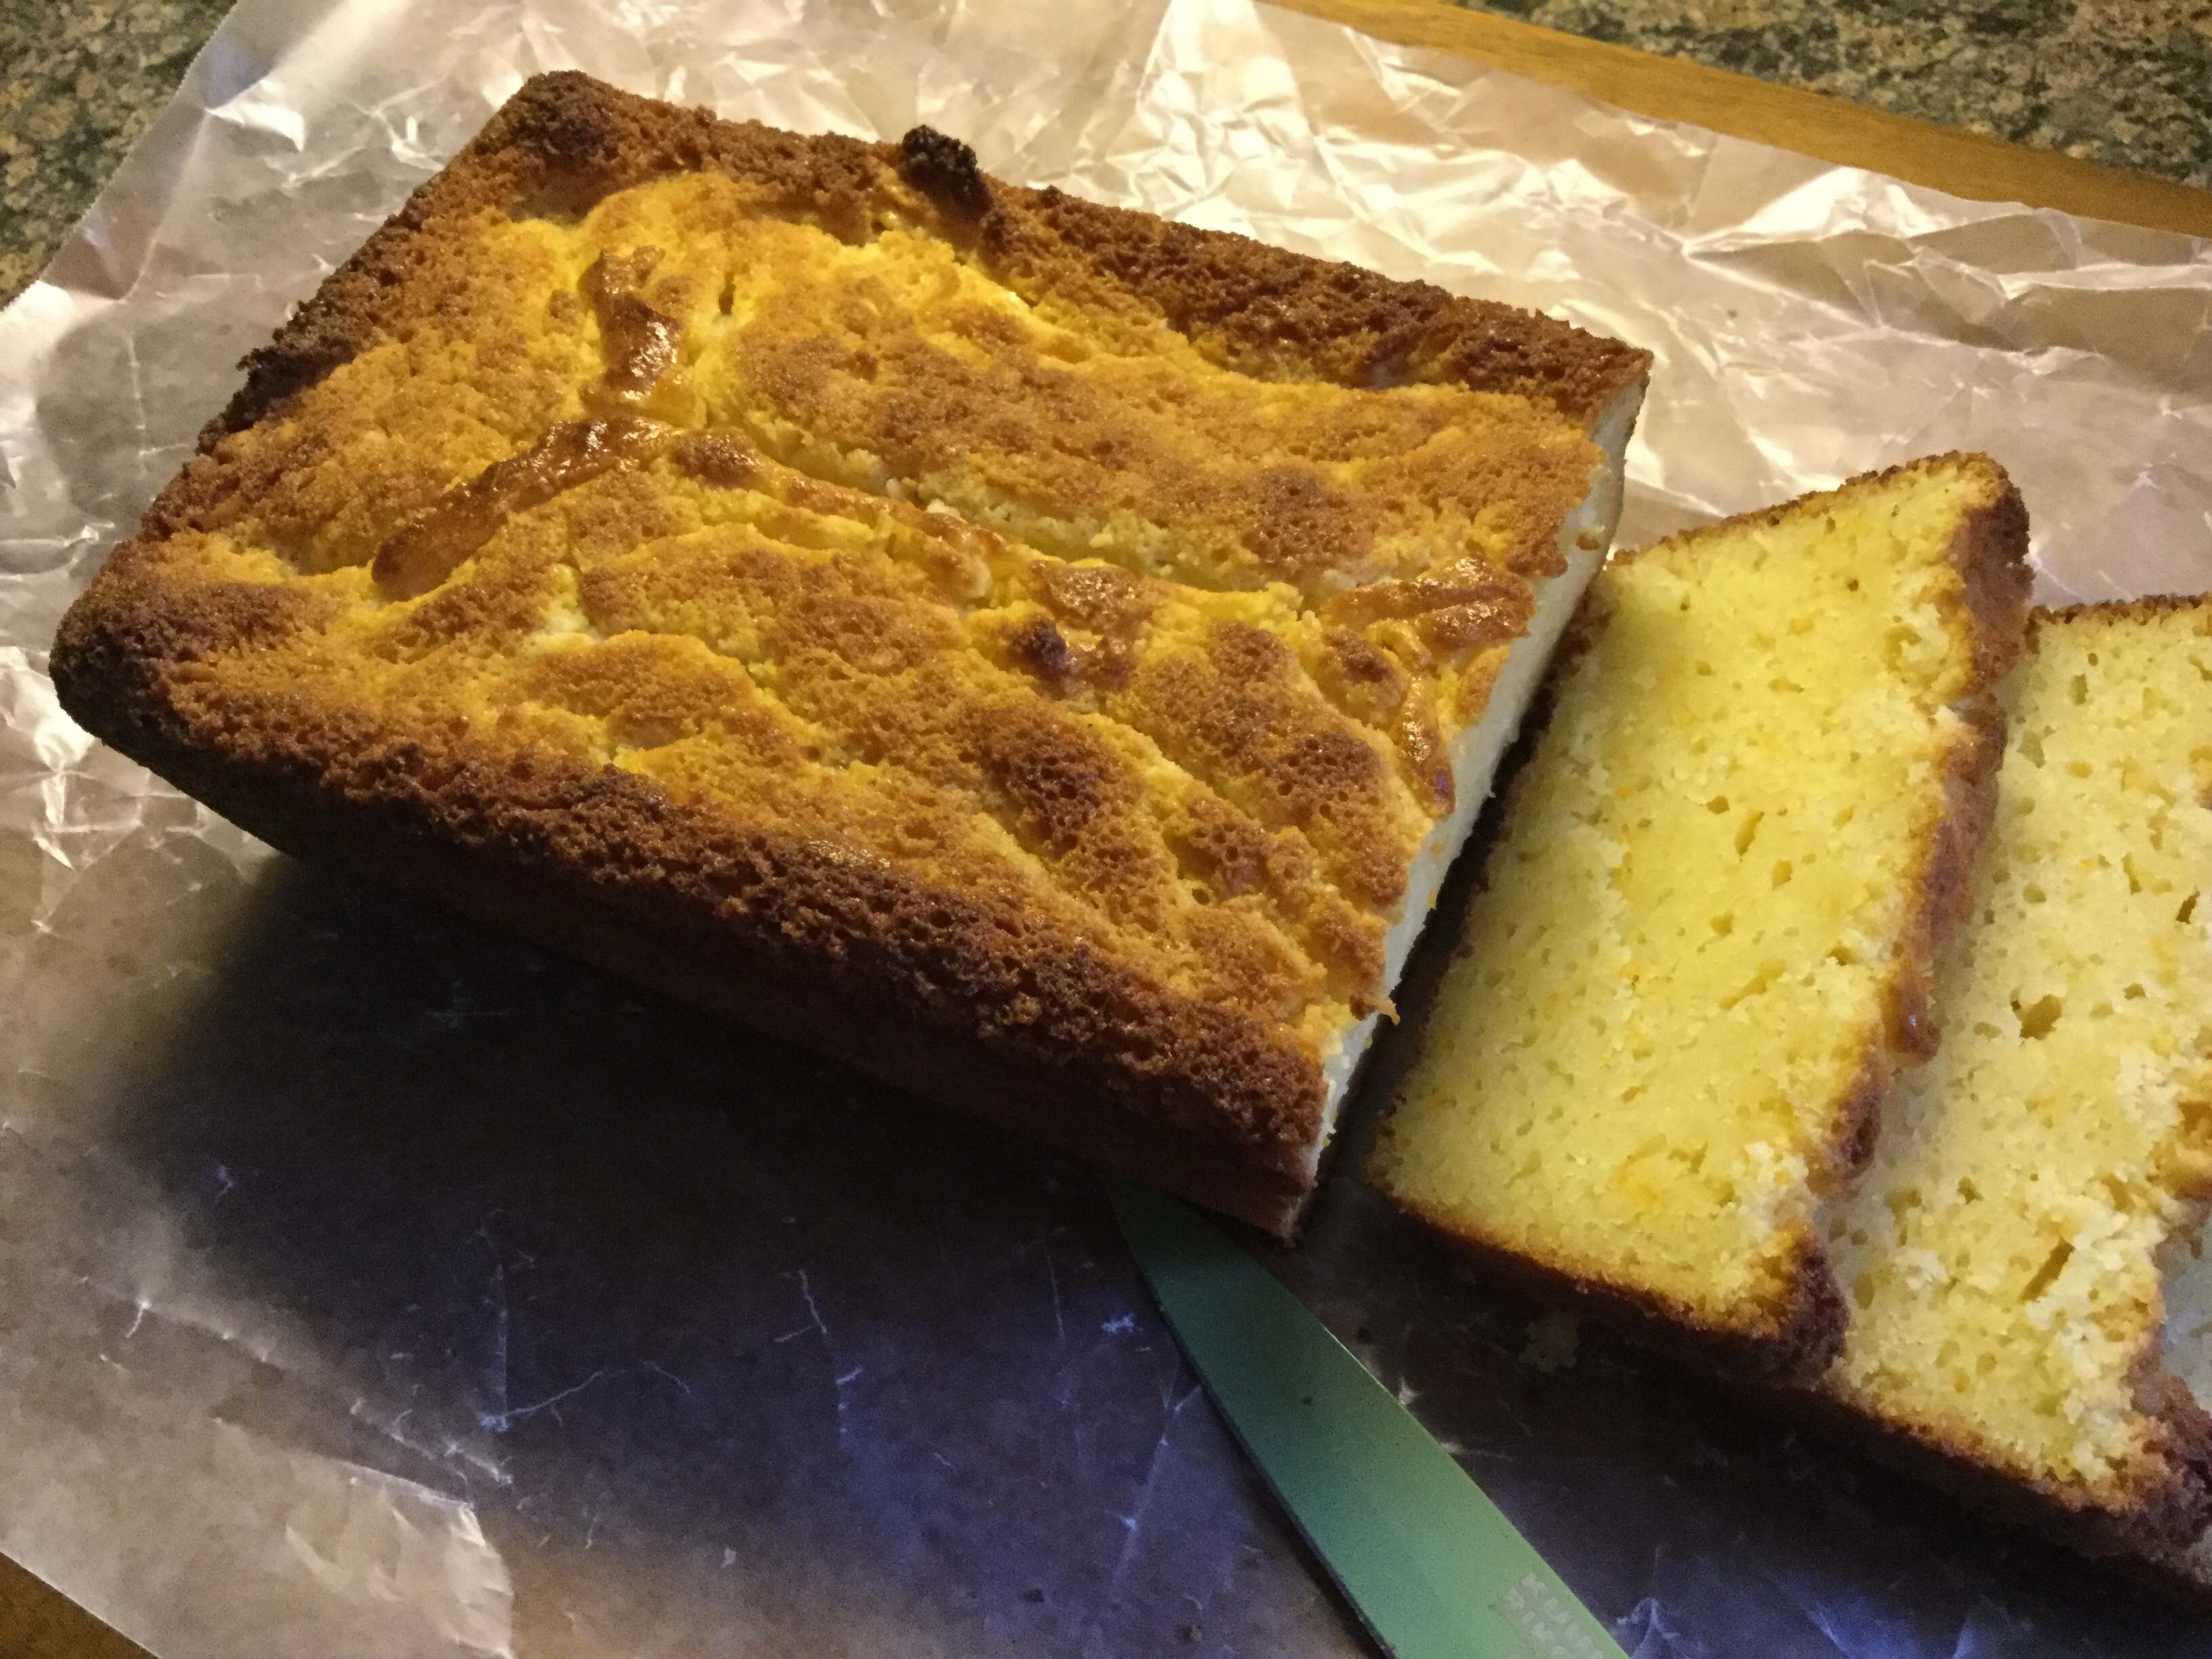
I let the cake cool for a few minutes in the pan and then inverted it onto a cake board and platter. I was initially just going to use the cake board, but, was concerned that the syrup that was created by the butter and sugar would spill over so I went with the platter as well. After inverting it, I let the pan rest on the cake for a few minutes to make sure that all of yumminess had dripped down. I easily removed the pan and a few pineapple stuck to the pan, I removed them and placed them on the cake.

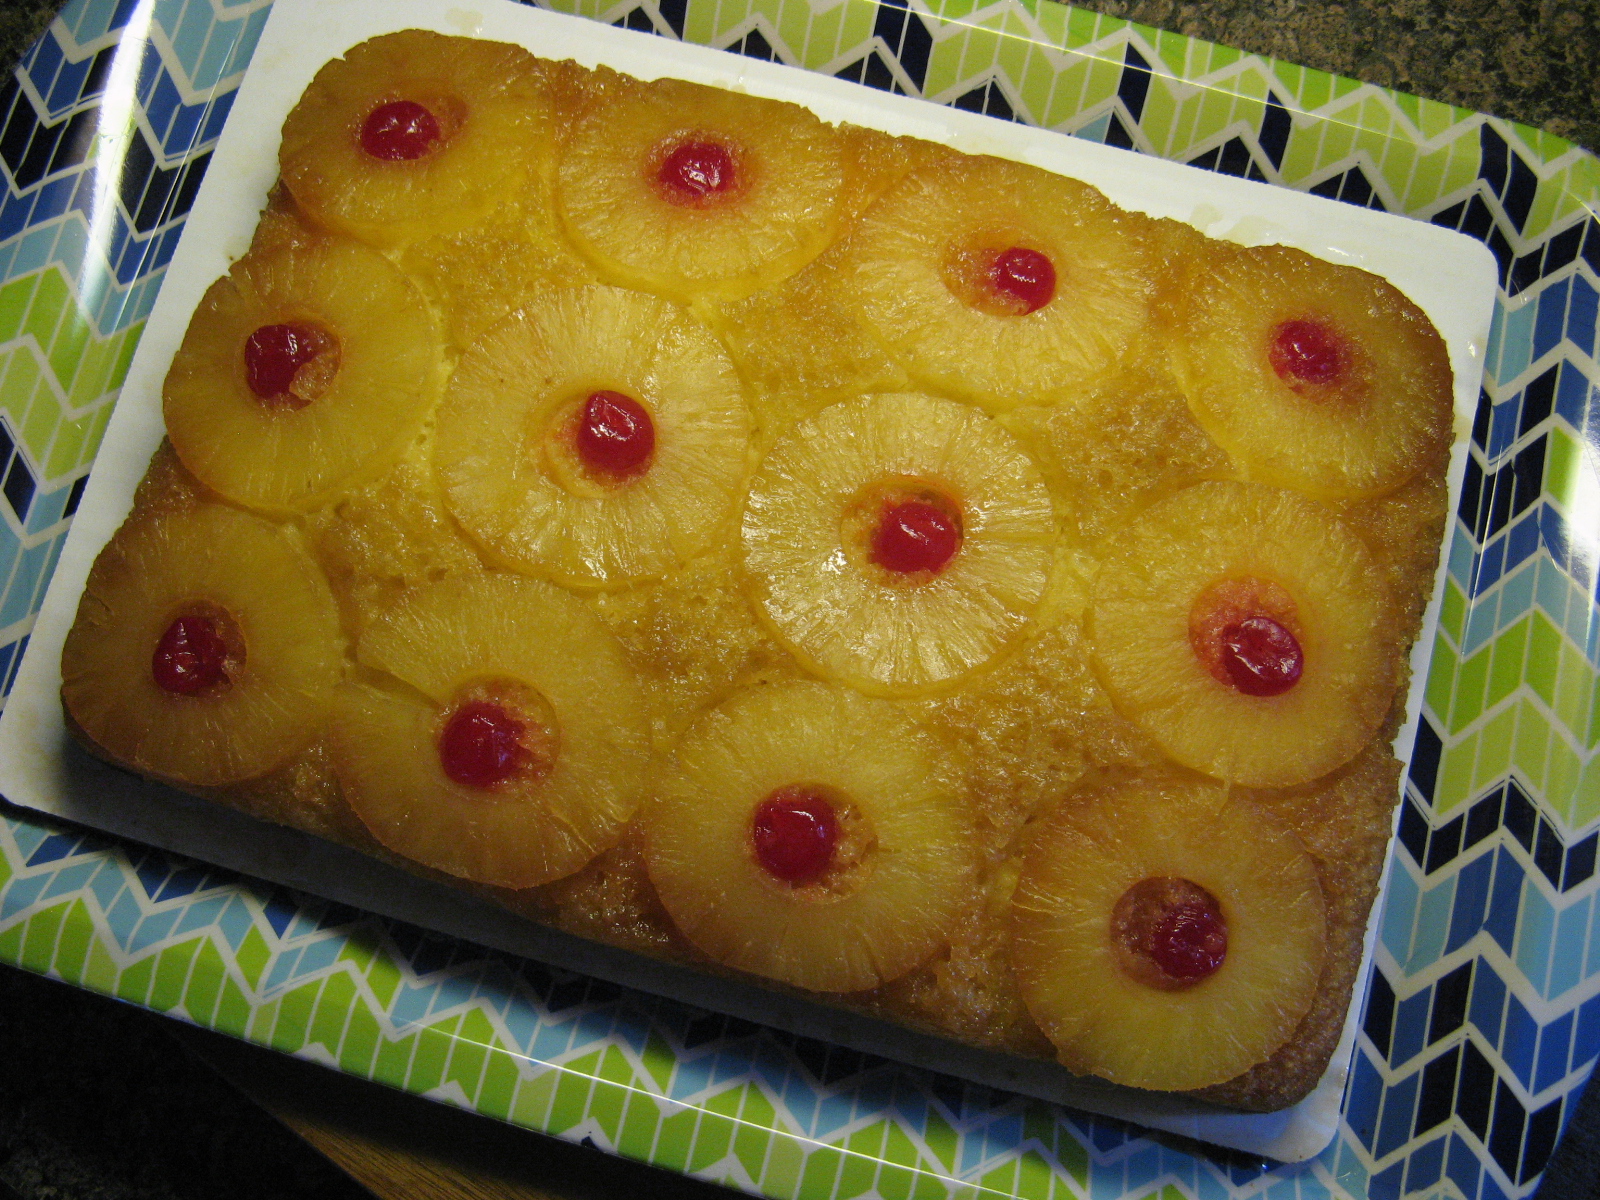
I can’t wait to make this cake again. It only took about an hour from start to finish and while I was concerned that it would be overly sweet and that the cake would be very thin, the outcome couldn’t have been farther from the truth. The cake was just the right height and was fluffy and light and the sweetness was right on point with the cake, pineapples and light brown sugar. One other thing that’s nice, thanks to the pineapples it’s so easy to cut this cake into 12 equal portions!


Pineapple Upside Down Cake

Ingredients:

1 stick unsalted butter

1 cup light brown sugar

12 pineapple slices in pineapple juice, reserve the juice*

12 maraschino cherries

1 box yellow cake mix, plus ingredients listed on box to make cake**


*I used a 20 oz. can & an 8 oz. can. The 20 oz. can had 10 slices and the 8 oz. had 4.

**Substitute the water with the pineapple juice


Directions:

Preheat the oven to 350 F.

Place the stick of butter in a 9×13 inch pan and place in the oven to melt. This will take a few minutes.

Remove the pan from the oven and sprinkle the brown sugar evenly over the butter. Arrange the pineapple slices over the sugar and then place a cherry in the center of each pineapple slice. Set aside.

Prepare the cake mix per the box instructions and then pour over the pineapple slices. You can tap the pan down or use a spatula to even out the batter.

Place in the oven and bake 35 – 45 minutes, until the cake has browned and pulled away from the sides of the pan.

Let the cake cool for a few minutes and then invert on a platter. Let the pan sit on top of the cake for a few additional minutes so all of the syrup can drain out and then remove the pan. If any pineapples or cherries remain on the pain just remove them and place them on the cake.

Enjoy warm or at room temperature.

Russian Decorating Tips

If you’ve been perusing decorated cakes on Instagram or Pinterest lately you may have noticed an influx of cakes decorated with some fancy and elaborate looking flowers. You may have thought to yourself that they require some advanced skill in cake decorating to create, but, the truth is, they only require specific types of decorating tips, a little patience and the right frosting consistency to replicate.

When I first started seeing them I did a little research and discovered that the flowers were being created with decorating tips known as “Russian Decorating Tips.” After a little more research I discovered that these tips have nothing to do with Russia. So, how did they get their name? Per another blogger, I Am Baker, they got their name because they were being sold by a company called Ali Express and they named them “Russian Tips.” At the time I didn’t feel like ordering a set over the internet, but, not too long ago I discovered that my local AC Moore began selling a set of 8 (along with an extra-large coupler to use with them) for less than $10. Truth be told, you don’t need the coupler. You can just cut your decorator bag and drop the tip in. I would suggest using a 16-inch decorator bag with these tips as opposed to a 12-inch one.


Unlike traditional decorating tips from Wilton & Ateco, these tips do not have numbers on them. The tips have a laser cut design on the end that allows the frosting to be piped through and form the different flowers. I will say that some of the tips are easier to use than others. Some of the designs, especially those that have detailed centers meant to emulate the stamen & stigma part of the flower, take a little more practice to master. One other thing that is different is the way you pipe them. With your usual tips you sometimes have to add a little wrist twist to get the flower design, or, you have to hold the bag at a 45 degree angle. But, with these tips you hold the bag at a 90 degree angle about an inch or so from your cake (or cupcake) and squeeze for a few seconds to form the flower. Before piping the next flower I would suggest wiping the tip clean to get a nice flower for the next pipe.

Like I mentioned earlier I purchased a set of these tips from my local AC Moore store. I can’t remember how I knew they carried them; I probably saw something on their Instagram feed. I decided to hold off on using them until I made my Mother’s Day cake. I did test them out using store bought vanilla frosting and as I had suspected and had read a little bit about, the frosting was too thin to get a well-formed flower. All of my test flowers looked like little blobs of frosting as opposed to a flower.

So, using my go-to Fluffy Vanilla Frosting that I then tinted in 4 different colors I began decorating the top of my cake. I was soon a bit frustrated with some of the tips. The flowers weren’t piping well and even though the frosting was a stiffer consistency the centers of the flowers weren’t looking nice. So, I decided to switch the tips I had chosen to use. Soon enough I got the hang of it and ended up with a flower topped cake I was content with. It wasn’t until I added in leaves (using a Wilton 352 tip) that I piped around the cake and in between the flowers to fill in the gaps that I was truly happy with the outcome.


Ricotta Orange Pound Cake

I always have a container of ricotta cheese in my fridge just in case I want to make a baked ziti, a cheesecake or something or other. Unfortunately what ends up happening is, it sits in my fridge, I know it’s there, but I don’t get around to using it until it’s about to expire and then I’m scrambling to make something because I don’t want to throw it out. When this recently happened I decided to make something I made a few years ago, but didn’t come out quite right the first time… a Ricotta Orange Pound Cake. This cake has a nice orange taste and is quite moist thanks to the ricotta cheese.

Ricotta Orange Pound Cake

Ingredients:

1 1/2 sticks unsalted butter, at room temperature

1 1/2 cups cake flour*

2 1/2 teaspoons baking powder

1 teaspoon kosher salt

1 1/2 cups whole-milk ricotta cheese

1 1/2 cups plus 1 tablespoon sugar

3 large eggs

1 teaspoon pure vanilla extract

1 orange, zested

2 tablespoons amaretto

*If you don’t have cake flour, use this method to substitute with all-purpose flour and cornstarch.

Directions:

Preheat the oven to 350 F. Grease a loaf pan with butter, or spray with cooking spray.

In a medium bowl combine the flour, baking powder and salt. Stir to blend.

With a mixer, cream together the ricotta cheese, butter, and sugar until light and fluffy. Add the eggs, one at a time, beating well after adding each one. Add the vanilla, zest and amaretto and beat until well combined. Add the dry ingredients, a little at a time, and mix until just incorporated.

Pour the batter into the prepared pan and bake until a cake tester or toothpick inserted in the middle comes out clean and the cake pulls away from the sides of the pan, about 45 to 50 minutes. If you find you need to bake it a little longer, you may want to lower the temperature of the oven to ensure that you don’t burn the cake. Let the cake cool in the pan for 10 minutes and then transfer to a wire rack to cool completely.

Recipe from Food Network

Lemon Pudding Cakes

It’s the first day of spring and unfortunately the temperatures aren’t spring-like and there’s snow in the forecast for tomorrow. Too bad the weather doesn’t automatically switch with the seasons – of course people would only enjoy that for the warmer months. Not many people would be too keen on frigid temps and snow the first day of winter, although it would make for a white Christmas! I’m welcoming spring today with a lemon treat. I’m not all that sure that lemon is synonymous with spring – I think it more of a summer flavored dessert – but, when I Googled Spring desserts a bunch of lemon ones were the first to come up. So, the lemon treat I settled on was Lemon Pudding Cakes.

I started by making the lemon base of the cakes by mixing together egg yolks, buttermilk, lemon juice and zest. Once those ingredients were well combined, I sifted in flour, sugar and salt and mixed these ingredients until combined.

Next I beat the egg whites until stiff peaks formed. Now, we all have those kitchen tasks we’re not fond of doing. I used to dislike having to mince garlic until I purchased a garlic mincer. Another task I dislike, beating egg whites into stiff peaks, well by accident, well not really accident, I finally realized what I was doing wrong… I was using the wrong bowl. I would normally beat them in a wide stainless bowl and I guess it would take long because of the larger surface of the bowl. I didn’t feel like grabbing that bowl when making these pudding cakes so I grabbed a smaller stainless bowl instead and my egg white were ready in half the time. I apologize to those of you who are like “Duh.” Sometimes we get so used to doing things a certain way we don’t stop to think of a more efficient way to do it.

After the egg white were ready I folded them – a small amount at a time- into the lemon mixture. I then divvied up the batter among 4 ramekins and baked them in a water bath. After letting them cool, I inverted them on a dish and topped them with fresh strawberries and confectioners’ sugar.  I knew these were going to be delicious, but, I was surprised by just how good they are. The cake texture was reminiscent of a ricotta cheesecake and there was a nice layer of lemon pudding on top… Hence, a Lemon Pudding Cake. This was a quick dessert if you are looking for a nice dessert for a small get together or, you just want a dessert that will remind you of the warmer temps that are sure to come.


Happy Spring!!!


Lemon Pudding Cakes

Ingredients:

2/3 cup superfine sugar, plus more for dusting

2 eggs, separated

2/3 cup reduced fat buttermilk

2 tablespoons lemon juice*

1 tablespoon lemon zest*

1/4 cup flour

1/4 teaspoon salt


Topping

Fresh berries

Confectioners’ sugar


Directions

Preheat the oven to 325 F. Butter and lightly sugar 4 ramekins.**

In a large bowl add egg yolks, buttermilk, lemon juice and lemon zest and using a hand mixer beat until well combine on medium speed. Sift in flour, sugar and salt into the mixture and beat on low until well combined.

In a separate bowl, beat egg whites until stiff peaks form. Gently fold the egg whites into the lemon mixture a little at a time until completely incorporated.

Divide the batter evenly among the ramekins and bake in a water bath. Place the ramekins in a large roasting pan and fill hallway with water.

Bake for 45 minutes until the top springs back when gently pressed. All the cakes to cool slightly and then invert onto a plate and garnish with fresh berries and confectioners’ sugar.

**I sprayed my ramekins with cooking spray then sprinkled sugar in them.

Recipe from Food Network

Food Network


Chocolate Whoopie Pies with a Dulce De Leche Filling

Remember a few years ago when whoopie pies were all the rage? I remember ripping out quite a few recipes from different magazines. Now, they didn’t go away, people just moved on to another rage. In fact, whoopie pies have been around for quite some time. Traditionally found in the New England area – they are considered the official state treat (who knew that was a thing!?!) of Maine and a Pennsylvania Amish tradition – you can find them in all parts of the country. I am sure depending on the region and season the flavors can vary greatly. Imagine a blueberry version from Maine made with fresh blueberries… YUM!

All this talk about them, let’s get to the bottom of what they are. They can be considered a cake, a cookie or a pie. How awesome is that!?! Traditionally they are made with 2 small round mounds of chocolate cake that are then filled with frosting or a filling made with marshmallow creme or fluff. These I’m sharing with you today are filled with a dulce de leche filling… Double YUM!

The cake part is made with a Devil’s food box cake mix (I used Pillsbury) and the filling is made with canned dulce de leche. I normally find it in the Hispanic food aisle in my supermarket. If you can’t find it by you, or just want to make it yourself, you can simmer a can of sweetened condensed milk. Here’s a great recipe for doing just that. It’s then mixed with cream cheese, butter and some other ingredients to make it the perfect consistency to pipe onto the chocolate cakes.

Chocolate Whoopie Pies with a Dulce De Leche Filling

  • Servings: Makes About 20
  • Print

Ingredients:

Whoopie Pies

1 box of Devil’s food cake mix

1/2 cup unsalted butter, melted

1/2 cup water

3 large eggs

Filling:

1/2 cup dulce de leche

4 ounces cream cheese, at room temperature

4 tablespoons unsalted butter, at room temperature

1 teaspoon vanilla extract

1/2 teaspoon salt

3 1/2 cups confectioners’ sugar

Directions:

Combine the cake mix, butter, water and eggs in a large bowl and beat at medium speed until smooth. Let the batter rest for 30 minutes.

Preheat the oven to 400 F and line a baking sheet with parchment paper.

Using a cookie scoop, drop the batter onto the parchment line baking sheet and bake for 5 to 7 minutes. Until a cake tester inserted in the middle comes out clean.  Cool completely on a wire rack.

In another large bowl beat the cream cheese and unsalted butter on medium speed until creamy. Reduce the speed to low and gradually add in the confectioners’ sugar and beat until well combined. Add the dulce de leche, vanilla extract and salt and beat until well combined.

Pipe or spread the filling onto half of the cookies, place the second cookie on top.

Recipe adapted from Land O Lakes

Descendants Themed Cake

It’s my Blogiversary! I started this blog 6 years ago and my very first post was an Elmo Cake I created for a friend’s daughter, aka my niece. Since then the cakes have gotten a bit more elaborate and 3 years ago they turned into fondant creations. I normally ask her a month or so in advance of her birthday what theme she’s thinking of. When she told me Descendants for this year I was stumped. I had only heard of Descendants, but had no clue what the deal was behind them. So, it was off to Pinterest to get some ideas. Once I had my idea down it was time to get my supplies and test out a few.

I needed to make sure that the icing was easily pipeable and also to test how thick the piping would be with the tip it came with. I opted to go with a smaller tip.

I also needed to make sure that the flower cut-out I purchased would make nice roses. Thankfully it did.

One more thing, I opted to purchase a dummy cake for the top tier of the cake. I normally do bake the cake, but, it usually doesn’t get eaten because it’s too much cake, so, to avoid waste and a little bit of stress on my part I purchased a dummy cake. In case you are wondering, it’s made out of Styrofoam. No one knew it was a dummy cake once it was covered and decorated.

To prep the dummy cake I covered it in frosting

I then covered it, as well as the actual cake, in fondant.

And after some piping, fondant rolling and cutting the cake came together. I have definitely learned with making these cakes that it’s important to walk away for a few minutes and then come back to truly appreciate the way it looks. So, I take a lot of mini-breaks, if not, I would probably drive myself crazy. One thing I did decide, I am going to avoid covering a cake with black fondant. I find that it tends to dry out fast and inevitably it always breaks. I had a few challenges trying to cover up the imperfections from it.

So, what will my next themed cake be…? Not sure yet. I’ll have to ask my other niece what’s she’s thinking of for her June birthday!


Apple Streusel Dump Cake

I’ve made dump cakes before, but, this one is slightly different because it uses fresh fruit as opposed to canned ones. Specifically Granny Smith Apples. Those are my go-to apples when it comes to baking since they are not overly sweet and are the perfect texture for baking. This cake is a great alternative if you don’t like dealing with pie crust, but, still want something that is akin to apple pie.

To begin, I peeled, cored and sliced Granny Smith apples that I then tossed with lemon juice, cinnamon and salt. I then scattered them in a baking dish that I sprayed with baking spray.

Next, I made the cake mix by combining flour, sugar, rolled oats, baking powder & soda, cinnamon, ginger and salt. I sprinkled this over the apples and then grated a stick and a half of unsalted butter over the cake mix.

And finally, I mixed flour, light brown sugar, sugar, cinnamon, ginger, salt with a stick of melted butter with my hands to form clumps and then sprinkled this over the cake.

I baked the cake for about 40 minutes and let it cool before digging in. While the apples were not overly sweet the topping and cake portion of the cake made up for it.

Apple Streusel Dump Cake

Ingredients:

For the base:

3 pounds Granny Smith Apples (or other sweet-tart apples) peeled, cored and thinly sliced (about 7)

1/4 cup lemon juice

1/2 teaspoon cinnamon

1/4 teaspoon kosher salt


For the cake mix:

1 1/4 cups flour

2/3 cup granulated sugar

1/2 cup old fashioned rolled oats

2 teaspoons baking powder

1/2 teaspoon baking soda

1/2 teaspoon cinnamon

1/2 teaspoon ginger

1/4 teaspoon kosher salt

1 1/2 sticks cold unsalted butter


For the streusel:

1 3/4 cups flour

1/3 cup light brown sugar

1/2 cup granulated sugar

1 teaspoons cinnamon

1/2 teaspoon ginger

1/4 teaspoon kosher salt

1 stick unsalted butter, melted


Directions:

Preheat the oven to 350 F. Grease a 9×13 baking dish with butter or nonstick spray

Make the base: In a large bowl toss the apples with the lemon juice, cinnamon and salt. Transfer to the prepared baking dish.

Make the cake: In a medium bowl combine all of the ingredients except the butter and sprinkle over the apples. Using the largest holes on a box grater grate the butter over the cake.

Make the streusel: In a medium bowl whisk together all of the ingredients except the melted butter. Once the dry ingredients are combined pour in the melted butter and stir. Using your hands squeeze the mixture together forming clumps and then sprinkle over the cake.

Bake until the cake is golden, about 30 to 45 minutes. Let cool 30 minutes before slicing.

Enjoy on its own or with a scoop or two of vanilla ice cream.

Recipe from Real Simple

Halloween Sprinkle Cake

Happy Halloween! So, will any of you be dressing up today? I can’t remember the last time I dressed up. These days I prefer to dress-up my baked treats with a Halloween theme. And this year, I made a Halloween themed Sprinkle Cake. If you’re wondering, a sprinkle cake is exactly what it sounds like. A cake covered in sprinkles. What’s fun and great about them, they work for any occasion… you just have to change the color of your sprinkles and you are all set.

I started off by baking, crumb coating and frosting my cake – getting it as smooth as possible. I opted to use a box cake mix – Pillsbury’s Halloween Funfetti Cake Mix – and store bought vanilla frosting – Betty Crocker Vanilla Frosting. Since I wasn’t all that sure how many ounces of  sprinkles I was going to need – I had a rough idea -and because I was planning on rolling the cake in a bed of sprinkles I opted to keep it small – 6 inches.

Speaking of the sprinkles… I order nonpareils – basically tiny balls of sprinkles – in purple, orange and black from NY Cake. I did a little research and they had the colors I wanted at the best price. I also ordered the green cupcake liners I used for the Cupcake Bouquet I made back in May from them. I went to their shop once in NYC and at the time I was just wandering around aimlessly looking at things. Since I decorate cakes more often now I am sure I would make the most of my next visit.

Next, I emptied the sprinkles onto a rimmed baking sheet and mixed them together. Let me just apologize now for my pictures. I need to stop baking and decorating at night and also on rainy days. Well, I can’t control the rainy days, but, I could definitely pick better times to start my baking/decorating projects.

To efficiently cover the cake in sprinkles I opted to roll the cake in the sprinkles. To do so, I placed a cake board on top of the cake, as well as the bottom, and simply rolled the cake in the sprinkles back and forth until it was covered. I used a spoon to cover any small spots I may have missed. To cover the top, I carefully removed the cake board and spread more frosting on it and poured handfuls of the sprinkles over it. To remove any excess sprinkles, I carefully tilted the cake to the side and tapped the bottom cake board so they could fall off.

Now it was time for a little more decorating. I’ve been seeing a lot of cakes on Instagram with a chocolate drizzle and I have been wanting to try it myself. I decided that this cake would be perfect for that. I made a chocolate ganache – the same one I made for the Pumpkin Crepe Cake – and poured it into a decorating bottle. I let the ganache sit for a few minutes so it would thicken up but still be pourable. You don’t want to pour it too soon or you’ll end up with a runny mess on your cake. I put it in a decorating bottle because I was only planning on decorating the edges of the cake and the sides, but, if you want to cover the entire top of the cake you could pour the ganache in the middle of cake and then use an offset spatula to smooth it out and let it drip down the sides.

After that, I tinted some of the remaining vanilla frosting a light orange color and piped a border around the bottom of the cake and used a large star tip to decorate the top. And finally placed a bat and a few creepy crawlers – spiders – on the cake for a final touch.


I love how this cake came out! I can’t wait to make another one with a completely different theme.

Happy Halloween!

Chocolate-Pumpkin Crepe Cake

I first heard of crepe cakes because of a bakery in NYC called Lady M. While I have never tried it myself, I do know a few people who have and have given it rave reviews. I came across a recipe over the summer for a Lemon Mascarpone Crepe Cake that I really wanted to try but never got around to. I feel like those flavors are summer-like so I just decided to wait to make it. And then, I received the recent issue of Food Network Magazine and among the pages was a recipe for a Chocolate Pumpkin Crepe Cake, so I decided to give it a try. I’ll admit, the idea of making crepes was a little intimidating at first, but, once I had made a few I got the hang of it.

To start, I made the pumpkin custard. Once made, I placed a piece of plastic wrap directly on the surface so the custard wouldn’t form a skin and refrigerated it for 2 hours.

Next, I made the batter for the chocolate crepes. Which I let rest, covered, for about 2 hours.

To finish the pumpkin filling, I beat heavy cream until stiff peaks formed and then folded it into the pumpkin custard and refrigerated the filling until it was firm, at least an hour.

Next, I made the crepes. Below I have some included some tips on making the crepes. Here is a pic of my crepe making assembly line. Having things laid out like this really made the crepe making a breeze. Also, I used a crepe pan as opposed to a non-stick pan to make them. I think using a crepe pan makes it easier due to the low angled rim of the pan… It makes flipping the crepes lest cumbersome.

I ended up with 18 crepes, it would have been 19, but my first crepe was a fail. The same thing happens when I make pancakes.

And once the crepes had cooled and filling was ready it was time to assemble the cake. I started and ended with a crepe, spreading about 3 tablespoons of pumpkin filling between each crepe. I then refrigerated the cake overnight.

The next day I covered the cake with chocolate ganache…

And after the ganache had set I sliced into the cake. It sounds cheesy, but, I was pretty excited when I cut into the cake and I saw how nice and perfect the layers look. There’s such a satisfaction you get when you feel intimidated by making something and in the end it comes up just as you hoped.

And it didn’t hurt that it tasted pretty good as well. Chocolate and pumpkin are definitely a winning combination.


Chocolate Pumpkin Crepe Cake

Ingredients:

For the Crepes:

1 cup all-purpose flour

1/4 cup unsweetened Dutch-process cocoa powder

1/4 cup sugar

1/2 teaspoon pumpkin pie spice

1/4 teaspoon salt

1 3/4 cups whole milk

4 tablespoons unsalted butter, melted and cooled slightly. Plus more for the pan.

3 large eggs

1/2 teaspoon vanilla extract


For the Filling:

1/2 cup sugar

2 large eggs

3 tablespoons cornstarch

1/2 teaspoon pumpkin pie spice

1/2 teaspoon vanilla extract

1/4 teaspoon salt

1 cup whole milk

1 1/4 cups pure pumpkin puree

1 cup cold heavy cream


For the Ganache:

4 ounces semi-sweet chocolate, chopped

1/2 cup heavy cream


Directions:

Make the filling: Whisk the sugar, eggs, cornstarch, pumpkin pie spice, vanilla and salt in a medium bowl. Combine the milk and pumpkin puree in a medium saucepan and cook over medium heat, whisking until steaming. Gradually whisk in the egg mixture (don’t add it all at once or you will end up with scrambled eggs) and bring to a boil, whisking constantly until very thick. Strain the filling through a fine mesh sieve into a medium bowl, push it through with a rubber spatula. Place a piece of plastic wrap directly on the surface and refrigerate for 2 hours.

Make the crepes batter: Combine the flour, cocoa powder, sugar, pumpkin pie spice, salt, milk, melted butter, eggs, and vanilla in a blender. Blend, scraping the sides occasionally until smooth. Transfer the batter to a bowl and cover, let sit for an hour.

Finish the filling: Beat the heavy cream in a large bowl with a hand-mixer on medium-high speed until stiff peaks form. Working in three batches, fold the whipped cream into the filling until combined. Refrigerate at least an hour, until firm.

Makes the crepes: Line a baking sheet with parchment paper. Heat an 8-inch nonstick skillet pan or a crepe pan over medium-low heat until hot; lightly brush with melted butter. Add about 3 tablespoons of batter to the pan and swirl to coat the bottom of the pan. Cook until the crepe is dry on the bottom and set on top, about 2 to 3 minutes. Carefully flip crepe and cook for 30 more seconds. Invert onto the prepared baking sheet. Repeat with the remaining batter to make about 20 crepes, brushing the pan with more butter and stacking the crepes as you go. (If any crepes tear, don’t worry, you can use those in the middle of the cake).

Assemble the cake: Lay a crepe on a plate or cake stand and spread with 2 to 3 tablespoons of the pumpkin filling, spreading it to the edges. Repeat this with the remaining crepes and filling, ending with a crepe. Lightly cover the cake with plastic wrap and refrigerate at least 6 hours or overnight.

Make the ganache: Put the chocolate in a small bowl. Heat the heavy cream in a small saucepan over medium heat until steaming, then pour over the chocolate. After 5 minutes, whisk until melted and smooth. If the chocolate isn’t completed melted, microwave in 15-second intervals. Let the chocolate sit for about 5 minutes, until it has thickened but still pourable. Pour the chocolate over the cake letting the excess drip down the sides then smooth the top with an offset spatula. Let the chocolate set about 15 minutes. To slice, run a sharp knife until hot water.

Recipe from Food Network


Crepe Making Tips:

Let the batter rest for at least an hour, if not the crepes will tear easily.

Butter the pan after every other crepe. Also, don’t put too much butter on the pan, it will take longer for your crepe to dry out.

If the crepes fold over when you flip them don’t worry. When you invert them on the baking sheet slowly unfold them so they will lay flat again

When pouring the batter, swirl the batter as your pour to ensure it covers the entire pan.

Pumpkin Gingersnap Tiramisu

I was on the fence with this dessert when I first tried it and I still am. I liked the custard part, but, I think the gingersnap cookies may have thrown off the flavor a bit, but, if you are a gingersnap cookie and pumpkin fan than this is the dessert for you. If you want more of a traditional tiramisu with a pumpkin flavor, check out the pumpkin tiramisu I posted last year.

After making the pumpkin custard I layered gingersnaps in a single layer in the bottom of a 9 x 13 baking dish. I then brushed them with apple brandy that I warmed with sugar and finally I spread a third of the custard over the cookie.

I repeated this layering two more times….

And on the final layer of custard I topped it with crushed gingersnap cookies.

I then covered the dish with wax and aluminum paper and refrigerated it overnight and before slicing it the next day I topped it with more crushed gingersnap cookies.

A few things I should mention. I slightly modified this recipe from the original by omitting gelatin in the custard and refrigerated my tiramisu as opposed to putting it in the freezer. I am sure that the gelatin would have resulted in cleaner slices, but, I just didn’t like the texture I was imagining that would result from the gelatin. And, the reason why I didn’t freeze it is that the directions said to let the tiramisu thaw for 6 hours before slicing. It just didn’t make sense to let it thaw for so long after freezing it to cut it.


Pumpkin Gingersnap Tiramisu

Ingredients:

6 large egg yolks

1/4 cup plus 2 tablespoons cornstarch

1/4 teaspoon salt

1 1/2 cups plus 1 tablespoon sugar

1 quart whole milk

1 15-oz. can pumpkin puree

1 tablespoon pure vanilla extract

3/4 teaspoon cinnamon

1 pound (2 cups) mascarpone

3 tablespoons apple brandy

1 1/4 pounds gingersnaps, 1/4 pound finely crushed


Directions:

In a large bowl, whisk the yolks, cornstarch, salt, and 1 1/2 cups of the sugar together until the sugar is moistened.

In a large saucepan, heat the milk until it just begins to steam. Whisk 1 cup of the milk into the egg mixture to temper the eggs. Pour the mixture into the milk in the saucepan and cook over medium heat, whisking constantly until boiling and thick, about 5 minutes. Then whisk in the pumpkin puree and cook, whisking for an additional minute. Remove from the heat and whisk in the vanilla extract and cinnamon and finally whisk in the mascarpone.

In a small microwave safe bowl, microwave the brandy and 1 tablespoon of sugar at high power for 10 seconds. Just until the sugar is dissolved.

Arrange one-third of the gingersnaps in a single layer in the bottom of a 9 x 13 inch baking dish. Lightly brush the cookies with some of the apple brandy and then spread a third of the pumpkin custard over the cookies. Repeat this layering two more times and then top the final layer of custard with half of the crushed gingersnaps. Cover the dish with wax paper and aluminum paper and place in the refrigerator overnight.

Before slicing sprinkle with the remaining crushed gingersnaps.

Recipe modified from Food & Wine