I came across Cupcake Bouquets while doing some research on Pinterest for something else. Once I saw it though I knew I wanted to try making one myself.
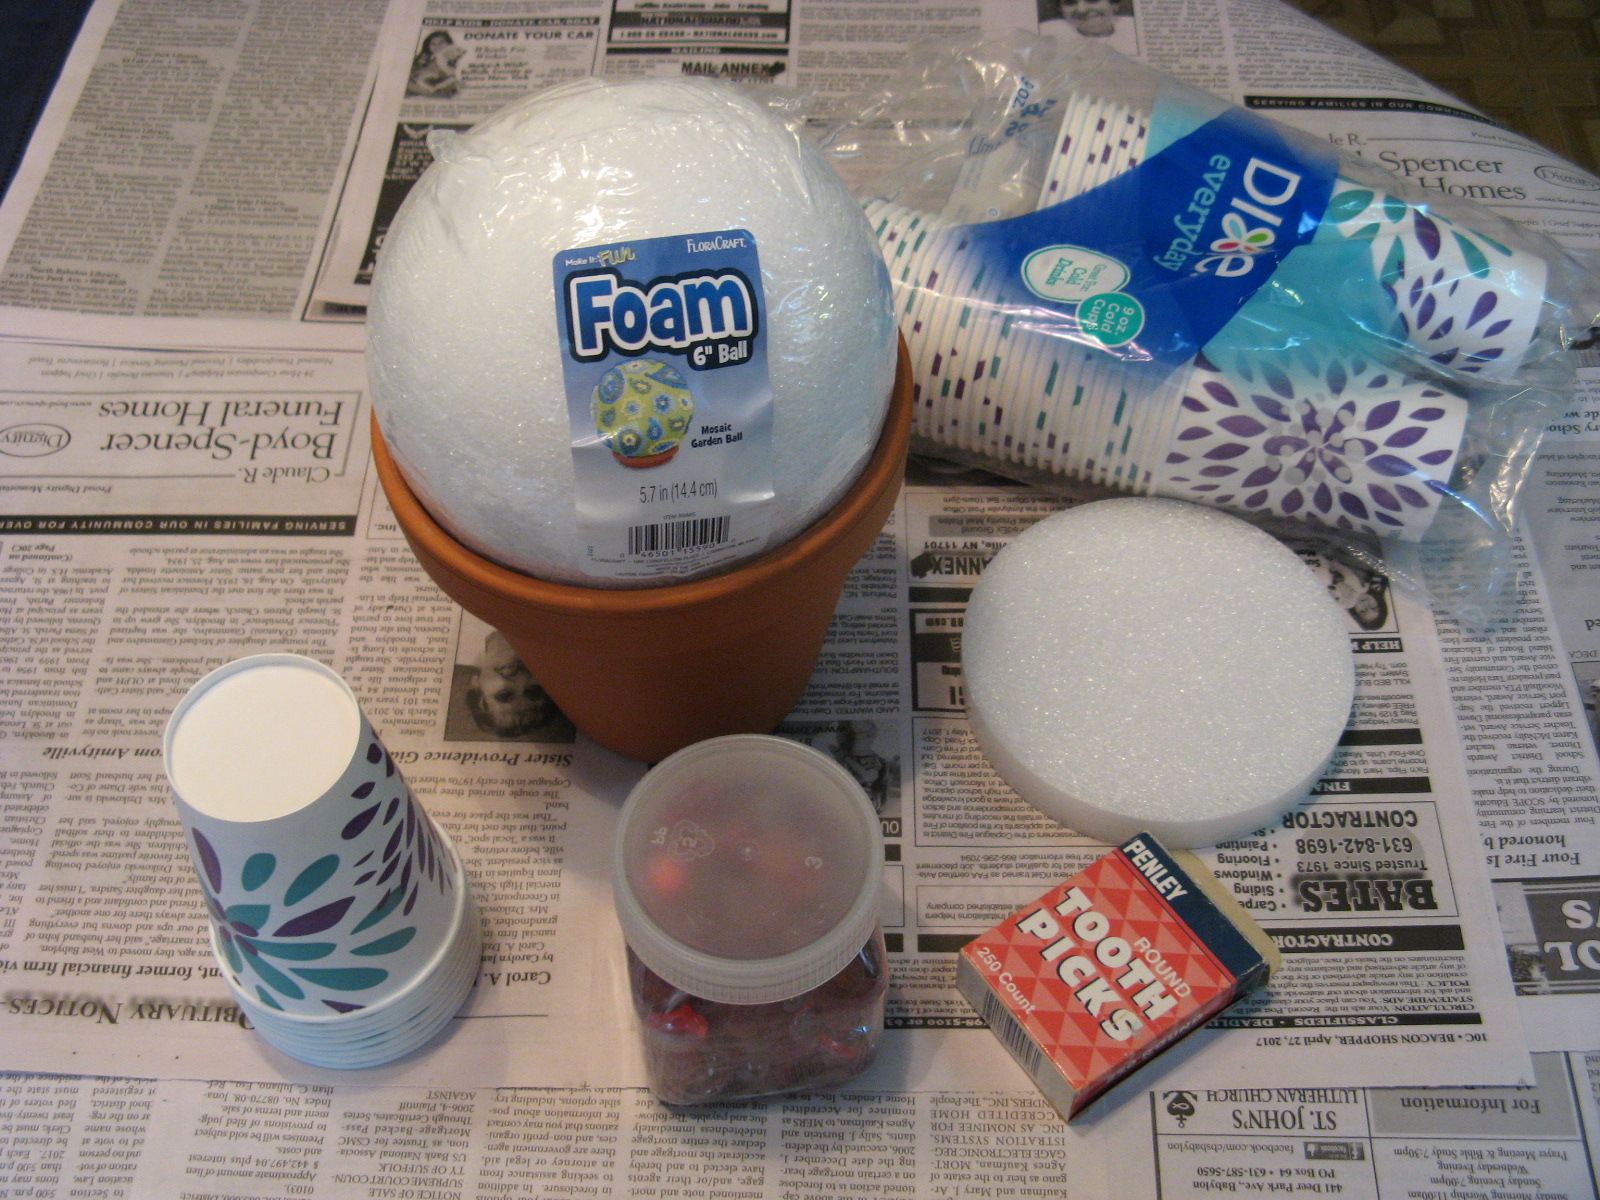
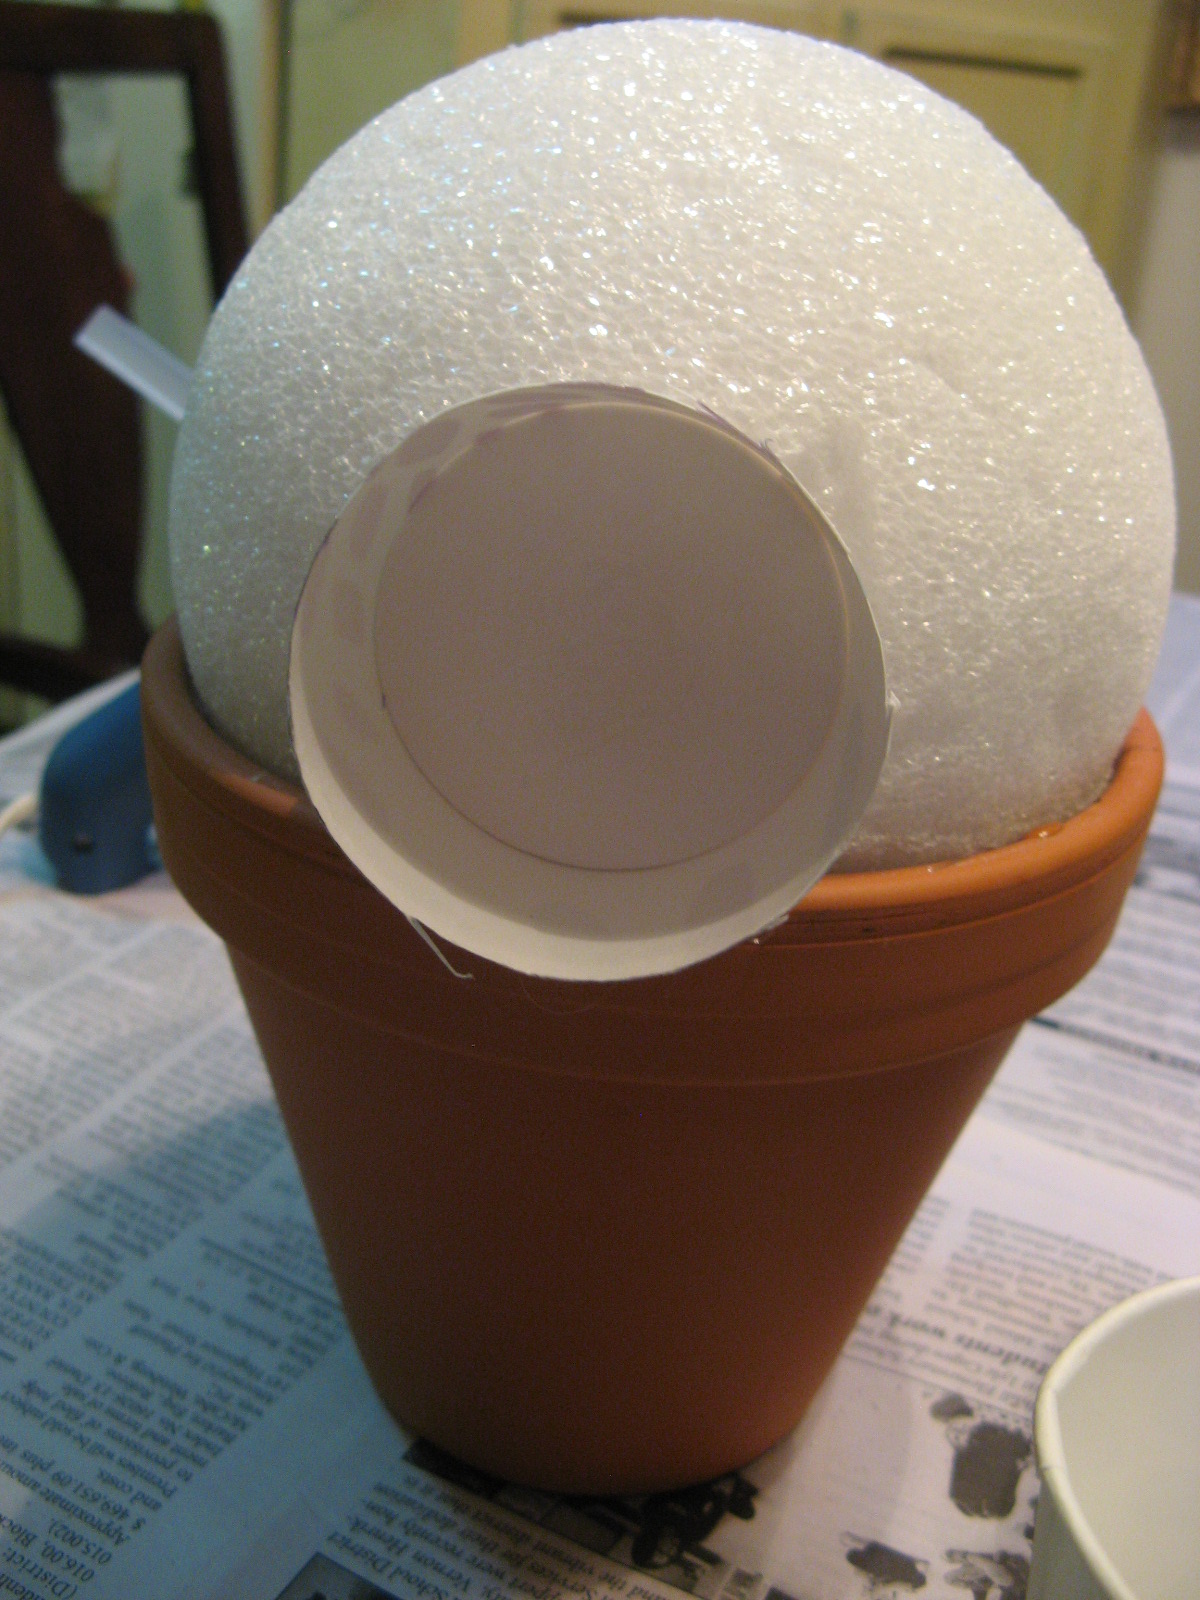
To begin, I gathered my supplies: a 6-inch pot, a 6-inch Styrofoam ball, 9oz. paper cups, toothpicks, and glass weights or rocks. You will also need a hot glue gun. A couple of things to point out… Make sure that the size of your pot and ball are the same size, or close to it, so that ball can fit snug inside of the pot.
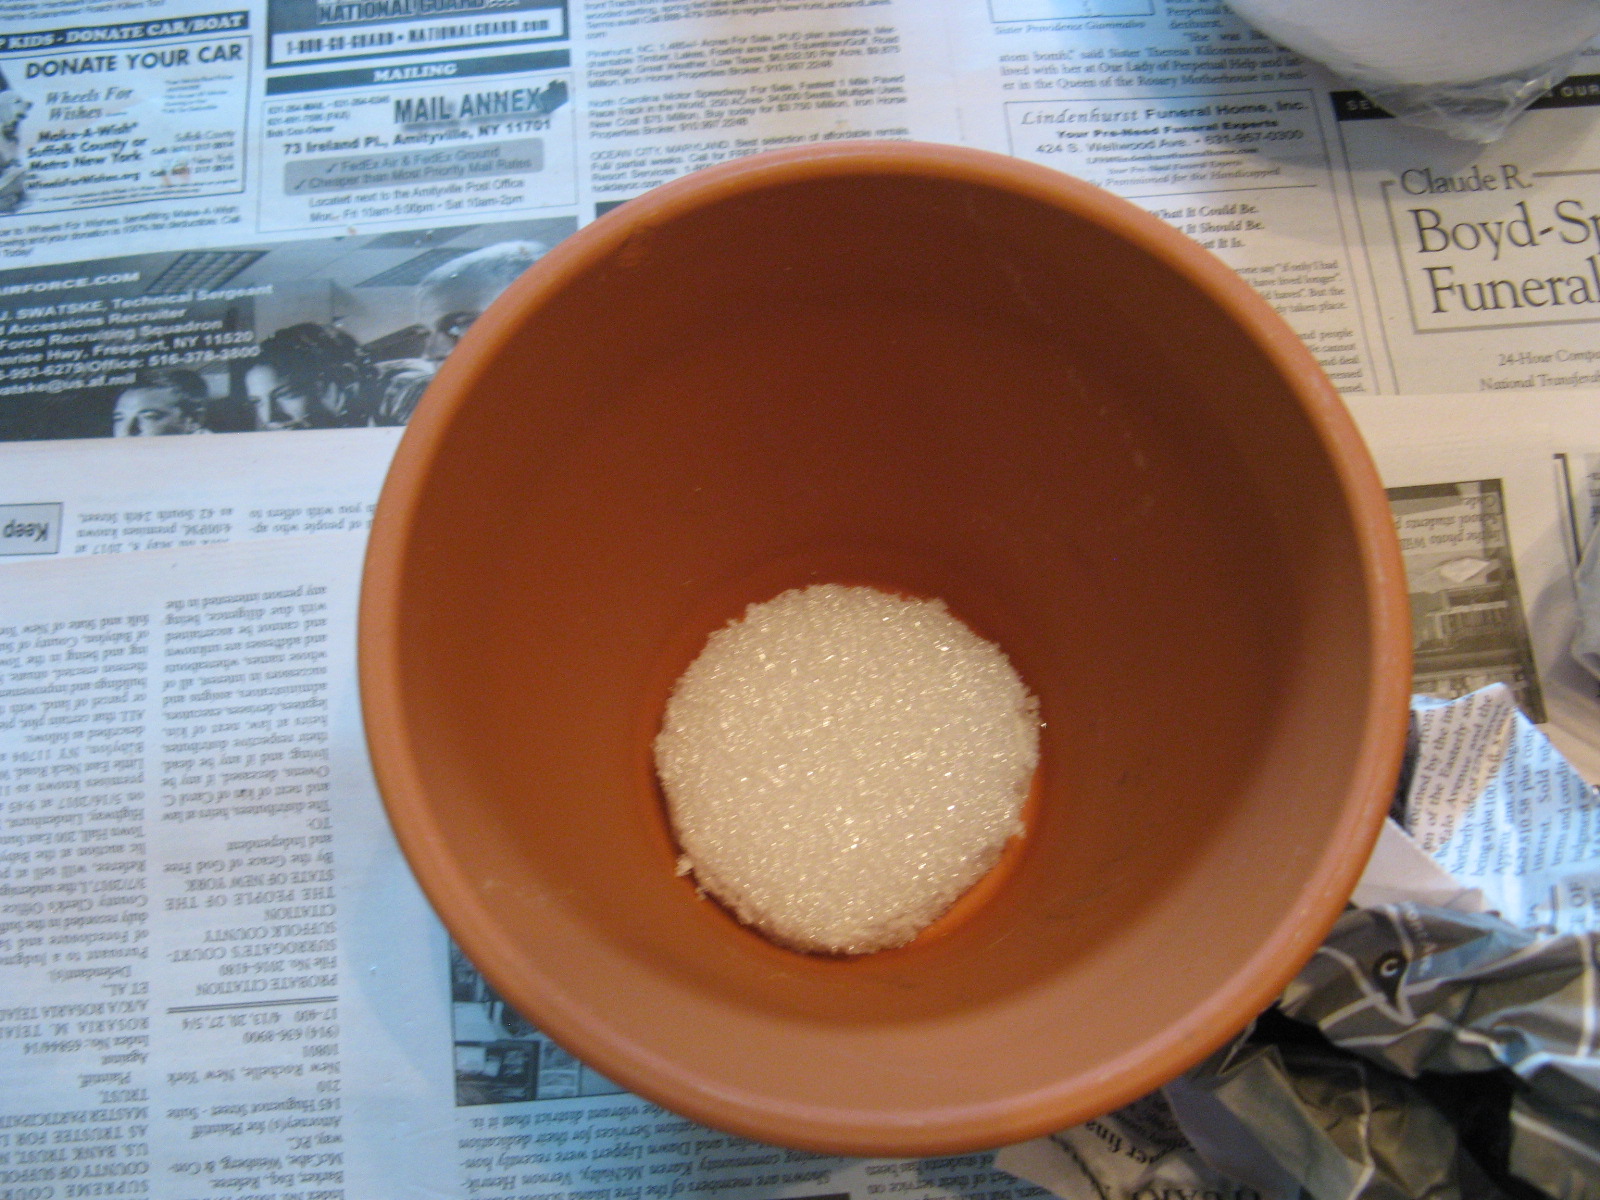
Since I had a piece of circular Styrofoam I decided to cut it down to fit inside the bottom of the pot…
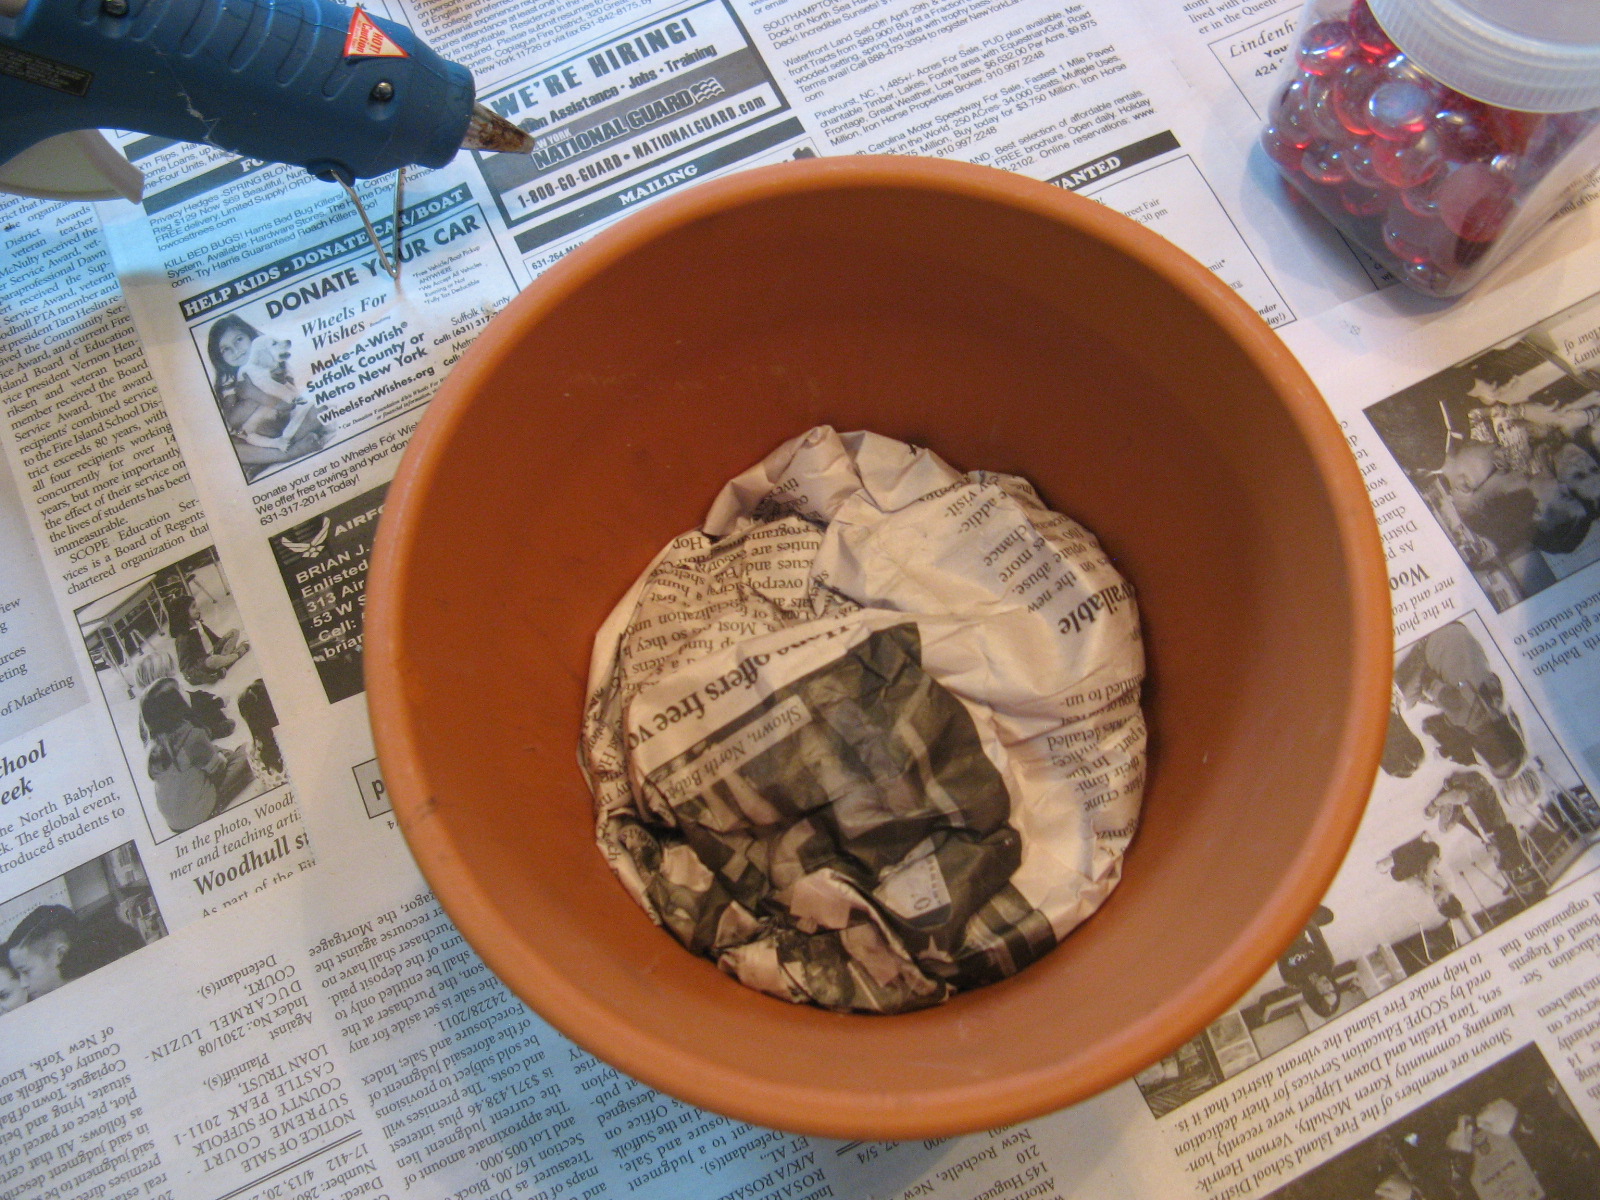
So, just in case any of my glass weights escaped from the newspaper I wrapped them in they wouldn’t fall through the hole in the bottom of the pot. The reason for the weights in the pot is to prevent it from tipping over if all the cupcakes are removed from one side.
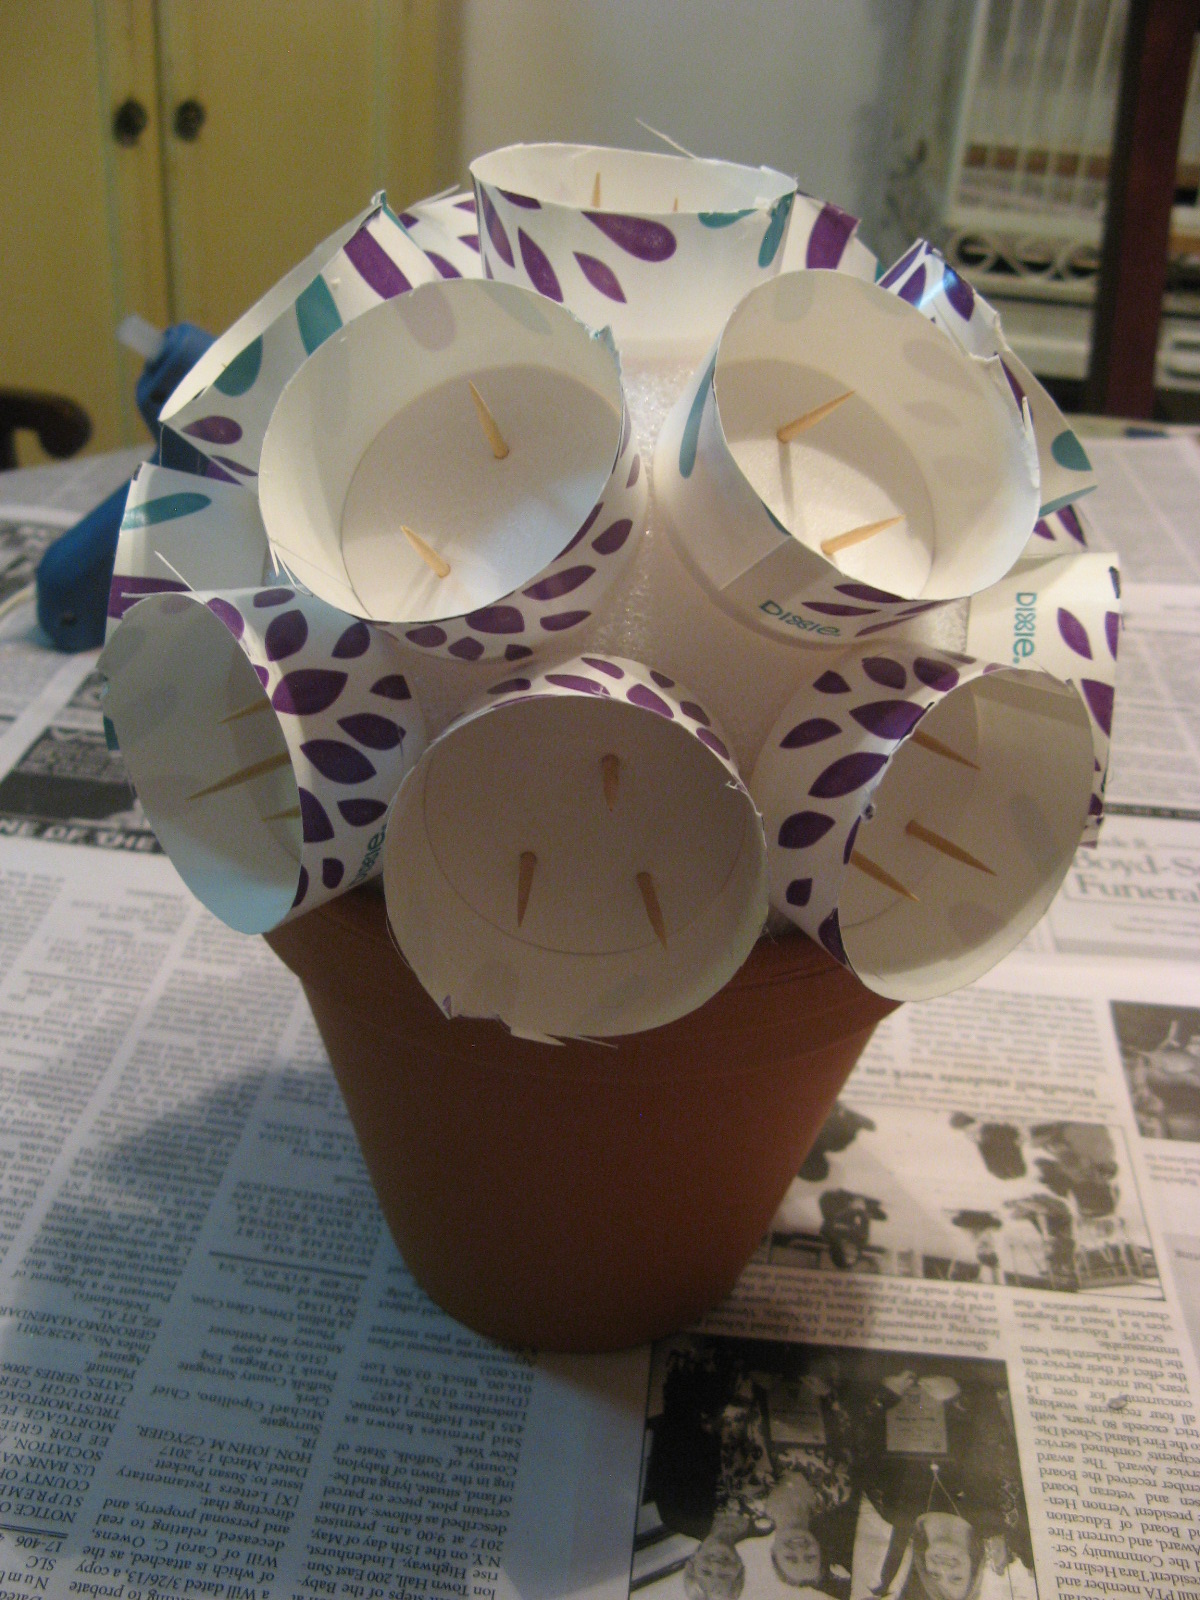
Next, I lined the inside of the top of the pot with hot glue and placed the Styrofoam ball inside and let it dry for a few minutes before hot gluing paper cups – that I cut to an inch tall – to the ball. Make sure you place the cups just above the rim of your pot, you don’t want too much space. You could attempt to just stick the cupcakes on to the ball using toothpicks, but, using the cups will give the cupcakes more support and less chance of them falling off.
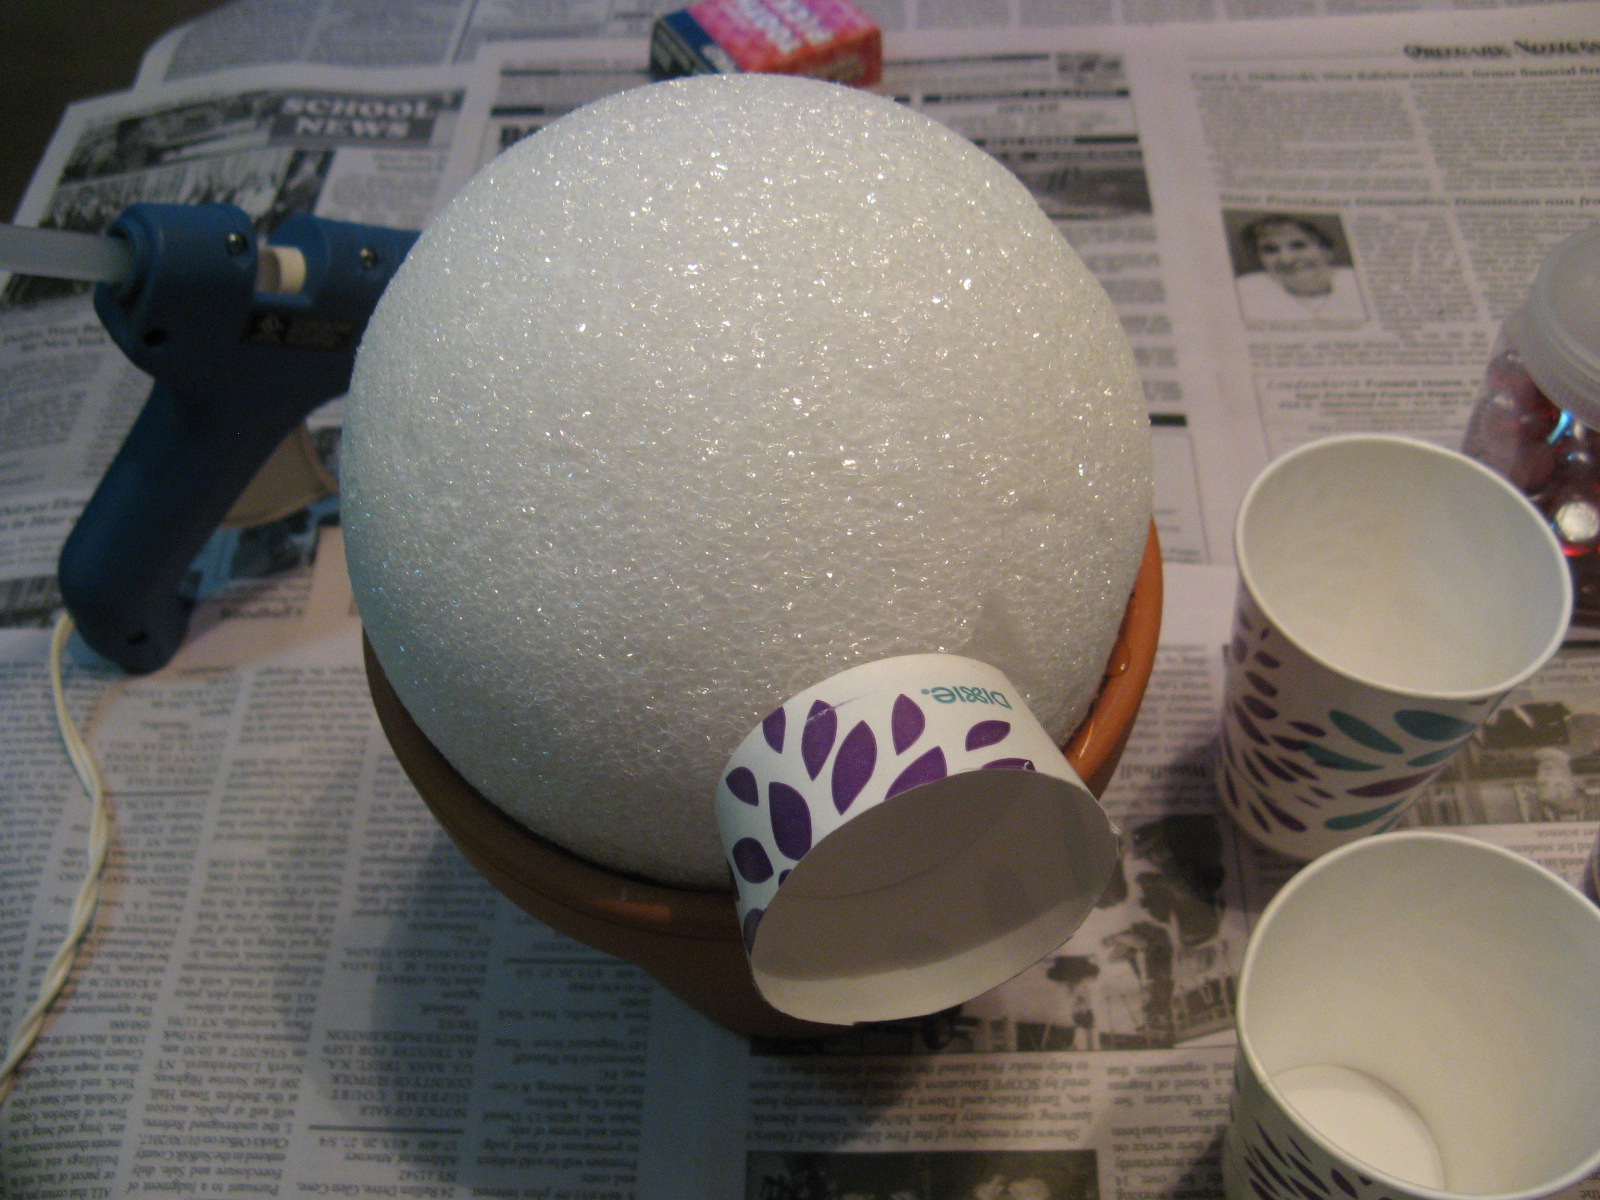
I continued gluing the cups around the ball, placing them fairly close together. I ended up with 9 cups in my first round.
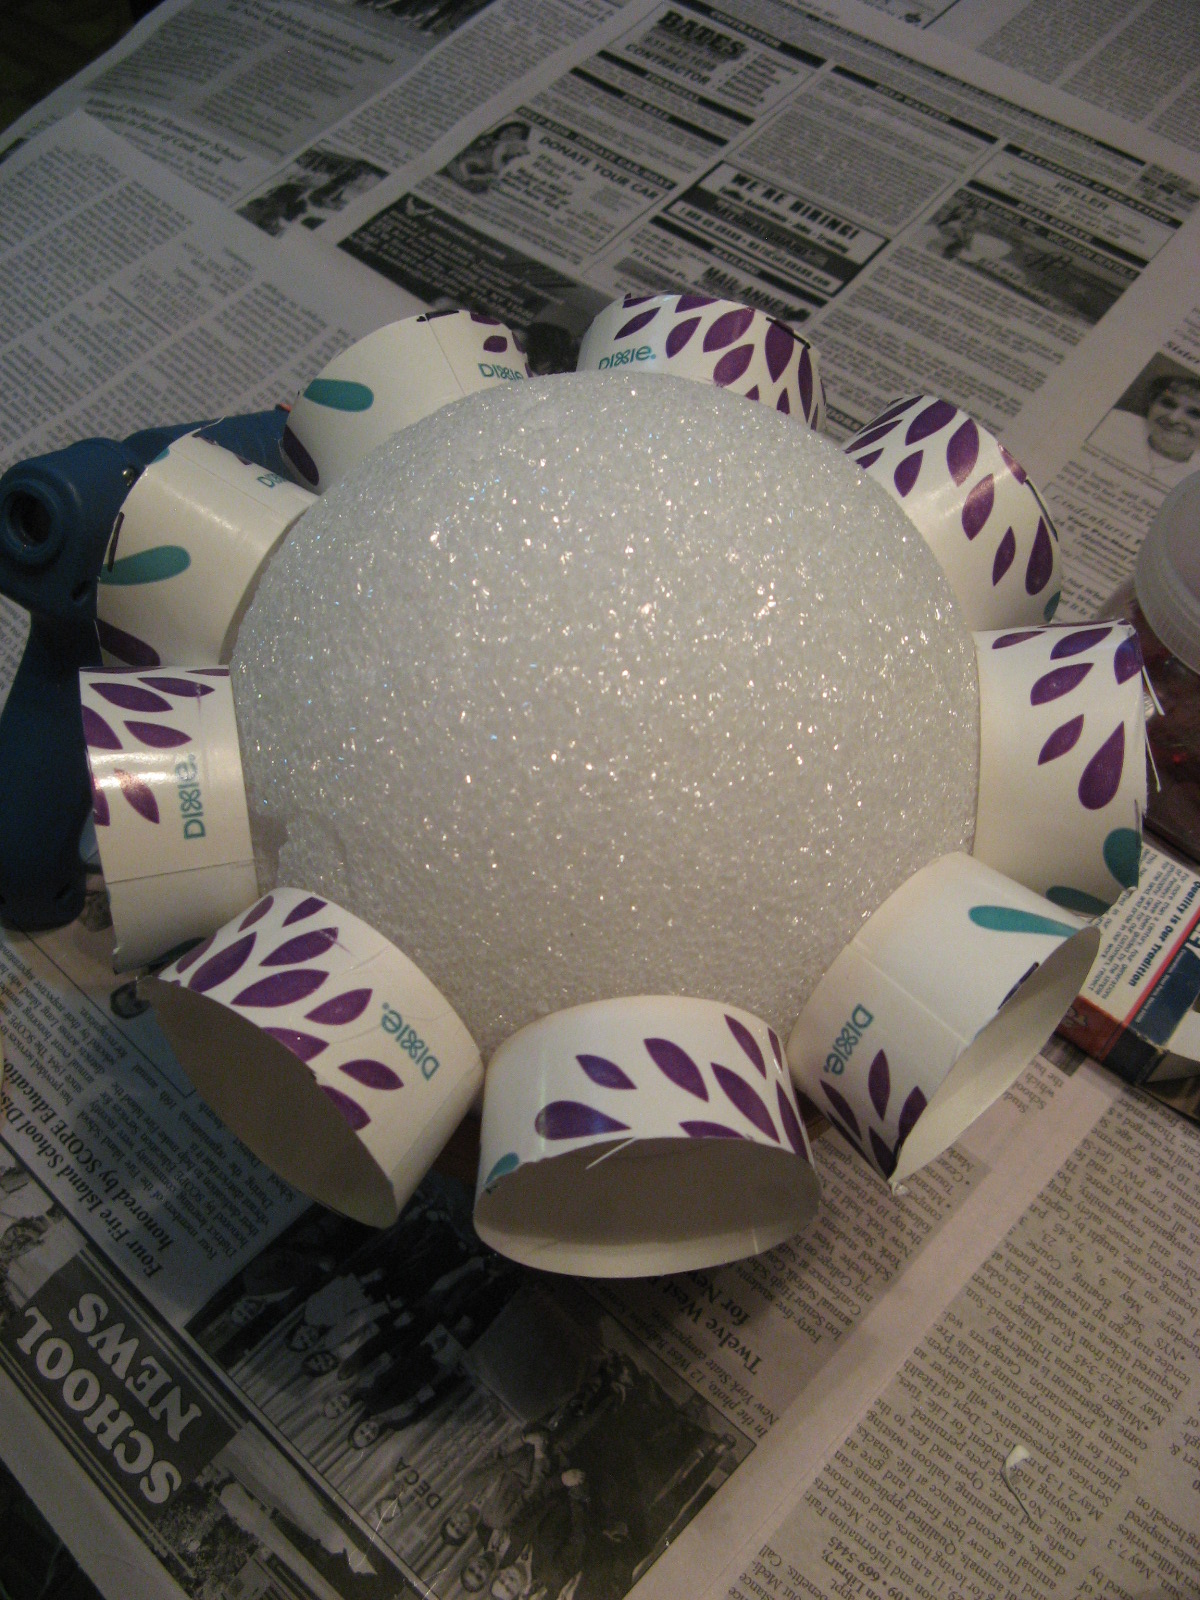
For the second round, I placed the cups in between two cups from the first round, ending up with a total of 6 cups. And then, one final cup on top of the ball. Don’t worry about the spaces as they will be filled later with cupcake liners.
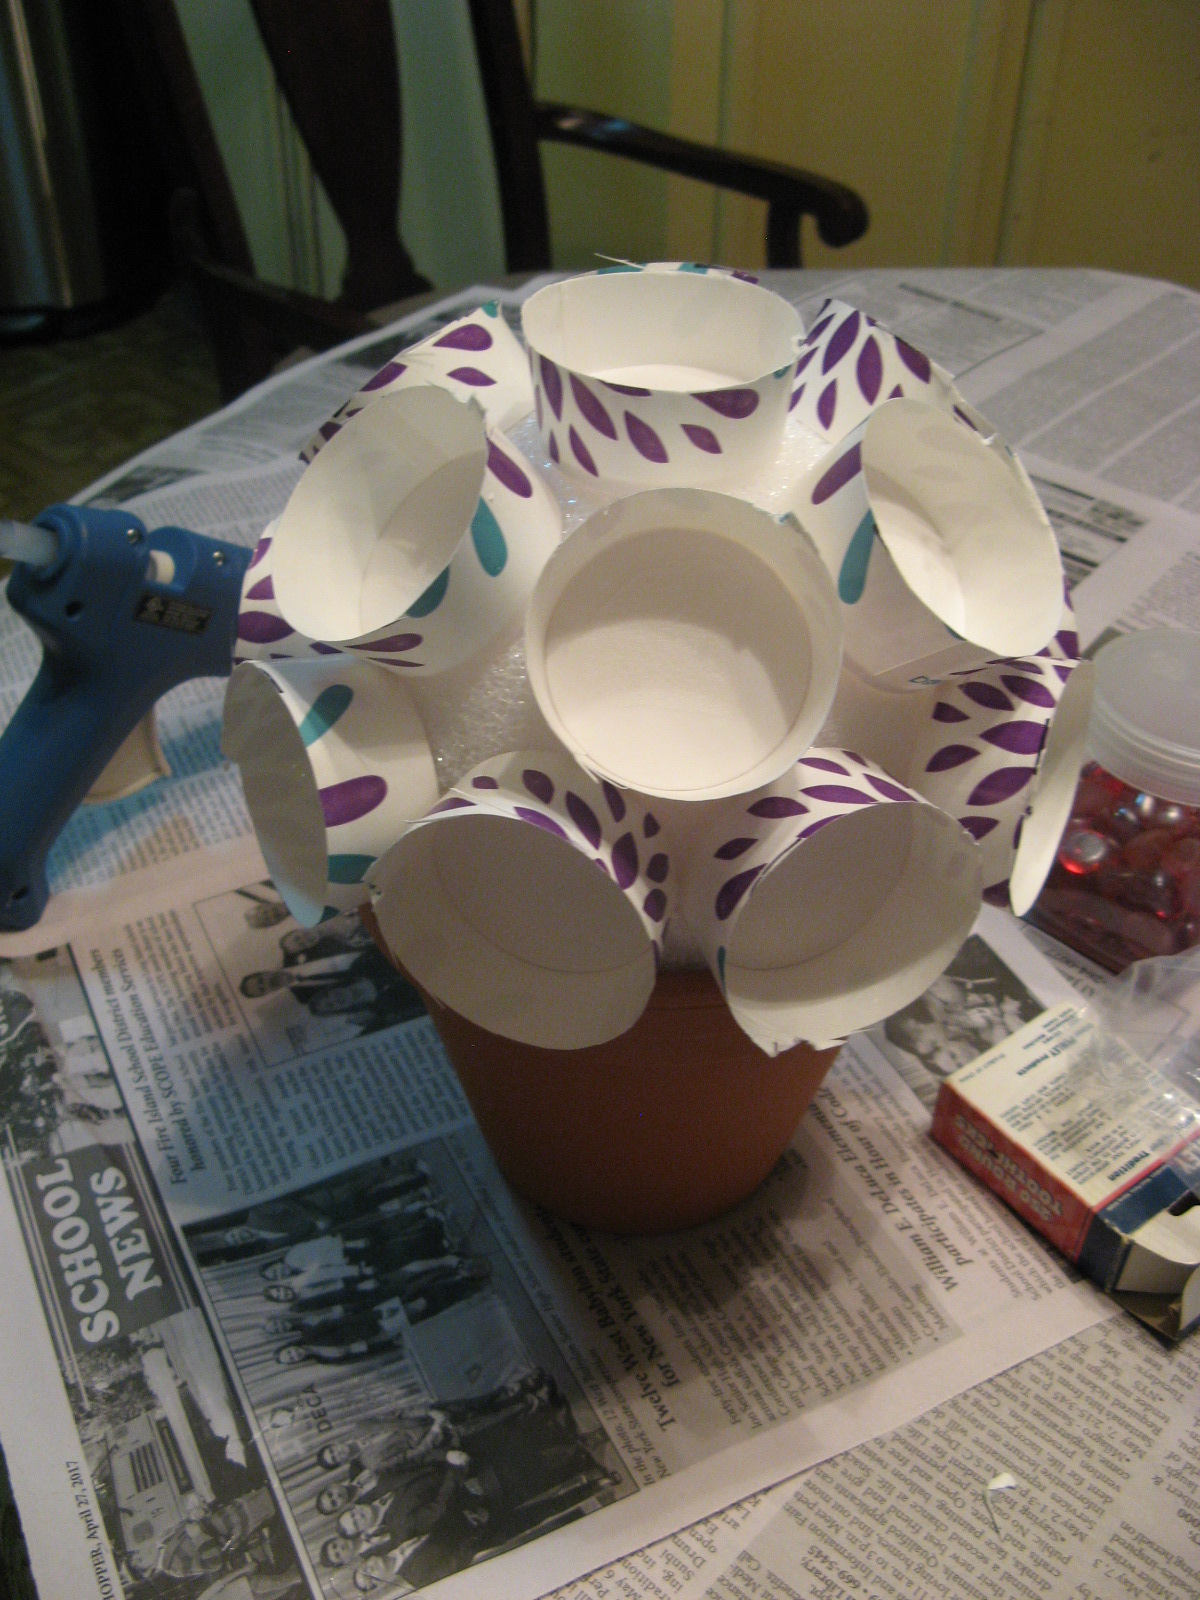
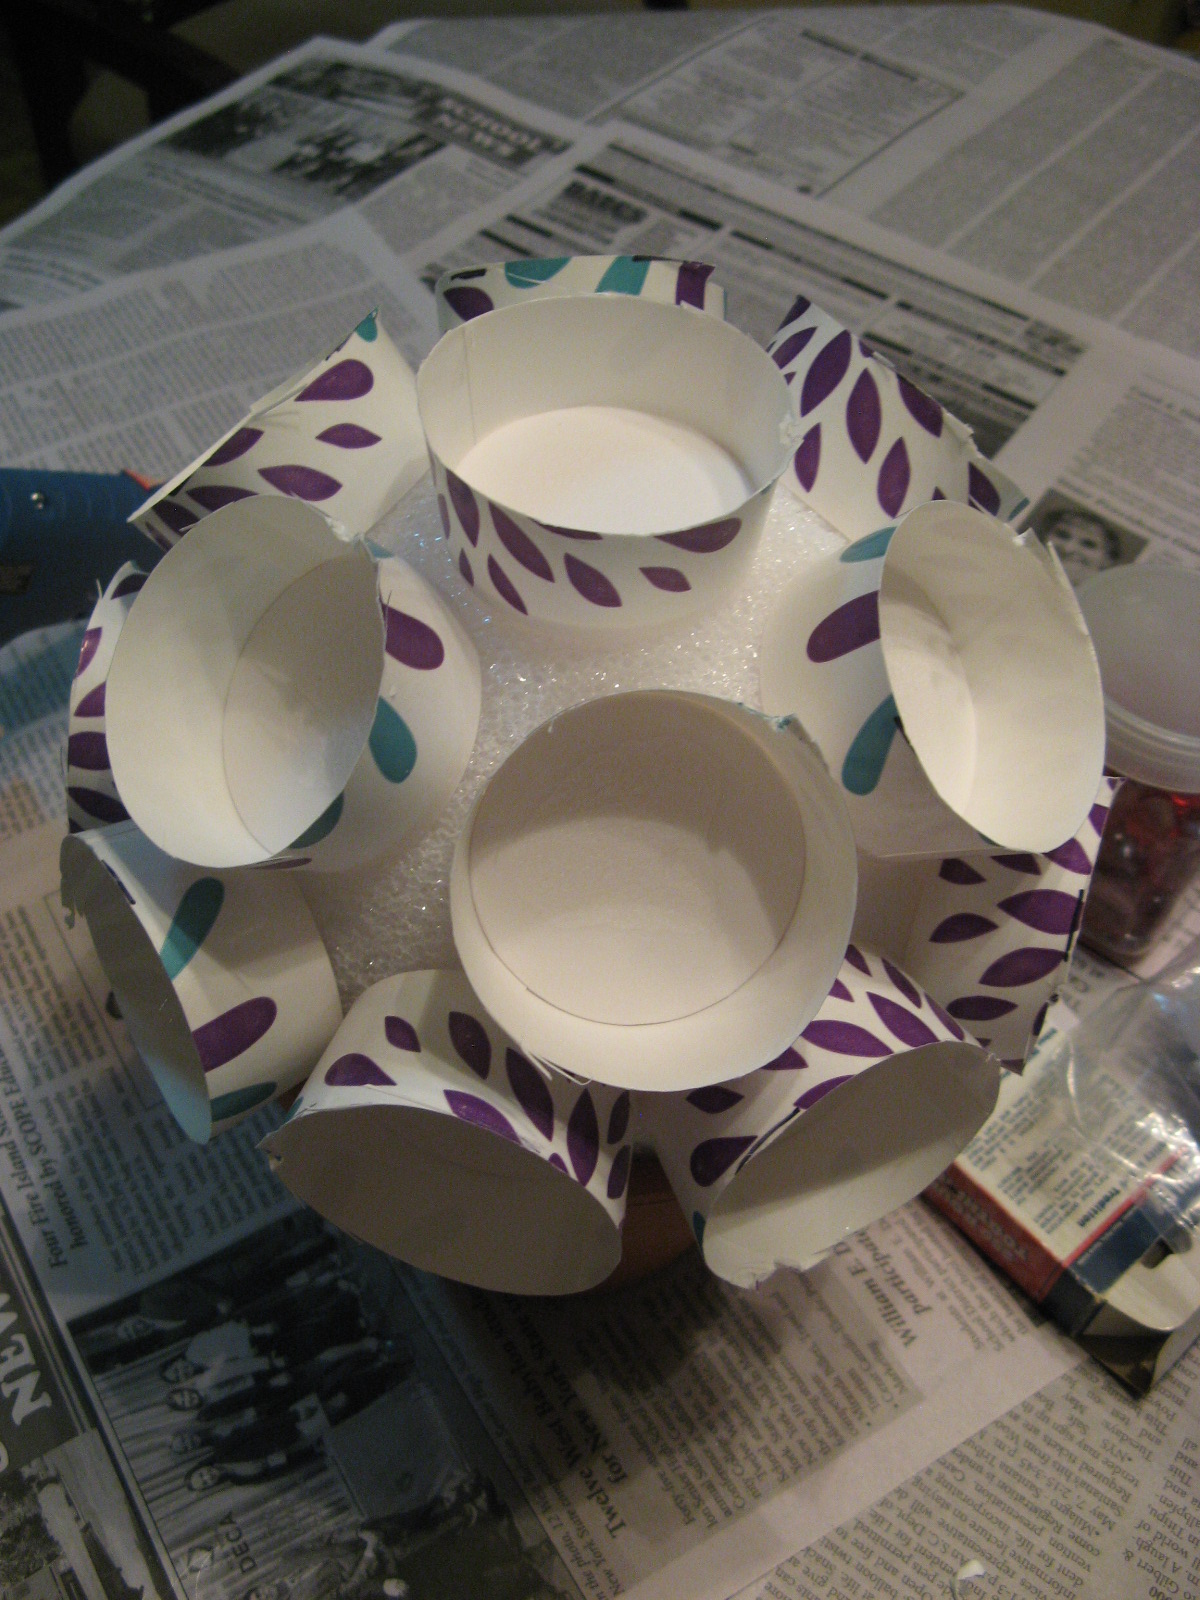
And finally I placed toothpicks inside of each of the cups. Three toothpicks forming a triangle in the first round, and two toothpicks in the cups on the second round and the one on top. Leave about half of the toothpick out. Be careful as you might stick yourself with a toothpick here and there and it can be quite painful.
A quick recap… A 6-inch Styrofoam ball in a 6-inch pot will yield a 16-Flower Cupcake Bouquet.
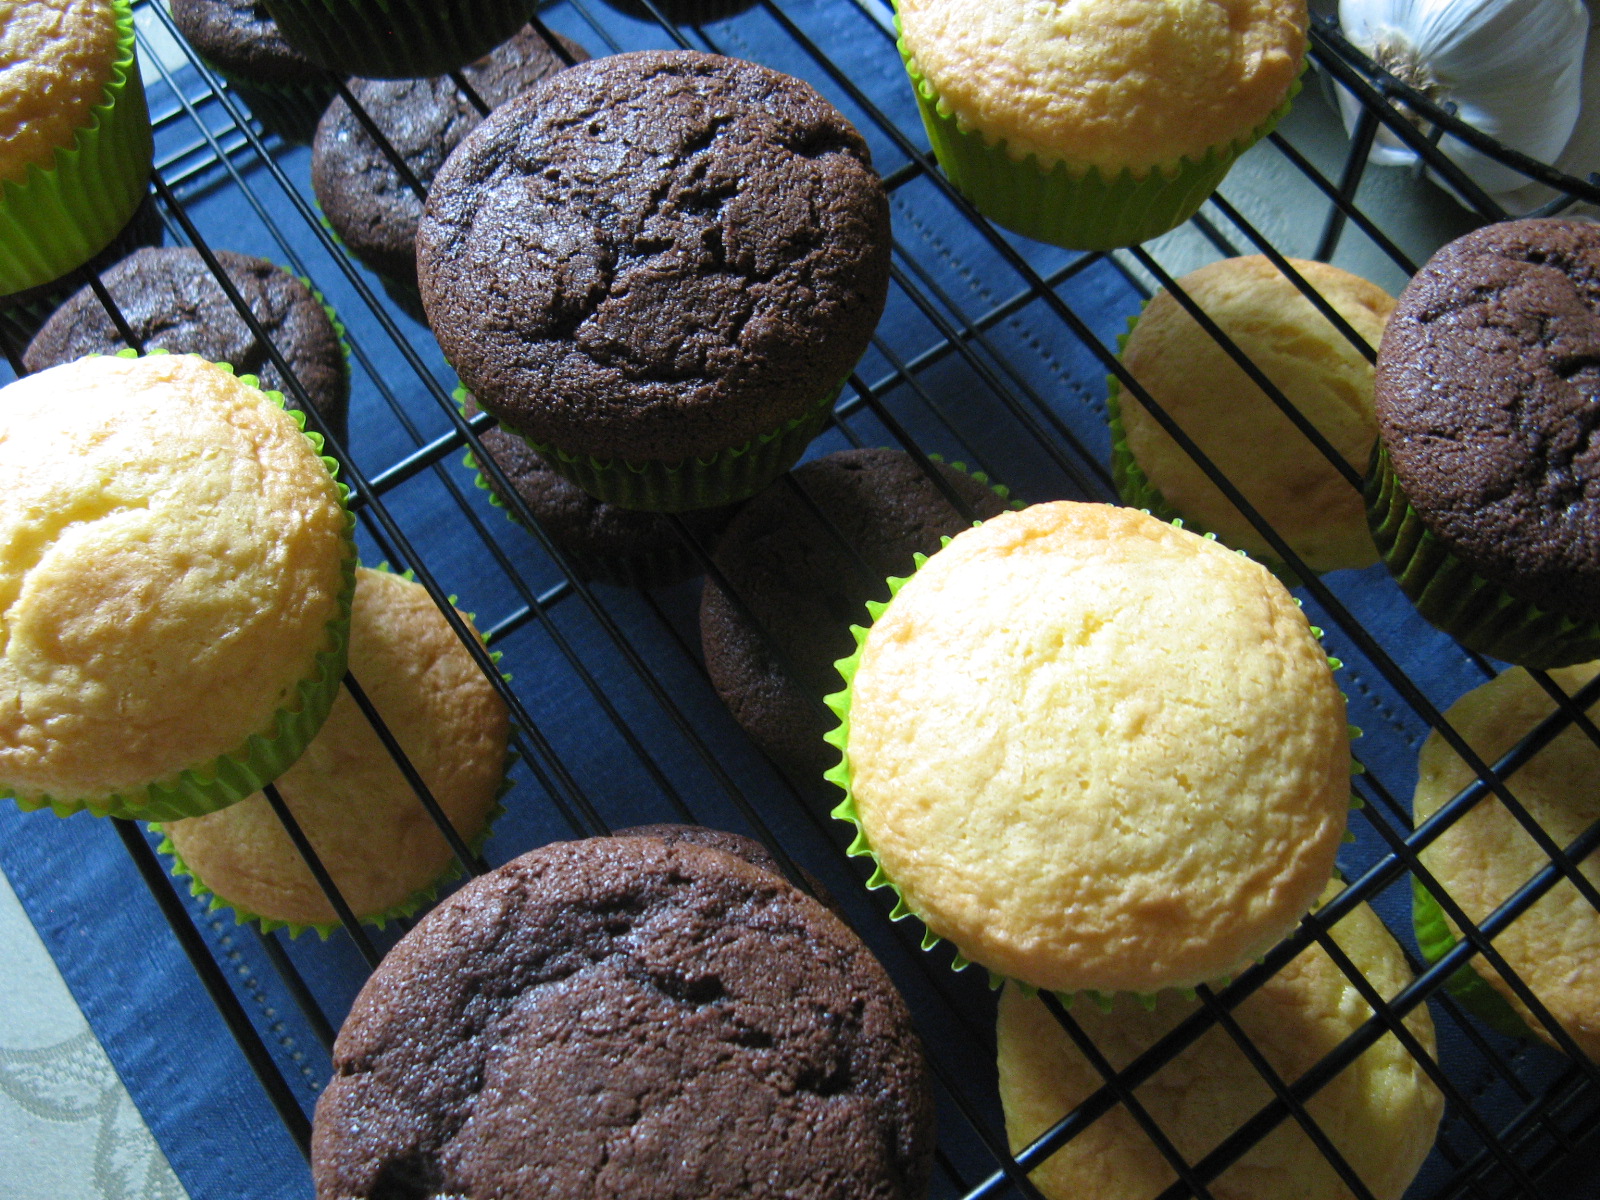
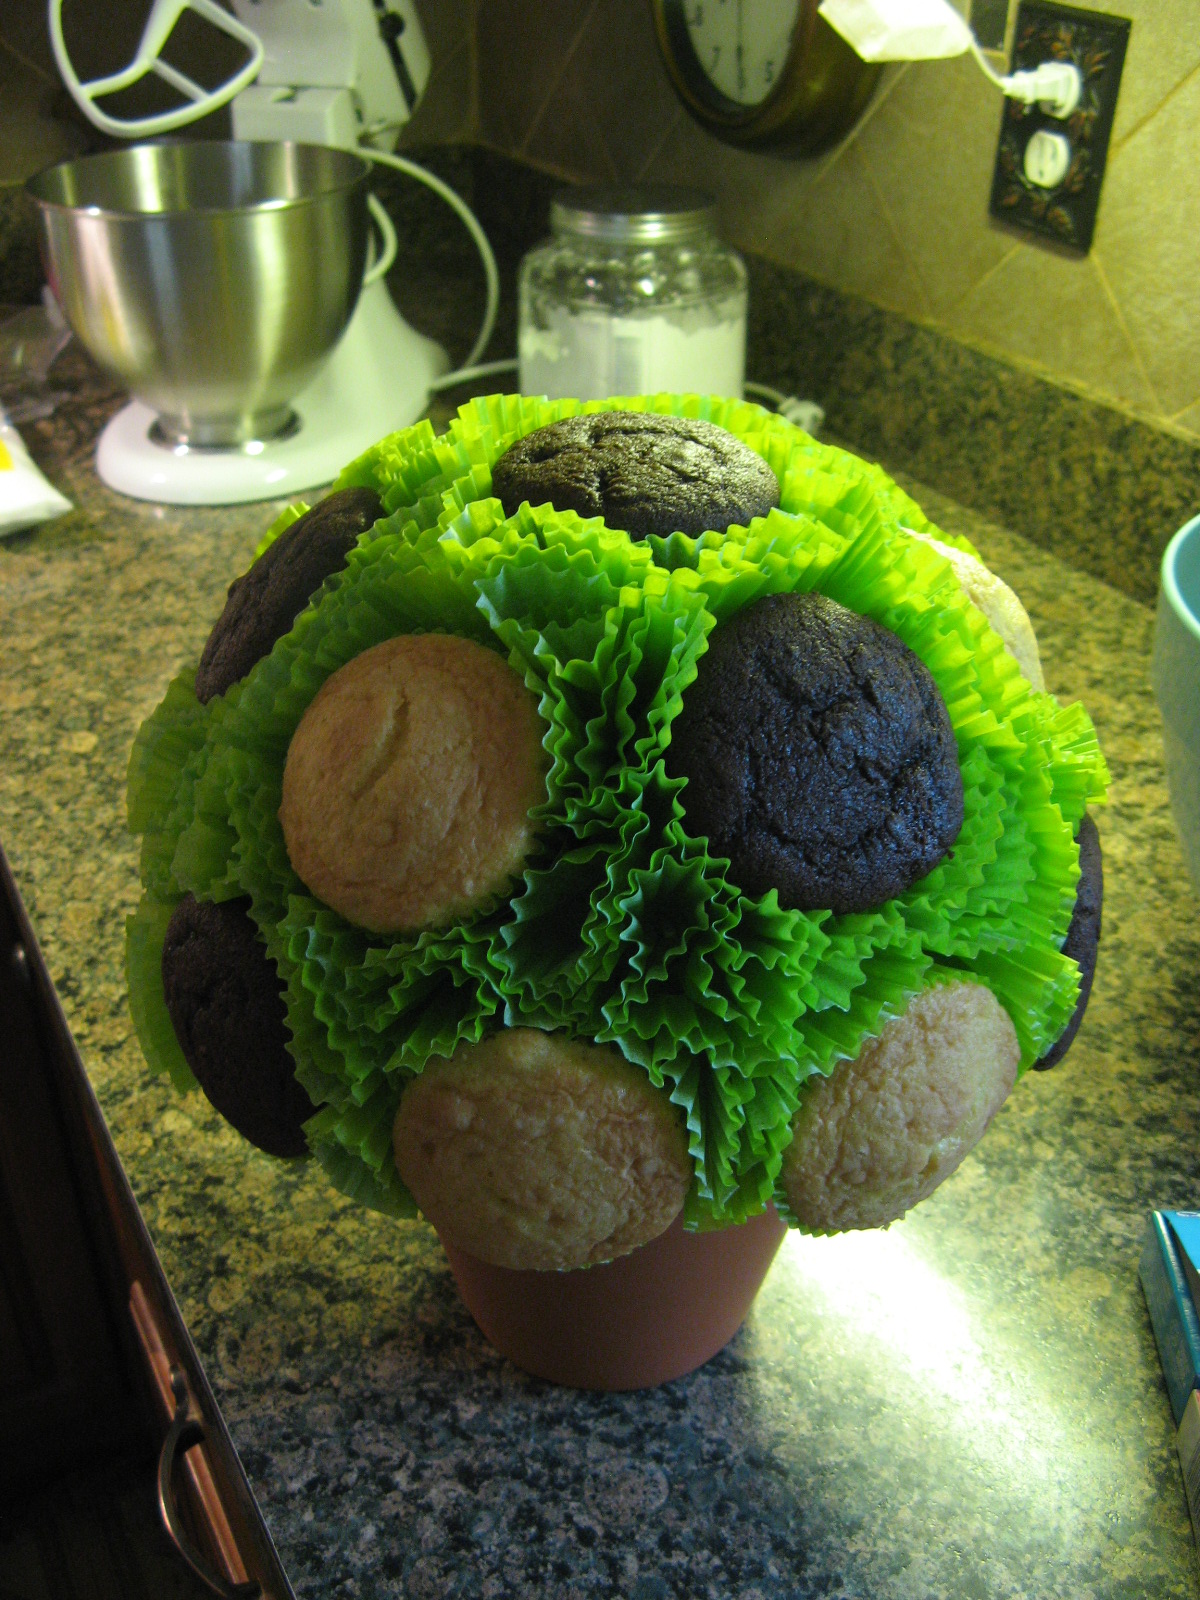
Next, bake your favorite cupcakes – I decided on Chocolate & Yellow cupcakes. Once they cooled I stuck one into each of the cups on the ball.
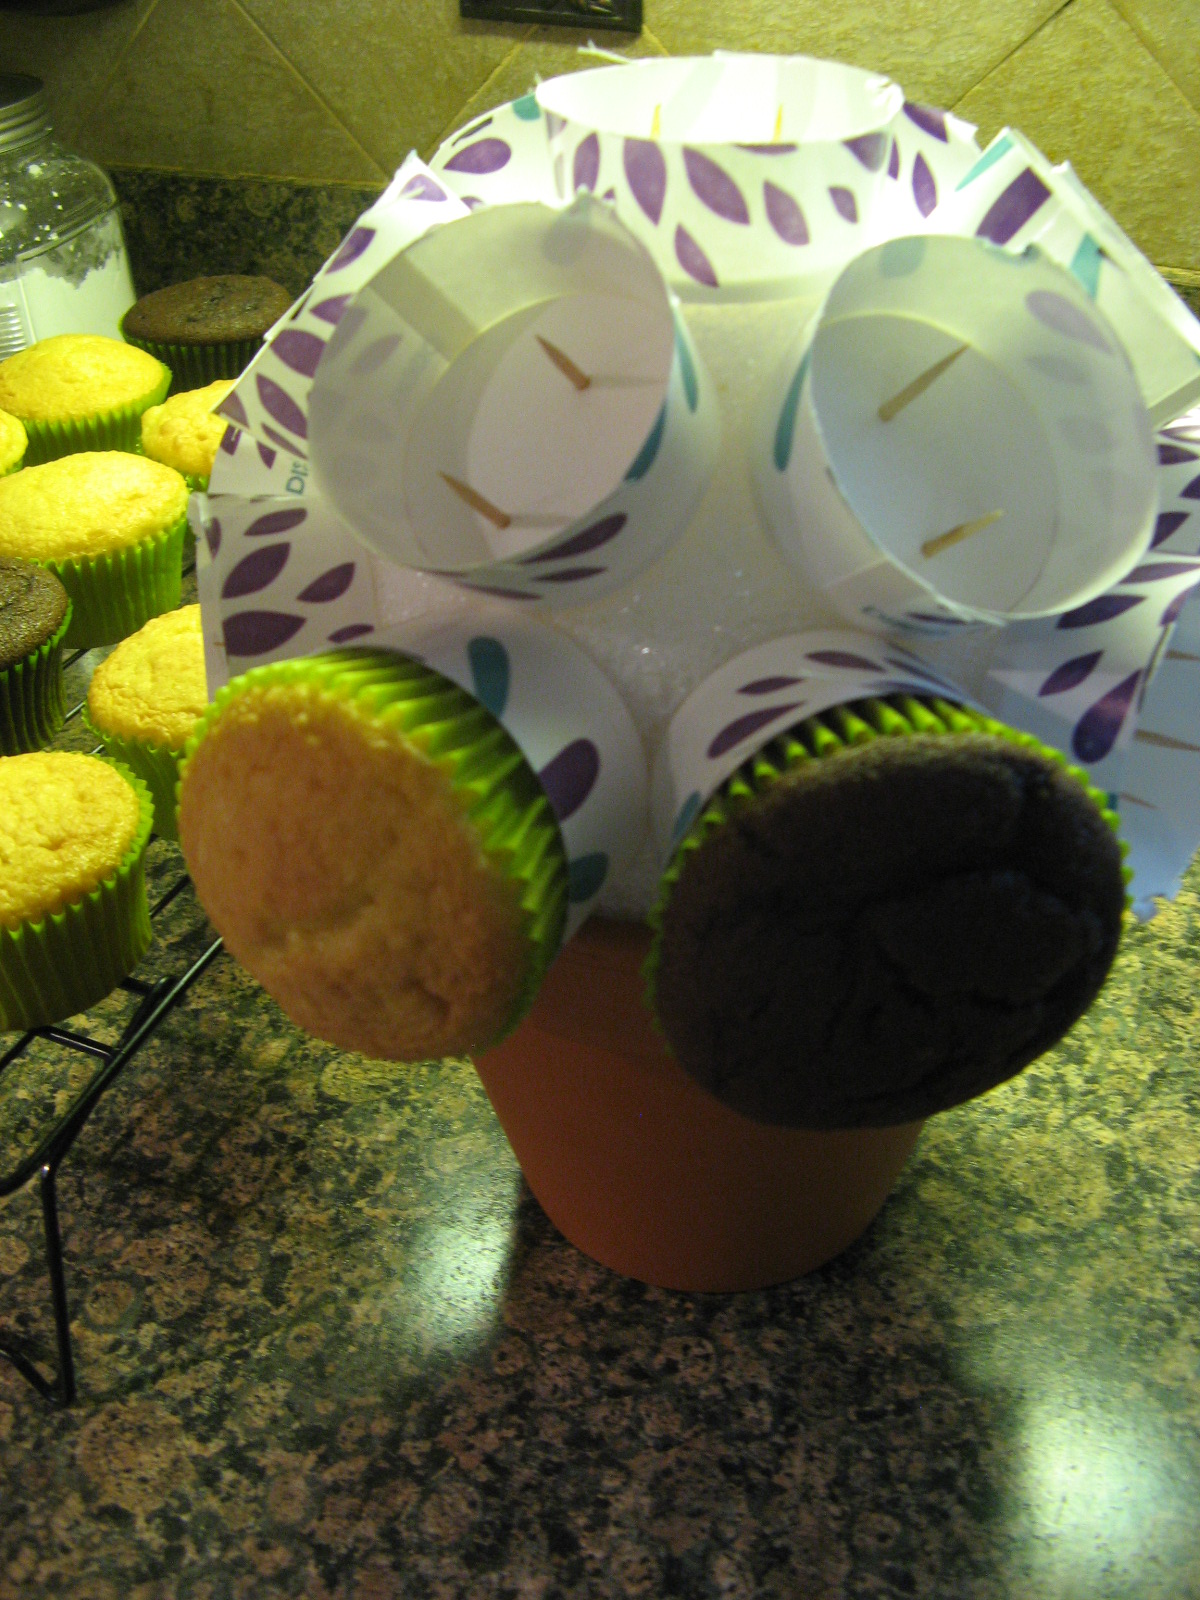
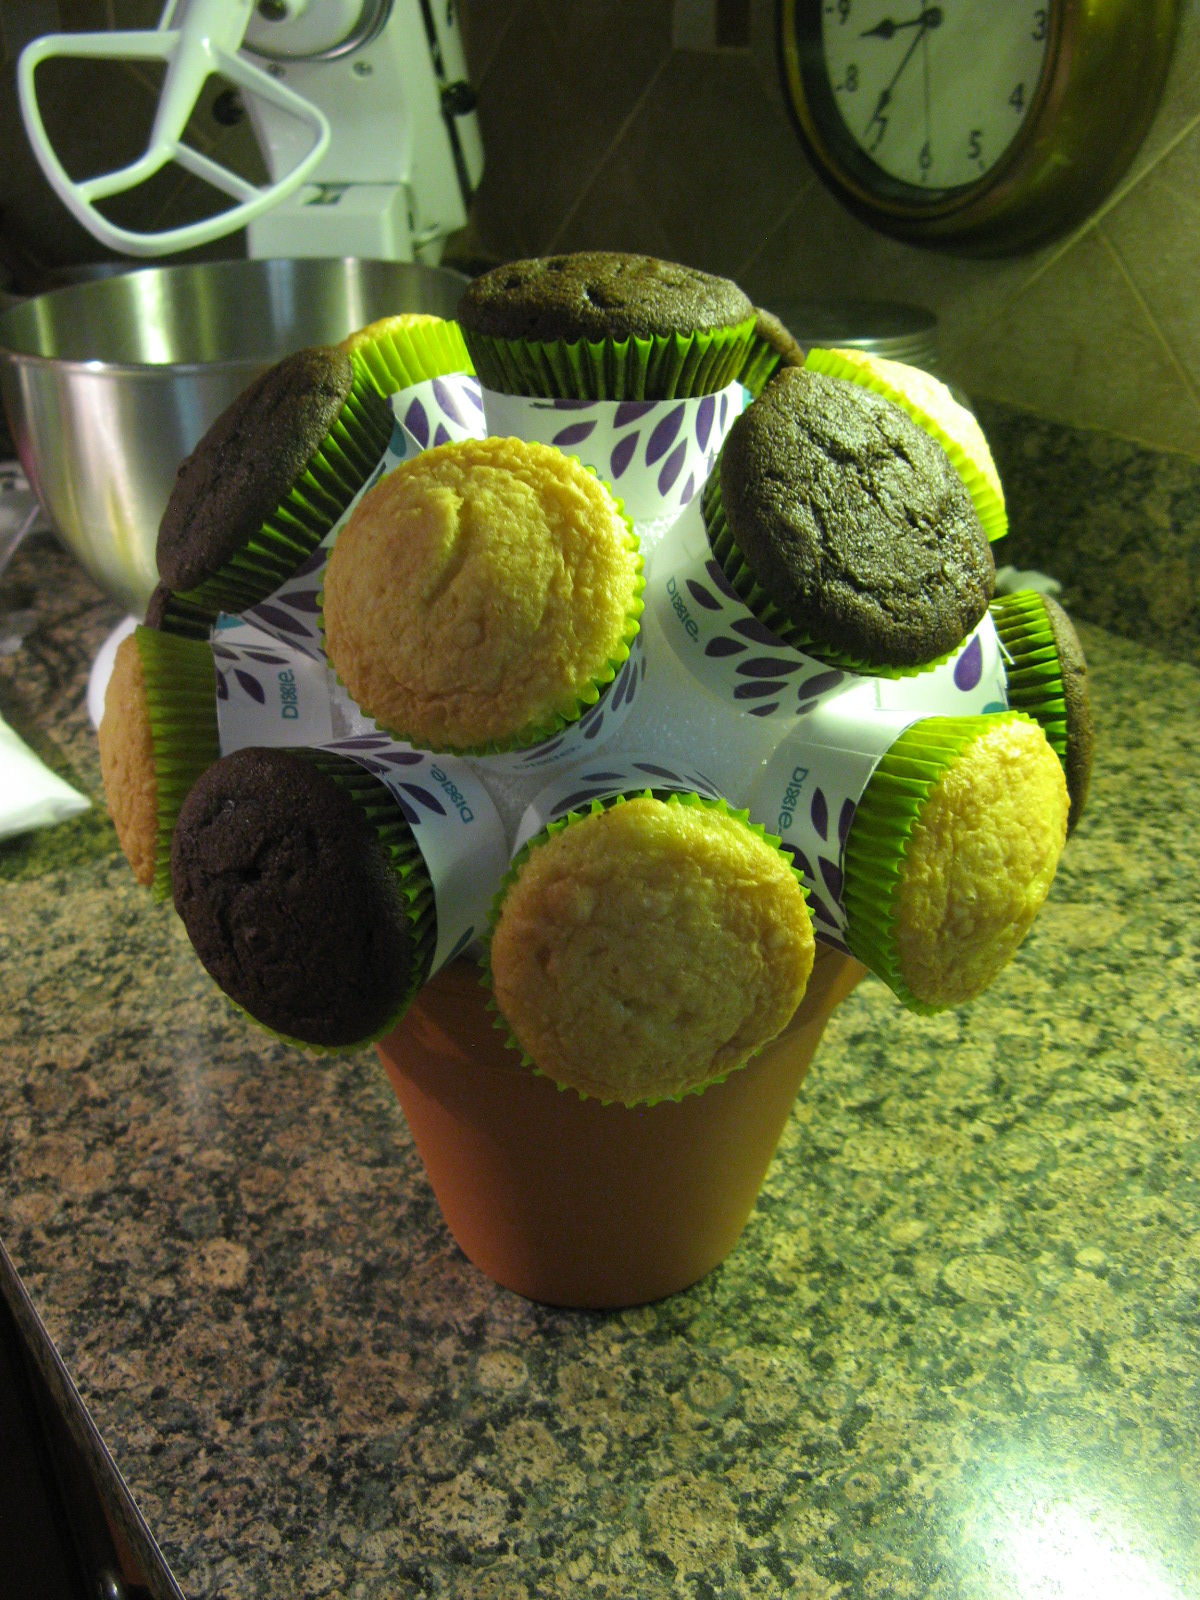
Now it’s time to fill the spaces between the cupcakes. Using green cupcake liners, I gathered them and began placing them in the empty spaces, using toothpicks to anchor them to the ball.
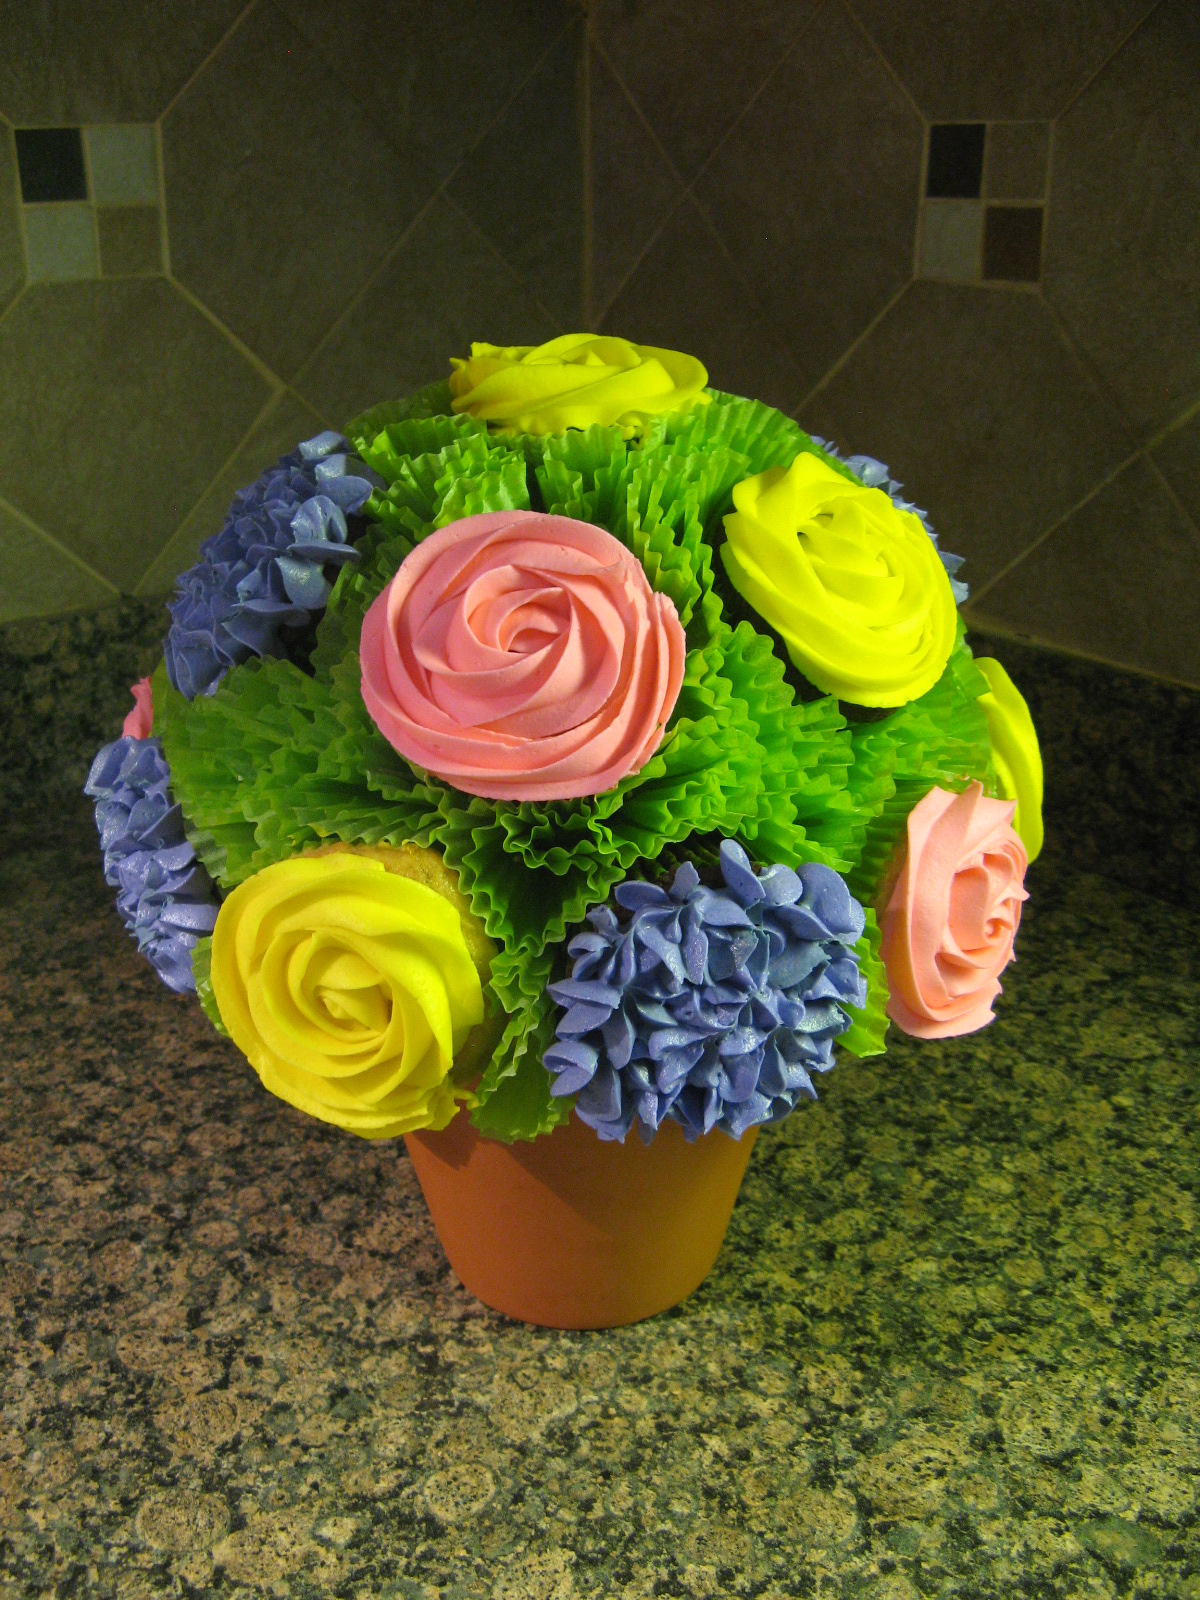
Next, the fun part – decorating the cupcakes. Since you will be piping flowers, make sure your frosting is firm enough to be piped. Your best bet is to make your own. My favorite frosting to use for piping and decorating is this Fluffy Vanilla Frosting. It’s the perfect consistency and tastes delicious. I used a Wilton 1M tip to creates the roses and a 2D tip to create the hydrangeas. Before you start piping the flowers on to the cupcakes just give them a little nudge to make sure they are all the way into the cups secured by the toothpicks.
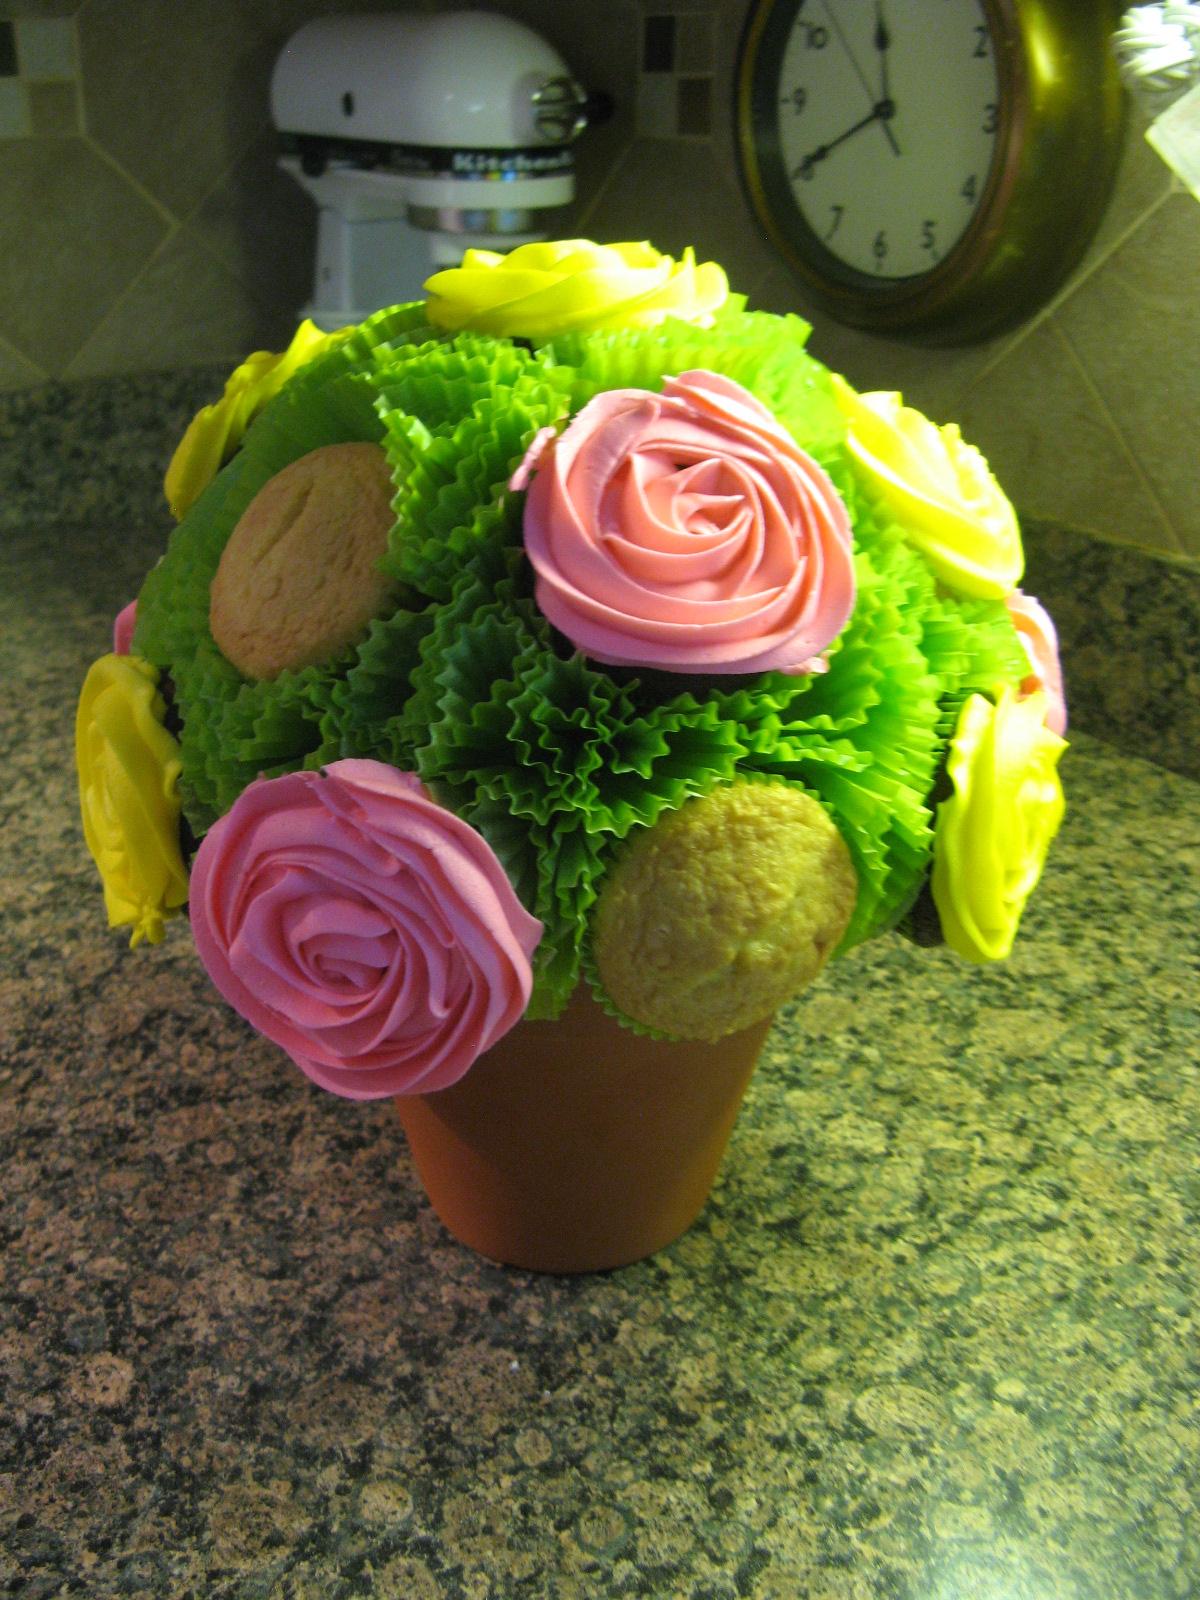
And finally… You have your Cupcake Bouquet. This is a nice gift for a birthday, a cute idea for a baby shower, or a nice alternative to flowers, etc.

One thought on “Cupcake Bouquet Tutorial”