Cheesy Garlic Monkey Bread

So this is sort of a continuation from yesterday’s post – Slow Cooker Marinara Sauce. I made the sauce to go along with today’s post… A Cheesy Garlic Monkey Bread. I originally came across this recipe in an issue of Rachael Ray Magazine last year. Well, the recipe was for a Basic Monkey Bread and then you had a few options to flavor the bread. I was partial to trying the Cheesy Garlic version.

The version in the magazine called for you to actually make the dough for the bread, but, to be honest working with yeast and me don’t always go over that well. So, when I saw a recipe that used Pillsbury Grands! Biscuits as the base for a monkey bread I knew I had to try it.

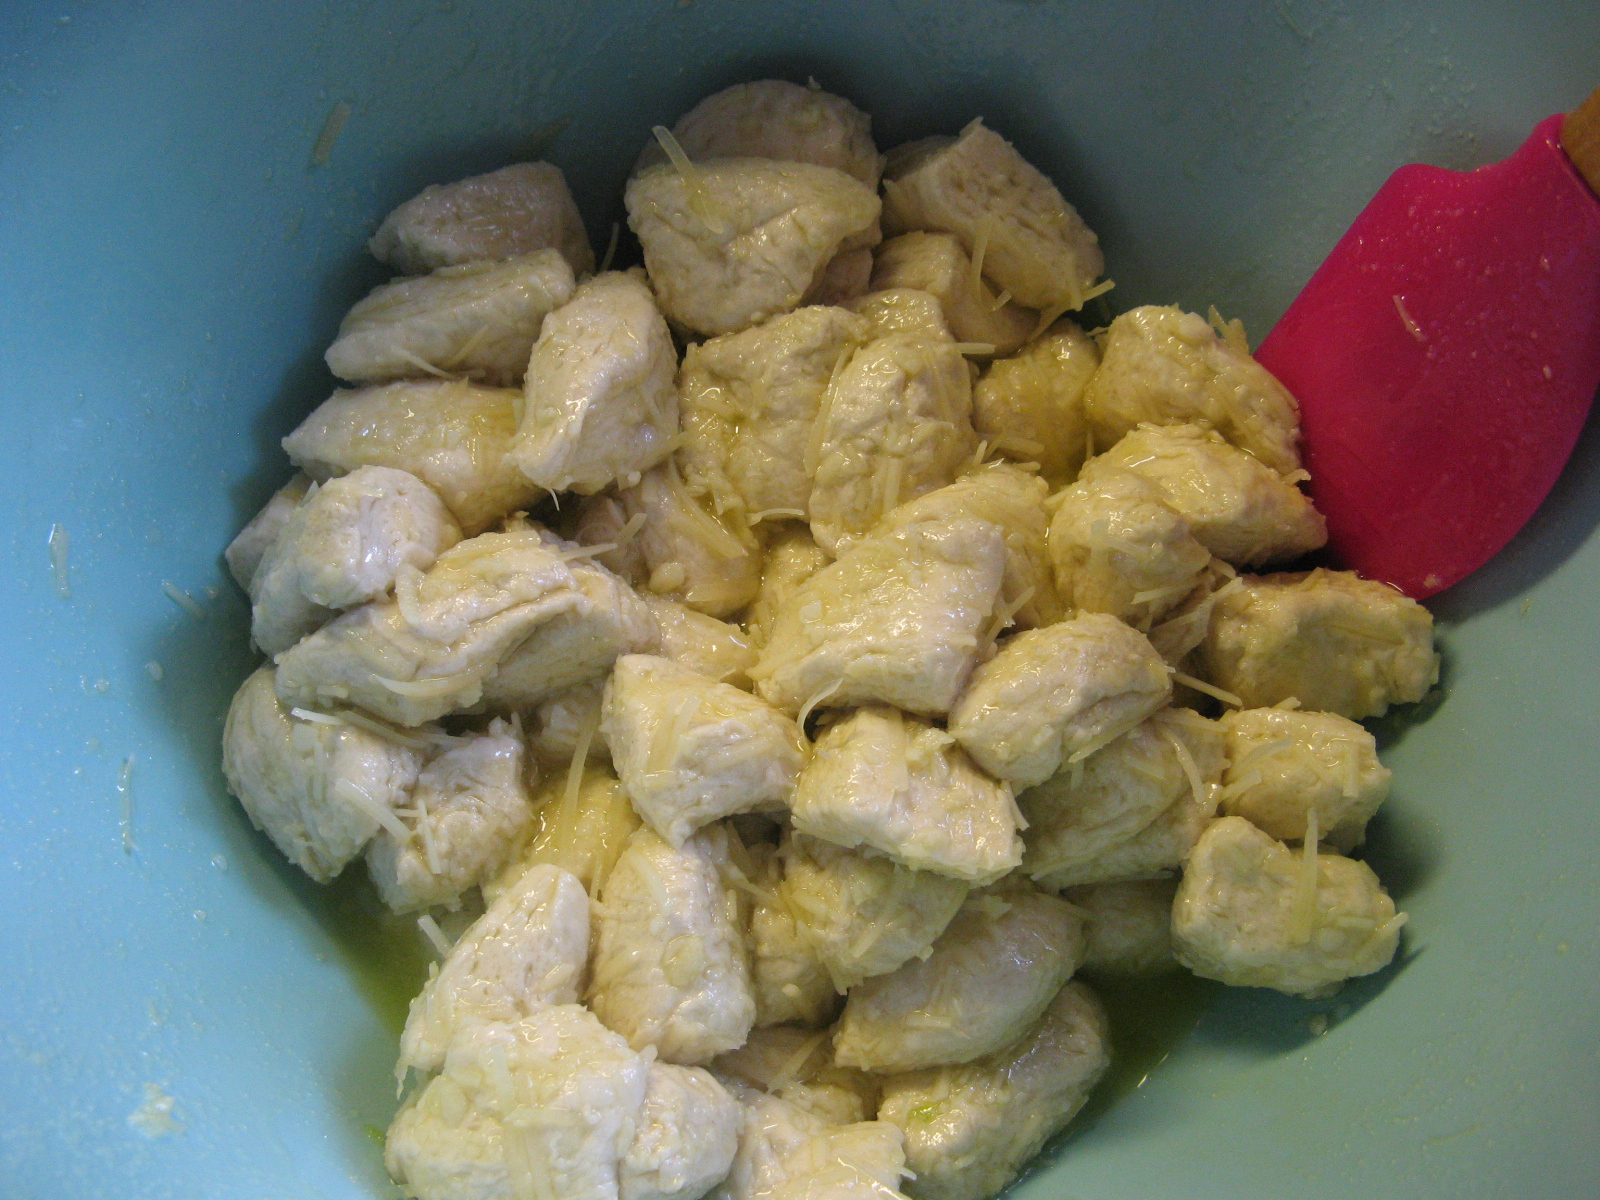
I began by combining olive oil, grated Parmesan, minced garlic and salt in a large bowl.

img_0412

Next, I cut each Grands! Biscuit into four equal pieces. I ended up using 2 cans of biscuits, each of which has 8 biscuits so I ended up with 64 pieces. After cutting the biscuits of the first can I placed them back in the refrigerator so they would stay cold while I cut biscuits from the second can. It’s best to work with the biscuits when they are cold, you don’t want them to become warm & sticky.

img_0416

I then tossed half of the quartered biscuits in the olive oil mixture and gradually added in the remaining quarters.

img_0417

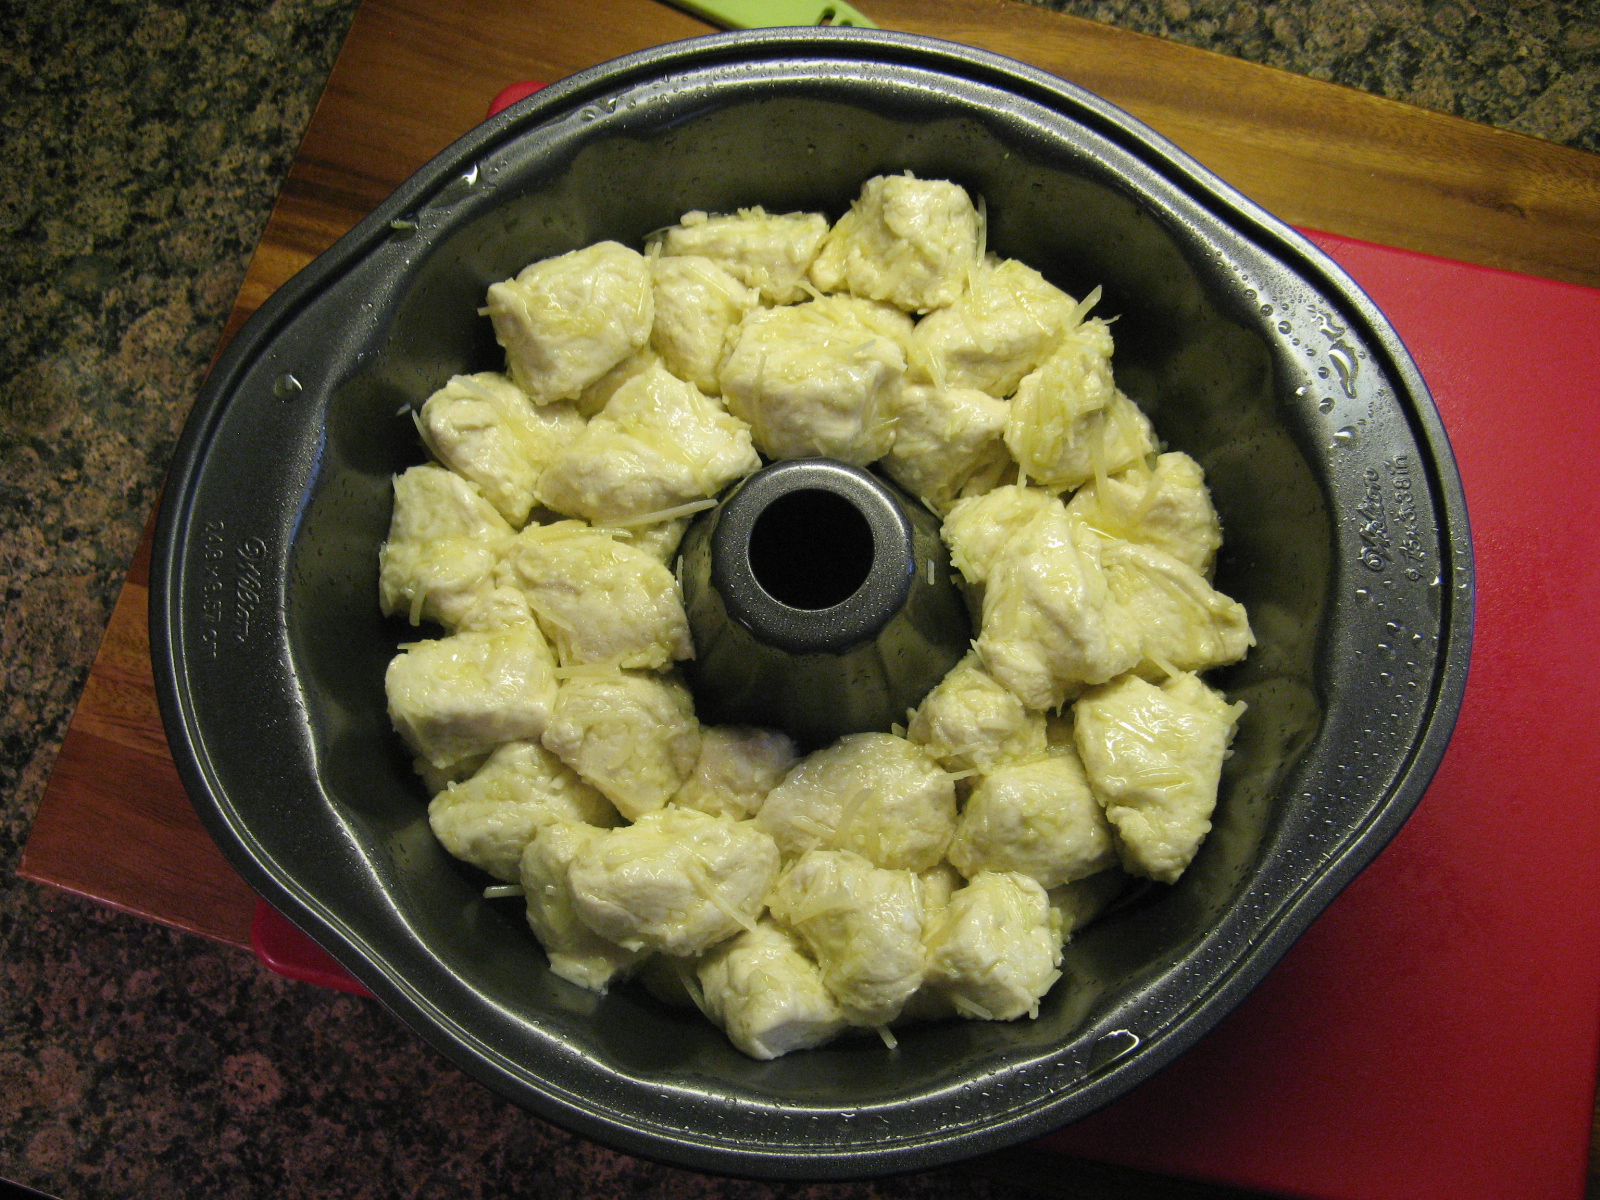
After spraying a Bundt pan with cooking spray, I layered the biscuit pieces into the pan. I opted to use my hands to spread the pieces into the pan to ensure they would be even throughout the pan.

img_0423

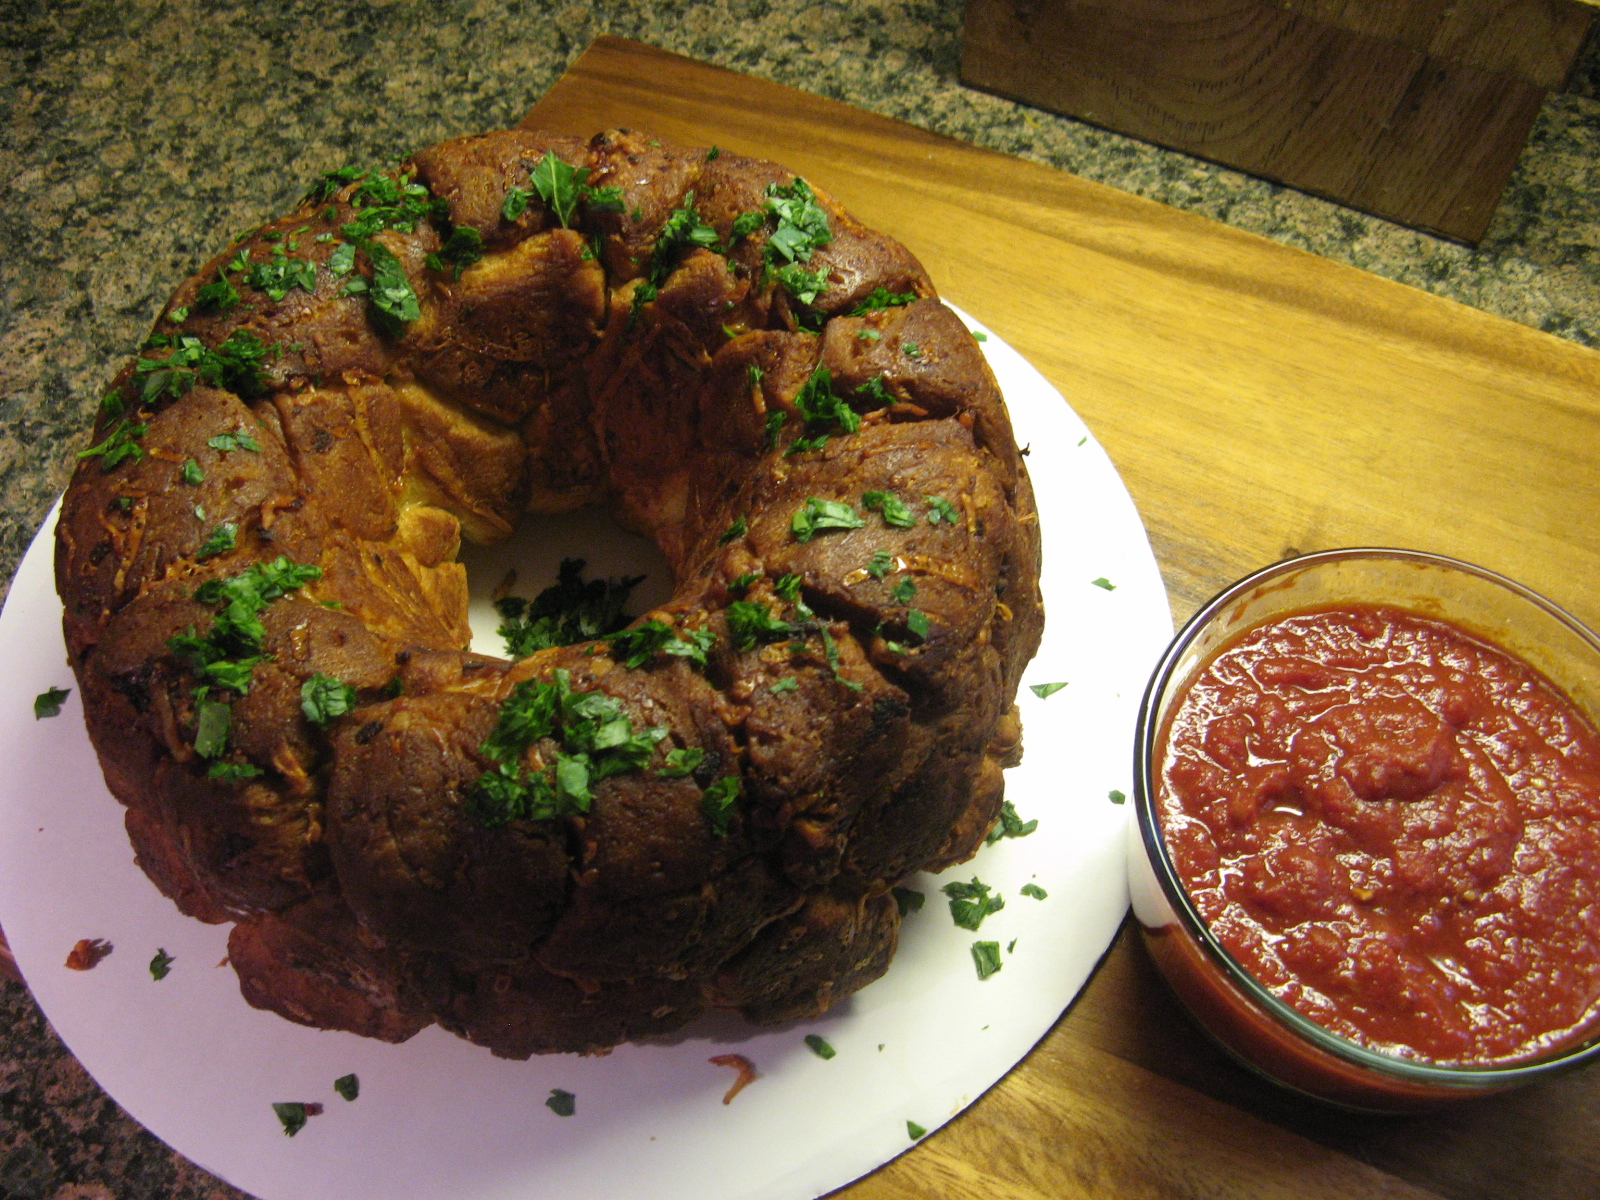
I then baked it in a 350F preheated oven for about 35 to 40 minutes. Until it was browned on top and I was sure that all of the biscuit pieces had cooked throughout the monkey bread. After letting it cool in the pan for a few minutes I inverted it and sprinkled it with freshly chopped parsley…

img_0431

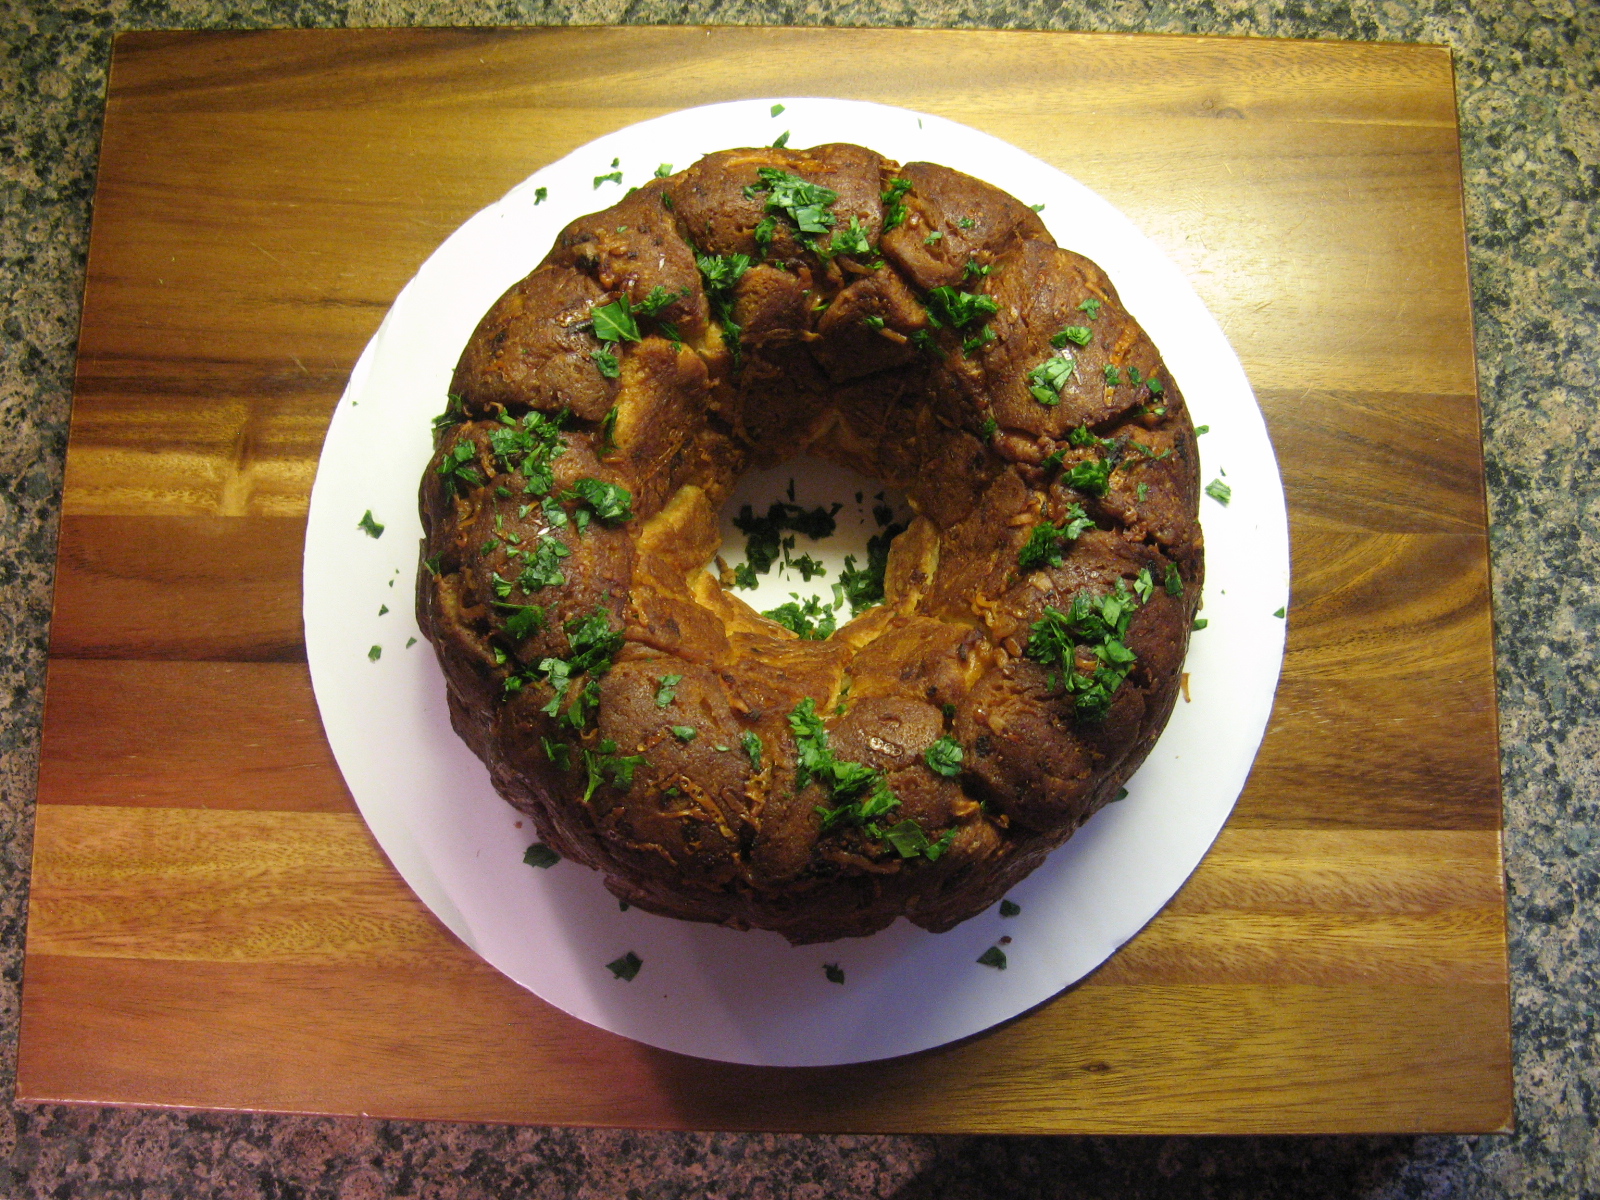
And a side of homemade marinara sauce.

img_0427


Cheesy Garlic Monkey Bread

Ingredients:

2 Cans (16.3 oz.) Grands! Original Biscuits

3/4 cup olive oil

1 cup grated Parmesan cheese

4 garlic cloves, minced

1 1/2 teaspoons salt

2 tablespoons chopped fresh parsley

Directions:

Preheat the oven to 350 F and butter a large Bundt pan.

In a large bowl combine the olive oil, parmesan cheese, garlic and salt and set aside.

Working with 1 can at a time, cut each of the biscuits into quarters. After cutting the first can place it back in the refrigerator while cutting the biscuits of the second can.

Fold half of the quartered biscuits into the olive oil mixture and gradually add in the remaining pieces.

Pile the biscuit pieces evenly into the prepared Bundt pan and bake for 35 to 40 minutes, until browned and cooked through.

Let cool for 5 minutes in the pan and then invert onto a large plate and sprinkle with parsley. Serve with marinara sauce for dipping.

Recipe Adapted From Rachael Ray Magazine


Sausage, Lentil and Kale Soup

There’s nothing like a delicious soup! And while there are plenty of delicious options available in cans, cartons and so forth at your local supermarket, making soup from scratch is such a better option and best of all…. the leftovers! I had this soup for lunch over the course of a week and by end of the week it was even better than the first day I had it.

I began by cooking a 1lb. of sweet Italian sausage meat in my Dutch oven over medium-high heat until it was beginning to brown. If you can find sausage meat in ground form as opposed to actual sausages it will save you some time and just make things easier so you don’t have to remove the meat from the casings. I then added in chopped onion and garlic and continued cooking everything until the onions were soften and the sausage was completed cooked.

img_0078

Next, I added in chicken stock, stirring and scraping to loosen any browned bits from the bottom of the pot. I then added in lentils, whole peeled tomatoes, salt and pepper and brought the whole thing to a boil. I then reduced the heat to medium-low and simmered the soup until the lentils had softened. As the soup simmered the tomatoes began to break down as well.

img_0079

And finally I added in baby kale leaves, stirring the soup constantly until the leaves had softened.

img_0080

Sausage, Lentil and Kale Soup

Ingredients:

1 lb. sweet Italian sausage meat*

1 cup chopped onion

2 garlic cloves, chopped

4 cups chicken stock

2 cups dried red lentils, rinsed

1 28oz. can whole peeled tomatoes, drained

1 teaspoon Kosher salt

1/2 teaspoon black pepper

5 cups loosely packed baby kale leaves

*If using sausages remove casings

Directions:

Cook the sausage in a Dutch oven (or your preferred pot for making soup) over medium-high heat, stirring often, until the meat crumbles and begins to brown. Add in the onion and garlic and continue cooking until the meat is cooked through and the onions have soften.

Add the stock, stirring and scraping the bottom of the pot to loosen any browned bits. Add the lentils, tomatoes, salt and pepper and bring to boil. Reduce the heat to medium-low and simmer until the lentils have softened.

Stir in the kale and cook, continue stirring until softened.

Recipe from Real Simple Magazine

Twice Baked Potato… In the Microwave

I made Twice Baked Potato a month or so ago for the first time the traditional way – in an oven. Just in case you don’t know, Twice Baked Potato is exactly what it says… A potato that’s baked 2 times. First you bake the potato, slice it in half, scoop it out, mix it with some toppings, spoon it back into the potato skins, top it with cheese and bake it again. And it’s delicious! But, I was left wondering if I can bake a potato in the microwave then why can’t make Twice Baked Potato in there also, so, I decided to try it out and I am so happy I did. It came out perfect and just as delicious.

I began by scrubbing two russet potatoes and pricking them with a fork a few times. Next, I baked them in the microwave. Luckily my microwave has a potato button, but, if yours doesn’t the average time is about 8-10 minutes.

img_0070

I let them cool for a few minutes and then sliced them in half and scooped out the inside.

img_0071

I mashed the potato with butter, sour cream and bacon bits. I then added in shredded cheddar cheese, milk, salt and pepper to taste.

img_0072

I then spooned the mixture into the potato skins and topped it with some more cheddar cheese.

img_0073

And finally I placed the potato back in the microwave and heated it for about 2 minutes, until the cheese melted.

img_0076

And that’s how simple it is to make Twice Baked Potato in the microwave!


Twice Baked Potato... In the Microwave

Ingredients:

2 medium russet potatoes

1/4 cup (1/2 stick) salted butter, sliced

1/4 cup bacon bits

1/4 cup sour cream

1/4 cup shredded cheddar cheese, plus more for topping

2 tablespoon milk*

salt and pepper

*I’ve used whole milk and 2% milk

Directions:

Scrub the potatoes and prick with a fork. Place the potatoes on a microwave safe plate and bake in the oven, using your microwave’s potato button, or for 8 – 10 minutes.

Let potatoes cool for a few minutes and then slice them in half. Scoop out the insides (be careful not to tear the potato skins) and place in a bowl with the butter, bacon bits and sour cream. Mash these four ingredients together and then add in the cheese, milk, salt and pepper.

Spoon the mixture back into the potato skins and top with cheese and return to the microwave for another minute or two until the cheese has melted.

Recipe modified from The Pioneer Woman on The Food Network

Tortellini with Pumpkin Alfredo Sauce

Every now and then I do make a pumpkin dish that is not a dessert. I’ve actually made this dish quite a few times (I mentioned it in a post way back in 2013, but, never actually blogged about it) but, this was the first time I followed the recipe and used tortellini as opposed to another type of pasta – usually penne – and I must say it made a huge delicious difference! Some dishes are just better with a little extra cheese in them. One thing though, the leftovers of this dish do taste good, but, it’s much better when you eat it right after you make it because the sauce is super creamy then.

img_0018

Tortellini with Pumpkin Alfredo Sauce

Ingredients:

2 9-ounce packages cheese tortellini*

1 tablespoon unsalted butter

1 small shallot, finely chopped

1/2 cup canned pure pumpkin

1/8 teaspoon of nutmeg

1 1/4 cups heavy cream

1/4 cup grated parmesan cheese, plus more for topping

Freshly ground pepper

Kosher salt

Directions:

Bring a large pot of salted water to boil and cook the tortellini according to the package directions. Reserve 1/2 cup of the cooking water and then drain the pasta.

While the tortellini is cooking, melt the butter in a skillet over medium-high heat. Add the shallot and cook, stirring until slightly soft. About 2 minutes, making sure not to burn the shallots.

Add the pumpkin and the nutmeg and continue cooking for about another minutes. Stir in the cream and bring to a low boil. Reduce the heat to medium low and let simmer while stirring until slightly thickened, about 5 minutes.

Finally, add in the cheese and continue cooking until thick. Season with the salt and pepper.

Add the tortellini to the skillet with the pumpkin sauce and toss to coat, adding some of the reserved pasta water to loosen the sauce**. Serve topped with parmesan cheese.

*I used a 20oz. package of Buitoni Three-Cheese Tortellini

**I used about 1/4 cup of the reserved water

Recipe from Food Network

Chicken Egg Rolls

There’s nothing like making homemade takeout… you know those staples like pizza, burgers, Mexican and probably one of the most popular Chinese. I don’t know about you but one of the things I like the most from my Chinese take-out are the egg rolls. And today I am bringing you a super simple and absolutely delicious recipe to making egg rolls at home!

First, in a medium bowl, I combined shredded chicken (I bought a cooked rotisserie chicken from the supermarket), broccoli slaw (which you can find in your local supermarket in the bagged salad area), cilantro, scallions, and freshly grated ginger along with teriyaki sauce, duck sauce and vegetable oil.

IMG_0197

Next, with the egg roll wrapper positioned in a diamond shape in front of me I placed about two tablespoons of the mixture in the lower corner.

IMG_0198

To roll, I folded up the bottom corner, then each of the sides (it’ll look like an envelope) and then dabbed the top edges with water and then rolled to enclose it.

IMG_0200

Once I had finished rolling all of the egg rolls I heated vegetable oil in my cast iron skillet. I’ll say it was about 1/4 of the way up the sides of my skillet. Now, I’m not one to take the temperature of the oil when frying food. My trick, place a wooden spoon in the center of the oil and if bubbles form around it you know the oil is ready. This is definitely a lot safer than my other “trick,” flicking water into the oil. Not a lot of course, just enough to get a reaction. So, once my oil was ready I fried the egg rolls in batches, turning, about 3-4 minutes until they were golden brown. I then transferred them to a paper towel-lined plate to drain.

IMG_0201

I served the egg rolls with a broccoli slaw salad made by combining the remaining broccoli slaw, cilantro and scallions in a large bowl and tossing it with teriyaki sauce, duck sauce, vegetable oil and rice vinegar. And of course with a side of duck sauce for dipping! YUM! The fresh grated ginger is really the standout ingredient in these egg rolls… You taste it, but, not as an overpowering ingredient but as one that really brings all the flavors together.

IMG_0206

And it wasn’t long before I made these again (less than a week later) but without the chicken, yet, they were just as delicious. I am thinking of trying shrimp next.


Chicken Egg Rolls with Broccoli Slaw

Ingredients:

1 1/2 cups shredded rotisserie chicken, skin removed

4 cups broccoli slaw (about 8 ounces)

1/2 cup roughly chopped fresh cilantro

4 scallions, sliced

2 tablespoons grated peeled fresh ginger

3 tablespoons teriyaki sauce

3 tablespoons duck sauce, plus more for serving

2 tablespoons vegetable oil, plus more for serving

8 egg rolls wrappers

1 tablespoon rice vinegar


Directions:

Mix the chicken, 2 cups broccoli slaw, 1/4 cup cilantro, 2 scallions, the ginger, 2 tablespoons each of teriyaki sauce and duck sauce and 1 tablespoon of vegetable oil in a medium bowl.

Heat about 1/4 inch of vegetable oil in a large skillet over medium-high heat until the oil is hot but not smoking. While the oil is heating, arrange the chicken mixture in the center of each egg roll wrapper.

Tuck in the ends and roll to enclose, dab the edges with water and continue to roll to enclose.

Once the oil is hot, fry the egg rolls in batches, turning, 3 to 4 minutes. Transfer to a paper towel-lined plate to drain.

To make the slaw, combine the remaining broccoli slaw, cilantro and scallions in a large bowl. Add the remaining tablespoon each of teriyaki sauce, duck sauce and vegetable oil along with the rice vinegar, toss. Serve with the egg rolls.

**The original broccoli slaw recipe included a 14-ounce can of baby corn which I opted to leave out.

Recipe from Food Network

Baked Onion Rings

I do my best to avoid frying anything; not because of health reasons but because I hate having to clean up oil splatter and inevitably I always end up with an oil stain on my shirt no matter what efforts I take to avoid it. So, whenever I can make one of my favorite foods that normally has to be fried baked I’m all for it – thank heaven for my doughnut pan! Today’s not fried but baked recipe I would like to share with you is Onion Rings!

To begin I sliced a small sweet onion and separated the rings. You can use any sweet onion to make these: Vidalia, Walla Walla, etc… Random fact, sweet onions have a lower sulfur content than other onions so you are less likely to cry when slicing them. I know this from experience! When I cook and am using onions they are always the last thing I cut so I can ensure I won’t end up slicing my finger while cutting other things because I am trying to control my onion crying fit.

IMG_9145

Next I combined panko bread crumbs with olive oil, salt and pepper and baked it on a rimmed baking sheet until they were golden brown. I then transferred them to a shallow bowl. I also put flour and two lightly beaten eggs in shallow bowls as well and was then ready to prep my onion rings for baking.

IMG_9148

I dipped the onion rings in the flour, then the eggs and finally in the bread crumb mixture and placed them on a baking sheet that I rubbed with olive oil. Once the sheet was full I baked the rings in a pre-heated 450 F oven for 12 minutes, flipping the rings once.

IMG_9151

Right out of the oven….

IMG_9153

After letting them cool for a few minutes I enjoyed them with a side of ranch dress – thank-you Johnny Rockets for introducing me to that winning combination! In case you are wondering, baking the rings still gives the crumb coating that crunch you are familiar with when frying them, but, I also think it makes the onion itself tender and sweeter!

IMG_9179

Baked Onion Rings

Ingredients:

1 1/2 cups panko bread crumbs

1/4 cup olive oil

1/2 teaspoon salt

1/4 teaspoon black pepper

1/3 cup all-purpose flour

2 large eggs, lightly beaten

1 small sweet onion, sliced and rings separated

Directions:

Preheat the oven to 450 F. In a small bowl combine the bread crumbs, 2 tablespoons of the olive oil, salt, and black pepper. Transfer the crumbs to a rimmed baking sheet and bake until golden brown, 3 to 5 minutes, tossing once. Transfer the crumbs to a shallow bowl. In two other shallow bowls place the flour and eggs.

Rub the remaining oil on 2 rimmed baking sheets. Dip the onion rings in the flour first, then the eggs (allowing any excess to drip off) and finally in the bread crumb mixture. Bake on the prepared baking sheets for 12 to 14 minutes, turning once.

Serve with your favorite dipping sauce; my go-to for onion rings is ranch dressing.

Recipe from Real Simple

1 Can of Pumpkin, 2 Recipes, 1 Day

My apologies to anyone who is not a fan of pumpkin as this is my second pumpkin post this week and third in a month! For those of you who can’t get enough of pumpkin read on and for those of who you could do without another pumpkin recipe just scroll down and look at the yummy pictures. Oh, as a warning there will be at least one more pumpkin recipe coming soon.

For most pumpkin recipes a full can of pure pumpkin is not necessary so you’re left with a cup or two remaining. What do you do? You can put it in a Tupperware and hope you remember to use it before it goes rancid. Or, the best solution obviously would be to use it up right away. Sometimes that’s easier said than done depending on what recipes you have on hand and/or what you’re in the mood for. But, if you don’t mind enjoying some pumpkin in the morning and then again at dinnertime I have just the recipes to use up that one can of pumpkin in a day! Pumpkin French Toast and Pumpkin Risotto. Both of which require a bit of time and the risotto some patience so they are best suited for those times you have extra time and patience on your hands.

I began the day by making the Pumpkin French Toast. I came across this recipe on People magazine’s website and it comes from fellow blogger Sally McKenney Quinn of Sally’s Baking Addiction. I began by whisking together milk and eggs in a bowl and then whisked in the pumpkin, maple syrup, vanilla extract, cinnamon and pumpkin pie spice. Once it was well combined I transferred the mixture to a shallow bowl. After slicing day old challah bread into fairly thick slices I dipped them into the mixture, a few seconds on each side, and then cooked them on a skillet that I heated on medium heat and greased with butter. I enjoyed them topped with butter and more maple syrup and it was an absolutely delicious breakfast.

IMG_9285

Later in the day I used up the rest of the pumpkin by making Pumpkin Risotto. I came across this recipe on People as well, but, in their magazine as opposed to their website. I began by doing a little prep work… I measured out 1 cup of Arborio rice & pumpkin, chopped a small yellow onion, minced 1 garlic clove and chopped fresh sage.

IMG_9331

After bringing 5 cups of vegetable broth to a gentle boil in a medium saucepan I let it simmer while I sautéed the onions in olive oil in a large skillet. Once the onions were soft I added in the garlic and cooked it for about a minute and then added in the rice and 1 cup of the warmed broth. I reduced the heat of the skillet from medium to medium low so the mixture could simmer while I stirred it often. Once the broth had been mostly absorbed I added in another cup of broth and continued stirring until once again it was almost absorbed. I continued doing this until I finished the broth and the rice was tender. I will say that even without the pumpkin the risotto tasted delicious at this point, so if you’re not really a fan of pumpkin don’t add it and you’ll have a delicious basic risotto. Once the rice was tender I stirred in the pumpkin, salt and nutmeg. I also seasoned it with pepper and continued stirring it until it was hot and then finally topped it with the chopped sage.

IMG_9335

Pumpkin French Toast

Ingredients:

3 large eggs

1 cup whole milk

1/2 cup pumpkin puree

1/4 cup maple syrup

1 teaspoon vanilla extract

1/2 teaspoon ground cinnamon

1/2 teaspoon pumpkin pie spice

1 Challah bread, sliced into 8 slices

Directions:

Heat a skillet over medium heat.

In a large bowl whisk together the eggs and milk. Once combined, add in the pumpkin, maple syrup, vanilla extract, ground cinnamon and pumpkin spice. Continue mixing until well combined and then transfer to a shallow dish.

Grease the skillet.

Take one slice of the challah bread and dip it into the mixture and let sit for a few seconds, flip the bread and let soak for a few more seconds. Transfer to the prepared skillet and let cook until golden brown on each side. Repeat with each slice.

Best served warm with butter, maple syrup, regular syrup, confectioners’ sugar or your favorite topping.

Recipe can be found here.

Pumpkin Risotto

Ingredients:

5 cups vegetable broth

3 tablespoons olive oil

1 small yellow onion, finely chopped

1 clove garlic, minced

1 cup Arborio rice

1 cup canned pure pumpkin

1 teaspoon kosher salt

1/8 teaspoon nutmeg

1/2 tablespoon chopped fresh sage

Freshly ground black pepper

Directions:

In a medium saucepan over medium-low heat bring the broth to a gentle boil and let simmer while preparing the recipe.

Heat a large skillet over medium-high heat and add olive oil. Reduce the heat to medium and sauté onions for about 3 to 4 minutes, until soft. Add the garlic and cook for addition minute, until fragrant. Stir in the rice and 1 cup of the heated broth and reduce the heat so the mixture simmers. Stir often, until most of the liquid has been absorbed. Repeat with an additional cup of broth and continue stirring. Repeat this step until the rice is tender, about 20-30 minutes.

Stir in the pumpkin, salt and nutmeg. Season with the pepper and stir the risotto until hot. Top with the sage and serve.

Recipe can be found in Chloe Coscarelli’s book Chloe’s Vegan Italian Kitchen

A Quick & Easy Bolognese

As the temperatures begin to drop our need and desire for hearty and comforting dishes begins to rise. There’s nothing like coming in from the cold with a nice hot bowl of soup waiting for you. That’s my usual go-to after a morning of shoveling, but let’s not talk about snow so early in the season. We haven’t even had our first frost yet! And just as comforting as soup is pasta and today I have a recipe for you for a quick and easy Bolognese. I came across it in a recent issue of Food Network Magazine where they coined it Weeknight Bolognese. I’m calling it quick and easy because I was able to make twice in one day without breaking a sweat. Why did I make it twice in one day you may be wondering? Well, it’s not because it was so delicious I finished it one sitting – don’t get me wrong, it was delicious – but, it was because I made a MAJOR snafu! If you didn’t know I am more of baker than a cook. The cooking thing is still fairly new to me and I have a lot to learn, like you shouldn’t substitute cooking wine for a dry red wine in any recipe. That’s why I made this recipe twice. The first time I used cooking wine in lieu of dry red wine and it was atrocious and incredibly salty. At first I couldn’t figure out what I had done wrong, but, a quick Google search let me know. I believe I may have made this mistake once before with another recipe but, it’s not coming to me right now. At least I know for future cooking endeavors!

So, on my second go around I had a delicious dinner to eat and with the temps a little cooler in the evening it was quite comforting.

IMG_9197

A Quick and Easy Bolognese

  • Servings: 4 to 5
  • Print

Ingredients:

2 tablespoons olive oil

1 pound lean ground beef*

4 garlic cloves, minced

1 tablespoon dried oregano

1/4 teaspoon crushed red pepper flakes

1 1/4 cups dry red wine**

1 28-ounce can of crushed tomatoes

2 tablespoons tomato paste

Kosher salt and black pepper

3/4 pound dried pasta, such as orecchiette or small shells

1/4 teaspoon ground nutmeg

1/4 cup chopped fresh basil leaves

1/4 cup heavy cream

1/2 cup freshly grated Parmesan cheese, plus extra for serving

*I used a 93% / 7% split

** I used Merlot

Directions:

Heat the olive oil in a large skillet over medium-high heat. Add the ground beef and cook, crumbling the meat with a wooden spoon until the meat has lost its pink color and has begun to brown. Add in the garlic, oregano, and red pepper flakes. Pour in 1 cup of the red wine, the crushed tomatoes, tomato paste, 2 teaspoons of salt and 1 teaspoon of black pepper, stirring until combined. Bring to a boil, then lower the heat and let simmer for 10 minutes.

Bring a large pot of water to boil and cook the pasta according to the package directions.

While the pasta is cooking finish the sauce by adding in the nutmeg, basil, cream and the remaining 1/4 cup of wine and continue simmering for 8 to 10 minutes, stirring occasionally until thickened.

When the pasta is cooked, drain and pour into a large serving bowl and top with the sauce and 1/2 cup of the Parmesan and toss well. Serve hot with extra Parmesan on top.

Recipe from Food Network

Deep-Dish Margherita Pizza

While I am partial to a thin and crispy crust when it comes to my pizza, once in a blue moon I want something with a little more bite to it, especially when it sounds super simple to make. A while back I came across a recipe for a deep-dish pepperoni pizza using a cake pan, and with these hot and humid days upon us the last thing I really want to do is make something complicated for dinner so this was right up my alley. I do my best to avoid using my oven when it’s too hot, but, this pizza was an exception since the total oven time was less than twenty-five minutes and prep time was just under ten minutes since I opted to make a Deep-Dish Margherita instead.

IMG_8996

To make things even easier for myself I used store-bought refrigerated pizza dough that I brought to room temperature prior to using. While the dough was “warming” I made the pizza sauce by combining whole peeled tomatoes (crushed by hand), olive oil, grated garlic, crushed red pepper and salt. I set this aside so the flavors could marinate and then thinly sliced some fresh mozzarella. Meanwhile, I preheated my oven to 475 F with an inverted cookie sheet on the bottom shelf and brushed the bottom and sides of a 9-inch cake pan with olive oil.

Once the dough was ready I stretched it into the cake pan, placed it on top of the inverted cookie sheet and baked it in the oven for about 10 minutes, until it was puffy and just starting to brown. After removing it from the oven I topped it with the sauce leaving about a 1/2 inch border. I then topped it with the fresh mozzarella and placed it back in the oven – on top of the cookie sheet again – and baked it for another 10 minutes. When I removed it from the oven I was a little scared that something had gone wrong. My pizza was completely puffed up, but, I allowed it to sit for a few minutes and thankfully it deflated and looked “normal.”

IMG_8997

And I’ll admit it’s not the best looking pizza, but, it was delicious! This may be my go to pizza sauce next time I make pizza!

Deep-Dish Margherita Pizza

Ingredients:

1 pound refrigerate pizza dough, at room temperature

1 14.5 oz. can whole peeled tomatoes, crushed by hand

2 tablespoons olive oil, plus an additional 2 tablespoons to brush the pan

2 garlic cloves, grated

1/4 teaspoon crushed red pepper

1 teaspoon salt

4 ounces fresh mozzarella, thinly sliced

Directions:

On the bottom oven rack place an inverted cookie sheet and preheat the oven to 475 F. Brush the bottom and sides of a 9-inch cake pan with 2 tablespoons of olive oil. Press the dough into the pan and bake for 10 minutes, until puffy and lightly golden.

Combine the tomatoes, remaining olive oil, garlic, crushed red pepper and salt in a large bowl and allow the flavors to marinate for a few minutes.

After removing the pizza crust from the oven, top with the sauce*, leaving a 1/2 inch border, and top with the fresh mozzarella. Return to the oven for another 10 minutes, until the cheese is bubbling.

Let the pizza cool for 5 minutes before slicing.

*You will have extra sauce.

Modified from here and here

Portobello Mushrooms Stuffed With Caprese Salad

While browsing through my Instagram feed last week I came across a picture that made me stop and double-tap immediately! If you’re on Instagram and you’re not following Foodgawker you should definitely go check them out and start following them. They post amazing pictures of food that you can get the recipes to by visiting their website. And most of the recipes are ones that you can easily make in your home kitchen – which we can all agree is very important! If you love quick recipes, mushrooms, tomatoes and mozzarella this is the recipe for you! And if mushrooms are not your thing – I think it’s something that people either love or hate – but if you love Caprese salad, you may want to think about roasting the mozzarella and tomatoes next time you make it – it really enhances the flavors.

IMG_8438

I began by cleaning out the gills of the mushrooms and wiping them with a damp paper towel. To remove the gills I used a small spoon to scoop them out. Now, I know there are some people who opt not to clean out the gills, and I did a little research (a quick Google search) as to which is the proper way to eat Portobello’s and it really comes down to personal preference. For me, I prefer them gone because sand could be trapped within the gills and the sand is not going to come out when you cook them and I just think they look “cleaner” when the gills are gone.

IMG_8430

Next, I melted butter with two cloves of crushed garlic in the microwave and brushed the garlic butter on the bottom of each of the mushrooms.

IMG_8433

Once the mushrooms were prepped I sliced grape tomatoes and fresh mozzarella into thin slices and placed them inside of the mushrooms.

IMG_8436

With the broil set to high I placed the mushrooms in the oven and broiled them for about ten minutes, until the cheese was melted and beginning to brown.

IMG_8437

While the mushrooms were in the oven I made a balsamic glaze to drizzle over them. I combined balsamic vinegar and brown sugar in a small saucepan and brought it to a boil, then reduce the heat and let it simmer until it was reduced by half. Once the mushrooms were done I took them out of the oven and transferred them to a platter and top them with torn basil leaves and the balsamic glaze.

IMG_8442

These mushrooms were absolutely delicious!  Caprese Salad is delicious on its own, but once you roast the tomatoes and bring out some of their sweetness and the mozzarella is melted it’s just a whole other level of delectableness. And the heartiness of the mushroom to go along with it makes this a great main dish with other vegetable or as a quick side.


Caprese Stuffed Garlic Butter Portobellos

Ingredients:

Garlic Butter:

1 tbsp. unsalted butter

2 cloves garlic, crushed

Mushrooms:

6 large Portobello mushrooms, stems and gills removed, wiped clean with a damp paper towel

1 cup grape tomatoes, each tomato sliced into thirds

Fresh mozzarella*, thinly sliced

Fresh basil, torn into pieces

Balsamic Glaze**:

1/4 cup balsamic vinegar

2 tsps. brown sugar


*I used about half of a 12oz. pre-sliced log, cutting each piece into strips

**You could also use store bought


Directions:

1. Arrange oven rack to middle of oven and preheat the oven to broil on the high setting.

2. Combine the garlic and butter and melt the butter in the microwave or in small saucepan on medium heat until the garlic becomes fragrant. Brush the bottoms of the mushrooms and place them, buttered side down, on a rimmed cookie sheet.

3. Fill each mushroom with tomatoes and mozzarella and place them in the oven, broiling them until the cheese has melted and begun to brown (about 8 – 10 minutes.)

4. Transfer the mushrooms to a serving dish and top with the basil and drizzle with the balsamic glaze. Sprinkle with kosher salt and fresh ground pepper.

To make the Balsamic Glaze:

Combine the sugar and vinegar in a small saucepan over high heat to bring to a boil. Reduce the heat allowing the mixture to simmer until the mixture has thickened and reduced to a glaze, 5 – 8 minutes.