Mushroom Quiche

I’ve had two frozen deep dish pie crusts in my freezer since a little before Thanksgiving. I purchased an extra pack just in case of a mishap while baking my pies for the holiday. Thankfully I didn’t need them. And then they sort of got buried in my freezer to make room for the frozen cookie dough I had stored in there for my Christmas baking. Once all the cookies had been baked though the crusts reemerged and I decided it was time to make something with them, something other than pie. And then I remembered I had photocopied a Mushroom & Sausage Quiche recipe from a cookbook I ultimately got rid of (I had one too many and needed to purge them). Which I then I decided to omit the sausage from and increase the amount of mushrooms and ended up with the Mushroom Quiche recipe below. Which I am happy to say will be made again and possibly with some baby spinach next time.
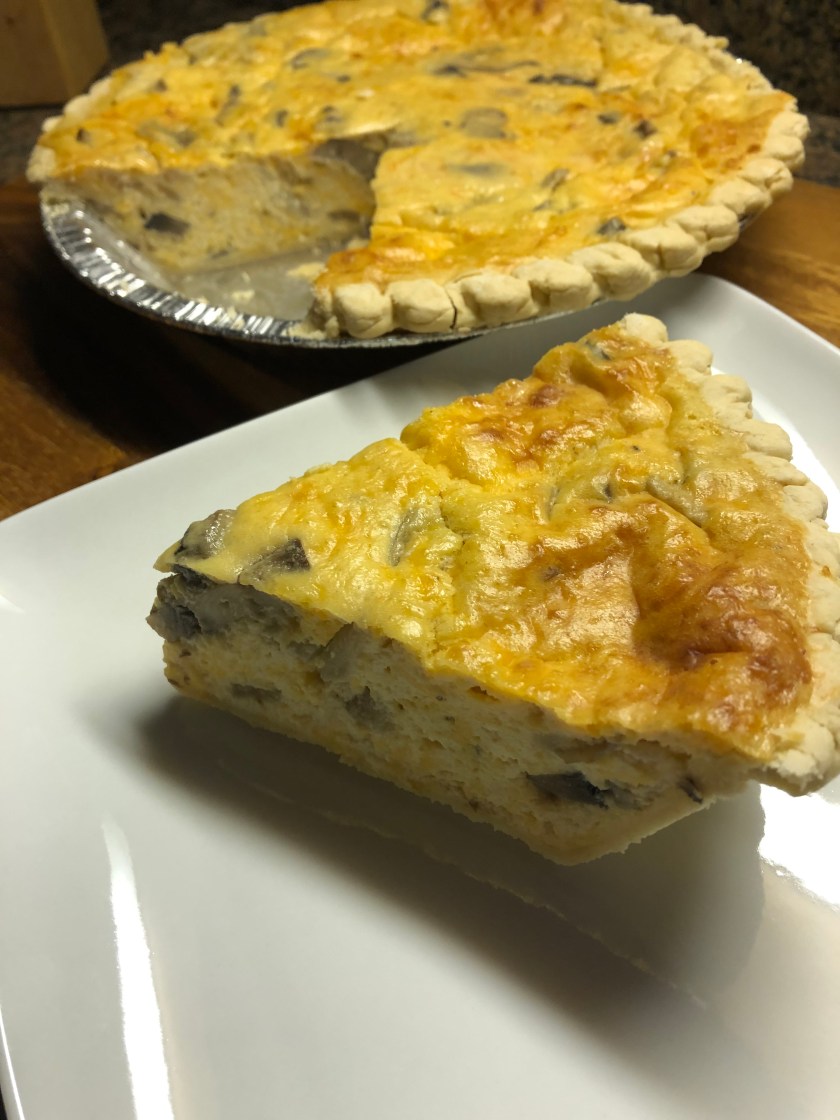
img_1299

Mushroom Quiche

Ingredients:

1 frozen deep dish 9-inch pie crust

1 tablespoon butter

8 oz. sliced white mushrooms

1 medium sweet onion, chopped

4 eggs

1 cup sour cream

1 cup cottage cheese, 2% or 4% milkfat

2 tablespoons flour

1 teaspoon hot sauce

3 tablespoons grated parmesan cheese

1 8 oz. package shredded cheddar cheese


Directions:

Preheat the oven to 350 F. Place the pie crust on a baking a sheet.

In a large skillet melt the butter over medium-high heat. Add the mushrooms and chopped onions and cook for 5 minutes, or until both are tender.

Place the eggs, sour cream, cottage cheese, flour, parmesan cheese and hot sauce in a food processor (or blender) and process until smooth. Scraping the bowl as necessary.

Transfer the mushrooms and onions to a large bowl and add in the egg mixture and cheddar cheese, stir to combine. Spoon the mixture into the pie crust (you may have some leftover). Cover the edges of the pie crust with strips of aluminum foil to prevent the crust from burning.

Bake in the preheated oven for 50 – 60 minutes, until the top is golden brown and the center is set. A toothpick or cake tester inserted in the middle should come out clean. Let cool for 10 minutes and enjoy!

Recipe adapted from a Mushroom & Sausage Quiche recipe found in the cookbook Paula Deen & Friends


Slow Cooker Sunday: Italian Vegetable and Pasta Soup

This is probably the best I have ever made and tasted, well, there was this French Onion Soup I had years ago at a restaurant that I still compare all French Onion Soup’s I have had to this day. Maybe I should try making that soup one day. But anyhoo, I digress, as usual. Back to the soup at hand, an Italian Vegetable and Pasta Soup that best of all is made in a slow cooker. There’s nothing better than dumping everything into your slow cooker and then coming back a few hours later with a great meal waiting for you.

I began by adding all of my vegetables to my slow cooker: corn, chopped onion, chopped carrots, sliced zucchini and garlic. I wasn’t sure if garlic could be considered a vegetable, but, adter a little research it turns out it can be.

 img_0001

Next, I stirred in broth, tomato paste, salt and basil until the tomato paste had completely blended into the broth. I used tomato paste with basil, garlic and oregano. I advise using this blend of tomato paste since it adds more flavor to the soup.

 img_0002

I opted to cook it on the high setting for about 3 1/2 hours and then added in dried shell macaroni and a bag of frozen green beans and cooked it for an additional 45 minutes.

 img_0004

Once it was done I served myself a bowl and topped it with shredded parmesan cheese. YUM!

 img_0007

Italian Vegetable and Pasta Soup

Ingredients:

1 10-ounce package frozen whole kernel corn

1 cup chopped onion

1 cup chopped carrots

1 small zucchini, sliced into half moons

2 garlic cloves, minced

6 cups low sodium vegetable or chicken broth

1 6-ounce can tomato paste blended with basil, garlic and oregano

1/2 teaspoon salt

1/2 teaspoon dried basil

1 9-ounce package frozen green beans

1 cup dried small shell macaroni

Shredded parmesan cheese, for topping

Directions:

In a 3 1/2 to 5 quart slow clooker combine the frozen corn, onions, carrots, zucchini and garlic.

Stir in the broth, salt, basil and tomato paste until the tomato paste is completely blended into the broth.

Cover and cook on high for 3 1/2 to 4 hours (or on low for 7 to 8 hours). Add the macaroni and green beans and cook for an additional 45 minutes. Please note, if you cooked the soup on the low setting, set it to high once you add in the macaroni and green beans.

Serve in bowls topped with shredded parmesan cheese.

Recipe from Better Homes and Gardens


Baked Onion Rings

I do my best to avoid frying anything; not because of health reasons but because I hate having to clean up oil splatter and inevitably I always end up with an oil stain on my shirt no matter what efforts I take to avoid it. So, whenever I can make one of my favorite foods that normally has to be fried baked I’m all for it – thank heaven for my doughnut pan! Today’s not fried but baked recipe I would like to share with you is Onion Rings!

To begin I sliced a small sweet onion and separated the rings. You can use any sweet onion to make these: Vidalia, Walla Walla, etc… Random fact, sweet onions have a lower sulfur content than other onions so you are less likely to cry when slicing them. I know this from experience! When I cook and am using onions they are always the last thing I cut so I can ensure I won’t end up slicing my finger while cutting other things because I am trying to control my onion crying fit.

IMG_9145

Next I combined panko bread crumbs with olive oil, salt and pepper and baked it on a rimmed baking sheet until they were golden brown. I then transferred them to a shallow bowl. I also put flour and two lightly beaten eggs in shallow bowls as well and was then ready to prep my onion rings for baking.

IMG_9148

I dipped the onion rings in the flour, then the eggs and finally in the bread crumb mixture and placed them on a baking sheet that I rubbed with olive oil. Once the sheet was full I baked the rings in a pre-heated 450 F oven for 12 minutes, flipping the rings once.

IMG_9151

Right out of the oven….

IMG_9153

After letting them cool for a few minutes I enjoyed them with a side of ranch dress – thank-you Johnny Rockets for introducing me to that winning combination! In case you are wondering, baking the rings still gives the crumb coating that crunch you are familiar with when frying them, but, I also think it makes the onion itself tender and sweeter!

IMG_9179

Baked Onion Rings

Ingredients:

1 1/2 cups panko bread crumbs

1/4 cup olive oil

1/2 teaspoon salt

1/4 teaspoon black pepper

1/3 cup all-purpose flour

2 large eggs, lightly beaten

1 small sweet onion, sliced and rings separated

Directions:

Preheat the oven to 450 F. In a small bowl combine the bread crumbs, 2 tablespoons of the olive oil, salt, and black pepper. Transfer the crumbs to a rimmed baking sheet and bake until golden brown, 3 to 5 minutes, tossing once. Transfer the crumbs to a shallow bowl. In two other shallow bowls place the flour and eggs.

Rub the remaining oil on 2 rimmed baking sheets. Dip the onion rings in the flour first, then the eggs (allowing any excess to drip off) and finally in the bread crumb mixture. Bake on the prepared baking sheets for 12 to 14 minutes, turning once.

Serve with your favorite dipping sauce; my go-to for onion rings is ranch dressing.

Recipe from Real Simple

%d bloggers like this: