Brown Butter Almond Cake with Chocolate Filling

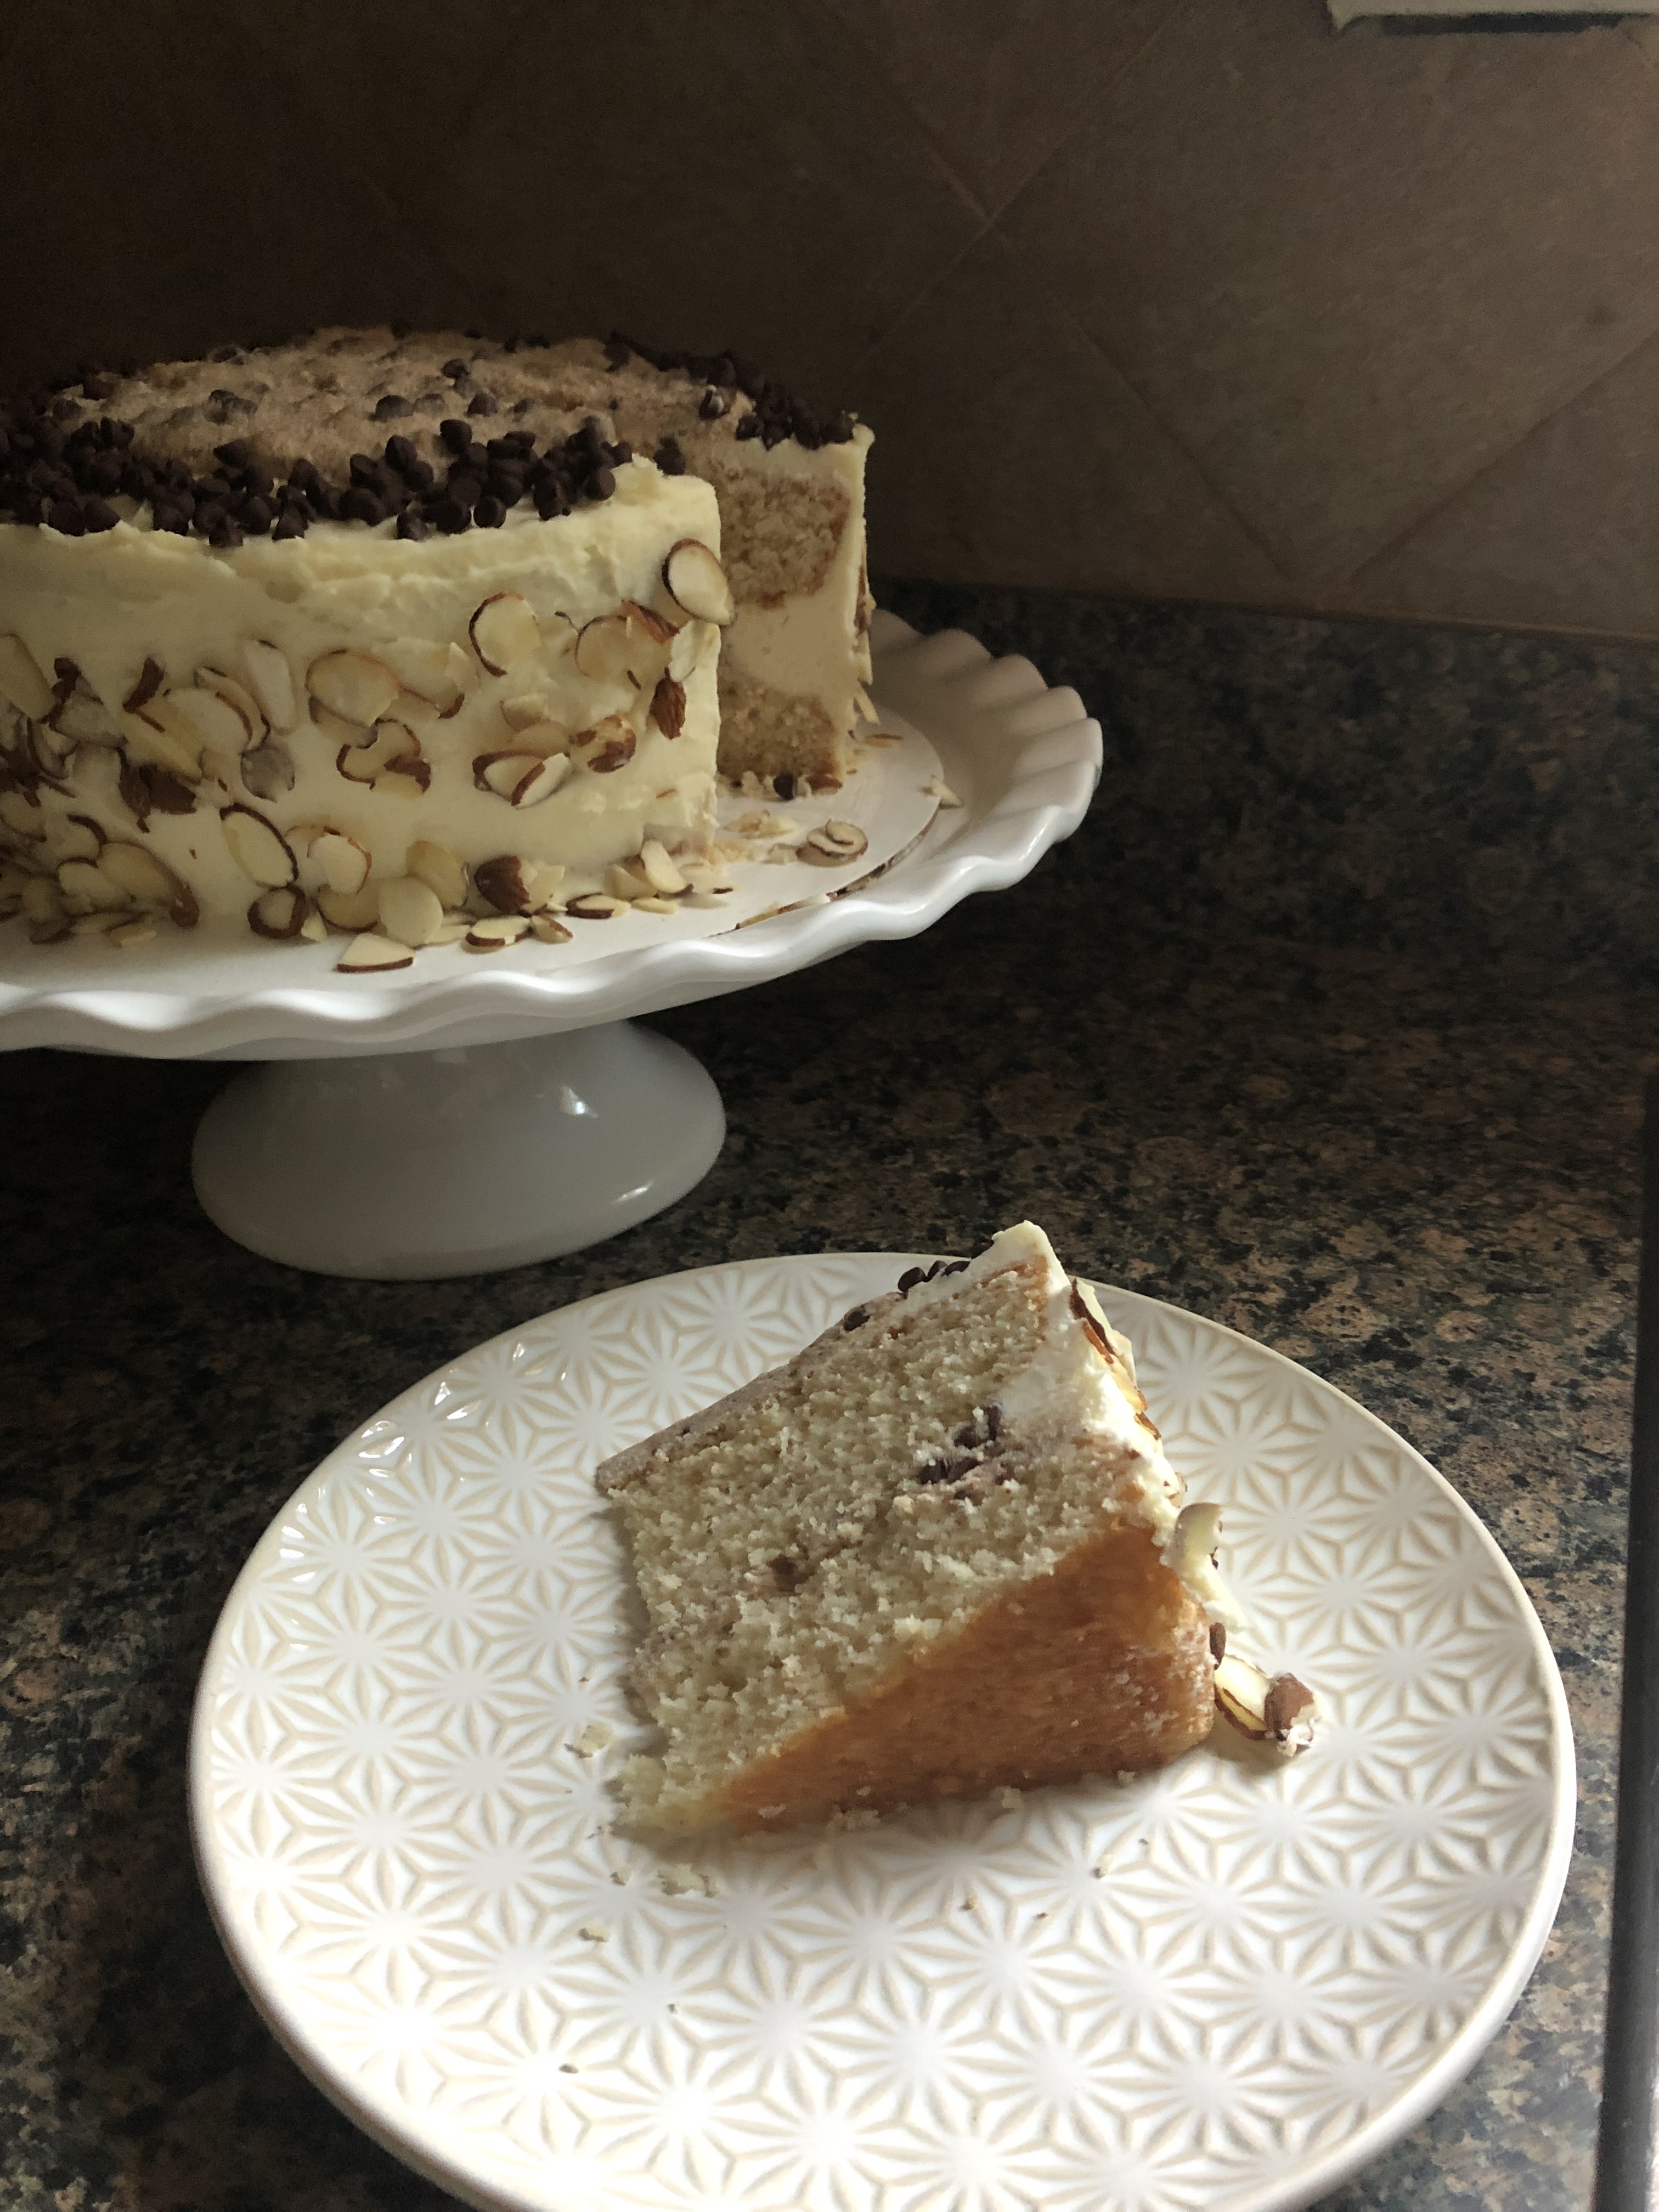
With the holidays quickly approaching you may be looking for new recipes to share with your loved ones. Today I am bringing you a Brown Butter Almond Cake with Chocolate Filling that I personally wouldn’t say is ideal for dessert but better suited as a breakfast / brunch treat. Or for an afternoon watching holiday movies, decorating or wrapping gifts while enjoying your favorite warm beverage.

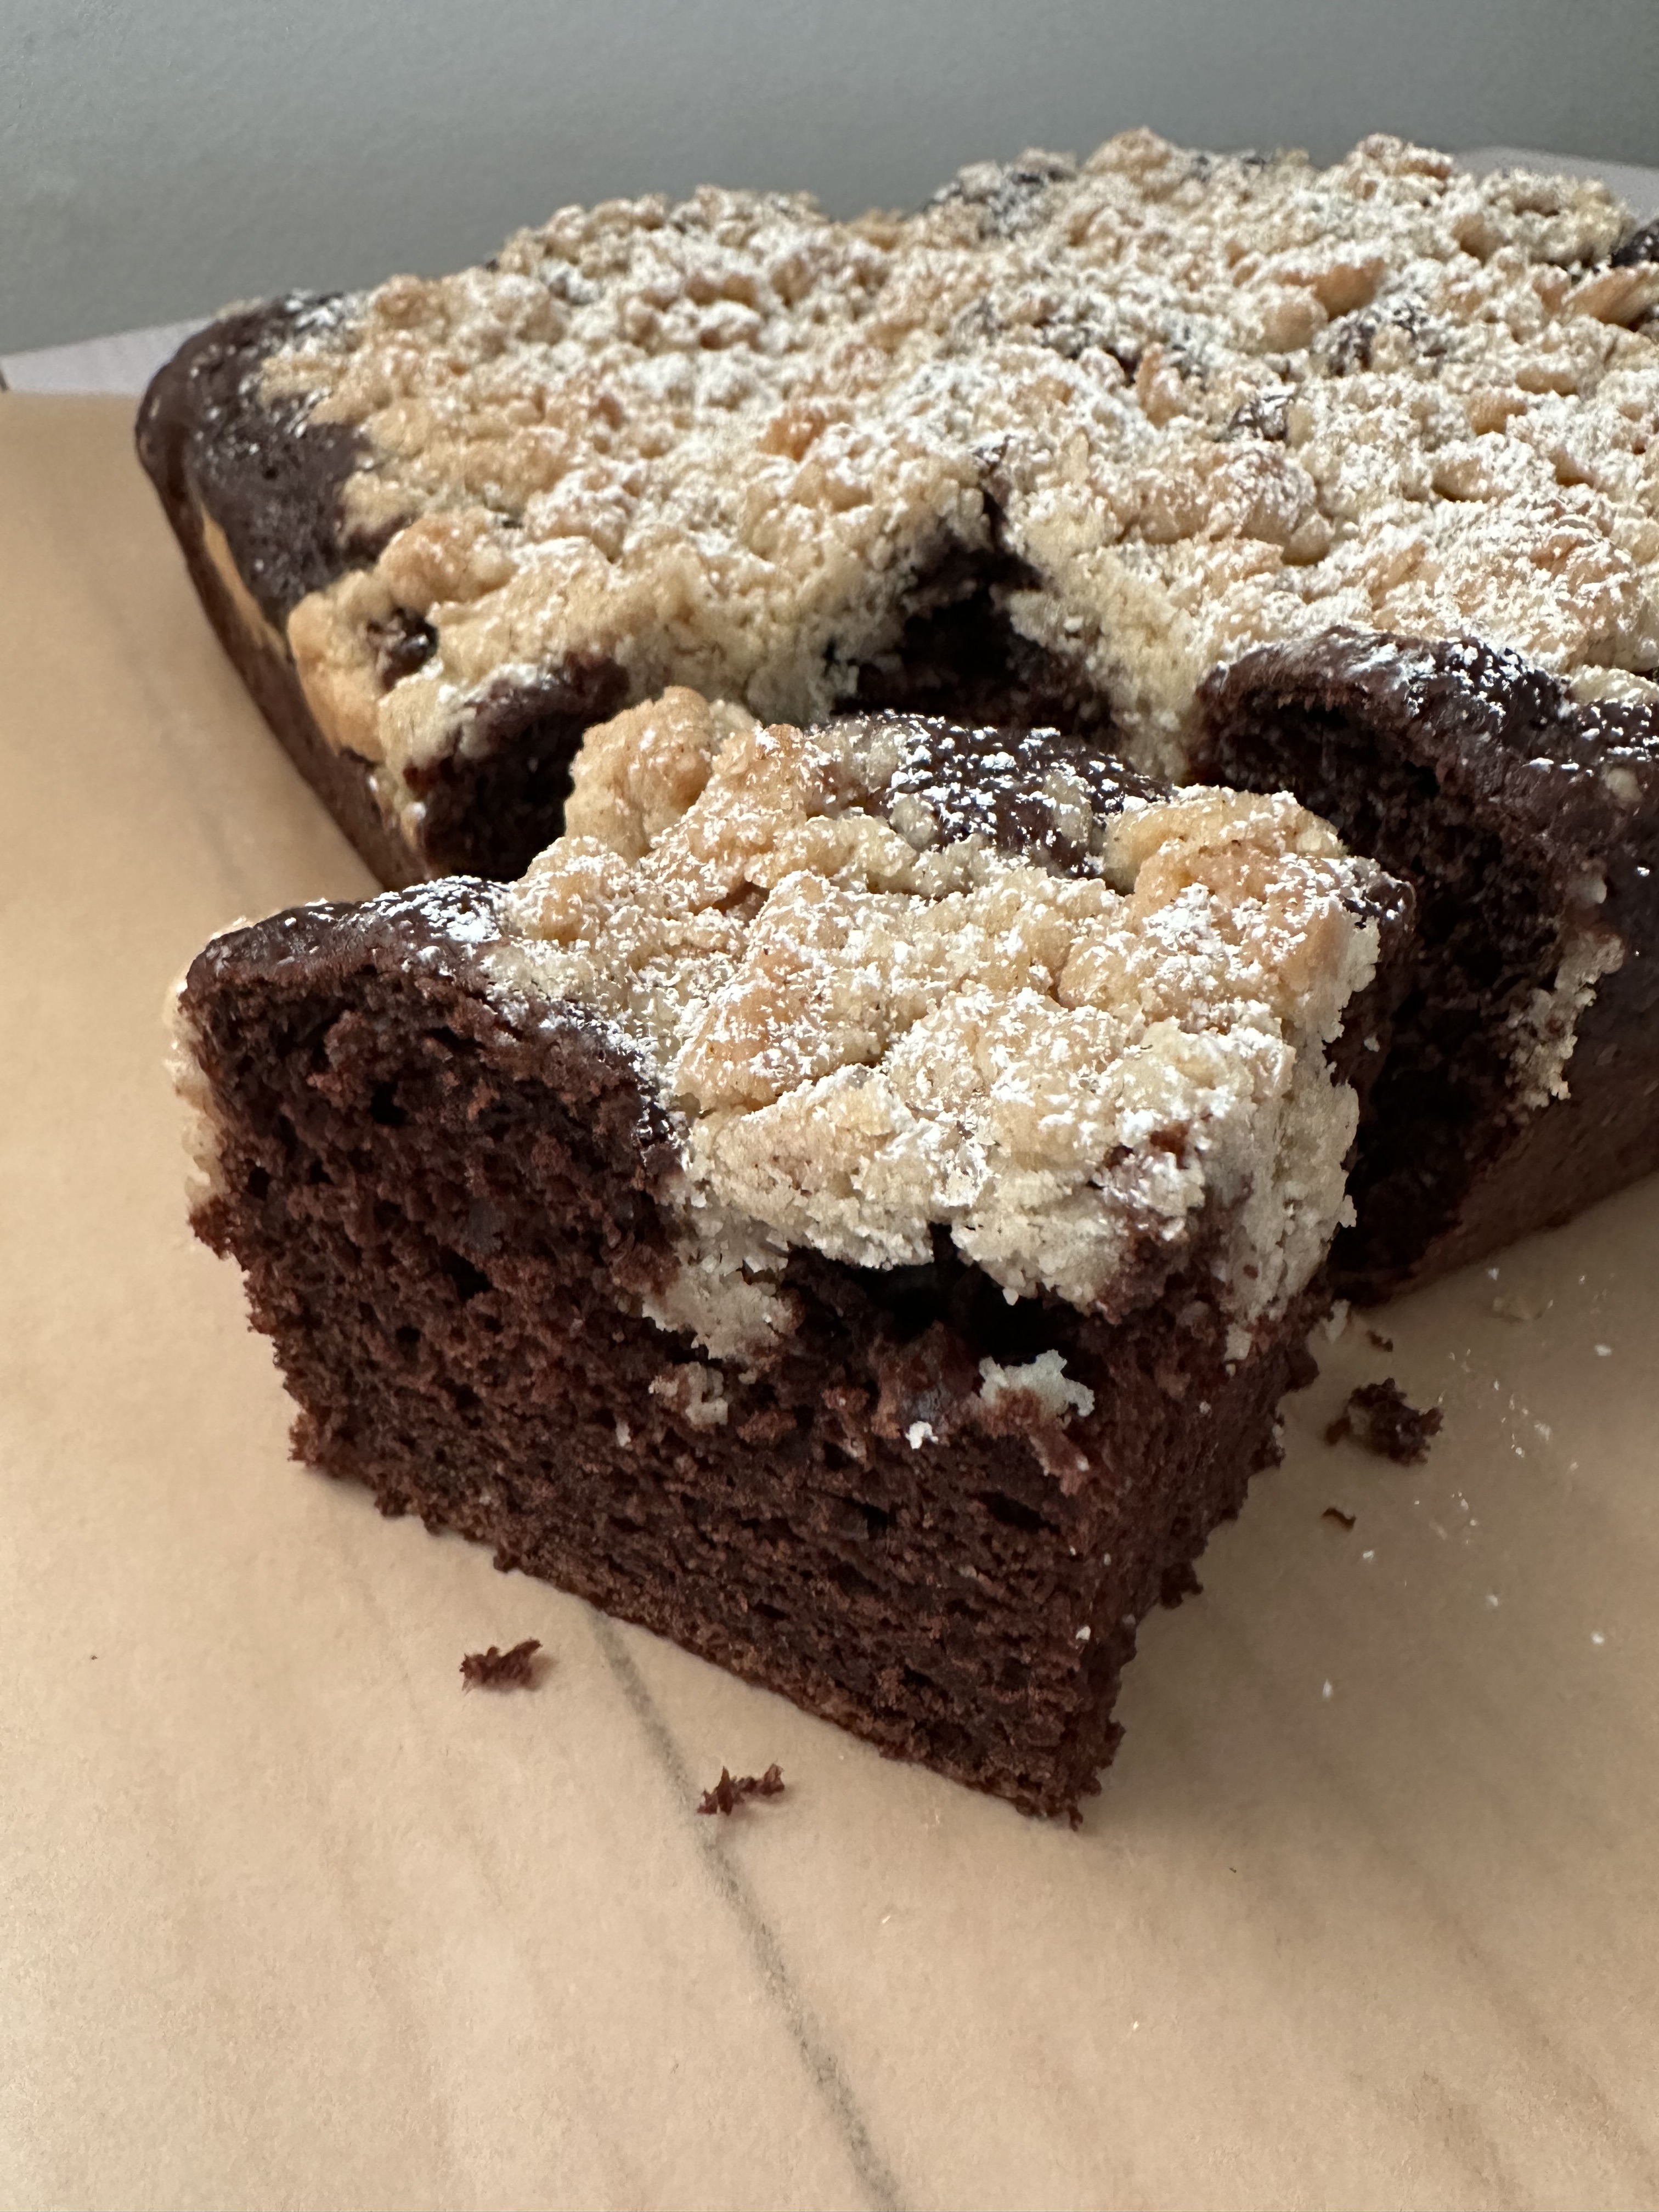
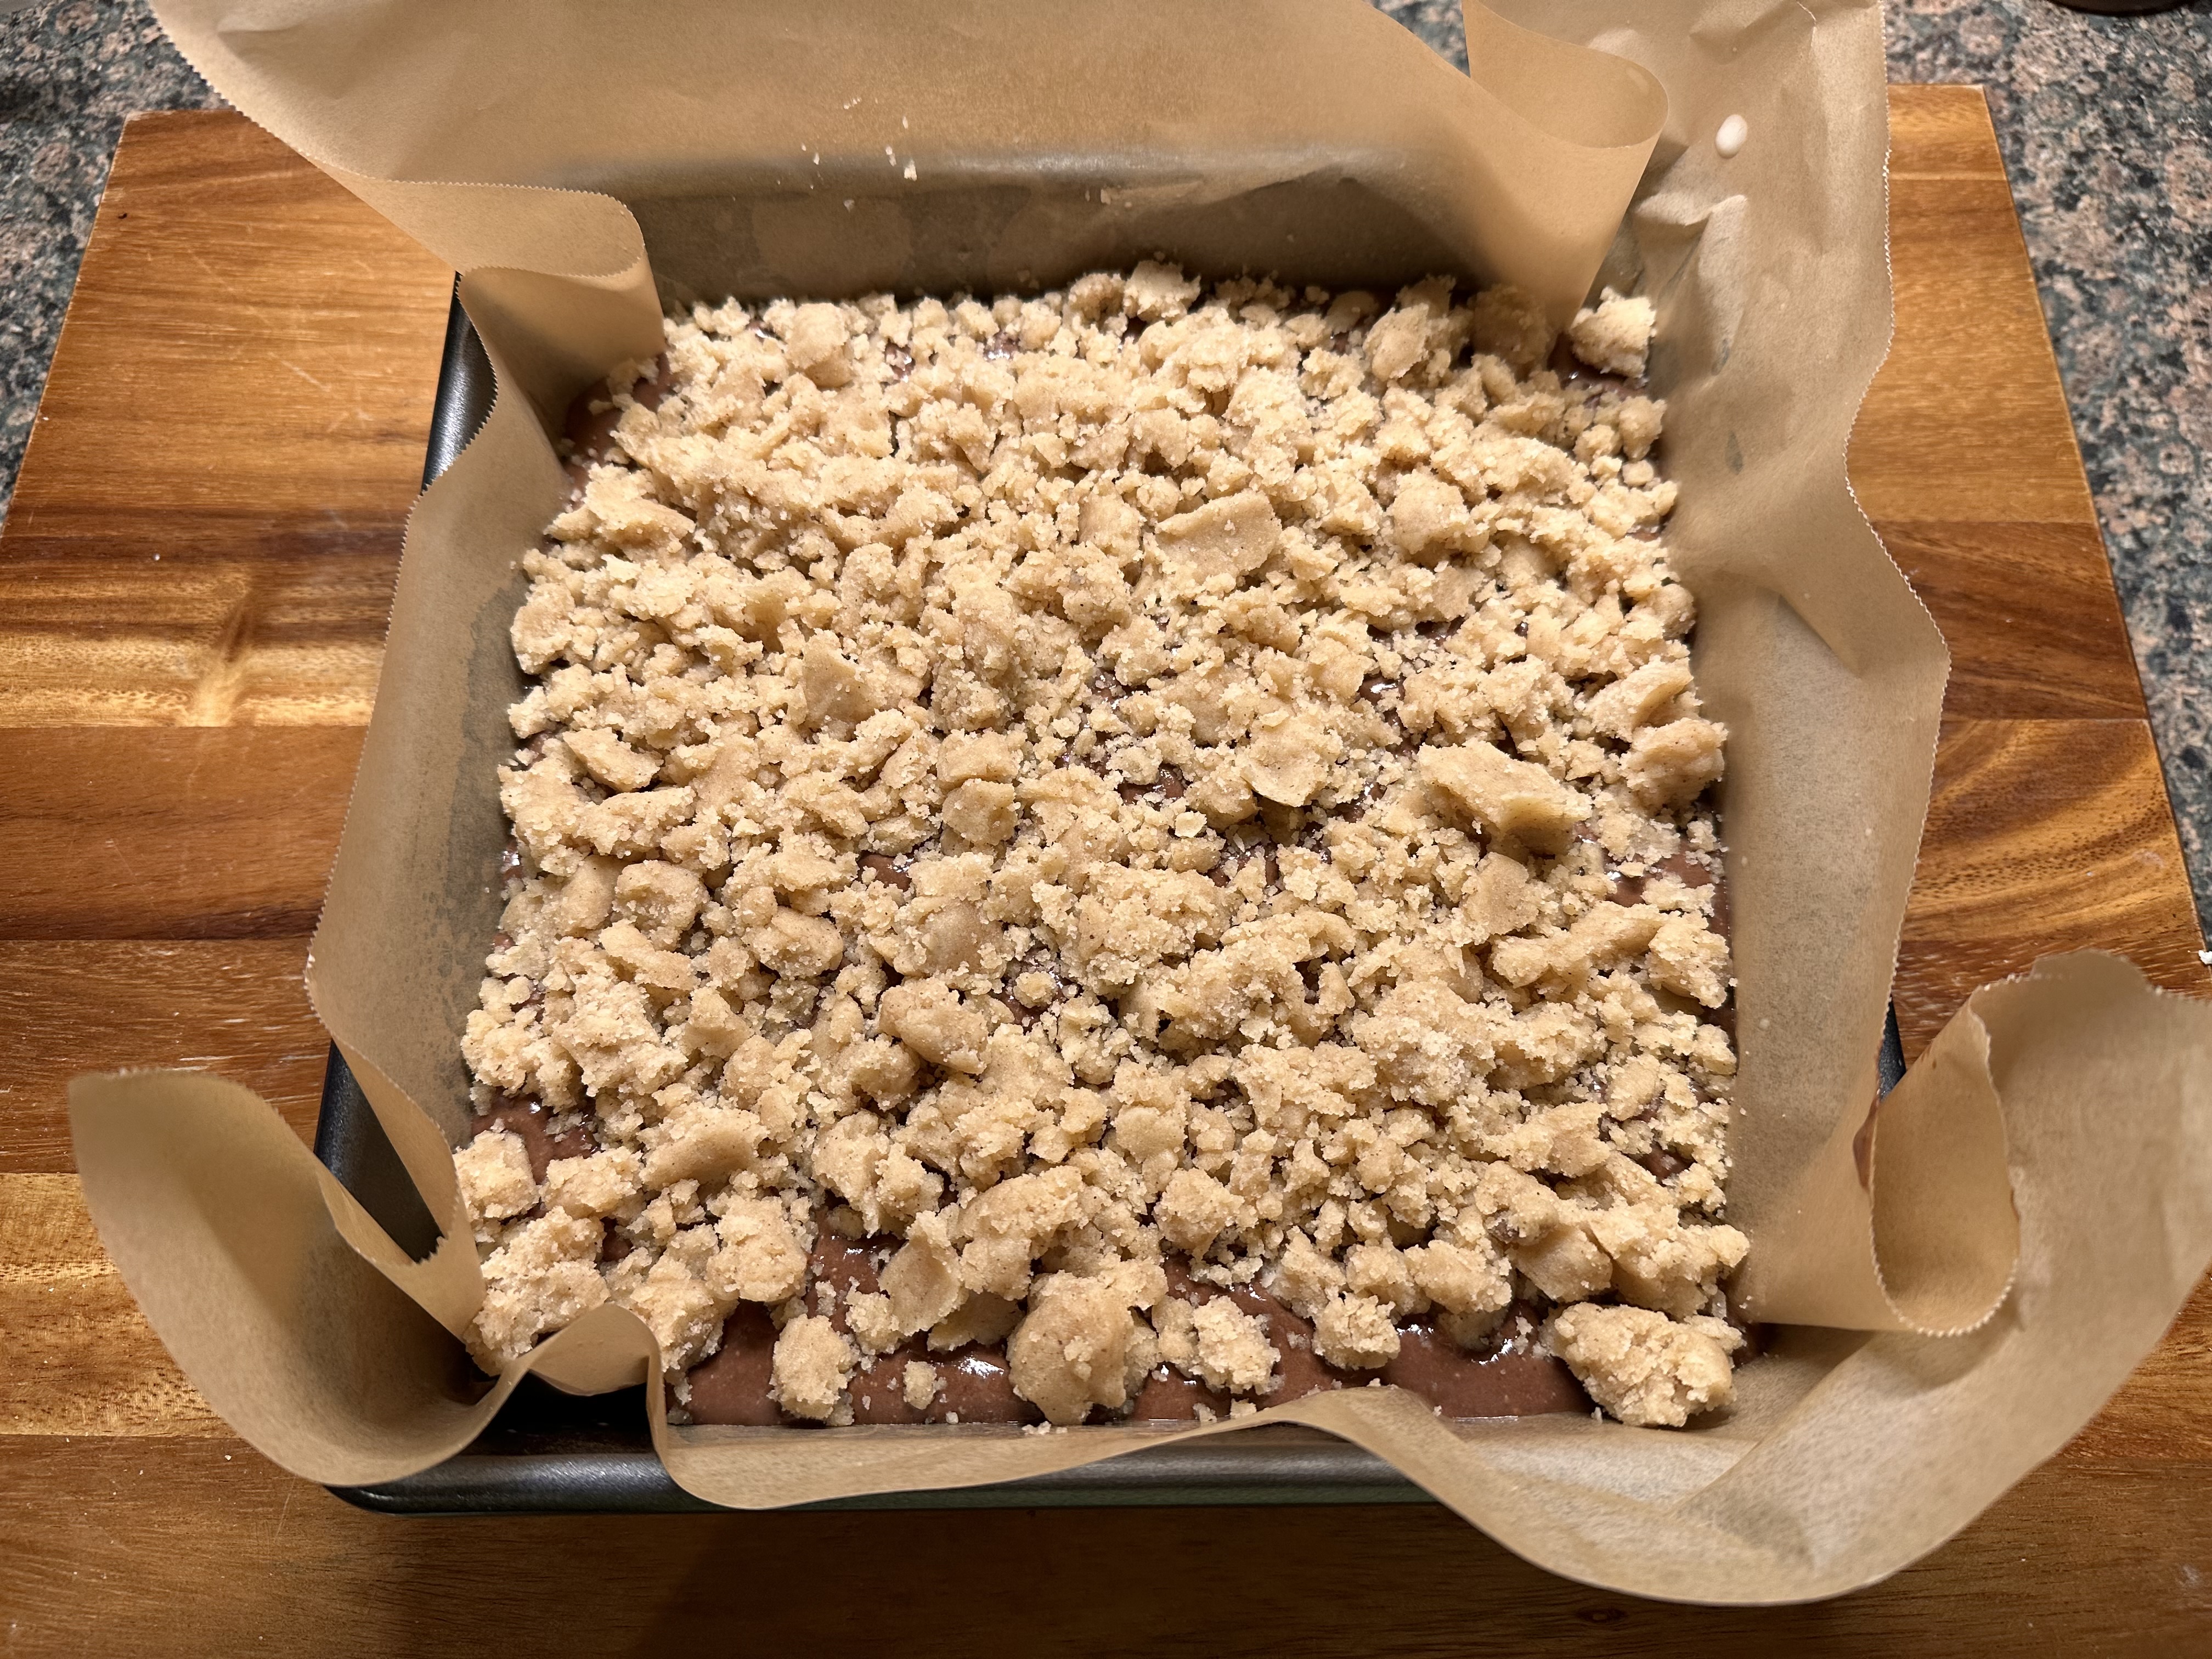
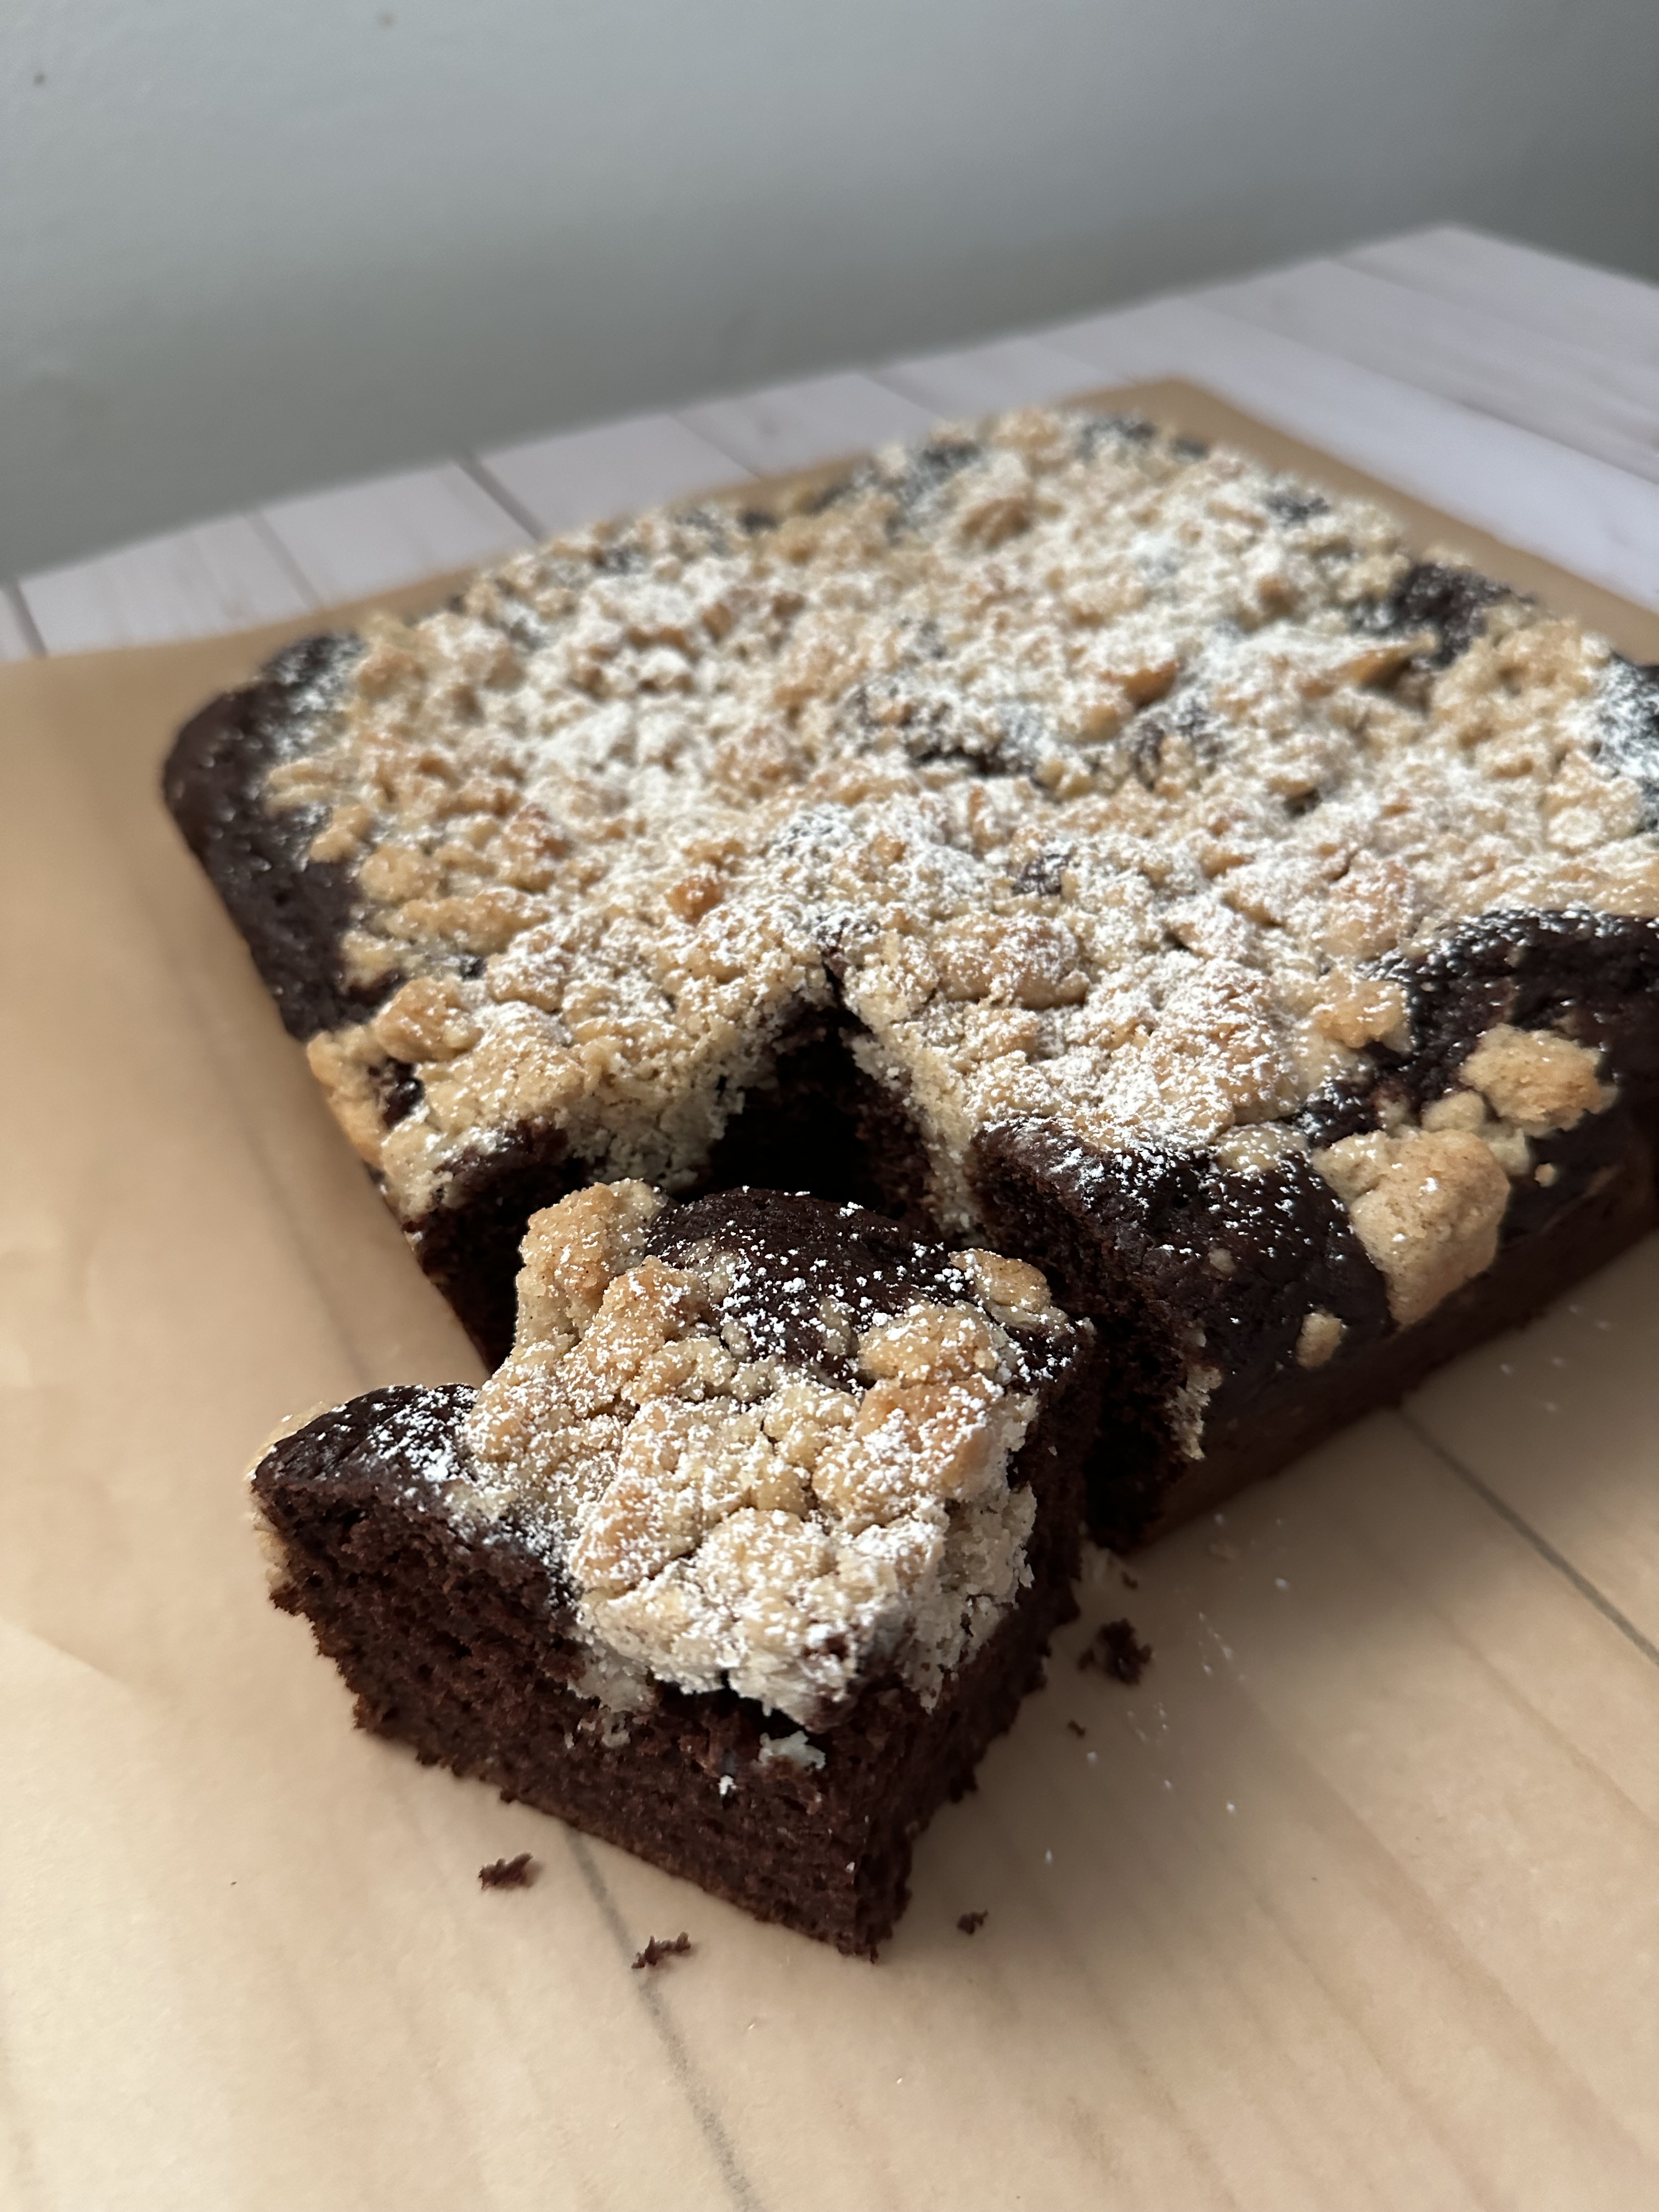
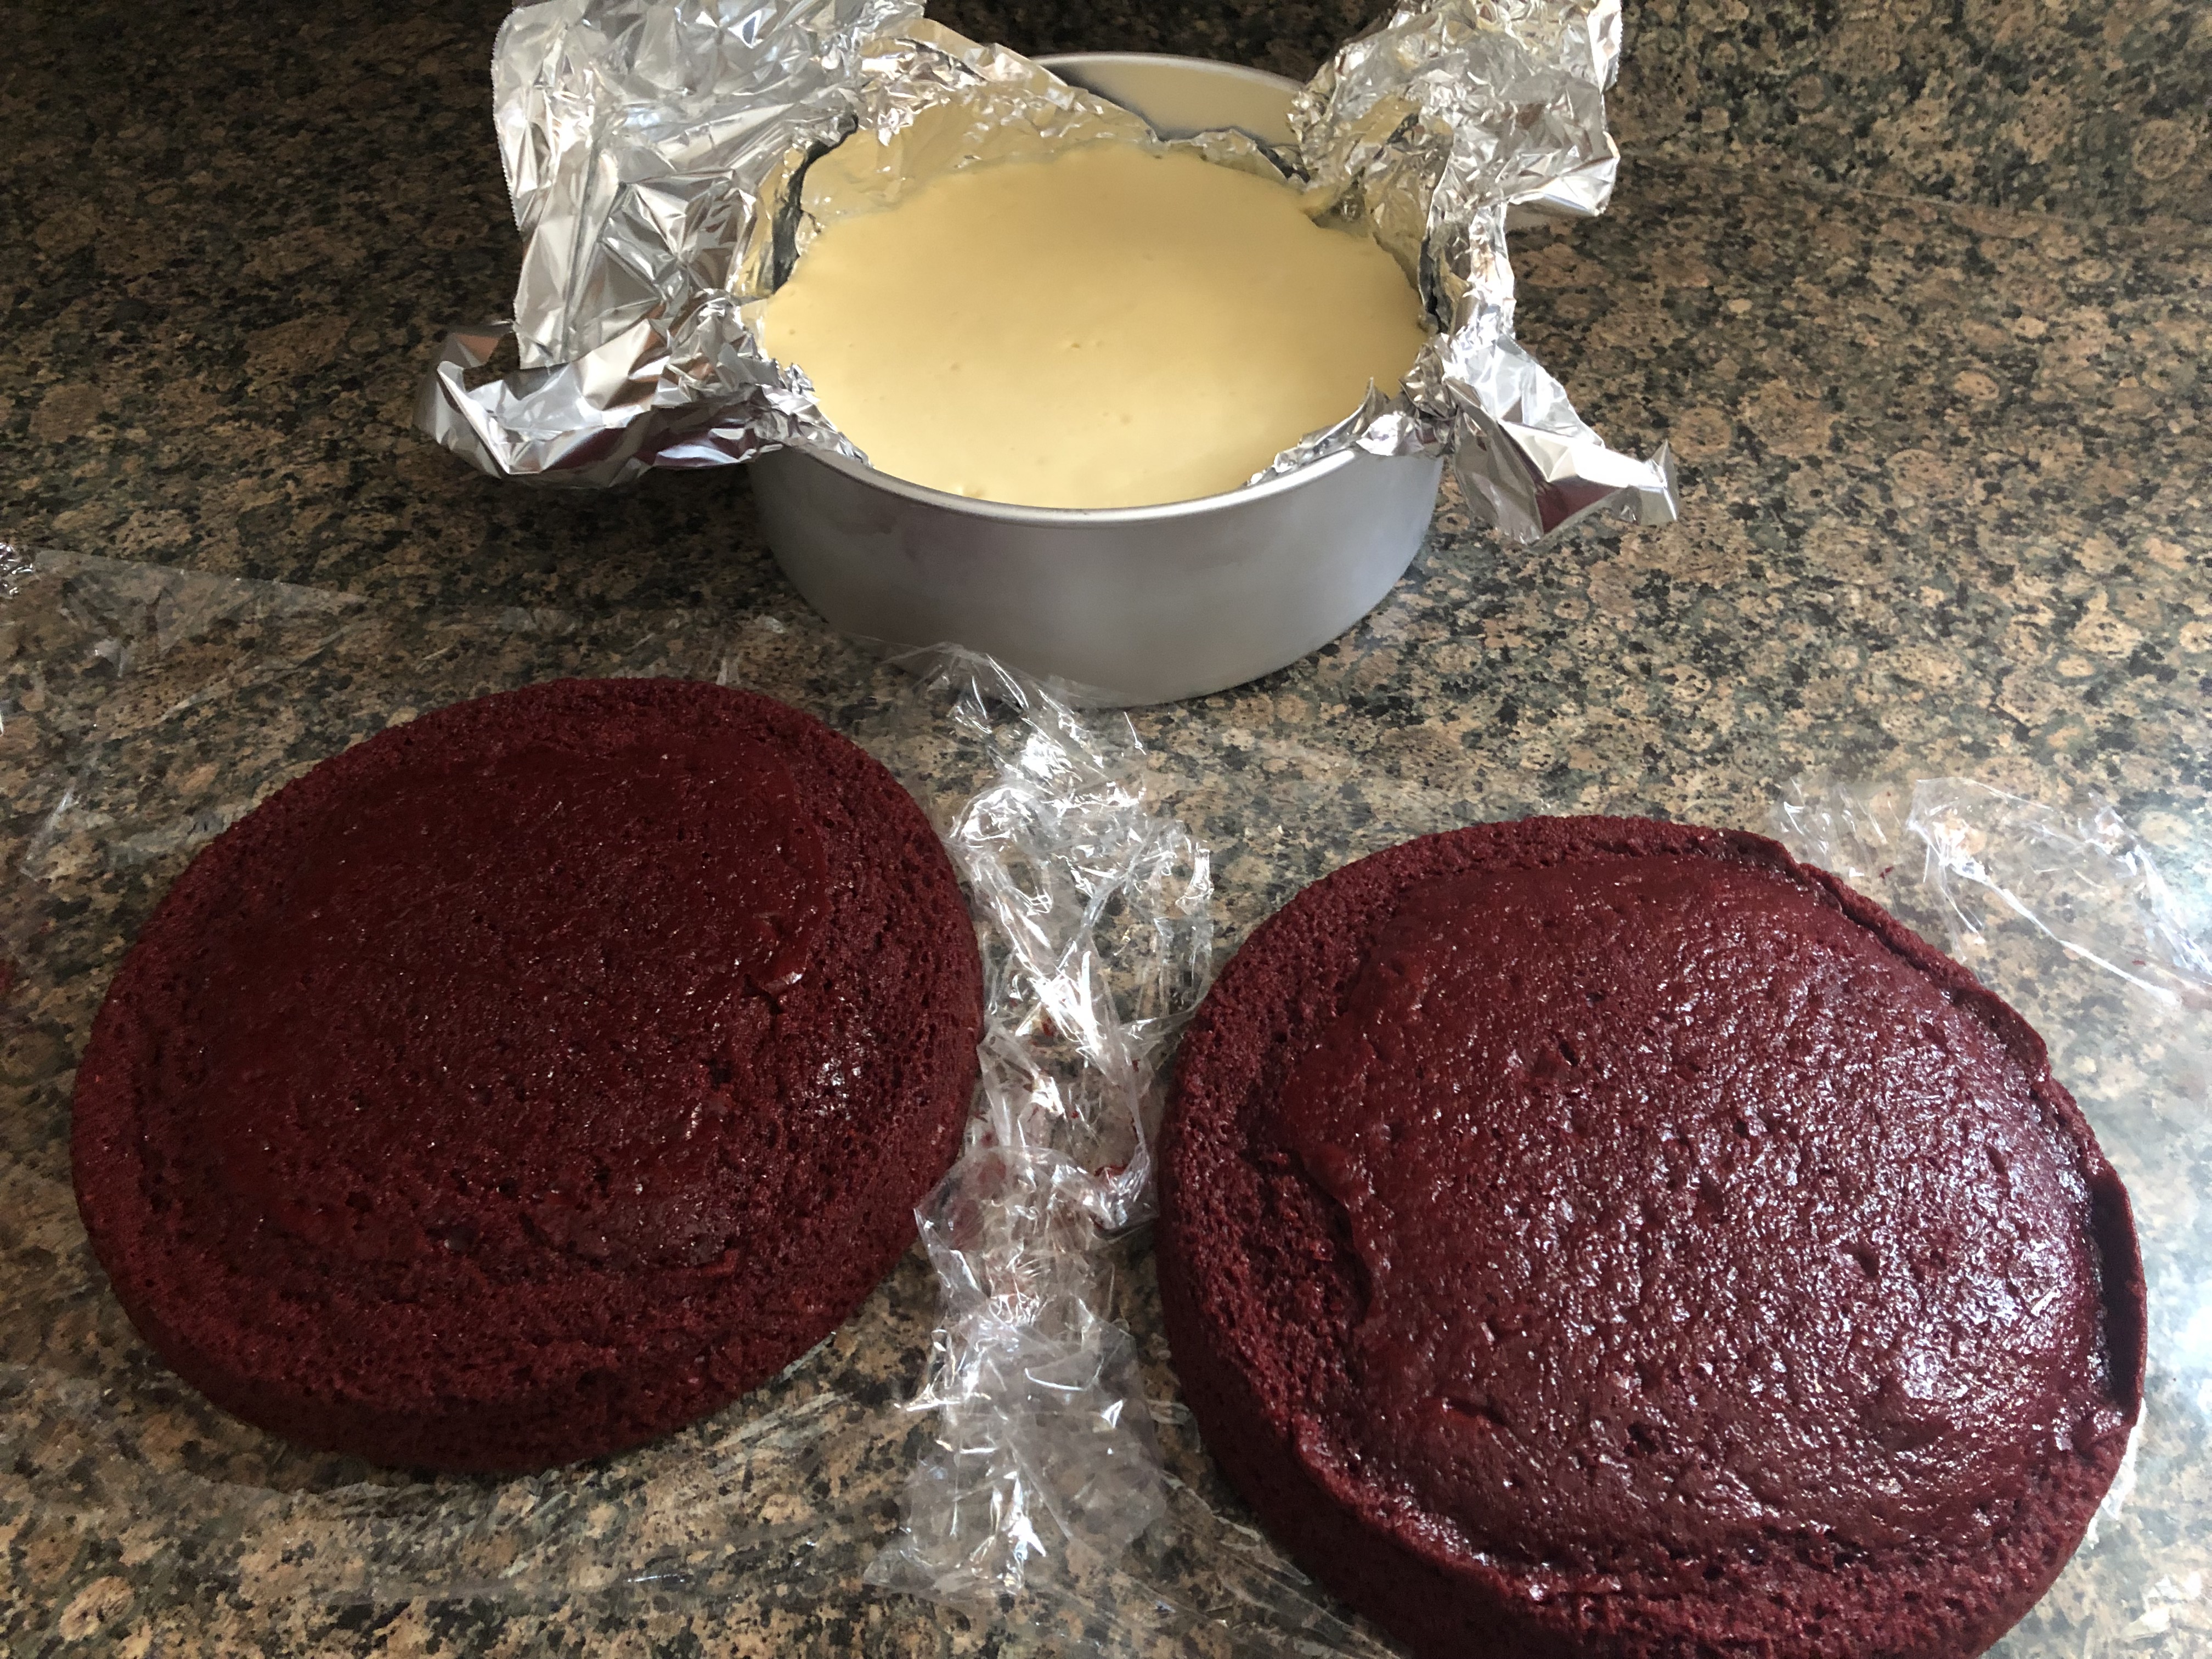
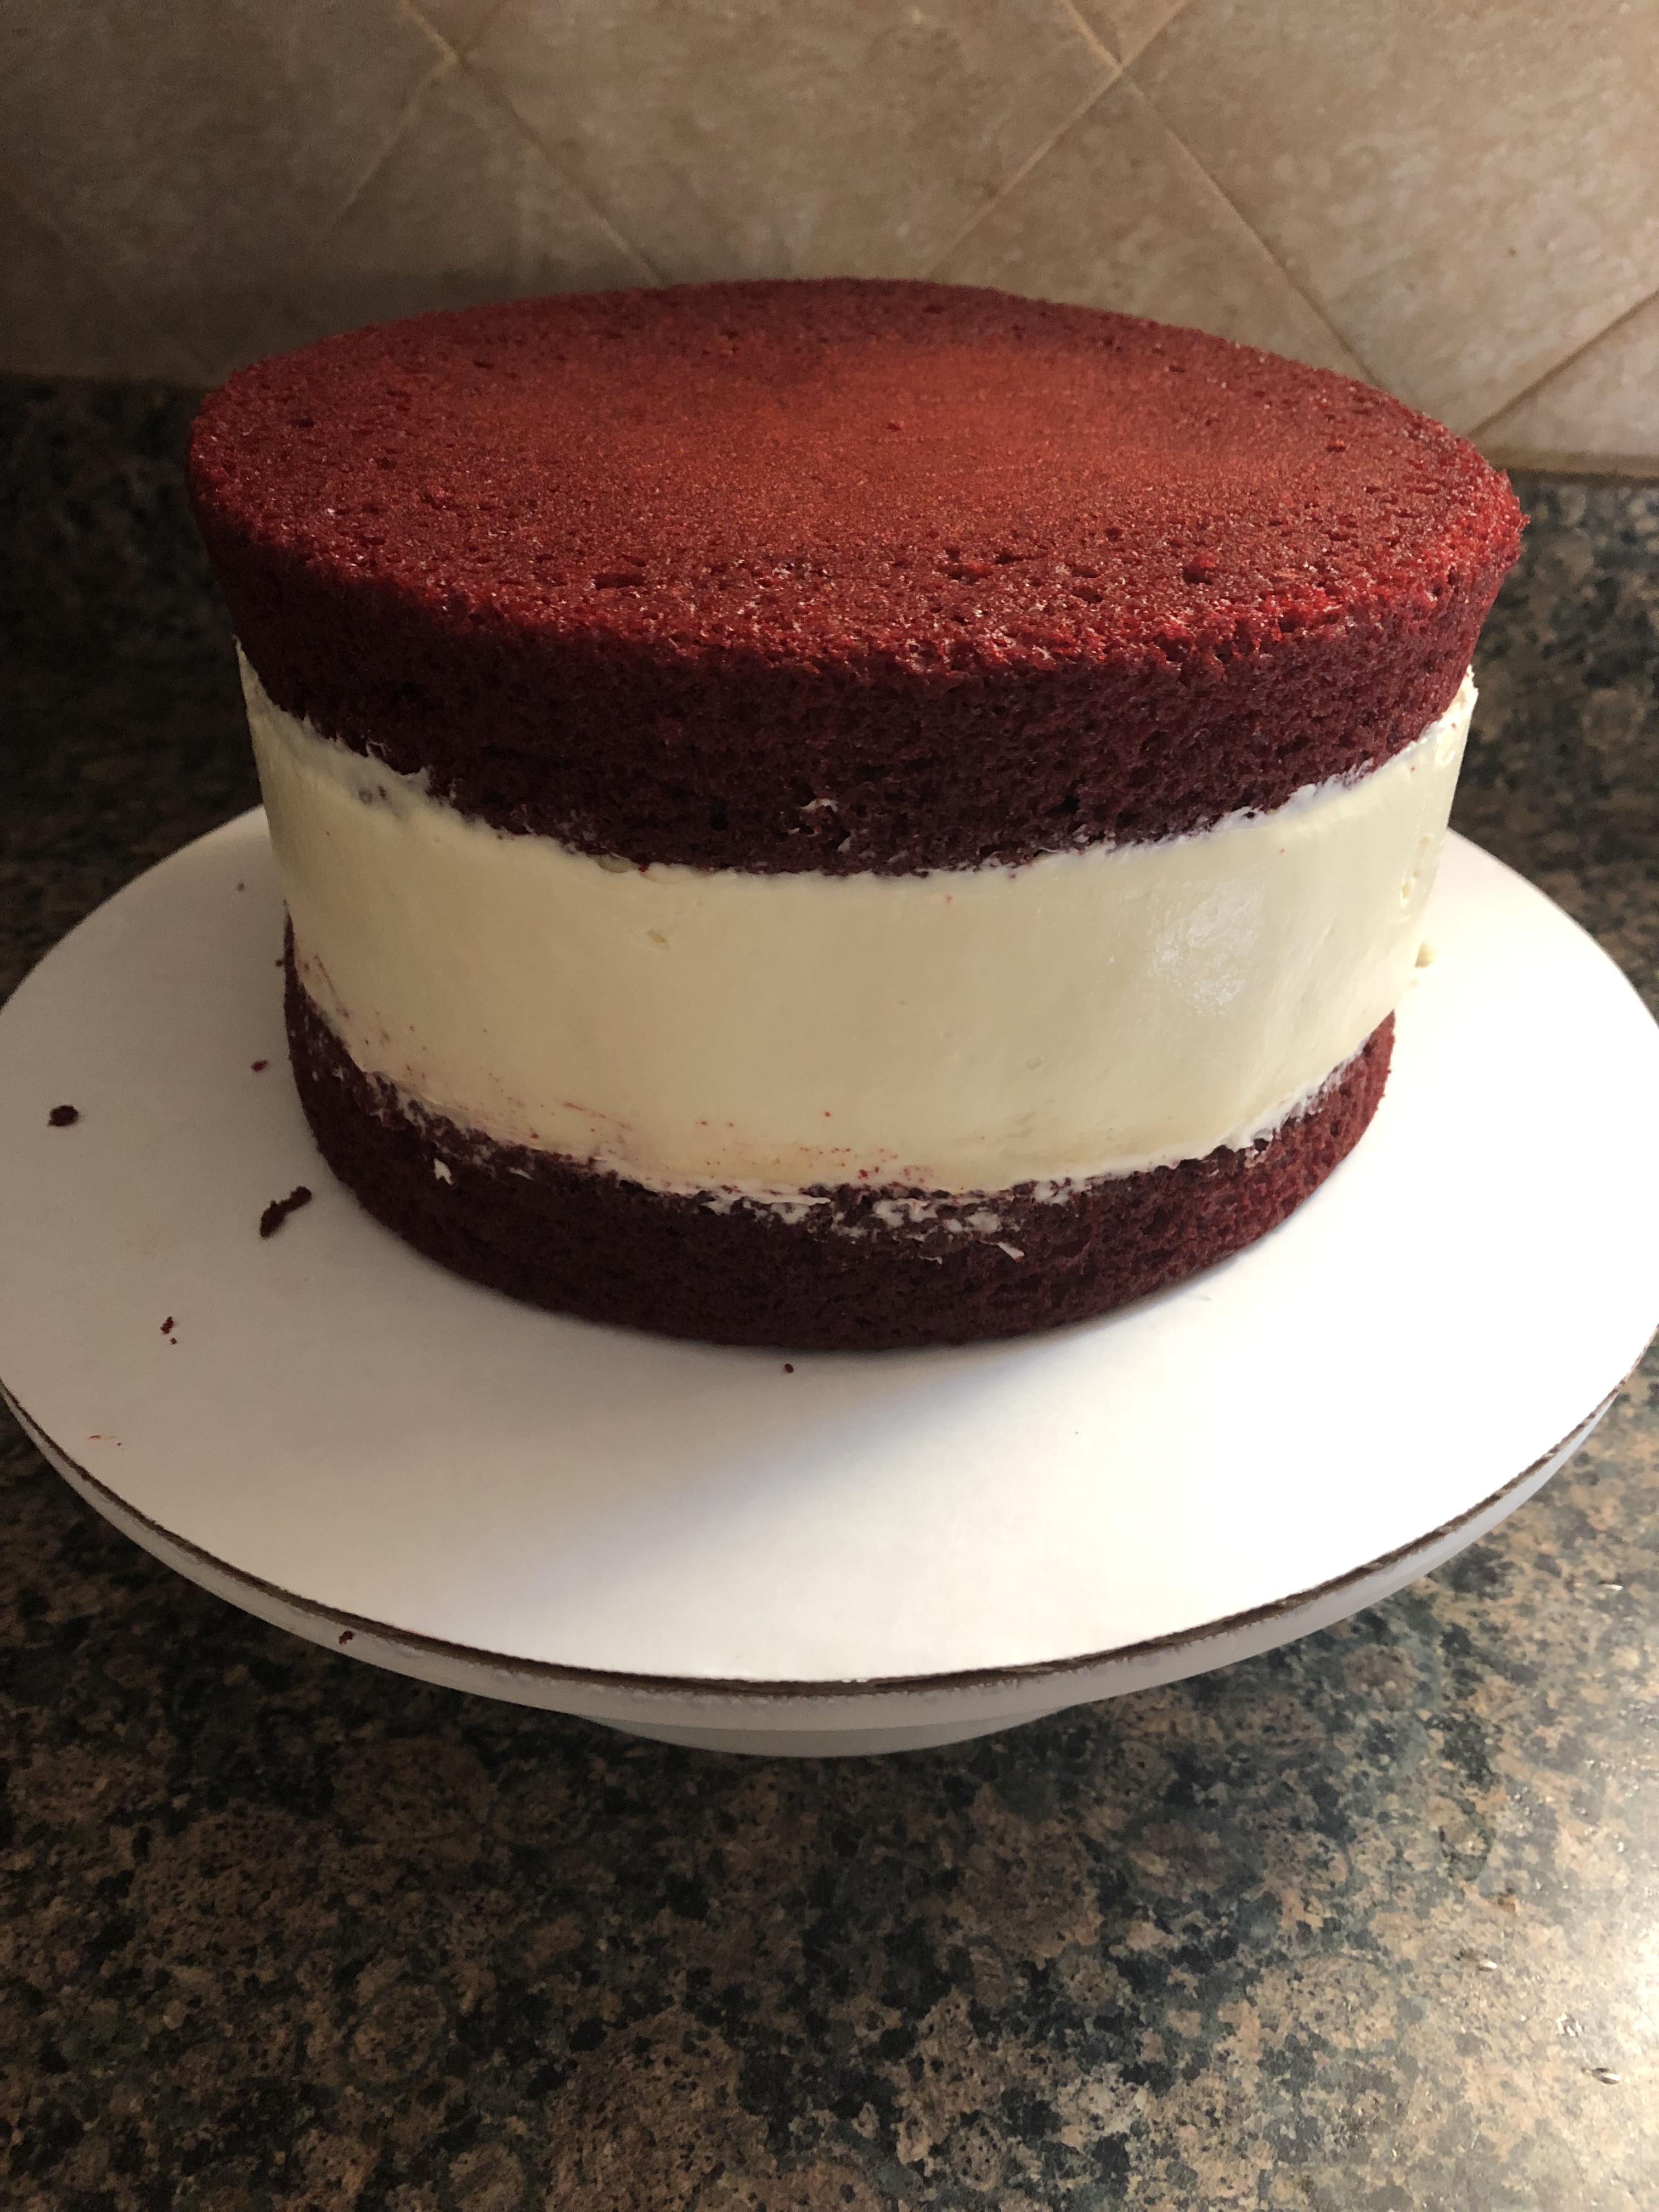
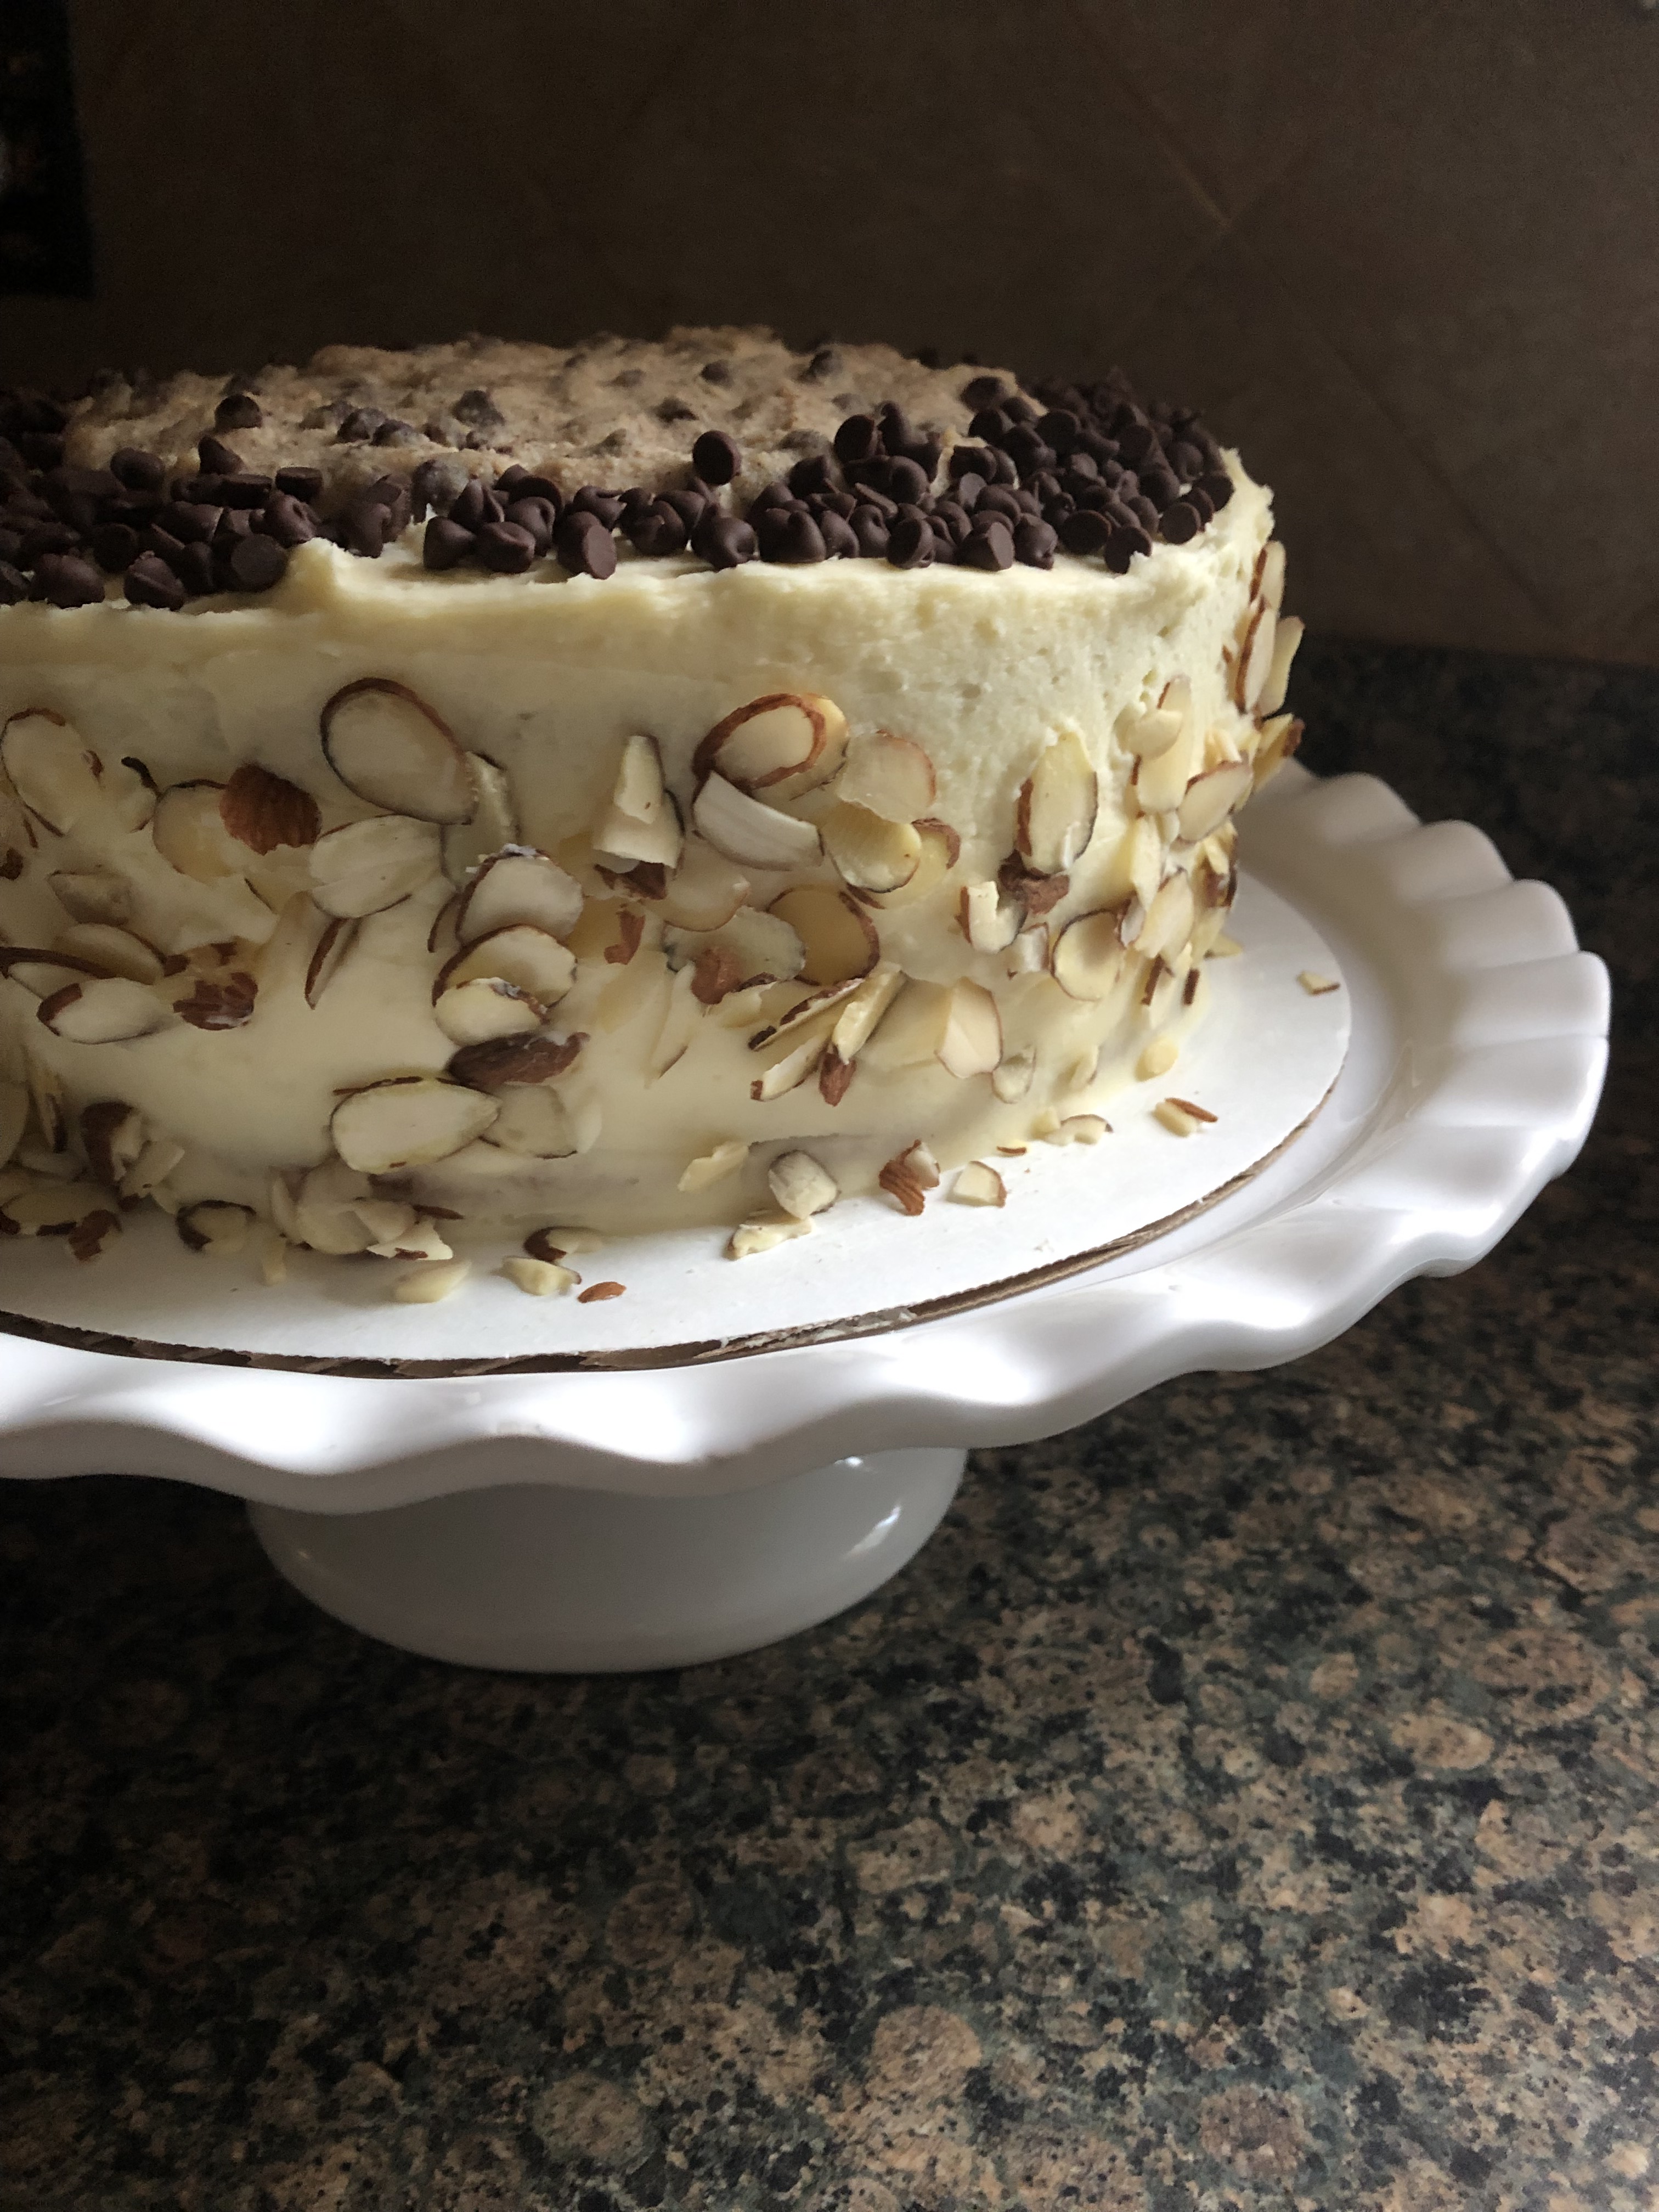
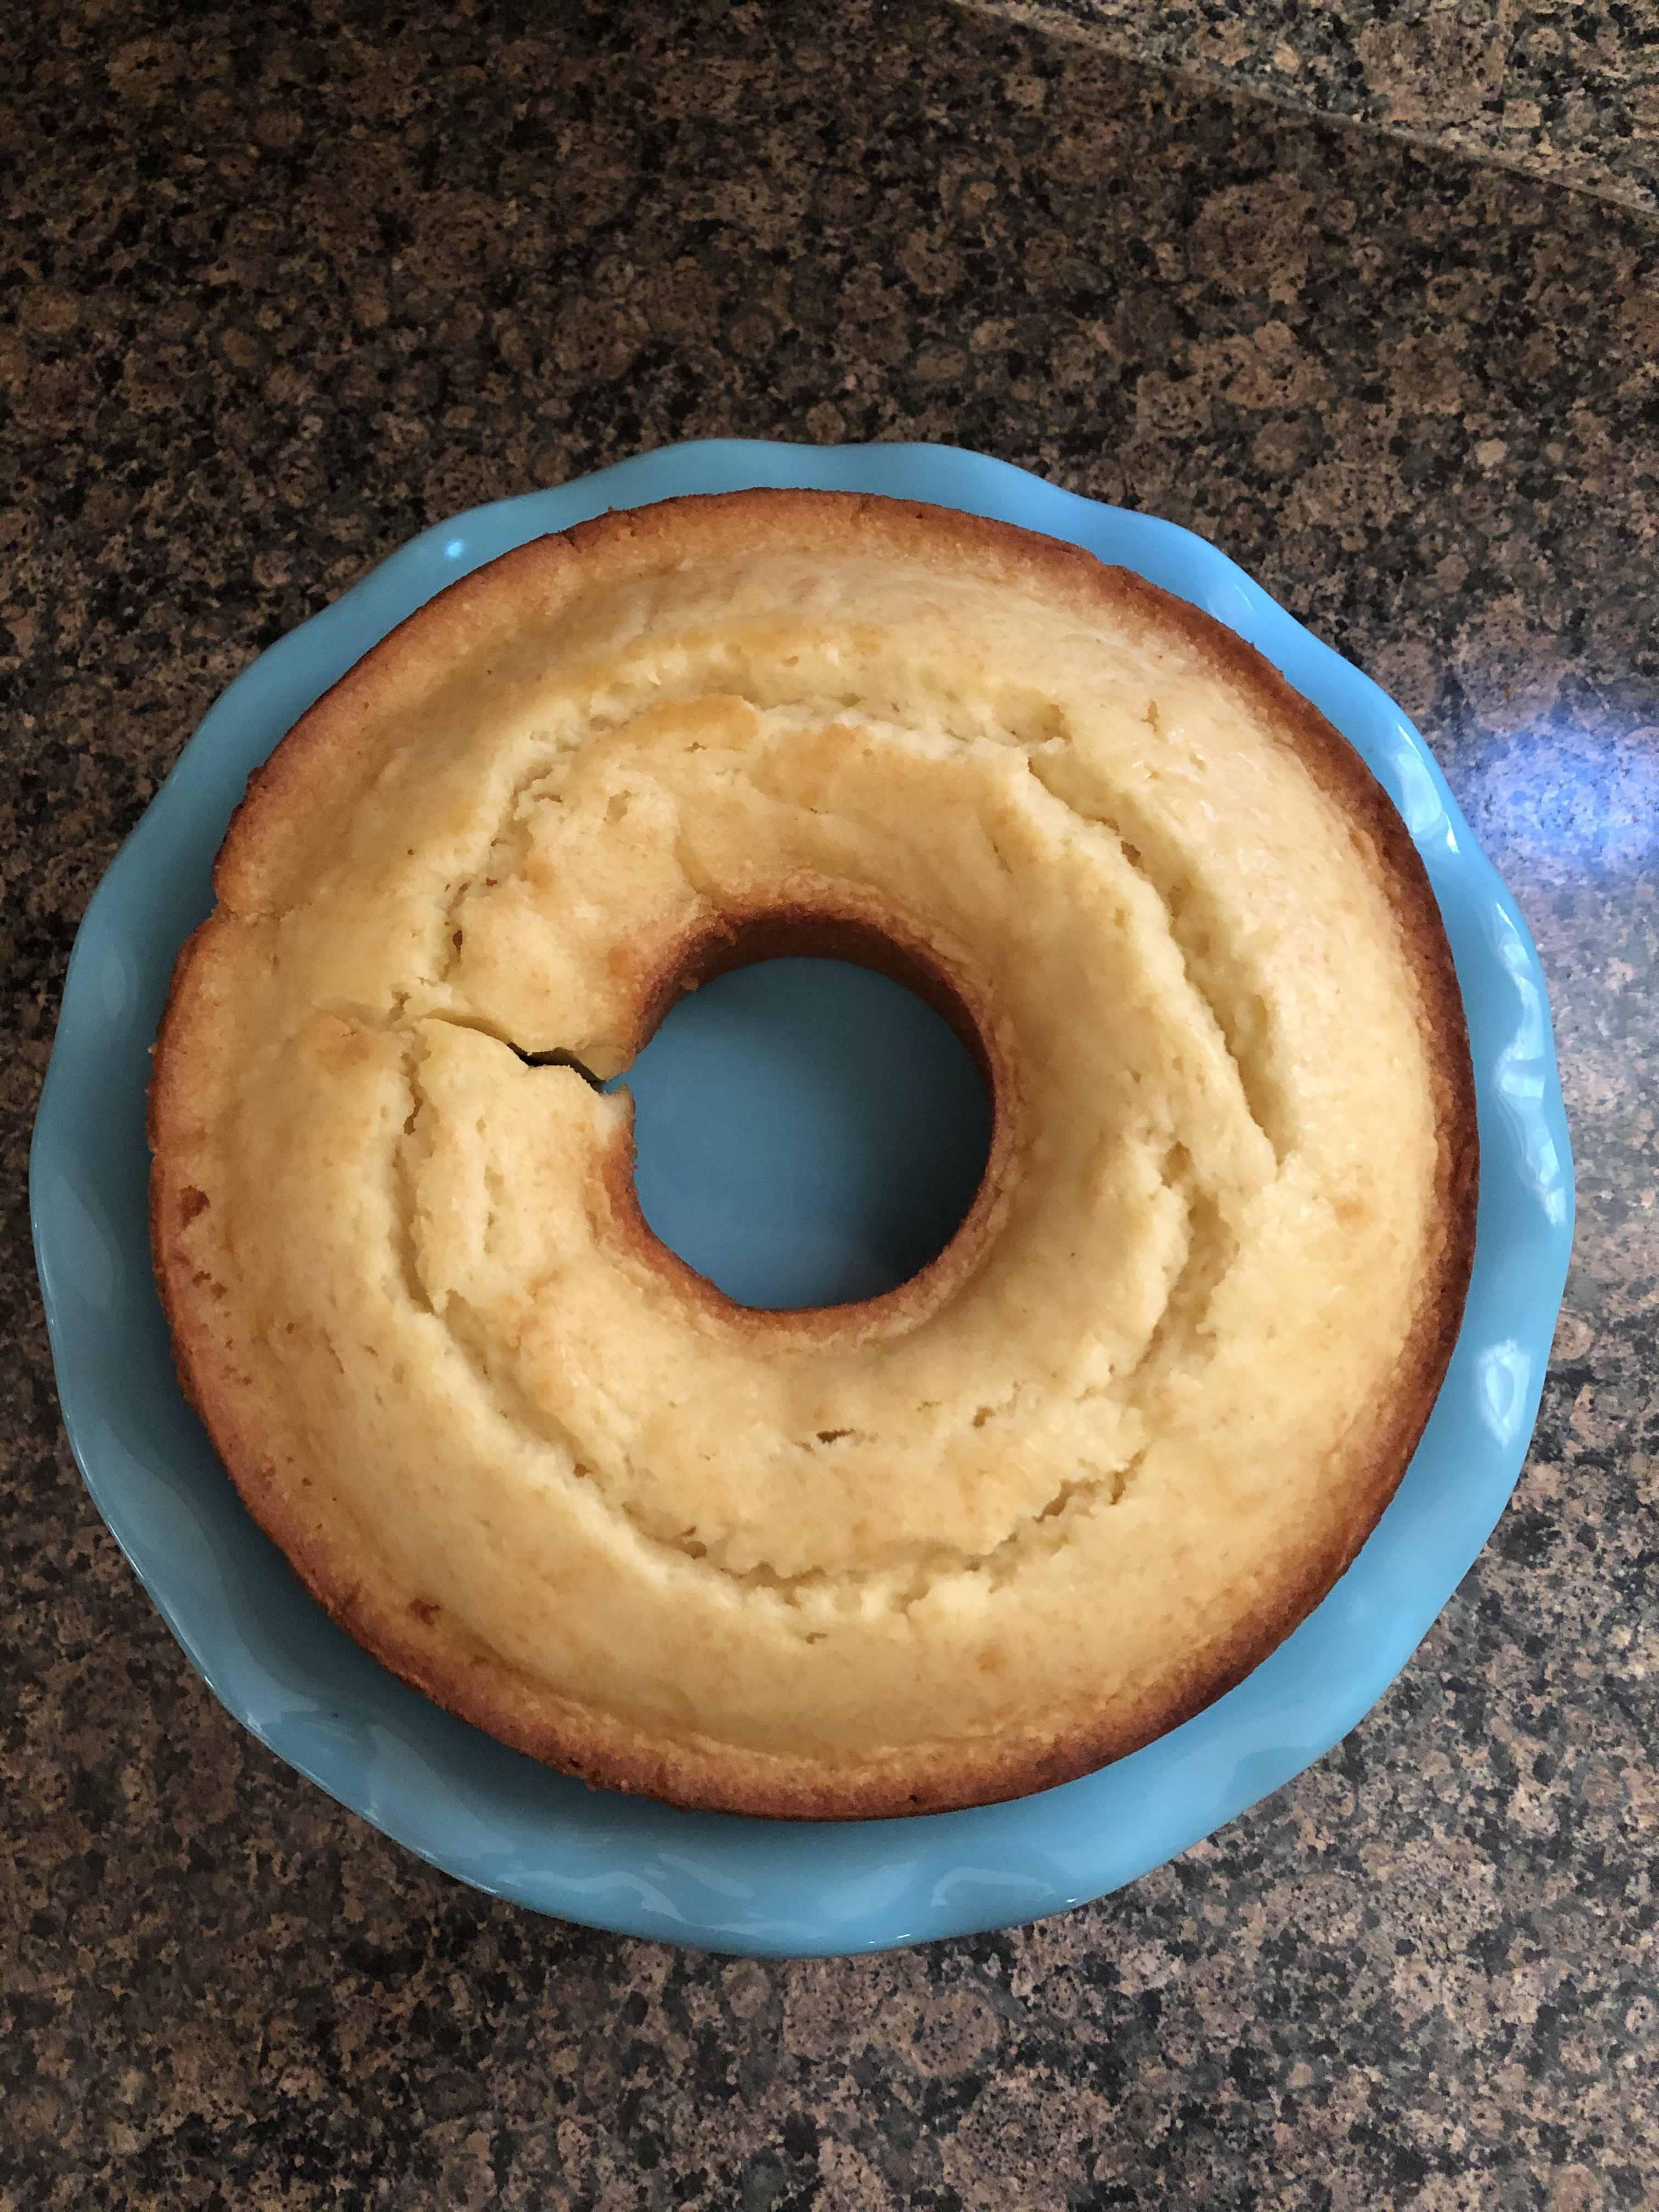
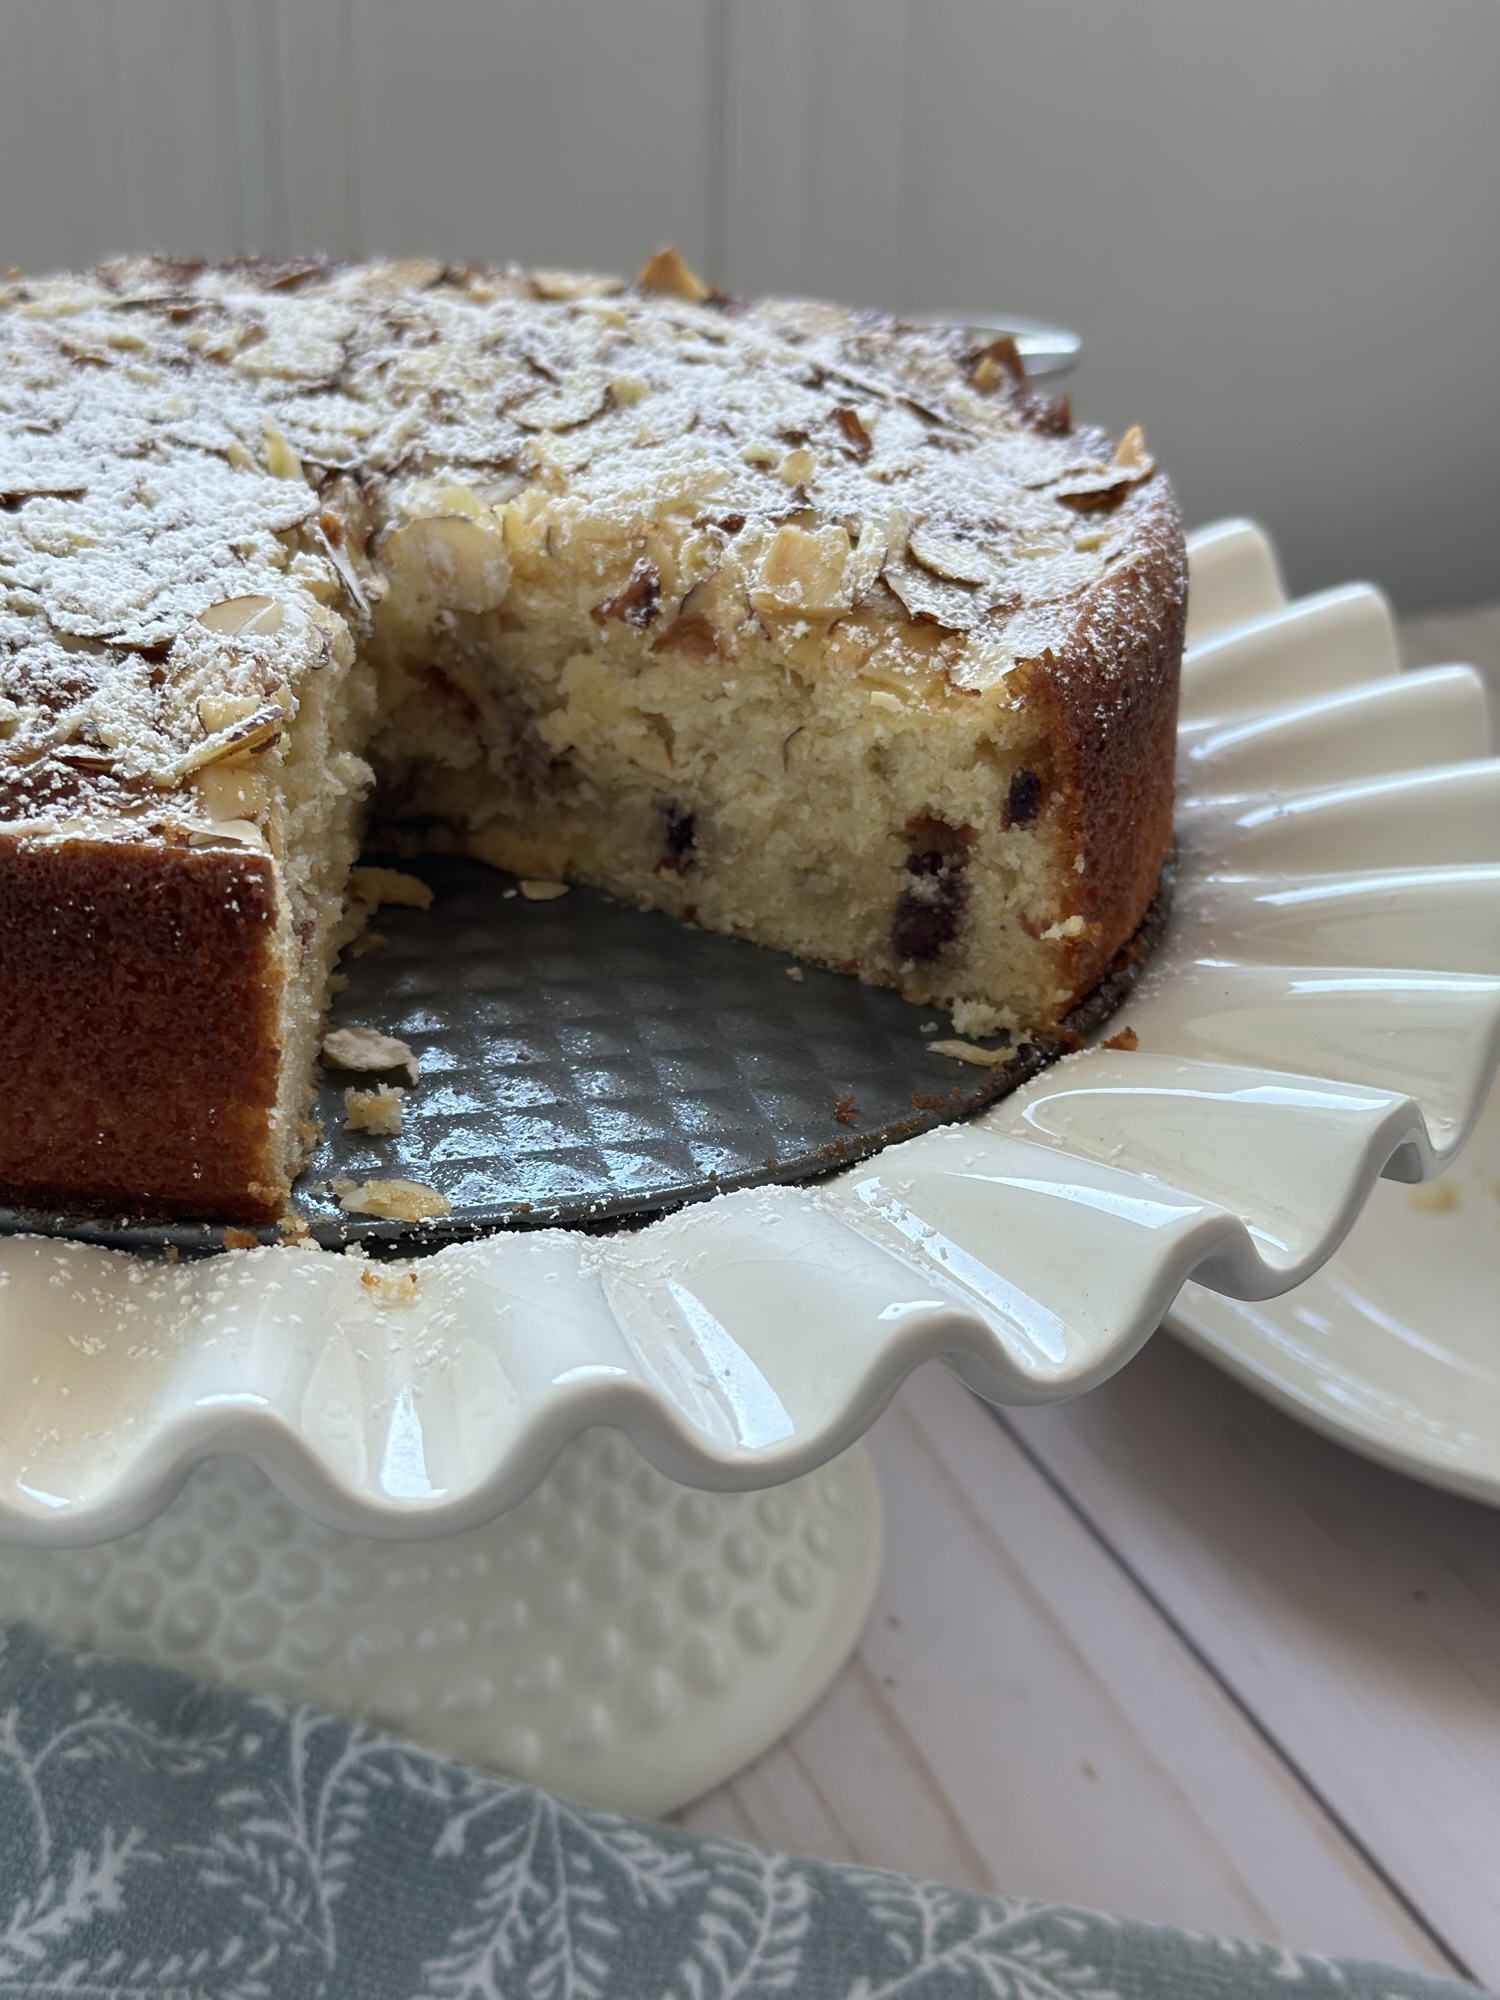
I started this cake by making brown butter. After letting it cool, I got to work on making the batter for the cake. I whisked the cooled brown butter with eggs, sugar and vanilla extract, until it was smooth. In another bowl I whisked together the dry ingredients – flour, almond flour and baking powder. I incorporated the dry ingredients into the wet ingredients in 3 batches alternating with buttermilk. While you can buy buttermilk, I always opt to make my own by combining whole milk and vinegar. Once the batter was ready, I poured half of it into my prepared pan and then topped it with diced almond paste and semi-sweet chocolate chips. I then topped it with the remaining batter and gently spread it with an offset spatula. Before placing it in the oven I sprinkled the top with sliced almonds. After the cake cooled I dusted it with Confectioners’ sugar before enjoying a slice.

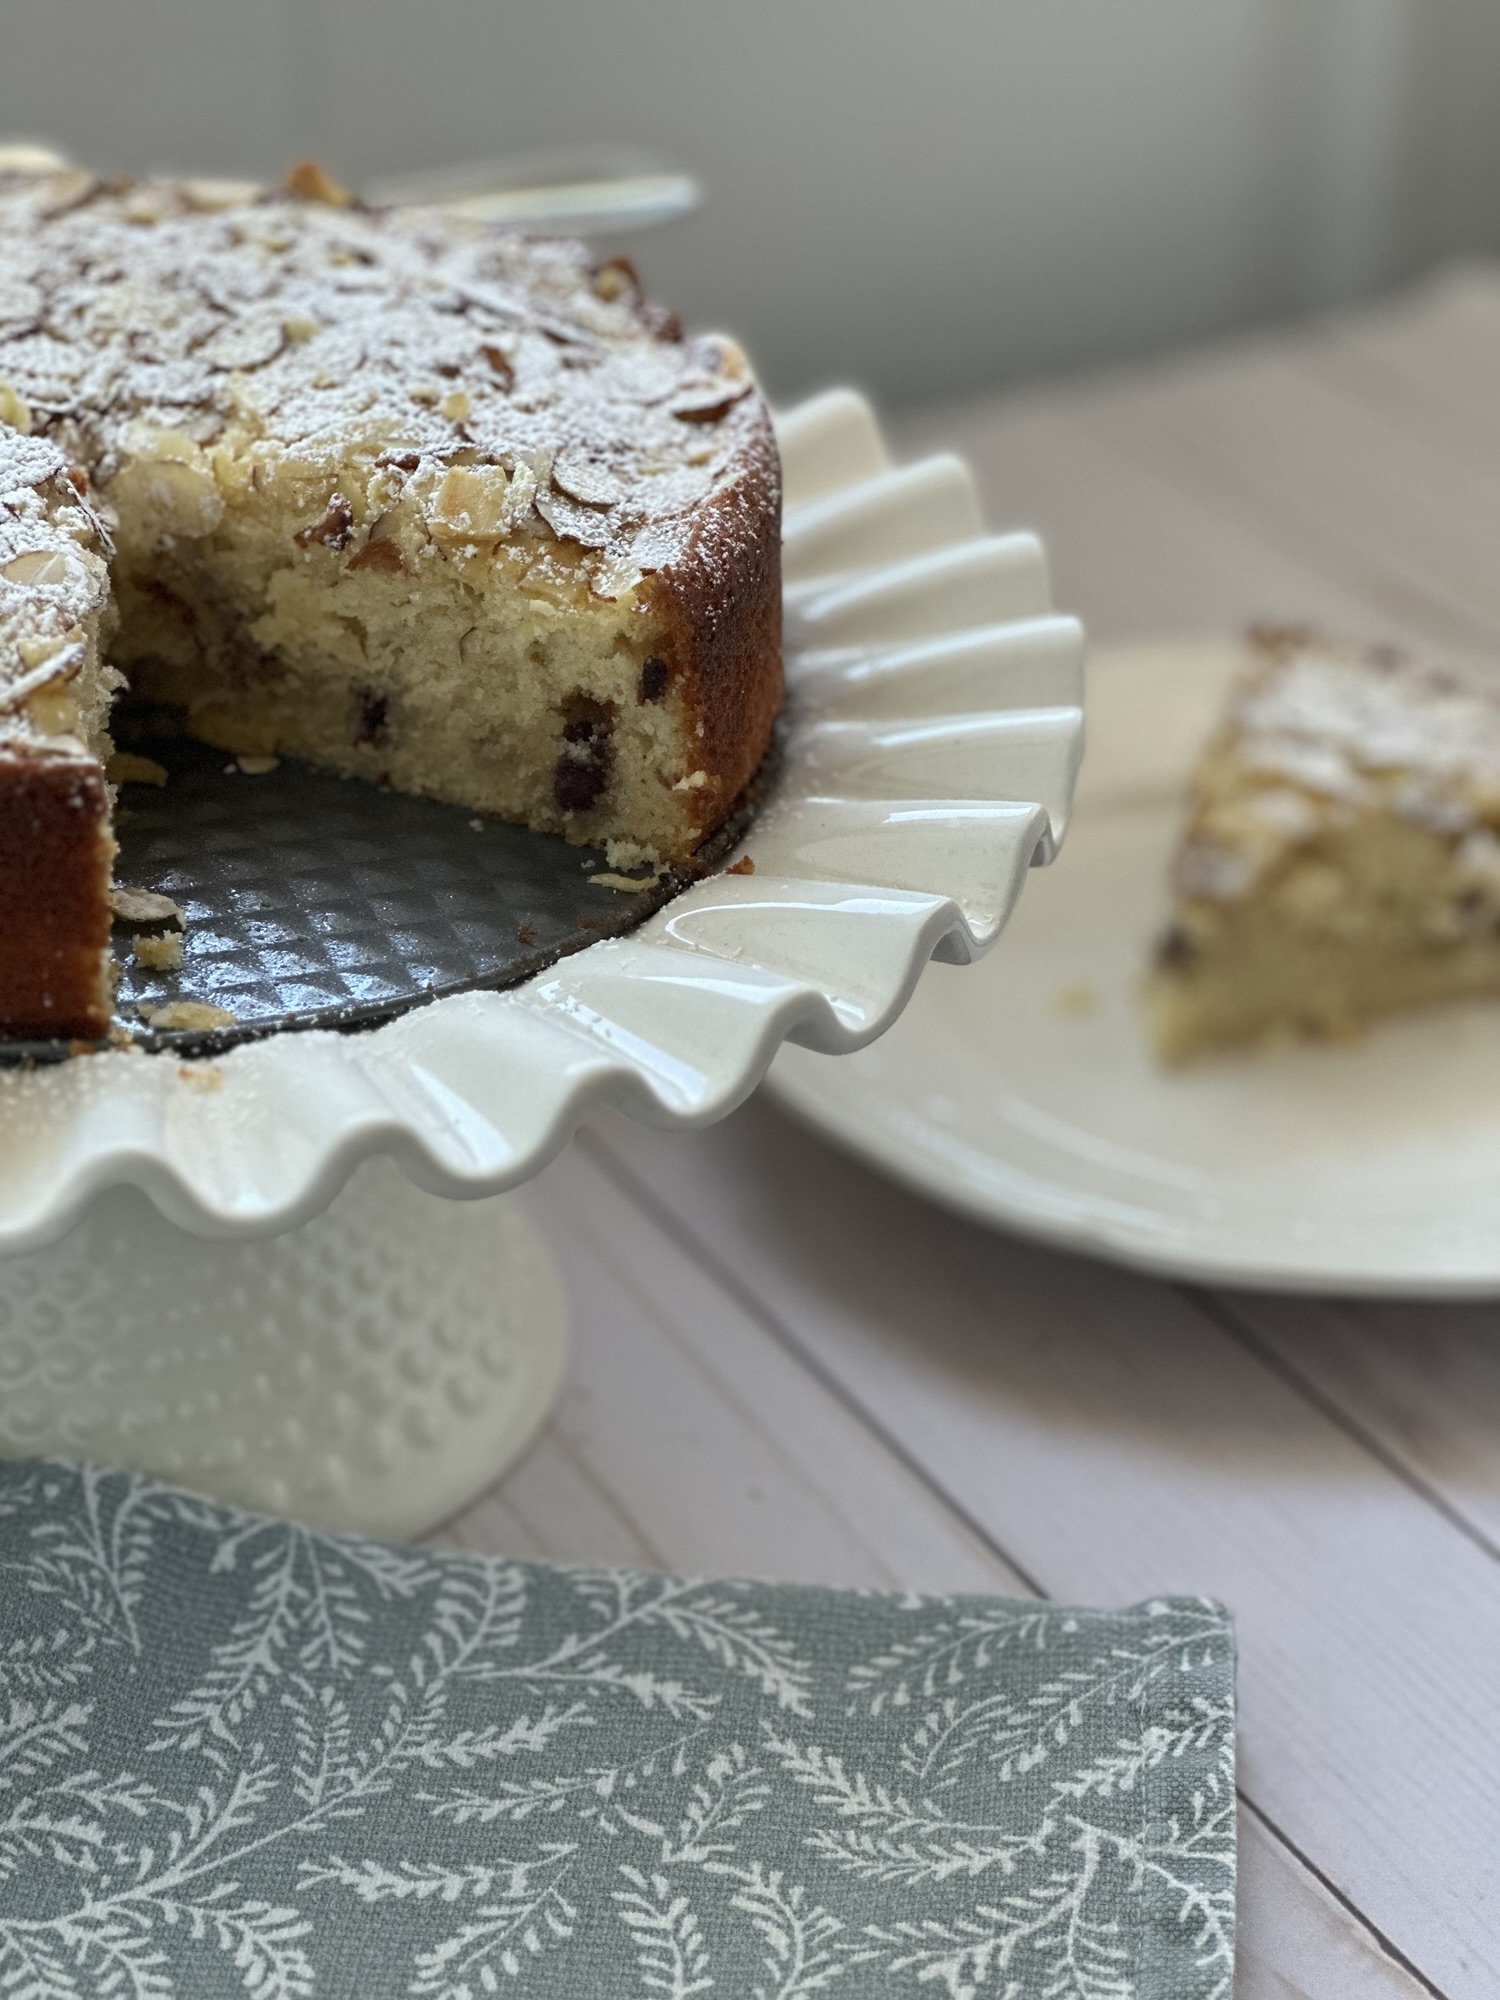
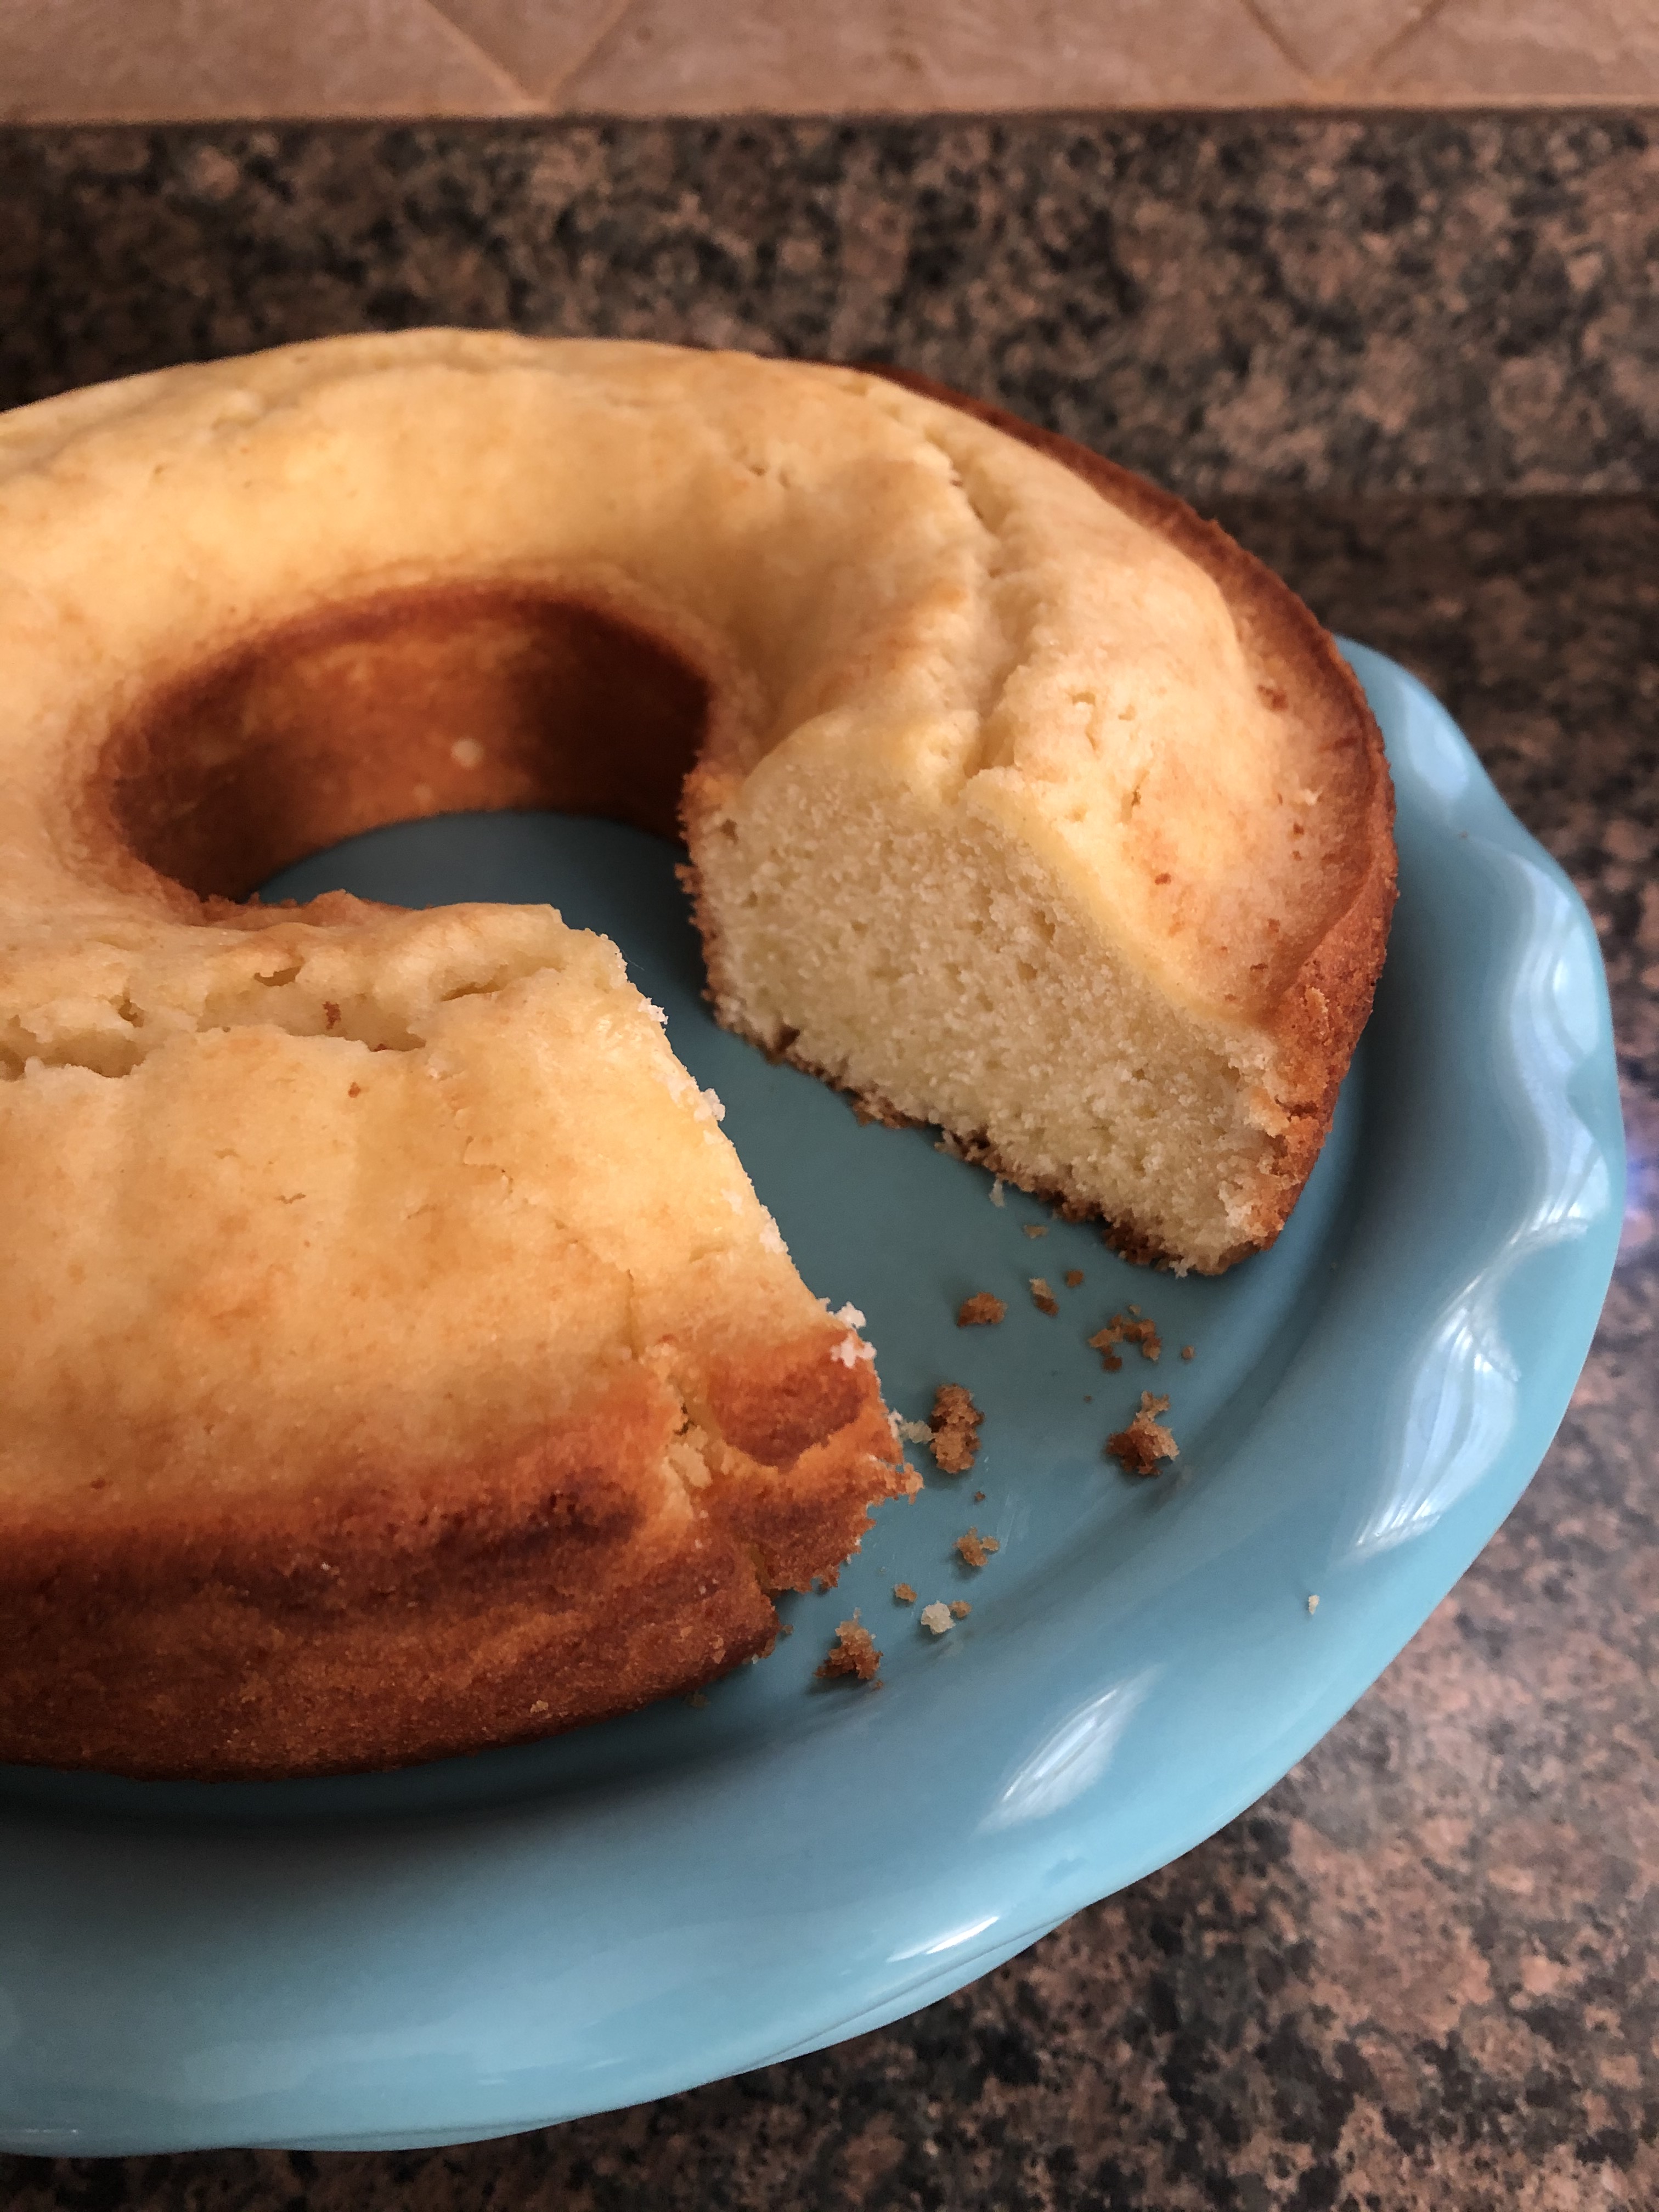
You may be wondering why I said this cake wasn’t very dessert-y. Well, besides the fact that it wasn’t very sweet, the texture was more reminiscent of a muffin or scone to me. It did taste good, but I think the recipe title is a bit deceiving. I was really hoping the brown butter flavor would stand out more as it did in the batter – yes, I tried the batter raw – but it somehow melted away while baking. And while the title does say “Almond Cake”, adding almond flour to the batter didn’t really give the cake an almond flavor, that really came from the almond paste that was added to the filling along with the chocolate chips. The almond flour aided in making the cake extremely moist though – always a good thing when it comes to cakes. No one wants to eat a dry cake, regardless of how good it may be. It is possible that the brown butter and almond flour somehow cancelled each other out, both having a nutty flavor or that the almond past just overpowered everything. Maybe a better title for this cake would be Brown Butter Cake with Almond & Chocolate Filling. Apologies if I sound negative, as I mentioned, the cake was good just not really what I thought it would taste like based on the recipe title. I would be curious to try this recipe again by omitting the almond flour and increasing the amount of all-purpose flour. Maybe then the flavor of the brown butter would really shine through.

Brown Butter Almond Cake with Chocolate Filling

Ingredients:

1 stick unsalted butter

1 1/2 cups flour

1/2 cup almond flour

1 teaspoon baking powder

3/4 teaspoon salt

2 large eggs

1 cup sugar

1 teaspoon vanilla extract

3/4 cup buttermilk

1/2 cup semi-sweet chocolate chips

2 ounces almond paste, finely diced (about 1/3 cup)

1/2 cup sliced almonds

Confectioners’ sugar, for dusting

Directions:

Brown the butter: Place the butter in a medium saucepan and melt over low-medium heat, stirring constantly until the butter reaches a warm amber color, about 5 to 7 minutes. Transfer to large bowl to cool.

Preheat oven to 350 F. Spray an 8-inch springform pan with baking spray and set aside.

In a medium bowl whisk together the flour, almond flour, baking powder and salt. Set aside.

Add the eggs to the cooled brown butter and whisk together until smooth. Whisk in the sugar and vanilla extract until combined. Add the flour mixture in three parts alternating with the buttermilk. Whisk until the batter is smooth.

Spread half the batter into the prepared pan. Scatter the chocolate chips and diced almond paste over the batter in an even layer right to the edge. Top with remaining batter and gently spread with an offset-spatula. Sprinkle the sliced almonds over the cake in an even layer.

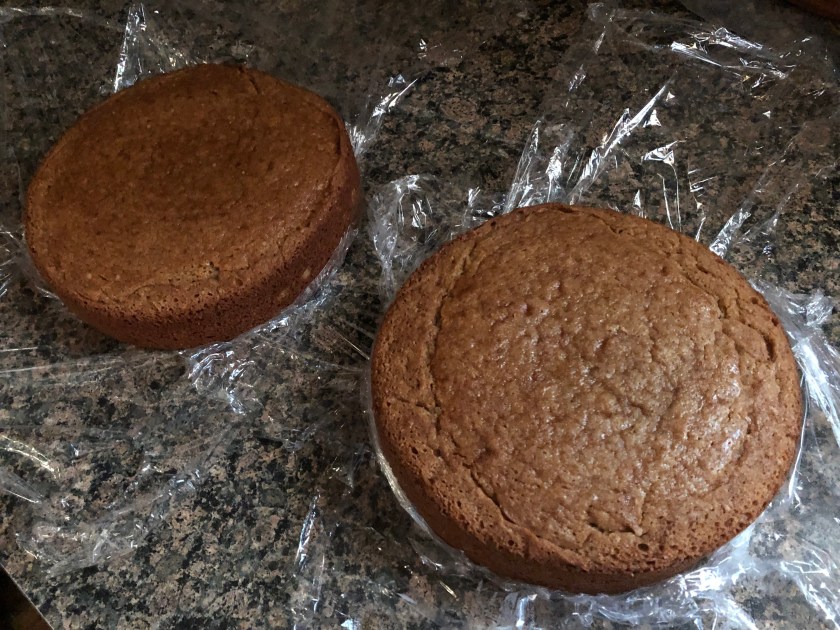
Bake in the preheated oven for 40 to 50 minutes, until the cake is golden brown and springs back when pressed. Transfer to a wire rack to cool for 20 minutes. Run a knife along the edges of the cake to loosen from the springform ring. Remove the springform ring and let the cake cool completely before dusting with Confectioners’ sugar.

Recipe from Food Network

Raspberry Almond Cake with Chocolate Frosting

Hi there… It’s been a while! I have been baking, but I haven’t really been baking anything new to share. I did tweak a Blueberry Crumb Muffin recipe that was quite yummy that I intended on sharing, but didn’t photograph so it didn’t become a blog post. I’ll have to whip up a batch soon to share especially since berry season is right around the corner. I’ve also been doing quite a bit of crocheting. I used up most of my remnant stash of Bernat Blanket Yarn to create a colorful granny square blanket. I’ll be sharing that soon. I’ve also been working on a sunburst granny square cardigan for myself. Full disclaimer, I’ve been working on it for over a year. I go through bursts of making the squares and then take a break. I believe I am only a few squares away from having enough to start stitching it together so hopefully it doesn’t take me another year to complete. But today I am sharing a cake where all the flavors work perfectly well together. A Raspberry Almond Cake with Chocolate Frosting. So, if you like chocolate-covered almonds, raspberry truffles, any almond dessert, etc. this cake is for you!

To start I made the raspberry curd. Yes, raspberry curd. While most people think of citrus –especially lemon – when it comes to curd you can pretty much make curd with any fruit. The steps are basically the same you may just have to adjust the amount of sugar you use depending on the sweetness of the fruit. Once the curd was done, I let it cool in the refrigerator overnight so it could thicken.

For the cake, I used a white cake mix that I doctored by adding in buttermilk, sour cream, vanilla extract and a decent amount of almond extract to get the perfect almond flavor without it being too overpowering – a full tablespoon. You may think this is too much, but any less and the almond flavor won’t stand out. I wanted the flavors to complement each other but also to stand out on their own.

Any to top it all off a simple chocolate buttercream frosting. Perfectly chocolatey without being overly sweet! I may have enjoyed a few spoonful’s of the leftover frosting.

Put all those together and you have a cake that may just become your go-to when looking for something special but not too difficult to make.

Raspberry Almond Cake with Chocolate Frosting

Ingredients:

Raspberry Curd:

11-12oz. Raspberries (frozen or fresh)

1 cup sugar

2 tablespoons lemon juice

6 egg yolks

1 stick unsalted butter, cubed

Almond Cake:

1 15oz white cake mix

3 large eggs, at room temperature

1/2 vegetable (or canola) oil

3/4 cup buttermilk, at room temperature

1/3 cup sour cream, at room temperature

1 tablespoon almond extract

1 teaspoon vanilla extract

Chocolate Buttercream:

2 1/2 sticks unsalted butter (1 1/4 cups), at room temperature

3 1/2 cups confectioners’ sugar

3/4 cup cocoa powder

5 tablespoons heavy cream, at room temperature

1/4 teaspoon salt

2 teaspoons vanilla extract

Fresh raspberries and sliced almonds for decorating, optional

Directions:

For the Raspberry Curd: In a medium saucepan combine the raspberries and the lemon juice. Cook on medium low heat until the raspberries begin to burst, and you can smash them. Once the raspberries are mostly liquid press them through a fine mesh sieve to remove the seeds. Allow it to cool.

In a medium saucepan lightly beat the egg yolks and then add in the sugar. Whisk the eggs yolks and sugar together until well combined. Then whisk in the cooled raspberry mixture. Cook on low heat whisking constantly until the mixture thickens and coats the back of a spoon. Remove from the heat and whisk in the cubed butter until it has completely melted. Strain the curd through a fine mesh sieve into a heatproof bowl. Allow it to cool to room temperature and then place a piece of plastic wrap directly on the surface then cover the bowl and refrigerate for at least 2 hours or until the curd has thicken.

For the Almond Cake: In a large bowl add the cake mix, eggs, oil, buttermilk, sour cream and both extracts. Beat with a hand mixer on low for 30 seconds and then increase speed to medium and continue beating for about 2 minutes until the ingredients are well combined. Do not overbeat. Divide the batter among 2 8-inch cake round pans that have been sprayed with baking spray. Bake in a 350 F preheated oven for 26-28 minutes, or until a cake tester inserted in the center comes out clean.

Allow the cakes to cool in the pans for 15 minutes and then transfer to a wire rack to cool completely.

For the Chocolate Buttercream: In the bowl of a stand mixer fitted with the paddle attachment beat the butter on high speed until creamy. Scrape the sides of the bowl and then add the sugar, cocoa powder, heavy cream, salt and vanilla extract. Beat on low speed for about 30 seconds and then gradually increase the speed to high and beat for an additional minute until all the ingredients are well incorporated and the frosting has come together.

To assemble the cake: If necessary, level the cake rounds. Place one of the cake rounds on a cake board or cake platter, flat side down. Using the chocolate frosting, pipe a dam around the perimeter of this cake round. Fill the cake with the cooled raspberry curd (you will only need a little more than half of the curd). Place the other cake round on top, with the flatter side as the top of the cake. Crumb coat the cake with the frosting and then refrigerate for 10 minutes so it can set. Finish frosting the cake with the remaining chocolate buttercream. If you would like you could pipe swirls on top of the cake with the remaining buttercream and then top each with a fresh raspberry. If using, decorate the sides of the cake with almond slices by simply pressing them on.

Recipe first appeared on Bead Yarn & Spatula

Chocolate Turtle Cake

Around the holidays I always do what I have termed as marathon baking. Usually on December 22nd or 23rd I bake a bunch of cookies that I give as Christmas gifts. I have tried and true recipes that I make every year that I know are crowd pleasers and then I try one or two new ones to add to the mix. Last year one of those cookies was a Chocolate Caramel Thumbprint, essentially a Turtle candy turned into a cookie. And just in case you are not familiar, Turtles are candies made with pecans and caramel dipped in chocolate. The cookies were so good that I ended up making them again for New Year’s Eve. Which then got me thinking of making a cake reminiscent of the flavors and ingredients. Hence, today’s Chocolate Turtle Cake.

So, how are all the flavors incorporated into the cake? Well, two chocolate cake layers are separated by a generous layer of caramel whipped cream and then the whole thing is covered in a delicious chocolate frosting. And finally, decorated with chopped pecans and drizzled with caramel sauce. YUM!

Chocolate Turtle Cake

For the Chocolate Cake:

1 15.25oz box of chocolate cake mix (I used Duncan Hines Devil’s Food)

3 large eggs

1 cup coffee, cooled

1/2 cup vegetable oil

1/2 cup sour cream

1 teaspoon vanilla extract

For the Caramel Sauce / Caramel Whipped Cream:

14oz. package caramels*

1/2 cup evaporated milk

1/4 cup maple syrup

1 cup heavy cream

For the Chocolate Frosting:

2 cups sugar

1 14 oz. can evaporated milk

8oz unsweetened chocolate melted and cooled

Pecan halves and/or chopped pecans, to decorate the cake

*I used Kraft caramels

Directions:

Preheat oven to 350 F. Spray two 8-inch round cake pans with baking spray and set aside.

For the chocolate cake: In a large bowl combine the eggs, coffee, vegetable oil, sour cream and vanilla extract. Beat with a hand mixer on medium speed until well combined. Sift the cake mix over the mixture and beat the mixture on low speed until just combined. Divide among the prepared pans and bake in the preheated oven for 30-35 minutes, or until a cake tester comes out clean. Cool the cakes in the pans for 10 minutes before transferring to wire racks to cool completely.

For the caramel sauce / caramel whipped cream: In a small saucepan combine the unwrapped caramels and evaporated milk. Over medium heat, stir constantly until the caramels melt and the mixture is smooth. Remove from the heat and stir in the maple syrup. Let cool.

Once the caramel sauce is cooled, add 1/4 cup of the sauce along with the heavy cream to a medium bowl and beat with a hand mixer on medium speed until stiff peaks form. Refrigerate the caramel whipped cream until ready to use. Set aside the remaining caramel sauce to drizzle on the cake.

For the chocolate frosting: Add the ingredients to a blender and blend on low speed for 1 minute and then switch to high speed and blend for another minute. The sound of the blender should change signaling that the frosting is done. Transfer the frosting to an airtight container and let sit at room temperature for 1 hour until thickened and spreadable.

To assemble: If necessary, level the cake layers. Place one of the layers on a cake stand or cake round. Transfer about 1 cup to 1 1/2 cups of frosting to a piping bag and pipe a dam around the bottom layer and then fill with the caramel whipped cream. You may have more whipped cream than you need. Place the second cake layer on top of the cake and crumb coat the entire cake. Refrigerate for about 30 minutes and then finish frosting the cake. With remaining frosting pipe decorate dollops on top of the cake. Drizzle some of the remaining caramel sauce on top of the cake as well and then decorate with chopped pecans along the sides of the cake.

Chocolate Crumb Cake

I think we can all agree that the best part of any crumb cake is the crumb! All crumb is not the same though. Leave it in the oven a tad too long and instead of it being delicious and sweet it’ll be burnt and dry. If you don’t mix the ingredients in just the right order your consistency will be off. I once made a batch of muffins with a crumb topping that ended up melting into the muffins while in the oven. And regardless of what the recipe says, I always refrigerate (or freeze) my crumb topping before using it. I think this helps it stay together better while in the oven. After all this talk about crumbs it should come as no surprise that today’s cake has a crumb topping… It’s a Chocolate Crumb Cake.

I’ve had the idea for this cake for quite some time. Years ago, I would get something similar at a bakery I would go to from time to time. In my mind it was a Chocolate Crumb Pound Cake, but that’s not what it was called on the menu. Truth be told, I have no idea what it was called. Whenever I ordered it, I would just point to it and get it (the best way to order things!). Ultimately the bakery closed but I never forgot about that cake. I have a list of things I want to bake / try to make, and that cake was always on there, but it would always get neglected. I finally decided that it would be a nice addition to this week since I was posting two recipes using a yellow cake mix for two different variations of marble cake to make with it. 

For this cake I started with a box chocolate cake mix. To make it taste a bit more homemade and to enhance the chocolate flavor I swapped out the water for coffee and I used vegetable oil and sour cream for the fat. I also added in vanilla extract. After making the batter I poured it into a 9-inch square pan I lined with parchment paper. It’s important to leave an overhang with the parchment paper so you can remove the cake from the pan easily. You really don’t want to flip it out of the pan as you would a regular cake because of the crumb topping. In doing so you could end up cracking the crumb topping or worse the cake itself. After the batter was in the pan, I used my hands to spread the crumb topping over the cake.

Once the cake was baked and completely cooled, I dusted the top of it with confectioners’ sugar – you can’t have crumb topping without it in my opinion.

Overall, the cake was DELISH! It was a hit with everyone I shared it with. Definitely something to make again!

Chocolate Crumb Cake

For the Crumb Topping:

1/4 cup sugar

1/3 cup light brown sugar

1 teaspoon cinnamon

1/4 teaspoon nutmeg

1/2 cup butter (1 stick) butter, melted

1 1/3 cups flour

For the Cake:

1 15.25 oz package chocolate cake mix (I used Duncan Hines Devil’s Food)

3 large eggs

1 cup coffee, cooled

1/2 cup vegetable oil

1/2 cup sour cream

1 teaspoon vanilla extract

Confectioners’ sugar, for topping

Directions:

Preheat oven to 350 F. Spray a 9-inch square pan with baking spray and then line with parchment paper leaving an overhang on all sides. Spray the parchment paper with baking spray and set aside.

Make the crumb topping: In a medium bowl whisk together both sugars, cinnamon and nutmeg. Stir in the melted butter and finally the flour. Continue mixing until the mixture clumps together. Refrigerate for 10-15 minutes.

Make the cake batter: In a large bowl combine the cake mix, eggs, coffee, vegetable oil, sour cream and vanilla extract. Beat with a hand mixer on low speed for 30 seconds to combine all of the ingredients and then increase the speed to medium and continue beating until everything is well combined.

Transfer the batter to the prepared pan and then using your hands sprinkle the chilled crumb topping over it.

Bake in the preheated oven for 40-45 minutes, or until a cake tester inserted in the center comes out clean.

Cool in the pan for 15 minutes and then use the parchment paper to carefully lift the cake out of the pan and place on a wire rack to cool completely.

Dust with confectioners’ sugar prior to serving.

Store leftovers in an airtight container at room temperature.

Recipe first appeared on Bead Yarn & Spatula.

11 Years…

Last week marked 11 years that I started this blog. It all started with an Elmo cake I made for my oldest niece’s birthday. Since then, there have been posts highlighting other theme cakes, birthday cakes, holiday cakes, cookies, pies, yarn projects and even some jewelry. And a few other things in between.

When I started, I was basically winging it (to some extent I probably still am). I got the basics of how to post my story and pics and went with it. I am still unsure about SEO, but I keep trudging along. I remember when I posted a recipe I would always take (and post) a pic of all of my ingredients assembled for it. It was something I saw other bloggers do so I figured I should do it as well. I moved away from that quite some time ago. Truth be told, nowadays I can be in such a zone creating (be it baking, knitting/crocheting, etc.) that I tend to forget to take a pic of the steps. I focus more now on getting a good pic of the finished project. I’m still working on getting those just right as well. I feel like I’m chasing the sunlight around my house. The different seasons tend to make the sunlight in my house perfect at different times of the day and in different areas of my house. And lately we have been having a ton of cloudy days, so my pics have been looking a bit gray. My recent location for photos has been by my front door. I set-up a table by my storm door to get as much unobstructed natural light as I can. This involves me contorting and squatting in a tight space to get the picture just right. And probably has my neighbors who have spotted me doing this wondering what the heck I am doing as they aren’t able to see my set-up, just me taking pics. When I come home at night I tend to stand in my yard and look up at the stars (which I think may be an odd sight at night), so this just adds to my eccentricities. It might be time to invest in one of those nifty backdrops to take my pictures though.

During these 11 years there have been times when I thought about ending my blog or taking an extended break from it. But I enjoy creating and writing and what better way to flex that muscle than with a blog. I have noticed that quite a few blogs I do (or did) follow have stopped and I get it. Blogging does take some time and I don’t just mean the writing (which of course takes time as well). You have to create the content. Whether it be working on a creative piece, testing a recipe, creating a recipe from scratch, that all takes time. And having extra time to do things is such a commodity! I am constantly making lists or going through things in my head to make sure I get everything I want done done. There’s always a list. I get such a feeling of accomplishment when I cross things off my lists. Maybe it’s a psychological thing, regardless, it works, and I am going with it. I have even started to try and map out the things I want to post about as well. Baking things earlier for holiday posts so I am not scrambling a day or two before to get all done. So, cheers to 11 years and hopefully too many more to come! Oh, and here’s a pic of my niece’s birthday cake this year… She turned 13 so instead of a theme cake something a bit more sophisticated!

Red Velvet Cheesecake Cake

Happy Holidays! A time of get-togethers, good food and even better desserts! If you are looking for a delicious cake to make for any of your get-togethers that has a festive touch to it this Red Velvet Cheesecake Cake just might be the one. A delicious creamy cheesecake is sandwiched between two red velvet cake layers and then frosted with a tangy and slightly sweet cream cheese frosting!

To ensure that your cake layers and cheesecake are the same size, use the same pans to bake them. While two pans may be the same size, one may have straighter edges than the other. I baked my cake layers and cheesecake in 8-inch round cake pans. You could also use 9-inch ones but keep in mind that your cake layers and cheesecake won’t be as high.

And while I did have to smooth the sides of the cheesecake a bit to get it flushed with the cake layers once the cake was assembled, I am sure it would have been a lot worse if I hadn’t used the same pans for all the layers.

And after a crumb coat…

I finished frosting and decorating the cake.

This cake will take you 2-3 days to bake and assemble depending on when you bake and/or refrigerate your layers. I opted to bake my cake layers on day 1, wrapped them in plastic wrap once they cooled and then refrigerated them. The following day I made my cheesecake layer and refrigerated that overnight. And finally, on the third day I made the cream cheese frosting and assembled the cake. You could also opt to bake everything on the same day and then refrigerate overnight, or the cheesecake one day and then the cake layers the following day and then assemble the cake once the cake layers have cooled. Whatever you decide, keep in mind that the cheesecake layer will need to be refrigerated at least 6 hours before assembling. Regardless of the baking schedule you choose you will end up with a delicious cake that will be perfect for your holidays, any other festive occasion or just because!

Red Velvet Cheesecake Cake

Ingredients:

Cheesecake:

3 8oz blocks cream cheese, at room temperature

1 cup sugar

3 tablespoons flour

1 cup sour cream

1 tablespoon vanilla extract

4 large eggs, at room temperature

Red Velvet Cake:

1 15.25 of package of Red Velvet Cake Mix (I used Duncan Hines)

3 large eggs

1 cup buttermilk*

1/3 cup vegetable oil

Cream Cheese Frosting:

2 8oz block cream cheese, at room temperature

2 sticks (1 cup) unsalted butter, at room temperature

4 cups Confectioners’ sugar, sifted

2 teaspoons vanilla extract

*Make your own buttermilk by adding 5 teaspoons of vinegar to a measuring cup and then adding enough whole milk to make 1 cup. Let stand for 15 minutes at room temperature, or until the milk becomes thick and appears curdled.

Directions:

For the Cheesecake:

Preheat the oven to 300 F. Line an 8-inch round cake pan with aluminum foil, leaving an overhang, and set aside.  

In a large bowl beat the cream cheese, sugar and flour with hand mixer on low speed until just combined. Add the sour cream and vanilla extract and continue beating on low until incorporated. Add the eggs 1 at a time and continue beating until everything is combined.

Pour the cheesecake batter into the prepared pan. Place the pan inside of a larger pan (larger cake pan or a roasting pan) and fill with water halfway up the sides of the pan. Bake in the preheated oven for 1 hour. Turn the oven off and leave the cheesecake in the oven for an additional 30 minutes. Afterwards, crack the oven door open and let the cheesecake cool in the oven for an additional 30 minutes. Transfer to a wire rack to cool and then refrigerate overnight.

For the Cake:

Preheat the oven to 350 F. Spray two 8-inch round cake pans with baking spray and set aside.

In a large bowl beat together the buttermilk, eggs and oil with a hand mixer on medium speed until well combined. Using a fine mesh sieve (or a sifter) sift the cake mix over the buttermilk mixture. Beat on medium speed until just combined and then use a rubber spatula to gently stir the batter together a few times. Divide the batter among the prepared pans and bake in the preheated oven for 26-30 minutes, or until a cake tester inserted in the center comes out clean. Let the cakes cool in the pans for 15 minutes and then transfer to a wire rack to cool completely.

If you are baking the cake layers ahead of time wrap them in plastic wrap and refrigerate until ready to use.

For the Cream Cheese Frosting:

Add the cream cheese, butter and Confectioners’ sugar to the bowl of a stand mixer with the paddle attachment and beat on low until combined. Raise the speed to medium high and continue beating the frosting until light and fluffy, about 5 minutes. Add the vanilla extract and continue beating on medium speed until incorporated.

If the frosting is too soft to use refrigerate for 10-15 minutes, or until desired consistency.

To Assemble:

Level the red velvet cake layers and crumble the cut pieces and set aside.

Spread a dollop of the frosting in the center of a cake board and place one of the cake layers on it. Spread a thin layer of the frosting on the cake.

Carefully remove the cheesecake layer from the aluminum foil and place it on top of the cake layer. Gently spread a thin layer of the frosting on the cheesecake and then top with the remaining cake layer, cut side down.

If need be, use a paring knife or long spatula to smooth the sides of the cheesecake to be flush with the red velvet cake layers.

Crumb coat the cake – cover the cake with a thin layer of frosting and refrigerate for 30 minutes. If the remaining frosting begins to get too soft place it in the refrigerator for the last 5-10 minutes.

Reserve about a cup of the frosting and then use the remaining frosting to cover the entire cake.

Sprinkle the top of the cake with the crumbled red velvet cake.

Transfer the reserved frosting to a piping bag fitted with a large star tip and pipe dollops on top of the cake.

Refrigerate until ready to serve.

Recipe first appeared on Bead Yarn & Spatula.

Pumpkin Tiramisu Cake

If at first you don’t succeed you must try again. That’s what’s been happening with some of the cakes I have been posting as of late. I have been trying to come up with recipes myself as opposed to relying on Google to give me a nice list of whatever idea pops into my head. On my first try it’s sometimes a complete fail, a great flavor but horrible texture or a so-so flavor and the right texture. And let’s be honest, if you can’t get the flavor and texture to be just right the cake is just not good to eat. That’s what happened with the first pumpkin cake I made for today’s Pumpkin Tiramisu Cake. I used an entire can of pumpkin puree for the cake and the end result was a cake that had an odd indentation around it, but tasted good. I had a feeling that it was the result of too much liquid (i.e. wet ingredients) in the cake and my suspicions were correct. I ended up tweaking the recipe a bit and ended up with a cake that had smooth edges and a much more cake-like consistency.

So, what makes this a tiramisu cake? Well, if you are thinking ladyfingers you won’t be finding any on this cake. It’s more about the flavor. The filling is basically the same filling that is used in your typical tiramisu… A custard that is mixed with mascarpone cheese and homemade whipped cream. To get that coffee flavor, each cake layer is brushed with a coffee and Kahlua mixture. And to top it off, the cake is covered in a Mascarpone Kahlua Frosting (YUM!). I had some leftover frosting after finishing the cake and I may have enjoyed a spoonful or two of it. It’s not sweet at all and the Kahlua gives it a very light coffee flavor. And finally, the cake is dusted with unsweetened cocoa powder to get that finishing look of Tiramisu.

The end result, a pumpkin cake that is perfectly complemented by the traditional flavors of Tiramisu.

If you are looking for a more traditional Tiramisu with the flavors of pumpkin instead, check out the recipe below from a few years ago.

Pumpkin Tiramisu

Pumpkin Tiramisu Cake

For the Pumpkin Cake:

1 15.25oz box of yellow cake mix (I used Duncan Hines)

1/2 tablespoon pumpkin pie spice

1 cup pumpkin puree

1 teaspoon vanilla extract

3 large eggs

1/2 cup milk

For the Tiramisu Filling:

3 egg yolks

1/3 cup + 1 tbsp sugar

1/3 cup whole milk

1/2 cup mascarpone cheese

1/2 cup heavy cream

1/2 teaspoon vanilla extract

For the coffee soak:

1/4 cup coffee

2 tablespoon Kahlua

For the Mascarpone Kahlua Frosting:

1 1lb. mascarpone cheese

2 cups heavy cream

2 cups Confectioners’ sugar

2 tablespoons Kahlua

1 teaspoon vanilla extract

Unsweetened cocoa powder, to dust on top of the cake

Directions:

For the cake:

Preheat the oven to 350 F. Spray 2 8-inch round cake pans with baking spray.

In a large bowl whisk together the cake mix and pumpkin pie spice. Add in the pumpkin puree, vanilla extract, eggs and milk. Beat with a hand mixer on low speed for 30 seconds and then increase the speed to medium and beat until just combined.

Divide the batter among the prepared pans and bake in the preheated oven for 24-28 minutes, or until a cake tester inserted in the center comes out clean.

Let the cakes cool in the pan for 10 minutes and then transfer to a wire rack to cool completely.

For the filling:

In a small saucepan, over medium heat, whisk together the egg yolks and sugar until blended. Whisk in the milk and stir constantly until it boils. Allow the mixture to boil for 1 minute. Remove from heat and transfer to a container and cool to room temperature. Place a piece of plastic wrap directly on the surface and then cover tightly and refrigerate for at least 1 hour.

Beat the heavy cream and vanilla together until stiff peaks form.

Beat the mascarpone cheese and chilled egg yolk mixture together until blended. Fold the whipped cream mixture in until no streaks remain. Refrigerate until ready to use.

For the frosting:

Add the mascarpone cheese, heavy cream, Confectioners’ sugar, Kahlua and vanilla extract to the bowl of a stand mixer fitted with the paddle attachment. Start the mixer on low and beat for 30 seconds to 1 minute to allow the ingredients to come together. Gradually increase the speed of the mixer to medium high and continue to beat until the frosting is light and fluffy. At first there may seem like there is too much heavy cream but as you continue to beat it, the heavy cream will be incorporated, and the frosting will become light and fluffy.

To assemble:

If necessary, level the cake layers. In a small bowl whisk together the Kahlua and coffee and brush it on the top of both cake layers.

Place the bottom cake layer on a cake board or serving platter. Transfer about a cup of frosting to a piping bag and pipe a dam around this bottom layer and then fill with the tiramisu filling. Place the second cake layer on top and then crumb coat the cake. Refrigerate for 30 minutes and then finish frosting the cake with the remaining frosting. You should have enough frosting to pipe decorative dollops on top of the cake. Finish the cake by dusting the top with cocoa powder using a fine mesh sieve.

Refrigerate until ready to serve.

Recipe first appeared on Bead Yarn & Spatula.

Cannoli Cake

Happy Holidays! Are you in the throes of holiday baking and eating your way through more sweets than you would like to admit? Well, today I am bringing you a cake that you would be a nice addition to your holiday dessert table and to be honest is my favorite cake flavor… A Cannoli Cake! And it doesn’t skimp on the flavors and ingredients of the delicious handheld dessert… Ricotta and chocolate chips.

The cake itself is made with a French Vanilla box mix (I used a Duncan Hines mix) and the cannoli flavors comes from the filling made with ricotta cheese, cinnamon, three different extracts, confectioners’ sugar and of course chocolate chips. It’s all topped off with a mascarpone cheese frosting and sliced almonds and mini chocolate chips are used to decorate it. It sounds like a lot, but, trust me it’s not. All of the flavors/ingredients work well together and you won’t feel guilty for enjoying a slice because it’s just so good!

Cannoli Cake

Ingredients:

1 package French Vanilla Cake Mix, plus additional ingredients to prepare per packaging

Filling:

2 cups ricotta cheese

1/2 cup confectioners’ sugar

2 teaspoons cinnamon

1 teaspoon almond extract

1 teaspoon rum extract

1 teaspoon vanilla extract

1/3 cup mini chocolate chips

Frosting:

2 8oz. packages mascarpone cheese, at room temperature

3/4 cup confectioners’ sugar

2 teaspoons almond extract

1 teaspoon vanilla extract

2 tablespoons whole milk

1 cup sliced almonds

mini chocolate chips, for top of cake

Directions:

Prepare and bake cake mix per package directions using two 8-inch round baking pans sprayed with baking spray. Cool in pans for 10 minutes and then transfer to wire racks to cool completely.

Make the filling: In a large bowl fold together the ricotta cheese, confectioners’ sugar, cinnamon, and all extracts until well incorporated. Stir in the chocolate chips. Set aside.

Make the frosting: In another large bowl, using a hand mixer on medium speed, beat the mascarpone cheese, confectioners’ sugar, almond & vanilla extracts and milk until creamy.

Place one of the cake layers on a cake board or serving plate and spread 1 cup of the filling over it. Top with the other cake layer and spread the remaining frosting over the top of the cake within 1inch of the edge. Frost the sides and top edge of the cake with the frosting.

Press the almonds on the sides of the cake and the chocolate chips around the edge of the top of the cake.

Refrigerate until ready to serve.

Recipe from Taste of Home

Apple Pie Spice Cake with Cream Cheese Frosting

Happy Fall Y’all! While I normally welcome my favorite season with a pumpkin dessert, I decided to switch it up this year with an apple one, well sort of. It’s a spice cake with an apple pie filling topped with cream cheese frosting. You get all the Fall feels with this cake… the warm spices – cinnamon, ginger, nutmeg, allspice and cloves – from the spice cake, the deliciousness of apple pie and you can never go wrong with cream cheese frosting!

To start I made the spice cake. I whisked together the dry ingredients and then beat the wet ingredients together and then incorporated both until it was just combined. To make sure I don’t overmix my batter I normally use a hand mixer and beat everything for about 30 seconds to a minute and then finish mixing everything with a rubber spatula. Once the batter was ready, I divided it among two 8-inch pans that I sprayed with baking spray and baked the cakes for about 40 minutes. After letting them cool in the pan for a few minutes I transferred them to a wire rack to cool completely. I always like to make my cakes a day or two in advance of assembling them so I wrapped them in plastic wrap and refrigerated them until I was ready to use them.

For the apple filling you can either make it a day ahead or if you plan on making it the day you intend to use it, just make sure to let it cool completely. I opted to use Granny Smith apples since these are one of the best apples for baking and can be found at pretty much any supermarket. Since you are cooking the apples you want to make sure you choose a variety that won’t get too mushy after cooking. The Granny Smith apples held up well after being boiled and simmered, they were tender but still firm.   

Next, I made the cream cheese frosting. I let my butter come to room temperature and then took my cream cheese out for only about five minutes. I don’t like using cream cheese that is too warm because I find that the frosting gets too soft then. I added the butter and cream cheese to the bowl of my stand mixer and beat it on low for a minute or two to incorporate them. I then sifted 2 cups of confectioners’ sugar right into the bowl, beat it on medium for about 30 seconds to blend it all together. And then sifted in another 2 cups of confectioners’ sugar and beat it on medium-high speed until the frosting was light and fluffy. Finally, I added in vanilla extract and beat everything on high for 30 seconds. I did find that my frosting was a little soft so I refrigerated it for a few minutes before using.

With all my components ready to go it was time to assemble my cake. I began by leveling the cakes. On the bottom cake, I spread a thin layer of frosting on it and then piped a dam around the perimeter of the cake so the apple filling wouldn’t “escape.”

I’ll admit that I didn’t pipe my dam perfectly, but, it did the trick and none of the apple filling escaped when I topped it with the other cake layer and finished frosting and decorating it!

Apple Pie Spice Cake with Cream Cheese Frosting

For the Cake:

2 1/2 cups flour

1 teaspoon baking powder

1 teaspoon baking soda

1/2 teaspoon salt

1 1/2 teaspoons cinnamon

3/4 teaspoons ginger

3/4 teaspoons nutmeg

1/2 teaspoon allspice

1/4 teaspoon ground cloves

2 sticks unsalted butter, melted

1 cup sugar

1 cup light brown sugar

1 cup sour cream

4 eggs, at room temperature

2 teaspoons vanilla extract

For the Apple Pie Filling:

2 Granny Smith apples, peeled and chopped

2 teaspoons lemon juice

1/4 cup sugar

1/4 cup light brown sugar

2 tablespoons cornstarch

1/2 teaspoon cinnamon

1/4 teaspoon nutmeg

1/8 teaspoon salt

1 1/2 cups water

For the Frosting:

2 8 oz. packages cream cheese

2 sticks unsalted butter, at room temperature

4 cups confectioners’ sugar, sifted

2 teaspoons vanilla extract

Directions:

For the cake: Preheat the oven to 350 F. Spray two 8-inch round pans with baking spray and set aside.

In a medium bowl whisk together the flour, baking powder, baking soda, salt, cinnamon, ginger, nutmeg, allspice and cloves and set aside.

In a large, using a handheld mixer on medium speed, beat the butter and both sugars together until smooth. Add in the sour cream and continue beating until well incorporated. Add the eggs, 1 at a time, beat well after each addition, and finally the vanilla extract.

On low speed beat in the dry ingredients until just combined.

Divide the batter among the two prepared pans and bake in the preheated oven for 35-40 minutes, or until a cake tester inserted in the center comes out clean.

Cool the cakes in the pan on a wire rack for 15 minutes and then remove from the pans and place on the wire rack to cool completely.

For the Apple Filling: Toss the apples in the lemon juice and set aside.

In a medium saucepan combine both sugars, the cornstarch, cinnamon, nutmeg and salt. Stir to combine and then add in the water and stir once again to combine. Bring the mixture to a boil over medium heat, stirring occasionally. Add the apples and bring to boil once again. Lower the heat to a simmer and let cook for about 10 minutes, or until the apples are tender. Remove the pan from the heat and let the apples cool completely before using. Can make a day ahead and refrigerate until ready to use.

For the Frosting: Using a stand mixer beat the cream cheese and butter together on medium speed to incorporate. Add in 2 cups of the confectioners’ sugar to mixture and beat on medium for 30 seconds, add the remaining 2 cups of confectioners’ sugar and beat on medium-speed until the frosting is light and fluffy. Add the vanilla extract and beat on high speed for 30 seconds. Refrigerate the frosting until ready to use.

To assemble the cake: Level the cake layers if necessary. Lightly frost the top of the bottom layer. Fill a piping bag with the frosting and pipe a dam around the bottom layer (a ring of frosting around the perimeter of the cake). It may be necessary to pipe two layers of the frosting. Fill with the apple mixture and top with the other cake. Crumb coat the cake and refrigerate for 15 minutes (place the remaining frosting in the refrigerator during this time as well). Finish frosting the cake and decorate as desired.

Recipe first published on Bead Yarn & Spatula

Mascarpone Cake

After making the Tiramisu Cheesecake I posted two weeks ago I still had about a cup of mascarpone cheese left. While I could have used it to spread on toast or crackers, I decided to bake something else with it. I came across a recipe for a Mascarpone Cake that sounded simple and delicious, so I decided to give it a try.

This is one of those recipes that most people love… It comes together in one bowl. No need for sifting or mixing your dry ingredients in one bowl and then combining them with your wet ones in another. You simply mix all of your wet ingredients first and then add the dry ones at the end. And after baking and cooling it’s time to enjoy.

This cake tasted just as the recipe sounded… delicious. It was reminiscent of a pound cake for me, just not as a dense. And not sweet at all. If you do you need a bit for sweetness to it, you can follow the original recipe and dust the cake with confectioners’ sugar once it has completely cooled.

Mascarpone Cake

Ingredients:

3 eggs

3/4 cup sugar

1 teaspoon vanilla extract

1 cup mascarpone cheese

1/2 cup vegetable oil

1 1/2 cups flour

1 1/2 teaspoons baking powder


Directions:

Preheat the oven to 350 F. Spray a tube pan with baking spray (or coat with butter and lightly dust with flour) and set aside.

In a large bowl beat together the eggs and sugar with a hand mixer on medium speed until light and fluffy. Add in the vanilla extract, mascarpone cheese and oil and continue beating until combined. Add the flour and baking powder and beat until smooth.

Pour the batter into the prepared ban and 30-40 minutes in the preheated oven, or until a cake tester inserted near the center comes out clean.

Let the cake cool in the pan for 15 minutes and then invert onto a wire rack to cool completely.

Store in an airtight container at room temperature.

Recipe from An Italian In My Kitchen