Chocolate Cheesecake with a Mint Cookie Crust

I got the idea for this cheesecake after watching a So Yummy video post on Instagram. It had a layer of melted chocolate mint cookies serving as the crust to a chocolate cheesecake. After searching for their recipe I decided it might be a little too sweet for my taste – it involved 4 cans of sweetened condensed milk. Yikes! So, I decided to improvise a bit.

I began by processing about 25 thin mint cookies (I used Keebler’s Grasshopper Cookies) in my food processor into fine crumbs. I then added in 3 tablespoons of melted butter and pulsed the mixture until it was combined. Next, I pressed the crumbs into the bottom and slightly up the sides of a 9-inch springform pan.

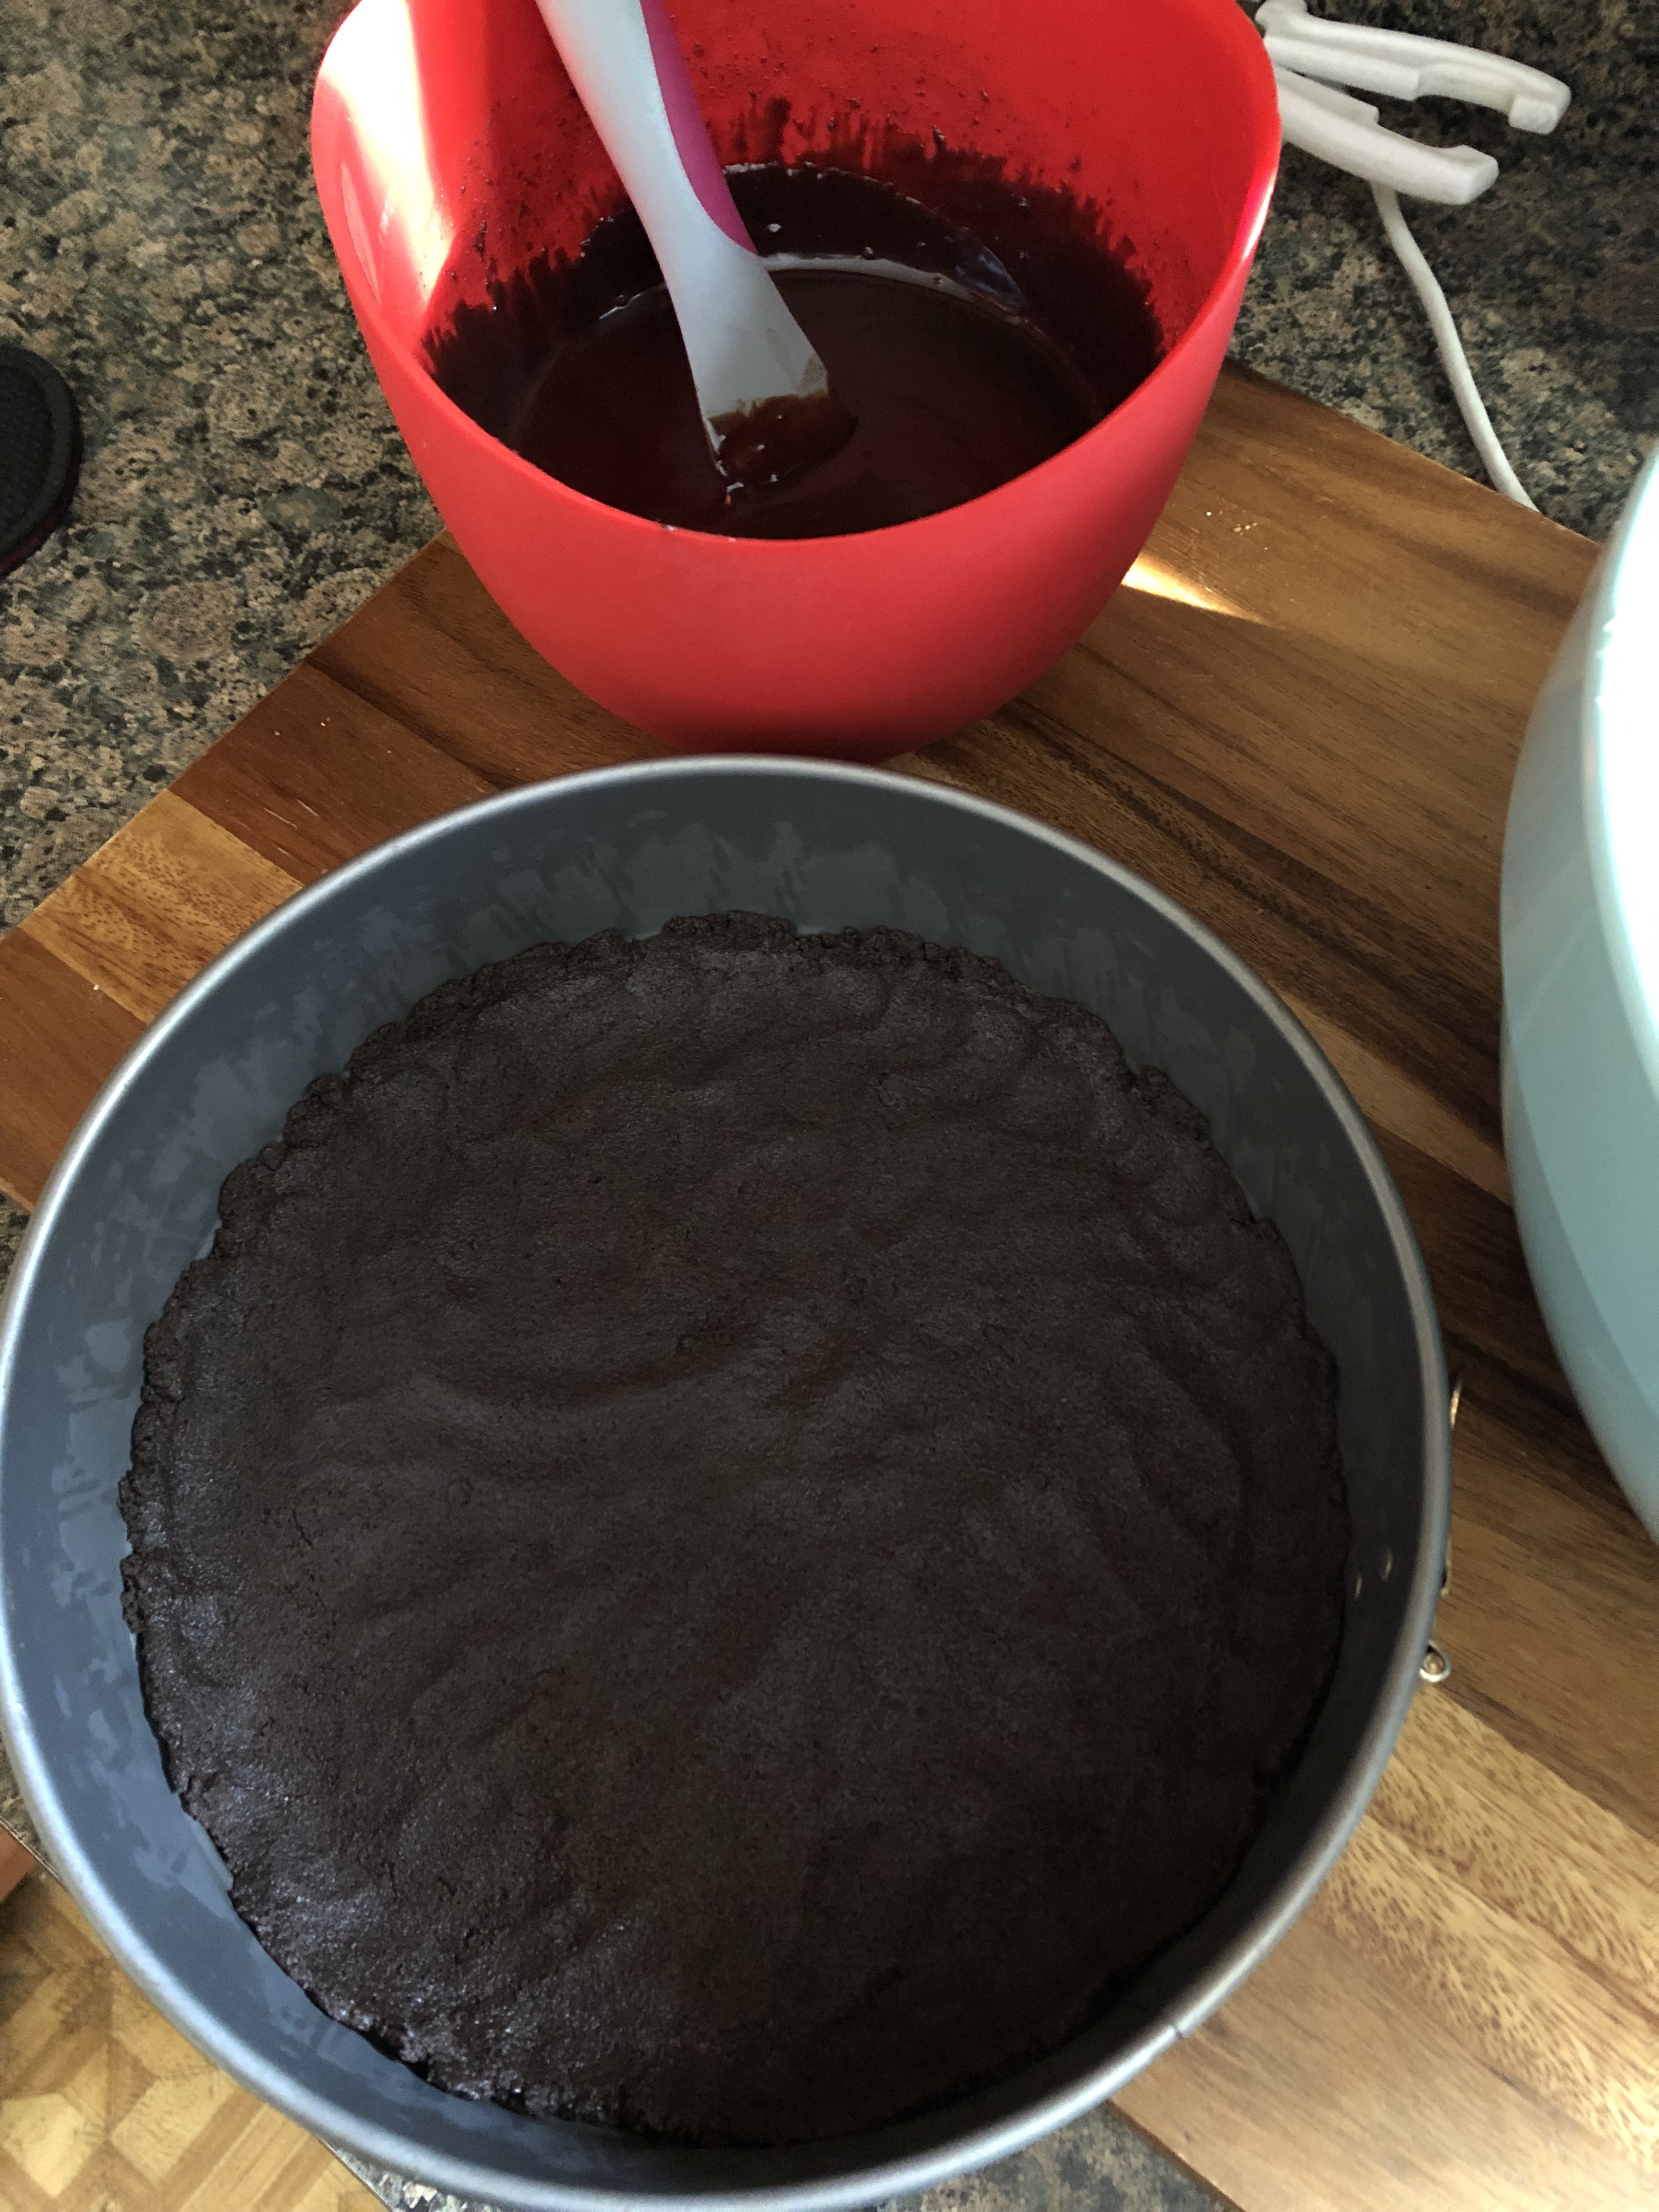
In a microwave safe bowl I combined a 12 oz. bag of semi-sweet chocolate chips with milk and microwaved it until the chocolate chips began melting. I heated the mixture two times at 40 seconds. I stirred the mixture until the chocolate chips had completed melted and the mixture was smooth.

Next I made the cream cheese mixture. In a large bowl I beat together cream cheese and sugar using a handheld mixer on low speed. Once the two ingredients were thoroughly combined I added in 4 large eggs, one at a time. Beating well after each addition. Finally, I stirred in vanilla extract and flour.

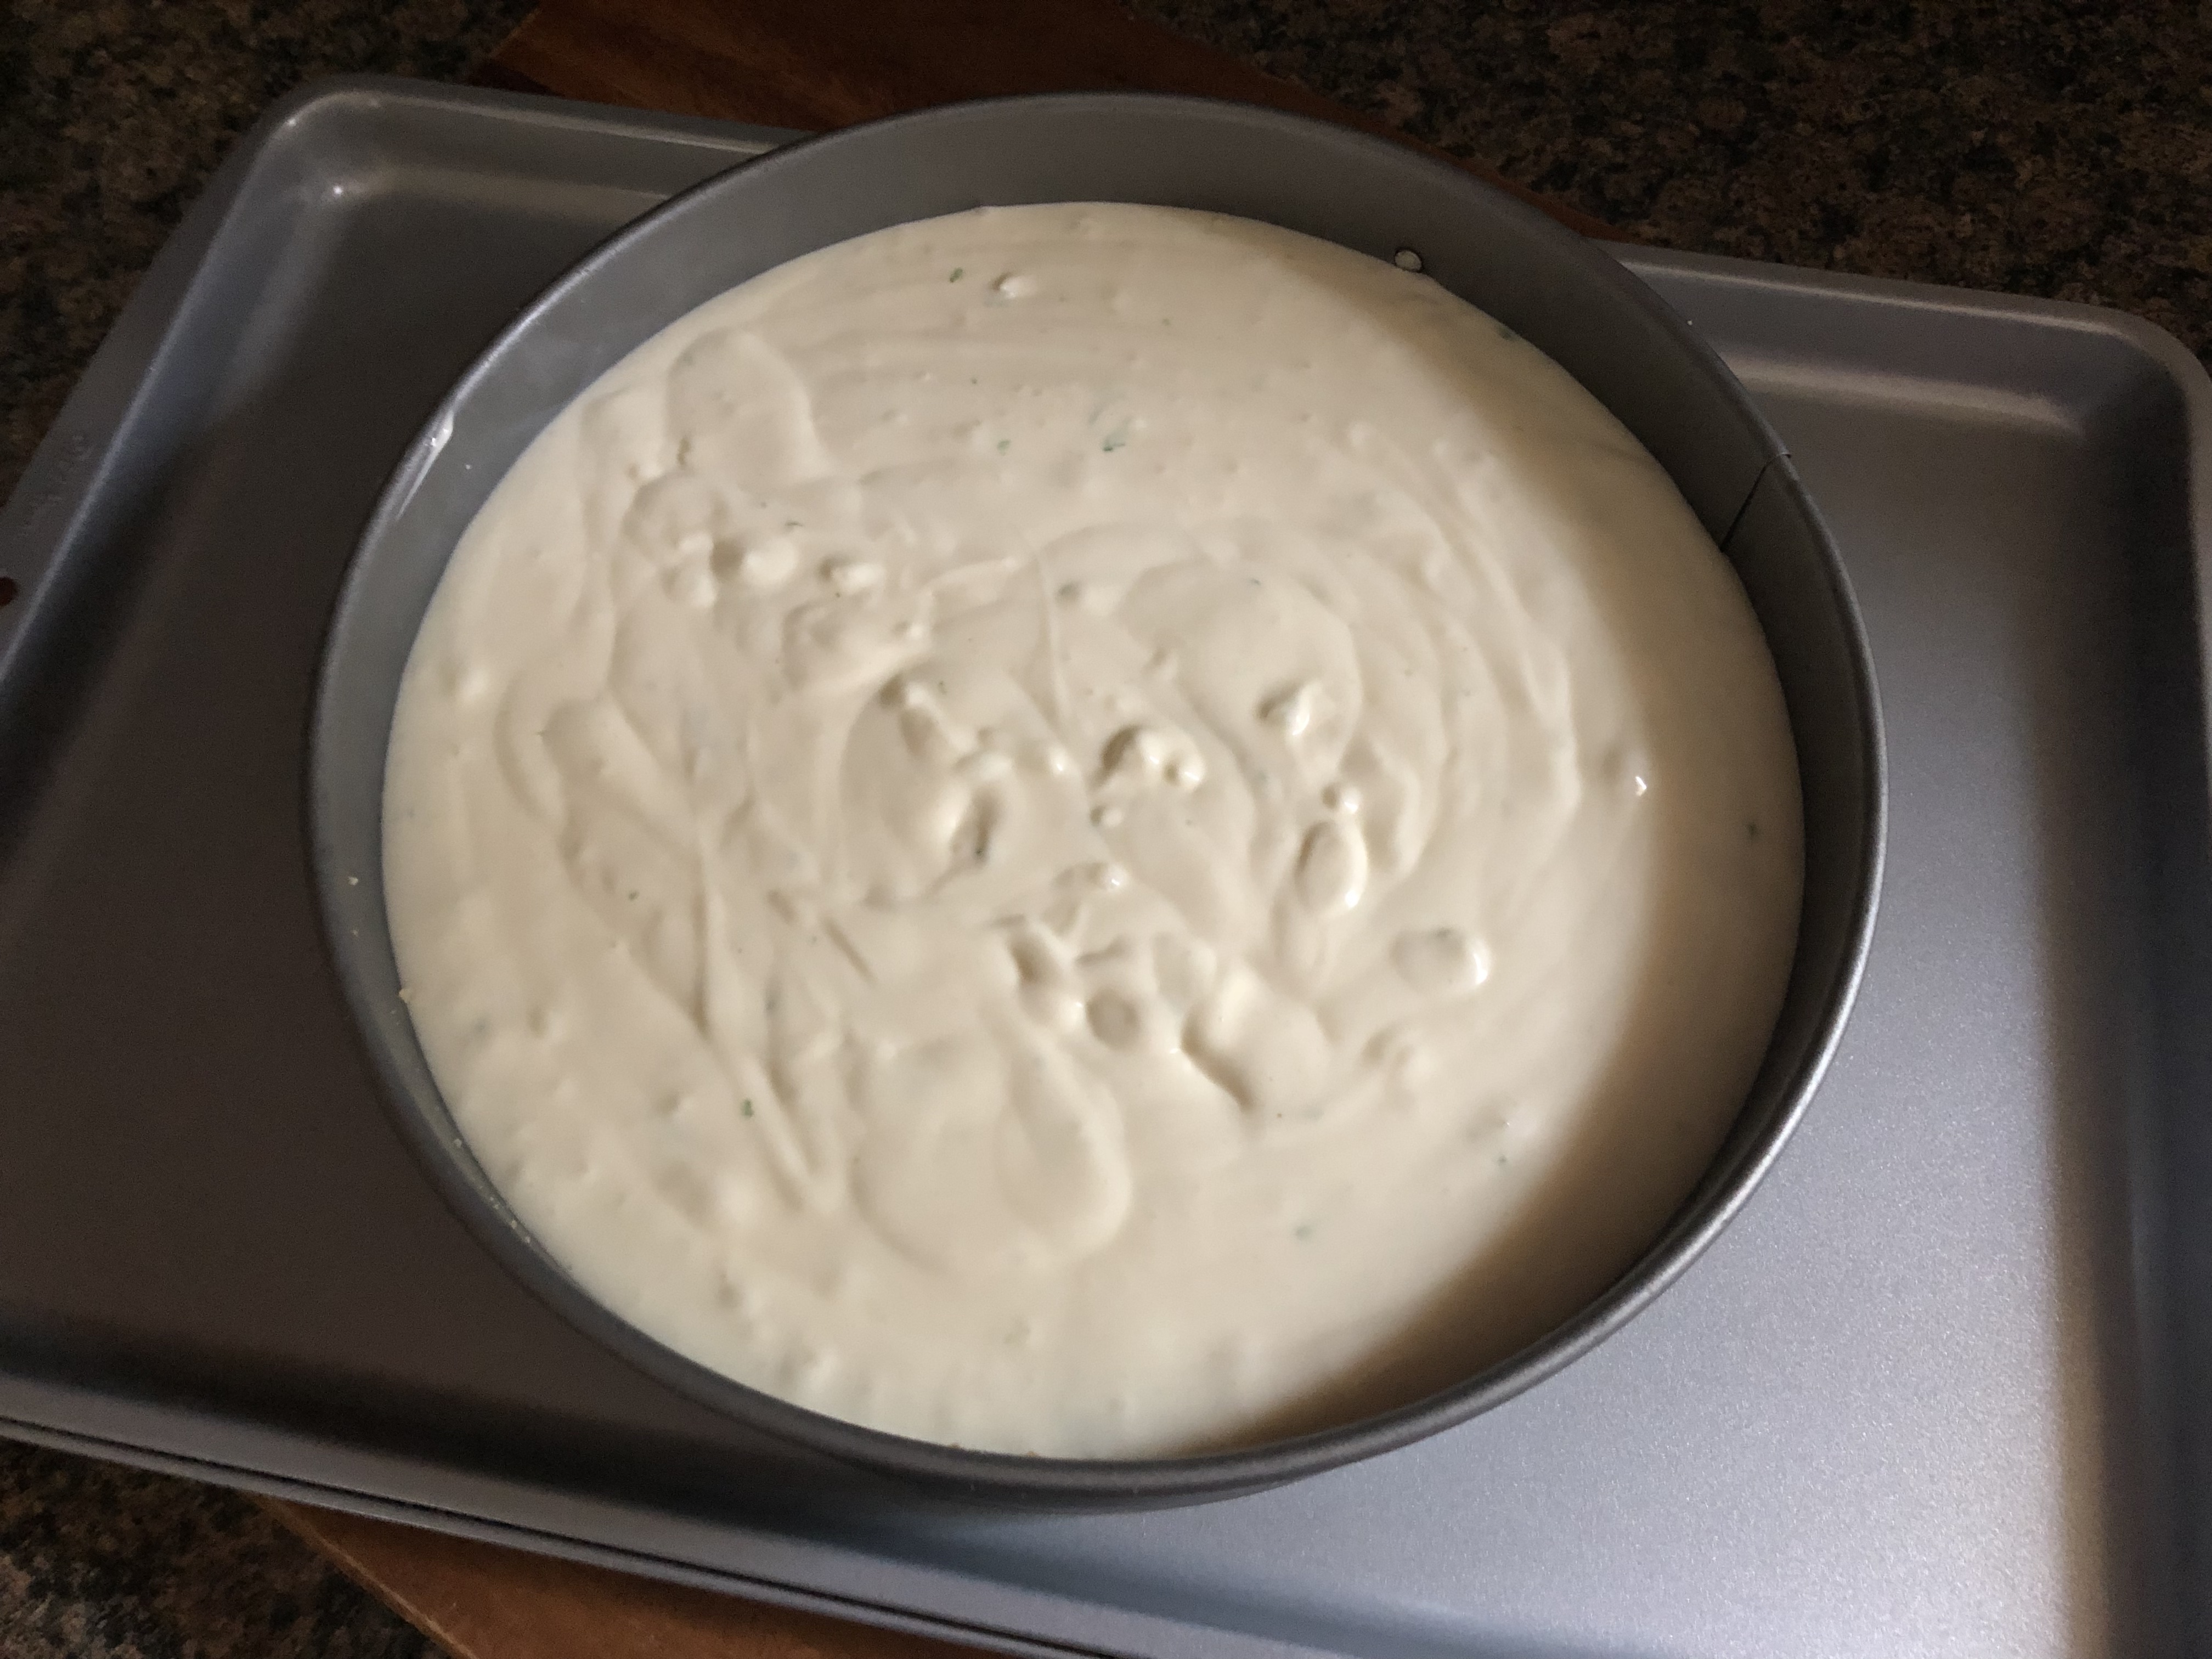
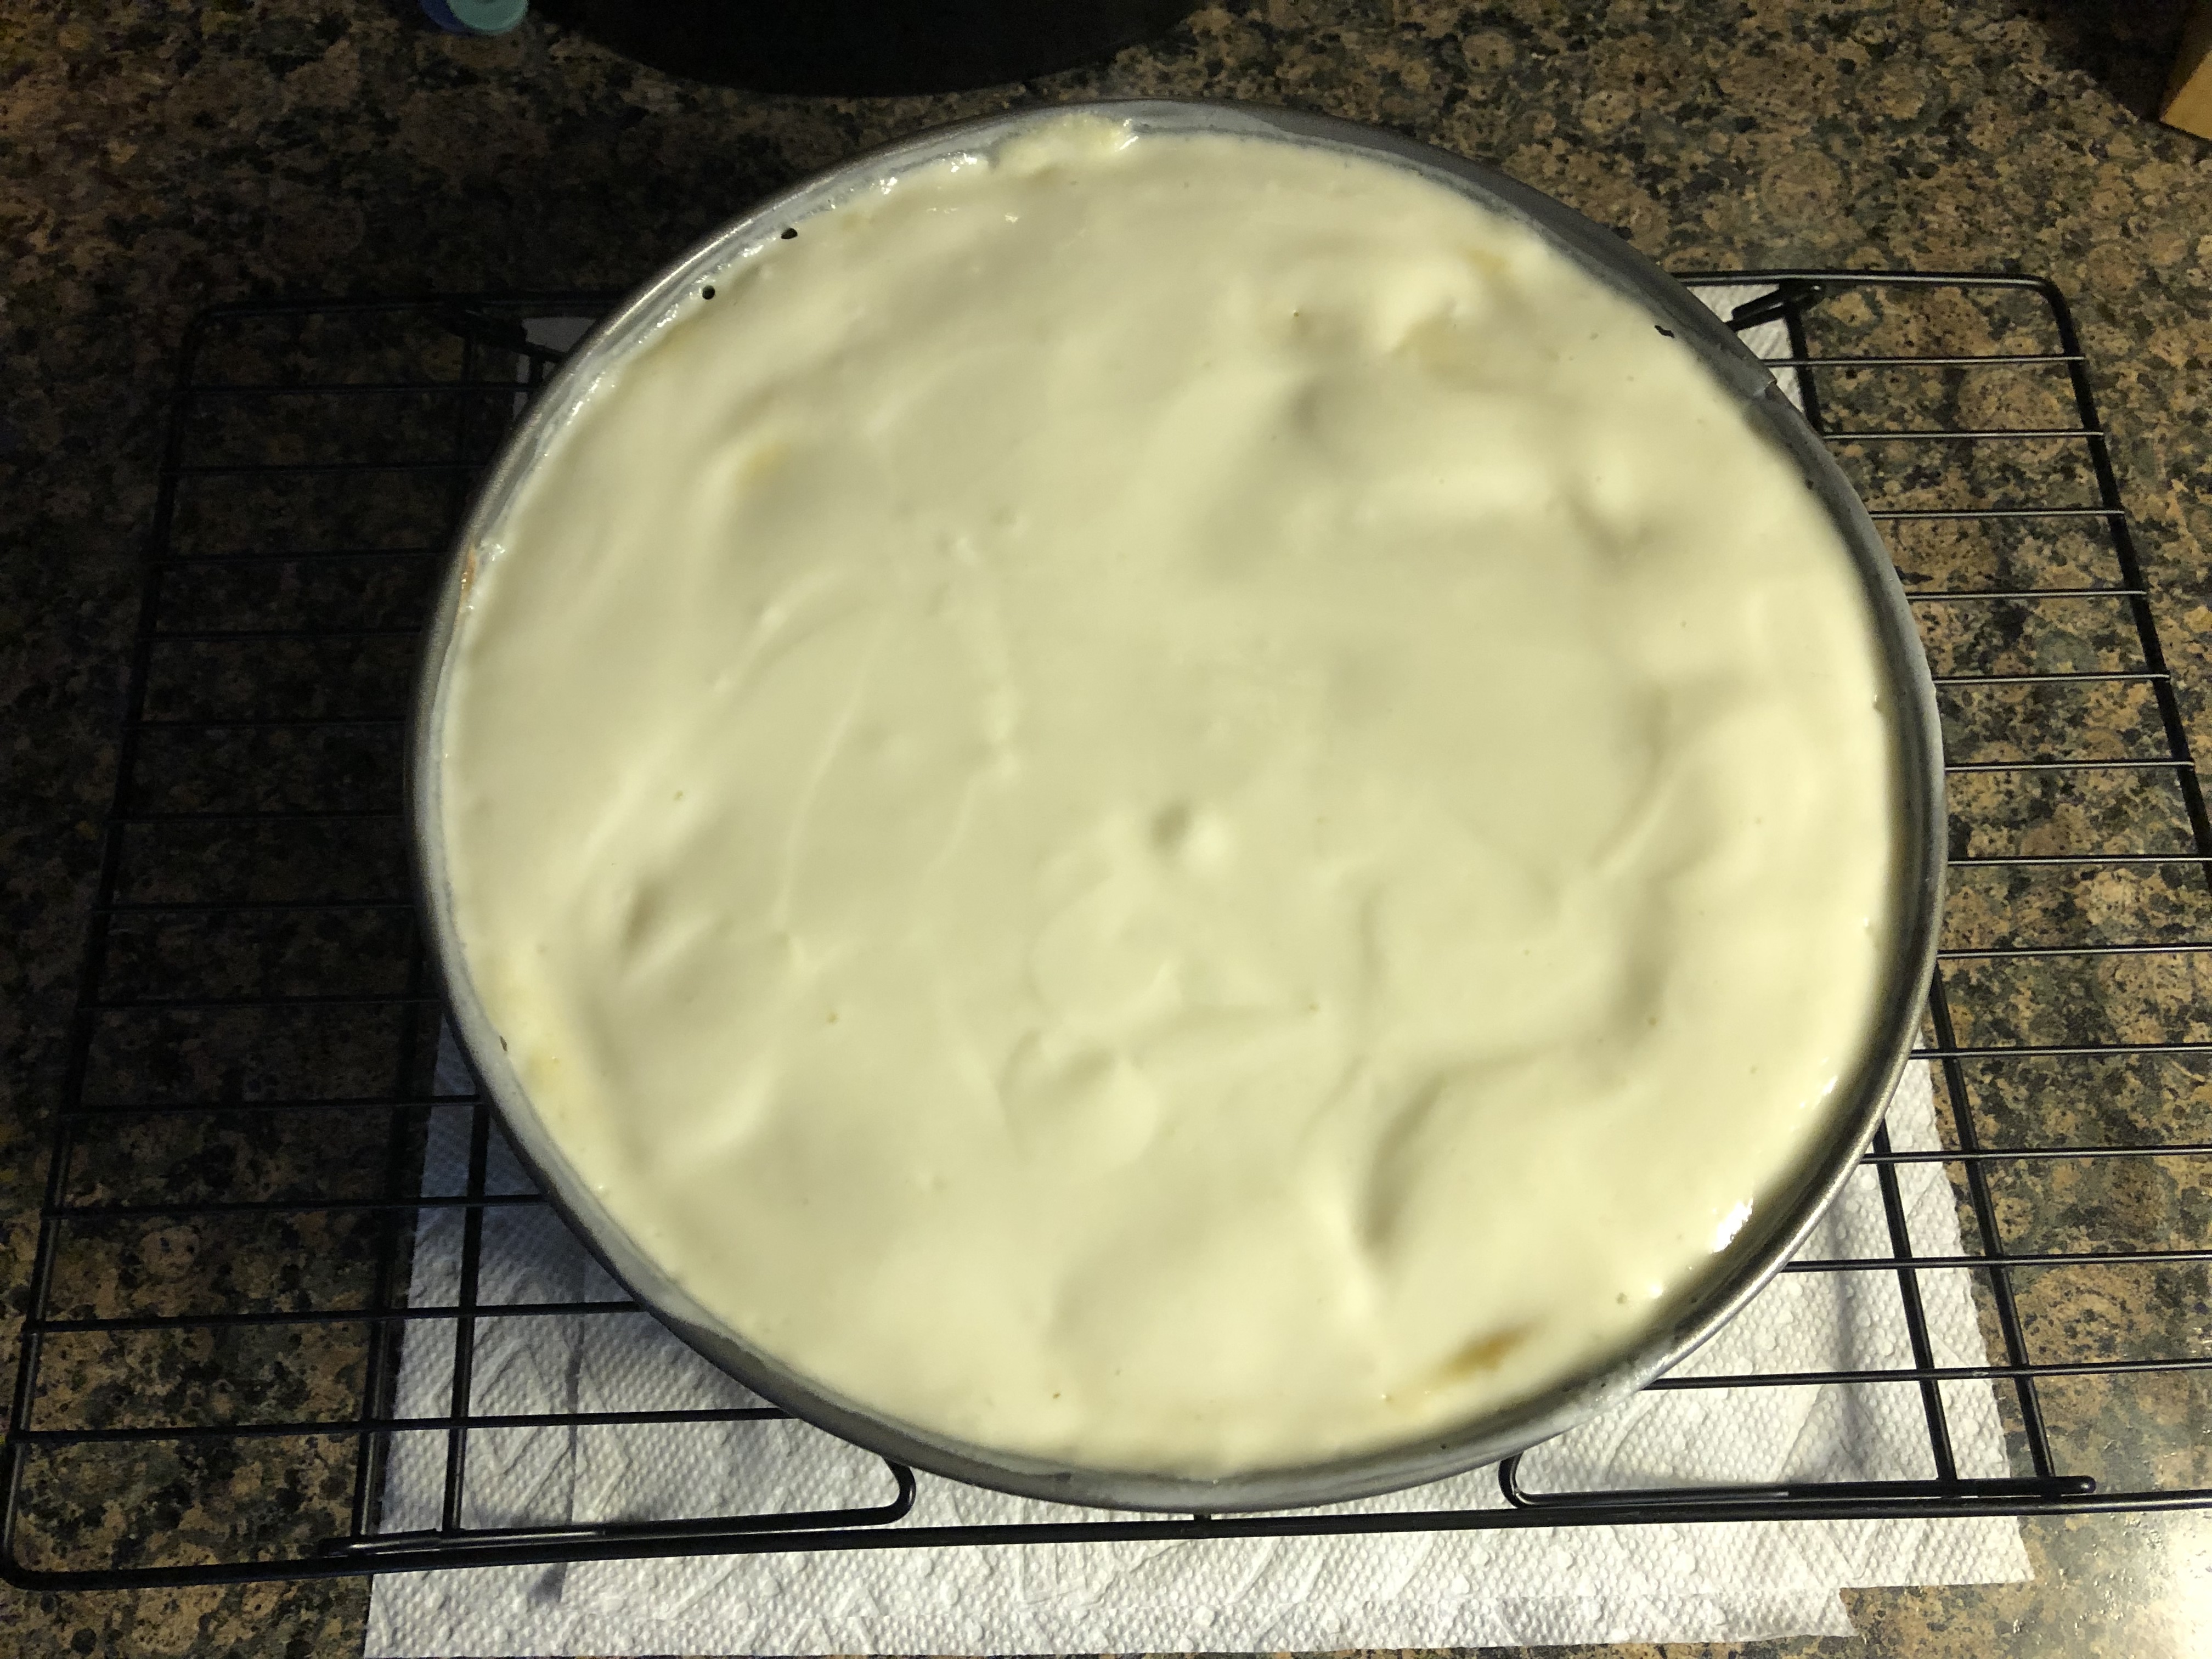
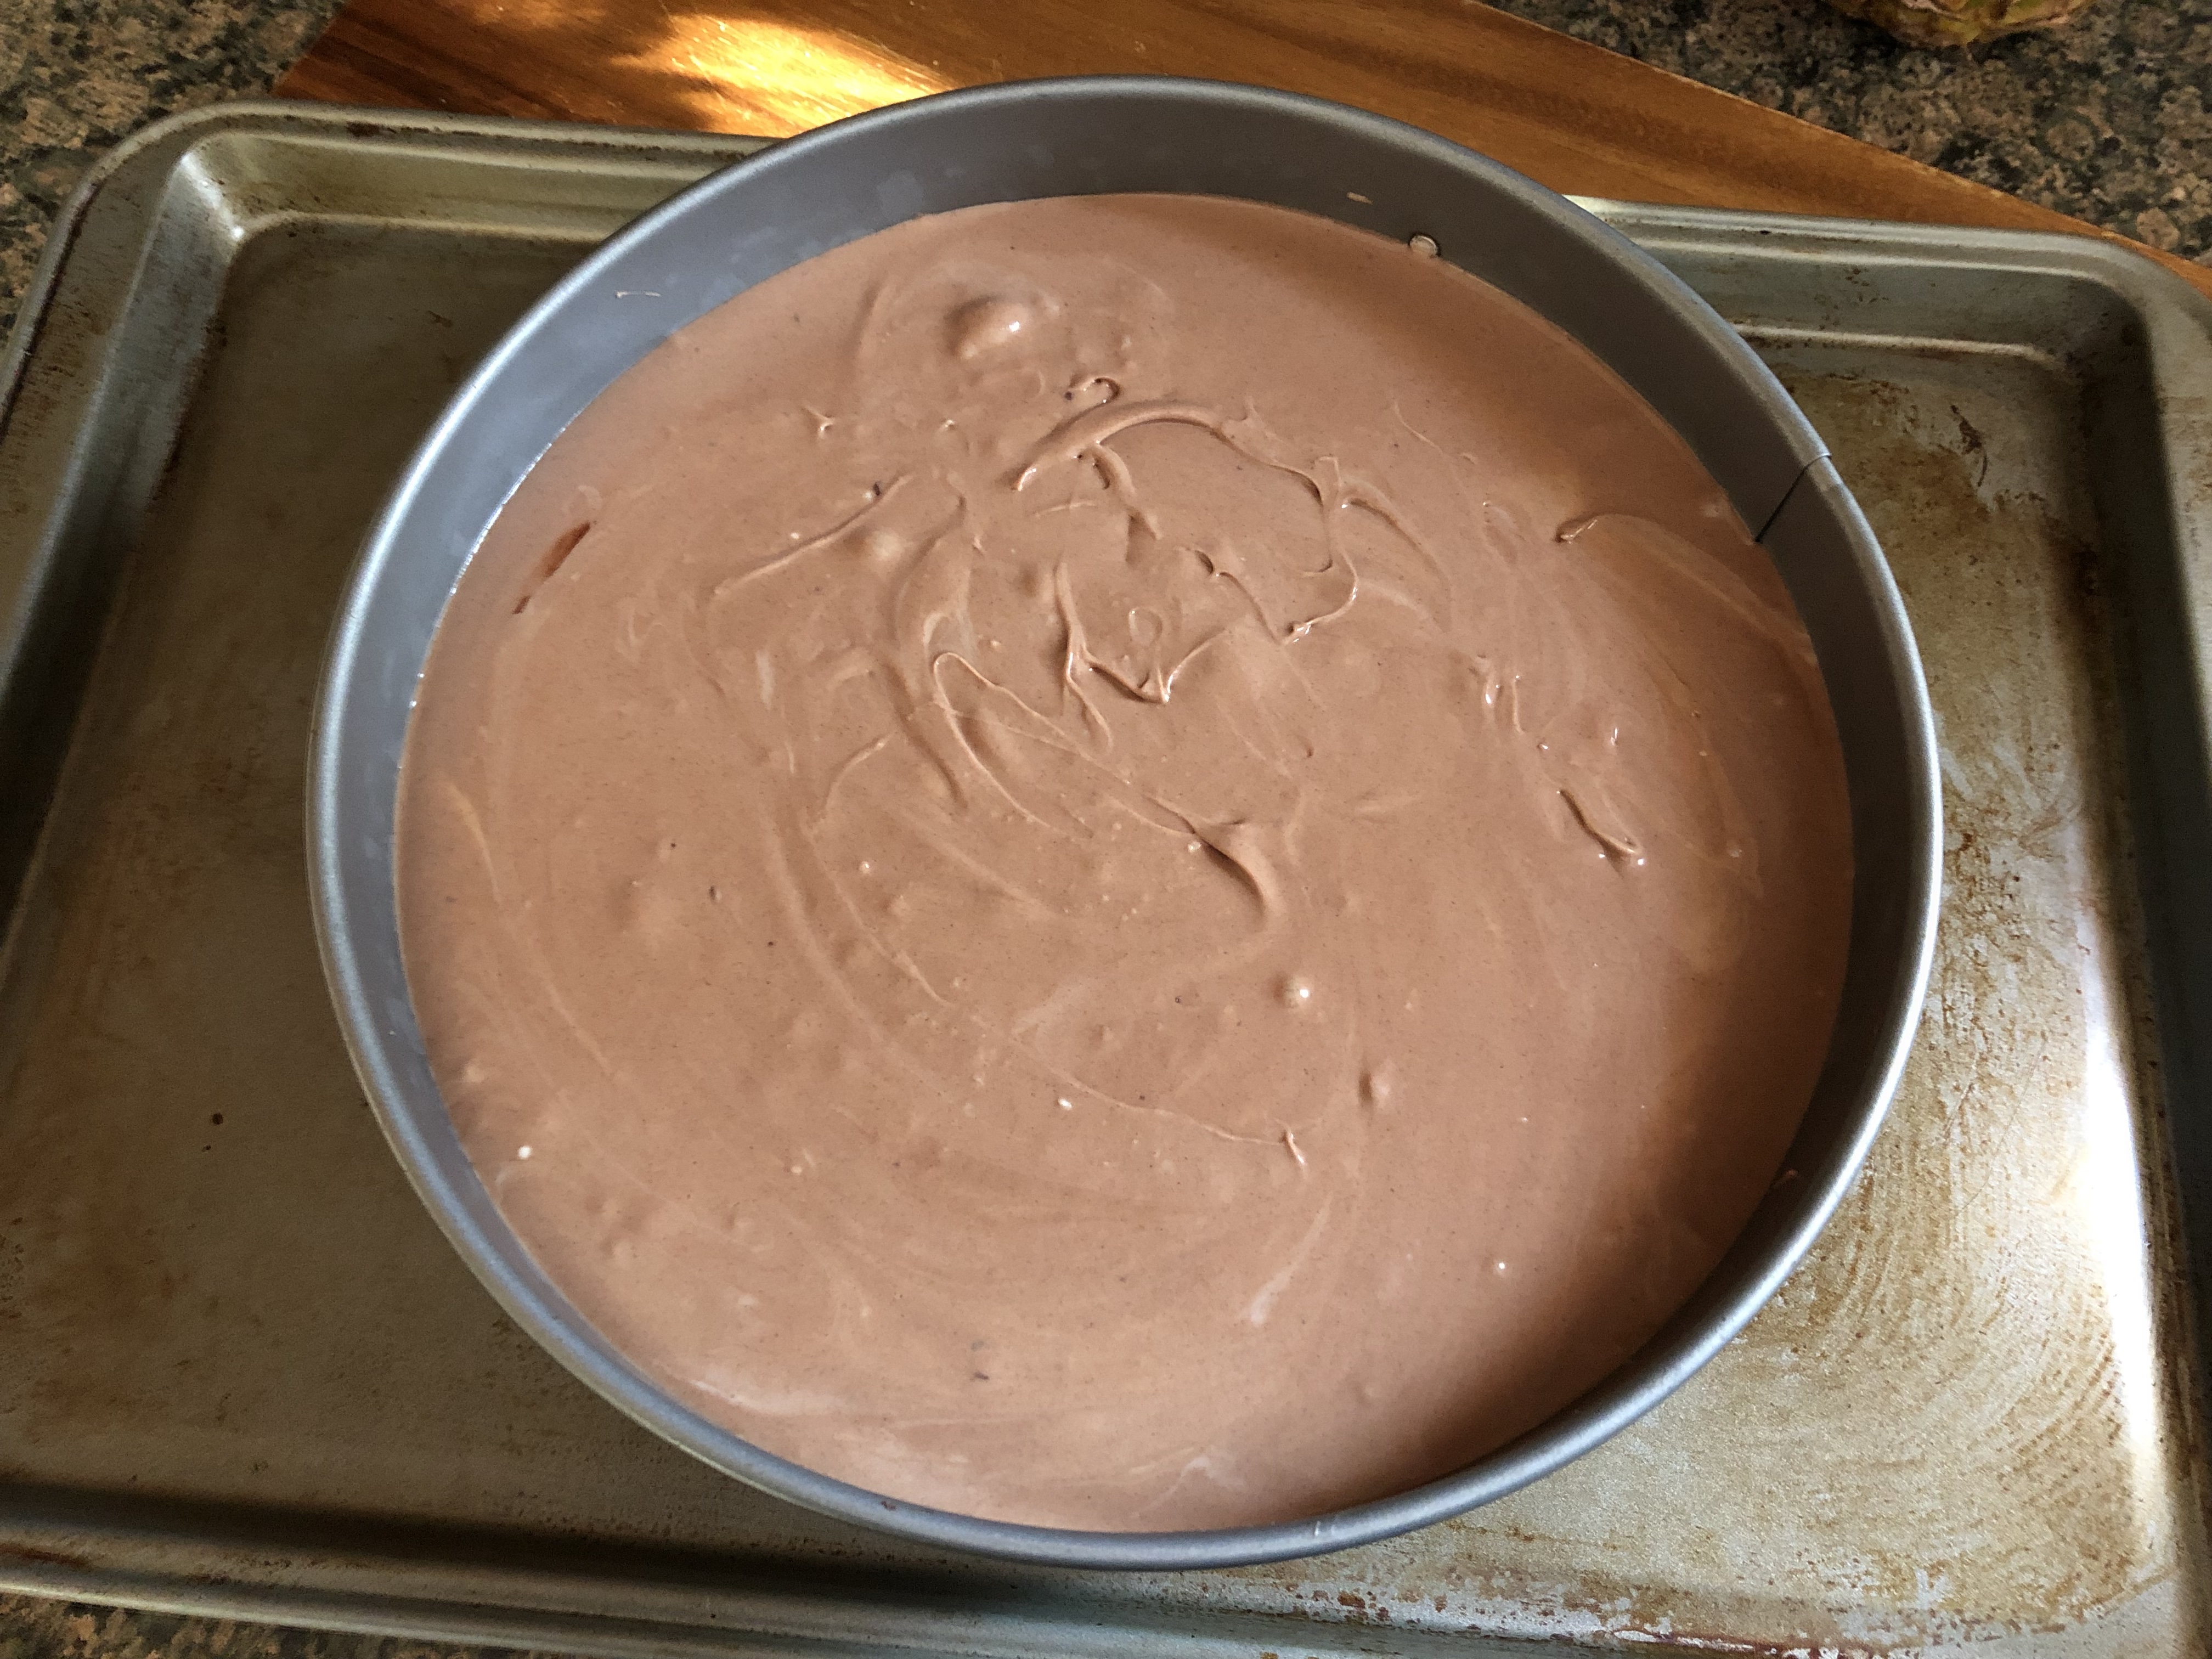
After combining the cooled chocolate and cream cheese mixture I then poured it into my prepared crust. I placed the pan on a baking sheet and then baked it in a 350 F preheated oven for about an hour. Once the cheesecake was done I turned off the oven and open the door a bit and let the cheesecake cool in the oven for an additional hour. After the hour, I removed the cheesecake from the oven and let it cool completely before covering it and placing it in the refrigerator overnight.

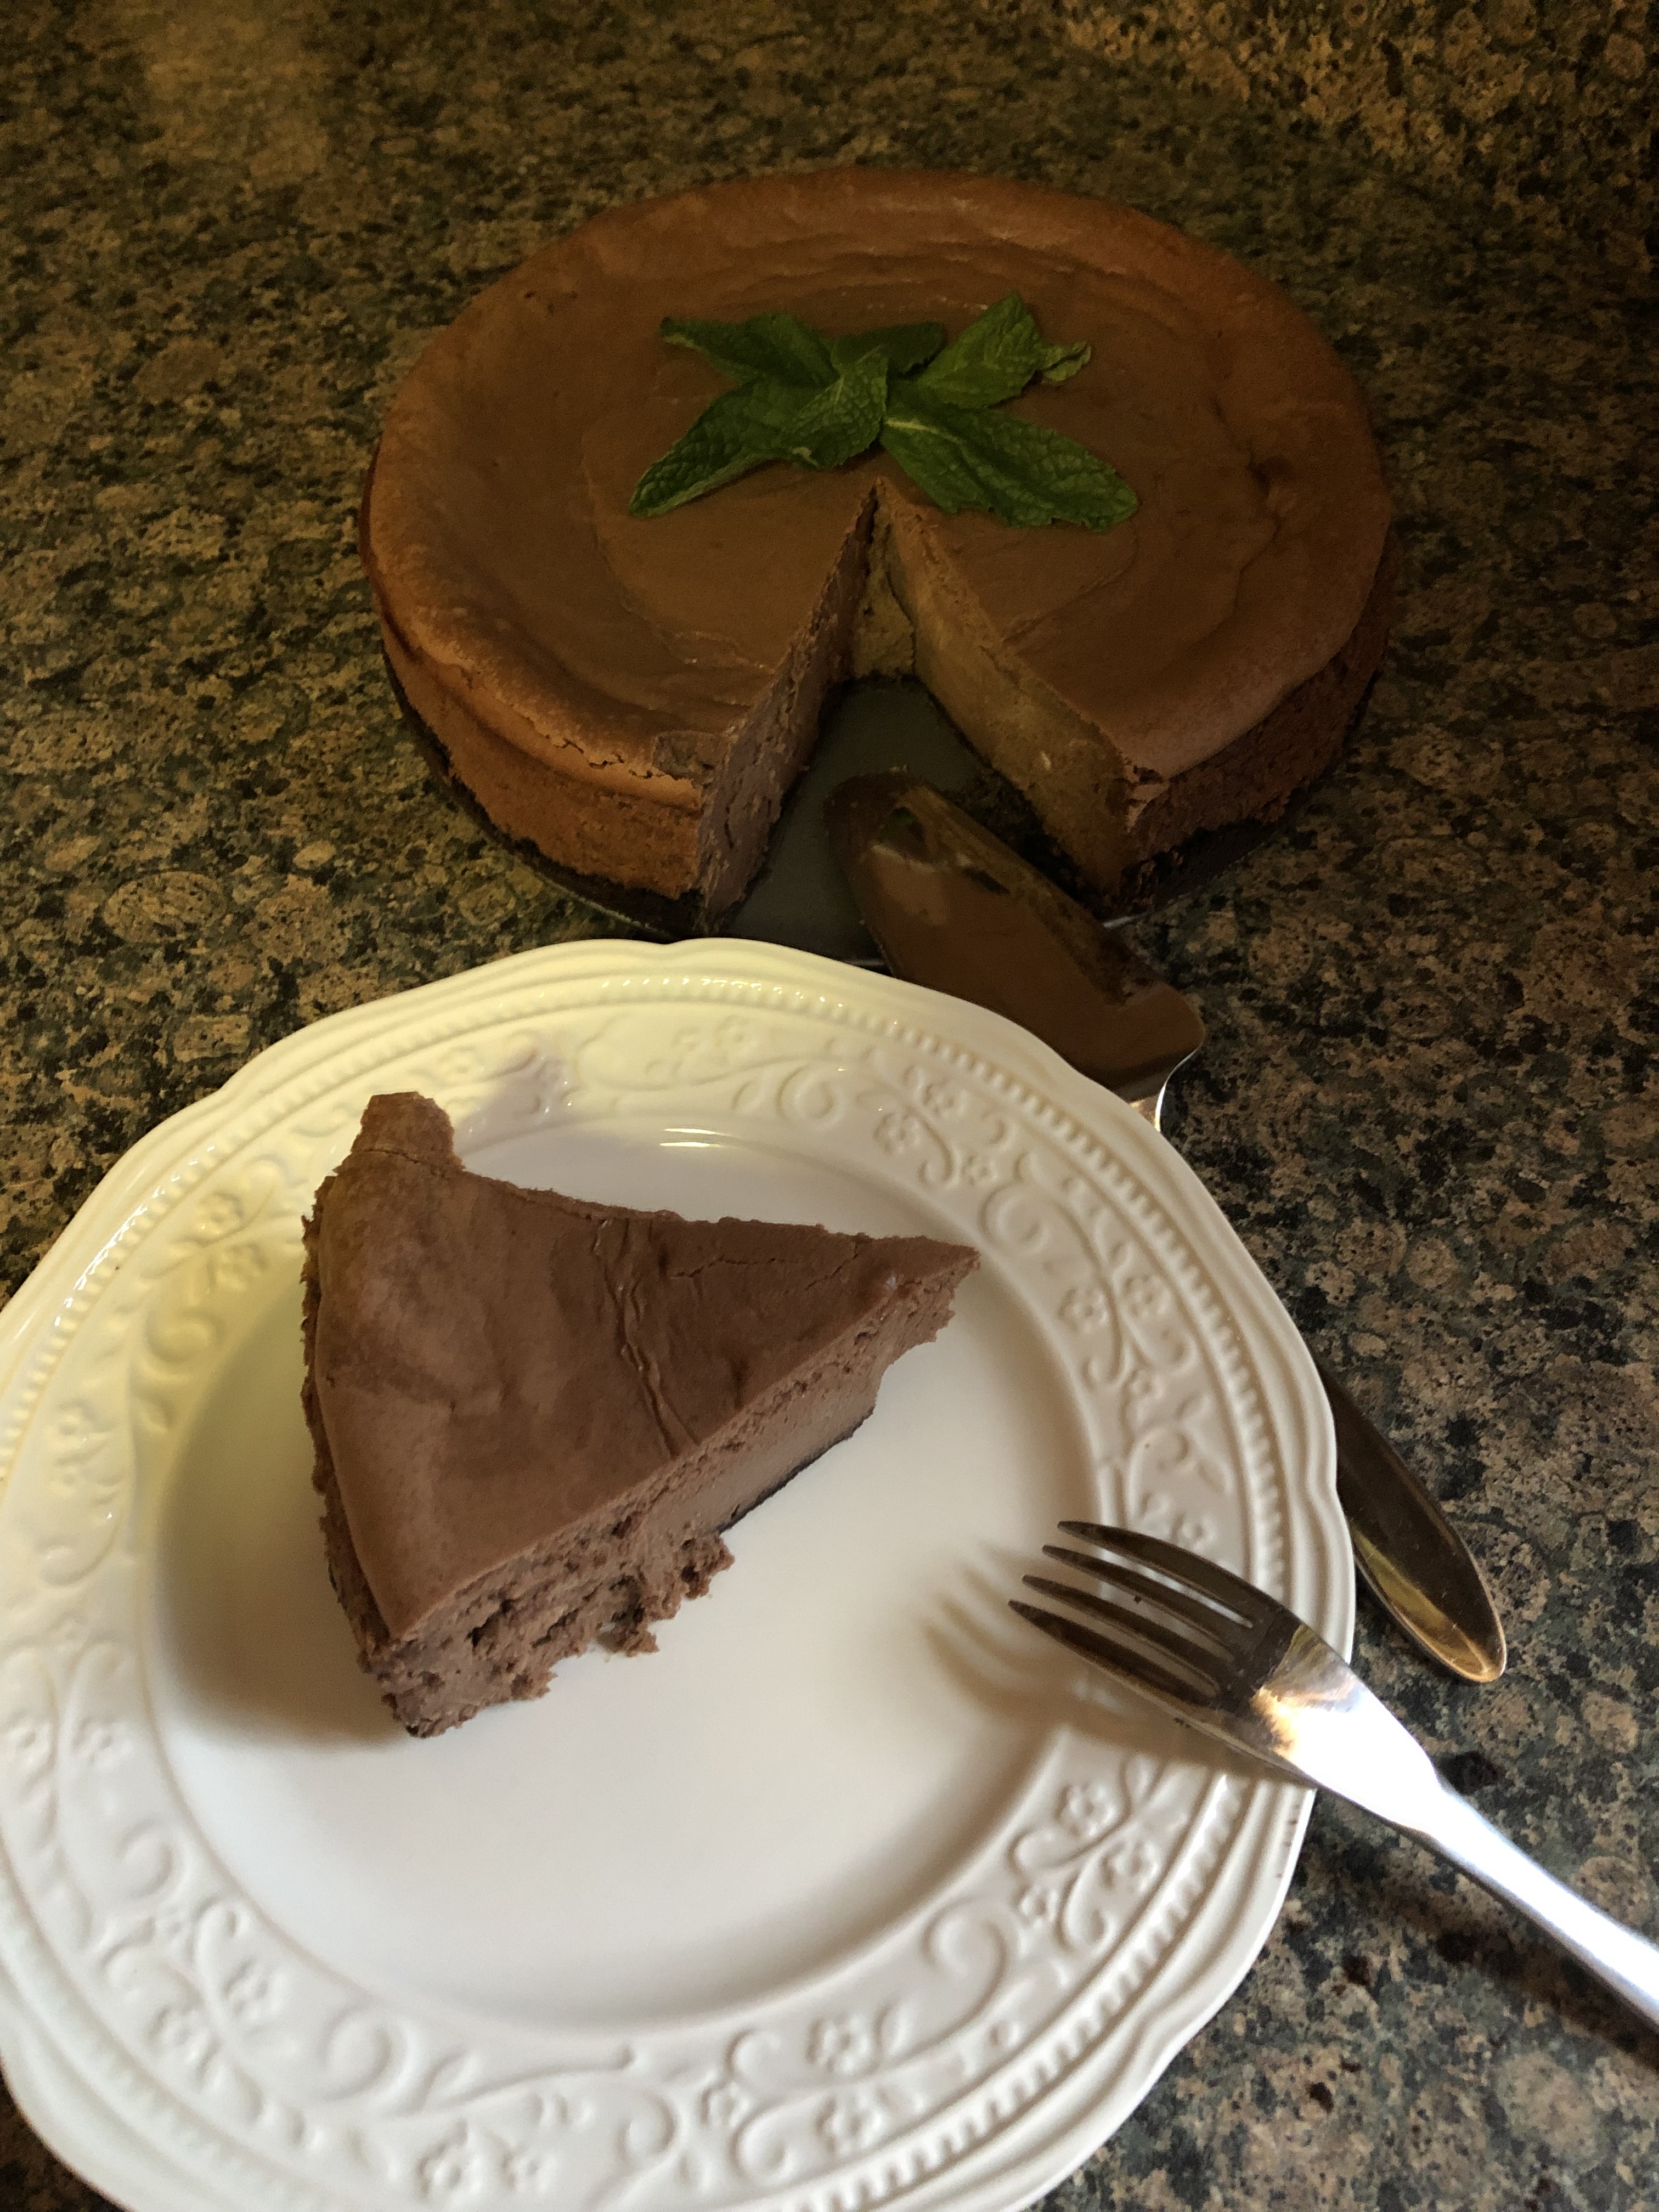
I topped it with a few mint leaves…

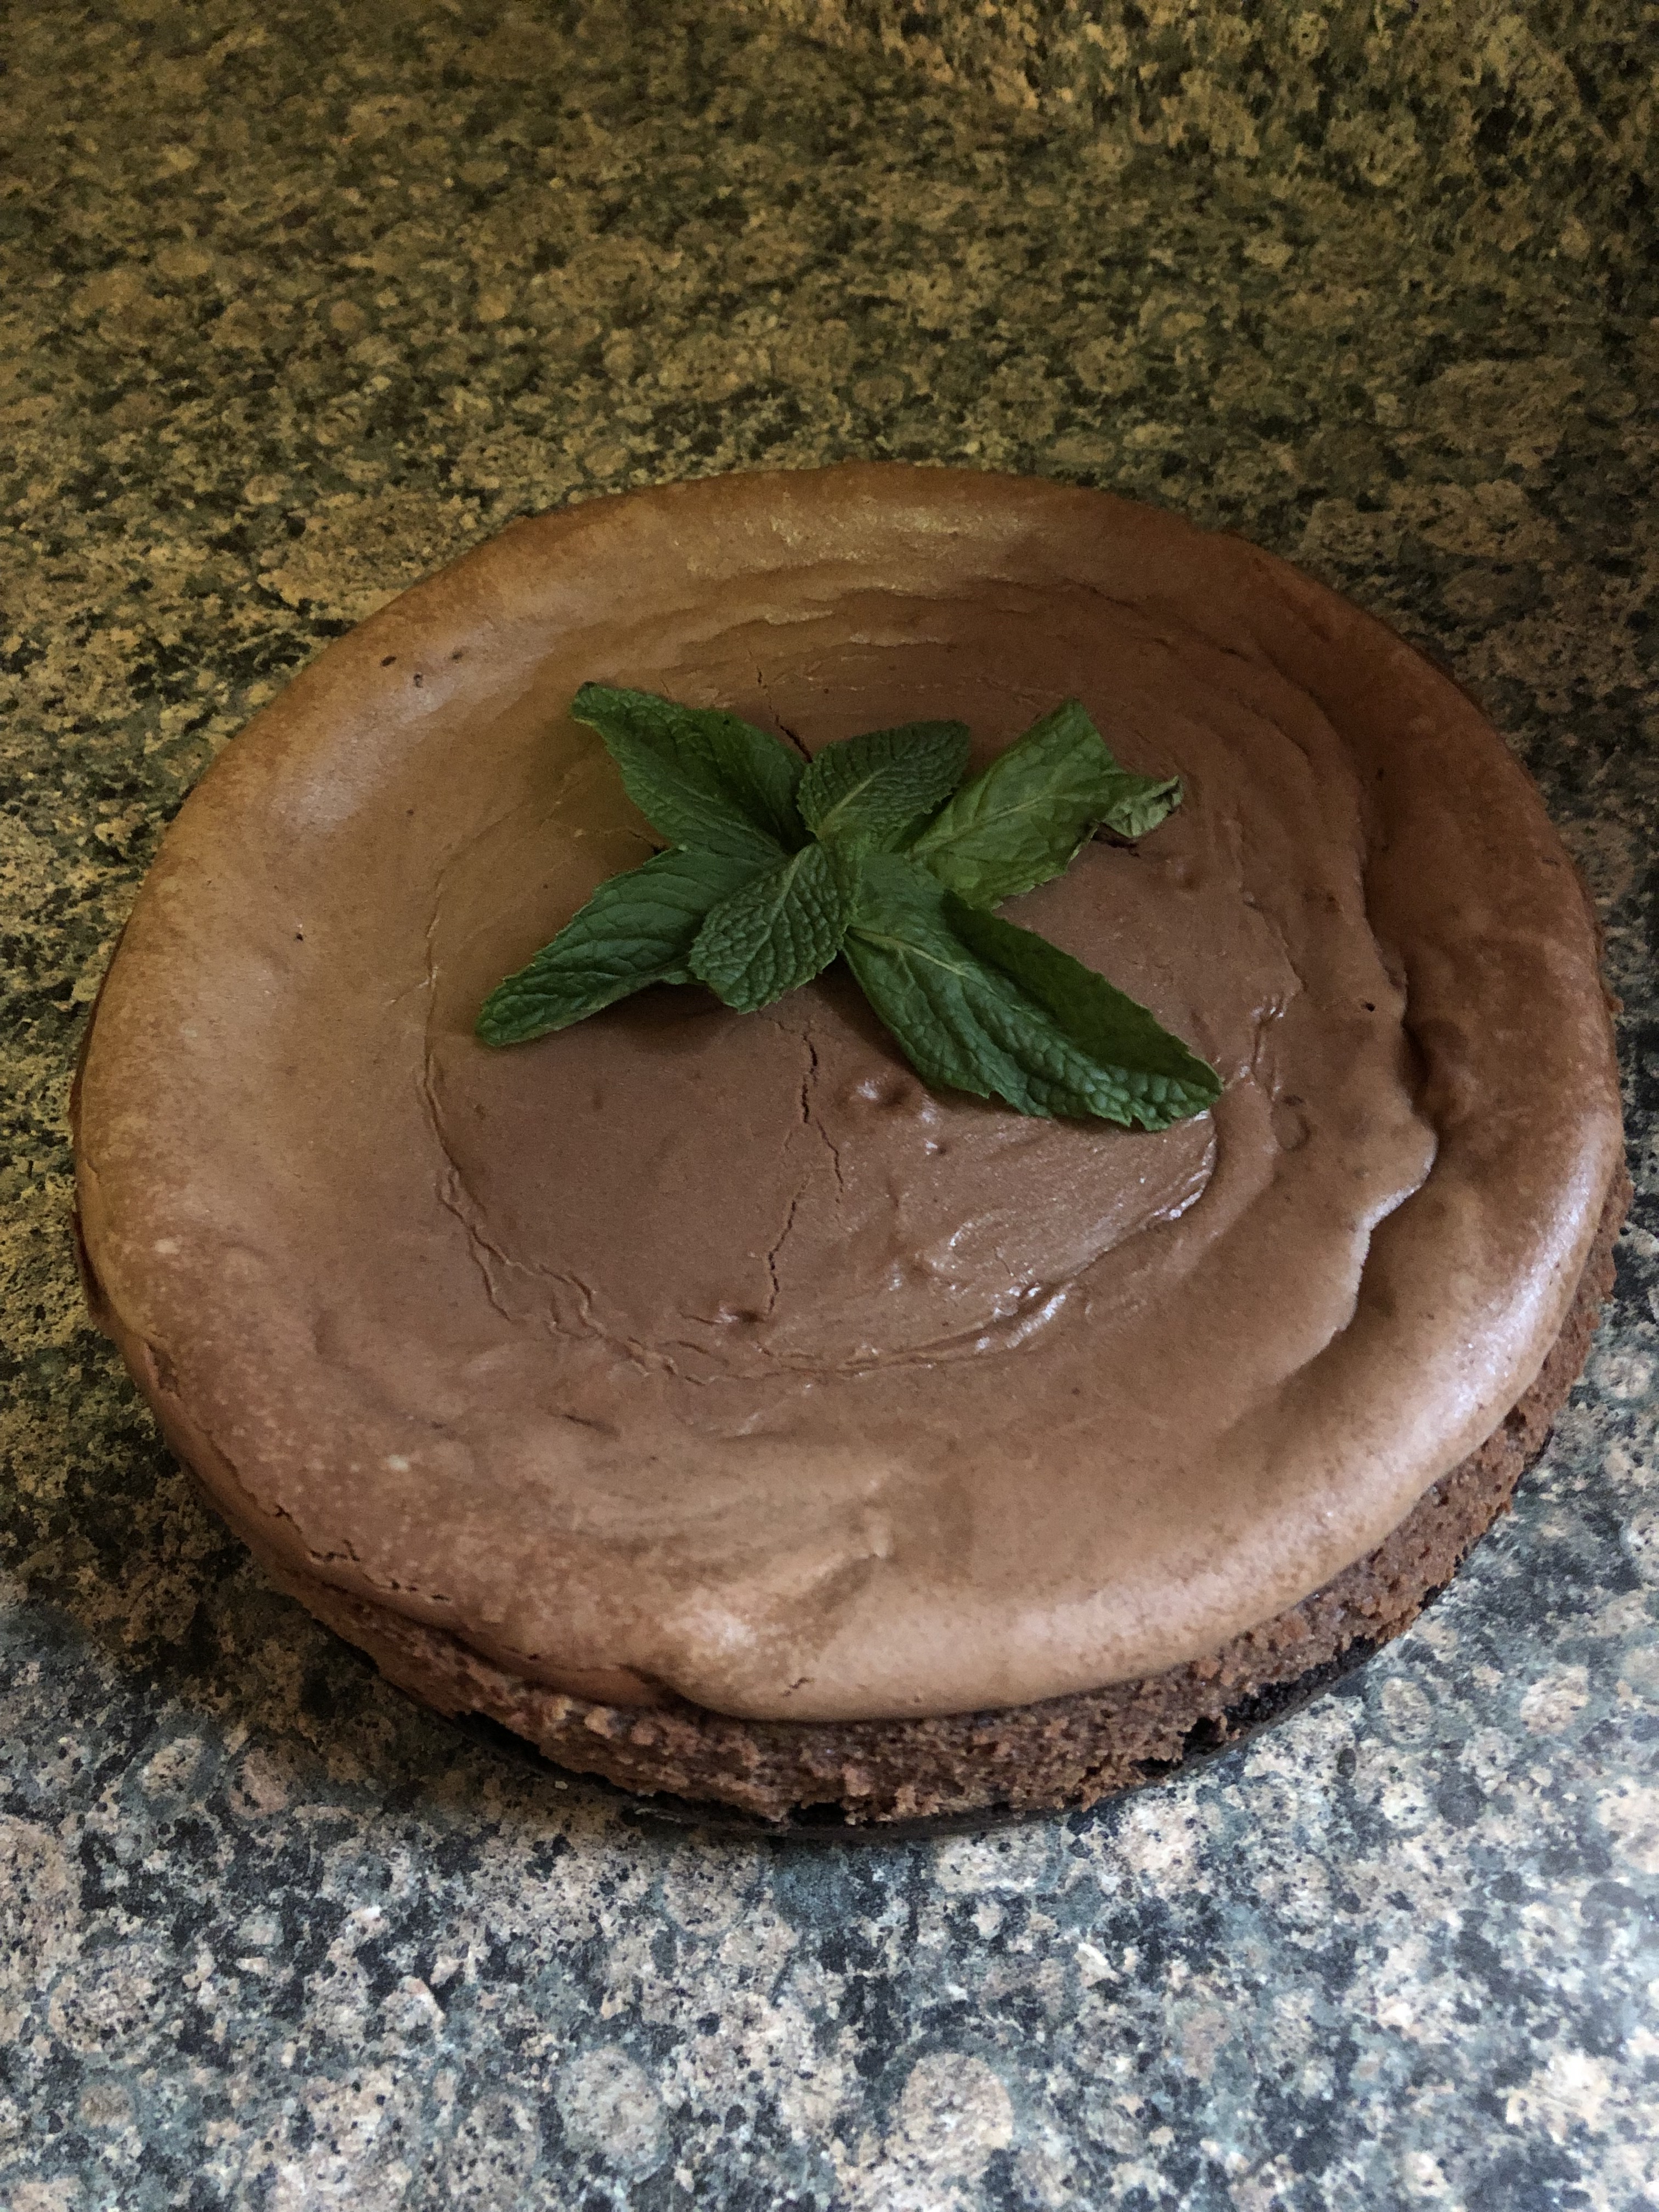
And then sliced myself a piece. The cheesecake was perfectly creamy and not overly sweet and the crust had the perfect hint of mint.

Chocolate Cheesecake with a Mint Chocolate Crust

Ingredients:

Crust:

25 chocolate mint cookies

3 tablespoons unsalted butter, melted


Cheesecake:

1/2 cup milk*

1 12oz. bag of semi-sweet chocolate chips

3 8oz. packages of cream cheese, at room temperature

1 cup sugar

4 large eggs, at room temperature

1 teaspoon vanilla extract

2 tablespoons flour


*I used whole milk, but, you could use 2% or skim


Directions:

Preheat the oven to 350 F.

Make the crust: Using a food processor process the cookies until they become fine crumbs. Add in the melted butter and continue mixing until the mixture is combined. Press the crumbs along the bottom and slightly up the sides of a 9-inch springform pan.  Place the pan on a baking sheet and set aside.

In a microwave proof bowl combine the chocolate chips and the milk. Heat in the microwave in 30-second intervals. Stirring between each time. Once the chocolate chips have begun to melt continue to stir until the chocolate chips are completed melted and the mixture is smooth. Set aside to cool.

In a large bowl beat the cream cheese and sugar together using a handheld mixer on low speed until combined. Add the eggs, one at a time, beating to combine well after each addition. Add in the vanilla and flour.

Stir the melted chocolate into the cream cheese mixture. Stir the mixture well so that the two are well incorporated.

Pour the chocolate mixture into the prepared pie crust and place in the oven on top of the baking sheet.

Bake for 45 to 50 minutes, or until a cake tester inserted into the cake 1-inch from the edge comes out clean. The center of the cheesecake may not look set, but that is okay.

Turn the oven off and open the door a few inches and leave the cheesecake in the oven for 1 hour to cool. After the hour, transfer the cheesecake to a wire rack to cool completely. Once cooled, cover the cheesecake and refrigerate until ready to serve.

Recipe adapted from King Arthur Flour


Margarita Cheesecake

Instead of drinking a margarita this past Sunday for Cinco de Mayo I opted to bake one instead in the form of a cheesecake. While this was a great dessert to celebrate Cinco de Mayo, the light lime flavor also makes it perfect for the upcoming warmer months of the summer.

I began by making the crust. I crushed Nilla Wafers into crumbs and then combined it with melted butter and then pressed it into the bottom and up the sides of a 9-inch springform pan. I then placed it in the refrigerator until the cheesecake mixture was ready. While I used Nilla Wafers for my crust, you could opt to get the salty rim of a traditional margarita in the form of a crust made with crushed pretzels instead.

Using a hand mixer I bet three room temperature 8oz. blocks of cream cheese until it was light and fluffy. I then added in sour cream, sugar, Grand Marnier, tequila, freshly squeezed lime juice and lime zest. I continued beating everything on medium speed until it was well combined. I then added in four eggs one at a time. On the off chance you taste the filling and think that it’s too much alcohol don’t worry, the alcohol flavor will burn off while the cheesecake is baking. On the converse side, if you feel like it’s not enough now would be the time to add in more.

I poured the filling into the prepared pan and then placed it on a baking sheet and baked it in a 350 F preheated oven for about 50 minutes, or until the center was just set.

A few minutes before removing the cheesecake from the oven I combined sugar, lime juice and sour cream in a small bowl. After removing the cheesecake from the oven I spread this sour cream mixture over the cheesecake and then placed it back in the oven for an additional five minutes.  This gives the cheesecake a nice topping and one other thing I like about it, it hides any cracks.

I then placed the cheesecake on a wire rack to cool and then placed it in the refrigerator for a few hours for it to chill.

Before serving, I removed the ring from the pan and garnished the cheesecake with thin slices of lime.

Margarita Cheesecake

Ingredients:

1 1/4 cups vanilla wafer cookie crumbs*

1/4 cup unsalted butter, melted

3 8oz. packages cream cheese, at room temperature

2 cups sour cream, divided

1 1/4 cups sugar

3 tablespoons Grand Marnier**

3 tablespoons gold tequila**

4 tablespoons lime juice, freshly squeezed

2 teaspoons lime zest

4 large eggs

Thin lime slices, for garnish


*I used Nilla Wafers

**I used the 5cl/50ml sized bottles. Each had exactly 3 tablespoons. For the tequila, I used Jose Cuervo Gold.


Directions:

Preheat the oven to 350 F. Mix the cookie crumbs and butter in a medium bowl until well blended. Press the crumbs onto the bottom and 1-inch up the side of a 9-inch springform pan.  Refrigerate.

In a large bowl beat the cream cheese with a hand mixer on medium speed until light and fluffy. Add in 1 cup of sour cream, 1 cup of sugar, Grand Marnier, tequila, 3 tablespoons of the lime juice and the lime zest and beat until well combined. Add in the eggs one at a time, beating until just blended after each addition.

Remove the pan from the refrigerator and pour the filling into the crust. Place on a baking sheet and bake until the center is just set, about 50 minutes. In a small bowl combine the remaining sour cream, sugar and lime juice and stir well to combine. Pour this over of the cheesecake and smooth with an offset spatula. Return the cheesecake to oven for an additional 5 minutes.

Transfer the cheesecake to a wire rack to cool completely and then chill in the refrigerator at least 4 hours prior to serving.

Before serving, remove the ring from the pan and garnish the cheesecake with the lime slices.

Recipe from Food Network

Churro Cake with a Spiced Chocolate Sauce

With Cinco de Mayo just a few days away (and it falling on the weekend this year) you may be searching for some fun and delicious recipes to make. If you’re thinking of making churros but aren’t keen on the idea of having to fry them or just want a fun alternative how about a Churro Cake with a Spiced Chocolate Sauce for drizzling over it. And don’t worry, you will still have the cinnamon sugar coating that makes a churro extra yummy.

I began by combining my dry ingredients – flour, baking powder, cinnamon and salt – in a medium bowl and setting it aside. In the bowl of my stand mixer I beat butter, sugar and vanilla on medium-high speed until it was light and fluffy – about five minutes. I then added in four eggs and two egg yolks, one at a time. And finally I beat in sour cream. With the mixer on low, I added in the flour mixture in three parts alternating with milk. Once the mixtures were combined I poured it into a Bundt pan that I sprayed with baking spray. I tapped the pan down on my counter a few times to release any air bubbles and then baked it in a 350 F preheated oven for about 50 minutes. Once the cake was done I let it sit in the pan for about 10 minutes and then inverted it on a wire rack to cool completely.

Once the cake was cool I placed it along with the cooling rack over a large bowl. I combined cinnamon and sugar in a small bowl and set it aside. In another small bowl I melted three tablespoons of unsalted butter in the microwave. Next, using a pastry brush, I brushed sections of the cake with the melted butter and then sprinkled the cinnamon-sugar mix over the section. Pressing the mixture on to the cake to adhere it. Hence me placing the rack over a large bowl, any excess melted butter and cinnamon sugar mixture simply fell into the bowl, making for an easier clean-up. You want to do this in sections, if you simply brush the entire cake and then tried sprinkling it with the cinnamon sugar it will not adhere to the cake as well (or at all) since the butter will seep into the cake.

Next, I made the chocolate sauce to go along with the cake. I combined half and half, chile powder, dark brown sugar, unsweetened cocoa powder, vanilla extract and salt in a small saucepan. I brought it to a simmer over medium heat and then removed it from the heat and added in semi-sweet chocolate chips. I let the mixture stand for a few minutes and then stirred it until it was smooth.

The best way to eat this… With the chocolate sauce drizzled over the cake. YUM! This cake was hit amongst my friends with some of us going back for seconds and practically drenching the cake with the sauce – it’s that GOOD!

Churro Cake with a Spiced Chocolate Sauce

Ingredients:

For the Cake:

2 3/4 cups flour

1 tablespoon baking powder

1 teaspoon cinnamon

1 teaspoon salt

2 sticks unsalted butter, at room temperature

1 3/4 cups sugar

1 tablespoon vanilla extract

4 large eggs plus 2 egg yolks, at room temperature

1/2 cup sour cream

3/4 cup whole milk


For the Cinnamon Sugar Topping:

3 tablespoons unsalted butter, melted

1/4 cup sugar

1 teaspoon ground cinnamon


For the Spiced Chocolate Sauce:

1 1/4 cups half-and-half

1/4 cup dark brown sugar

2 tablespoons unsweetened cocoa powder

1/2 teaspoon vanilla extract

1/4 teaspoon chile powder**

Pinch of salt

3/4 cup semi-sweet chocolate chips*


*original recipe called for 4 ounces semi-sweet chocolate, chopped

**If you want your sauce to have more of a kick add in 1/2 – 1 teaspoon of chile powder


Directions:

Preheat the oven to 350 F. Prep a Bundt pan by spraying it with baking spray (or brushing it with butter and then coating it with flour).

In a medium bowl whisk together the flour, baking powder, cinnamon and salt.

In the bowl of a stand mixer, or using a handheld mixer, beat the butter, sugar and vanilla extract on medium-high speed until light and fluffy, about 5 minutes. Beat in the eggs one at a time, and then the egg yolks. Beat in the sour cream. Reduce the speed to low and add in the flour mixture in three parts alternating with the milk. Beat until combined.

Pour the batter into the prepared pan and tap the pan on the counter a few times to release any air bubbles. Smooth the top of the batter with a spatula and then place in the oven for about 50 – 55 minutes. Until a cake tester inserted in the center comes out clean.

Let the cake cool in the pan for 10 minutes and then loosen the edges with your cake tested or butter knife and invert the cake on a wire rack to cool completely.

Once the cake has cooled make the topping.

Combine the cinnamon and sugar in a small bowl. Place the cake along with the rack over a large bowl. Working in sections, brush the cake with the melted butter and then sprinkle the cinnamon sugar over the cake, pressing to adhere it to the cake.

To make the spiced chocolate sauce combine all of the ingredients, minus the chocolate chips, in a small saucepan. Bring to a simmer over medium heat, stirring until the sugar dissolves. Remove from the heat and add in the chocolate chips. Let it sit for 2 minutes and then stir until smooth.

Serve the cake with the spiced chocolate sauce.

Recipe from Food Network

Mess Free Piping

I’ve been seeing people use plastic wrap inside of their piping bags for some time now- on other blogs, Pinterest, Instagram, etc.- especially when piping two or more colors together to create a fun swirl on a cupcake or to pipe flowers. I haven’t had a reason to try it until this past weekend when I decided to make chocolate cupcakes with vanilla frosting to go along with the carrot cake I made for Easter. Carrot cake is usually not a hit amongst kids so I decided I should bake something that was more kid friendly and you can you can’t get more kid friendly than a chocolate cupcake with colorful frosting.

After tinting the frosting I placed small amounts of it on a decent sized piece of plastic wrap as below.

Next I folded the plastic wrap in half and then simply rolled the entire thing to create a cylinder shape and tightly wound the ends of the plastic wrap so the frosting couldn’t “escape.” I quickly realized that I may have placed too much frosting on the plastic wrap since I didn’t have too much plastic wrap on the ends to wind together.

I then snipped one of the ends of the plastic wrap off and dropped it into a piping bag that I had already fitting with a Wilton 2D piping tip.

And I simply piped a large rosette on the cupcake to get this beautiful and colorful top.

I used the same technique to decorate the top of my Easter cake, using pastel colors to match the Mini Cadbury Eggs I placed on top of the cake. Instead of rosettes though, I simply decorated the cake with drop flowers, once again using the Wilton 2D piping tip.

In all honesty I think I will be using this plastic wrap method going forward with all of my cake decorating / piping. One of the things I dislike about using piping bag is no matter how tight I wind the top of the bag or use a rubber band to seal it, frosting always seems to seep out. And also, I just find it super messy having to refill the bag with more frosting while I am decorating. With this method I can simply remove the plastic wrap wrapped frosting and drop in another. Yes, I may be using extra plastic wrap doing this, but, it’s worth it.

Bunny Hug Cookies

Still looking for something fun and simple to bake for Easter… These Bunny Hug Cookies are quick, easy and adorable. You’ll need three things to make them – sugar cookie dough (use your favorite recipe or go the short-cut route like I did and use a store bought prepackaged mix), Cadbury Mini Eggs and a gingerbread man cookie cutter. You may be scratching your head on that last one, but, I’ll get to that in a few.

Since I opted to use store bought, more specifically Betty Crocker’s Sugar Cookie Mix, I didn’t have to wait for the dough to chill in the refrigerator as is necessary with most sugar cookie recipes made from scratch. So, once the dough came together I rolled it out on a lightly floured surface and cut out the bunny shape. Here’s the trick to using a gingerbread man cookie cutter to cut out a bunny, hold it upside down. The legs are then the bunny’s ears, while the gingerbread man’s head becomes the bunny’s body and the arms, well, they are still the arms on the bunny.

Once you cut out all of your cookies transfer them to a parchment lined baking sheet and place a Cadbury Mini Egg in the center of the cookie between the arms and gently wrap the arms around the egg, the arms won’t completely wrap around the egg. Lightly press the dough onto the egg so it can stick. Don’t worry if the dough slightly tears when you fold up the arms. Once you bake the cookies it will be fine. Use a toothpick to poke eyes and a nose and then bake the cookies in a 350 F (anything higher and the Cadbury eggs will crack miserably) for about 8 -10 minutes, or until the cookies are lightly golden around the edge. Let the cookies rest on the pan for 2 minutes before transferring them to a wire rack to cool completely. If you find that the nose and eyes have disappeared while baking use the toothpick once again to redefine them while the cookies are still warm.

And there you have it… Bunny Hug Cookies!


Hot Cross Buns

As Lent season comes to an end you may be seeing Hot Cross Buns available in the bakery section of your local supermarket or at your favorite bakery. They are synonymous with this time of the year due to their symbolism for the holiday.

I attempted to make them last year and while they smelled great while they were baking, the end result were buns that were hard and dry. And I instantly knew what the problem was, my yeast mixture was off. The recipe stated that when you added the yeast mixture to the flour mixture the dough should be shaggy. That never happened, but, I forged on hoping for a soft and tasty bun in the end. This time around though I got it all right. In my mind there’s an emoji of me jumping up and down with excitement.  See, I am not a fan of working with yeast. If you follow me on Instagram, you’ll know I recently made bread three weekends in a row – Irish Soda Bread, Cranberry Walnut Bread and Jalapeno Cheddar Bread. Irish Soda Bread doesn’t require yeast so I am very comfortable baking it and the latter two while they do require yeast, both are no-knead breads. You combine all of the ingredients, form it into a dough and then place in a bowl covered with plastic wrap and let it rest for about 18 hours so it can rise – 100% foolproof.  And while these buns aren’t all that difficult to make, sans the yeast part, they do require two things from you, time and patience. Give yourself at least 3 to 3.5 hours to prep and bake them.

I started by making the yeast mixture. In a medium saucepan I combined water and milk and heated it on low heat until it reached a temperature of 100 F, making sure it didn’t go above 110 F. I used my candy thermometer to keep track of the temperature. Once it reached the right temperature I removed the saucepan from the heat and sprinkled yeast and a pinch each of sugar and flour over the surface. I left it undisturbed for about 30 minutes. I was waiting for the mixture to become foamy and begin to rise up the sides of the pan.

Meanwhile, in a large bowl I whisked together flour, sugar, salt, nutmeg, cinnamon and ginger. Once the ingredients were well combined I made a well in the middle.

Once the yeast mixture was ready I whisked in an egg yolk, melted butter and vanilla extract into it. Once all of these ingredients were well combined I poured them into the well I created in the flour mixture. Using a wooden spoon I mixed all of the ingredients together and a thick, shaggy and sticky dough formed. I stirred in raisins and then turned the dough onto a floured surface and kneaded it until it was soft and elastic and formed it into a ball.

I quickly washed the large bowl I had used to make the dough and then rubbed the inside with softened butter. I returned the dough to the bowl and began turning it to coat it with the butter from the bowl. I covered the bowl with plastic wrap and let it rest for about 90 minutes until it was doubled in size.

Just before I began forming the buns, I greased a baking pan with softened butter and preheated my oven to 200F. Once the dough was ready I removed it from the bowl and formed it into a 16 x 8 rectangle. I then divided the dough in half lengthwise, then in half crosswise and then divided each of the sections into three equal parts. To make the buns round, I tucked the edges in and then placed them into the prepared pan leaving a little space in between each. Next time I make these I will form the dough into balls by rolling it between my hands to get a better round shape. The tucking method resulted in buns that looked a little more square / rectangle. I then covered the pan with a piece of plastic wrap that I coated with softened butter. At this point, I turned off my oven and placed the covered pan in the oven so the buns could rise. Here’s a tip, when yeast recipe calls for something to be placed in a warm spot to rise, preheat your oven to 200 F, turn it off and then place the item in the oven. It’s the perfect environment for it to rise. I left the buns in the oven for about 40 minutes, they more than doubled their size. Once I removed them I preheated the oven to 375F and brushed the tops with a beaten egg before returning them to the oven for 25 minutes, until they were golden brown on top and puffy.

I let the buns cool completely in the pan. Once cooled, I made the traditional cross pattern on each bun with a confectioners’ sugar glaze.

Hot Cross Buns

Ingredients:

For the Buns:

1/2 cup water

1/2 cup whole milk

1/2 cup sugar

2 1/4 oz. packages active dry yeast

1/3 cup unsalted butter, melted (plus more at room temperature as needed per directions)

1 large egg yolk

1 1/2 teaspoons vanilla extract

3 cups flour

3/4 teaspoon salt

1/2 teaspoon ground nutmeg

1/2 teaspoon ground cinnamon

1/4 teaspoon ground ginger

1/2 cup raisins

1 egg beaten, for brushing buns


For the Glaze:

2 cups confectioners’ sugar, sifted

2 tablespoons milk

1/4 teaspoon lemon zest

1 teaspoon vanilla extract


Directions:

In a medium saucepan combine the water and milk. Heat on low heat until it reaches a temperature or 100 F, not exceeding 110 F. Remove from the heat and sprinkle the yeast and a pinch of sugar and flour over the surface. Set aside without stirring until the mixture becomes foamy and begins to rise up the sides of the pan, about 30 minutes.

In a large bowl whisk together the flour, sugar, salt, nutmeg, cinnamon and ginger. Make a well in the middle of the mixture and set aside.

When the yeast mixture is ready, whisk in the melted butter, egg yolk and vanilla extract.

Pour the yeast mixture into flour mixture and using a wooden spoon mix it to form a thick, shaggy and sticky dough. Stir in the raisins. Turn the dough out onto a lightly floured surface and knead the dough until it is soft and elastic, about 8 minutes. Shape the dough into a ball.

Brush the inside of a large bowl with softened butter. Put the dough into the bowl and turn it to coat it with the butter. Cover the bowl with plastic wrap and let the dough rise at room temperature until it has doubled in size, about 90 minutes.

Butter a 9 x 14 inch baking pan. Turn the dough out of the bowl and pat into a 16 x 8 inch rectangle. Divide the dough in half lengthwise and then again crosswise. Divide of each of these pieces into thirds and form the dough into rounds. Place in the prepared pan, leaving a little space between each. Cover the pan with a buttered plastic wrap and set the rolls to rise, they will double in size, in a warm place. About 45 minutes.

Preheat the oven to 375 F.

Remove the plastic wrap from the pan and brush the top of the buns with a beaten egg. Bake until golden brown on top and puffy, about 25 minutes. The internal temperature of the buns should be 190 F. Let the buns cool in the pan.

In a medium bowl combine the ingredients for the glaze and stir until smooth. Transfer the glaze to a piping bag or zip bag and make a small cut on the end or corner. Ice each of the buns with a cross.

Recipe from Food Network

Bunny Ear Cupcakes

Earlier this week I showed you how quick and easy it is to create Sprouting Carrot Cupcakes and today I am showing you a fun companion cupcake to go with them, Bunny Ear Cupcakes.

For these cupcakes I decided to make coconut cupcakes, since it is a popular flavor for Easter, topped with cream cheese frosting (my favorite frosting flavor). I then sprinkled the top of the frosting with sweetened shredded coconut.  If you are not a fan of coconut, or, just want to make something a bit quicker and simpler you could opt to make a white or yellow box cake mix into cupcakes and then top it with store bought vanilla frosting and instead of topping the cupcakes with coconut opt for white sprinkles.

Using kitchen shears I cut large marshmallows in half on the diagonal. I then dipped the cut side in a small bowl I filled with pink sanding sugar. And voila, bunny ears.

Next, I placed the marshmallow bunny ears on to the cupcakes.

And there you have it, Bunny Ear Cupcakes. While I decided to stop with the ears, sometimes less is more, you could decorate these cupcakes further by using chocolate chips for the eyes and rolling a small ball of marshmallow in the pink sanding sugar for a nose.

Coconut Cupcakes

  • Servings: 12 Cupcakes
  • Print

Ingredients:

1 1/2 sticks unsalted butter, at room temperature

1 cup sugar

3 large eggs, at room temperature

3/4 teaspoon vanilla extract

3/4 teaspoon almond extract*

1 cup flour

1/2 teaspoon baking powder

1/4 teaspoon salt

1/2 cup buttermilk**

7 ounces sweetened shredded coconut***, plus more for topping cupcakes

*If you want a stronger coconut flavor, substitute the almond extract with coconut extrac

**I’ve gotten into the habit of making my own buttermilk. To do so, add 4 1/2 teaspoons of vinegar to a measuring cup, then fill it with enough milk (I’ve used 2% and whole milk) to reach 1 cup. Stir it a few times then let it sit for 10-15 minutes. The buttermilk is ready when it begins to curdle. For this recipe since I only needed 1/2 cup of buttermilk, I used 2 1/4 teaspoons of vinegar and added enough milk to my measuring cup to reach 1/2 cup.

***I used about a 1 1/2 cups of coconut

Directions:

Preheat the oven to 325 F. Line a 12-cup cupcake tin with cupcake liners and set aside.

Using a stand mixer or a handheld mixer beat the butter and sugar together on high spend until light and fluffy. Reduce the speed to low and add the eggs, 1 at a time. Scraping the bowl as needed between each addition. Add in the vanilla and almond extracts and continue mixing until everything is well incorporated.

In a separate medium bowl sift together the flour, baking powder, baking soda and salt.

Add the dry ingredients to the butter mixture in 3 additions, alternating with the buttermilk, beginning and ending with the dry ingredients. Mix until well combined and then fold in the shredded coconut.

Divide the batter among the prepared cupcake tin, filling the batter to the top.

Bake in the preheated oven for 25 – 30 minutes, or until a cake tester inserted in the middle comes out clean. Let the cupcakes cool in the pan for 15 minutes, and then transfer them to a wire rack to cool completely. Once completely cooled top with frosting.

Recipe modified from Food Network


Cream Cheese Frosting

Ingredients:

1 8oz. packages of cream cheese, at room temperature

1 stick unsalted butter, at room temperature

2 cups confectioners’ sugar, sifted

1 teaspoon vanilla extract


Directions:

In a stand mixer or using a handheld mixer, beat the cream cheese and butter at medium speed until creamy. Gradually add in the sugar until well combined. Add in the vanilla extract and continue beating until the mixture is smooth and creamy.


Sprouting Carrot Cupcakes – Tutorial

With Easter right around the corner I decided to make some fun themed cupcakes to get in the spirit of the holiday. Today I am sharing with you these Sprouting Carrot Cupcakes and later this week I will be sharing with you Bunny Ear Coconut Cupcakes.

I began by baking a batch of chocolate cupcakes. While they cooled, I made the frosting. I made a basic buttercream frosting and then removed a third of it. In this third I stirred in melted unsweetened chocolate until it was fully incorporated. I tinted the remaining frosting orange and then transferred it to a piping bag fitted with a large round tip.

After the cupcakes were cool I used a paring knife to cut a small cone-shaped piece out of the center of each one. I crumbled these small pieces of cake into a small bowl and set it aside.

Next, I spread the chocolate frosting over the cupcakes leaving the holes open. I then patted the crumbled pieces of chocolate cake onto the frosting to resemble dirt.

To make the carrots I piped the orange tinted frosting into the holes and then mounded it a bit above the hole. And finally, I cut small pieces of green sour apple straws and placed them in the piped carrots.

And there you have it… Sprouting Carrot Cupcakes.


While I opted to make my cupcakes and frosting from scratch, you could easily go the time-saving route and use a box chocolate cake mix and store bought chocolate and vanilla frosting. If you opt for store bought frosting I would advise refrigerating the vanilla frosting after tinting it orange for about 10-15 minutes prior to piping the carrots. Store bought frosting tends to be on the softer side so decorating with it can be frustrating since it won’t take shape, refrigerating it helps to stiffen it.


Supplies:

12 chocolate cupcakes

1 cup chocolate frosting

1 1/2 cups vanilla frosting

Orange food coloring

Green sour apple straws

Piping Bag fitted with a round tip


Slow Cooker Sunday: Corn & Bean Enchilada Bake

You may have noticed that I haven’t been posting as many Slow Cooker Sunday recipes. It’s for a few reasons, one of them, I am running low on recipes. Quite a few of the recipes I have shared have been from this cookbook. While I haven’t tried them all, there are some dessert recipes I would like to try, I have tried those that sounded most appealing to me. Another reason, a lot of the recipes I come across are usually for 6- 10 servings, great if you are cooking for 2 or more people, but, since I cook for just myself that’s way too many leftovers. Don’t get me wrong, I love leftovers (especially since it means I don’t have to cook everyday),but, after eating the same thing for lunch & dinner after two or three days it just doesn’t taste the same by the 5th or 6th time eating it. And yes, I could start working on creating my own recipes, but, I am more comfortable creating recipes for stovetop and oven cooking. So, I did some research and came across the answer, a slow cooker cookbook with recipes geared towards 2 people. No more leftovers for days and days and days.

There’s a little bit of everything in this cookbook. A section on poultry, beef, breakfast, desserts and even seafood. Although, I always avoid making seafood in my slow cooker. I feel like since seafood cooks fast enough there’s no reason to slow cook it. Also, seafood odors can linger and cooking it in a slow cooker for hours on end may not be that delightful. So, I am geared with a new cookbook and ready to start using my smaller slow cooker to whip up some delicious meals that won’t be lasting me days on end.

First up, I made a Corn and Bean Enchilada Bake.

In a medium bowl I combined a chopped tomato, chopped onion, minced garlic, a minced jalapeno pepper, a can of black beans and corn.

After spraying the insert of my slow cooker with cooking spray I layered the ingredients for the enchilada.

I poured salsa verde in the bottom of the slow cooker. While the cookbook does include a recipe for homemade salsa verde I decided to go the easier route and used store bought. I then topped the salsa with 3 corn tortillas, overlapping them. I poured half of the bean mixture over the tortillas and topped it with more salsa verde and finally shredded cheese. I repeated the layers once more and then covered the slow cooker and set it to cook on low for 6 hours.

After the six hours the cheese had melted and the tortillas were soft. And I had the perfect sized meal for 2 lunches and 1 dinner.

Corn and Bean Enchilada Bake

Ingredients:

1 yellow onion, chopped

1 jalapeno pepper, minced

1 large tomato, seeded and chopped

3 garlic cloves, minced

1 14oz. can black beans, drained and rinsed

1 8.5oz. can yellow sweet corn

1 1/4 cups salsa verde

6 corn tortillas, taco style

2/3 cup Mexican blend shredded cheese


Directions:

In a medium bowl combine the first 6 ingredients.

Spray the insert of a slow cooker with cooking spray.

Pour 1/3 cup of salsa verde in the bottom of the slow cooker.

Place three of the tortillas in the slow cooker overlapping them. Pour half of the bean mixture over the tortillas and the top with half of the remaining salsa and half of the cheese. Repeat the layers, ending with the cheese.

Cover and cook on low for 6 hours.

Recipe from The Complete Slow Cooking for Two Cookbook


The Sofa

Who knew that a simple piece of furniture could change your perspective?

The same sofa sectional had been in my living room for as long as I could remember. My parents brought it to the house from their apartment in the Bronx when they purchased the house in the late 1970’s; so that should give you some idea of old it was. It was old school as well… covered in plastic that was cracking and dreadful to sit on in the dead of summer and had a gold paisley pattern on it. I’m not 100% sure why my parents never changed it. My Mom has a tendency of not wanting to let go of things. When she ended up in a nursing home due to a stroke and my Dad was in the hospital for a second time I thoroughly cleaned up their bedroom to make room for the hospital bed he would ultimately need. And boy, were there a lot of things to get rid of. In this living room with said sectional there are also wood paneled walls, also there for as long as I can remember. Probably before my parents bought the house, so it’s not the nice modern ones you see nowadays. I long dreamed of taking down the paneling, painting the walls a bright white (something completely opposite of the dark paneled walls), ripping up the carpets to expose the original hardwood floors and of course getting rid of the sectional.

After my Dad passed away I remember sitting on that sectional and wondering what life would be like now alone in the house. Making changes to the living room was the furthest thing from my mind. I think I found comfort in the familiarity. Seeing it the same allowed for memories to easily flood my thoughts. I could easily remember sitting on that couch eating my dinner – the dinner my Dad put aside for me in a tupperware that I only needed to pop in the microwave to heat up after arriving home from work in the city – and talking to him about my day. Little by little though I did make some changes. I moved my Dad’s recliner to the perfect corner so there would be more space in the living room. I moved the rocking chair to what I still refer to as my parents’ bedroom even though my Mom hasn’t been in the house in five years and my Dad passed away three years ago. And eventually I removed two pieces of the sectional. Removed sounds a lot nicer than I threw them out, which is what I really did do. I don’t really recall what prompted me to do it. It was time I guess. Of course I took a picture so that I won’t have to think too hard to remember what it used to look like.

The one piece I held on to was the curved middle piece. For two reasons, Lucky, my dog, liked to go under the sofa and I still needed a place for people to sit when they came over. Granted it was a small piece, but, it was something. I had visions in my mind of what I wanted the remodeled living room to look like. I was thinking light aqua walls, whitewashing the accent brick wall, hardwood floors and some patterned curtains. Oh, and I had a vision of a grey couch with studding. I stuck up color swatches on the wall to get ideas for the right shade of aqua and I ordered curtain swatches to match them to my chosen wall color. And then recently something changed. We spend a lot time living our lives with a vision of a future that may or may never come. We think to ourselves, oh, when this happens then I’ll do x y and z. But, what if that thing never happens. What if we never meet the right person, never get our dream job and desired salary, or whatever else it is that we are waiting for? Are we supposed to give up on the dreams we hope would follow? Absolutely not. We should find a way to make anything and everything happen that will make us happy. So, there I was waiting for the perfect salary to have enough money to do everything I wanted all at once. But, I realized that what I wanted was to be able to sit in my living room now and watch television, read a book, crochet/knit, etc. So, I decided I would buy a new sofa, nothing expensive. But, something to hold me over until I could get what I really wanted. I decided on my favorite color, navy blue.

I did some research online and then went to the store armed with a tape measure to measure the space between the sofa and the floor. I was hoping to find something that Lucky would still be able to sneak under. He’s 17 and as silly as it sounds I didn’t want him to feel slighted by the new piece of furniture. That I was somehow displacing him from the home he has known since he was few months old. I almost picked a different sofa that would have afforded him the space to go underneath, but, in the end stuck to the one I liked and wanted. That evening I decided that since my new sofa wouldn’t be delivered for another week and a half that I would throw out that final curved piece on the next garbage day to get Lucky used to the idea of not going underneath the new one. Dogs can really take over your life. I also decided that I would breathe new life into my Dad’s old recliner with a new cover. I wasn’t sure if recliner covers existed but a quick internet search let me know otherwise. So, I removed that final piece of the sectional, vacuumed the rug and ordered a grey cover for the recliner in anticipation of my new sofa. And I began to think, maybe I should change my vision and make this new sofa the focal point of it. So, gone were the ideas of aqua walls and in place of it a nice shade of green (although lately I am starting to lean towards a shade of white) which would go nicely with the brick accent wall that I now wouldn’t have to whitewash. I am still holding on to some cool patterned curtains though – I recently ordered a new assortment of fabric swatches to go with this new color scheme. And I am still planning on exposing those hardwood floors that I am sure will have to be stained because of the accident or two (or more) that Lucky has had.

And then the day arrived… My new sofa came. It fit into its designated space perfectly and I was in awe of how it changed the whole look of my living room, even with its old curtains and paneled walls. Later that day the recliner cover arrived and I couldn’t wait to put it on and was once again happy at how it completely changed the look of the room as well. The following day I went out and purchased a new lamp. A silver base with a white scale pleat shade to replace the gold base lamp with an almond color shade. I also purchased new picture frames for a few of the pictures that hang on the wall.

As I sit in my living room now I am happy with the space I have created. And while I have lived in this home for many years (we’ll just say 30 plus), and have lived in it alone for 3, it’s finally beginning to feel like my own, all thanks to a sofa.