Cookie Palooza: Snickerdoodle Biscotti

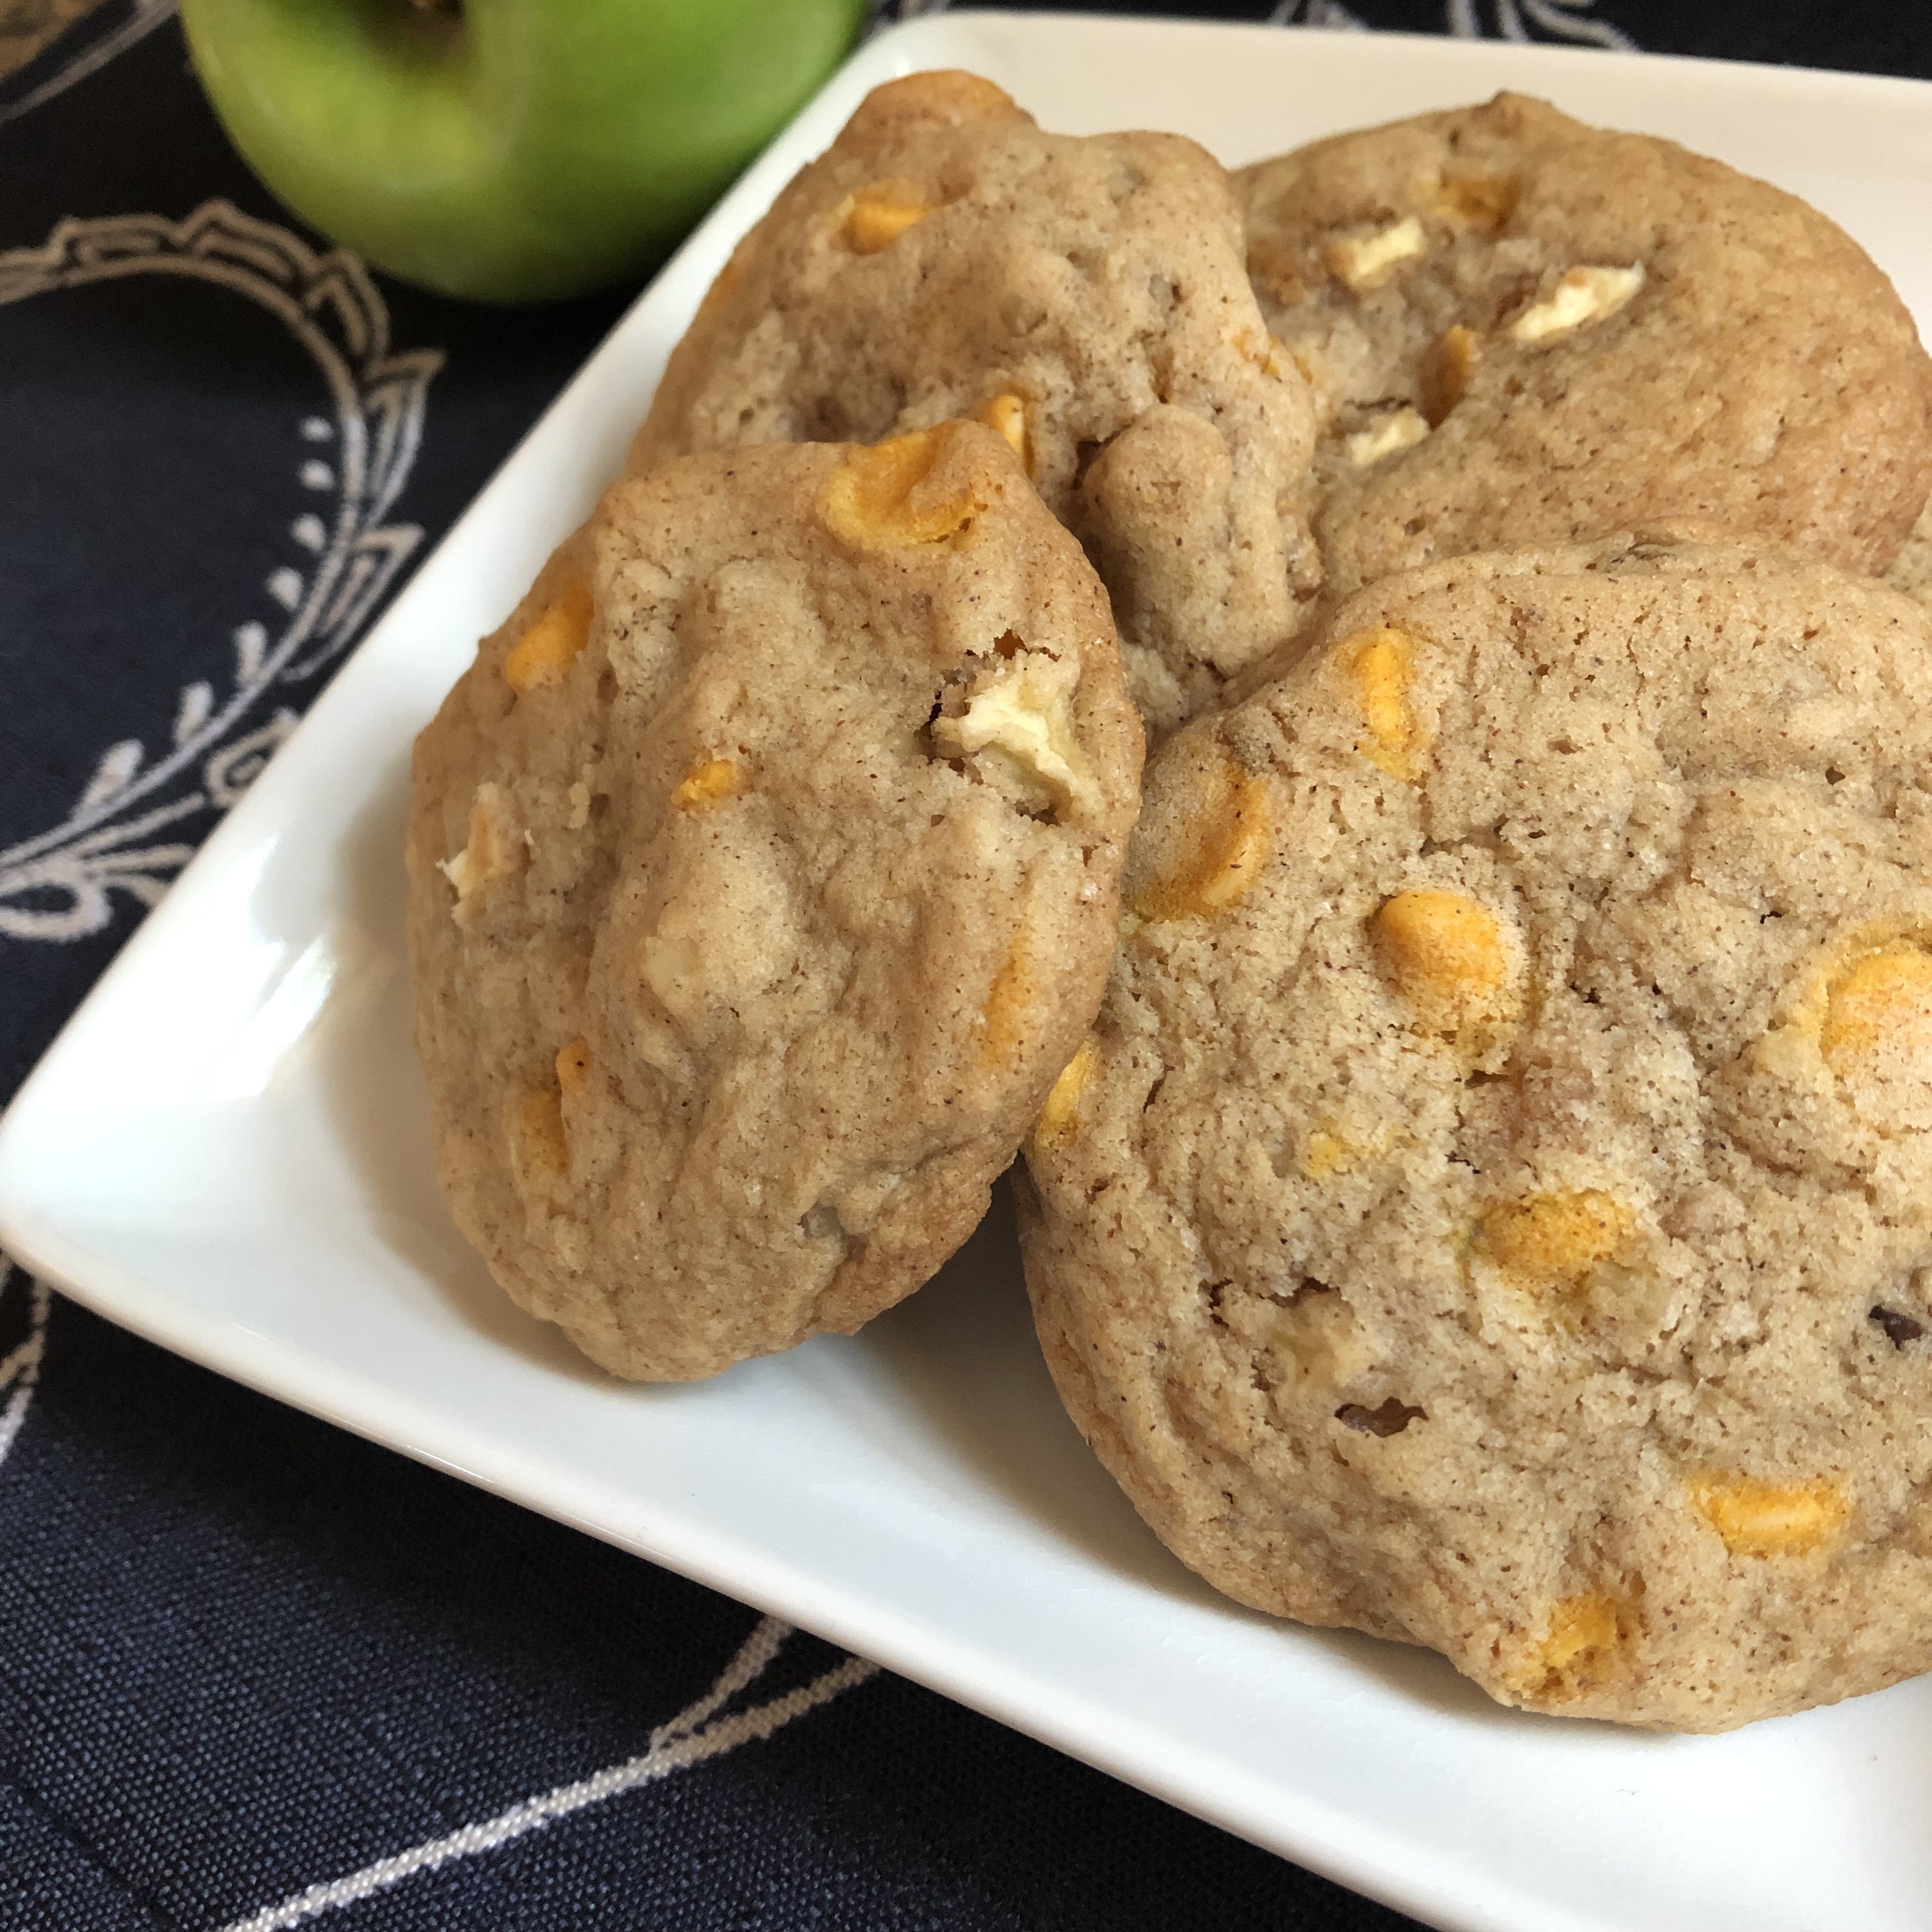
Welcome to day 2 of Cookie Palooza 2021. Today I am bringing you a twist on a holiday favorite. While Snickerdoodles are great any time of the year they are especially great around the holidays. It could be because they are a nice complement to a hot cup of cocoa or because they can easily be transformed into a holiday cookie by using colored sanding sugar in lieu of white sugar to be rolled in. Either way, they are always a welcomed addition to any cookie platter. Today though, we are making them into another holiday favorite… biscotti.

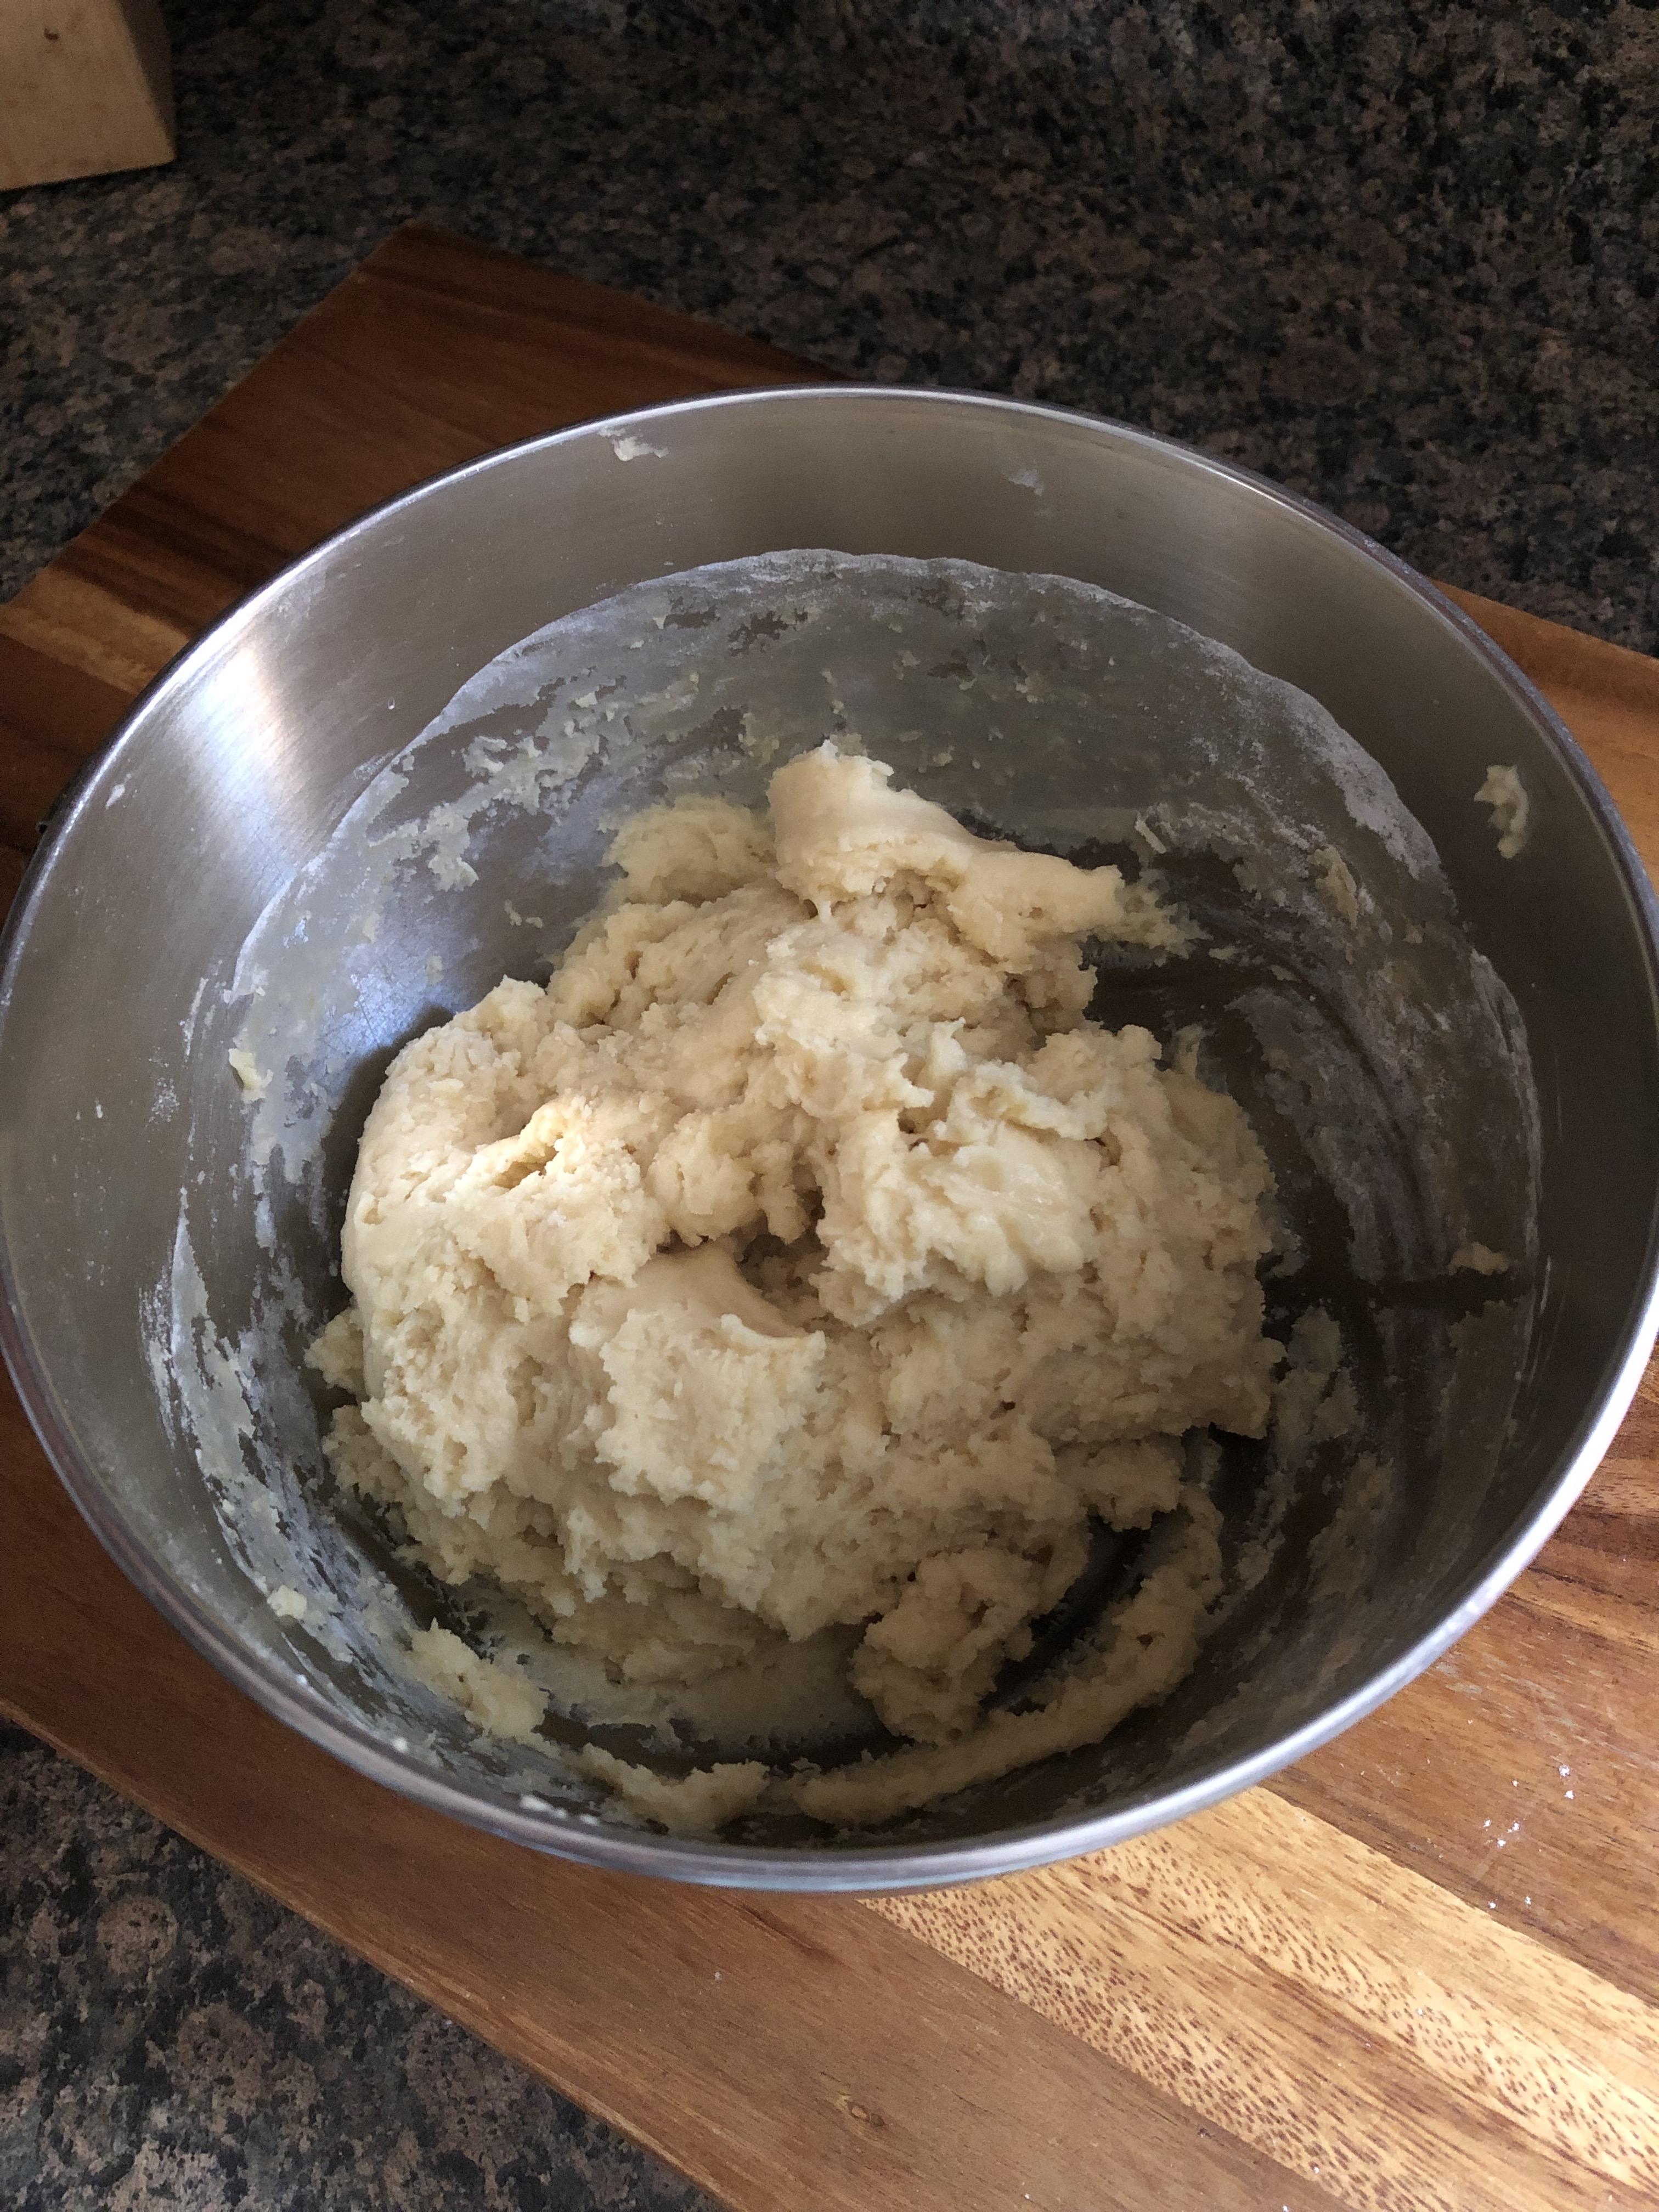
I started by making and refrigerating the dough for 30 minutes.

While the dough was chilling I prepped an extra-large baking sheet by lining it with parchment paper. I opted to use one baking sheet to ensure that the biscotti would cook evenly.

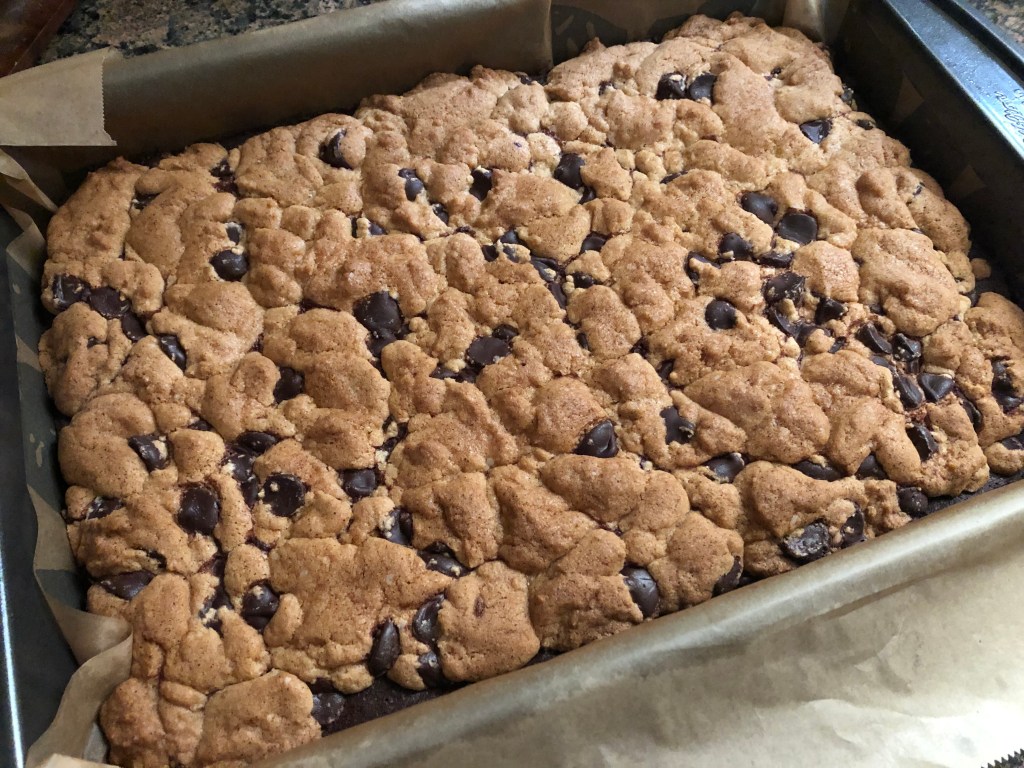
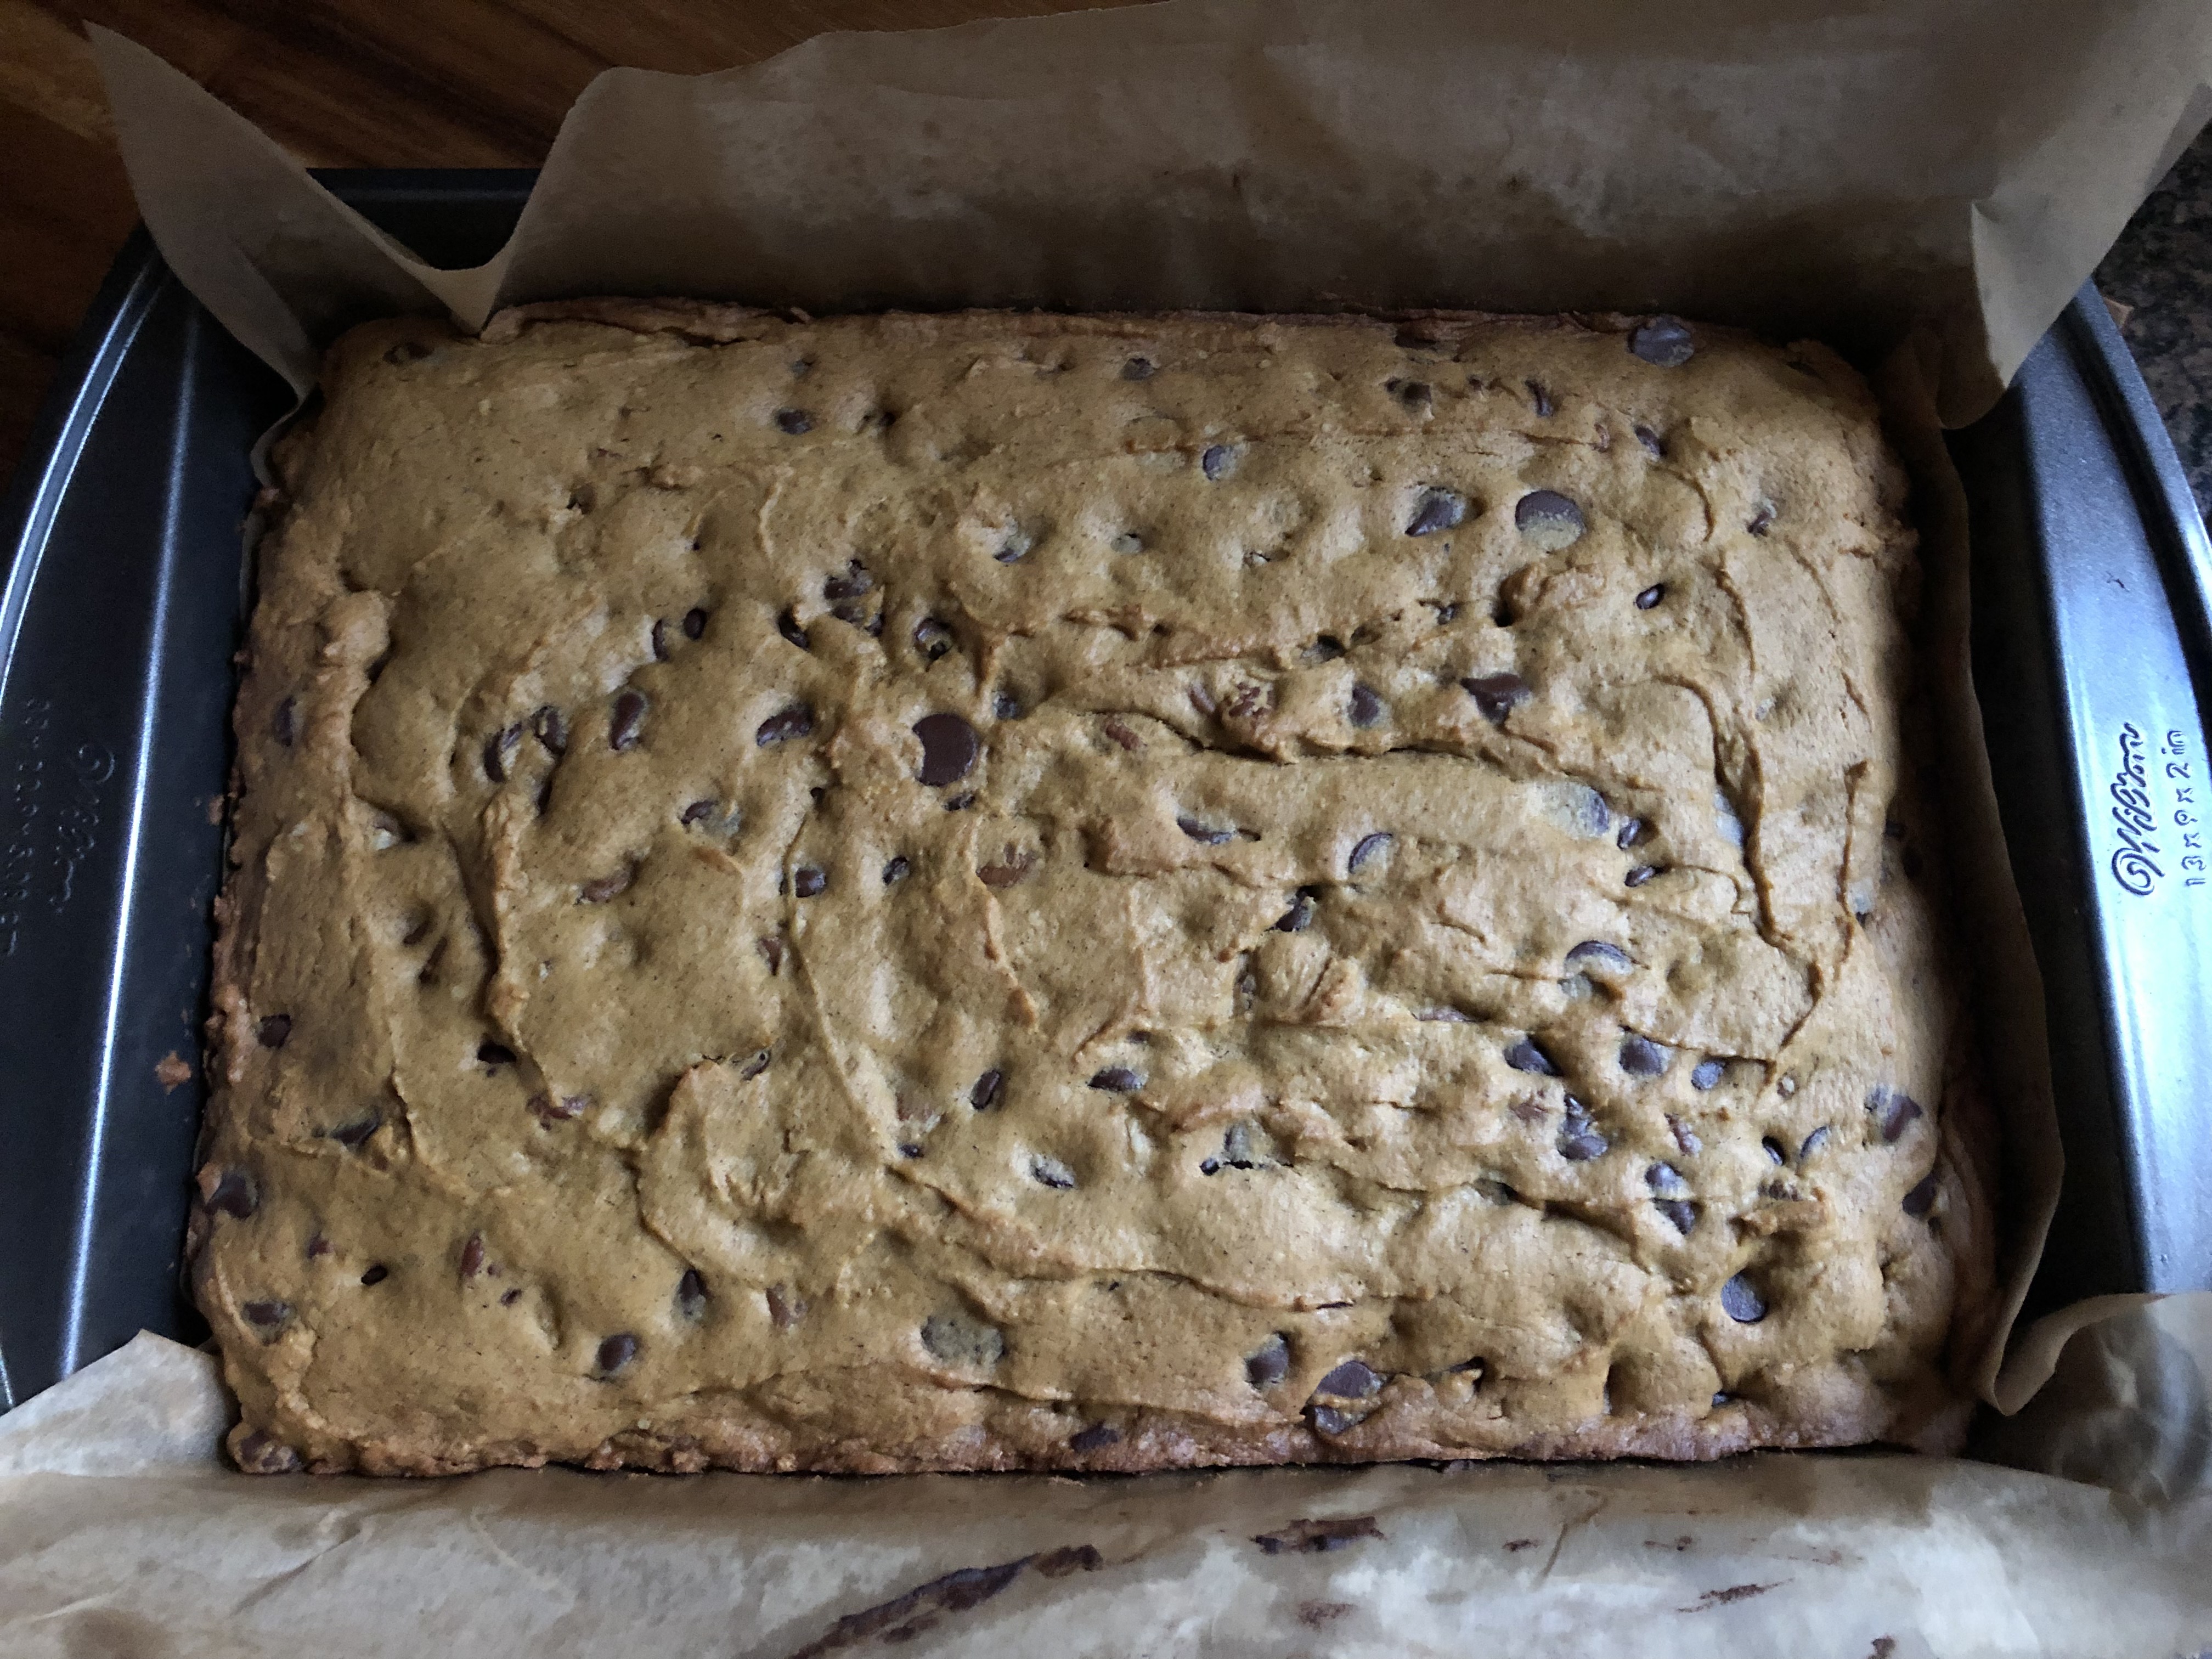
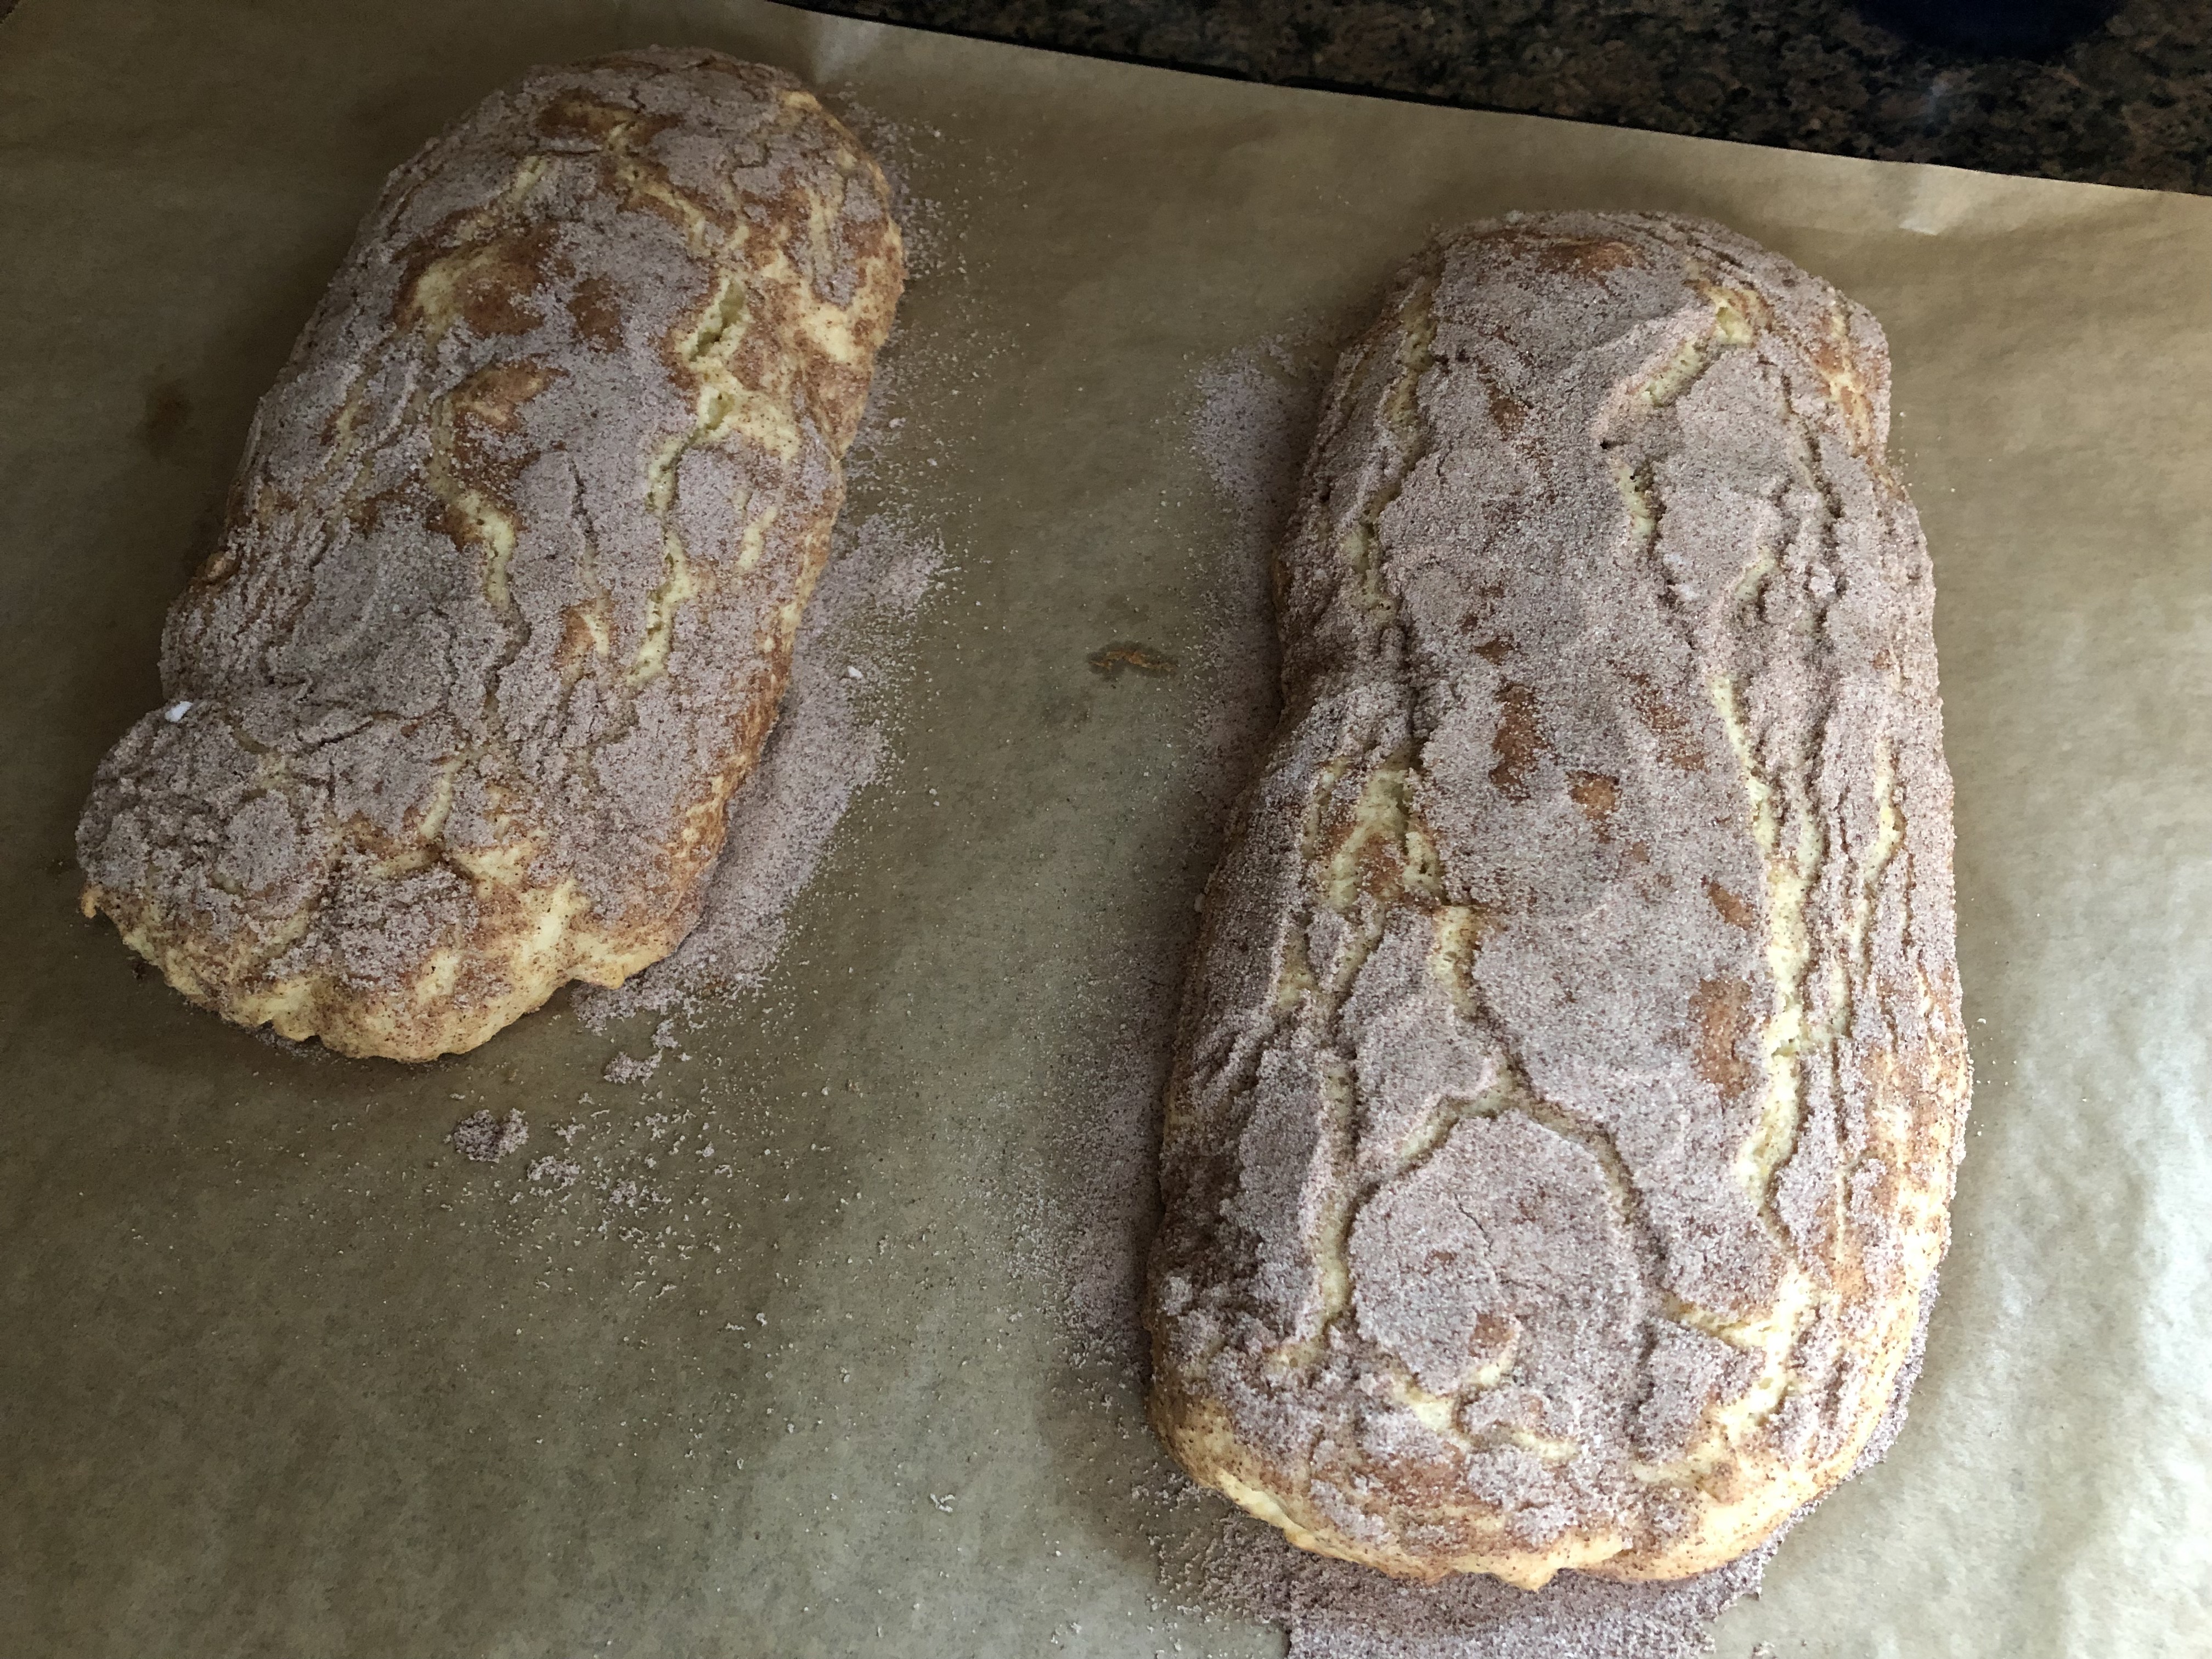
Once the dough was chilled I divided it in half and shaped both pieces into a 10×4-inch rectangle. The dough was quite sticky so I wet my hands with water beforehand. I would suggest shaping the dough right on the parchment paper. You may have trouble transferring it from your counter to the baking sheet otherwise. Next, I generously covered both loaves with a cinnamon-sugar mixture and gently pressed it into the dough.

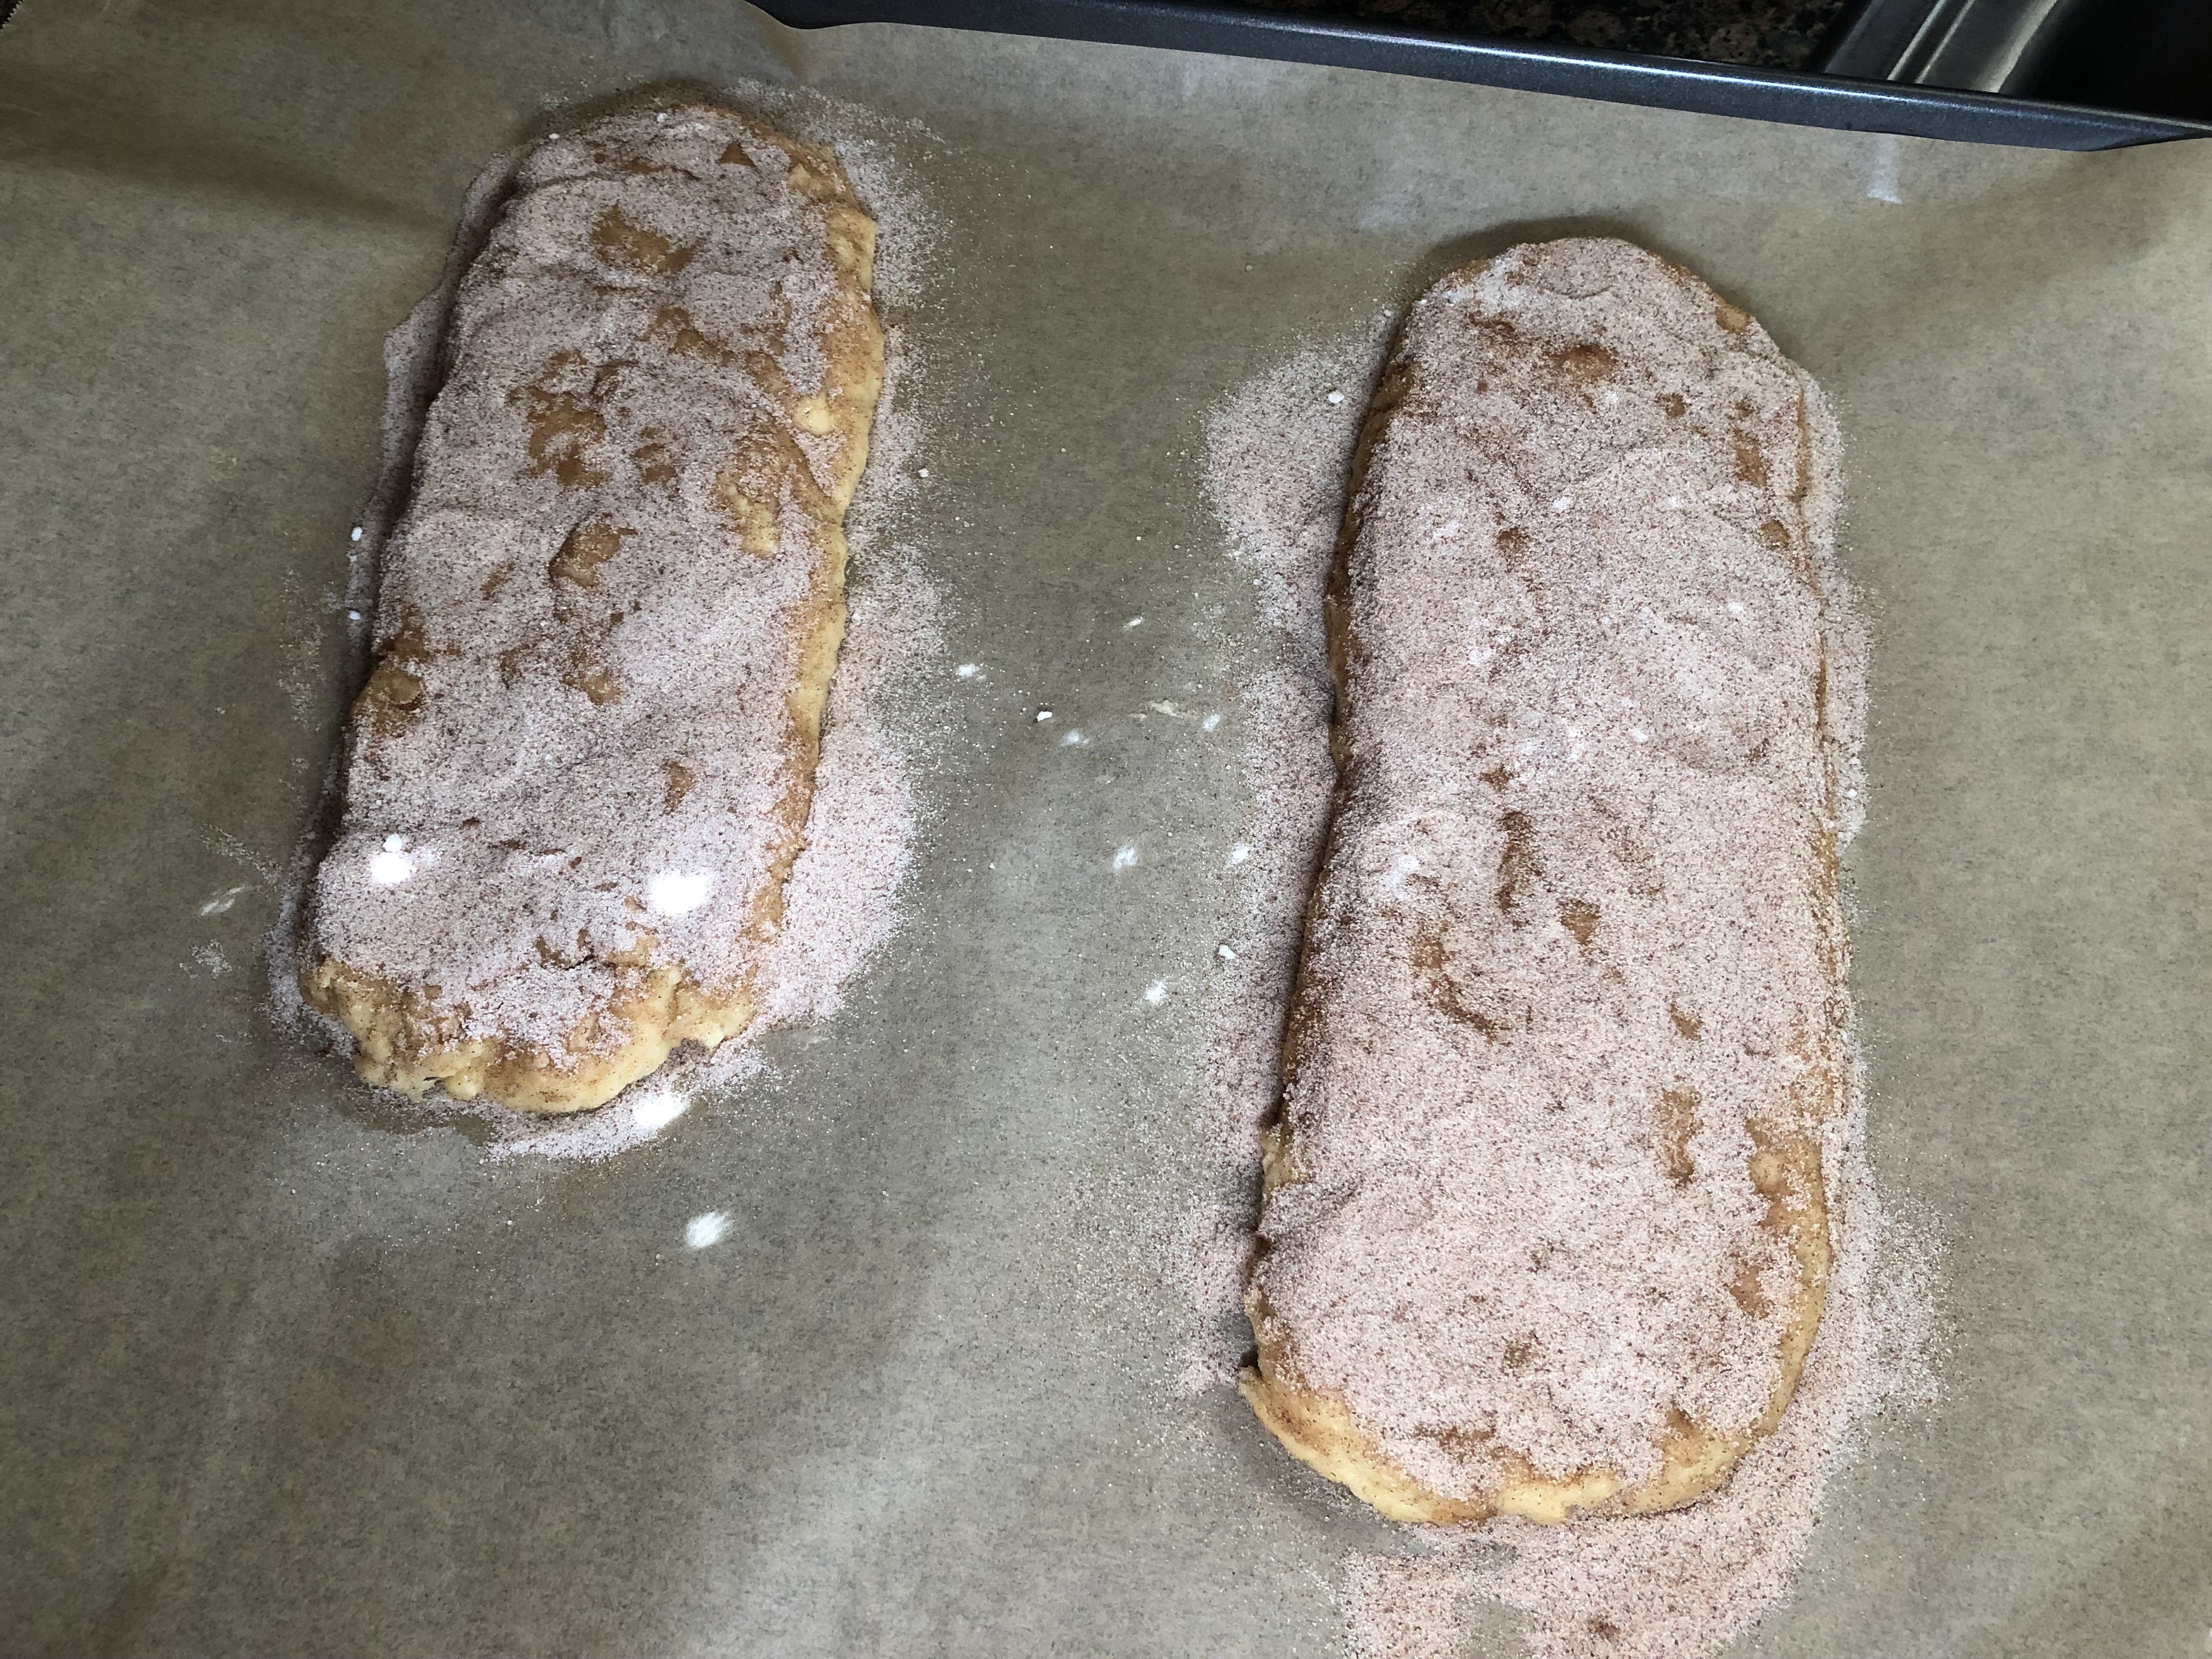
After baking in a 350 F oven for 25 minutes I removed it and using the parchment paper I transferred it to a wire rack to cool for 10 minutes. While the loaves cooled I lined my baking sheet with a fresh piece of parchment paper. I must say, the top of the loaves reminded me of what snickerdoodles look like after they are baked. That cracked look with the cinnamon-sugar coating.

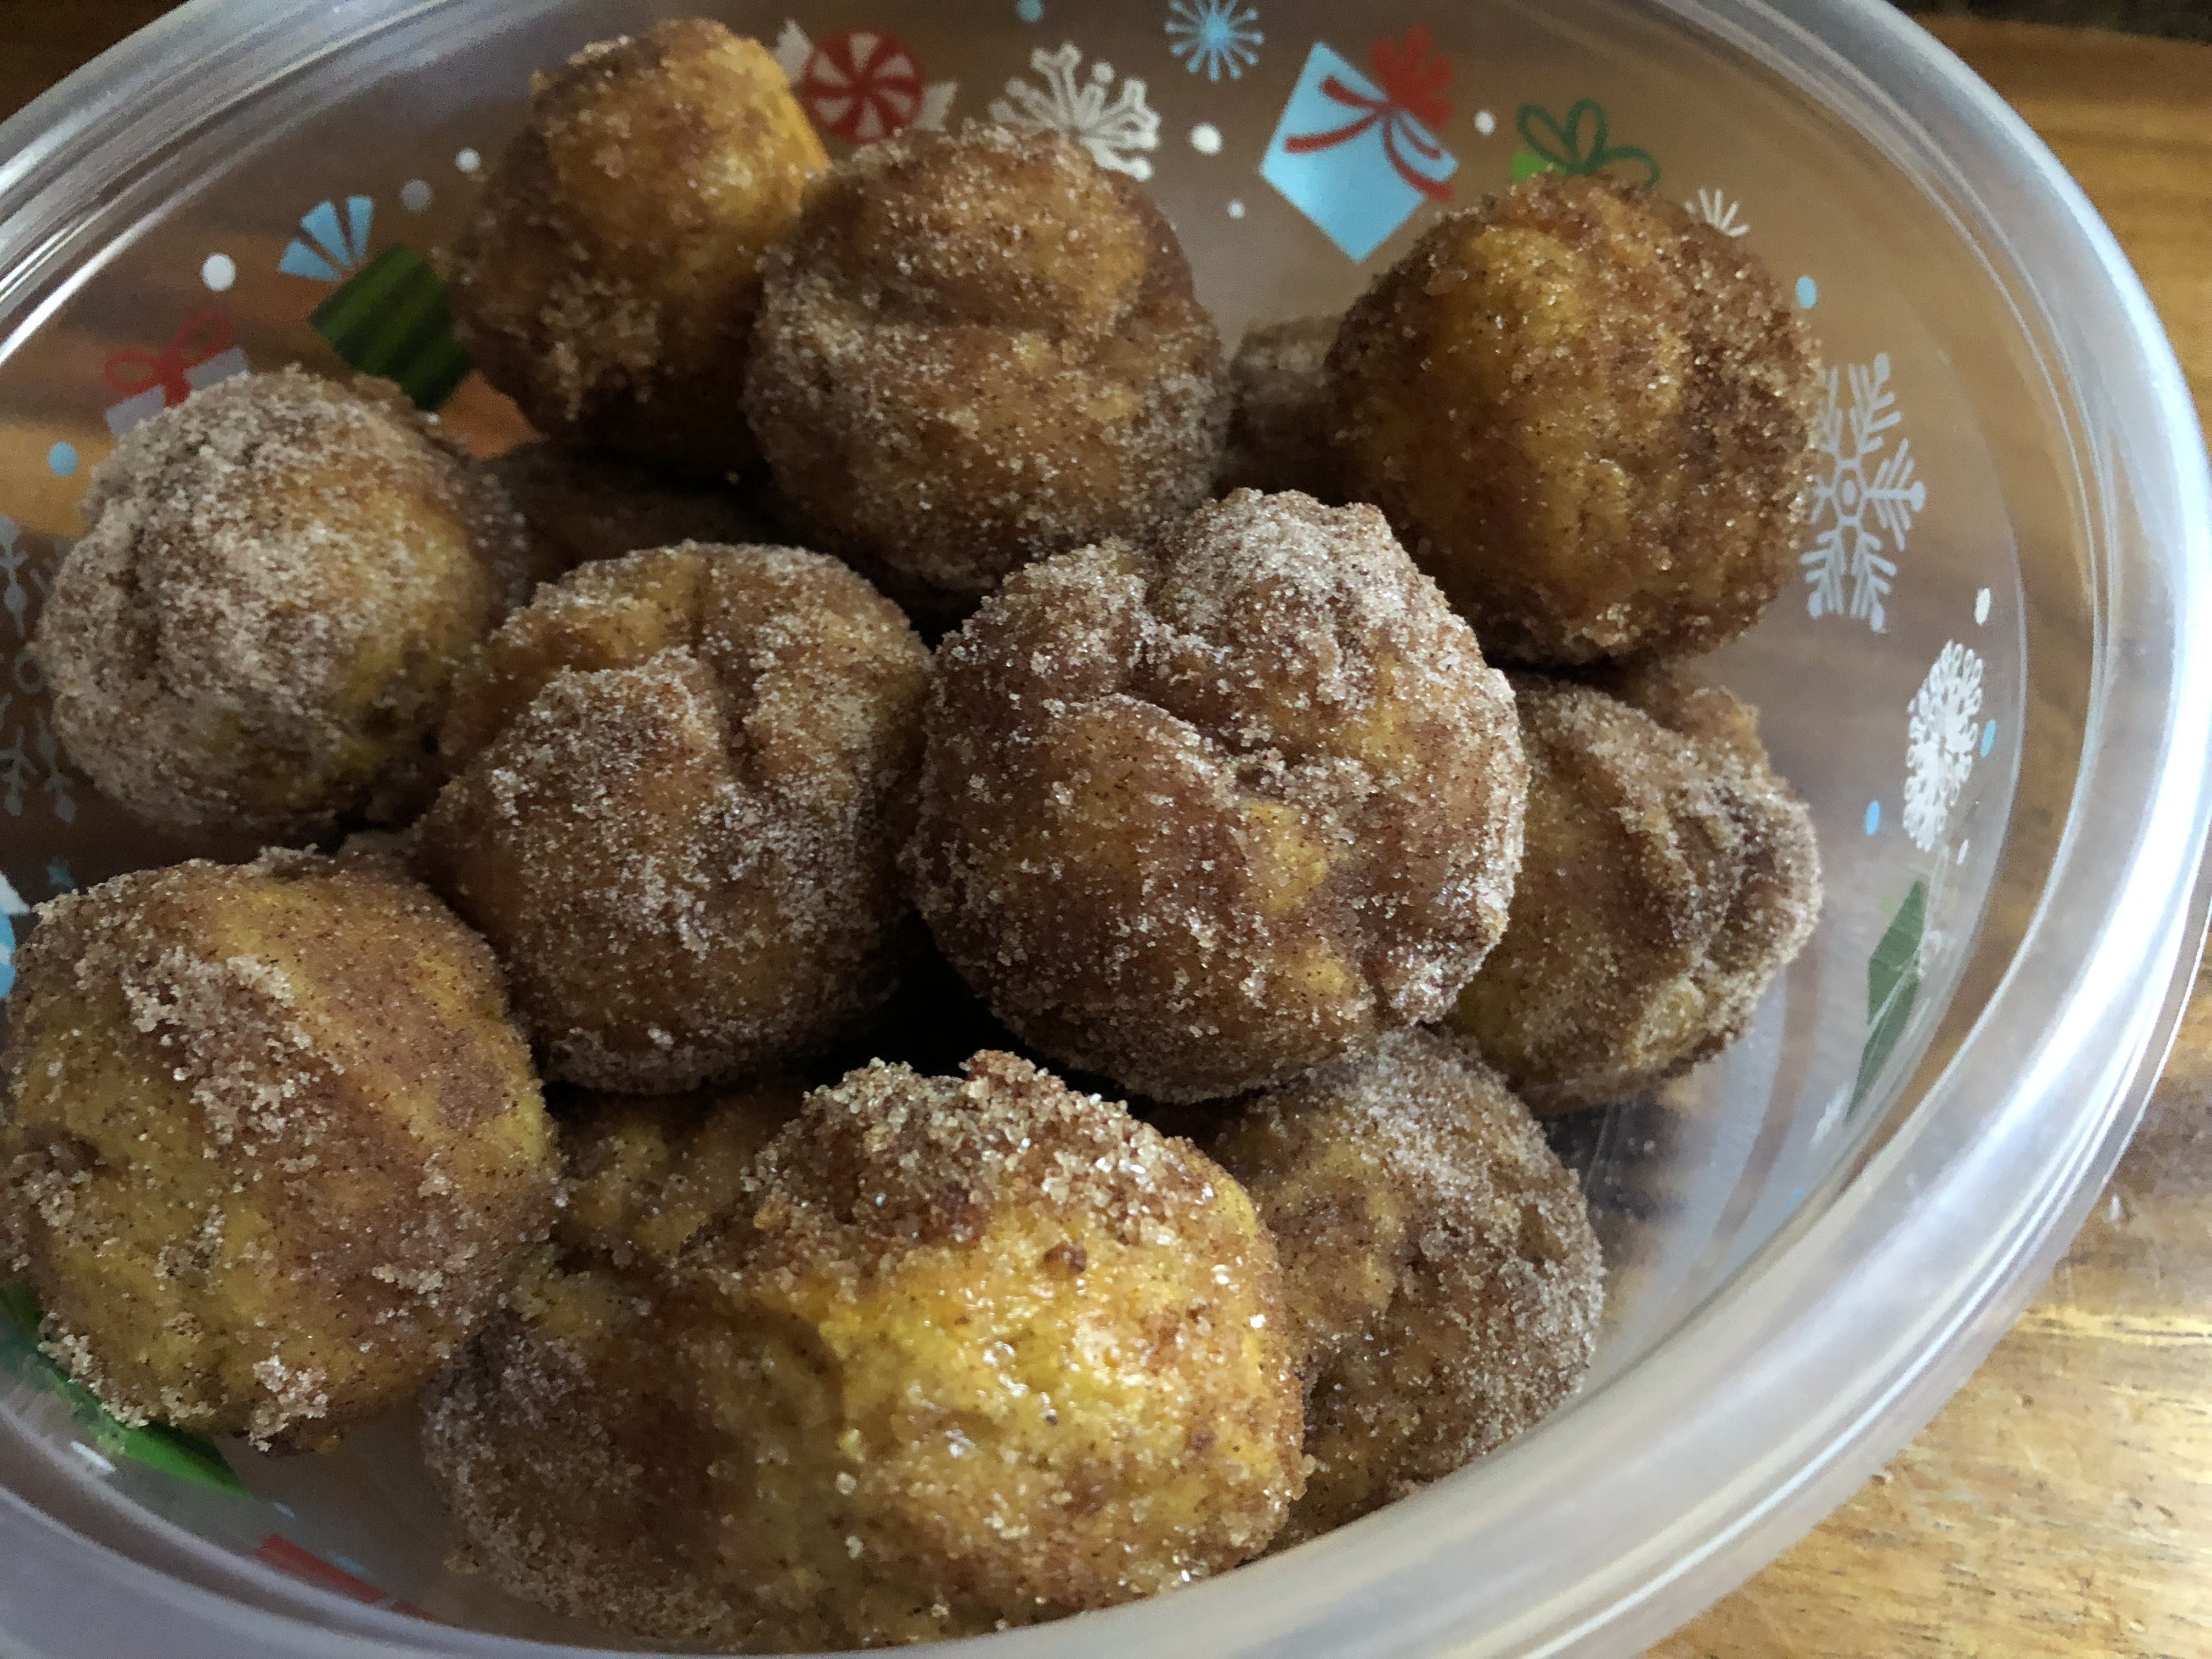
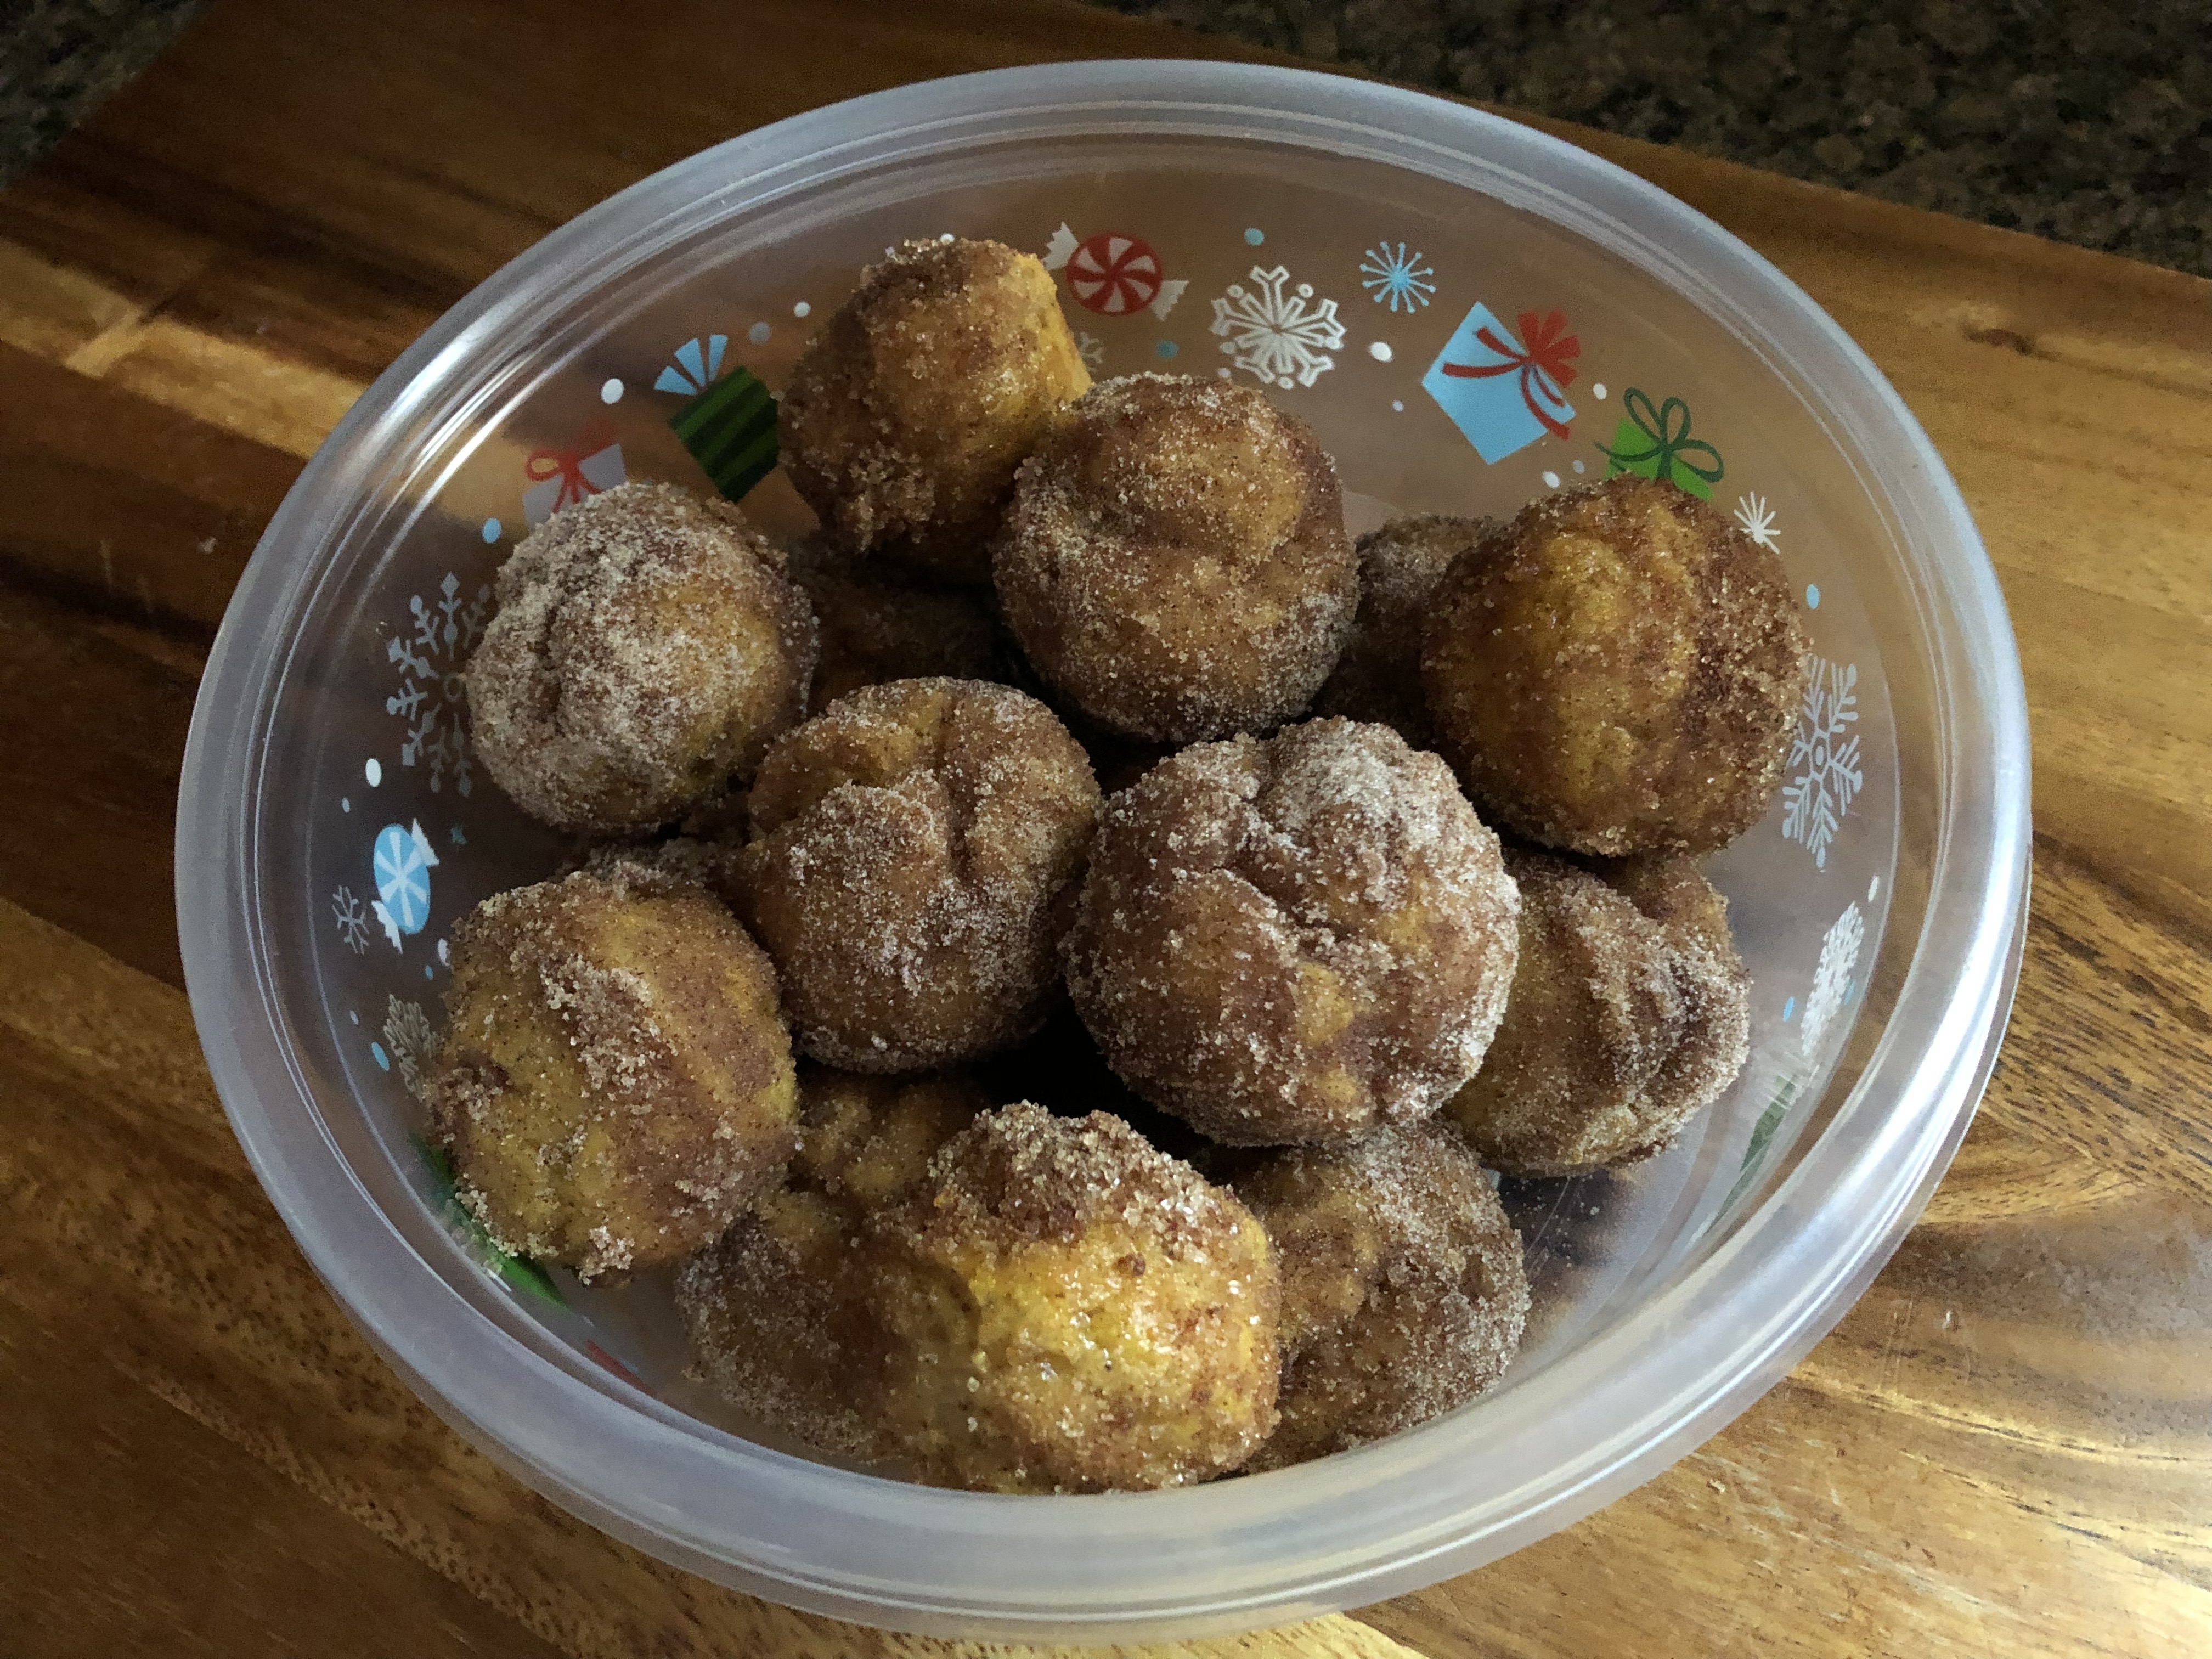
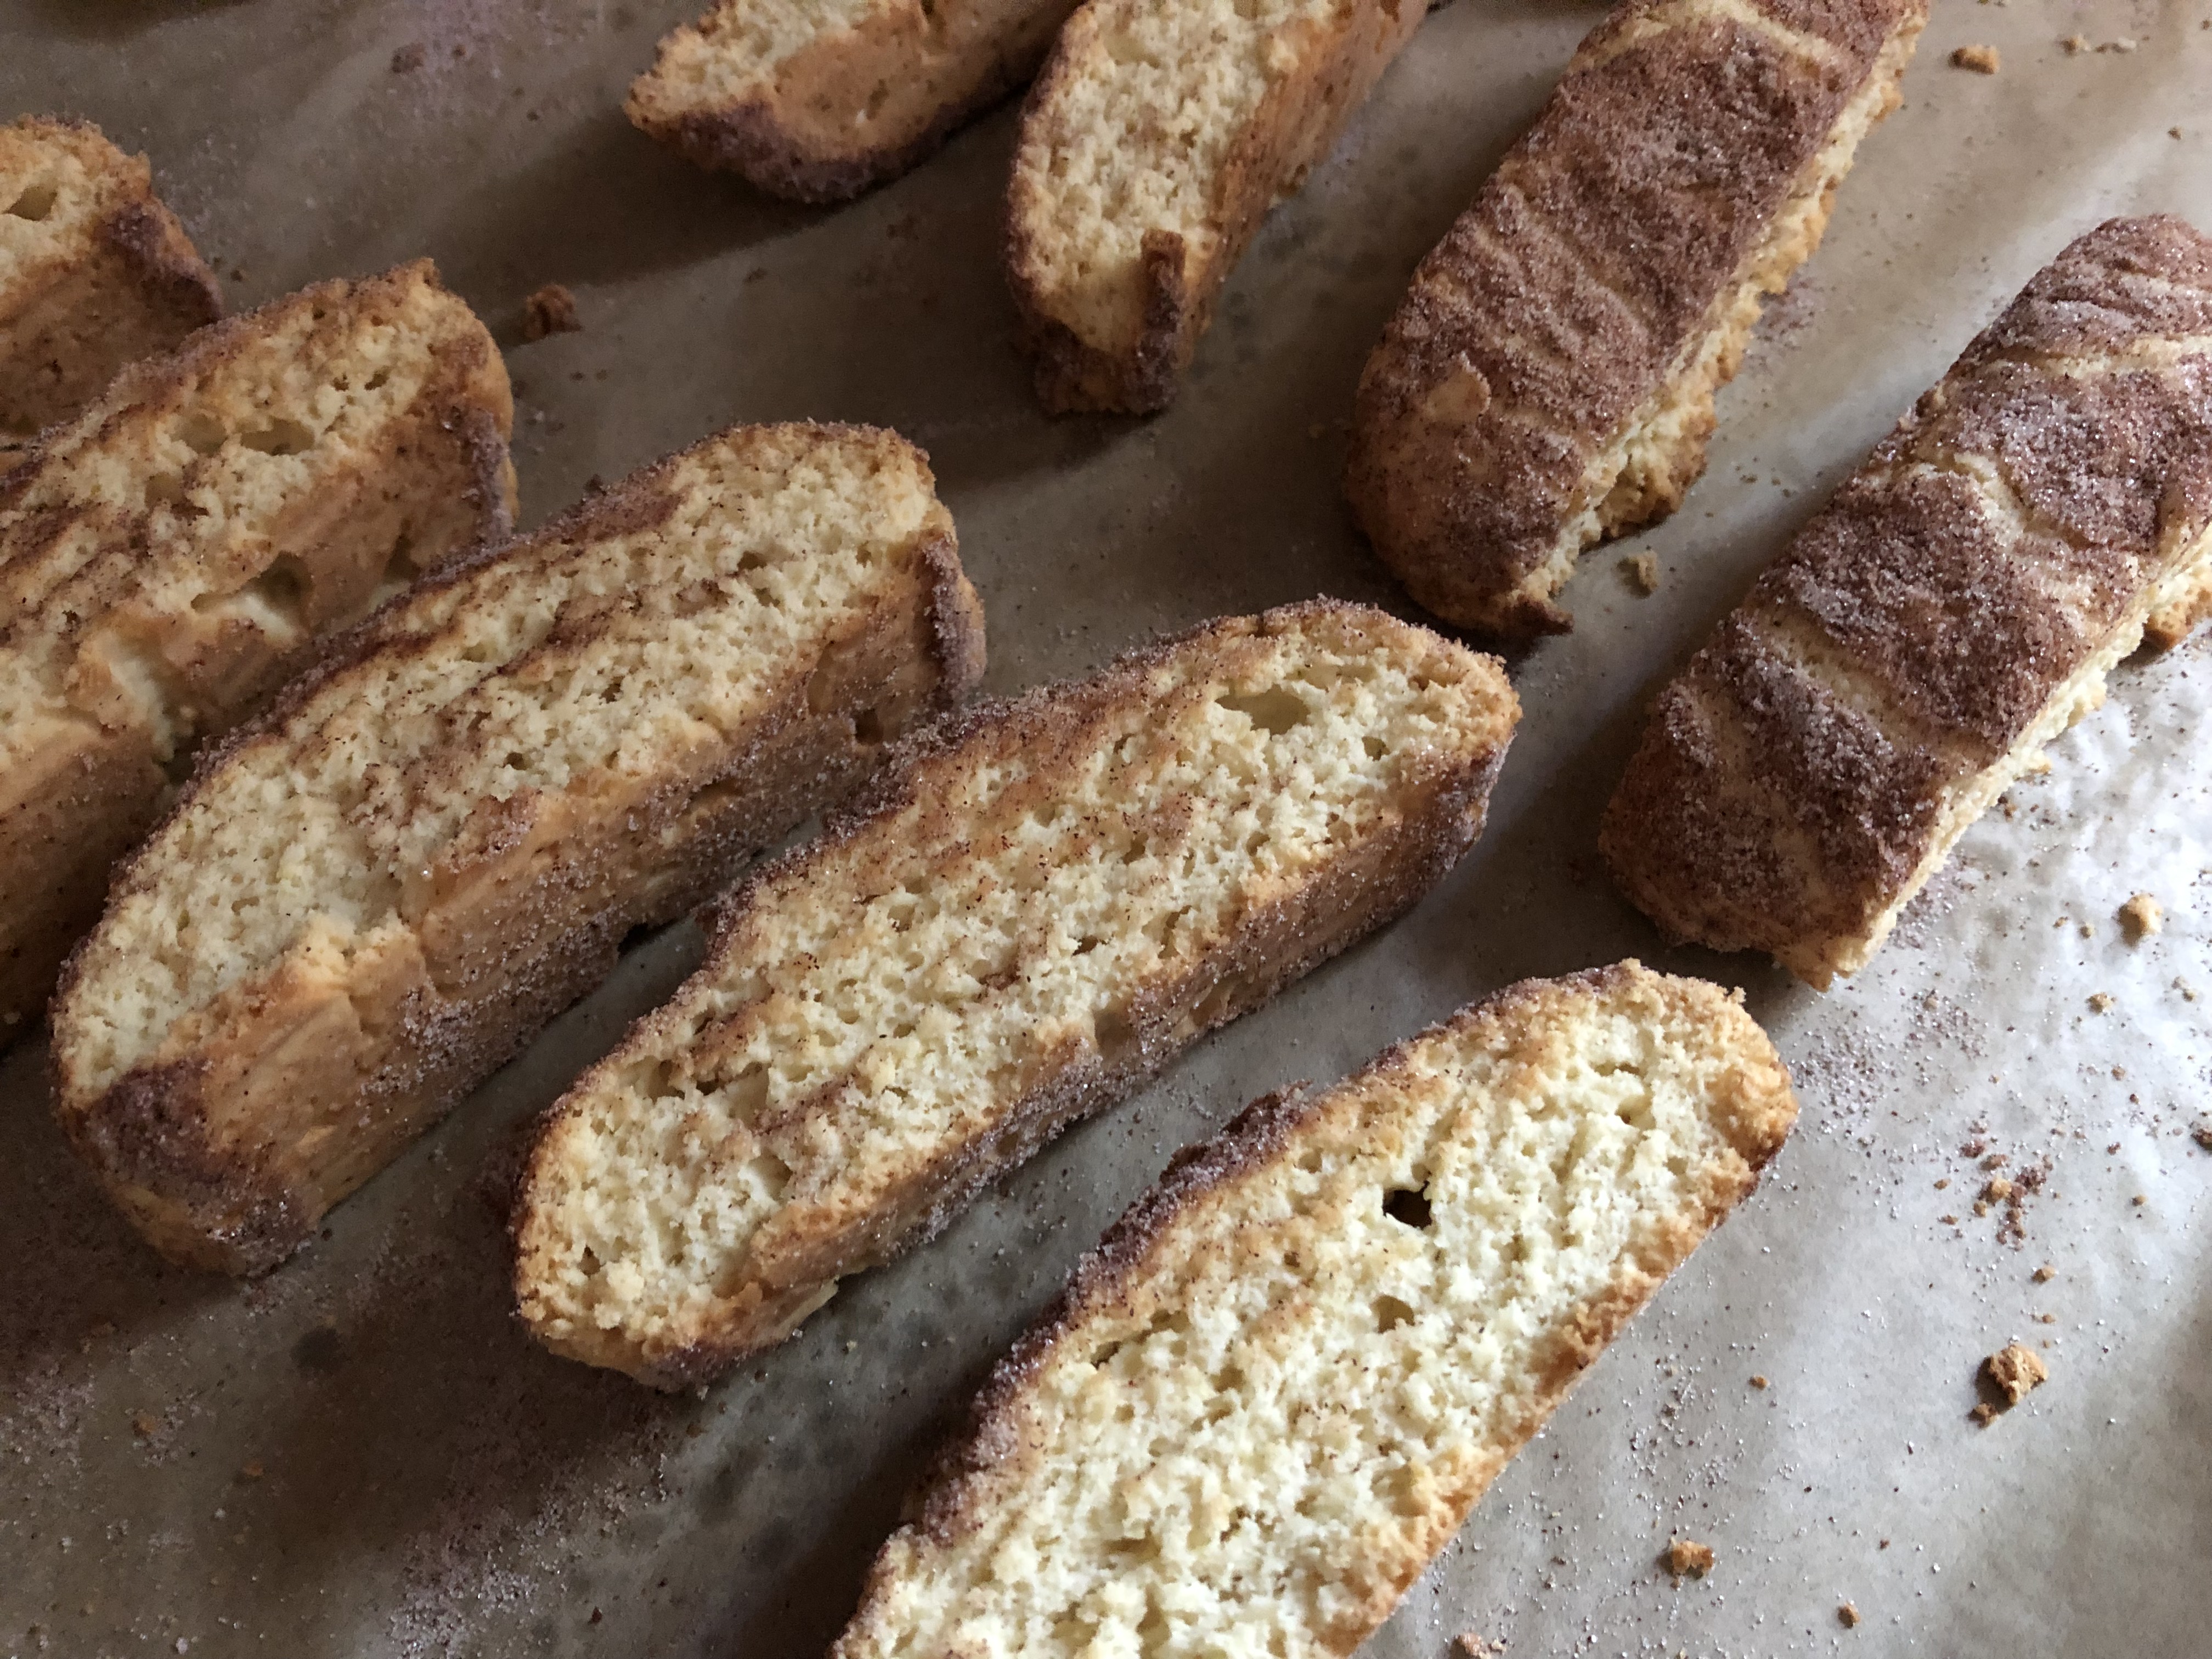
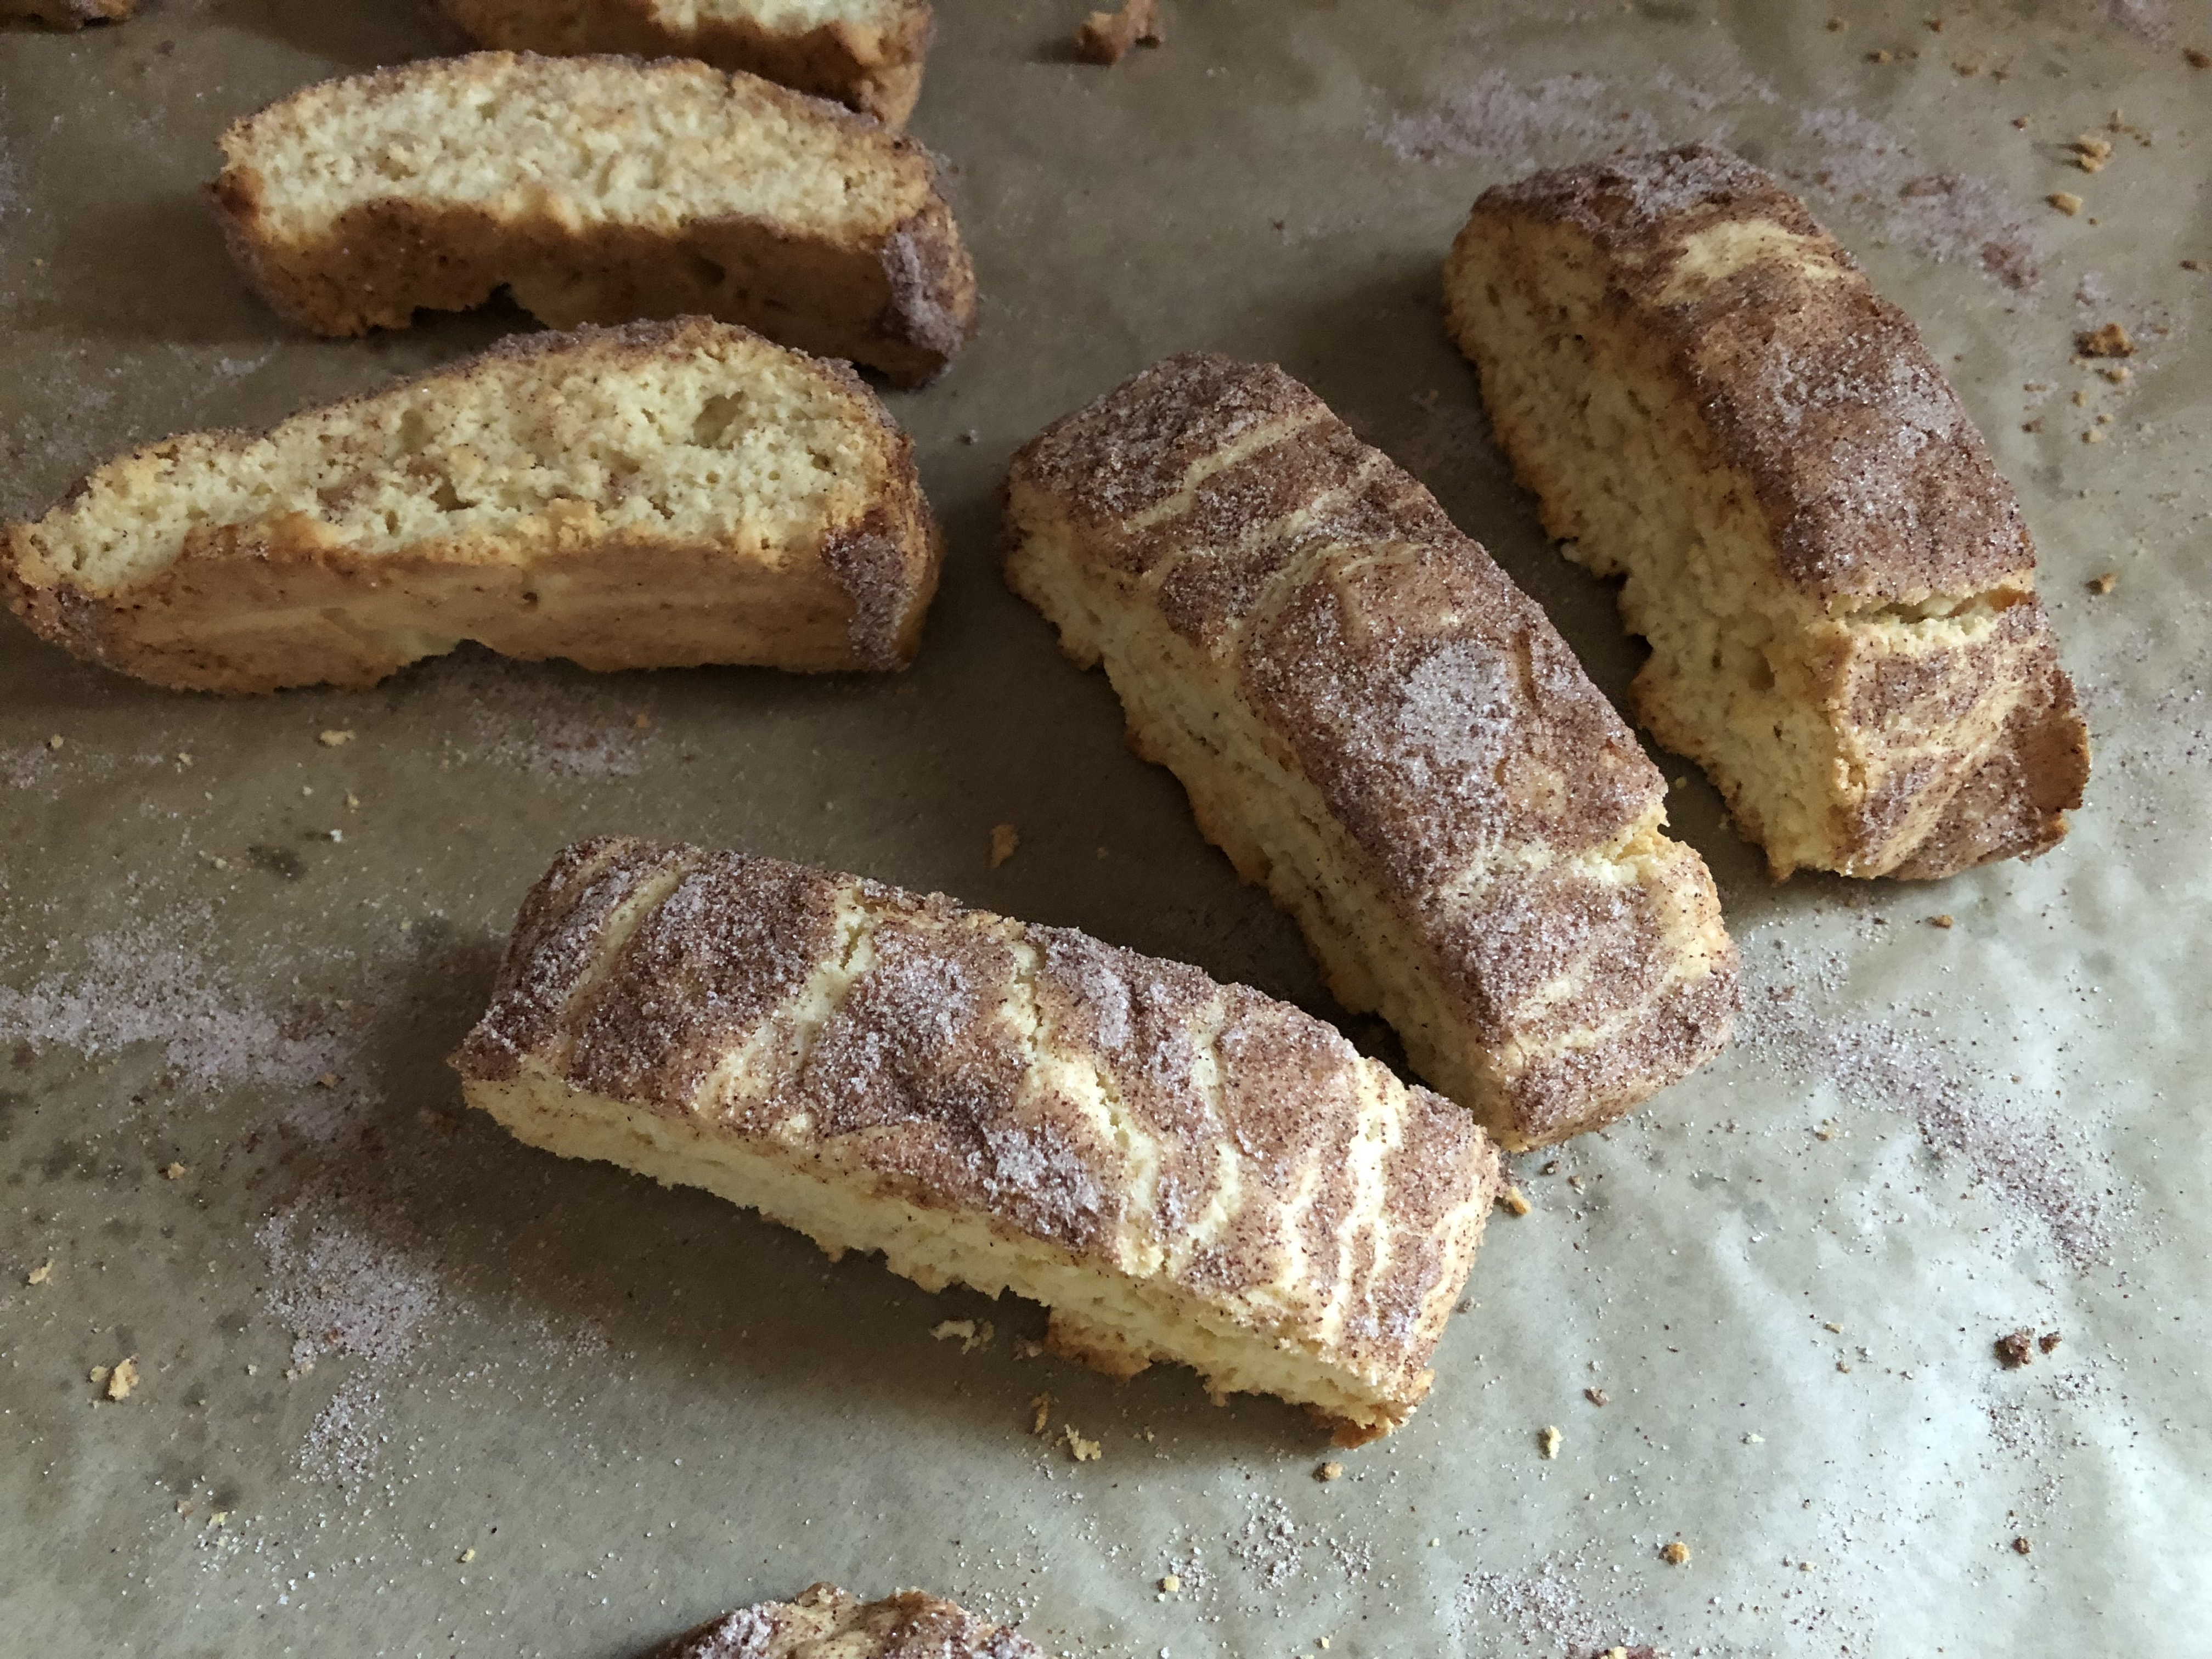
After letting the loaves cool for 10 minutes I used a serrated knife to slice them into 3/4-inch pieces. I then placed the biscotti, cut side down, back on my prepared baking sheet. I baked them for 10 minutes, flipped them, and then baked them for an additional 10 minutes. I then let the biscotti cool completely on the pans before enjoying.

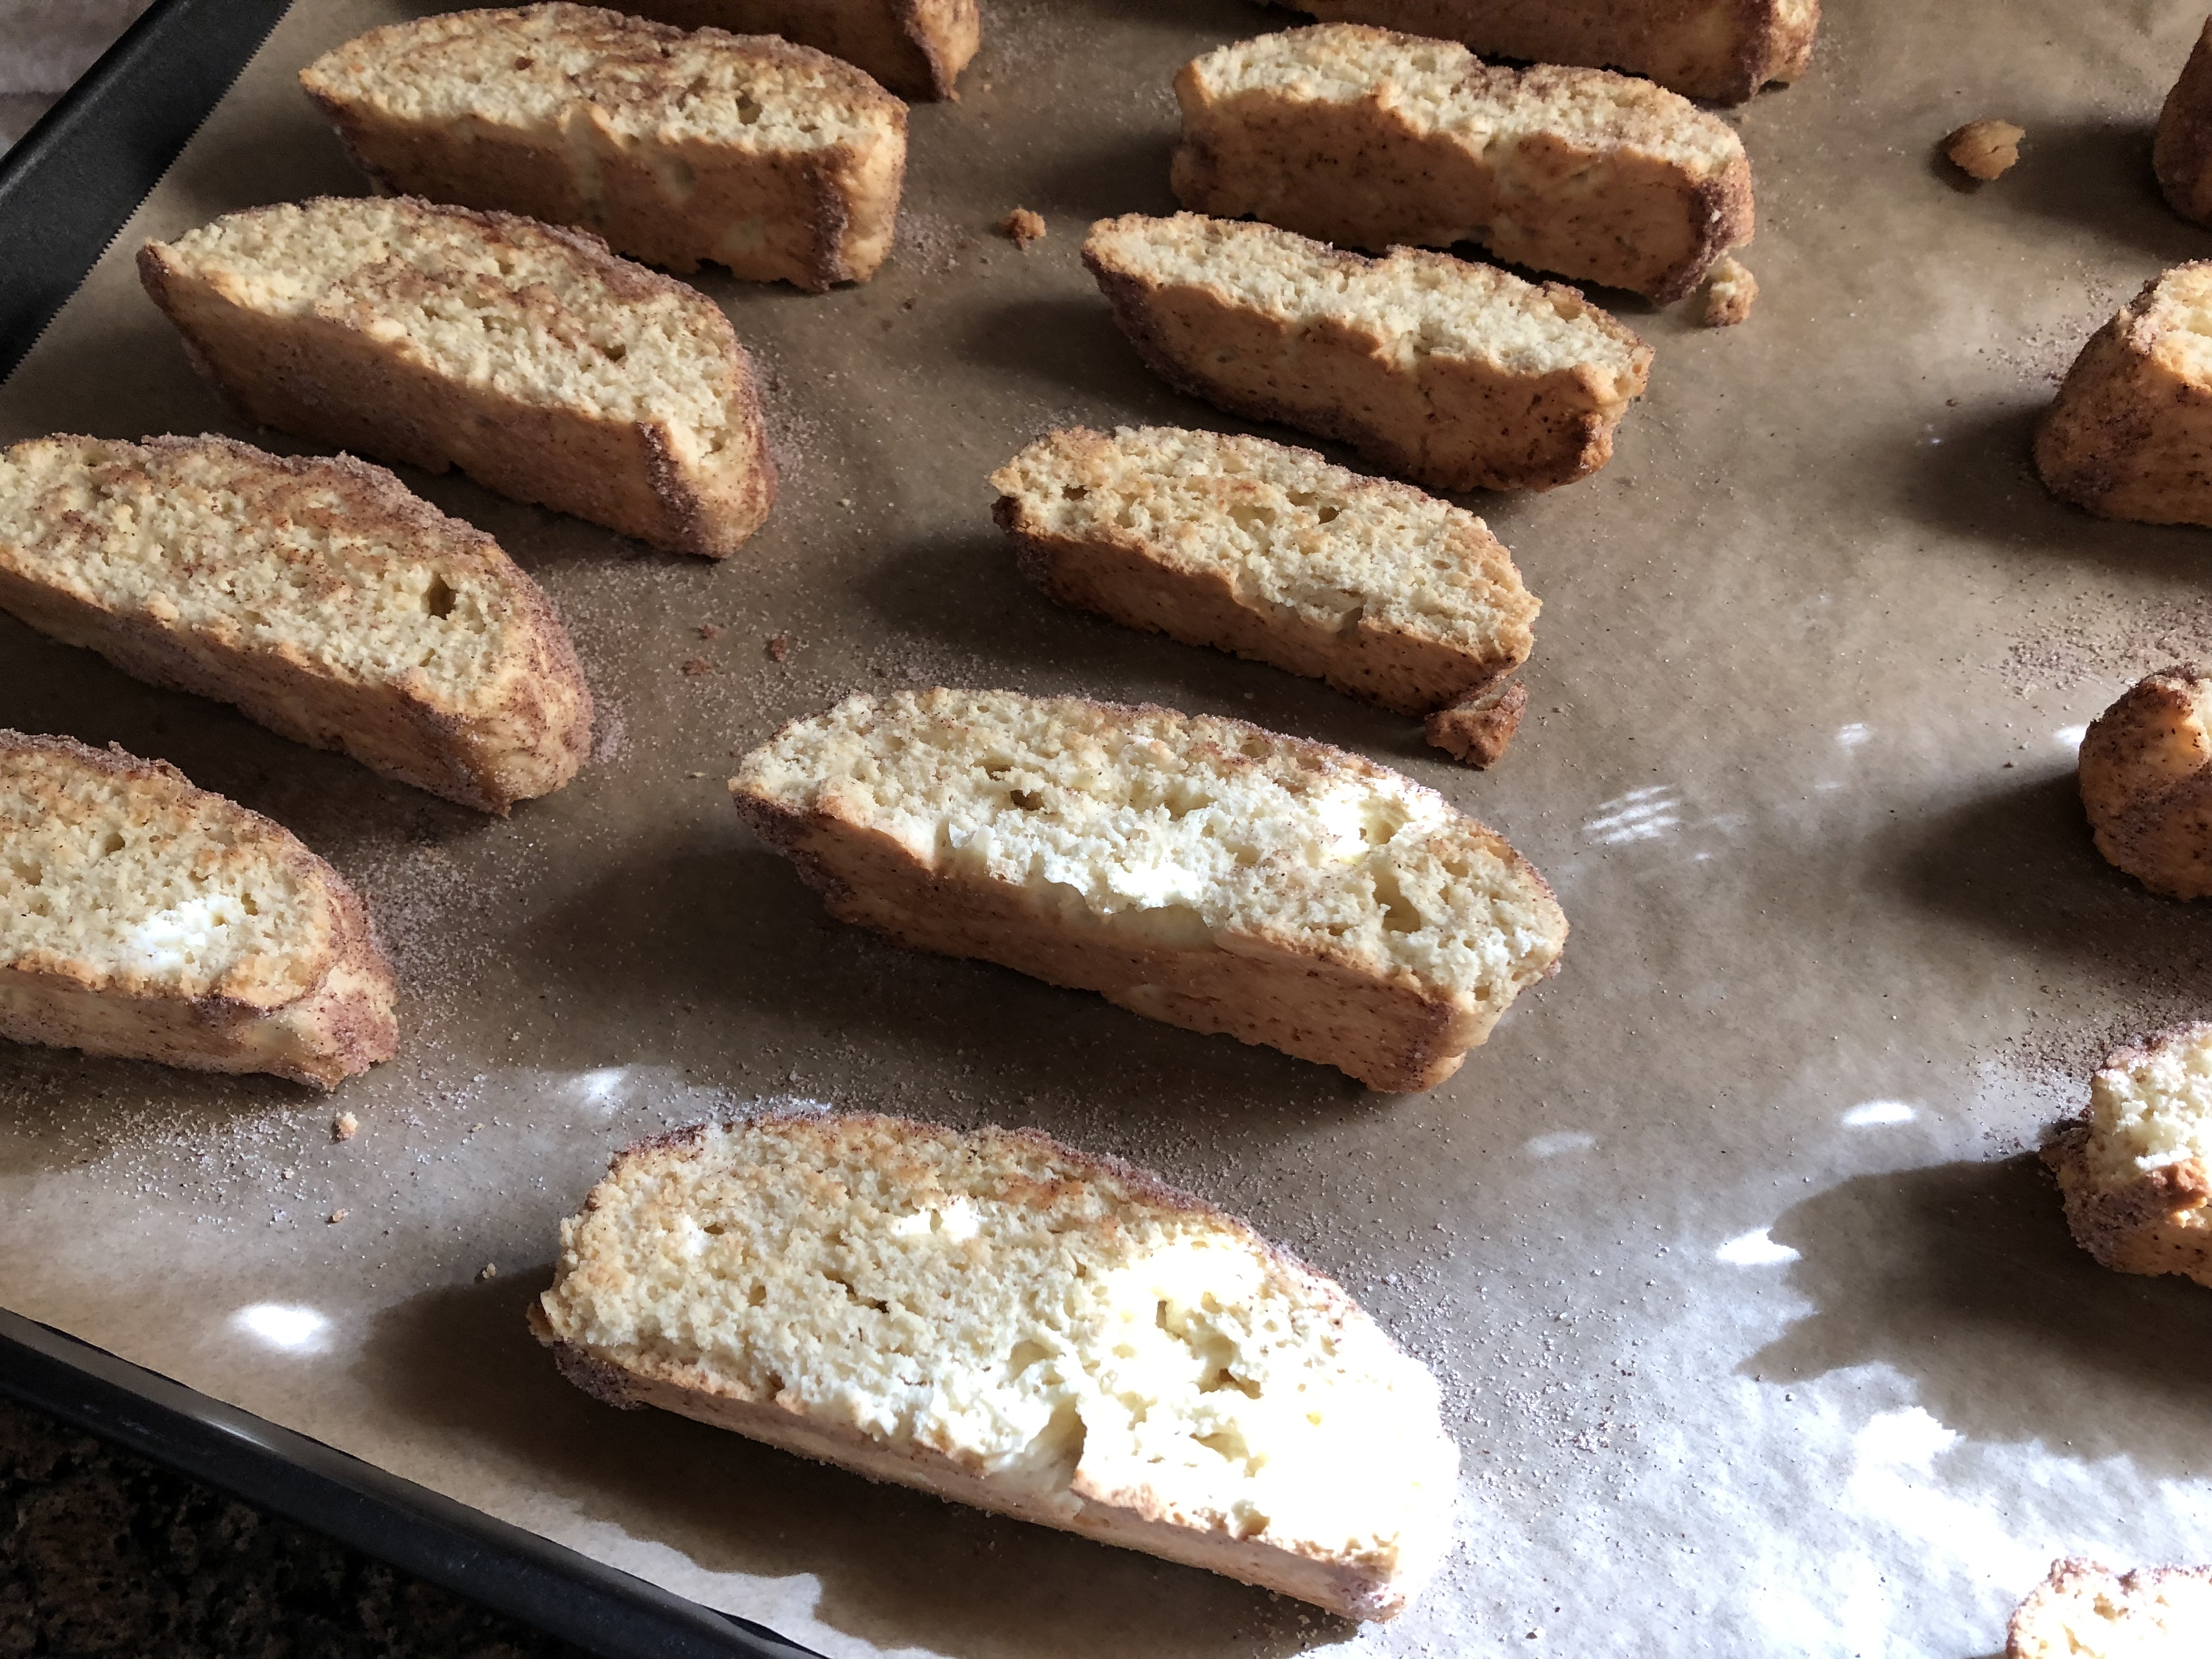
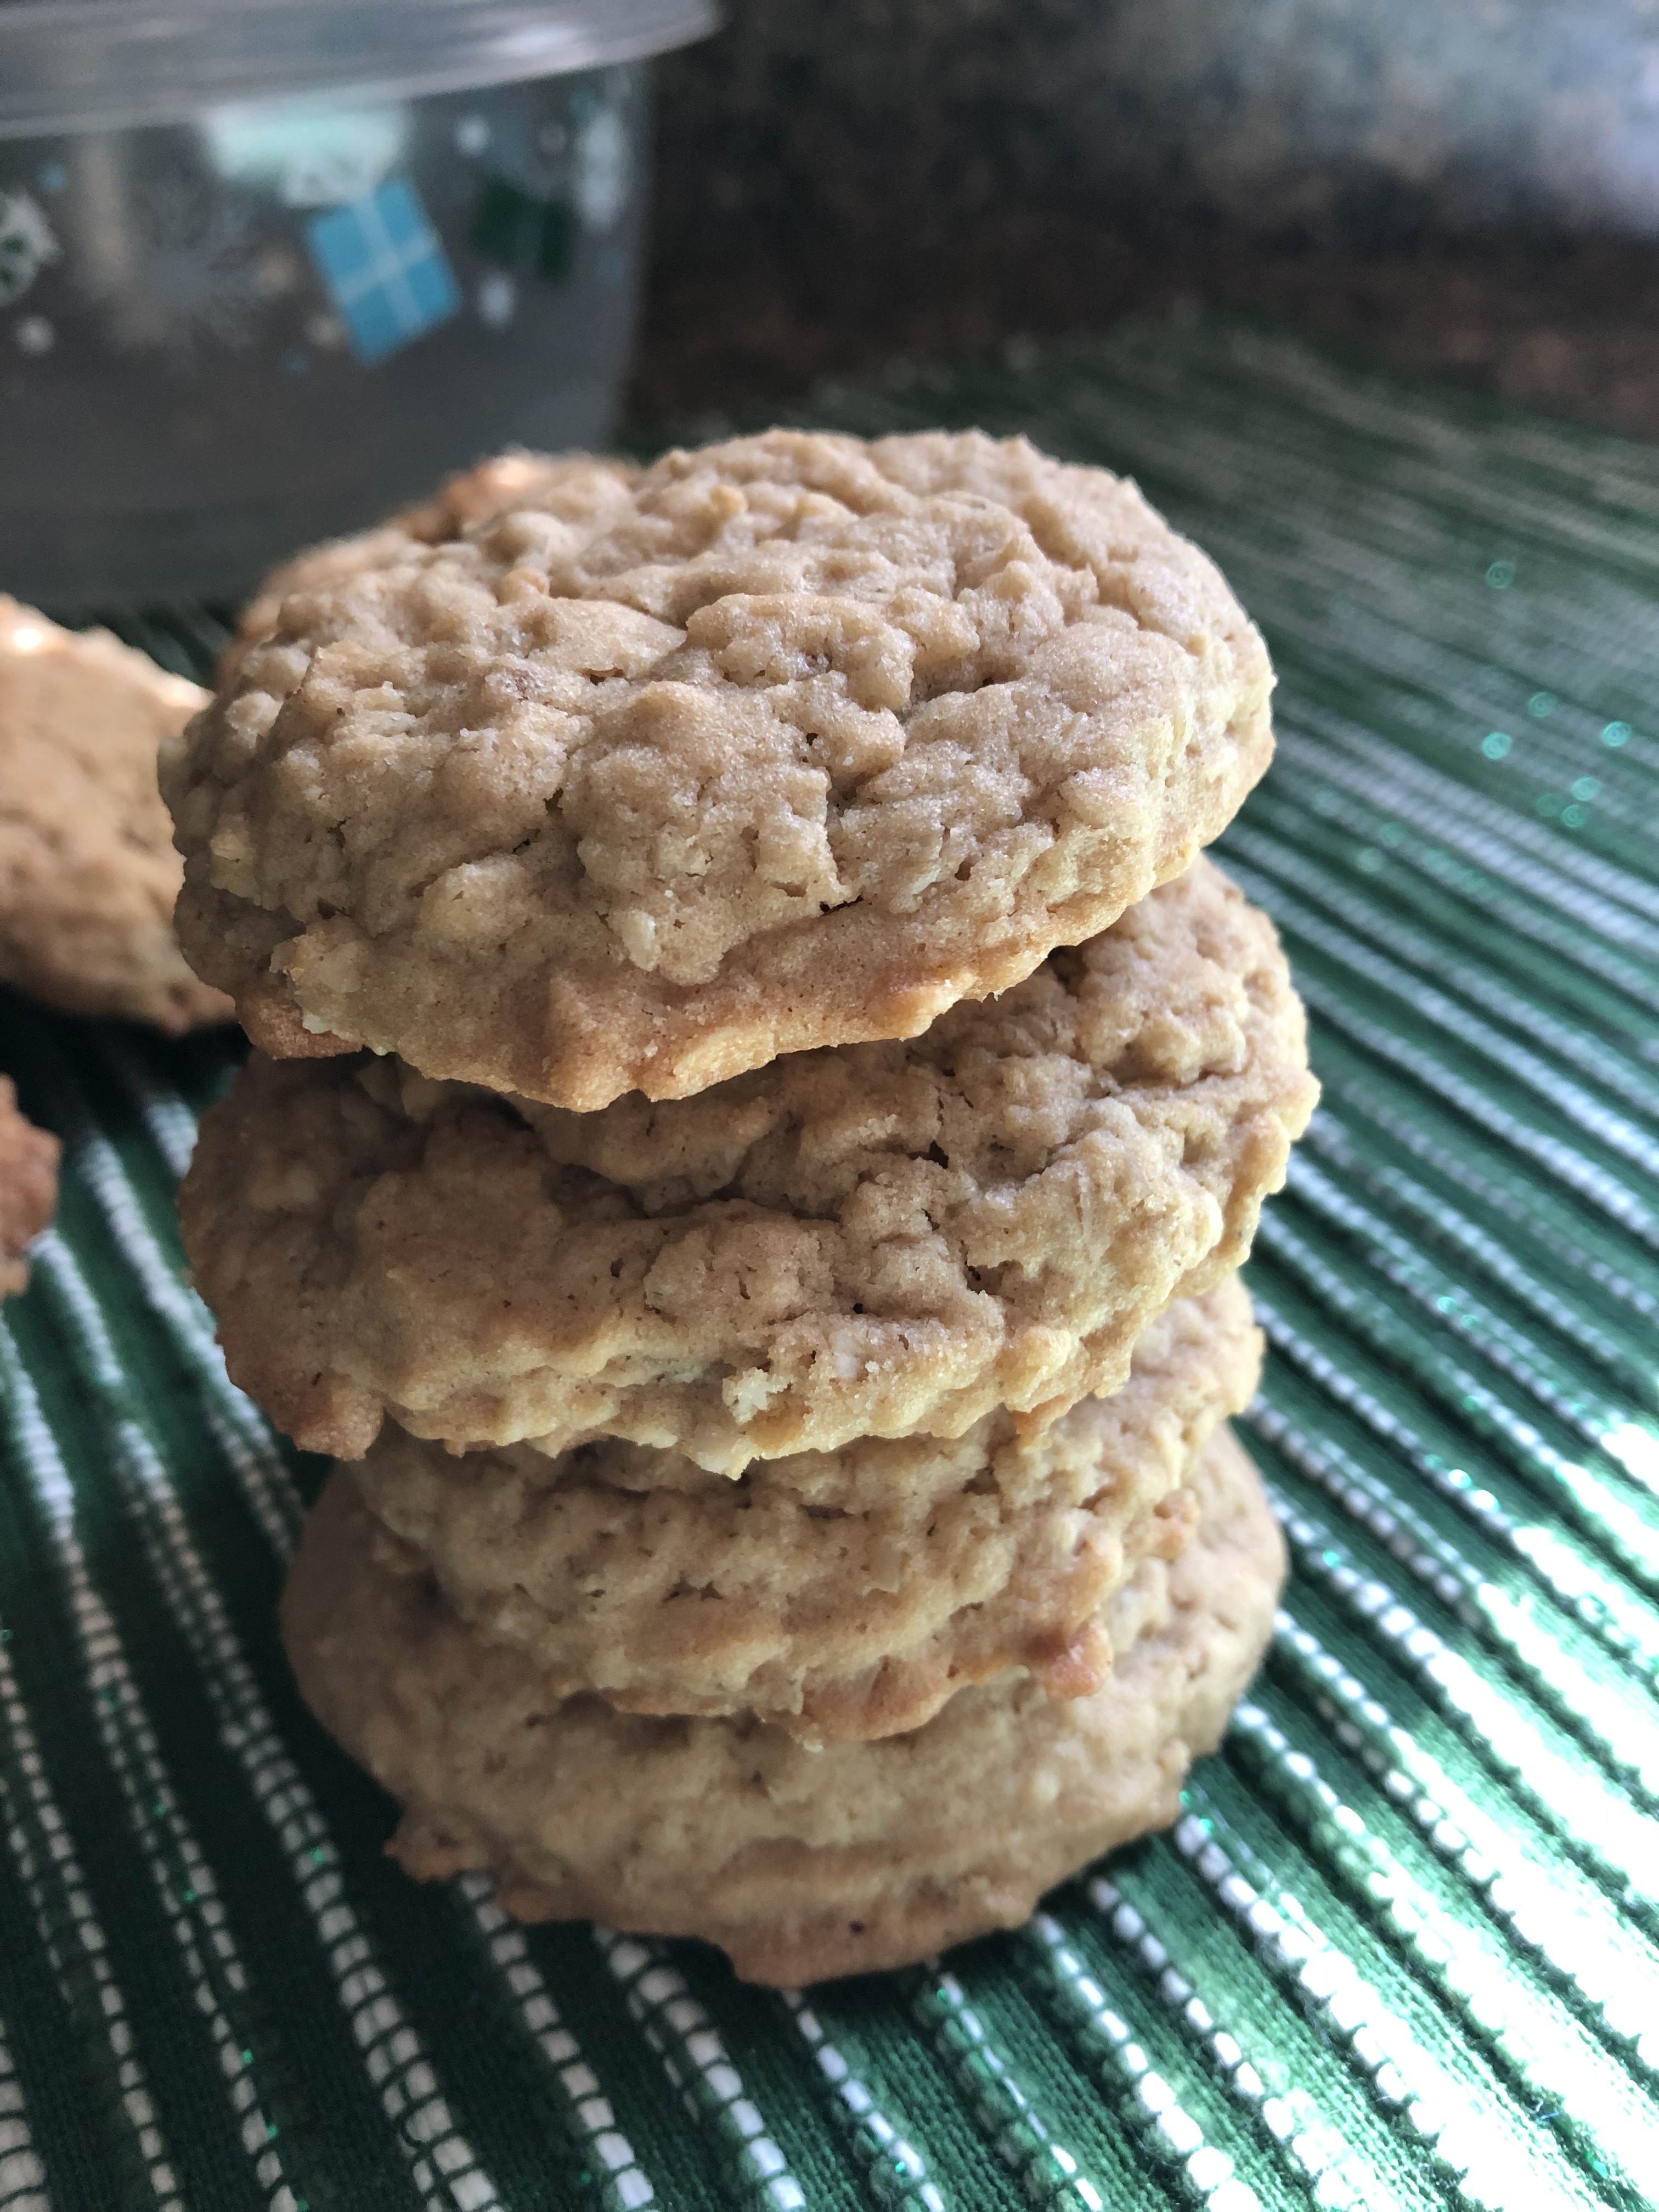
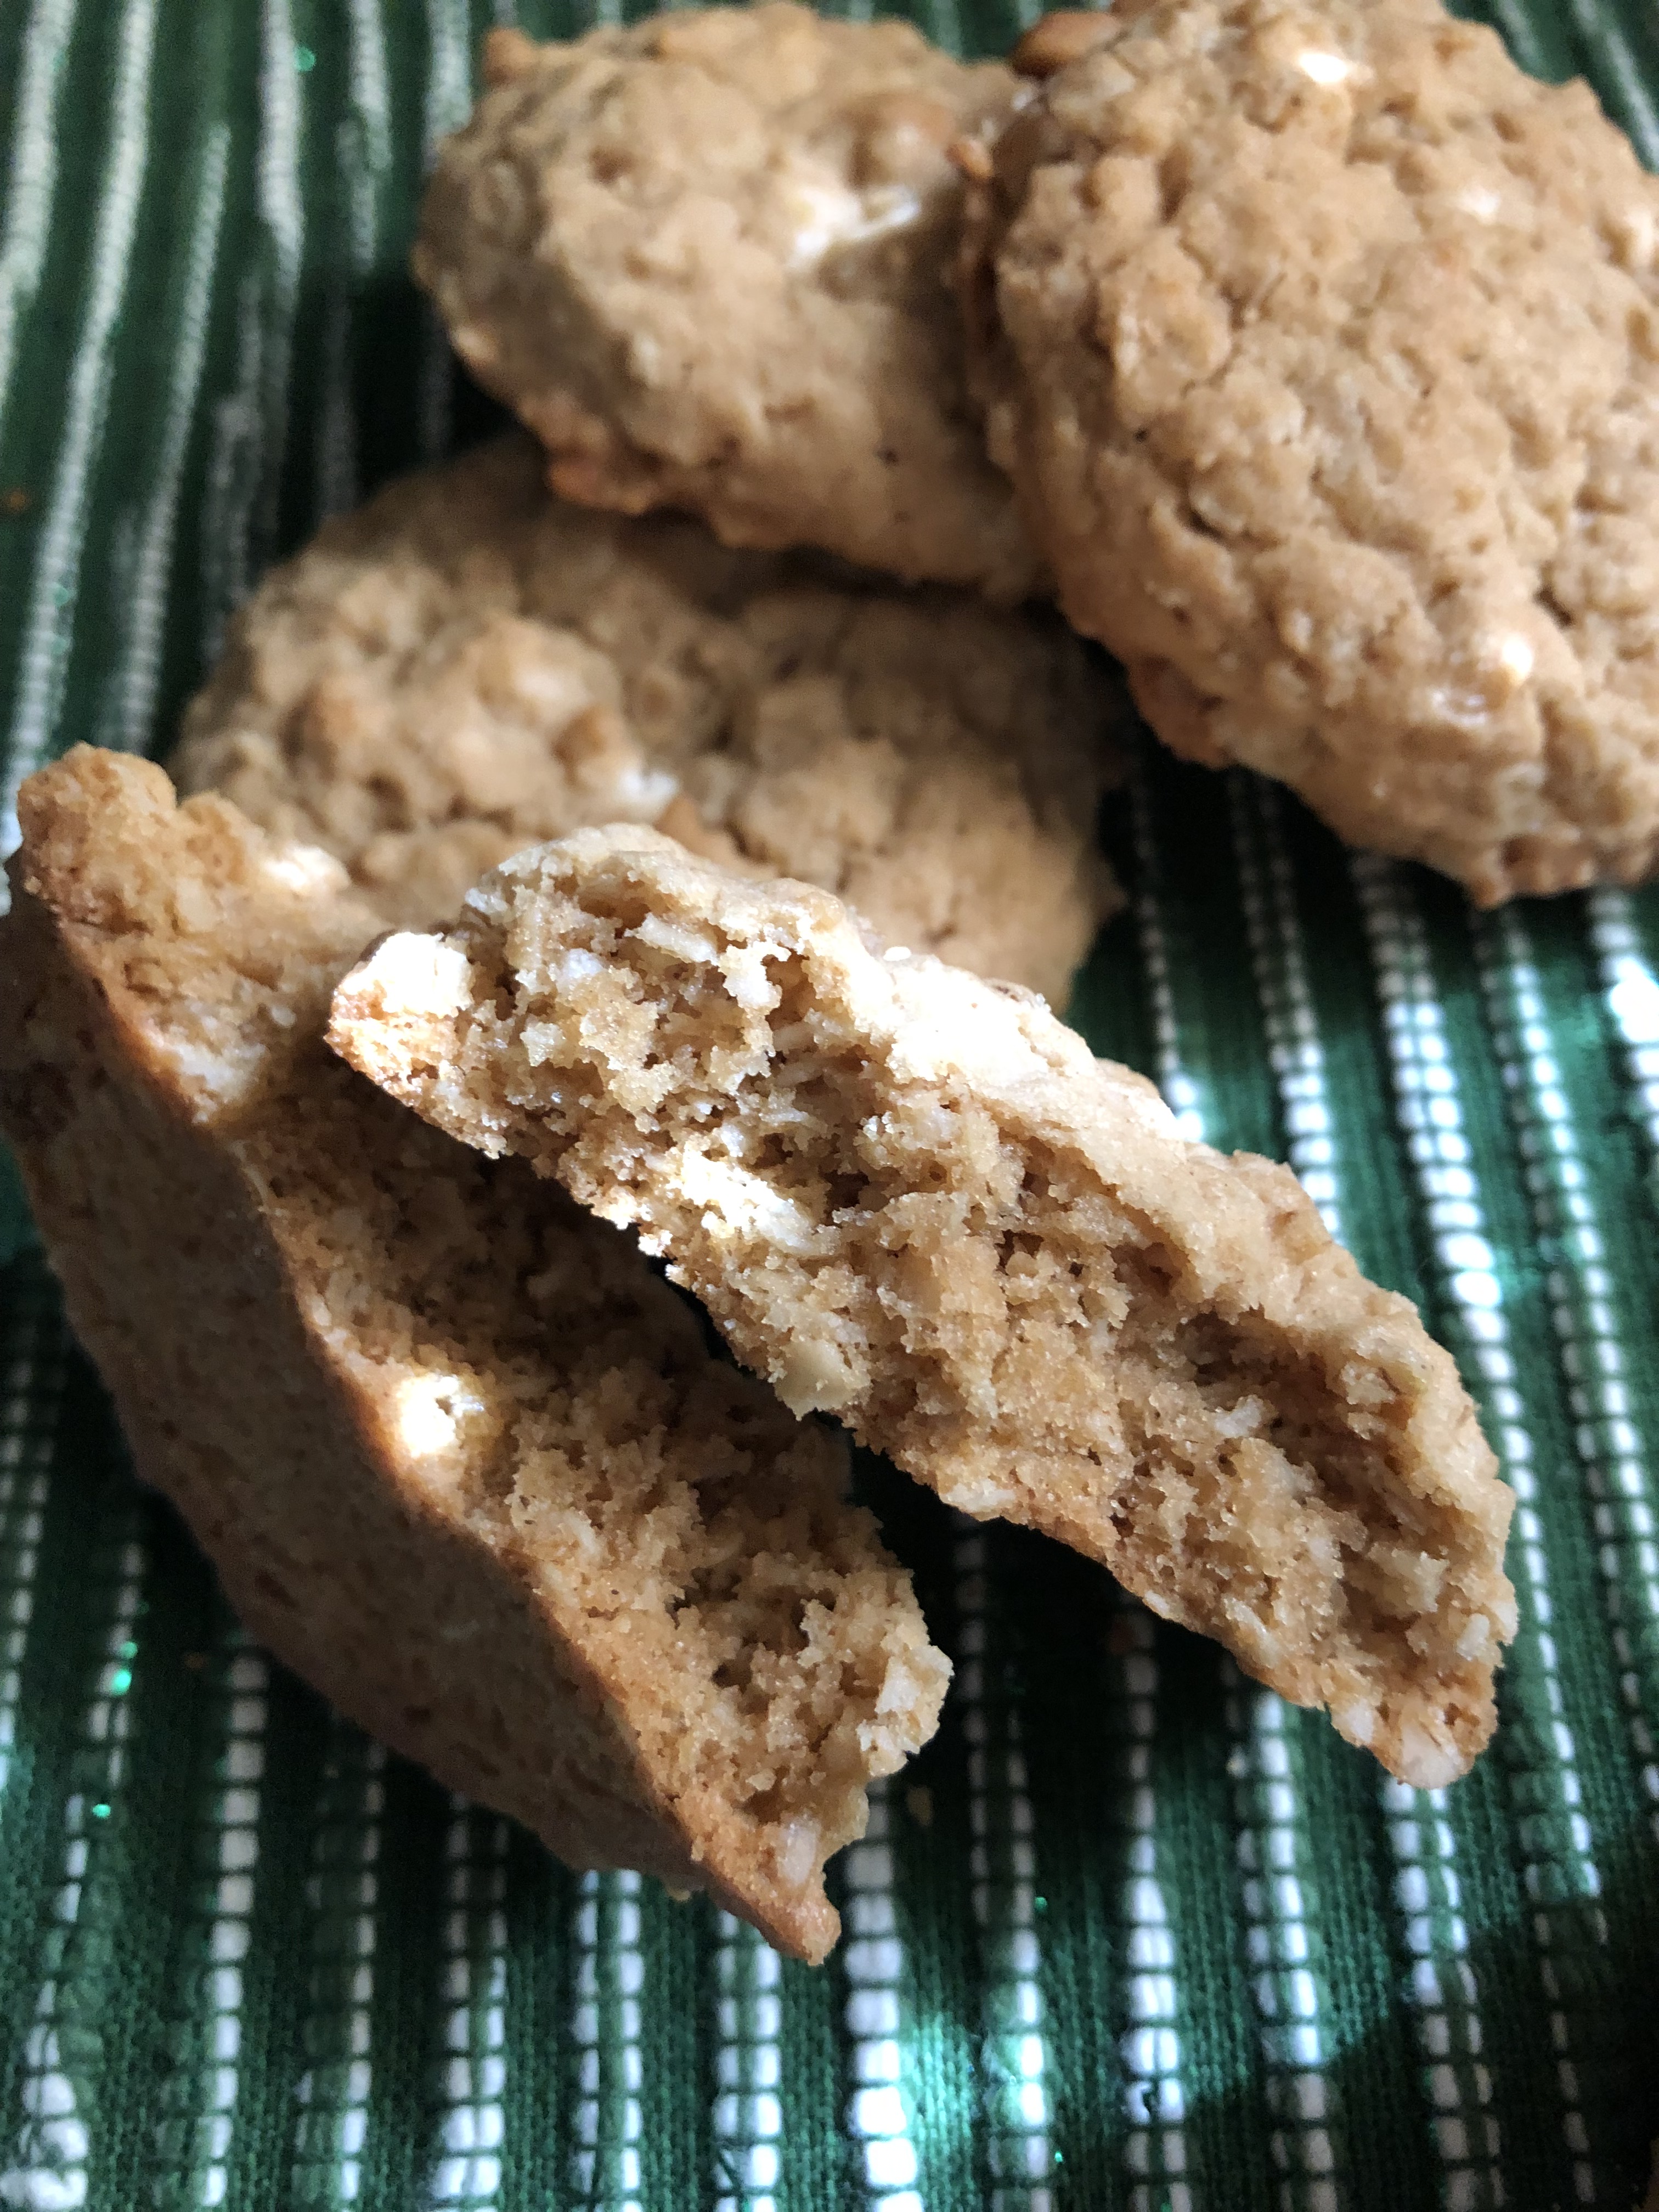
I’ll admit that some of my pieces were slightly bigger than 3/4 of an inch. They were closer to an inch. Oops! Needless to say though, they were delish. They definitely tasted like your traditional Snickerdoodle.

These would make the ideal food gift for anyone who enjoys a sweet treat with their warm beverage or anyone who loves a good snickerdoodle!

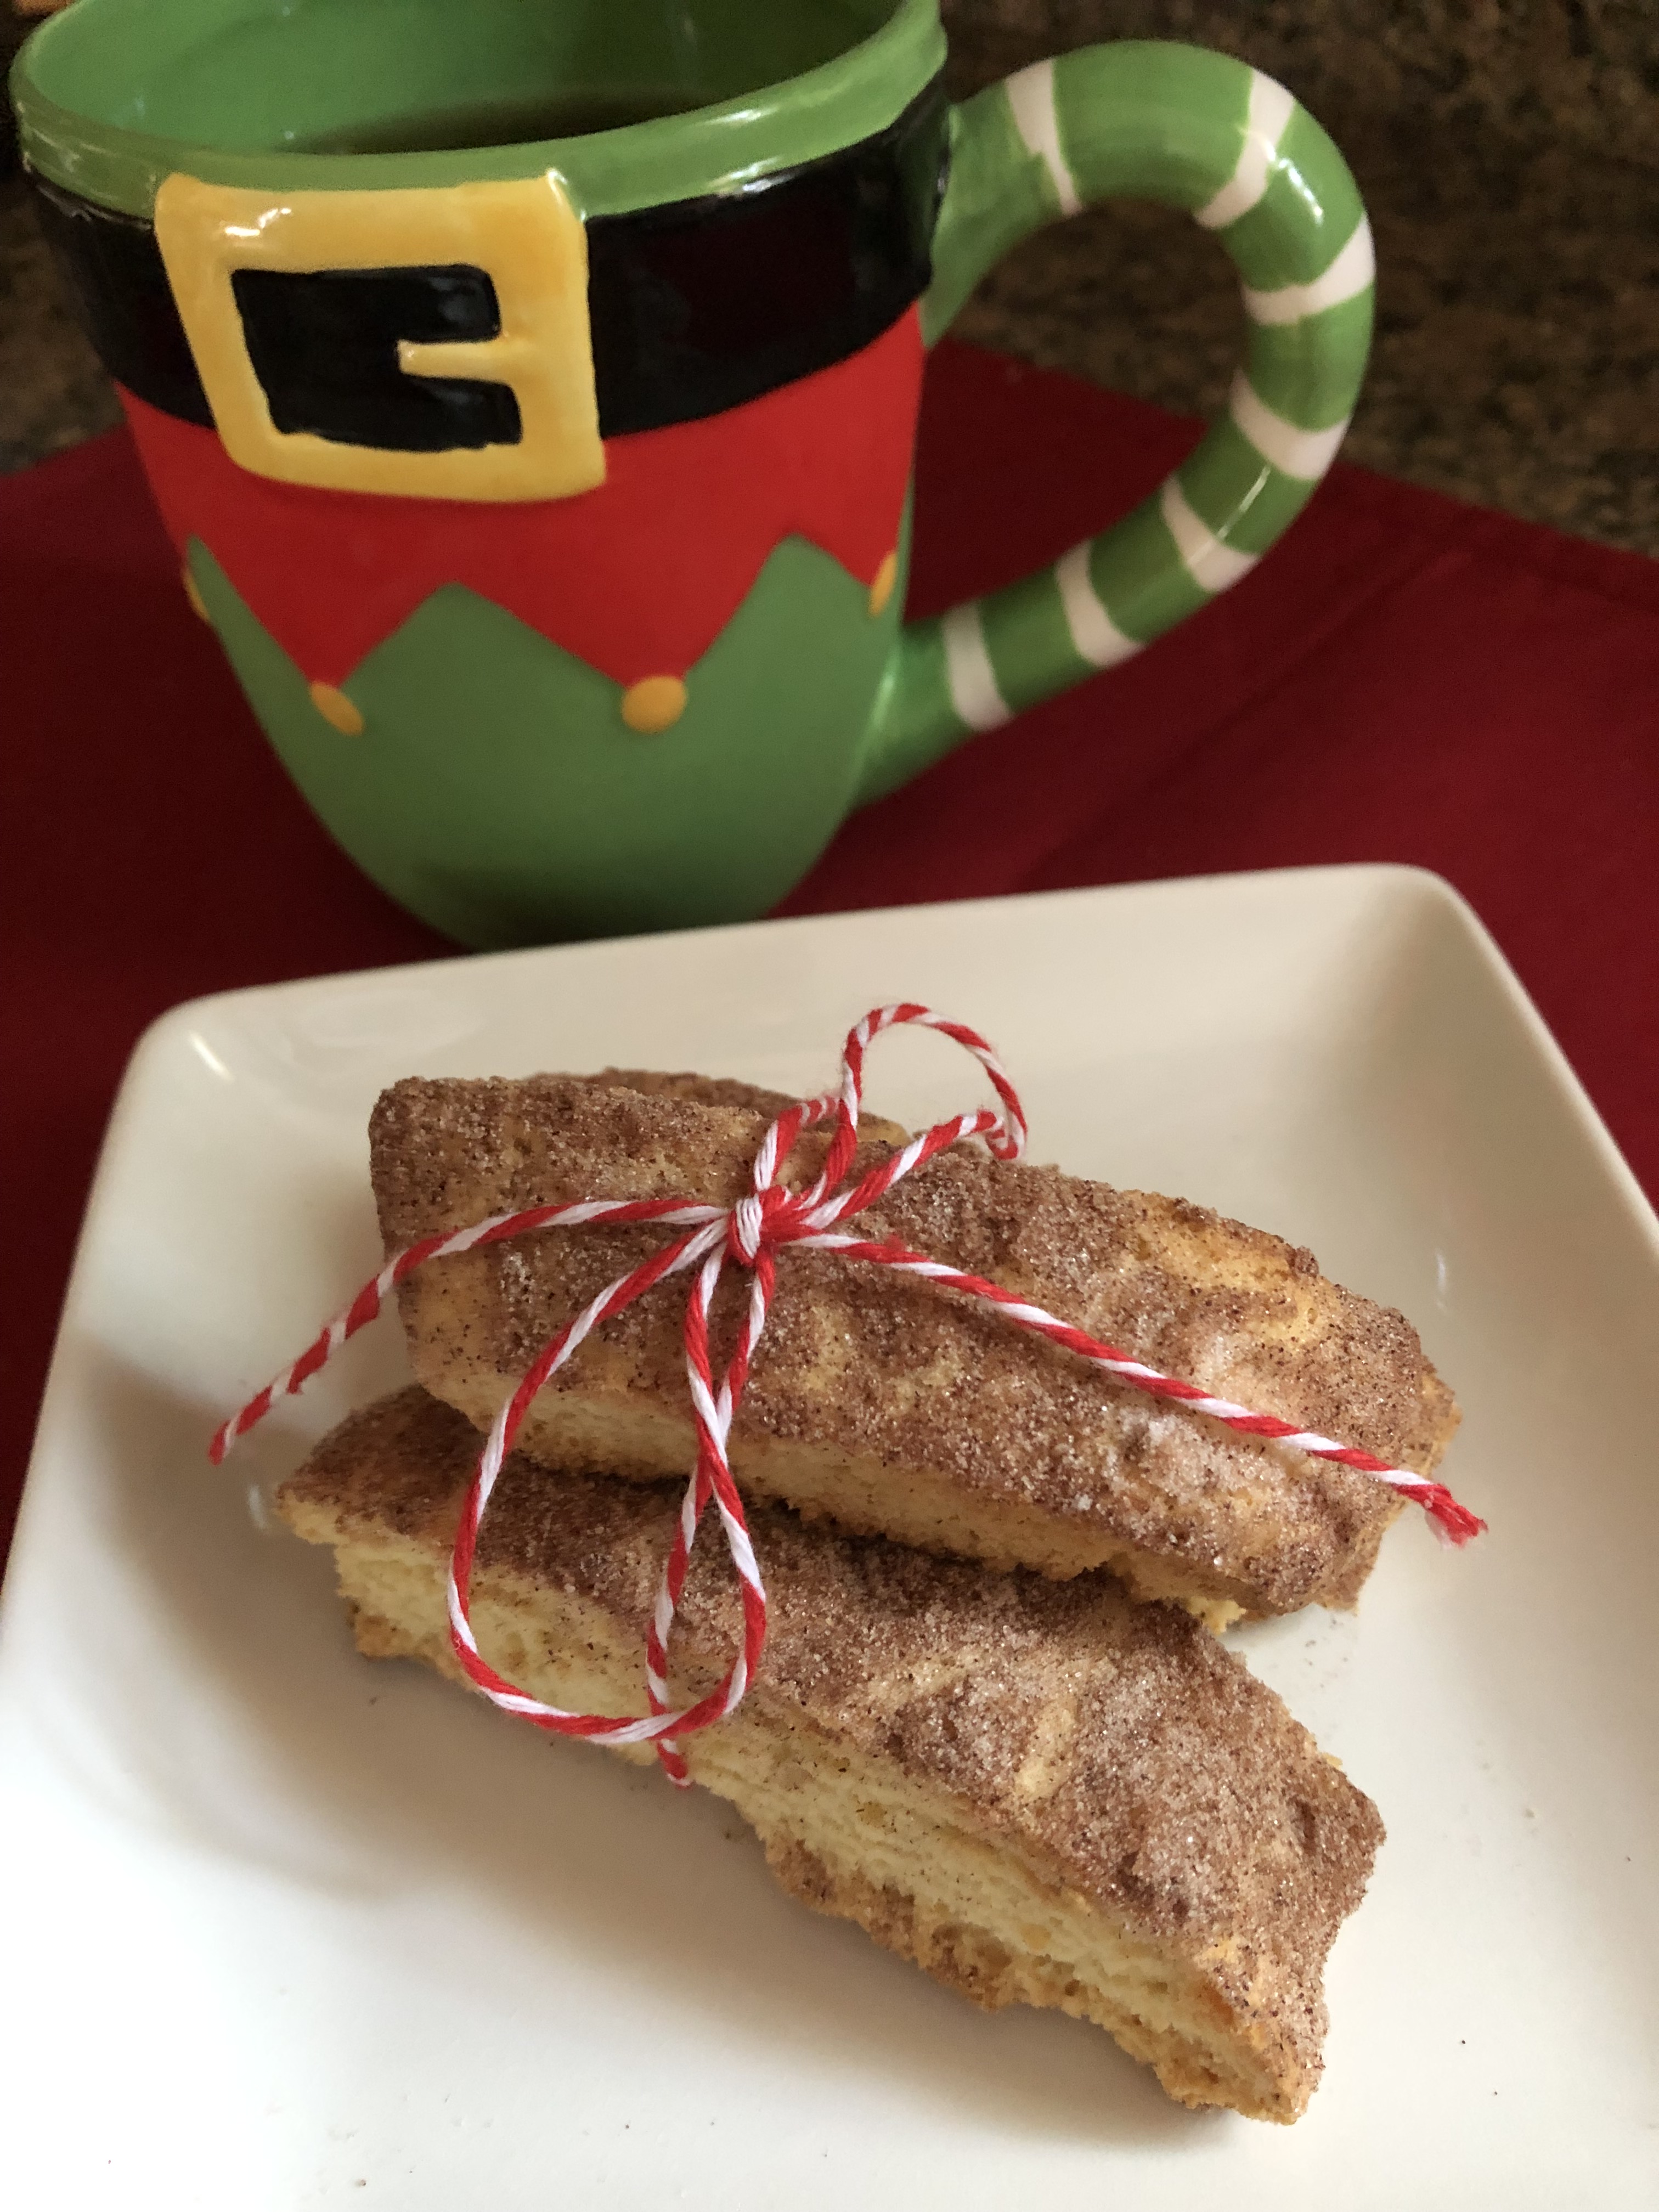
One thing I should note, the original recipe called for dipping the finished biscotti in white chocolate. I opted to omit that part since a) Snickerdoodles aren’t normally dipped in chocolate and b) I like to dip my biscotti in tea or hot cocoa and I felt that the white chocolate would just get in the way of that.

Snickerdoodle Biscotti

Ingredients:

3 cups flour

1 1/2 teaspoons baking powder

1/2 teaspoon kosher salt

2 teaspoons cinnamon

1 cup sugar, divided

1 stick unsalted butter, melted and slightly cooled

1/4 cup rum*

3 large eggs, at room temperature

*could use brandy or bourbon instead

Directions:

In a medium bowl whisk together the flour, baking powder, salt and cinnamon. Set aside.

In a large bowl whisk together 3/4 cup sugar, melted butter and rum. Add the eggs one at a time, whisking until smooth after each addition. Using a wooden spoon, stir in the flour mixture until no streaks of the flour mixture remain.  Cover the bowl tightly with plastic wrap and refrigerate for 30 minutes.

Preheat the oven to 350 F. Line 1 extra-large baking sheet or 2 medium baking sheets with parchment paper.

Divide the dough in half and using moistened hands shape each half on the prepared baking sheets into a 10×4 – inch rectangle.

In a small bowl stir together the remaining 1/4 cup sugar and the cinnamon and sprinkle generously over the both doughs. Gently pressing it in.

Bake in the preheated oven for 25 minutes, until pale golden.

Remove from the oven and using the parchment paper transfer to a wire rack to cool for 15 minutes.

Leave the oven on and line your baking sheet(s) with fresh parchment paper.

Using a serrated knife, cut the biscotti loaves crosswise into 3/4 – inch slices. Place the slices cut side down on the prepared baking sheet(s).

Bake for 10 minutes, and then flip the biscotti and bake for another 10 minutes. Let cool completely on the baking sheet(s).

Store in an airtight container.

Recipe from Baked From Scratch

Cookie Palooza: Peanut Butter Oatmeal Cookies

It’s the first week of December and around here that means Cookie Palooza! A week dedicated to cookies that would make a great addition to your holiday cookie platters. And we are kicking it off with a cookie that combines two favorites, peanut butter and oatmeal. I personally love a good peanut butter cookie and a good oatmeal cookie. And I like both just plain, no peanuts in my peanut butter cookies and no raisins in my oatmeal ones. I got to thinking one day what about combining the two. Hence, the resulting Peanut Butter Oatmeal cookie. A cookie that is soft like a peanut butter one, but has the texture and heartiness of an oatmeal one. So, you get the best of both worlds.

And while these cookies are delicious just the way they are you could make them extra special by adding in a cup of semi-sweet chocolate chips. You can never go wrong with peanut butter and chocolate together!

Peanut Butter Oatmeal Cookies

  • Servings: 3 Dozen Cookies
  • Print

Ingredients:

2 sticks unsalted butter, room temperature

1 cup light brown sugar

1/2 cup sugar

1 cup creamy peanut butter

2 eggs, room temperature

2 teaspoons vanilla extract

1 1/4 cups flour

1 teaspoon baking soda

1 teaspoon salt

3 cups quick cooking oats

Directions:

Preheat the oven to 350 F. Line two cookie sheets with parchment paper.

In a medium bowl beat the butter, both sugar and peanut butter using hand mixer on medium speed until smooth. Beat the eggs in 1 at a time. Stir in the vanilla extract.

In another medium bowl whisk together the flour, baking soda and salt.

Add the flour mixture into the peanut butter mixture and beat until just blended. Stir in the oats.

Using a cookie scoop, drop the dough onto the prepared cookies sheets 2 inches apart.

Bake in the preheated oven 12-14 minutes, or until the cookies are set and beginning to brown.

Allow to cool on the cookies sheets for two minutes before transferring to a wire rack to cool completely.

Store in an airtight container at room temperature.

Recipe first published on Bead Yarn & Spatula

Apple Cranberry Pie

Are you deep into prepping for Thanksgiving? Or, are you just showing up somewhere with an empty belly and possibly a bottle of wine in hand? Or, maybe you are like me, you bring the desserts? If you are the latter, today I am bringing you a pie that’s quick to prepare and combines two traditional flavors of Thanksgiving… Apples & Cranberries.  Simply stated an Apple Cranberry Pie.

Now, cranberries are not a favorite among many. Most prefer it in the canned jellied form when it comes to eating it with their holiday meal, and don’t get me wrong, I won’t pass up a slice or two of it, but, even though fresh cranberries are tart and not enjoyable to snack on like a blueberry, they can be turned into a delicious sauce. While I don’t go all out and cook a Thanksgiving meal, I will whip a batch or two of cranberry sauce around this time of the year. For this pie, I used some of the same ingredients I use in my cranberry sauce (orange zest & ginger) along with the traditional sugar, cinnamon and nutmeg from apple pie to create a filling that would allow both fruits to complement each other.

When it comes to making pies, I take a major short-cut and use store-bought pie crusts. It’s fool-proof and a great time-saver. The one time I decided to make a pie crust from scratch it didn’t bake evenly and even though my pie filling was delicious the failed crust just took away from it. One day I will attempt to do it again though. For this pie, I opted to use a frozen pie crust as my bottom crust. In a large bowl, I folded all the pie ingredients together and then spooned it into the crust.

Since I was planning on making a decorative top crust I let two refrigerated pie crusts come to room temperature and then lightly rolled them out on a floured surface before slicing them into strips to create a lattice design on the pie. I also cut out a few leaf and acorn designs to apply to the crust. I then brushed it with a beaten egg and sprinkled it with turbinado sugar. I used turbinado sugar since I had it on hand and it gives the crust a nice golden color, but, you could use regular sugar instead. Alternatively, if you are not planning on making a decorative top crust, you can use 2 refrigerated pie crusts to make your pie. Simply roll out one into your pie dish, fill it and then top it with the second pie crust. Seal the edges, cut slits into the top crust, brush with an egg, sprinkle with sugar and then proceed to bake it.

I placed the pie on a baking sheet and baked it in a 400 F preheated oven for 20 minutes. I then lowered the oven temperature to 350 F and tented the pie with aluminum foil so it wouldn’t brown too quickly on top and baked it for an additional 35 minutes. I removed the foil for the last 5 minutes so the pie could get a nice golden color.

After letting the pie cool completely it was time to slice into it and enjoy a piece. And I must say all the flavors worked well together. The orange zest helped to cut the tartness of the cranberries and the sugar, of course, brought out the sweetness of both the apples and the cranberries. I was also about to taste hints of the cinnamon, nutmeg and ginger.

Another great thing, the pie held together perfectly when sliced. No runny messes.

Happy Thanksgiving!!!

Apple Cranberry Pie

Ingredients:

1 box refrigerated pie crusts (2 count)

3 large Granny Smith Apples, peeled & sliced 1/4 inch thick

1 1/2 cups fresh cranberries

3/4 cup sugar

1/2 tablespoon lemon juice

1 teaspoon cinnamon

1/4 teaspoon ground nutmeg

1/4 teaspoon ground ginger

2 teaspoons orange zest

1/3 cup flour

Egg Wash:

1 egg, beaten

Sugar

Directions:

Preheat oven to 400 F.

Place 1 pie crust in an ungreased 9-inch glass pie plate. Press firmly into the dish.

In a large bowl, gently mix the remaining pie ingredients with a rubber spatula until well incorporated. Spoon the filling into the prepared pie dish.

Top the filling with the second pie crust and press the edges together to seal. Cut 4 slits in the center of the top crust. Brush the pie with the beaten egg and sprinkle with sugar.

Place on a baking sheet and bake for 20 minutes. Lower the oven to 350F and tent the pie with aluminum foil and bake for an additional 35-40 minutes. Or until the filling begins to bubble. If desired, remove the foil for the last 5 minutes of baking so the crust can brown a bit more.

Let cool on a wire rack.

Recipe first appeared on Bead Yarn & Spatula

Brookies – Chocolate Chip Cookie Brownies

Chocolate Chip Cookies and Brownies are probably among the top desserts that people eat. Both can have a slew of variations and add-ins but when it comes down to it they are comforting and familiar. So, what happens when you combine the two? Well you get the best of both worlds in what is perfectly termed a “Brookie.” A brownie layer with a chocolate chip cookie topping.

I came across this recipe in Martha Stewart’s Cookie Perfection cookbook. I made a few slight changes though. I opted to use dark chocolate chips instead of bittersweet chocolate and since unbleached and all-purpose flour are interchangeable I went with all-purpose flour. I bought a bag of unbleached flour for a few recipes last year and ended up never finishing it so I didn’t want to buy another one.  And, I opted to make my brownie batter a bit differently. The original recipe called for melting the chocolate and butter together in a double boiler, but, I decided to melt the two together in the microwave in :30 intervals, stirring between each. I figured I had done before with success so why wouldn’t it be okay this time as well.

I started by making the chocolate chip cookie dough and then set it aside while I made the brownie batter. As I mentioned, I melted the chocolate and butter together in the microwave. I then whisked in the remaining ingredients and then spread the batter in a 9×13-inch pan I lined with parchment paper. I then crumbled the cookie dough over the batter making sure it was evenly spread out. After baking it, I let the Brookies cool completely in the pan on a wire rack. I ended up baking this in the evening so I let them cool overnight on my counter. In case you are wondering, when I leave things to cool on my counter overnight I normally lightly cover them with a paper towel or piece of aluminum foil.

I waited until the following afternoon to slice them. Thanks to the parchment paper they easily came out of my pan and I then sliced them into 16 squares. I ended up with a lot of crumbs and some of the brownie layer didn’t really stick to the cookie dough. I think I should have pressed the cookie dough into the batter as well. And, I also forgot to heat my knife in hot water between each slice.

But, it was all the good. The main thing, they were delicious! Next time though I might slice them into smaller pieces, maybe 24 or 32. They are a bit decadent.

Now, if you want to make your own Brookies but don’t want to go through all the work of making the separate dough and batter, you could always use a brownie box mix and pre-made cookie dough found in most refrigerated sections of the supermarket.  With the holidays coming up these would be a nice addition to your dessert table.

Chocolate Chip Cookie Brownies

Ingredients:

For the Cookie Dough:

1 stick unsalted butter, at room temperature

1 3/4 cups flour

1/2 teaspoon baking soda

1/2 teaspoon baking powder

3/4 teaspoon Kosher salt

1/2 cup light brown sugar

1/2 cup sugar

1 large egg, at room temperature

1 teaspoon vanilla extract

1 cup dark chocolate chips

For the Brownie Batter:  

1 stick unsalted butter, cut into cubes

1 cup dark chocolate chips

1 1/2 cups sugar

3 large eggs, at room temperature

1/4 cup unsweetened Dutch-process cocoa powder

1/2 teaspoon Kosher salt

1/2 cup plus 2 tablespoons flour

Directions:

Preheat the oven to 350 F. Spray a 9×13-inch baking pan with non-stick spray. Line with parchment paper, leaving an overhang on the long sides of the pan, and spray with additional non-stick spray.

For the Cookie Dough: In a medium bowl whisk together the flour, baking soda, baking powder and salt and set aside.

In a larger bow, using a hand mixer on medium speed, cream together the butter and both sugars until pale and fluffy. With the mixer on low, beat in the egg and vanilla extract. Then beat in the flour mixture until just incorporate. Finally, stir in the chocolate chips. Set aside.

For the Brownie Batter: In a microwave-safe bowl add the butter and chocolate chips and microwave on :30 second intervals, stirring between each. Continue to do this until the mixture is smooth. Whisk in the sugar. Then whisk in the eggs, one at a time, until combined. Whisk in the cocoa powder and salt. Finally, fold in the flour until combined.

Spread the brownie batter evenly in the prepared pan and then crumble the cookie dough on top. Lightly press the cookie dough into the batter.

Cover the pan with a parchment paper and then aluminum foil and then bake in the pre-heated oven for 20 minutes. After the 20 minutes remove the parchment paper and foil and continue baking for an additional 25-30 minutes, or until a cake tester inserted in the center comes out moist with a few crumbs.

Transfer the pan to a wire rack to cool completely. Lift the Brookies from the pan using the parchment paper and slice into 16 squares. Store in an airtight container.

Recipe from Martha Stewart Cookie Perfection

Mini Cinnamon Sugar Pumpkin Muffins

I recently posted saying I finally found the perfect pumpkin muffin recipe for me and here I am posting another one. So, what’s the difference? Well, I consider these Mini Cinnamon Sugar Pumpkin Muffins to be more like donut holes and I find them to be more dessert-like than for breakfast. But most importantly, they are delicious nonetheless!

A definite plus about this recipe… You don’t need a stand mixer or a hand mixer to make the batter. You whisk the dry ingredients together in one bowl and the wet ingredients in another and then whisk both together to make the batter. Next, using a cookie scoop (or a small spoon) drop the batter into a mini muffin pan sprayed with baking spray (no cupcake liners needed either!).

Bake in a 350 F preheated oven for about 12 minutes and let them cool slightly in the pan…

Before rolling in melted butter and a cinnamon sugar mixture for the topping. YUM! And, while I normally don’t like glazes and coatings (they can be a tad bit too sweet for me) I will say that while these mini muffins are delicious without the coating, they are amazing with it so don’t skip it.

Mini Cinnamon Sugar Pumpkin Muffins

  • Servings: 24 Mini Muffins
  • Print

Ingredients:

For the Muffins:

1 3/4 cups flour

1 1/2 teaspoons baking powder

1/2 teaspoon salt

1 teaspoon cinnamon

1 1/2 teaspoons pumpkin pie spice

1/4 cup unsalted butter, melted and slightly cooled

1/2 cup light brown sugar

1 large egg

1 1/2 teaspoons vanilla extract

3/4 cup pumpkin puree

1/2 cup whole milk

For the Cinnamon Sugar Coating:

1/2 cup sugar

2 teaspoons cinnamon

1/4 cup unsalted butter, melted

Directions:

Preheat the oven to 350 F. Spray a mini-muffin pan (24 count) with baking spray and set aside.

In a medium bowl whisk together the flour, baking powder, salt, cinnamon, and pumpkin spice.

In a large bowl, whisk together the cooled melted butter and brown sugar. Add in the egg, vanilla extract, pumpkin puree and milk and continue whisking until combined.

Add the dry ingredients to the wet ingredients and whisk everything together until just combined and no streaks of the flour mixture remain. The batter will be thick.

Using a cookie scoop, drop scoops of the batter into the prepared pan.

Bake in the preheated oven for 11-13 minutes, or until a cake tester inserted in the center of one of the muffins comes out clean.

Transfer the pan to a wire rack and allow the muffins to cool slightly.

While the muffins are cooling combine the sugar and cinnamon for the coating in a small bowl.

Once the muffins are cool enough to handle dip them in the melted butter and then roll in the cinnamon sugar mixture.

Store in an airtight container.

Recipe from Sally’s Baking Addiction

Pumpkin Blondies

I wasn’t planning on making so many pumpkin recipes this year, but, inevitably I come across a recipe here and there and it sounds too good not to make it. Besides its Fall Y’all… it’s all about the apples and the pumpkins! Now, I haven’t attempted to make a pumpkin brownie since the Pumpkin Chocolate Brownies from 5 years ago. Those brownies required 9 eggs, more than 1 can of pumpkin puree, turned into a debacle when I went to slice them and I was on the fence as to whether or not I liked them. Considering that I never thought to make them again, that should be my answer. But this year when I was thinking of something to bake for a friend’s birthday (she’s a pumpkin fan like me) I thought about attempting a pumpkin brownie again, definitely not that recipe though. But that idea quickly turned into a Pumpkin Blondie instead. In case you are wondering, the biggest difference between a blondie and a brownie is that a blondie does not have cocoa powder.

I knew right off the bat that these blondies would be much better than those brownies. The batter wasn’t as dense so I knew that when they were done baking there wouldn’t be any undercooked sections. I baked them until the edges were beginning to brown and pulled away from the sides of the pan. And when I inserted a cake tester in the center it came out clean.

And when I sliced them, I was right. They were completely baked through. And more importantly they were delish. I’ll go out on a limb and say that these blondies may be good for you. Along with the pumpkin, they also have dark chocolate and pecans, all three of which have health benefits.

Pumpkin Blondies

  • Servings: 24 Blondies
  • Print

Ingredients:

2 1/3 cup flour

1 tablespoon pumpkin pie spice

1 teaspoon cinnamon

1 teaspoon baking soda

3/4 teaspoon kosher salt

2 stick unsalted butter, at room temperature

3/4 cup sugar

3/4 cup dark brown sugar

1 large egg

2 teaspoons vanilla extract

1 15oz. can pure pumpkin puree

2 cups dark chocolate chips*

3/4 cup chopped pecans

*I used a 10oz. bag of dark chocolate chips

Directions:

Preheat the oven to 350 F. Line a 9×13 baking pan with parchment paper, leaving an overhang on all sides, and spray with baking spray.

In a medium bowl whisk together the flour, pumpkin pie spice, cinnamon, baking soda and salt. Set aside.

In the bowl of a stand mixer using the paddle attachment, or a large bowl using a hand mixer, cream the butter and both sugars together on medium-high speed until smooth. Beat in the egg and vanilla extract until everything is combined. Add in the pumpkin puree and beat until combined.

With the mixer on low, add in the dry ingredients. Mixing until everything is just combined. Fold in the chocolate chips and chopped pecans with a rubber spatula.

Transfer the batter to the prepared pan and using an offset spatula spread the batter out evenly. Bake in the preheated oven for 35 to 40 minutes, or until the edges begin to pull away from the sides of the pan and when a cake tester inserted in the center comes out clean.

Place pan on a wire rack and let blondies cool completely in the pan before removing and slicing.

Recipe from My Baking Addiction

Chocolate Chip Pumpkin Muffins

I must say I have been on the search for a good pumpkin muffin recipe for a while now. Two years ago, I shared two that were quite good and very different from each other. A Pumpkin Cream Cheese Swirl Muffin, that reminded me of this Cheesecake Stuffed Pumpkin Bread and a Pumpkin Cranberry one, that I got the idea for from a Chobani pumpkin yogurt. And while both of those pumpkin muffins were delicious, I think I finally found the perfect pumpkin muffin for me. It stayed moist for a couple of days in an airtight container at room temperature, it doesn’t involve a lot of crazy ingredients and it has chocolate chips. Which means it works just as well as a breakfast treat as it does for a midday snack or even dessert.  I enjoyed one for each of those occasions. It’s simply called a Chocolate Chip Pumpkin Muffin.

One more thing that’s great about this recipe… You can halve it easy enough and still end up with a decent amount of delicious muffins. I halved it and ended up with enough batter for 14 muffins. One last thing, make sure to sprinkle your muffins with a few extra chocolate chips prior to baking. It makes them prettier and a little extra sweeter!

Chocolate Chip Pumpkin Muffins

  • Servings: 24 Muffins
  • Print

Ingredients:

3 cups flour

3 cups sugar

2 teaspoons baking soda

1/2 teaspoon baking powder

1 teaspoon Kosher salt

2 cups pumpkin puree

1 cup vegetable oil

4 eggs

2/3 cup water

1 teaspoon ground clove

1 teaspoon all spice

2 cups semi-sweet chocolate chips, plus additional for sprinkling on top

Directions:

Preheat oven to 350 F. Line two cupcake pans with liners.

In a medium bowl whisk together the flour, sugar, baking soda, baking powder, and salt. Set aside.

In a large bowl, using a handheld mixer, beat the pumpkin, oil, eggs, water and spices on medium speed until combined. With the mixer on low gradually add in the flour mixture and mix until just combined. And finally, fold in the chocolate chips with a rubber spatula.

Transfer the batter to the prepared cupcake tins, filling each crevice about 2/3 full. Sprinkle the top of each muffin with a few chocolate chips. Bake in the preheated oven for 25-30 minutes, until a cake tester inserted into the center of one of the muffins comes out clean. Let cool in the pans for five minutes and then transfer to a wire rack to cool completely.

Store in an airtight container at room temperature.

Recipe from What’s Gaby Cooking

Pumpkin Spice Latte Bundt Cake

Are you one of those people who counts down the days until Starbucks brings back their Pumpkin Spice Latte for the Fall? Or, are you like me? You’re not a coffee drinker, but, tend to order at least one during the season because you’re into pumpkin and the taste isn’t that bad even though it is coffee. Either way, I have the dessert for you today to get your pumpkin spice latte fix without all the caffeine and you don’t have to wait for it to cool down to truly enjoy it. A Pumpkin Spice Latte Bundt Cake.

While you do need two different batters to get the pumpkin spice and latte portions of the cake, you don’t start out by making two separate ones. You start off by making the pumpkin spice one, dividing it in half and adding an espresso mixture and cocoa powder to one of them.

Next, the fun, and depending on how you do it the messy part. Initially when I tried this recipe I tried to halve it to make a loaf sized cake. Something went wrong and while it tasted okay, the texture was a little weird. It was kind of rubbery. When I added the batter to the pan I used two cookie scoops to alternate adding it in. I think I was low on patience that day because it felt like it was taking forever. So, the next time I made the recipe, per the instructions and used a Bundt pan I decided to add the batters to piping bags. Well, instead of using 16-inch ones, I opted to use 12-inch ones. Which were too small so as I was piping the batter into the Bundt pan it was overflowing a bit from the top of the bags. In the end though, very little batter was lost. Once I was done piping all the batter into the pan I tapped it on the counter a few times to get rid of any air bubbles and to make sure the batter had incorporated together and settled.

I baked it in a 350 F preheated oven for about 40 minutes and after letting the cake cool in the pan for 10 minutes I inverted it onto a wire rack to cool completely.

Once it was cooled, it was time to enjoy a slice. And even though it was a bit of a mess to get the batters into the pan the cake did end up with a nice pattern.  And yes, the taste is very on point with your traditional Pumpkin Spice Latte.

Pumpkin Spice Latte Bundt Cake

Ingredients:

2 tablespoons instant espresso

3/4 cup evaporated milk

2 1/3 cups cake flour*

2 teaspoons baking powder

1 teaspoons pumpkin pie spice

1/2 teaspoon Kosher salt

1 1/4 cups sugar

1/2 cup butter, at room temperature

1 1/4 cups canned pumpkin

2 eggs

2 egg whites

1 teaspoon vanilla extract

1/3 cup vegetable oil

3 tablespoons dark unsweetened cocoa powder

*To make my own cake flour, I used 2 1/3 cups of all-purpose flour, removed 4 tablespoons and 2 teaspoons of the flour and replaced it with the same amount of cornstarch. After whisking it together I then sifted it to make sure it was well combined. For future reference, when a recipe calls for cake flour, you can simply use all-purpose flour and remove 2 tablespoons per cup of flour and replace it with cornstarch. Whisk the two together and then sift.

Directions:

Preheat oven to 350 F. Spray a Bundt pan with baking spray, or grease with butter and lightly coat with flour.

In a small bowl whisk together the instant espresso and 1 tablespoon of the evaporated milk, until the expresso has dissolved.

In a medium bowl whisk together the flour, baking powder, pumpkin pie spice & Kosher salt.

In a large bowl, using a handheld mixer on medium, beat together the butter and sugar until fluffy. Add in the pumpkin, eggs, egg whites, vanilla extract and oil. Beat on low until combined.

With the mixer on low, add the in the flour mixture in three parts alternating with the remaining evaporated milk.

Divide the batter in half. In one half add in the espresso mixture and the unsweetened cocoa powder. Fold the batter until the expresso mixture and cocoa powder is incorporated into it and no streaks of either remain.  

Using two cookie scoops, two large spoons, or two piping bags, alternate adding the batter to the prepared Bundt pan. Once all the batter has been added, tap the pan on the counter a few times to release any air bubbles and to ensure the batter is well incorporated.

Bake in the preheated oven for 35 – 40 minutes, or until a cake tester inserted comes out clean. Cool the cake in the pan on a wire rack for 10 minutes, before inverting and letting the cake cool completely.

Slice and enjoy.

Recipe from Better Homes & Garden

Apple Fritter Bread

Are you tired of apple recipes? I hope not, I have one more that’s just as good as the previous two I posted recently – Apple Pie Spice Cake & Apple Butterscotch Cookies. Today I am bringing you an Apple Fritter Bread. All the deliciousness of an Apple Fritter without the guilt of it being fried. And just for a quick recap, an Apple Fritter is a deep-fried donut filled with apples and cinnamon.

With this bread, cinnamon coated apple pieces are layered between the batter and then swirled in before baking.

The result, each slice is filled with apple cinnamon goodness. For that final apple fritter touch, the bread is drizzled with a sour cream icing. If you are not a fan of icing though this bread would be just as delicious without it.

Apple Fritter Bread

Ingredients:

For the Bread:

1 medium Granny Smith apple, peeled, cored and finely chopped (about 1 1/4 cups)

1/4 cup light brown sugar

1 teaspoon ground cinnamon

1 1/2 cups flour

2 teaspoons baking soda

1/4 teaspoon salt

1 cup sugar

1/3 cup unsalted butter, at room temperature

2 eggs

1/2 cup milk*

1 teaspoon vanilla extract

For the Sour Cream Icing:

3 tablespoons sour cream

1/2 teaspoon vanilla extract

3/4 cup confectioners’ sugar

Milk, if necessary

*I used whole milk

Directions:

Preheat the oven to 350 F. Spray a 9.25 x 5.25 loaf pan with baking spray. Set aside.

In a medium bowl combine the apples, light brown sugar and cinnamon. Set aside.

In another medium bowl whisk together the flour, baking powder and salt. Set aside.

In a large bowl, using a handheld mixer on medium speed, beat together the sugar and butter until combined. Beat in the eggs one at a time, beating well after each addition. Beat in the milk and vanilla until the mixture in smooth. With the mixer on low, beat in the flour mixture until just combined.

Pour half of the batter into the prepared pan and spread half of the apple mixture on top. Top the apples with the remaining batter and then top with the remaining apple mixture. Gently pat the apples in the batter and use a knife to swirl the apples into the batter.

Bake in the preheated oven for 50-60 minutes, or until a cake tester inserted in the center comes out clean.

Cool in the pan on a wire rack for 10 minutes and then remove from the pan and let cool completely on the wire rack.

Once cooled, make and drizzle with the sour cream icing. In a medium bowl whisk together the sour cream, vanilla extract and confectioners’ sugar until smooth. If you find that the mixture is too thick whisk in 1 teaspoon of milk at a time until it’s a consistency easy to drizzle.

Place the wire rack with the cake over a baking sheet or a piece of wax paper and drizzle with the icing. Let sit for a few minutes to let the icing set before slicing.

Store leftovers in an airtight container at room temperature.

Recipe from Better Homes & Gardens

Apple Butterscotch Cookies

So, I’m on a bit of an apple kick. I welcomed Fall on here with an Apple Pie Spice Cake, I recently made an Apple Fritter Bread that I will be sharing very soon and today I am bringing you a recipe for Apple Butterscotch Cookies. They do say an apple a day keeps the doctor away, but, I am just not sure if that also applies to apples baked into desserts.

These cookies are perfect for Fall. Not just because of the apples, but because the cinnamon and butterscotch in these cookies would pair perfectly with a hot cup of tea or cider. Both of which are a welcome relief to combat the slight chill in the air of a perfectly crisp Fall day. As for the texture, they are firm around the edges and perfectly soft in the middle. The ideal combination of any cookie.

Apple Butterscotch Cookies

  • Servings: 36 cookies
  • Print

Ingredients:

2 ½ cups flour

2 teaspoons cinnamon

1 teaspoon baking soda

2 sticks unsalted butter, at room temperature

3/4 cup sugar

3/4 cup light brown sugar

2 eggs

1 teaspoon vanilla extract

1 Granny Smith apple peeled and diced

1 cup chopped walnuts

1 cup butterscotch chips

Directions:

Preheat oven to 350 F. Line two baking sheets with parchment paper.

In a medium bowl whisk together the flour, cinnamon and baking soda and set aside.

In a large bowl, using a hand mixer on medium speed, cream together the butter and both sugars until creamy. Add the eggs 1 at a time, beating well after each addition. Beat in the vanilla extract.

Add the flour mixture to butter mixture and beat on low until just incorporated.

Add in the diced apple, chopped walnuts and butterscotch chips and mix until everything is well combined.

Use a cookie scoop to drop the dough on the prepared baking sheets. Bake in the preheated oven for 13-15 minutes, until the cookies are set on top and starting to brown around the edges.

Transfer to a wire rack to cool completely. Store in an airtight container at room temperature.

Recipe first appeared on Bead Yarn & Spatula.