Malted Oatmeal Cream Pies

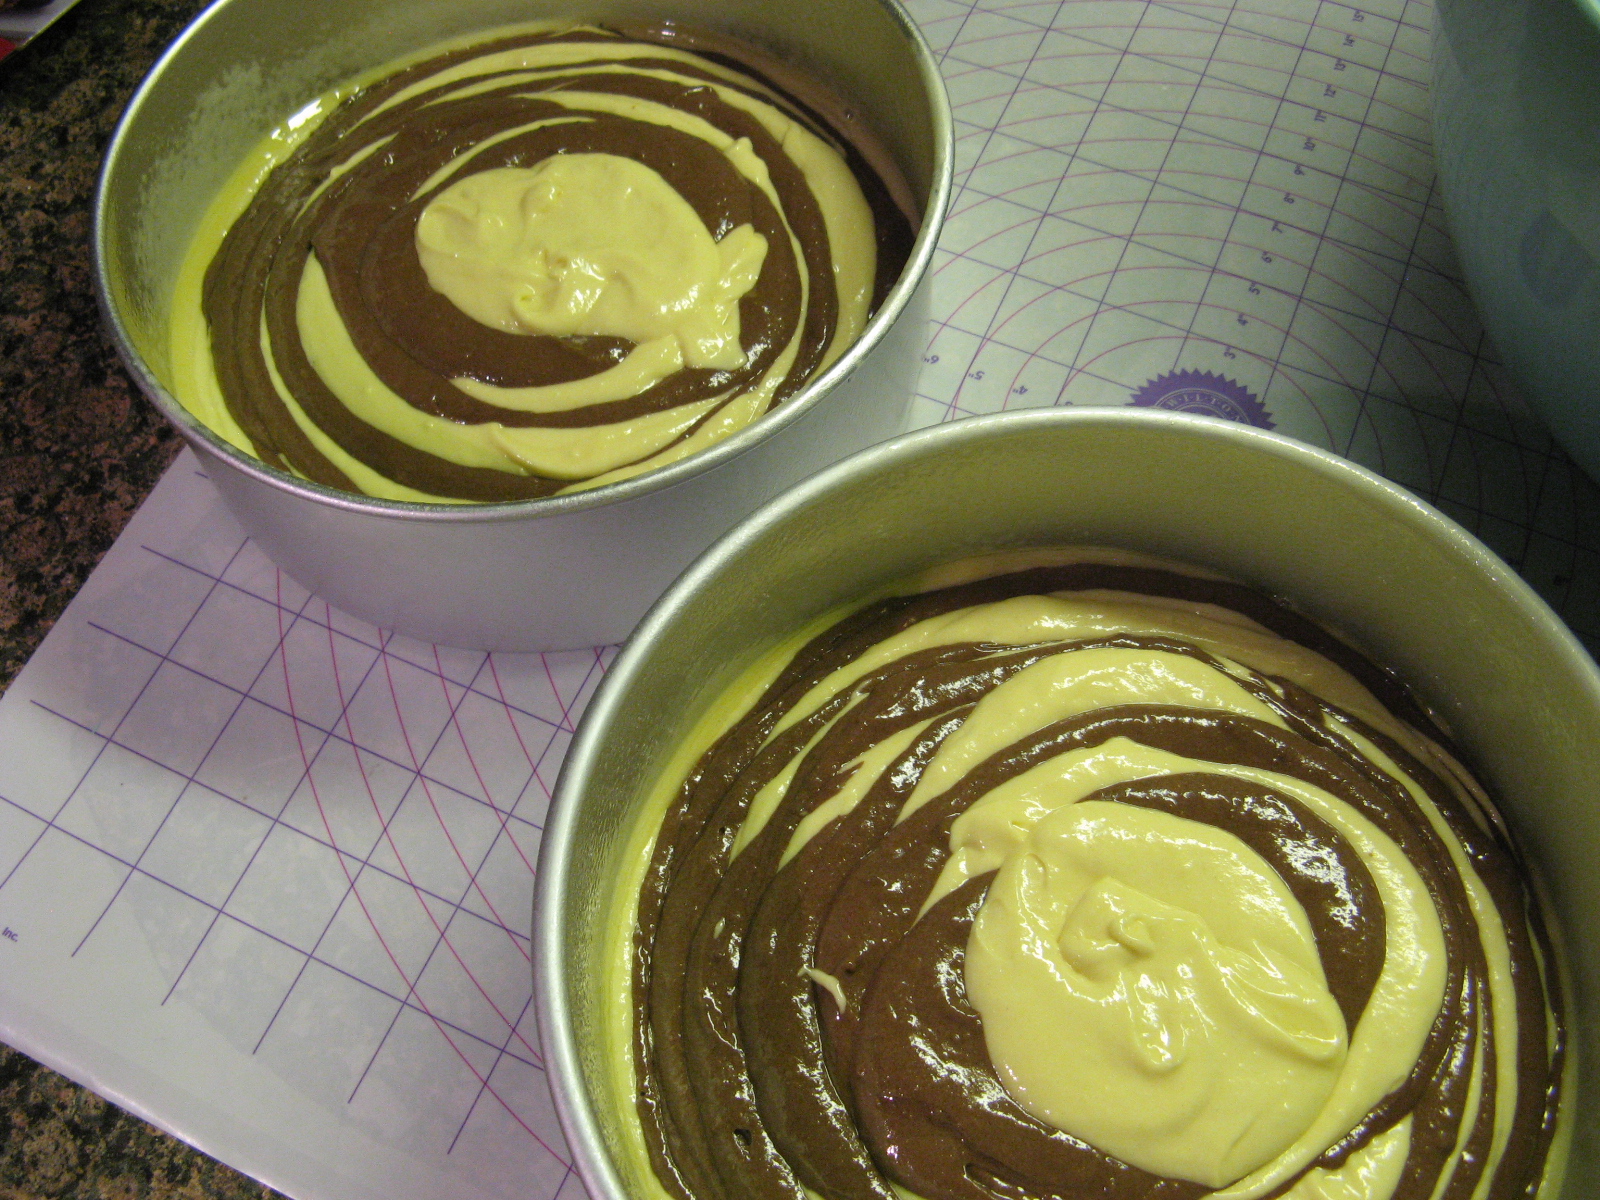
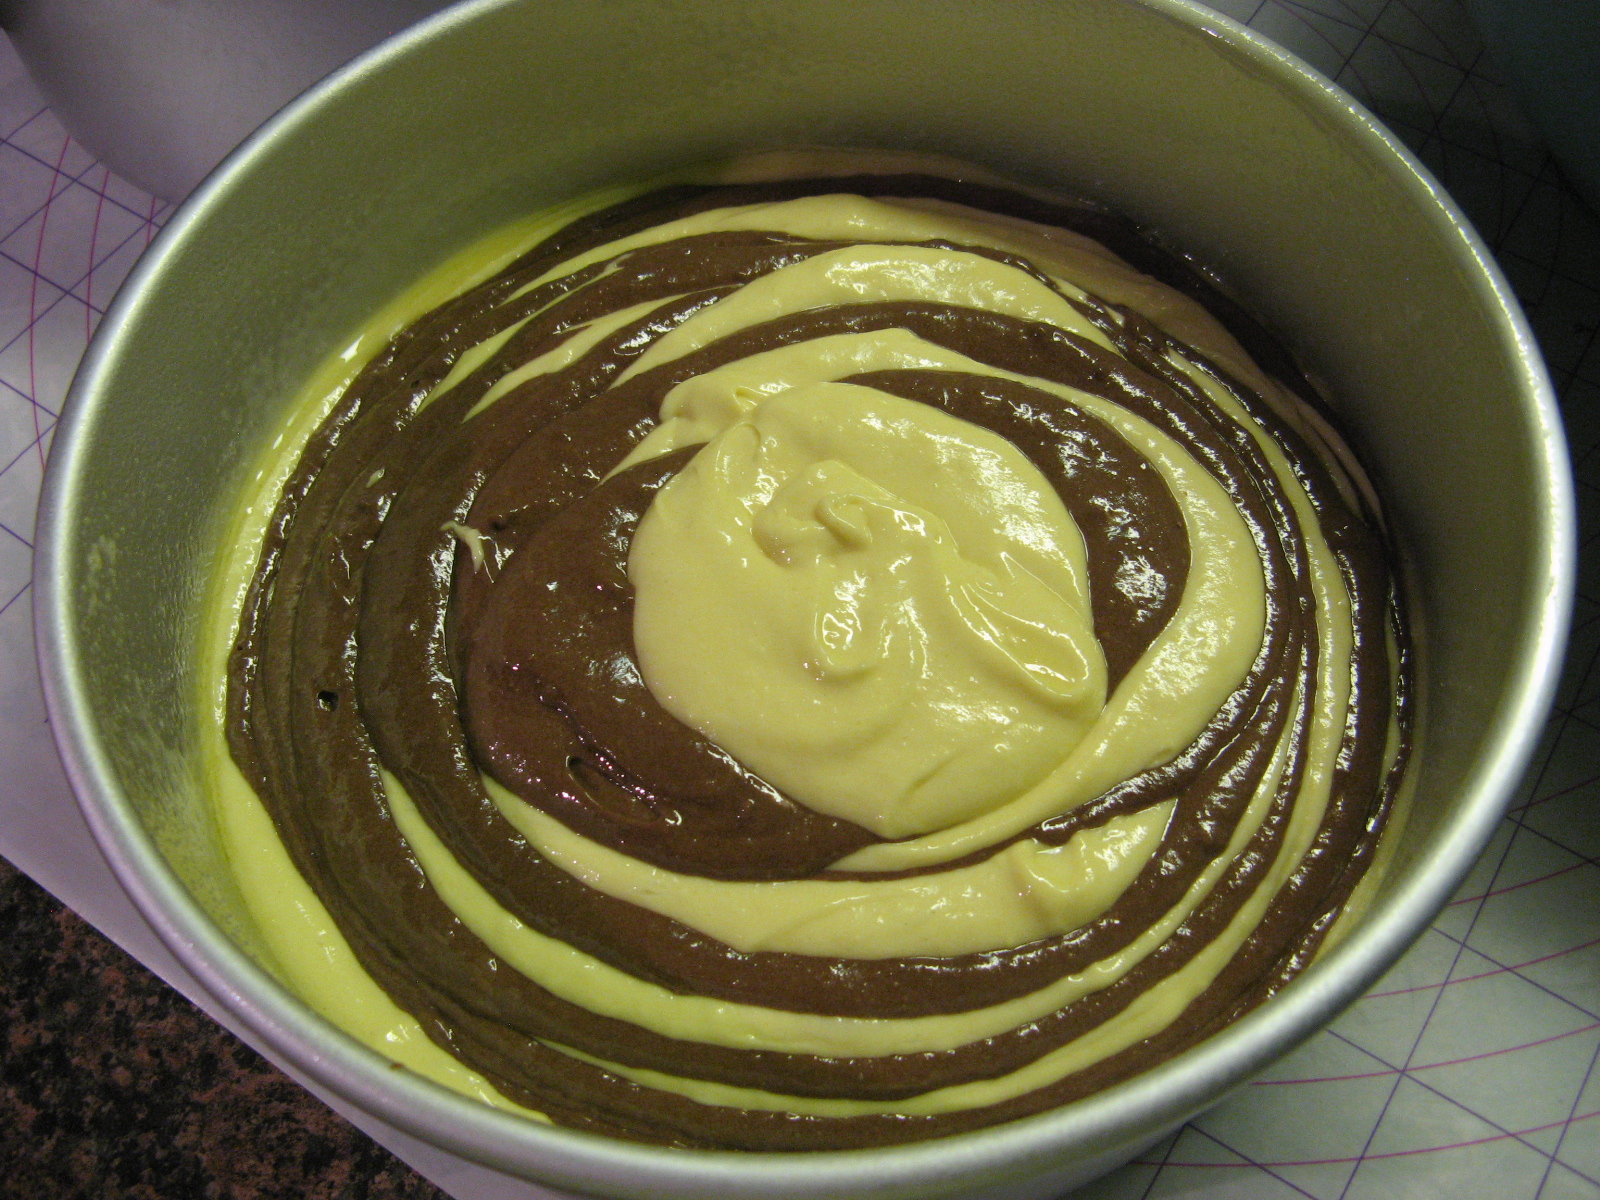
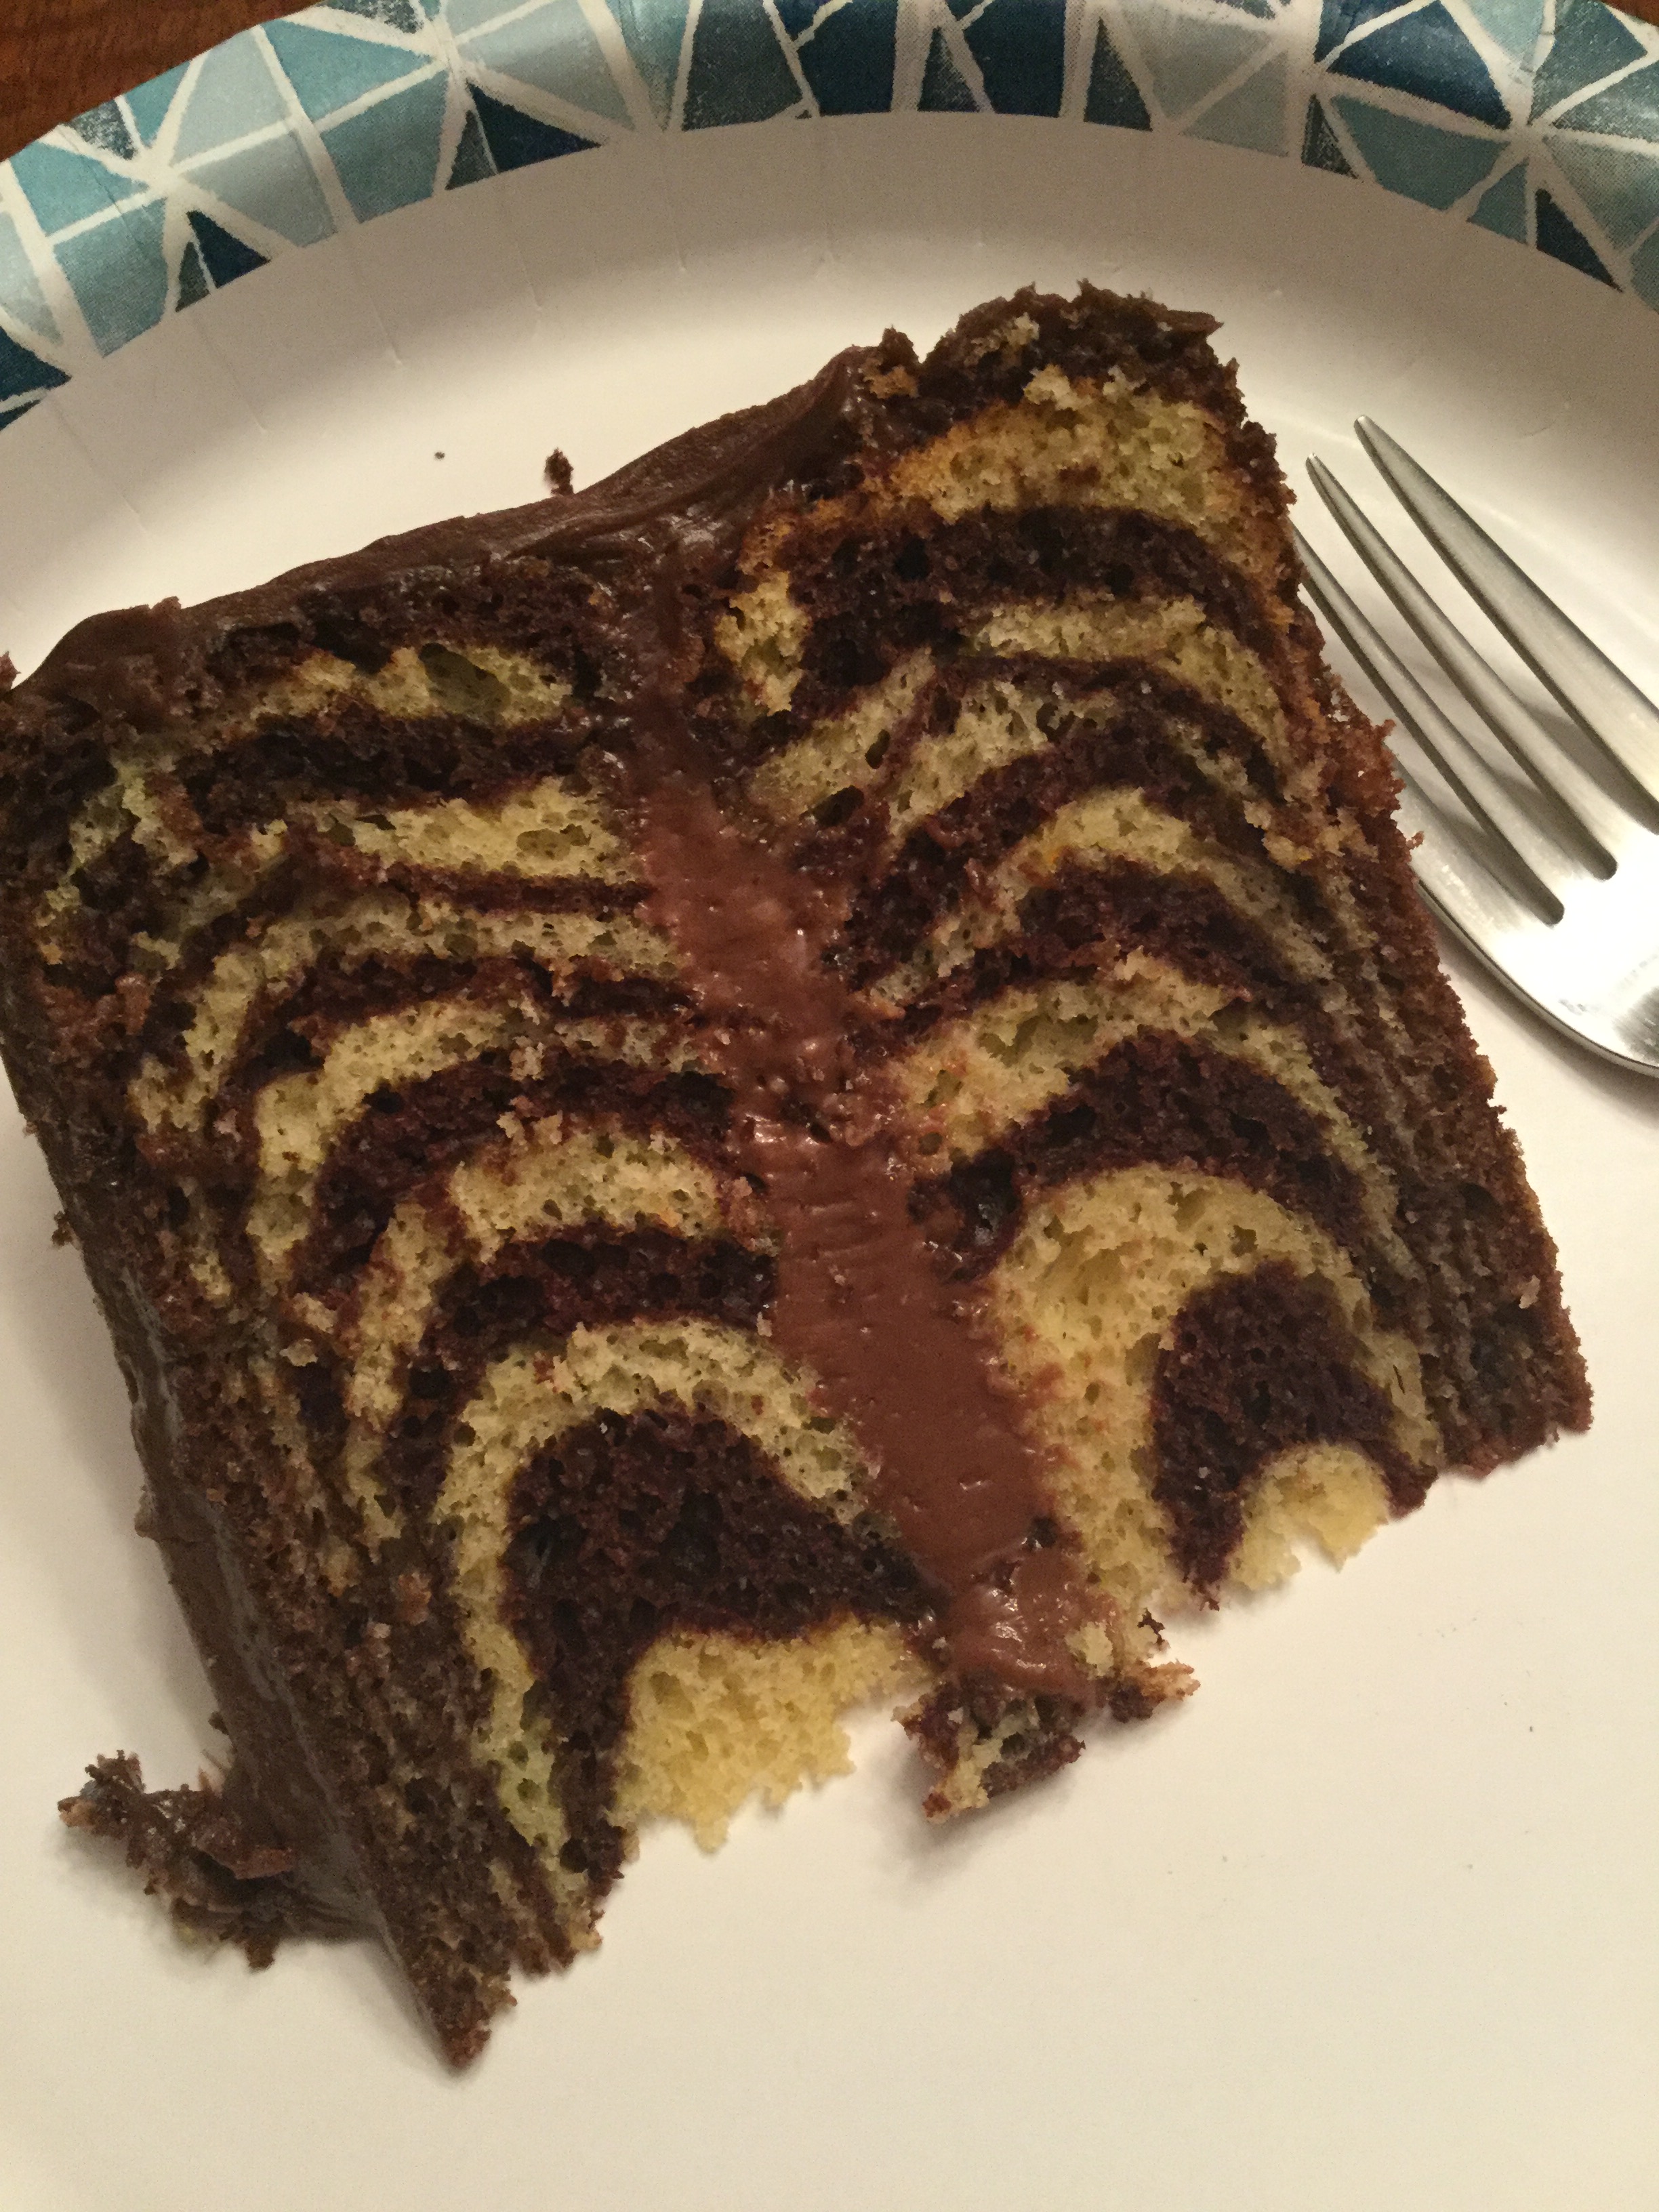
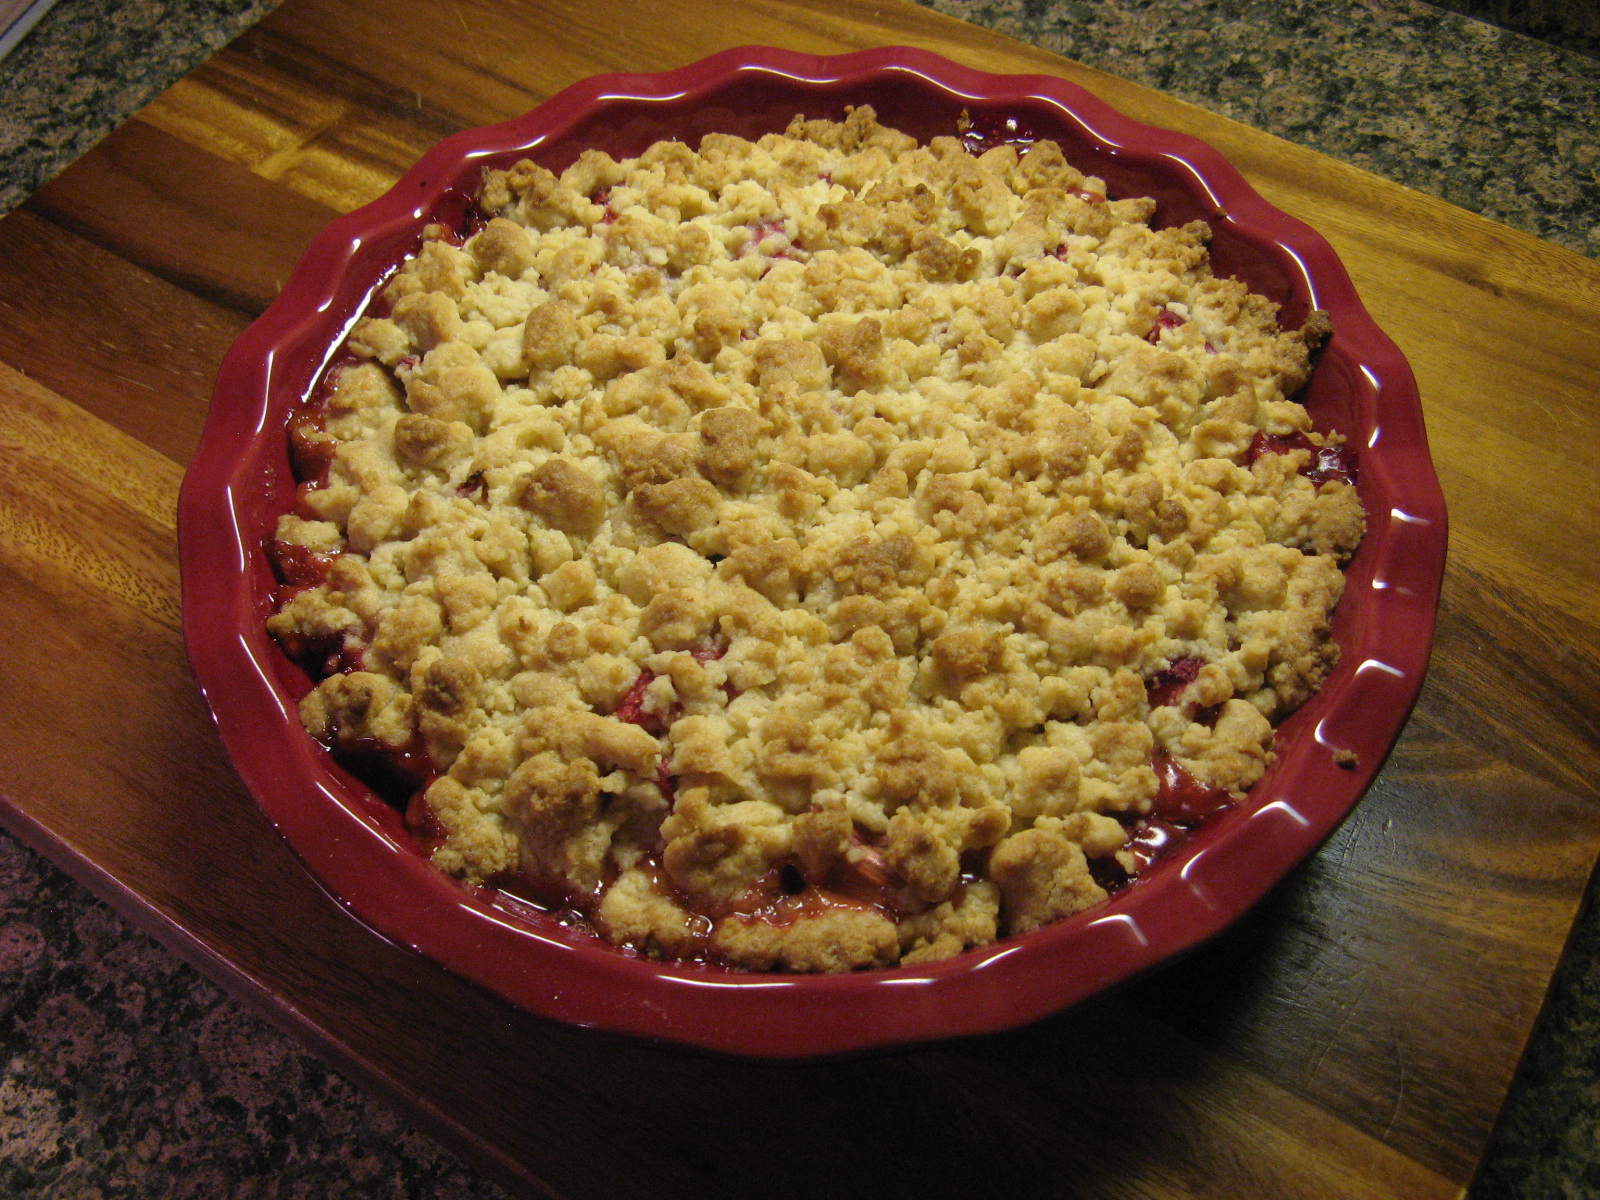
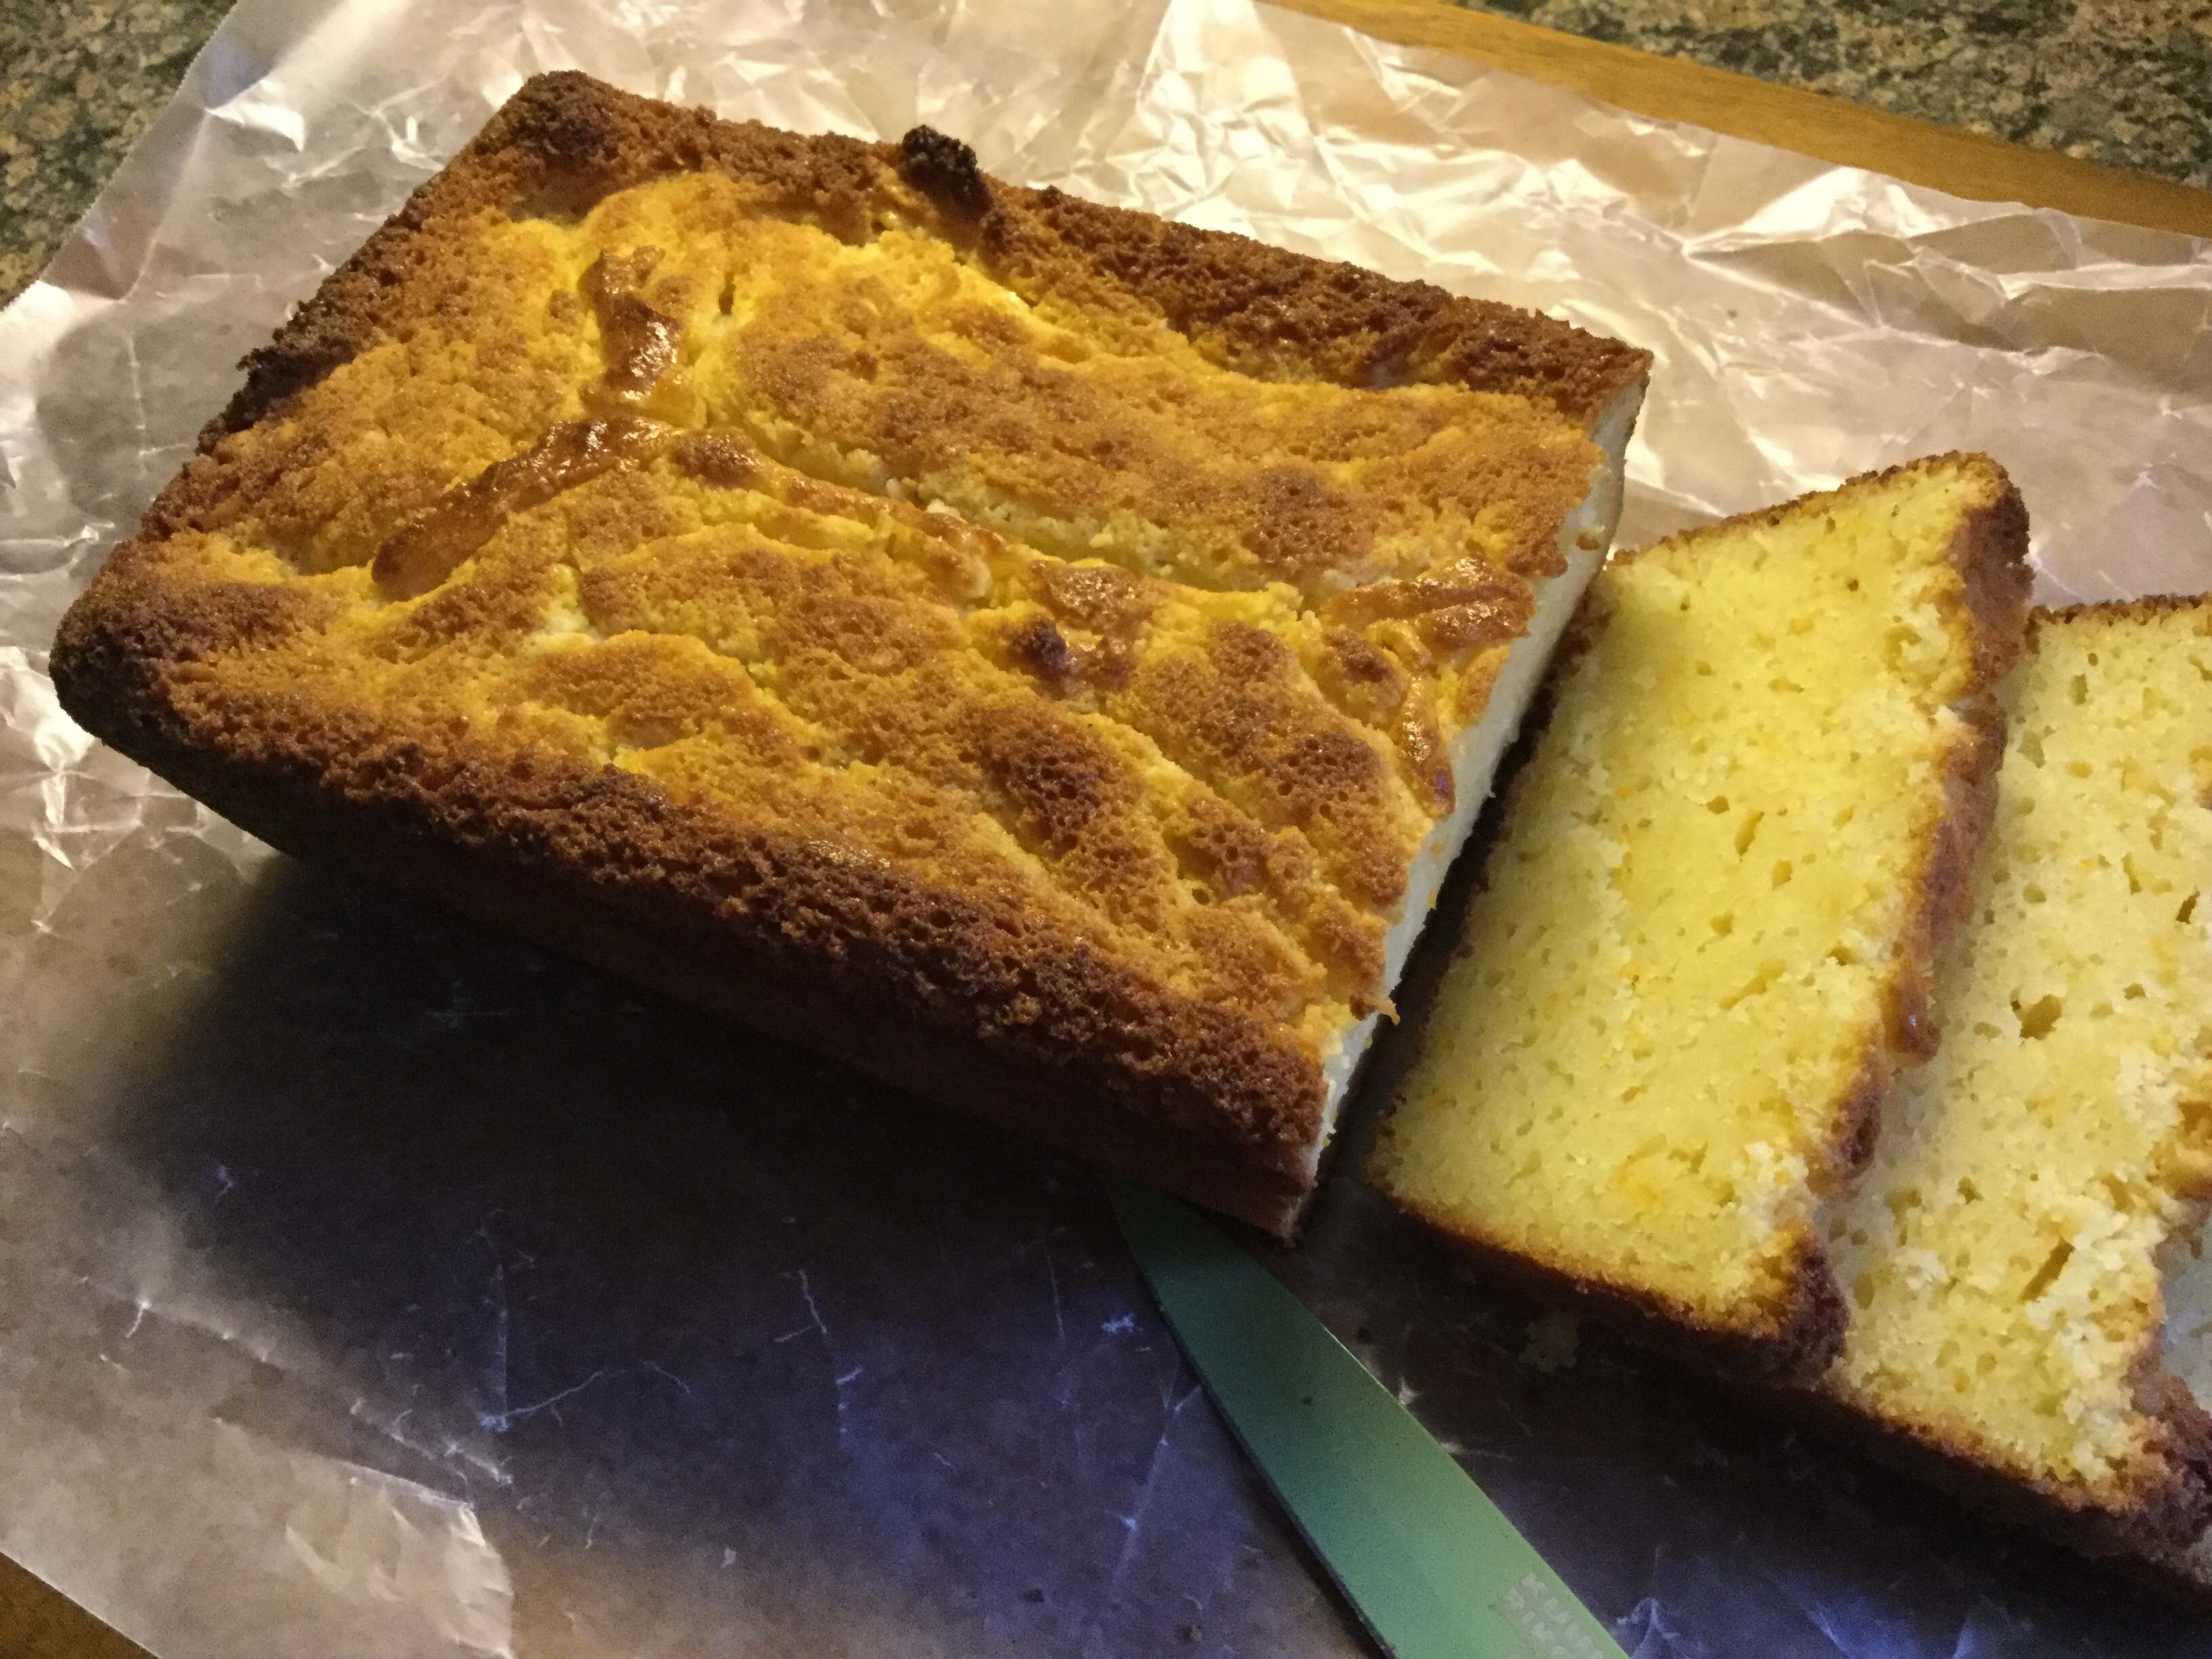
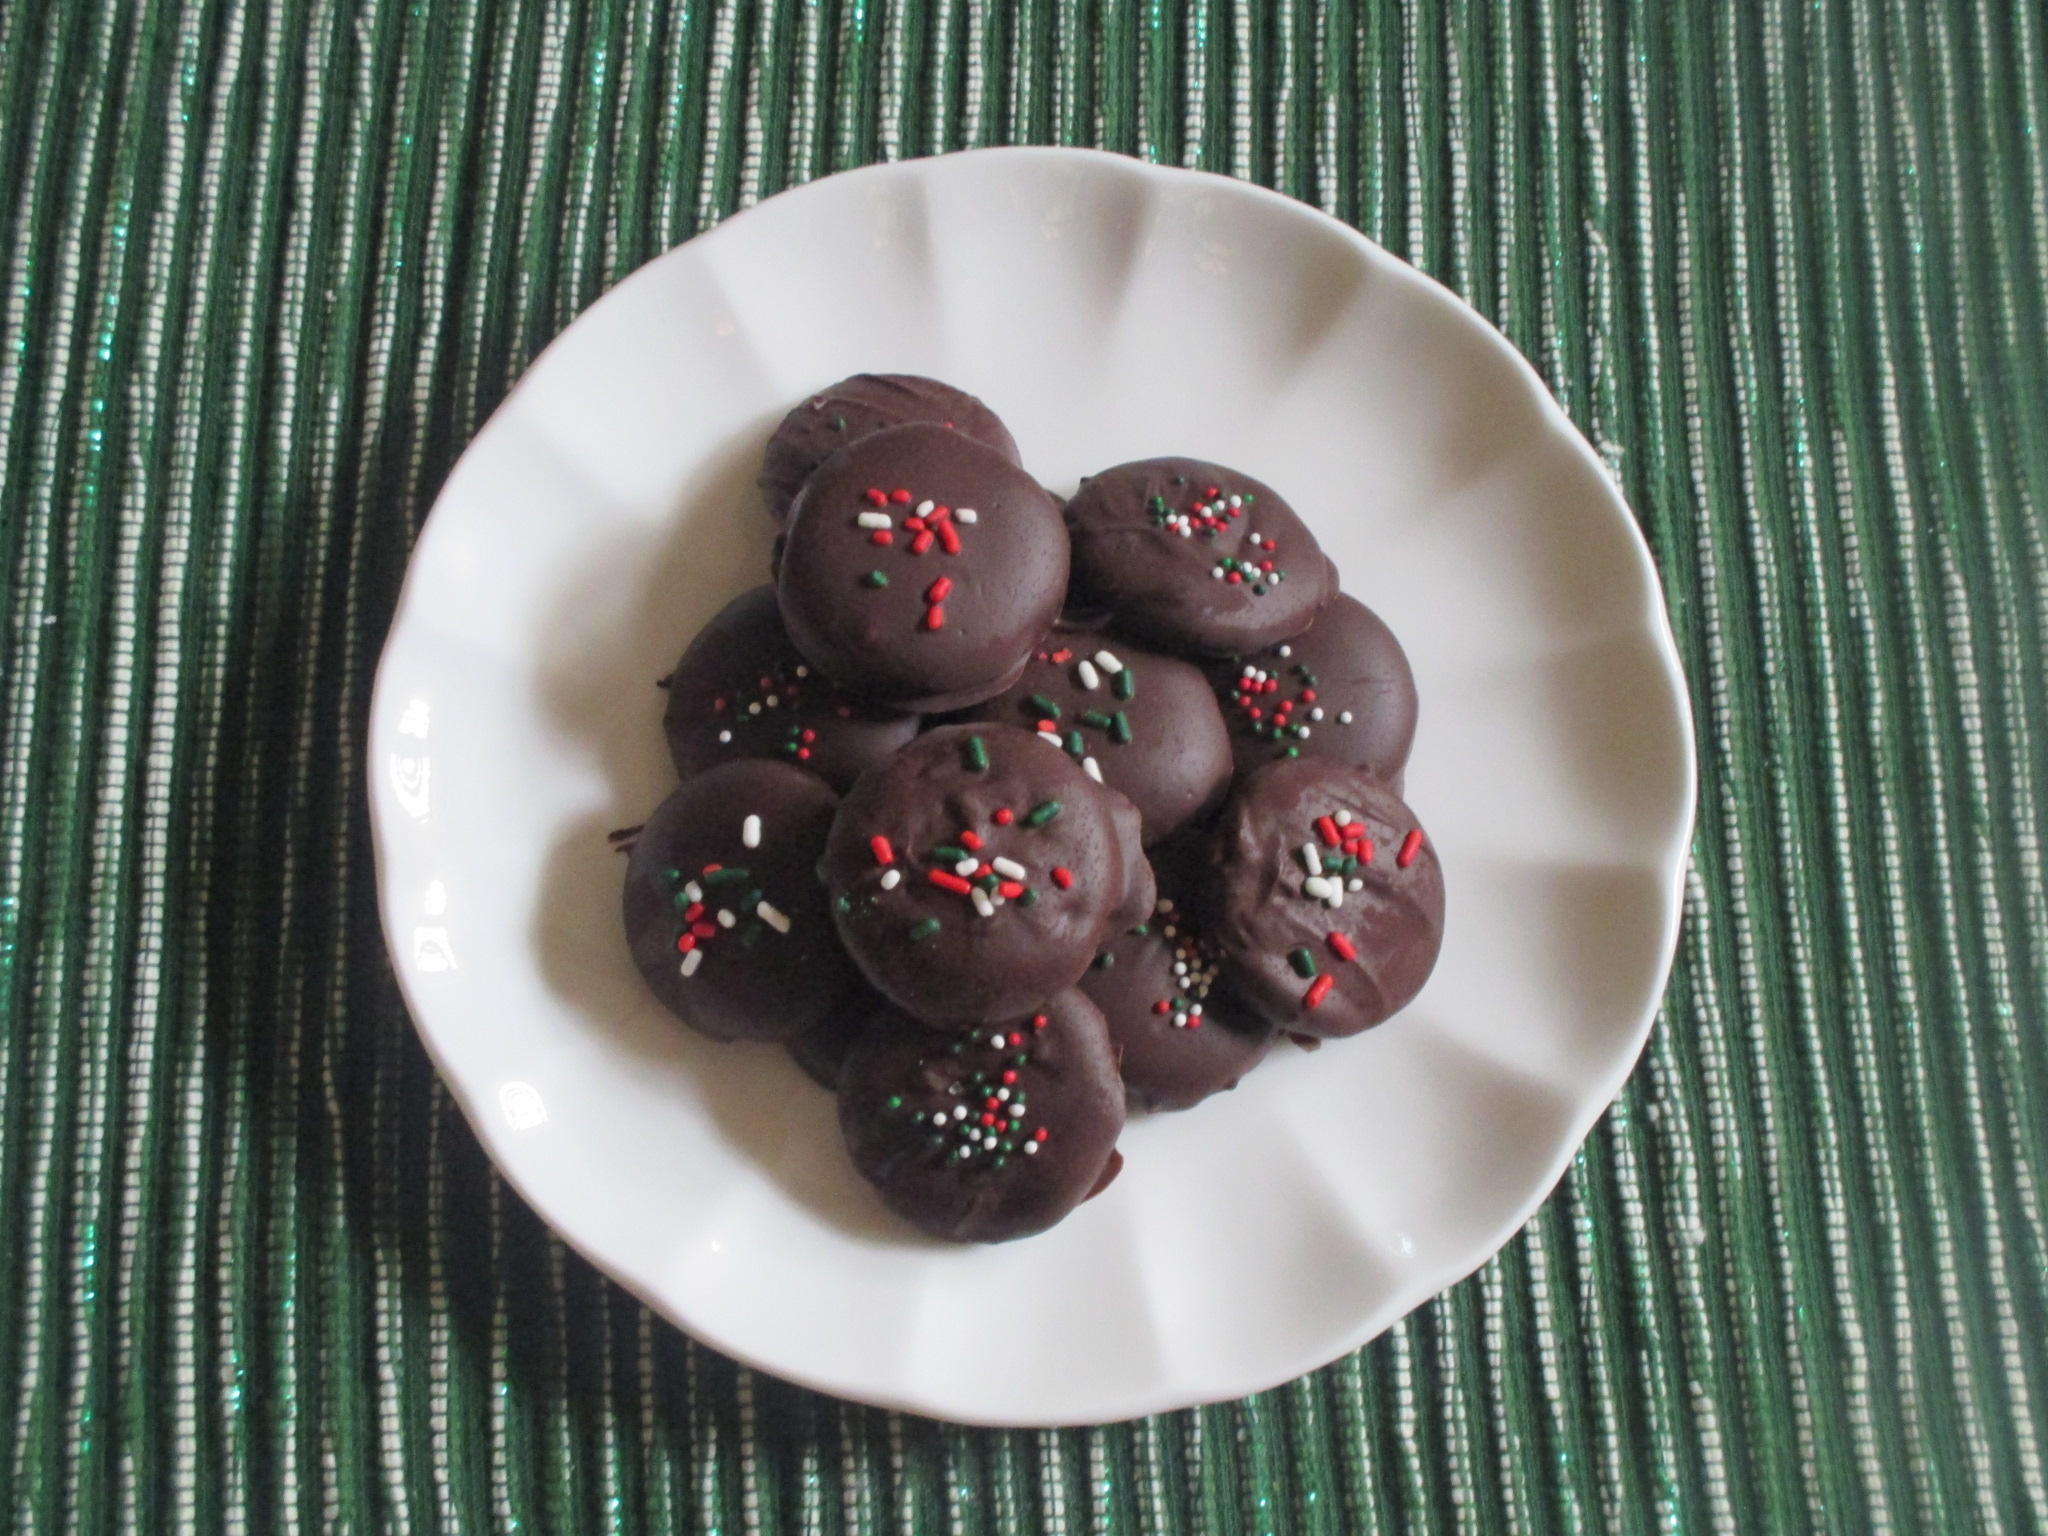
Have you been doing a lot of baking this summer? Unfortunately I haven’t. I did my fare share for a July 4th celebration, including the cake below, but, other than that baking has been to a minimum. It’s primarily due to the fact that it’s been a little warm and humid and that coupled with the fact that I don’t have air conditioning does not make for the ideal recipe to turn on my oven.

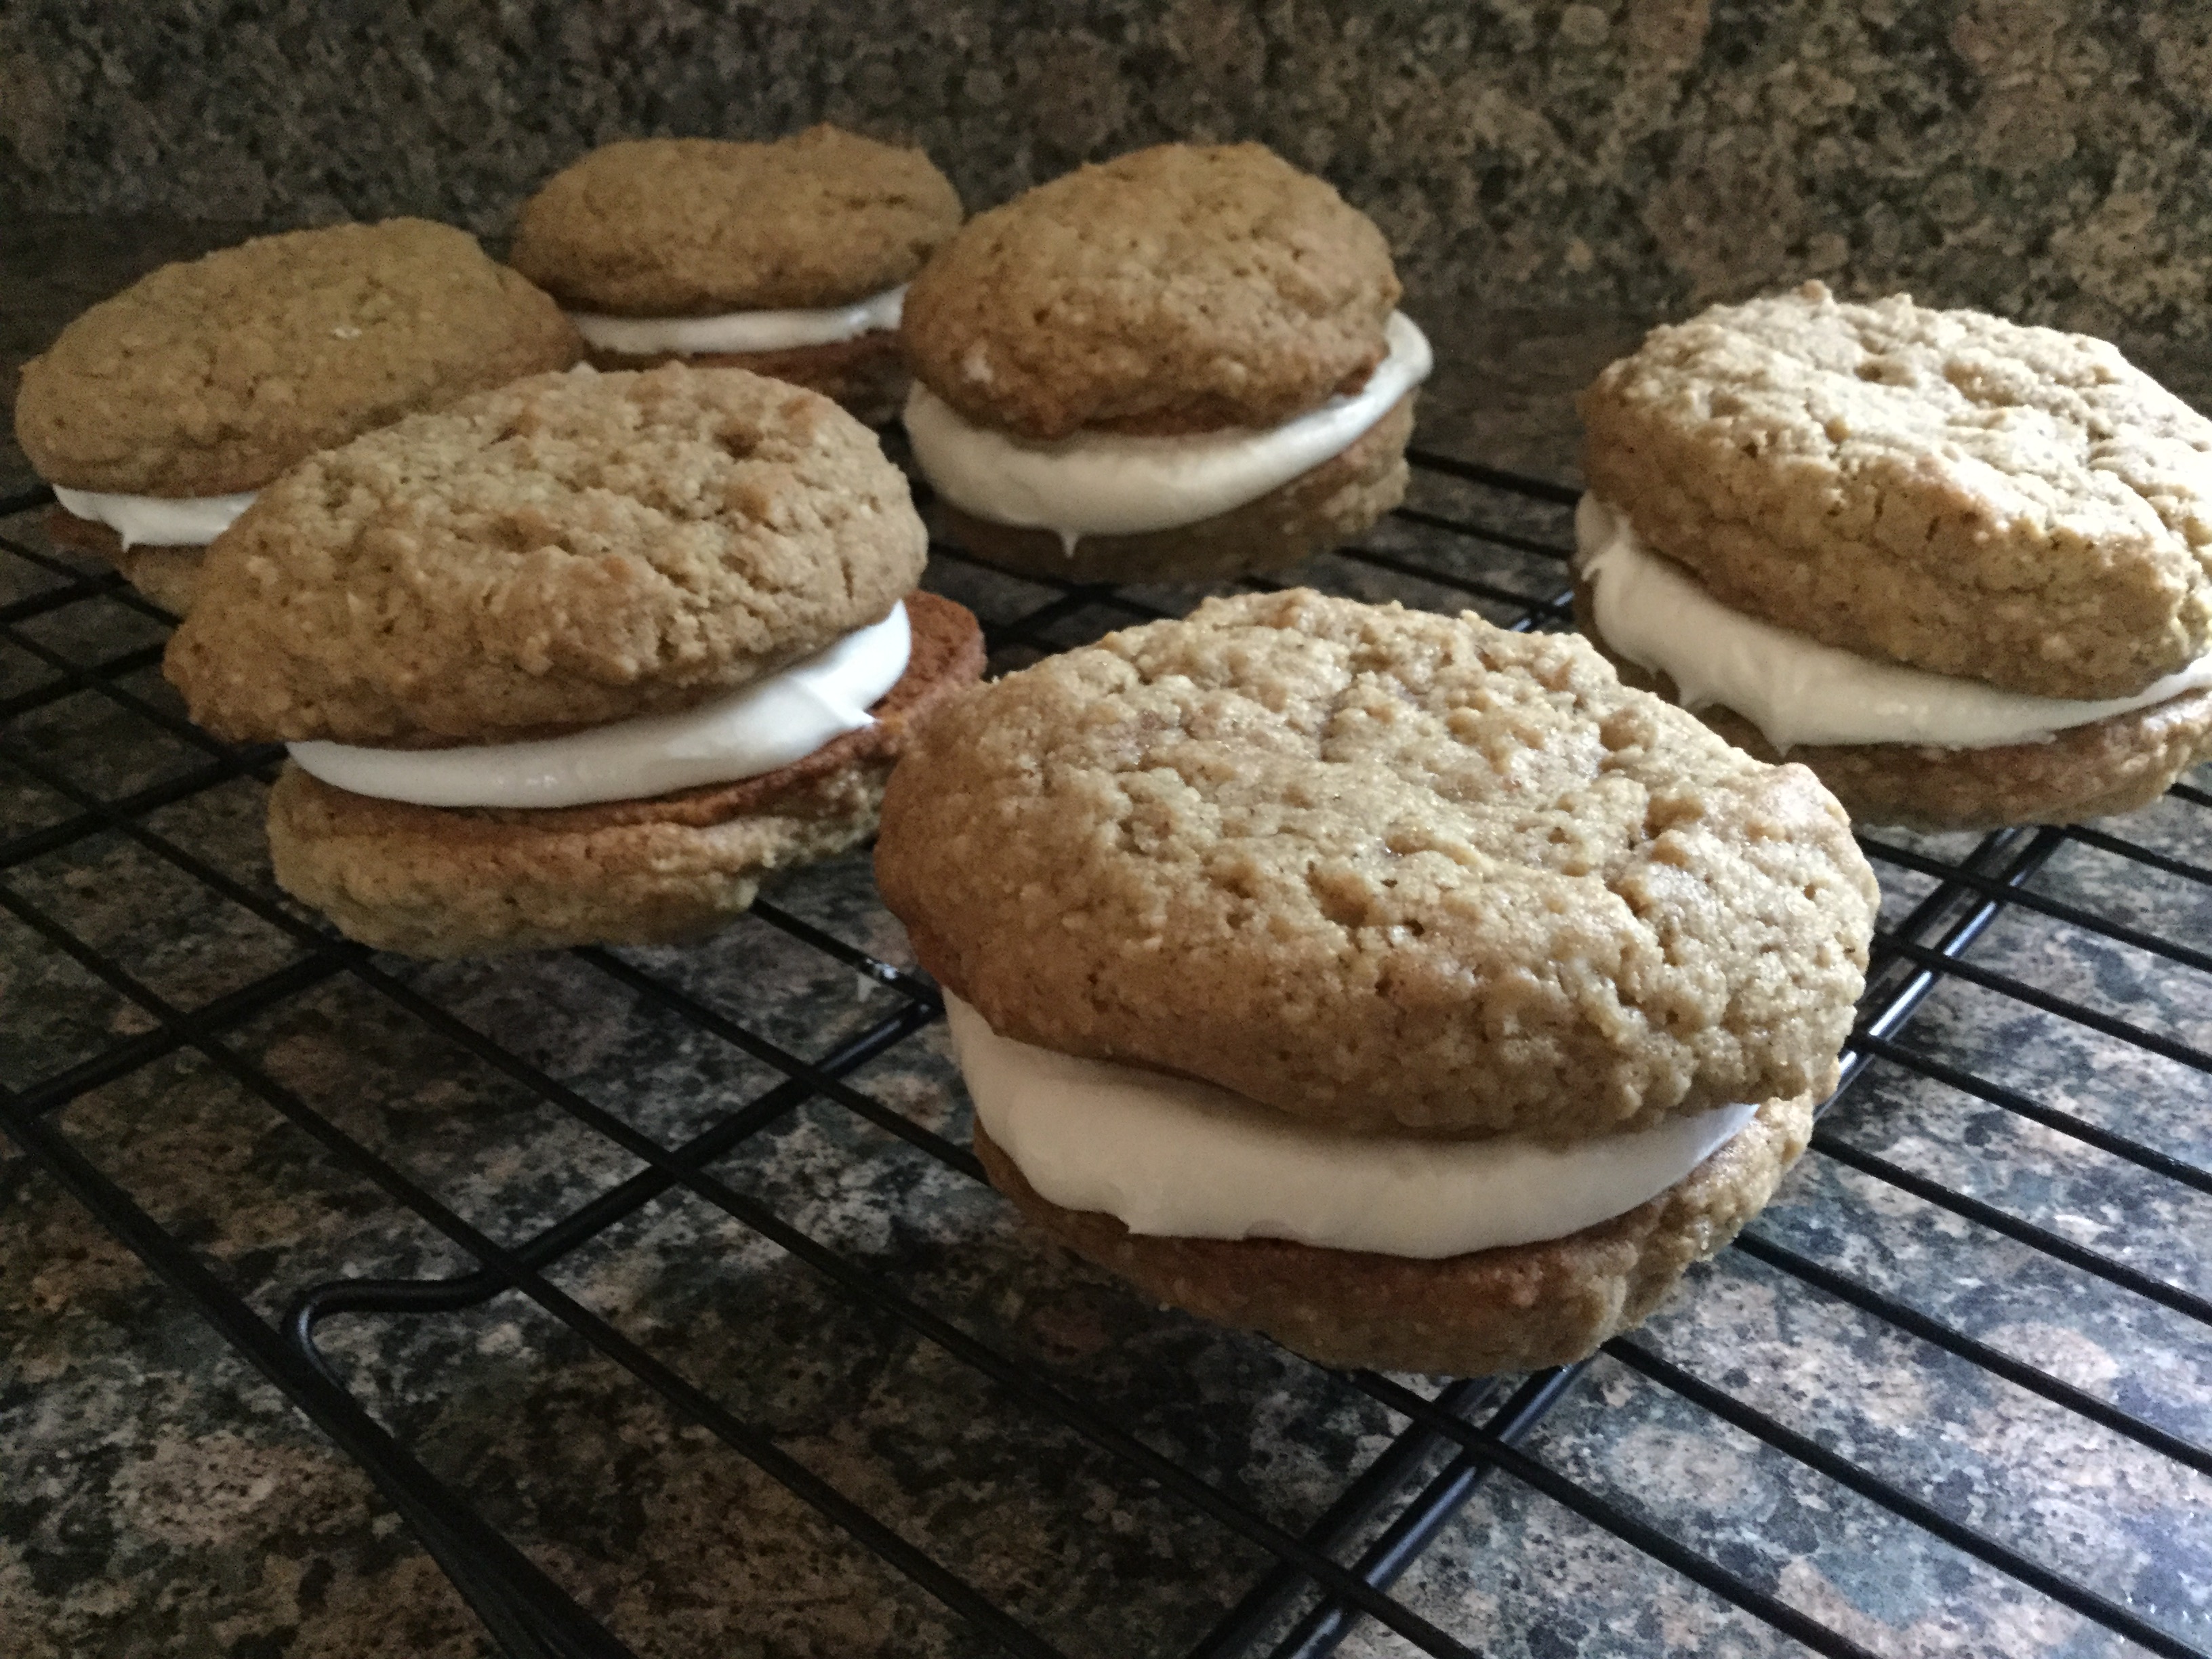
I did make some Banana Walnut Chocolate Chip Cookies and while they were good, they were a bit too cakey for my liking. And that brings me to the recipe I am sharing with you today… Malted Oatmeal Cream Pies, a la Little Debbie Oatmeal Cream Pies. Truth be told, I have never had a Little Debbie Oatmeal Cream Pie, but, when I saw this in an issue of Food Network Magazine last year (yes, it’s taken me that long to finally make them) I knew I wanted to try them.

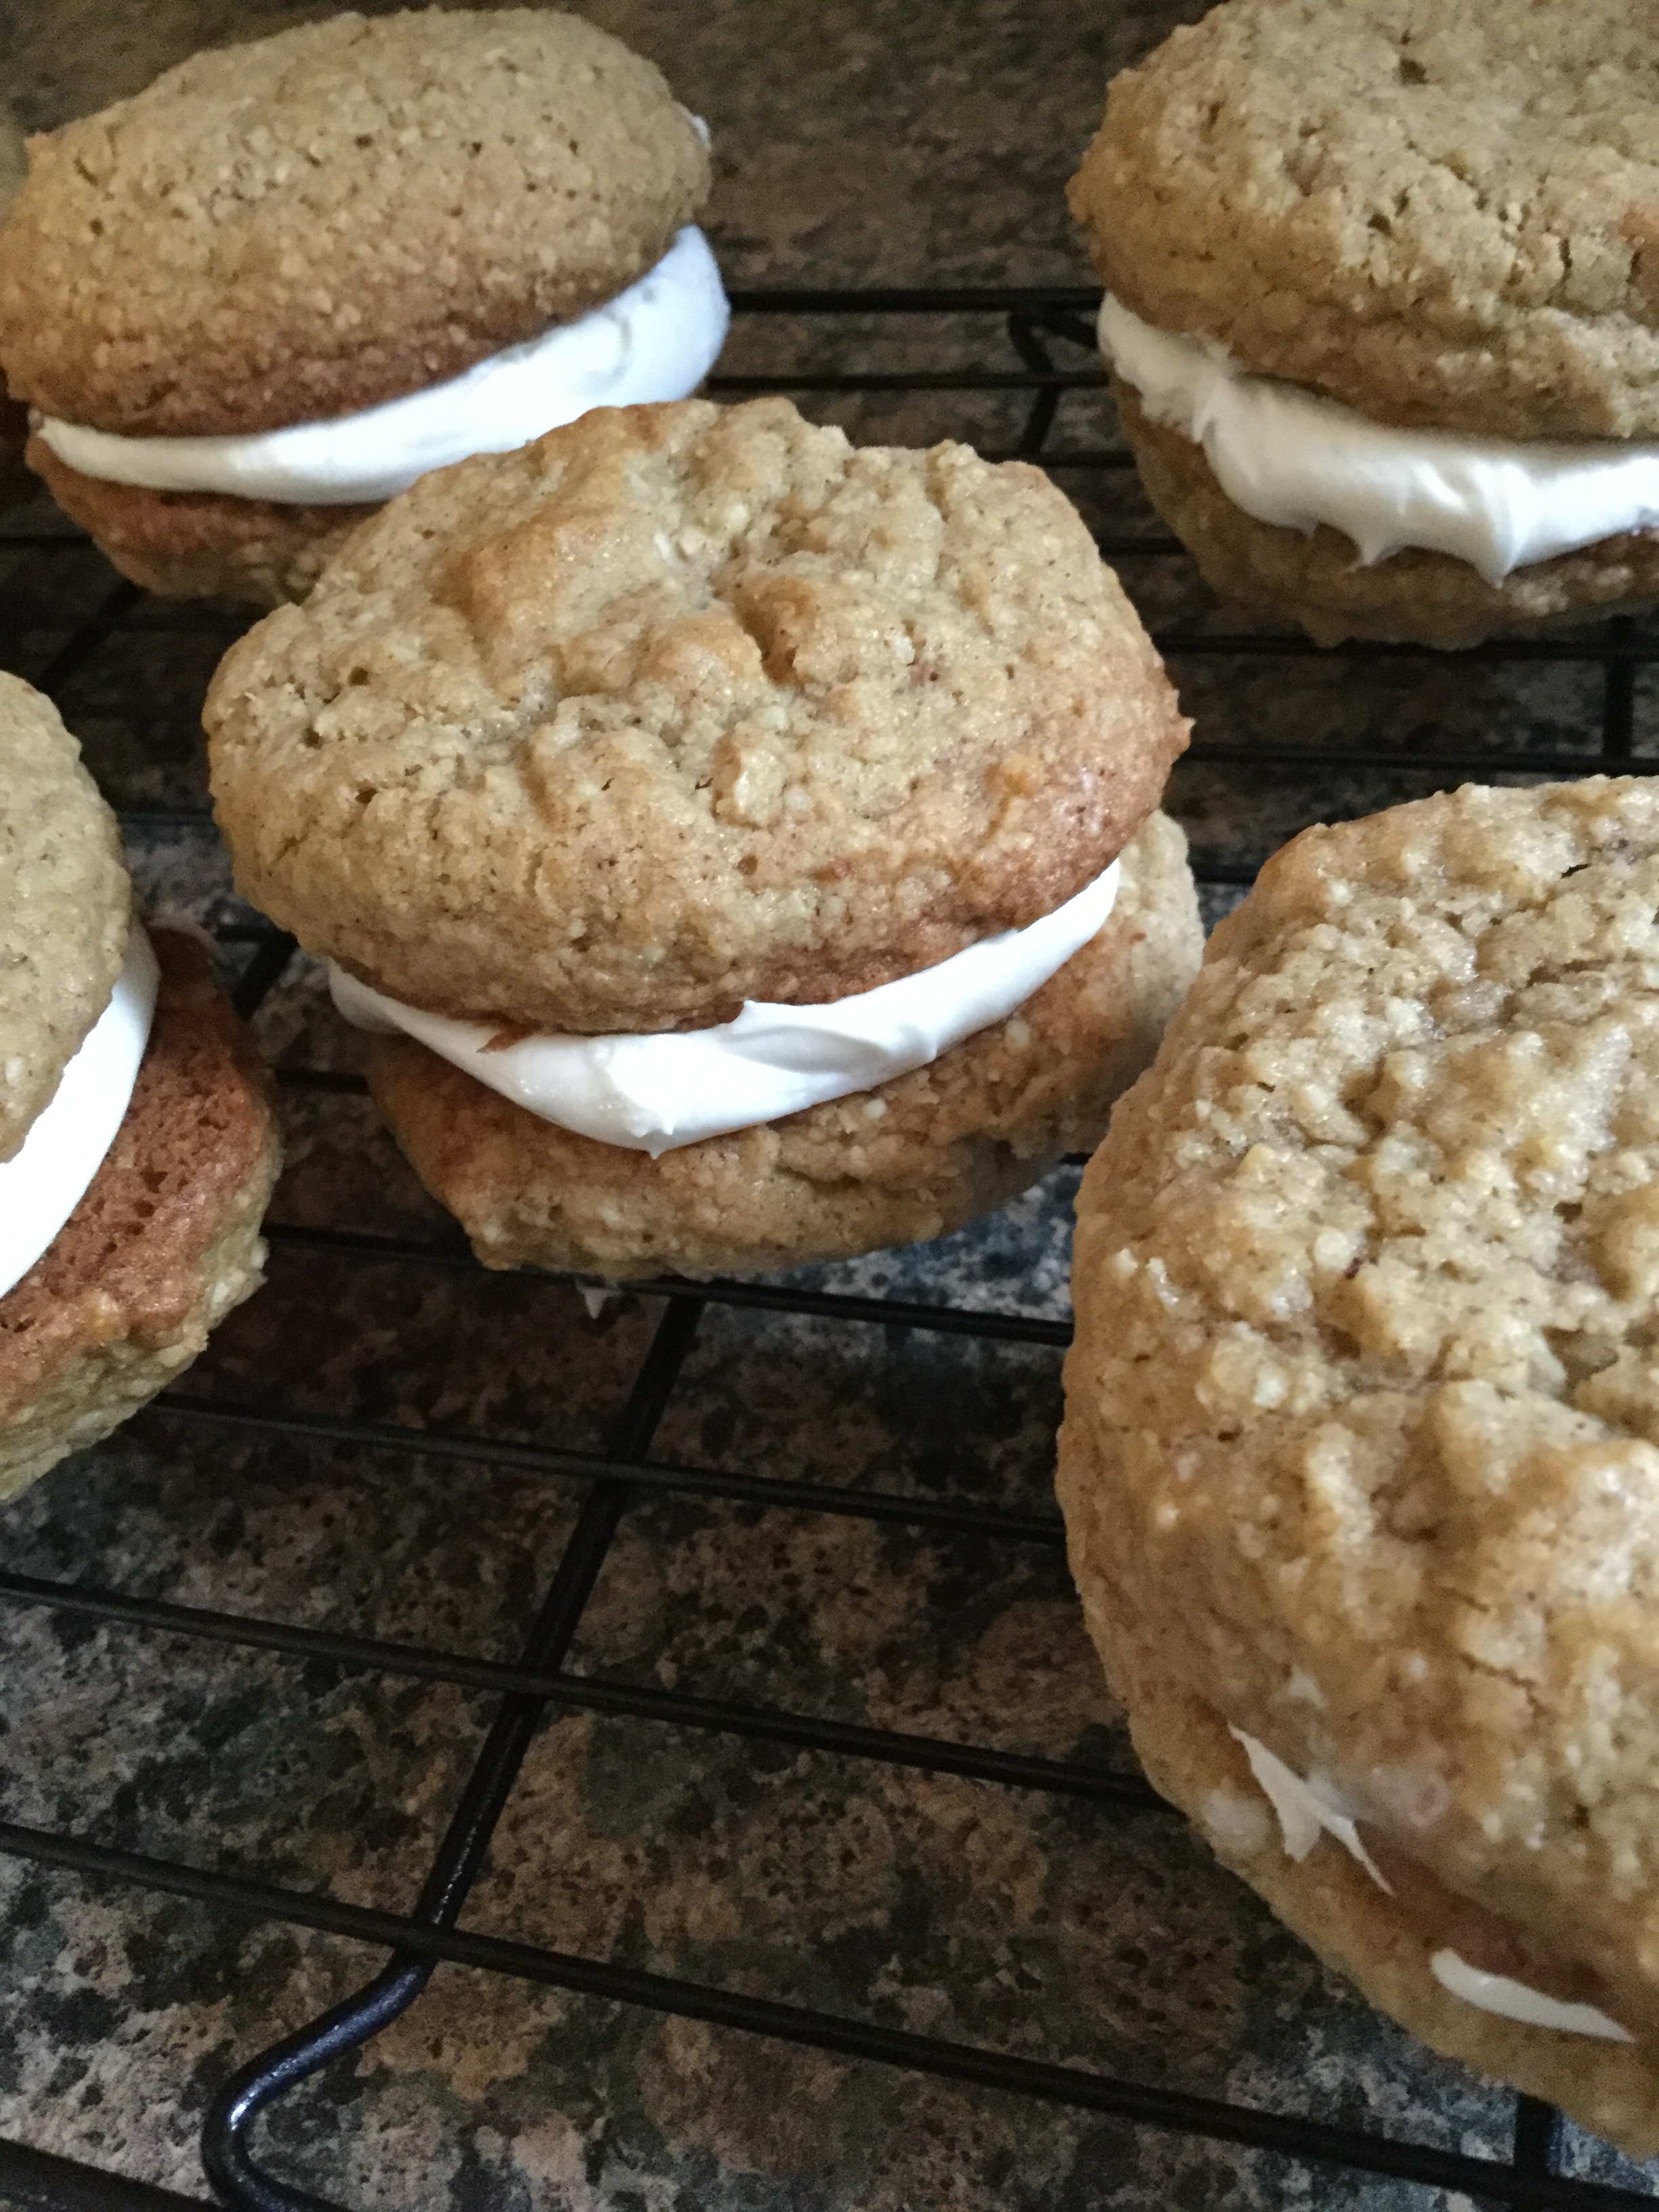
One of the things I liked about this recipe is that you got the oatmeal texture of the cookie without the actual pieces of oatmeal because the recipe calls for you to pulse the oatmeal along with almonds. I think the next time I make a batch of oatmeal cookies I will try that out. What I didn’t like… The size of the pies. The recipe called for the dough to be scooped out in 1/4-cup balls, a little too much for my liking especially since the cookies were pretty thick. I think next time I make these I will keep them on the smaller size, maybe just use a cookie scoop. The cream part though was delish and I wouldn’t change a thing about it.


Malted Oatmeal Cream Pies

Ingredients:

For the Cookies:

1 1/2 cups flour

1 tablespoon malted milk powder

1 teaspoon baking soda

1 teaspoon cinnamon

1/2 teaspoon salt

3 cups old-fashioned oats

1/2 cup sliced almonds

2 sticks unsalted butter, at room temperature

3/4 cup dark brown sugar

1/2 cup sugar

2 large eggs

1 teaspoon pure vanilla extract


For the Filling:

5 tablespoons butter, at room temperature

2 cups confectioners’ sugar

1 tablespoon malted milk powder

2 tablespoons whole milk

1/4 teaspoon pure vanilla extract


Directions:

Begin by making the cookies. Whisk the flour, malted milk powder, baking soda, cinnamon and salt in a medium bowl and set aside. In the bowl of a food processor, pulse together the oats and almonds until coarsely ground, set aside.

In a large bowl (or using a stand mixer) beat the butter and both sugars on medium speed until light and fluffy. Add the eggs, one at a time, then beat in the vanilla. With the mixer on low, add in the flour mixture until just combined and then add in the oat mixture and beat until just combined.

Line 2 baking sheets with parchment paper. Scoop 1/4-cup balls of dough and place on the prepared sheets about 2 inches apart. Freeze until firm.

Preheat the oven to 350 degrees and bake the cookies until just golden and crisp around the edges, about 15 to 17 minutes. Let cool on the sheets for 5 minutes and then transfer to a wire rack to cool completely.

Make the filling. In a large bowl beat the butter, confectioners’ sugar and, malted powder on medium speed until well combined. Reduce the speed to low and add in the milk and vanilla extract until just combined. Increase the speed to high and beat until light and fluffy. If the filling is too thick add more milk, too thin, add more confectioners’ sugar. Spread the filling on half of the cookies and then top with another and enjoy!

Recipe from Food Network

Zebra Cake

It’s one thing when a cake is appealing to the eye on the outside, but, when you cut into a cake and reveal a hidden surprise on the inside your eyes widen in wonder and delight. That’s the excitement behind a Piñata Cake. Who wouldn’t want to cut a slice of cake to only have sprinkles and candy come cascading out? A smile (and squeals from little one’s) is sure to follow. The same can be had when the cake itself reveals a pattern or design. Think of a Checkerboard Cake (Sorry for the pictures in both of those posts – Nighttime baking is not a blogger’s friend when it comes to taking pictures.)

I recently made a cake to celebrate a friend’s daughters (aka my nieces) dance recital performance – it was their first. Since I was making a cake for one of their birthdays the day before I didn’t want to make another chocolate cake for their recital celebration. And since I was making a themed cake for that birthday I also didn’t want to make a cake that I would have to heavily decorate – I was actually able to find doll-sized versions of their dancing shoes to top the cake with so I figured that was perfect enough decoration. So, I figured I should do something special with the inside. After a little thought I decided to make a zebra cake with a Nutella mousse filling since they both like the hazelnut spread.

To make things super easy I went with box cake mix – a yellow cake mix and a chocolate cake mix. I prepared both per the box directions. Whenever I use cake mix I normally use Duncan Hines. One of the reasons, and it will sound silly, is because it has a Wilton approved emblem on it. Truth be told though, Duncan Hines is perfect for making a zebra cake because they do not have pudding in the mix which can make the cake batter thick and not ideal for making this cake.

Once my batters were prepared, I poured a ¼ cup of the yellow cake batter in the center of two 8-inch cake pans that I sprayed with baking spray. Next, I poured a ¼ cup of the chocolate cake batter in the center of the yellow cake batter, and then a ¼ cup of the chocolate cake mix in the center of the previously poured yellow cake mix. I continued in this pattern until the pan was about 2/3 full. You won’t use all of the batters, but, just about.

I gently tapped the pans down and then baked them in a preheated 350 F oven for about 45 minutes, until a cake tester inserted in the middle came out clean. I let the cakes cool in the pans for about 15 minutes and then inverted them on cooling racks to cool completely.

One cooled, I torte the cakes to remove the dome that formed on both. The zebra pattern was instantly visible and I was quite excited that it worked.

The pattern was even more visible once the cake was layered and cut into.

You could really customize this cake. Use a white cake mix and tint it colors to show your team spirit, someone’s favorite colors or even a gender reveal cake.

And here’s a pic of the birthday cake I made the same weekend – An Elena of Avalor themed cake.

Strawberry Rhubarb Crumble

Crumbles are great for the warmer months. They can be made with pretty much any fruit, are super simple and pair well with a scoop of vanilla ice cream on top. Summer is an ideal time for cherry pie, blueberry pie and strawberry rhubarb pie… How about making one of those into a crumble? Today, I am bringing you just that… A Strawberry Rhubarb Crumble.

A little backstory on Rhubarb… You may think that rhubarb is related to celery because it pretty much just looks like red celery and that it is a fruit because it’s primarily used in dessert, but, both accounts are wrong. Rhubarb and celery while they may look alike are not part of the same family, and based on the theory that fruits have seeds, rhubarb is not a fruit. Rhubarb is used in baking because its tart flavor will not become overly sweet when added with sugar and other sweeteners. To me rhubarb tastes like an unripen apple. If you’re keen on tart flavors then raw rhubarb may be perfect for you, but, avoid eating its leaves as they contain high levels of oxalic acid which can cause kidney damage, granted, you would have to eat a pretty hefty amount, but even a small amount can make you sick so why take the chance. Anyhoo, back to the crumble.

I began by making the topping… I mixed flour, baking powder, granulated sugar, light brown sugar and lemon zest in a bowl. I then added in melted butter and stirred all of the ingredients together until it formed into clumps and then refrigerated it for 10 minutes.

In another bowl I made the filling by tossing together chopped rhubarb, quartered strawberries, lemon juice, granulated sugar, salt and to thicken the filling, cornstarch. I transferred this to a 9-inch deep dish pie plate and let it sit for 10 minutes.

Once everything had sat for its designated time I covered the fruit with the crumb topping…

And baked it in a 375 preheated oven for about 45 minutes. Until the filling was bubbly.

I let the crumble rest for a bit and then enjoyed some with what else, a scoop of vanilla ice cream.

If you’re looking for some more easy summer cakes to make check out the Dump Cakes I posted about a few years ago or the Apple Streusel Dump Cake I made for Thanksgiving last year.

And, if you happen to buy too much rhubarb and need another recipe to try out, check out these Rhubarb Cupcakes.

Strawberry Rhubarb Crumble

Ingredients:

For the Topping:

1 1/3 cups flour

1 teaspoon baking powder

3 tablespoons granulated sugar

3 tablespoons light brown sugar

Grated zest of 1 lemon

10 tablespoons unsalted butter, melted

For the Filling:

1 1/2 cups 1-inch pieced chopped rhubarb (about 3 stalks)

1 quart strawberries hulled and quartered (about 4 cups)

Juice of lemon

1/2 cup granulated sugar

3 tablespoons cornstarch

Pinch of salt

Vanilla ice cream for serving

Directions:

Preheat the oven to 375 F.

Make the topping: In a medium bowl combine the flour, baking powder, both sugars and the lemon zest. Add the melted butter and stir the mixture until it forms small and large clumps. Refrigerate for 10 minutes.

Make the filling: In a large bowl combine the rhubarb, strawberries, lemon juice, sugar, salt and cornstarch. Let rest for 10 minutes and then transfer to a 9-inch deep dish pie plate or a 9-inch square baking dish.

Top the filling evenly with the topping mixture and place the dish on a foil lined baking sheet. Bake until the topping is golden brown and the filling is bubbling, about 40 to 50 minutes.

Let the crumble rest for at least 15 minutes before enjoying.

Serve warm and store leftovers in the refrigerator.

Recipe from Food Network

Rainbow Cookie Donuts

Happy National Donut Day! In honor of the day I decided to make Rainbow Cookie Donuts.

If you do a Google search for Rainbow Cookie Donuts you normally see a rainbow cookie – the tri-color cookie separated by raspberry jam and then covered in chocolate – shaped like a donut. A bit much if you ask me. I really wanted to make one similar to the one a coworker brought me from a local donut shop by her – Honey Pig Donuts. Instead of the donut being layered the colors were marbled together.

I knew that my go-to Rainbow Cookie recipe wouldn’t be right for these cookies… It’s not light enough and I would end up with a donut that would be quite dense. I was going to try and tweak the recipe to get the right texture, but, then I came across a Rainbow Cookie Cake recipe that would be perfect, once I halved the recipe.

Once I made the batter I divided it in three and tinted each of them. I normally only tint the green and pink layer when I make the cookies, but, since I was making them in donut form I decided to tint the natural color layer with a bit of yellow so each part of the rainbow donut could stand out. Next, I transferred the batter to piping bags and snipped a small portion of the tip off and then piped the batter into donut pans that I sprayed with baking spray. I filled the cavities about 3/4 full and then baked them in a 350 F preheated oven for about 15 minutes.

After the donuts had cooled I melted a few tablespoons of seedless raspberry jam in a small saucepan over medium-low heat to melt it. Once melted I used a brush to brush the tops of the donuts with the melted jam.

While the jam settled I made the chocolate glaze. In a small saucepan over medium-low heat I combined chopped semisweet chocolate with heavy cream, vanilla extract and salt and stirred the mixture until it melted. Once melted and smooth I removed it from the heat and let it cool for about 5 minutes. I gave it a few more stirs and then dipped the tops of the donuts into the melted chocolate. After dipping them I placed them on a cooling rack that I set on a wax paper lined cookie sheet so the chocolate could set.

And there you have it… Rainbow Cookie Donuts. While I enjoy the cookie version, I really love the lightness of these donut versions. The almond flavor really shines through as opposed to the cookies where the raspberry jam flavor stands out more for me. Truth be told, the donuts are delicious on their own without the melted raspberry and chocolate glaze. I kept the sans raspberry and chocolate glaze version in an airtight container at room temperature for three days and they still tasted delicious and I kept the raspberry chocolate glaze versions in the fridge for a day or two longer and they still tasted good – I let them come to room temperature before enjoying.

Rainbow Cookie Donuts

Ingredients:

Donuts:

1 1/2 (12 tablespoons) unsalted butter, at room temperature

3/4 cups sugar

3 large eggs, at room temperature

7 oz. almond paste, grated

1/2 tablespoon almond extract

1/2 cup while milk

1 1/2 cups flour

1 1/2 teaspoons baking powder

red, green & yellow food coloring

Raspberry Glaze:

4-5 tablespoons seedless raspberry jam

Chocolate Glaze:

4 ounces semisweet chocolate, chopped

1/2 cup heavy cream

1 teaspoon vanilla extract

pinch of salt

Directions:

Spray two donut pans with baking spray and preheat the oven to 350 F degrees.

Using a hand mixer or a stand mixer, cream the butter and sugar together on medium speed until light and fluffy, about 5 minutes. Add the eggs and continue beating for a few more minutes until combined. Add in the grated almond paste, almond extract and milk and beat well until combined, making sure the almond paste is completely incorporated.

In a separate bowl sift together the flour and baking powder and gradually add it to the butter batter while mixing on low. Continue mixing until the two mixtures are well combined.

Divide the batter among three bowl and tint it with the food coloring. Transfer the batter to three piping bags and snip the ends off. You could also use Ziploc bags and snip one of the corners off. Pipe the batter into the cavities of the donut pan haphazardly to create a marbled effect. Fill the cavities about 3/4 full. Tap the pans down before placing the oven to even the batter down. Bake for about 12-15 minutes, or until a cake tester inserted comes out clean.

Let the donuts cool in the pans for a few minutes and then transfer to a wire rack to cool completely. Rinse and spray the pans again before piping in the next batch of batter.

Once the donuts have cooled, melt the raspberry in a small saucepan over medium-low heat, do not let it boil. Using a pastry brush, brush the tops of the donuts with the raspberry jam.

As the jam settles make the glaze by heating the chocolate, cream, vanilla and salt in a small saucepan over medium-low heat, stirring, until melted and smooth. Remove from the heat and let cool for 5 minutes. Give the mixture a few good stirs. Place a cooling rack on a wax-lined cookie sheet and then dip the tops of the donuts into the melted chocolate and place on the cooling rack so the chocolate can cool and set.

Recipe for Donuts adapted from Always Order Dessert

Ricotta Orange Pound Cake

I always have a container of ricotta cheese in my fridge just in case I want to make a baked ziti, a cheesecake or something or other. Unfortunately what ends up happening is, it sits in my fridge, I know it’s there, but I don’t get around to using it until it’s about to expire and then I’m scrambling to make something because I don’t want to throw it out. When this recently happened I decided to make something I made a few years ago, but didn’t come out quite right the first time… a Ricotta Orange Pound Cake. This cake has a nice orange taste and is quite moist thanks to the ricotta cheese.

Ricotta Orange Pound Cake

Ingredients:

1 1/2 sticks unsalted butter, at room temperature

1 1/2 cups cake flour*

2 1/2 teaspoons baking powder

1 teaspoon kosher salt

1 1/2 cups whole-milk ricotta cheese

1 1/2 cups plus 1 tablespoon sugar

3 large eggs

1 teaspoon pure vanilla extract

1 orange, zested

2 tablespoons amaretto

*If you don’t have cake flour, use this method to substitute with all-purpose flour and cornstarch.

Directions:

Preheat the oven to 350 F. Grease a loaf pan with butter, or spray with cooking spray.

In a medium bowl combine the flour, baking powder and salt. Stir to blend.

With a mixer, cream together the ricotta cheese, butter, and sugar until light and fluffy. Add the eggs, one at a time, beating well after adding each one. Add the vanilla, zest and amaretto and beat until well combined. Add the dry ingredients, a little at a time, and mix until just incorporated.

Pour the batter into the prepared pan and bake until a cake tester or toothpick inserted in the middle comes out clean and the cake pulls away from the sides of the pan, about 45 to 50 minutes. If you find you need to bake it a little longer, you may want to lower the temperature of the oven to ensure that you don’t burn the cake. Let the cake cool in the pan for 10 minutes and then transfer to a wire rack to cool completely.

Recipe from Food Network

Slow Cooker Sunday: Sour Cream Cheesecake

So, last week I brought you a Chocolate Chip Cheesecake made in my slow cooker and this week I am bringing you a Sour Cream Cheesecake. The recipes are quite similar, but, I actually preferred this cheesecake a little more. As I mentioned last week, I wasn’t too keen on the chocolate chips in the cheesecake.

I began by making a graham cracker crust. I pressed the crumbs onto the bottom and slightly up the sides of a 6-inch springform pan. Next I made the filling by beating together the ingredients for the cheesecake. Quick not, the recipe called for almond extract, but, if you are not a fan of almond extract feel free to substitute vanilla extract in its place. After making the batter I poured it into my prepared pan and then placed the pan in my slow cooker on top of a rack and filled it with a 1/2 inch of water. After cooking it on high for 2 hours I turned my slow cooker off and let the cheesecake stay in the slow cooker covered for an hour.

Afterwards, I let the cheesecake cool completely on wire rack before placing in the refrigerator to chill before slicing and enjoying.

Slow Cooker Sour Cream Cheesecake

Ingredients:

3/4 cup graham cracker crumbs

2 1/2 tablespoons unsalted butter, melted

1/4 teaspoon cinnamon

2/3 cup plus 1 tablespoon sugar

Salt

12 ounces cream cheese, at room temperature

1 tablespoon flour

2 large eggs

1 teaspoon almond extract*

1 cup sour cream

*Can substitute vanilla extract if you prefer

Directions:

In a medium bowl mix the graham cracker crumbs, the melted butter, cinnamon, a tablespoon of sugar and a pinch of salt. Press the crumbs over the bottom and slightly up the sides of a 6-inch springform pan.

Using a stand mixer or a handheld mixer beat the cream cheese with the flour, remaining sugar, and a 1/4 teaspoon salt on medium-high speed until smooth, about 2 minutes. Add the eggs and almond extract and beat at medium speed until blended. Add the sour cream and beat until smooth. Pour into the prepared pan.

Place a rack inside the insert of your slow cooker and fill with a 1/2 inch of water. Place the pan on top of the rack and cover the slow cooker and cook on high for 2 hours. Turn the slow cooker off and keeping the lid on let the cheesecake cool inside of the slow cooker.

After an hour, remove the cheesecake and cool completely on a wire rack. Once cooled refrigerate at least four hours before serving.

Recipe from Food & Wine

Cookie Palooza – No Bake Peppermint Chocolate Cookies

I hope you’ve enjoyed this week of cookies. I’m ending Cookie Palooza 2017 with an easy no bake cookie that only requires three ingredients, four if you count the sprinkles… Peppermint Chocolate Wafers.

First ingredient… Melted semi-sweet chocolate. I melted the chocolate using a double-boiler. You could melt the chocolate in the microwave (which was always my preferred method,) but I find melting the chocolate in a double boiler minimizes the chance of scorching the chocolate and you can keep it warm while you’re working so it will stay smooth and thin. Whereas when you melt it in the microwave after a few minutes the chocolate begins to thicken. Creating a double boiler is quite simple… fill a medium saucepan about a little less than halfway with water – you don’t want to fill it too much because then when you place the bowl in the water it will spill over. Bring the water to a boil and then reduce the heat so the water is simmering. Place a heatproof bowl in the water, add chopped chocolate and stir occasionally until the chocolate has melted. Once the chocolate has melted, reduce the flame to low to keep the chocolate warm and add in the peppermint extract (the second ingredient), stir to mix in.

Dip the Nilla Wafers (third ingredient) in the chocolate and flip them over to get them fully covered. The process will go much easier if you have candy dipping tools, but if not a fork will work well. Once cookies are covered lift the cookies out of the chocolate and let the excess drip and then place them on a wax paper lined baking sheet and sprinkle them with festive sprinkles or crushed peppermint candy/candy canes (fourth ingredient.)


Once you are done dipping the cookies place them in the refrigerator for about 10-15 minutes so the chocolate can harden.

And that’s it! A simple cookie that’s perfect for the season and best of all, doesn’t require you to turn on your oven.

Happy Holidays!!!

Peppermint Chocolate Dipped Cookies

Ingredients:

8 oz. semi-sweet chocolate, chopped*

1/2 teaspoon peppermint extract

30 – 36 Nilla Wafer cookies

Sprinkles, optional

Directions:

Melt the chocolate using a double boiler on medium to medium low heat. Once the chocolate has melted add the peppermint extract and stir well to combine. Keep the heat on low for the double boiler so that the chocolate will remain smooth and thin.

Dip the wafers in the chocolate one at a time, making sure to coat the entire cookie. Remove from the chocolate and let the excess drip off before placing on a wax paper lined baking sheet to set.

Sprinkle with sprinkles or crushed peppermint candy. Or let the chocolate set for a few minutes and then drizzle with the left-over melted chocolate. Place in the refrigerator so the chocolate can harden. Store in an airtight container.

*You could also use chocolate chips

**The ratio of peppermint extract to chocolate I used was 1/4 teaspoon per 4 oz.

Cookie Palooza – Lemon Ricotta Cookies

Lemon Ricotta… A flavor combination I first had in the form of pancakes and was instantly hooked so when I saw a cookie recipe using the two I knew I had to try it. A few things to note, these cookies are soft, almost cake-like. They kind of remind me of muffies – aka the top of a muffin. And while I am not one for glazes, I usually leave my baked good unglazed when a recipe calls for it, these cookies definitely need the glaze. Not because they are not delish without it – I tried one before glazing and it was good as is – but when I added the glaze the lemon flavor was kicked up a notch, but, not to the point that it was overbearing.

Lemon Ricotta Cookies Lemon Glaze

  • Servings: 40 cookies
  • Print

Ingredients

2 1/2 cups flour

1 teaspoon baking powder

1 teaspoon salt

1 stick unsalted butter, softened

2 cups sugar

2 eggs

1 15 oz. container whole milk ricotta cheese

3 tablespoons fresh lemon juice (juice of 1 lemon)

1 lemon, zested


Glaze:

1 1/2 cups confectioners’ sugar

3 tablespoons fresh lemon juice

1 lemon, zested


Directions:

Preheat the oven to 375F.

In medium bowl combine the flour, baking powder and salt. Set aside.

In a large bowl combine the butter and sugar. Beat on medium speed until light and fluffy, about 3 minutes. Add the eggs 1 at a time, beat the mixture well so all of the ingredients are incorporate.

Add the ricotta cheese, lemon juice & zest. Beat to combine and then stir in the dry ingredients (the flour mixture.)

Line baking sheets with parchment paper. Spoon the dough – about 2 tablespoons for each cookie – onto the baking sheets. Bake for about 15 minutes, until the edges of the cookies are golden. Remove from the oven and the cookies cool on the baking sheets for 20 minutes.

During the 20 minutes make the glaze: Combine the all of the ingredients in a small bowl and stir until smooth. Spoon about 1/2 teaspoon onto each cookie and use the back of the spoon to smooth the glaze over the cookie. Let the cookies sit for 2 hours so the glaze can harden.

Recipe from Food Network

Cookie Palooza: Dulce De Leche Thumbprint Cookies

Cookie Palooza continues today with these Dulce De Leche Thumbprint Cookies. Thumbprint cookies offer a delicious double-punch… The cookie itself is great and the filling adds additional flavor to it. Not a fan of dulce de leche, try these with your favorite jam or a chocolate filling.

Dulce De Leche Thumbprint Cookies

  • Servings: 36 cookies
  • Print

Ingredients:

1 cup (2 sticks) unsalted butter, at room temperature

2/3 cup granulated sugar

1 large egg yolk

1 teaspoon vanilla extract

2 1/4 cups all-purpose flour

1/2 teaspoon kosher salt

6 oz. dulce de leche


Directions:

Preheat the oven to 375 F. Line two baking sheets with parchment paper.

Beat together the butter and sugar until light and fluffy, on medium-high speed. Beat in the egg yolk and vanilla extract. Add in the flour and salt and mix until well-blended and dough comes together in a ball.

Form the dough into 1-inch balls and arrange on the prepared baking sheet. Flatten the balls with the palm of your hand and then using a 1/2 teaspoon or your thumb make an indentation in the center of each cookie. Bake for 8 to 10 minutes.

Remove the pan from the oven and gently press the indentation once again to redefine it. Fill each indentation with about 1/2 teaspoon of dulce de leche and return to the oven for 3 minutes. Transfer the cookies to a wire rack to cool completely.

Recipe from Love and Olive Oil


Chocolate Cream Pie

How was your Thanksgiving? Have you eaten the last of your leftovers? At some point were you suffering from a food coma? Mine was good. I was in charge of dessert, and along with a traditional pumpkin pie and the Brown Butter Vanilla Pear PieI posted a few weeks ago I also made an Apple Streusel Dump Cake (come back tomorrow for that recipe) and today’s Chocolate Cream Pie. This pie was a HIT! Not too sweet… The perfect amount of chocolate! The recipe yields more mascarpone whipped cream than needed, don’t toss it, enjoy it with some berries. Use it to top off some hot chocolate. Or, spread it in a thin layer, freeze it and then use small cookie cutters to cut it into shapes to use in lieu of marshmallows in your hot chocolate.

And here’s my trio of pies from Thanksgiving…


Chocolate Cream Pie

For the crust:

1 disk homemade or store-bought pie crust

4 ounces bittersweet chocolate, chopped

Flour, for dusting


For the Filling:

2 1/2 cups whole milk

4 ounces unsweetened chocolate, chopped

1 cup sugar

3 tablespoons cornstarch

2 tablespoons flour

3/4 teaspoon kosher salt

4 large egg yolks, lightly beaten

2 tablespoons unsalted butter

2 teaspoons vanilla extract


For the Whipped Cream

1/2 cup mascarpone cheese

5 tablespoons confectioners’ sugar

1 tablespoon vanilla extract

1 1/2 cups cold heavy cream

Shaved chocolate for decorating


Directions:

Make the crust: Preheat the oven to 375 F. Roll out the pie dough into a 12-inch round on a lightly floured surface then fit into a 9-inch pie plate. Fold the overhang dough under itself and crimp the edges. Place a piece of parchment paper inside the pie crust and fill with dried beans or pie weights and bake until the crust is starting to set and brown, about 20 minutes. Remove the parchment paper and the beans/weights and bake for another 5 minutes, until the crust is golden and crisp looking. Let it cool completely.

Melt the bittersweet chocolate in heatproof bowl over a saucepan of simmering water. Using a pastry brush, brush the inside of the pie crust with the melted chocolate in a thin layer, place in the refrigerator to harden.

Make the filling: Pour 2 cups of the milk into a heatproof bowl and set over the pan of simmering water. Heat the milk until it’s almost boiling. Add the unsweetened chocolate and stir until melted. Remove from the heat.

In a large bowl whisk the sugar, cornstarch, flour and salt. Whisk in the remaining 1/2 cup milk and then add this mixture to the hot chocolate milk mixture. Raise the heat of the simmering water to medium-high and return the chocolate mixture over the water. Whisk in the egg yolks and cook, whisking constantly until the mixture is very thick. Remove from the heat and stir in the butter and vanilla until smooth. Let the filling cool slightly and then pour into the pie shell. Place a piece of plastic wrap directly on top of the surface of the filling and refrigerate until cold, at least three hours,

Before serving make the mascarpone whipped cream: Beat the mascarpone, sugar and vanilla extract in a large bowl with a mixer until creamy. Add the heavy cream and continue beating until it holds stiff peaks. Add the cream to a pastry bag fitted with a large star and pipe it on top of the pie. Sprinkle with shaved chocolate.

Recipe from Food Network