Día De Los Muertos Cupcakes

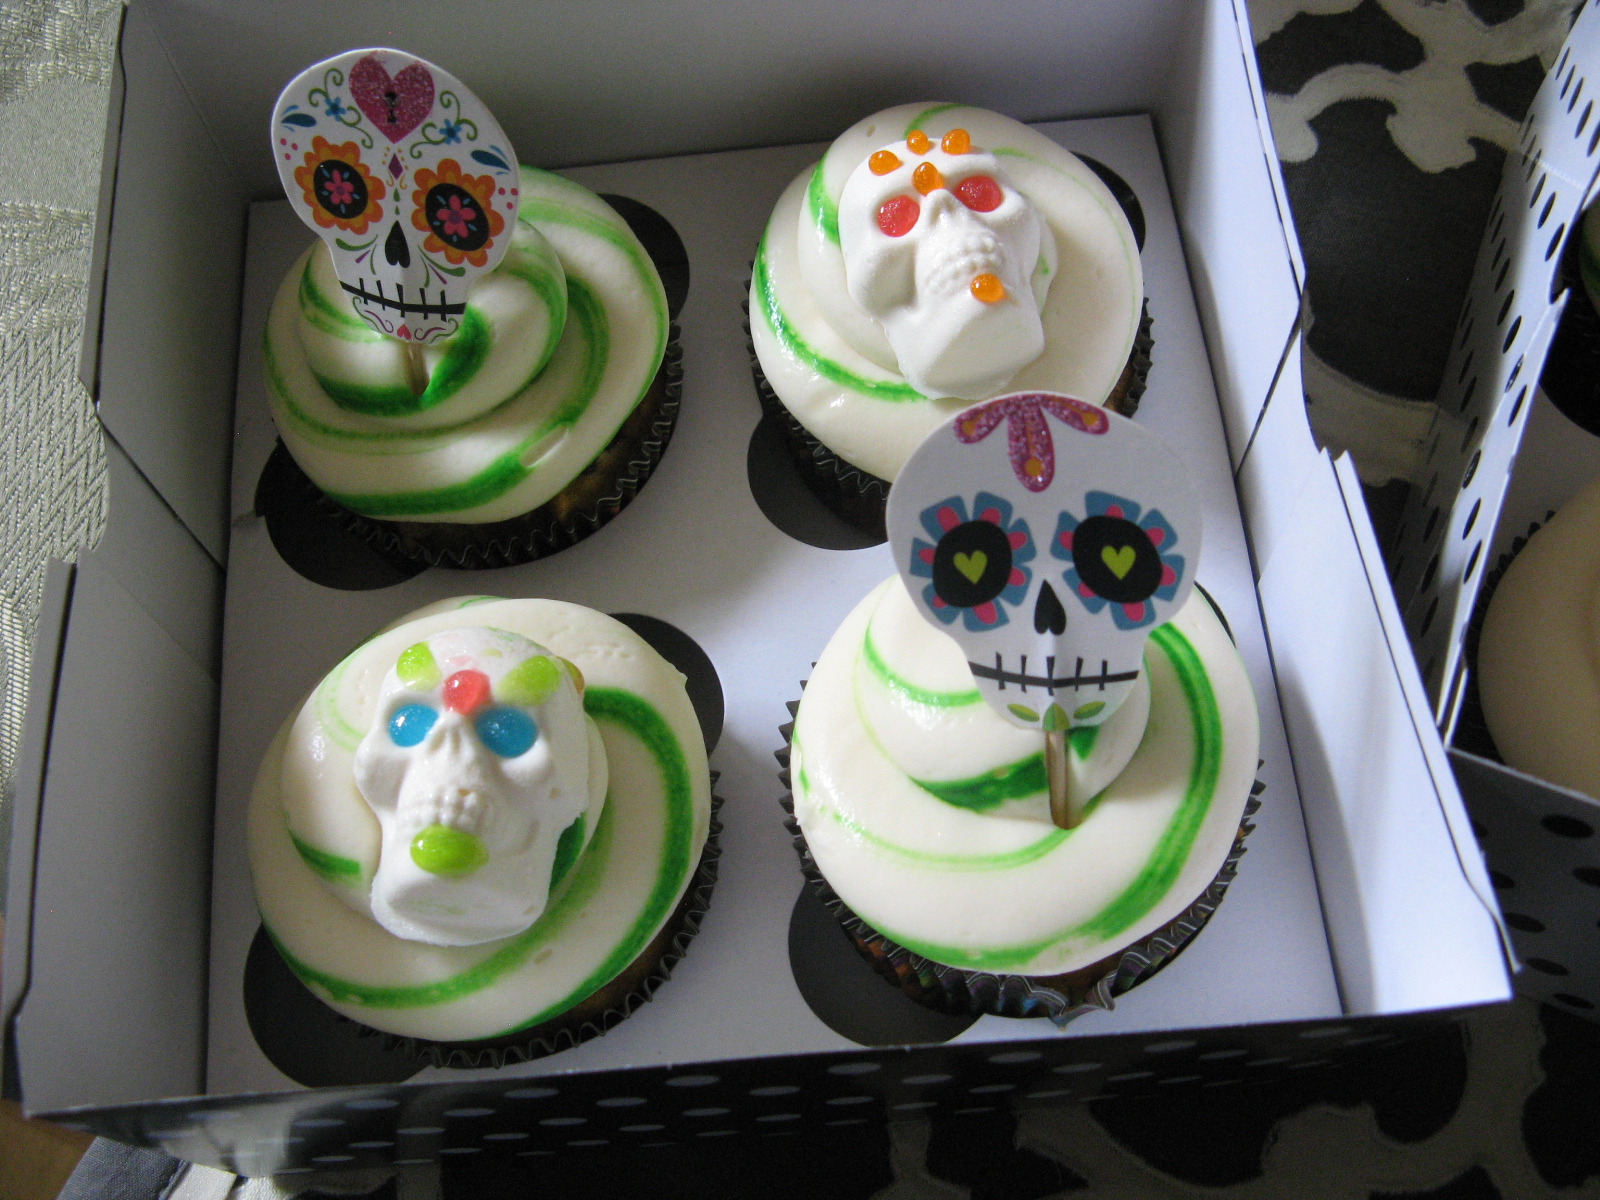
Happy Halloween! This year instead of a Halloween inspired treat I opted to go with a Día De Los Muertos (Day of the Dead) one instead. So, what is Día De Los Muertos you may ask? Well, it’s a three-day Mexican holiday where one remembers and celebrates friends and family members who have died. And while pumpkins and ghosts are symbolic of Halloween, sugar skulls are the symbol associated with this holiday. These are skulls that are colorfully decorated. The biggest difference I would say between the two holidays is how one celebrates death and the other fears death. With Día De Los Muertos people set-up altars to celebrate the dead, bring food and/or beverages, among other gifts, to their loved one’s grave site. While with Halloween, children wear masks and costumes as protection and jack-o-lanterns are meant to ward off evil spirits. So, whichever you choose to celebrate, or if you are among those who did not celebrate at all, I hope you have a wonderful day filled with candy! One of the reasons I decided to go with this theme was because I was giving these cupcakes as part of a birthday gift to a friend who really likes the décor of the holiday and she’s probably a bigger pumpkin spice fan than me.

img_0066

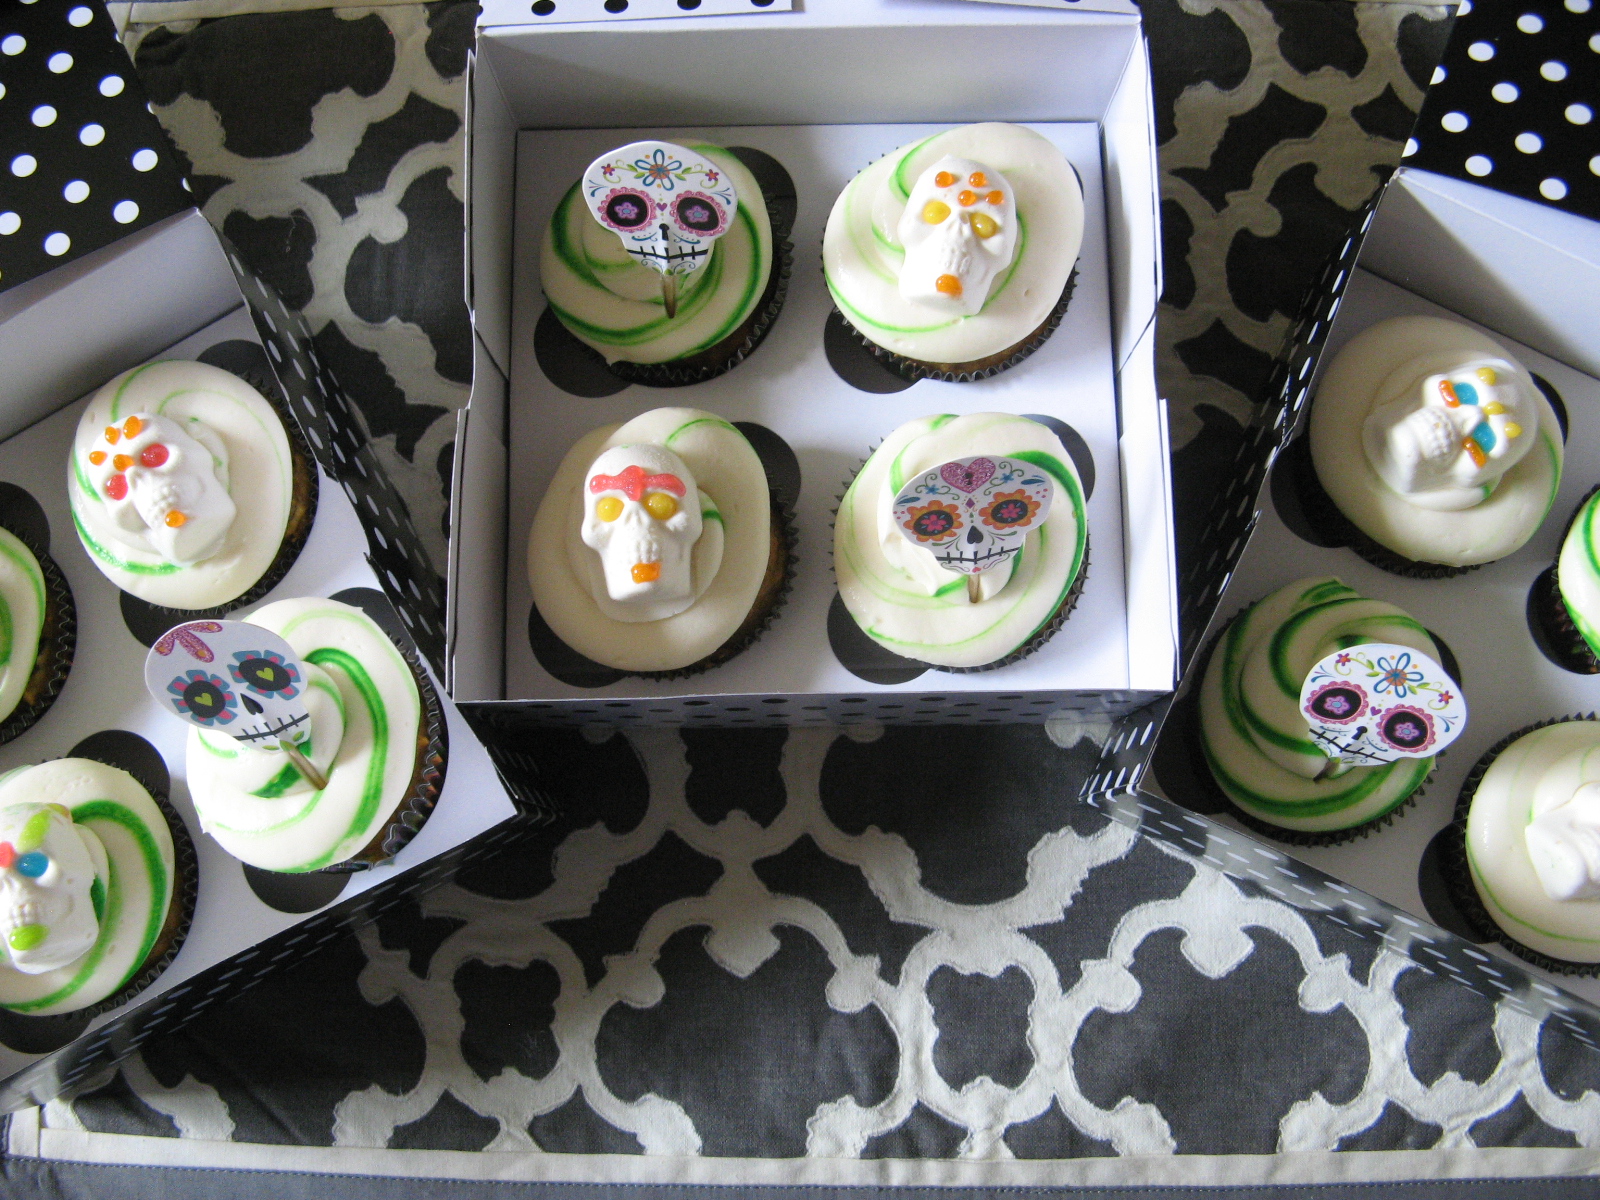
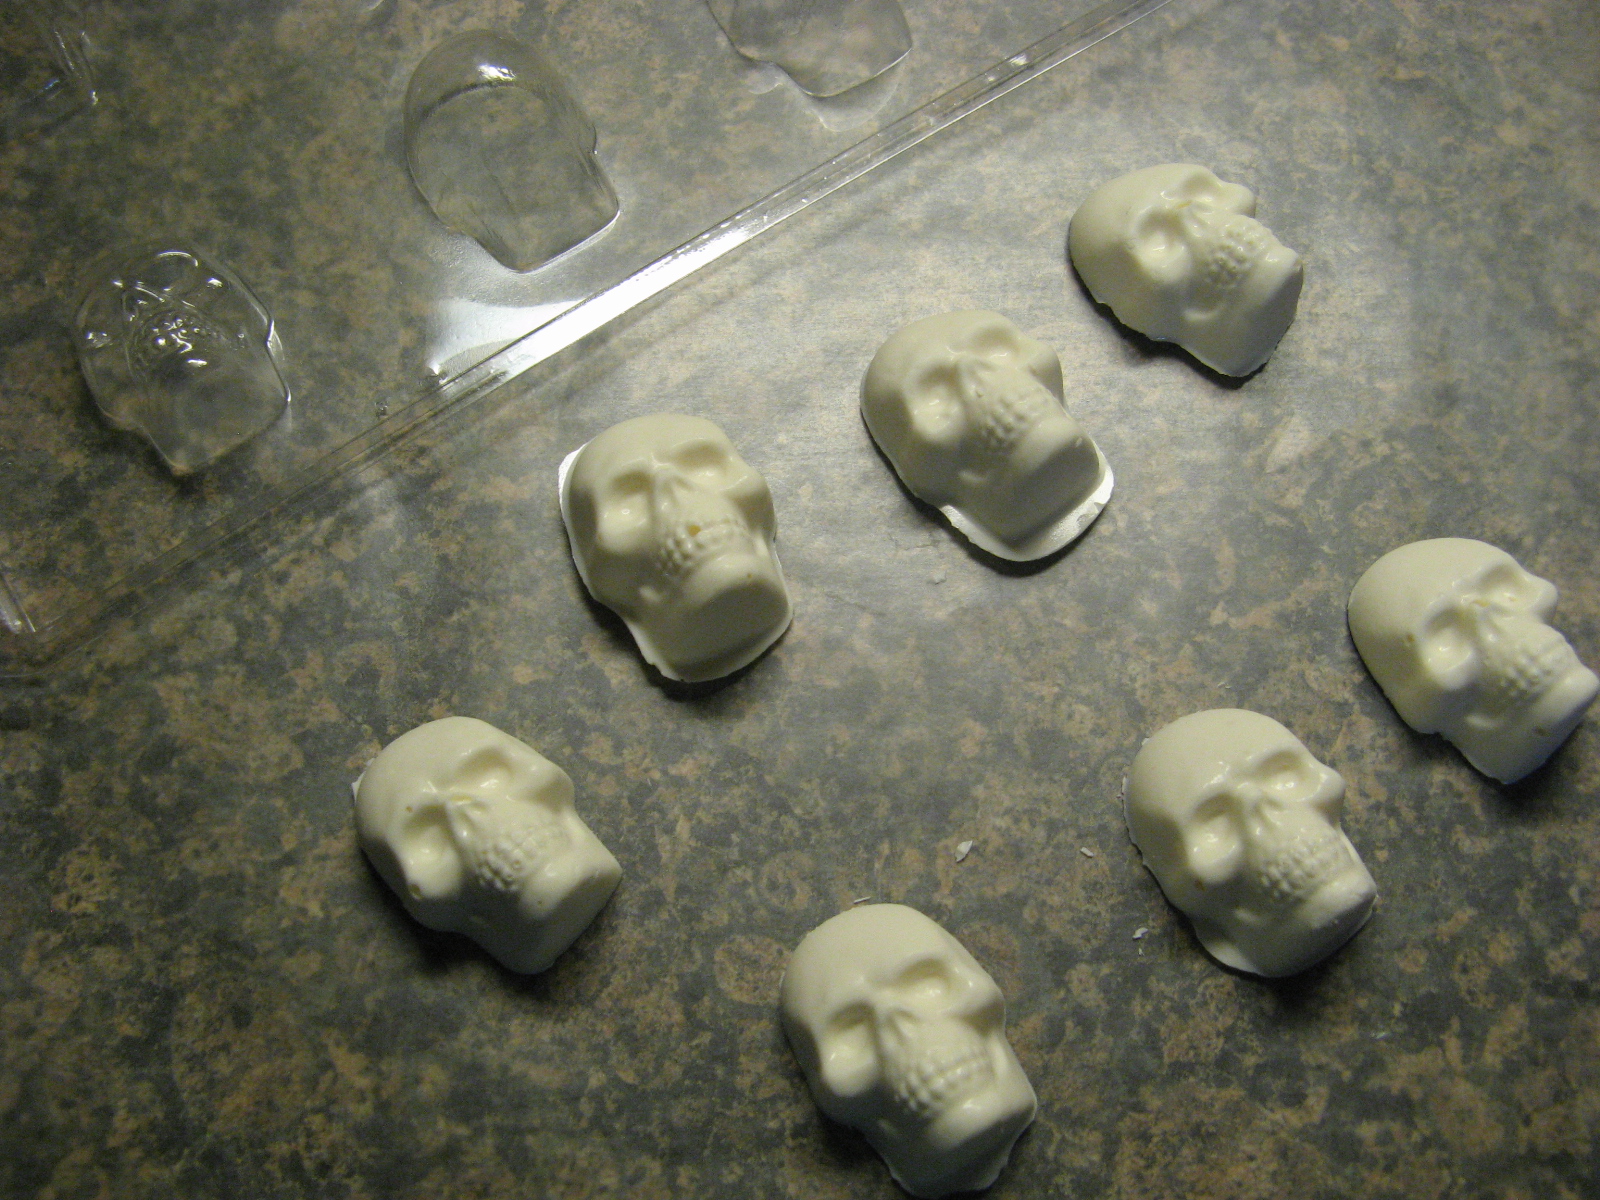
I began these cupcakes by making the sugar skull toppers. I melted Wilton White Candy Melts and poured them into skull molds and then placed them in the refrigerator so they could set.

img_0019

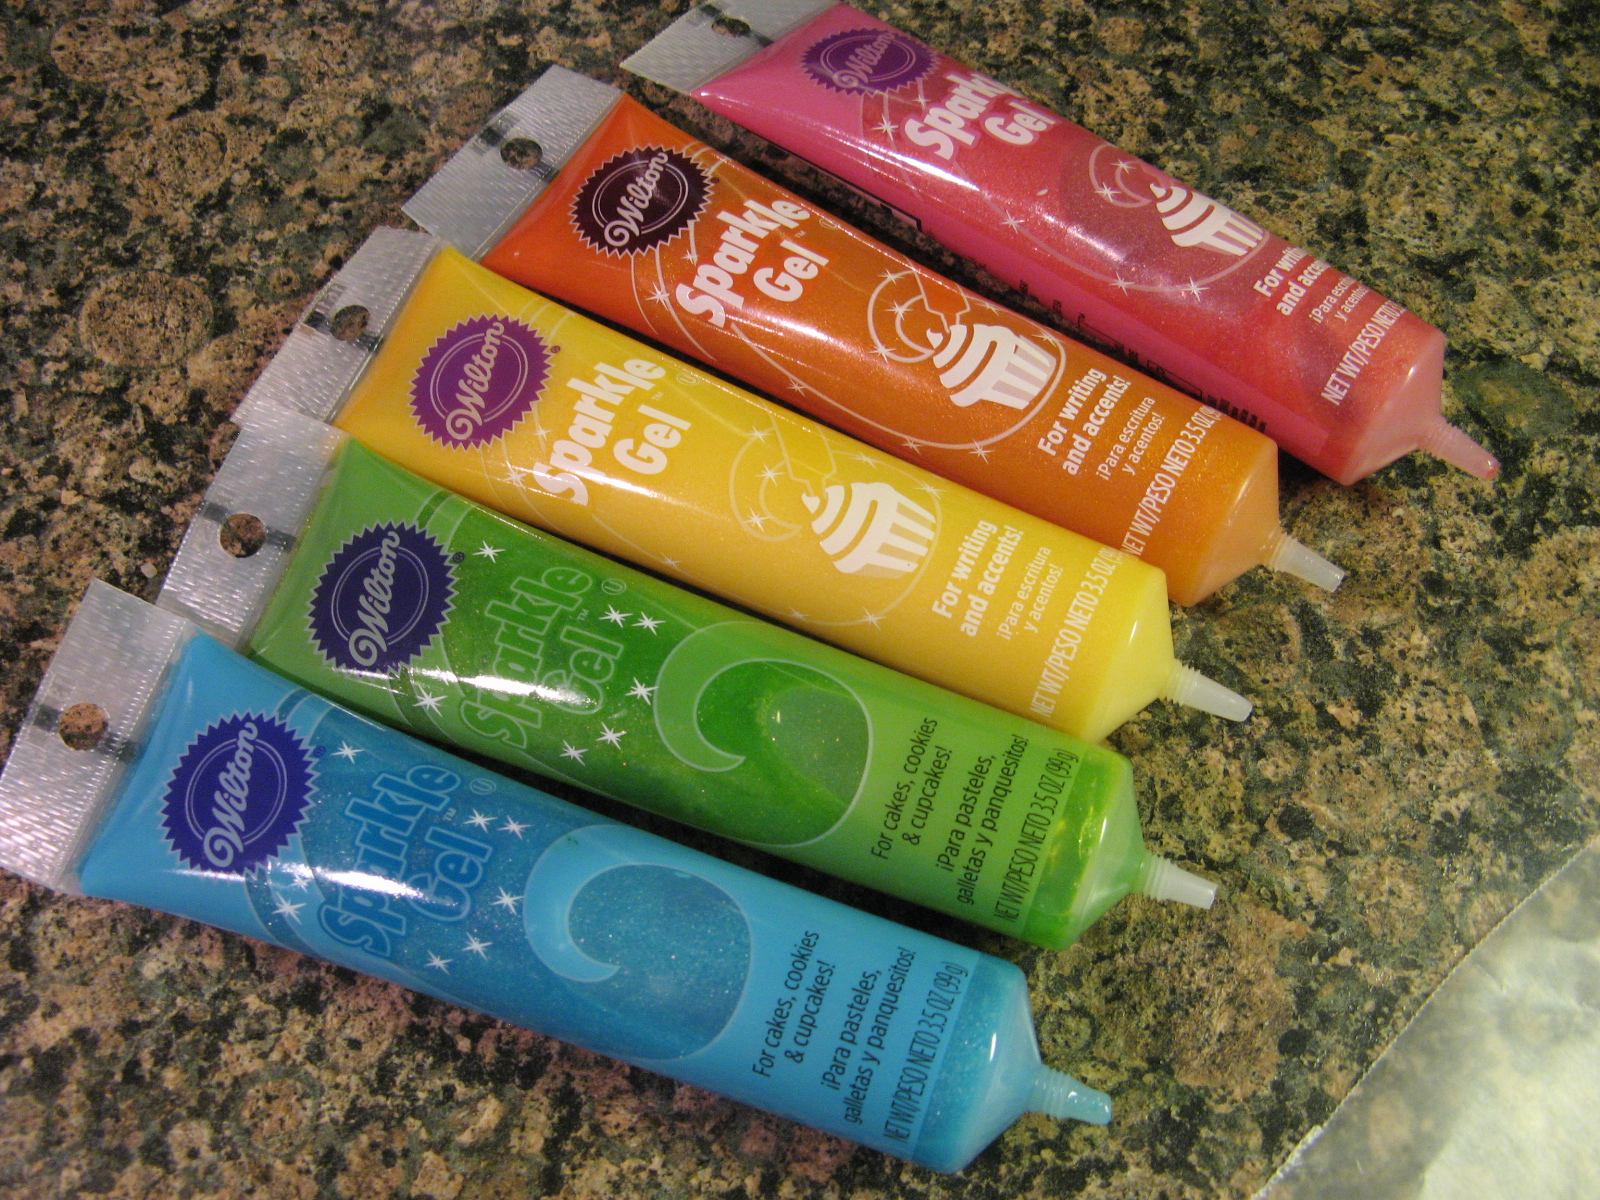
The following day using an array of sparkle gel…

img_0023

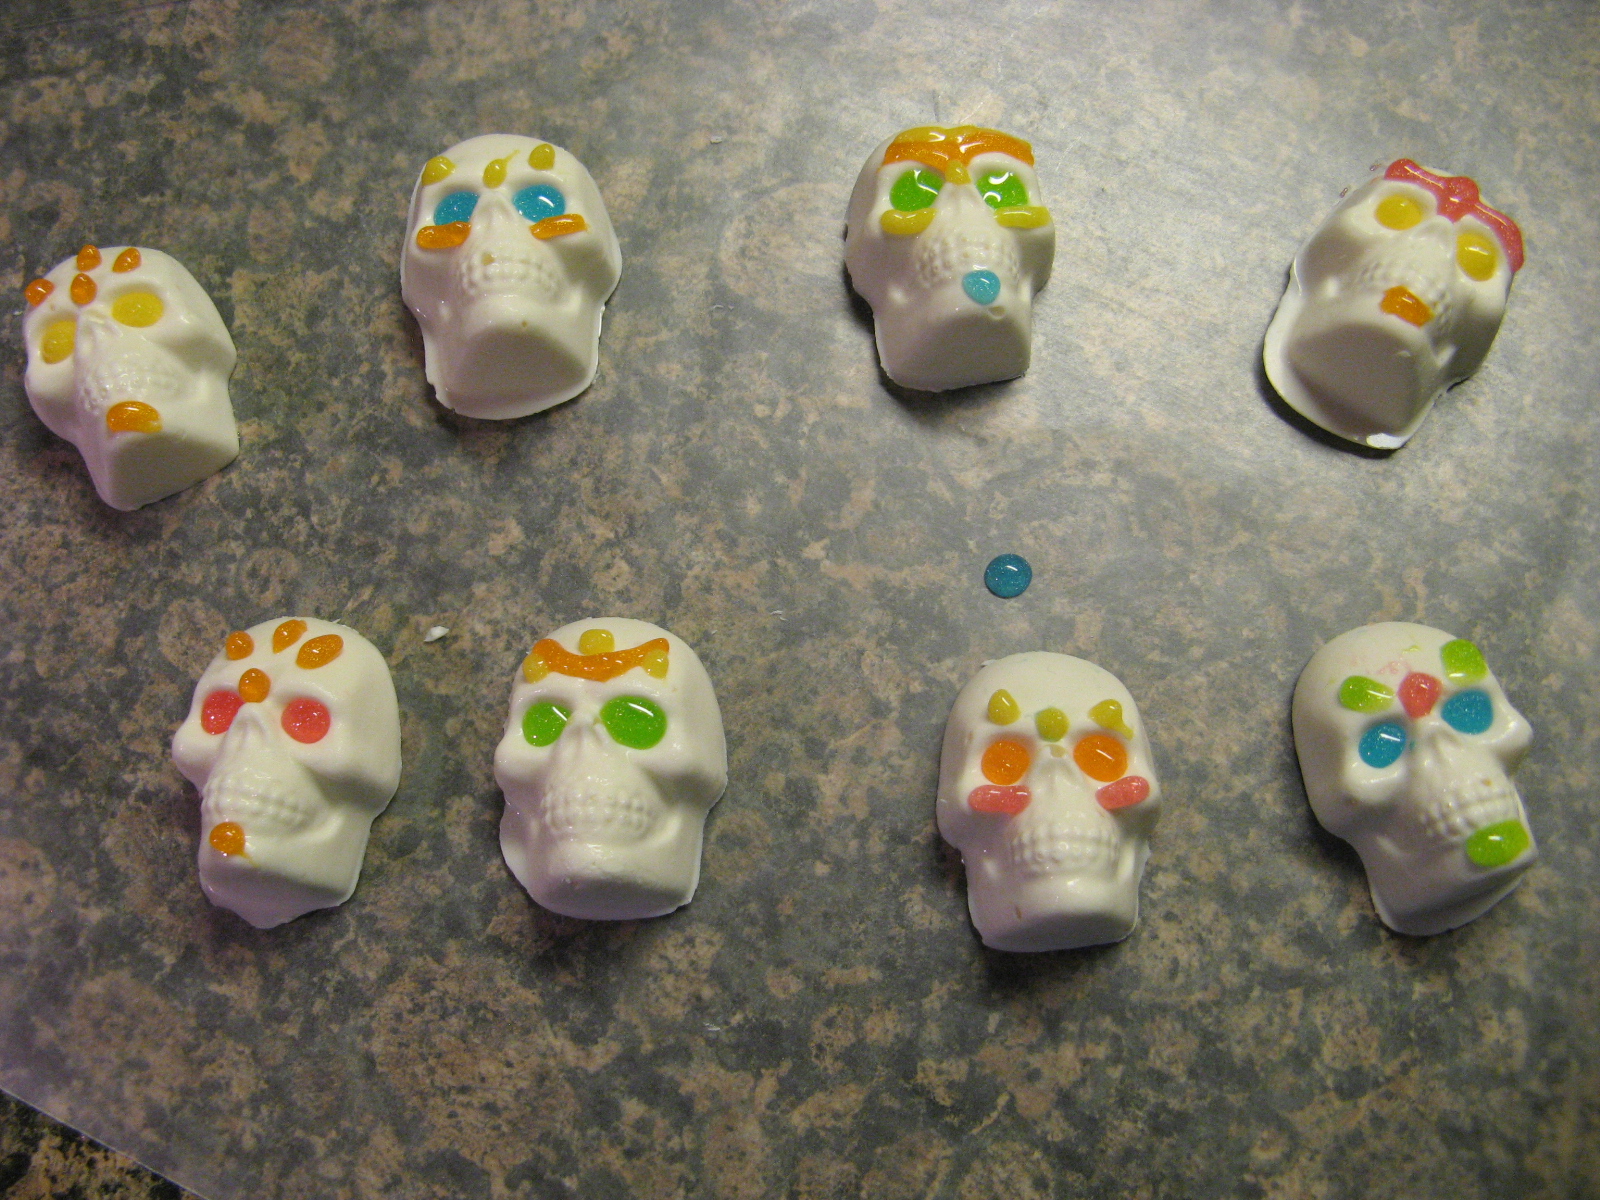
I decorated the skulls to mimic sugar skulls and then placed them back in the refrigerator.

img_0026

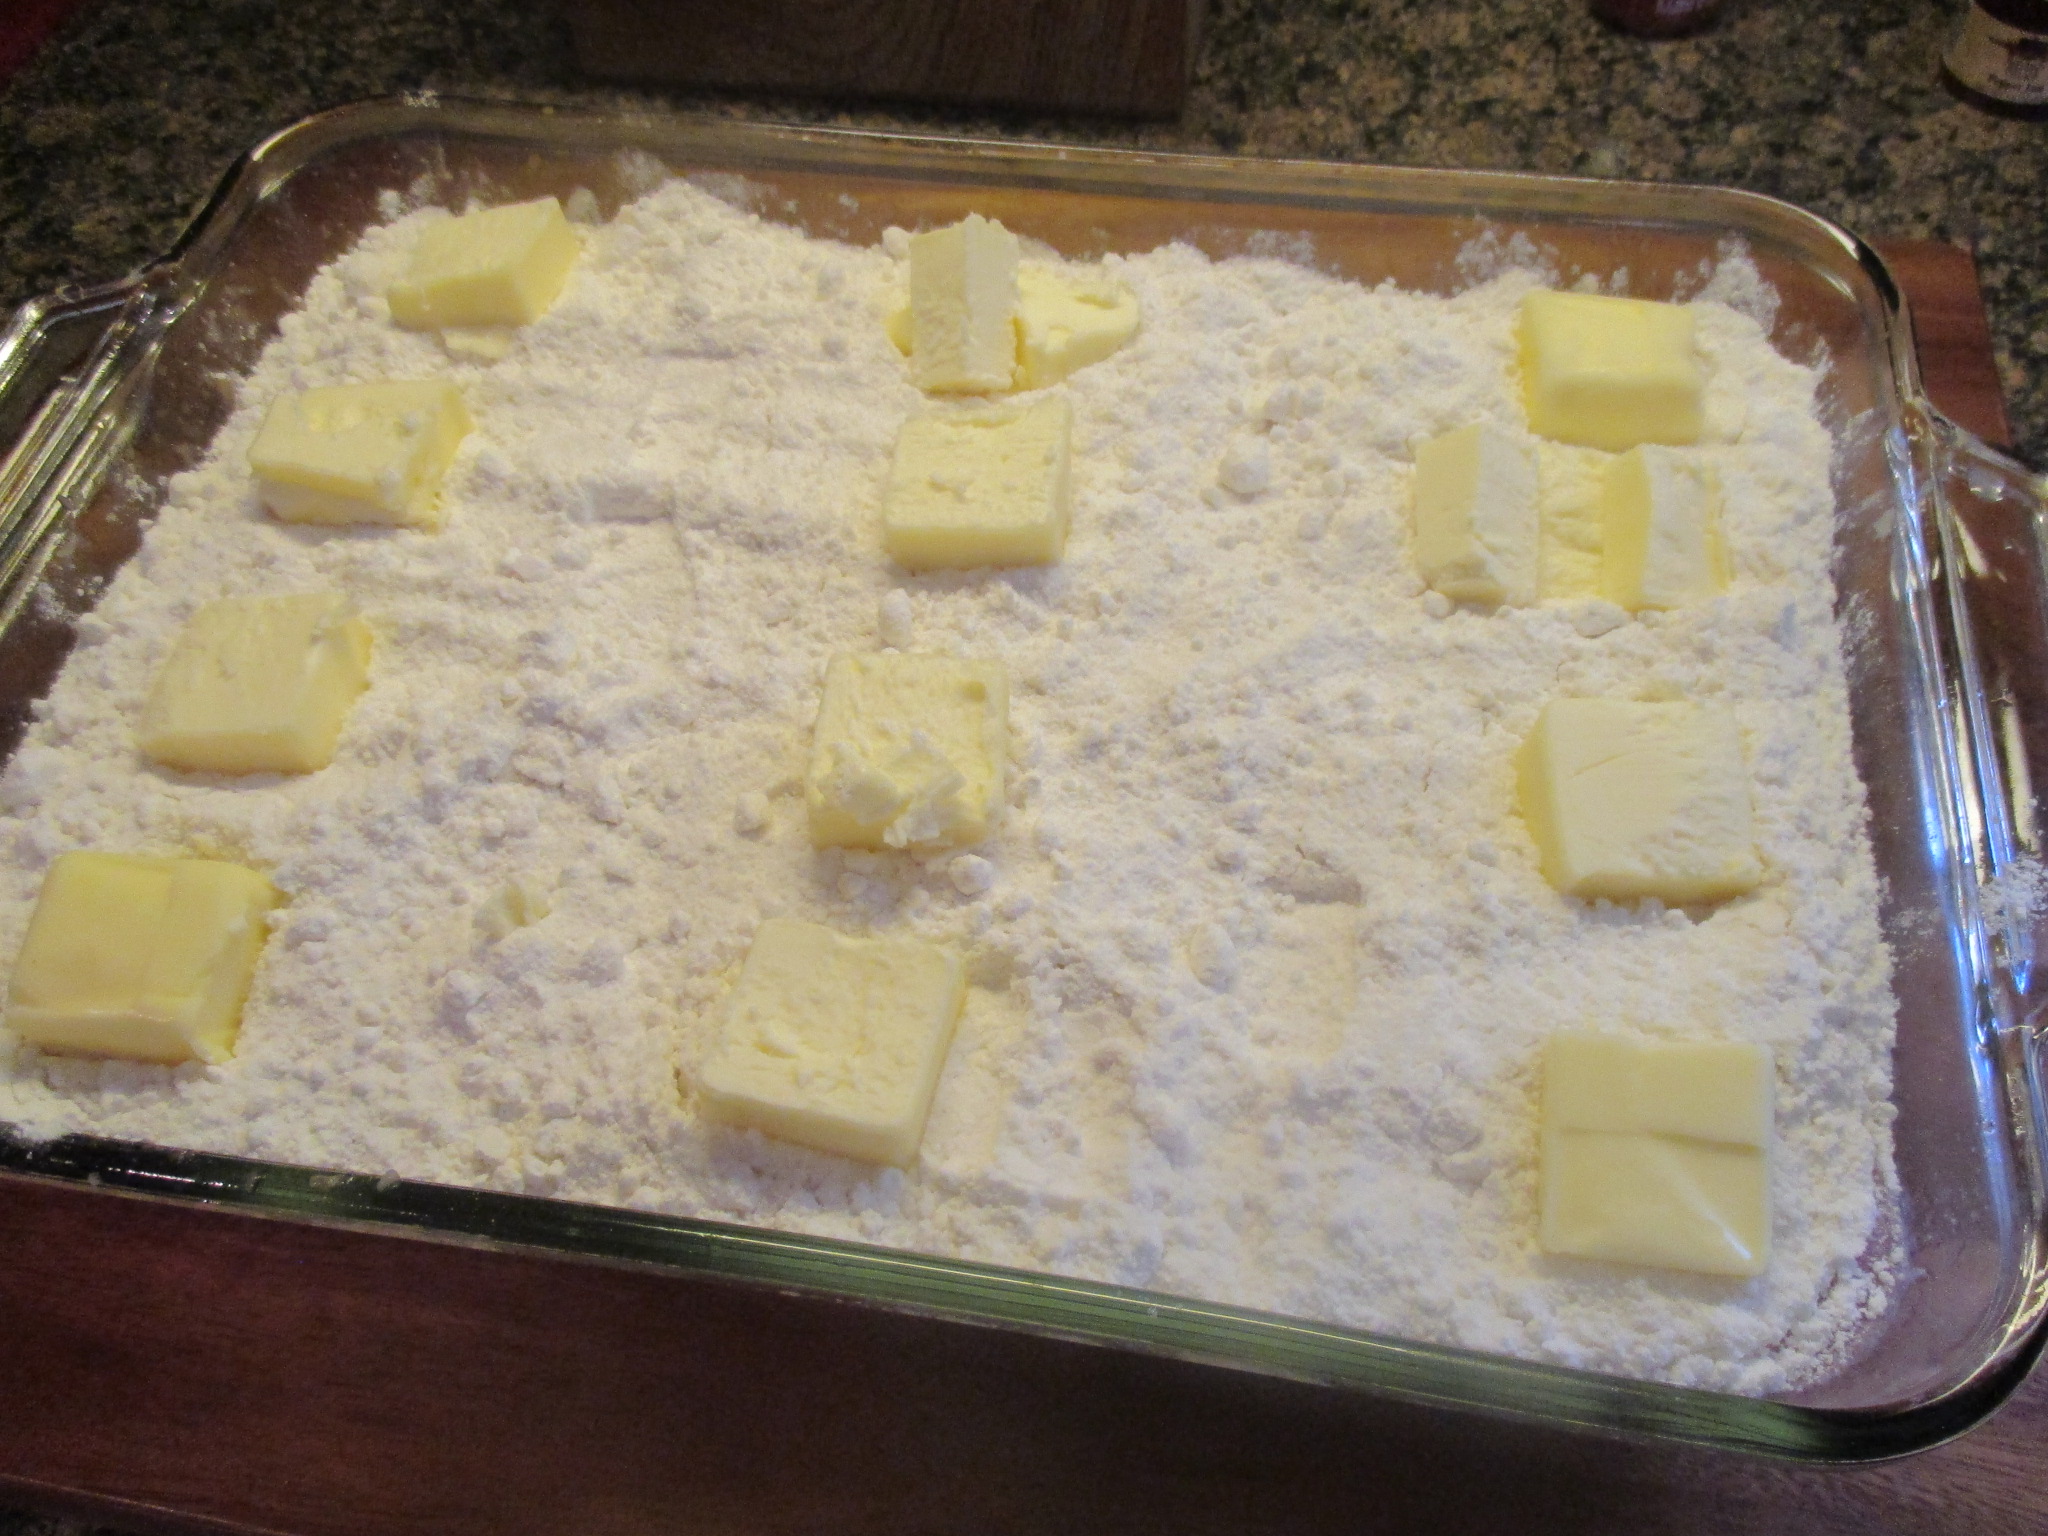
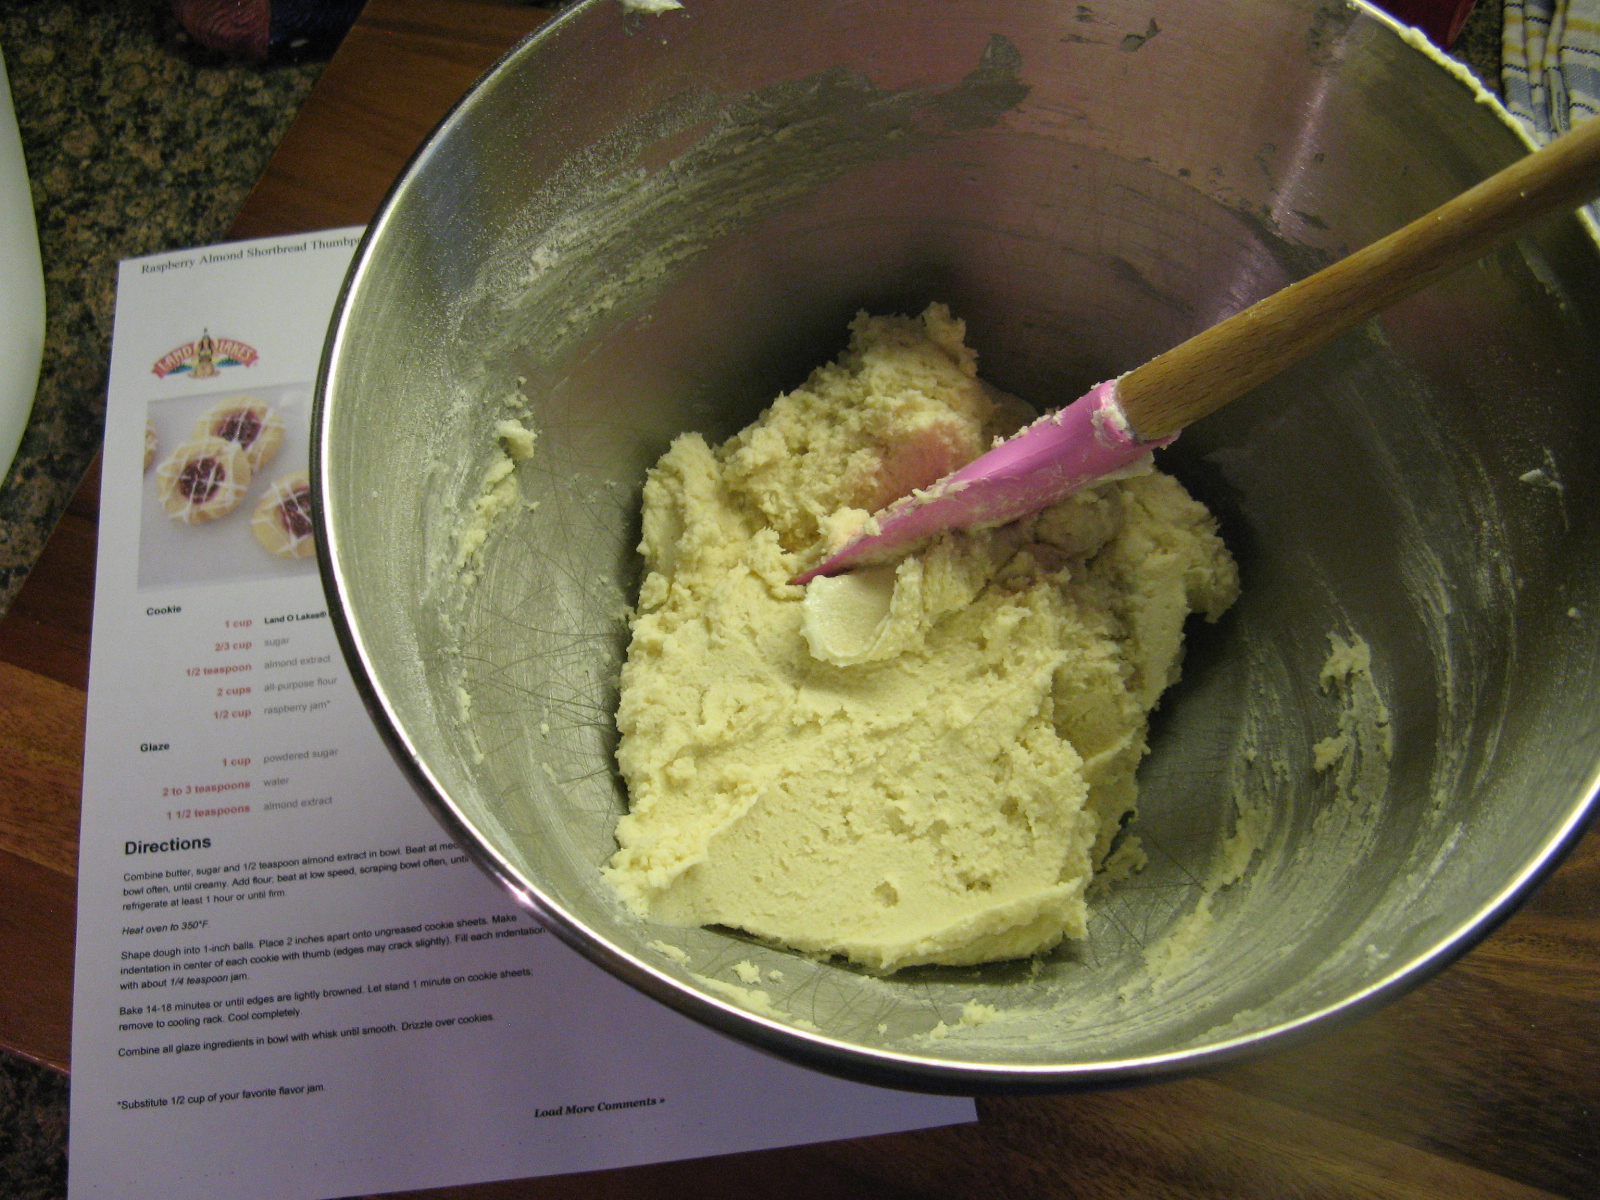
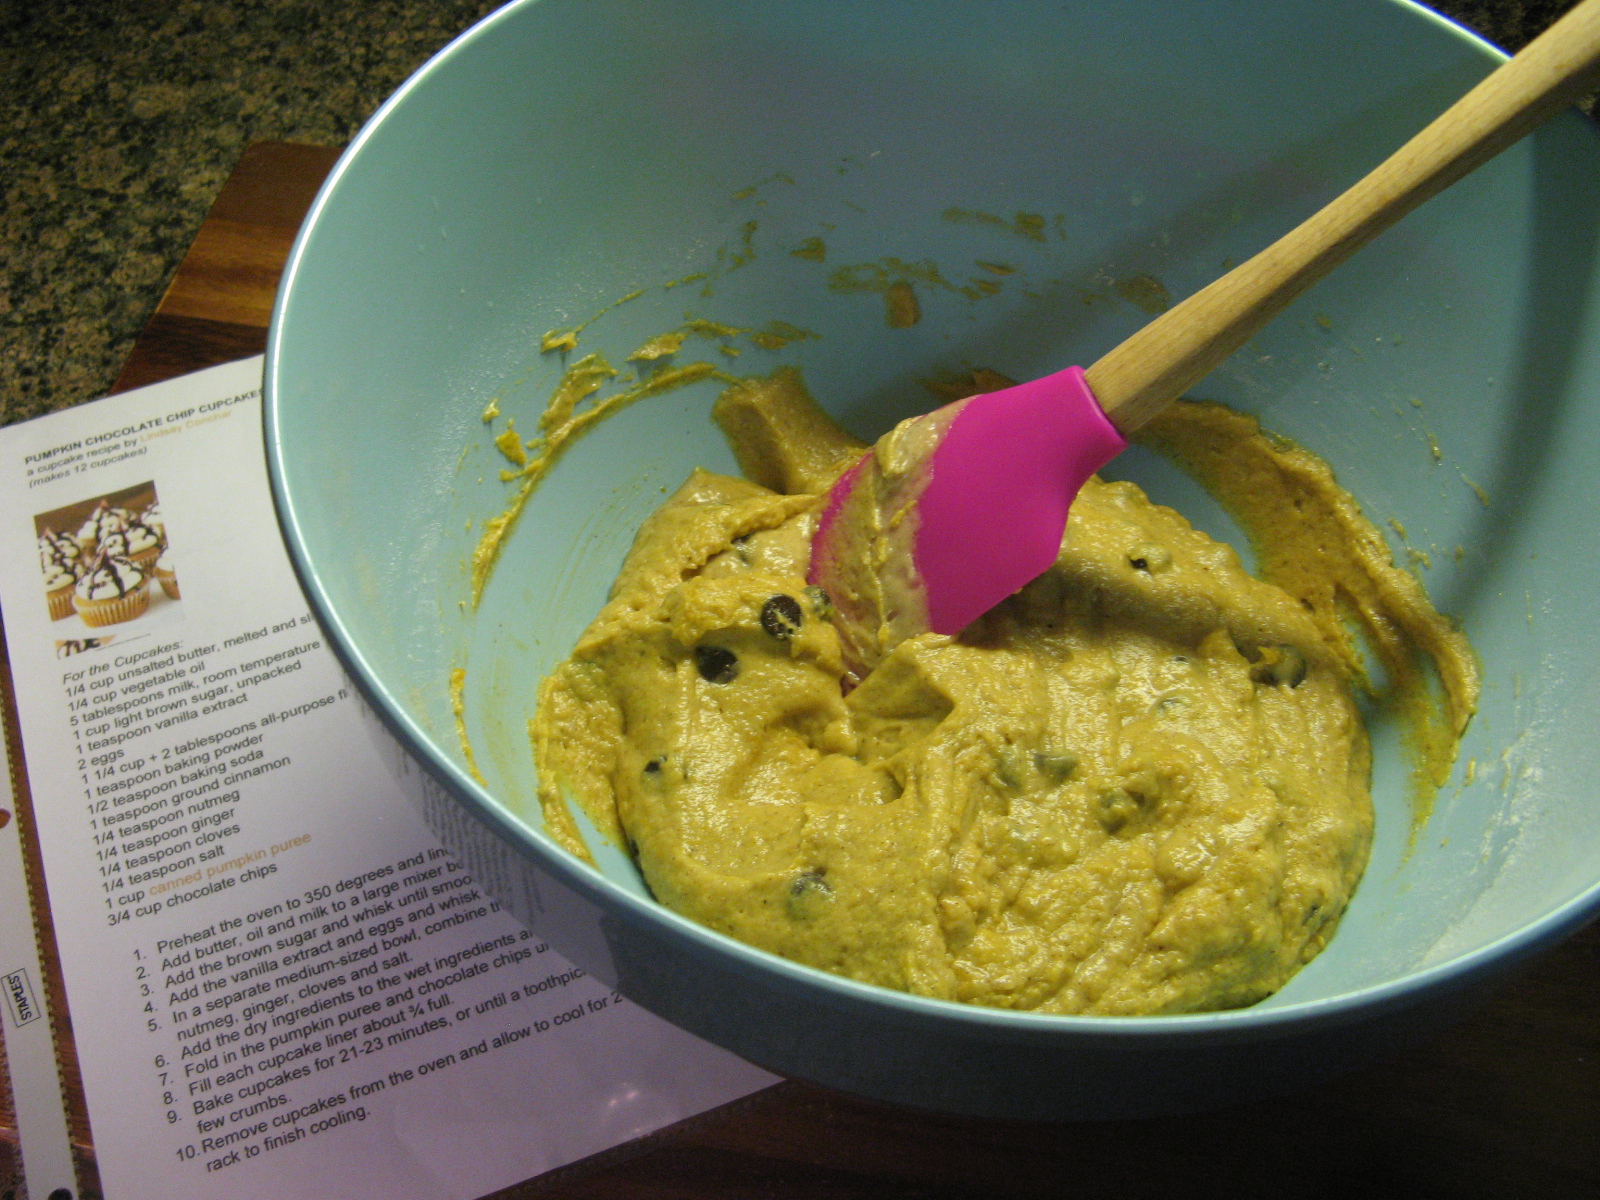
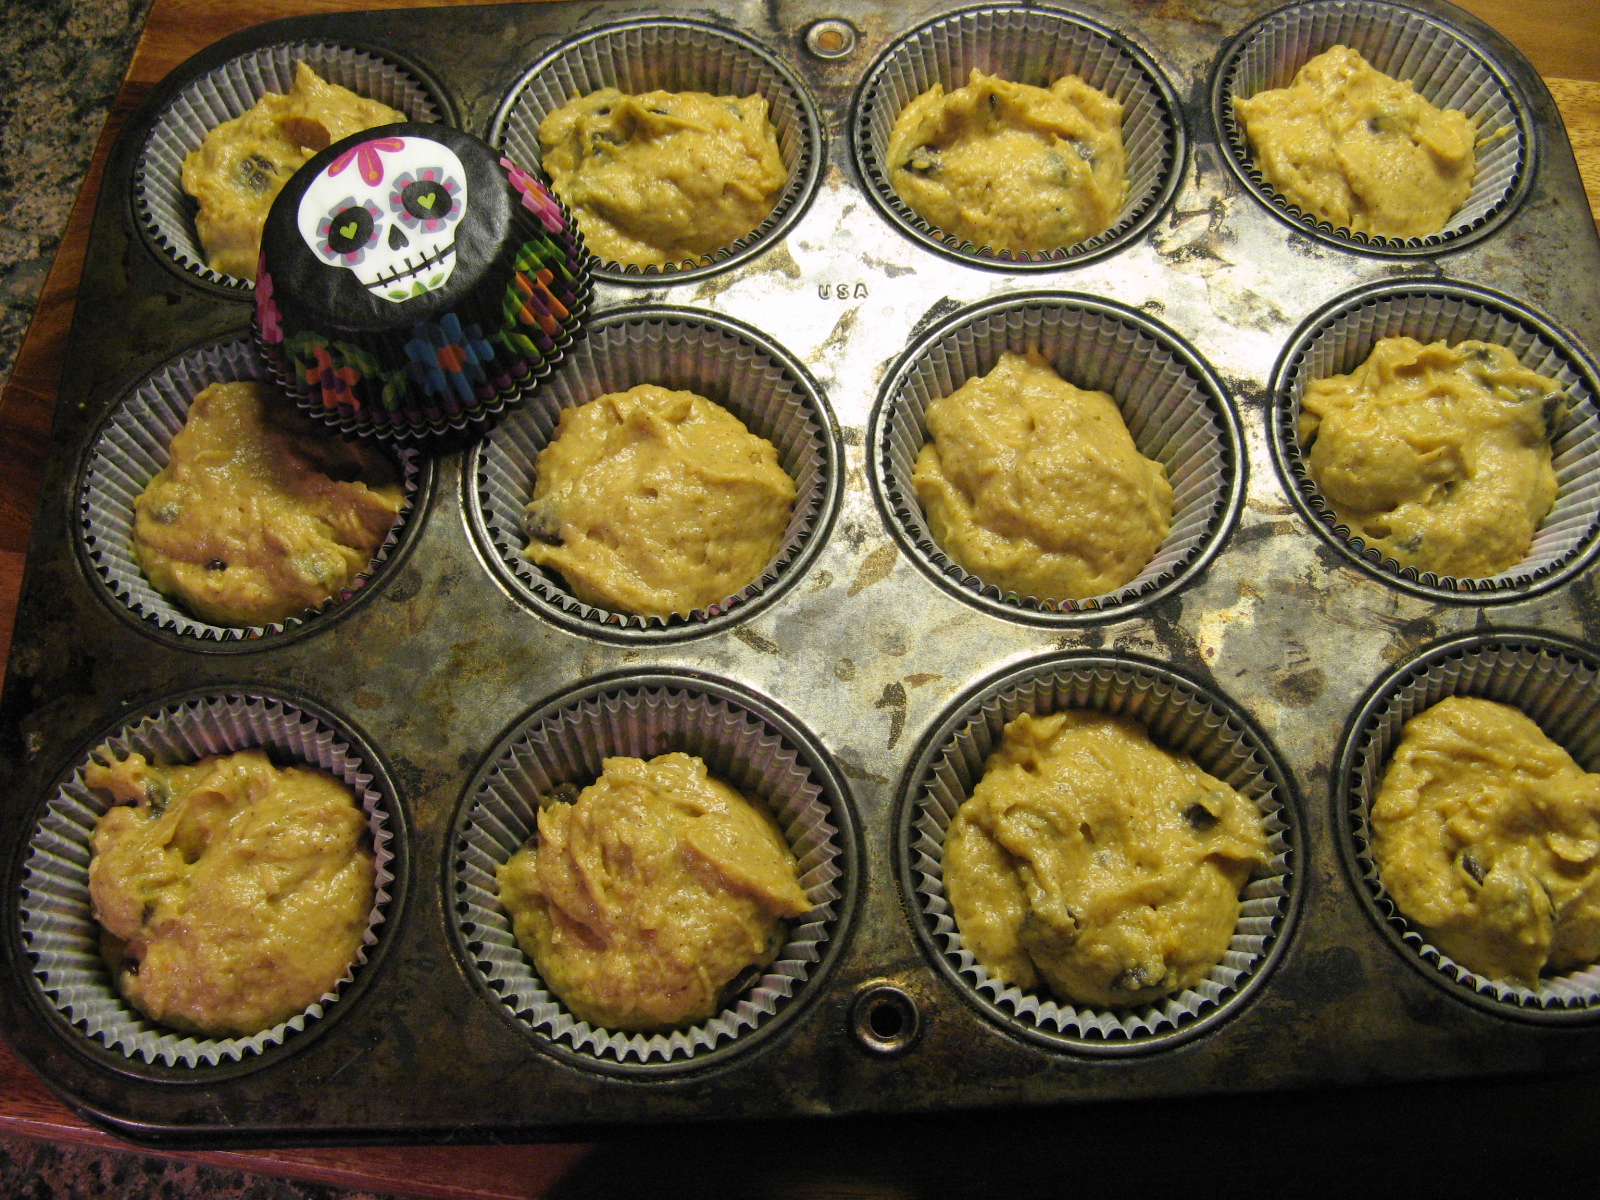
A few days later I made the cupcakes. To make the batter I began by whisking together melted butter, oil and milk. Once that was well combined I added in brown sugar and continued whisking until it was smooth. And then finally I added in vanilla extract and eggs. In another bowl I combined the dry ingredients (flour, baking powder, baking soda, cinnamon, nutmeg, ginger, cloves and salt) and then added them to the wet ingredients. Next I folded in pumpkin puree and chocolate chips.

img_0048

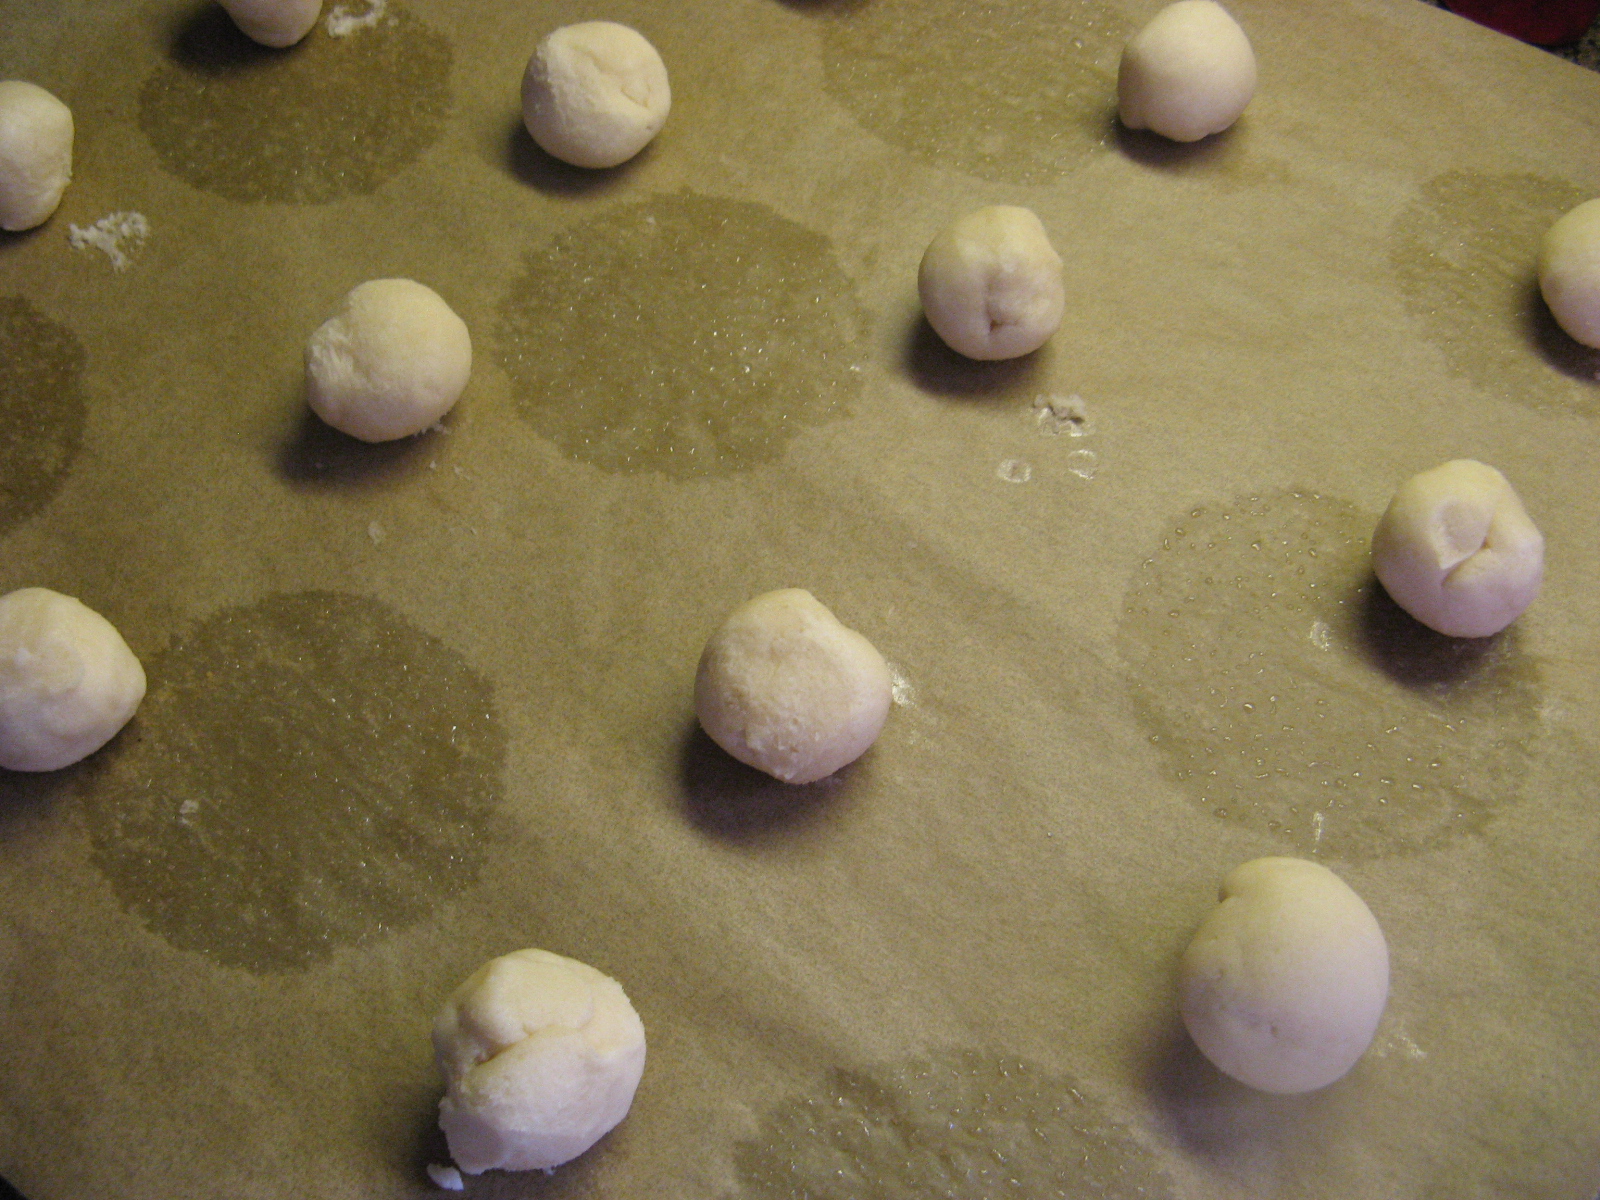
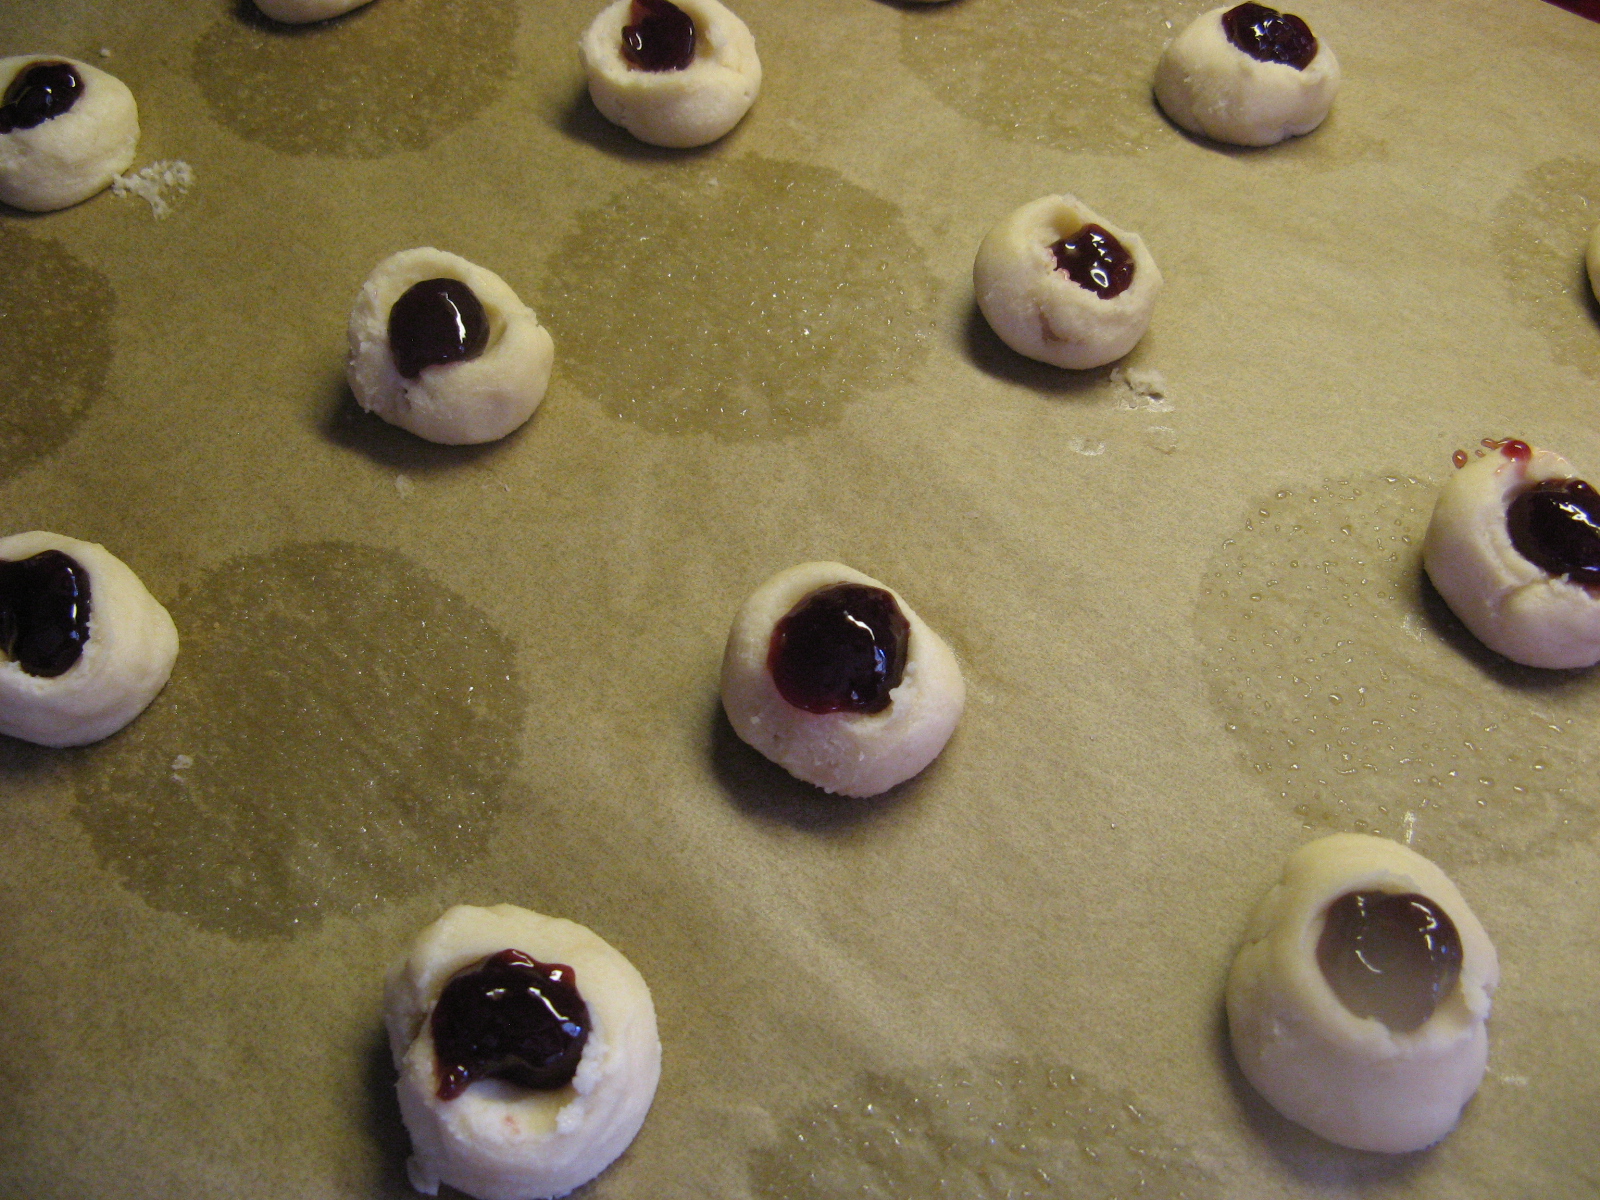
I then filled Día De Los Muertos themed cupcake liners about 3/4 full and baked them in a 350 F preheated oven for about 20 minutes.

img_0049

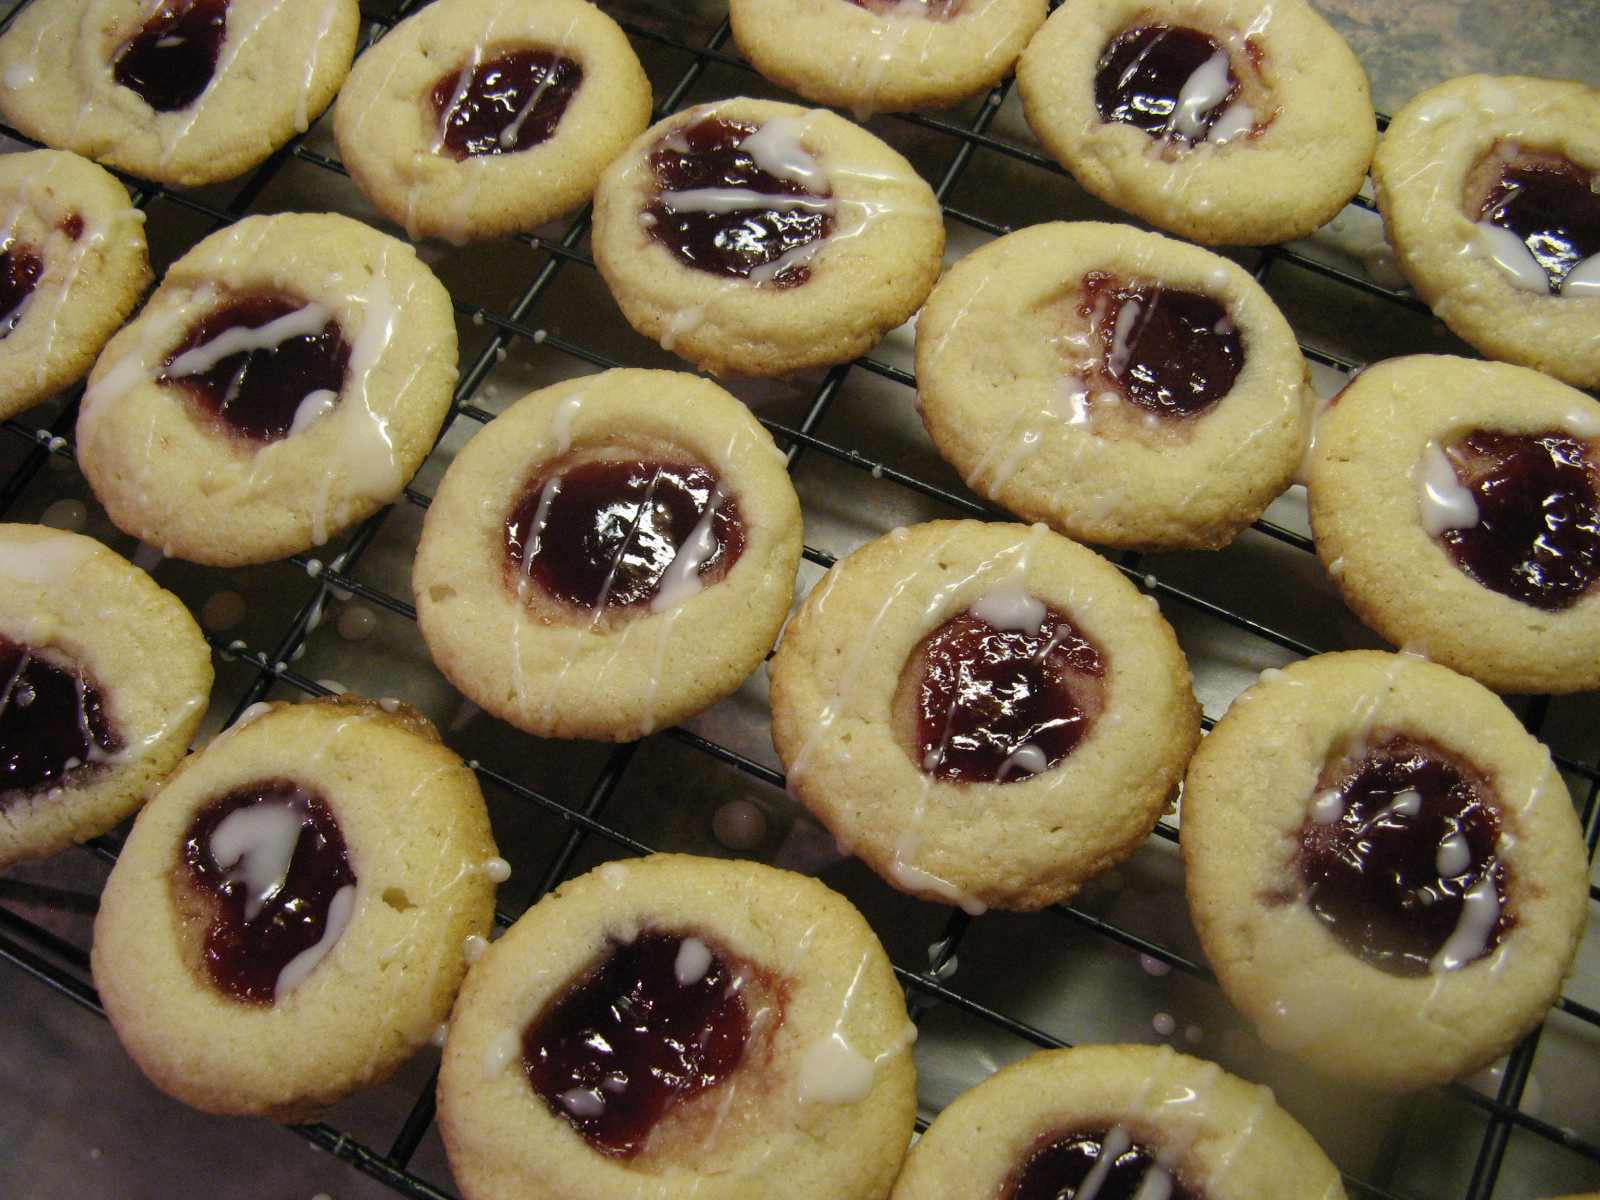
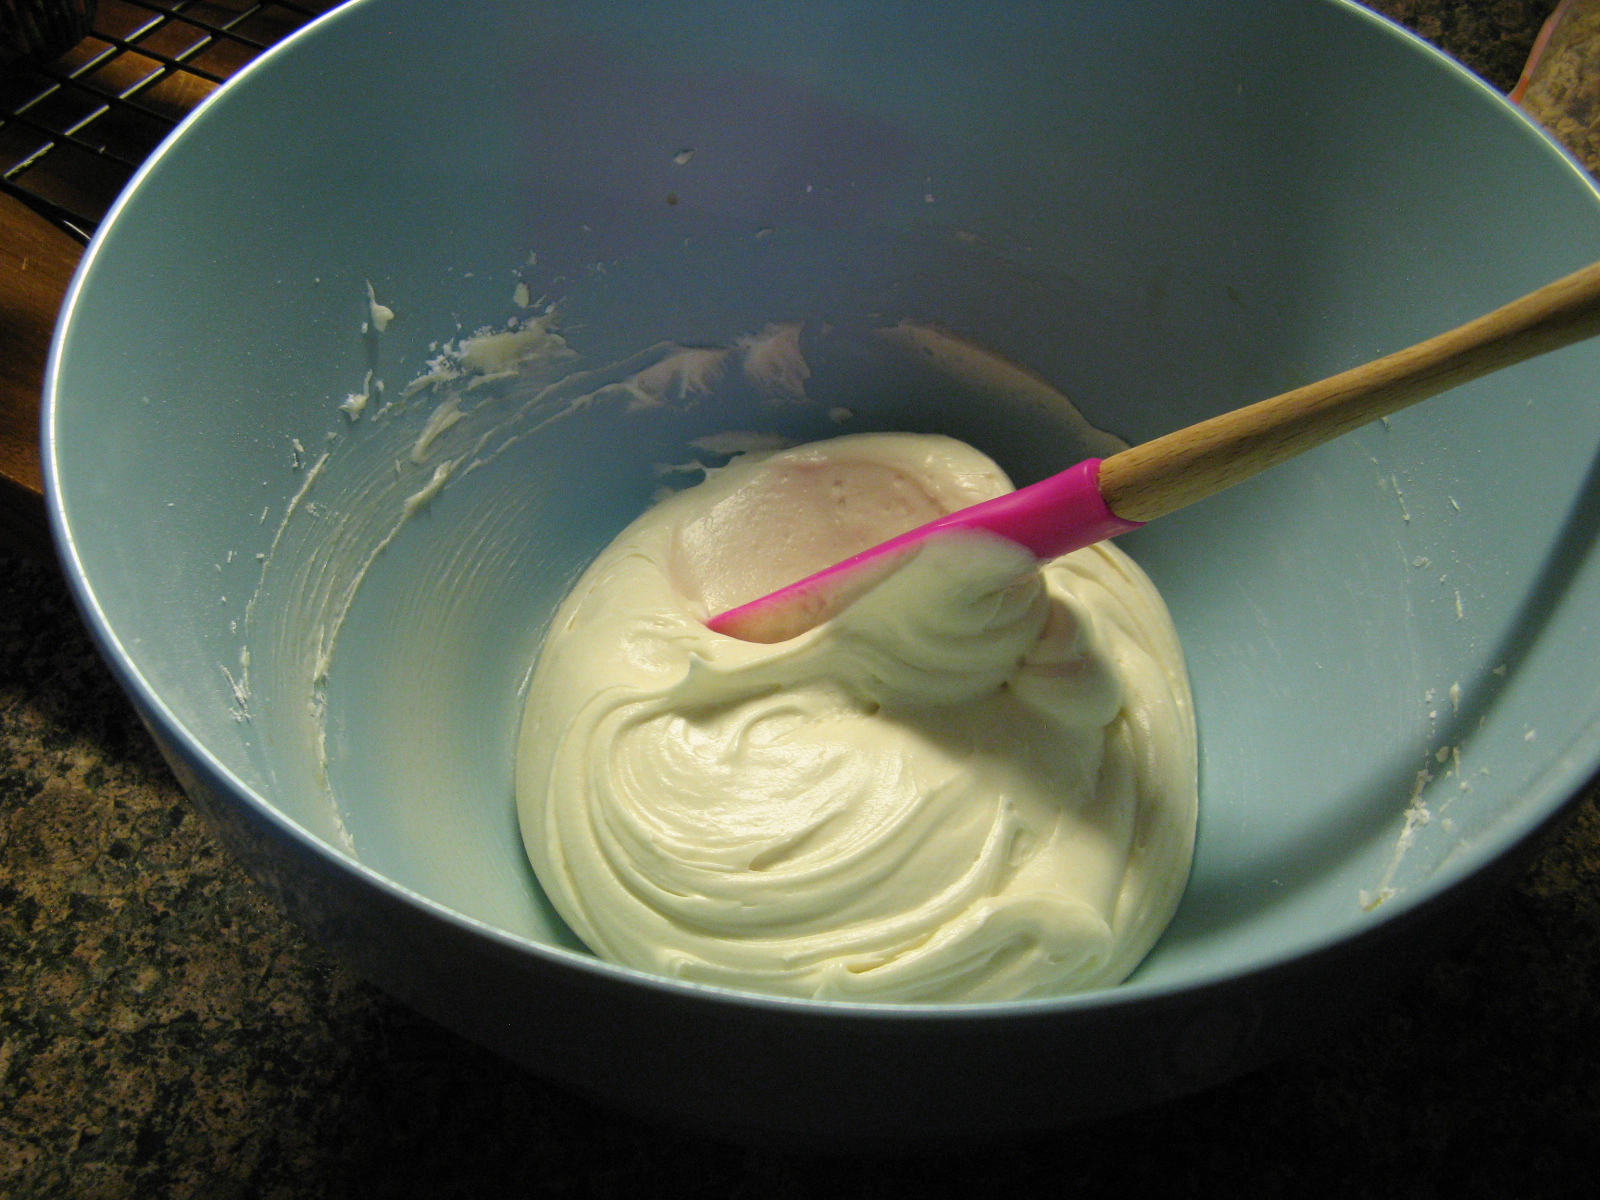
After letting them cool completely I made a cream cheese frosting to top them off.

img_0055

So the sugar skulls would pop a little I opted to stripe the inside of the decorator bag with green before adding the frosting to pipe. And there you have it… Día De Los Muertos Pumpkin Cupcakes.

img_0068

Pumpkin Chocolate Chip Cupcakes

Cupcake Ingredients:

1/4 cup unsalted butter, melted and slightly cooled

1/4 cup vegetable oil

5 tablespoons milk*, room temperature

1 cup light brown sugar

1 teaspoon vanilla extract

2 eggs

1 1/4 cup + 2 tablespoons flour

1 teaspoon baking powder

1/2 teaspoon baking soda

1 teaspoon ground cinnamon

1/4 teaspoon nutmeg

1/4 teaspoon ginger

14 teaspoon ground cloves

1/4 teaspoon salt

1 cup canned pure pumpkin puree

3/4 cup chocolate chips

*I used 2%

Cupcake Directions:

Preheat the oven to 350 F and lined a cupcake pan with cupcake liners.

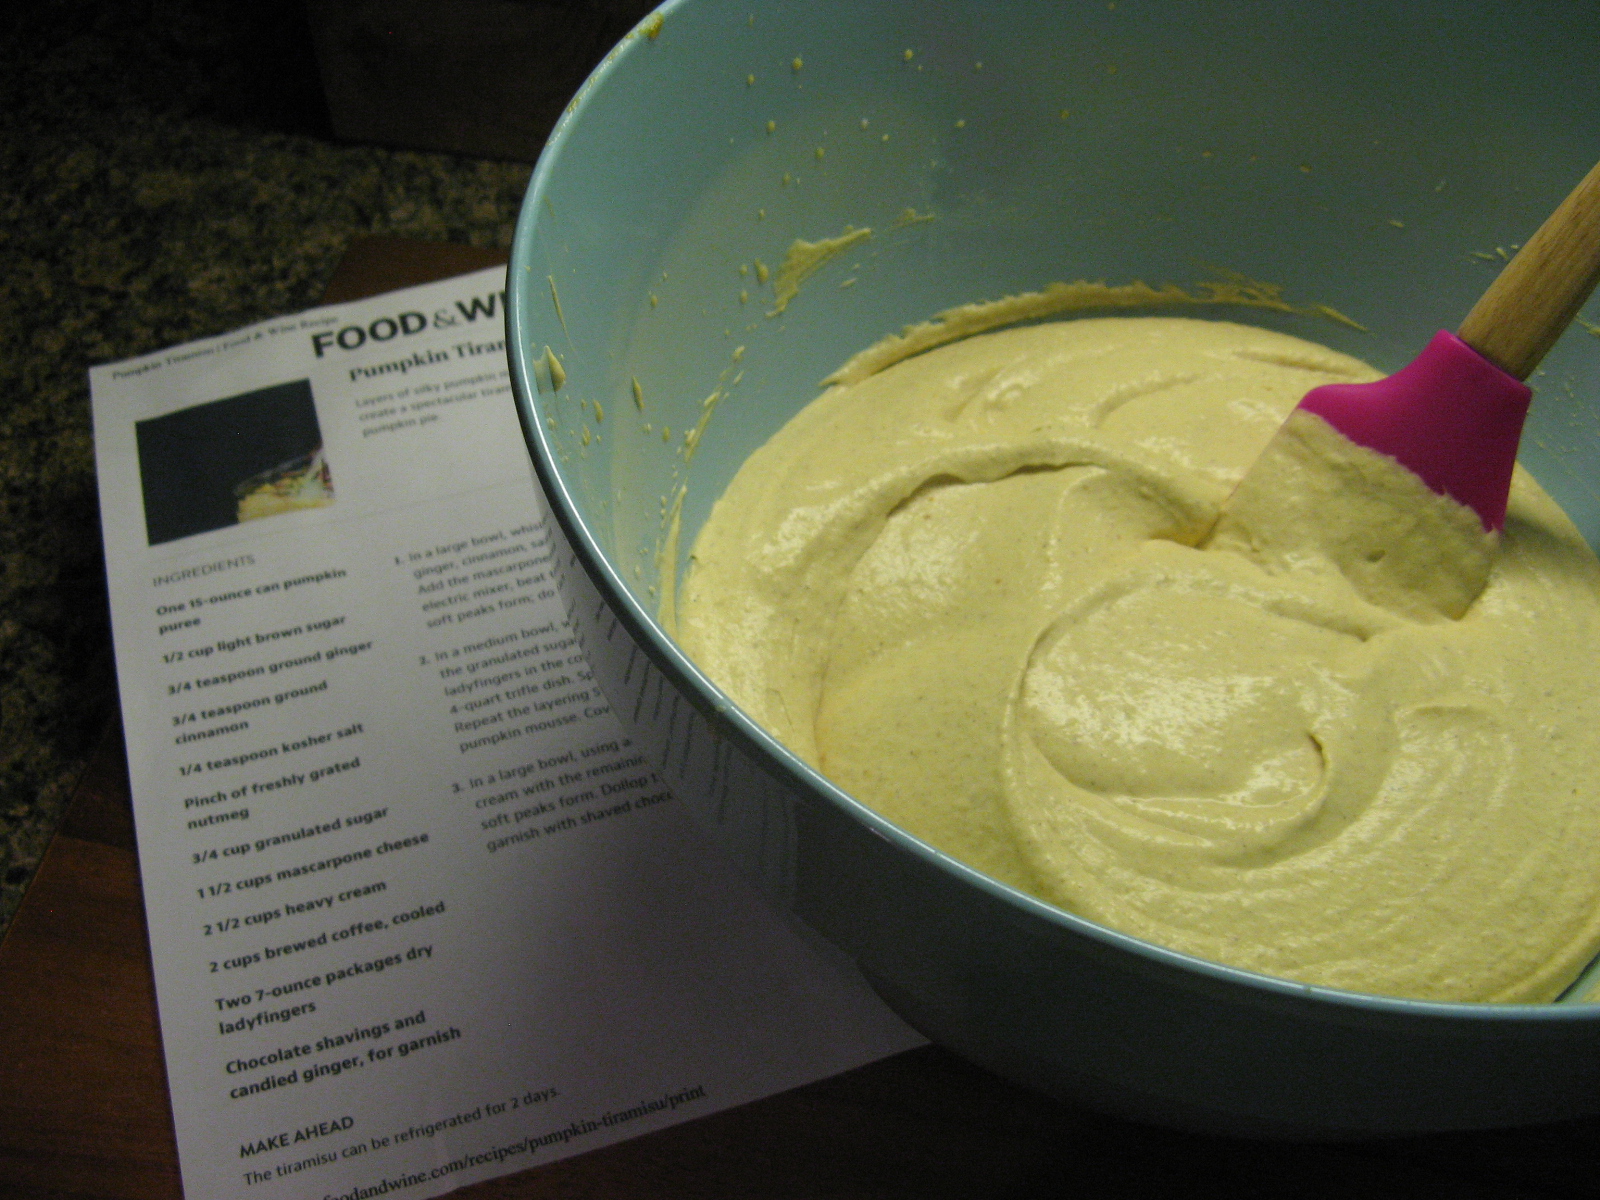
In a large bowl whisk together the butter, oil and milk until smooth. Add in the brown sugar and continue mixing until smooth and finally add in the vanilla and eggs, continuing to whisk until smooth.

In a separate large bowl, combine the flour, baking powder, baking soda, cinnamon, nutmeg, ginger, cloves and salt.

Add the flour mixture to the wet mixture and mix it until smooth.

Fold in the pumpkin puree and then the chocolate chips until well combined.

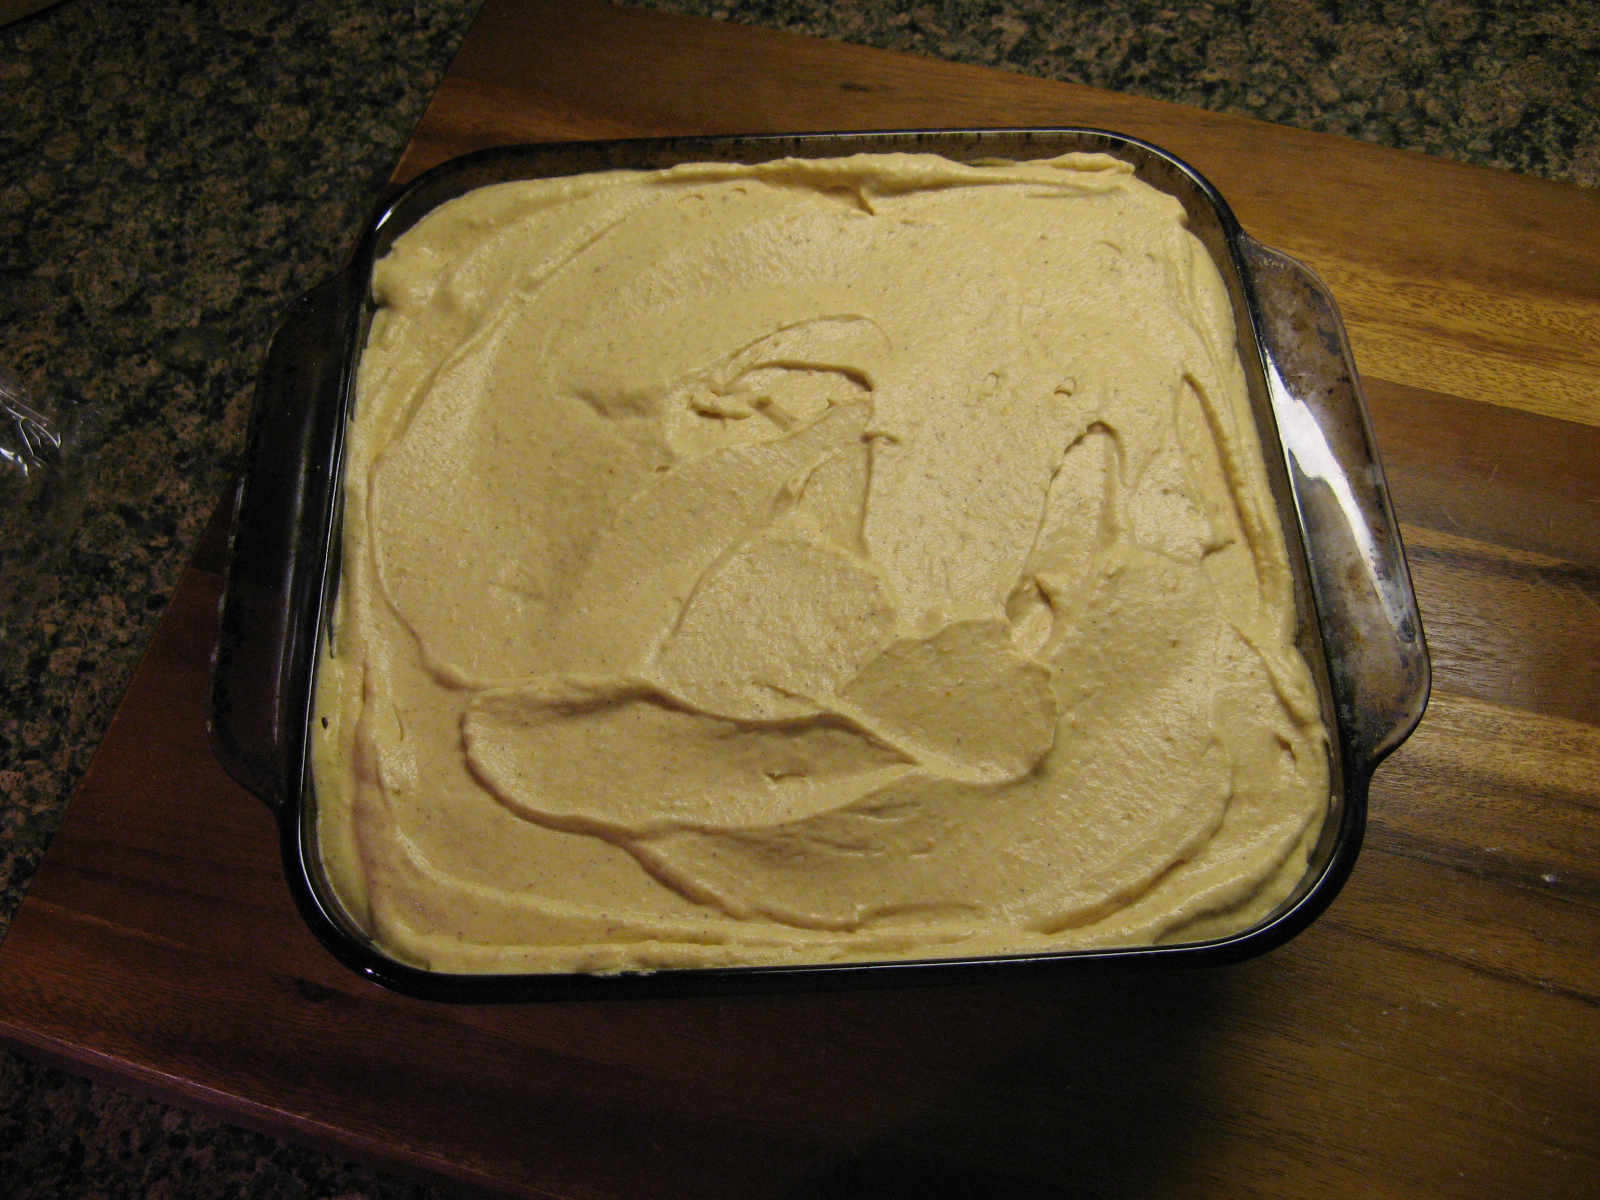
Fill each cupcake liner about 3/4 full and bake for about 21-23 minutes, until a cake inserted in the center of one of the cupcakes comes out clean.

Let cupcakes cool in the tin for a few minutes and then transfer to a wire rack to cool completely.


Ingredients for Frosting:

8 ounces cream cheese, room temperature

1/4 cup unsalted butter, room temperature

4 cups Confectioners’ sugar

1 1/2 cups vanilla extract

Frosting Directions:

Combine the cream cheese and butter in a large bowl and mix together until smooth.

Add half of the sugar and mix until smooth, then add the vanilla extract and continue mixing. Finally add the remaining sugar and continue mixing until smooth.
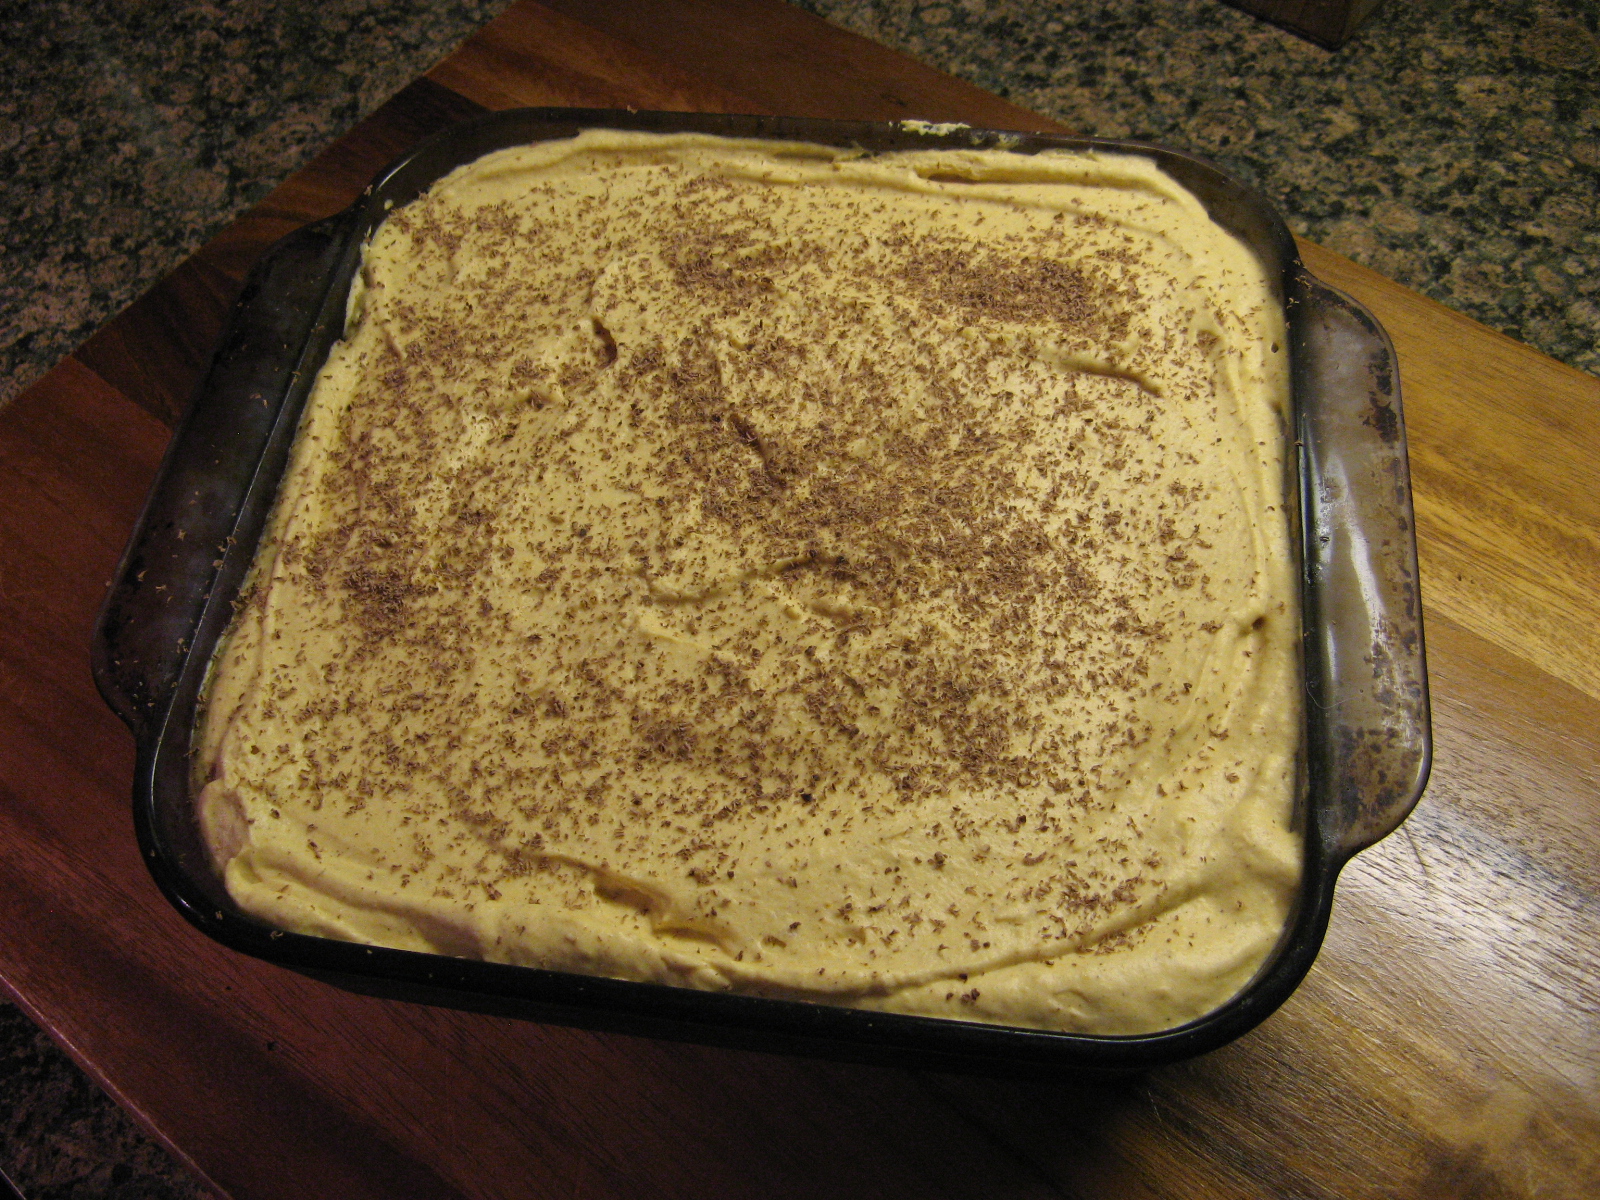
Frost the cupcakes.

Recipe from The Cake Blog

Pumpkin Tiramisu

So, here’s one of those pumpkin recipes I wanted to try that I mentioned in my Pumpkin Bread post… A Pumpkin Tiramisu. About a month or so ago I started thinking about different Pumpkin desserts, not just the typical pie or loaf bread or a variation of them but something more outside the box. Hence the Pumpkin Tiramisu. You may not think it’s not too out of the box, but, how many times have you gone to a restaurant or bakery and they had a different type of tiramisu?

I began by making a pumpkin mousse. In a large bowl I whisked together the pumpkin puree along with brown sugar, ground ginger, cinnamon & nutmeg, salt and sugar. Once that was well combined I added in mascarpone cheese and heavy cream and beat it with my hand mixer on medium speed until soft peaks formed. I must say, this pumpkin mousse is delicious on its own. I actually had some leftover after assembling the tiramisu and it’s the perfect fall dessert with not as much guilt.

img_0350

Next, it was time to assemble. Prior to making the mousse I brewed coffee (I really didn’t brew it, I just made instant – I’m not a coffee drinker) and whisked in sugar and a few tablespoons of Kahlua. After letting it cool, I soaked ladyfinger cookies in it for a few seconds and arranged them on the bottom of an 8×8 baking dish. I then spread the mousse over the cookies and repeated these two steps one more time.

img_0351

And voila… I covered it with wax paper and aluminum foil and refrigerated it overnight.

img_0352

The following day I shaved chocolate over it and enjoyed it!

img_0354


Pumpkin Tiramisu

Ingredients:

15-ounce can pumpkin puree

1/2 cup light brown sugar

3/4 teaspoon ground ginger

3/4 teaspoon ground cinnamon

1/4 teaspoon ground nutmeg

1/4 teaspoon kosher salt

1/2 cup plus 2 tablespoons granulated sugar

1 1/2 cups mascarpone chees

1 1/2 cups heavy cream

2 cups brewed coffee, cooled

2 tablespoons Kahlua*

2 7-ounce packages (about 20) dry ladyfingers

Chocolate shavings, for garnish

*Optional

Directions:

In a large bowl whisk together the pumpkin puree with the brown sugar, ginger, cinnamon, nutmeg, salt and 1/2 cup of the granulated sugar. Add the mascarpone cheese and the heavy cream. With an electric mixer, beat the mixture on medium speed until soft peaks form. Be sure not to overbeat.

In a medium bowl combine the coffee, 2 tablespoons of sugar and the Kahlua and whisk together until the sugar dissolves. Dip half the ladyfingers in the coffee mixture and arrange them on the bottom of an 8×8 baking dish. Spread a generous amount of the pumpkin mousse over the ladyfingers. Repeat these two steps cover and refrigerate overnight. You will have some mousse leftover.

Prior to serving garnish the tiramisu with the chocolate shavings.

This recipe was slightly modified from Food & Wine

Cake, Cake and More Cake!

So, if you follow me on Instagram or if you take a peek at my Instagram feed on the lower right-hand side of this page you’ll notice that I post more of my baking adventures on there than I actually blog about. It’s for various reasons… Sometimes I’ve already blogged and shared the recipe or as this post is about, its pictures of cakes that I have made and decorated and don’t blog about because I am really bad at taking pictures of the step by step of decorating them. So, I decided that since I made a fair share of cakes this summer I would compile them into a post and give a little description of each.

Up first, a Lion Guard themed birthday cake that I made for a friend’s daughters’ 2nd birthday. Whenever I create these themed fondant cakes quite a bit of thought goes into them and a bit of Pinterest surfing. A week before I actually made the cake I did some prep work by cutting out all the leaves, flowers and animals and stored them in my refrigerator.

img_00631

And then the following week it was time to bake, frost, roll fondant and assemble. After covering the base cake with yellow fondant I painted it orange to give the effect of a sunset. To do so, I combined orange gel color with vodka. I didn’t completely mix the two so I would get different shades of orange as the gel color diluted into the vodka. Once the color was dry I attached all of the cut-outs I made the week before to the cake and topped it with some Lion Guard figurines I picked up from my local Disney Store.

lion-guard-cake

For the 4th of July I created this patriotic cake.

4th-of-july-cake

The inside was patriotic as well…

img_01791

As a belated birthday gift for a dear friend I made this adorable cake topped with a bright big sunflower and some cute purple flowers that I am not sure the name of. To decorate the sides of the cake I piped ruffles vertically using a 1M tip.

img_02531

And finally, this past weekend I made this cake for another dear friend’s birthday. It was truly a death by chocolate cake… A chocolate cake with chocolate frosting and the filling was the mocha cream that I used for the Mocha Chocolate Icebox Cake I blogged about last week. I knew I had to use that delicious cream again for something and what better way than with chocolate cake. I created the dark and white chocolate toppers for this cake by melting Wilton candy melts and then piping them into small drops using a Wilton 6B tip and then placing them in the refrigerator so they could set. The other drops are the mocha cream which I piped using the 6B as well as a 4B tip.

img_02881

And there you have it… My summer shown through decorated cakes!


Mocha Chocolate Icebox Cake

The unofficial end of the summer is upon us! A bittersweet time… the lazy days of summer are coming to an end, kids go back to school (yay for crazy morning traffic – that being said in my most unenthusiastic and sarcastic voice) and temperatures begin to drop. Granted, that last fact is a welcome change to me. Fall is upon us! If you didn’t know, it’s my favorite season! There’s pumpkin everything (I’m actually eating a Chobani Flip Pumpkin yogurt as I write this), apple picking, the crisp air in the morning, the leaves changing color and so many other wonderful things. It also leads us to my other favorite time of the year… The Holiday Season! You know, that time between Thanksgiving and Three Kings Day. Well, that’s what I personally consider the Holiday Season to be, I know for some it ends with the New Year. But, before we get to all that and our ovens working overtime baking wonderful holiday treats, I have a dessert for you that’s perfect for any BBQ’s you’ll be heading to this holiday weekend and for any of those random 90+days that are sure to come… An icebox cake, more specifically a Mocha Chocolate Icebox Cake.

I first saw this recipe on Food Network’s Instagram feed. It’s from Ina Garten aka “The Barefoot Contessa” and I knew I had to make it. And then a few weeks later it was featured in their magazine. Its super simple, only requires 1 bowl for mixing and you have don’t have to bake it. You assemble it and let it set overnight in your fridge – hence icebox cake.

In a large bowl combine heavy cream, mascarpone, sugar, Kahlua, cocoa powder, espresso powder & vanilla extract. Using a hand mixer, mix on low speed until combined and slowly raise the speed until stiff peaks form. Before using this mocha cream of course I had to try it and it tasted similar to the cream used in Tiramisu… Delish!

IMG_0234

Once the cream is made it was time to assemble the cake. I arranged a layer of thin & crispy chocolate chip cookies flat in an 8-inch springform pan. I used Tate’s cookies, which are famous for their thin & crispy texture. If you can’t find Tate’s or you just don’t feel like ordering them, you can try Chips Ahoy’s new Thins Chocolate Chip Cookie. So, after arranging the first layer of cookies, I spread about a fifth of the cream evenly over the cookies. Next, another layer of cookies and then the cream. I continued this layering pattern until I had 5 layers of each, ending with the cream. I then smoothed the top, covered it with plastic wrap and refrigerated it overnight.

IMG_0235

IMG_0240

The following day to unmold the cake I ran a sharp knife along the sides and then removed the ring and topped the cake with chocolate shavings.

IMG_0264

Delicious is an understatement for how good this cake is! The cookies soften due to the cream, but, are left with enough texture that you don’t feel like you’re eating mushy cookies… Which would be gross! And the combination of the mocha cream and the chocolate chip cookies is just perfect!

IMG_0266


Mocha Chocolate Icebox Cake

Ingredients:

2 cups heavy cream, cold

12 ounces mascarpone cheese

1/2 cup sugar

1/4 cup Kahlua liqueur

2 tablespoons unsweetened cocoa powder

1 teaspoon instant espresso powder

1 teaspoon pure vanilla extract

24 ounces thin & crispy chocolate chip cookies, about 35

Shaved semi-sweet chocolate, for garnish


Directions:

In a large bowl combine the heavy cream, mascarpone, sugar, Kahlua, cocoa powder, espresso powder & vanilla extract. Using a hand mixer mix on low speed until all ingredients are combined, gradually increase the speed until firm peaks form.

To assemble to the cake, arrange the chocolate chip cookies flat in an 8-inch springform pan, breaking the cookies as necessary to completely cover the bottom of the pan. Spread a fifth of the mocha cream evenly over the cookies. Place another layer of cookies lying flat and then another fifth of mocha cream. Continue this layer pattern until there are 5 layers of each, ending with the mocha cream. Cover with plastic wrap and refrigerate overnight.

To unmold, run a sharp knife along the edges and remover the ring. Sprinkle with shaved chocolate and serve cold.

Recipe from Food Network


Dump Cakes

Memorial Day Weekend is upon us- the unofficial start of the summer – and with the official start right around the corner and the inevitable warmer temperatures, you may be looking for desserts that will satisfy your sweet tooth but won’t take too long to put together and don’t require a slew of ingredients. If so, today I have the recipe for you… A Dump Cake! And trust me, it tastes a whole lot better than the images the name may conjure up for you.

I wish I could say that I came up with this genius idea of a dessert myself, but the credit goes to Pioneer Woman: Ree Drummond. Warning… If you are adverse to box cake mix, can pie filling / canned fruit and butter stop reading now and deprive yourself of the opportunity to make something super simple and delicious. Hey, you have standards to keep. And yes, it only takes those three ingredients to make this cake.

To begin, in a 9×13-inch baking dish pour out a can of cherry pie filling and a can of crushed pineapple (okay, this version of the cake requires four ingredients, but, you could easily omit the pineapple.) Mix the two together well.

IMG_0107

Next, evenly pour the cake mix over the fruit… Make sure you get the corners.

IMG_0108

And finally, top it with a stick and a half of unsalted butter sliced into tablespoons, making sure to space the butter evenly over the cake.

IMG_0111

Bake it in a preheated 350 F oven for 45 minutes – 1 hour; until the top is browned and the fruit filling is bubbling.

IMG_0114

Let it cool for a few minutes before digging in. Enjoy slightly warmed with a scoop or two of vanilla ice cream or a dollop or two of whipped cream.

This cake was so delicious that I soon made another one along with a peach version.

IMG_0132


Dump Cake

Ingredients:

Cherry and Pineapple

1 21oz. can cherry pie filling

1 20oz. can crushed pineapple

1 box white cake mix

12 tablespoons unsalted butter, sliced


Peach

1 29oz. can sliced peaches in syrup

1 box yellow cake mix

12 tablespoon unsalted butter, sliced


Directions

Preheat oven to 350 F.

Pour fruit into a 9×13-inch baking dish. For the cherry and pineapple version mix both fruits together well.

Top evenly with the cake mix, making sure to get the corners.

Space the butter evenly over the cake and bake in the oven for 45 minutes – 1 hour, until the top is browned and the fruit is bubbling.

Let it cool for a few minutes before slicing so the cake can “set.”

Enjoy with ice cream, whipped cream or on its own.

Recipe from Food Network


A Sweet Way to Ring in the New Year… Chocolate and Strawberries!

Happy New Year! So, how did you ring in the year? Asleep? Out and about? Or like me, surrounded by family and friends? In my case, the friends actually fall under the family category, so I should say I rang it in with family. Either way, I hope it was an enjoyable time and a great kick off to the new year ahead. And how about those resolutions? Did you make any? I may have mentioned it before, but, I don’t make resolutions. I think it’s great for those people who do so, but, I don’t think you need a new year to make a new start. Every day you wake up is an opportunity to do something different and better for yourself and those around you. I sound like self-help guru or something… LOL! But, it’s true. Every day we have a choice as to how we are going to lead our day and we can make the decisions that are best for us or the ones that are not so great. But, it’s up to each of us to make those decisions. So, maybe that’s my resolution, to live the best day possible each and every day. And trust me I know from experience that it’s not always easy, but, you always have to try and find the silver lining because if you don’t you may always wonder, “Why me?” And now on to the Chocolate and Strawberries!

So, I always want to make something different and delicious as a sweet treat for New Year’s Eve and I was pondering attempting to make macarons, but, I quickly decided against it. I think that’s best left for when it’s just a random day and if they don’t come out well I don’t have to scramble to make something else in their place. So I opted for cupcakes. Something that is foolproof and always a crowd favorite. And these were cupcakes that I wanted to make for a month or two now. I came across the recipe when I was flipping through an old holiday magazine for cookie recipe ideas – remember I am a bit of a recipe hoarder! They are a super simple mocha chip cupcake with a chocolate sour cream frosting. The coffee in the cupcake offsets the chocolate from the chocolate chips in it and the sour cream adds a nice tang to the frosting so overall this isn’t an overly sweet or chocolatey cupcake. And to make it festive I sprayed a few using an edible gold shimmer spray and topped the others with strawberries.

IMG_0246

And since I had leftover strawberries and half a bag of chocolate chips left it was the perfect set-up for some chocolate covered strawberries. I simply melted the chocolate chips in the microwave in minute intervals and then dipped the strawberries in it and then placed them on a wax-paper covered cookie sheet and placed them in the refrigerator until set. Once they were set I drizzled more melted chocolate over them. These were a HIT and barely made it to midnight!

IMG_0243

So, stay tuned in 2016 for more sweet treats, slow cooker meals, beaded jewelry and yarn projects!


Mocha Chip Cupcakes

  • Servings: 12 cupcakes
  • Print

Ingredients:

1 cup all-purpose flour

1/2 teaspoon baking soda

1/4 teaspoon salt

1/2 cup unsalted butter, room temperature

1 cup sugar

2 large eggs

1 1/2 teaspoon vanilla extract

3 ounces unsweetened chocolate, melted and cooled slightly

2 teaspoons instant espresso powder, dissolved in 1/2 cup cool water

2/3 cup semi-sweet chocolate chips


Directions:

Preheat the oven to 350 F and line a 12 standard cup muffin tin with paper liners.

Sift the flour, baking soda, and salt together in a bowl and set aside.

In a large bowl beat the butter on medium speed until smooth, 30 to 60 seconds. While the mixer is running, slowly poor in the sugar, scraping the sides of the bowl as necessary, with the mixer on medium-high speed beet until the mixture is light and fluffy, 2 to 3 minutes. Beat in the eggs, one at a time, on medium speed. Beat until the batter is smooth and scraping the bowl as necessary. Add the vanilla and the melted chocolate and beat until smooth and blended. With the mixer on low speed add the flour mixture in three parts, alternating with the dissolved espresso powder. Finally stir in the chocolate chips by hand.

Divide the batter among the prepared muffin tin and bake 20 to 22 minutes, until the cupcakes spring back when gently pressed in the center.

Let the cupcakes cool in the tin for 5 minutes on a wire rack and then remove them allowing them to cool completely on the wire rack.

Recipe from Fine Cooking


Chocolate Sour Cream Frosting

  • Servings: 1 1/4 cups
  • Print

Ingredients:

1 tablespoon unsalted butter, at room temperature

1/3 cup sour cream

3/4 teaspoon vanilla extract

pinch of salt

1 1/2 cups confectioners’ sugar, spooned and leveled

2 ounces unsweetened chocolate, melted and cooled slightly

milk, if necessary

Directions:

In a medium bowl whisk butter, sour cream, vanilla extract and salt to blend. Gradually whisk in the sugar until smooth. Add the chocolate and beat it in with the whisk until the frosting is smooth and creamy. The frosting must be thick and spreadable; if it’s too thick thin it with a drops of milk. If it’s too thin, chill it briefly, stirring occasionally until thickened.

Recipe from Fine Cooking

Christmas Wrap-Up

How was your Christmas? Mine was good… Filled with great times, great food and great cookies! As I’ve done in years past I had a Christmas baking marathon and baked various cookies to give as gifts. I took my last sheet of cookies out of the oven early in the day Christmas Eve. This year along with the usual rugelach and malted chocolate chip cookies, I made another batch of these vanilla spritz cookies along with peanut butter cookies and oatmeal cookies. YUM! And, there was also a batch of Gingerbread Men, one of who was a bit angry after losing part of his leg.

IMG_0197

And luckily this year I got my handmade Christmas gifts done in plenty of time, okay, with about a week to spare. This for me is good, since it gave me enough time to wrap them with pretty ribbon bows. I made two Afghans and an earring and bracelet set.

The first afghan was made with Lion Brand’s Thick & Quick Yarn following their Cromwell Court Afghan Pattern. Here’s a pic of the start…

IMG_9788

And the finish product…

IMG_0170

The second afghan was made with Lion Brand’s Vanna’s Choice Yarn following their 5 1/2 Hour Throw Pattern… Truthfully it took me longer than the 5 1/2 hours and since it involved crocheting three colors together I opted to wind the three colors into a ball to make crocheting a lot simpler.

IMG_9781

And the finish product…

IMG_0180

And finally the earring and bracelet set that I made using tila beads, superduo beads, seed beads and crystals just using basic beadweaving techniques.

IMG_0092 IMG_0089

I also squeezed in some time to make my Christmas cards once again this year.

IMG_0110

I hope you are all enjoying the holidays and that you all have a wonderful New Year!


Christmas Sugar Cookies

It’s Christmas Eve! Have you gotten all of your baking done? I took my last sheet of cookies out of the oven not too long ago. Speaking of cookies… Decorated sugar cookies are synonymous with the Holidays. Whether they are decorated with royal icing, sprinkles or both, you can usually find them on most cookie platters this time of the year. Now, there are so many different recipes for sugar cookies out there. I once tried one with orange juice… it definitely wasn’t my favorite. What grabbed me about this recipe was that it was for Soft Sugar Cookies. Yes, sugar cookies are supposed to be on the crispier side but I sometimes find that if you leave those cookies in the oven for a few seconds too long your bordering on hard cookies not crispy ones.

To make the dough for these cookies I began by beating butter in the bowl of my stand mixer on medium-high speed until it was light and fluffy. I then added in sugar, egg, vanilla extract and sour cream. Once all of those ingredients were well incorporated I added a flour mixture that included flour, baking powder, salt and baking soda. After the dough came together I shaped the dough into a disk, covered it with plastic wrap and refrigerated it until it was firm.

IMG_0155

Once it was firm I rolled it out on a floured surface and began cutting out my Christmas shapes.

IMG_0158

After transferring the cutouts to a parchment lined cookie sheet I decorated them with holiday themed sprinkles and sugar.

IMG_0160

I baked them in a 350 F preheated oven for 5 to 6 minutes and then transferred them to a wire rack to cool completely. This recipe is definitely going to be my go-to recipe for whenever I want to make sugar cookies. They are not overly sweet and are the perfect texture. They have a little bite to them but overall are nice and soft!

IMG_0164

Hope you all have a wonderful Christmas!!!

Soft Sugar Cookies

  • Servings: 36 3-inch cookies
  • Print

*Please note that I halved the recipe which yielded me 30 2-inch cookies. If you would like to do the same follow the measurements in parenthesis.


Ingredients:

3 cups flour (1 1/2 cups)

1 teaspoon baking powder (1/2 teaspoon)

1/2 teaspoon salt (1/4 teaspoon)

1/4 teaspoon baking soda (1/8 teaspoon)

1 1/2 sticks unsalted butter, at room temperature (6 tablespoons)

1 cup sugar (1/2 cup)

1 egg (2 tablespoons of a whisked egg)

1 teaspoon vanilla extract (1/2 teaspoon)

1/4 cup sour cream (2 tablespoons)


Directions:

In a medium bowl whisk together the flour, baking powder, salt and baking soda and set aside.

In a large bowl using an electric mixer (or using a stand mixer) beat the butter on medium-high speed until light and fluffy. Add the sugar and beat to blend. Add in the egg and vanilla and then the sour cream. Switch the speed to low and beat in the flour until just blended. Halve the dough, shape into disks and wrap plastic wrap and refrigerate until firm – 1 1/2 to 2 hours. If using the smaller measurements just shape into one disk.

Preheat the oven to 375 F and line cookie sheets with parchment paper.

On a floured surface roll out the disk to about 1/8 inch thick and cut out using desired cookie cutters. Place on prepared cookie sheets about 1-inch apart.

Bake until the bottoms of the cookie are light golden, 5 to 7 minutes. Transfer to a wire rack to cool completely.

If you plan on decorating with sprinkles and sugar, place those on the cookies prior to baking. If you plan on decorating with royal icing wait until the cookies have completely cooled to do so.

Recipe from Rachael Ray Magazine

Raspberry Almond Shortbread Thumbprints

There are some recipes you see that you know that you must instantly try… As was the case when I got a recipe in my inbox last week from Land O’ Lakes for a Raspberry Almond Shortbread Thumbprint cookie. I pretty much love any pastry / baked item that involves almonds and then when you throw raspberry into the mix you are definitely in for something pretty delicious. Best of all, not only are these cookies amazing, but, they are simple to make and add a festive to look to your holiday cookie platters.

I began by making the dough (obviously… LOL!)… I combined butter, sugar and almond extract in the bowl of my stand mixer and beat it at medium speed until it was well combined, scraping the bowl as necessary. On low speed I added in flour and continued beat the mixture until it was well combined. Once the dough had come together I covered and refrigerated it for an hour or until the dough was firm.

IMG_0070

Once it was firm, I rolled dough into 1-inch sized balls – I used approximately 1/2 tablespoon of dough for each ball.

IMG_0075

Then using the back of a 1/4 teaspoon (you could simply use your thumb as well, hence the name of the cookie) I made a small indentation into the center of each cookie and then filled them with raspberry jam.

IMG_0076

After refrigerating the cookies for about 10 minutes I baked them in a 350 F preheated oven for about 12-14 minutes, until the edges just began to brown. You don’t have to refrigerate the cookies prior to baking, but, I did so so that the dough could firm up again a bit so the cookies wouldn’t spread as much while baking. My cookies did spread some so I probably could have left them in the refrigerator a bit longer. After removing them from the oven I let them sit on the cookie sheet for a minute or two and then transferred them to a wire rack to cool completely.

IMG_0083

Once the cookies cooled I drizzled a glaze of water, confectioners’ sugar and almond extract over them.

IMG_0096

One word for these cookies… YUM!


Raspberry Almond Shortbread Thumbprints

  • Servings: 36-42 cookies
  • Print

Ingredients:

1 cup (2 sticks) unsalted butter, softened

2/3 cup sugar

1/2 teaspoon almond extract

1/2 cup raspberry jam


For the Glaze:

1 cup powdered sugar

2 to 3 teaspoons water

1 1/2 teaspoons almond extract


Directions:

Combine the butter, sugar and almond extract in a bowl and beat at medium speed until creamy, scraping the sides of the bowl as necessary. Switch to low speed and add in the flour, beating well until all the ingredients have been combined. Cover and refrigerate for at least 1 hour.

Preheat oven to 350 F and cover cookie sheet with parchment paper.

Shape the dough into 1-inch balls; approximately 1/2 tablespoon of dough. Place 2 inches apart on prepared cookie sheets. Make a small indentation in the center of each of the cookies and fill with a 1/4 teaspoon of the raspberry jam.

You could place the cookies back in the refrigerator for a few minutes for the dough to firm up again, or place them directly in the oven for about 12-14 minutes, or until the edges are slightly browned. Let stand on the cookie sheets for 1 minute and then transfer to a cooling rack to cool completely.

Combine all the ingredients for the glaze in a bowl and whisk together until smooth and then drizzle over the cooled cookies.

Recipe from Land O’ Lakes

Vanilla Spritz Cookies

How is your holiday baking going? I’ve been squeezing it in while trying to finish up Christmas cards, Christmas shopping and Christmas gift crafting (i.e. knitting and crocheting.) I think I am on track to get it all done; if not there will be some late nights in my near future.

Today I am bringing you super simple and delicious Vanilla Spritz Cookies. So customarily when you make spritz cookies you pipe them through a cookie press, well, I tried that once and the results were horrible. So for these cookies I decided to pipe them using a pastry bag and a large star tip instead and the end result was great!

IMG_0069

To make the dough I began by beating butter in my stand mixer on medium speed for 30 seconds. Next I added in sugar and baking powder. Once those ingredients were well combined I added in an egg and vanilla bean paste. And finally flour.

IMG_0064

Next I transferred the dough to a pastry bag fitted with a large star tip and made simple piped drop cookies which I then sprinkled with festive colored sugar and sprinkles. Now, I went simple and just did simple drop cookies, but, you could get creative and pipe wreaths or different swirl designs.

IMG_0067

After baking them in a 375 F preheated oven for 8 minutes I removed them from the oven and transferred them to a wire rack to cool completely. Now, these cookies are of the dangerous variety… On the smaller side and super yummy. Which means you could grab a decent handful and munch away on them absentmindedly. But, since it’s the Holidays it’s okay!

IMG_0068


Vanilla Spritz Cookies

  • Servings: 72 cookies
  • Print

***Please note that I halved the recipe. Below is the original recipe with the original measurements. If you would like to make a smaller batch of cookies, i.e. 36, follow the measurements in the parenthesis. To get the 2 tablespoons of egg, whisk the egg and then measure it out. You might be tempted to use the entire egg, but, that would make the dough to watery and prevent you from being able to pipe or form the dough.


Ingredients:

1 1/2 cups unsalted butter, softened (3/4 cup / 12 tablespoons)

1 cup granulated sugar (1/2 cup)

1 teaspoon baking powder (1/2 teaspoons)

1 egg (2 tablespoons)

1 tablespoon vanilla bean paste* (1/2 tablespoon)

3 1/2 cups all-purpose flour (1 3/4 cup)

Sprinkles and Sugar Crystals to decorate

*If you do not have vanilla bean paste you can use an equal amount of vanilla extract

Directions:

Preheat the oven to 375 F. Line cookie sheets with parchment paper.

In a large bowl beat butter with a mixer on medium speed for 30 seconds. Add the sugar and baking powder, continue beating until well combined then add in the egg and vanilla bean paste. And finally the flour. Scrape the sides of the bowl as necessary during the mixing.

Transfer the dough to a pastry bag fitted with a large star tip and pipe drop cookies onto prepared cookies sheets. Sprinkle the cookies with decorative sugar and/or sprinkles.

Bake for 7-8 minutes, until the edges are firm but just beginning to brown. Remove from the oven and transfer the cookies to a wire rack to cool completely.


Recipe slightly modified from Better Homes & Gardens 100 Best Cookies Magazine