Brussels Sprouts & Cranberry Sauce

So, I’m working a little backwards here. Yesterday I brought you a delicious pie you can serve for Thanksgiving dessert and today I am bringing you two sides. A roasted Brussels sprouts dish and homemade cranberry sauce. Come back on Sunday for Slow Cooker Sunday where I will tell you how I slow cooked a turkey breast – see, definitely working backwards!

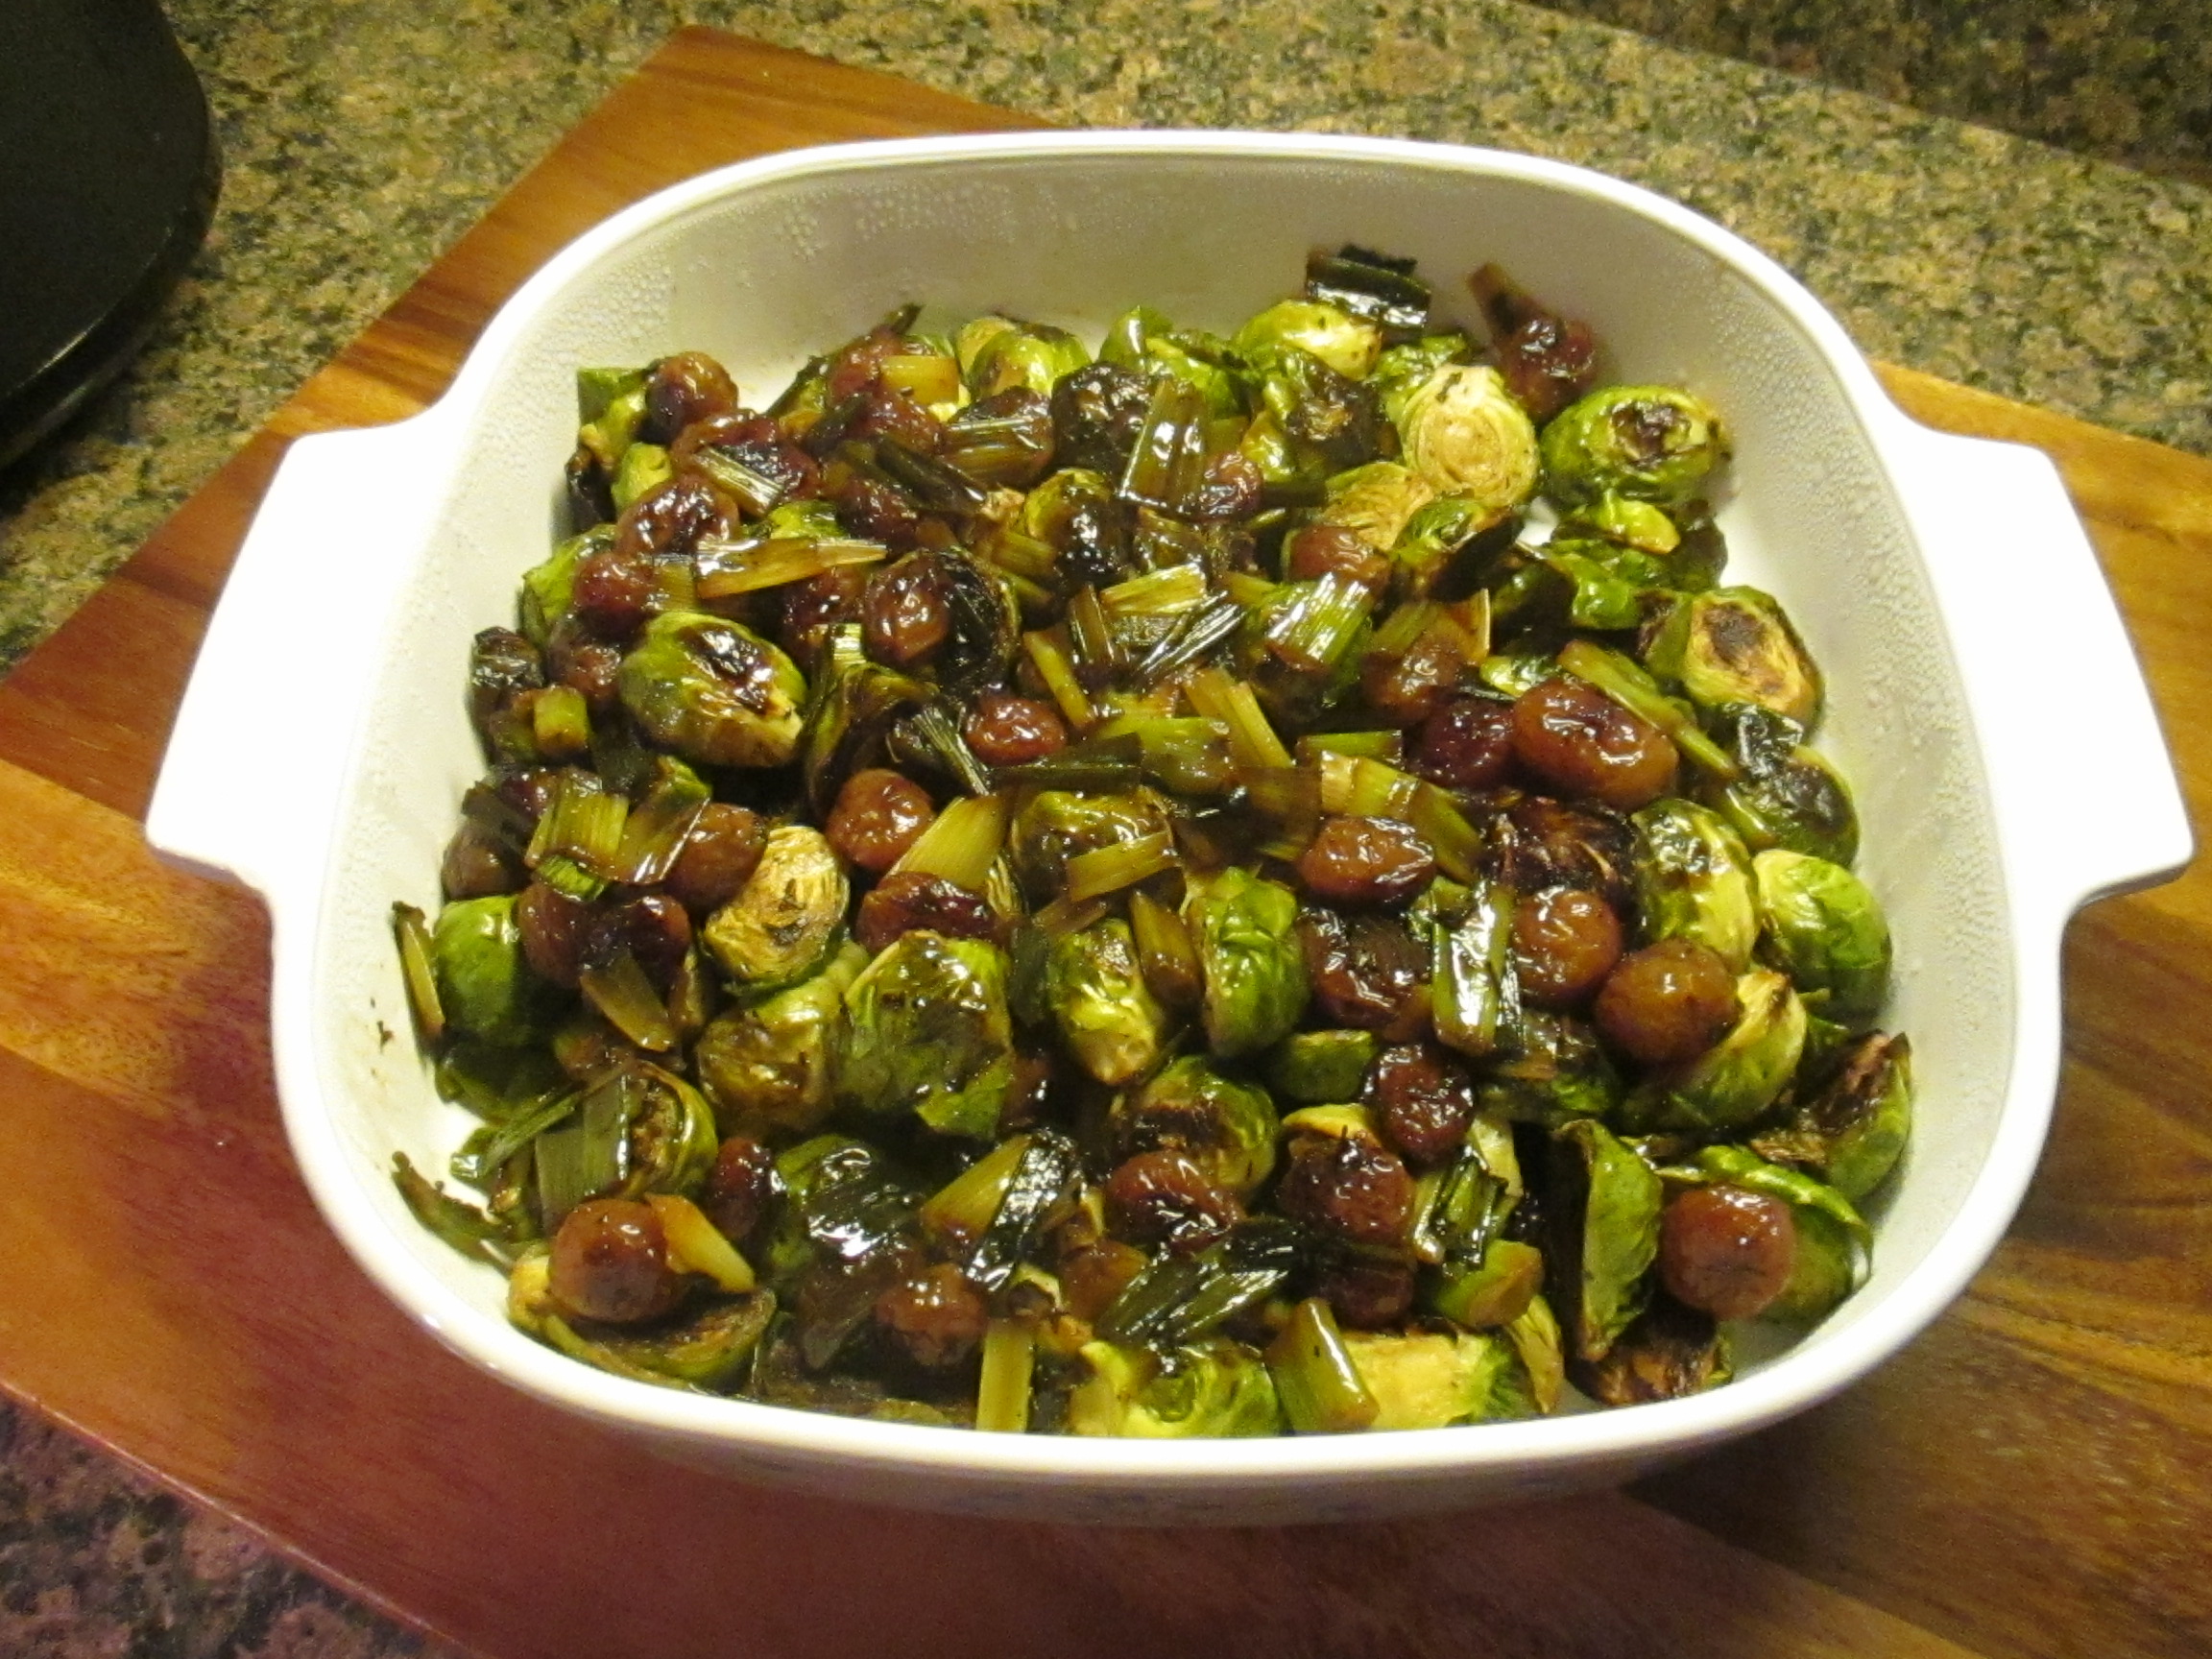
I know Brussels sprouts is not a favorite vegetable for many, but, I think the reason is because they are not preparing them the best way. Yes, they have a bitter flavor, just like broccoli rabe, but, when you season and roast them in the oven they take on a whole new flavor. Even the little charred sections taste good. And, they get perfectly tender. The recipe I recently tried called for them to be roasted in the oven and then topped with a glaze made with grapes, honey & scallions… YUM! I can’t wait to make it again and I am pretty sure it will make any Brussels sprout skeptic think twice about that vegetable that looks like a baby cabbage.

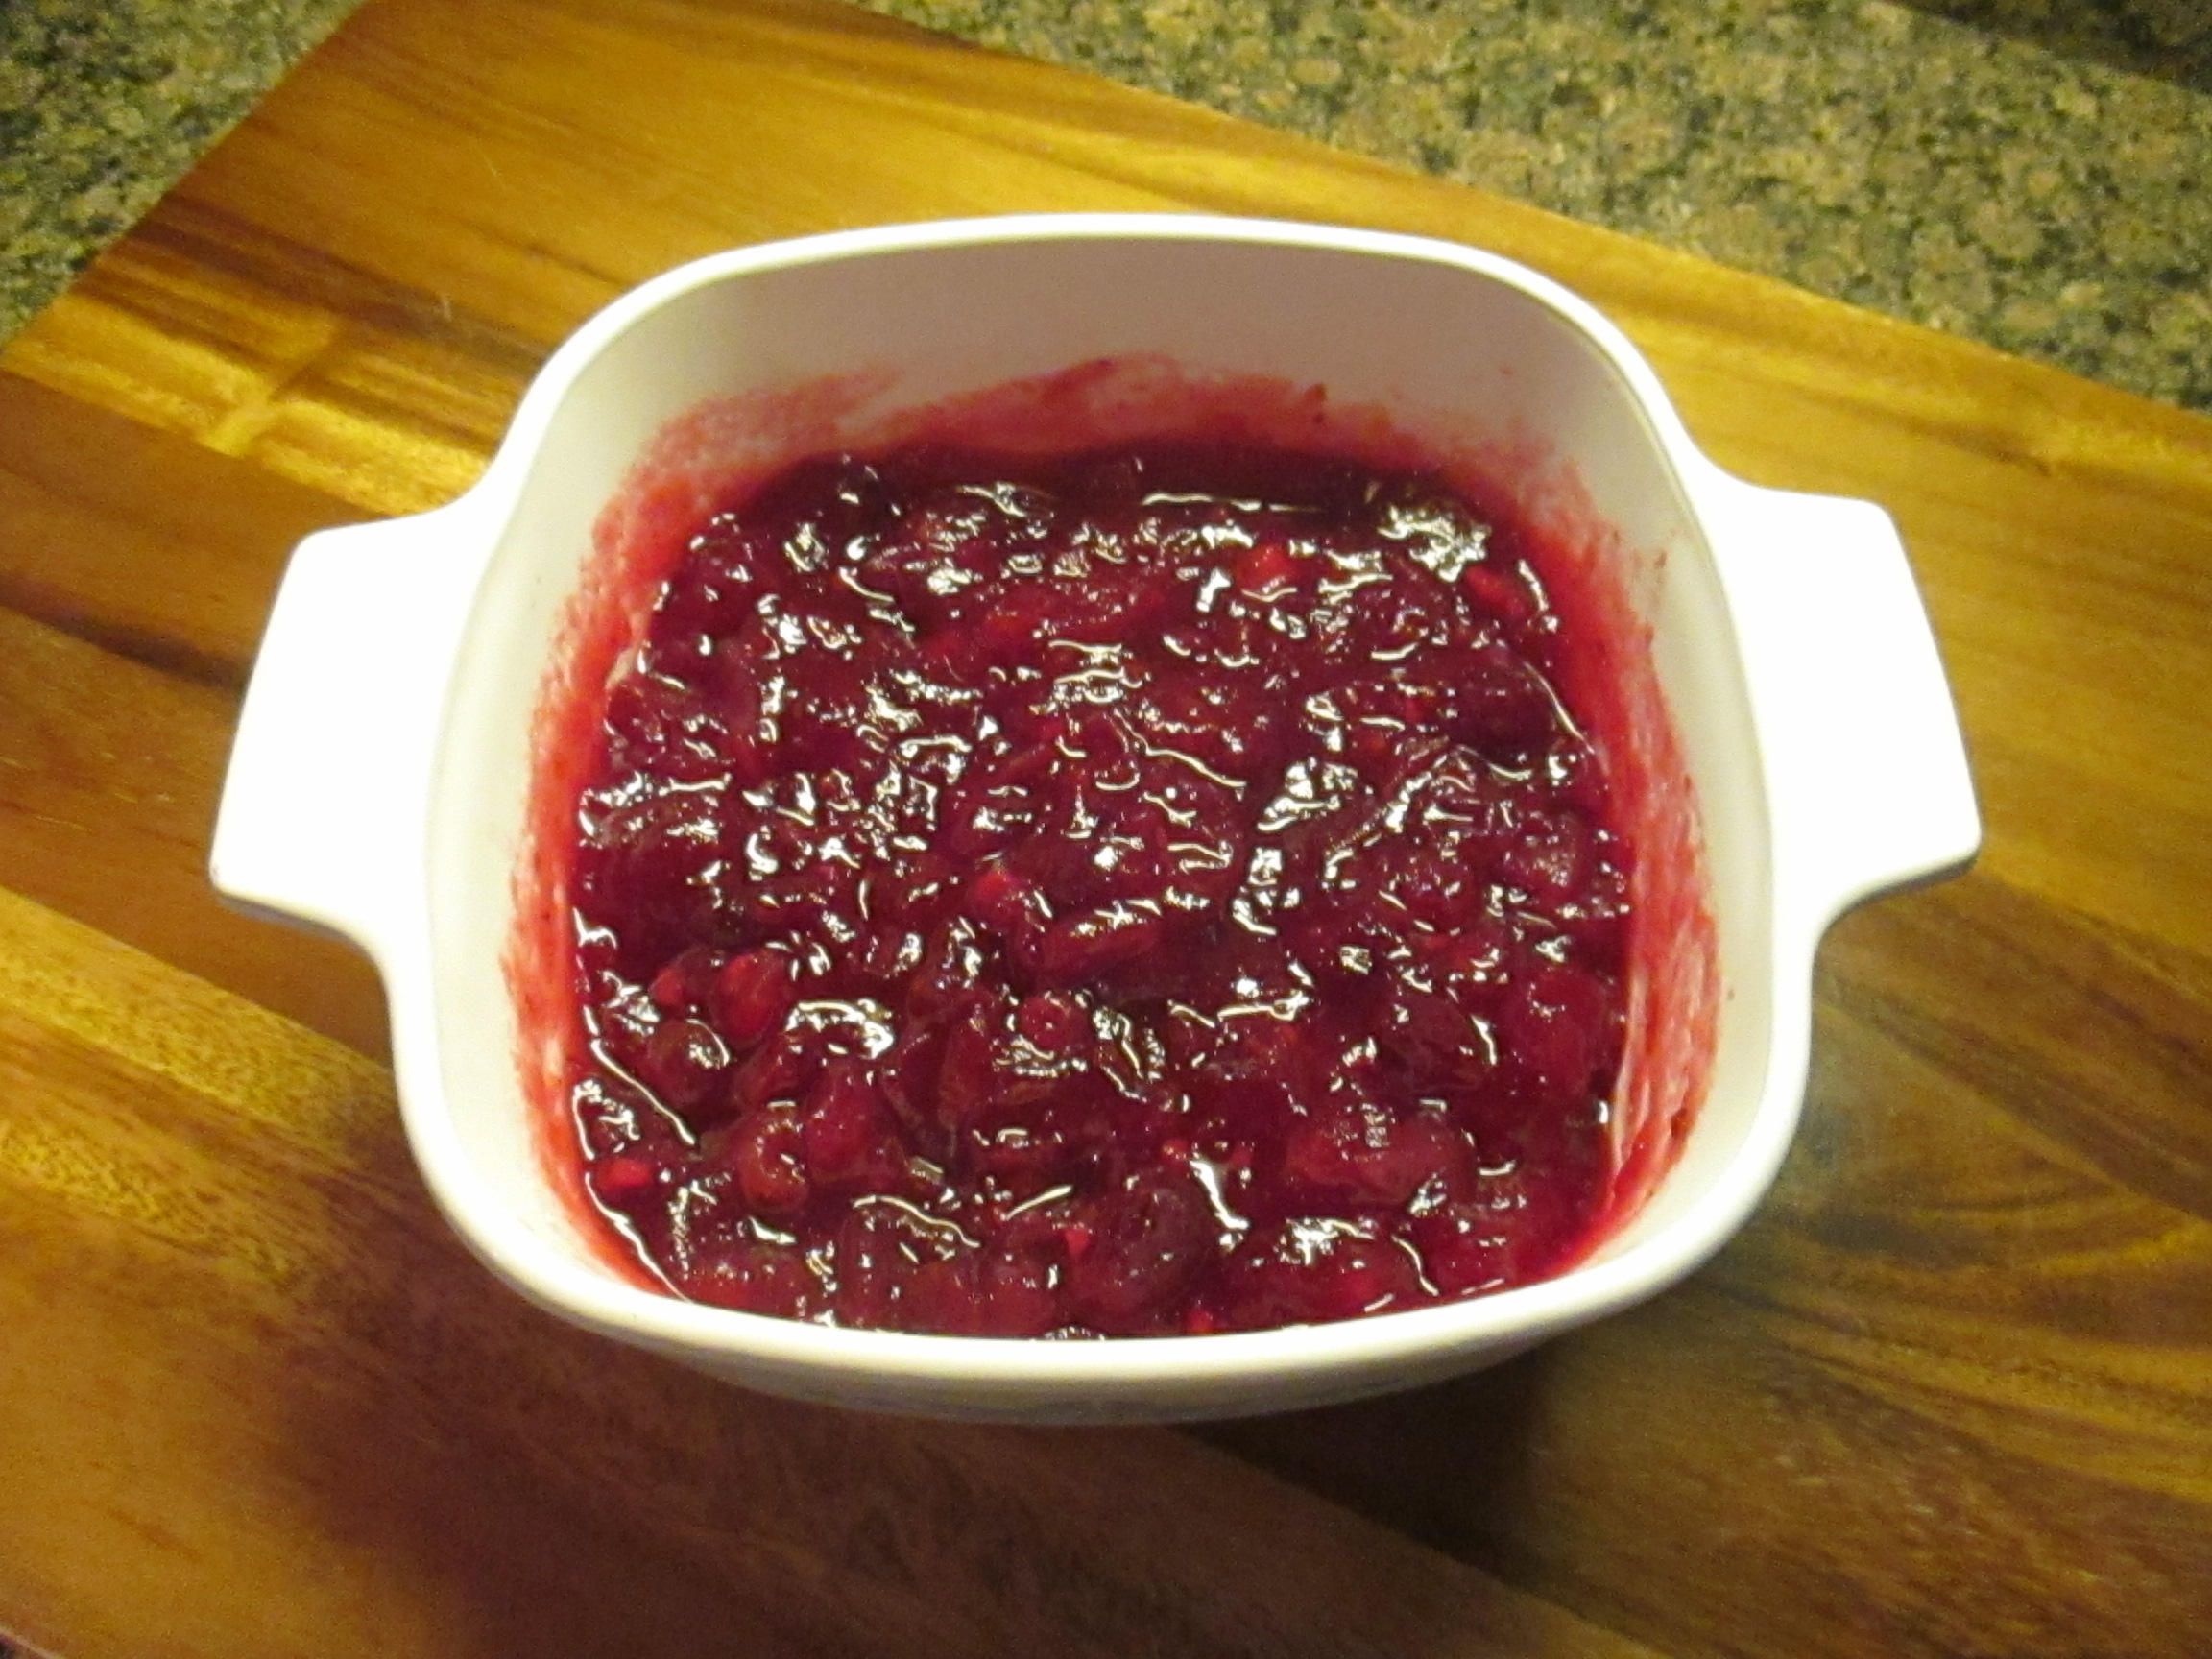
I grew up eating cranberry sauce from a can, not the whole berry sauce one, but, the jellied version. It’s weird, I won’t eat the whole berry one from a can because I feel like it’s too fake but I will eat the jellied version. Yes, I will still eat it with my turkey and stuffing. I don’t really know what prompted me to try making cranberry sauce myself since I was content with the can stuff, but, I’ve used the same recipe now for quite a few years and it’s one of my favorite things about Thanksgiving. I look forward to a sandwich with leftover turkey warmed up with melted cheese (preferably provolone) and topped with cranberry sauce every year after Thanksgiving. I am dreaming of it now as I type… LOL! So, what is so special about this sauce? I think it’s the simplicity of it. There are no out of the box ingredients. It’s simply a bag of fresh cranberries, sugar, water, fresh ginger, orange zest, a cinnamon stick, ground cloves and salt. I tried getting a little fancy one year, but, it just didn’t top the simple yet delicious taste of this cranberry sauce. Make a few days before you intend to use to really get the best flavor.

So, I hope these two dishes will make their way to your table, or, they have given you ideas of something else to try.


Roasted Brussels Sprouts With Grapes

Ingredients:

2 pounds Brussels sprouts, trimmed and halved

3 tablespoons olive oil

3 tablespoons unsalted butter

2 cups red seedless grapes

2 teaspoons chopped fresh thyme

1 bunch scallions, cut into 1-inch pieces

2 tablespoons honey

Kosher salt & freshly ground black pepper


Directions:

Place a baking sheet on the middle rack of the oven and preheat to 450 F.

Toss the Brussels sprouts with the olive oil, 1/2 teaspoon salt and a few grinds of pepper in a large bowl. Spread them on the hot baking sheet and roast, tossing halfway through until tender and charred in spots, 20 to 30 minutes.

While the Brussels sprouts are in the oven…. Melt the butter in a large skillet over medium-high heat. Add the grapes and thyme and cook until the grapes starting to burst, stirring occasionally. Add the scallions and honey. Increase the heat to high and bring to boil, then reduce the heat to medium-low and let simmer until the juices thicken and the grapes are glazed. Season with salt and pepper.

Once ready, transfer the Brussels sprouts to a dish and drizzled the grape mixture over them

Recipe from Food Network


Cranberry Sauce

  • Servings: 2 1/2 Cups
  • Print

Ingredients:

1 12 ounce bag fresh cranberries

1 cup sugar

1 cinnamon stick

2 teaspoons finely chopped ginger

2 teaspoons orange zest

1/4 teaspoon salt

1/8 teaspoon ground cloves


Directions:

In a medium saucepan combine 1 cup of water with the sugar, cinnamon stick, ginger, orange zest, salt and cloves. Cook over medium heat, stirring, until the sugar dissolves. Stir in the cranberries and bring to a boil, then lower the heat to medium-low and allow to simmer, stirring until slightly thickened.

Remove from the heat and transfer to a bowl. Allow to cool before refrigerating

Recipe from Rachael Ray

Chicken Vegetable Ramen Noodle

When I was in college I used to make ramen noodles a few times a week in my trusty electric hot pot. It was one of the few things that was fool proof to make in there, besides heating up a can of soup. Once I graduated though the hot pot was thrown out and I stopped eating ramen noodles. Then last year not long after my Dad passed away I had a sudden craving for ramen noodles. There was such a feeling of comfort and safety in that bowl of noodles. A reminder of when life was easier and the safety of youth made you feel like nothing could ever go wrong or nothing bad could happen. Grief is a funny thing. It can make you remember things you completely forgot and question whether or not they happened and can make you find comfort in the oddest of things, hence the ramen noodles. To this day I still enjoy the occasional bowl of ramen noodle and have a case of it in my cabinet at all times. It got me thinking, why not try to make a traditional ramen bowl as opposed to the instant one I have been enjoying.

I began by prepping my various vegetables to have them ready to add to the pot as I was going…

And once I started it came together pretty quick, the most time consuming part of making this ramen bowl was prepping all of the vegetables. Oh yeah, and finding the miso. I ended up going to a local Oriental grocery market that I’ve known about for years. I did find miso at my local supermarket, but, the recipe called for white miso and the one they had was red and I didn’t want to take any chances with subbing ingredients.

And while it was delicious, I did have a minor mishap. I left the pot covered a little too long with the noodles so I ended up with something more like Lo Mein than ramen soup. I did have enough broth for one bowl, but, not for two.

Oh well… My noodles and veggies were just as delicious.

I’ll definitely make this again, but, I think next time I will omit the eggs and the chicken. It was definitely enough with just the vegetables.


Chicken Vegetable Ramen Bowl

Ingredients:

1 teaspoon kosher salt

1/4 teaspoon black pepper

1 teaspoon garlic powder, plus more for seasoning chicken

3 tablespoons toasted sesame oil, divided

1 chicken breasts (about 1 pound)

2 eggs

1/2 medium onion, chopped

1-inch piece ginger, finely chopped

3 tablespoons soy sauce

4 cups chicken or vegetable broth

2 tablespoons white miso

8 ounces fresh shiitake mushrooms, de-stemmed and sliced

1 cup baby spinach

4 to 5 mini sweet peppers plus more for garnish, sliced

3 to 4 green onions plus more for garnish, sliced

1 large carrot, thinly sliced into ribbons

6 ounces ramen noodles


Directions:

Preheat oven to 375 degrees.

In a skillet over medium-high heat, warm the 1 1/2 tablespoons of the oil. Sprinkle each chicken breast with salt, pepper and garlic powder. Once hot, add the chicken breasts to the skillet. Brown chicken for 5 minutes on each side.

Transfer the chicken to the oven and bake for 20 minutes, until cooked through.

In a small saucepan, place the eggs and cover with water and cover the pan. Bring to a boil then turn off the heat. Keep lid on saucepan for 5 minutes. Drain the hot water and fill with cold water, once cool drain the water and peel the eggs.

In a large stockpot over medium-high heat, warm the remaining oil. Once hot, add onion and ginger. Cook for 5 minutes, until onions are translucent.

Add garlic powder, stirring frequently for 1 minute. Whisk in soy sauce, broth and miso. Add mushrooms and bring to a boil, then reduce to a simmer. Let simmer covered for 15 minutes.

Add the peppers, green onions, spinach and carrots. Continue to simmer covered for 5 minutes. Taste the broth and add salt if necessary.

Finally, add ramen noodles and turn off heat (the heat from the soup will soften the noodles).

Slice chicken breasts and eggs. Divide soup into bowls and serve with chicken and a halved egg.

Recipe from Simply Organic

Caribbean Chicken

Every week there are two questions I dread… What should I make for lunch for the week and what should I make for dinner? I try to switch it up and make different things but sometimes I just run out of ideas or quite simply I just don’t feel like cooking. Thankfully, I have a binder of organized recipes I have been collecting for quite some time and I am finally putting them to good use. This Caribbean Chicken recipe is one that I ripped out from Food Network Magazine a few years ago and I am sure I will be making it again.

To start I browned boneless skinless chicken thighs that I seasoned with curry powder, allspice, thyme salt and pepper in melted coconut cream that I skimmed off the stop of the coconut milk. Just remember not to shake the coconut milk or you won’t be able to skim this cream off of it.


Once the chicken was browned I transferred it to a plate and added onion, garlic, cilantro, a serrano chili and thyme sprigs to my Dutch oven and cooked until the onions began to soften. 


I then returned the chicken to the pot along with water and the remaining coconut cream and milk from the can and cooked it covered on medium-low heat, for about 15 minutes until the sauce was thickened and the chicken was cooked through, about 15-20 minutes. And finally, I added in a cup frozen peas and carrots thawed and cooked everything until the pear and carrots were warmed through. I then seasoned it with salt and pepper.


And served it with white rice.


Caribbean Chicken

Ingredients:

1 1/2 teaspoons curry powder

1/2 teaspoon ground allspice

1/2 teaspoon chopped fresh thyme, plus 3 sprigs

Kosher salt and freshly ground pepper

1 1/2 pounds skinless, boneless chicken thighs, quartered

1 13.5 ounce can unsweetened coconut milk (do not shake)

1 yellow onion, chopped

2 garlic cloves, minced

2 tablespoons chopped fresh cilantro

1 Scotch bonnet, habanero or serrano chili pepper, seeded and finely chopped

1 cup frozen peas and carrots, thawed

Cooked white rice for serving

Directions:

Combine the curry powder, allspice, chopped thyme, 1 teaspoon salt and a few grinds of black pepper in a small bowl and use it to season the chicken.

Skim 2 tablespoons of the solid cream off the top of the coconut milk and transfer to a large Dutch oven or pot and melt over medium-high heat. Add the chicken and brown on both sides, about 5-7 minutes. Transfer to a plate.

Add the onion, garlic, cilantro, chili and thyme sprigs to the pot and cook, stirring until the onions are softened. Return the chicken to the pot along with a 1/4 cup of water and the coconut milk along with any remaining coconut cream. Reduce the heat to medium, cover and cook until thickened, about 15 minutes.

Remove the thyme sprigs and add the peas and carrots and continue cooking until warmed through.

Serve with rice.

Recipe adapted from Food Network


Hello Fresh Review

I would have never thought to try Hello Fresh if it wasn’t for a gift card they sent me in the mail for $50 off – i.e. $25 off my first 2 boxes. So, I figured why not! I ultimately ended up getting a better deal when I went through the registration process and then didn’t complete the order. They sent me an email for $35 off my first box with just one hitch, I had to use the code within 48 hours. I made it a point then to definitely finish my order. After a little navigating around the website – one too many pop-ups appeared that navigated me away from where I wanted to be – I was able to select my meals. My first reaction… This is it? I don’t know what I was expecting but I guess I wanted meals that were a little more “exciting.” Oh, let me just say, I selected the classic plan for 2 people and 3 meals a week which is approximately $60/week, with my discount I paid a few pennies less than $25. I figured I could have dinner and then take the leftovers to work the next day for lunch. I ended up settling on these three meals: Thai-Spiced Pork Meatballs, Veggie-Loaded Orzo and Sausage and Pineapple Poblano Beef Tacos.

And here’s my box. It arrived on my selected day. Thankfully, my mail arrived early that day and while I could have cooked that night I had some leftovers in the fridge that I wanted to finish up.

And the inside…

I was thinking that everything would be loose inside of the box and I would have to pair of all the ingredients to the recipe, but, much to my surprise and something I loved, all of the ingredients were grouped together in these brown bags and the meats were below in between two ice packs. What’s really nice is that you don’t have to measure. All of the seasonings are pre-measured and packaged. There’s absolutely no waste. But, you do have to dice, slice and chop the vegetables.

And the recipe cards are oversized and offer pictures of each step with thorough instructions. Including prep and cook time which were accurate.

Here are pictures of the meals I made…

Thai-Spiced Pork Meatballs

Pineapple Poblano Beef Tacos

Veggie-Loaded Orzo and Sausage

And while all three meals were good, my favorite was the orzo. I think it was because it was the one meal that didn’t have a spice packet, so most of the flavor came from the vegetables and sausage and it’s a meal that I could easily recreate myself. With each meal I had more than enough for dinner and lunch the next day which was great.

There isn’t much that I didn’t like. Maybe the vegetables that I got wouldn’t have been the ones that I picked, but, it’s not like they were bruised or ended up rotting before I got to use them. But, I would have preferred that my garlic wasn’t peeled. It looked like it had been poked or something.

The final verdict… While Hello Fresh may be good for some, it’s not for me and I opted to cancel my subscription. It’s for various reasons. The price I paid was great, but, the normal price of $60/week is a little too much for just me myself. It’s odd, but, you would think that having the meals waiting for me at home to cook would take some of the pressure of what to cook off but it actually kind of made it worse. Almost like I was being forced to cook. Normally I’ll cook and make enough so I can have leftovers for a few days and with this it was dinner for one day and lunch for the next. Which meant I was cooking every day and cleaning pots and dishes and my kitchen as well. Not something I normally do every day. When I did cancel they had a list of possible reasons and I selected that it was the price, the next screen then gave me the option to reduce the frequency of receiving a box. I could have chosen every 2 weeks or every 4 weeks, but, I still wasn’t interested. I will say though that the meal selections for the following did look really good and I was tempted but no. When I think about how much I spend on groceries each week Hello Fresh is just not cost effective for me. That isn’t to say that I wouldn’t try another meal kit delivery service though.

So, have any of you tried Hello Fresh? What did you think?


Rigatoni Pie

Don’t worry… You’re not putting pasta in a pie crust with this pie. This is a fun variation on your basic pasta, sauce and cheese dish.

You start off by boiling a pound of rigatoni pasta until it is lightly less than al dente – the minutes truly depend on the brand of pasta you buy. Once the pasta is ready, drain it and spread it on a baking sheet and toss with a tablespoon of olive oil.

Next, line a baking sheet with aluminum foil and place a 9-inch springform pan in the center. Grease the pan with a tablespoon of olive oil and began standing the rigatoni on their ends in the pan until the entire pan is filled.

Pour your favorite pasta sauce over the noodles and then sprinkle mozzarella and parmesan cheese over the sauce.

Tent the pan with aluminum foil and bake for 30 minutes in a preheated 375 F oven. Uncover the pan and bake for about another 30 minutes, until the cheese is golden brown and bubbly.

Let the pasta cool for 10 minutes and then carefully remove the ring from the pan, cut the pie and serve.


Rigatoni Pie

Ingredients:

4 cups of marinara sauce (store bought or homemade)

1 pound rigatoni

2 tablespoons olive oil

Kosher salt

1 pound mozzarella cheese, grated

2/3 cup parmesan cheese, grated


Directions:

Preheat oven to 375 F. Grease a 9-inch springform pan with a tablespoon of olive oil and place on a foil-lined baking sheet.

Bring a large pot of salted water to a boil and cook the pasta until is slightly less than al dente. Drain the pasta, spread in a single layer on a rimmed baking sheet and toss with a tablespoon of olive oil.

Stand the rigatoni on their ends in the prepared springform pan. Pour the sauce over the noodles and spread with the back of a spoon. Sprinkle with cheeses.

Tent the pan with aluminum foil and bake in the oven for 30 minutes, uncover and bake until the cheese us bubbly and golden brown, about an additional 30 minutes. Cool for 10 minutes and then remove the ring from the pan.

Recipe from Food Network


Margherita Naan Bread Pizza

Naan bread pizza… One of the easiest ways to make homemade pizza. I usually top mine with mozzarella cheese, caramelized onions and black olives, but, after seeing this recipe on Instagram I knew I had to try it.

To start, I prepped the toppings…

Next, I assembled the naan bread with all of the toppings…

I then baked it in a preheated 350 F oven for 8 minutes, until the cheese melted and then switched the oven to the broil setting and broiled the pizza for about 2 minutes, until the cheese began to bubble.

After the letting the pizza rest for a few minutes I then sliced and enjoyed it! This is definitely a much easier way to make pizza. And trust me, I’ve tried quite a few different ways.


Margherita Naan Bread Pizza

Ingredients:

2 naan breads

olive oil

1 green onion, sliced

2 garlic cloves, minced

8 sliced fresh mozzarella (8oz.)

2 plum tomatoes, sliced

2 slices prosciutto, torn into pieces

6 basil leaves, roughly chopped

2 tablespoons grated Parmesan cheese

salt and ground pepper

*Recipe can easily be halved

Directions:

Preheat the oven to 350 F degrees. Line a baking sheet with aluminum foil.

Place the naan breads on the baking sheet and brush the top with olive oil.

Spread the green onion and garlic over the naan bread. Then top each one with 4 slices of the mozzarella cheese. Top with the tomato slices – season the tomato with salt and pepper. Top the tomato with the prosciutto, basil and parmesan cheese.

Bake in the oven for 8 -10 minutes, until the pizza is crispy and the cheese had begun to melt. Switch the oven to broil and broil the pizza for 2 – 3 minutes until the cheese has begun to bubble.

Recipe from Allrecipes

A Bean Salad, A Potato Salad and A Watermelon Salsa

Summer is in full swing! The weather has been quite spectacular thus far. Days have been in the low 80’s and there hasn’t been that many ridiculously oppressive weather days. You know the ones I am talking about… the ones with the three dreaded H’s – Hazy, Hot & Humid. Fingers crossed it continues like this and August doesn’t rear its ugly head with horrific weather. Nonetheless, pleasant weather or not, it is the summer and one thing is for sure, heavy meals are just not what you want to eat. I know I personally don’t like to eat anything too heavy during the summer months. So today, I am brining you two salads and a salsa that I recently made for my 4th of July BBQ that got rave reviews.

Up first a Greek Chickpea Salad. The most time consuming part of this salad was chopping Persian cucumbers and halving cherry tomatoes. Hence, it was a cinch. What was really nice about this salad is that the leftovers kept well for a few days. There are some salads that just turn into a soggy or sour mess, but, not this once. That could be because the vinaigrette is freshly made as opposed to using something from a bottle.

Next, a Cucumber Potato Salad. It might sound like an odd combination and what might sound even more odd is that soy sauce is added to the mayonnaise, but, thanks to the addition of freshly squeezed lemon & lime juice that soy flavor is really toned down and the two veggies together really complement each other. The red potatoes have a nice creamy texture to them and the cucumbers give the salad a nice crunch.

And finally… A Watermelon Salsa. Yes, a watermelon salsa. My friends more or less had a bewildered or apprehensive look on their face when I told them what the salsa was made of, but, once they tried it their eyes widened in delight. It was supposed to have mango, but, since I didn’t have any on hand I opted to add in an extra cup of diced watermelon. Also, I made this salsa the day before to make sure all of the flavors – cilantro, red onion, basil, lime, etc. – really blended together and then on the day of, before serving it, I transferred it to another bowl and drained some of the juices out of it so it wouldn’t be a watery mess.

So, what salads have you been enjoying or wanting to try this summer?


Greek Chickpea Salad

Basic Vinaigrette:

1/4 red wine vinegar

1 tablespoon Dijon mustard

3/4 cup extra-virgin olive oil

1 tablespoon minced shallot

1/2 teaspoon dried oregano

Kosher salt and freshly ground pepper

Whisk the vinegar, Dijon mustard, shallot, oregano. 1/4 teaspoon salt and a few grinds of the pepper in a medium bowl until combined. Slowly drizzle in the olive oil in a steady stream, whisking constantly, until the dressing is emulsified and smooth. Refrigerate until ready to use and any leftovers.

Salad:

2 15 oz. cans of Chickpeas – drained and rinsed

2 cups Persian cucumber, chopped

2 cups cherry tomatoes, halved

1/2 cup pitted Kalamata olives, halved

1/2 cup crumbled feta cheese

1/2 cup chopped basil

1/2 cup chopped parsley

Combine all ingredients in a large bowl and toss with 2/3 cup of the basic vinaigrette. Season with salt and pepper if necessary and refrigerate until serving.


Cucumber Potato Salad

Ingredients:

2 lbs. red potatoes, cut into 1-inch cubes

1 1/2 tsp. kosher salt, divided

1 cup mayonnaise

2 tbsp. soy sauce

1 tsp. lemon zest plus 1 tbsp. fresh juice

1/2 tsp. lime zest plus 1 tbsp. fresh juice

1/2 cup chopped chives

1/2 cup finely diced celery

1/3 English cucumber, sliced into half moons

1 tbsp. finely diced scallions

black pepper

Directions:

Place the potatoes in a medium saucepan and cover with about 1 inch of water, add 1 teaspoon of salt. Bring to a boil over high and reduce heat to medium low and simmer for about 20 to 25 minutes, until the potatoes are tender. Drain and spread the potatoes on a baking sheet and allow them to cool to room temperature.

In a large bowl mix together the mayonnaise, soy sauce, lemon zest, lemon juice, lime zest and lime juice, stir together. Add black pepper and the remaining salt. Add the cool potatoes along with the chives, celery, cucumber and shallots. Stir gently and refrigerate until serving, at least 20 minutes.

Recipe from Dale Talde


Watermelon Salsa

Ingredients:

1 1/2 tsp. lime zest (about 1 lime)

1/4 fresh lime juice (about 3 limes)

1 tablespoon sugar

Freshly ground pepper

3 cups seeded and finely diced watermelon*

1 cucumber, peeled, seeded and diced

1 mango, peeled and diced*

1 jalapeno pepper, seeded and minces

1 small red onion, finely chopped

8 fresh basil leaves, finely chopped

Tortilla chips for serving

*Instead of using a mango I used 4 cups of watermelon

Directions:

Stir together the lime zest, lime juice, sugar and 3/4 teaspoon pepper in a bowl. Add the watermelon, cucumber, mango, jalapeno, onion and basil and toss gently. Chill the salsa until ready to serve. If you find the salsa is too watery before serving, drain some of the juices out. Serve with tortilla chips.

Recipe from Trisha Yearwood


Garlicky Baked Shrimp

This is my kind of recipe… Quick, simple and foolproof. I’ve made it 3 times and each time it was perfect. What is it… Garlicky Baked Shrimp. I usually serve it with rice, but, I think it would be perfect tossed with some pasta.

A few things to note… Don’t bake for more than 7 minutes or you will overcook the shrimp and you definitely don’t want rubbery shrimp. You can broil for an extra minute or so, but, once you see the bread crumbs are a nice toasty color you’re good to go – you don’t want garlic shrimp with a burnt topping. And finally, if you like your shrimp extra garlicky, through in an extra clove of garlic or two.

Garlicky Baked Shrimp

Ingredients:

1 1/2 – 2 lbs. raw shrimp, peeled and de-veined*

6 cloves garlic, minced

3 tablespoons white wine**

Kosher salt and freshly ground black pepper

4 tablespoons melted butter***

1/2 cup Panko bread crumbs

1-2 tablespoons freshly-squeezed lemon juice

2 tablespoons fresh Italian-leaf parsley, chopped

*I buy my shrimp frozen, uncooked, peeled and de-veined. I let it sit out for a few hours to defrost and then proceed with the recipe.

**I used Chardonnay

***I used unsalted. If you choose to use salted keep that in mind when seasoning the shrimp with salt

Directions:

Preheat the oven to 425 F.

In a medium bowl combine the shrimp, garlic and white wine and toss to combine. Transfer the shrimp mixture to a 9 x 13 – inch baking dish and spread it out in an even layer. Season with salt and pepper.

Rinse out the bowl and then add the melted butter and bread crumbs. Use a fork to stir everything together. With your finger, sprinkle the bread crumb mixture evenly over the shrimp.

Bake for about 7 minutes, until the shrimp is just turning pink. Switch the oven to broiler setting (high if you have that option) and broil for 2-3 minutes. Until the shrimp are completely pink and cooked through and the bread crumbs are beginning to turn golden.

Remove from the oven and drizzle the lemon juice over the shrimp and then sprinkle the parsley.

Recipe from Gimme Some Oven Blog


Southwestern Chicken Egg Rolls

You may recall a while back I made Chicken Egg Rolls that were super simple and quite delicious. Well, the wrappers I used came with a few more recipes and I finally got around to trying one of them out… A Southwestern Chicken Egg Roll.

I began my mixing together chicken, cilantro, salsa, jack cheese and fresh lime juice in a bowl and chilled it in the refrigerator for a few minutes. Instead of cooking chicken I opted to pick up a rotisserie chicken from Costco… they are cheap enough and then I have leftovers to make other things or for lunch.  I should note that the original recipe also called for a slice of avocado in each egg roll and while I had every intention of adding it, my avocado never ripened properly. On a side note, have you noticed that the price of avocados is rising and they don’t taste as good? I guess once something goes mainstream prices must rise. There is that whole rage of avocado toast now, can I just say that I have been eating avocado on bread  – as I always have referred to it as – for years, way before it was cool… LOL!

Next, I filled the wrappers and folded them to create the egg rolls.


I ended up with 12 egg rolls…

And then fried them for 2 minutes…

Then transferred them to a baking sheet….

To then bake them in a 425 F oven for about 4 minutes – until they were crispy and the filling was hot.

There’s no need for a dipping sauce for these egg rolls as the salsa added to the chicken mixture kept the filling moist and quite honestly I didn’t miss the avocado! I can’t wait to make these again!

Southwestern Chicken Egg Rolls

  • Servings: 12 Egg Rolls
  • Print

Ingredients:

1 1/2 cups chicken meat, cooked and shredded

2 tablespoons cilantro, chopped

3/4 cup salsa

1/4 cheddar jack cheese, shredded

1 1/2 teaspoons fresh lime juice

12 egg roll wrappers

oil for frying

Directions:

Preheat oven to 425 F.

Mix chicken, cilantro, salsa, cheese and lime juice together in a bowl and set aside in the refrigerator to chill for a few minutes.

With a wrapper in front you in a diamond shape moisten all 4 edges of the wrapper. Place 2 tablespoons of the chicken mixture just below the center and fold up the bottom corner, then fold in the sides and finally roll the egg roll and seal the top corner.

Fry for 2 minutes in 350 F oil and then place on a baking sheet. Once all the egg rolls have been fried place the baking sheet in the oven for 3-5 minutes until the egg rolls are crispy and the filling is hot.

Recipe adapted from JSL Foods

Skillet Spinach Lasagna

So, I wasn’t too impressed with this Skillet Spinach Lasagna right after I made it, but, after taking it to work the following day for lunch my opinion changed. I think what initially had me a little eh about it was the lack of sauce and the fact that the bottom of it got burned, but, both of those things are things that can easily be changed next time I make it.

I began by browning a pound of sausage meat in a 12-inch skillet. I was able to find ground sausage meat, but, you could easily use a pound of sausage removed from the casings.

img_0474

Next, over medium heat, I added crushed tomatoes, Italian seasoning and salt. I let the sauce simmer for about 5 minutes.

img_0477

While the sauce was cooking, I combined ricotta cheese, an egg, a cup of shredded mozzarella and salt in a medium bowl.

img_0475

Once the sauce was ready it was time to assemble the lasagna. I set aside 3 cups of the sauce and placed a layer of no-boil lasagna noodles over the remaining sauce in the skillet. I then topped the noodles with a cup of the reserved sauce, 3/4 cup of the ricotta mixture and 3 cups of the spinach. I repeated the layer two times with the remaining ingredients, omitting the spinach from the top layer.

I then returned the skillet to heat; covered and cooked over medium heat until the noodles were softened and sauce began to bubble, about 15-20 minutes. I think next time I will do this step over medium-low heat. I then topped it with remaining cup of spinach and covered and cooked it for another minute or so until the spinach had wilted.

And finally, I uncovered the lasagna and topped it with a cup of shredded mozzarella and broiled it until the cheese began to melt and brown. About 5 minutes. I then sprinkled it with freshly chopped basil.

img_0479


Skillet Spinach Lasagna

Ingredients:

1 lb. ground Italian sausage

1 28oz. can crushed tomatoes

1 1/2 teaspoons dried Italian seasoning

1 teaspoon kosher salt, divided

1 16 oz. container ricotta cheese

1 egg

8 oz. (2 cups) shredded mozzarella cheese, divided

6 oz. no-boil lasagna noodles

7 cups (about 5 oz.) baby spinach, divided

2 tablespoons chopped fresh basil

Directions:

Cook the sausage, stirring often, in a 12-inch ovenproof nonstick skillet over medium heat until browned and cooked through.

Add the tomatoes, Italian seasoning and 1/2 teaspoon of the salt; cook, stirring occasionally until the sauce begins to simmer.

While the sauce is cooking, combine the ricotta cheese, 1 cup of the mozzarella cheese, an egg and the remaining salt in a medium bowl.

Preheat broiler with oven rack 6 inches from the heat.

Once the sauce is cooked remove it from the heat, reserving 3 cups of the sauce in a bowl. Place a layer of the lasagna noodle over the sauce, breaking the pieces as necessary. Top with 1 cup of the reserved sauce. 3/4 cup of the ricotta mixture and 3 cups of the spinach. Repeat the layer two times with the remaining noodles, sauce, ricotta mixture and spinach, omitting the spinach from the top layer.

Return the skillet to the heat; cover and cook over medium / medium-low heat until the noodles are softened and the sauce begins to bubble, about 20 minutes. Uncover and top with the remaining spinach; cover and cook for about a minute until the spinach is wilted. Uncover and top with the remaining mozzarella. Broil until the cheese begins to brown, 4 to 5 minutes. Sprinkle with basil.

Recipe from Real Simple Magazine