Hershey’s Deep Dish Brownies

I love brownies, but, truth be told, they are not one of my favorite things to bake. Not because they are difficult to prepare, but, because I always have an issue with either removing them from the pan and/or slicing them. They always seem to stick the pan, even though I prep the pan, and/or crumble when I slice them, even though I wait until they are completely cooled before doing so. And I will point out that I have used parchment paper sometimes to make brownies, but, I still run into some issue with them, usually it’s them falling apart when I slice them.

Recently I tried a very simple recipe that resulted in perfect brownies… They didn’t stick to the pan when I flipped it over and I was able to slice them without any crumbly pieces. Who knew it was actually possible!?!? This great recipe is from Hershey’s, it’s their Deep Dish Brownie Recipe. I will tell you though that these brownies are more cake-like than fudgy, but, if you want a fudgier brownie you can reduce the egg count in the recipe from 3 to 2. I will admit I haven’t tried it with this recipe, but, I do know that eggs are one of the ingredients that changes the texture of brownies from cake-like to fudgy. One other thing I liked about these brownies was that they had some height to them as well. Great for topping them with ice cream after warming them up for a few seconds in the microwave.

Hershey’s Deep Dish Brownies

  • Servings: 12-16 Brownies (depending on how you slice them)
  • Print

Ingredients:

3/4 cup (12 tablespoons) unsalted butter, melted

1 1/2 cups sugar

1 1/2 teaspoons vanilla extract

3 eggs

3/4 cup flour

1/2 cup cocoa powder

1/2 teaspoon baking powder

1/2 teaspoon salt


Directions:

Preheat the oven to 350 F. Grease an 8×8 pan.

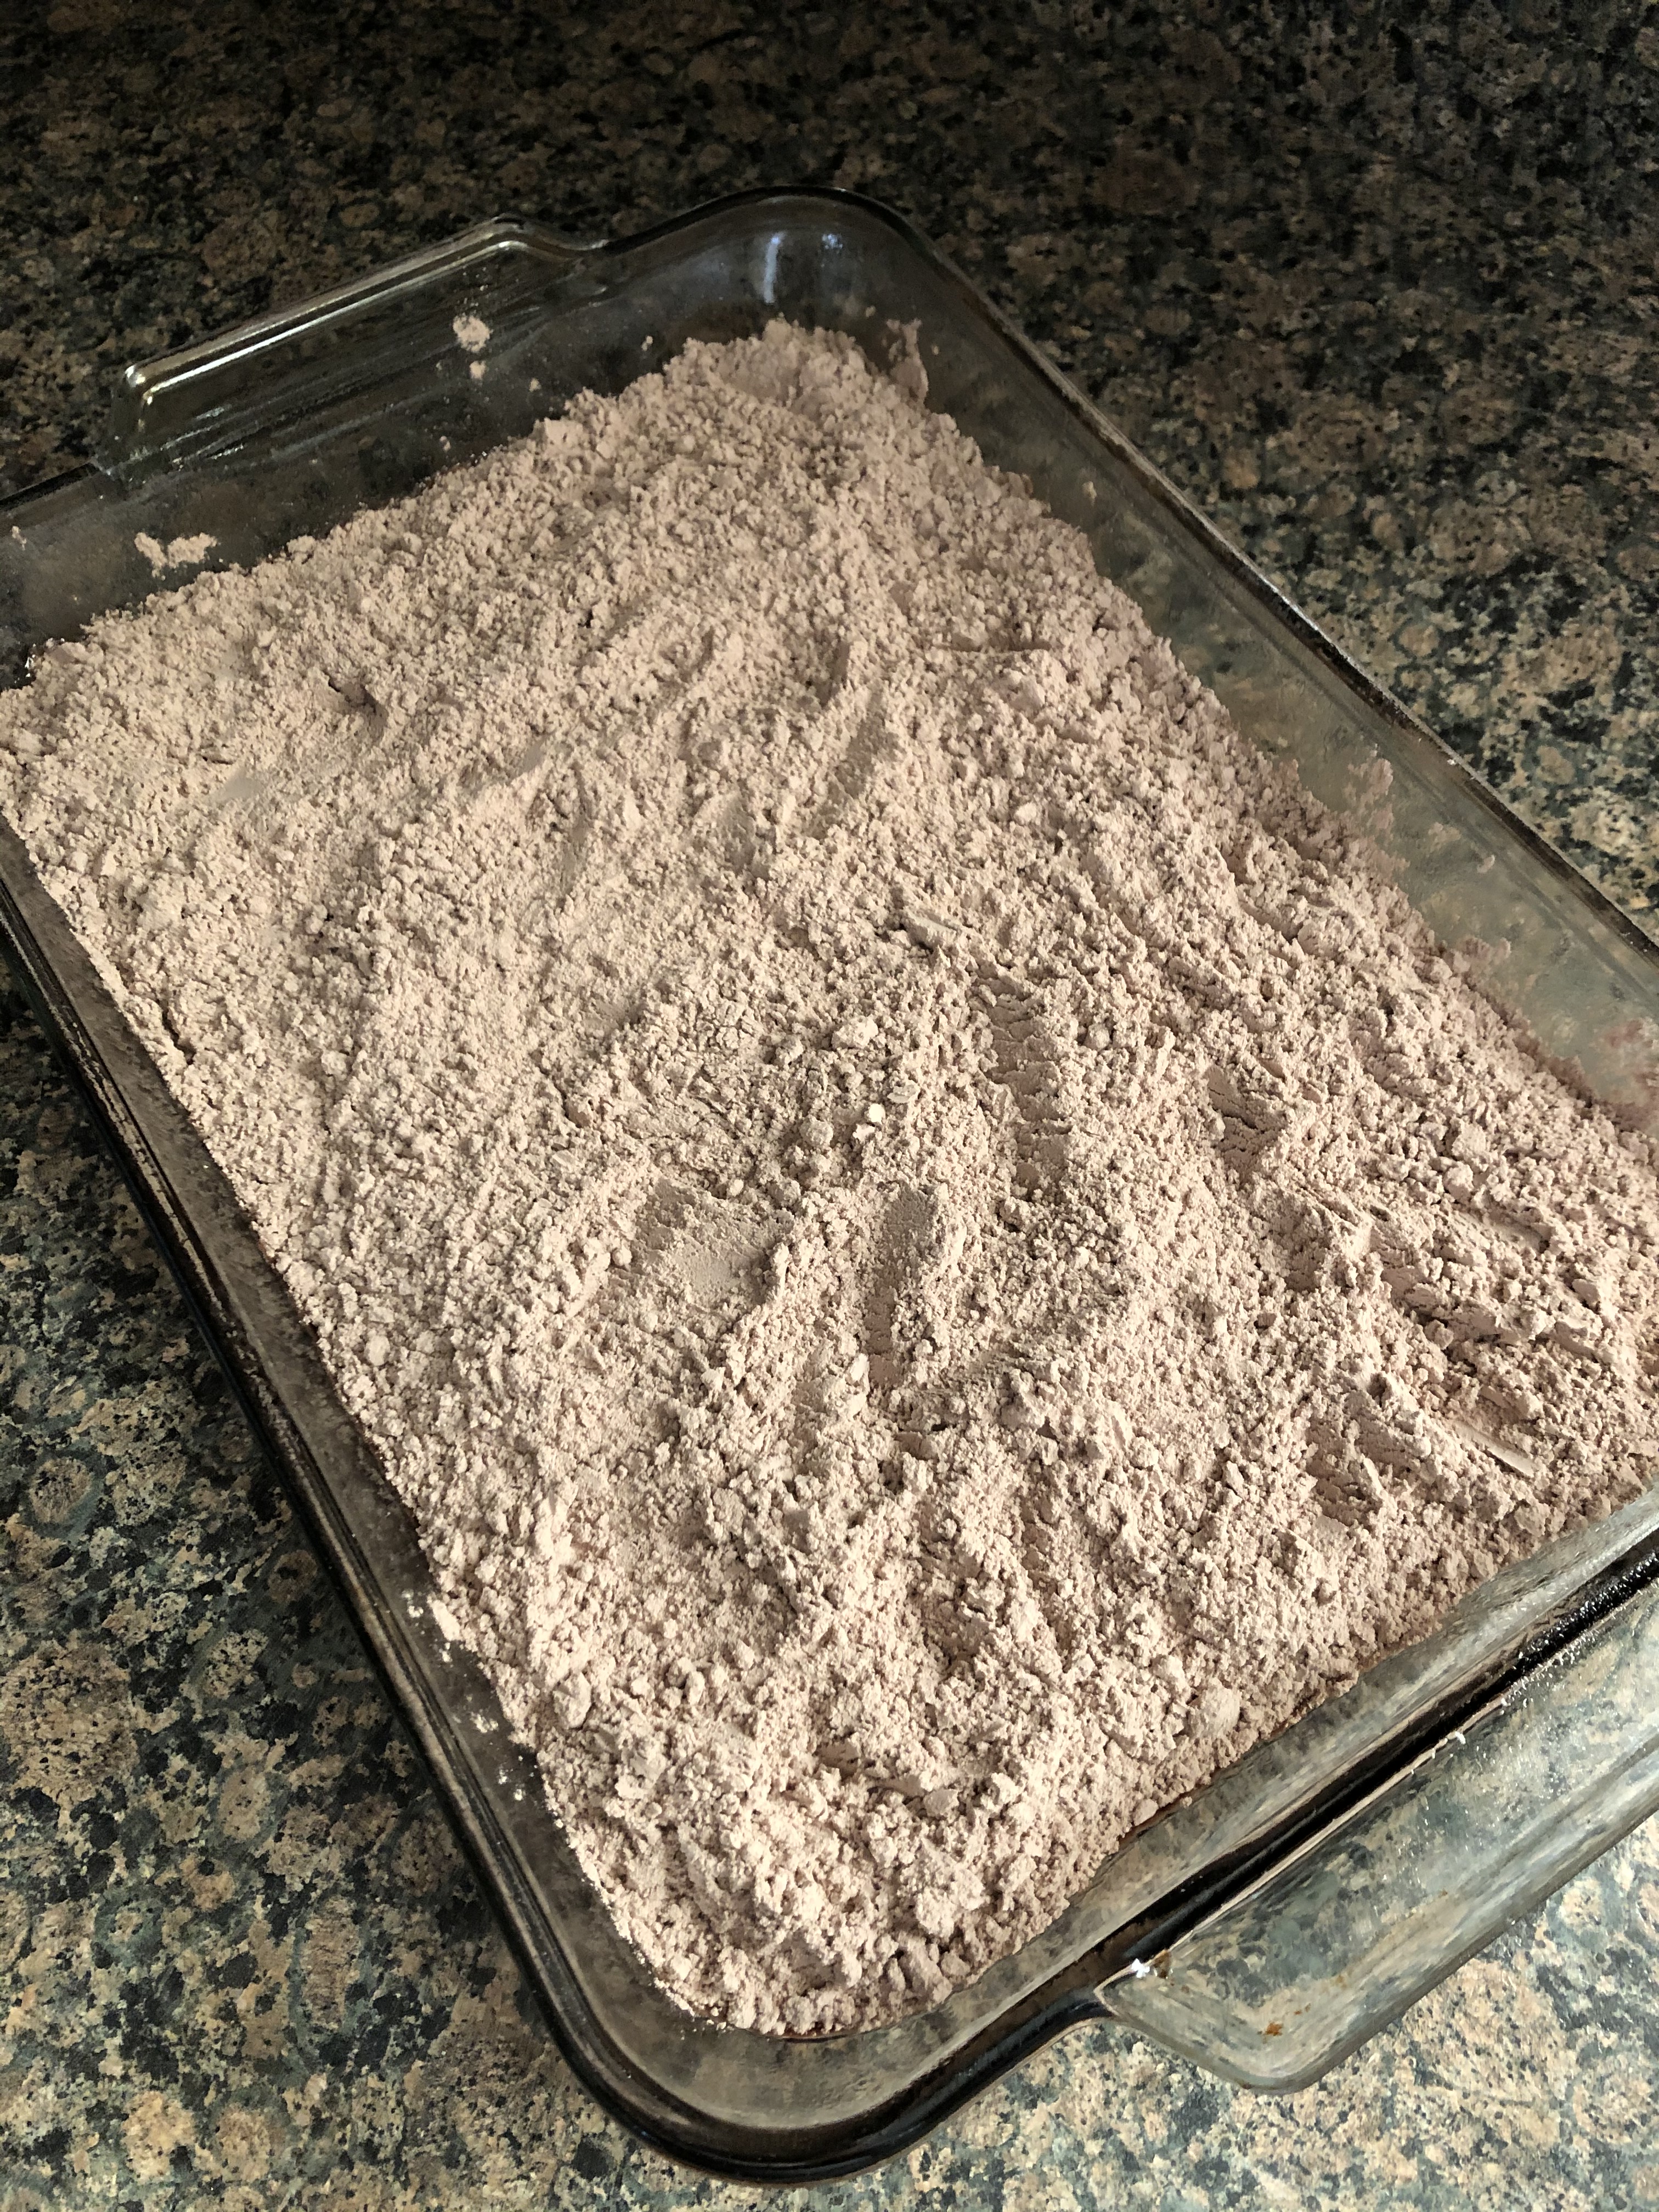
In a medium bowl whisk together the dry ingredients – flour, cocoa powder, baking powder and salt – and set aside.

In another bowl whisk together the melted butter, sugar and vanilla extract until combined. Add in the eggs and whisk everything together until well incorporated. Gradually whisk in the flour mixture.

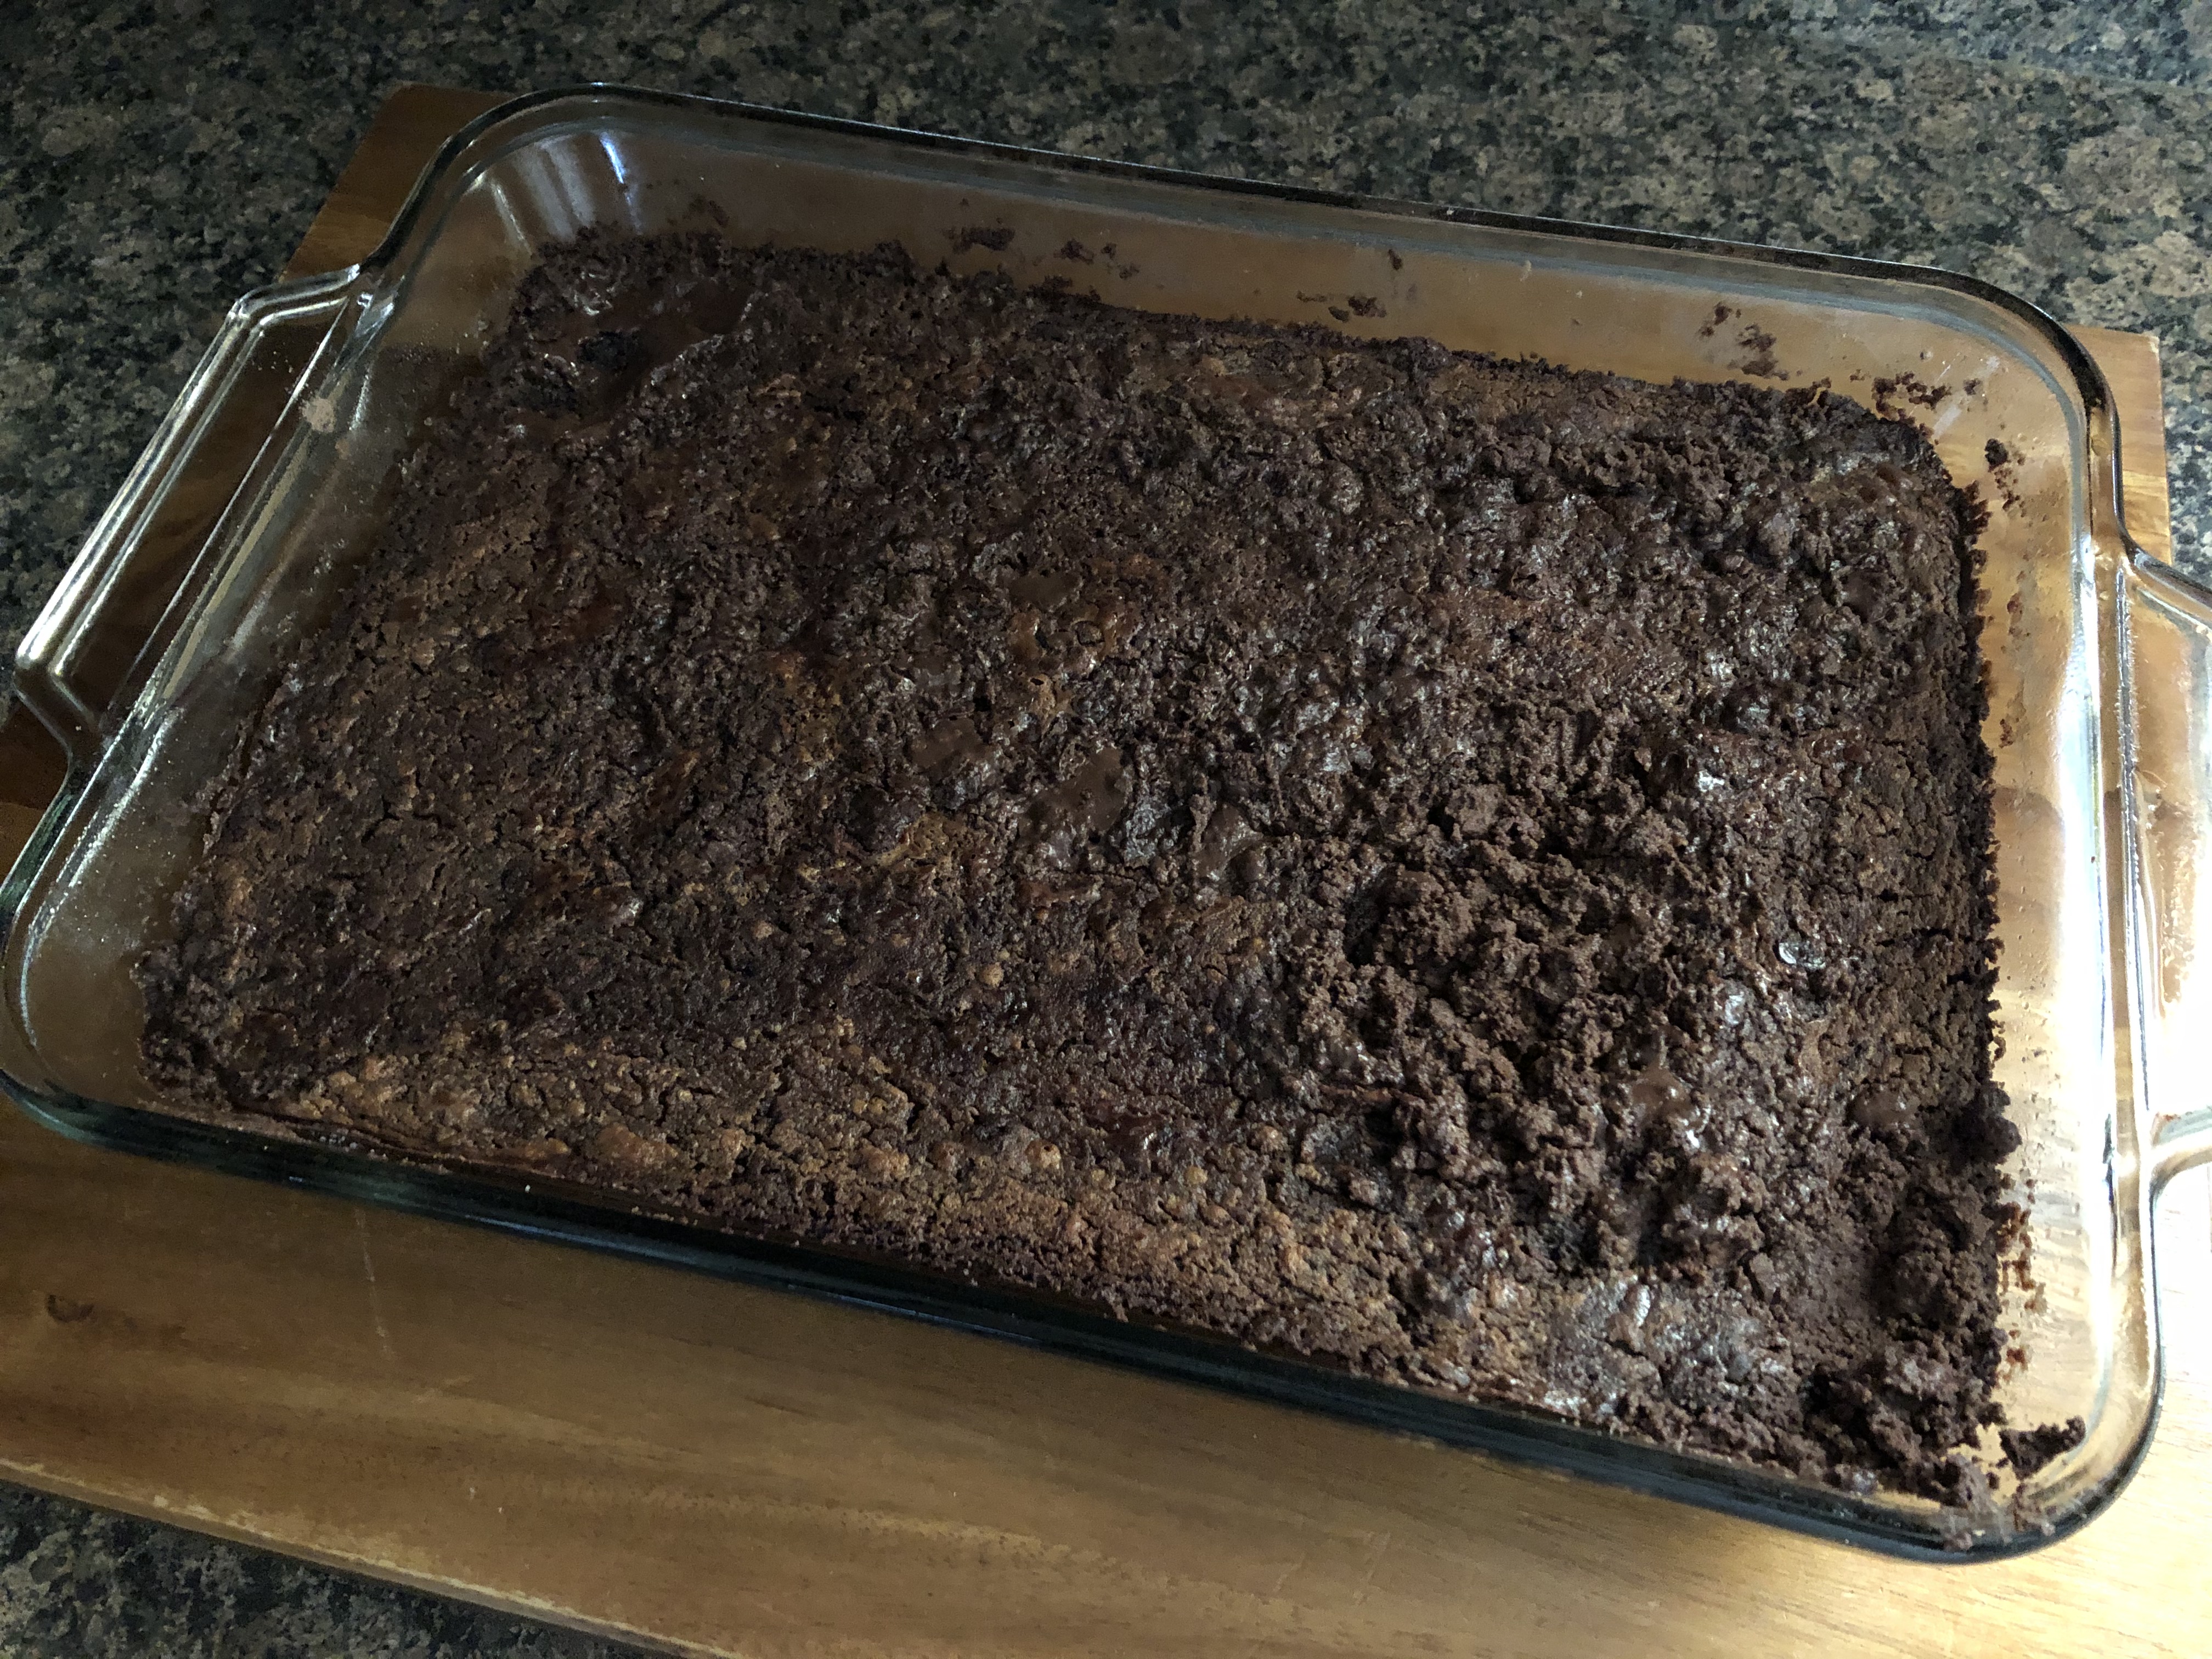
Pour the batter into the prepared pan and bake for 40 – 45 minutes, until the brownies begin to pull away from the sides of the pan and when a cake tester inserted about one inch from the edge comes out clean.

Let the brownies cool completely in the pan on a wire rack before inverting and slicing.

Recipe from Hershey’s

DoubleTree Chocolate Chip Cookies

Truth be told there’s nothing like a perfectly baked chocolate chip cookie! It’s comforting and familiar. And if you’ve ever stayed at a DoubleTree Hotel you more than likely have been welcomed by their signature chocolate chip cookie, I know I have. Last month they finally made the recipe for their iconic cookie available so at-home bakers can bake up a batch themselves to find some comfort in these crazy & unfortunate times.

There are quite a few reasons to love these cookies. First and foremost they are delicious. They only require 1 bowl (no need for mixing the dry ingredients separately and then incorporating it into the dough) and they have walnuts! I love chocolate chip cookies with walnuts!

As I mentioned they only require 1 bowl. So, I began by creaming together the butter with the sugars and then adding in the eggs, vanilla and lemon juice. Yes, you read that right. Lemon juice in a chocolate chip cookie. Don’t worry, the cookies will not have a lemon flavor whatsoever, what the lemon does do is brighten the flavor of the cookie. I continued mixing until the dough was light and fluffy. Next, I added in the dry ingredients – flour, oats, baking soda, salt and cinnamon. After mixing the dough on low to incorporate these ingredients I then used a rubber spatula to fold in the chocolate chips and walnuts.

Now, these cookies aren’t your typical chocolate chip cookies that use about a tablespoon of dough, these require about 3 tablespoons of dough. I ended up using an ice cream scoop to scoop the dough. Since my ice cream scoop is slightly more than 3 tablespoons I ended up with less cookies than the recipe indicated; 20 as opposed to 26. I placed the mounds of cookie dough on parchment lined baking sheets 2 inches apart.

I then baked them for 20 minutes in a 300 F preheated oven and once I removed them from the oven I placed the baking sheet on a wire rack for an hour so the cookies could cool right on the sheets. The cookies were golden brown around the edges and quite soft in the middle when I removed them from the oven, but, as they cooled they firmed up nicely.

Once cooled it was time to enjoy them. And they definitely did not disappoint. I know I will be baking these cookies up for years to come. Also, they are sturdy and large enough that they could be the base for the perfect ice cream sandwich.


DoubleTree Chocolate Chip Cookies

  • Servings: 26 Cookies
  • Print

Ingredients:

2 sticks unsalted butter, at room temperature

3/4 cup + 1 tablespoon sugar

3/4 cup light brown sugar

2 large eggs

1 1/4 teaspoons vanilla extract

1/4 teaspoon freshly squeezed lemon juice

2 1/4 cups flour

1/2 cup rolled oats*

1 teaspoon baking soda

1 teaspoon salt**

Pinch of cinnamon

2 2/3 cups semi-sweet chocolate chips***

1 3/4 cups chopped walnuts


*These are the old-fashioned oats, not the quick-cooking ones

**I used kosher salt

***This is about 16 oz. of chocolate chips


Directions:

Preheat oven to 300 F. Line three baking sheets with parchment paper and set aside.

In a large bowl cream together the butter and both sugars using a handheld mixer on medium speed for about 2 minutes.

Add the eggs, vanilla and lemon juice to the butter mixture and mix on low for 30 seconds and then on medium speed for 2 minutes, or until the mixture is light and fluffy.

Add the flour, oats, baking soda, salt and cinnamon to the mixture and beat on low speed for 45 seconds. Don’t overmix.

Stir in the chocolate chips and walnuts using a wooden spoon or rubber spatula.

Portion the dough with a scoop (about 3 tablespoons) onto the prepared baking sheets about 2 inches apart.

Bake in the preheated oven for 20 to 23 minutes, or until the edges of the cookies are golden brown and the center of the cookie is still soft.

Remove the cookies from the oven and place the sheet on a wire rack to cool for 1 hour.

Recipe from Hilton


Dalgona Chocolate

Have you tried the new coffee craze all over social media? In case you didn’t know it’s called Whipped Coffee, or more formally Dalgona Coffee. It’s made by whipping together equal parts of instant coffee powder, sugar and hot water until it becomes creamy and then adding to cold or hot milk.

Since I’m not a coffee drinker I decided to make the chocolate counterpart. For the chocolate version, besides swapping the chocolate for coffee, you use heavy whipping cream in place of the water.

First, I tried it with warm milk and some Starbuck’s Peppermint Cocoa mix that I had in my pantry. I buy a canister of this every holiday season. It’s my favorite drink from Starbucks and I order it pretty much any time of the year.  In a medium bowl I combined the cocoa mix with heavy cream and using my handheld mixer I whipped the two ingredients together on high speed for about 4 minutes, until stiff peaks formed.

Next, I warmed milk in a small saucepan over medium heat until it just started boiling. After pouring it into my mug I topped it with my whipped peppermint cocoa.

After trying the trend with warm milk and peppermint cocoa, I decided to try again with cocoa powder and cold milk to make a kicked-up version of cold chocolate milk. In a medium bowl I combined unsweetened cocoa powder, sugar and heavy whipping cream and once again I beat the ingredients until stiff peaks formed. I tried to get a little fancy this time and used an ice cream scoop to scoop the whipped chocolate on top of the milk. It didn’t come out exactly how I was imagining, but, it worked anyway. And, I must say that the whipped chocolate mixture tasted exactly like chocolate ice cream… YUM!

With both of these versions, I stirred the whipped mixture into the milk before drinking so the chocolate flavor could blend into it. And while both were good, and it was a nice treat, I just don’t think this will be my go-to way of enjoying chocolate milk going forward. Truthfully, for me it wasn’t worth the extra time or the dishes!


Dalgona Chocolate

Ingredients:

With Chocolate Powder Mix:

1 Tablespoon chocolate mix (flavor of your choice; peppermint, strawberry, vanilla, chocolate, etc.)

4 Tablespoons heavy whipping cream


With Unsweetened Cocoa Powder:

3/4 teaspoons unsweetened cocoa powder

1 teaspoon sugar

3 tablespoons heavy whipping cream


6oz. Milk (any type of milk will work)


Directions: Add your ingredients to a medium bowl and using a handheld mixer on high, beat the ingredients together until stiff peaks form.

Spoon the whipped chocolate over warmed or cold milk. Stir together and enjoy.

Key Lime Bundt Cake

Happy Cinco de Mayo! How perfect that this year it lands on a Tuesday so you can make it a “Taco Tuesday” to celebrate!

Originally I was planning on making Coconut Lime Crumble Bars to celebrate the day, but, one of the necessary ingredients was macadamia nuts. I normally have walnuts and almonds in my fridge but neither seemed to be a good substitute. And since my grocery shopping hasn’t been as frequent as before and I’m sticking to the things I really need and with the prices of certain things currently inflated, macadamia nuts just didn’t make the list. So, I opted to make this Key Lime Bundt Cake instead. Not really festive for the day, but, the flavor does make up for it and I have all of the necessary ingredients on hand.

After baking and letting the cake cool…

I made the key lime glaze for it. I’ll admit, whenever I saw cake recipes that included a glaze I would normally omit them thinking that the cake would just be overly sweet with them, but, I have to come to realize that the glazes enhance or complement the flavor of the cake. After drizzling the glaze on the cake I popped it in the refrigerator for a few minutes so it could set.

And then it was time to enjoy a slice! The cake itself isn’t overly sweet and the lime flavor isn’t overpowering by any means. The glaze didn’t add any extra sweetness, if anything, it added to the lime flavor.

Key Lime Bundt Cake

Ingredients:

Cake:

3/4 cup unsalted butter, at room temperature

1 3/4 sugar

2 tablespoons key lime zest (or lime zest)

3 eggs, at room temperature

1/4 key lime juice*

3 cup flour

1 teaspoon baking soda

1 1/2 cups buttermilk**


Glaze***:

2 1/2 cups confectioners’ sugar

3 tablespoons key lime juice

1 tablespoon milk


*Use can use freshly squeezed juice or use store-bought

**Make your own buttermilk by combining 1 1/2 cups milk (I used whole milk) with 7-8 teaspoons of white vinegar in a measuring cup. Stir together and let sit until thickened and slightly curdled.

***This makes more glaze than you will need for the cake, you can easily cut the ingredients in half and will still have enough glaze to drizzle over the cake.


Directions:

Preheat the oven to 350 F. Spray a 12-cup Bundt cake with baking spray, or grease the pan and lightly dust with flour.

In a medium bowl combine the flour and baking soda and set aside.

In a large bowl using a handheld mixer beat the butter, sugar and lime zest together on medium speed until creamy. Add the eggs, one at a time, and then add in the lime juice. Continue beating until everything is well combined.

Add the flour mixture in three parts, alternating with the buttermilk.

Pour the batter into the prepared pan, spreading it out evenly. Tap the pan on the counter a few times to release any air bubbles.

Bake in the preheated oven for 50-60 minutes, or until a cake tester inserted in the cake comes out clean.

Let the cake rest 10 minutes in the pan and then invert on a wire rack to cool completely.

Once the cake has cooled you can pour the glaze over it.

In a medium bowl combine the powdered sugar, key lime juice and milk and whisk together until the glaze is smooth and there are no lumps remaining. Drizzle the glaze over the cake and refrigerate a few minutes so it can set and then slice and serve.

Recipe from Life In The Lofthouse

Disney Park Churros

How have you been spending your extra time at home? I have done my fair share of crafting and of course some baking and cooking. Granted, some of my baking and cooking has been limited to what I have on hand. I am definitely not running to the store to pick up any missing ingredients for recipes I want to try like I used to. Thankfully I always have a few bags of flour and sugar on hand as well as some other baking basics. There have been a few recipes that have made it to the top of my baking to-do lists. Specifically those from companies that are releasing recipes to their signature treats. With Cinco de Mayo around the corner, I decided to make Disney’s Churro Bites that they recently released the recipe to on their blog.

I began by prepping the dough. In a medium saucepan I combined water, butter, salt and cinnamon and brought the mixture to a boil over medium heat. I then reduced the heat to low and added in flour and stirred it until the mixture formed into a ball. Next, I removed the pot from the heat and let it cool for about 7 minutes. Once the dough was cooled I added in three eggs one at a time. It’s important to let the dough cool before adding the eggs so the eggs don’t cook.

After the eggs were well incorporated into the dough I transferred it to a piping bag fitted with a large star tip – I used a Wilton 1M Tip.

Finally it was time to fry the churros. I heated oil in a cast iron skillet and once it reached 350 F I began piping the dough into the hot oil and used a knife to cut the dough. Once they were golden brown I removed them from the oil using a slotted spoon and drained them on a baking sheet I lined with paper towels. After letting them drain for a few minutes I then tossed them in a cinnamon sugar mixture.

And while the churros can be enjoyed on their own thanks to their cinnamon sugar coating, they are even better with dipping sauces. I made a quick and easy raspberry sauce (I simply melted raspberry jam with fresh lemon juice) and a milk chocolate sauce to dip them in.

Disney Park Churros

Ingredients:

1 cup water

8 tablespoons butter

1/4 teaspoon salt

3/4 teaspoons cinnamon, divided

1 1/4 cups flour

3 eggs

1/2 cup sugar

Vegetable or canola oil, for frying


Directions:

Prep a large baking sheet with paper towels and set aside.

In a medium bowl, combine the sugar and 1/2 teaspoon of the cinnamon and set aside.

Combine the water, butter, salt and the remaining 1/4 teaspoon of cinnamon in a medium saucepan. Heat the ingredients over medium heat, bringing the mixture to a boil.

Reduce the heat to low and add in the flour and stir until the mixture forms a ball. Remove the pan from the heat and let stand for 5-7 minutes.

While the dough is cooling, heat the oil in a Dutch oven or cast-iron skillet over medium-low heat until it reaches 350 F.

Add the eggs one at a time to the dough and stir until combined.

Spoon the dough into a piping bag fitted with a large star tip. Pipe the dough into 1-inch strips into the hot oil. Cutting the dough with a knife. Repeat this until the churros have filled the pot, but, they still have enough room to fry in the oil. The churros will be done once they are a golden brown. Remove the churros from the hot oil using a slotted spoon and drain on the prepared baking sheet.

While the churros are still warm toss them in the cinnamon sugar.

Enjoy the churros on their own or dipped in your favorite sauce.

Recipe from Disney


Raspberry Sauce

  • Servings: About 1 cup
  • Print

Ingredients:

1 cup seedless raspberry jam

2 tablespoons fresh lemon juice

Directions:

Combine the jam and lemon juice in small saucepan and heat over medium heat. Stir to combine and continue stirring until the jam has melted and the two ingredients have combined.


Milk Chocolate Sauce

  • Servings: About 2 Cups
  • Print

Ingredients:

3/4 cups milk chocolate chips

1/4 cup unsalted butter, cubed

1/2 teaspoon cinnamon

2/3 cups sugar

2/3 cups evaporated milk

Directions:

Place the chocolate chips, butter and cinnamon in small saucepan and heat over medium heat until the chocolate chips and butter has melted. Stir in the sugar.

Slowly add in the evaporated milk and then bring the mixture to a boil and then reduce the heat to simmer the chocolate sauce for about 8-10 minutes, constantly stirring. The sauce will thicken as it simmers.

Black & White Cookies

Black & White Cookies… The perfect cookie for those individuals who cannot decide between vanilla and chocolate. And also for those who prefer a cakey cookie instead of crunchy or crispy one. I attempted to make Black & White Cookies a few years ago and it was a fail. Granted, I decided to be a bit adventurous and instead of making traditional ones I opted to make a red velvet version. But, once the cookies were done baking and cooled I decided to try one before going through the trouble of making the icing and it tasted horrible. Needless to say those cookies got tossed in the trash and the icing wasn’t made. And since I am not a big fan of icing on cookies I never thought again of attempting to make them. A few months ago while spending the day with my oldest niece we saw Black & White Cookies at a bakery and she casually mentioned to me that she liked those cookies. Being the auntie that I am I told her that I would make her some. I just needed to find a recipe that wouldn’t be a fail again. Before turning to Google to do a search for a decent recipe I decided to scour some of my cookbooks. There was one book in particular that I was sure I would find a no-fail traditional Black & White Cookie recipe, Martha Stewart’s Cookies Cookbook . And I was right. In there was a recipe for a mini version of this classic bakery cookie.

The cookie itself doesn’t require any special ingredients, well, unless you count buttermilk, but, since it’s so easy to make your own at home with just milk (I use whole milk) and white vinegar the ingredient list is filled with things you more than likely already have in your pantry. Back to the buttermilk for a second, if your skeptical about making it at home and think it’s best to buy the real deal I can assure you that after making my own for quite some time now and using it in recipes that I used to buy buttermilk for I haven’t noticed any difference with the finished product.

The dough for the cookies came together pretty quickly and while the recipe I was following stated to roll the cookies into balls before dropping them onto the prepared cookie sheets, the dough was just too sticky to do so. Instead I used a cookie scoop to scoop and drop the dough onto the sheets. I then baked them for about 10 minutes until the bottoms were a golden brown.

Once the cookies were cooled – and I tried one to make sure it tasted good – I made the icing. In a medium bowl I combined the ingredients to make the icing and then transferred half of it to a small bowl to add cocoa powder to it. While the consistency for the white icing was spot on, once I added cocoa powder to the other half it was much too thick to be able to spread onto the cookies so I added a few teaspoons of water to it to thin it out. Working on the flat sides of the cookies, I spread the white icing on half of each of the cookies.

I waited a minute or two for the icing to set and then I spread the chocolate icing on the other side of each of the cookies.

And while my cookies didn’t come out looking perfectly they tasted awesome!

Mini Black & White Cookies

  • Servings: About 24 Cookies
  • Print

Ingredients:

Cookies:

1 1/4 cups flour

1/2 teaspoon baking soda

1/2 teaspoon salt

6 tablespoons unsalted butter, at room temperature

1/2 cup sugar

1 large egg

1/2 teaspoon vanilla extract

1/3 cup buttermilk*


Icing:

2 cups confectioners’ sugar

1 tablespoon plus 1 teaspoon light corn syrup

2 1/2 teaspoons fresh lemon juice

1/4 teaspoon vanilla extract

1 tablespoon water

1 tablespoon unsweetened cocoa powder


*I made my own buttermilk by combining 1/3 cup whole milk with 2 teaspoons white vinegar in a measuring cup. I stirred to combine the two and then let it stand for 10 to 15 minutes. The buttermilk will be ready when mixture begins to curdle.


Directions:

Preheat the oven to 350 F. Line two baking sheets with parchment paper.

In medium bowl sift together the dry ingredients (flour, baking soda salt) and set aside.

In a large bowl, using an electric hand mixer, mix the butter until creamy. Add the sugar and continue mixing until the mixture is fluffy. Add in the egg and the 1/2 teaspoon of vanilla and continue mixing until well incorporated. Mix in the flour in 3 batches, alternating with the buttermilk.

Using a small cookie scoop, scoop the dough and place it on the prepared cookie sheets 2 inches apart. Bake in the preheated oven for 10 minutes, or until the bottom of the cookies turn golden brown. Transfer to a wire rack to cool completely.

While the cookies cool make the icing. In a medium bowl combine the confectioners’ sugar, corn syrup, lemon juice, remaining 1/4 teaspoon vanilla extract and the tablespoon of water. Mix together until the mixture is smooth. If the mixture is too thick add more water, a little at a time (the icing should be a bit thicker than the consistency of honey). Transfer half of the mixture to a small bowl and stir in the unsweetened cocoa powder. Once again, if the mixture is too thick thin with water.

Once the cookies are completely cooled, spread the white icing on half of the flat side of each cookie and the spread the cocoa icing on the other half. Let the cookies rest for 30 minutes so the icing can set and then enjoy!

Recipe from Martha Stewart

Peanut Butter Brownie Dump Cake

Dump cakes… One of the simplest ways to make a quick and delicious dessert. I’ve made them using canned fruit with a box cake mix and fresh fruit with a homemade cake mix. So, when I came across a recipe for a Peanut Butter Brownie Dump Cake I knew I had to try it.

When I read the reviews for these brownies I had some reservations about making them, but, I realized that the issue most people were having was that they weren’t reading the directions properly. They kept saying that they added eggs to the mixture, but, nowhere in the ingredient list were eggs mentioned. After a few more seconds of thought I realized what most people were doing wrong. They were preparing the batter for the brownies as the directions on the box instructed them as opposed to just using the flour mixture itself. That’s the key to dump cakes. You are not preparing the batter for the box mix, but, just using the flour mixture from it.

I began by melting together semi-sweet chocolate, peanut butter and milk in the microwave. I heated it for about 2 minutes and then whisked the mixture until it was smooth.

I then poured the mixture into a 13×9-inch baking dish that I sprayed with cooking spray. Next, I sprinkled the brownie mix over the melted chocolate.

Finally, I drizzled melted butter and milk over the brownie mix. I also used a fork to smooth down the top of the brownie mix to level it off.

I then baked it in a 350 F preheated oven for about an hour.

Unfortunately I didn’t take any pics of the brownies once I had sliced up. I’ll admit that the picture above doesn’t make them look too appetizing, but, trust me, they were delicious. Everyone who tried them said the same thing as well. One thing though, I decided to use a chewy fudge brownie mix, next time I make these I will use a milk chocolate mix. I think using the chewy fudge mix increased my baking time and I ended up brownies that were too soft. When I sliced these I honestly thought that were going to fall apart, even though I waited for them to cool before doing so. After slicing them though they did firm up a little more. They tasted great warmed-up with a scoop of vanilla ice cream on top.


Peanut Butter Brownie Dump Cake

Ingredients:

8 oz. semi-sweet chocolate baking bar*

1 cup creamy peanut butter

2 1/4 cups milk, divided**

1 pkg. brownie mix (18 to 20 oz. size / 13×9-inch pan size)

3/4 cup butter, melted

Whipped cream or ice cream for topping


*I used 1 1/2 cups semi-sweet chocolate chips in lieu of the 8oz. chocolate

**I used whole milk


Directions:

Preheat oven to 350 F. Spray a 13×9-inch with cooking spray and set aside.

In a microwave safe bowl combine the chocolate, peanut butter and 1 1/2 cups of milk. Microwave on high for 2 1/2 minutes or until chocolate is almost melted. Stir the contents together until they are melted and smooth.

Pour the mixture into the prepared dish. Sprinkle the dry brownie mix over the chocolate mixture. Drizzle the top of the brownie mix with the melted butter and then the remaining milk.

Bake for 45 to 50 minutes in the preheated oven, or until a cake tester inserted in the middle comes out with fudgy crumbs.

Let cool completely and then slice into pieces.

Recipe from Betty Crocker

Orecchiette with Sausage and Spinach

Quick and easy dinners… Something we can all appreciate and are always in search of. This pasta dish is ready in about 30 minutes and you can switch up some of the ingredients to change the flavors. Instead of using regular canned diced tomatoes you can try one that is seasoned with different spices and instead of orecchiette pasta you can easily substitute small shells. And maybe instead of spinach try arugula. As you can see the possibilities are endless.

Orecchiette with Sausage and Spinach

Ingredients:

16 ounces sweet Italian sausage

1 bunch scallions, chopped (white and green parts separated)

1/2 teaspoon dried rosemary

1 14 oz. can diced tomatoes

16 ounces orecchiette

5 ounce bag of baby spinach, roughly chopped

1/2 cup grated Parmesan cheese

3 tablespoons olive oil

Kosher salt


Directions:

Bring a large pot of salted water to boil.

Heat 2 tablespoons of olive oil in a large skillet over medium heat. Add the sausage meat and cook, breaking up the meat with a wooden spoon, until browned. Add the scallion white and rosemary and cook until the scallions have wilted. Add the tomatoes with their juices and 1/2 cup of the boiling water. Let simmer while the pasta cooks.

Add the pasta to the boiling water and cook according to the directions on the box for al dente. Reserve 1/2 cup of the cooking water then drain the pasta.

Add the pasta to the tomato sauce along with the spinach and half of the scallion green. Toss to coat the pasta with the sauce and continue cooking until the spinach has wilted. Gradually add the reserved pasta water as needed to loosen the sauce. Season with salt and drizzle with the remaining tablespoon of olive oil and remove from the heat.

Sprinkle the cheese and remaining scallions over the pasta when serving.

Recipe slightly modified from Food Network

Staying Home and Crafting

How have you been spending all this extra time at home? Cleaning crevices of your home you never thought of cleaning? Finally clearing out your closets to discover items you had long forgotten? Constantly searching the internet for recipes to use up obscure items found in your pantry? Or simply catching up on television shows or discovering new ones? And of course, there are those things on your to do list that you know you should get to, but, just don’t seem to have the motivation to do so. One of those things for me is raking the leaves in my backyard. A task I am never fond of doing, but, once done I am so happy to have done. Sometimes too we put so many things on our to-do lists that we become overwhelmed with what to do first. I know that happens with me often. Especially on my list of crafts I want to do.

For quite some time I had a small pile of beadweaving projects that I wanted to get to. I even organized the beads I wanted to use for the projects so all I had to was actually sit down and make them. Well, I finally started working on some of those projects and soon discovered that I didn’t like how a few of them were turning out or I just didn’t have the patience so I gave up and moved on to the next one. I did find one project that I liked and I ended up making two pairs of earrings.

I’m in the middle of making this bracelet. So far so good, I just need to figure out how to put a knot in the end of the bracelet without destroying the braid or making it look wonky.

I also attempted to make a new Easter wreath. I picked up the supplies in late February after coming across the directions and they sounded simple enough. Decoupage plastic Easter eggs with small pieces of paper napkins and then glue them to a straw wreath adorned with Spanish moss. I’ve made quite a few wreaths so I thought I would have no problem with this one. I started, well, I should say I tried to decoupage the eggs and it was a mess. The paper wasn’t flat on the eggs regardless of how small I cut the napkin and I couldn’t stand the smell of the decoupage glue. Oh well. Thankfully the supplies weren’t that expensive and they are all things I can use for other projects so it wasn’t a total loss.

Before things got really bad with the virus and places were still open I was taking crocheting/knitting classes at my local library. I had just finished a series of three classes where we made crocheted tote bags and was starting another series of three classes to make a knitted keyhole scarf. I actually made a crocheted version last year. We got through one class before the library decided to cancel all classes and then ultimately closed. Thankfully in that one class I got the gist of how to make the scarf – it involved splitting stitches and using double-pointed needles, neither of which I had done nor used before in knitting – so, I was able to complete it on my own.

And then I started another scarf (my neck is ready for next winter). Initially, using Lion Brand’s Homespun yarn, I was knitting a scarf in garter stitch (knitting every stitch in each row) and once completed I was going to weave ribbon through the scarf in a basketweave pattern. I got to a certain point and tested out weaving the ribbon through and just didn’t like how it was looking so I decided to go with a pattern (Flights of Fancy) I had in a folder and I am liking this much better. I’ve thought about going through my yarn stash and putting all my remnant yarns together to make a blanket. For now though, I’ll just add that to my to-do list.

So, I’ve definitely been trying to keep myself busy at home as you can see. And yes, I have cleaned corners of my house I never thought of cleaning all while avoiding those leaves. As for television, I don’t subscribe to any streaming services so I split my time between watching actual television and listening to music. I am always amazed how there are so many channels and still nothing to watch at times. As for cooking and baking, I haven’t gotten too creative yet. I did make this Banana Cake with Mascarpone Whipped Cream Frosting last week as a means to use up some bananas and mascarpone cheese. I do have a pasta dish that I have yet to hit publish on that I give quite a few ideas to customize with what you have in your pantry. The main thing right now though is to stay home, stay safe and stay healthy!


Whipped Cream Dyed Easter Eggs

While we may not be able to celebrate Easter as we normally do this year there is one activity that can still be fun and remain the same… Dyeing Easter Eggs.

There are plenty of creative ways to dye Easter eggs… The traditional way of using water, vinegar and food coloring, the all-natural method of using vegetables and spices or the fancy way of using silk ties.  And then there are bunch of different methods in between. One of those, the shaving cream method. With this method you swirl food coloring into a dish of shaving cream and then set the eggs in the cream so they can absorb the color swirl. The only problem with this method is that the shaving cream makes the eggs inedible since egg shells are porous. I definitely don’t think it’s safe to eat a hard-boiled egg that may have traces of shaving cream on it. So, instead of shaving cream you can use whipped topping to achieve the same results and also have eggs that are still safe to eat after decorating.

After boiling your eggs let them cool completely. I suggest saving the carton from your eggs so you can store them in there once they have been dyed. Pour vinegar into a medium bowl and submerge the eggs in the vinegar for about two minutes. Remove the eggs and pat them dry with a paper towel. Set aside.

Now, you can make your own whipped cream if you choose, but, I opted to buy frozen whipped topping, aka Cool Whip. I placed it in the refrigerator overnight so that it could defrost. Once defrosted, I emptied the contents of 2 8oz. tubs of whipped topping into a 9×9-inch baking dish. Next, I dotted the top with gel food coloring. I opted to use three colors, I wouldn’t suggest using more colors than three as the colors can get really muddled together then. I would also try avoid using colors that when blended together make a new color, i.e. red and yellow (orange), blue and yellow (green), red and blue (purple), and so forth.  Using a toothpick I swirled the colors into the topping, making sure to get the color into the bottom of the dish as well so that when I submerged the eggs they would be completely covered with the dyed whipped topping. I then placed the eggs in the whipped topping. I fit about 9 eggs in the 9×9-inch dish. I covered the top of the eggs with the whipped topping and I let the eggs sit there for about 15-20 minutes. The longer the eggs sit, the more vibrant the colors will be.

Next, I removed the eggs from the whipped topping and placed them in a bowl of water to clean them off. You don’t want to wipe the whipped topping off with a napkin as this could rub the colors off as well. After rinsing the eggs off I placed them on paper towels so they could dry off and then placed them back in the egg carton.

Overall I was happy with how these eggs came out. My nieces were especially happy. I think it was the first time that we dyed eggs and the eggs actually had a nice color to them.


Supplies:

18 hardboiled eggs

Vinegar

4 8oz. tubs of whipped topping

Food Coloring – preferably gel

2 9×9-inch (or 8×8-inch) baking dishes

2 Bowls

Toothpicks

Paper towels