Cookie Palooza: Sea Salt Chocolate Chip Cookies

Over the summer I went to a pop-up shop celebrating Kitchen Aid’s 100th anniversary. While there I got to try different treats, saw a life-sized Kitchen Aid Stand Mixer (unfortunately it was just for show), got a free customized tote bag and stocked up on recipe cards. One of the recipes is today’s Cookie Palooza cookie… A Sea Salt Chocolate Chip Cookie.

If you are hoping for a sweet and salty cookie I am sorry to disappoint you but that’s not what you are getting with this cookie. What you do get is a cookie that is thick, chocolatey and perfect for any add-ins. I love walnuts in my chocolate chip cookies and this would be the perfect chocolate chip cookie for just that. And while this recipe is not ideal for cookie swaps since its only 12 cookies, it’s perfect for gift giving in a festive holiday tin.

A few things to note about these cookies. The original recipe called for smoked sea salt, I searched and couldn’t find smoked sea salt so I opted to use regular sea salt. I did come across sour sea salt which had me wondering what recipe would call for that. I also swapped out using chopped semi-sweet with chocolate chips. I used Ghirardelli chocolate chips since I knew theirs were a tad bit bigger than Nestle’s Toll House, although, if you can find these Nestle Toll House Chocolate Chunks they would be perfect.


Sea Salt Chocolate Chip Cookies

  • Servings: 12 cookies
  • Print

Ingredients:

1/2 cup unsalted butter, at room temperature

1/4 cup dark brown sugar

1/4 cup granulated sugar

1 egg

1 teaspoon vanilla extract

1 1/2 cups flour

3/4 teaspoons baking soda

3/4 teaspoons sea salt*

1 1/2 cups semi-sweet chocolate chips**

3/4 cups chopped walnuts (optional)


*Original recipe called for smoked sea salt

**Original recipe called for 8 ounces semi-sweet chocolate, chopped


Directions:

In a medium bowl combine the flour, baking soda and salt. Set aside.

Add butter and sugars to a large bowl and beat on medium speed with a hand mixer until the mixture is smooth. Add in the egg and vanilla extract and continue mixing until well blended.

Add the flour mixture to the butter mixture and beat on low until just combined. Add in the chocolate chips and walnuts (if using) and continue mixing on low speed until just combined. Cover the bowl and refrigerate for at least 2 hours or overnight.

Preheat the oven to 350 F. Line 2 cookie sheets with parchment paper. Using a 1/4 cup measuring cup (or a trigger ice cream scoop) scoop the dough* and place it on the prepared cookie sheets. Bake for 12-15 minutes until the cookies are set and no longer shiny on top. Transfer to a wire rack to cool.

*You may have to let the dough sit at room temperature for a few minutes before scooping.

Recipe from Yummly / KitchenAid

Cookie Palooza: Cinnamon Chip Chai-Spiced Snickerdoodles

Welcome to Cookie Palooza 2019. For the past couple of years I have dedicated the first week of December to bringing you cookie recipes that would be a perfect addition to your cookie swaps, dessert tables, office parties, get togethers and so forth for the holidays. This year I have a fun batch of cookies to bring you, starting with a nice twist on your traditional snickerdoodle. A Cinnamon Chip Chai-Spiced Snickerdoodle. If you can’t find cinnamon chips in your neck of the woods, the only brand I’ve come across that sells them is Hershey’s, it’s totally okay to leave them out. These cookies will still be delish thanks to the homemade chai-spiced sugar that’s added to the dough and that the cookie is rolled in prior to baking.

After making the dough I refrigerated it for at least an hour so it could firm up. The dough will be too soft to handle otherwise and what will ultimately happen is that the cookies will spread too much during baking or they will be a mess when trying to roll in the sugar.

Once the dough was firm enough I used a cookie scoop to scoop the dough and rolled it between my hands to round it off before rolling it in the spiced sugar. I then placed the dough on cookie sheets that I covered with parchment paper. After baking the cookies for about 11 minutes I removed them from the over and transferred them to a wire rack to cool completely. Don’t worry if you think the cookies are too soft, they will harden as they cool. One thing to note, the recipe states the dough will make 6 dozen cookies, but, I was only able to get 4 dozen out of it. I thought maybe my dough balls were larger than the 1-inch mentioned in the recipe but, I measured them and they were just about 1-inch.

I’ll just say, if you love chai tea you are going to love these cookies. Thanks to rolling the cookies in the spiced sugar every part of the cookie will have the flavors of the spices. Warm spices that are perfect for this time of year.

Cinnamon Chip Chai-Spiced Snickerdoodles

  • Servings: 4 Dozen Cookies
  • Print

Ingredients:

Chai-Spiced Sugar

1/2 cup sugar

2 teaspoons cardamom

2 teaspoons cinnamon

1/2 teaspoon ginger

1/2 teaspoon cloves

1/4 teaspoon nutmeg


Dough:

1/2 cup butter, at room temperature

1/2 cup shortening

1 cup sugar

2 large eggs, at room temperature

1 teaspoon vanilla extract

2 3/4 cups flour

2 teaspoons cream of tartar

1 teaspoon baking soda

Pinch of salt

1 10 oz. bag cinnamon baking chips


Directions:

Combine the ingredients for the spiced sugar in a medium bowl and set aside.

In a large bowl cream together the butter, shortening, sugar, and 2 tablespoons of the spiced sugar using a hand mixer until light and fluffy. Beat in the vanilla extract and eggs.

In another bowl combine the flour, cream of tartar, baking soda and salt and whisk together.

Gradually beat the flour mixture into the butter mixture until well combined. Stir in the cinnamon baking chips.

Cover the bowl and refrigerate until the dough is firm enough to shape, about 1 hour.

Preheat the oven to 350 F. Cover two baking sheets with parchment paper.

Once the dough is firm, using a cookie scoop scoop the dough and shape into balls. Roll the dough into the remaining spiced sugar and then placed on the prepared cookie sheet. Leave space between each as the cookies will spread while baking.

Bake for 11-13 minutes, until the cookie starts to set around the edges. Transfer to a wire rack to cool completely.

Recipe from Taste of Home

Freezing Cookie Dough

I knew I would be pressed for time this year when it came to baking cookies for Christmas, so, I decided to do something I’ve never done before and was always skeptical of doing… freezing cookie dough. I normally have a good day or two to bake, but, the way things are falling this year I am only going to have one good full day to bake all of my cookies and I just knew that it wouldn’t be enough time due to the fact that I have a few other things to take care of that day as well. So, currently there are about 6 or 7 different batches of drop cookies in my freezer along with the dough for these Checkerboard Cookies . And, there is also a batch of Gingerbread People ready to be popped in the oven. I also went out and purchased some extra-large baking sheets. I am sure you have seen them, the Wilton Mega-Sized Baking Sheet. As you can tell, I am serious about baking these cookies in record time.

So, let’s talk about freezing cookie dough. Were or are some of you skeptical like me about it? Or, is it something you have been doing for years and are shocked to read my apprehension about it? The best cookies to freeze are drop cookies and slice and bake cookies. You can also freeze the dough for roll out cookies (sugar cookies, gingerbread people, etc.), but, I would suggest rolling out the dough and cutting it into your desired shapes first and then freezing it. That’s exactly what I did with the Gingerbread ones. Using a freezer-safe container, I lined it with two pieces of plastic wrap lengthwise and widthwise leaving a few inches of overhang. I layered the cookies in the containers making sure they were flat and placed a piece of parchment paper between each layer and on the top layer. Once filled, I wrapped the plastic wrap over the top layer making sure to press out any air. Topped the container with the cover and placed it in the freezer. You could freeze the entire disk of dough as well, but, I personally think that the time spent waiting for it to defrost would be better spent just making the dough to use immediately. My plan for these is to let them thaw a little and then press mini M&M’s into them before baking and then ultimately decorating them with royal icing.


Back to the drop cookies and slice and bake variety…. For the drop cookies I simply made the dough, rolled the dough into balls (scooping it with a cookie scoop) and then placed it on a baking sheet. Since the dough was going in the freezer and not in the oven I was able to place the dough really close together on the baking sheet. I just made sure none of them were touching which could ultimately lead to them freezing together. I then placed the sheet in the freezer for a few hours until the dough was thoroughly frozen. Once frozen, I transferred the dough to a freezer-safe plastic zip bag. I labeled the outside of the bag with the type of cookie it was. Since I wasn’t planning on leaving it in the freezer too long I opted not to include the date, oven temperature and baking time on the bag as well. The suggested length of time for leaving dough in the freezer is 3 months. I actually baked a batch of one of the cookies this weekend and I am happy to say it was a success. To bake them, I placed the dough on a parchment lined baking sheet 1 to 2 inches apart and increase the suggested baking time by 1 to 2 minutes to account for the dough being frozen. The cookies baked perfectly and tasted like I had just made the dough that morning. That’s really what my fear was (and still is to a certain extent), that the cookies will somehow have a weird flavor from the dough being frozen.


For the slice and bake cookies, you can follow your directions and form the dough into a log, wrap it in a few layers of plastic wrap, place it in a freezer-safe bag that has been labeled and then freeze it. It’s not necessary to refrigerate the dough prior to freezing as most slice and bake cookies require prior to slicing. To bake these cookies, let the dough sit at room temperature unwrapped for 10 to 15 minutes. The dough should feel cold to the touch, but soft enough that you will be able to slice it. Slice and bake per the directions, once again adding an additional minute or two to the time.

Since my test batch was a success I am little less unnerved by the process. Fingers crossed I will still be singing high praises come Sunday when I bake quite a few more batches.

Cookie Palooza: Key Lime Crinkles

How about some crinkles for Mr. Kringle? Sorry for corniness, but, I couldn’t resist. While crinkles are customarily a chocolate cookie I decided to switch things up a bit and bring you Key Lime Crinkles for the last cookie of Cookie Palooza week. And in case you didn’t know, crinkles are a drop cookie that is rolled in confectioners’ sugar prior to baking. The sugar draws moisture out of the cookie while it’s baking allowing the cookie to crack and dry out. Leaving the exterior of the cookie with a bit of a crust and the interior soft and yummy. This key lime version is a great cookie for someone who wants something sweet but not with all the decadence of chocolate.

The search for these cookies came about because I recently asked some friends what cookie they wanted for Christmas and one friend said rugelach and a key lime pie. So, I started searching for key lime cookies since I wasn’t planning on making a pie during my weekend of cookie baking in a few weeks. The first cookie I came across was a thumbprint cookie that actually has a key lime filling, I was all set to make that one for Christmas and then I came across this recipe and decided that I would share this recipe with you as my final cookie for Cookie Palooza week. While I normally share a no-bake cookie as my final cookie, I just couldn’t find one this year that I liked 100%. My friend who wants the key lime pie tried these and he said that while they are good and they do have the key lime flavor he likes, he was hoping for a key lime filling, a la the aforementioned thumbprint cookie. So, I will be making the pie after all since that is quicker and easier than the cookies.

It may be hard to find key limes this time of year, so, you can use bottled key lime juice. I usually find this key lime juice in the baking aisle of my supermarket. This is the same juice I use to make my key lime pie when I am short on time to squeeze key limes, or they are not available at my supermarket. In all honesty, I’ve made key lime pie with fresh limes and with this juice and the taste is exactly the same. And if all else fails, you can use regular limes. I actually used the zest of a regular lime in this recipe. And speaking of zest, if you want more of a lime flavor I suggest adding in more zest. I would avoid adding in more lime juice as that will alter the consistency of your dough.

I hope you’ve enjoyed Cookie Palooza 2018 as much as I enjoyed baking the cookies and bringing you the recipes. Check back next week for Holiday Cake Week. I’ve also got some other Holiday treats hitting the blog soon as well… Chocolate Covered Pretzels, Slow Cooker Spiced Nuts (they are really Candied Nuts) and a Chocolate Truffle Cookie (which I initially was thinking would be cookie #5 for this week).


Key Lime Crinkles

  • Servings: 30 cookies
  • Print

Ingredients:

2 1/2 cups flour

1 teaspoon baking powder

1 teaspoon key lime zest

1/2 teaspoon salt

1 stick unsalted butter, at room temperature

1 1/4 cups granulated sugar

2 large eggs

1 tablespoon key lime juice

1/2 cup confectioners’ sugar, sifted

Directions:

In a medium bowl whisk together the flour, baking powder, zest and salt.

In a large bowl combine the butter and sugar and beat with an electric mixer on medium speed until light and fluffy. Add the eggs, one at a time, mixing well after each one. Mix in the lime juice.

With the mixer on low speed, gradually add the flour mixture to the butter mixture and beat until just combined. Cover the dough and refrigerate for 30 minutes.

Preheat the oven to 350 F. Line two baking sheets with parchment paper. Place the confectioners’ sugar in a small bowl.

One chilled, use a cookie scoop to scoop the dough and roll into balls and then roll in the confectioners’ sugar. Place on the prepared baking sheets and bake for 15 to 18 minutes, or until the cookie begin to brown along the edges.

Cool on the pans for 5 minutes and then transfer to a wire rack to cool completely.

Recipe from Bake or Break

Cookie Palooza: Cranberry Pecan Chocolate Chip Cookies

Welcome to day 4 of Cookie Palooza. Today’s cookie is basically a kitchen sink cookie. Don’t worry, there are no food scraps in this cookie, but, there are a bunch of add-ins, hence the kitchen sink analogy. There are pecans, dried cranberries, semi-sweet chocolate chips, milk chocolate chips, oatmeal and coconut. And while I know many people are not a fan of coconut (it seems people either love it or hate it) don’t fear, this cookie does not have a coconut flavor. The coconut adds texture to the cookie. And I am sure I may have lost some of you already as I know people are not always fond of a cookie with texture, especially a cookie like this that already has so much going on, but, trust me, all of the ingredients work so well together you will forget that there may be an ingredient or two you don’t like. Unless you have an allergy to one of them of course.

I got this recipe from Food Network’s 50 Chocolate Chip Cookies, and while there were quite a few among those 50 that sounded yummy I opted to make this one because it reminded me of another cookie I like to make around the holidays, a White Chocolate Chip Cranberry Cookie, that I just realized I have never posted about. I’ll have to do that this holiday season as I am sure I will be making it again. Something I did realize though going through some old posts, I need to stop taking pictures at night. Unfortunately I do a lot of baking at night, but, I will have to refrain from taking picture then because they just do not post well.

The recipe called for 1/4 cupfuls of dough (about an ice cream scoop size) to make about 10 cookies, I opted to use a cookie scoop to make mine. Which yielded about 30 cookies. A nice amount to gift or to have on hand for a holiday guests.


Cranberry Pecan Chocolate Chip Cookies

Ingredients:

1 1/2 cups flour

3/4 teaspoon baking soda

1/2 teaspoon salt

10 tablespoons unsalted butter, at room temperature

1 cup brown sugar

1 large egg, at room temperature

1 teaspoon vanilla extract

2/3 cup semi-sweet chocolate chips

2/3 cup milk chocolate chips

2/3 cup old fashioned oats

2/3 cup sweetened shredded coconut

2/3 cup dried cranberries

2/3 cup chopped pecans


Directions:

Preheat oven to 350 F and line two baking sheets with parchment paper.

Whisk the flour, baking soda and salt together in a medium bowl and set aside.

In a large bowl beat the butter and sugar with a mixer on medium-high speed until light and fluffy. Beat in the egg and vanilla. Reduce the speed to low and beat in the flour mixture until just combined. Stir in the remaining ingredients.

Using a cookie scoop, drop the dough 2 inches apart on the prepared baking sheets. Bake for 12 to 15 minutes, until set around the edges. Let cool for 10 minutes on the cookie sheets then transfer to a wire rack to cool completely.

Recipe from Food Network

Cookie Palooza: Checkerboard Cookies

It’s Day 3 of Cookie Palooza and once again I am bringing you a cookie that looks difficult to make but really isn’t, a Checkerboard Cookie. Normally I avoid making slice and bake cookies. Mine never end up looking like a perfect circle, but more like an oval. They taste good, but, the shape is off. I prefer drop cookies and occasionally I will make roll-out cookies. But, I am trying to step up my baking and challenge myself a little more and figure out ways to overcome the pitfalls that I encounter when I try different things in the kitchen. Sounds a little silly since I am just talking about simple cookies, but, it’s a good attitude to adopt to face other challenges that life may throw at you. So, I figured these Checkerboard Cookies were a good way to overcome my avoidance of slice and bake cookies. They are simple to make, are pretty forgiving in terms of their shape once sliced and are pretty impressive looking.

To make the dough I combined butter, sugar and vanilla extract and beat it until it was light and fluffy. I then added in flour and an egg and continued mixing until the dough came together. Finally, I divided the dough in half and transferred one half to a piece of parchment paper and left the other half in the bowl I made the dough in. To the bowl I added unsweetened dark cocoa powder and used a rubber spatula to fold the powder into the dough making sure it was fully incorporated and no streaks of the plain dough remained.

Next, I divided the plain dough in half and rolled each piece into a 12-inch log. I did the same with the chocolate dough. I placed one plain log and one chocolate log next to each other on the piece of parchment paper and then placed the remaining 2 logs on top of them alternating the dough. I then wrapped the dough in the parchment paper and rolled it a few times to smooth the dough and to make sure all 4 pieces were pressed together well. Finally I placed the dough in the refrigerator until it was firm, at least an hour.

Once firm, I removed the dough from the refrigerator and sliced a small piece from both ends of the log so it would have straight ends. Next, using a ruler and a sharp knife I scored the dough before actually slicing the cookies. You want to work pretty fast as the dough will begin to soften and your slices will become more oval-like than square as the dough warms up. If this happens you can place the dough back in the refrigerator for a few minutes to firm up again, or, simply flip the log so the bottom is now the top.


I placed the slices on a parchment lined baking sheet and placed it in the refrigerator for 10 minutes before baking in a 350 F preheated oven for 12 minutes.

While some of my cookies didn’t have a perfect checkerboard look to them – partly because each of my logs wasn’t the same width – they did taste delicious and the shape wasn’t completely off.  These would be a nice addition to any cookie platter you are making this holiday season. Here’s a fun idea, instead of mixing half of the dough with cocoa powder you could tint one half of the dough red and the other green for a real festive checkerboard cookie!

Checkerboard Cookies

  • Servings: 40 cookies
  • Print

Ingredients:

1 stick of unsalted butter, at room temperature

3/4 cup sugar

1 teaspoon vanilla extract

1 3/4 cups flour

1 egg

2 tablespoons unsweetened dark cocoa powder


Directions:

In a large bowl beat the butter, sugar and vanilla extract with a hand mixer on medium speed until light and fluffy, about 2 minutes.

Sift the flour 3 times and add half of it to the butter mixture, beating until just combined. Add the remaining flour and the egg and beat until combined, about 2 minutes.

Divide the dough in half and transfer one piece to a sheet of parchment paper. Leave the other half in the bowl and add in the cocoa powder. Using a rubber spatula, fold the dough and cocoa powder together until no streaks of the plain dough remain.

Divide each piece of dough (plain and chocolate) in half. Roll each of these pieces into a 12-inch log. Place one plain and one chocolate log next to each other on the piece of parchment paper. Place the other two logs on top of them, alternating the pattern to create the checkerboard pattern. The chocolate log should be on top of the plain log and the plain log should be on top of the chocolate one. Wrap the log in the parchment paper and press each of the logs together while rolling and smoothing the edges. Place in the refrigerator until firm, at least an hour.

Preheat the oven to 350 F and line two cookies sheets with parchment paper.

Remove the dough from the refrigerator and unwrap it. Using a sharp knife (and a ruler if necessary) slice the log into 1/4 inch slices and place on the parchment lined cookie sheet, about 2 inches apart. Refrigerate for 10 minutes.

Bake until the cookies are just beginning to turn golden brown around the edges, 10 to 15 minutes. Let cool on the baking sheets for five minutes and then transfer to a wire rack to cool completely. Store in an airtight container at room temperature.

Recipe from Nik Sharma

Happy Holidays!

How was your Thanksgiving? Mine was good… Surrounded by loved ones, delicious food and sweet-tooth satisfying desserts. Of course, I did my fair share of baking… Key Lime Pie, Pumpkin-Brownie Swirl Pie, Pumpkin Pie, a Pumpkin Tiramisu Cake and the below Pear Cranberry Pie, just to name a few things.


I’ll admit that I took some major shortcuts when it came to making the crust for this pie. First off, I used a frozen deep dish pie crust as the base and for the lattice pattern I used refrigerated pie crust that I cut into strips to weave and braid and then added a decorative border with leaf cut-outs. I decided to brush the pie with milk prior to baking – I usually use an egg, but, after all of the baking I did I was feeling lazy and didn’t feel like cracking and whisking an egg – so I made sure to dab a little milk under the leaf border so to that the leaves and the lattice and braided strips would adhere to the crust. One other thing to note, I let the frozen crust sit out at room temperature for a few minutes after filling it so that it would be easier for my top crust stick to it. As for the filling, if you’ve never had pear pie you should definitely try one. For me, pear pie isn’t as sweet as apple pie and while I do bake a lot I actually don’t like things that are overly sweet. If you want the best of both worlds, try this Brown Butter & Vanilla Pear Pie I made last year for Thanksgiving. While the filling consists mainly of pears, there is 1 apple in the mix. As for the recipe for this or, I got it from the premiere issues of Magnolia Journal last year. You can find the recipe here.

Now that Thanksgiving is over I am looking forward to Christmas and New Year’s. I can’t believe how quickly the year has flown by. Fourth of July honestly feels like it was just a few short weeks ago, but, it was more like 5 long months ago. Today marks my three-month anniversary at my new job, oh yeah, I never mentioned that, I got a new job. I was working part-time before but I am now working full-time, which has given me some challenges when it comes to writing blog posts and sometimes baking, but, not really. I can always squeeze in some time for baking.

Next week I will be bringing you my 3rd annual Cookie Palooza… Hopefully you’ll try at least one of the recipes and just maybe it will become one of your staples. One of the cookies is actually one I am planning on making and gifting later this month, oops, later next month – we are still in November. I kind of like that Thanksgiving was early this year. I feel like it cuts down on the panic of realizing that the next set of holidays are just around the corner. Although, I was at Walmart a few weeks ago and seeing people shopping for what seemed like Christmas gifts already had me panicking a bit. Like I was short on time to get things done. Yikes! I have to-do lists everywhere I look.

The second week in December I am bringing you something new… A Holiday Cake Week. The idea came about last year when I never seemed to get the time to post about a Yule Log Cake I made and then some Snickerdoodle Cupcakes I made. So, I figured I would save the write-up for both and create a special week for them this year. Rounding out the five is a Pull-Apart Cupcake Christmas Wreath, a Rum Cake and a Rainbow Cookie Cake. Yum!

So, sit back, enjoy this last month of the year and don’t forget to indulge in some delicious treats. ‘Tis the season!

Cookie Palooza – No Bake Peppermint Chocolate Cookies

I hope you’ve enjoyed this week of cookies. I’m ending Cookie Palooza 2017 with an easy no bake cookie that only requires three ingredients, four if you count the sprinkles… Peppermint Chocolate Wafers.

First ingredient… Melted semi-sweet chocolate. I melted the chocolate using a double-boiler. You could melt the chocolate in the microwave (which was always my preferred method,) but I find melting the chocolate in a double boiler minimizes the chance of scorching the chocolate and you can keep it warm while you’re working so it will stay smooth and thin. Whereas when you melt it in the microwave after a few minutes the chocolate begins to thicken. Creating a double boiler is quite simple… fill a medium saucepan about a little less than halfway with water – you don’t want to fill it too much because then when you place the bowl in the water it will spill over. Bring the water to a boil and then reduce the heat so the water is simmering. Place a heatproof bowl in the water, add chopped chocolate and stir occasionally until the chocolate has melted. Once the chocolate has melted, reduce the flame to low to keep the chocolate warm and add in the peppermint extract (the second ingredient), stir to mix in.

Dip the Nilla Wafers (third ingredient) in the chocolate and flip them over to get them fully covered. The process will go much easier if you have candy dipping tools, but if not a fork will work well. Once cookies are covered lift the cookies out of the chocolate and let the excess drip and then place them on a wax paper lined baking sheet and sprinkle them with festive sprinkles or crushed peppermint candy/candy canes (fourth ingredient.)


Once you are done dipping the cookies place them in the refrigerator for about 10-15 minutes so the chocolate can harden.

And that’s it! A simple cookie that’s perfect for the season and best of all, doesn’t require you to turn on your oven.

Happy Holidays!!!

Peppermint Chocolate Dipped Cookies

Ingredients:

8 oz. semi-sweet chocolate, chopped*

1/2 teaspoon peppermint extract

30 – 36 Nilla Wafer cookies

Sprinkles, optional

Directions:

Melt the chocolate using a double boiler on medium to medium low heat. Once the chocolate has melted add the peppermint extract and stir well to combine. Keep the heat on low for the double boiler so that the chocolate will remain smooth and thin.

Dip the wafers in the chocolate one at a time, making sure to coat the entire cookie. Remove from the chocolate and let the excess drip off before placing on a wax paper lined baking sheet to set.

Sprinkle with sprinkles or crushed peppermint candy. Or let the chocolate set for a few minutes and then drizzle with the left-over melted chocolate. Place in the refrigerator so the chocolate can harden. Store in an airtight container.

*You could also use chocolate chips

**The ratio of peppermint extract to chocolate I used was 1/4 teaspoon per 4 oz.

Cookie Palooza – Lemon Ricotta Cookies

Lemon Ricotta… A flavor combination I first had in the form of pancakes and was instantly hooked so when I saw a cookie recipe using the two I knew I had to try it. A few things to note, these cookies are soft, almost cake-like. They kind of remind me of muffies – aka the top of a muffin. And while I am not one for glazes, I usually leave my baked good unglazed when a recipe calls for it, these cookies definitely need the glaze. Not because they are not delish without it – I tried one before glazing and it was good as is – but when I added the glaze the lemon flavor was kicked up a notch, but, not to the point that it was overbearing.

Lemon Ricotta Cookies Lemon Glaze

  • Servings: 40 cookies
  • Print

Ingredients

2 1/2 cups flour

1 teaspoon baking powder

1 teaspoon salt

1 stick unsalted butter, softened

2 cups sugar

2 eggs

1 15 oz. container whole milk ricotta cheese

3 tablespoons fresh lemon juice (juice of 1 lemon)

1 lemon, zested


Glaze:

1 1/2 cups confectioners’ sugar

3 tablespoons fresh lemon juice

1 lemon, zested


Directions:

Preheat the oven to 375F.

In medium bowl combine the flour, baking powder and salt. Set aside.

In a large bowl combine the butter and sugar. Beat on medium speed until light and fluffy, about 3 minutes. Add the eggs 1 at a time, beat the mixture well so all of the ingredients are incorporate.

Add the ricotta cheese, lemon juice & zest. Beat to combine and then stir in the dry ingredients (the flour mixture.)

Line baking sheets with parchment paper. Spoon the dough – about 2 tablespoons for each cookie – onto the baking sheets. Bake for about 15 minutes, until the edges of the cookies are golden. Remove from the oven and the cookies cool on the baking sheets for 20 minutes.

During the 20 minutes make the glaze: Combine the all of the ingredients in a small bowl and stir until smooth. Spoon about 1/2 teaspoon onto each cookie and use the back of the spoon to smooth the glaze over the cookie. Let the cookies sit for 2 hours so the glaze can harden.

Recipe from Food Network

Cookie Palooza: Key Lime Pie Tassies & Pistachio Cookie Cups

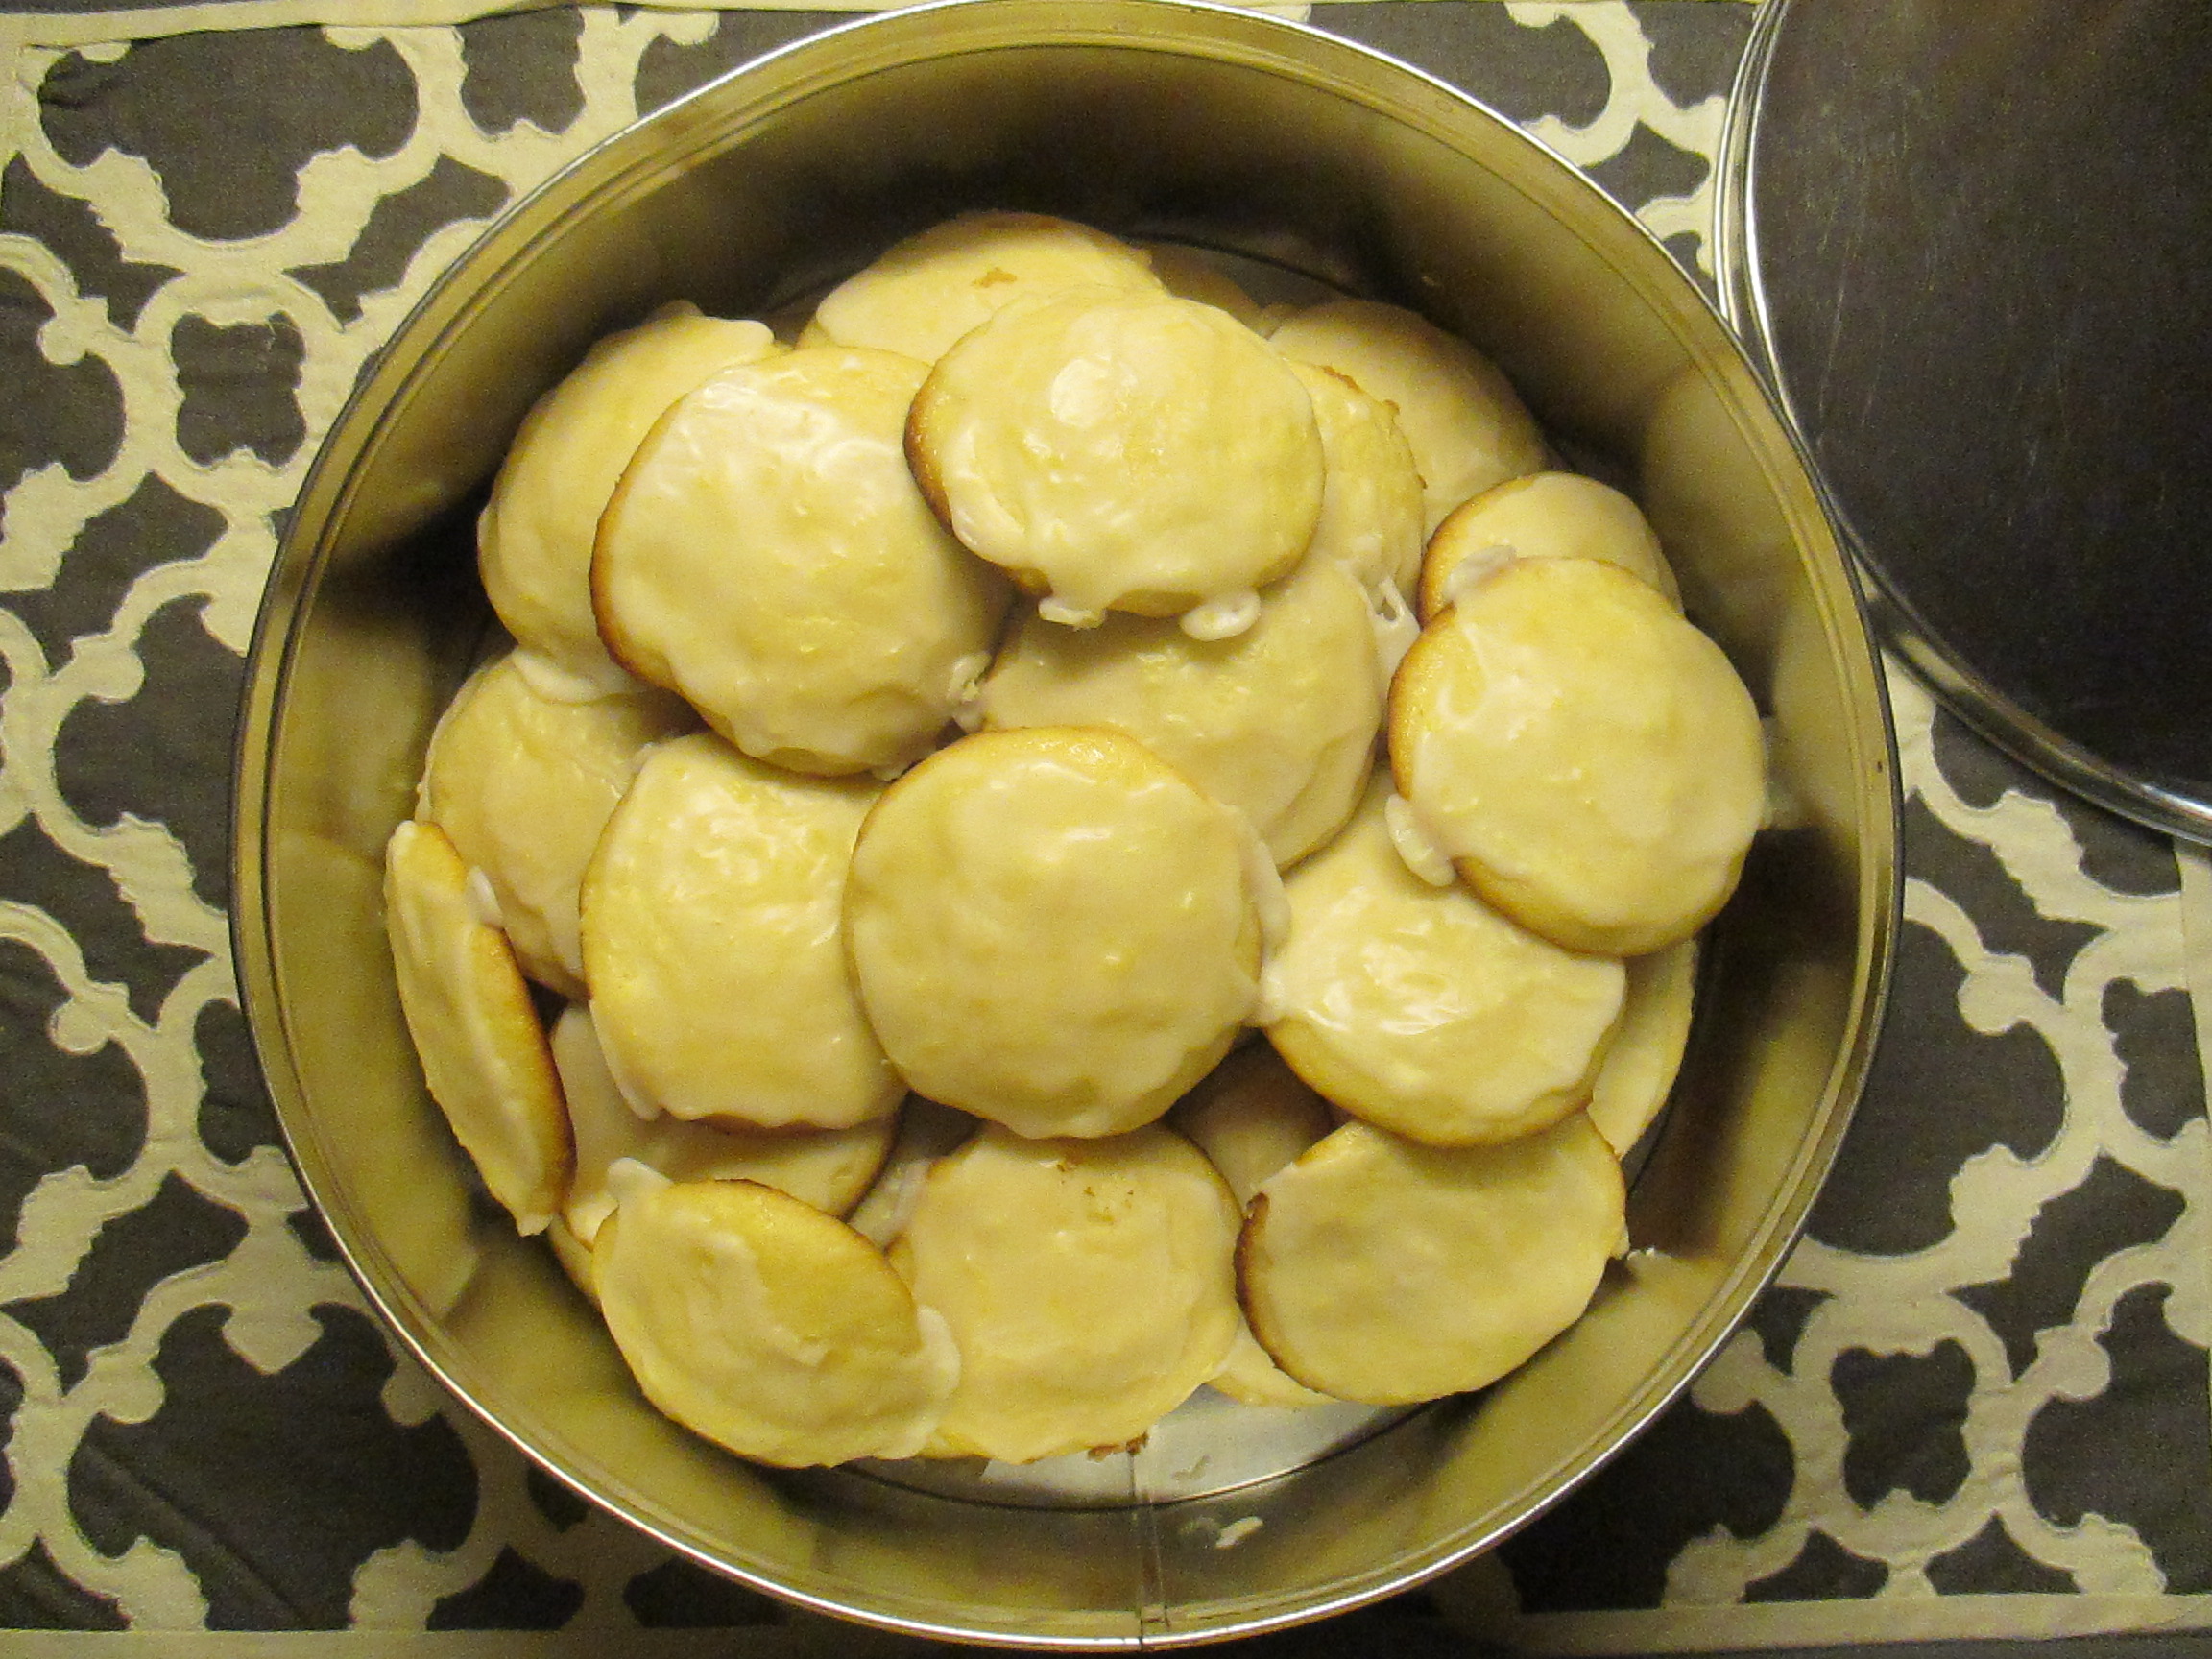
These are definitely not your typical cookies, they’re more like mini tarts, but are cookies nonetheless. I tried to do some research as to how a tassie got its name and what the difference was between a tassie and a cookie cup, but, I came up empty handed… Oh well. If anyone knows feel free to share it in the comments sections below!

These weren’t on my original list of cookies for this week, originally I was planning on an Earl Gray Tea Cookie that called for cardamom. Cardamom became the main flavor of the cookie as opposed to the titled earl gray and while that was fine as the cookie tasted good, after making the cookie 2 different times – following the directions exactly the first time and making some variations the second time – both times the cookie came out too dense. I knew then that the recipe was a fail and searched for something else. Hence these tassies and cookie cups, both of which turned out to be a major hit. On a side note, I had a second fail with another cookie recipe as well. It was for a Maple Pecan Chocolate Cookie that called for maple sugar. I had to do some searching for the maple sugar and while the cookie dough – yes, I eat raw cookie dough from time to time – tasted delish with a maple flavor the cookie itself lost the maple flavor and was flat, chewy in the middle and crispy along the edges. Not at all what I was expecting. I read the directions numerous times afterwards to make sure I added the right amount of ingredients and such and I had. I wonder if anyone tests some of these recipes before publishing them sometimes.

Back to the cookies at hand. When I initially made them I didn’t want to make too many – each recipe calls for 24 – just in case this was another fail. But, after friends tried them it was evident that I needed the full amount so I made them again for Thanksgiving and once again they were a hit.

Here are some tips to make these…

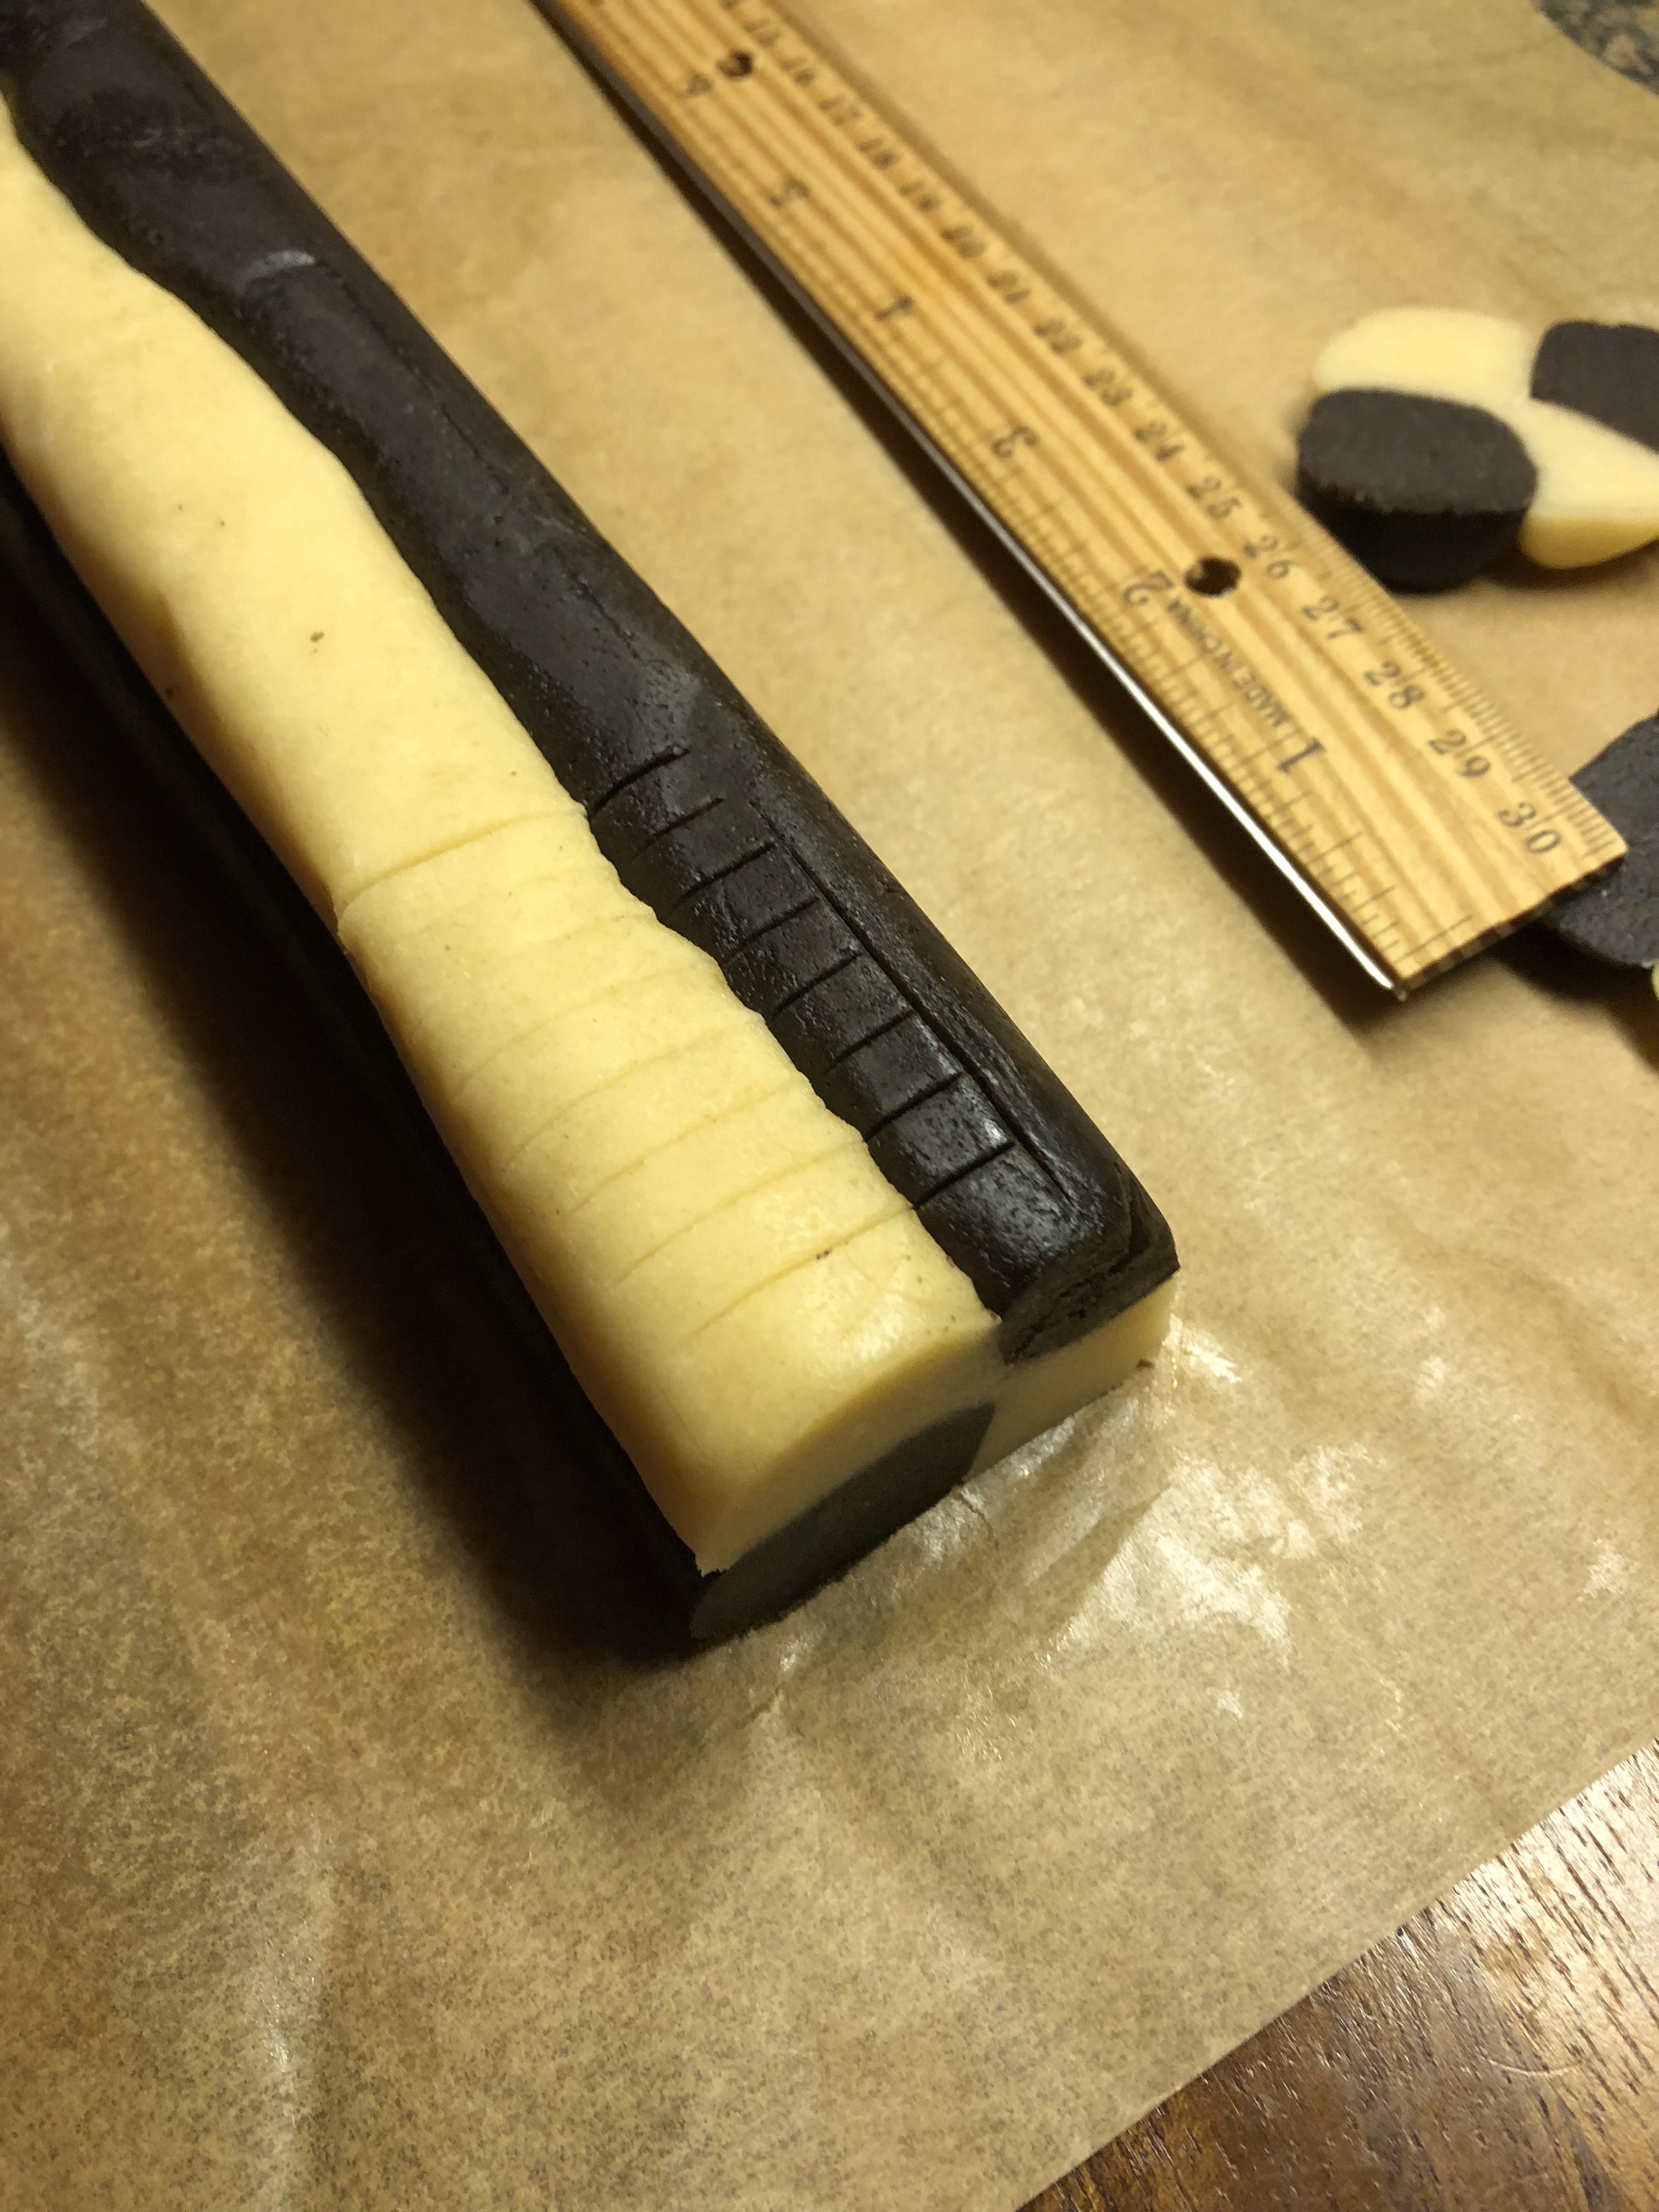
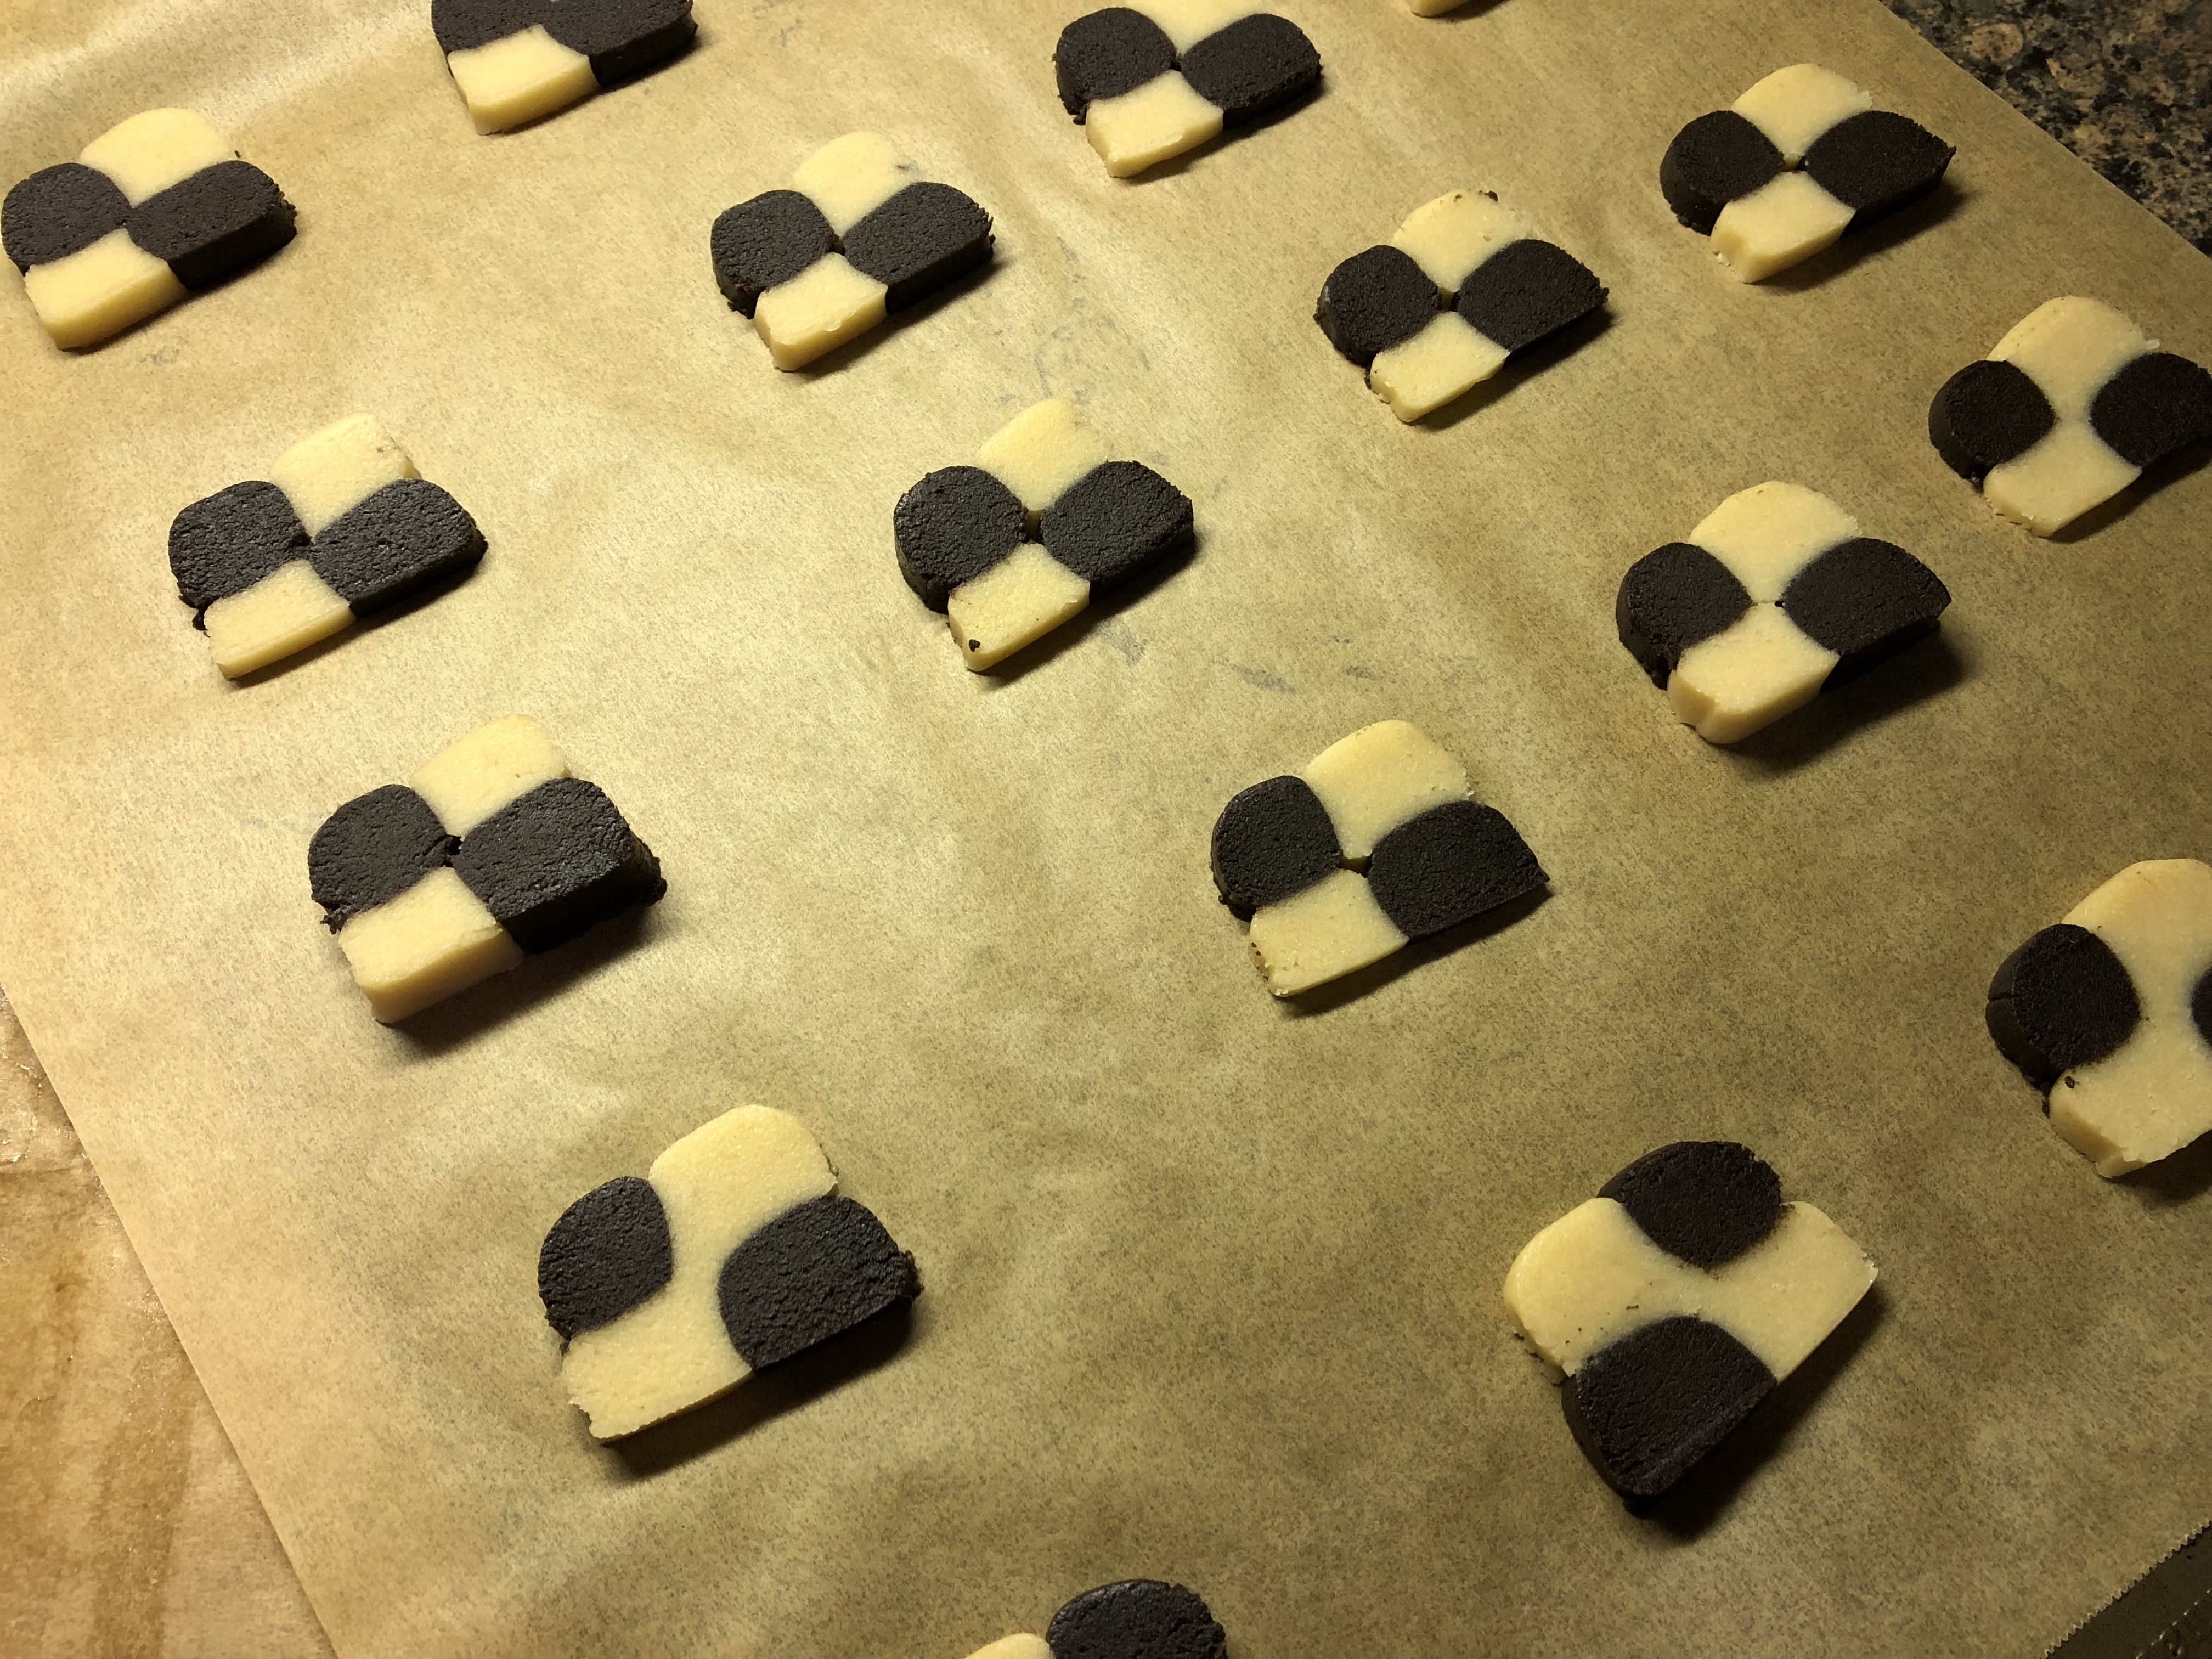
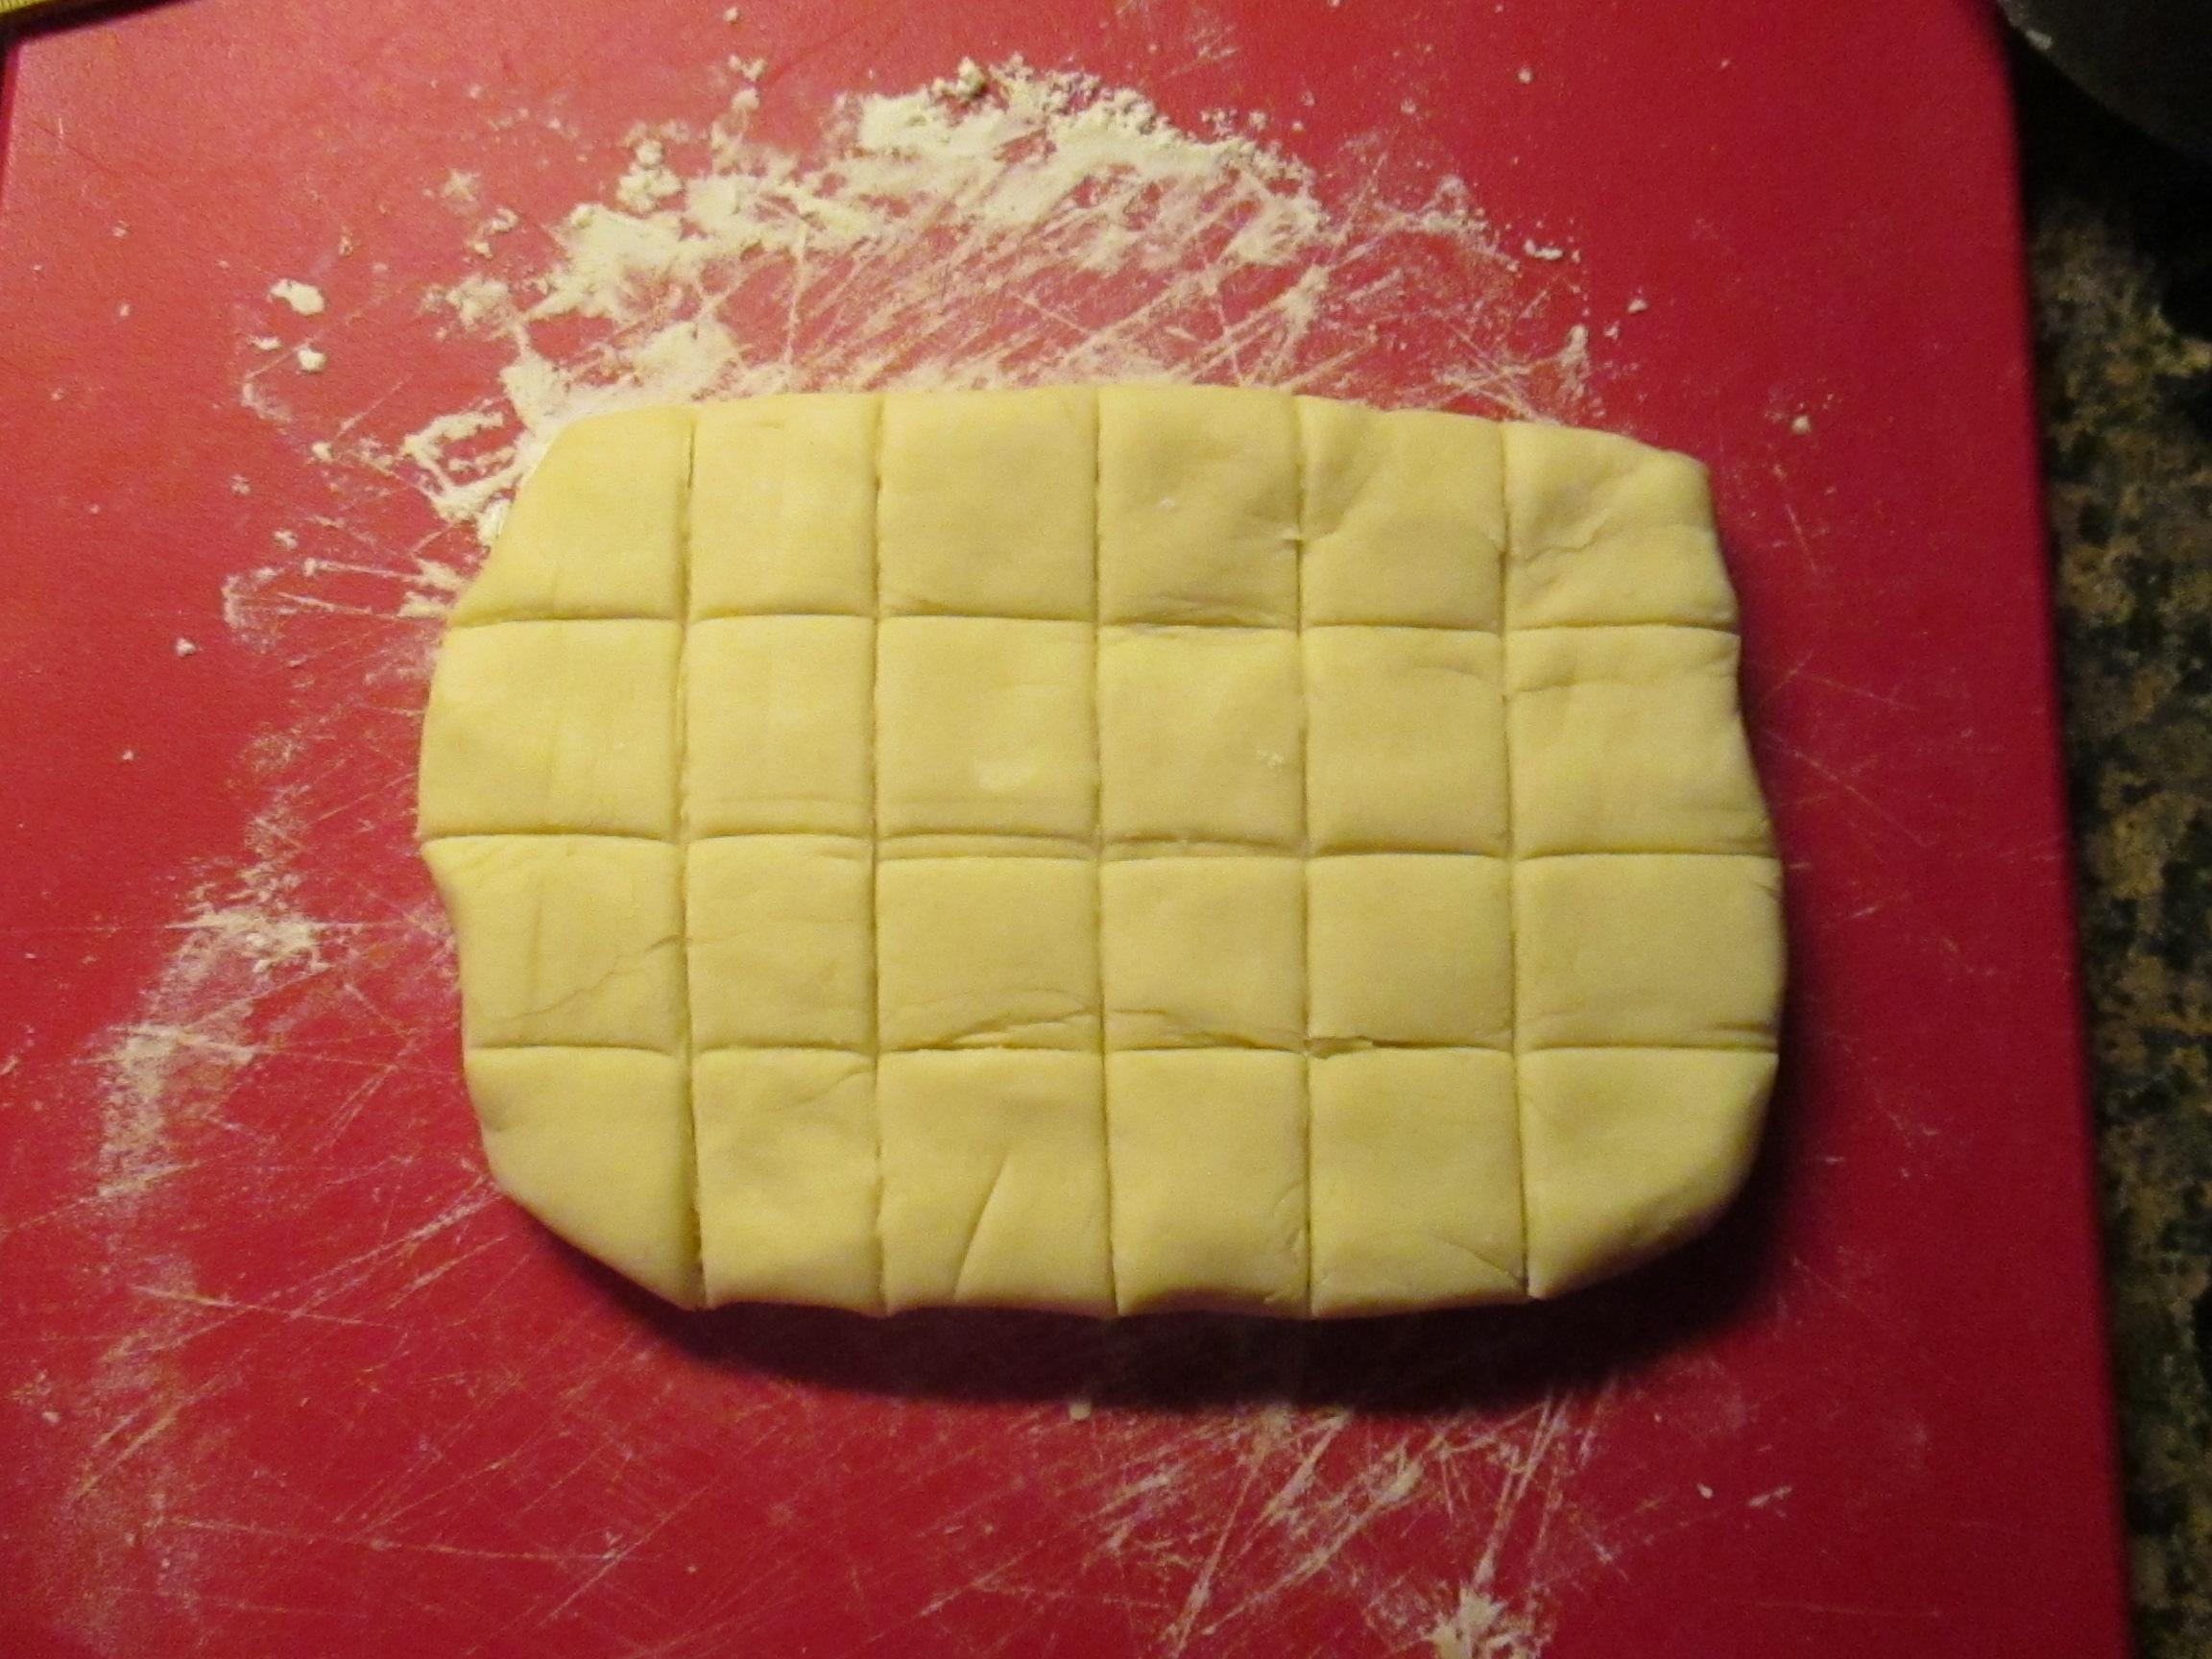
To help divide the dough into 24 somewhat evenly balls I formed the dough into a 6×4-inch rectangle on a lightly floured surface and cut it into 24 squares. I began by scoring it with a pizza cutter and then actually cut it once it had all been scored.

For the Pistachio Cookie Cups to save money, but not time, I opted to buy roasted unsalted pistachios in their shells and shelled and chopped them myself.

Which I then mixed with an egg, confectioners’ sugar and chopped dried apricots for the filling.

Since key limes aren’t always available in my area and I do love key lime pie, I usually have key lime juice in my fridge. You can find it in the juice aisle or oddly enough at some supermarkets they have it in the baking aisle. I can’t say for sure if using the juice from key limes as opposed to regular limes alters the flavor of the tassies since there are other ingredients involved, but, I do know that there is a difference in the flavor between the two of them. It’s all about preference and authenticity to the recipe when it comes to which lime or lime juice you choose.

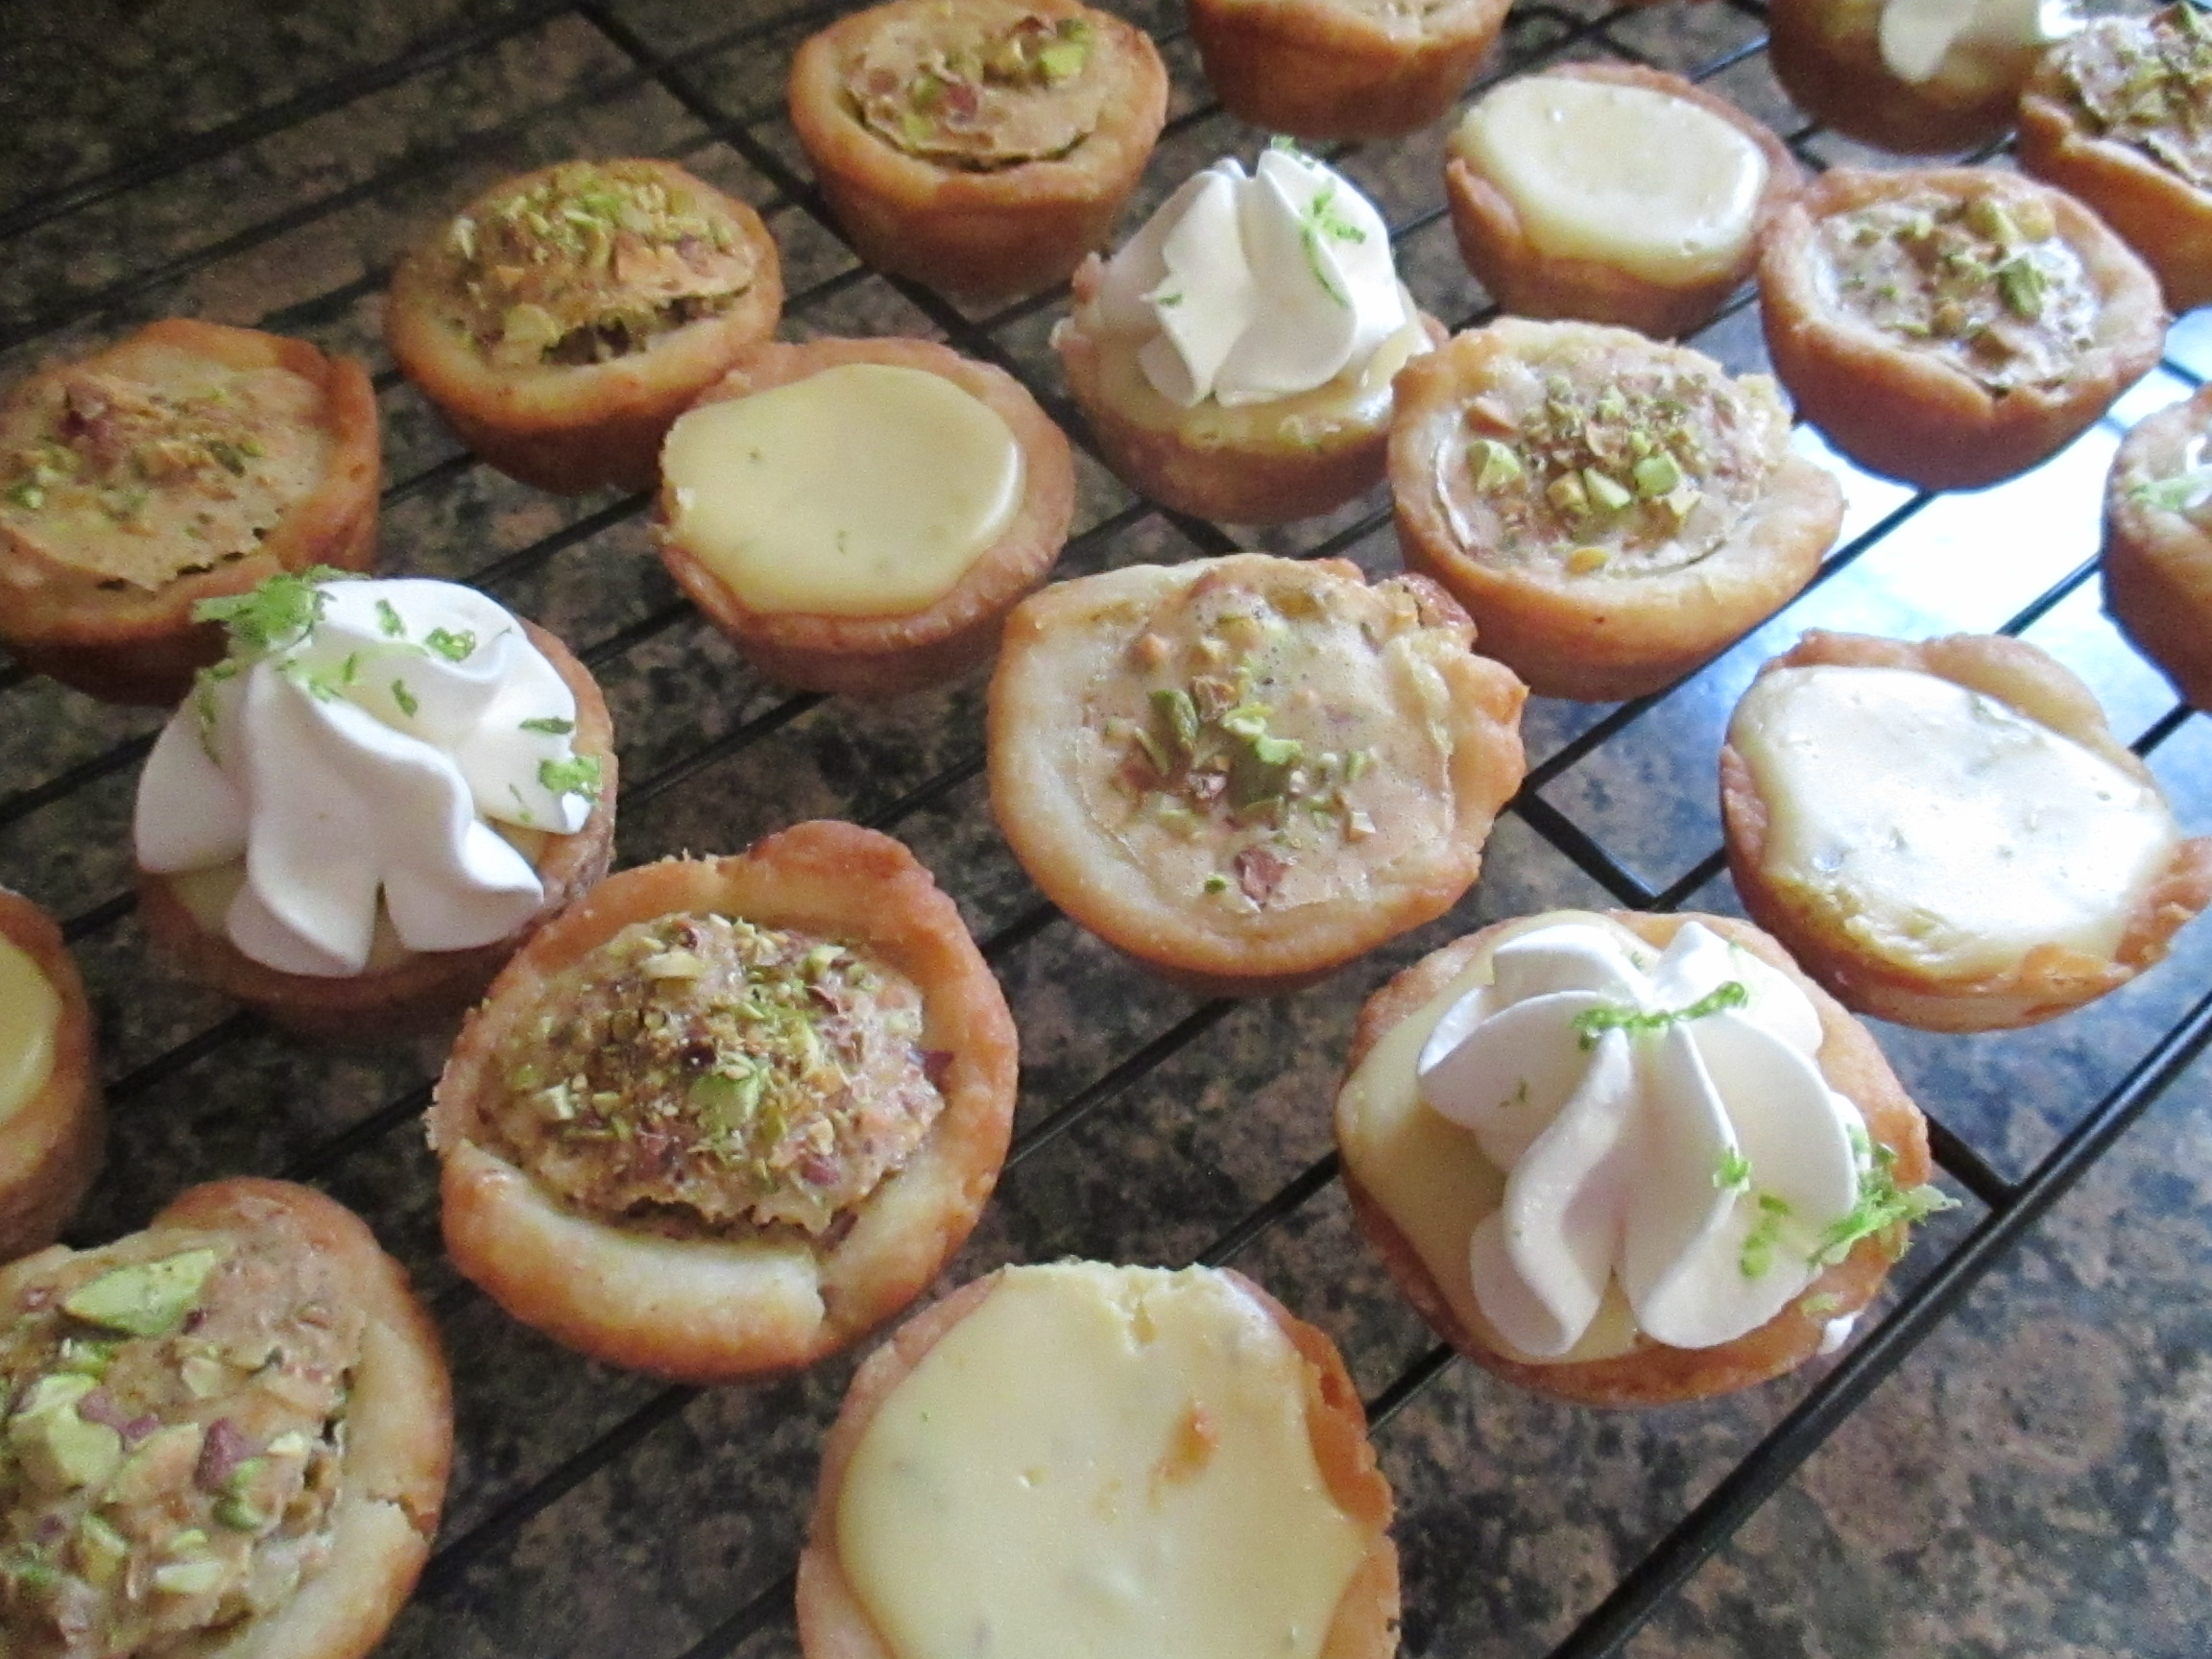
The Pistachio Cookie Cups are baked filled while the Key Lime Pie Tassies pastry cup is baked first and then filled with the key lime filling and then baked again. Don’t worry, the pastry cup won’t burn or dry out… that’s what I initially thought would happen. Both of these are delicious and it’s hard to choose a favorite and thankfully they are easy enough and quick enough to bake that you could bake them both to enjoy them at the same time.

And while the Key Lime Pie Tassies are good on their own, I decided to add a little homemade whipped cream and lime zest to some of them for a little more sweetness.

Pistachio Cookie Cups

  • Servings: 24 Cookie Cups
  • Print

Ingredients:

1/2 cup butter, softened

3 oz. cream cheese, softened

2 tablespoons sugar

1 cup flour

1/2 teaspoon orange zest

1 egg, lightly beaten

1 cup confectioners’ sugar

1/2 cup finely chopped pistachios

2 tablespoons finely chopped dried apricots

Directions:

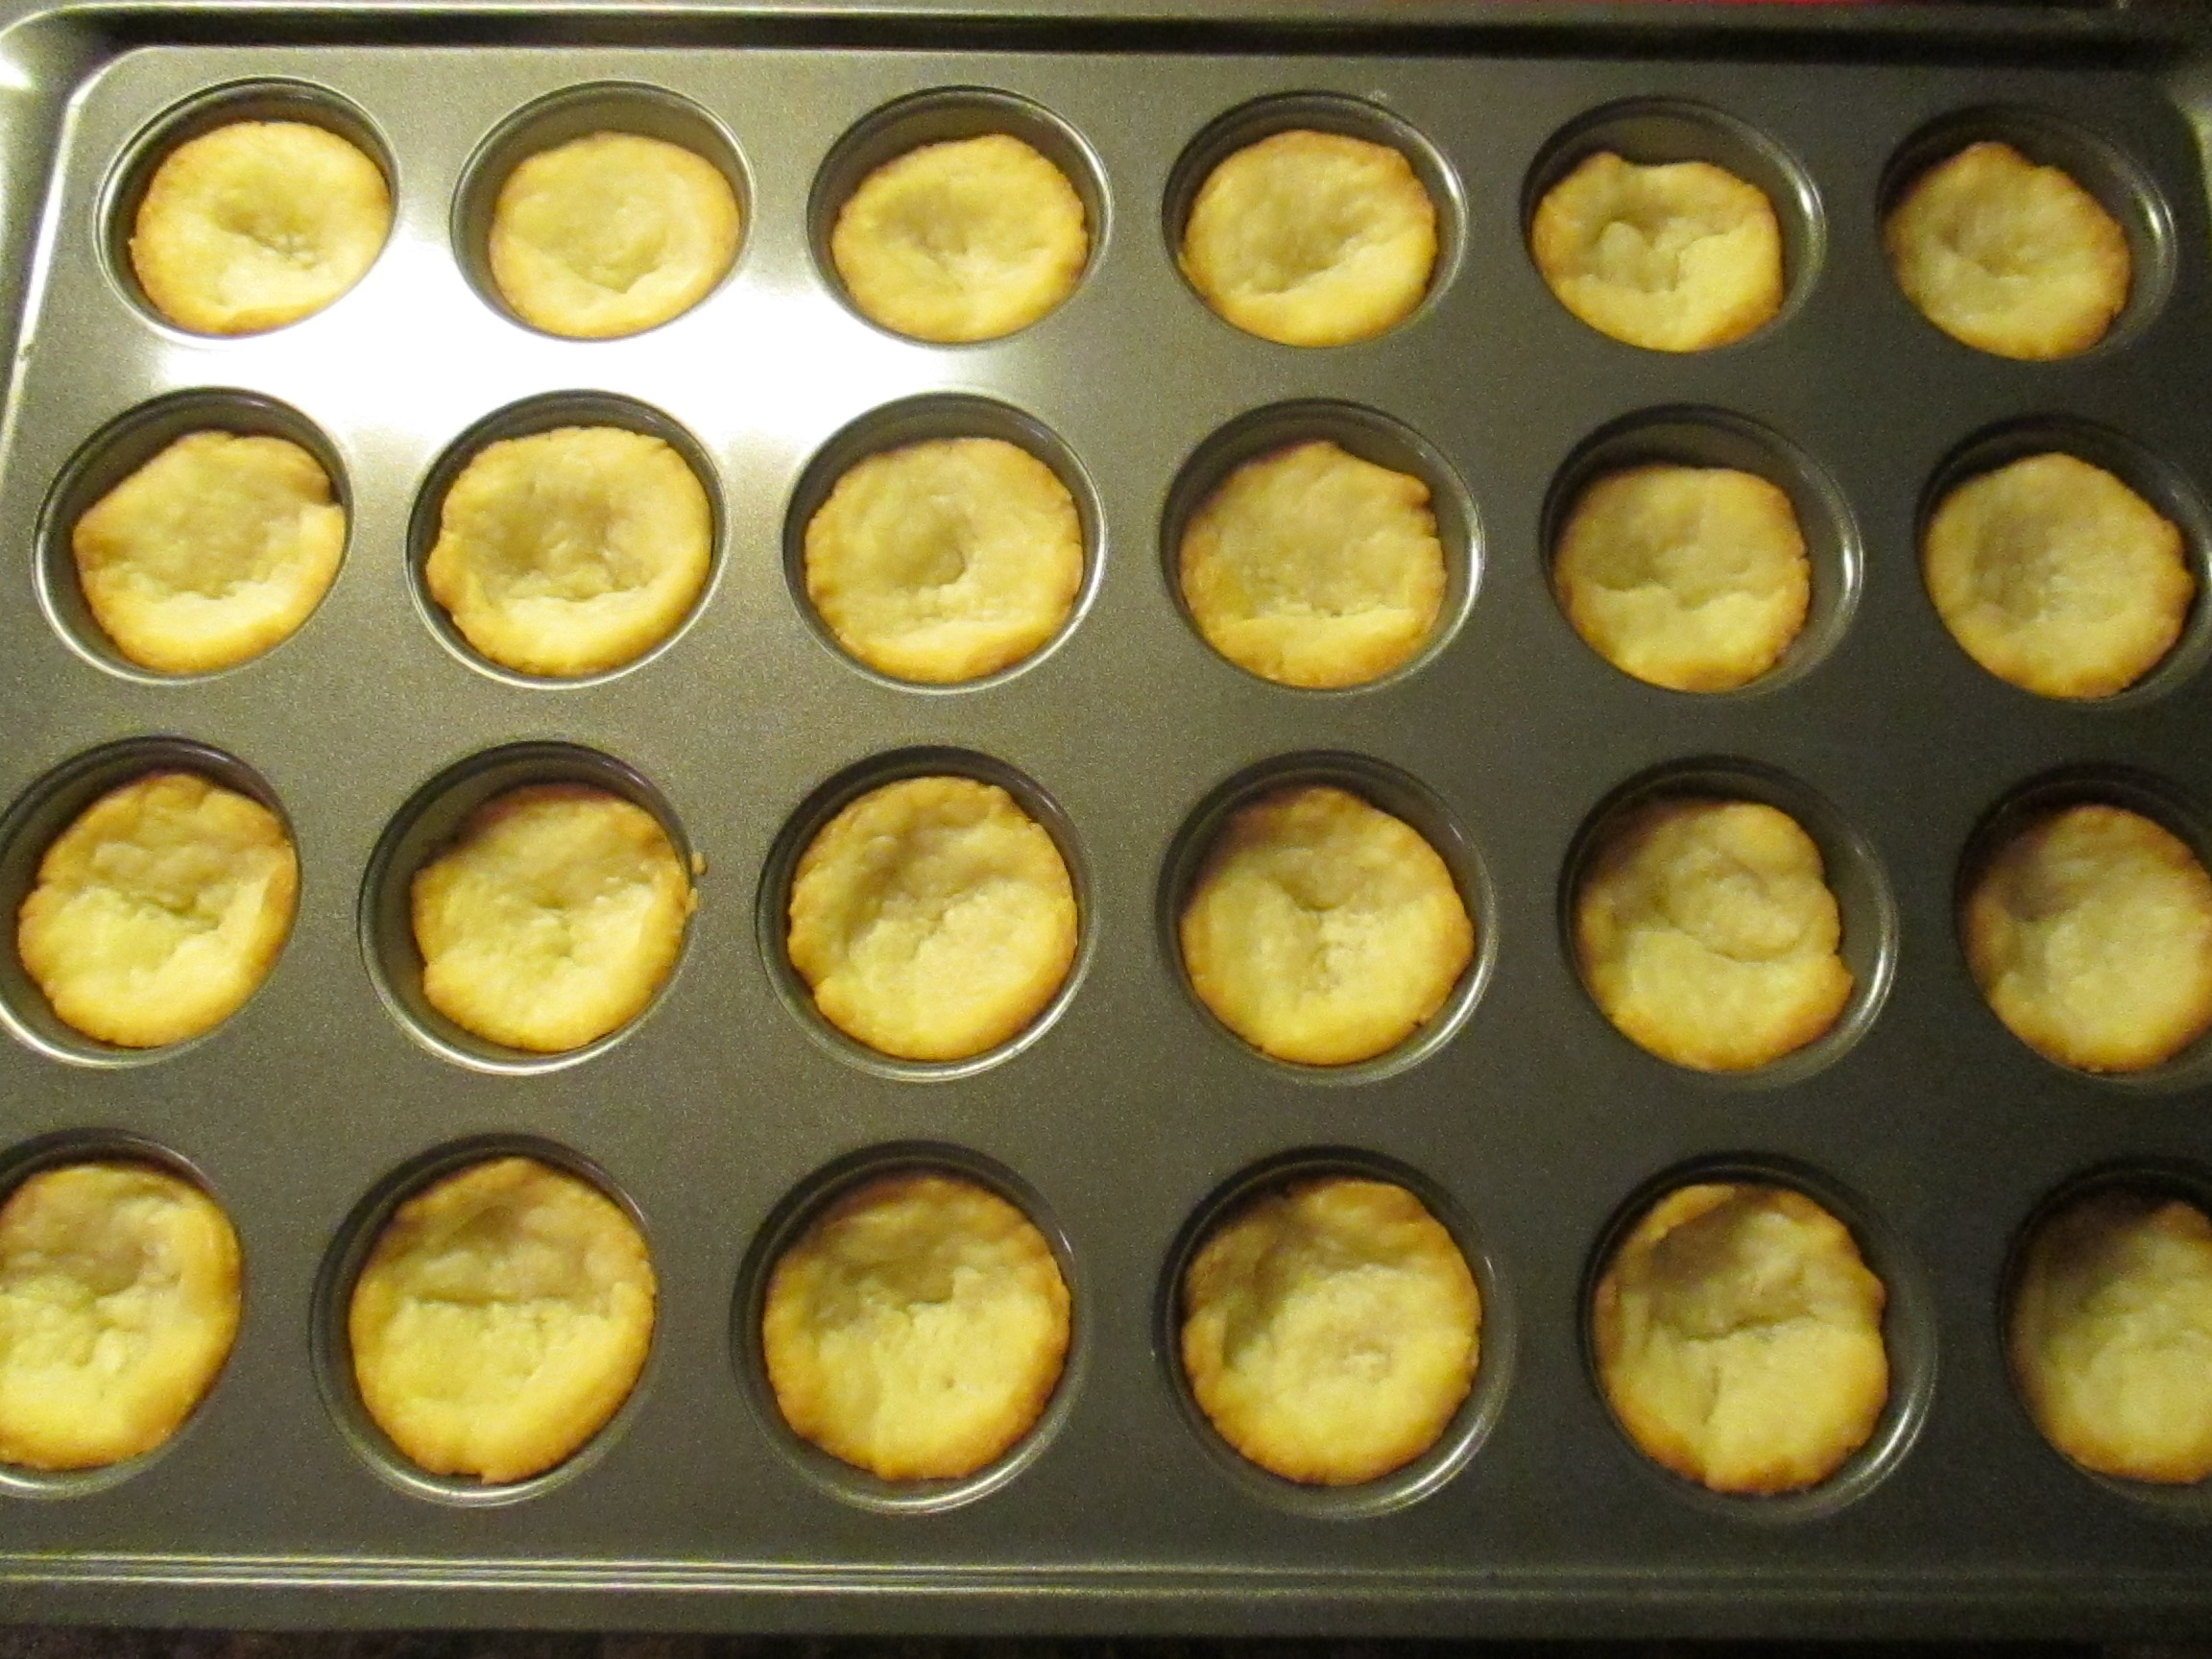
Preheat oven to 350 F. In a medium bowl beat the butter, cream cheese and sugar with a mixer on medium speed until smooth. Beat in the flour and orange zest. Shape the dough into 24 balls and press onto the bottom and sides of mini muffin pan.

To make the filling: In a small bowl combine the egg, confectioners’ sugar, 1/3 cup pistachios and the dried apricots. Spoon into the pastry-lined mini muffin tin. Sprinkle remaining chopped pistachios over them.

Bake 18 to 20 minutes or until the pastry is golden brown and the filling set. Cool in the muffin tin on a wire rack for 10 minutes. Remove from the pans and cool completely.

Recipe from Better Homes & Gardens

Key Lime Pie Tassies

  • Servings: 24 Tassies
  • Print

Ingredients:

1/2 cup butter, softened

3 oz. cream cheese, softened

1 cup all-purpose flour

1/2 teaspoon lime zest

1/4 cup key lime or lime juice, but bottled or the juice from 5 to 6 key limes or 2 to 3 regular limes

2 egg yolks

2/3 cup sweetened condensed milk

Sweetened whipped cream for topping, optional

Directions:

Preheat oven to 325 F. In a medium bowl beat the butter and cream cheese with a mixer on medium speed until smooth. Beat in the flour. Shape the dough into 24 balls and press onto the bottom and sides of mini muffin pan. Bake 20 to 25 minutes, or until the edges are golden brown. Cool slightly in the muffin tin on a wire rack.

Make the filling: In a medium bowl beat the eggs with a whisk. Gradually whisk in the condensed milk. Next, whisk in the lime zest and lime juice. Spoon about 1 tablespoon of the filling into each pastry-lined cup.

Bake about 10 minutes, or until filling is set. Cool in muffin tin on a wire rack. Cover and chill for 2 to 3 hours. If desired, top with sweetened whipped cream and additional lime zest.

Sweetened Whipped Cream: Beat 1/2 cup heavy, 1 tablespoon confectioners’ sugar and 1/4 teaspoon vanilla extract with a mixer on medium speed until soft peaks form.

Recipe adapted from Better Homes & Gardens