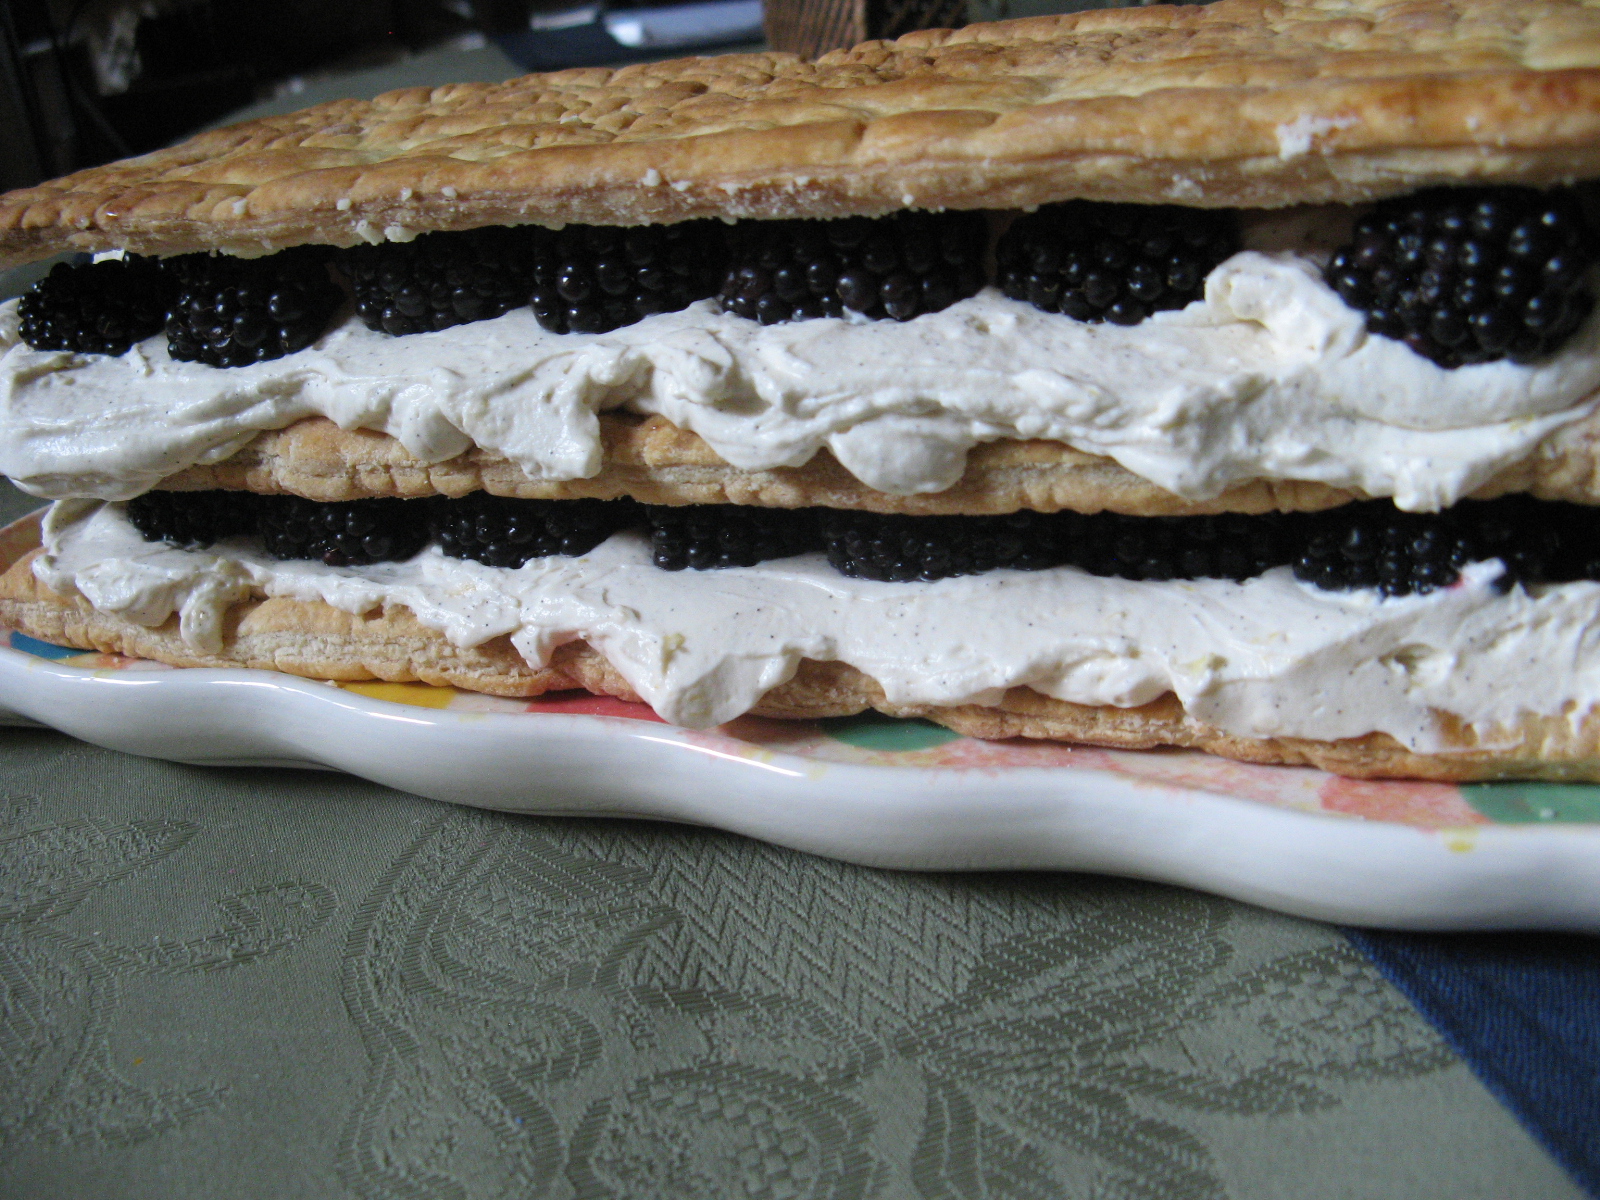
Pumpkin Cannoli

If you visited my blog yesterday you saw my post for a Slow Cooker Pumpkin Spice White Hot Chocolate (YUM!) and I mentioned these Pumpkin Cannoli in that post. Today I am sharing the recipe with you. Sometimes with one can of pumpkin puree you can enjoy 2 or 3 delicious treats.

Pumpkin Cannoli

Ingredients:

4 large cannoli shells

1 cup whole milk ricotta cheese

1/3 cup confectioners’ sugar

1/2 cup pumpkin puree

1/2 teaspoon pumpkin pie spice

Directions:

Fold the ricotta cheese, sugar, pumpkin puree and pumpkin pie spice together in a medium bowl until well blended. Transfer the mixture to a large piping bag (or a gallon size resealable bag) and snip a half inch hole at the end (or corner) of the bag and pipe the mixture into both ends of the cannoli shells. Dust with confectioner’ sugar and enjoy.

Recipe from Rachael Ray Magazine

Lemon Ricotta Bars

So, even after I made the Ricotta Orange Pound Cake I posted about last week, I still had ricotta cheese left-over and I didn’t want to toss it. So, I decided to make Lemon Ricotta Bars. Lemon & ricotta go together so well… If you don’t believe me try making these bars, these pancakes I posted about a few years ago or these cookies I posted right before the holidays last year. All were delish!

Lemon Ricotta Bars

Ingredients:

For the crust:

2 cups graham cracker crumbs (15 crackers)

2 tablespoons sugar

1 stick unsalted butter, melted

For the filling:

1 cup whole-milk ricotta

4 large eggs, beaten

1 1/3 cups sugar

3 tablespoons all-purpose flour

2 tablespoons lemon zest

2/3 cup lemon juice, from 3 to 4 large lemons

1/4 teaspoon salt

Directions:

Preheat the oven to 350F. Spray a 9x13x2 baking dish with nonstick cooking spray.

For the crust: Combine the ingredients for the crust in a medium bowl and mix until moistened. Press the mixture evenly in the prepared pan and about 1/4 inch up the sides of the dish. Bake in the preheated oven for 8-10 minutes, until set, and then set aside to cool.

Reduce the oven to 325F.

For the filling: Whisk the ricotta, eggs, sugar and flour in a bowl until well combined. Stir in the lemon zest, lemon juice and salt and blend well. Pour the filling into the crust and bake until filling is firm, about 30 minutes.

Let the pan cool on a wire rack, at least 2 hours. Cut into desired sized bars with a knife, wiping the knife between cuts.

Recipe adapted from Food Network and Food52

Sweets For Your Sweet

Are you thinking of making some homemade treats for your Valentine? Or, maybe something for yourself? Well, I have two quick and easy treats for just that… Matzo Crack & Chocolate Peanut Butter Cheesecake Truffles.

For the Matzo Crack, you start off by making a simple toffee using butter and brown sugar. Which you then spread over matzo crackers that have been arranged in a single layer on an aluminum foil lined baking sheet. Pop it in the oven for about 10 minutes, remove and then spread a bag of chocolate chips – semi-sweet, milk or dark – over the bubbling toffee. Let it sit for a few minutes and then using an off-set spatula smooth the chocolate over the toffee. Sprinkle with seat salt (and nuts if you like) and refrigerate for about 45 minutes. Once the chocolate has hardened transfer to a cutting board and cut into pieces.

The truffles are just as easy… After making the filling – beat cream cheese, peanut butter, graham crumbs, sugar and peanuts together – roll it into 1-inch balls and freeze for about 10 minutes. Melt the chocolate and dip each of the balls in the chocolate, sprinkle with chopped peanuts and refrigerate until firm.

There you go… two quick, easy and delicious treats that you can enjoy this Valentine’s Day or any day!

Chocolate Toffee Matzo Crack

Ingredients:

4-5 lightly salted matzos

1 cup (2 sticks) unsalted butter

1 cup light brown sugar

12 ounce bag of chocolate chips – milk, semi-sweet or dark

Sea Salt

Favorite nuts, optional

Directions:

Preheat the oven to 350 F. Line a baking sheet with aluminum foil – make sure the foil goes up and over the edges of the pan. Top the foil with parchment paper. Cover the paper with the matzo, cutting and piecing the pieces together.

Combine the butter and sugar in a medium saucepan and cook over medium heat, stirring constantly with a whisk until the mixture comes to a boil. Once the mixture comes to a boil cook for a few more minutes until it becomes foamy and thickened. The mixture may look like its separating, continues whisking and it will come together. Pour the toffee over the matzo and spread it into an even layer using an off-set spatula. Pop it in the oven and bake it for about 10 minutes, until the toffee is bubbling. Remove from the oven and place on a wire rack

Scatter the chocolate chips over the hot toffee, let it sit for a few minutes and then using an off-set spatula spread the chocolate in an even layer over the toffee. Sprinkle with the sea salt and nuts (if using) and place in the refrigerator for about 45 minutes. Don’t let it stay in the refrigerator too long or it will be more difficult to cut.

Using the overhang aluminum foil transfer the matzo crack to a cutting board and cut it into pieces. Store in an airtight container in the refrigerator.

Recipe From Once Upon A Chef

Peanut Butter Cheesecake Truffles

  • Servings: About 28 Truffles
  • Print

Ingredients:

8oz. cream cheese, softened

1/2 cup graham cracker crumbs

1/4 cup confectioners’ sugar

1/4 cup creamy peanut butter

3 tablespoons chopped peanuts, divided

8oz. semi-sweet chocolate, chopped into pieces

Directions:

Beat cream cheese in a large bowl until creamy. Add in the remaining ingredients, except the sugar, and continue beating until all ingredients have mixed together.

Roll the cream cheese mixture into 28 balls, using about a tablespoon of the mixture for each ball. Place on a waxed covered baking sheet and freeze for 10 minutes.

Meanwhile, melt the chocolate. You can melt it in the microwave or using a double boiler. Dip the cream cheese balls into the chocolate and transfer them back to the wax-lined baking sheet. Sprinkle with the remaining chopped peanuts and refrigerate until firm, about an hour.

Store in an airtight container in the refrigerator.

Recipe from Kraft

Flan

We’re at the end of January… Is it too late to say Happy New Year? I think not, so, Happy New Year! I hope the new year is treating you well so far.

It took me three tries to get the caramel sauce right for this flan. The first time, I made it in a skillet and I let it sit on the flame a little too long and the color was dark and it had a slight burnt taste. The second time I used a saucepan and I don’t know what happened, but, it just wasn’t right. The third time I used a glass saucepan and once the sugar started to caramelize I lifted the pan off the heat so it wouldn’t be heating it directly and I finally got the color and taste right.

I immediately divided it among my ramekins and it quickly hardened. I hadn’t made flan in a long time so I couldn’t remember if that was normal or not good. Thankfully, it was all good. I blended the ingredients for the custard and also divided that among the ramekins and baked in a roasting pan in a hot water bath and after letting them cool I had the perfect flan.

It was the right consistency and the perfect amount of sweetness.

Flan

Ingredients:

1 cup sugar

1 can (14oz.) sweetened condensed milk

1 can (12oz.) evaporated milk

1/2 cup whole milk

3 eggs

2 egg yolks

1 teaspoon pure vanilla extract

Pinch of salt


Directions:

Preheat oven to 350 F. In a large shallow roasting pan, place six 6oz. ramekins.

In a heavy nonreactive pan pour the 1 cup of sugar and heat over medium heat. Stir constantly until sugar melts and becomes caramel colored, about 10 – 15 minutes. Pour caramel evenly into ramekins.

In a blender combine the condensed milk, evaporated milk, whole milk, eggs, egg yolks, vanilla and salt and blend until mixture is smooth. Strain the mixture, then pour over the caramel in the ramekins.

Place the roasting pan in the oven and fill the pan with 1 inch of hot water. Bake for about 30 minutes, until the center of each flan is set.

Remove pan from oven and let cool. When the water reaches room temperature remove the ramekins, cover with plastic wrap and refrigerate for 2 to 3 hours.

Gently run a knife around the edge of the flan to loosen and then invert on a plate.


Pumpkin Spice Marshmallows

I’m not a big fan of marshmallows, but, I have pondered making them from scratch because I like the challenge of making different things. I finally decided to give it a try and make them as part of a gift for a dear friend and since she’s a pumpkin/pumpkin spice fan I decided to challenge myself even further and make Pumpkin Spice Marshmallows.

In the bowl of my stand mixer I combined 3 packets of unflavored gelatin with a half cup of water. I stirred it together and let it sit so the mixture could bloom while I made the syrup.

In a saucepan, I combined granulated sugar, corn syrup, salt and water and brought it to a boil without stirring – stirring could cause the mixture to crystalize. Once the syrup reached 240 F I slowly poured it into the gelatin mixture with the mixer running on low. Once I added all of the syrup I turned the speed to high (8 on my KitchenAid Stand Mixer) and whisked it for 12 minutes.

While the mixture didn’t look like much at first, soon enough, about 5 minutes in, it began to resemble something that could ultimately become marshmallows. And, after the full 12 minutes I was so elated I could have done a happy dance if it wasn’t for the fact that I wanted to transfer the marshmallows to my prepared pan ASAP.

This wasn’t as easy as just spreading it with a spatula though. Because the mixture was thick and sticky I rubbed my hands with vegetable oil in order to smooth and stretch it into the dish.

I let the marshmallows cure in the pan on my counter for 24 hours and then sliced them using a pizza slicer. I then coated each of the marshmallows in a coating of corn starch, powdered sugar and pumpkin pie spice. In the directions below I include directions on making your own pumpkin pie spice, but, you could easily just use store-bought if you have it on hand.

Of course I tried these before packing them up and mailing them and I must say and of course it’s no surprise, homemade marshmallows are so much better. I didn’t get the funny aftertaste I usually get with store bought ones.

Pumpkin Spice Marshmallows

Ingredients:

3 packs of unflavored gelatin

1 cup water (divided)

1 1/2 cups white granulated sugar

1 cup light corn syrup

1/2 teaspoon salt

1 1/2 teaspoons vanilla extract

1/2 cup cornstarch

1 cup powdered sugar


Pumpkin Pie Spice:

2 tablespoons cinnamon

1 1/2 teaspoons ground nutmeg

1 1/2 teaspoons ground ginger

1 1/2 teaspoons allspice


Directions:

In the bowl of a stand mixer, add the gelatin and 1/2 cup of water. Stir together and let sit while you make the sugar mixture.

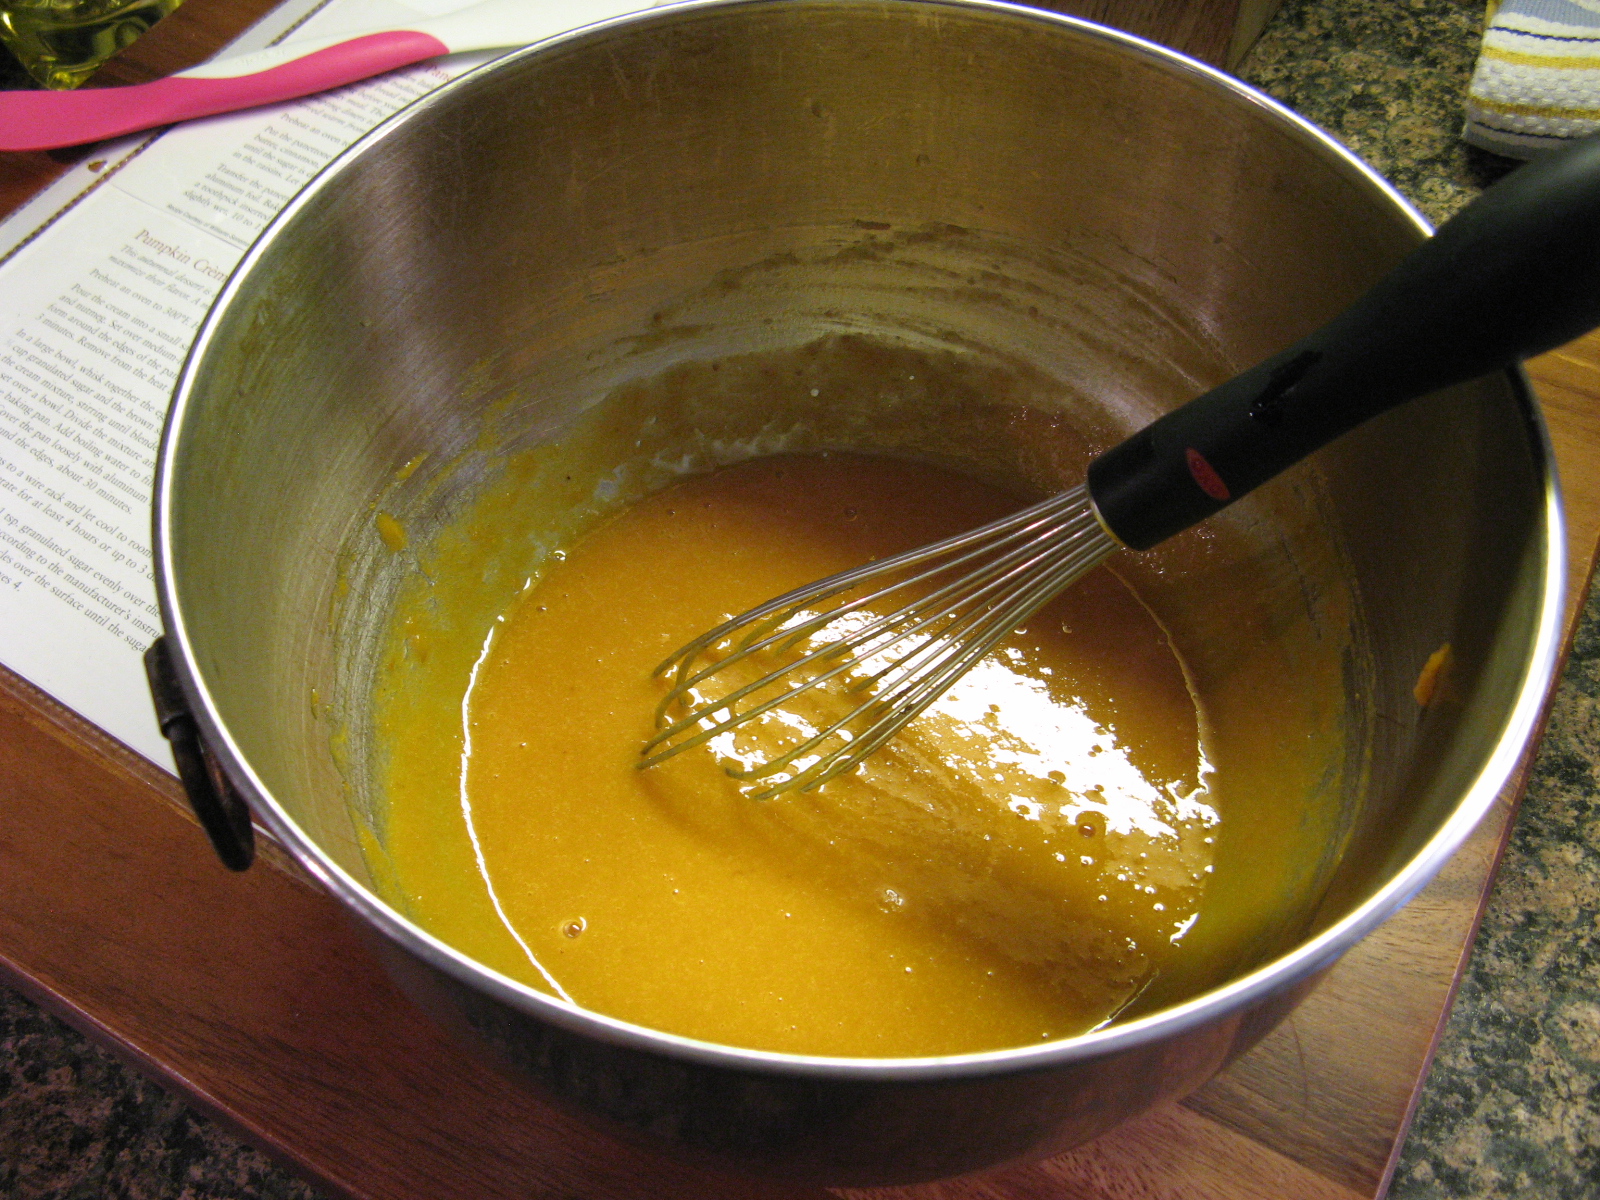
In a small saucepan, combine the granulated sugar, corn syrup, salt and the remaining 1/2 cup of water. Let it come to a boil over medium-high heat. Do not stir, or the mixture will crystalize. Clip a candy thermometer to the pot and once the temperature of the syrup reaches 240 F remove the syrup from the heat.

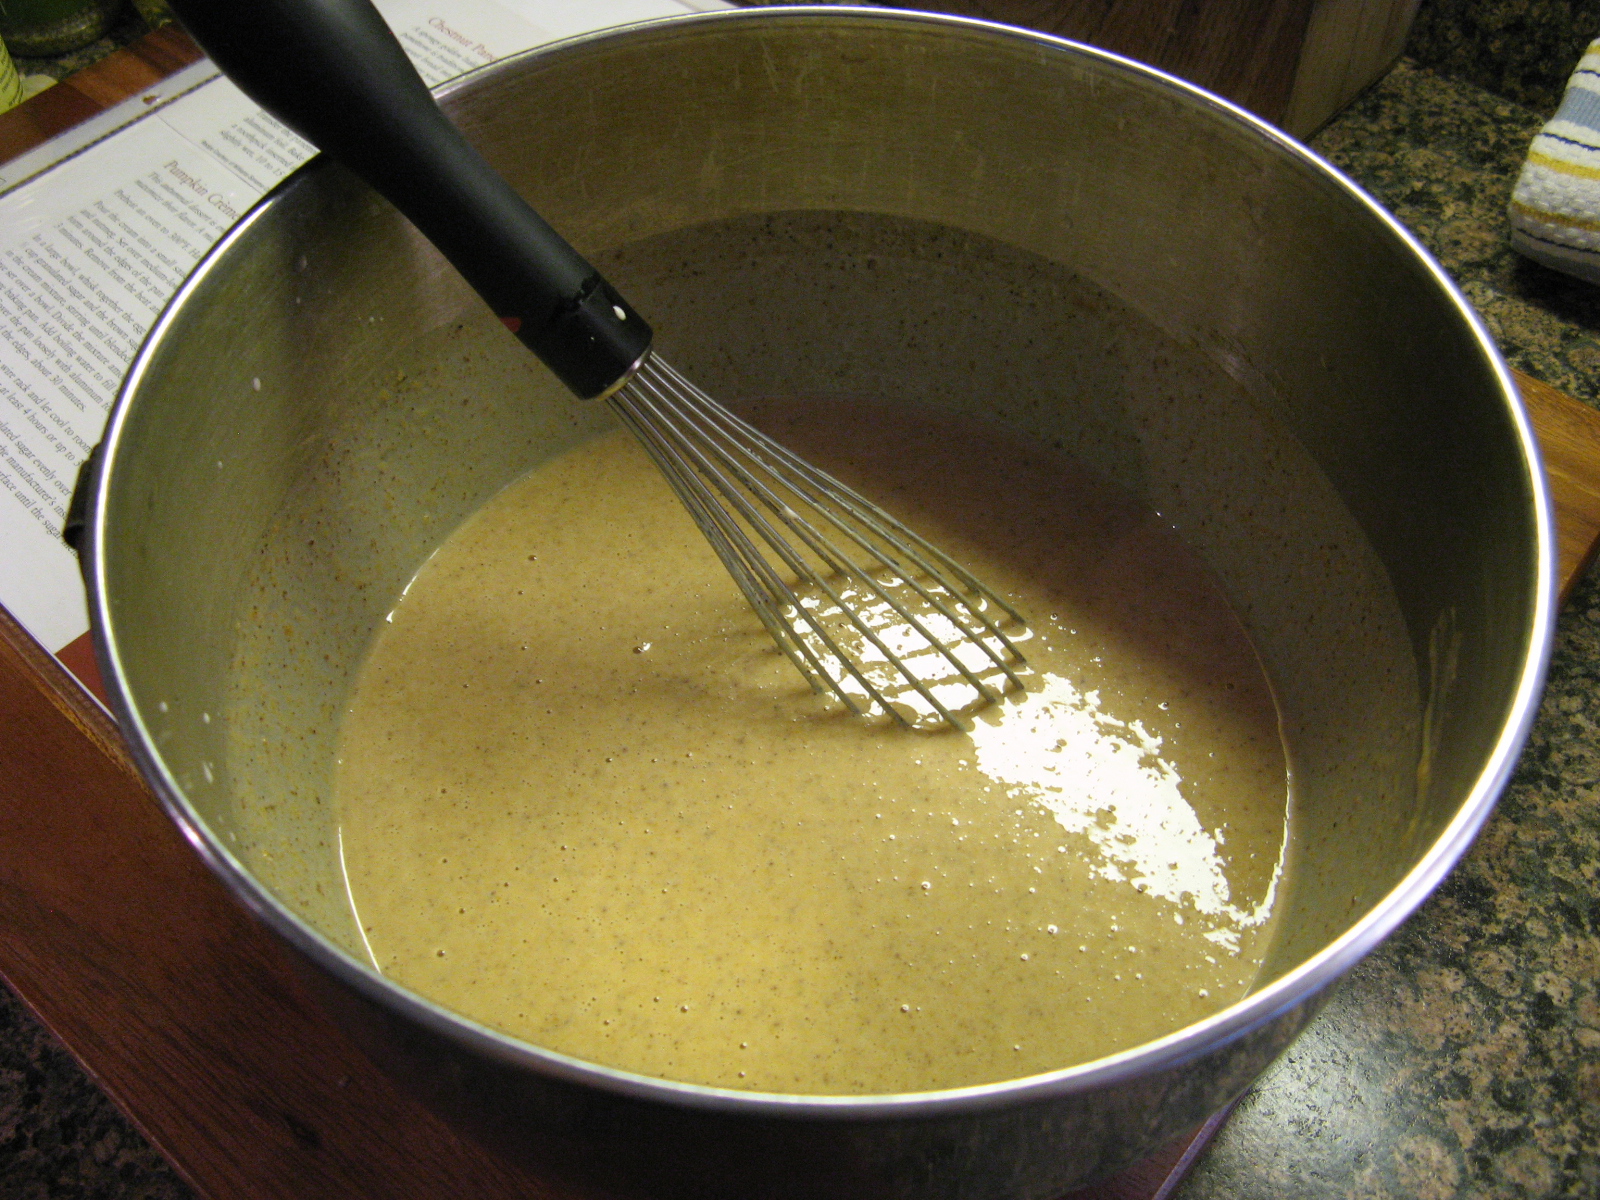
With the mixer on low and using the whisk attachment, slowly pour the syrup mixture into to the gelatin mixture. Once all of the syrup has been added raise the speed of the mixer to high and beat for 12 minutes.

Meanwhile, make the pumpkin pie spice by combining all of the spices in a small bowl, set aside.

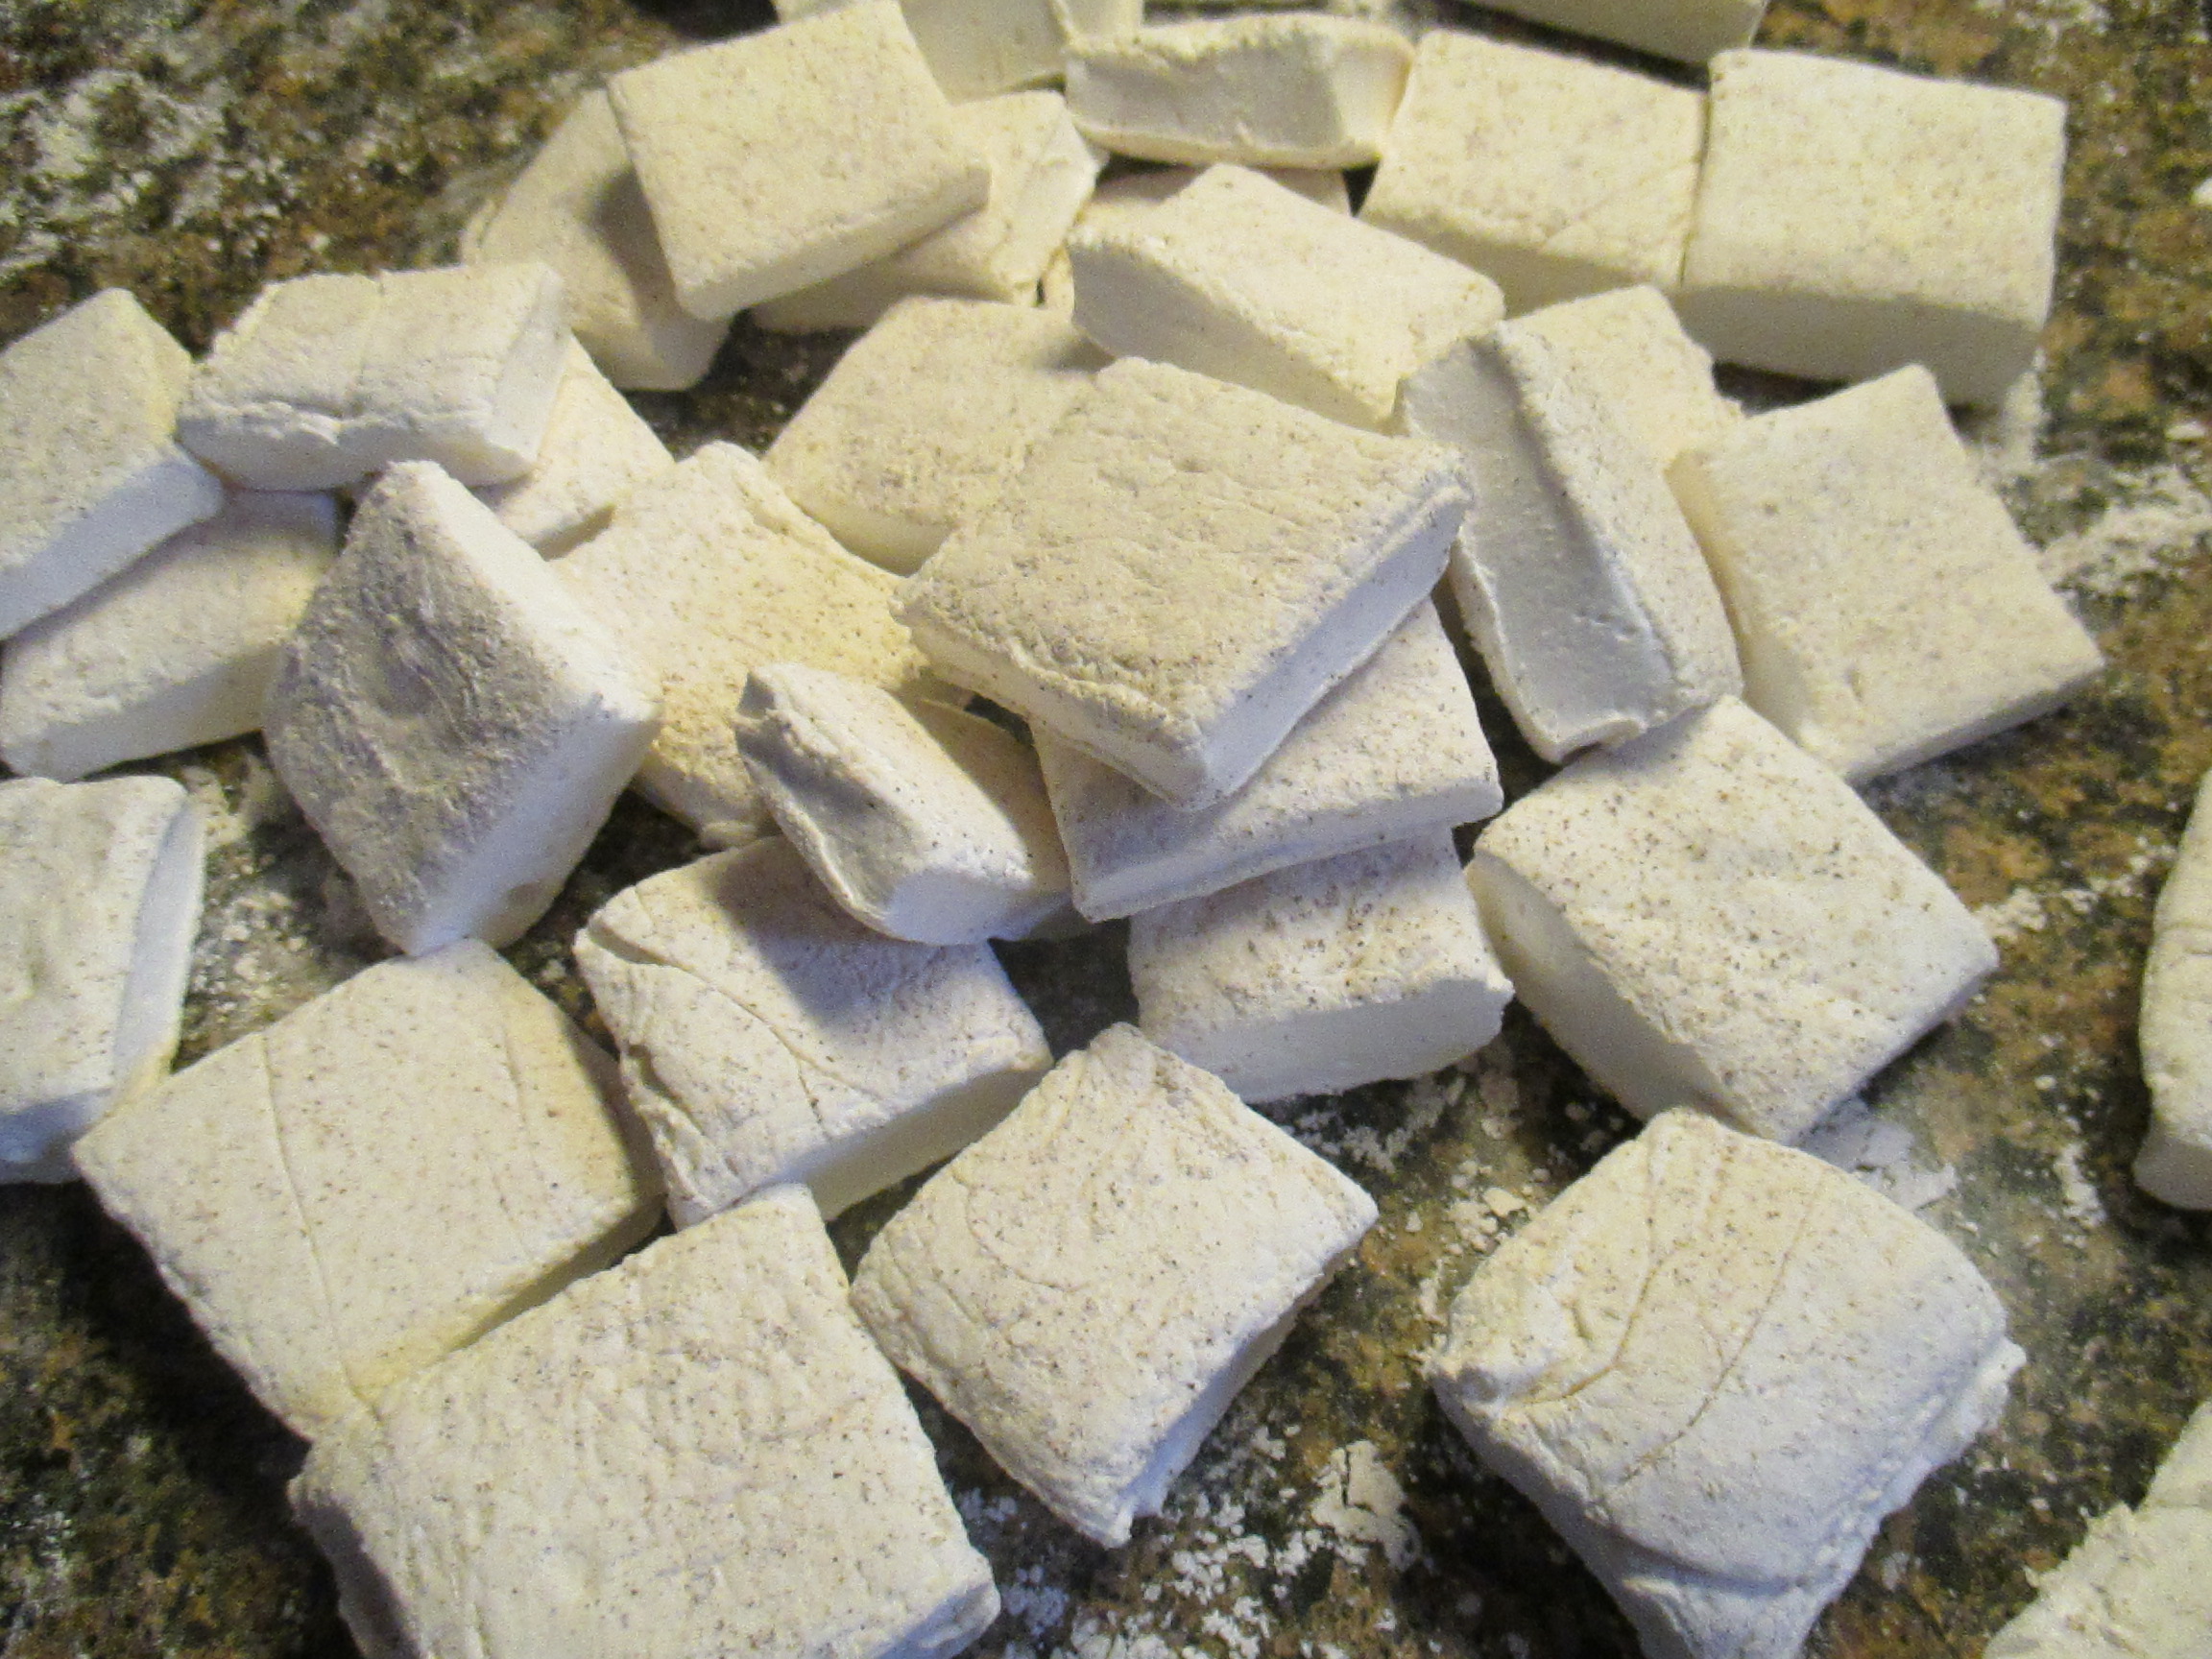
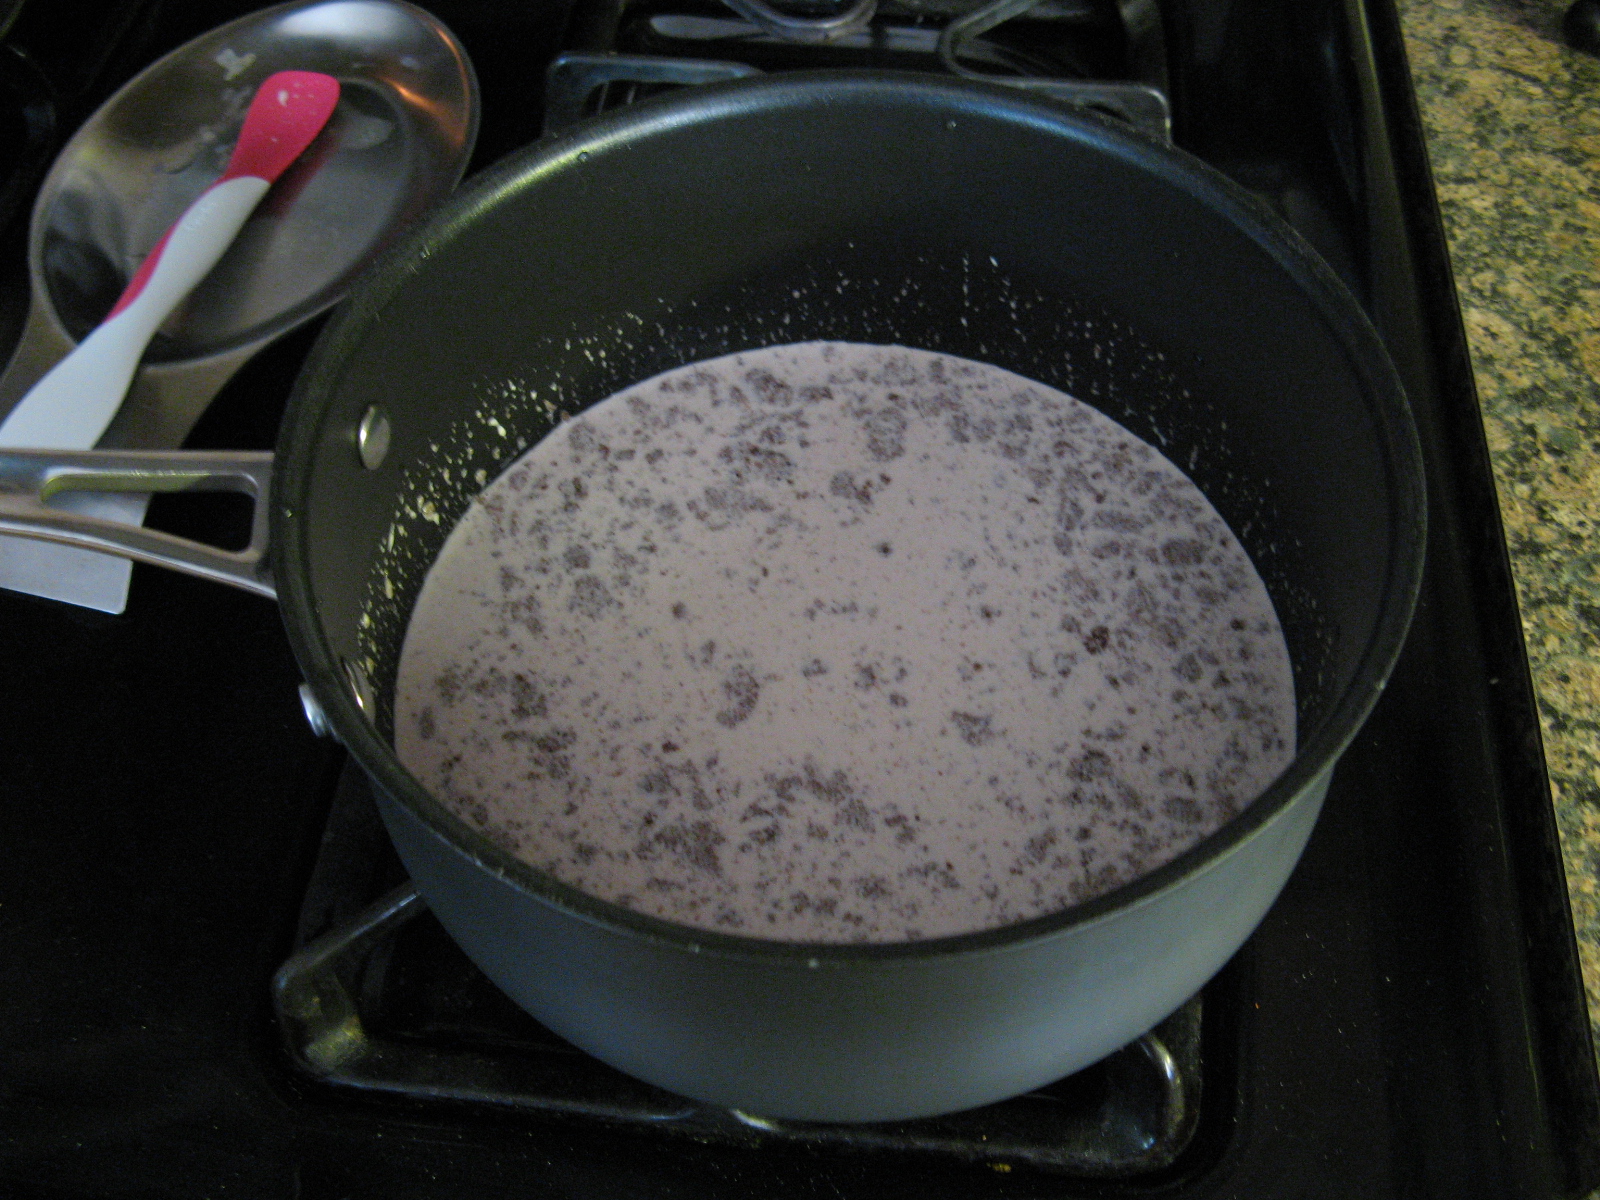
In a medium bowl combine the cornstarch, powdered sugar and 1 tablespoon of the pumpkin pie spice. Stir to combine. This will be the coating for the marshmallows.

Dampen a paper towel with vegetable oil and spread the oil all over the inside of a 9×13 inch baking dish. Once the entire dish has been coated, sprinkle a few tablespoons of the powdered sugar mixture into the pan and move it around so the dish is coated.

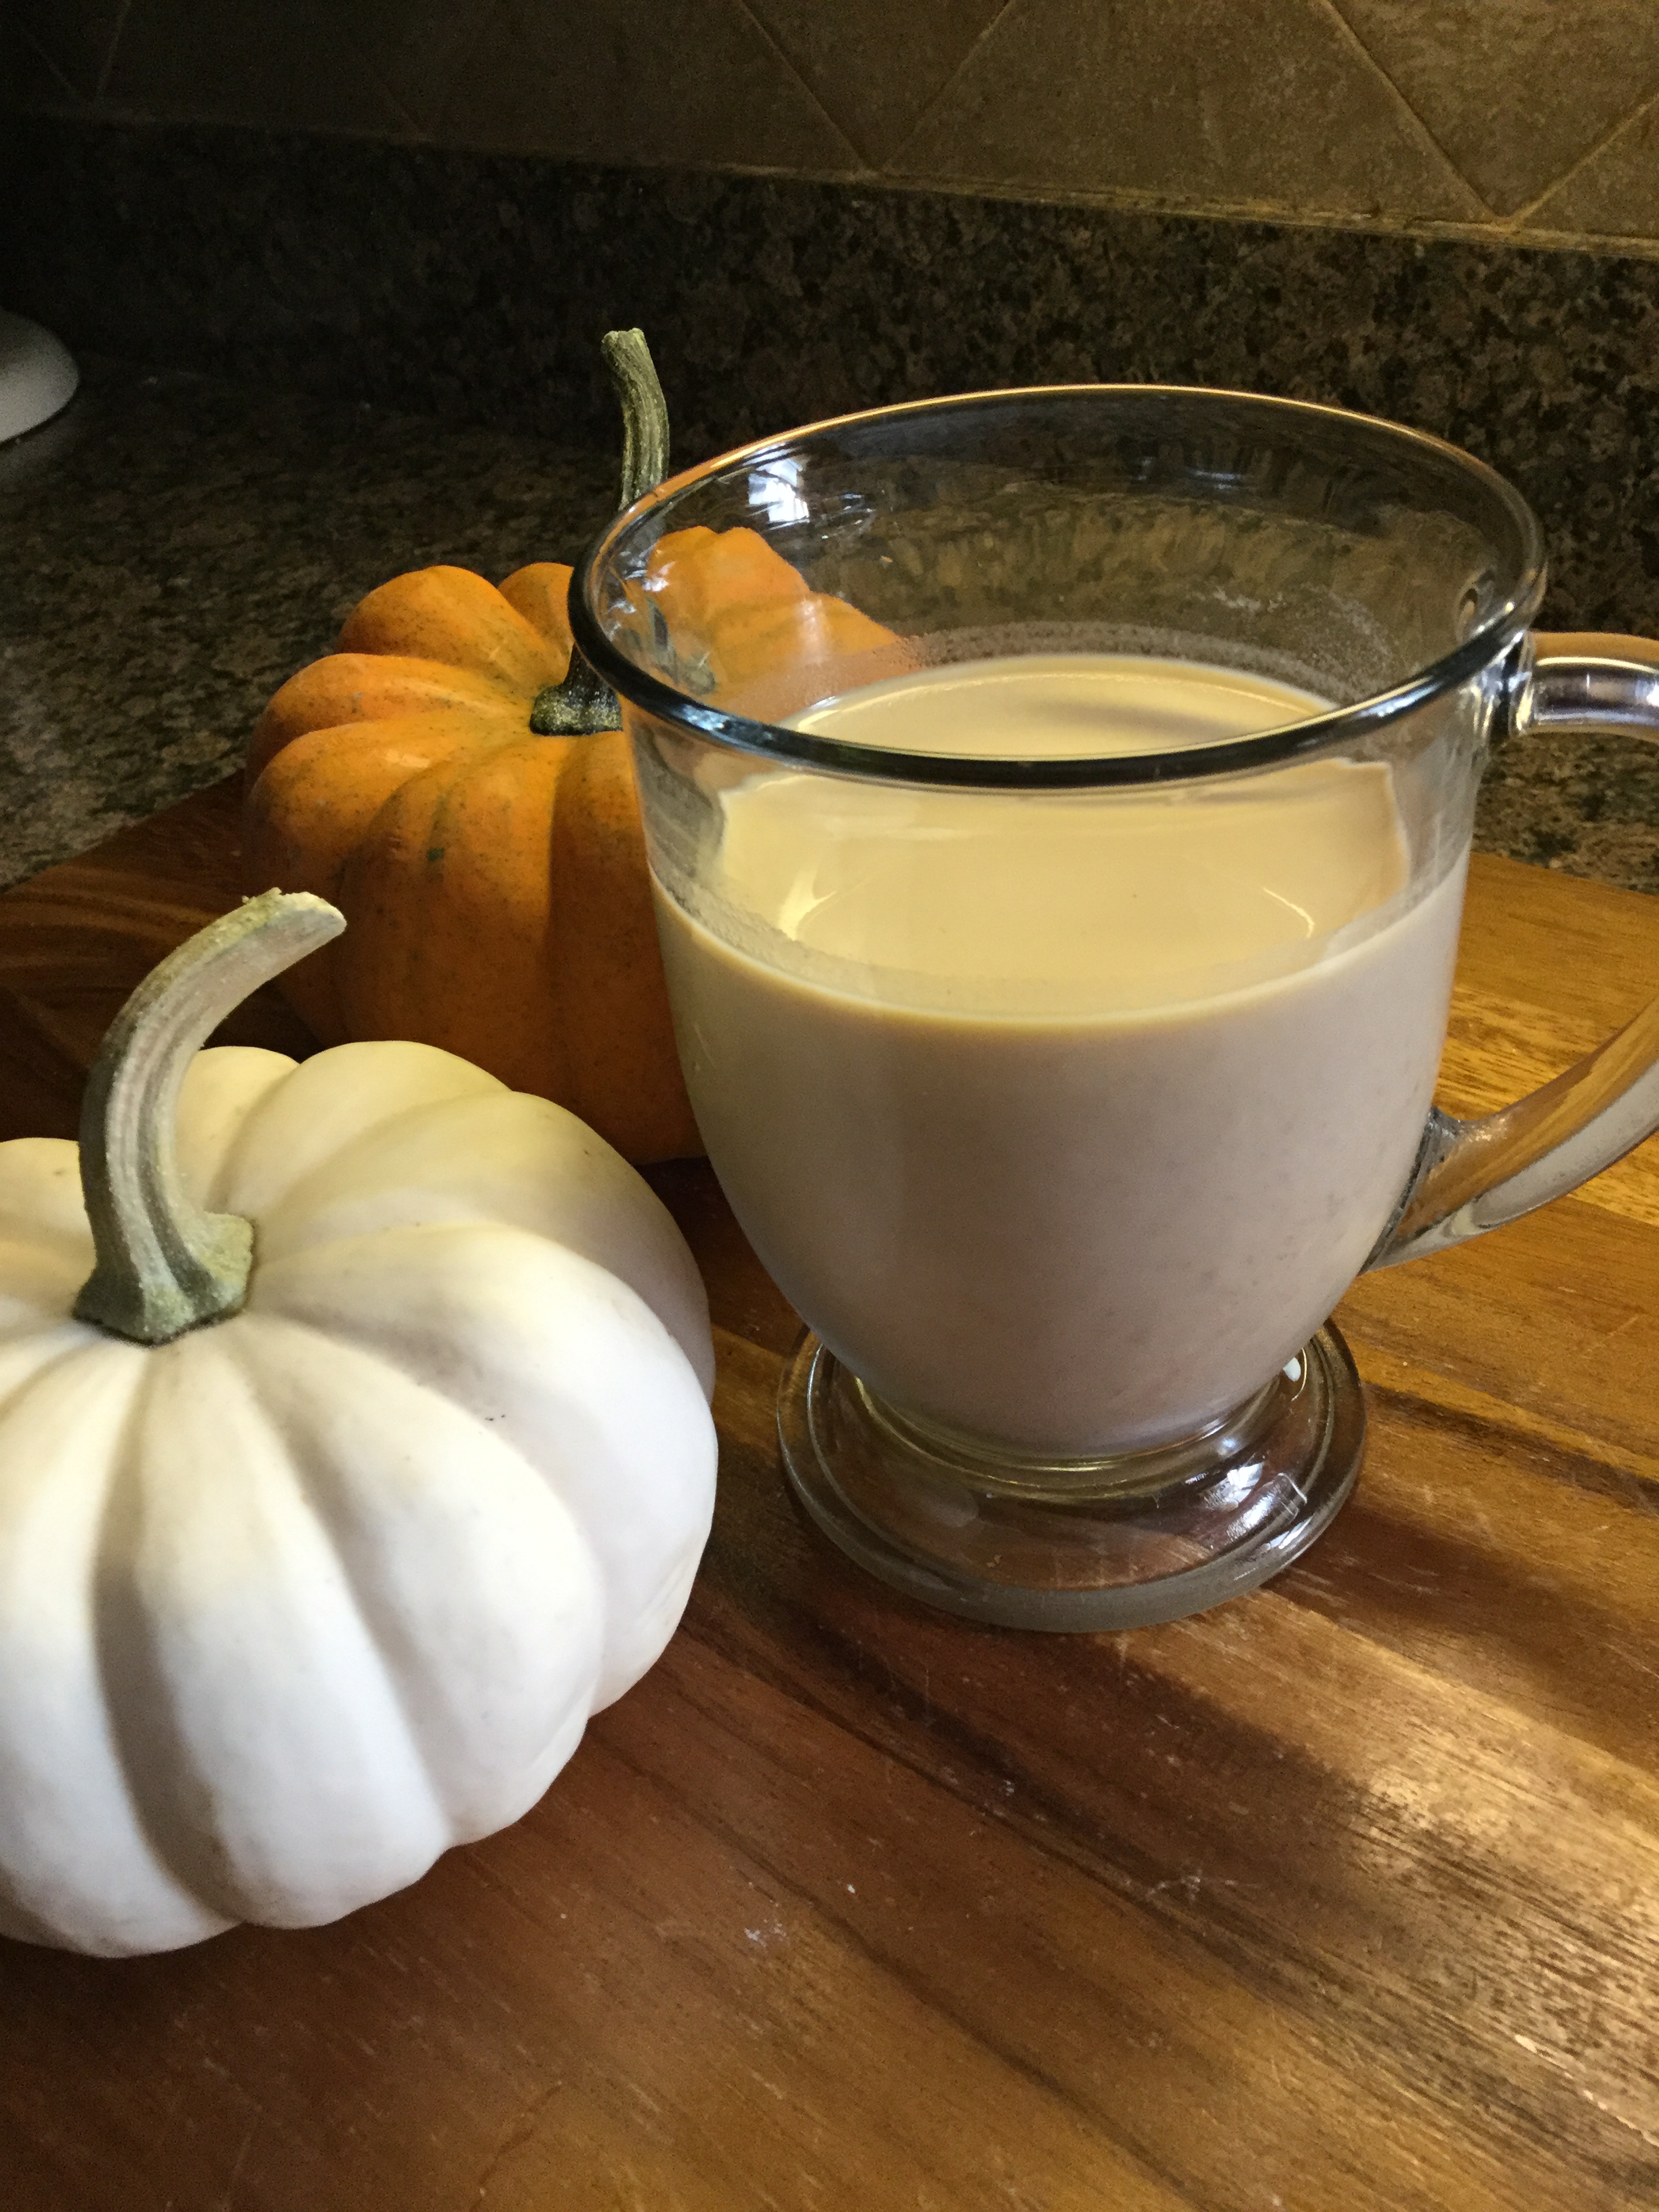
When the marshmallow fluff has been beating for 11 minutes add in the vanilla extract and teaspoons of pumpkin pie seasoning. .

Once the marshmallow is done beating transfer it to the prepared baking dish and use a spatula to smooth the top.

Using a sifter or sieve, cover the top of the marshmallows with a light coating of the powdered sugar mixture.

Let the marshmallows sit out on your counter for at least 4 hours or overnight. I let mine sit out for 24 hours.

When they are done, sprinkle some of the coating onto your counter and turn the marshmallows out and slice with a knife or a pizza cutter.

Add the marshmallows to the bowl with the powdered sugar mixture to coat them.

Once all of the marshmallows have been coated store for a few weeks in a Ziploc bag or Tupperware.

Keep the extra powdered sugar mixture. After sitting for a few days, the marshmallows will absorb the coating, just toss them in the mixture once again.

Recipe from The Garlic Diaries

Pumpkin Chai Latte

It’s officially fall! My favorite season… Pumpkins, apples, apple picking, foliage, scarf weather and we’re closer to my other favorite time of the year (the holiday season). I think I have covered it all. And while pumpkin flavored everything has been on store shelves for a few weeks now and I will admit that I did bake a few things that are pumpkin flavored, I have waited until now to post anything pumpkin related. And I am starting small with this Pumpkin Chai Latte. Before I get to the latte though, I just want to touch on the pumpkin flavored phenomena. It’s a bit out of control! It’s so excessive that I am not really tempted to get anything. I did pick up some Pumpkin Flavored Cheerios that remind me more of Apple Cinnamon Cheerios than anything, and some Pumpkin Fruit Butter. I used to love Pumpkin Flavored Milanos and I even enjoyed some pumpkin spice almonds I picked up a year or two ago, but now, I prefer the baked pumpkin flavored treats I make more than anything.

Now, back to the latte. I began by heating milk and steeping a bag of chai tea in the milk for about 5 minutes. And here’s something I learned and maybe some of you knew this but somehow I didn’t… By steeping the chai tea bag in milk I had a chai tea latte. It’s one of the few things I order at Starbucks but I am pretty excited to know now that I can make it at home now. It just needs a little sugar. Once the milk was read I whisked in pumpkin puree and a pinch each of pumpkin spice and honey. You can sub sugar if you prefer your latte on the sweeter side. I then strained it and enjoyed!

Pumpkin Chai Latte

Ingredients:

1 cup hot milk

1 chai tea bag

1/4 pumpkin puree

pinch of pumpkin spice

pinch of honey

Directions:

Steep the tea bag in the milk for about 5 minutes. Whisk in the pumpkin puree, pumpkin spice & honey. Strain and enjoy.

Recipe from Food Network Magazine

Blackberry Mille-Feuille

So, you may be wondering what exactly a Mille-Feuille is? I know I was wondering that when a friend tagged me in an Instagram post for Ree Drummond’s Marvelous Mille-Feuille. Translated from French it means one thousand sheets, layer, or leaves. Still wondering? Well, it’s a dessert consisting of layers of puff pastry and cream… Think a Napoleon. For this version though I added in some blackberries along with a custard made with mascarpone cheese… YUM! A slight variation from Ree Drummond’s as she used raspberries. Why did I use blackberries? Well, it was because the recipe called for raspberry liqueur and since I still had some blackberry liqueur from last year’s White Chocolate Blackberry Tiramisu I decided to swap out the berries.

I began by thawing a frozen sheet of puff pastry according to the package directions – I used Pepperidge Farm’s Frozen Puff Pastry. Once it was defrosted I rolled it into a 12 x 15 inch rectangle and then cut it into three 12 x 5 inch rectangles. I placed the three pieces on a parchment lined baking sheet and pricked it with a work and then placed it in the refrigerator for 20 minutes (alternatively you could place it in the freezer for 10 minutes.

While the puff pastry was in the fridge I preheated the oven to 425 F. Once the puff pastry was perfectly chilled, I sprinkled each rectangle with confectioners’ sugar…

And baked it in the oven from about 15 minutes. Until the puff pastry was a golden brown and puffy. I the transferred them to a wire rack to cool.

While the puff pastry cooled, I made the filling. In the bowl of my stand mixer I added confectioners’ sugar, mascarpone cheese, heavy cream and vanilla paste and whisked it until soft peaks formed. I then added in the blackberry liqueur and lemon zest and whisked for a few more second until the ingredients were combined.

It was then time to assemble. I placed a dab of the whipped mixture on a serving plate and place one of the puff pastry’s on the plate glaze-side down. I spread half of the mascarpone mixture over the puff pastry and then arranged half of the blackberries on top.

I repeated this with another puff pastry rectangle and the remaining mascarpone mixture and berries. I then topped it with the remaining puff pastry rectangle and before serving I dusted it with more confectioners’ sugar.

Verdict… It was a hit! I can’t wait to make it again using freshly picked berries… Maybe I’ll try making it with raspberries next.

Blackberry Mille-Feuille

Ingredients:

1 14-oz. sheet frozen all-butter puff pastry, thawed

2 tablespoons confectioners’ sugar, plus more for dusting the pastry and the finished dish

8 ounces mascarpone cheese

1 cup heavy cream

2 tablespoons vanilla extract or vanilla bean paste

2 tablespoons blackberry liqueur

zest of 1 lemon

3 – 4 cups fresh blackberries


Directions:

Line a baking sheet with parchment paper.

Unfold the pastry and roll it to a 12 x 15 inch rectangle and then cut into three 12 x 5 inch rectangles. Transfer to the prepared baking sheet and prick the pastry with a fork and chill for 10 minutes in the freezer or 20 minutes in the refrigerator.

Preheat the oven to 425 F.

Dust the pastry with confectioners’ sugar and bake until golden brown and puffy, about 15 minutes. All to cool for about 15 minutes on a wire rack.

In a bowl add the confectioners’ sugar, mascarpone, heavy cream and vanilla paste/extract, beat until soft peaks form – If using a stand mixer use the whisk attachment. Add the blackberry liqueur and lemon zest and continue mixing for an additional 10 seconds to ensure the ingredients are all combined.

To Assemble: Dab a dollop of the mascarpone mixture on the serving plate and place one piece of the pastry on the plate – glaze-sized down (the side you sprinkled the sugar on). Spoon half of the mascarpone mixture on the pastry and smooth it out evenly. Arrange half of the blackberries on top and repeat with another piece of pasty and the remaining mascarpone mixture and blackberries. Top with the remaining pastry piece and dust with confectioners’ sugar.

Recipe adapted from Ree Drummond

Horchata Treats for Cinco De Mayo!

Happy Cinco de Mayo! This year I decided to make Horchata in honor of the day and then use some of that fresh Horchata to make Horchata Cupcakes topped with Cream Cheese Frosting and sprinkled with cinnamon.

After a few Google searches I decided to make my Horchata as close to “authentic” as possible. I found a recipe that used evaporated milk, one that used rice milk and another that suggested purchasing powdered Horchata mix and mixing it with milk. For authenticity I opted to go the traditional route of blending water with rice until the rice was broken down and then letting the mixture sit in the refrigerator overnight. The next day I strained the water to get all of the rice bits out and blended it with whole milk, vanilla extract, almond extract (okay, this was a bit of a shortcut since some Horchata recipes call for ground almonds), cinnamon and sugar. Yum!

And then the next day I used the fresh Horchata to make cupcakes that were super moist and had a hint of the Horchata in them. Delish!

Feliz Cinco De Mayo…  May your guacamole be spicy, your margaritas strong and your food delicioso!


Horchata

Ingredients:

1 cup uncooked long grain white rice

1 quart warm water

1/2 cup whole milk

2 teaspoons pure vanilla extract

1/2 teaspoon almond extract

1/2 teaspoon ground cinnamon

1/4 cup sugar

Cinnamon sticks for serving, optional

Directions:

In a blender combine the rice and water. Blend for about 1 to 2 minutes, until the rice has broken down but does not form a powder. Refrigerate the rice water mixture for at least 6 hours or overnight.

Strain the rice mixture into a container through a fine mesh sieve or several layers of cheesecloth to remove the rice solids.

Transfer the rice water to a blender and add in the milk, vanilla and almond extracts, cinnamon and sugar. Blend for a minute until all of the ingredients are well combines and smooth.

Refrigerate if not serving immediately. When serving, pour over ice with cinnamon sticks as stirrers.

Recipe from The Food Network


Horchata Cupcakes

Ingredients:

4 tablespoons (1/2 stick) unsalted butter, at room temperature

3/4 cups sugar

1 cup all-purpose flour

1 teaspoon baking powder

1/4 teaspoon salt

1/2 cup Horchata

1/2 teaspoon vanilla extract

1/2 teaspoon cinnamon

2 large egg whites

Directions:

Preheat the oven to 350 F. Line a standard muffin pan with paper liners.

Cream the butter on high speed and then add in the sugar, continue beating until light and fluffy, about 2 to 3 minutes

Sift the flour, baking powder and salt together, set aside.

Mix the Horchata, vanilla and cinnamon together, set aside.

Add the flour mixture and the Horchata mixture to the butter mixture in 3 parts, alternating between the flour and Horchata mixture. Beginning and ending with the flour. Set aside.

In a separate bowl, beat the egg whites until soft peaks form. Fold the egg whites in to the cupcake batter until incorporated.

Scoop the batter into the prepared muffin pan and bake for about 20 minutes or until a cake tester comes out clean. Let the cupcakes cool in the pan for 5 minutes before transferring to a wire rack to cool completely.

Recipe adapted from The Foodies Kitchen


Cream Cheese Frosting

Ingredients:

1 8oz. package cream cheese, at room temperature

1/4 cup (4 tablespoons) unsalted butter, at room temperature

1 cup sifted Confectioners’ sugar

1/2 teaspoon vanilla extract

Directions:

Beat the cream cheese and butter together until creamy.

Add in the vanilla extract and continue beating, then gradually add in the confectioners’ sugar.

If not using immediately, store in the refrigerator.

Pumpkin Custards

It’s officially Fall and you know what that means… Bring on the Pumpkin treats! Can I just say it really is amazing (and a bit insane) how pumpkin and pumpkin spice flavor can be found in almost everything! Now, don’t get me wrong, I love pumpkin spice flavor but, I just don’t think I need to have it in everything. Have you seen these Pumpkin Spice Flavored Candy Corn? I’m totally cool with the traditional flavor of candy corn so I really don’t see the need for it being spruced or spiced up with additional flavoring. If anyone has tried them though please let me know how they taste in the comment section below… LOL! There are a few pumpkin flavored items I couldn’t resist trying though… Chobani Flip Yogurt, M&M’s and Pepperidge Farm Milano Cookies. All of which were quite tasty in my book. I also purchased some Pumpkin Spice Morsels from Nestle that I can’t wait to bake into cookies. Which leads me to my first pumpkin baked treat of the season… Pumpkin Custards.

To begin to I whisked together heavy cream along with cinnamon, allspice, ginger and nutmeg in a medium saucepan and heated it over medium-low heat and warmed the mixture until it began to bubble along the edges and steam. I then removed it from the heat and let it stand for 15 minutes.

IMG_9188

While the cream mixture was cooling, in a large bowl I blended together egg yolks, vanilla extract, salt, pumpkin puree, granulated sugar and light brown sugar until it was smooth.

IMG_9186

Slowly I poured the cream mixture into the egg mixture, and stirred it until it was blended. You don’t want to put the cream into the eggs too quickly because you don’t want to end up with scrambled eggs!

IMG_9189

After straining the mixture through a fine mesh sieve I divided it among 4 ramekins which I placed in a baking pan and filled the pan with boiling water about halfway up the sides of the ramekins. After covering the pan with aluminum foil I baked it in a preheated 300 F oven for about a half hour – until the edges of the custards began to set.

IMG_9193

Once I removed them from the oven I transferred the custards to a wire rack to cool to room temperature. I had a bit of a mishap in transferring them. My wire rack somehow slipped and I ended up losing two of the custards. Thankfully the ramekins didn’t break, but, I was left with a quite a mess to clean-up since the custards hadn’t completely set and ended up splattering everywhere.

After they had cooled I covered them and placed them in the refrigerator and later that evening it was time to enjoy my first pumpkin treat – well, first pumpkin treat that I personally baked – for the season with a topping of whipped cream!

IMG_9224

Pumpkin Custards

Ingredients:

1 1/2 cups heavy cream

1 1/2 teaspoon cinnamon

3/4 teaspoon allspice

1/8 teaspoon ginger

3/4 teaspoon nutmeg

5 egg yolks

1/2 teaspoon vanilla extract

Pinch of salt

6 tablespoons pumpkin puree

1/3 cup granulated sugar

1 tablespoon light brown sugar

Directions:

Preheat the oven to 300 F and boil a pot of water.

Pour the cream into a small saucepan and whisk in the cinnamon, allspice, ginger and nutmeg. Heat over medium-low heat and the warm the mixture until bubbles form around the edges and steam begins to rise. Remove from the heat and let stand for 15 minutes.

In a large bowl blend together the egg yolks, vanilla extract, salt, pumpkin puree, granulated sugar and light brown sugar.  Slowly pour in the cream mixture, stirring until blended. Pour the mixture through a fine-mesh sieve set over a large bowl. Divide the mixture among four 8 fluid-ounce ramekins and place them in a baking dish. Pour the hot water into the pan about halfway up the sides of the ramekins. Cover the pan loosely with aluminum foil and bake for about 30 minutes, until the custards are just set around the edges.

Transfer the ramekins to a wire rack to cool to room temperature, then cover with plastic wrap and refrigerate for at least 4 hours or up to 3 days.

From Williams-Sonoma

Panettone Bread Pudding

Customarily bread pudding is made with day old (or even older) stale bread… I think this where some people get turned off from eating or even trying it. The idea that something has to go “old” to be turned into something delicious is a bit of an oxymoron. Well, if this is what your apprehension is to trying or making bread pudding today I have a recipe for you that uses panettone, an Italian sweet bread along the lines of a fruit cake, but, definitely not as a dense. And since the holidays – yes, I said the “H” word in September – are just around the corner you’ll be seeing those lovely boxes of panettone everywhere soon enough.

To begin I cubed a 2lb. round panettone and spread it on a baking sheet and lightly toasted it in a 350 F oven for 10 minutes. Once cooled I put the cubes in a large bowl.

IMG_8770

In a medium bowl I whisked together eggs, sugar, melted butter, cinnamon, nutmeg, and vanilla extract. I then slowly whisked in warmed heavy cream – you don’t want to add the heavy cream too quickly as you may end up with scrambled eggs – and continued whisking the mixture until the sugar had dissolved.

IMG_8771

I poured the egg mixture over the cubed panettone along with some golden raisins.

IMG_8772

After folding all of the ingredients together, making sure that the panettone had soaked in the egg mixture well, I let the mixture stand for 20 minutes.

IMG_8773

Next, I transferred the mixture to a buttered 9 x 13 inch baking dish and baked it in the oven for 30 minutes, covered with aluminum foil. After removing the aluminum foil I baked it for another 10 minutes. After removing it from the oven I let it cool completely on a wire rack.

IMG_8781

Once cooled I transferred it to a cutting board and cut some pretty healthy pieces.

IMG_8803

And while this bread pudding it delicious on its own due to the deliciousness of the panettone itself and the addition of extra raisins, cinnamon and nutmeg it’s even better when warmed and topped with a scoop or two of vanilla ice cream!

IMG_8817

Panettone Bread Pudding

Ingredients:

2 lb. round panettone, cut into cubes and lightly toasted

6 eggs

2/3 cup granulated sugar

1 stick unsalted butter, melted

1 1/2 teaspoon ground cinnamon

1/8 teaspoon ground nutmeg

1 tablespoon vanilla extract

2 cups heavy cream, warmed

1/2 cup golden raisins

Directions:

Preheat an oven to 350 F and butter (you can also use a cooking spray) a 9 x 13 inch baking dish.

After the panettone cubes have cooled place them in a large bowl. In a medium sized bowl whisk together the eggs, sugar, butter, cinnamon, nutmeg and vanilla extract. Slowly whisk in the heavy cream, whisking until the sugar has completely dissolved. Pour the mixture over the panettone cubes, and then add in the raisins. Fold all of the ingredients together and let stand for 20 minutes.

Transfer the panettone mixture to the prepared baking dish and cover with aluminum foil and bake for 30 minutes. Remove the foil and bake for another 10 -15 minutes; until a toothpick inserted in the center of the pudding comes out clean but is still slightly wet.

Recipe is from a Williams-Sonoma Class