Strawberry Tiramisu

It’s the dog days of summer which usually means you will do anything to avoid turning on your oven. Thankfully there are many delicious recipes out there that can prevent you from doing just that and today I am sharing one, a Strawberry Tiramisu. This spin on tiramisu is perfect for the summer with the abundance of perfectly ripened strawberries available this time of year.

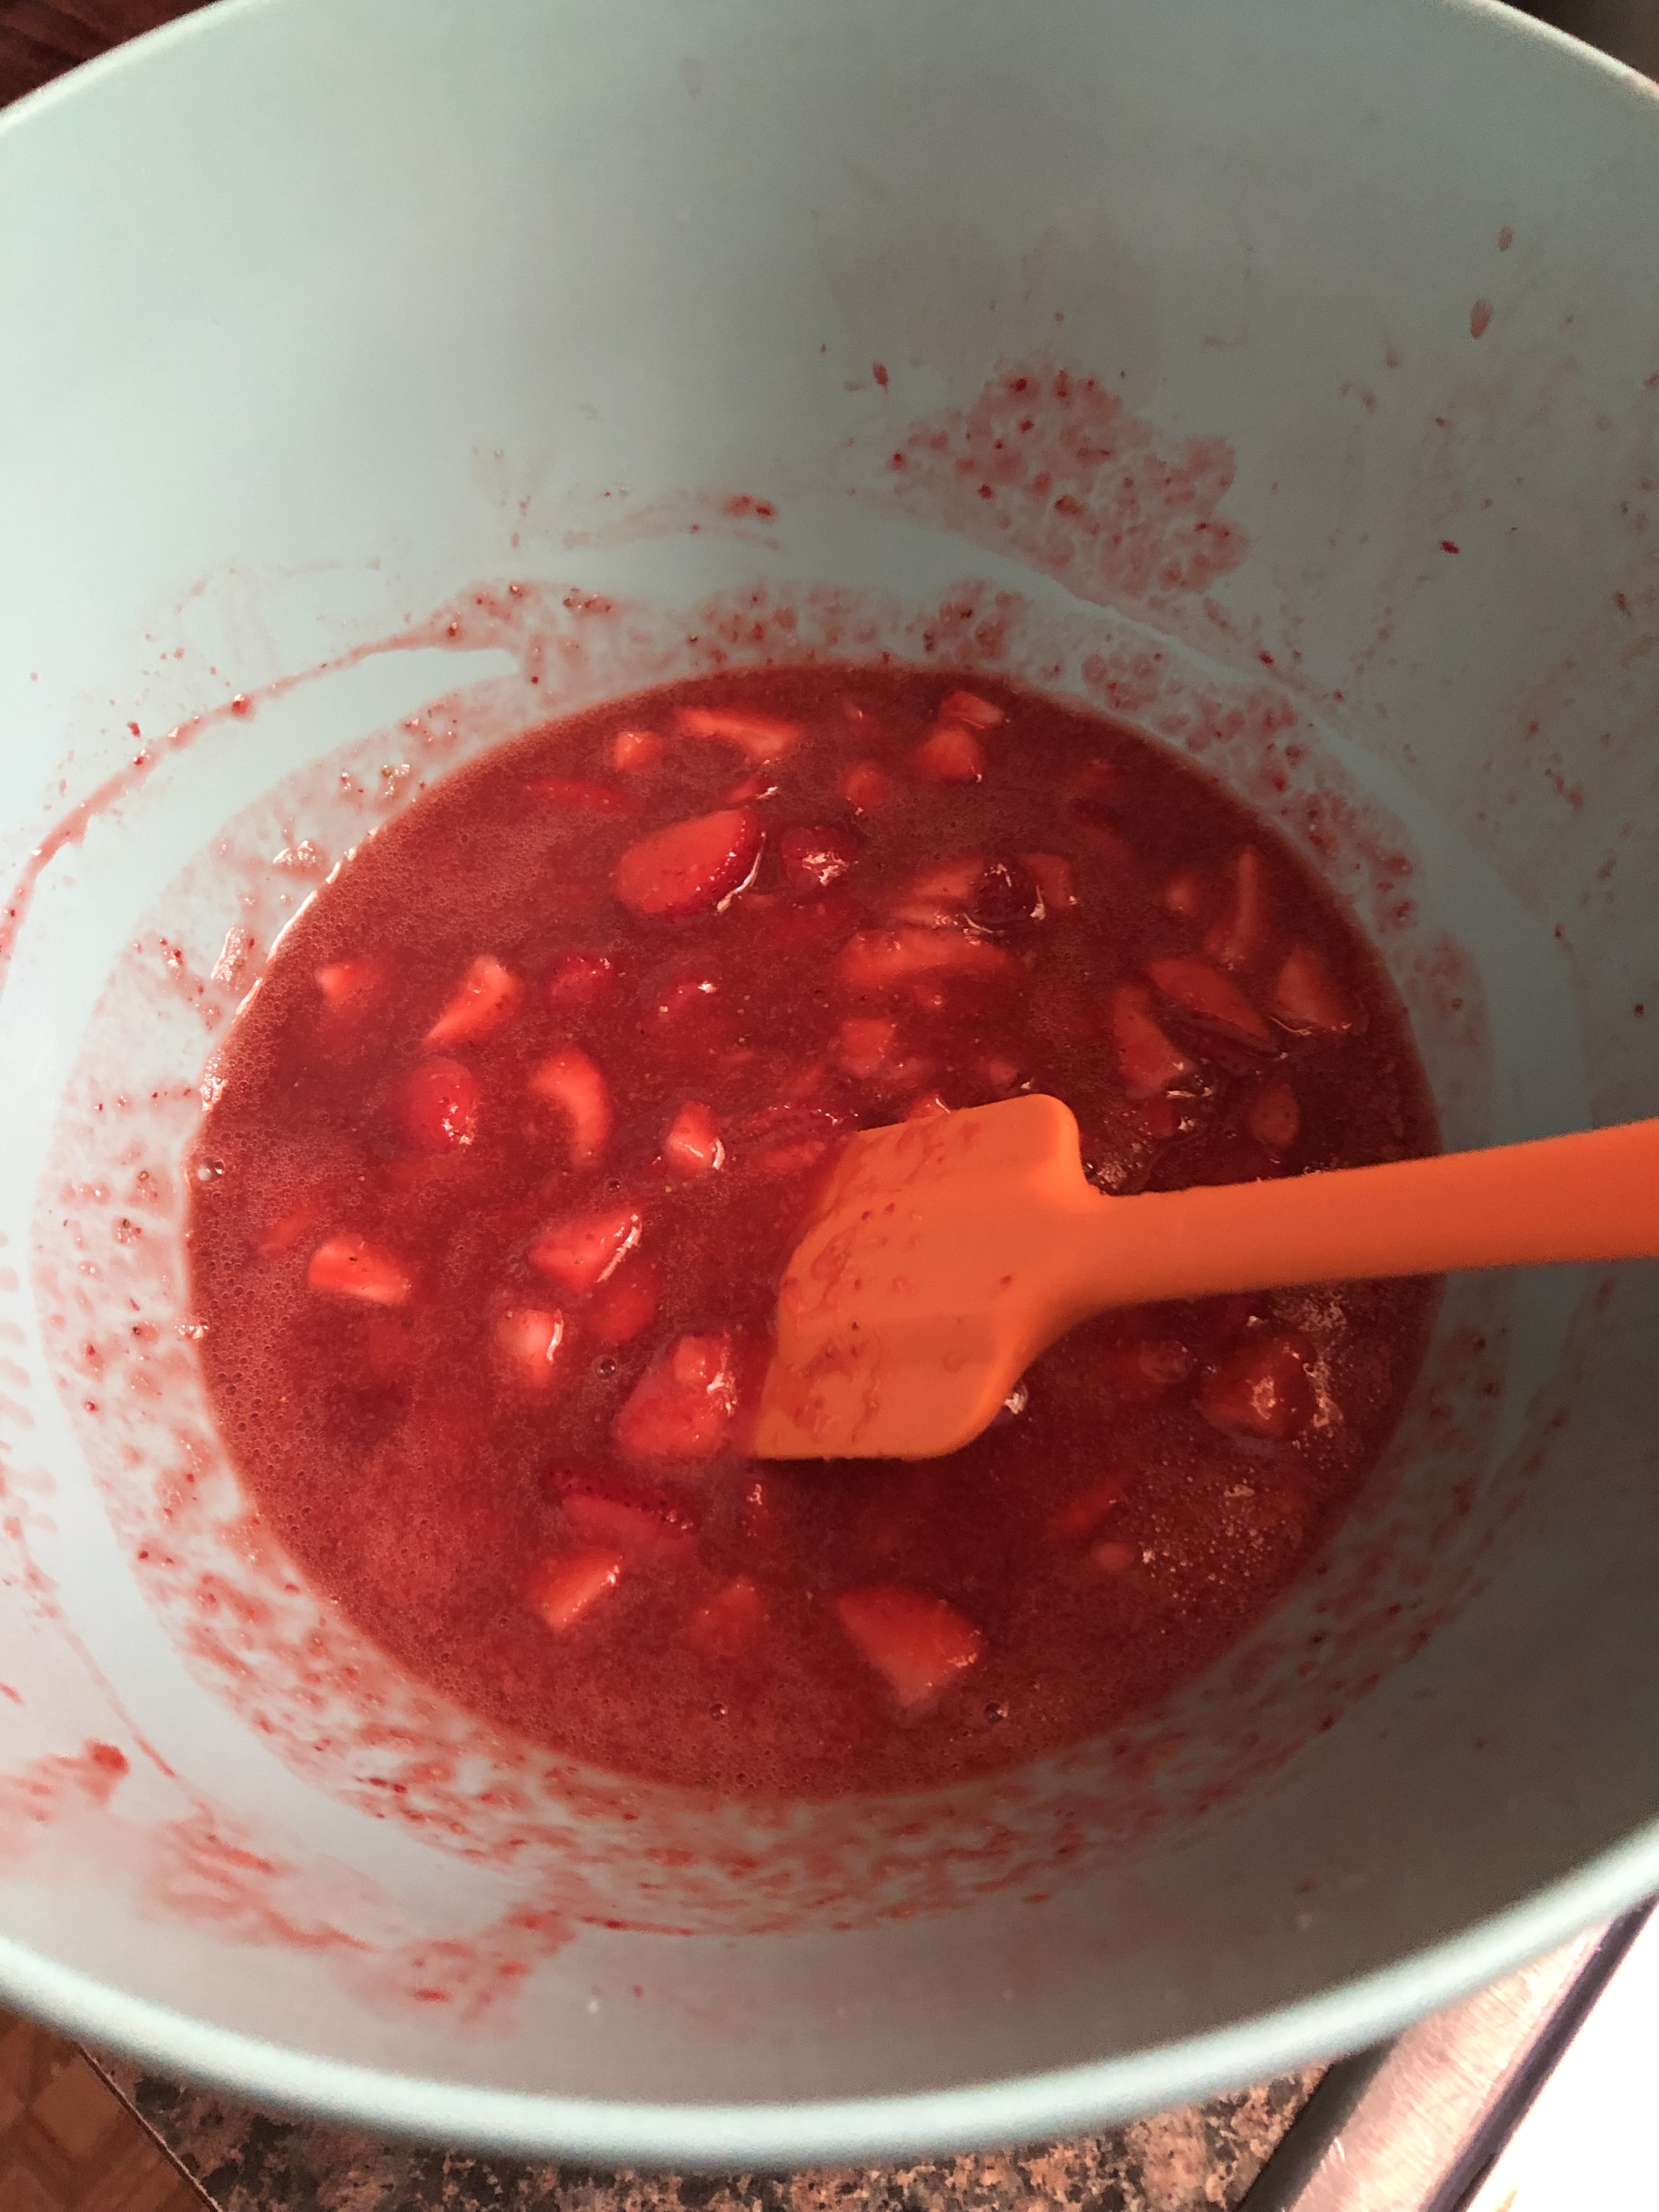
To begin, you will make the strawberry sauce. In a large bowl combine sliced strawberries with orange liqueur, balsamic vinegar, salt and sugar. After letting it sit for about 15 minutes puree half of it along with seedless strawberry jam in a food processor until smooth and then return the mixture to the strawberries and stir together. It may seem like the mixture is a tad watery, but it will be absorbed by the ladyfingers. No need to fear, your dessert will not be a runny mess when sliced.

Next you will make the mascarpone – whipped cream mixture. Beat heavy cream with confectioners’ sugar and vanilla extract until soft peaks form. Next, fold in mascarpone cheese & orange zest until the whipped cream and mascarpone cheese are well incorporated and no streaks of either remain.

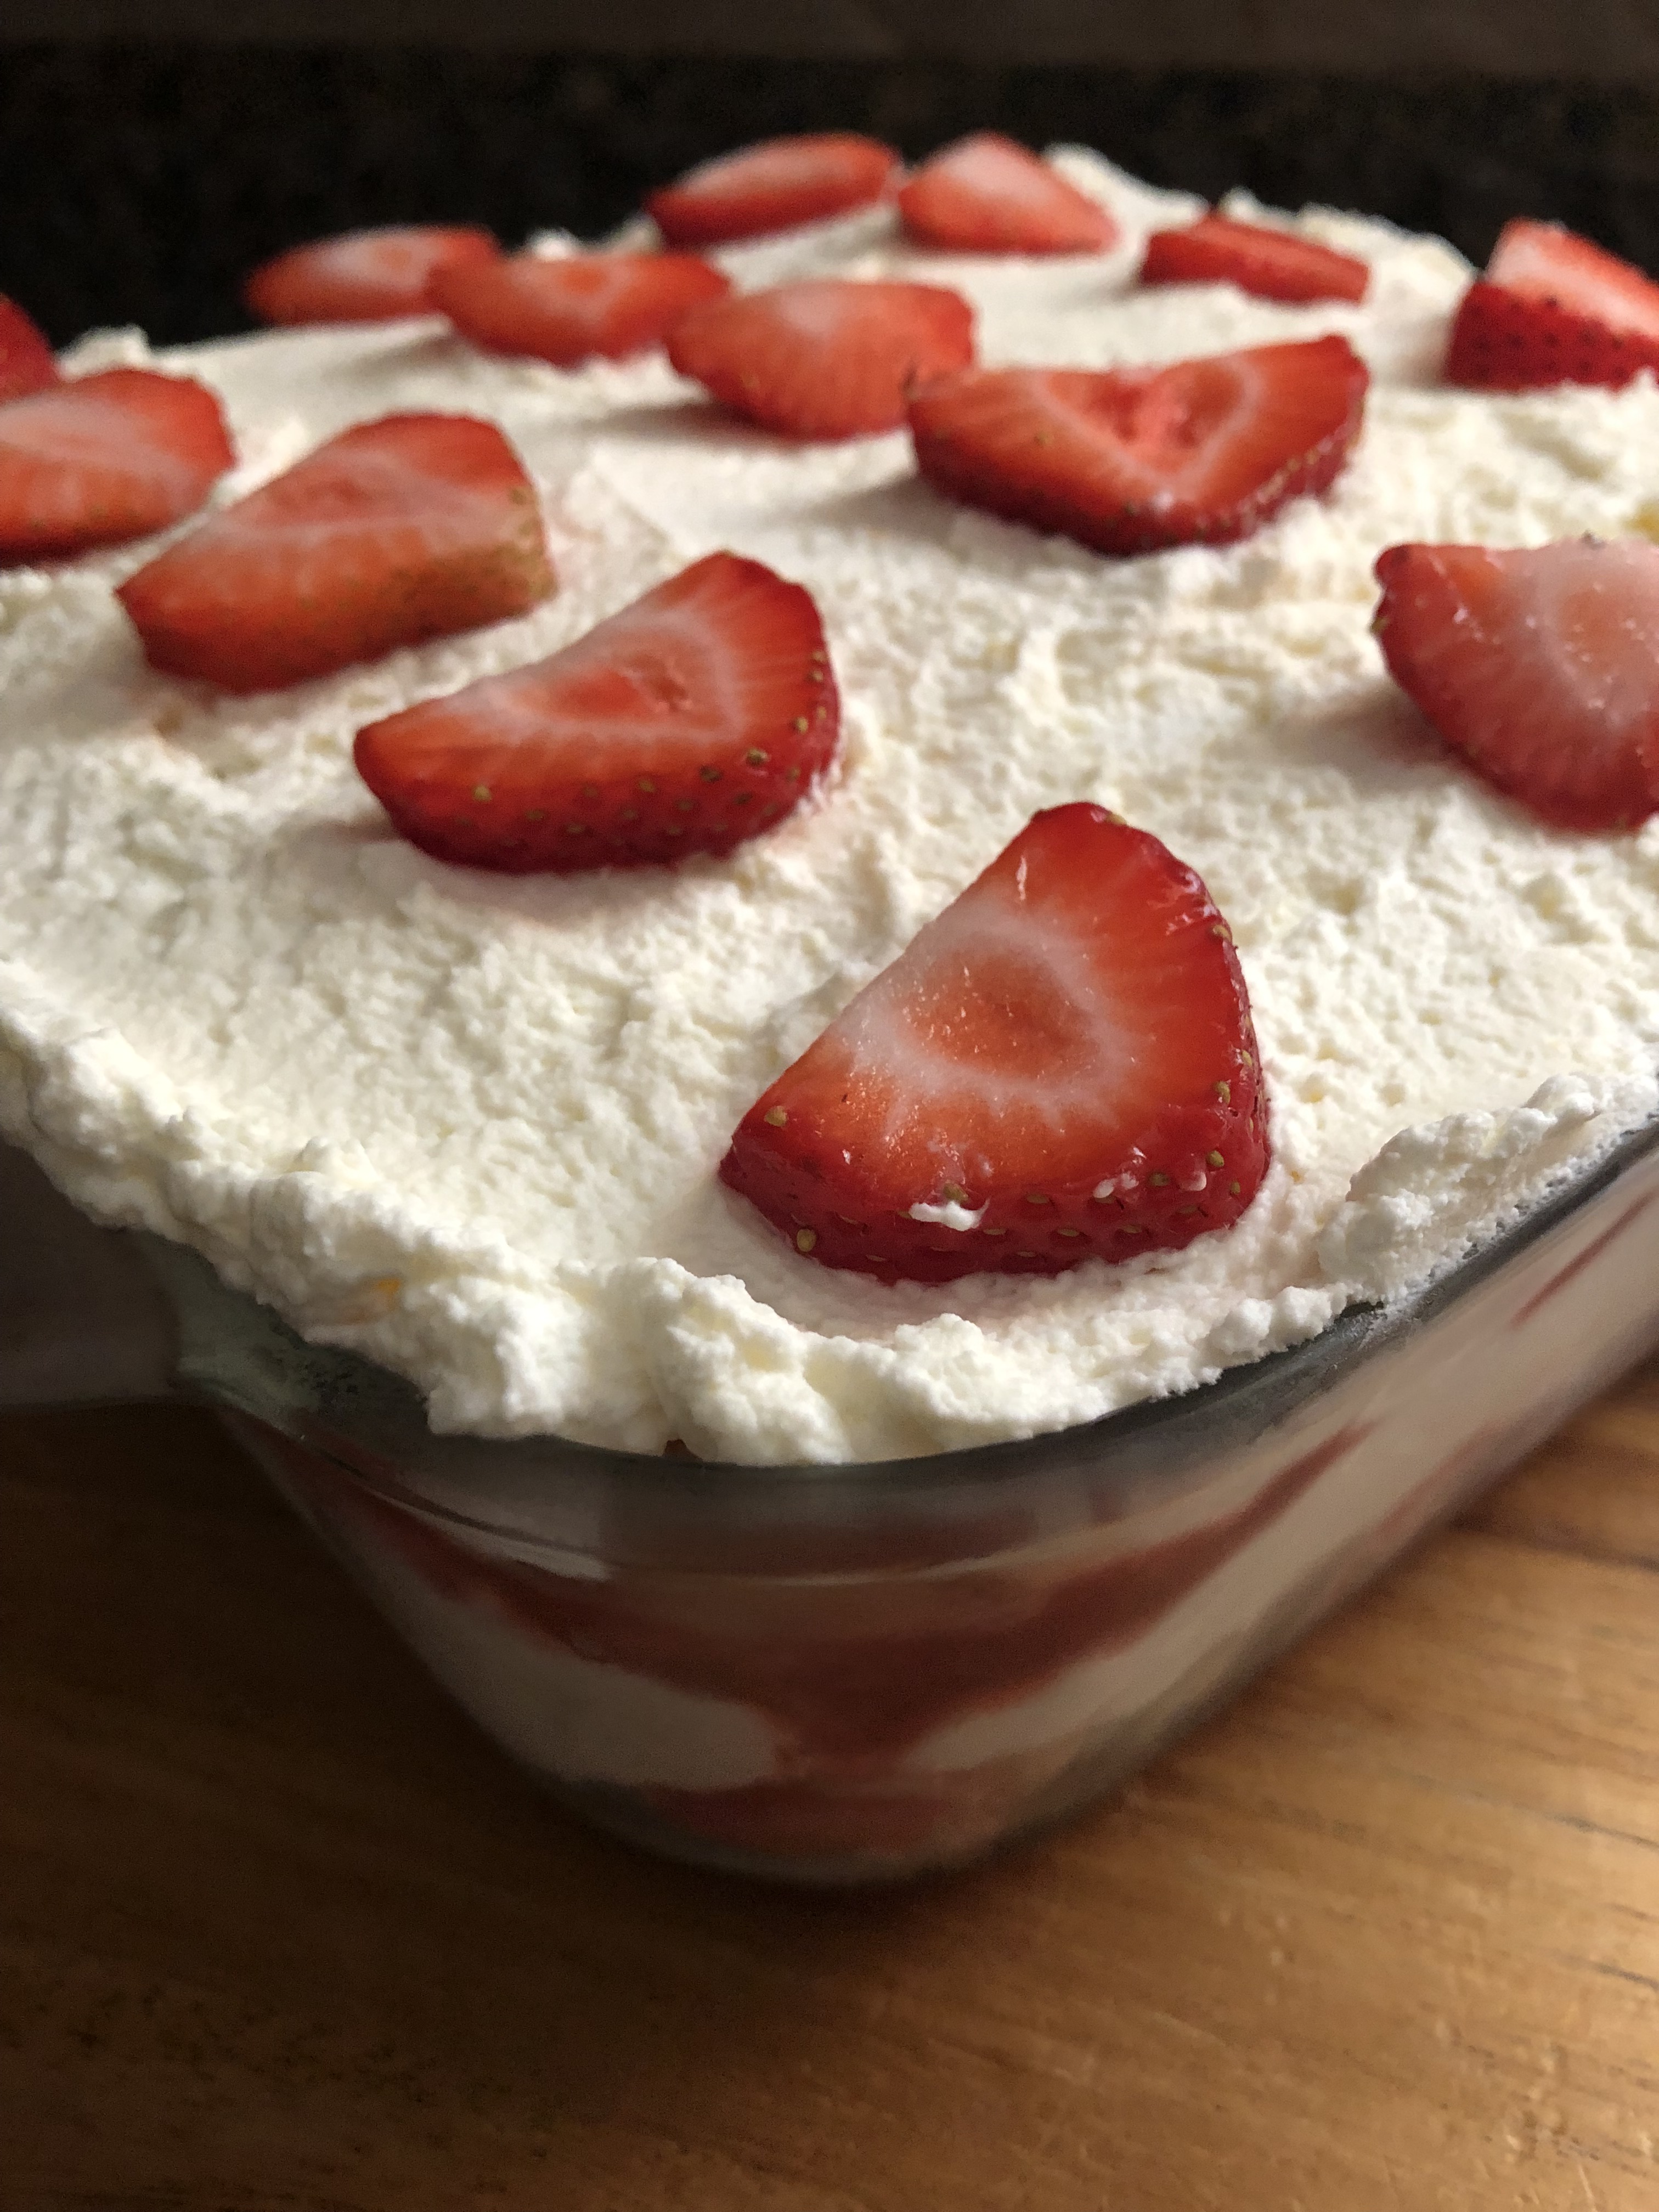
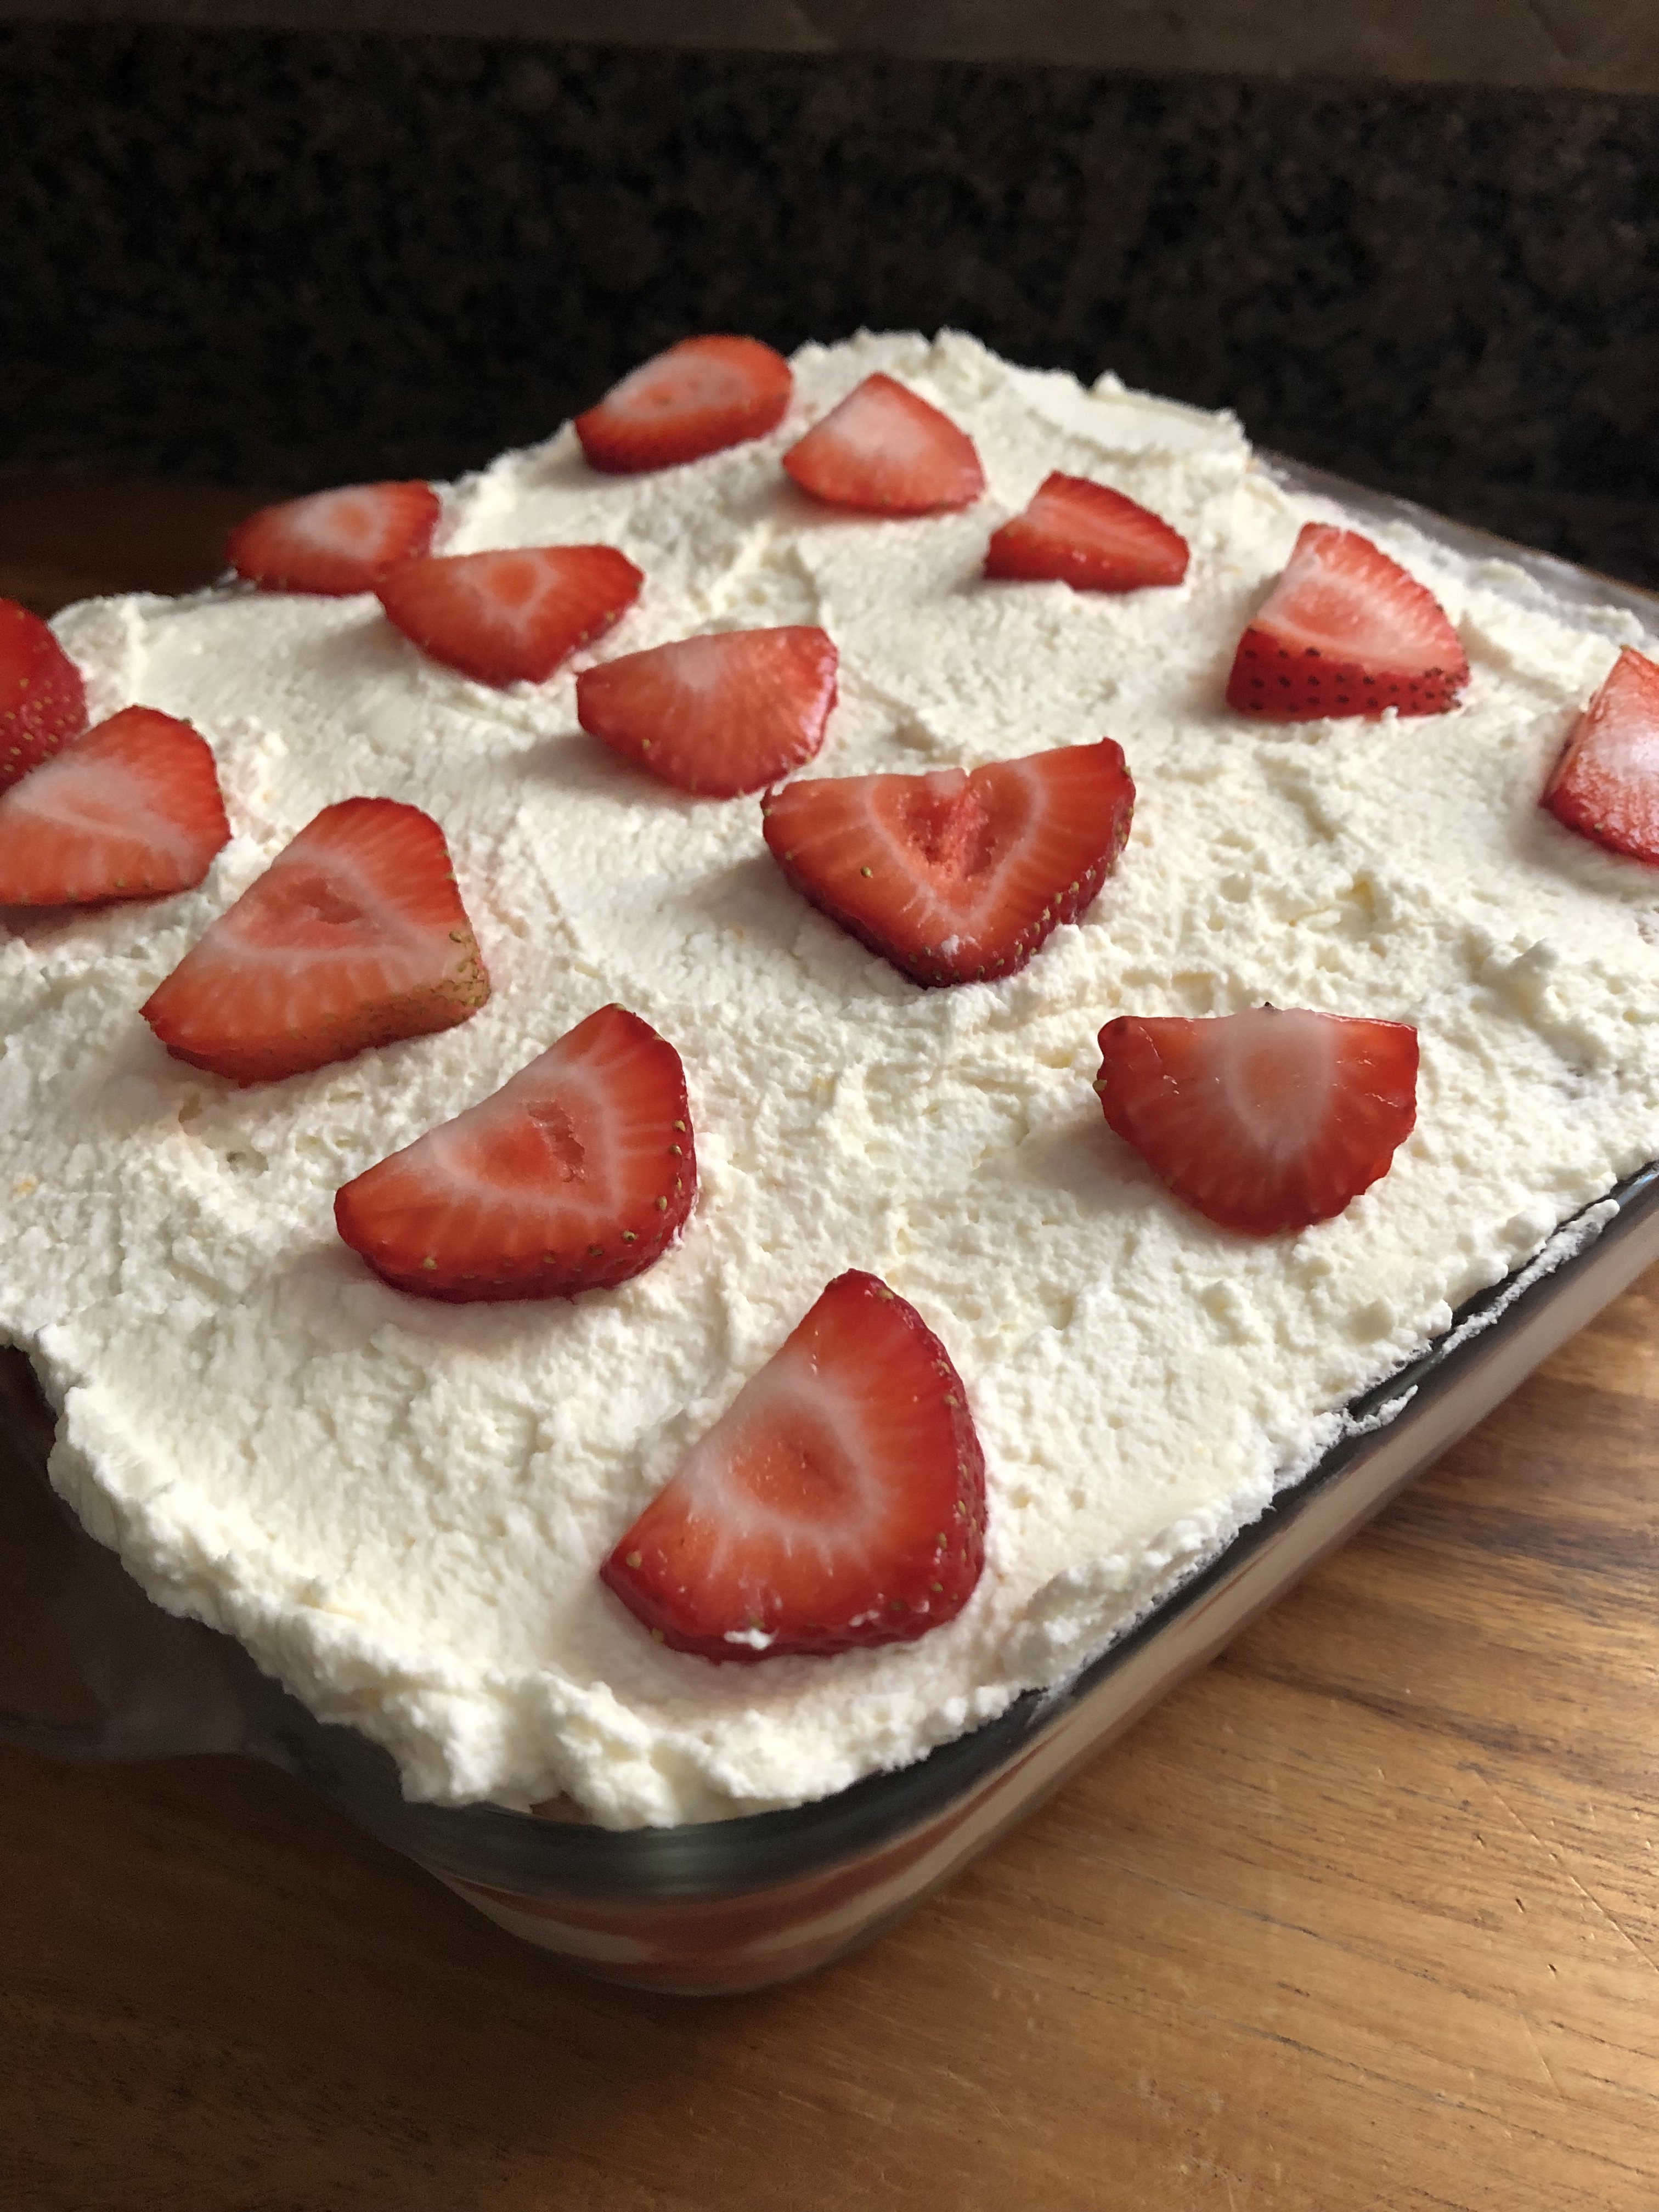
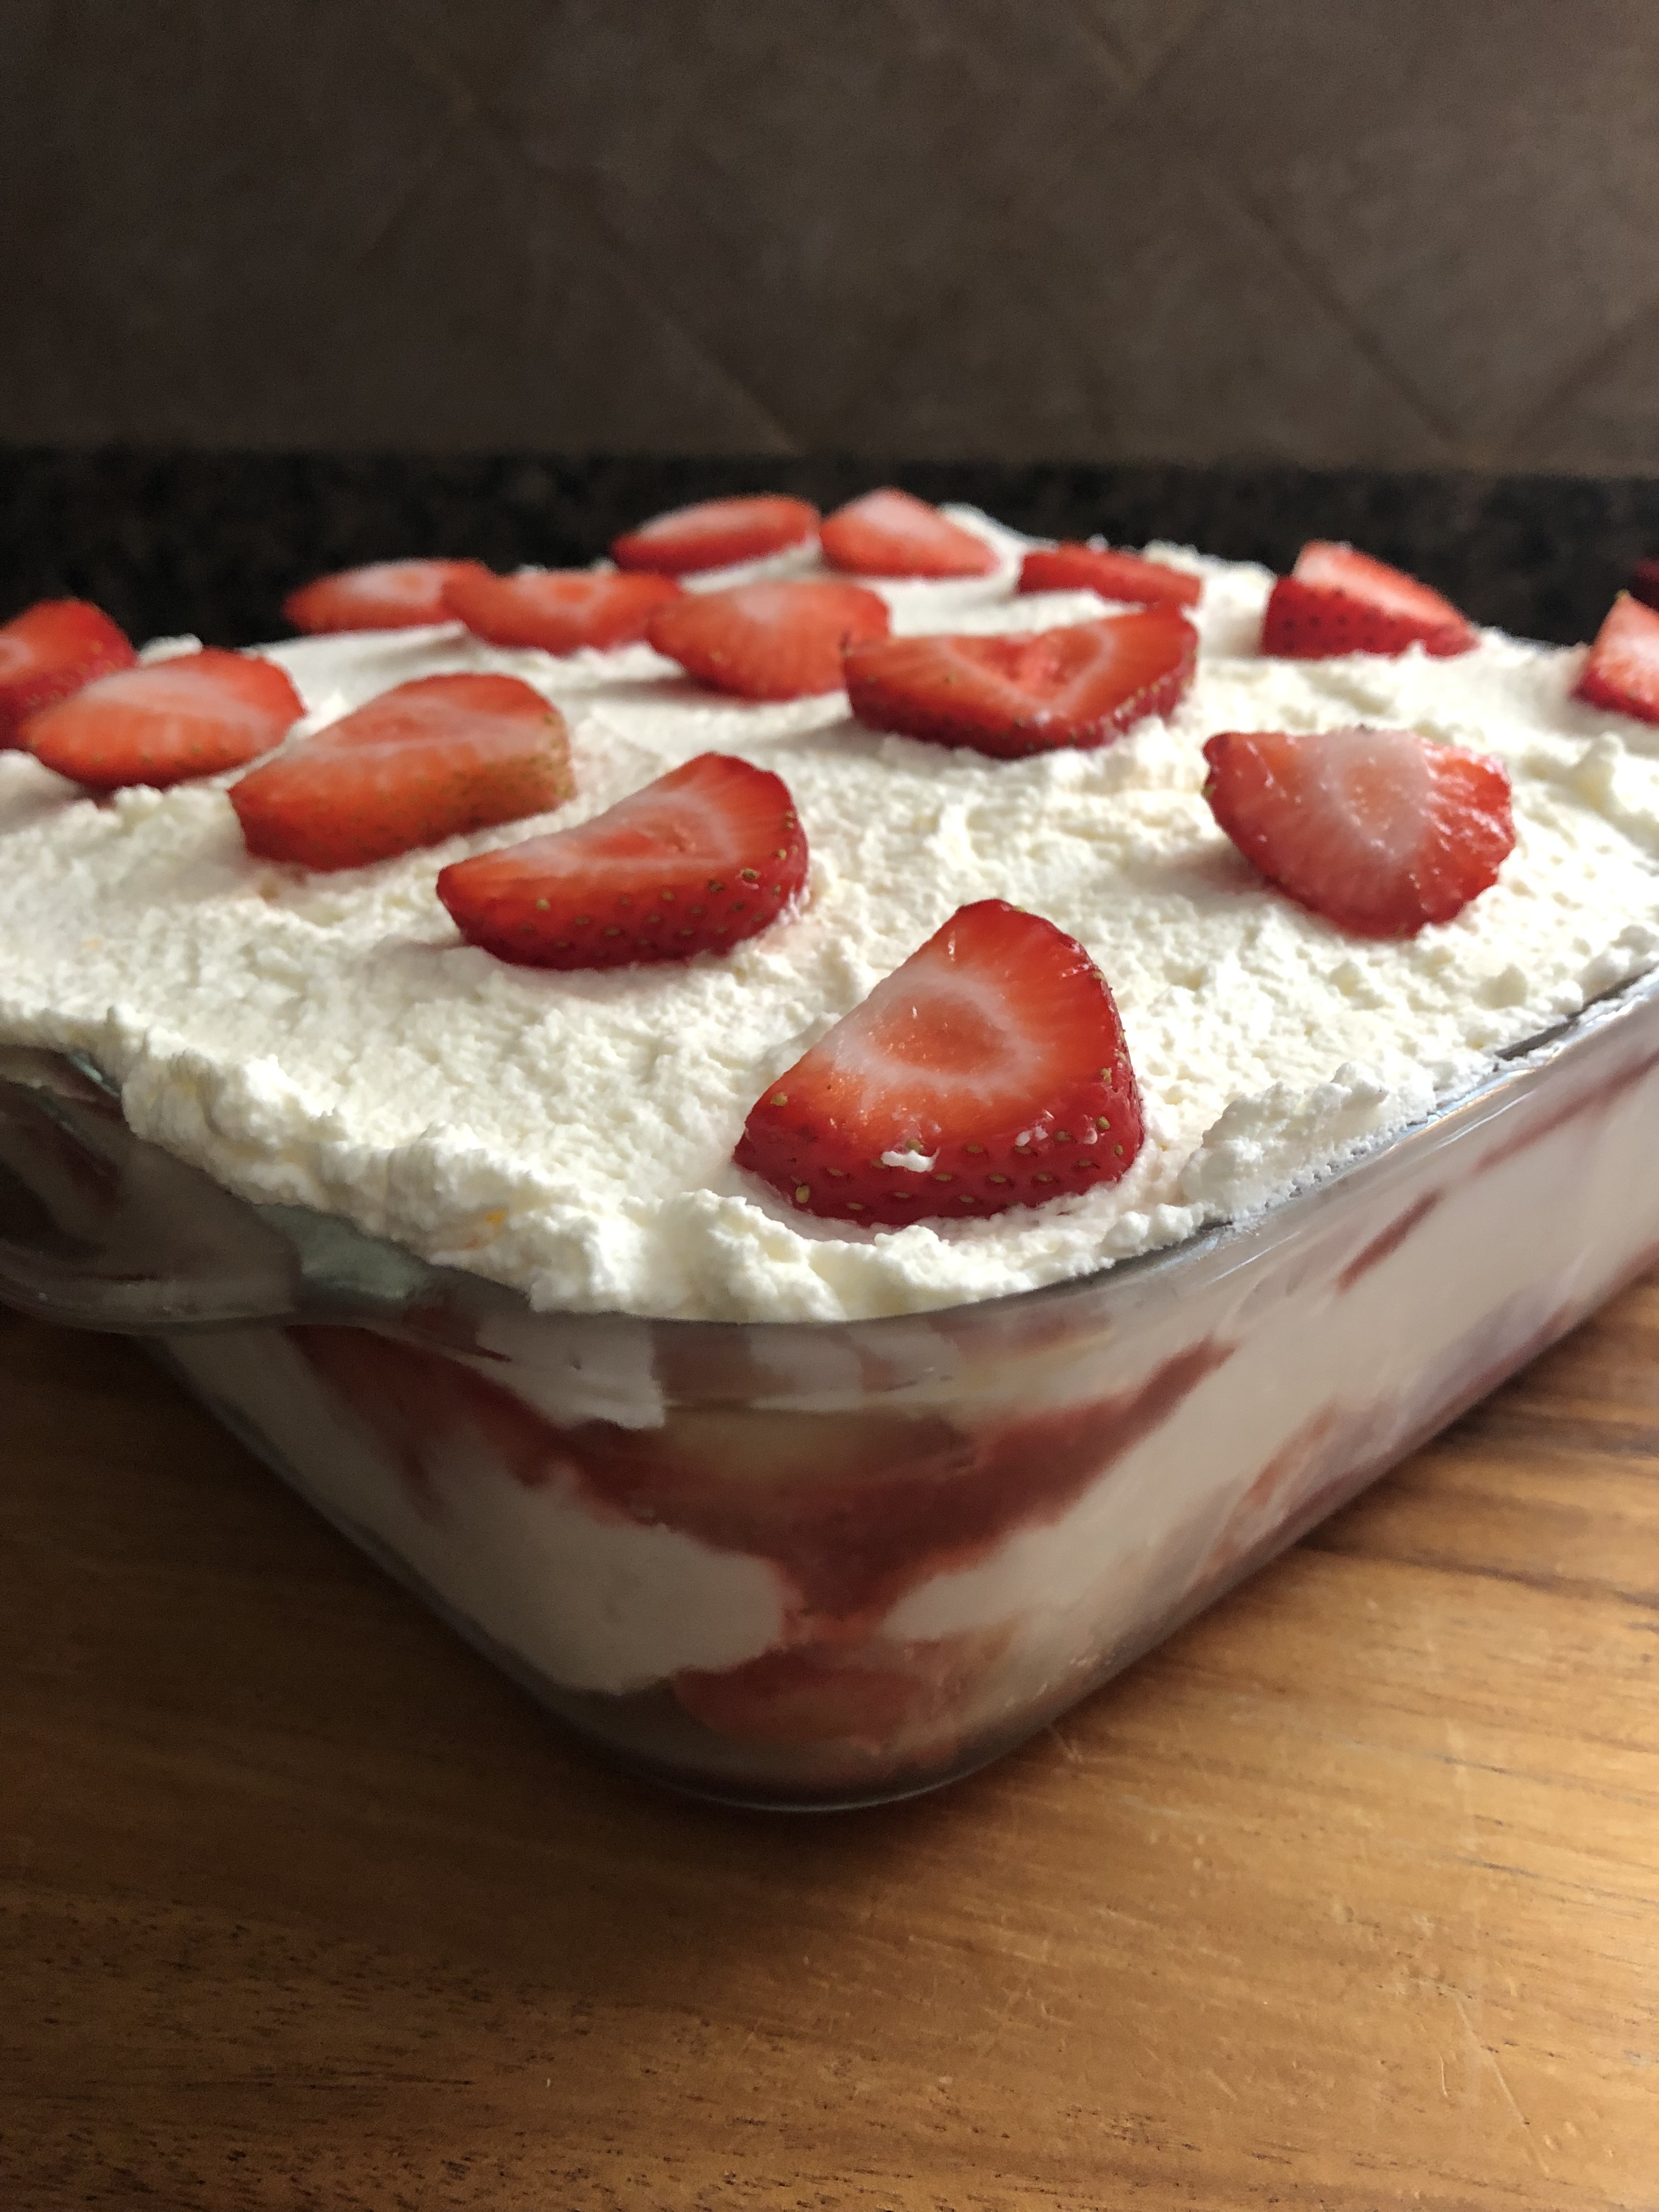
Now it’s time to assemble. Begin by spreading some of the strawberry mixture in the bottom of your dish. Then add a layer of ladyfingers on top and then spread half of the mascarpone cheese mixture over them. Repeat the layers ending with the remaining half of the mascarpone cheese mixture. Decorate the top with sliced strawberries and then cover and refrigerate for at least 8 hours before slicing and serving.

This is a light and refreshing dessert that isn’t overly sweet… Perfect for these warmer days!

Strawberry Tiramisu

Ingredients:

2 tablespoons orange liqueur*

2 teaspoons balsamic vinegar

1/8 teaspoon Kosher salt

3 tablespoons granulated sugar

4 cups sliced strawberries, divided**

1/4 cup seedless strawberry jam

1 1/2 cups heavy cream

2 tablespoons confectioners’ sugar

1 teaspoon vanilla extract

1 8oz. container mascarpone cheese

1 teaspoon grated orange zest

1 7oz. package ladyfingers

*I used Cointreau

**About 1.5 lbs

Directions:

In a large bowl stir together 3 cups of the sliced strawberries, the liqueur, balsamic vinegar, salt and granulated sugar. Let stand for 15 minutes, stirring a few times. Transfer half of the mixture to a food processor (or blender) along with the strawberry jam and blend until smooth. Pour the pureed mixture back into the bowl with the remaining marinated strawberries and stir together. Set aside.

In a medium bowl beat the heavy cream with the confectioners’ sugar and vanilla extract with a hand mixer on medium speed until soft peaks form. Fold in the mascarpone cheese and orange zest until both are incorporated well and no streaks of either remain.

To assemble: Spread 3/4 cup of the of the strawberry mixture in the bottom of an 8×8 square baking dish. Top with a single layer of ladyfingers. Spread half of the mascarpone cheese mixture over the ladyfingers. Top the ladyfingers with the remaining strawberry mixture and then top with another layer of ladyfingers. And finally, spread the remaining mascarpone cheese mixture over the ladyfingers. Top with the remaining cup of sliced strawberries. Cover and refrigerate for 8 hours or overnight before slicing and serving.

Recipe modified from Food and Wine

No-Knead Olive Bread

I love bread recipes that don’t require too much work. And if you agree with me, then No-Knead Bread recipes are perfect for you as well. Instead of having to knead the dough to form the gluten strands that give the bread its texture, you allow the dough to rest for 12-18 hours. And for someone who is never quite sure if they have kneaded their dough too long or too short this is the perfect method. Today I am sharing with you a No-Knead Olive Bread. Don’t like olives, read on to get ideas on other No-Knead Breads you can try instead.

To start, in a large bowl I mixed all the ingredients – flour, sea salt, yeast, oregano, garlic powder, chopped olives and water – together using a wooded spoon and then shaped the dough into a ball before covering it with a piece of plastic wrap and aluminum foil.

I let the dough rest on my counter for about 18 hours, I did peak at it a few times during those hours to make sure it was rising. Hence using a piece of plastic wrap and then aluminum foil on top. And I happy to say that it did rise considerably, although it didn’t have many air bubbles.

After shaping it again into a ball and letting it rest for an additional 30 minutes I baked it in my Dutch oven. And after letting it cool I had a delicious bread to slice into.

What’s great about this recipe is that it can easily be switched up. The base of it is the flour, sea salt & water. And from there you could add in anything to satisfy your taste buds. Think a Cranberry Walnut Bread, a Jalapeno Cheddar version, or maybe a Sun-Dried Tomato & Pesto one… The possibilities are endless.  

No-Knead Olive Bread

Ingredients:

3 cups + 2 tablespoons flour

2 teaspoons sea salt

1/2 teaspoon instant yeast

2 teaspoons dried oregano

1 1/2 teaspoons garlic powder

1 cup chopped olives*

1 1/2 cups warm water (95 F)

*I used 1/2 cup black olives and 1/2 cup pimento stuffed Manzanilla olives

Directions:

In a large bowl stir together the flour, sea salt, yeast, oregano, garlic powder and chopped olives. Add in the warm water and stir. The dough will be sticky. Shape into a ball and cover the bowl with plastic wrap and then aluminum foil. Let it sit on the counter at room temperature for 12-18 hours. The dough will double in size and be covered in air bubbles.

Once the dough is ready, preheat the oven to 450 F.

Lightly dust your work space with flour and turn out the dough. Using lightly floured hands shape the dough into a ball and then transfer to a large piece of parchment paper*. You want your piece of parchment paper to be large enough to fit in your Dutch oven**.  Score an “X” into the top of the dough with a sharp knife and then cover loosely with a piece of plastic wrap for 30 minutes. During these 30 minutes, place your Dutch oven in the preheated oven.

After the 30 minutes carefully remove your pot from the oven. Remove the plastic wrap from the top of your dough and place the dough, along with the parchment paper, into your Dutch oven. Cover and bake for 25 minutes. Remove the lid and bake for an additional 10 minutes, until the bread is golden brown on top. Remove the pot from the oven and transfer the bread, along with the parchment paper, to a wire rack to cool for 30 minutes before slicing.

Store in an airtight container at room temperature.

*Make sure to check your parchment paper to see what the highest and safest temperature it can be used at.

**If you don’t have a Dutch oven you could also use a heavy-duty pot.

Recipe adapted from Sally’s Baking Addiction

Cranberry Orange Walnut Muffins

Not sure why, but, I had two bags of dried cranberries in my pantry that were quickly approaching their expiration date. They were probably on sale or I was planning on eating more salads than I have been. Either way, I decided it was time to start using them before they did expire. Cranberries are always a good add in for baked goods since they offer a pop of sweetness and do have health benefits. I like to think they are still healthy even after they are baked into something sweet. I was debating between cookies or muffins, but, I opted to go with the muffins… A Cranberry-Orange Walnut Muffin.

The recipe for these is pretty straight forward. Next time I make them though I will cut the sugar in half (1/2 cup as opposed to a 1 cup). They were delicious, but, I just found them to be a tad bit sweet and since I normally eat muffins for breakfast and I am not big into sweets for breakfast I think I would enjoy them more with less sugar. Also, since you are using freshly squeezed orange juice and if your orange is sweet and then you add sugar and dried cranberries on top of that you are getting sugar from all sides so it’s best to cut back on the actual sugar you are adding in. They will still be delicious and even a bit better for you. And while the original recipe called to make these in a 12-cup cupcake tin, I opted to bake them in 6-cup muffin tin instead. I prefer bakery sized muffins than cupcake sized ones. To accommodate the extra batter, I placed my muffin liners in ramekins on a baking sheet and baked them as normal.

Cranberry Orange Walnut Muffins

  • Servings: 8 Large Muffins / 12 Small Muffins
  • Print

Ingredients:

1 cup sugar

1 stick unsalted butter, at room temperature

1 large

2 cups flour

1 1/2 teaspoons baking powder

1/2 teaspoon salt

1/2 teaspoon baking soda

1 teaspoon freshly grated orange zest

3/4 cup freshly squeezed orange juice*

3/4 cup dried cranberries

1/2 cup chopped walnuts

*I used 3 large navel oranges

Directions:

Preheat oven to 350F. Line a muffin/cupcake pan with paper liners.

In a medium bowl whisk together the flour, salt, and baking powder & soda together. Set aside.

In a small bowl stir together the orange juice & zest. Set aside.

In a large bowl cream together the butter and sugar using a handheld mixer on medium speed. Add the egg and continue beating until incorporated. With the mixer on low speed add the flour mixture in three parts alternating with the orange juice mixture. Stir in the cranberries and walnuts.

Divide the batter among the prepared pans. Bake in the preheated oven for 25-25 minutes for smaller muffins and 30-35 minutes for larger muffins. Let cool in pans for 5 minutes before removing muffins from pans and cooling completely on a wire rack.

Recipe from Fisher Nuts

Baked Peach Crumb Donuts

It’s the first Friday in June which means it’s National Donut Day! It’s been a while since I have shared a donut recipe on here. And to be honest, they are not something I bake all that often. My favorite donut that I have made are the Rainbow Cookie Donuts I posted a little over 4 years ago. I have made those a few times since then. And these Baked Peach Crumb Donuts I am sharing today are a very close second. If you are not a fan of peaches, you can swap out the peaches for blueberries, raspberries, strawberries, etc. The base of the donut would work well with any of those fruits and crumb topping works well with any of those fruits and is always delish!

A few things to note… Whatever fruit you choose to use you don’t want to add it to the batter of your donuts. After making the batter pipe or spoon it into your donut pan and then sprinkle the fruit on top lightly pressing it into the batter.

Once your fruit is placed then sprinkle the top with the crumb topping and once again lightly press it into the batter to make sure it sticks while your donuts are baking and doesn’t end up falling off. 

And finally, once your donuts have cooled dust the top of them with Confectioners’ sugar. The added sweetness of the sugar is just what these donuts need since they aren’t too sweet to begin with. Which is perfect by me.

Baked Peach Crumb Donuts

For the donuts:

2 tablespoons unsalted butter, melted

1/2 cup buttermilk*

1/4 cup sugar

1 large egg

1 teaspoon vanilla extract

1 cup flour

1/2 teaspoon cinnamon

1/8 teaspoon salt

1/2 teaspoon baking soda

1/2 teaspoon baking powder

1 cup diced peaches (can use fresh or frozen)

For the crumb topping:

2 tablespoons brown sugar

1 tablespoon sugar

1/4 teaspoon cinnamon

1/3 cup flour

2 tablespoons unsalted butter, cold and cubed

Confectioners’ sugar, for dusting

*Make your own by combining 1/2 cup whole milk with 3 teaspoons of white vinegar. Stir together and let sit for 15 minutes.

Directions:

Preheat the oven to 350 F. Grease 2 6-welled donut pans with butter, or spray with non-stick spray. Set aside.

In a medium bowl whisk together the flour, cinnamon, salt, baking soda and baking powder.

In a large bowl whisk together the melted butter, buttermilk, sugar, egg and vanilla extract until well combined.

Stir the dry ingredients into the wet ingredients until just combined.

Spoon the batter into the prepared donut pans until 2/3 fill. You can also transfer the batter to a large piping bag or Ziploc bag and pipe the batter into the pan.

To make the crumb topping whisk together both sugars, cinnamon and flour. Using a fork, pastry cutter or your hands, cut the butter into the flour mixture until it’s pea sized and looks like coarse sand.

Divide the diced peaches among the donut batter, pressing it lightly into the batter. Sprinkle the crumb topping over each donut, once again pressing it lightly into the batter.

Bake in the preheated oven 10-11 minutes. Let the donuts cool in the pan for 2 minutes and then transfer to a wire rack to cool completely. Once cooled dust the donuts with confectioners’ sugar.

Recipe from Katie Bird Bakes

Cherry Amaretto Cheesecake

The idea for this cheesecake came to me after making the Almond Tiramisu I posted about last month. I had another package of Amaretti cookies and while the Almond Tiramisu was delicious I didn’t want to make another one so soon and while I could have just eaten the cookies I thought to myself that there had to be something yummy I could make with them. Initially I was thinking raspberries instead of cherries for this cheesecake, but, I thought cherries would be a better complement to the almond flavors in the cheesecake. And I was right! Since cherries aren’t currently in season I opted to use frozen ones, but, with summer just around the corner you could make this with a fresh batch of cherries that are sure to be hitting the produce department of your local supermarkets in no time.

I started off by making the crust. In the bowl of my food processor I processed 7oz. of Amaretti cookies into fine crumbs. I then added in melted butter and pulsed everything together a few times. Finally, I pressed the mixture into the bottom and up the sides of a 9-inch pie dish I sprayed with non-stick cooking spray.

I set the crust aside and made the filling for the cheesecake. In a large bowl, using a handheld mixer on medium speed, I beat together cream cheese, sour cream, sugar, almond & vanilla extract and Amaretto liqueur until it was well combined. I then added in 2 eggs and continued to beat the mixture until it was smooth. Once the cheesecake mixture was ready I poured it into the prepared crust and placed it in a 325 F preheated oven for about 45 minutes. I knew the cheesecake was done once the center was just about set. I let the cheesecake cool on a wire rack before refrigerating it overnight.

While the cheesecake was cooling on the wire rack I made the cherry topping. In a medium saucepan I whisked together water, cornstarch, lemon juice and sugar (a slurry). I then heated the mixture over medium heat and stirred it until it started to thicken. Once it did, I added in the cherries. I stirred the mixture occasionally. You may think that your cornstarch mixture isn’t enough for the cherries, but, as the cherries cook they will let out their own juices. If you opt to use frozen cherries as I did, do not defrost them beforehand. Once the sauce begins to boil and thickens remove it from the heat and allow it to cool to room temperature. Make sure to taste the mixture. If your cherries aren’t very sweet you may need to add more sugar to bring out their flavor. Once the mixture was cool, I transferred it to a resealable container and refrigerated it overnight.

The following day, before serving the cheesecake I spooned the cherry mixture over it. This was a hit with everyone who tried it.

And I must say, that it tasted even better a day or two afterwards. I think the almond flavor from the cheesecake seeped into the cherry topping and it really brought all the flavors together!

Cherry Amaretto Cheesecake

Ingredients:

Crust:

7oz. package Amaretti cookies

1/3 cup unsalted butter, melted

Cheesecake:

2 8oz. packages cream cheese, at room temperature

1/2 cup sour cream

1/2 cup sugar

1 tablespoon almond extract

1/2 teaspoon vanilla extract

1 tablespoon Amaretto liqueur

2 large eggs, at room temperature

Cherry Topping:

3 cups frozen (or fresh) cherries

1/4 cup water

1 tablespoon cornstarch

1 tablespoon lemon juice

2 tablespoons sugar*

*You may need to add additional sugar if your cherries aren’t sweet

Directions:

Preheat oven to 325 F.

For the crust: In the bowl of a food processor process the cookies into fine crumbs. Add the melted butter and pulse a few times to combine. Press into the bottom and up the sides of a 9-inch pie dish sprayed with non-stick spray.

For the cheesecake: In a large bowl combine the cream cheese, sour cream, sugar, almond & vanilla extracts and the Amaretto and beat with a hand mixer on medium speed until well blended. Add the eggs, 1 at a time, and continue beating until the mixture is smooth.

Transfer the cheesecake batter to the prepared pie crust and bake in the preheated oven for 40-45 minutes, or until the center is almost set. Cool on a wire rack and then refrigerate for at least 3 hours or overnight.

For the cherry topping: While the cheesecake is cooling, whisk together the water, cornstarch, lemon juice and sugar in a medium saucepan. Heat over medium heat and stir until the mixture begins to thicken. Add the cherries and stir occasionally until the sauce begins to boil and has thickened. Remove from the heat and allow to cool to room temperature. Refrigerate until ready to use. The mixture will continue to thicken as it cools.

To serve, spoon the cherry mixture over the cheesecake and slice. Store leftovers in the refrigerator.

Recipe first appeared on Bead Yarn & Spatula

Chocolate & Banana Chip Peanut Butter Cookies

While these cookies may sound like they have a lot going on they are essentially just a peanut butter chocolate chip cookie. And we all know that peanut butter and chocolate are a match made in heaven. I honestly didn’t get any banana flavor from the banana chips (nor did anyone else who tried them). What the banana chips did offer was an extra crunch to the cookie, which you also get from the peanuts added. If you are looking for that banana flavor though you could add a mashed banana to the dough. Next time I make these though I will be omitting the banana altogether. I honestly don’t think they need that extra layer of flavor.

Chocolate & Banana Chip Peanut Butter Cookies

  • Servings: 12 Large Cookies
  • Print

Ingredients:

1 cup peanut butter

3/4 cup sugar

1/2 cup light brown sugar

1 stick unsalted butter, at room temperature

1 large egg

2 teaspoons vanilla extract

1/3 cup flour

1 teaspoon Kosher salt

1/2 teaspoon baking powder

1/4 teaspoon baking soda

1/2 cup roasted & lightly salted peanuts, chopped (plus more for topping)

1/3 cup banana chips, chopped or 1 banana cut into 1/4-inch pieces*

1/3 cup semi-sweet chocolate chips (plus more for topping)

*Can omit to make a Peanut Butter Chocolate Chip Cookie

Directions:

Preheat the oven to 375 F. Line two baking sheets with parchment paper.

In large bowl, using a hand mixer on medium speed, cream together the peanut butter, both sugars and the butter until smooth. Add the egg and vanilla extract and continue beat until well combined. With the mixer on low add in the flour, salt, baking powder and baking soda until just combined. Add in the peanuts, banana chips / banana (if using) and chocolate chips and beat on low until combined.

Using an ice cream scoop (or 1/4 cup measuring cup) drop the dough on the prepared cookie sheets. Pat down the cookies to create 2-inch disks. The dough may be a little sticky. Sprinkle the tops of each cookie with additional chopped peanuts and semi-sweet chocolate chips.

Bake for 10-11, or until the edges are golden but the centers still soft. Let cookies cool on the baking sheets for 10 minutes before transferring to a wire rack to cool completely.

Store in an airtight container at room temperature.

Recipe from Christina Tosi

Tres Leches Bundt Cake

Happy Cinco de Mayo! To celebrate the day, I’m sharing a recipe that’s a slight twist on the traditional Tres Leches Cake, a Tres Leches Bundt Cake. I love a good Tres Leches Cake, but I thought that a Bundt version would absorb the tres leches topping a little better so that the cake wouldn’t be as wet. And I was right! One thing though, since the Bundt cake is a bit denser than a regular cake it’s best to pour the tres leches topping over the Bundt cake while it’s still warm and the crumb of the cake is soft. If you wait until the cake is room temperature or cooler the cake will still absorb the topping, but, it will just take a bit longer and it might not spread throughout the cake as well. If that does happen it’s all good as you can use some of the reserved tres leches topping to drizzle over your slice. And while the recipe didn’t call for it, I decided to spruce up the top of the Bundt cake with a little whipped cream and sliced strawberries. It was also a good way to hide the holes I poked in the cake for the topping.

Tres Leches Bundt Cake

Ingredients:

For the cake:

3 sticks unsalted butter, at room temperature

1 1/2 cups sugar

6 large eggs, at room temperature

3 cups flour

3 teaspoons baking powder

1 teaspoon Kosher salt

1 cup whole milk

1 tablespoon vanilla extract

For the Tres Leches topping:

1 14oz. can sweetened condensed milk

1 12oz. can evaporated milk

1/4 cup whole milk

Directions:

Preheat the oven to 350 F. Spray a Bundt pan with baking spray and set aside.

In a medium bowl whisk together the flour, baking powder and Kosher salt. Set aside.

Using a hand mixer (or a stand mixer) on medium speed beat the butter and sugar together on medium speed until it is light and fluffy, about 5 minutes.

Add the eggs, one at a time, to the butter mixture, beating well after each addition. Beat in the vanilla extract.

With the mixer on low speed add the flour mixture to the butter mixture in three parts alternating with the milk.

Transfer the batter to the prepared Bundt pan and bake in the preheated oven for 50-60 minutes, or until a cake tester inserted come out clean.

Cool the cake in the pan for 10 minutes before inverting onto a serving dish. While the cake is still warm poke holes into it using a fork or a skewer. Make sure to poke the holes all the way thru the cake.

In a small bowl whisk together the condensed, evaporated and whole milk until well combined. Pour about 3/4 of the mixture over the cake. Make sure you pace pouring the milk mixture over the cake to give it time to be absorbed by the cake. Once the cake has absorbed the milk mixture cover it and refrigerate it for at least 2 hours. Reserve the remaining milk mixture to drizzle over slices of the cake.

Recipe from A Classic Twist

Pretzel Monkey Muffins

I always come across recipes for pretzels that sound amazing and I am tempted to make them, but it never happens. I attempted to make pretzels from scratch once years ago (before I even started blogging) and I must have been scarred by the experience because since then I haven’t tried again. Those pretzels were a complete fail so subconsciously I must be holding on to that. Recently though while scrolling through Instagram I came across a video from Food Network that used refrigerated biscuit dough to make Pretzel Monkey Muffins and I knew I had to try them.

After separating the biscuits, I cut them into quarters…

And then on a lightly floured surface I rolled each piece of dough with a rolling pin to flatten.

Next, I placed about a teaspoon of shredded cheddar cheese in the center of each dough piece and pinched it closed.

Here’s the one step from making traditional pretzels I couldn’t avoid. I boiled each of the dough balls in a pot of boiling water with baking soda & Kosher salt for about 30 seconds, until they were slightly puffed. I was concerned that they would open while they were in the hot water but none of them did. I did have to do a major cleaning of my stove afterwards since I had so much residue from the steam of the water.  

Next, I sprayed 8 cups of a 12-cup cupcake tin with baking spray and placed three dough balls in each. I then sprinkled each with an additional teaspoon of shredded cheddar cheese and topped each with the remaining dough balls.

After brushing each with an egg wash and sprinkling them with salt I baked them in a 400 F preheated oven for 15 minutes (per the instructions). When I took them out of the oven they did have a nice color to them, but, they looked slightly undercooked in certain spots and I didn’t like how moist the areas where the dough balls stuck together seemed. So, I placed them back in the oven for an additional 5 minutes or so…

And then they had the golden brown hue of a traditional pretzel. Trust me, they weren’t burnt! They were delish on their own but even better with a dollop of honey mustard to dip into.

Some things to note about these muffins though… They are best enjoyed the day they are made and within an hour or two of making them. They really didn’t reheat that well. They would be the perfect snack for a game night or such.

Pretzel Monkey Muffins

Ingredients:

1/2 cup baking soda

2 teaspoons Kosher salt

1 16.3-oz tube of refrigerated biscuit dough (not flaky)

1 cup shredded cheddar cheese

Flour, for dusting

1 egg

Coarse salt, for sprinkling*

Honey Mustard, for serving

*can use Kosher salt

Directions:

Preheat the oven to 400F. Line a baking sheet with parchment paper and set aside.

In a large pot add 8 cups of water along with the baking soda and Kosher salt. Bring to a boil over high heat.

Separate the biscuits and cut each one into quarters. Lightly flour a work surface and roll each quarter with a rolling pin until flattened, about 3 inches. Spoon 1 teaspoon of the shredded cheese in the center of each flattened dough piece and pinch closed.

Once the water is boiling, working in batches, boil the dough balls, flipping once, until they are slightly puffed. Using a slotted spoon remove them from the water and place on the parchment lined baking sheet.

Spray 8-cups of a 12-cup cupcake tin with non-stick spray. In a small bowl beat the egg with 1 tablespoon of water.

Add 3 balls of dough to the bottom of each prepared cupcake cup. Top each with an additional teaspoon of shredded cheese and place the remaining dough balls on top of each. Brush each with the egg wash and sprinkle with salt.

Bake in the preheated oven for 15-20 minutes, until the tops are golden brown. Cool slightly before removing from the pan. Serve with honey mustard sauce.

Recipe from Food Network

Spice Market Carrot Cake

I’ve been using the same recipe for carrot cake for years. It’s a basic recipe with the only add-in being walnuts. No pineapple, coconut and/or raisins that you find in some recipes, but it’s delicious and moist nonetheless. I did try a different recipe a year or two ago and it just wasn’t that good. One of the reasons it never made it on here. I recently came across a recipe though that was completely different from any one I had seen before, a Spice Market Carrot Cake, that I instantly knew I wanted to try. I decided to make it for Easter this year. Which led me to wonder why is carrot cake so popular for Easter? Does it have anything to do with rabbits and their affinity to carrots? While I couldn’t find a definitive answer, I did learn this tidbit…  Carrot cake became popular in the 1970’s during the dieting craze. People apparently thought that by using carrots in a cake it would make the dessert seem healthier. I can get behind that. It’s like the theory that chocolate is a vegetable (some say fruit) since it’s a product of the cacao bean.

So, what makes the Spice Market Carrot Cake so special? It has a Moroccan-inspired flair thanks to the addition of ras el hanout – a Moroccan spice blend – and dried fruit (for the cake I made I went with apricots, but, you could use pitted dates instead).  Thankfully I didn’t need to go in search of ras el hanout and was able to make the blend myself using allspice, black pepper, cinnamon, coriander, turmeric and nutmeg. And to top the cake off, a twist on the traditional cream cheese frosting that I personally think is the best frosting for carrot cake, a Ginger-Orange Cream Cheese Frosting that includes ground ginger and the zest and juice of an orange.

This cake was a hit! All the flavors worked well together, and while I normally love nuts in my desserts, especially walnuts, I didn’t miss them one bit in this cake!

Spice Market Carrot Cake

Ingredients:

For the Cake:

2 cups flour

1 1/2 cups sugar

1 tablespoon ras el hanout*

2 teaspoons baking powder

1/2 teaspoon baking soda

1/4 teaspoon salt

4 eggs at room temperature, lightly beaten

3 cups (1 lb.) finely shredded carrots

3/4 cup vegetable oil

1/3 cup honey

1 cup chopped dried apricots

For the Frosting:

1 orange – remove 2 teaspoons of zest and squeeze for 2 tablespoons of juice

1 8oz package cream cheese, at room temperature

1 1/2 sticks (12 tablespoons) unsalted butter, at room temperature

1 teaspoon ground ginger

2 – 3 1/2 cups confectioners’ sugar

*To make the ras el hanout stir together 1 teaspoon each of cinnamon & turmeric, 1/2 teaspoon each of black pepper, coriander, nutmeg and allspice.  

Directions:

Preheat oven to 350 F. Spray 3 8-inch round baking pans with baking spray.

To make the cake: In a large bowl whisk together the flour, sugar, ras el hanout, baking powder, baking soda and salt.

In a medium bowl stir together the eggs, carrots, oil and honey.

Stir the egg mixture into the flour mixture until combined and then stir in the chopped apricots. Divide the batter among the prepared pans and then bake in the preheated oven for 25 to 30 minutes, or until a cake tester inserted in the center comes out clean.

Allow the cakes to cool in the pans for 10 minutes and then remove from the pans and cool completely on a wire rack.

I like to wrap my cakes in plastic wrap and refrigerate overnight before frosting, but, you can frost them once they are completely cooled.

To make the frosting: In a large bowl, beat together the cream cheese and butter and beat with a hand mixer on medium speed until light and fluffy. Add in the orange juice and ground ginger and continue beating until both are incorporate. Switch the speed to low and gradually add in 2 cups of confectioners’ sugar. Continue beating until well incorporated. Gradually add in an additional 1 cup to 1 1/2 cups of confectioners’ sugar until the frosting is spreadable. Stir in zest.

Frost and stack the cakes and then decorate as desired. Store leftovers in the refrigerator.

Recipe from Better Homes & Gardens

Semi-Homemade Almond Croissants

One of my favorite pastries are Almond Croissants. I also love just a plain old croissant as well. I’ve looked at recipes to make both and while they don’t seem complicated, it’s just so much easier to buy them. Well, plain croissants that is. You can pretty much get them at any supermarket that has a bakery. Granted, some are better than others. Whereas I find that Almond Croissants can only be found at certain bakeries or cafés and unfortunately, they aren’t always that good. I have tried to make pseudo Almond Croissants with crescent rolls and almond paste and it was a total fail. Well, a fail in the taste department. They did look good. Recently though I came across a recipe for Almond Croissants that started off by using store-bought (or homemade if you are so inclined) croissants and were doctored with a delicious almond filling. I had high hopes for them. They were starting off with an actual croissant and filled with an almond filling that included almonds and almond paste – the more almond flavor the better. And I must say, they didn’t disappoint. These would be a great addition to your Easter brunch this weekend and could really impress your guests!

After getting a good batch of croissants…

I started off by making the filling for them. In the bowl of my food processor I pulsed toasted sliced almonds until they were finely ground. I then added in almond paste and sugar and processed the mixture until it resembled fine meal. Finally, I added in an egg, Amaretto, vanilla extract and salt and processed everything until it was smooth and creamy. As it was the mixture is too loose to spread on the croissants, so, I transferred the mixture to an airtight container, covered and refrigerated it overnight. The following day I let it sit at room temperature uncovered so it could get to the right consistency.

Once the almond filling was ready it was time to prep the croissants. I sliced each of them horizontally and spread a few tablespoons of the almond filling on the bottom of each cut half and arranged them on a large baking sheet.

Next, I topped them with the top half of the croissants and spread about a tablespoon of the remaining almond filling on top of each. I then pressed about a tablespoon of sliced almonds on each.

I baked them in a 375F preheated oven for about 8 minutes. After letting them cool for about 15 minutes I sifted confectioners’ sugar on top of them.

These were delicious, just as good and possibly better than any decent Almond Croissant I have gotten at a bakery or café.

Semi-Homemade Almond Croissants

Ingredients:

8 large store-bought croissants

1 1/2 cups sliced almonds, divided

7 ounces almond paste*, broken into small pieces

1/3 cup sugar

1 large egg

3 tablespoons unsalted butter, softened

1 tablespoon Amaretto**

2 teaspoons vanilla extract

1/2 teaspoon salt

Confectioners’ sugar for dusting

*Depending on the brand you purchase, you could also use 8 ounces.

**The original recipe called for brandy

Directions:

Preheat oven to 350 F. Spread 1 cup of the sliced almonds in an even layer on a baking sheet. Bake in the preheated oven for 8 to 10 minutes, or until golden brown. Tossing the almonds at the halfway point. Let them cool to room temperature.

In the bowl of a food processor add the toasted almonds and pulse until finely ground, about 12 pulses. Add the almond paste and sugar and process the mixture until it resembles fine meal, about 15 seconds. Add the egg, butter, brandy, vanilla extract and salt and process the mixture until it is smooth and creamy, about 2 to 3 minutes. Transfer the mixture to an airtight container. Cover and refrigerate until the mixture is firm, at least 30 minutes and up to 4 days. If you opt to refrigerate the mixture for more than 30 minutes, let it sit at room temperature uncovered for 15 to 30 minutes before using.

Preheat the oven to 375F. Slice each of the croissants in half horizontally. Spread 2 tablespoons of the almond paste mixture on the cut side of each bottom. Top with the top half of the croissant and place on a large baking sheet. Repeat with the remaining croissants. Spread about a tablespoon of the remaining almond paste mixture on each croissant top and then gently press the remaining sliced almonds onto it (about a tablespoon per croissant). Bake in the preheated oven for 5 to 8 minutes, or until the almonds turn a light golden brown. Let the croissants cool on the baking sheet for 15 minutes. Dust with confectioners’ sugar.

The croissants are best eaten the day they are made, but, can be stored in an airtight container for 1-2 days.

Recipe from Food & Wine