No Churn Passion Fruit Ice Cream

I scream, you scream, we all scream for ICE CREAM! Happy 1st (official) day of summer. I say official, because I am sure there are plenty of people who feel that Memorial Day is the kick-off to summer. Which, I don’t completely disagree with, but, the weather in my neck of the woods has been saying otherwise. There have been some warm days, but, quite a few days have felt like we are back in April with the rain, wind and chill in the air. As you know, April showers bring May flowers, well, we are well into June now Mother Nature so we don’t need so much of the rain. Hopefully she’ll listen. So, what better way to kick off summer than with some homemade ice cream. Last year I shared with you a No Churn Coffee-Caramel Ice Cream to kick off the summer and this year I am sharing with you a No Churn Passion Fruit Ice Cream. YUM! Passion Fruit happens to be my favorite Chobani Yogurt flavor. That’s where the idea for this ice cream flavor came about. I figured if it tasted good as a yogurt it ought to taste just as good as ice cream (and I was right.)

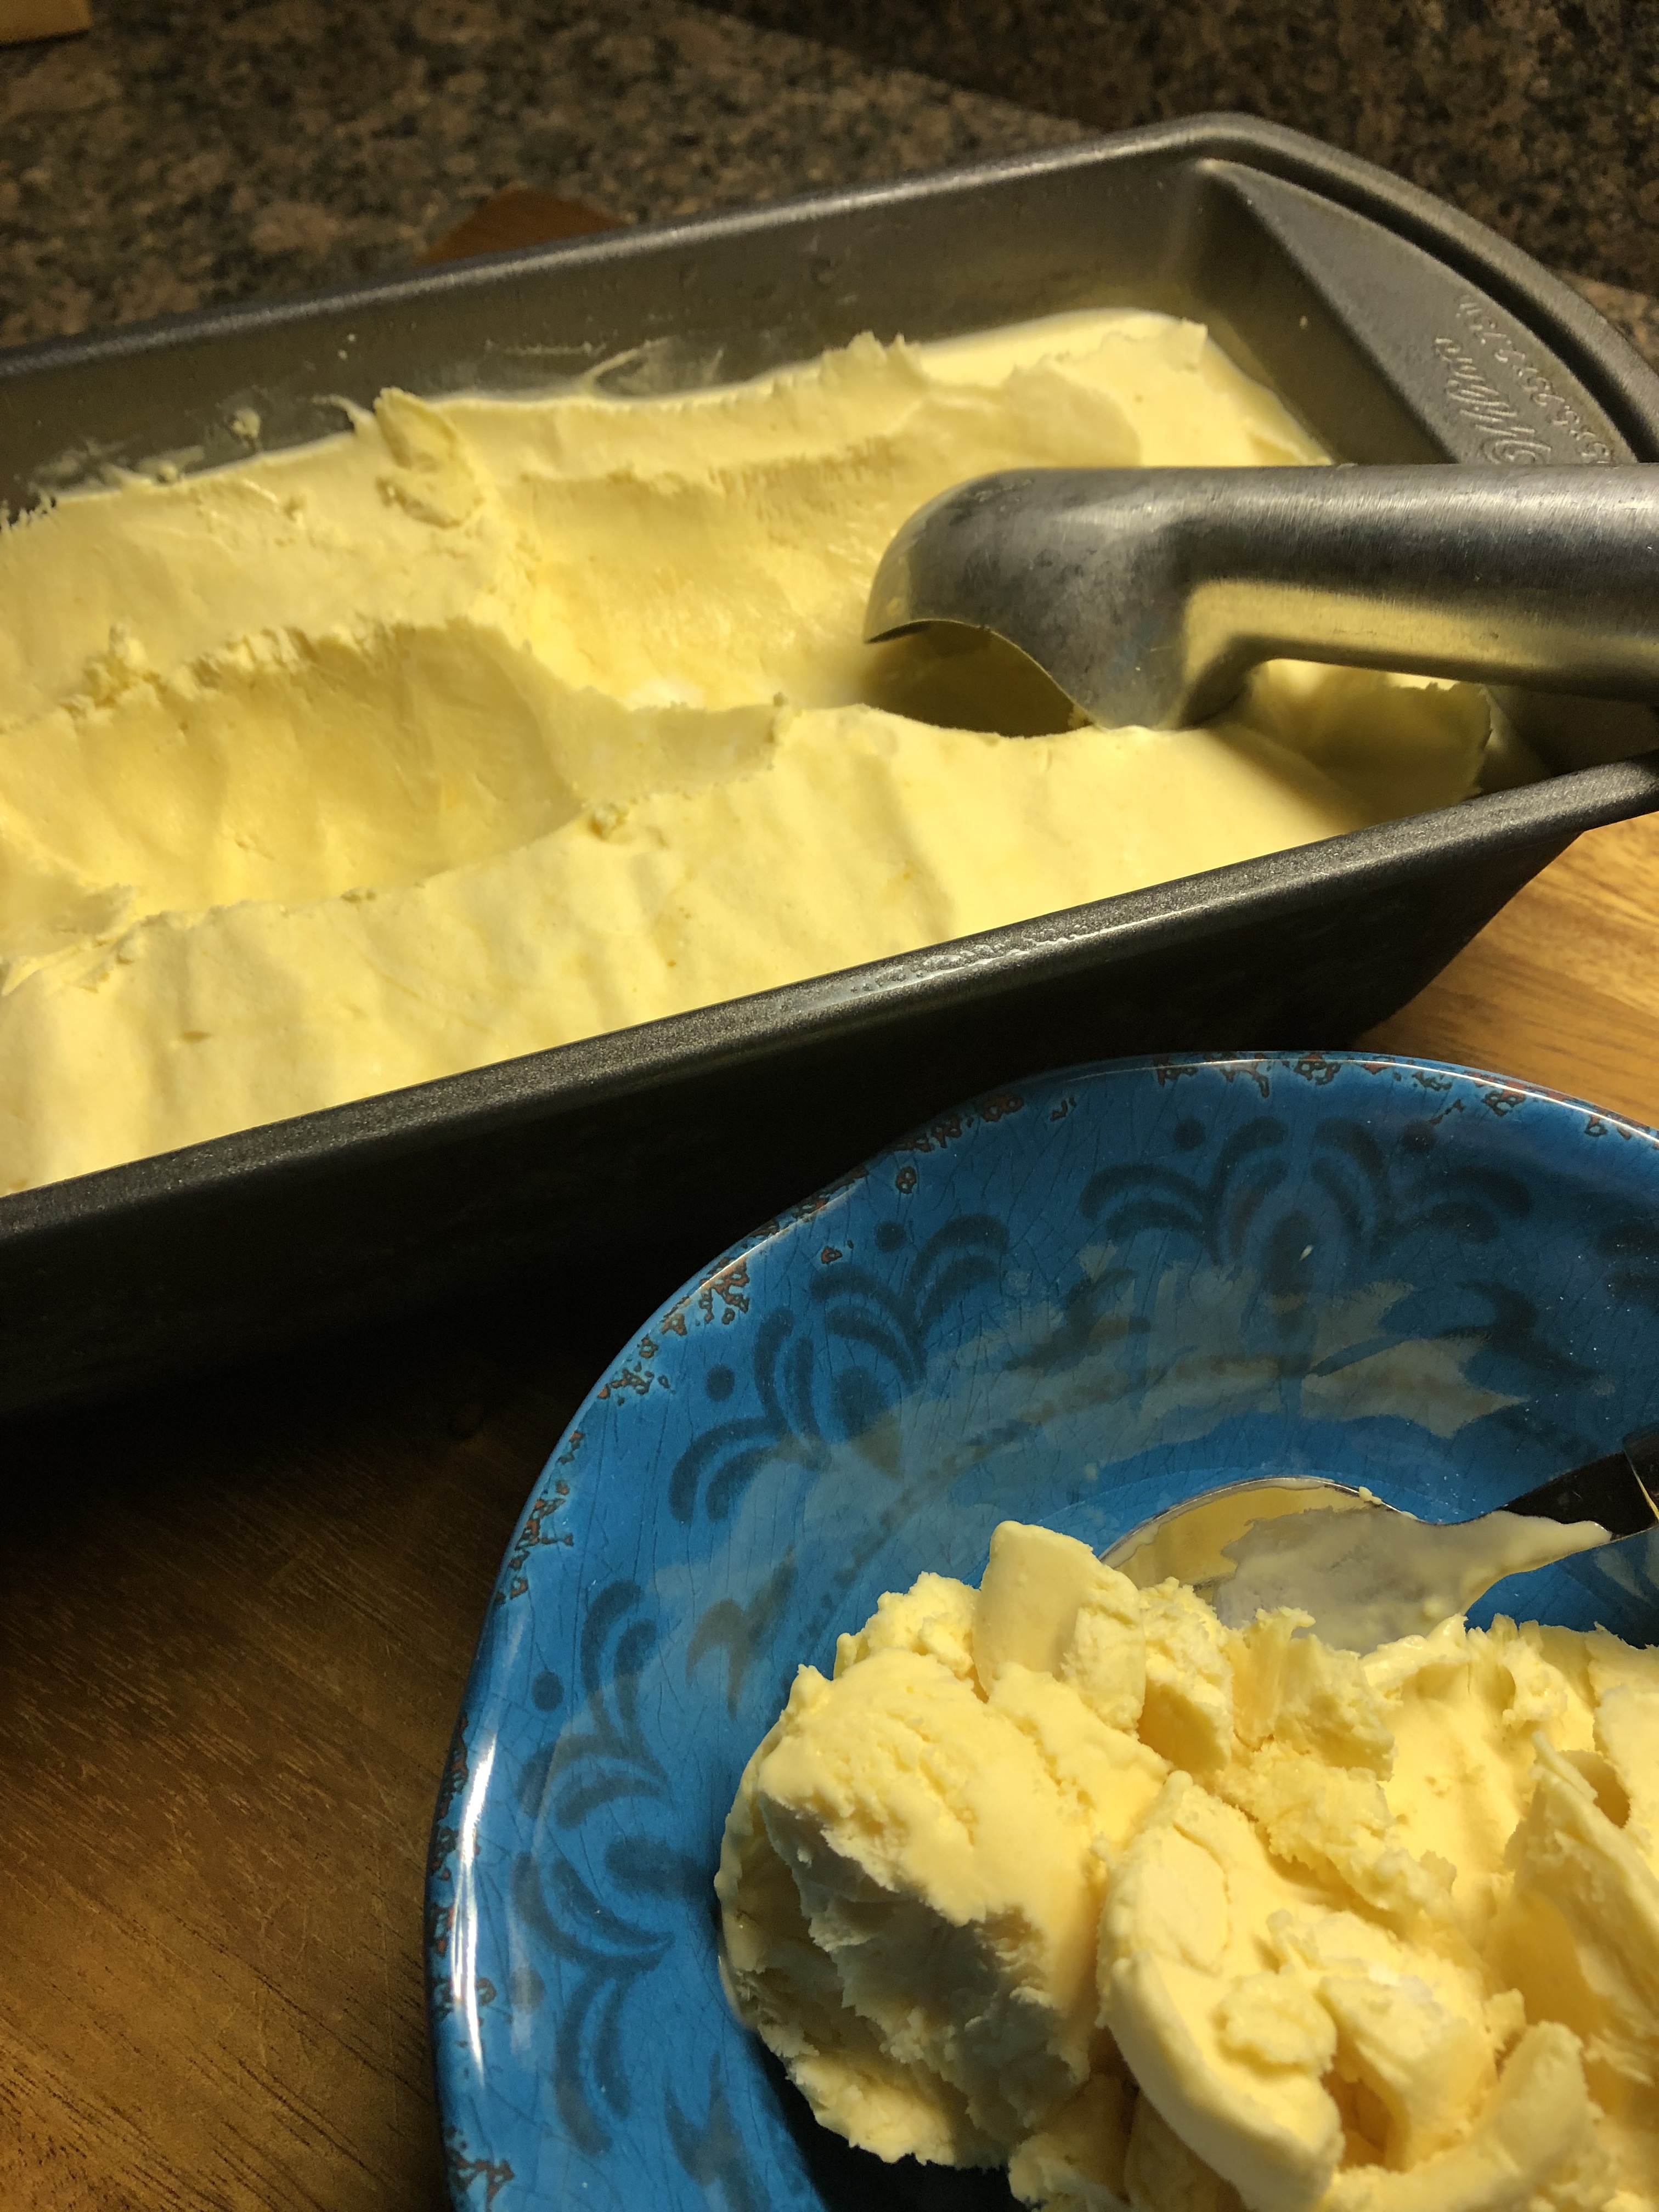
While I came across quite a few different recipes for this ice cream, I opted to go with one that required only 3 ingredients and less than 15 minutes of prep time. I purchased frozen passion fruit pulp from my local supermarket. To defrost it, I placed it in my refrigerator for about a day. Once it was defrosted I combined it with a can of sweetened condensed milk, whisking the two together until they were well combined. In another bowl, using my hand mixer, I whipped extra cold (I placed it in the freezer for 10 minutes) heavy cream until stiff peaks formed. I then added in the passion fruit mixture and beat everything together until just combined. I transferred the mixture to a loaf pan and placed a piece of wax paper directly on the surface before covering the pan with aluminum foil and then placing it in the freezer. And of course, I snuck a taste of it beforehand and it tasted just like my favorite Chobani yogurt, without the pesky little black seeds

After letting the ice cream set in the freezer for a few days (I am sure it was ready after a few hours, but, I happen to make this in the middle of week and was busy some doing baking and other things and totally forgot it was in freezer) I scooped myself a scoop or two and enjoyed it.

Passion Fruit Ice Cream

Ingredients:

1 14 oz. package of Passion Fruit Pulp, defrosted

1 14oz. can sweetened condensed milk

1 cup of cold heavy whipping cream

Directions:

Place the heavy cream in the freezer for 10 -15 minutes.

In a medium bowl whisk together the defrosted passion fruit pulp and sweetened condensed milk.

In another medium bowl beat the heavy cream until stiff peaks form. Add the passion fruit mixture and continue beating until the two mixtures are combined.

Transfer the mixture to a loaf pan and place a piece of wax paper directly on the surface and the cover with a piece of aluminum foil before placing in the freezer. Free for at least 2 hours and up to two weeks.

Recipe from Olivia’s Cuisine

Cherry Pie

Happy First Day of Summer! You may recall back in March I posted a Blueberry Pie in honor of Pi Day and that it was the first time I ever had Blueberry Pie, well, another confession. I’ve never had Cherry Pie. So, what better way to celebrate the start of the summer and cherry season than with a Cherry Pie!

First things first… Since I was using fresh cherries I had to pit them. I don’t own a cherry pitter so I pitted the cherries by using a reusable plastic straw. I literally just pushed the straw through the cherry to remove the pit. Check out this link for a few more ideas on how to pit cherries without a cherry pitter.

You may recall I’m not a fan of making pie crust from scratch – one of these days I will attempt to make it again – so I used my usual Pillsbury Pie crust. I rolled out one of the crusts an extra inch or two and then placed it in the bottom of my pie dish.

To prep the filling, I mixed flour, sugar and cinnamon in a Ziploc bag and then added in the cherries and tossed them around in the mixture to make sure they were completely covered.

I then poured the mixture, along with the excess flour mixture, into the pie plate.

Next, I used the second pie crust to top the pie and brushed it with milk and sprinkled sugar on it.

I then baked it in a 425 F preheated oven for 25 minutes and then lowered the oven temperature to 350 F and baked it for an additional 30 minutes. Until the filling was bubbling.

While my crust did come out a little wonky looking, it didn’t take away from how delicious the pie was. There’s something to be said about using fresh fruit… YUM!


Cherry Pie

Ingredients:

4 cups sweet cherries, pitted

1 cup sugar

1/4 cup flour

1/2 teaspoon cinnamon

pastry for double-crust 9-inch pie


Directions:

Preheat the oven to 425 F

Line the bottom of a 9-inch pie dish with one of the pie crusts

In a Ziploc bag combine the sugar, flour and cinnamon. Add the cherries and toss to coat. Add to the pie crust lined-dish

Place the second crust on top and trim the ends. Cut vent slits in the middle of the pie and crimp the edges.

Bake for 25 minutes and then lower the oven temperature to 350 F and bake for another 25 to 30 minutes. If the edges of the pie begin to brown too quickly, tent the pie.

Recipe from Food.com

Blueberry Crumb Muffins

While berries can pretty much be found year-round at most supermarkets, there’s nothing like getting them during the summer when they are at their peak. I have definitely made the most of them this summer incorporating them into quite a few desserts – as the pièce de résistance on a lemon & pastry cream cake, as a topping to 4th of July themed cupcakes and most recently in raspberry cupcakes. And when I saw that I had a pint of blueberries sitting in my refrigerator a little longer than I would have liked, I decided it was time to use them before losing them. I opted on making a recipe that I love using for blueberries – and one that I have blogged about before – a Blueberry Crumb Cake. Although, this time around I made two tweaks to the recipe….

I dredged the blueberries in flour before folding them into the batter so they wouldn’t all sink to the bottom…

IMG_4397

And I used the batter to make muffins instead of a cake,

IMG_4398

Which I still topped with streusel before baking.

IMG_4399

Hence, Blueberry Crumb Muffins.

IMG_4417

And if you are wondering if the flour covered blueberries worked, just take a look. You can see hints of blueberries at the top of the muffin near the crumb topping as opposed to seeing all of the blueberries at the bottom.

IMG_4439

Blueberry Crumb Muffins – adapted from here

Makes 8 Muffins

Streusel:

1/4 cup granulated sugar

1/3 cup light brown sugar

1 teaspoon ground cinnamon

1/8 teaspoon ground nutmeg

1/4 pound (1 stick) unsalted butter, melted

1 1/3 cups all-purpose flour

Muffins:

6 tablespoons unsalted butter, at room temperature (3/4 stick)

3/4 cup granulated sugar

2 large eggs, at room temperature

1 teaspoon pure vanilla extract

1/2 teaspoon grated lemon zest

2/3 cup sour cream

1 1/4 cups all-purpose flour

1 teaspoon baking powder

1/4 teaspoon baking soda

1/2 teaspoon kosher salt

1 cup fresh blueberries, dredged in enough flour to coat them


Preheat the oven to 350 F. Line 8 muffins cups with paper liners.

For the streusel:

Combine granulated sugar, brown sugar, cinnamon and nutmeg in a bowl. Stir in the melted butter and then the flour. Mix well and set aside.

For the muffins:

In a medium bowl sift the flour, baking powder, baking soda and salt together, set aside.

In the bowl of an electric mixer fitted with the paddle attachment cream the butter and sugar on high speed for 4 to 5 minutes, until light. Reduce the speed to low and add the eggs, one at a time. Then add the vanilla, lemon zest and sour cream.

With the mixer on low speed, add the flour mixture to the batter until just combined. Fold in the blueberries and stir with a spatula to be sure the batter is completed mixed.

Divide the batter among the muffin cups – I used an ice cream scoop – and crumble the streusel over the batter.

Bake for 20 – 25 minutes, until a cake tester comes out clean. Remove the cupcakes from the tins and let them cool completely on a wire rack.


%d bloggers like this: