Granny Square Blanket

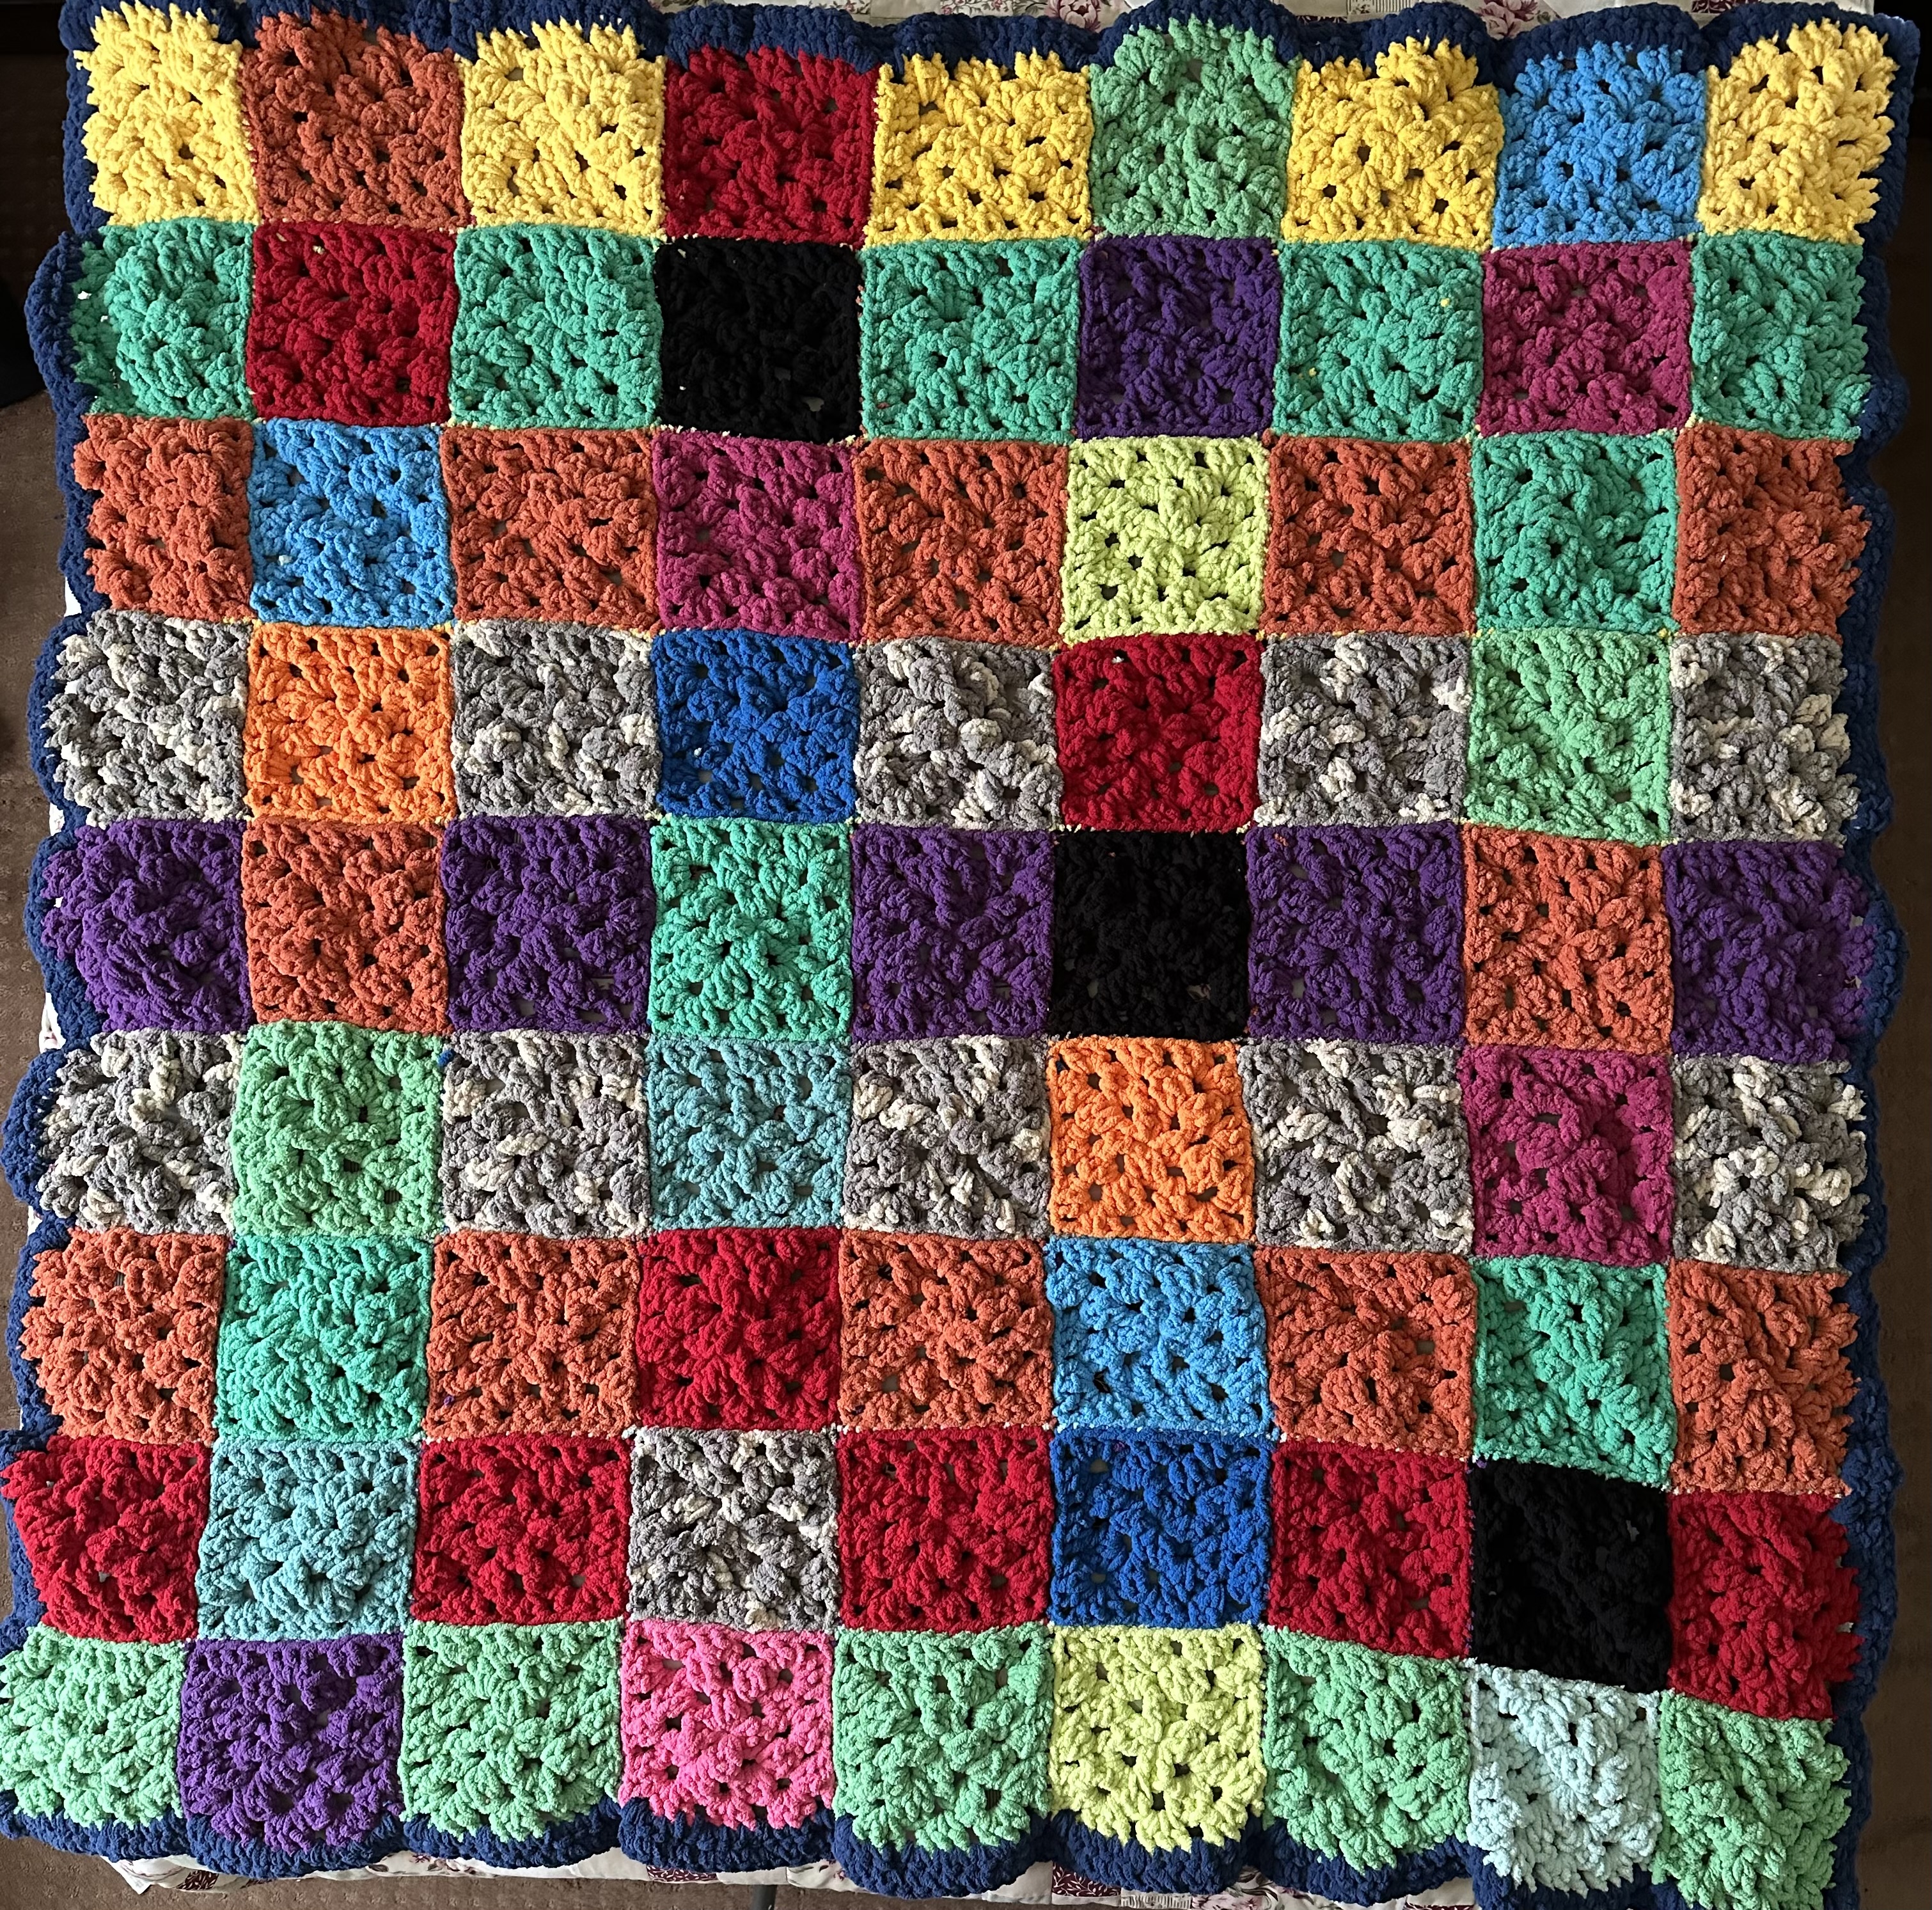
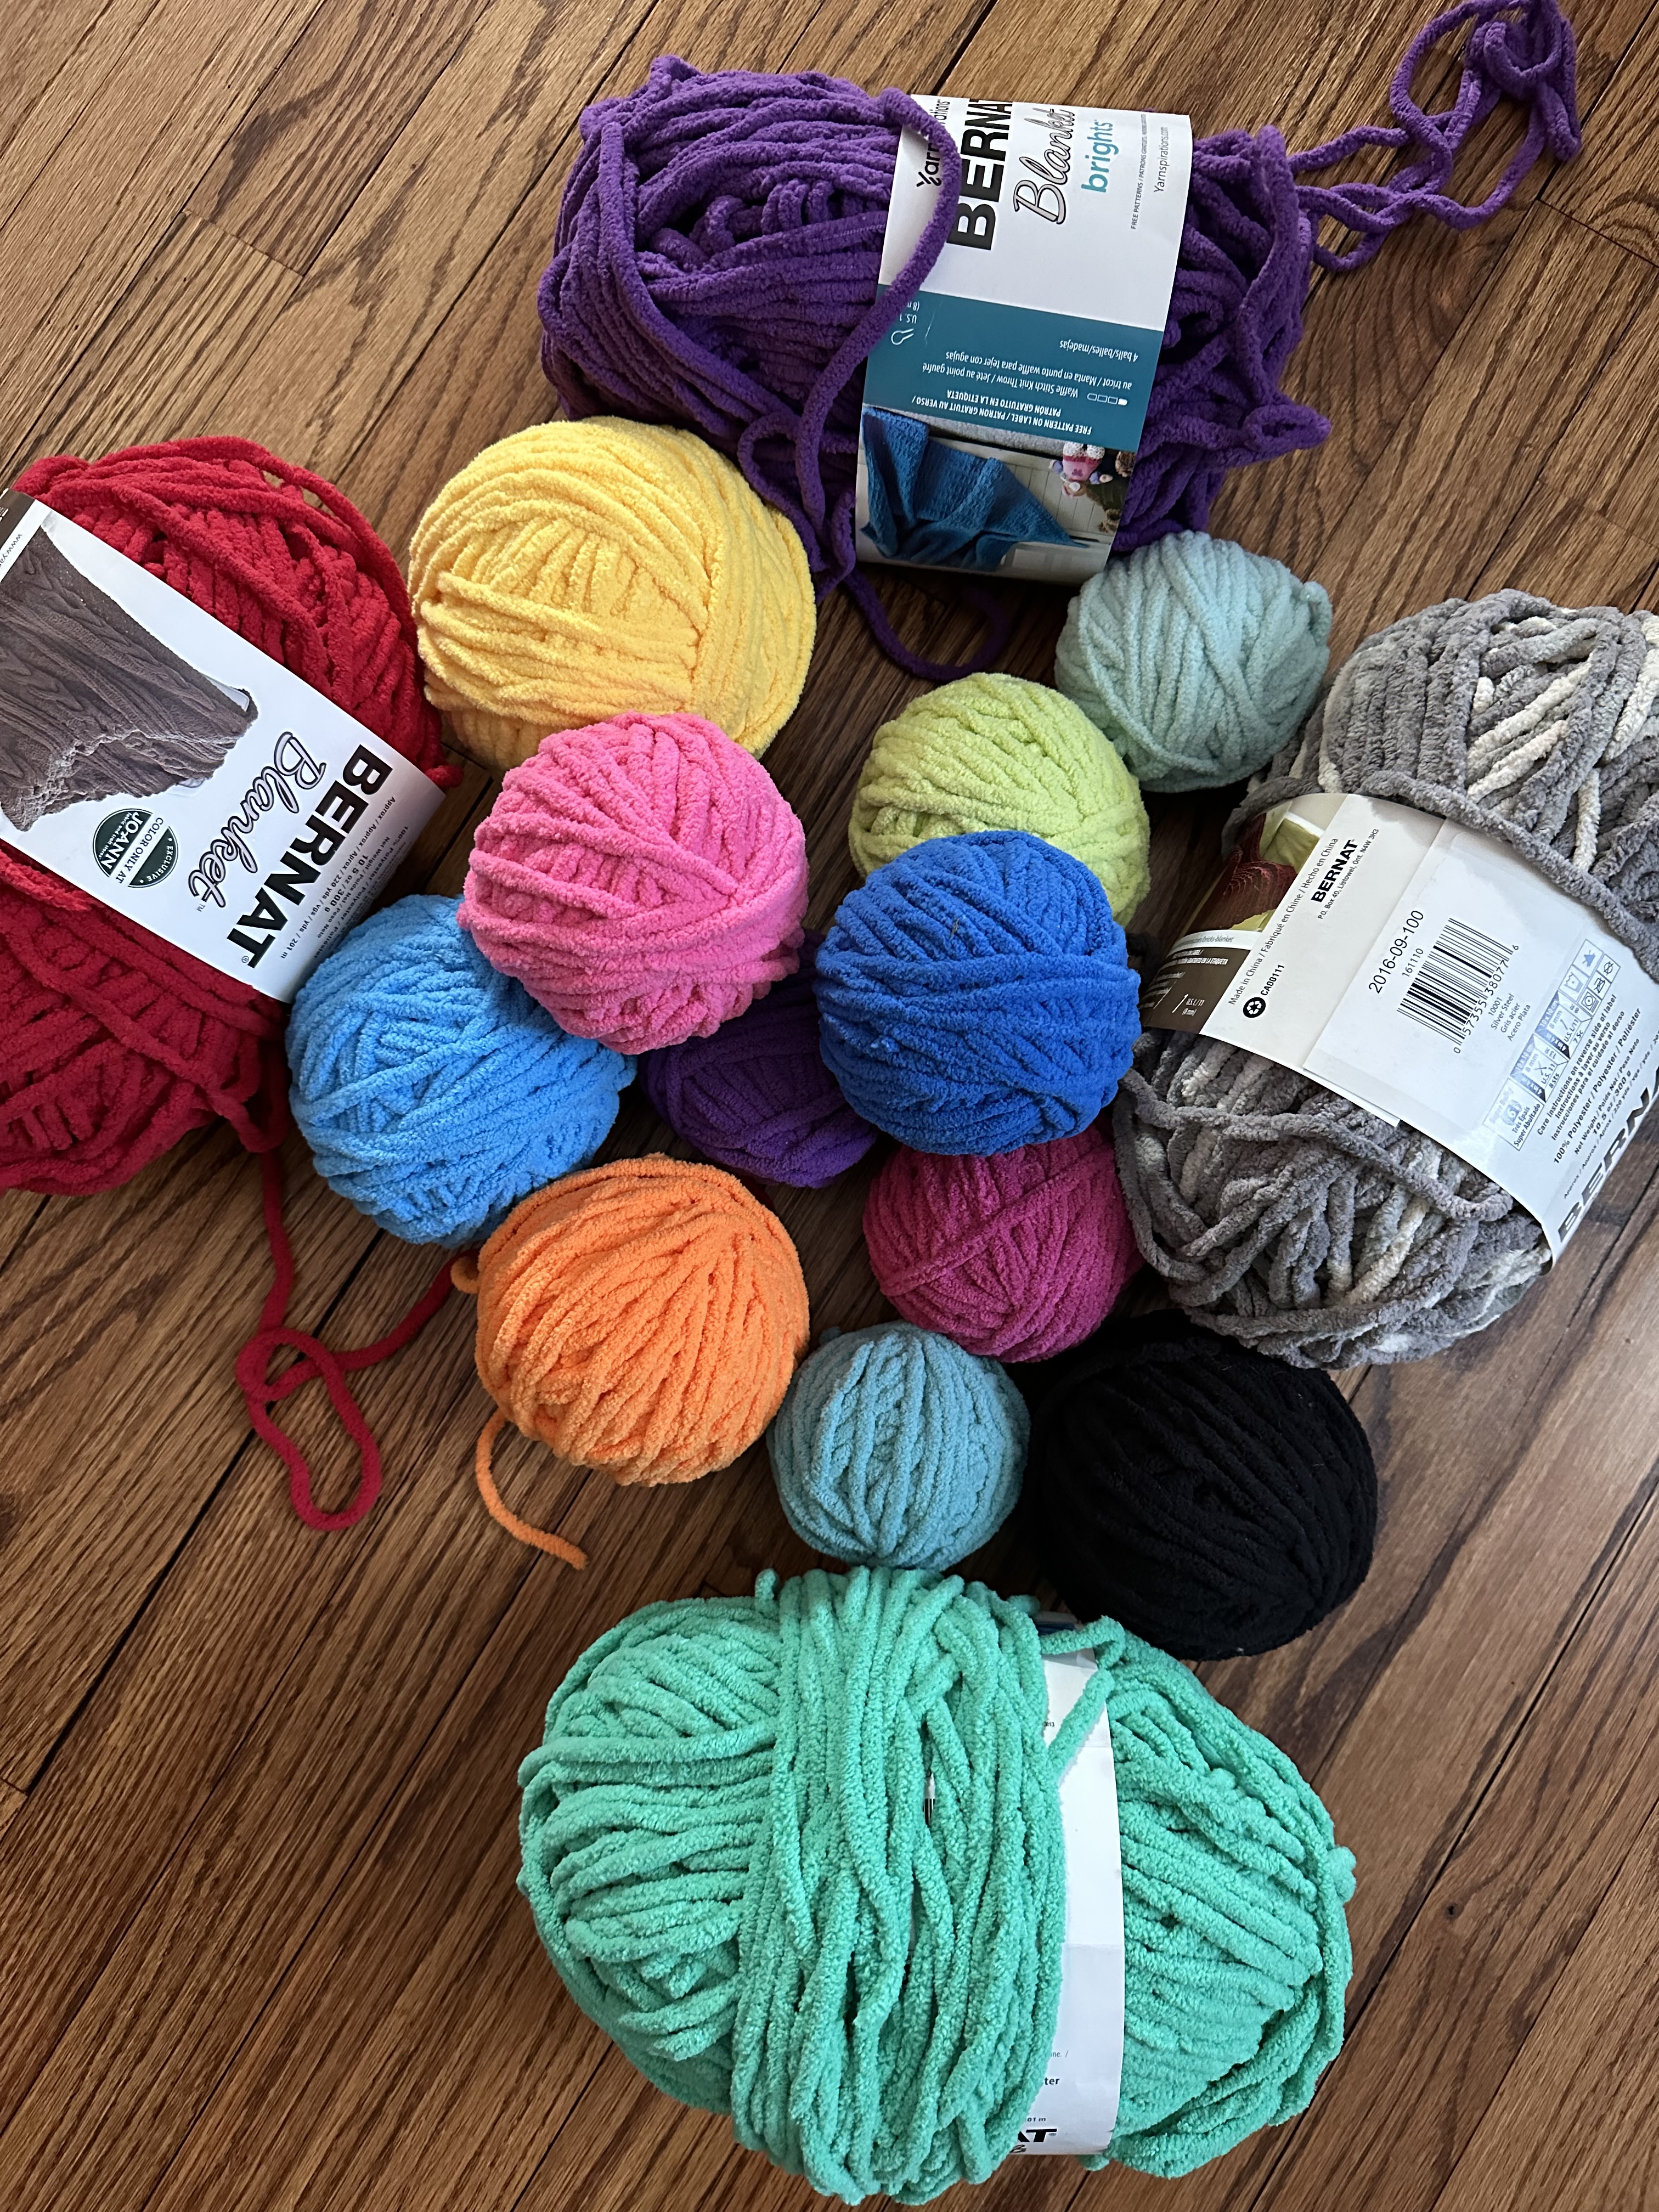
Recently I decided it was time to clean out my yarn stash. While some crocheters/knitters may save every bit of their scrap yarn, after a while I feel the need to purge it. Often, it’s not enough yarn to do anything with. I have thought about making a yarn ball wreath – I made one years ago for Christmas – but I just haven’t gotten around to it. I have a laundry list of yarn projects I want to make, and it just keeps getting longer.  While going through my yarn I noticed that I had quite a bit of Bernat Blanket Yarn leftover from numerous projects in an array of colors. Since it was so much, I thought to myself that there had to be something I could make with it. Of course, the best thing was a blanket. It is called Blanket Yarn after all.

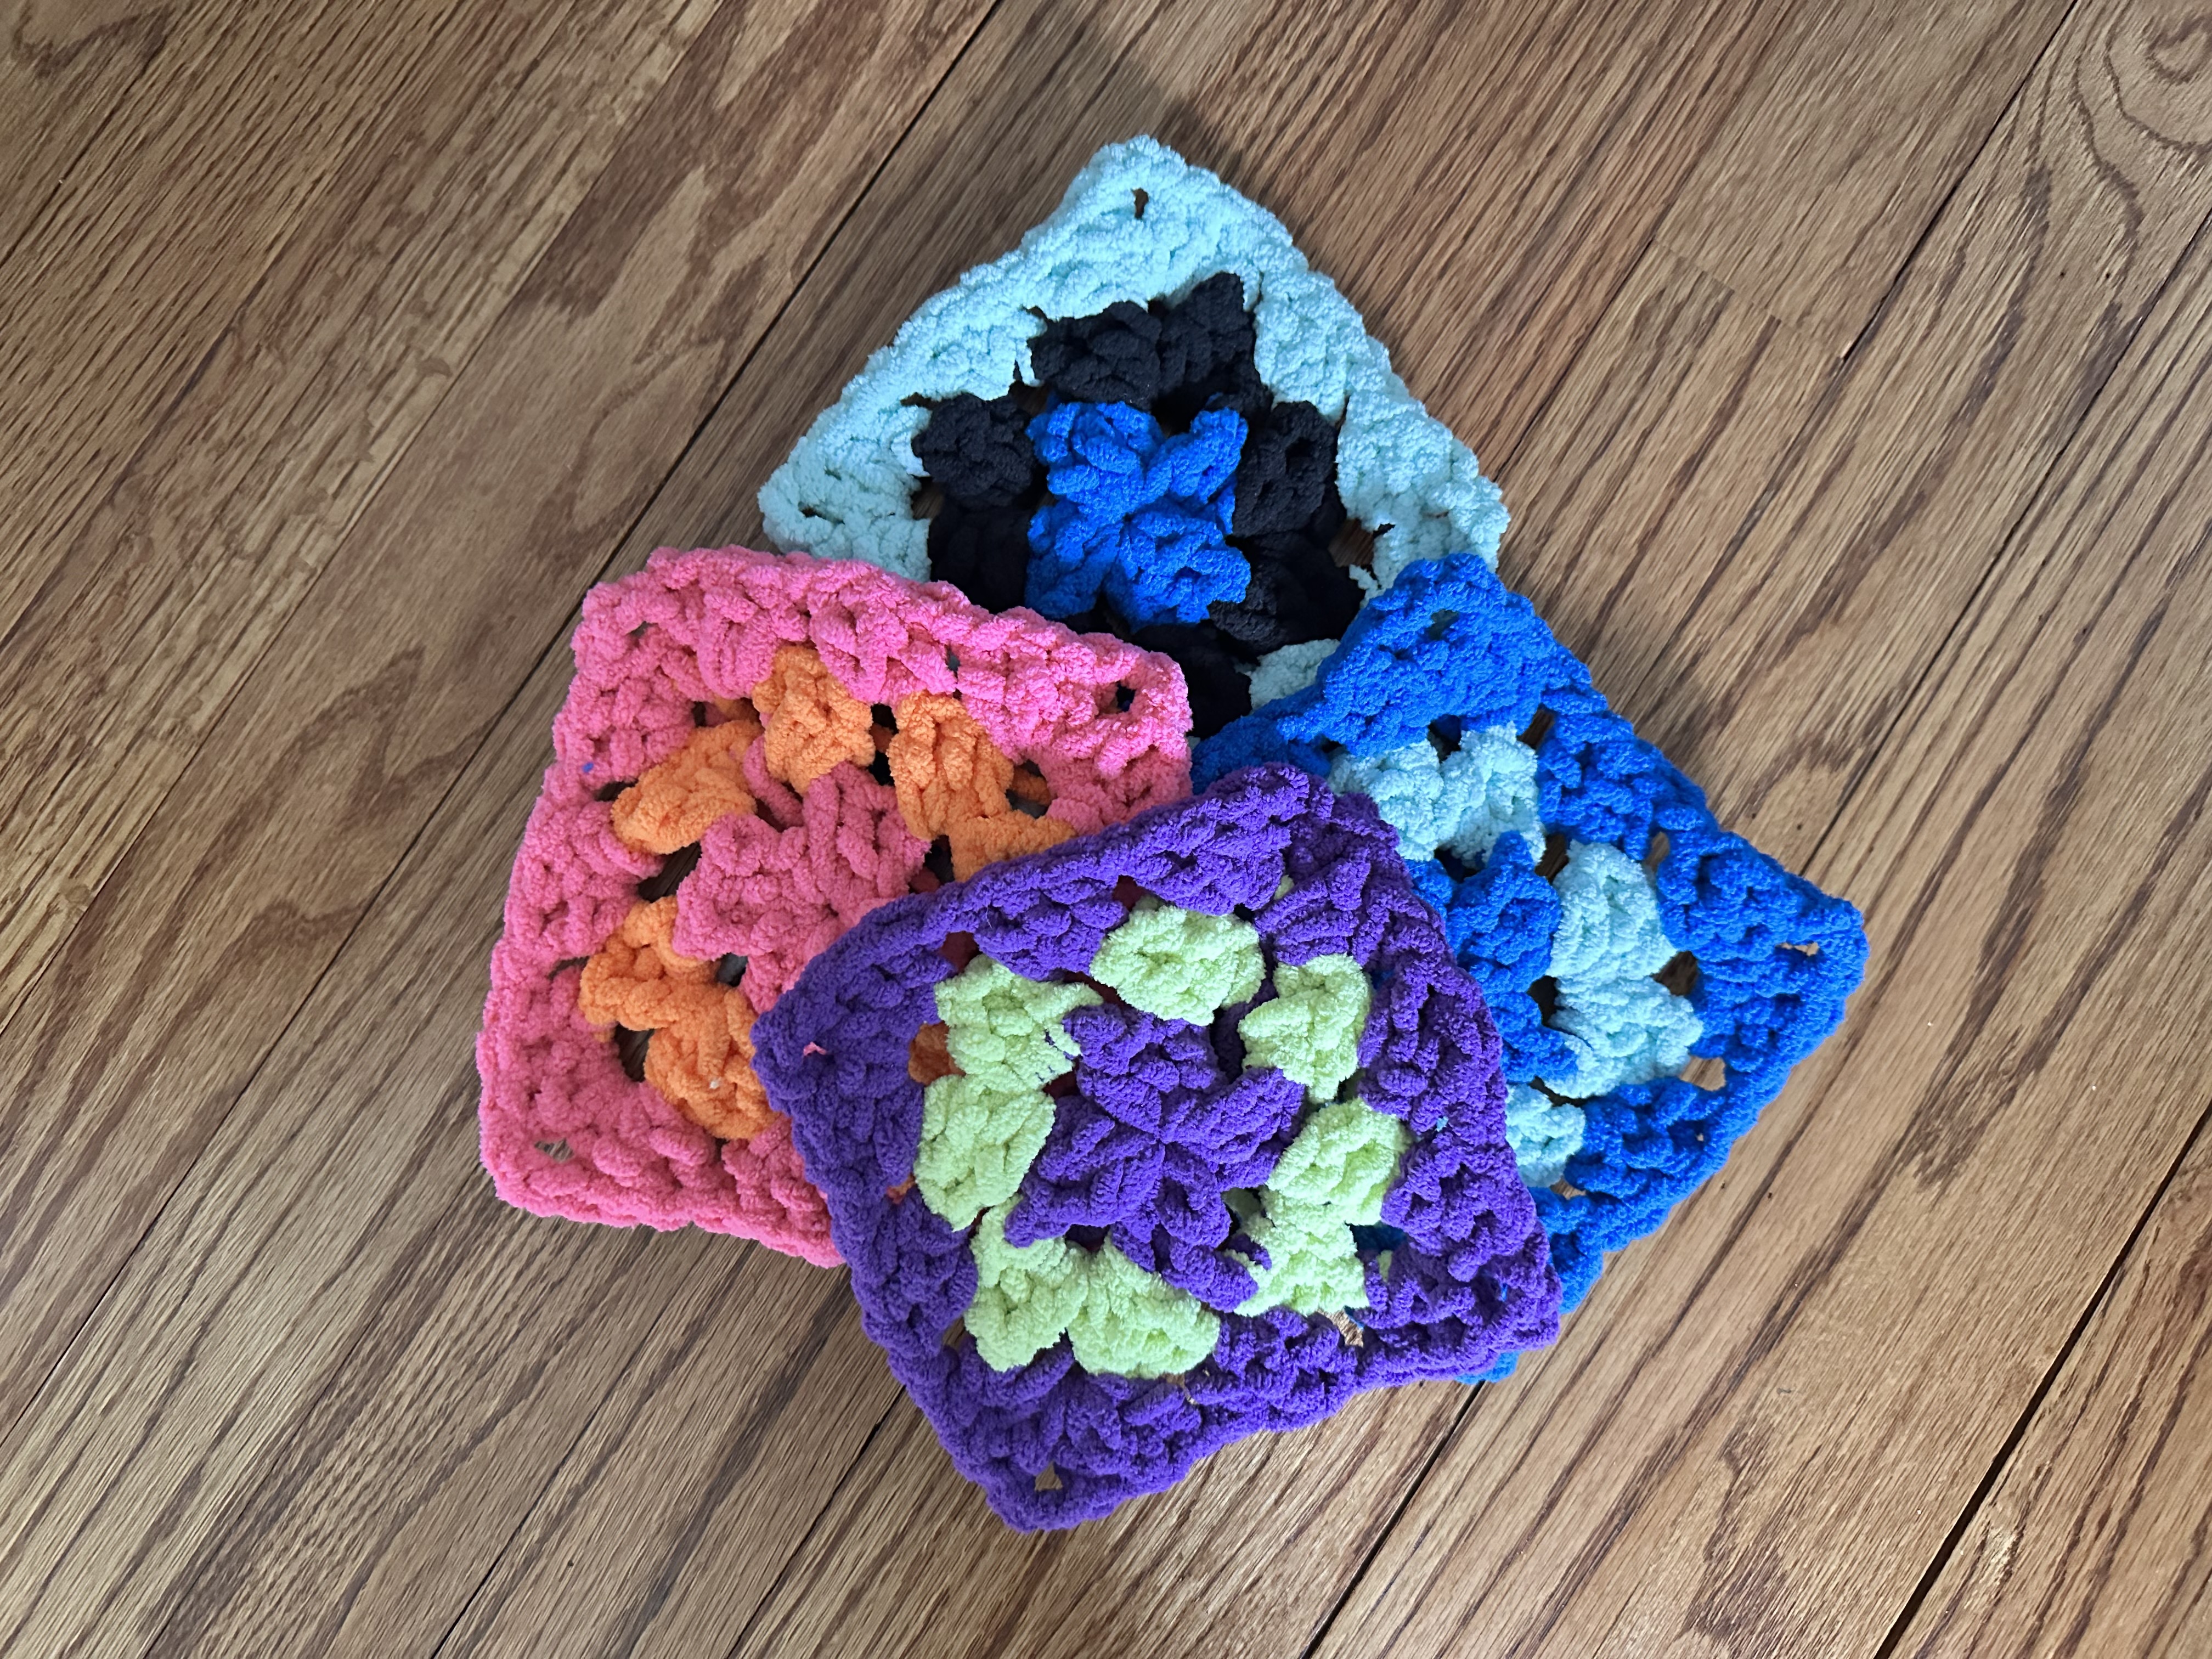
At first, I wasn’t sure what pattern I wanted to use. I thought maybe doing a simple pattern and using each color haphazardly until it ran out and then moving on to the next color. But when I envisioned that it didn’t look very aesthetically pleasing. So, I decided the best way to use up the yarn and to make a somewhat cohesive looking blanket would be to make a bunch of granny squares and then stitch them together. Which I was a bit apprehensive about because I am like most crocheters… weaving in ends is my least favorite task when it comes to crocheting and there would be a lot of ends to weave in with this pattern. Which could have meant that this project could have sat for quite some time once the squares were done. Thankfully, I am trying to be more proactive when it comes to weaving in ends, so it doesn’t seem like such a daunting task at the end of my project. I’ve started to weave as I go.  Which has been helpful and has made some of my recent projects go a little quicker.

Initially I thought I would make some of the granny squares multicolor, but after making a few of them and laying them out with the solid color ones I made I didn’t like how it looked. So I decided to stick with making all the squares a solid color.

Which meant that I did have to buy a few skeins of yarn to make sure I had enough yarn to make all of the squares I would need. Thankfully (but unfortunately) I was able to get them at JoAnn’s during their going out of business sale at a discount. This also meant that it was easier for me to create a somewhat pattern with the squares.

So, once all my squares were done (and the ends weaved in) I began to lay them out to figure out the best position for each of them.

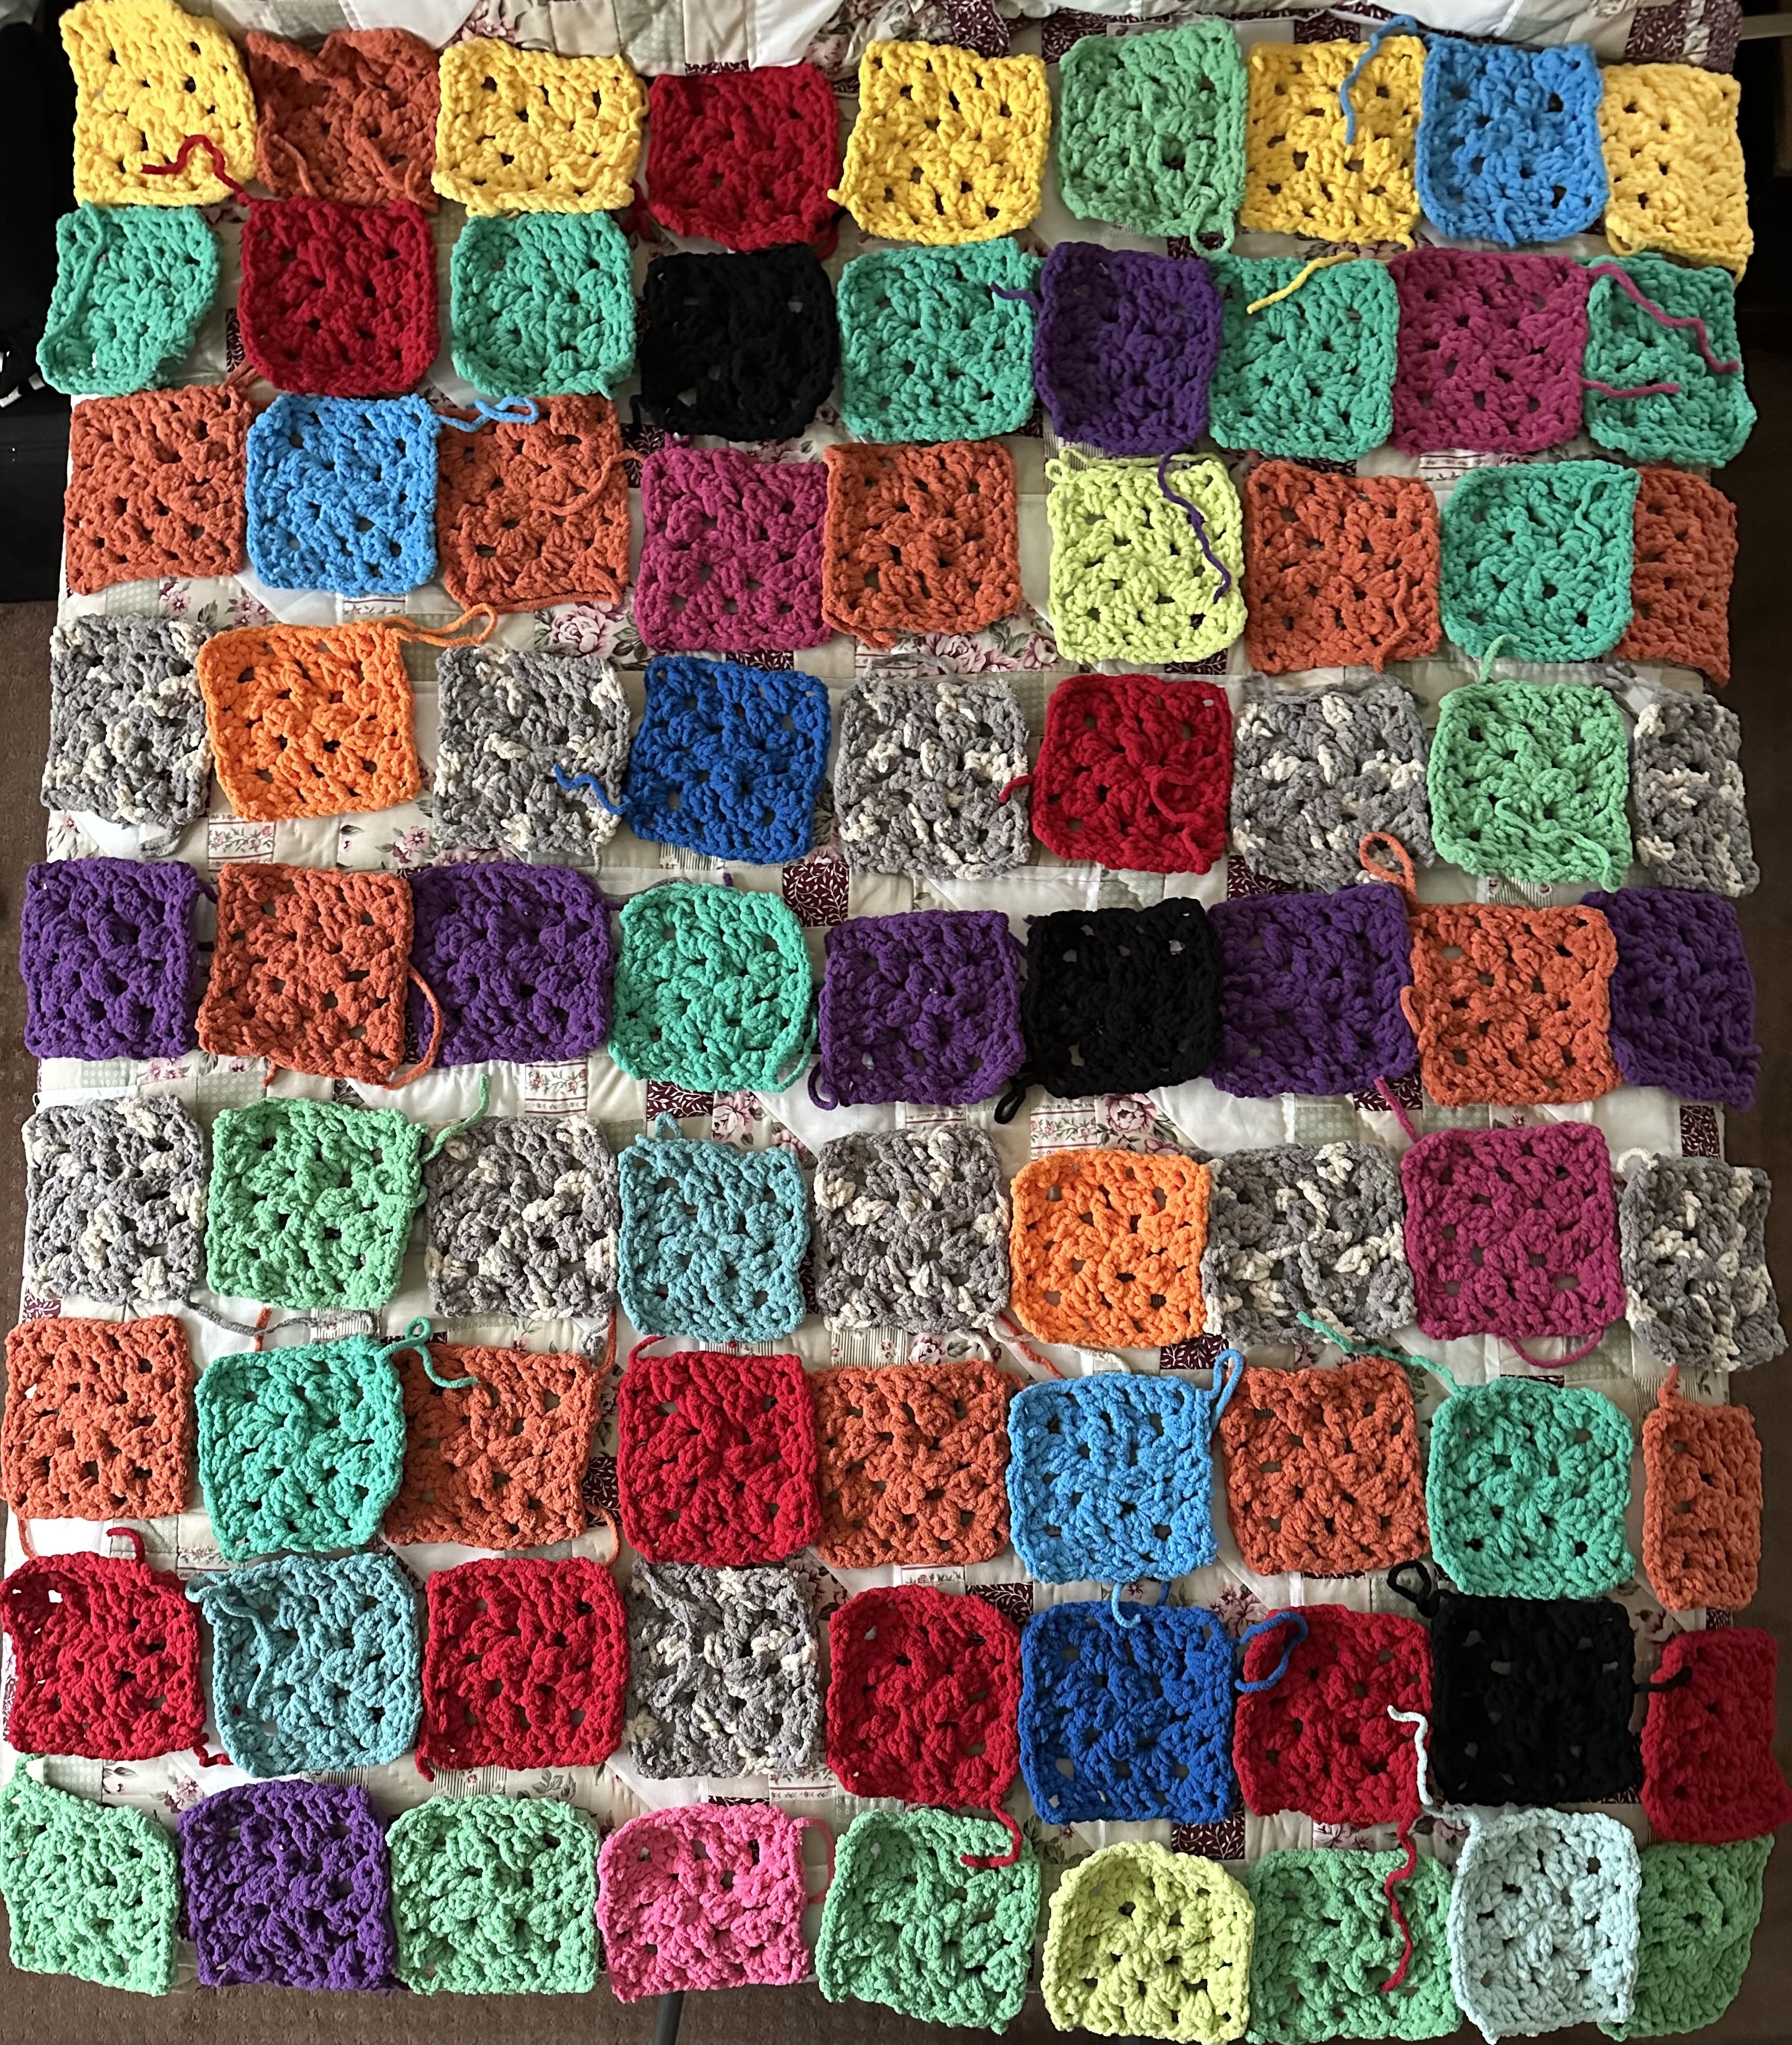
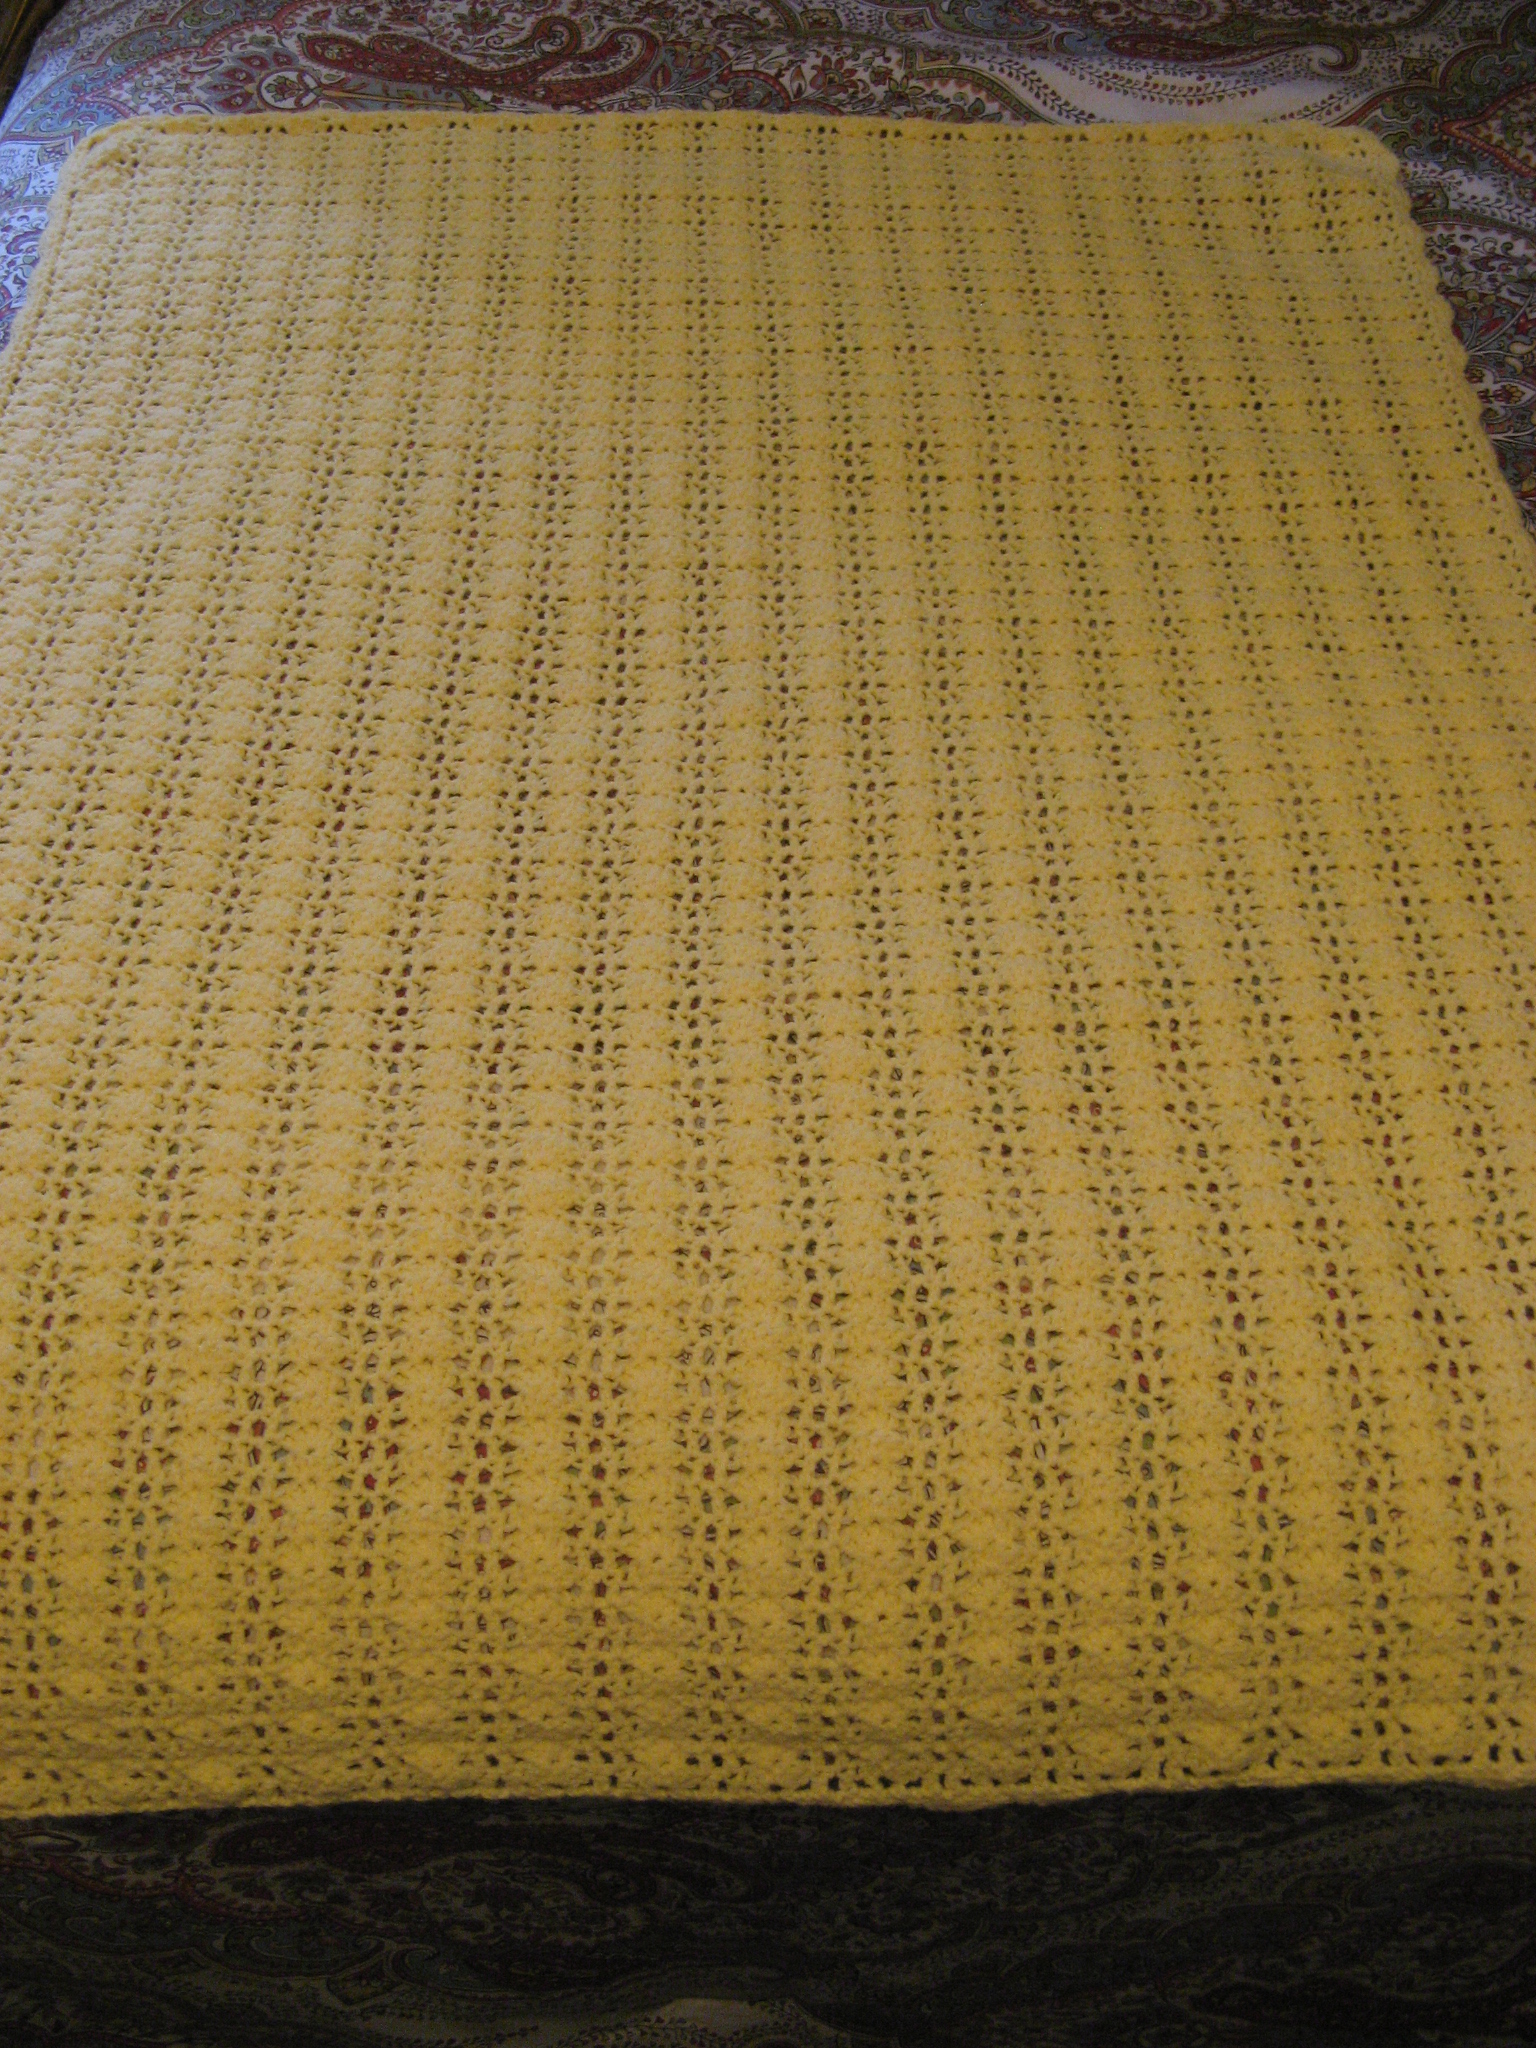
Once I was happy with the placement of all the squares, it was time to sew them together to form the rows and then sew all the rows together to finish the blanket. One thing I noticed about the yarn while making the squares was that even though they were all the same weight (Super Bulky) the texture was a bit different for some of the colors. Some of the yarn I’ve had for over 5 years, and I am thinking that over the years the manufacturer has made the yarn a bit smoother/silkier. Which kind of left the border of my blanket looking a little wonky and unfinished. So, after all the squares were sewn together, I decided to add a simple border in a contrasting color. I was very happy with the final product.

A Blanket, a Tote Bag and Some Pumpkins

As I mentioned in my last post, I haven’t been doing much baking – although now that the temps & humidity are dropping I am hoping to get back into it – but one thing I have been doing is a decent amount of crocheting.

I’ve been working on a granny square tote bag. Out of nowhere these bags started popping up on my Instagram feed and I figured since I knew how to make a granny square why not try one. Well, it’s taken me a bit longer than I thought it would. First, I was trying to come up with different color variations so no two squares would be the same. I gave up on that plan quickly and then decided to settle on a few variations and work with those to create a pattern for the bag. I made a slight mistake while stitching them together but decided it was okay… It’s a prototype. LOL!  Then it was time to work the border and make handles… Not sure what happened but I didn’t like how it was coming out, so I ended up frogging the whole border and the handles to start over. I am at that point now. 

I recently finished a baby blanket in a ripple stitch pattern. While I normally like to use white as the accent/separator color the person requesting this blanket asked that I use green instead. While I initially had my doubts about how it would look, I ended up really liking the variation.

I also finished a few pumpkins to add to my Etsy shop. I made these pumpkins using the bobble stitch. It’s a fun stitch that gave the pumpkins a nice 3D texture. Some might say that they are reminiscent of a pumpkin with warts, but just in a more uniform pattern. Either way, they are cute! It was the first time I used the stitch and while it’s a super easy stitch that results in a nice design it is one that requires a lot of yarn. It’s a yarn eater! The reason is because the stitch consists of multiple double crochets that are grouped together in the same stitch. Not sure I would ever make something larger than these pumpkins using the stitch.

They are available on my Etsy shop now.  

I also have other pumpkins available that were made with a simpler stitch but are just as equally cute.

One great thing about these pumpkins is that they will last all season year after year!

And that’s about it when it comes to my yarn projects. I have some ideas for a few other things I would like to make but I haven’t gotten to them yet. Hopefully soon!

A Blanket Down, A Scarf To Go

I recently completed the toddler blanket I was working on and am very happy with how it came out. While I have crocheted/knitted my fair share of blankets, this was the first toddler blanket I completed and was a little unsure about the size I wanted to make it…. I obviously didn’t want it to be on the smaller side which would be more appropriate for a baby, but, I also didn’t want it to be so large that it would be too big for a young child. Ultimately the final size of the blanket ended up being 40 x 50 inches, which I think is a decent size for a young child.

IMG_7110

I’ve already moved on to my next yarn project… An infinity scarf (you can never have too many scarves) made with t-shirt yarn. While there a quite a few tutorials online on how to make your own t-shirt yarn I opted to buy mine. I first came across t-shirt yarn when I saw an Arm-Knitting Project using Lion Brand’s Fettuccini Yarn. After visiting the Lion Brand store in NYC I opted to pass on purchasing the yarn for the project – they didn’t have enough skeins of the yarn in the color I wanted and it just seemed like the scarf would end up being a lot more bulky than I would like. Not long after that while at my local Michael’s I came across t-shirt yarn from their Loops & Threads brand and it was more reasonable priced (about $3 skein on clearance than the $9/skein for the Fettuccini Yarn) and didn’t seem as bulky. I decided to scrap the idea of learning how to arm-knit and decided to make an infinity scarf just by regular knitting. So far so good…

IMG_7121


Lion Brand Pound of Love Delectable Shell Afghan – modified from here

Materials:

2 Balls Lion Brand Pound of Love Yarn

Crochet Hook – Size H-8

Directions:

Afghan

Chain 173

Row 1: Double-crochet in 5th Chain from hook, *Skip next  2 chains, 5 double-crochets in next chain, skip next 2 chains, double-crochet in next chain, chain 1, skip next chain, double-crochet in next chain, repeat from * across.

Rows 2 – 95: Chain 4, turn, *Skip next Chain 1 space, double crochet in next double crochet, skip next 2 double-crochets, 5 double-crochets in next double-crochet, skip next 2 double-crochets, double-crochet in next double-crochet, chain 1; repeat from * across, double-crochet in 3rd chain of turning chain. Do not fasten off.

Border

Round 1: Do not turn; work single-crochet evenly spaced around entire outside edge of Afghan, working 3 single-crochets in each corner; join with slip stitch in first single-crochet.

Round 2: Chain 1, single-crochet in same single-crochet as join, skip next single-crochet, 5 double-crochets in next single-crochet, *skip next single-crochet, single-crochet in next single-crochet, skip next single-crochet, 5 double-crochets in next single-crochet; repeat from * around; join with slip stitch in first single-crochet. Fasten off.

Weave in ends.


T-Shirt Yarn Infinity Scarf

Materials:

T-Shirt Yarn (being that I haven’t finished the scarf I am unsure of how much yarn I will ultimately use, I do have 2 skeins that are 100 yards each)

Knitting Needles: US 19 / 15 MM

Directions:

Cast on 10 stitches

Row 1: Knit 2, *Purl 2, Knit 2; repeat from * across. Repeat Row 1 until piece measures your desired length (either to loop around your neck or the classic way – topping it over a top)

Bind off.

To finish, sew the ends together and weave in the ends of the yarn.


Where are the Beads & Yarn?

While as of late most of posts have been about baking (i.e. the Spatula) I have been working on some yarn and bead projects and today I would like to share with you some of the yarn projects.

I recently completed three scarves…

A button-through cowl I made with Lion Brand Wool-Ease Thick & Quick yarn in Barley. This was a quick cowl to crochet thanks to the nature of the yarn (hence the name of the yarn) and the easy pattern working with double crochets. I believe I was done with this in less than three hours!

IMG_6961

Next I completed another cowl using another Lion Brand yarn, their Landscapes yarn in Desert Spring. It’s a beautiful self-striping roving yarn that’s also great to work with. Well, it was great yarn to work with once I wound it up into a ball as opposed to pulling it out from the skein. I did that during my first go at making this scarf and the yarn began to fray which affected the outcome of the cowl. Thankfully I bought 2 skeins of the yarn – even though the pattern only required one – so I was able to start over with much better results. One other thing, the pattern called for the cowl to be knitted in the round but I opted to add a few extra stitches and just sewed the ends together.

IMG_6967

And finally using Red Heart With Love yarn I crocheted a puff stitch scarf. I had a slight mishap while making this scarf. I knew that it was looking a little funny while working on it but it wasn’t until I finished and needed to add the border around the scarf that I knew for sure what I had done wrong. I didn’t end one of the rows on the right stitch so every few rows the last stitch was sticking out which prevented me from adding the border. So, I had to take the scarf apart and crochet it again. Thankfully it was a quick pattern to stitch up so I was done in no time and done correctly

IMG_6970

And currently on my crochet needle is a toddler blanket for a friend’s daughter – I actually made a smaller version of this blanket last year as a baby gift for another friend. I’m about half-way done and just about to start working with another skein of Lion Brand’s Pound of Love yarn in Honey Bee. As with the button-through cowl, this blanket is just a series of double-crochets.

IMG_7003