Checkerboard Cake

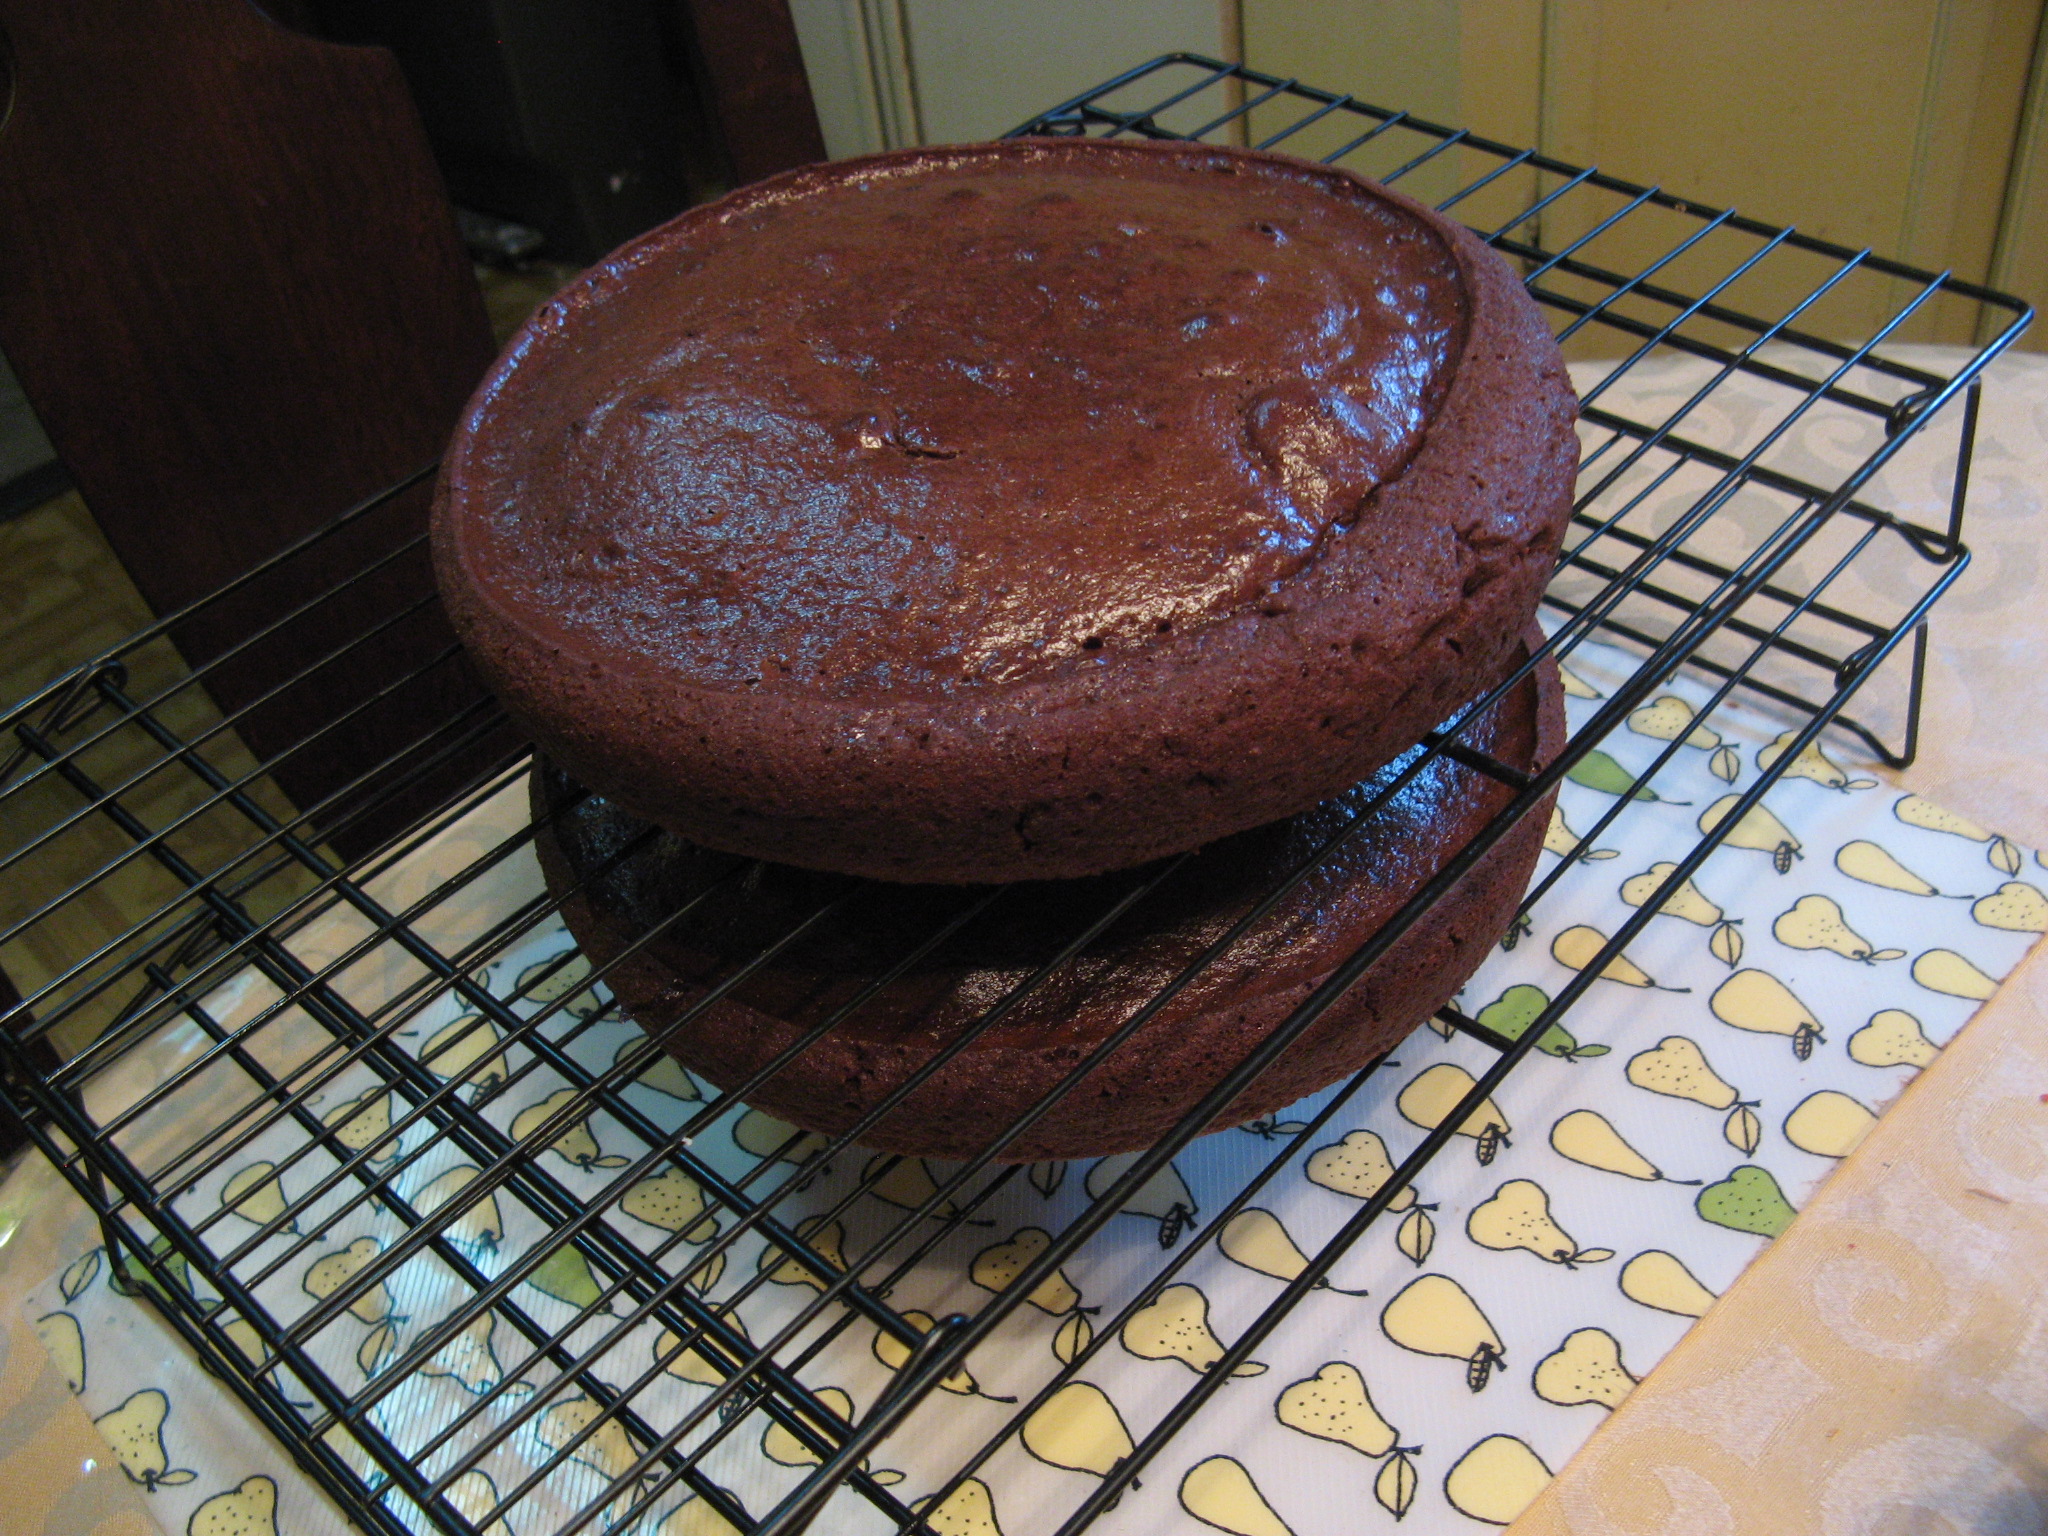
I’ve attempted to make a Checkerboard Cake two times before and both times I didn’t have much luck. The first time I followed the directions on the pan set  I have for it exactly, even following the recipe for the cake and I didn’t like the taste of the cake and my cake batter ran into each other so it didn’t look all that great when I sliced into it. The second time I opted to use box cake and while the cake tasted better I still had the issue of the cake batter running so once again not all that checkerboard looking when I sliced into it. According to the directions for the pan set you put the ring separator into the pan, pour the batter in, remove the ring and then bake. This wasn’t working for me, so on this (my third) try I opted to bake the cakes first and then use the ring separator to cut the cakes and then assemble it for the checkerboard pattern and I’m happy to say I didn’t strike out! Granted it was a bit messy to assemble but it wasn’t anything that couldn’t be fixed (or hidden) with a little frosting.

IMG_2245

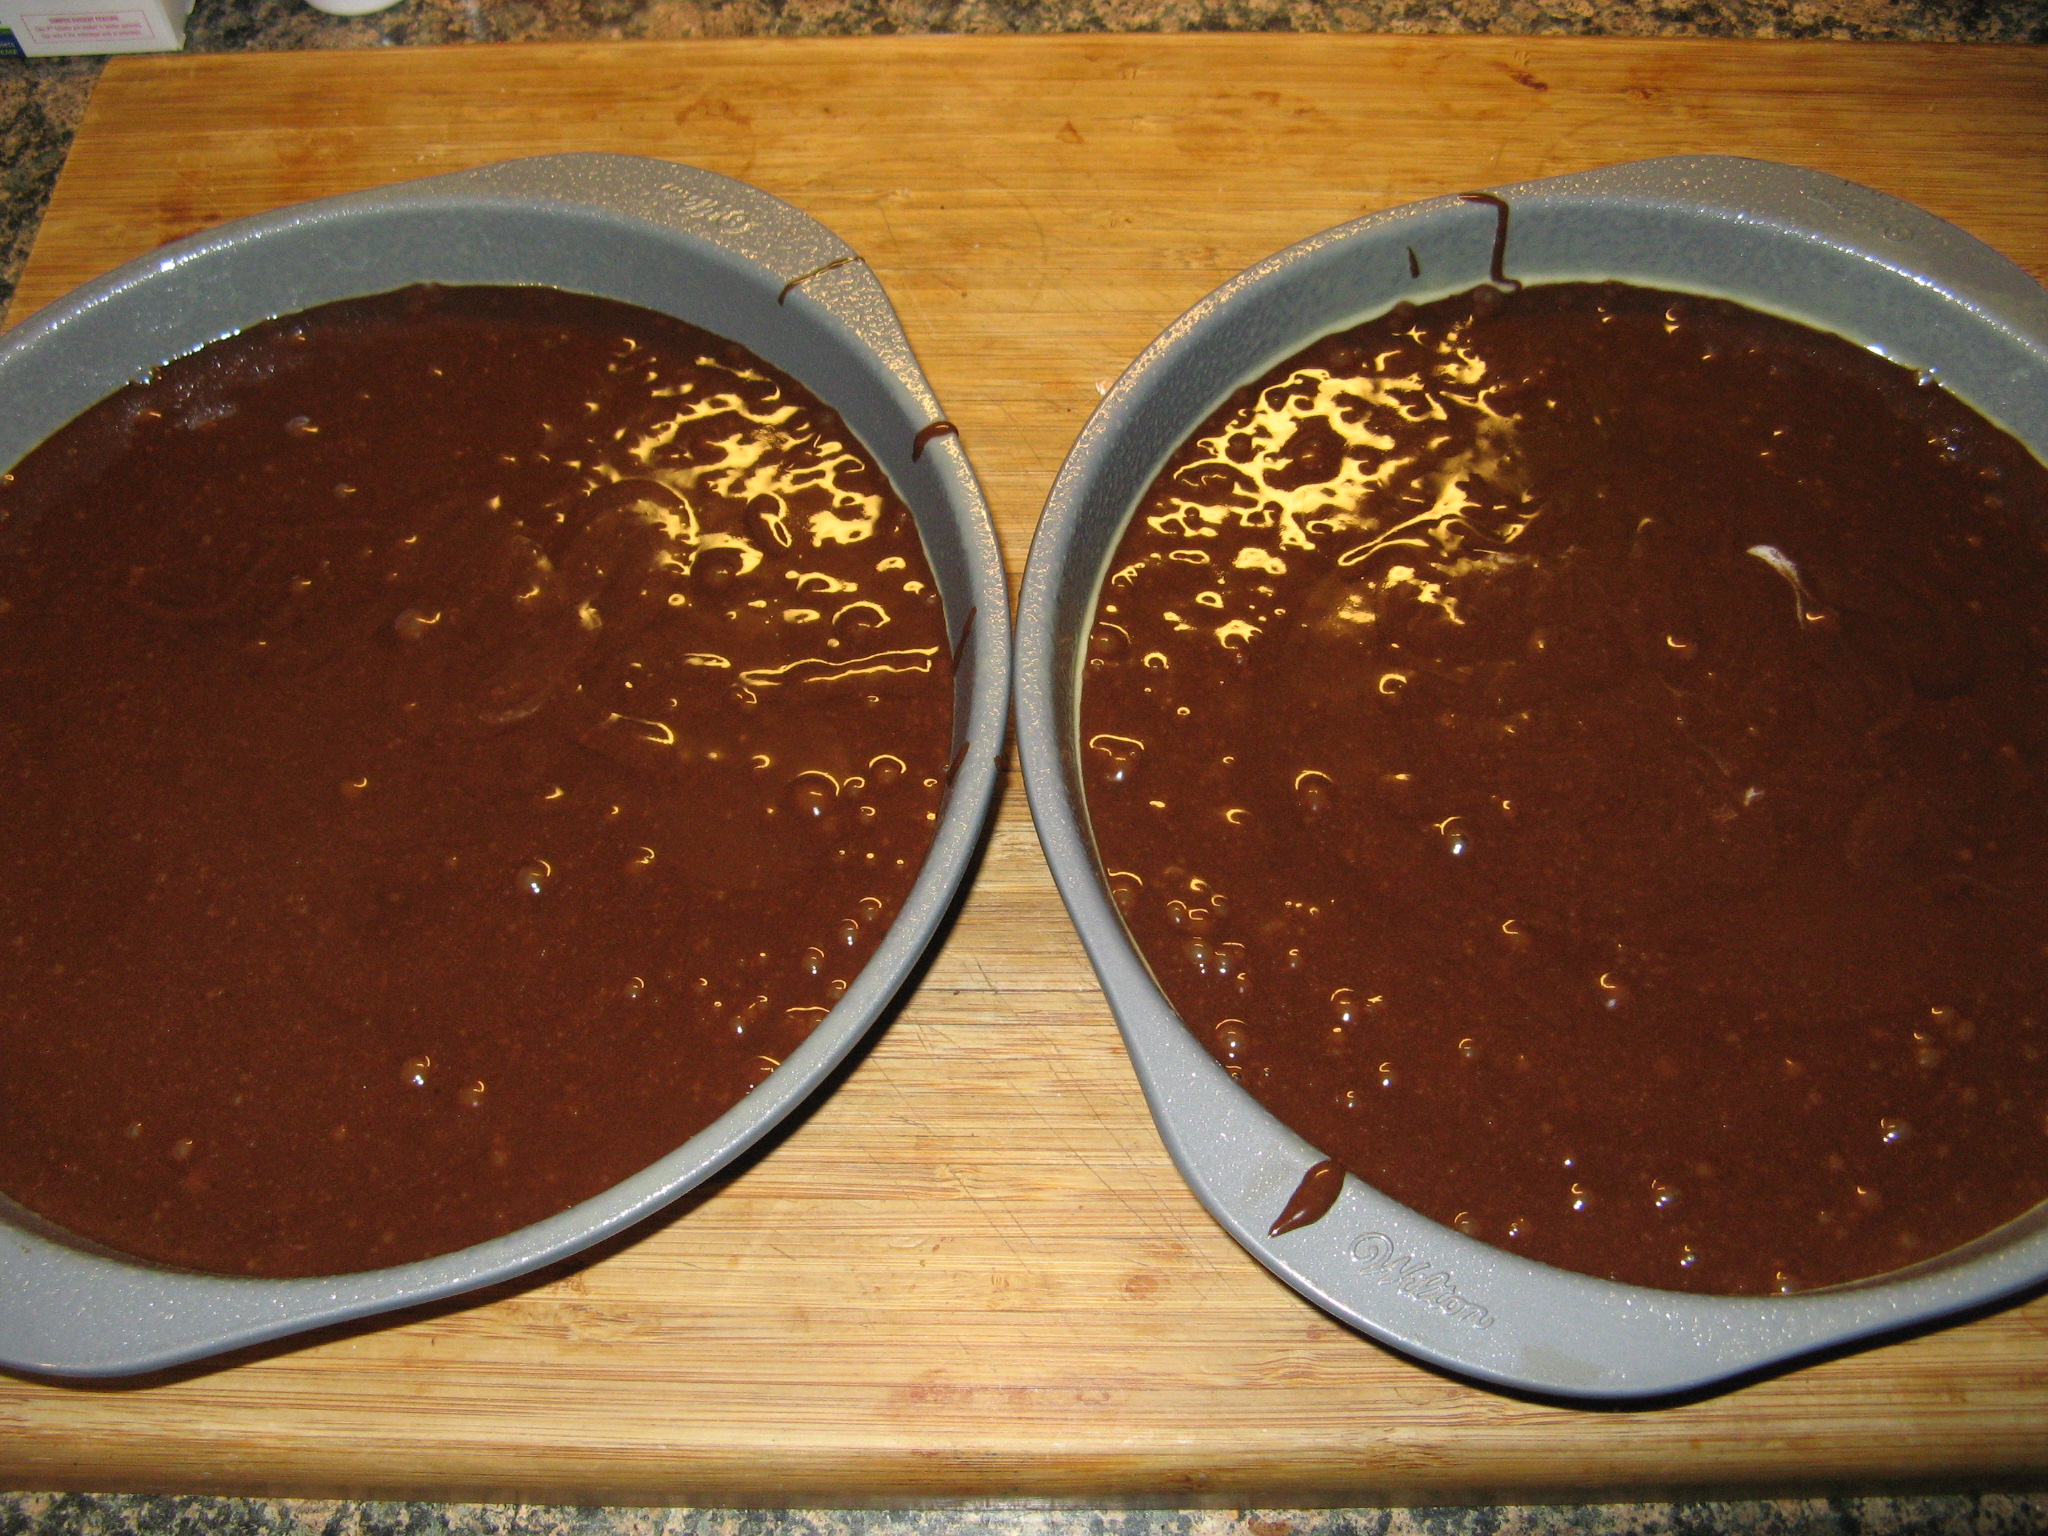
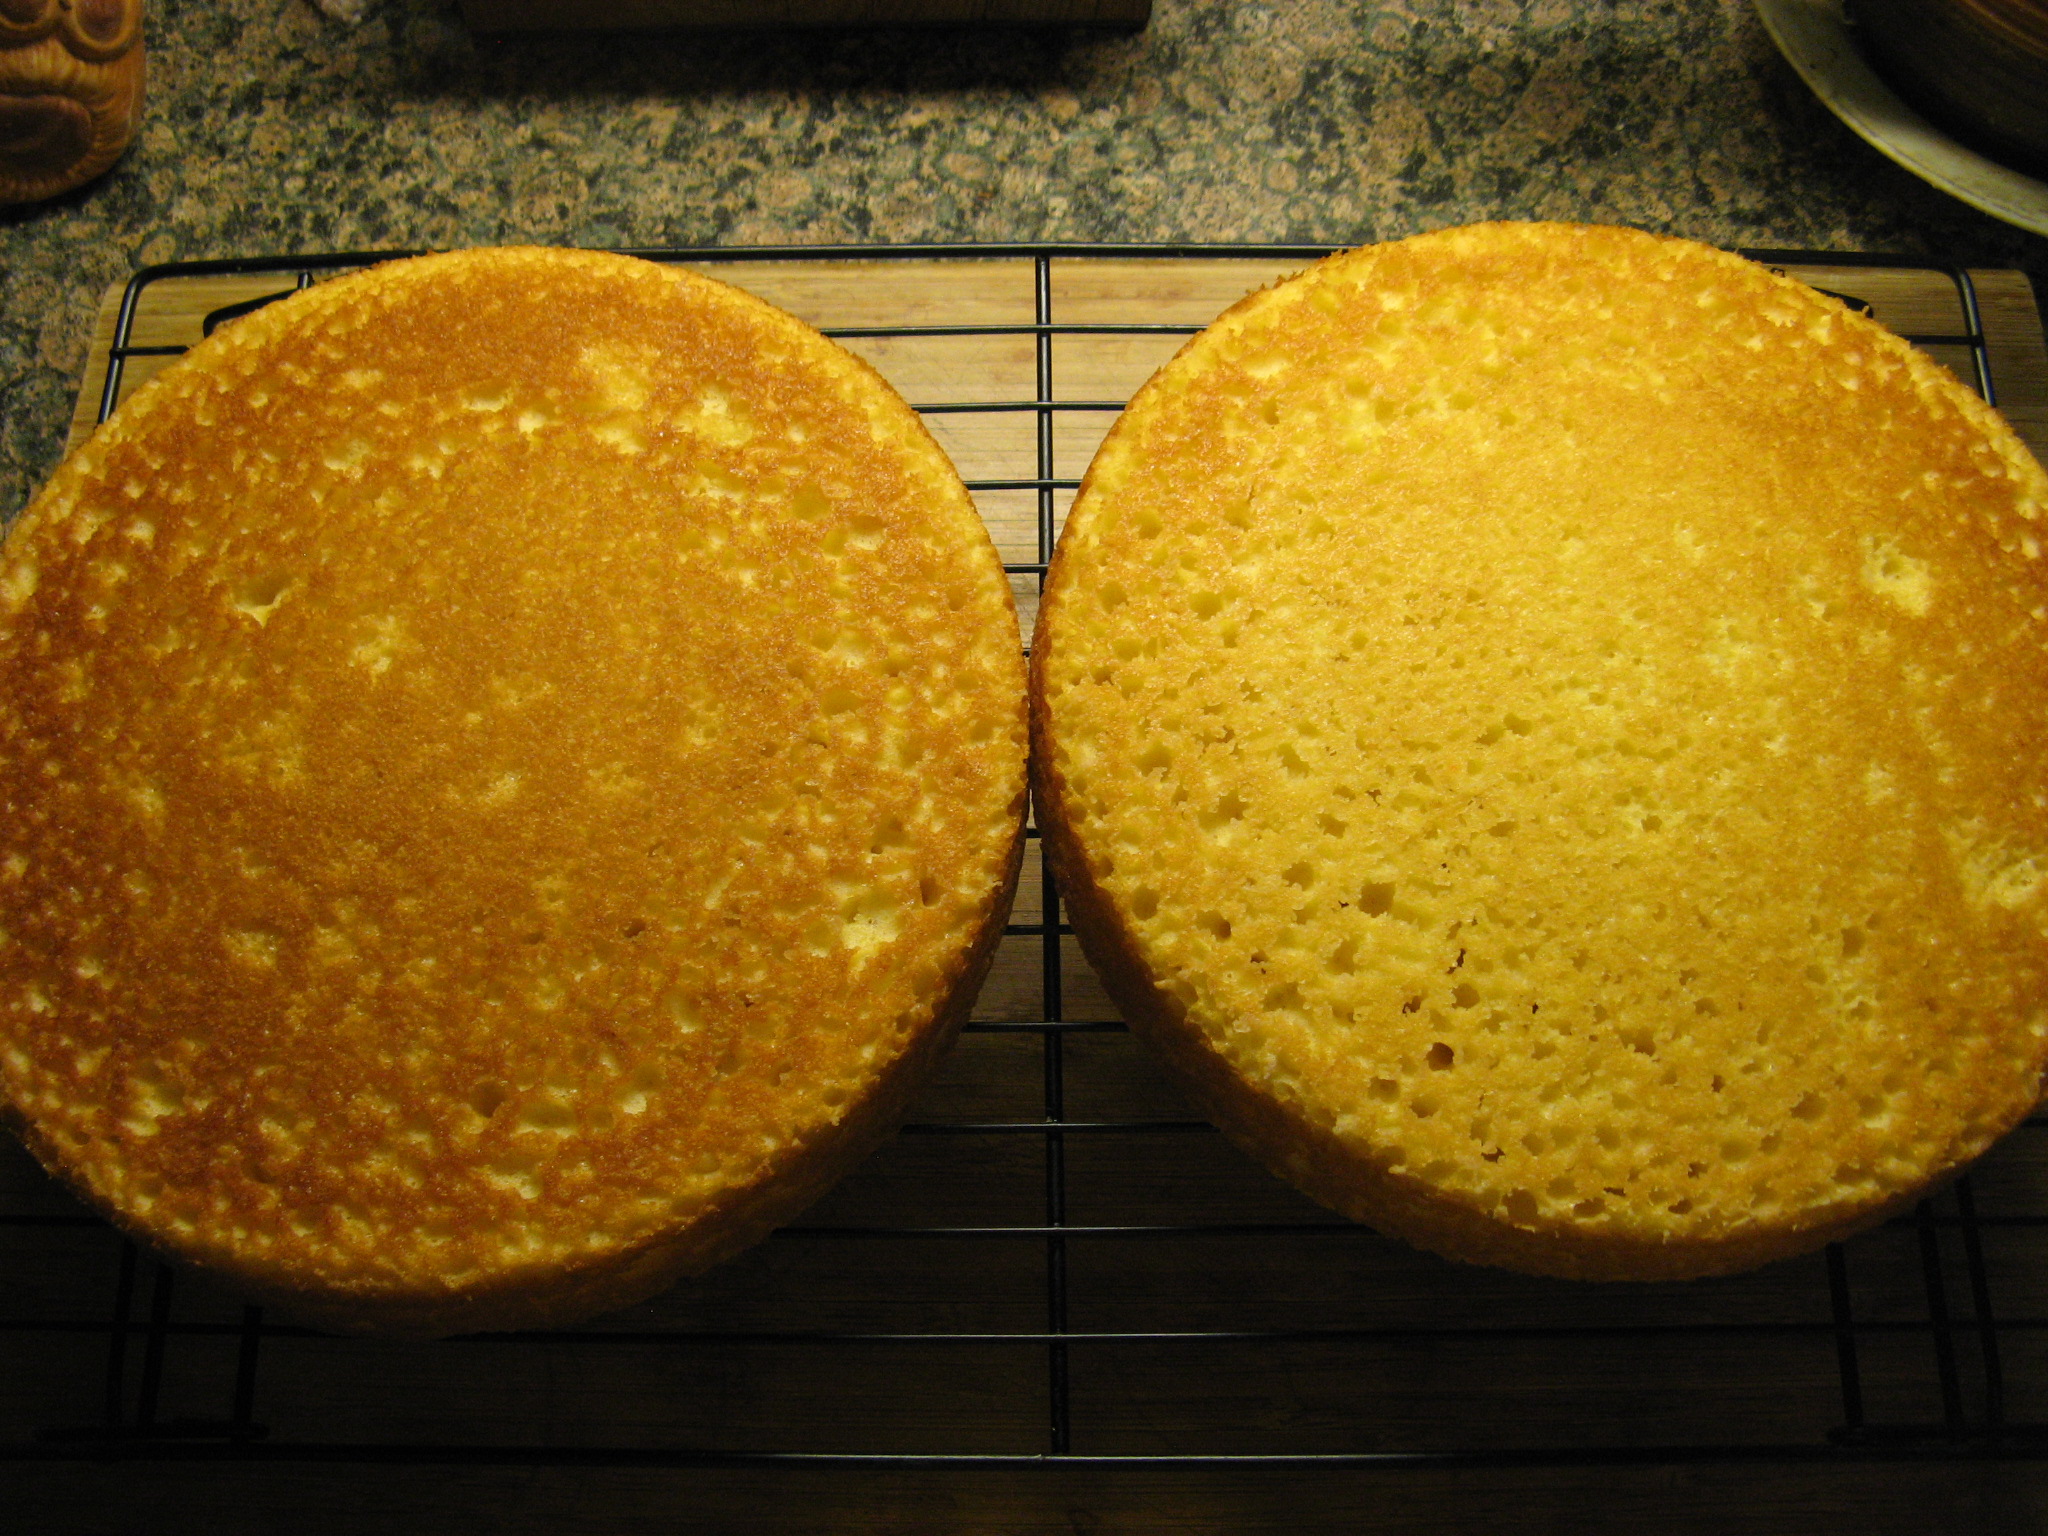
Using Betty Crocker’s Super Moist Milk Chocolate and Yellow cake mix I prepared the cakes according to the directions on the box.

IMG_2215 IMG_2216

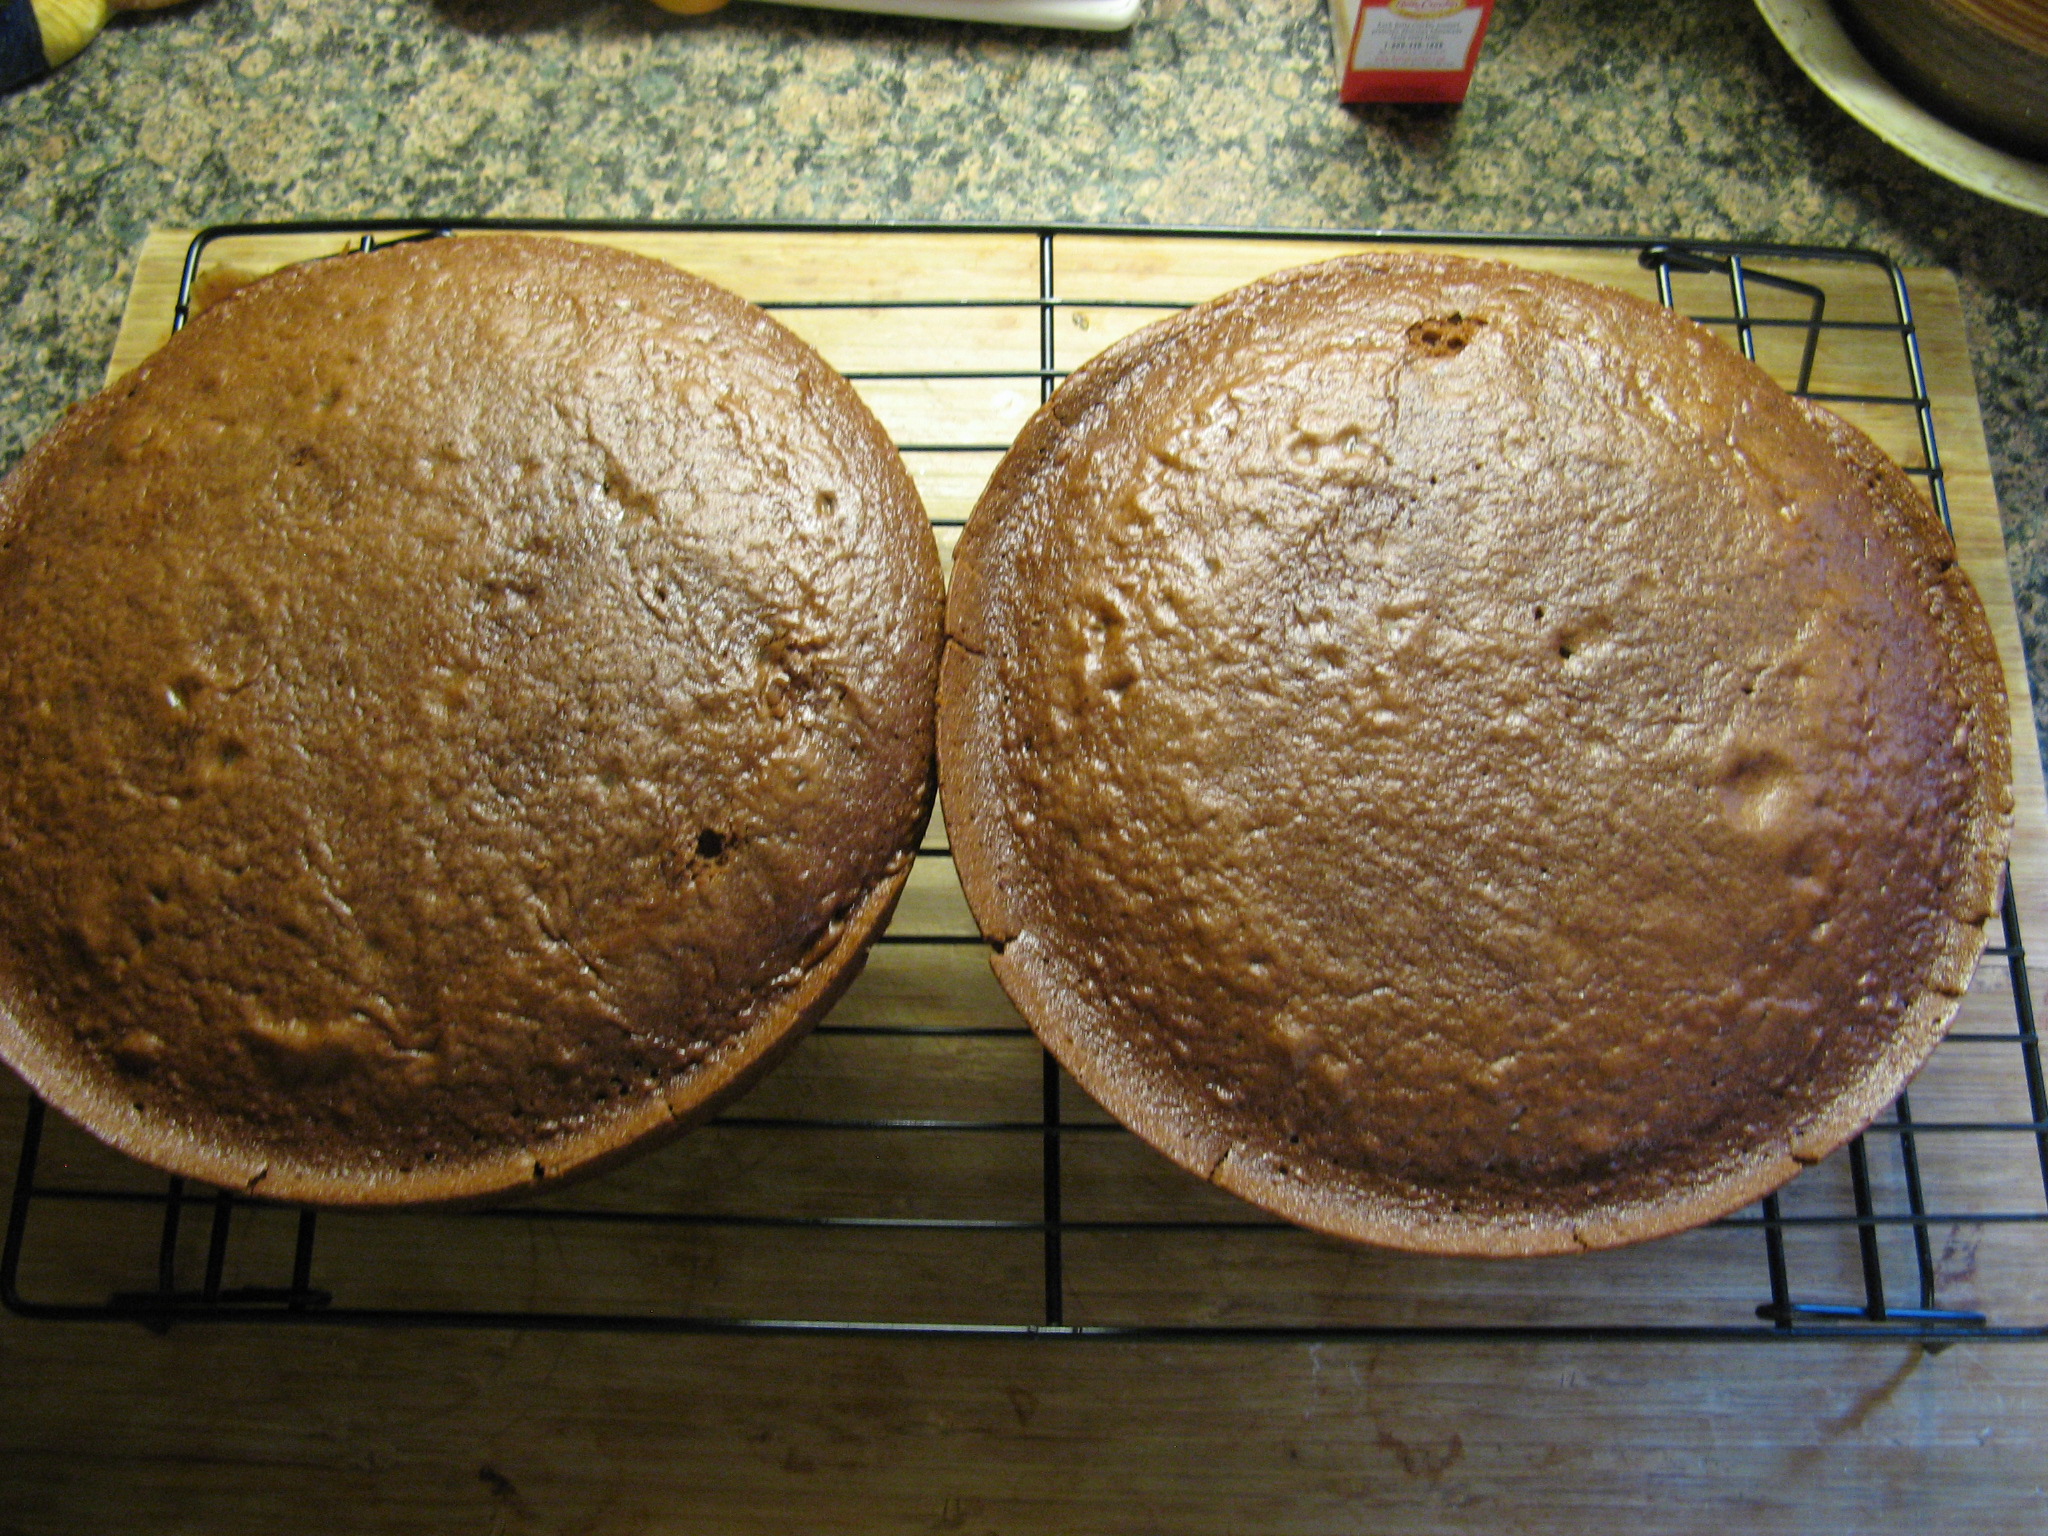
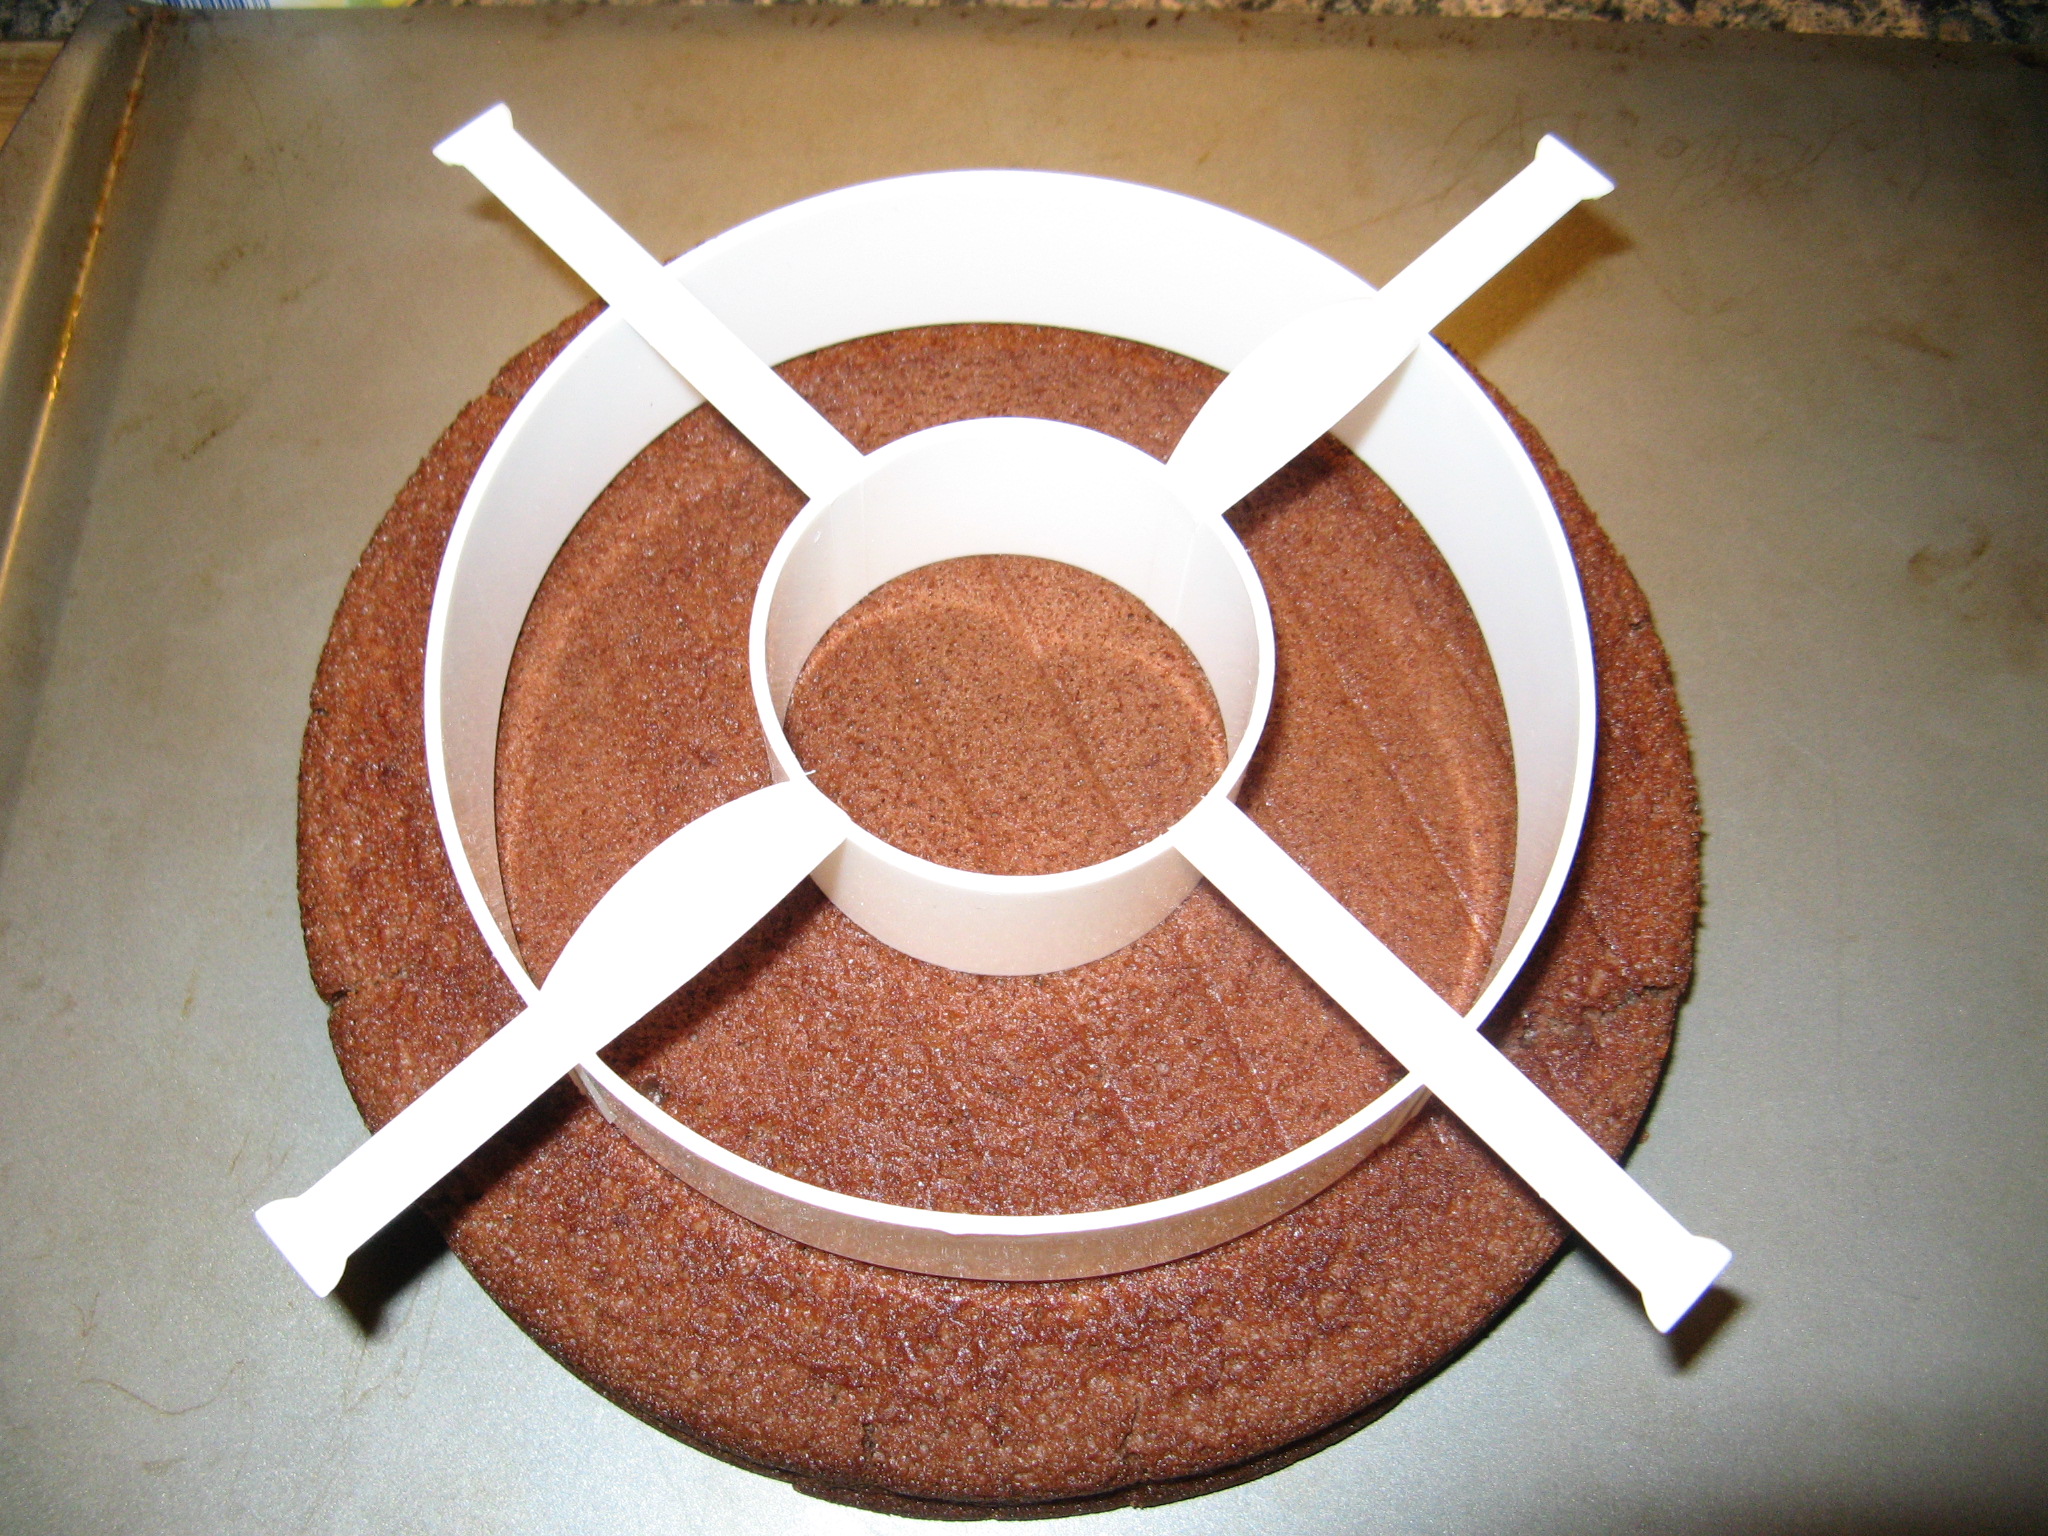
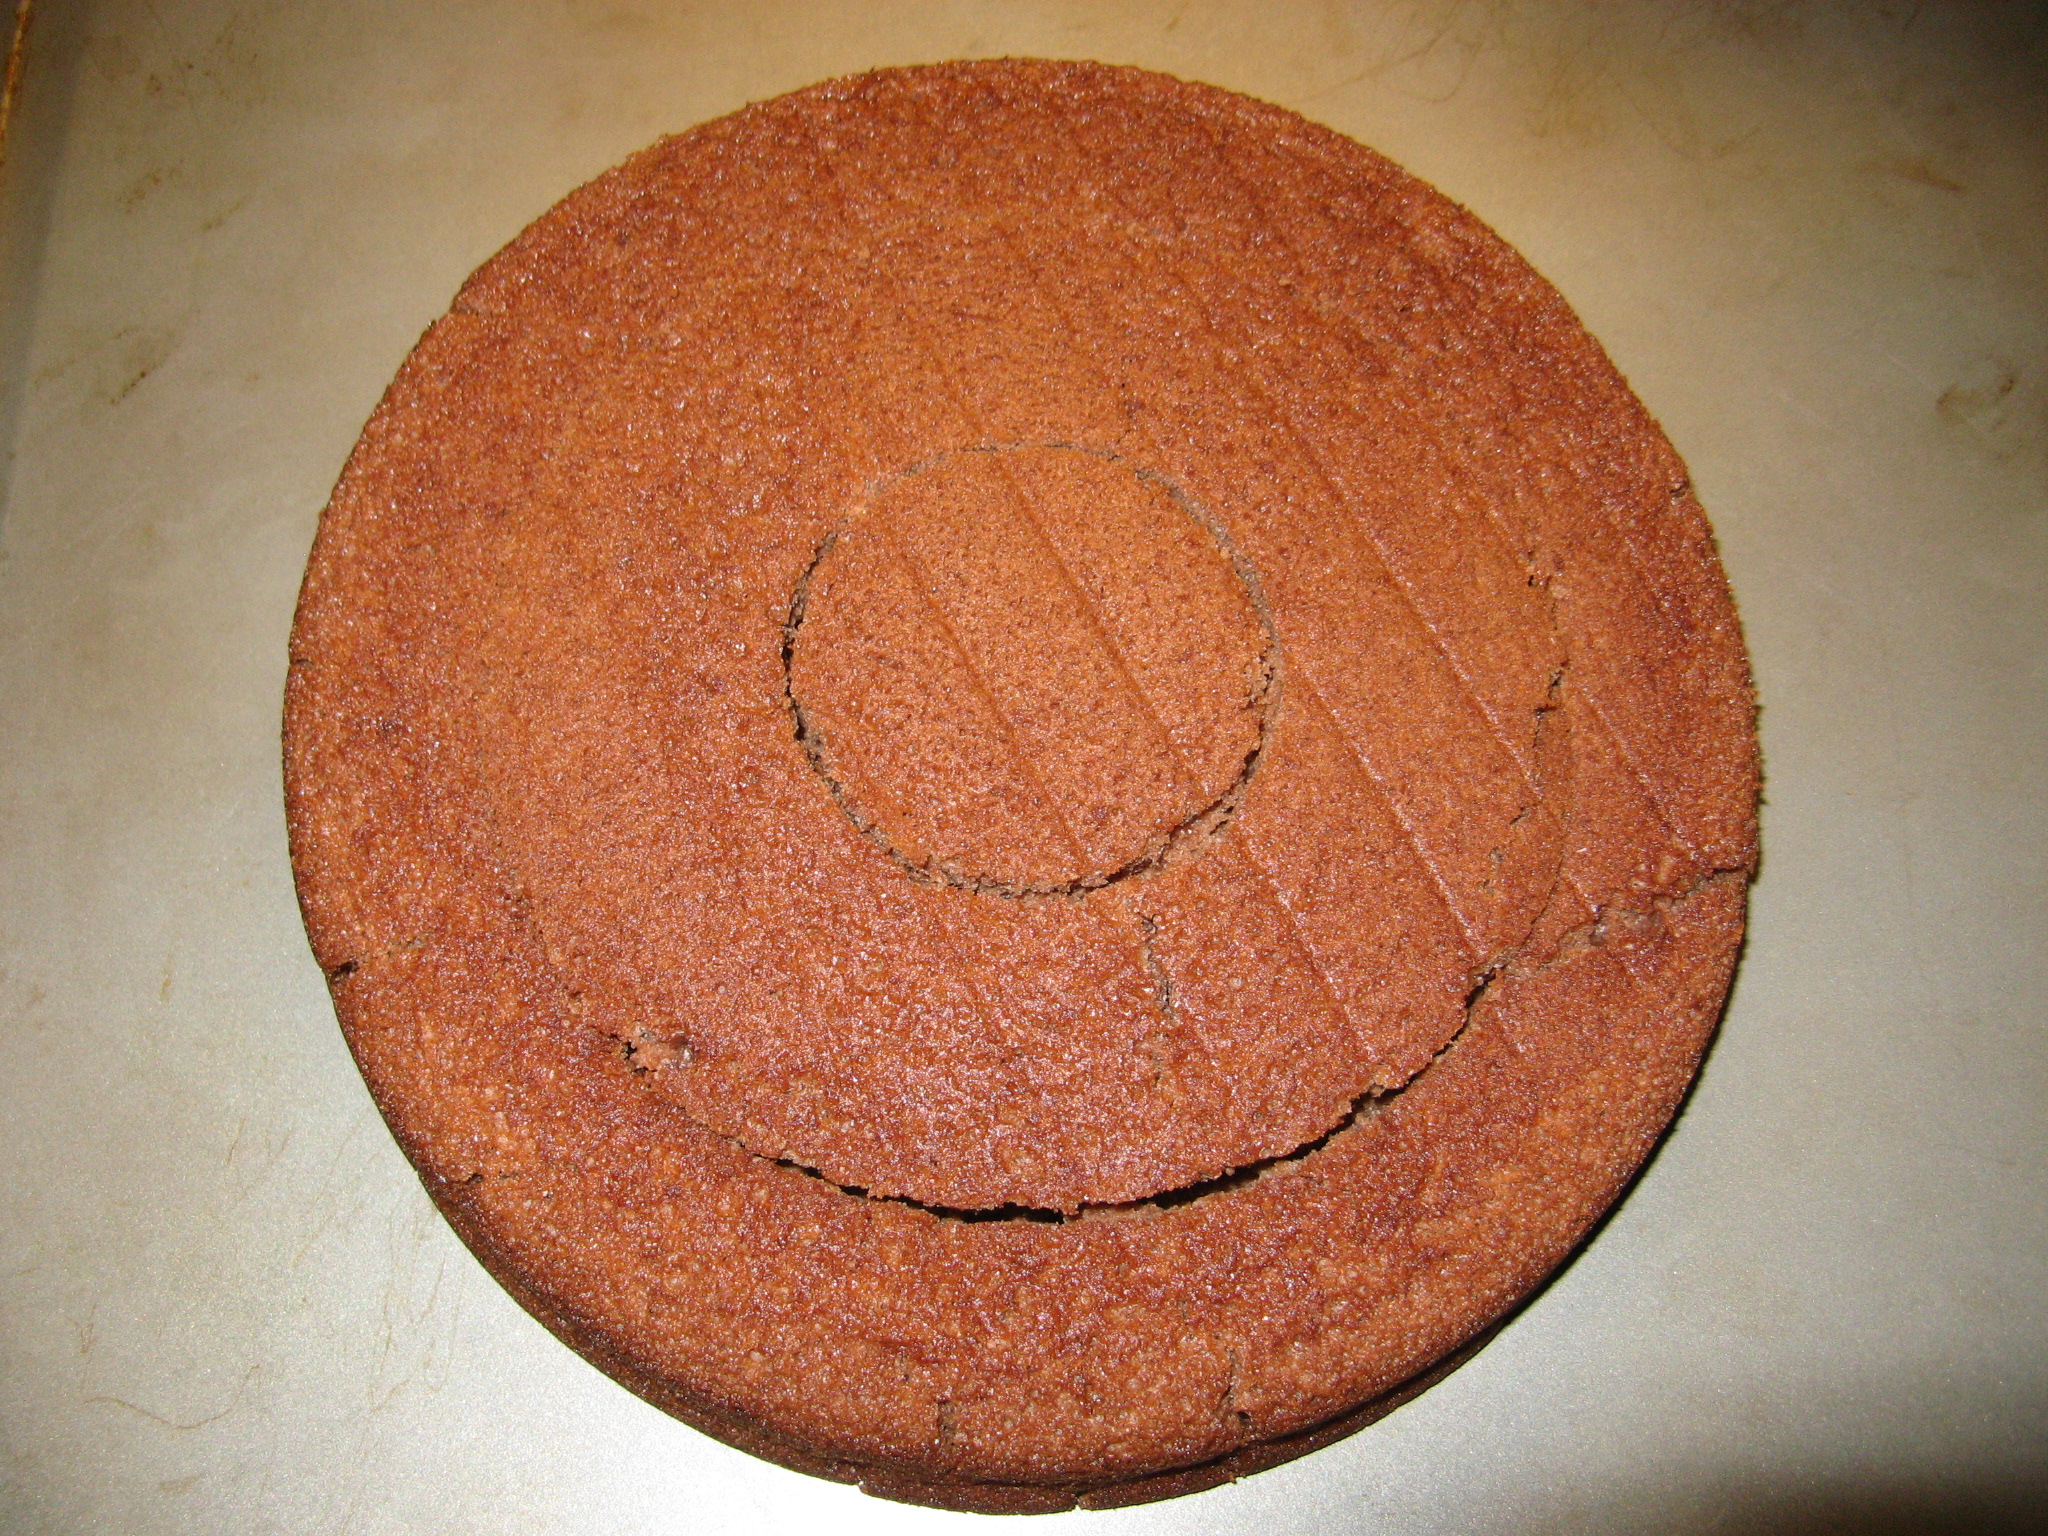
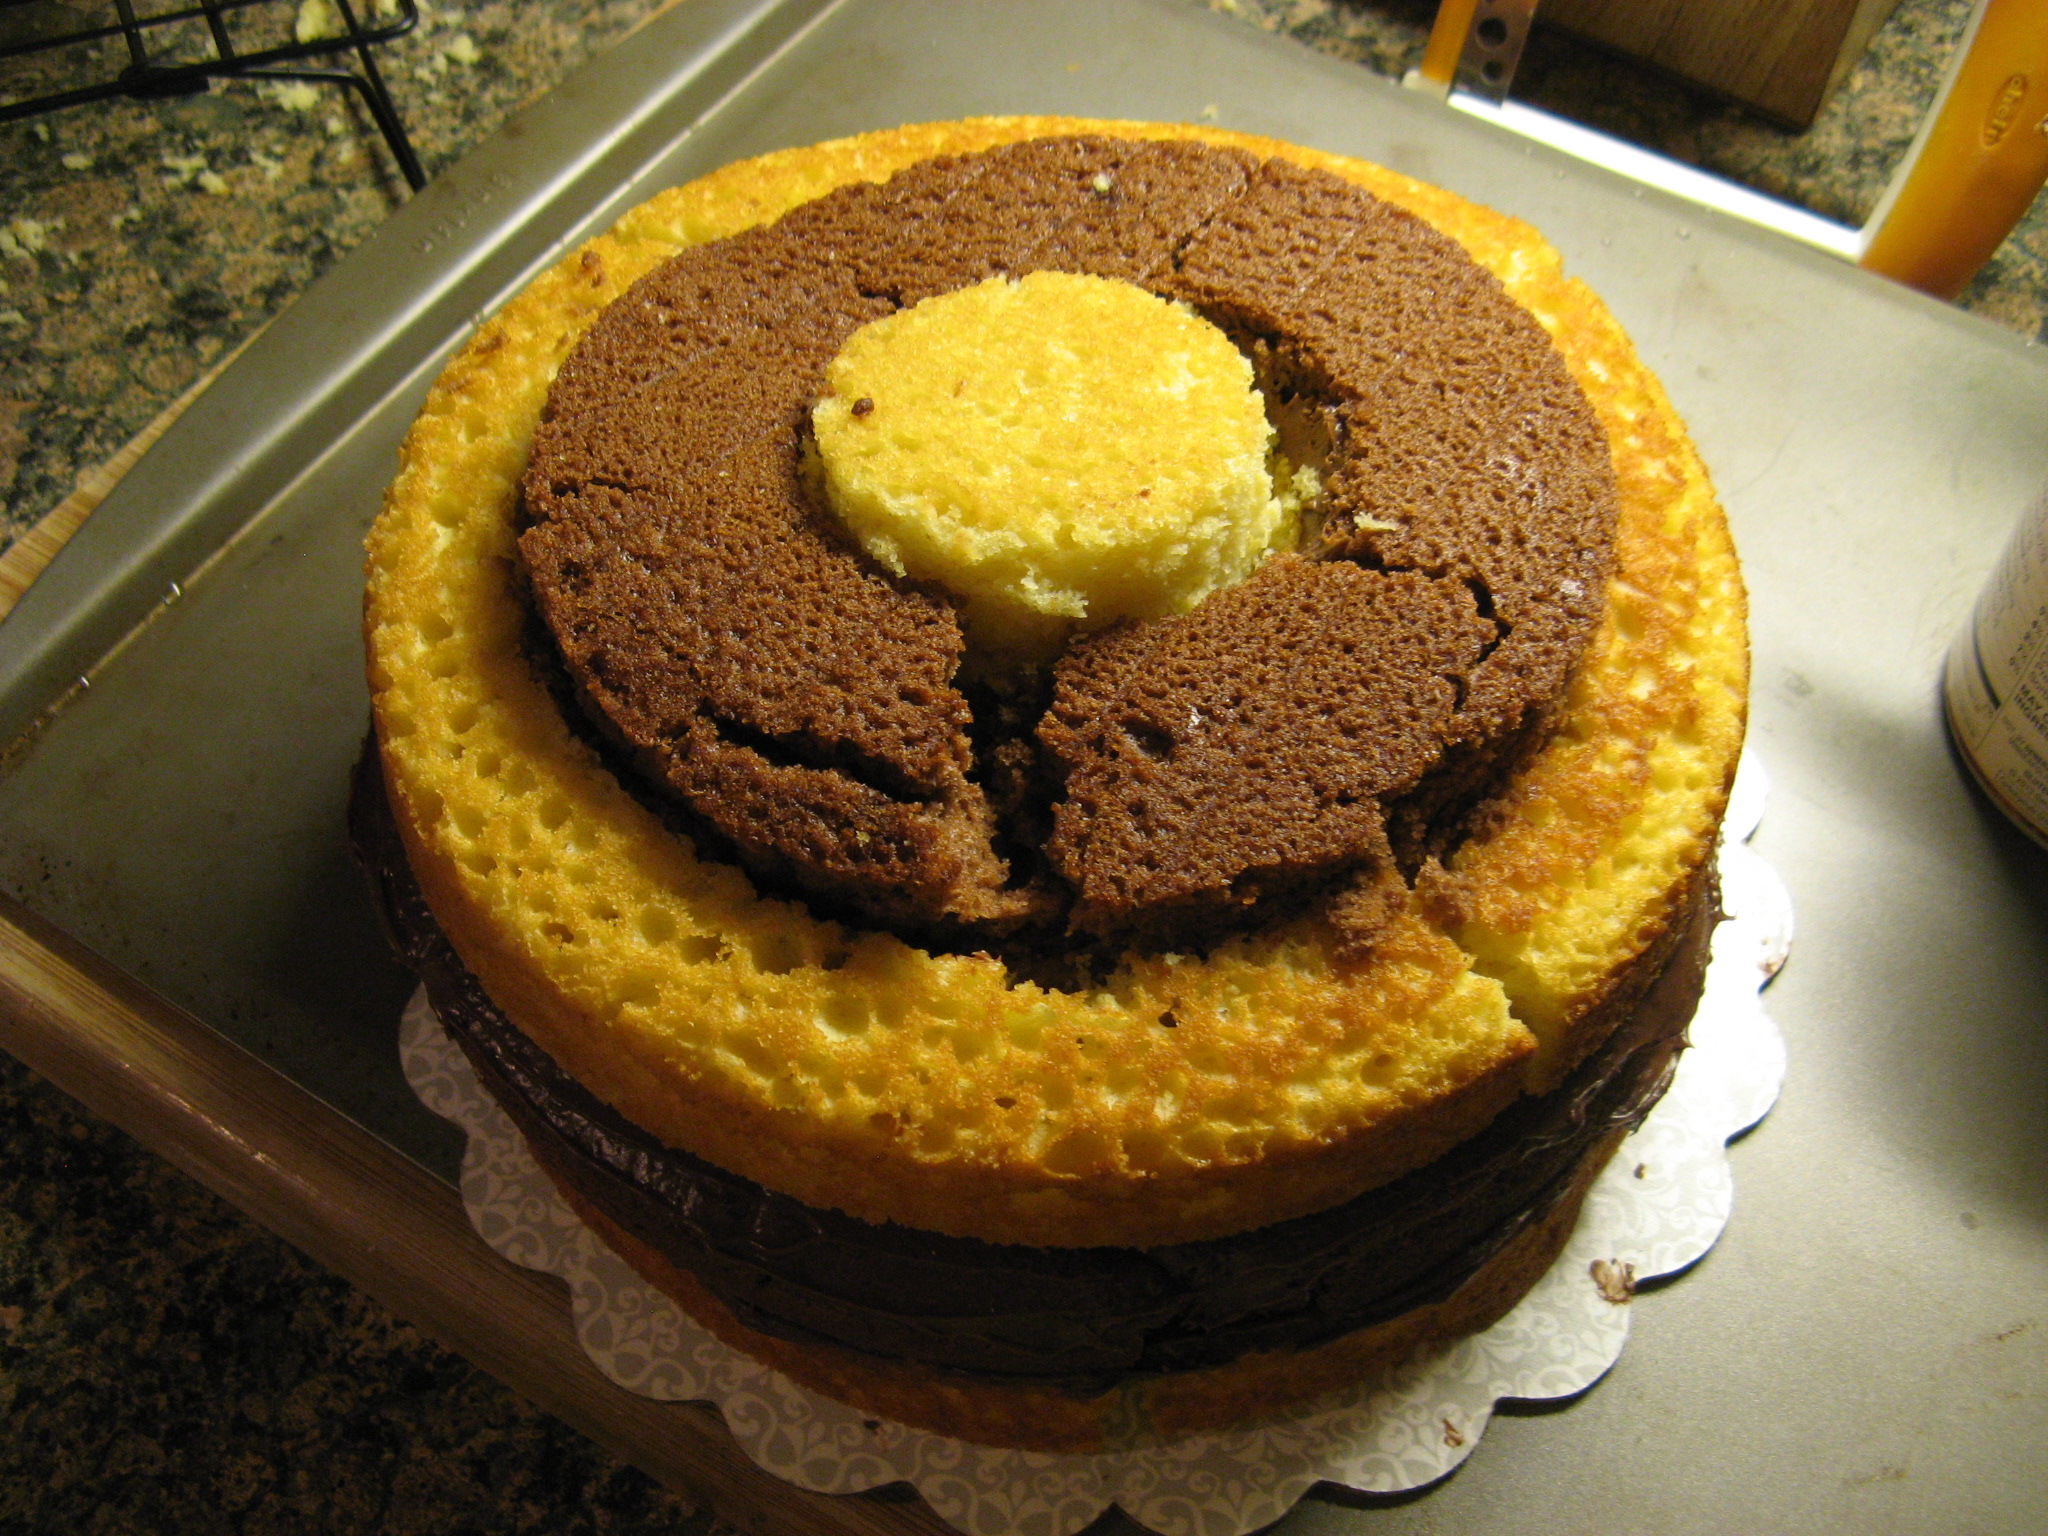
After letting the cakes cool I took the ring separator and sliced each of the cakes into three rings.

IMG_2218 IMG_2219

And then the messy part began… Assembling. As you can see some of the rings broke up a little, but like I said frosting covered up all the little imperfections. To make sure the rings of the cake wouldn’t fall apart when slicing I “glued” them together with icing along the inside of each ring.

IMG_2220

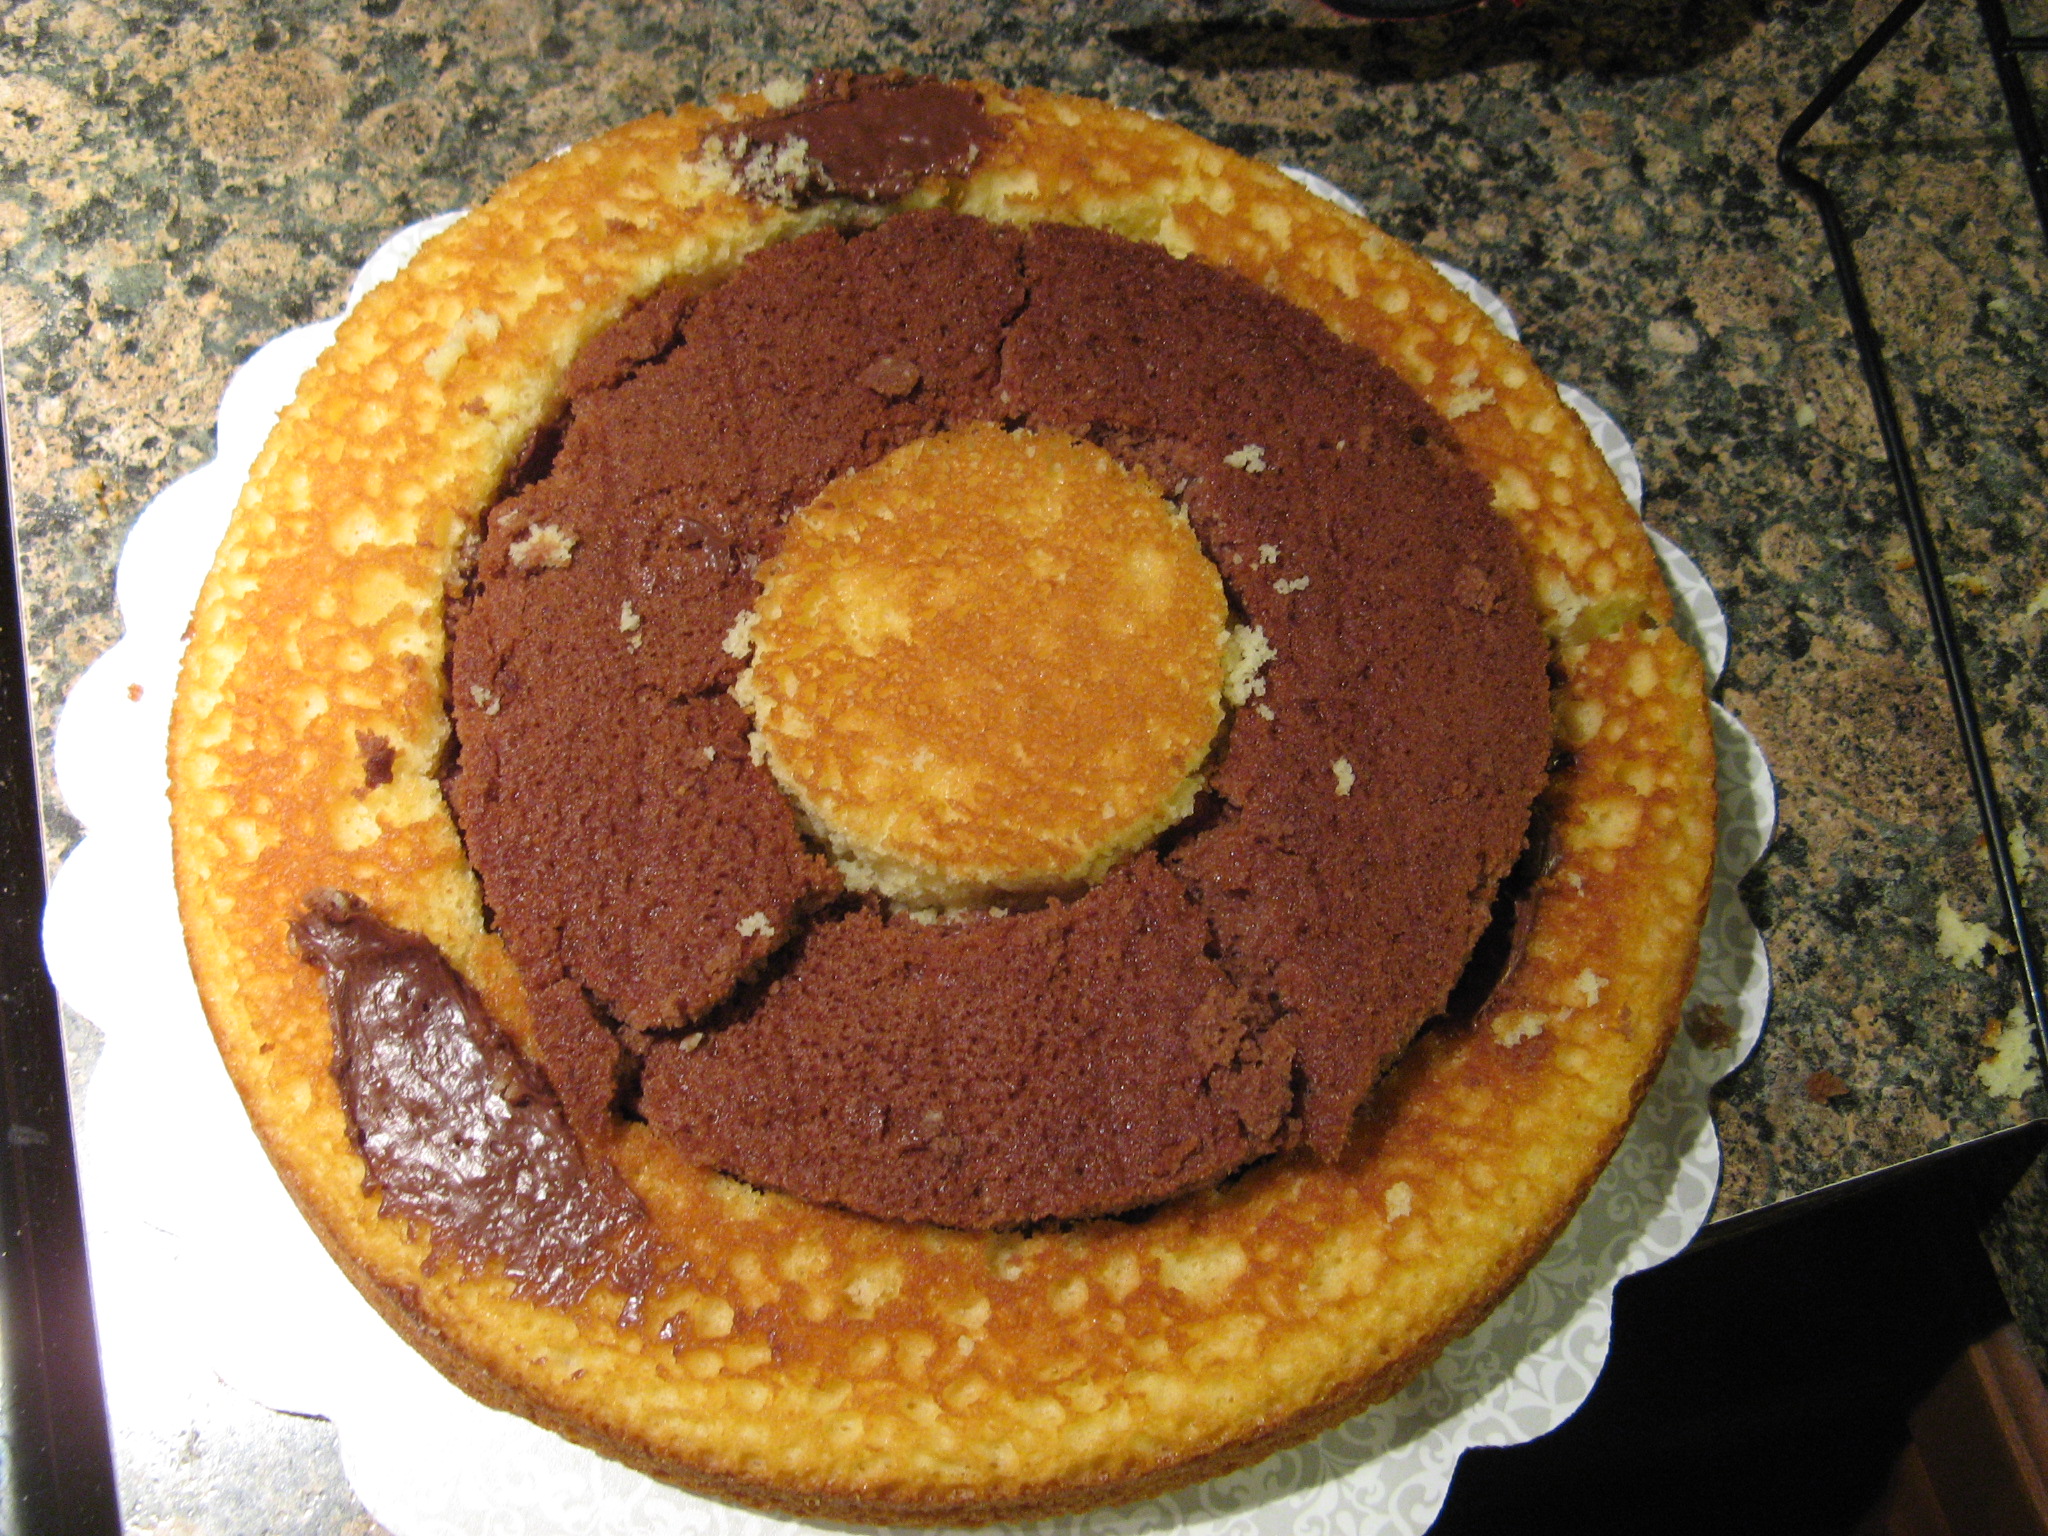
After covering the first layer with frosting I added the second layer and then spread frosting on it as well.

IMG_2223

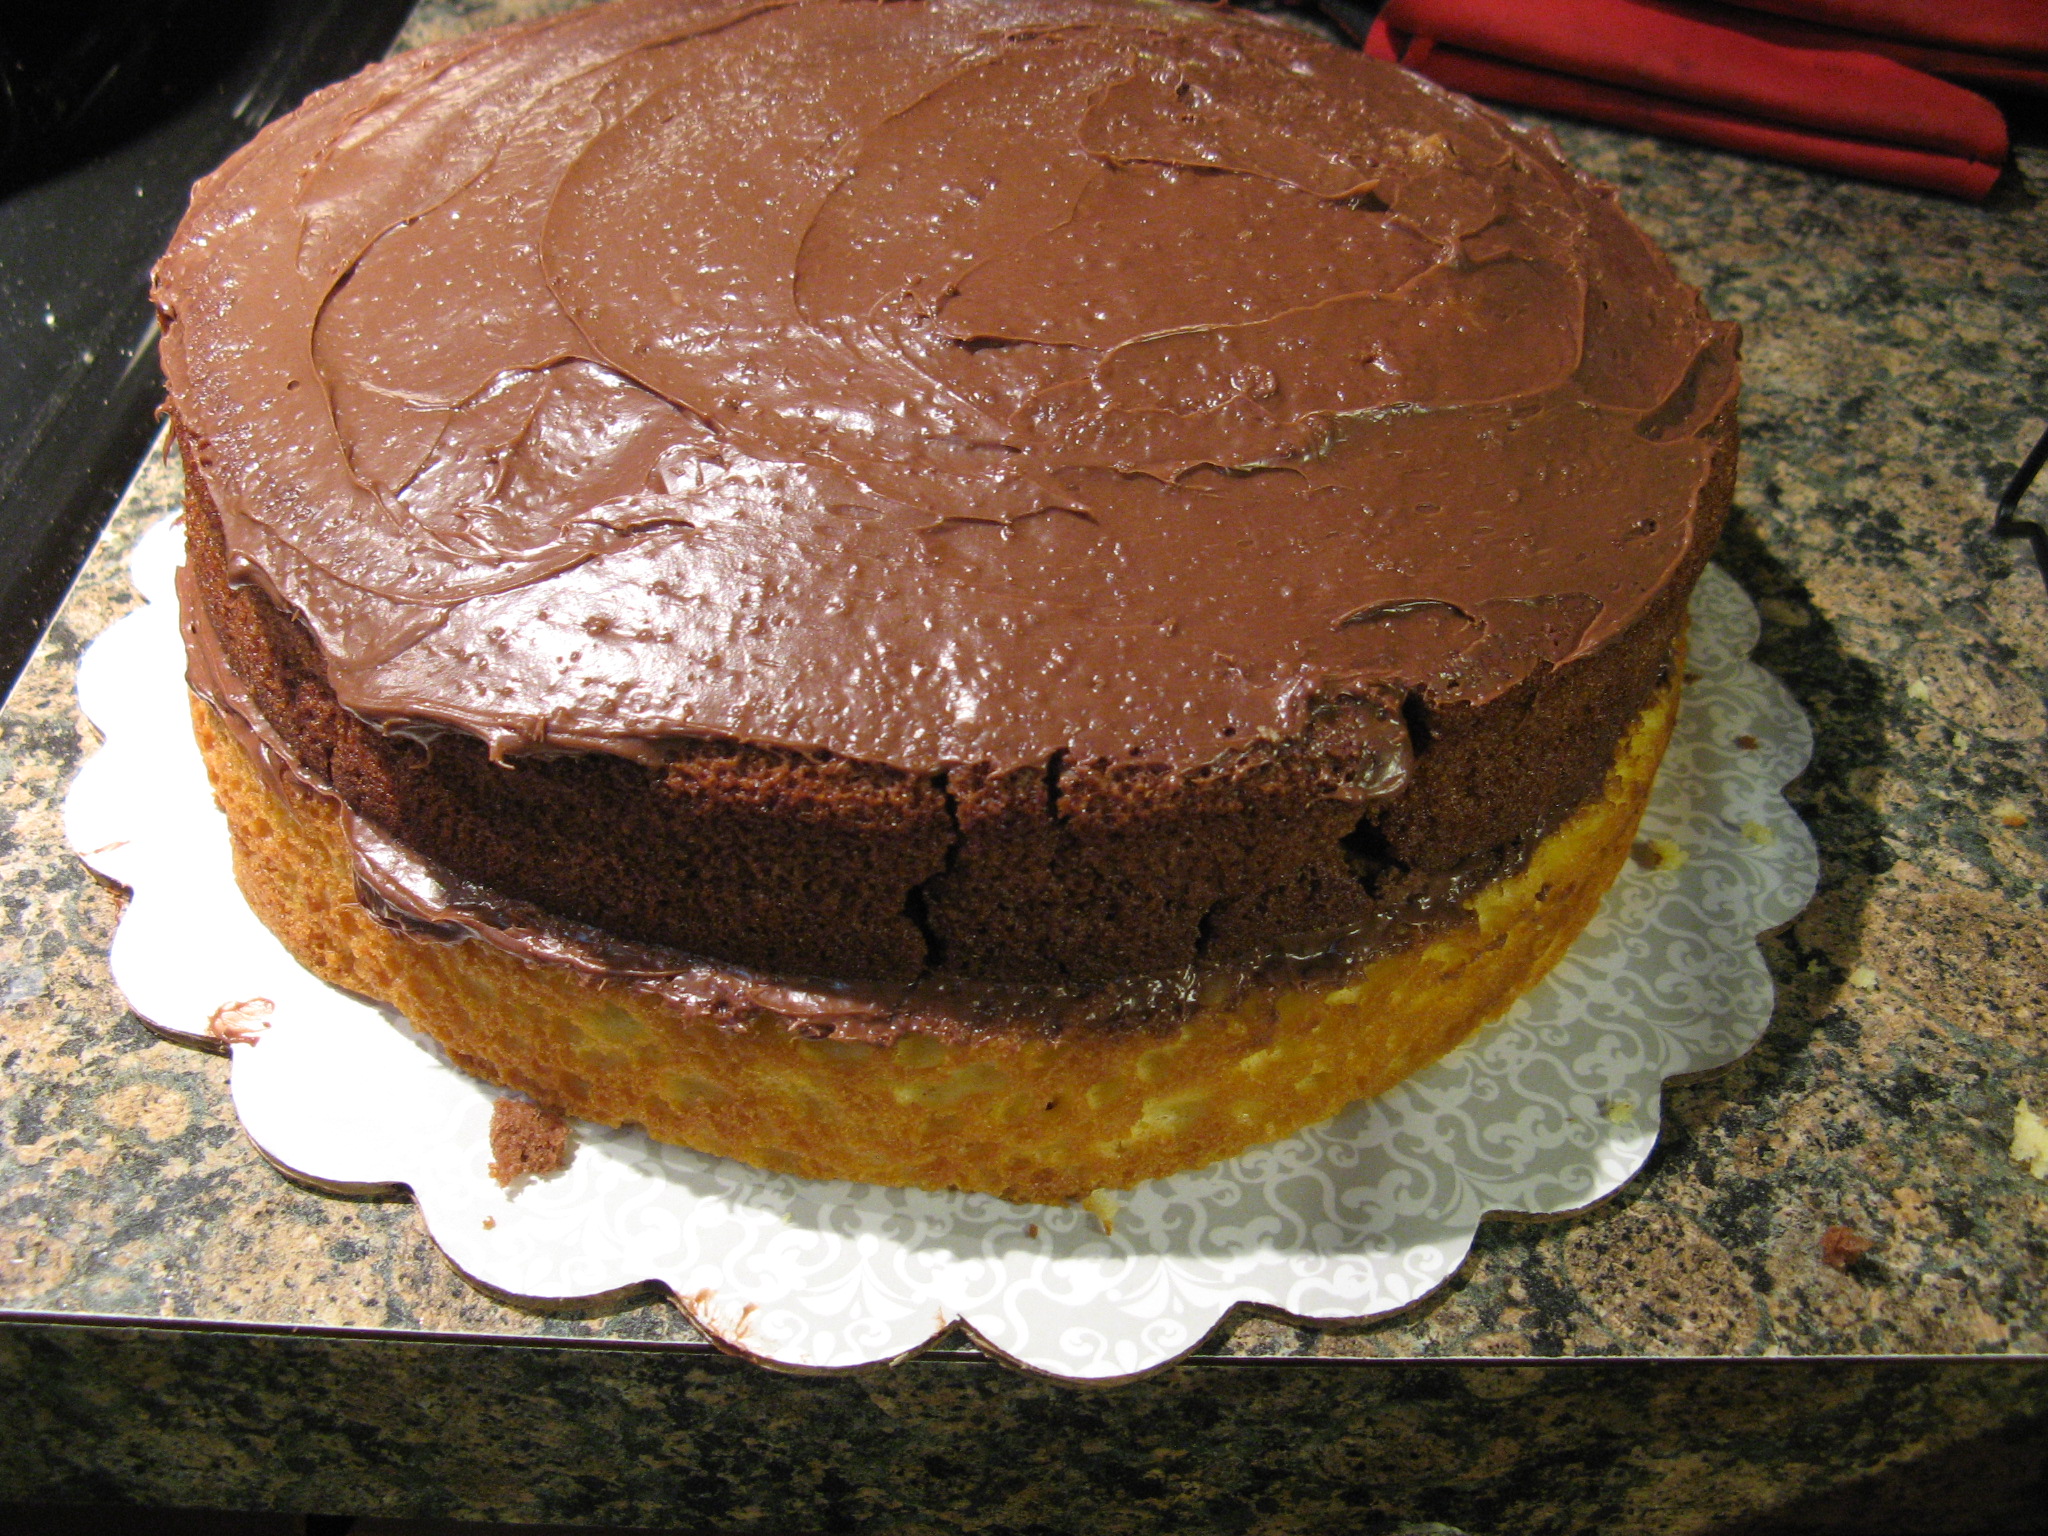
And finally the third layer…

IMG_2224

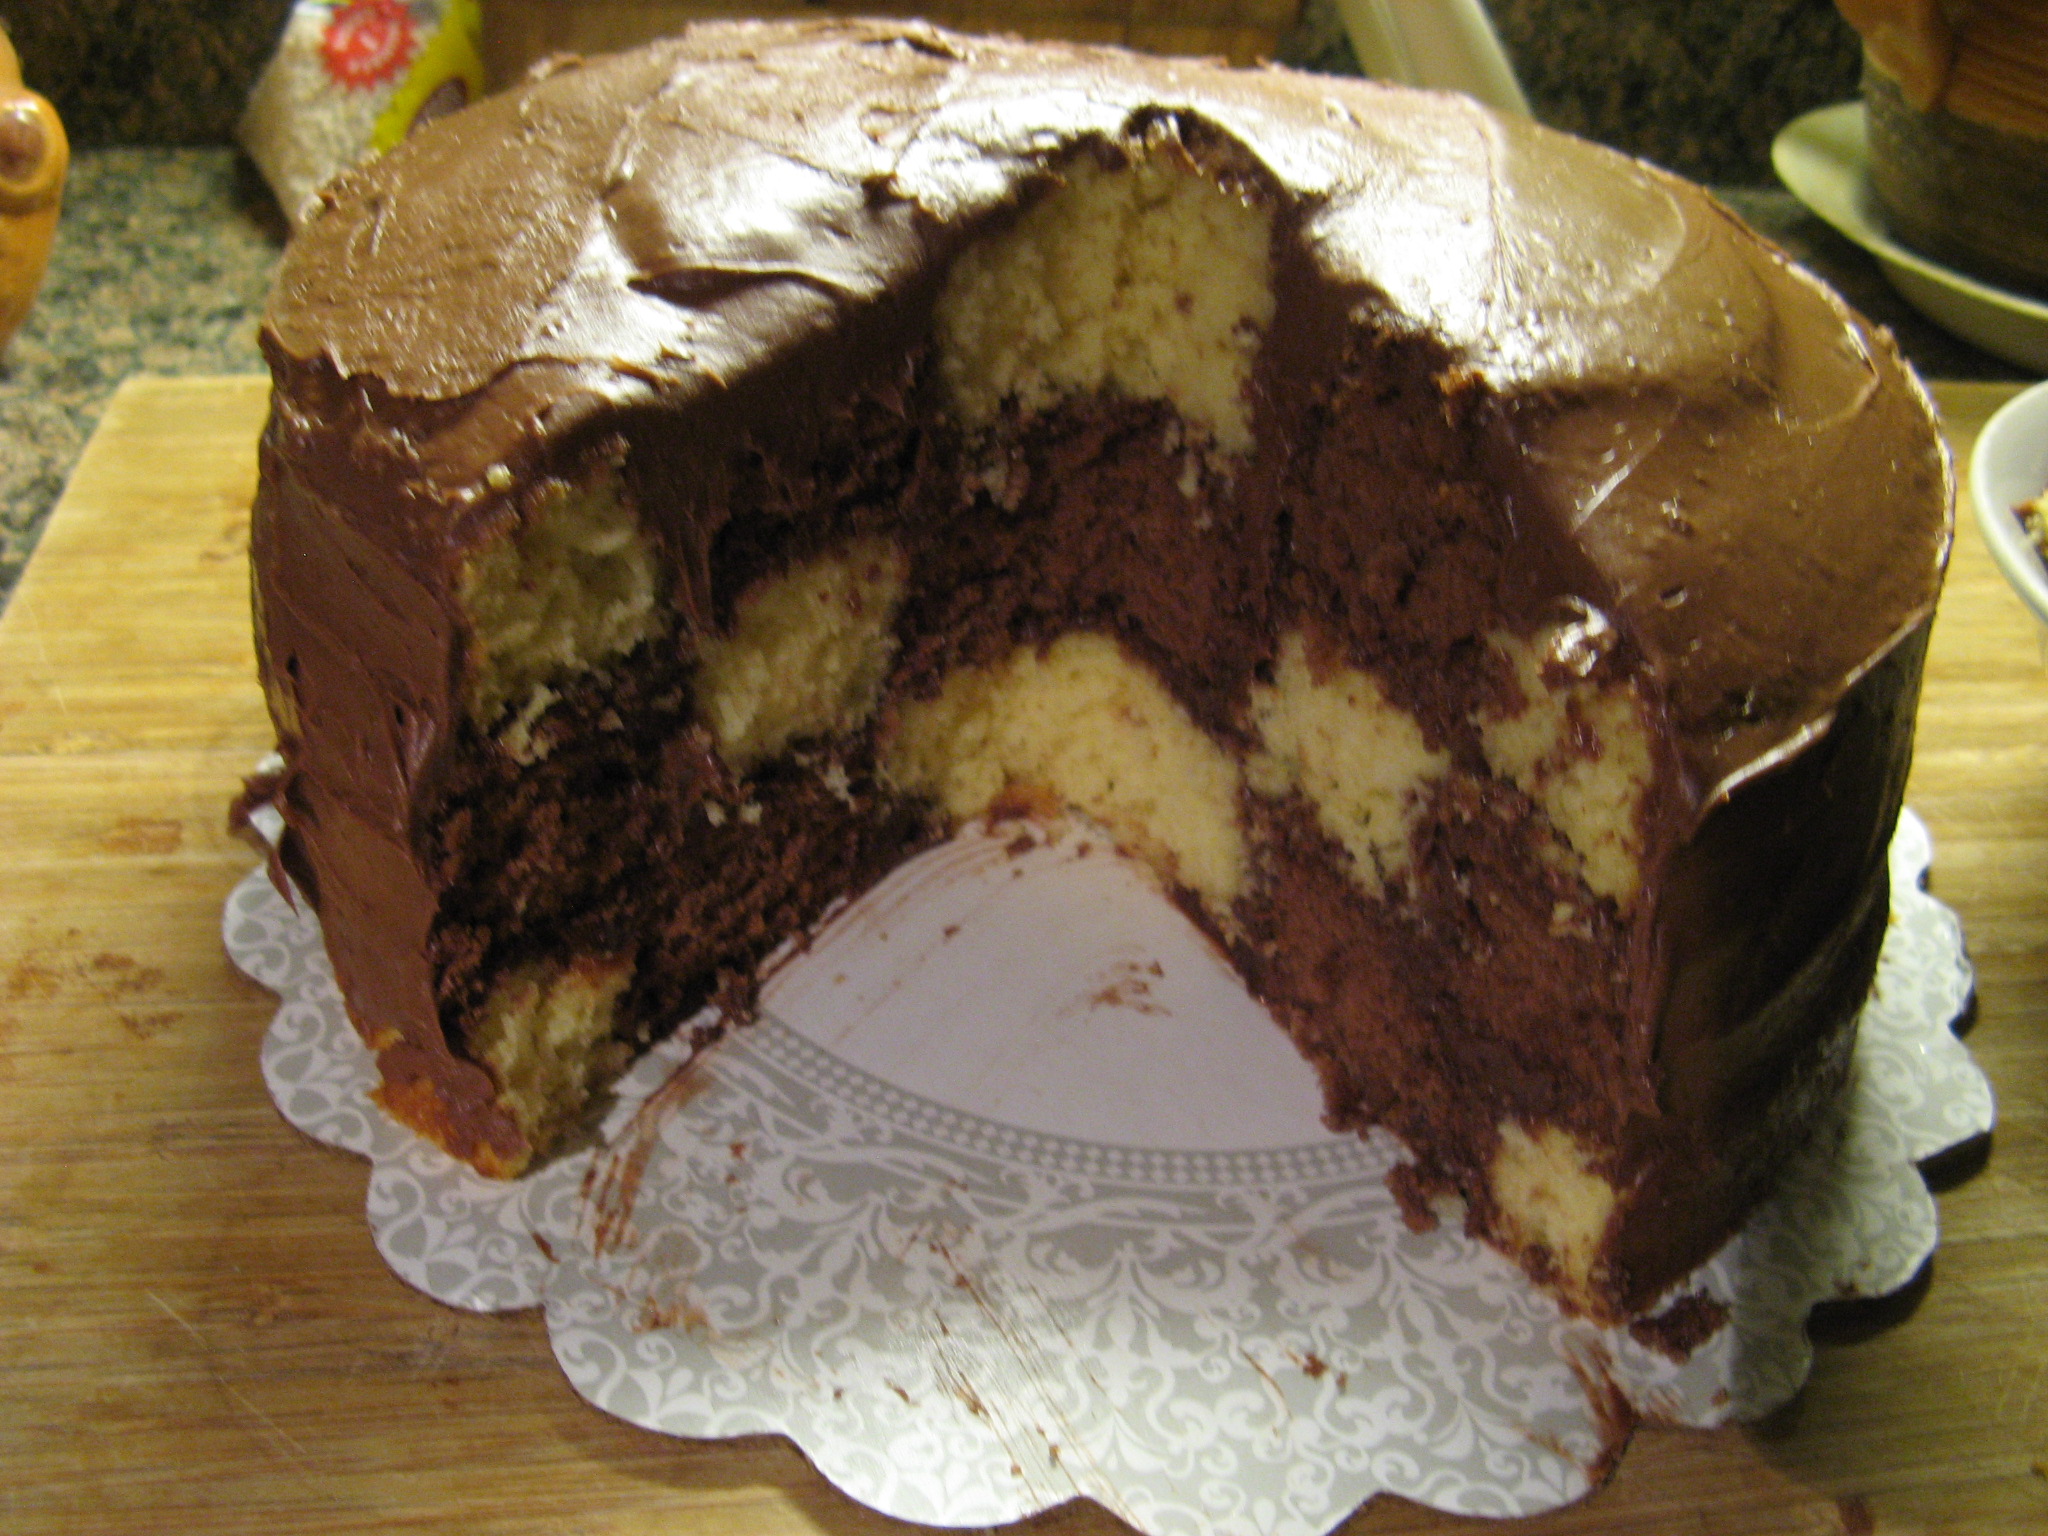
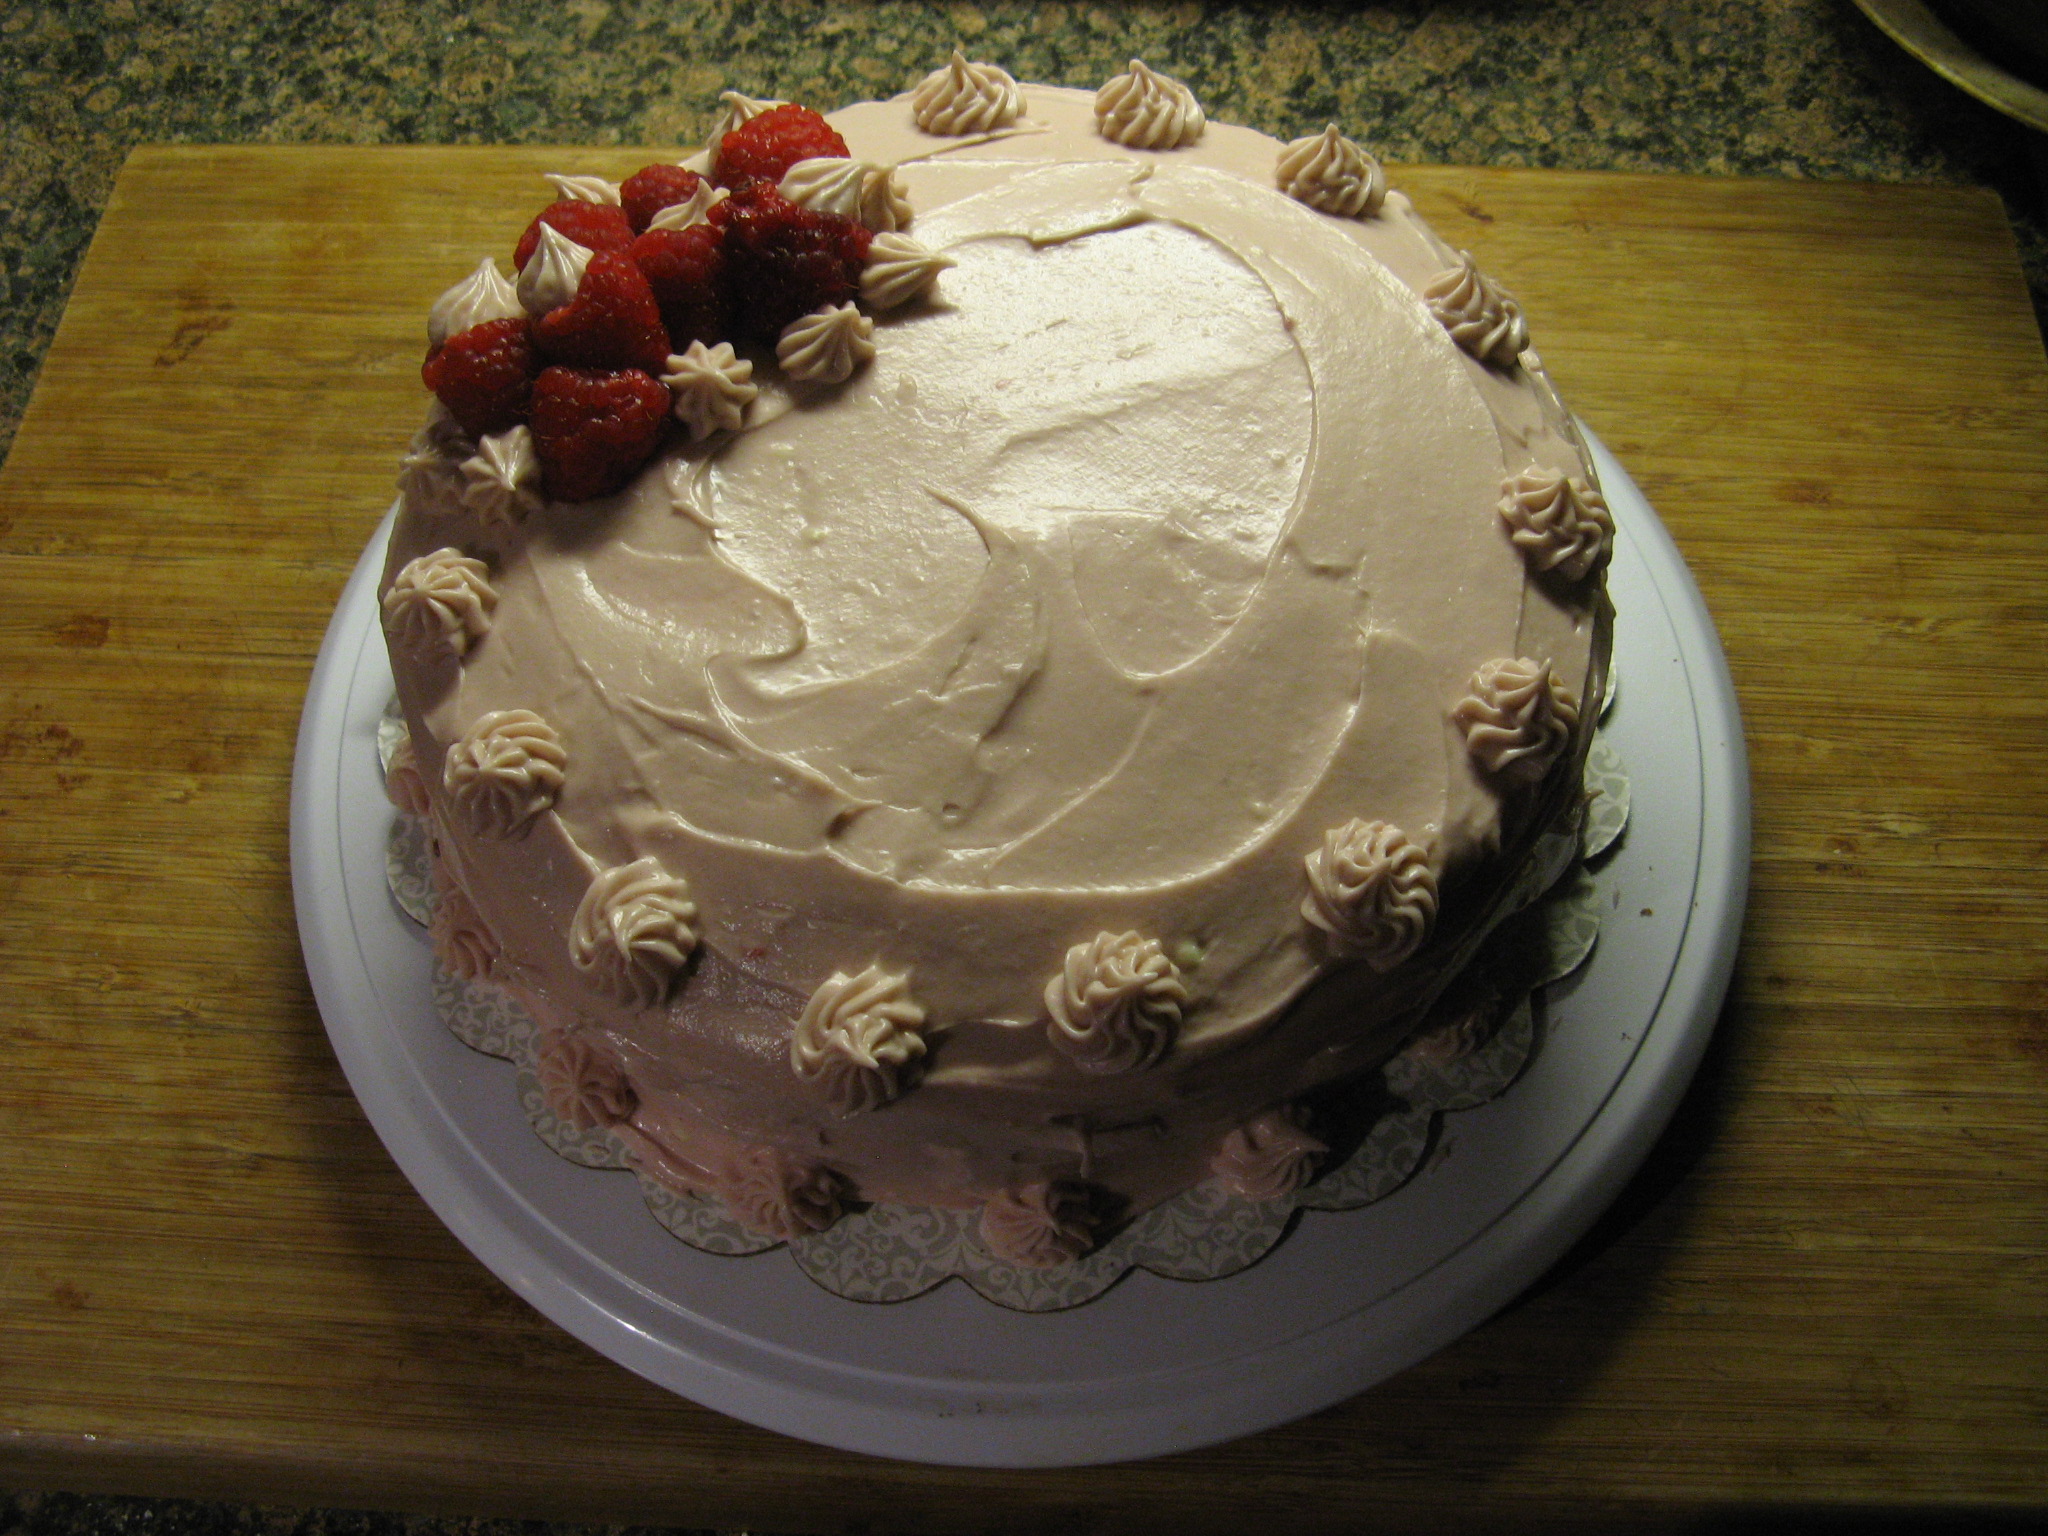
I’ll admit the final product was a bit lopsided and could have used a little extra frosting (I used two containers of Betty Crocker’s Milk Chocolate Frosting to get to this point) but this was an afternoon whim of baking to see if the technique would work.

IMG_2225

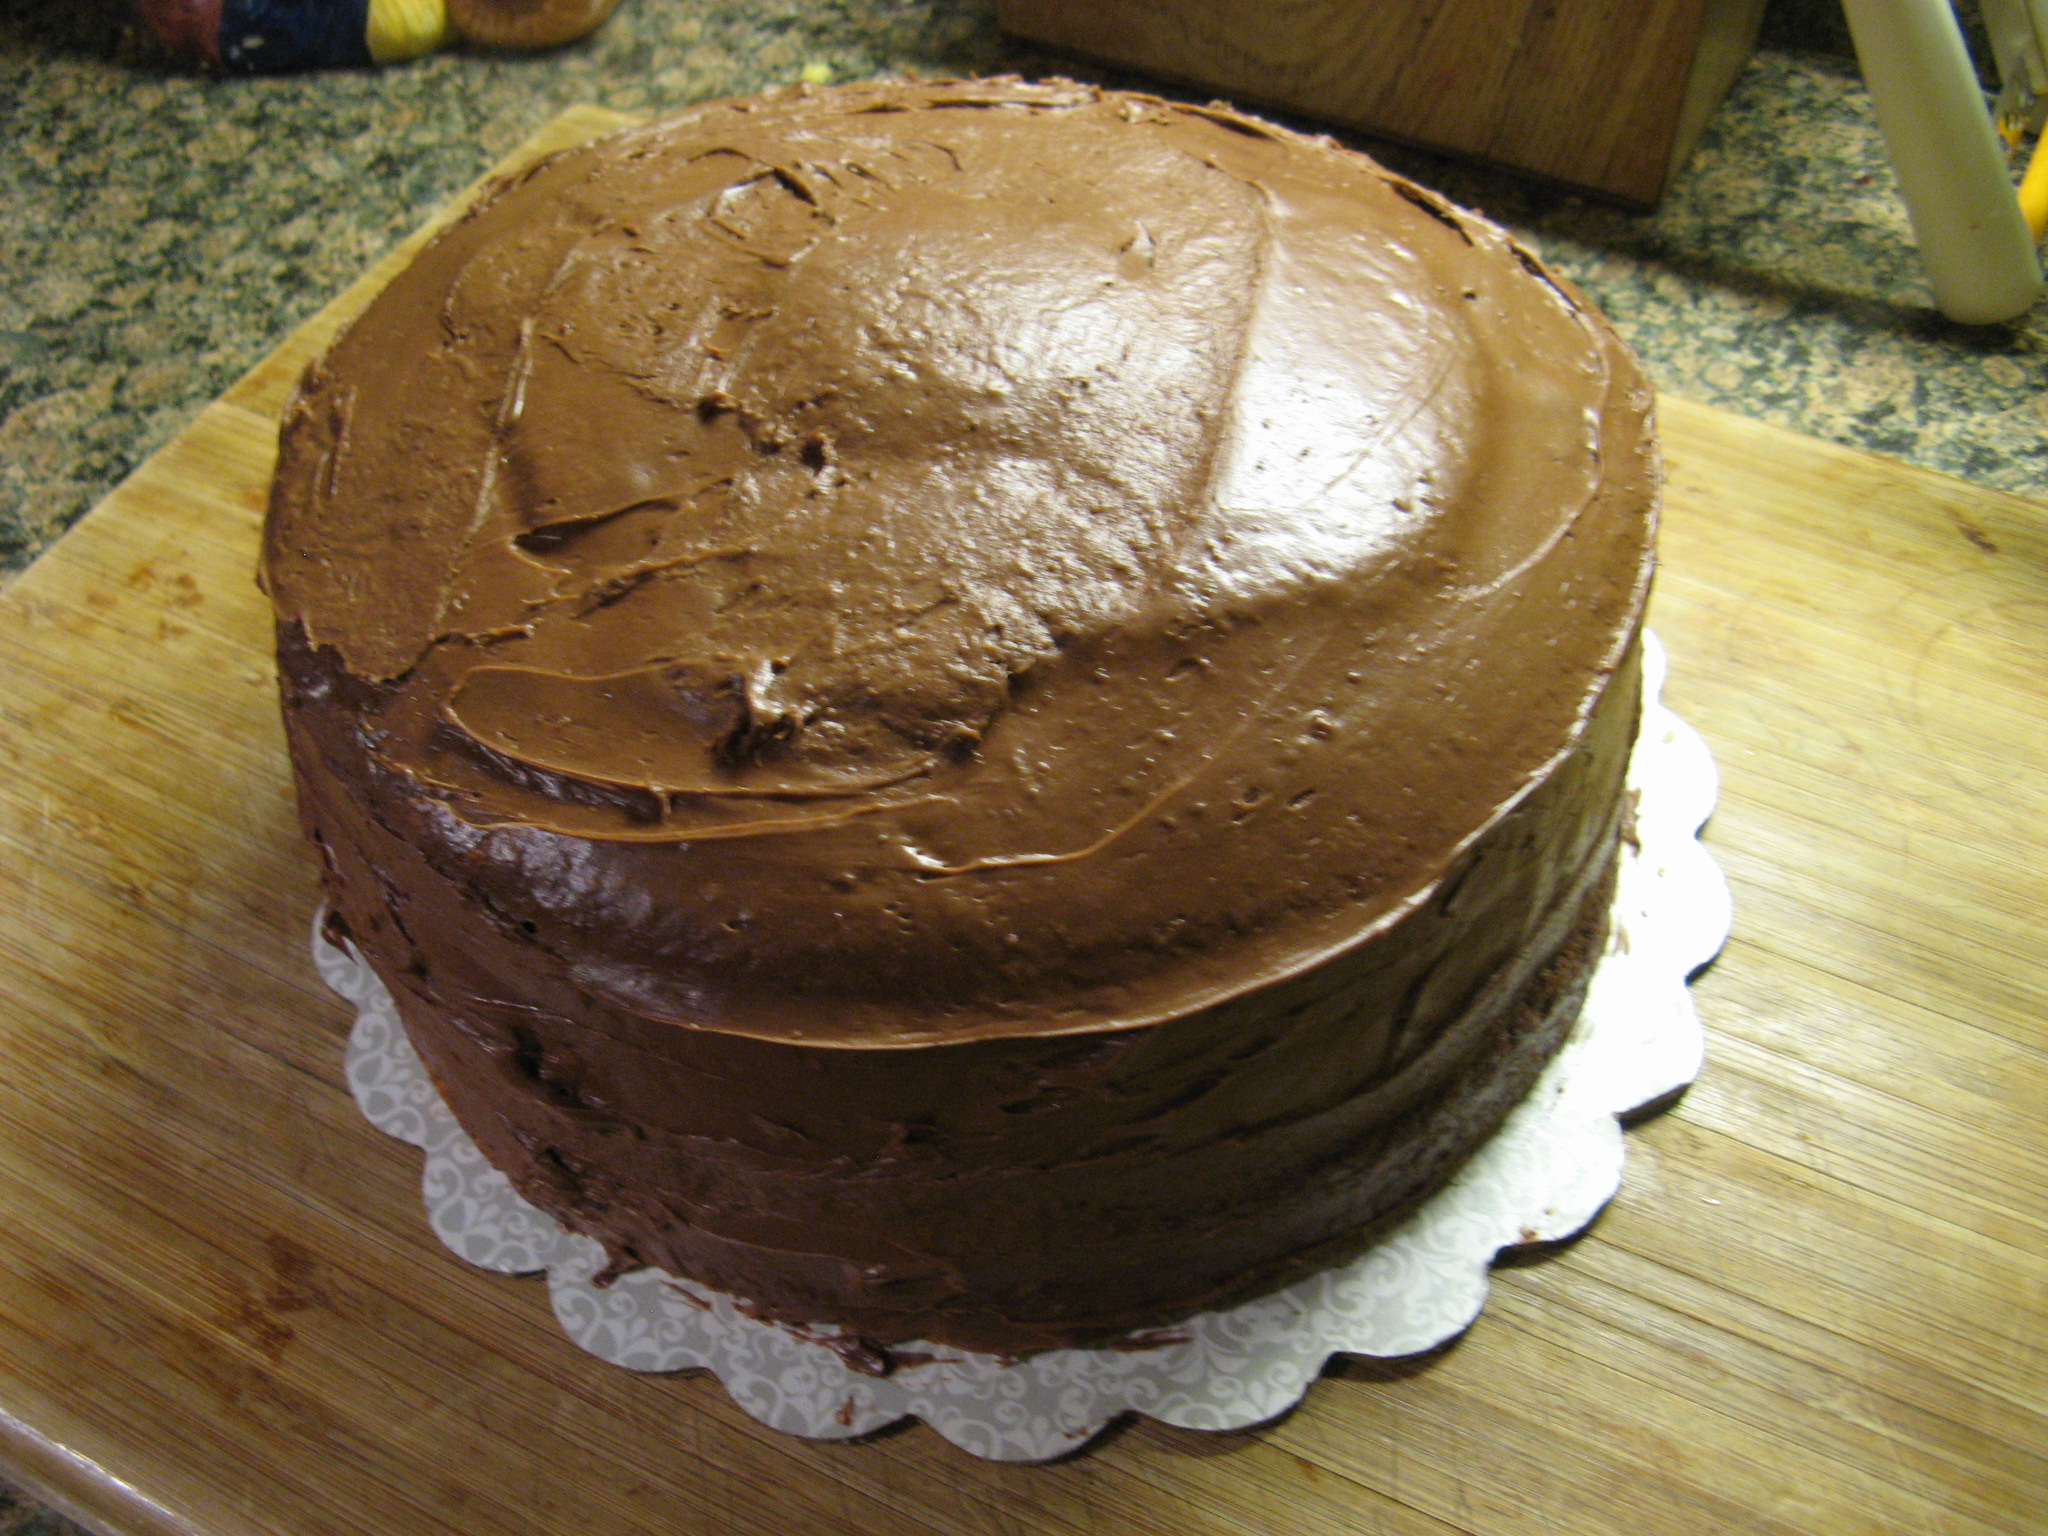
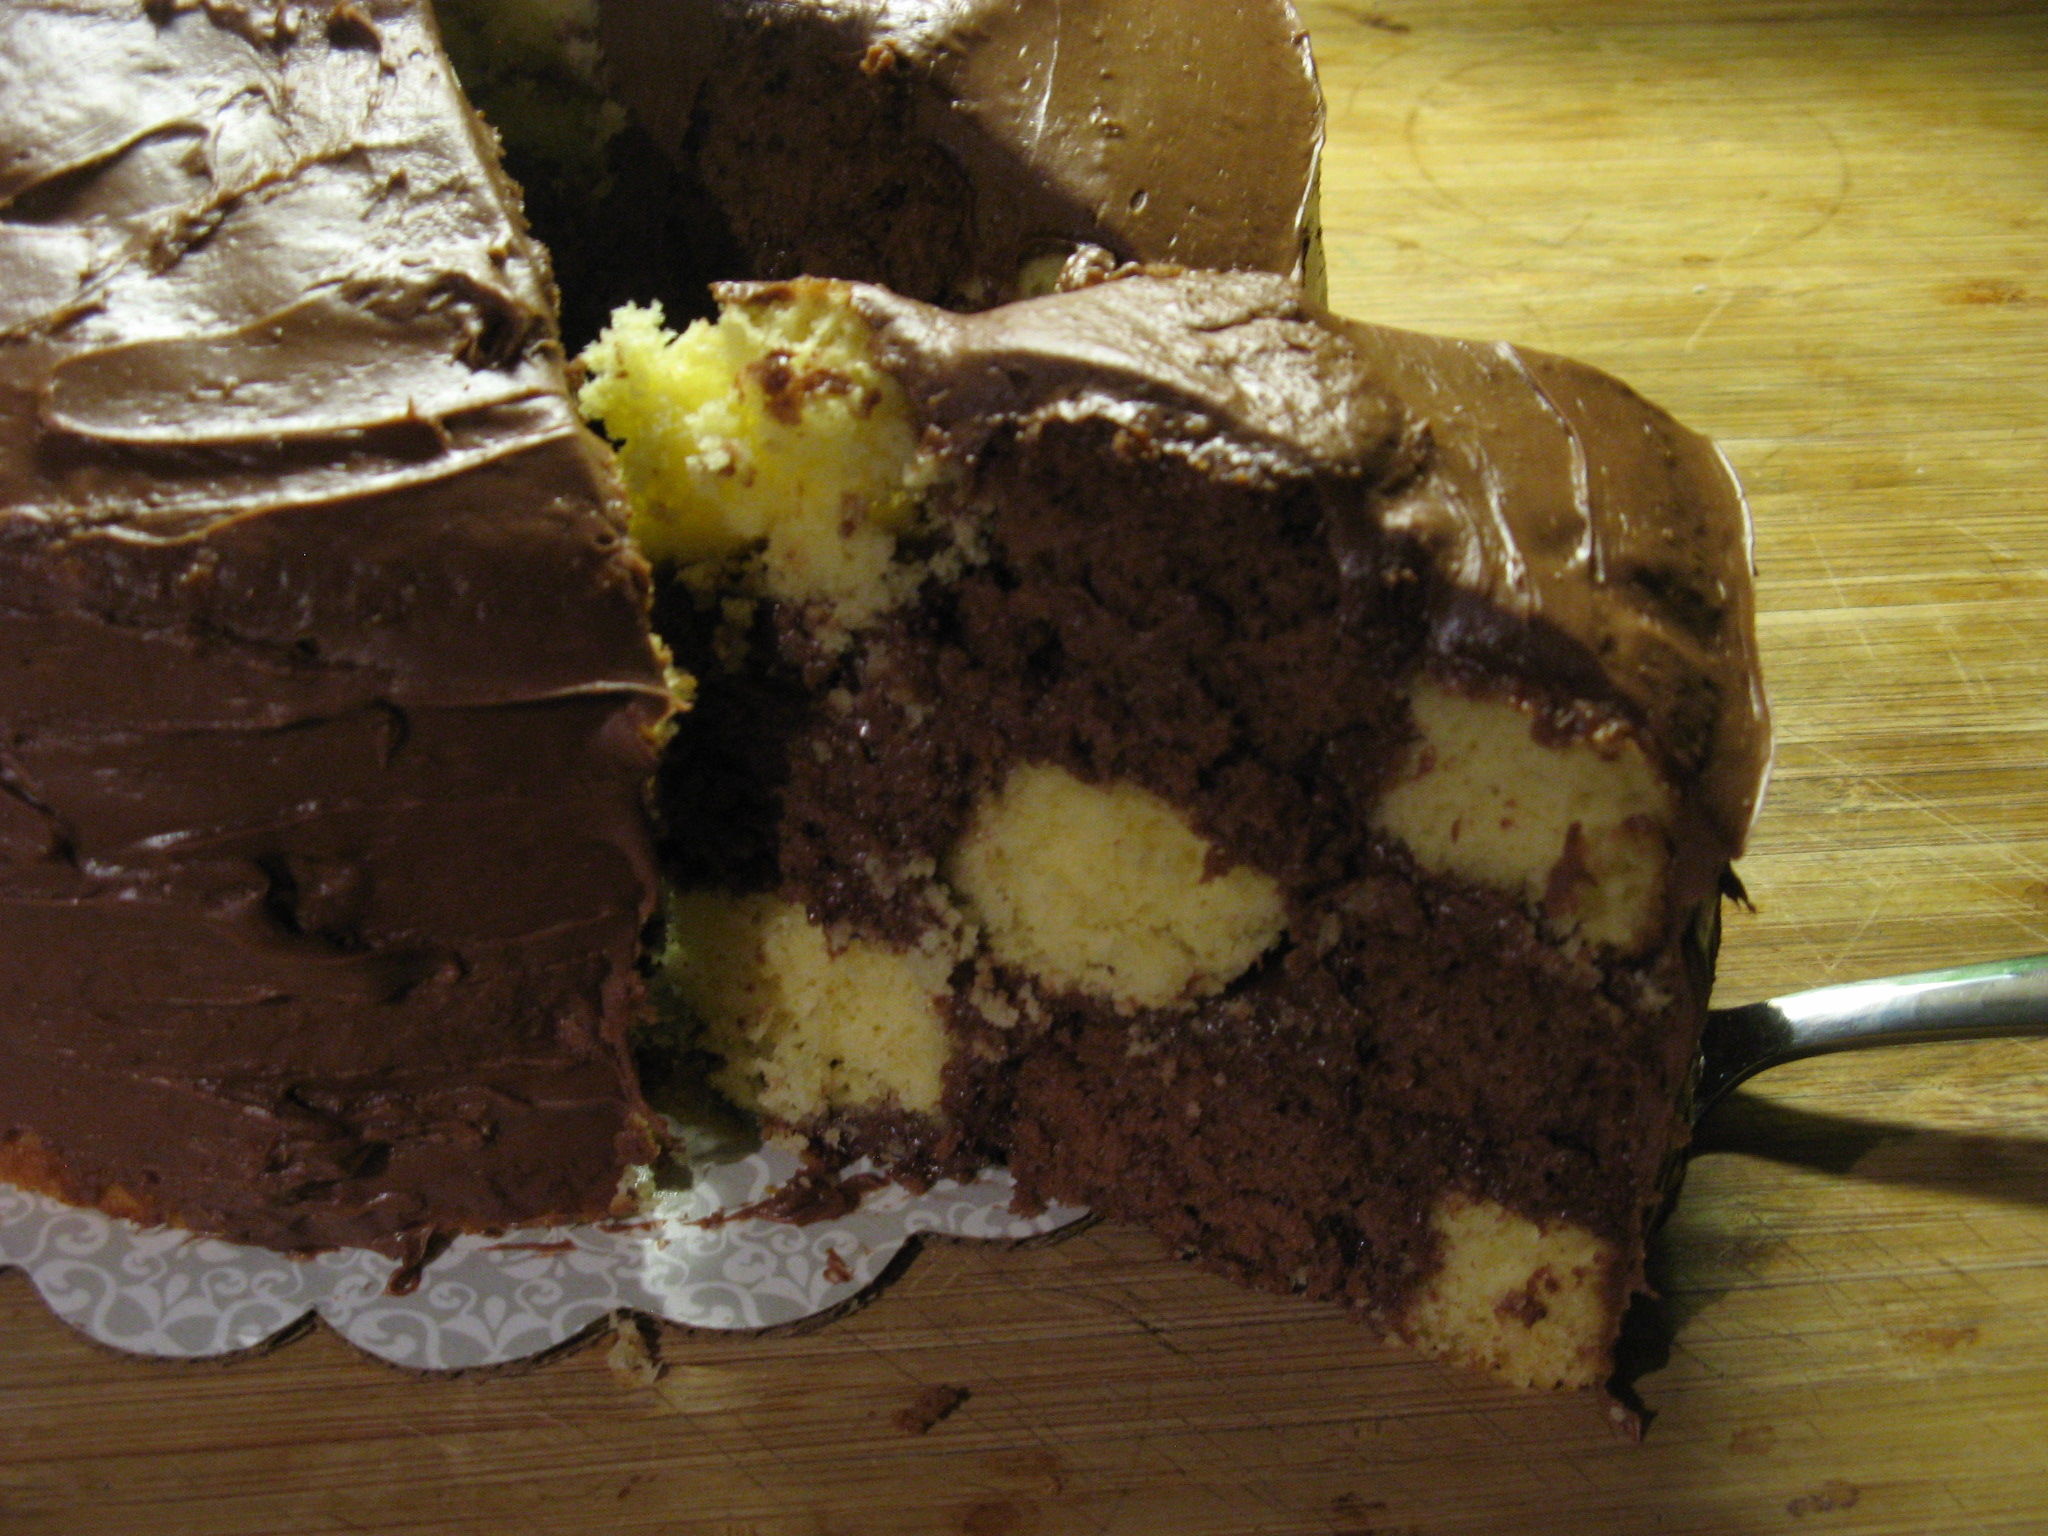
And the moment of truth… I got a pretty decent looking checkerboard!!! The saying is true… If at first you don’t succeed try, try, try again. And I’ll definitely be trying it again with more time and frosting.

IMG_2227 IMG_2234

Chocolate & Raspberries… Always A Good Combination

There’s nothing like a homemade birthday cake and whenever I bake one I usually let the honoree pick whatever they want – as was the case when I recently baked one for a friend’s mom. She had loved the Raspberry Cream Cheese frosting I used when I made the Lemon Cupcakes so I wanted to make a cake that would complement it and at the right moment I received an email from Real Simple with a Classic Chocolate Layer Cake recipe that sounded like the perfect match.

I started off by combining all of my dry ingredients (flour, sugar, cocoa powder, brown sugar, baking soda & salt) in a large bowl and whisking them together.

IMG_0739 IMG_0741

I then combined two sticks of unsalted butter and a cup of water in a small saucepan and brought it to a boil.

IMG_0743

Once it boiled and the butter was completed melted I added it to the dry ingredients.

IMG_0745

Once it was combined I added in two eggs one at a time.

IMG_0747

Then sour cream.

IMG_0748

And finally vanilla extract.

IMG_0749

I then divided the batter between two 9-inch round pans and baked it in a 350 degrees preheated oven for 35 minutes.

IMG_0751

I let the cakes cool completely before frosting them.

IMG_0756

I whipped up a batch of Raspberry Cream Cheese Frosting and folded in about a cup of fresh raspberries into half of the frosting and used it as the filling between the two cakes. I used the other half of the frosting to crumb coat the cake and then refrigerated it for about fifteen minutes so the filling and frosting could set. Meanwhile I made another batch of the frosting to cover and decorate the cake. I also used some fresh raspberries to decorate the cake and this was the final outcome…

IMG_0762

It looked and more importantly tasted delicious. Definitely something I’ll make again!

Classic Chocolate Layer Cake

Serves 8

Hands-On Time: 45m

Total Time: 2hr 00m

Ingredients

1  cup  unsalted butter (2 sticks), cut into pieces, plus more for the pans

2  cups  all-purpose flour, spooned and leveled

1 1/2  cups  granulated sugar

3/4  cup  unsweetened cocoa powder

1/2  cup  dark brown sugar

1  teaspoon  baking soda

1  teaspoon  kosher salt

2  large eggs

1/2  cup  sour cream

1  teaspoon  pure vanilla extract

Directions

1. Heat oven to 350º F. Butter two 8- or 9-inch round cake pans and line the bottom of each with a round of parchment paper.

2. In a large bowl, whisk together the flour, granulated sugar, cocoa powder, brown sugar, baking soda, and salt.

3. In a small saucepan, combine the butter and 1 cup water and bring to a boil. Add to the flour mixture and, using an electric mixer, mix until combined. Beat in the eggs, one at a time, then the sour cream and vanilla.

4. Divide the batter evenly between the prepared pans. Bake until a toothpick inserted in the center of each cake comes out clean, 35 to 45 minutes. Cool in the pans for 20 minutes, then turn out onto a rack to cool completely.

Raspberry Cream Cheese Frosting

Ingredients

1 8 oz. package cream cheese, softened

1 stick unsalted butter, softened

1 teaspoon vanilla extract

2 cups confectioners’ sugar

1/4 cup seedless raspberry jam

Directions

Begin by creaming the cream cheese and butter together and then add in the vanilla extract. Reduce the speed of the mixer to low and add in the confectioners’ sugar, once the sugar is incorporated add in the raspberry jam and continue mixing on medium speed.