No Bake Passion Fruit Tres Leches

Memorial Day weekend is upon us… The unofficial start of the summer. The season to spend less time indoors and enjoy the great (hopefully) weather outdoors! It’s also a time where we are all looking for quick and easy recipes that don’t require us being in a hot kitchen for hours on end. That applies to desserts too. And today I have a great recipe that will require you to turn on your stove but not your oven. It’s a No Bake Passion Fruit Tres Leches Cake. Ladyfingers take the place of the traditional cake part and are then topped with a layer of passion fruit curd followed by layer of homemade whipped cream. YUM!

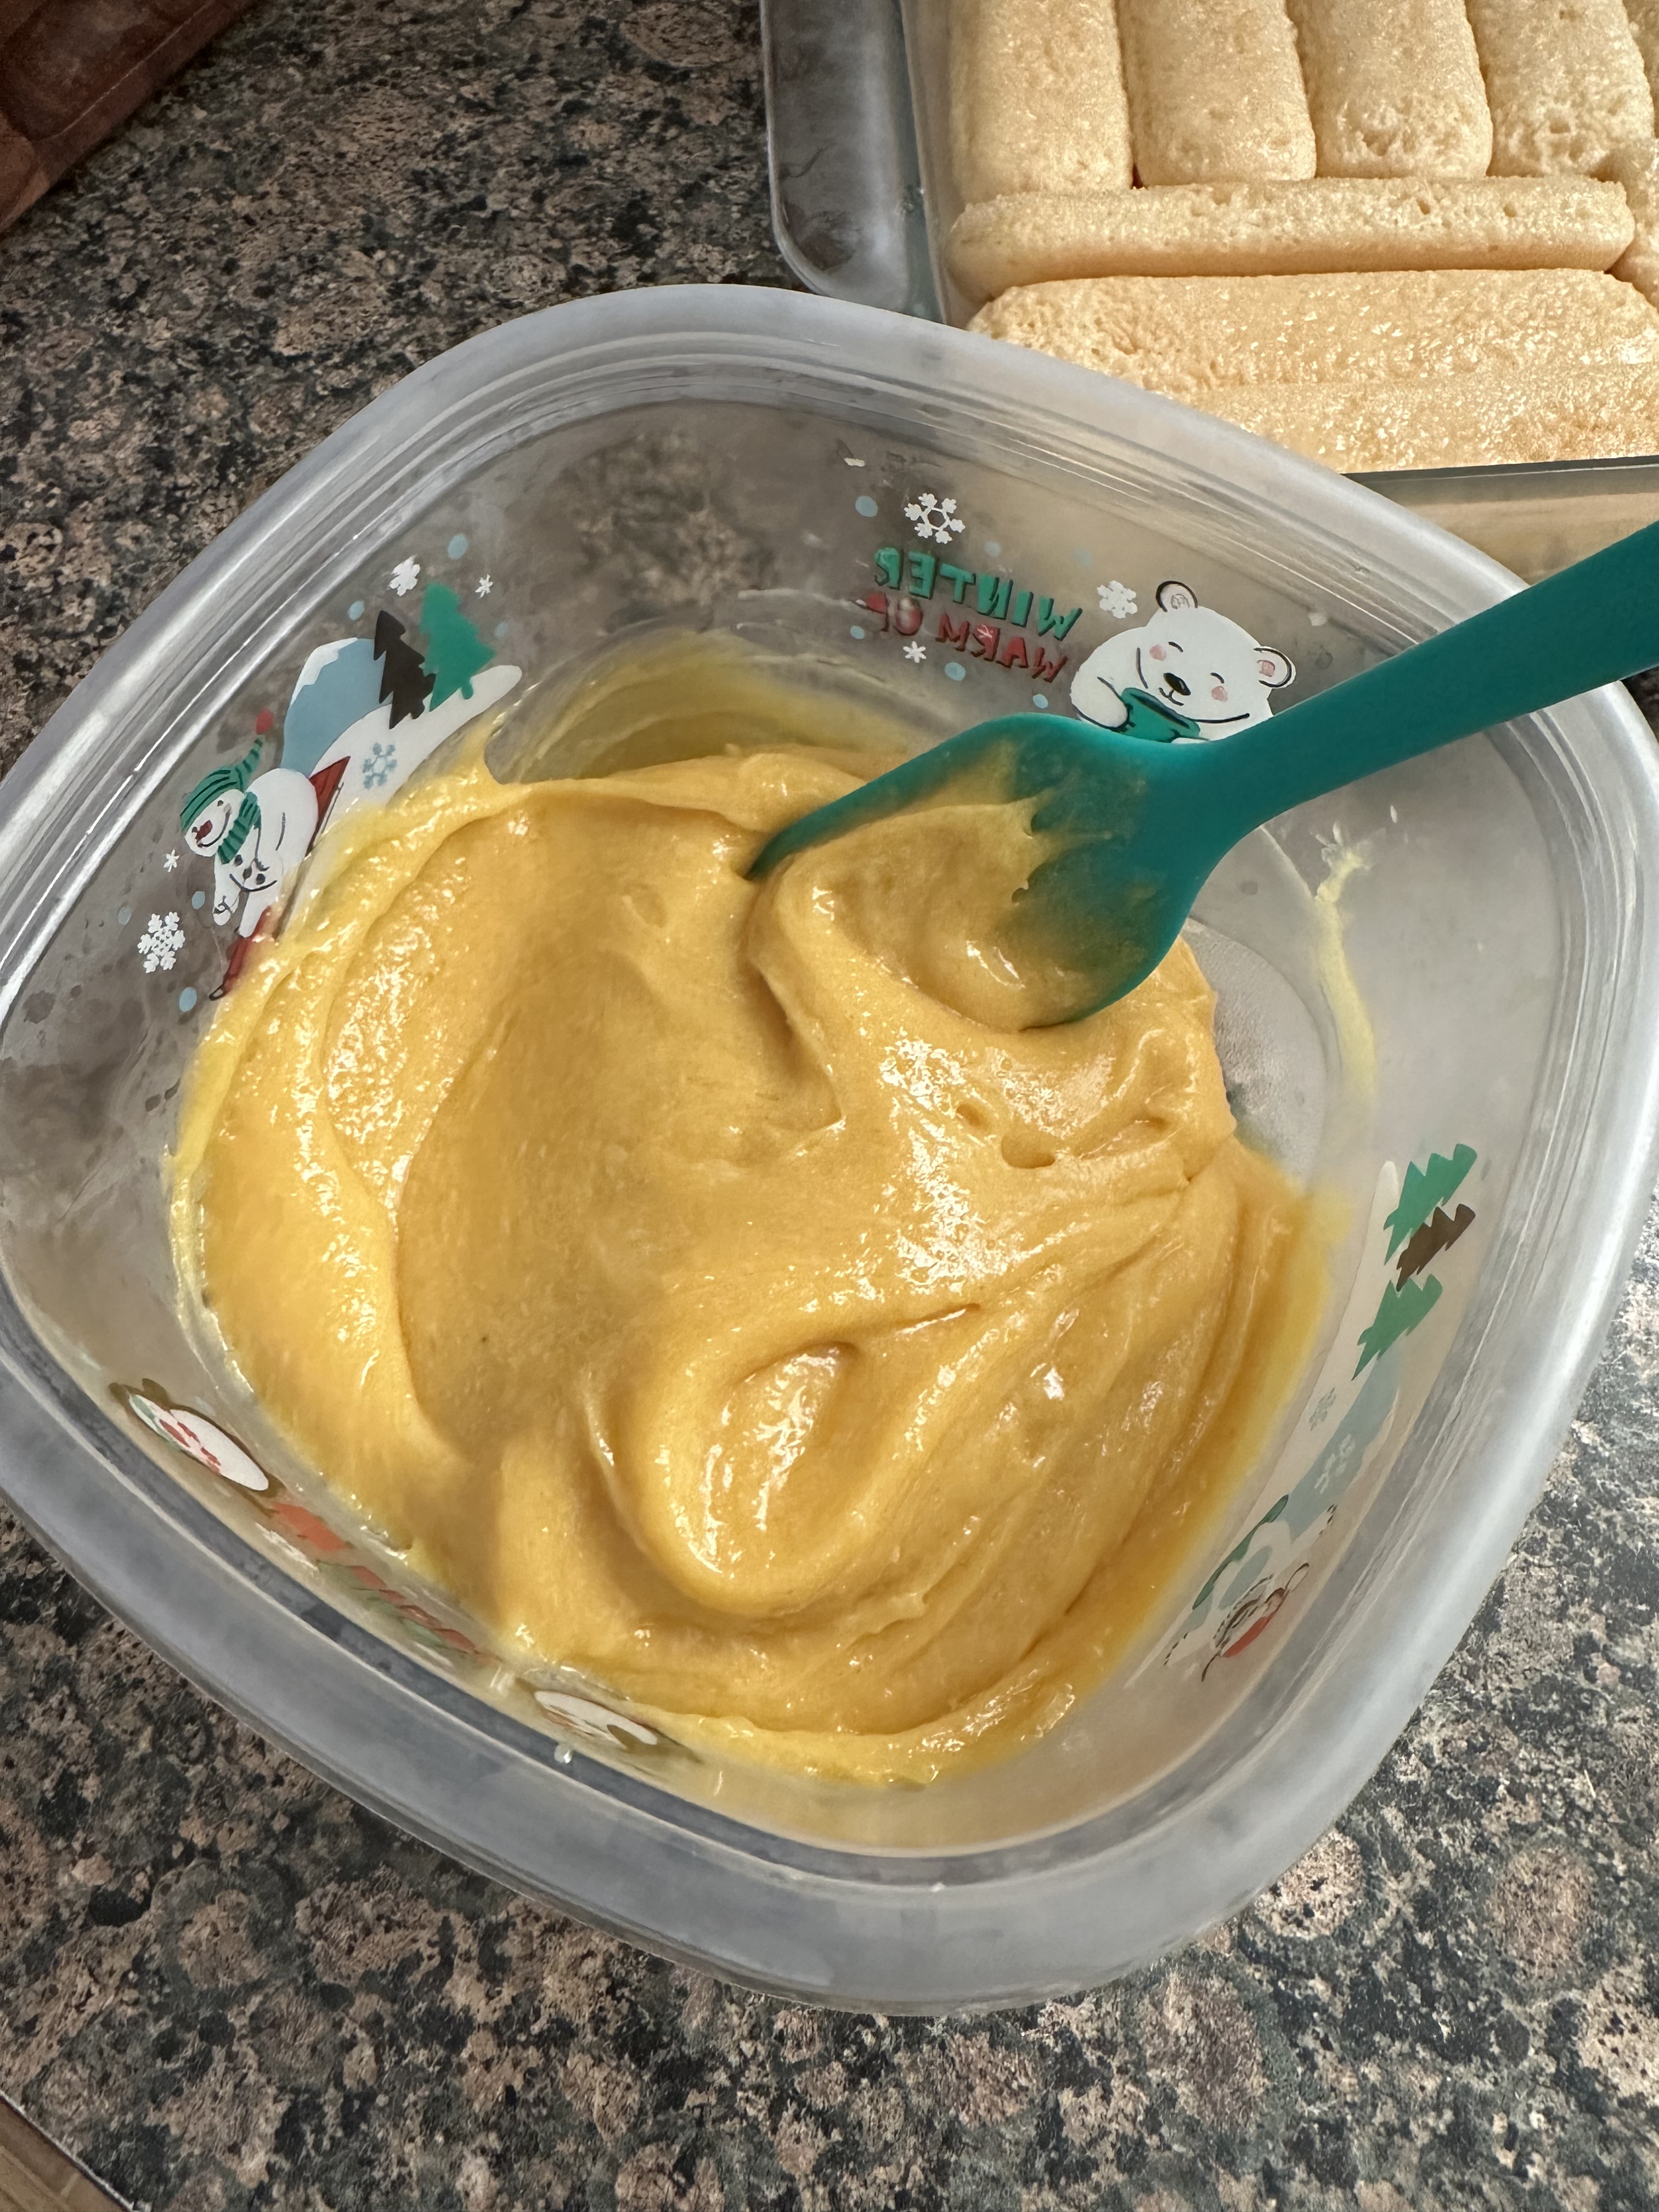
And while this recipe doesn’t require any baking, it does require some time to prep and assemble. Mostly inactive time though.  I started by making the passion fruit curd since it needed to chill and set in the refrigerator. While I am sure you could use 100% pure passion fruit from a bottle, or even extract the juice from fresh passion fruits I opted to use frozen passion fruit pulp that I defrosted in the refrigerator overnight. It takes the work out of using fresh passion fruits and I know for certain it’s only passion fruit pulp with nothing added in. I followed the same curd recipe I used to make a Passion Fruit & Coconut Cake a few years back and it was just as easy and delish!

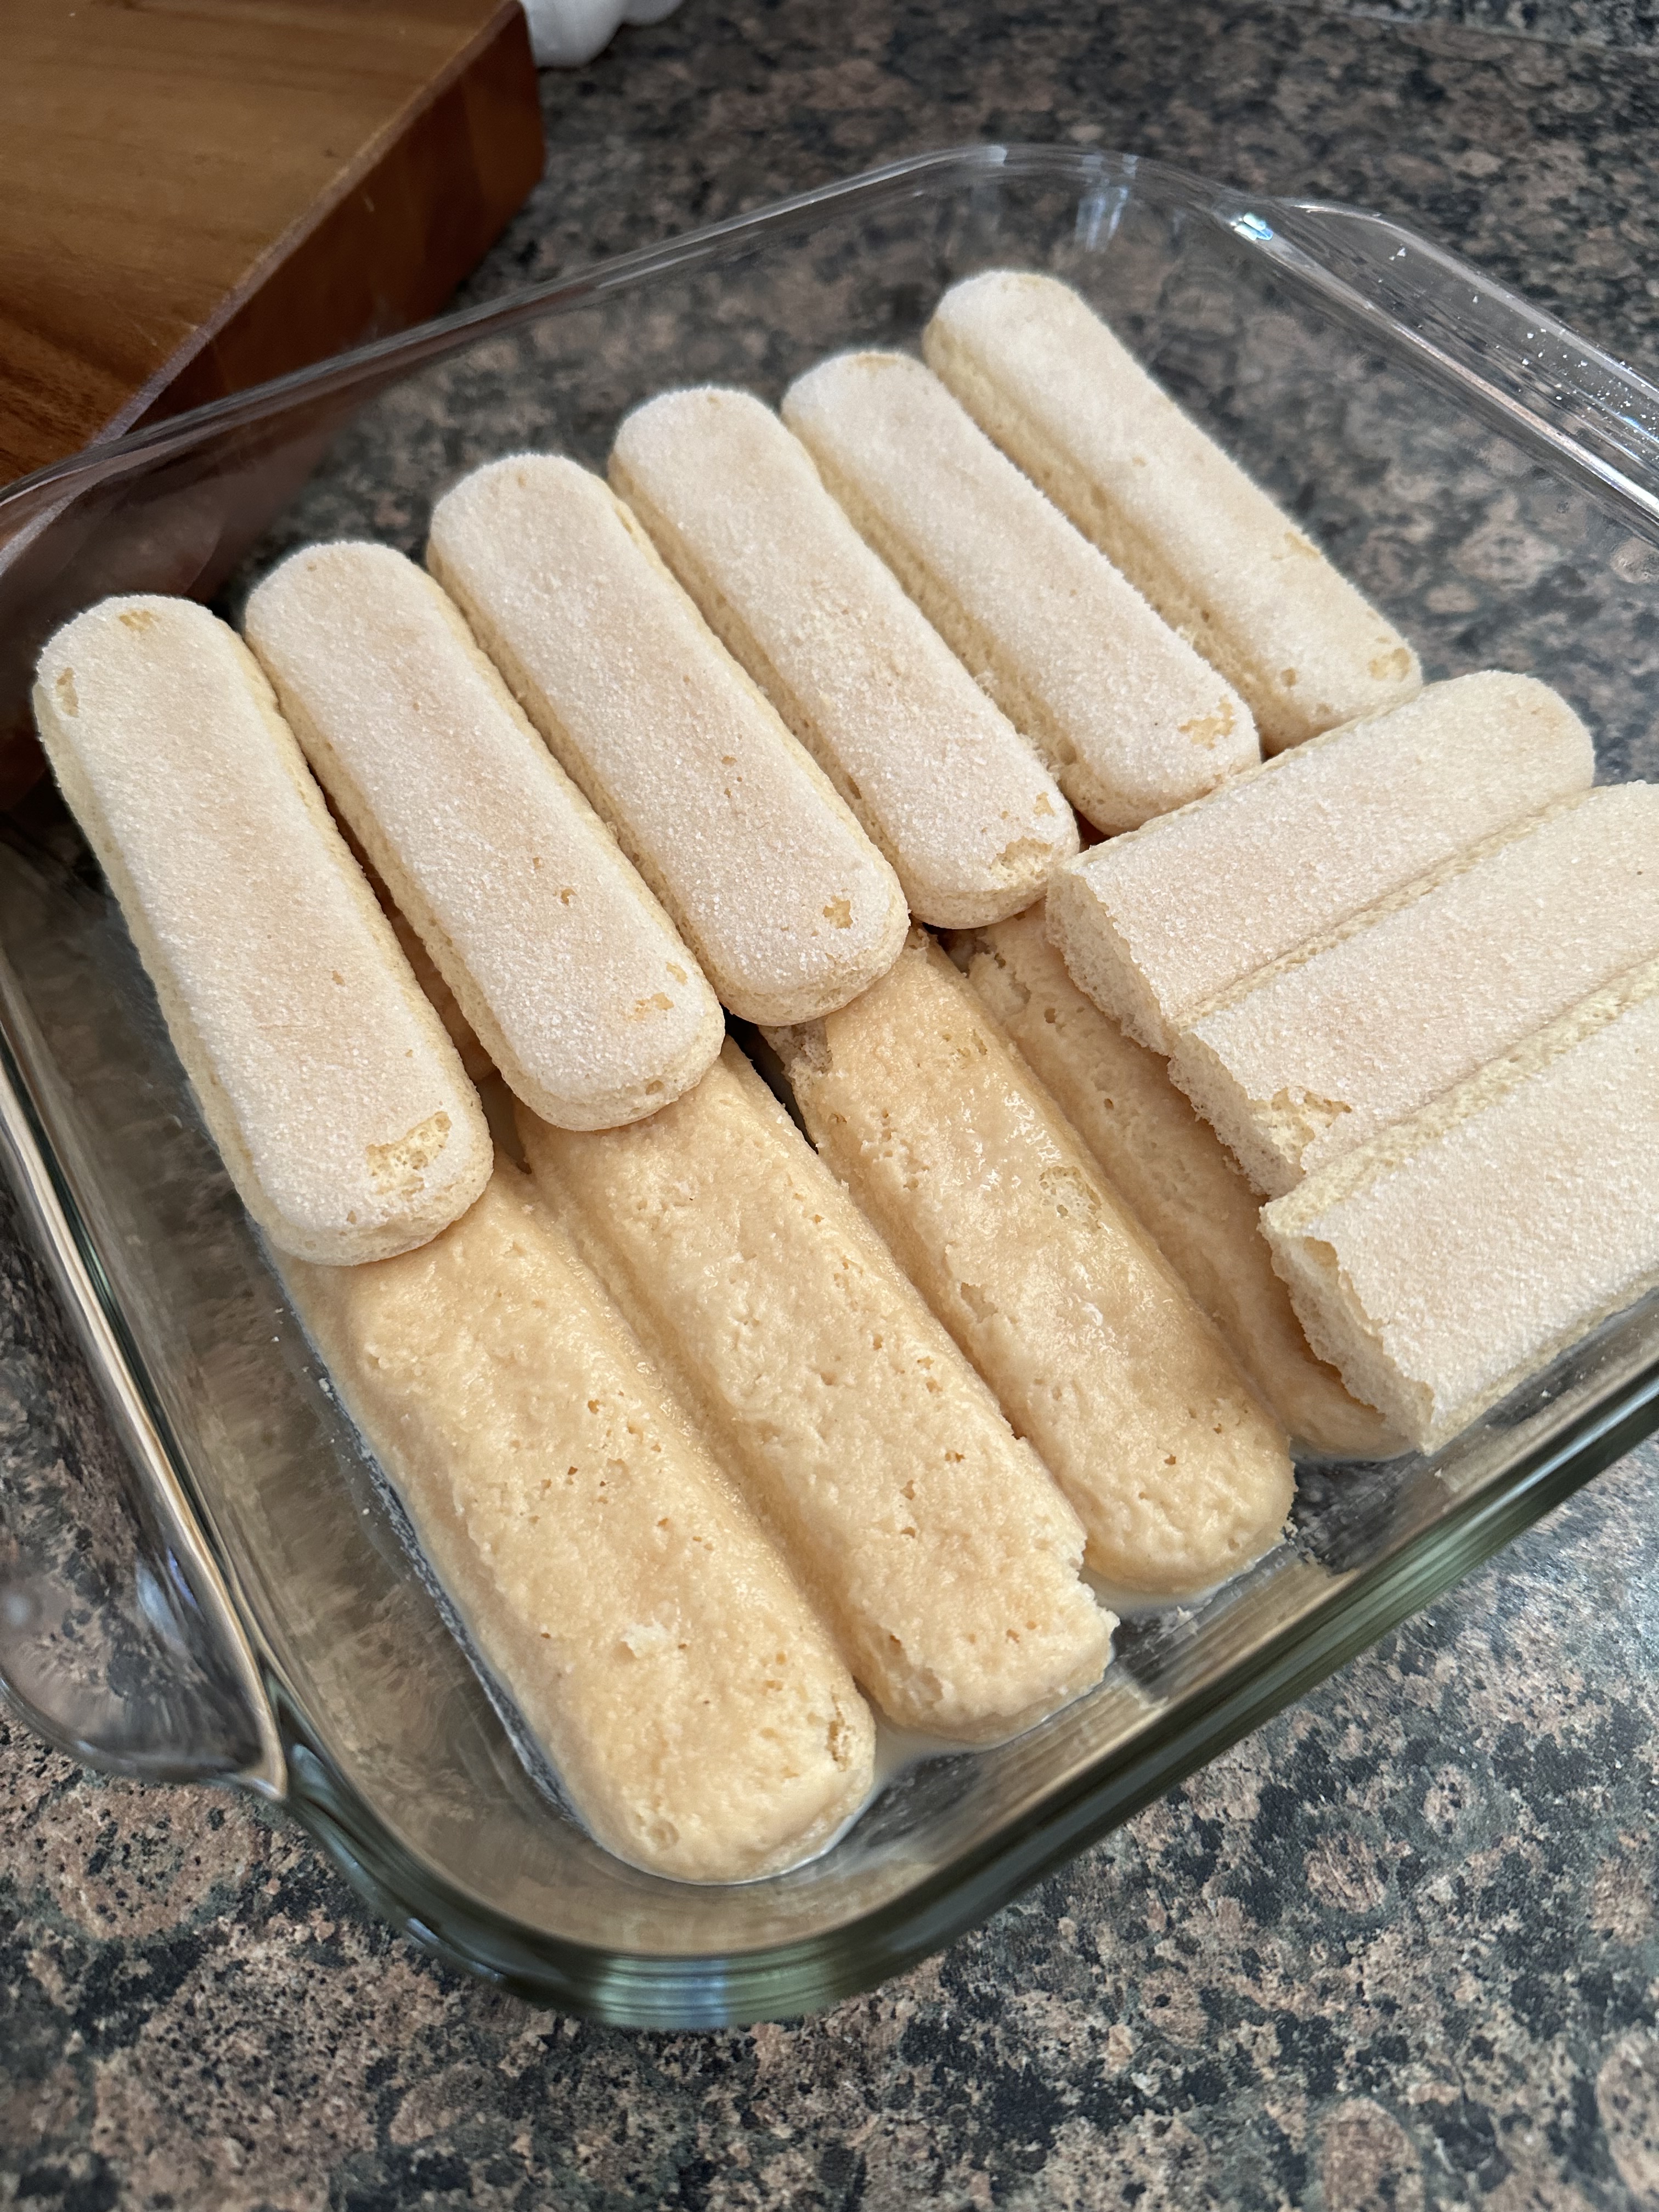
While the curd cooled and set in the refrigerator, I prepped the tres leches cake. In a medium bowl I whisked together evaporated milk, sweetened condensed milk and heavy cream until it was well combined. I then transferred the mixture to a large measuring cup (at least 4 cups) to make it easier to pour over the ladyfingers. I reserved 3/4 cup of the mixture in a small food storage container and refrigerated it. In an 8×8-inch baking dish I arranged ladyfingers in an even layer and then poured about 3/4 cup of the milk mixture over them. After letting it soak in for 15 minutes, I poured another 3/4 cup of the mixture over the ladyfingers again.

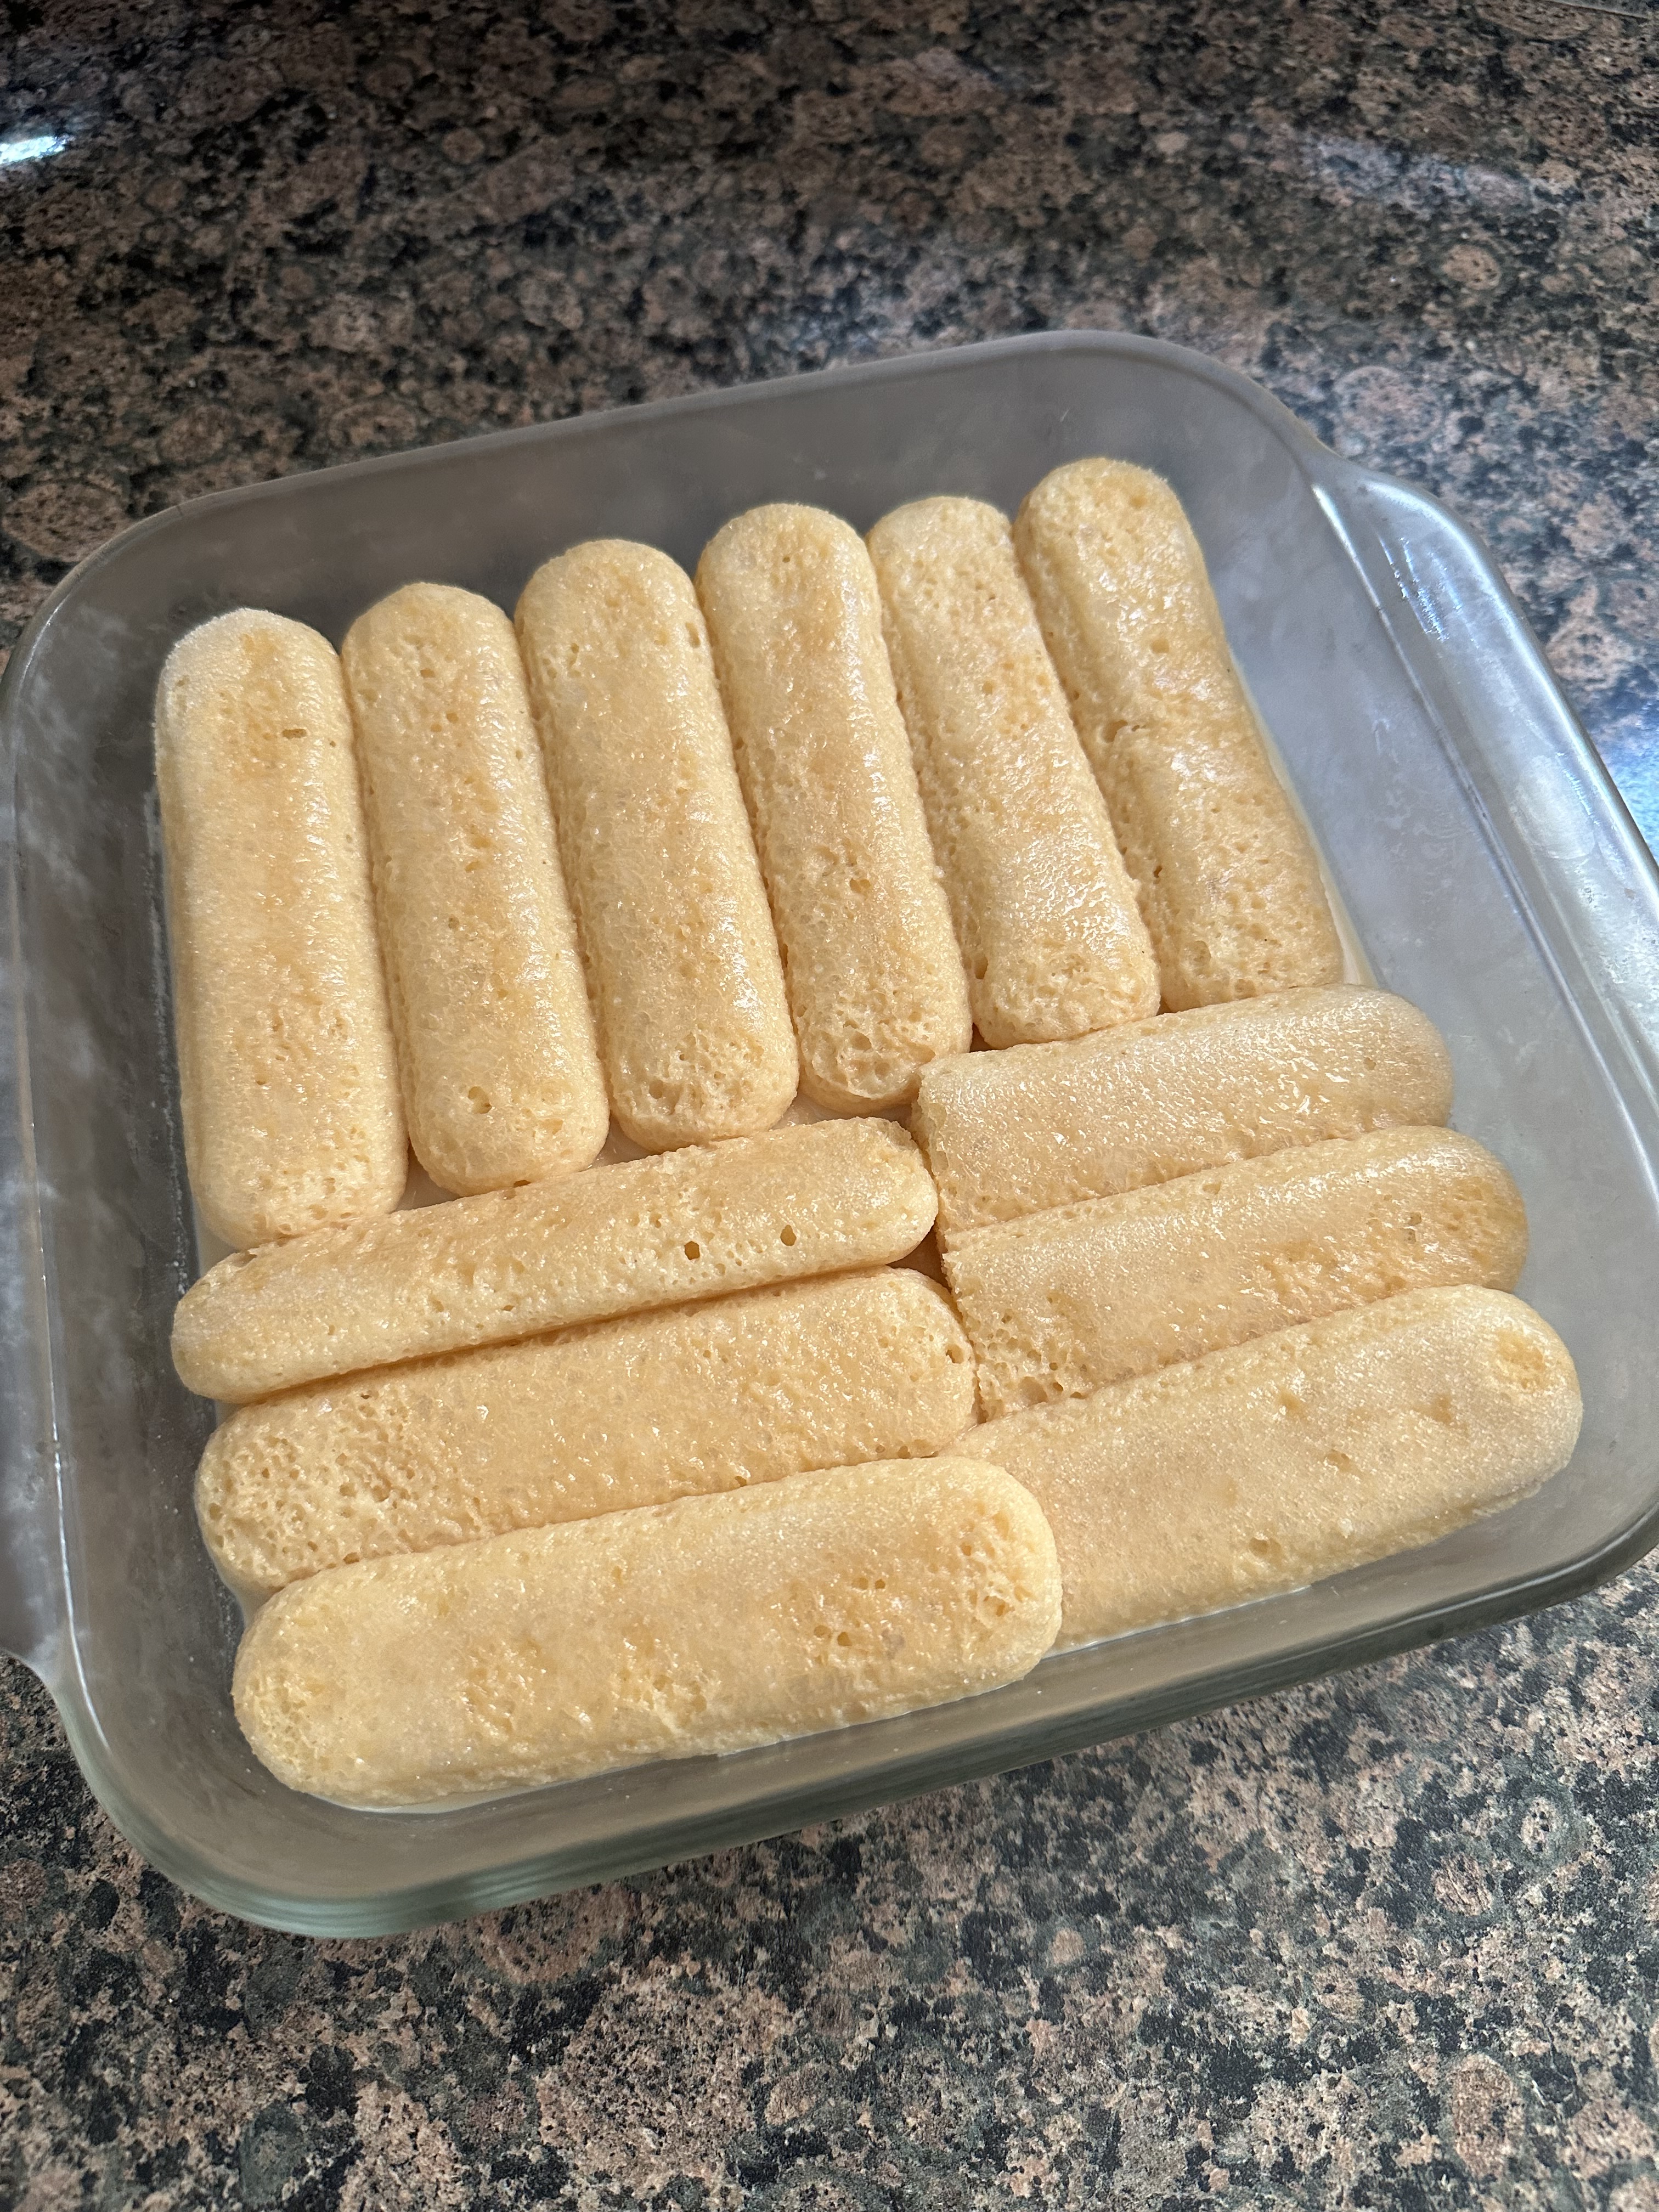
I then arranged a second layer of ladyfingers over the first. For the second layer I placed the ladyfingers in the opposite direction as the first layer to ensure that the cake would hold together when sliced.

As with the first layer, I poured 3/4 cup of the milk mixture over the ladyfingers and let it rest for 15 minutes before pouring another 3/4 cup over them. I then covered the dish with aluminum foil and refrigerated it for 3 hours so the ladyfingers could fully soak in the milk mixture and become soft.

After 3 hours, I poured the reserved milk mixture over the ladyfingers, re-covered the dish and refrigerated for an additional hour.

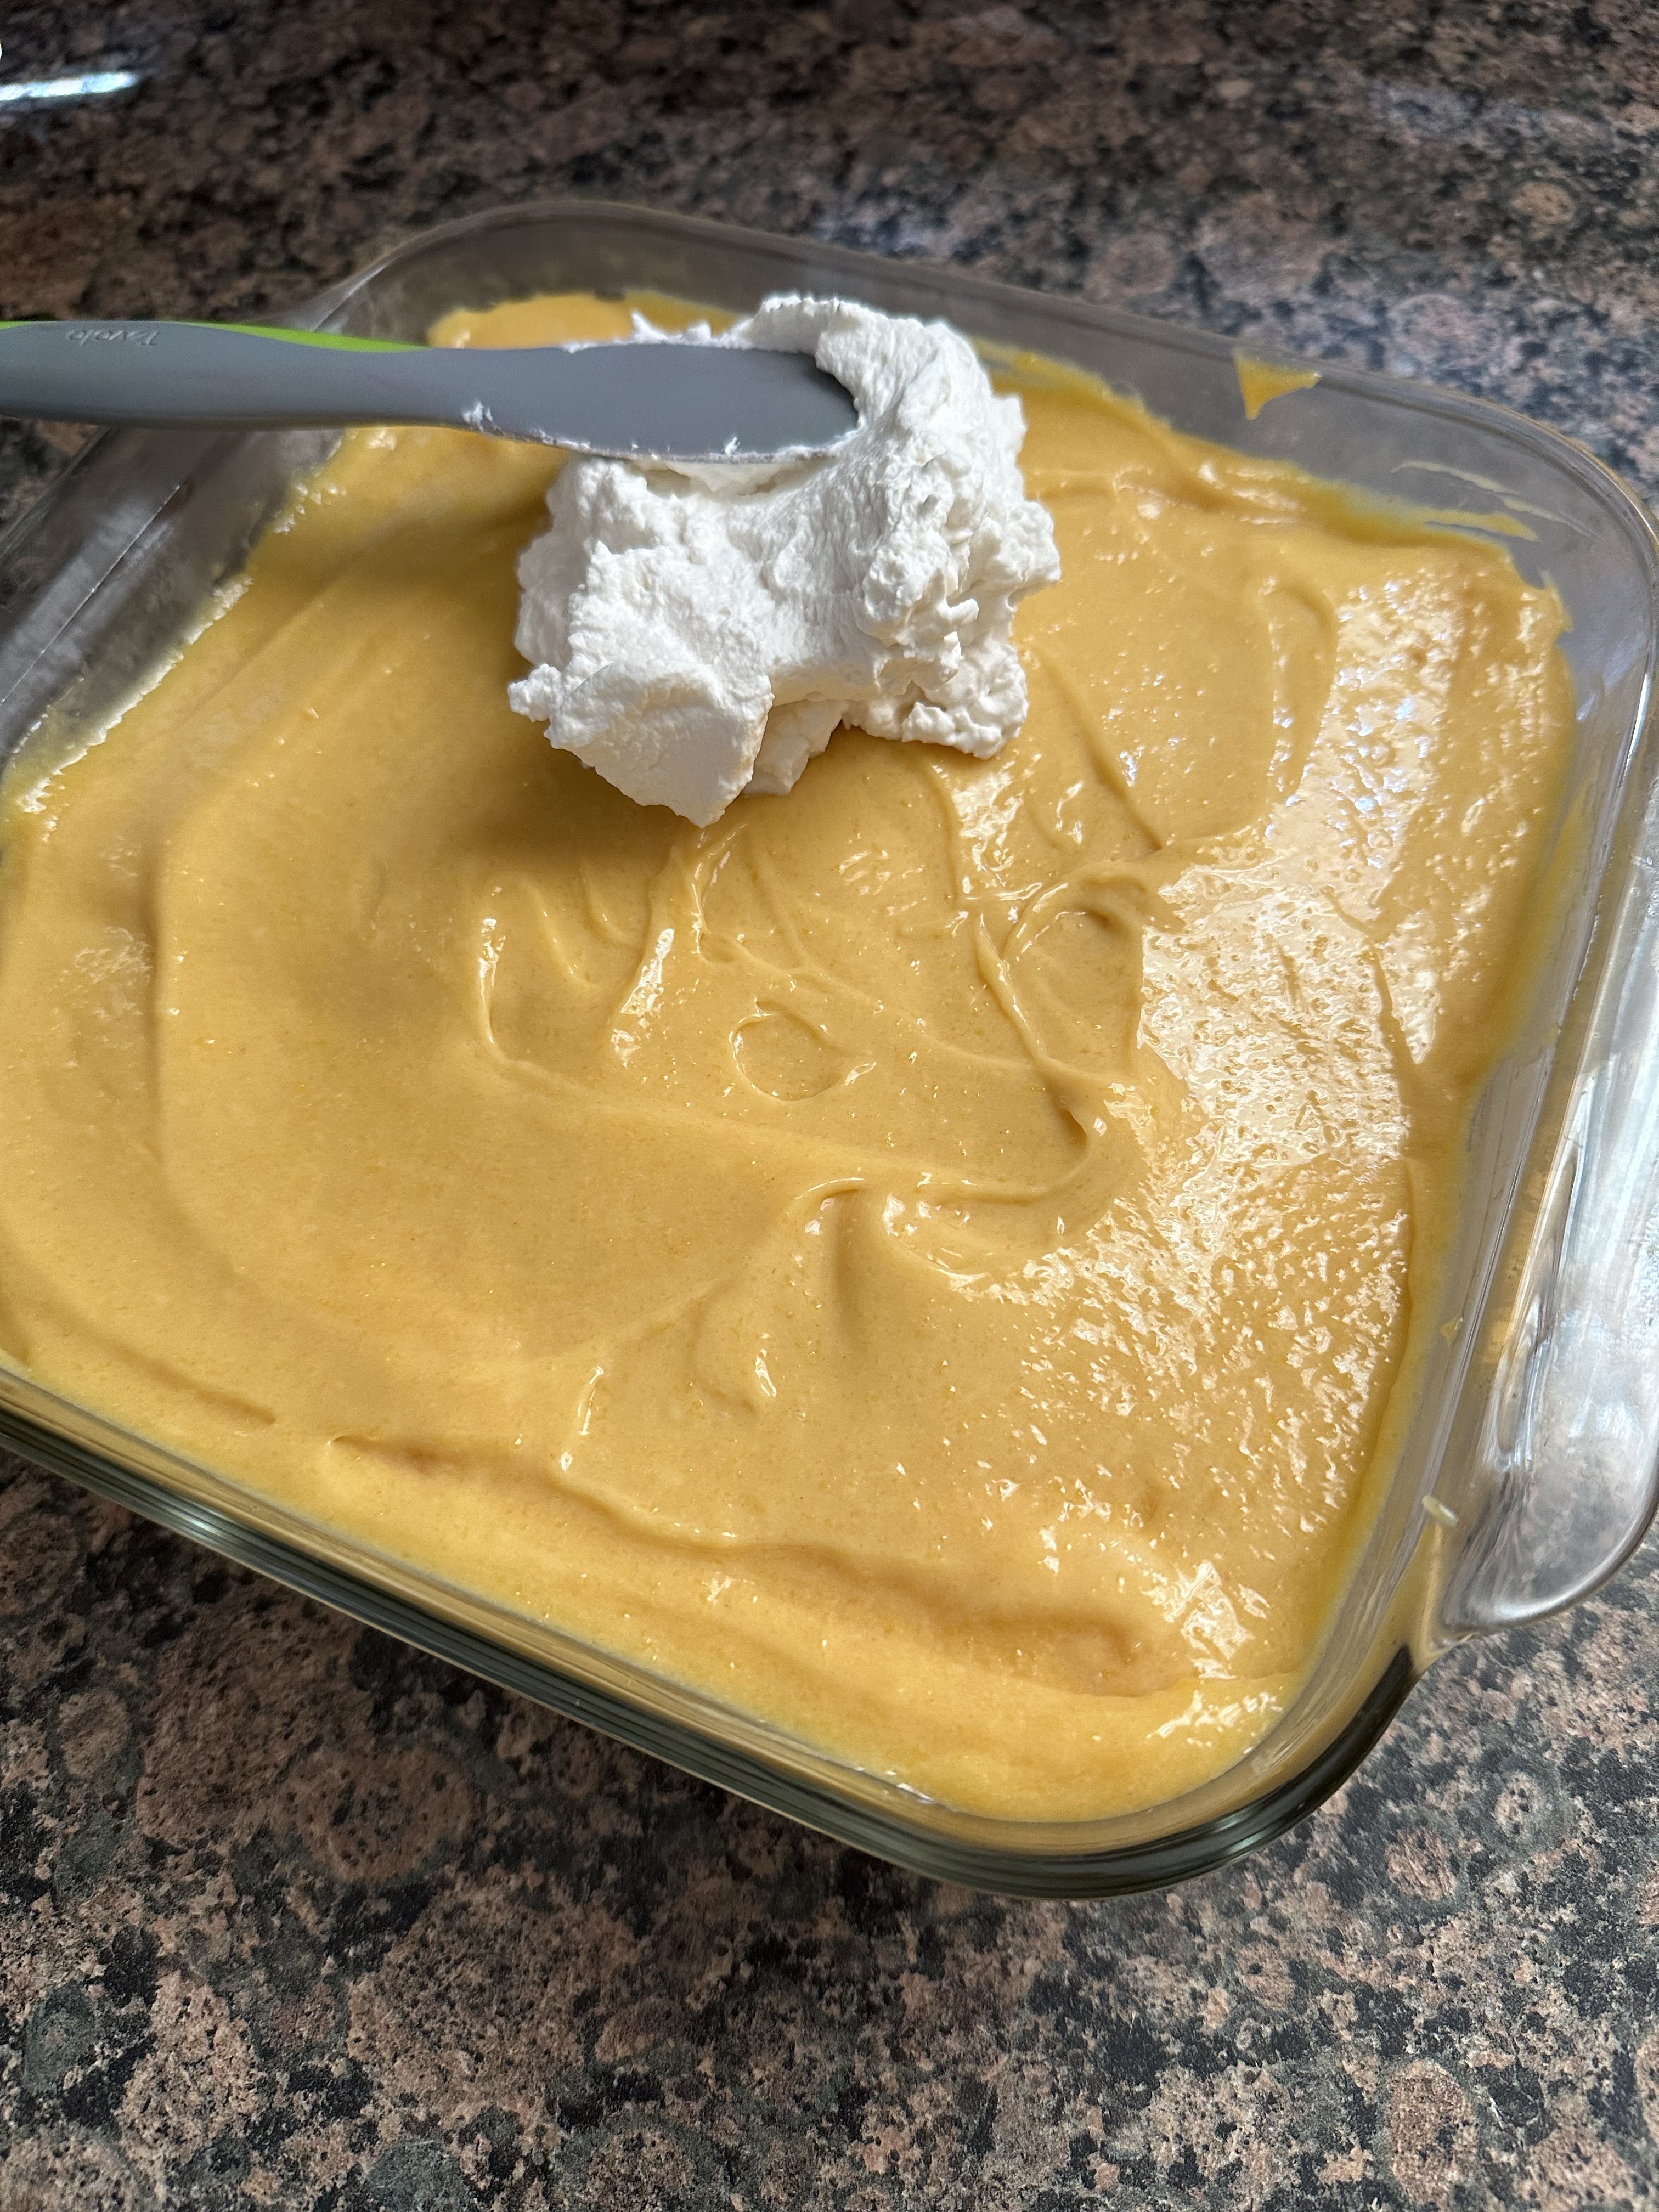
After an hour it was time to finish assembling the cake. I spread the passion fruit curd on top of the ladyfingers and then spread homemade whipped cream over the curd.

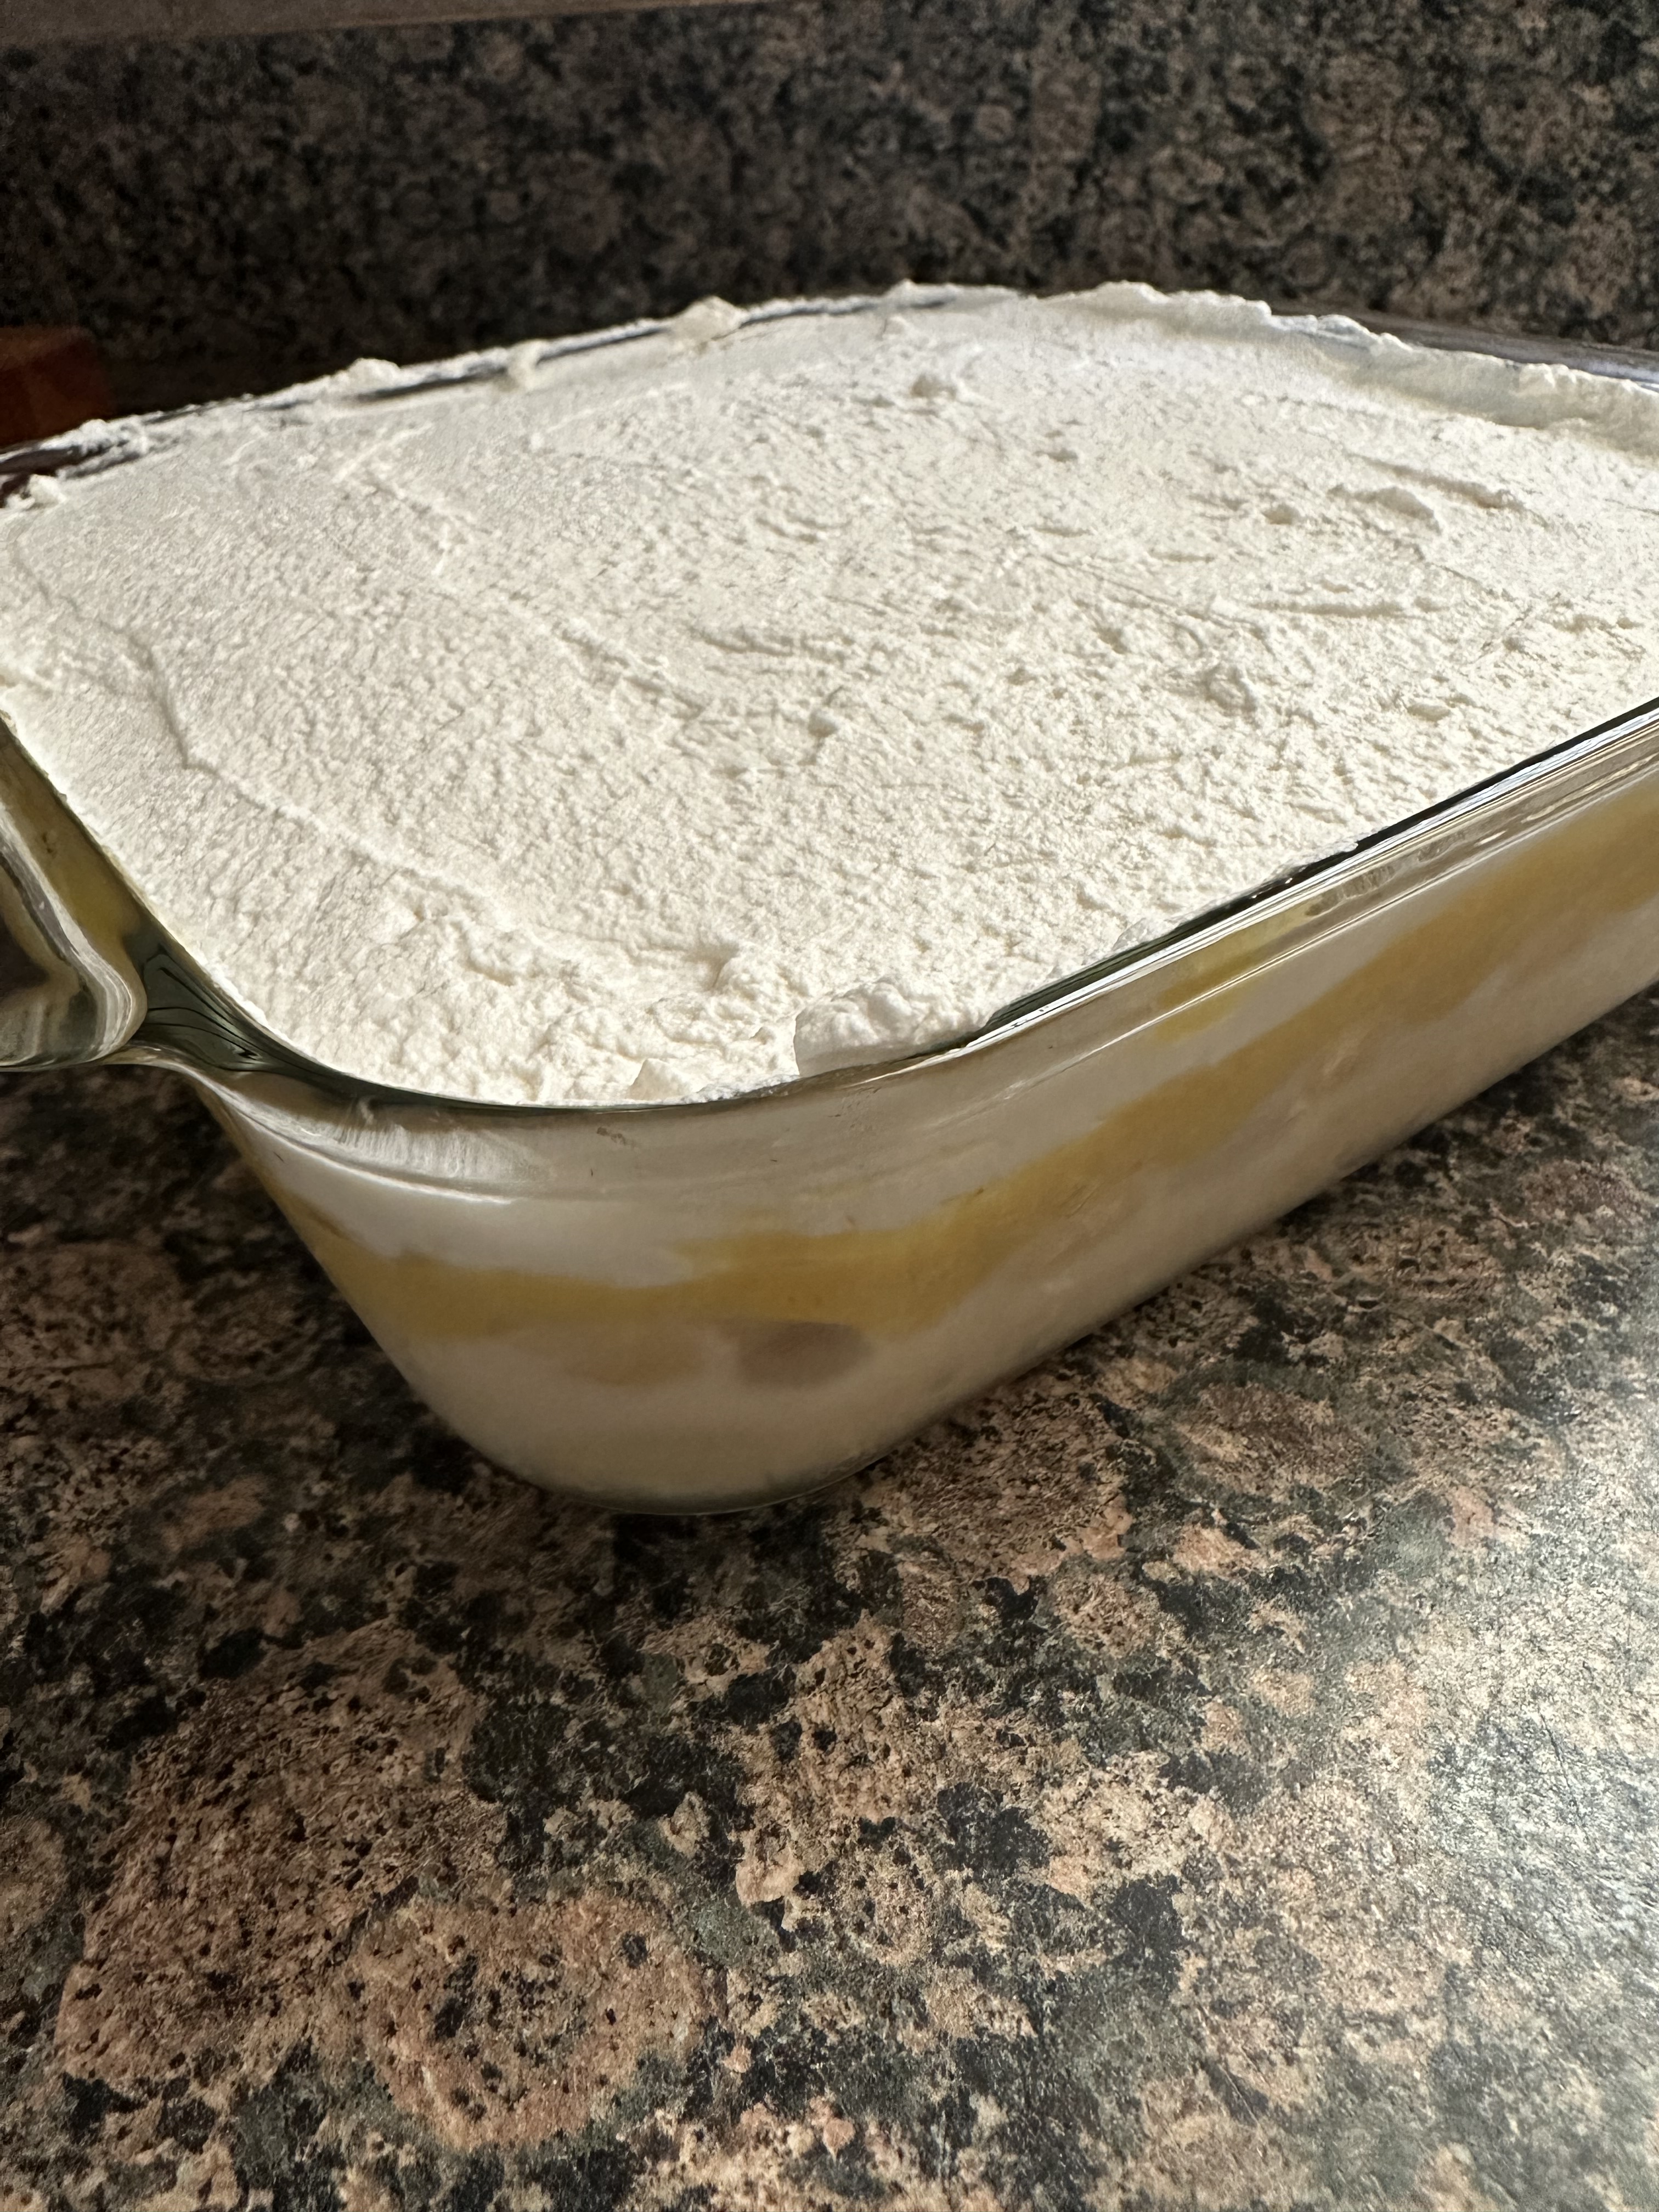
I thought about decorating the top with fresh strawberries strictly for picture purposes, but the week I made this the strawberries didn’t look that great at the supermarket. Instead, here is a side picture of the different layers.

While I was concerned that this No Bake Passion Fruit Tres Leches would be overly sweet as some Tres Leches cakes can be I was pleasantly surprised that it wasn’t. While the curd and whipped cream were sweetened and the sweetened condensed milk is of course sweet, using the ladyfingers, which aren’t that sweet, really helped to keep the sugary taste down.

If you love passion fruit, check out these desserts as well…

No Churn Passion Fruit Ice Cream

Passion Fruit Panna Cotta

Passion Fruit Pie

No Bake Passion Fruit Tres Leches

Ingredients:

For the Passion Fruit Curd:

1/2 cup passion fruit juice*

7 large egg yolks

1 cup sugar

10 tablespoons unsalted butter, sliced into tablespoons

Pinch of salt

For the Tres Leches Cake:

22-25 Ladyfingers

12.5 oz can of evaporated milk

14 oz. can sweetened condensed milk

1/3 cup heavy cream

For the Whipped Cream Topping:

1 cup heavy cream

2 teaspoons confectioners’ sugar

1 teaspoon vanilla extract

*I used defrosted frozen passion fruit pulp

Directions:

For the Passion Fruit Curd: In a medium saucepan combine the passion fruit juice, egg yolks and sugar, stir to combine. Heat over medium heat and continue stirring until the sugar has dissolved and the mixture thickens, enough to coat the back of a spoon.

Remove from the heat and add a pinch of salt. Add the butter a tablespoon at a time, stirring between each addition to ensure the butter has melted. Strain the mixture through a fine mesh sieve two times. The first time into a bowl and the second time into the container you plan to use to store the curd. Place a piece of plastic wrap directly on the surface of the curd, cover and refrigerate for 2-3 hours, until cool and thickened.

For the Tres Leches: In a medium bowl whisk together the evaporated milk, sweetened condensed milk and heavy cream until well blended. Transfer to a large measuring cup to make it easier to pour. You should have about 3.5 cups. Reserve 3/4 cups in a separate bowl, cover and refrigerate.

Arrange half of the ladyfingers in the bottom of an 8×8-square baking dish. Pour a quarter of the remaining milk mixture over the ladyfingers, about 3/4 cup. Let rest for 15 minutes and then pour another 3/4 cup of the milk mixture over the ladyfingers.

Arrange the remaining ladyfingers over the soaked ladyfingers. Pour another 3/4 cup of the milk mixture over the second layer of ladyfingers. Let rest for 15 minutes and then pour the remaining mixture over the ladyfingers. Cover with aluminum foil and refrigerate for 3 hours.

After 3 hours pour the reserved milk mixture over the ladyfingers. Cover and refrigerate again for about an hour.

For the Whipped Cream Topping: In medium bowl beat together the heavy cream, confectioners’ sugar and vanilla extract with a hand mixer on medium speed until stiff peaks form.

Finishing the Tres Leches: Spread the passion fruit curd in an even layer over the soaked ladyfingers. Then spread the whipped cream topping over the curd. You can now serve the Tres Leches or cover with wax paper and aluminum foil and refrigerated until ready to serve.

Recipe first appeared on Bead Yarn & Spatula

Apple Tiramisu

This week I’m bringing you a twist on some traditional desserts, a Fall twist that is with the addition of apples to both. Up first an Apple Tiramisu, and later this week an Apple Crisp Cheesecake.

So, where did the idea for an Apple Tiramisu come from? Well, I had a pack of ladyfingers that were quickly approaching their expiration date and while I was planning on making a traditional tiramisu with them, I started to think that maybe something a little more seasonal would work. And thankfully I was right. Truth be told I had some reservations that the apple filling, similar to what you would make for apple pie, would work in the tiramisu.

To start, I made the apple filling since it needed to be completely cooled before assembling the tiramisu. After peeling, coring and chopping my apples I tossed them with lemon juice, light brown sugar, cinnamon and flour. I then cooked them in melted butter along with a few tablespoons of water in a medium saucepan. The apples were soft, but still had a slight crunch to them.

While the apples cooled, I made a bourbon whipped cream and the mascarpone filling. I folded some of the bourbon whipped cream into mascarpone cheese and reserved the rest for the topping of the tiramisu. I also made the dipping mixture for the ladyfingers by whisking together milk, sugar, vanilla extract and bourbon.

Once all the components were done it was time to start assembling the tiramisu. I began by dipping half of the ladyfingers in the milk mixture and arranging them in an even layer in the bottom of an 8×8-inch baking dish. I spread half of the mascarpone filling over the ladyfingers and then topped it with half of the apple mixture. I repeated the layer one more time and then spread the reserved bourbon whipped cream over the top. I covered the tiramisu with a piece of wax paper and aluminum foil and refrigerated it overnight.

The following day I made a small and quick batch of caramel sauce. After sprinkling chopped walnuts on top of the tiramisu I then drizzled the caramel sauce over it.

This was a nice Fall twist on the traditional Tiramisu. It was light with just the right amount of sweetness from the apples.

Apple Tiramisu

Ingredients:

7oz. package of Ladyfingers

1/2 cup chopped walnuts, for topping

For the Apple Filling:

3 large Granny Smith Apples, peeled, cored & chopped

2 tablespoons lemon juice

2 tablespoons light brown sugar

1 teaspoon cinnamon

1 tablespoon flour

3 tablespoons unsalted butter

4 tablespoons water

For the Mascarpone Cream:

8 oz. mascarpone cheese, at room temperature

3 teaspoons vanilla extract, divided

2 cups heavy cream

1/3 cup sugar

2 tablespoons bourbon

For the Ladyfingers Dipping Mixture:

1 1/2 cups milk*

1 tablespoon sugar

1/2 teaspoon vanilla extract

2 tablespoons bourbon

For the Caramel Drizzle:

1/4 cup light brown sugar

2 tablespoons unsalted butter

1 tablespoon milk

1/2 teaspoon vanilla extract

*I used whole milk

Directions:

Apple Filling: In a medium bowl toss the apples with the lemon juice. Add in the sugar, cinnamon and flour and toss together until the apples are well coated.

In a medium saucepan melt the butter over medium heat, add the apples and water and toss everything together. Lower the heat to medium-low and cook the apples until they are soft but still have a slight crunch to them, 10-15 minutes, stirring occasionally so the apples don’t stick to the pan. Remove from the heat and cool completely.

Mascarpone Cream: In a medium bowl stir together the mascarpone cheese and 1 teaspoon of the vanilla extract until well combined.

In another medium bowl, beat together the heavy cream, sugar, bourbon and the remaining 2 teaspoons of vanilla extract with a hand mixer on medium speed until stiff peaks form. Reserve about 1 1/4 cups of the whipped cream mixture.

Gradually fold the remaining whipped cream mixture into the mascarpone cheese mixture. Start with a quarter of the of the whipped cream mixture and then the remaining amount. Continue folding the two mixtures together until no streaks of either remain and they are well incorporated.

Dipping Mixture: In a shallow bowl whisk together all the ingredients – milk, sugar, vanilla extract and bourbon – until combined.

Assemble: Dip the rounded side of half of the ladyfingers in the dipping mixture and arrange them in an even layer in the bottom of an 8×8-inch baking dish. Top with half of the mascarpone cream and then spread half of the cooled apple mixture over the cream. Repeat the layers once more. Top with the reserved whipped cream mixture. Cover with a piece of wax paper and them aluminum foil and refrigerate for at least 4 hours, or overnight.

For the caramel drizzle: An hour before serving, make the caramel sauce. In a small saucepan combine the sugar, butter and milk. Heat over medium heat until sugar melts and the mixture boils. Boil for a minute or two stirring occasionally, until the sauce thickens. Remove from the heat and stir in the vanilla extract. Allow to cool. The sauce will continue to thicken as it cools. If it looks like it’s separating while it’s cooling, whisk it for a minute or so.

Right before serving, sprinkle the chopped walnuts over the tiramisu and then drizzle with caramel sauce.

Store leftovers in the refrigerator.

Recipe first appeared on Bead Yarn & Spatula.

Cookie Palooza – No Bake Peppermint Chocolate Cookies

I hope you’ve enjoyed this week of cookies. I’m ending Cookie Palooza 2017 with an easy no bake cookie that only requires three ingredients, four if you count the sprinkles… Peppermint Chocolate Wafers.

First ingredient… Melted semi-sweet chocolate. I melted the chocolate using a double-boiler. You could melt the chocolate in the microwave (which was always my preferred method,) but I find melting the chocolate in a double boiler minimizes the chance of scorching the chocolate and you can keep it warm while you’re working so it will stay smooth and thin. Whereas when you melt it in the microwave after a few minutes the chocolate begins to thicken. Creating a double boiler is quite simple… fill a medium saucepan about a little less than halfway with water – you don’t want to fill it too much because then when you place the bowl in the water it will spill over. Bring the water to a boil and then reduce the heat so the water is simmering. Place a heatproof bowl in the water, add chopped chocolate and stir occasionally until the chocolate has melted. Once the chocolate has melted, reduce the flame to low to keep the chocolate warm and add in the peppermint extract (the second ingredient), stir to mix in.

Dip the Nilla Wafers (third ingredient) in the chocolate and flip them over to get them fully covered. The process will go much easier if you have candy dipping tools, but if not a fork will work well. Once cookies are covered lift the cookies out of the chocolate and let the excess drip and then place them on a wax paper lined baking sheet and sprinkle them with festive sprinkles or crushed peppermint candy/candy canes (fourth ingredient.)


Once you are done dipping the cookies place them in the refrigerator for about 10-15 minutes so the chocolate can harden.

And that’s it! A simple cookie that’s perfect for the season and best of all, doesn’t require you to turn on your oven.

Happy Holidays!!!

Peppermint Chocolate Dipped Cookies

Ingredients:

8 oz. semi-sweet chocolate, chopped*

1/2 teaspoon peppermint extract

30 – 36 Nilla Wafer cookies

Sprinkles, optional

Directions:

Melt the chocolate using a double boiler on medium to medium low heat. Once the chocolate has melted add the peppermint extract and stir well to combine. Keep the heat on low for the double boiler so that the chocolate will remain smooth and thin.

Dip the wafers in the chocolate one at a time, making sure to coat the entire cookie. Remove from the chocolate and let the excess drip off before placing on a wax paper lined baking sheet to set.

Sprinkle with sprinkles or crushed peppermint candy. Or let the chocolate set for a few minutes and then drizzle with the left-over melted chocolate. Place in the refrigerator so the chocolate can harden. Store in an airtight container.

*You could also use chocolate chips

**The ratio of peppermint extract to chocolate I used was 1/4 teaspoon per 4 oz.