Sprinkle Fault Line Cake

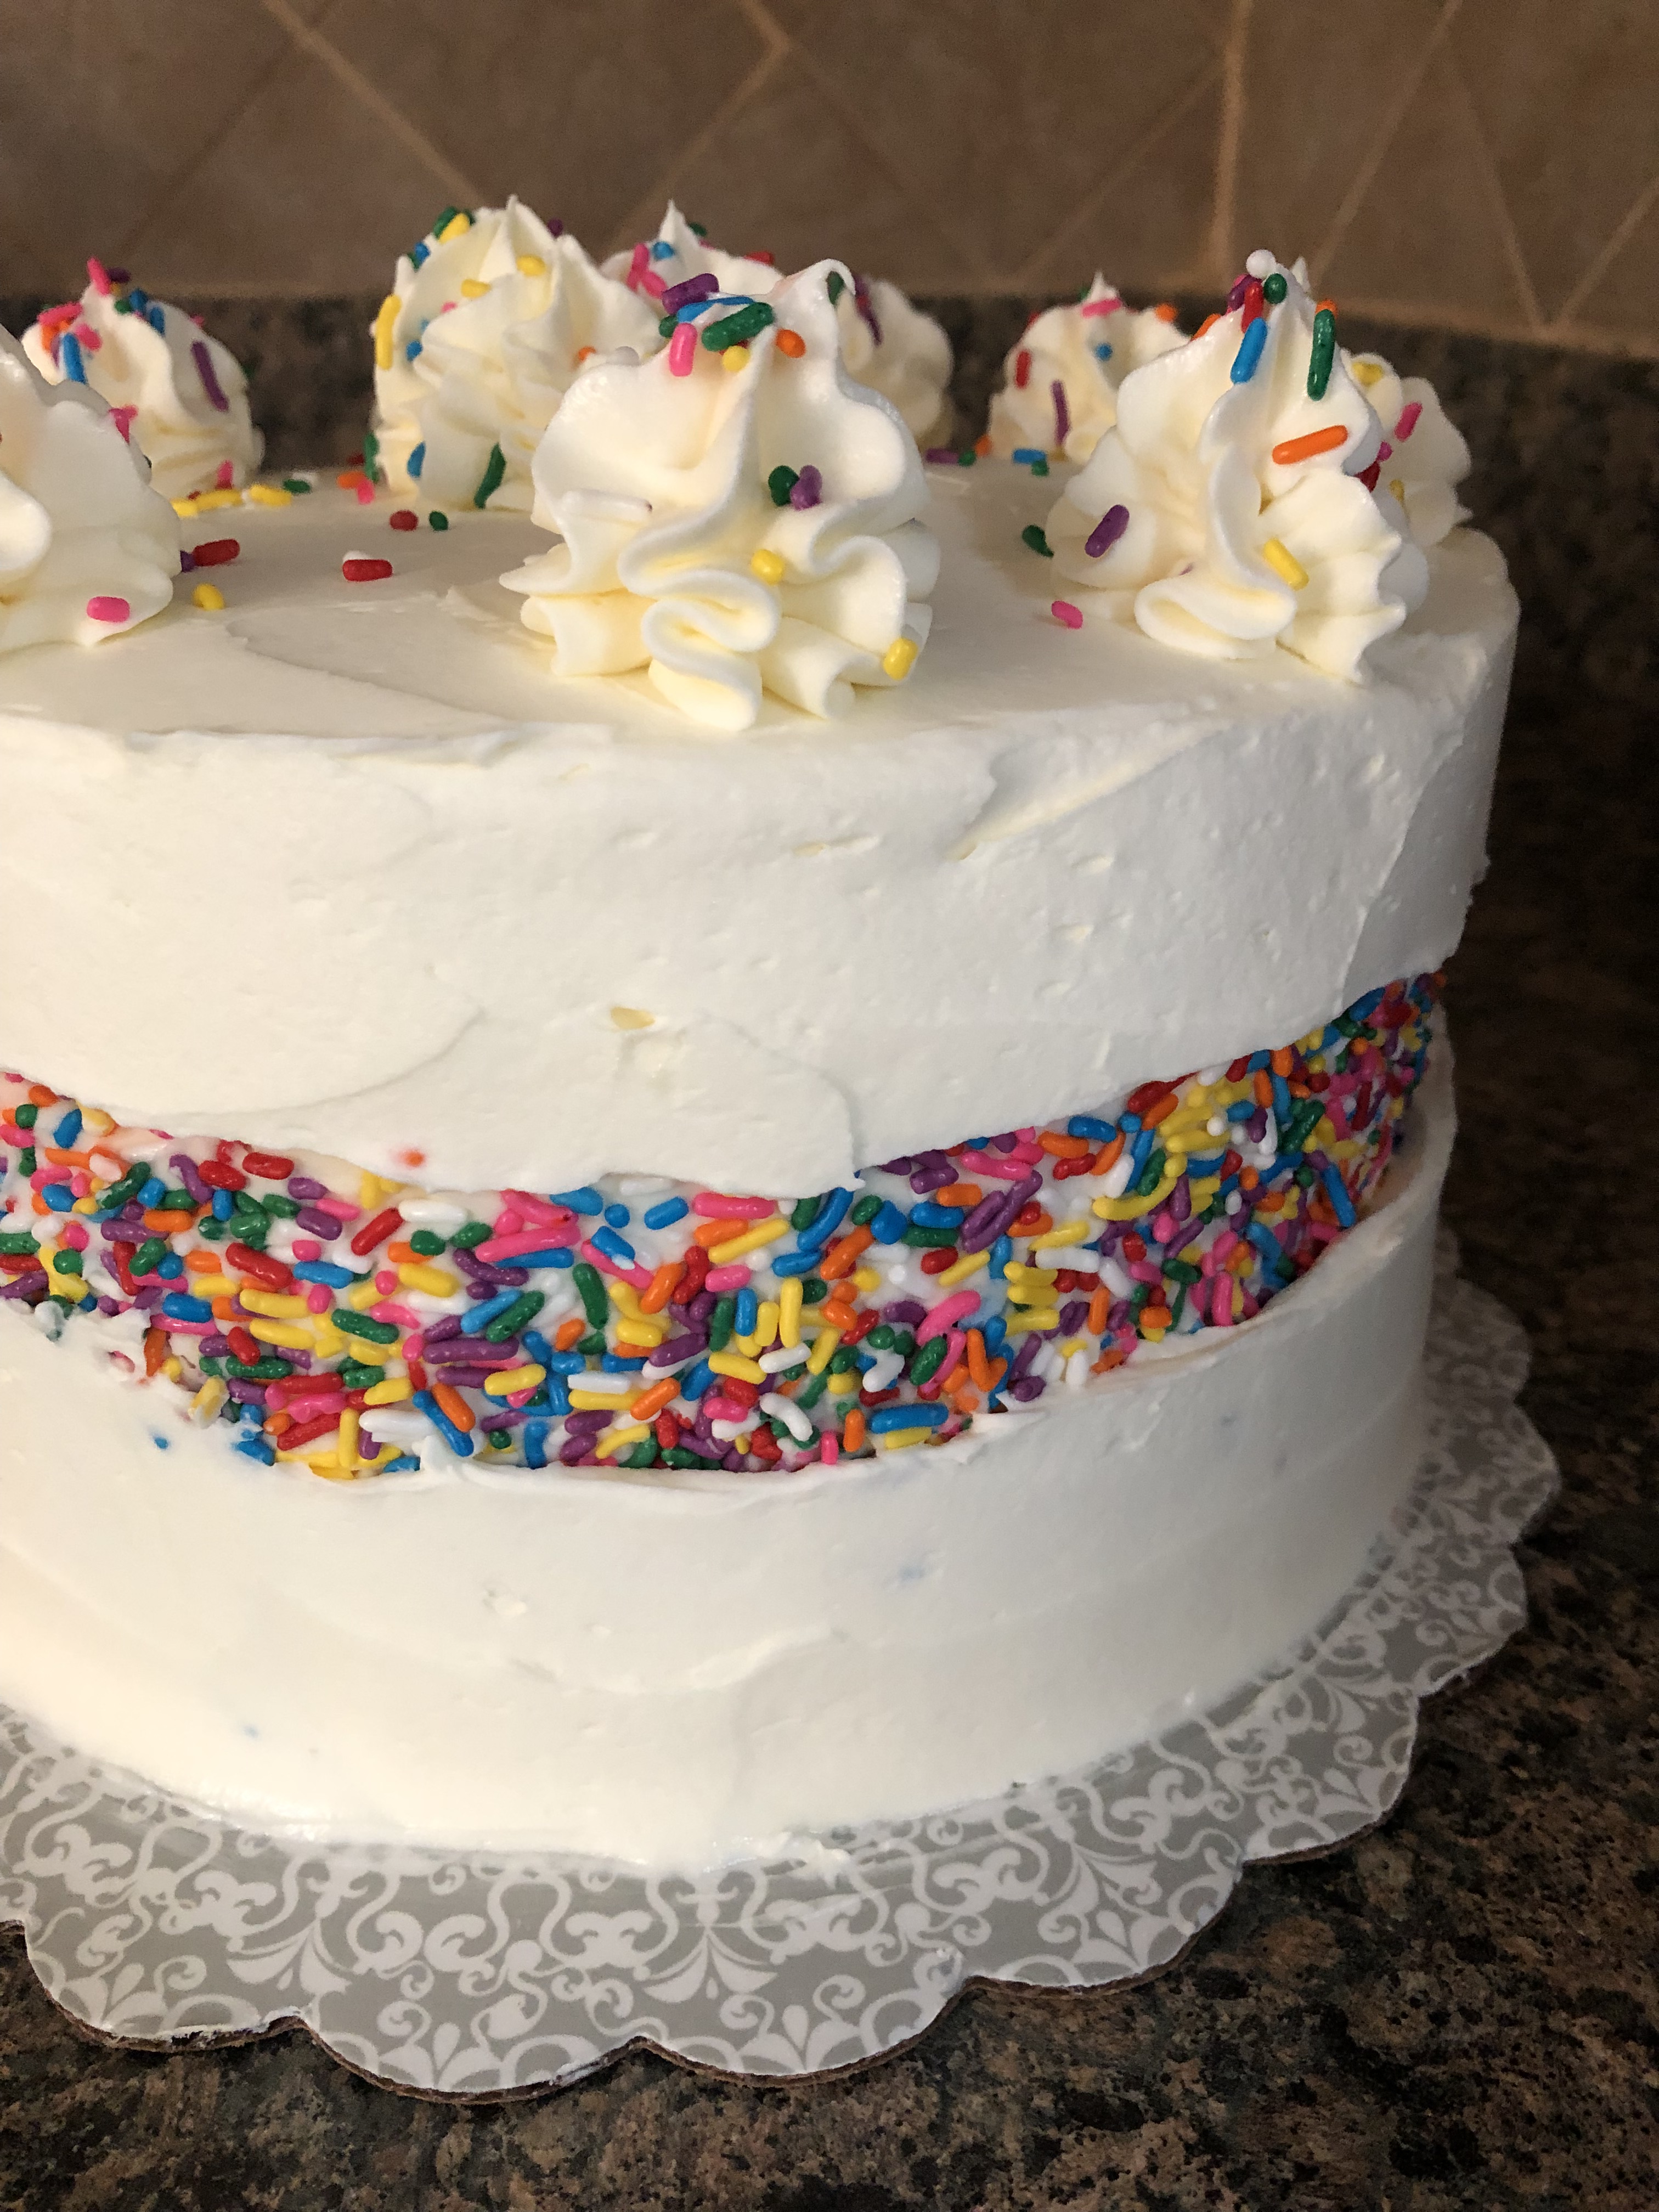
Earlier this summer a new cake trend began flooding my Instagram feed… A Fault Line Cake. Initially I thought it would be extremely difficult to create. And I am sure some of the ones I have seen are – ones with macaroons, lemons, edible decorative paper and so forth – but, the one that caught my eye and seemed somewhat easy to practice on was a sprinkle one. Essentially, the center of the cake exposes a design between two thick layers of frosting. Sort of like a fault line separating after an earthquake and exposing the ground beneath.

I first attempted this trend a few weeks ago and it was a complete DISASTER! Since I was just trying out the technique I attempted to take some short-cuts… mainly use store bought frosting. Chocolate frosting at that and I really should have known better. Not that there is anything wrong with store bought frosting – I have used it quite often to decorate – but, it was hot outside (and inside my house) and I have learned that store bought frosting just doesn’t hold up as well in the heat as homemade. Also, I made a six inch cake using boxed cake mix thinking that would give me enough height for the cake and I was wrong on that account as well.

Here’s what happened… I baked a yellow cake mix into a two-layer 6-inch cake and it came out just fine. Then, I started to frost it and the issues began. Like I said it was hot on this day so I decided to refrigerate the frosting for about 20 minutes so it could firm up a little. Once it was firm, I started by crumb coating the cake and it just wasn’t going on smooth, but, I plowed ahead. Once I finished with the crumb coat I placed the cake in the refrigerator so it could set. After about a half hour I removed the cake from the refrigerator and attempted to add more frosting to the middle of the cake to adhere the sprinkles and it was a mess. The crumb coat never got a crust on it so when I added more frosting it was all just coming off. I continued and finally got a layer of frosting around the middle of the cake and then added the sprinkles. But, since I had to add such a thick layer of frosting to the cake to get it to adhere my sprinkles got swallowed up by the frosting. It was such a fail. At this point I just gave up. I realized that the frosting was just not going to cooperate and that the cake didn’t have enough height to look good.

Fast forward a few weeks later and with a free weekend ahead of me I decided to try once again. I made some tweaks this time though. I decided to make a three-layer 8-inch cake and for the frosting I whipped up two batches of Martha Stewart’s Fluffy Vanilla Frosting. It’s my go-to frosting whenever I have to decorate a cake. It has a great consistency that makes it perfect for frosting, piping and/or tinting.

I opted to go with a box cake mix again. I used a yellow cake mix to make two 8-inch layers and then a chocolate mix to make one 8-inch layer. I used the remaining chocolate batter to make 6-inch cake.

Once the cakes were done I let them cool in the pans for about 15 minutes and then transferred them to a wire rack to cool completely. I then wrapped them in plastic wrap and placed them in the refrigerator overnight. I used to just leave my cakes out at room temperature, but, I have found that refrigerating them makes it easier to torte, layer and frost.

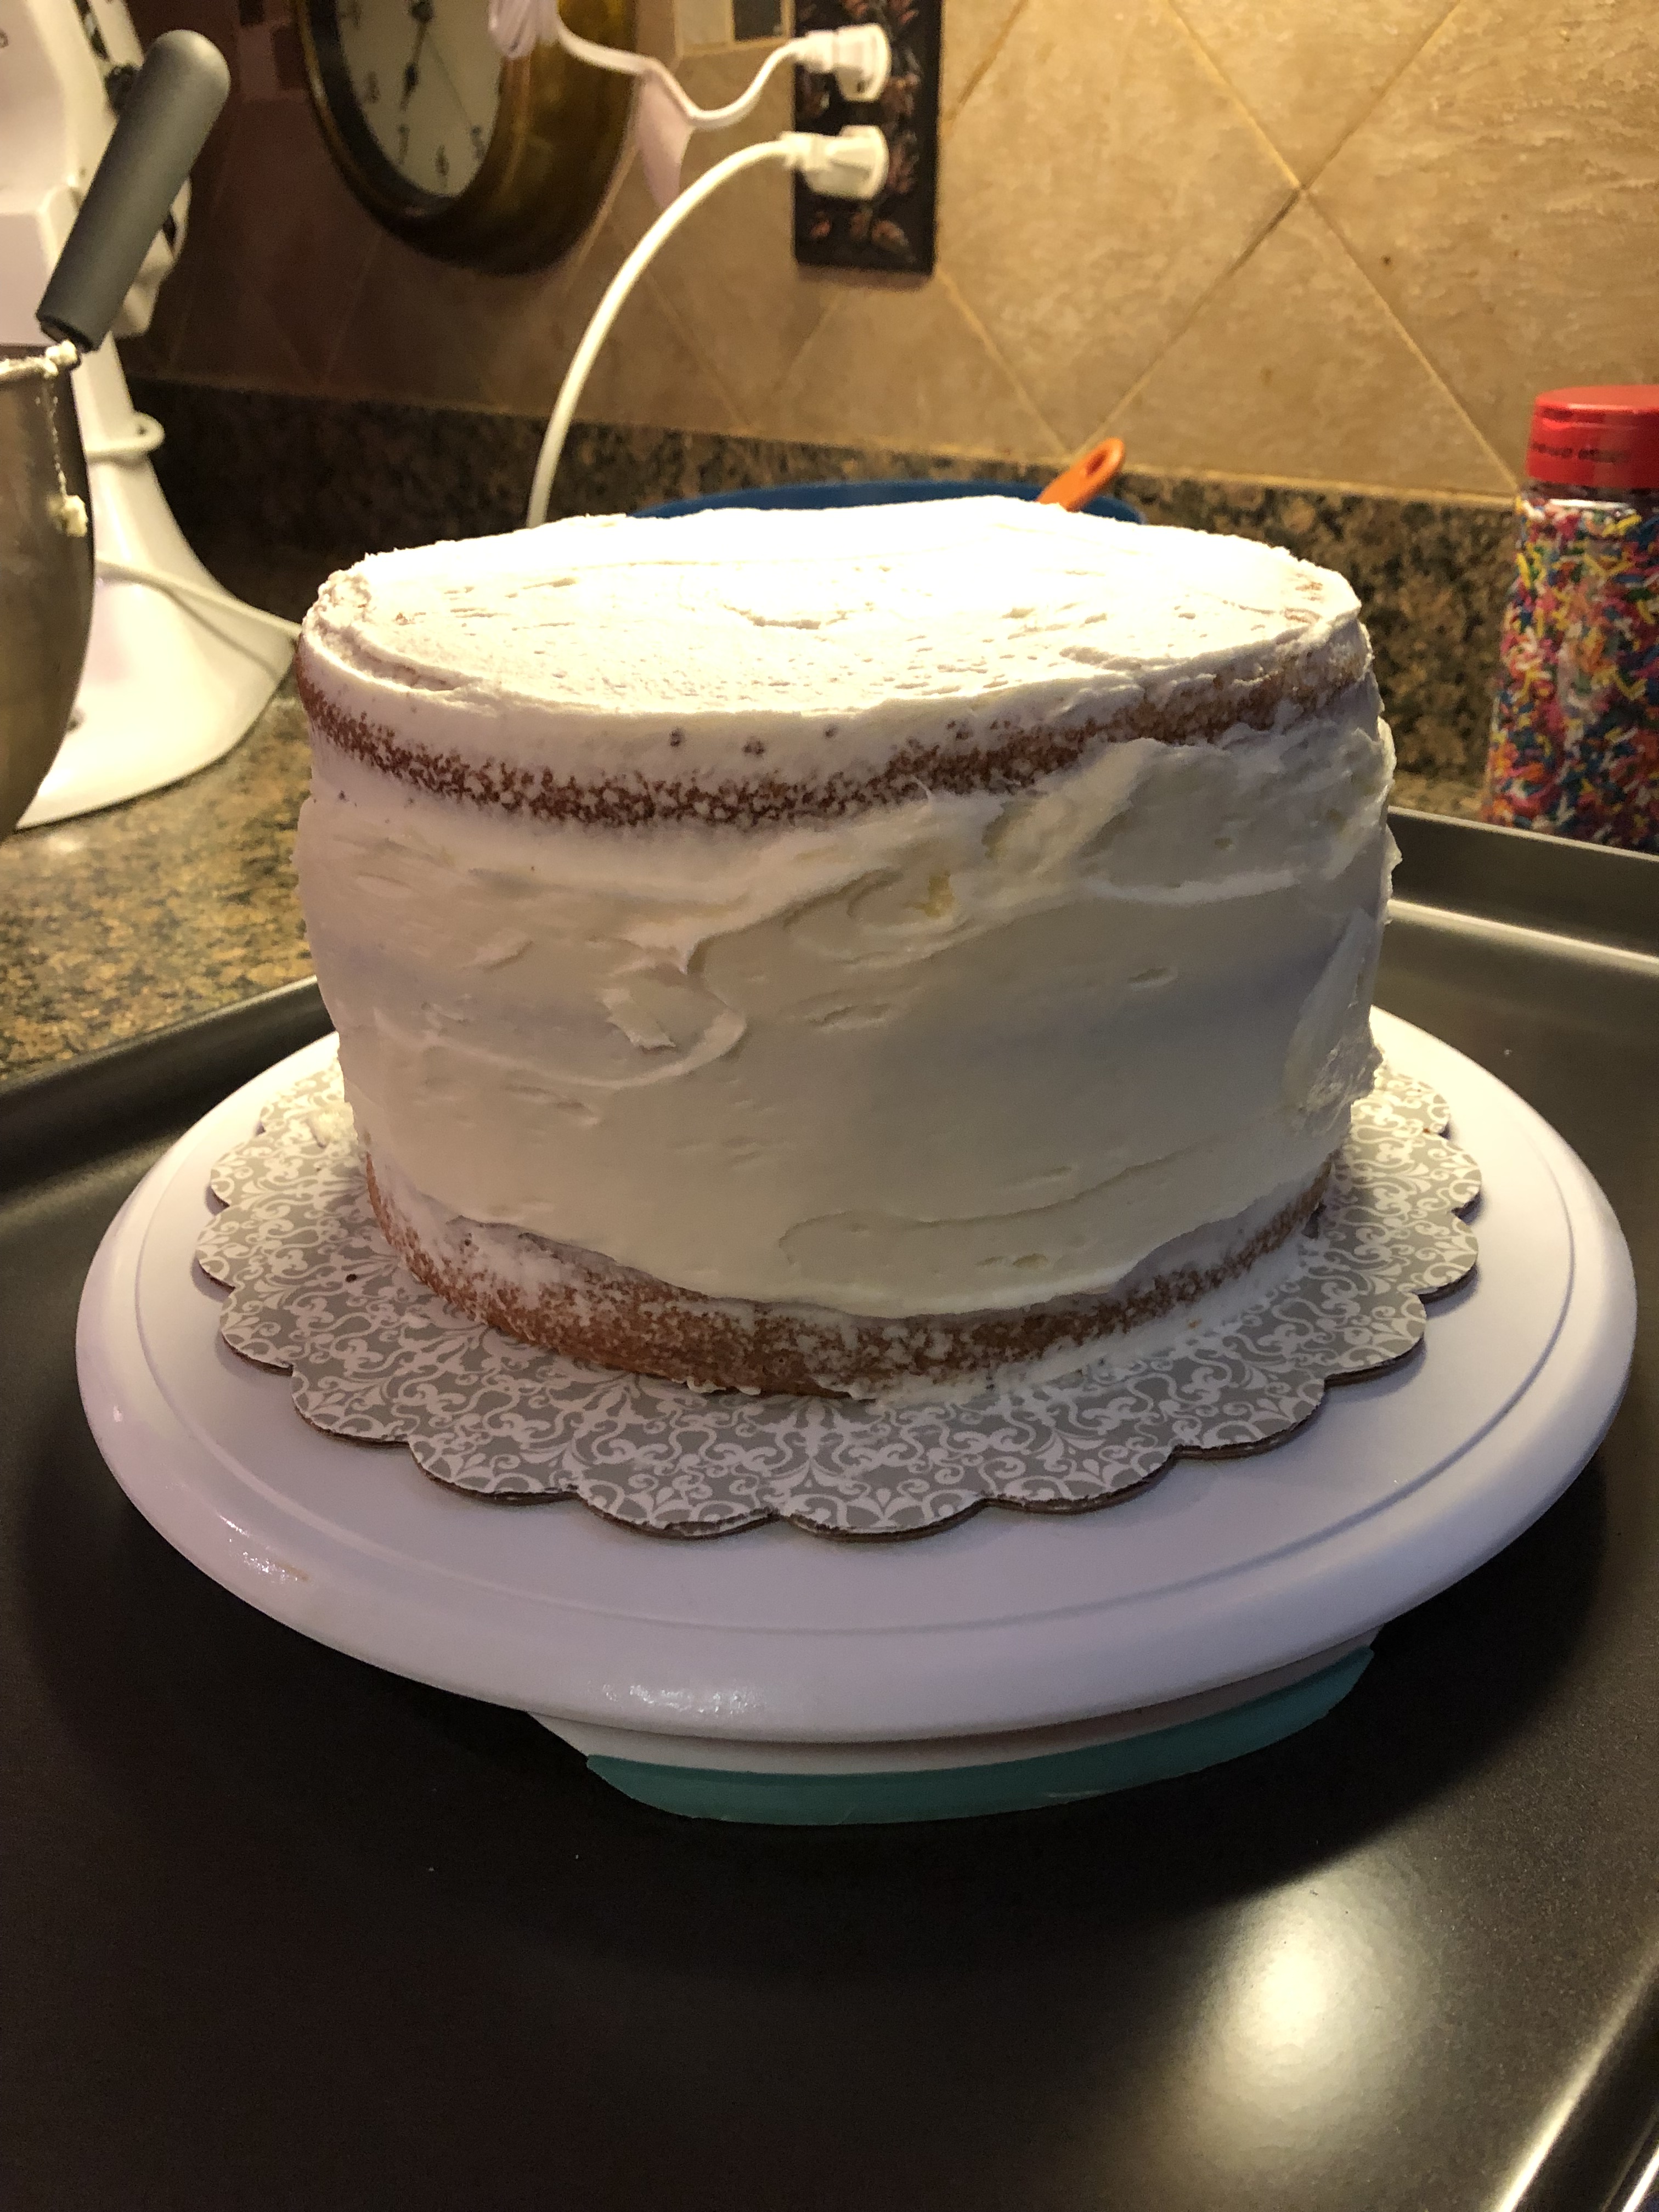
The next day I made two batches of vanilla frosting and my short-cut chocolate mousse (beat a package of Jell-O chocolate pudding mix along with a cup each of heavy whipping cream and whole milk until thick). I then torted and layered the cake, filling the layers with the chocolate mousse. Next I crumb coated the cake and placed it in the refrigerator for about a half hour.

After the half hour I removed the cake from the refrigerator and added an extra layer of frosting in the middle of the cake…

And then added sprinkles to that layer of frosting.

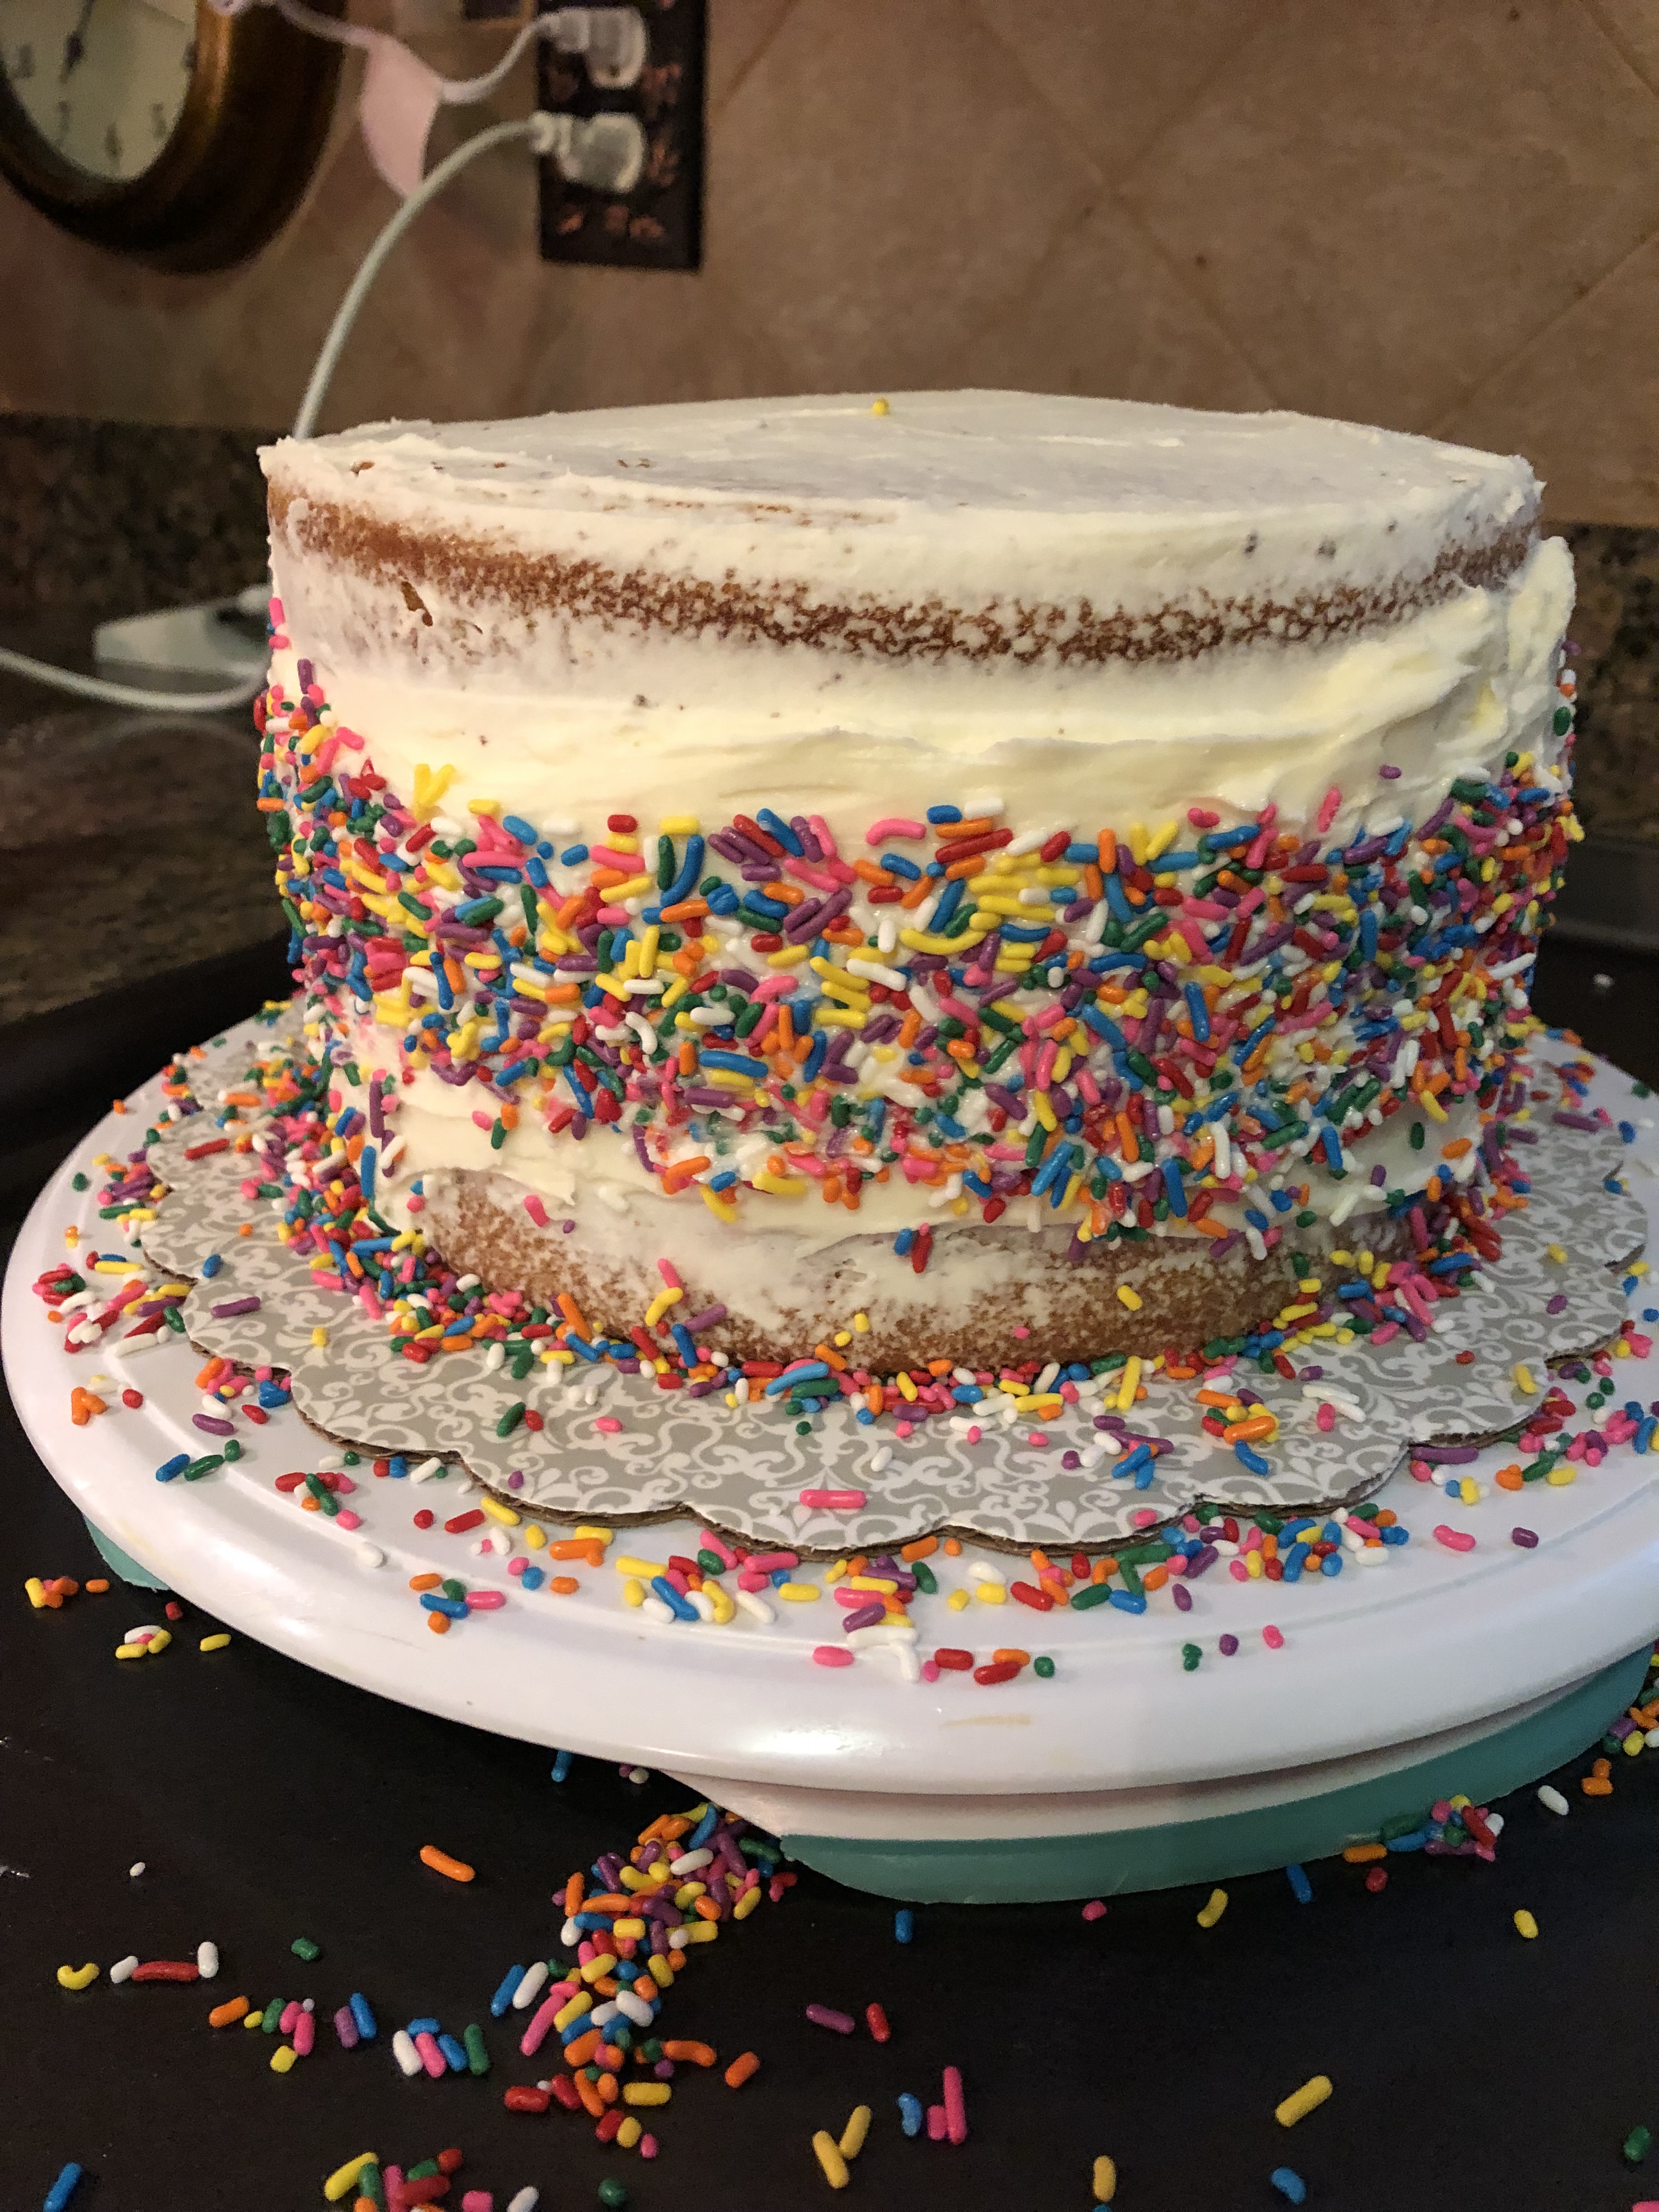
I then placed the cake back in the refrigerator for another half hour so the frosting and sprinkles could set.

I transferred frosting to a piping bag and snipped the end off and piped the frosting around the cake, except for the part with the sprinkles.

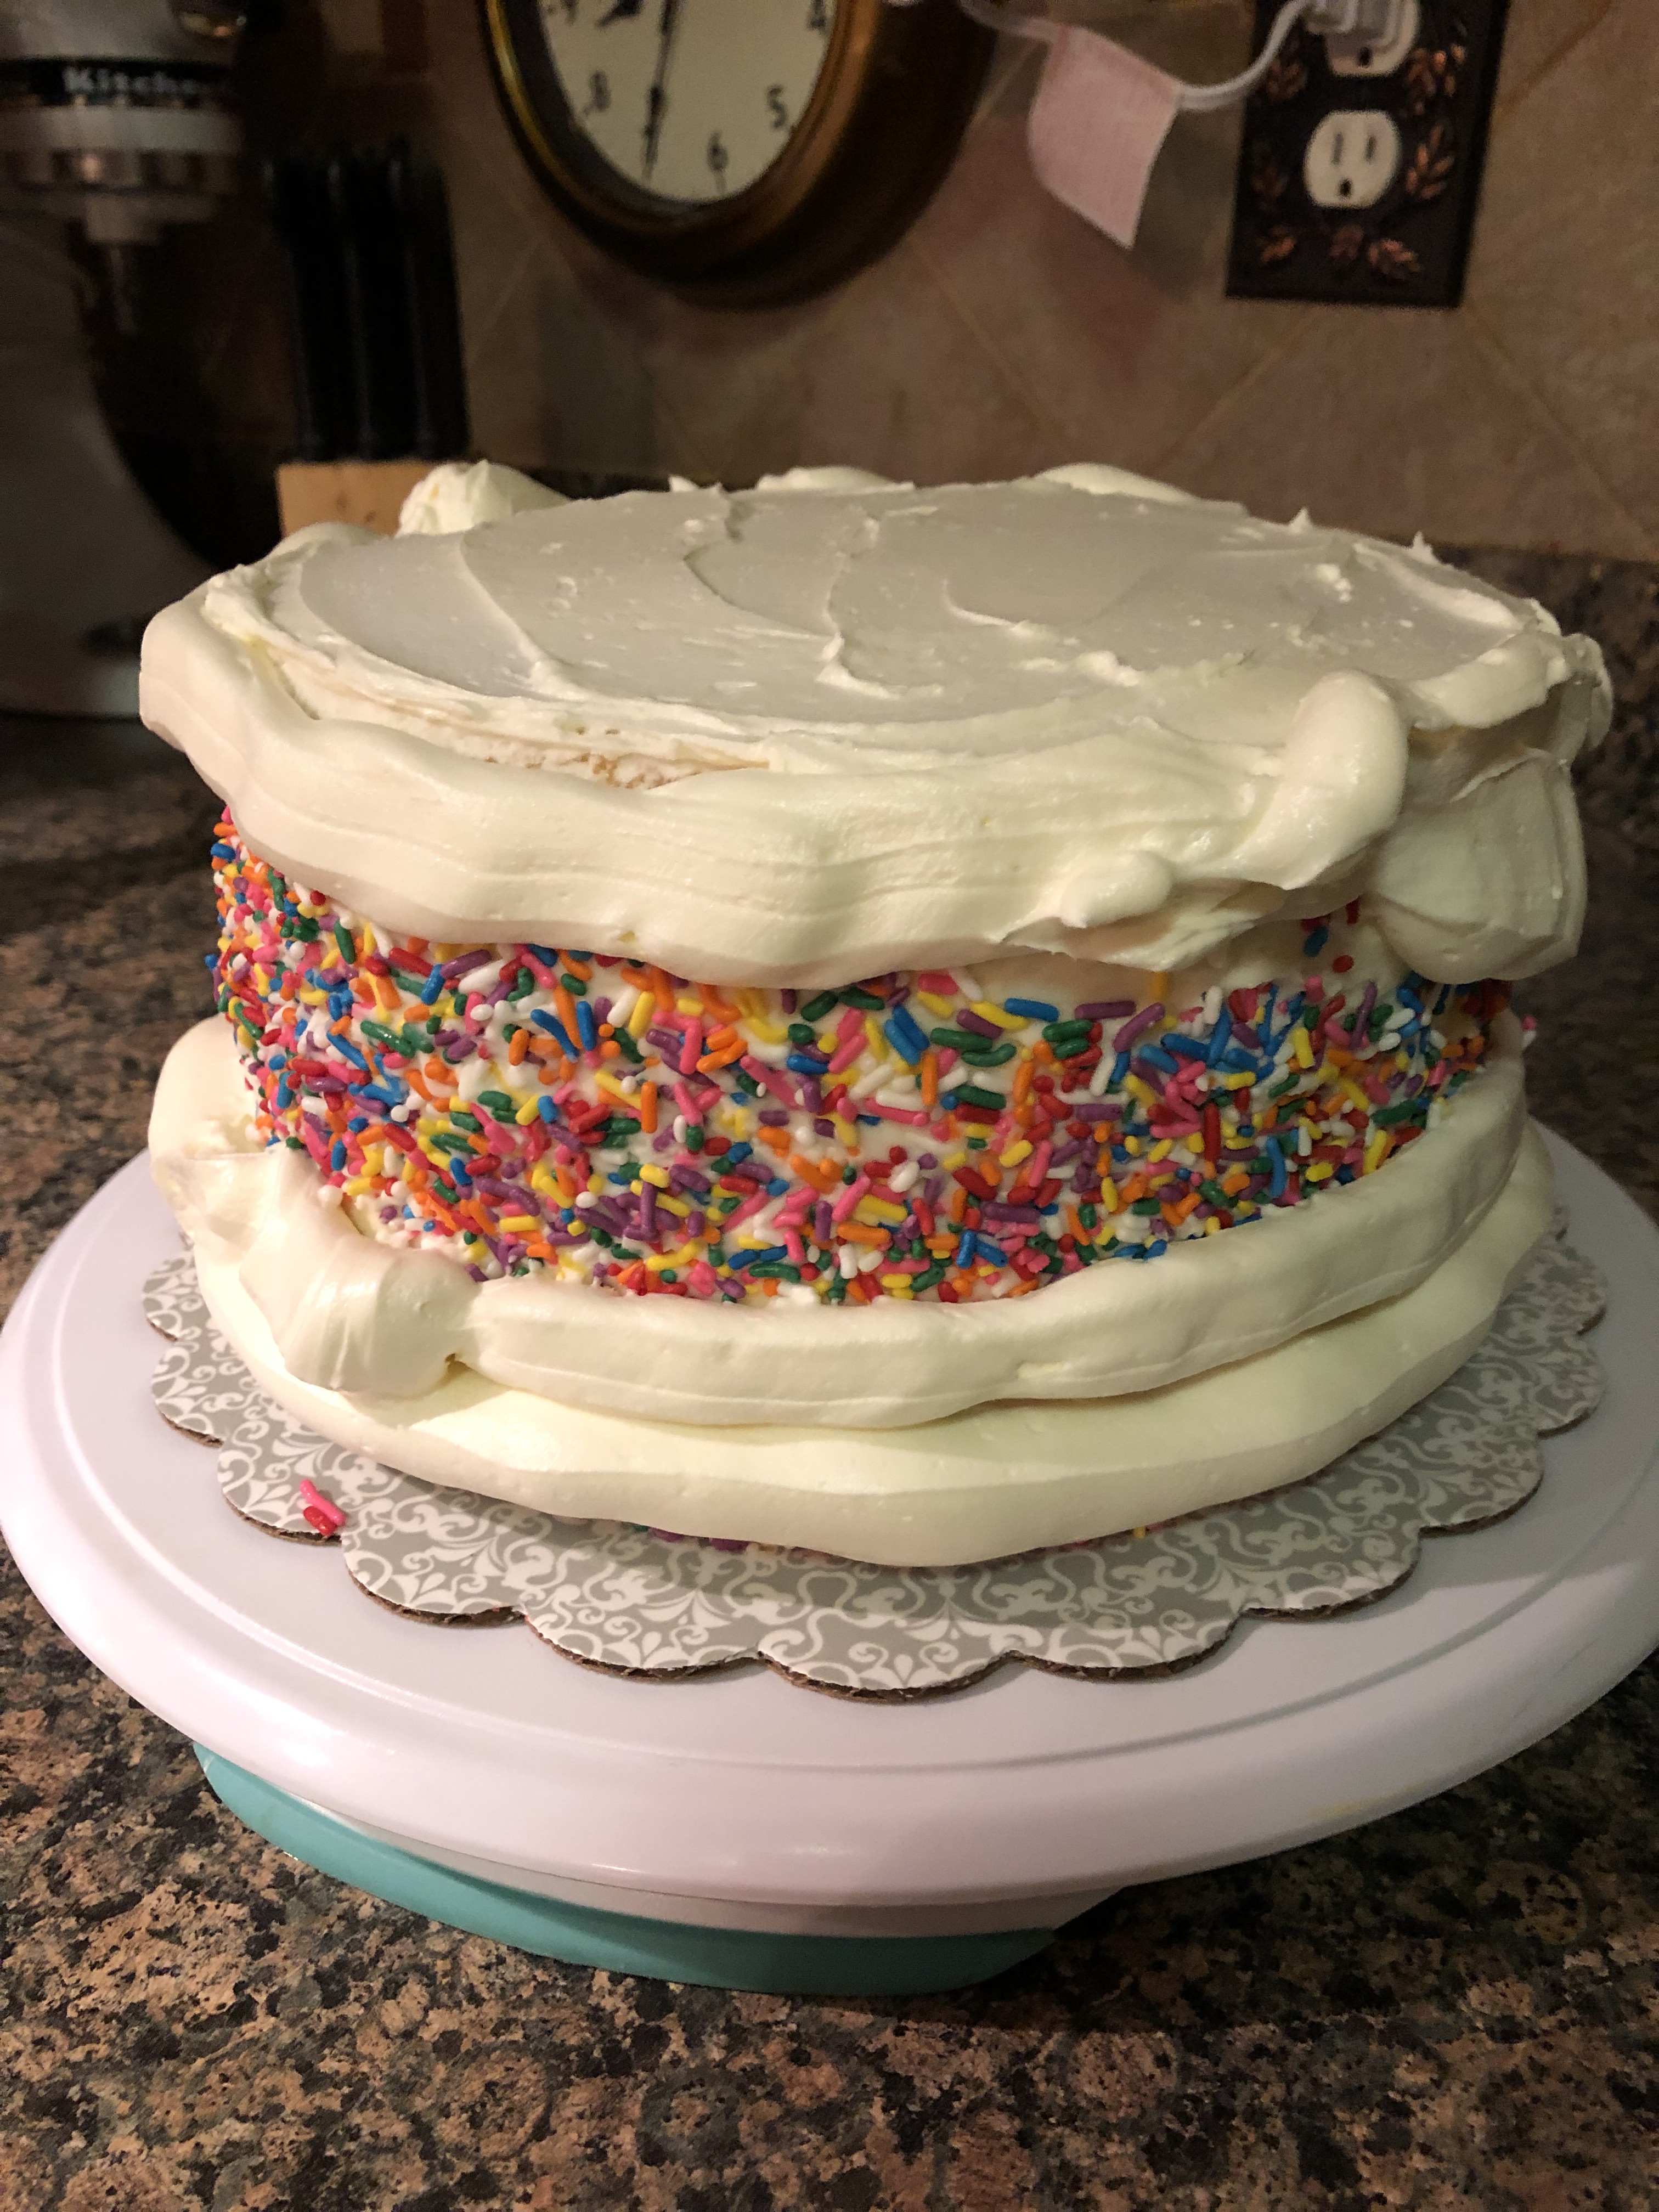
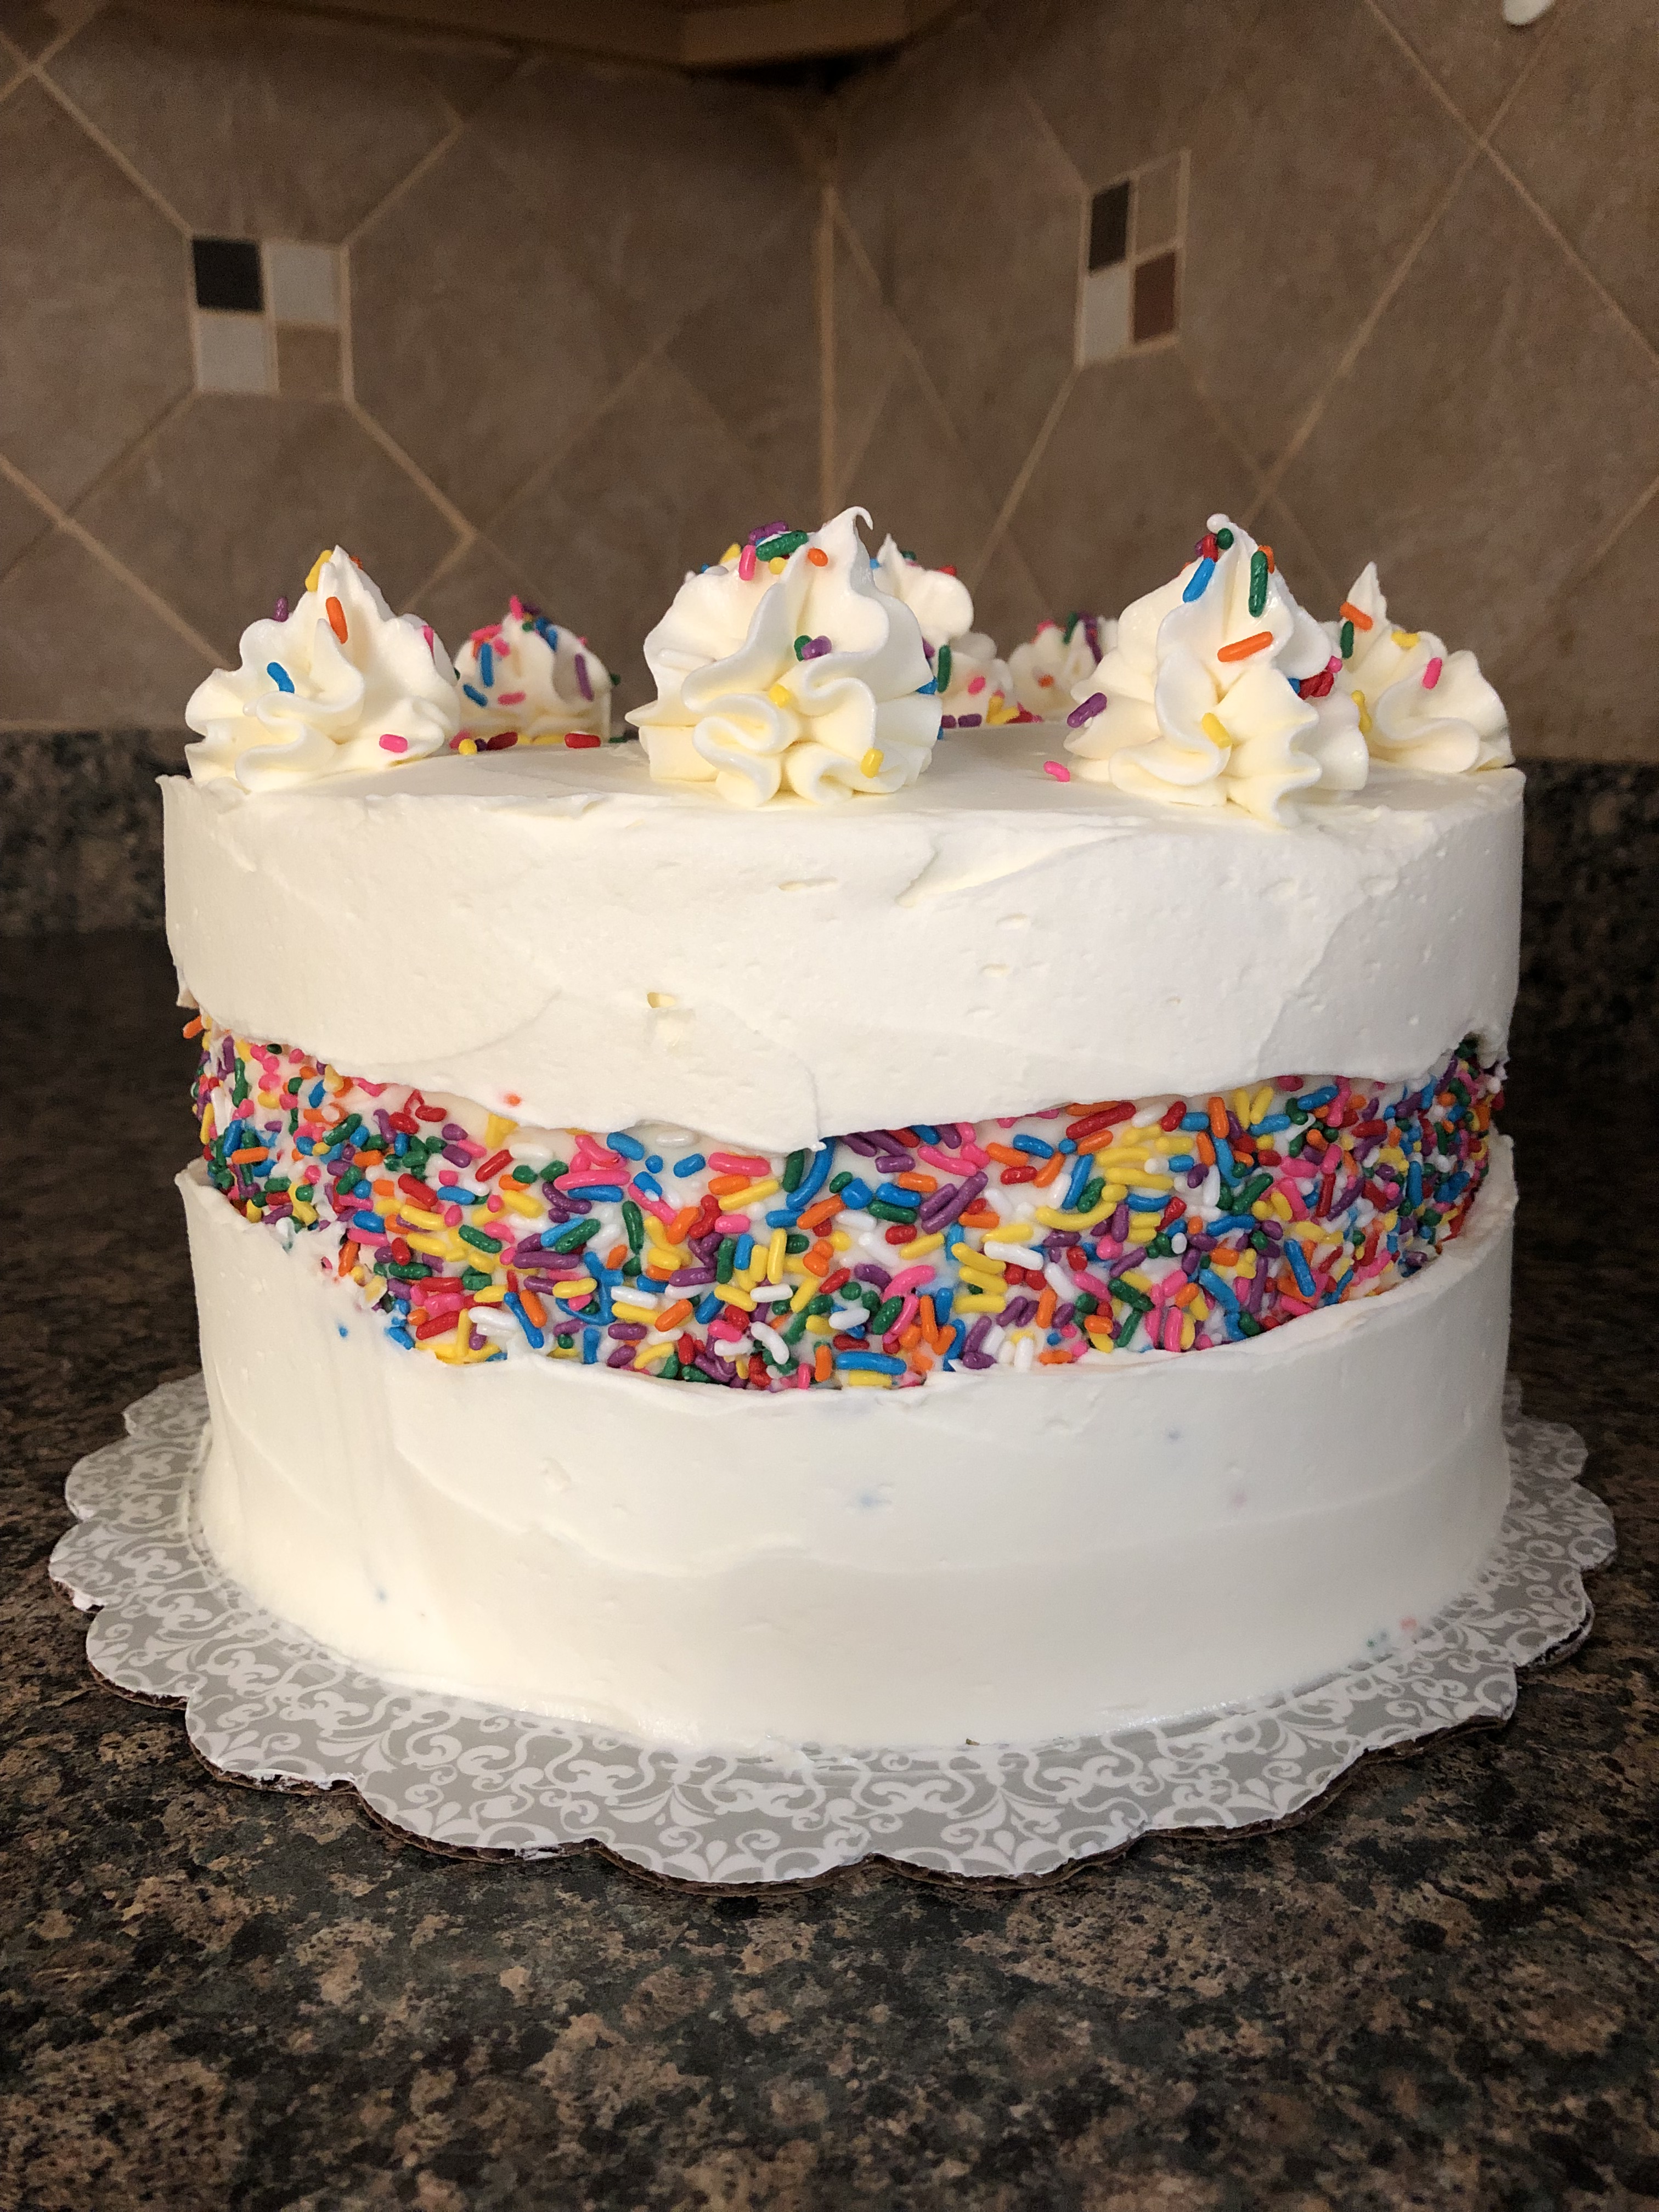
I then smoothed the frosting and added some 1M swirls on top of the cake and sprinkled them with sprinkles and my cake was done. I finally created a successful Fault Line Cake. I wonder what new cake trend will be flooding my Instagram feed next.

Lime Pudding Cups

The best desserts in the summer are of course no-bakes ones. No one wants to turn on their oven when it’s 90+ degrees outside, but, sometimes you can make a slight exception and light up your stove for a quick delicious treat like these Lime Pudding Cups. These came up on my Instagram feed a few weeks ago and I knew instantly that I wanted to make them – partially because it meant using up the last of some heavy whipping cream I had in my refrigerator that was expiring soon and more importantly because they reminded me of one of my favorite desserts… Key Lime Pie.

The prep and cooking time for these is less than an hour. That includes juicing and zesting the limes, cooking the pudding on the stove and then letting it cool before straining and dividing it. (Okay, maybe it’s more like less than 45 minutes). Once all that is done you place them in the refrigerator for at least 2 hours so the pudding can set. While they are in the refrigerator you whip up some homemade whipped cream to top them and refrigerate it until they are ready.

Once the pudding has set top each one with a dollop of whipped cream, crushed graham crackers (to crush, I placed 1 graham cracker in a Ziploc bag and then rolled with a rolling pin) and lime zest.

And as simple as that you have a refreshing summer dessert that’s sweet and citrusy!

Lime Pudding Cups

Ingredients:

2 cups heavy cream

2/3 cup granulated sugar

1 tablespoon grated lime zest, plus more for topping

Pinch of kosher salt

1/3 cup freshly squeezed lime juice (from 4 medium-sized limes)

Crushed graham crackers, for topping

Sweetened whipped cream, for topping (use store-bought or follow recipe below to make your own)


Directions:

In a medium saucepan combine the heavy cream, sugar, lime zest and salt and bring to a boil over medium heat. Stir the mixture often until it is reduced to 2 cups. About 8 to 10 minutes.

Remove the saucepan from the heat and stir in the lime juice. Let cool for 20 minutes and then strain the mixture through a sieve into a measuring cup, discarding the solids. Divide evenly (about 1/3 cup in each) among 6 ramekins. Place in the refrigerator until set, at least 2 hours.

To make the whipped cream: Combine 1 cup heavy cream, 2 tablespoons confectioners’ sugar and 1/2 teaspoon vanilla extract in a chilled bowl. Beat on low speed until the mixture thickens and then beat on medium speed until soft peaks form.

Once the pudding is set, top each one with a dollop of whipped cream, some of the crushed graham cracker and lime zest.

Recipe from Martha Stewart

No-Bake Chocolate Chip Cannoli Cheesecake

So, you want something sweet, but, you don’t feel like turning on your oven in the dead of summer to bake something. I hear ya’. On those hot days when I must bake or cook something I usually try to make a couple of things at once so that turning on my oven isn’t too futile. Every year I hope it’s the year I can get central air conditioning but, it hasn’t been yet. I finally did get an air conditioning unit to put in my living room window and that does help, but, on a recent day when the feel like temps were over 100 degrees and I waited until the early afternoon to turn it on it really didn’t do much in cooling down the house. My dog positioned himself perfectly on the floor though and enjoyed it. Maybe I should have curled up next to him. The solution to those sweet tooth cravings in the summer are no bake desserts. Now, I have made a few ice box cakes during the summer months to avoid the oven – S’mores, Mocha Chocolate & Chocolate Hazelnut – but, I have never made a no-bake cheesecake. Not really sure why. Maybe I had my doubts that it would be as good as a baked one or hold together as well. Well, I finally decided to try making one after coming across a recipe for a No-Bake Chocolate-Chip Cannoli Cheesecake. Cannoli are one of my favorite desserts so if I can have anything reminiscent of the filling I am trying it.

I made some tweaks to the original recipe I found. Instead of using a combination of crushed cannoli shells and graham cracker crumbs for the crust I decided to go an easier (and less driving around route) and use a store bought graham cracker crust. And since I didn’t have rum extract at home but did have rum, I opted to use the pure rum instead. I’ll admit the cheesecake did have more of an alcohol taste due to this, but, no one was complaining. It was delicious nonetheless and perfectly chilled for a refreshing dessert after hot summer day’s dinner.


No-Bake Chocolate Chip Cheesecake

Ingredients:

1 9-inch graham cracker pie crust

2 8 oz. packages of cream cheese, at room temperature

1 cup confectioners’ sugar

1/2 teaspoon grated orange zest

1/4 teaspoon cinnamon

3/4 cup part-skim ricotta cheese

1 teaspoon vanilla extract

1 tablespoon light rum*

1/2 cup miniature chocolate chips

Chopped pistachios for topping, optional


*The original recipe called for a 1/2 teaspoon rum extract


Directions:

Using a stand or hand mixer, beat the cream cheese, sugar, orange zest and cinnamon on medium speed until well combined. Add in the ricotta cheese, vanilla and rum and continue beating until incorporated. Fold in the chocolate chips and then transfer the mixture to the graham cracker crust.

Cover with a piece of plastic wrap and refrigerate for at least 4 hours until the filling is set. Top with chopped pistachios before serving.

Recipe modified from Taste of Home

S’mores Chocolate Chip Cookies

Happy National S’mores Day! This year to commemorate the day I decided to make S’mores Chocolate Chip Cookies. Now quite a few years ago I made a S’mores Stuffed Chocolate Chip Cookie – this was before I was aware of this celebratory day for this campfire staple – and it was exactly as the name suggests, an actual s’more (marshmallow, chocolate and graham cracker) baked into the center of a chocolate chip cookie. For these cookies today the ingredients for a s’more are incorporated into the cookie. The graham crackers are crushed and whisked together with the flour and cocoa powder while the marshmallows and milk chocolate chips are folded into the cookie dough once all of the other ingredients have been mixed and combined.

The resulting cookie is one that’s perfectly chocolatey, a little gooey thanks to the marshmallows and has a hint of graham cracker.

S'mores Chocolate Chip Cookies

  • Servings: 30 cookies
  • Print

Ingredients:

1 cup mini marshmallows

1 cup flour

1 cup crushed graham cracker crumbs

1/2 cup dark cocoa powder

1 teaspoon baking powder

1/2 teaspoon salt

1/2 cup unsalted butter, softened

1/2 cup sugar

1/2 cup light brown sugar

2 eggs

1 teaspoon vanilla extract

1 1/2 cups milk chocolate chips


Directions:

Prep baking sheets with parchment paper and set aside.

The night before you make the cookies place the marshmallows in a bowl and leave on the counter uncovered. This will “age” the marshmallows and help them keep their shape while baking.

In a large bowl whisk together the flour, graham cracker crumbs, cocoa powder, baking powder and salt. Set aside.

Using a hand or stand mixer, cream together the butter and sugars until light. Add the eggs and vanilla extract and beat until fluffy.

Slowly add the flour mixtures, scraping the sides of the bowl as necessary. Once the ingredients are full incorporate stop mixing. Fold in the chocolate chips and the marshmallows.

Using a cookie scoop form the dough into balls and place on the prepared cookie sheets, leaving room for spreading. Chill the dough on the cookie sheets in the refrigerator for at least an hour.

Preheat the oven to 350 F and baking the cookies for 12-15 minutes. The cookies will be set on the outside and soft in the middle.

Let the cookies cool on the cookie sheets for 5 minutes and then transfer to a wire rack to cool completely.

Recipe modified from Food52

Crocheted Keyhole Scarf

Earlier this year I got a request to make a keyhole scarf (it can also be referred to as an Ascot scarf). It’s a short scarf that sits at the upper chest. As opposed to other scarves this style stays put because one end is inserted into the keyhole of the other. Since I truly had no clue how to make one I started looking for patterns online similar to the picture of the one requested. Once I found a pattern I set it aside figuring I would have time to make it by the deadline of September. Eventually I picked up the pattern to give it a good read over and instantly got worried. I wasn’t sure if I would be able to actually make it. The words leaf, keyhole and neck in the pattern through me for a bit of a loop. I decided though that I would practice on some extra yarn that I have stored away – I have a bin of yarn in my basement with remnants from past projects. I clean it out every now and then because I realized you don’t really need a few yards of random shades of yarn.

So, I picked a yarn that was similar in weight to the yarn I planned on using for the actual scarf. And I must say actually working on something with your hands as opposed to reading and imagining how to do it are so opposite. Once I had the yarn and crochet needle in my hand the pattern made sense and the scarf was a cinch to crochet. I decided to work thru the pattern from the first leaf, to making the keyhole and then a bit of the neck (all those words that through me for a loop at the beginning.) Once I got to a decent point I showed the sample to the recipient of the final product and they were happy with it. I then went and purchased the actual yarn.

And started working on it…

It took me less than a week (probably the quickest I’ve ever gotten a yarn project done – well, except for some ruffle scarves I made a few years ago. I was cranking out two a day after someone requested like 10 of them) and the scarf was done. This is a pic of the scarf just completed but before washing and blocking it.

After washing and blocking the scarf it laid flat.

Here’s a pic of the keyhole…

What the scarf looks like without one end being inserted into the other…

And a not so great shot of me wearing the scarf, but, it gives you an idea of how the scarf fits.

Most importantly, the intended recipient was delighted with it and is planning on wearing it on her upcoming Alaskan cruise!

Unfortunately I cannot share the pattern I used to make the scarf, but, if you would like to make it yourself the pattern I used was the Rita Ascot Scarf by Emily Johannes.